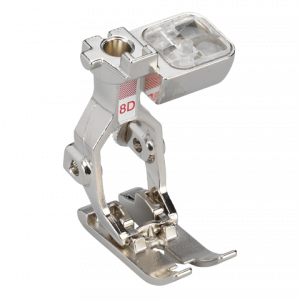
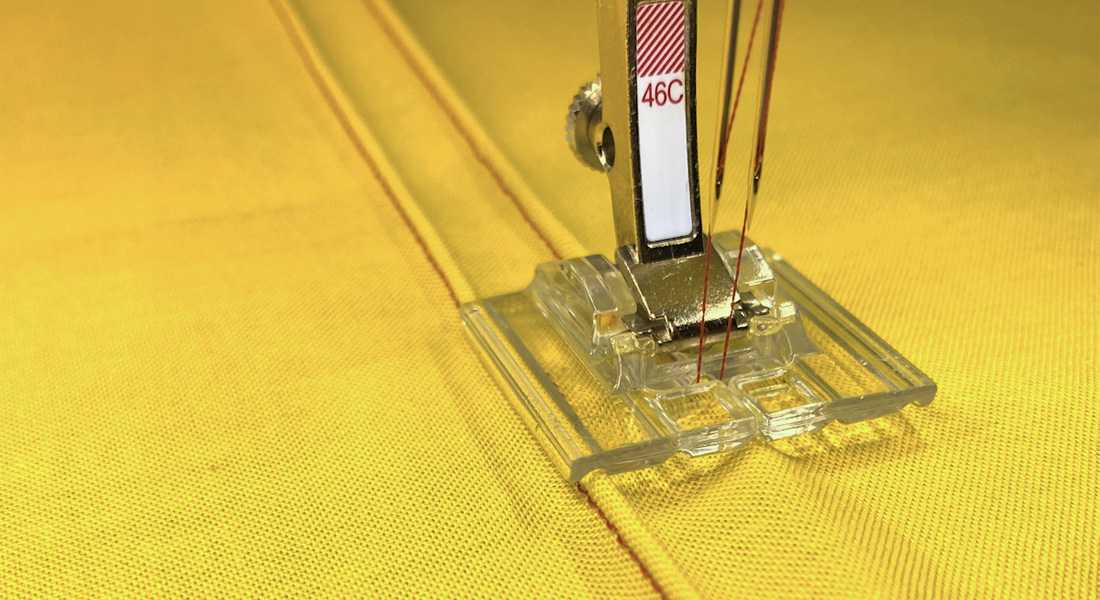
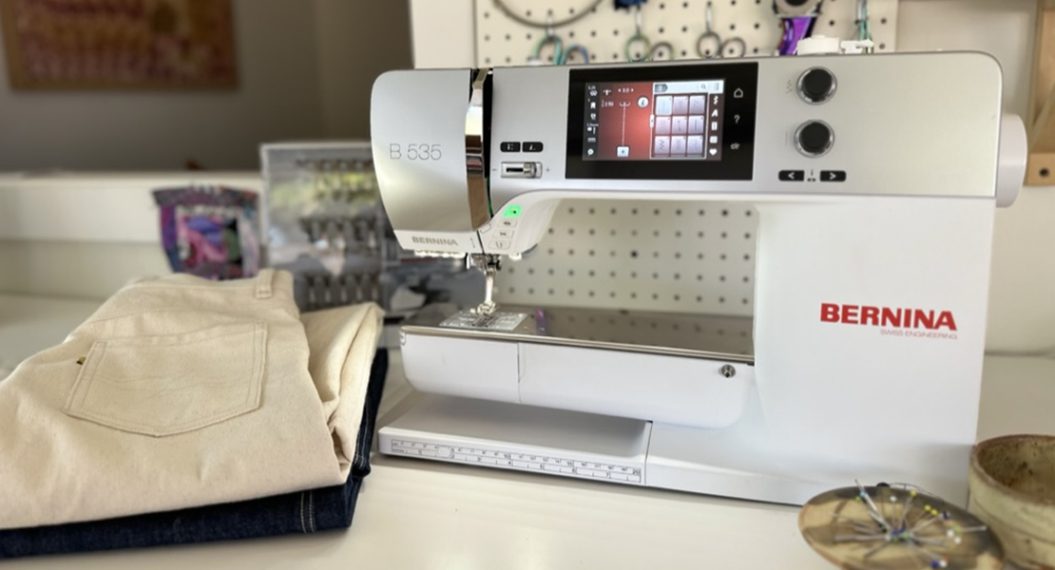
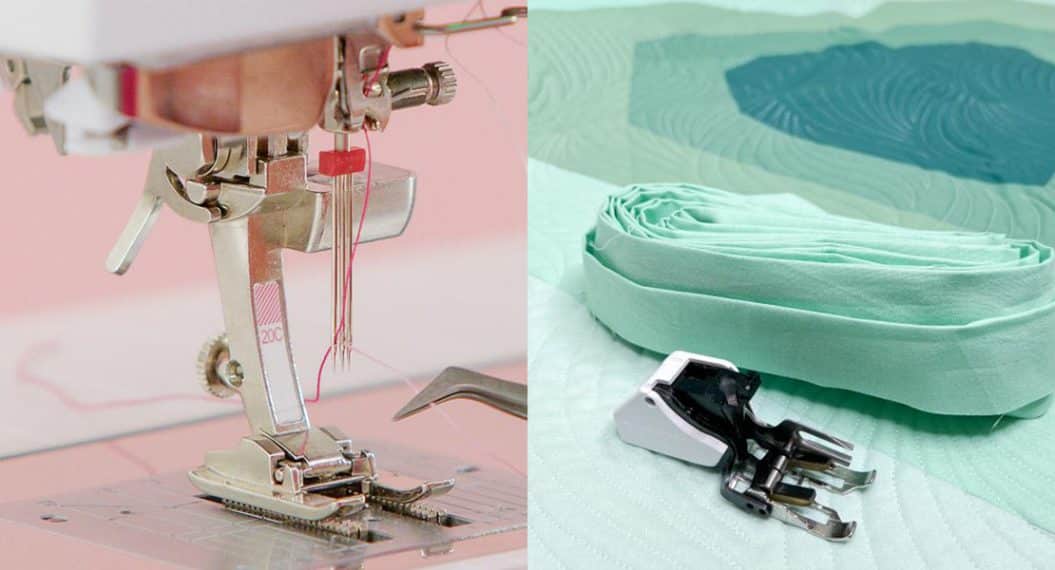
Straight Stitching with BERNINA Jeans Foot #8/8D
There is a variety of BERNINA presser feet that qualify as straight stitch feet. All of them help optimize conditions for an impeccable straight stitch. Some incorporate elements to facilitate the sewing process (e.g. the D version of such feet) while others assist in precision sewing, like the patchwork feet.
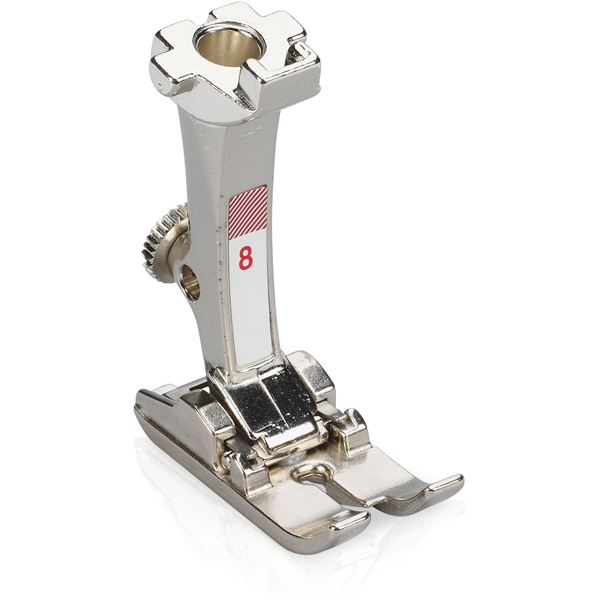
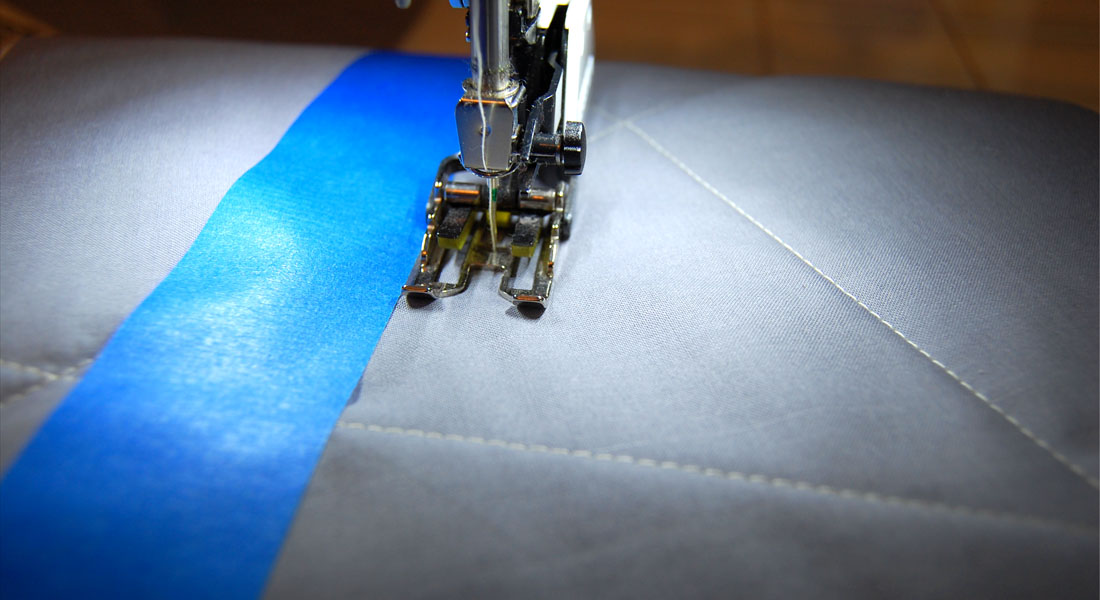
One foot stands out among the selection for its ability to sew a perfect straight stitch through thick or thin materials: the Jeans Foot #8/8D.
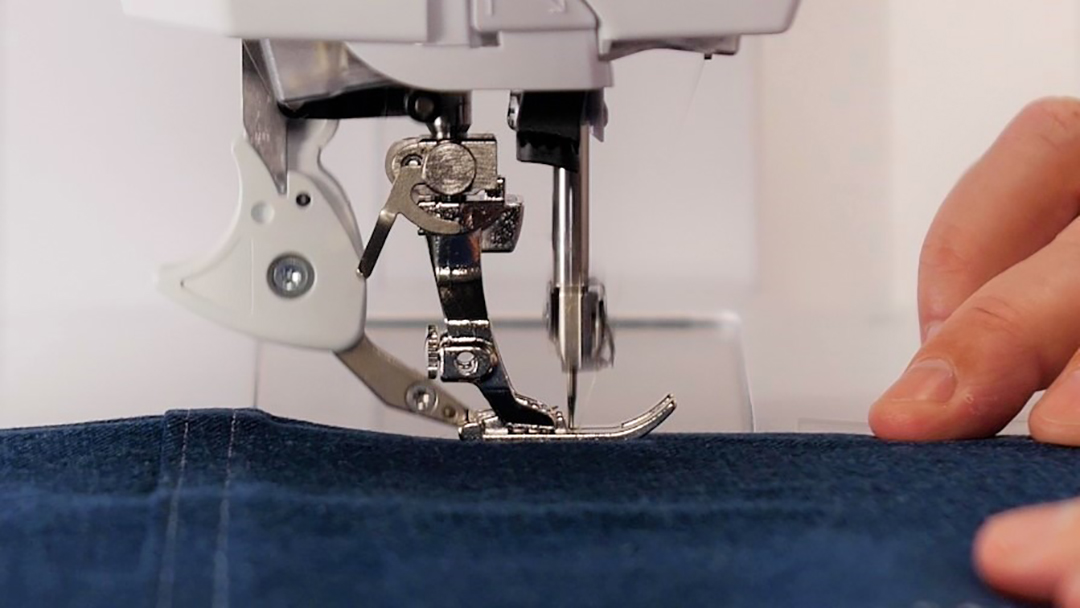
What Makes the BERNINA Jeans Foot #8/8D Special?
- The small needle opening in the foot is ideally suited to promote a perfect straight stitch
- The groove under the foot lets the stitch that was just laid down ride straight and flat on the fabric, undisturbed. This is the key element in promoting a perfect straight stitch on all types of fabrics, thick or thin.
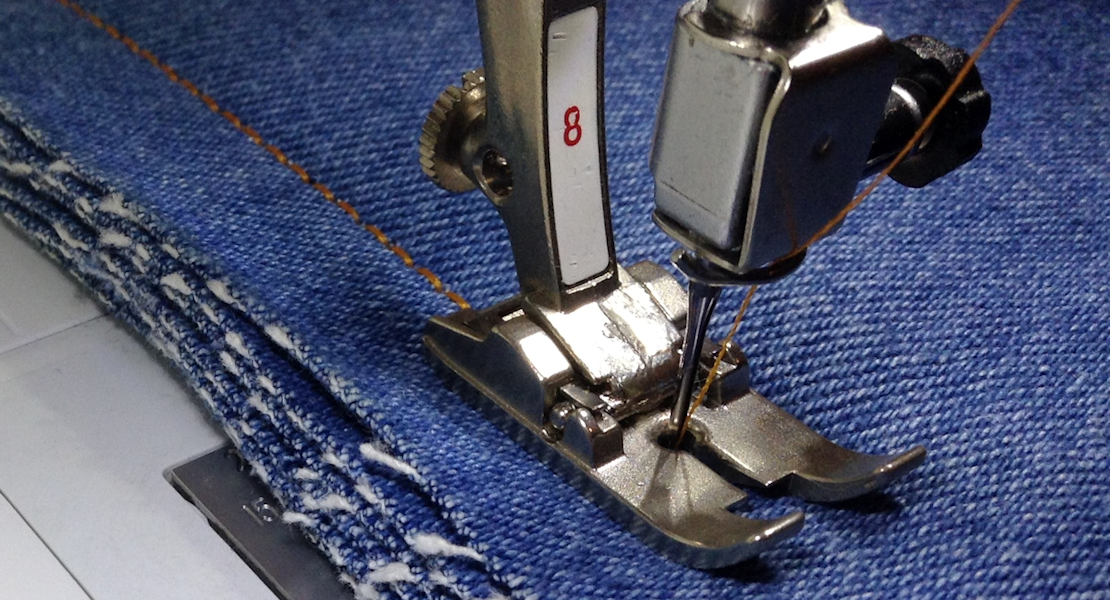
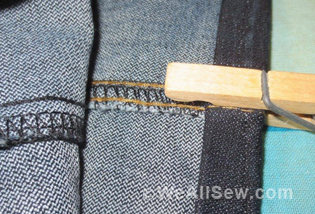
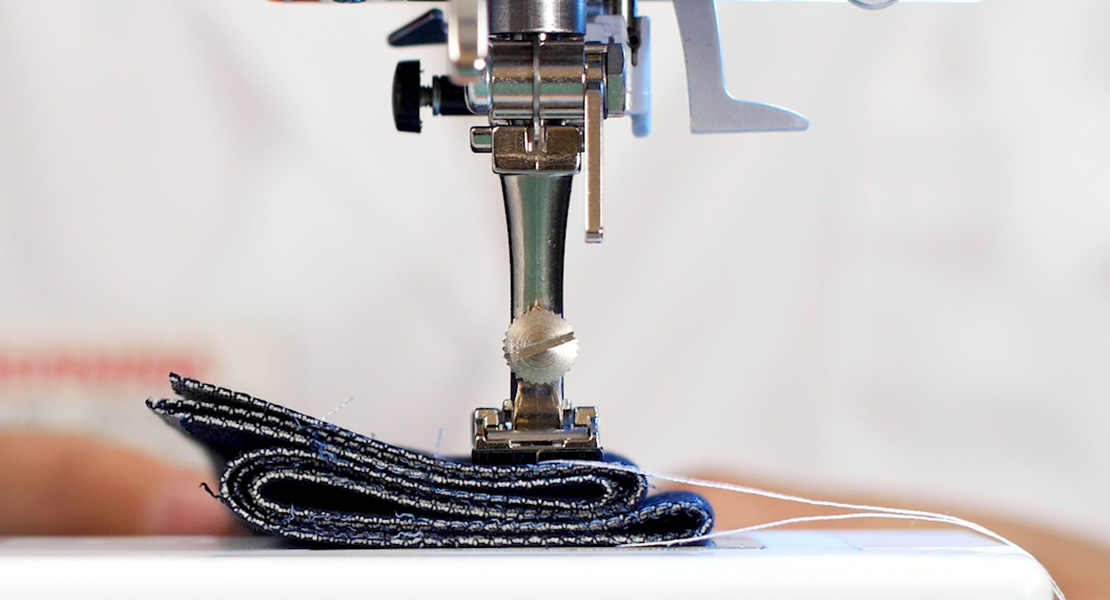
- The foot can angle up when it encounters thicker layers like the cross seam in the hem of jeans.
That is the dreaded moment. Luckily, Jeans Foot #8/8D is uniquely designed to handle that very situation.
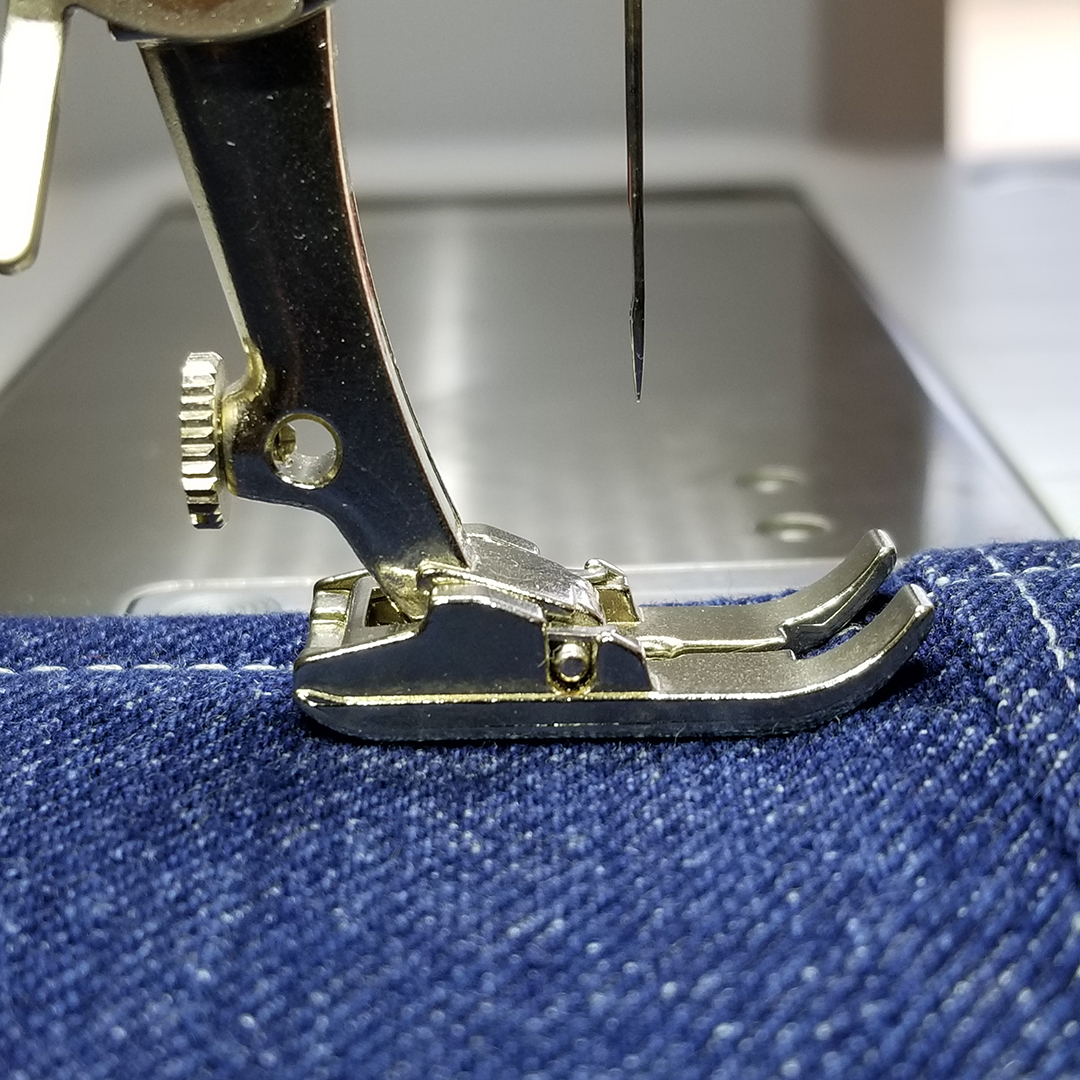
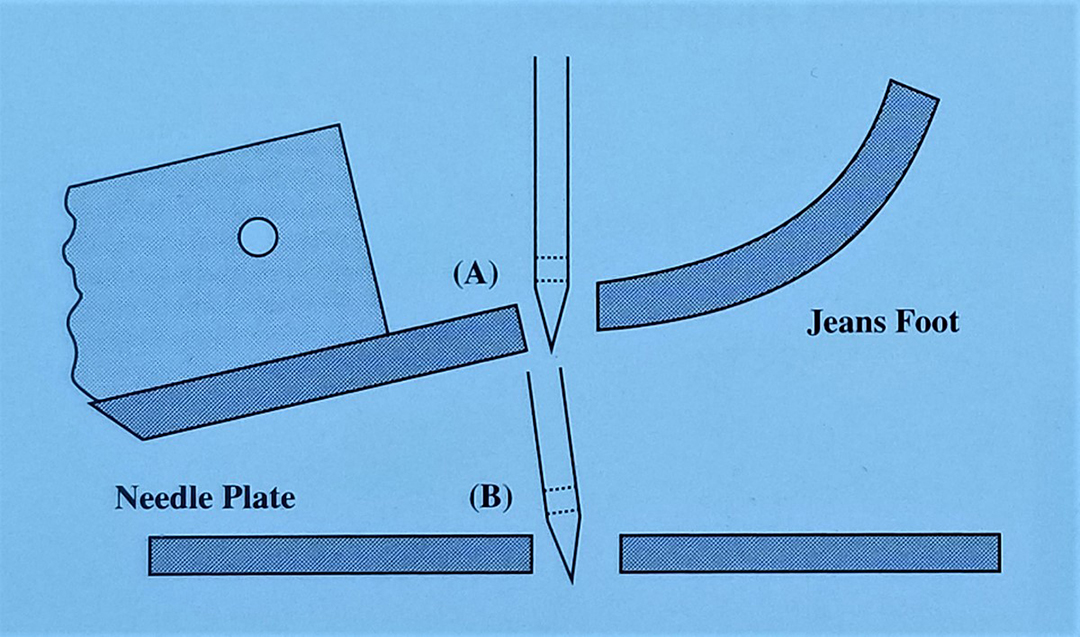
- When combined with a straight stitch plate and a larger needle (size 110 or 100), this foot will guide the needle so that it penetrates the layers without bending and breaking. Here’s a drawing that was made by the BERNINA engineers decades ago, illustrating the design and how it works. It’s become a classic!.
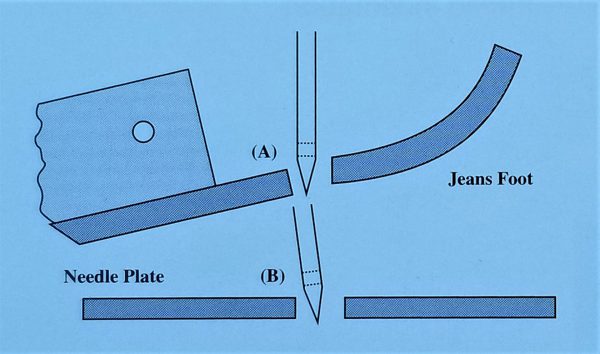
- Whenever the foot angles up due to the extra bulk of the seam allowance, the needle will be guided first by the back of the hole in Jeans Foot #8/8D, which is shaped like a funnel and which will force the needle (Point A in the diagram) to enter the stitch hole no matter what.
- As the needle passes through the stitch hole, it will be kept in alignment by grazing the front of the needle hole in the stitch plate (Point B in the diagram) since there is no wiggle room with a small straight stitch hole.
- This works even if you are going from 2 layers of heavy denim to 6 layers, such as when you sew a hem and have to climb over the cross-seam bulk.
- The result is a successful seam instead of a broken needle.
- The 8D version adds the benefit of Dual Feed for extra traction, useful with especially heavy projects.
And that is why Jeans Foot #8/8D lets you power through multiple layers of heavy materials without breaking a needle.
Factors that Promote Best Results
Always Test First to get the Right Mix!
- Needle type/size: Select the right needle for the project:
- For example, use a, Jeans or Topstitch needle for hemming jeans or sewing tote bags.
- Use a larger needle when adding layers (e.g. sewing the box seam at the bottom of a tote bag).
- Consider using more than one needle size on a project: A Jeans 80 needle is sufficient to construct a pair of jeans. A Jeans 90 needle will become necessary for thicker areas like hems, pockets, crotch seams (note that belt loops are a special case, requiring a zig-zag foot and potentially a larger needle like a size 100, depending on the heaviness of the denim).
- Whenever I have to increase the needle size from 90 to 100 or 110 (e.g. on tote bags), I will switch needle type from Jeans needle to Topstitch needle. The latter has a larger eye which will help ensure the thread flows freely through the tough and thick layers. This helps ensure proper stitch formation and top stich quality (pun intended!).
- Stitch length: Should be proportional to fabric thickness/density/layers.
- Lengthen the stitch to 3.0 – 3.5 mm when sewing over more than 2 layers.
- Thread tension: Adjust as needed. Usually, the preset tension on the straight stitch on BERNINA machines requires little adjustment.
TIP: If you see thread loops when stitching over more than 2 layers, you may need to increase the size of your needle.
- Presser Foot Pressure: When working on very thick seams (e.g. on some parts of tote bags), consider reducing presser foot pressure to facilitate fabric transport.
- Dual Feed if available: I have both versions of Jeans Foot #8/8D and I typically use the 8D version nowadays, especially on thick projects. The added traction helps stitch those heavy seams more evenly.
- Last and definitely not least: Team your Jeans foot with a Straight Stitch Plate. To get the full benefit from the foot’s design, especially when crossing heavy layers, the straight stitch plate is the other half of the equation.
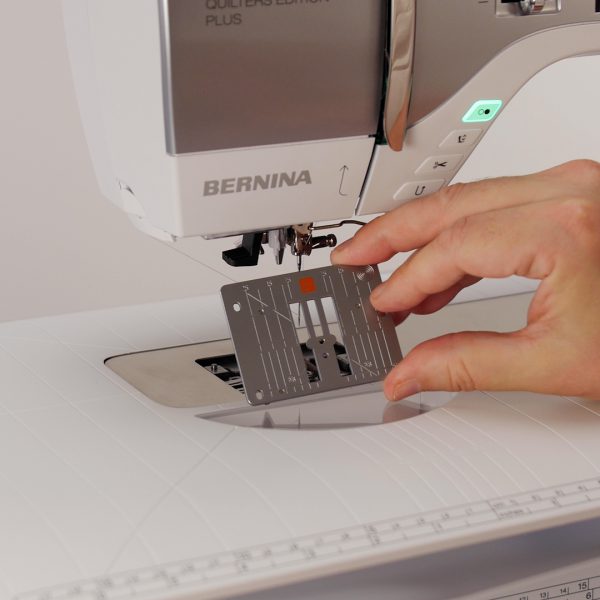

TIP: Remember to select the Straight Stitch Plate from your security program if your machine has a touch screen. This will help save that needle. If your machine has Presser Foot Selection, you can select Foot #8 or 8D. Personally, since I always team up the foot with the Straight Stitch Plate, I rely on the plate selection for safety, so that if I detach the foot and not the plate, that safety measure remains in place until I swap out the plate.

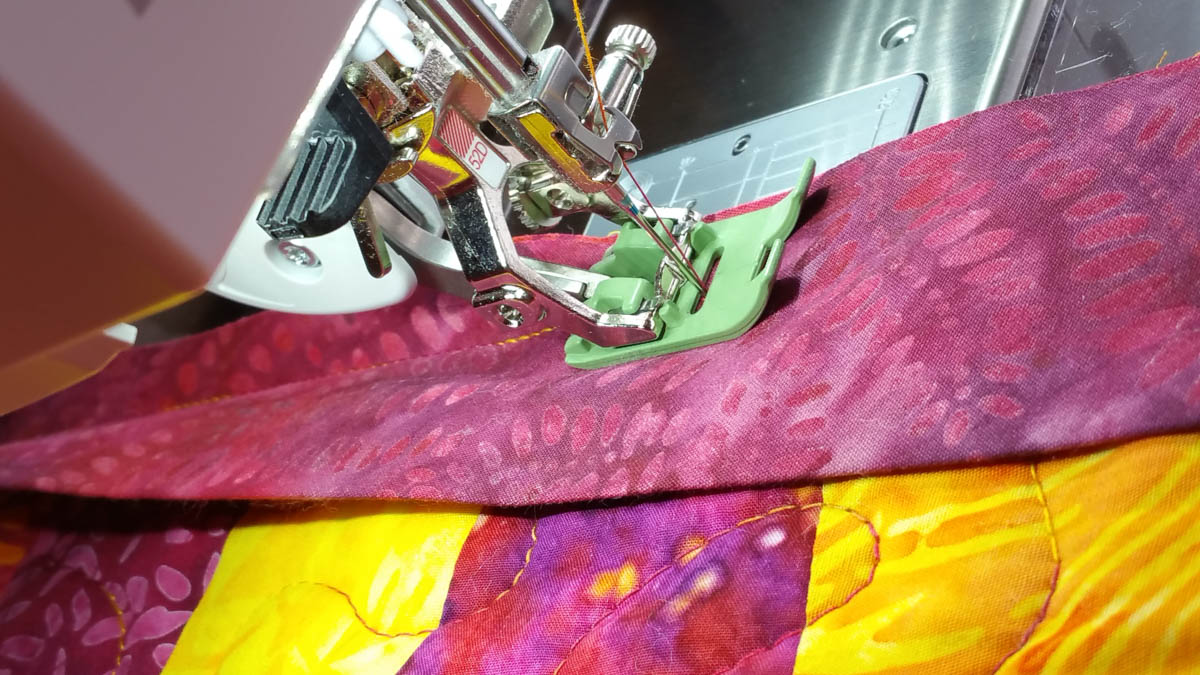
For Heavy Fabrics/Layers
- 2-4-8 Layers of Heavy Denim: While sewing on 2 layers of denim is easy with just about any presser foot, when the layers add up (here 8), the Jeans Foot really shines. The sole helps lay the thread down perfectly so that on regular heavy layers it becomes just another regular seam. Remember to lengthen the stich as needed when adding layers.
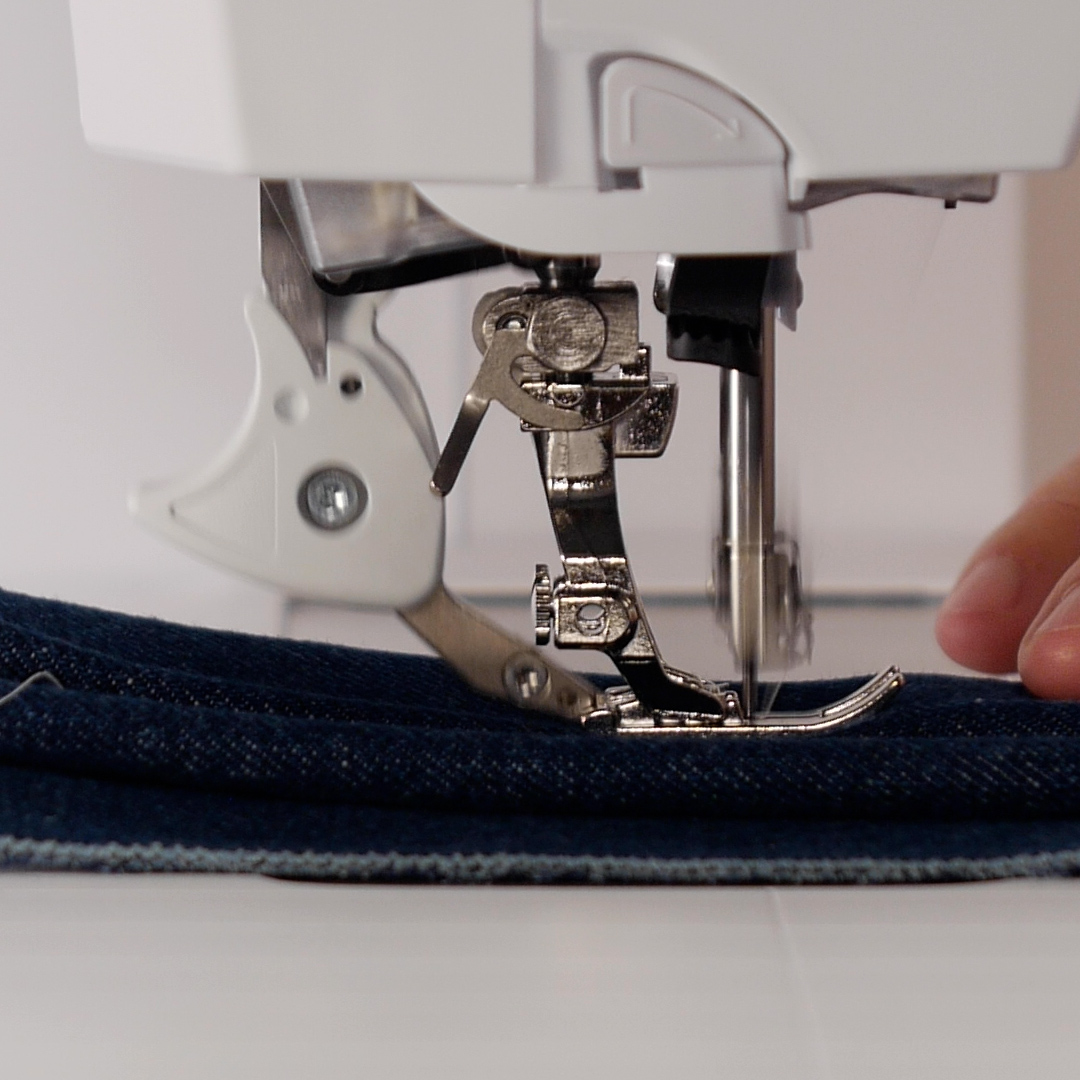
Hemming Jeans
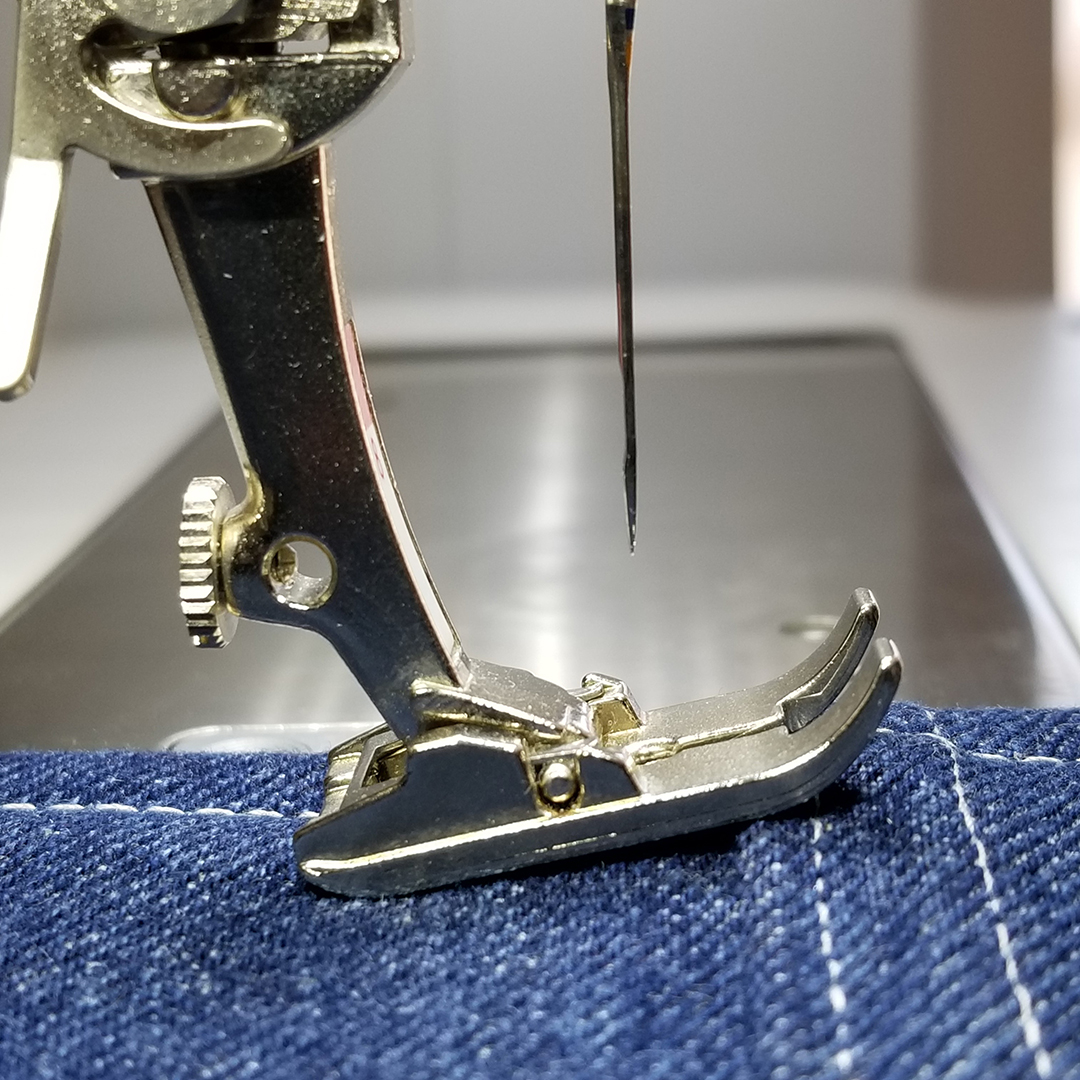
This is the application most of us associate with the Jeans Foot. The only challenging part when hemming jeans is stitching across the bulky cross seams. As illustrated above, using the foot and the Straight Stitch Plate will help ensure an even seam… without broken needles.
Here’s the shortlist of items to consider/include:
- Jeans 90 needle to start with
- Straight stitch, length of 3.0 – 3.5 mm
For more detailed instructions on hemming jeans, consult the following article posted here on WeAllSew.com:
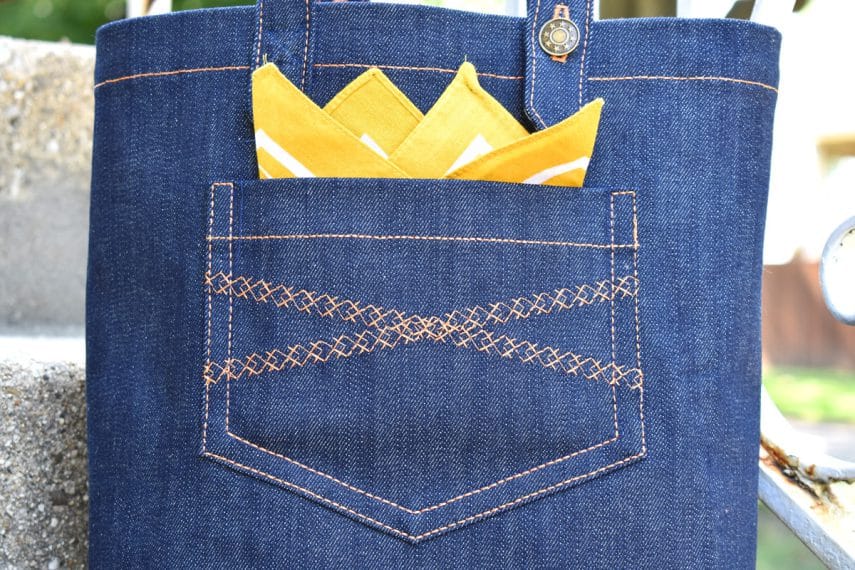
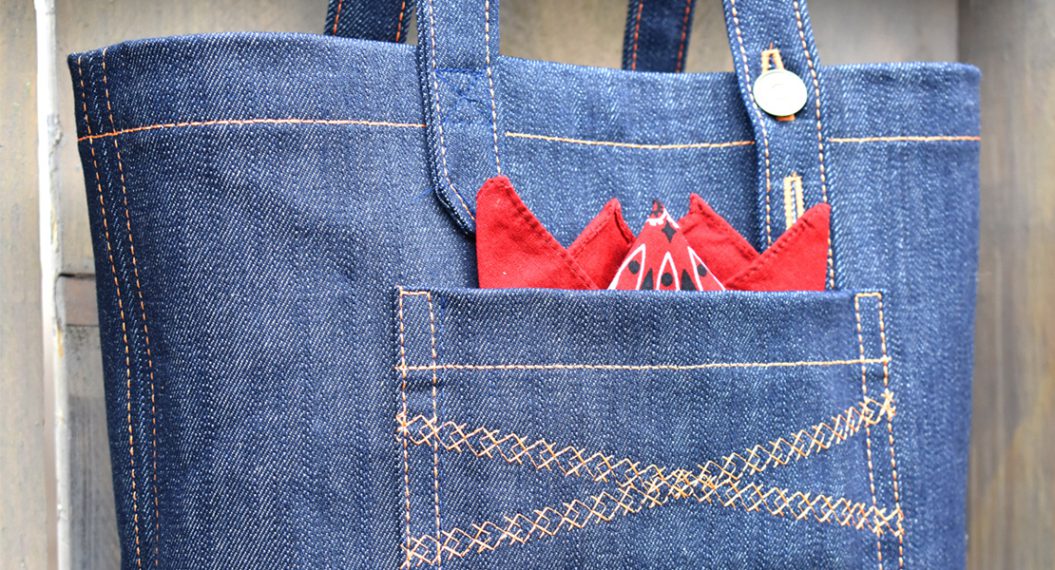
Straps/Handles on Canvas (e.g., Tote Bags)
When teaching a tote bag-making class, I always enjoyed sewing on the straps/handles. It put the tote closer to my hands (no pun intended), closer to finished. Straps and handles can be challenging though.
- They are often made of bulky, grainy materials like webbing (especially nylon webbing. Webbing is durable, but ‘crunchy’ under the needle sometimes),
- This can make it hard to pin them down..
TIP: Use a water-soluble glue stick if possible to pre-position the strap or webbing on the bag to keep it in place. - They add bulk, especially when turned under at the ends. If a strap or handle crosses a thicker area at the top of the bag (e.g. if webbing is applied as a trim at the top of the bag), the thick, uneven layers issue becomes compounded.
Here again, Jeans Foot #8/8D to the rescue! Teamed up with the Straight Stitch Plate, it navigates the uneven layers while maintaining an even stitch.

If you need ideas to make tote bags, there is a great selection of projects here on WeAllSew.com. Follow this link for a list of totes made from a wide variety of materials.
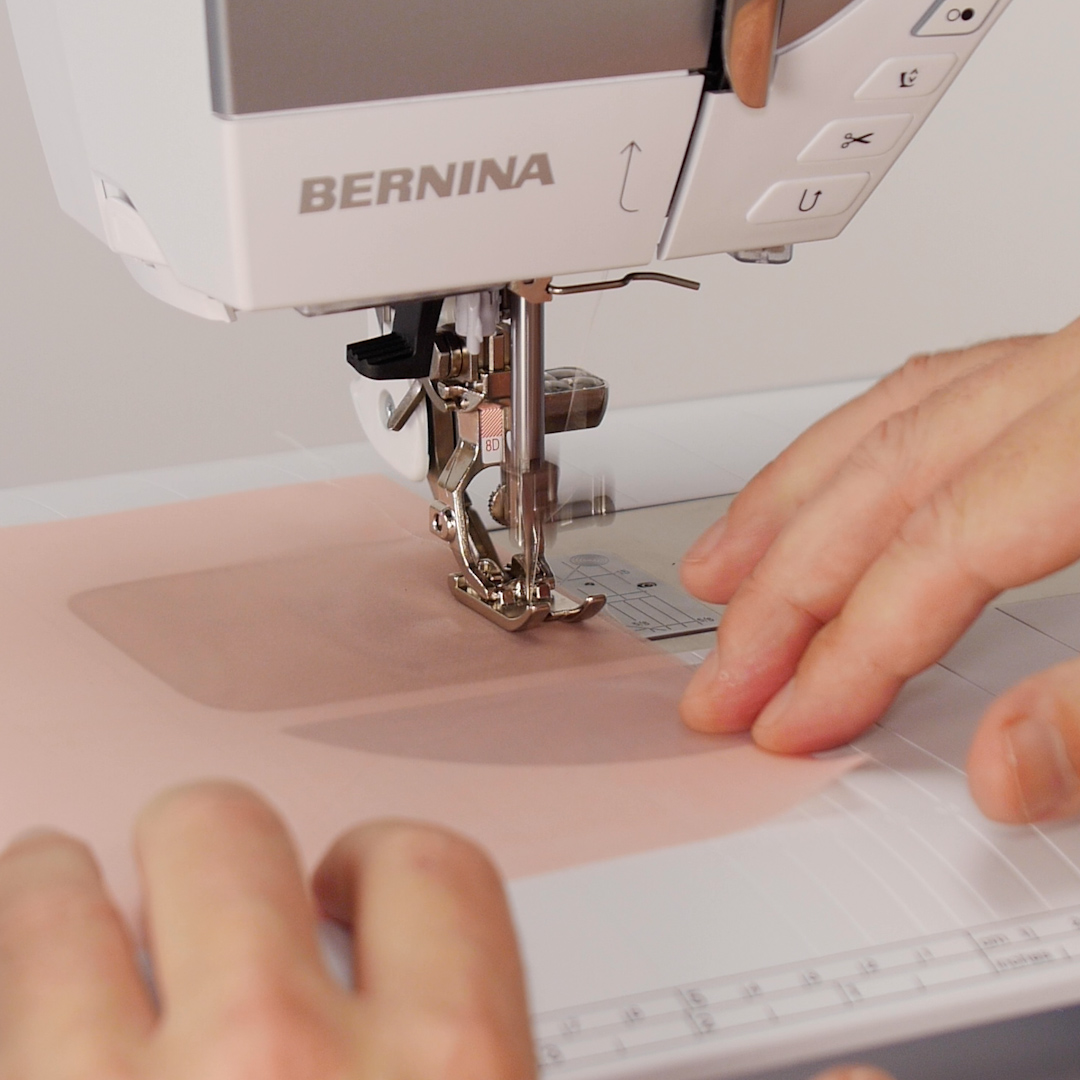
For Light and Sheer Fabrics
As mentioned at the top of this article, the Jeans Foot #8/8D is not only for denim and heavy projects. It also excels at fine stitching on lightweight and sheer fabrics. Its design as a straight stitch foot is key here.
Here are some factors to consider when stitching on very lightweight fabrics:
- Select the right needle type: A sharp needle, like a Microtex needle, usually does well for this application, with its very fine and tapered point. It will do well even on microfiber (the root of its design). A jeans needle can also be used if Microtex needles are missing from your supply. (Jeans needles used to be called ‘sharp’.)
- Select as small a needle size as is practical: A size 70 is usually plenty large for such lightweight fabrics.
- Use as fine a thread as possible: 70 or 100 wt threads are preferable to heavier threads like 50 wt cotton or poly.
TIP: A good-quality overlocker thread is usually 70 wt. It’s my backup option when I don’t have the exact intended thread on hand. - Consider a higher presser foot pressure than usual for enhanced fabric control on very fine fabrics like sheers/georgette/charmeuse.
- If possible, practice taut sewing to keep the layers from shifting. Sheers tend to be slinky and layers can shift against each other if left to their own.
- Test First! Superfine fabrics are more troublesome than nice heavy, firm and stiff fabrics like denim and canvas.
In closing, Jeans Foot #8/8D is my go-to foot for any kind of sewing on heavier projects. Its ability to maintain stitching performance and quality over uneven layers when using the correct size needle, even when stitching through extreme bulk, means that I don’t have to worry about the results. I can simply focus on handling the bulk and let my BERNINA do the stitching, aka handle the rest. After all, that is why I bought my first BERNINA as a graduate student in 1993, to have a machine that could handle every sewing scenario. The key is to use the right foot for the job. Always.
Used Products

What you might also like

11 comments on “Straight Stitching with BERNINA Jeans Foot #8/8D”
-
-
The key would be to hold your threads when you start a row, especially given that you are using different threads in needle and bobbin. I learned to sew holding my threads at startup and still do it, even with automated cutters. I still pull the bobbin thread to the top for decorative and topstitching applications.
-
-
Just finished garden aprons for myself and gifts. The Jeans 8D foot made the construction and finishing so easy!
-
I just bought a bucket at a church festival, I saw some sewing items. Upon opening I saw a large roll of webbing and another adhesive tape that has Stiff lattice – not sure what this is for
-
will the # 8 foot work with the Bernina 931 Record?
-
There is a version of Foot #8 for your 931 Record. It’s what we call ‘old style’, with a rounded shape at the top/back of the shank. Your local BERNINA store can order it for you.
-
-
I used this foot all day today- knits, linen, cotton and wa s able to cleanly sew 1/8 seams. This is a great tool to have.
-
I have a Bernina 950 and I’m wondering if there is a straight stitch plate and jeans foot for my machine, please? Thank you!
-
What we refer to as ‘old style’ foot #8 will work on your machine. As for the straight stitch plate for your 950, it may no longer be available, given how long ago this model left our active catalog. Contact your local BERNINA store as they can check on availability of the plate.
-
-
Is there a jeans foot that’s compatible with the 1008 machine? I love my old style machine and frequently work on bulky fabrics/layers when making theatrical costumes. I think the jeans foot is exactly what I need!
-
There sure is!
for your reference, the 1008 is in the same category as ‘vintage’ models (models made before the introduction of the built-in needle threaders) when it comes to presser feet. We refer to this group of models affectionately as ‘old style’ when it comes to presser feet. I personally own (an love) 5 such models of machines 🙂Your local BERNINA store will be able to procure the right foot #8 for your machine.
-
Leave a Reply
You must be logged in to post a comment.

I have a Bernina 480 and i just made a bucket hat out of canvas with a quilting cotton lining. I used the #8 foot, straight stitch plate, a 90/14 topstitch needle, regular thread in the bobbin, topstitch thread in the top and i increased the tension to fix the looping but every time i began a new row of topstitching, i got a tangled “nest” underneath and often had to start over. It was very frustrating. What did i do wrong?