Jeans Tips: Stitching Details
In this blog series, explore the interesting subject of jeans making with BERNINA Educator, Jaime David. Ever since the Ginger Jeans Pattern craze in 2014-15, Jaime has been honing her skills in making jeans and has some great tips to share with you. There are so many patterns and sources available today. In addition, learn how pressing tools and choosing the right needles and threads can improve your results. Finish those jeans with professional details like buttonholes and rivets—with some helpful tips before you even start. Finally, learn how to repair and alter your denim to expand its livelihood.
Stitching Details
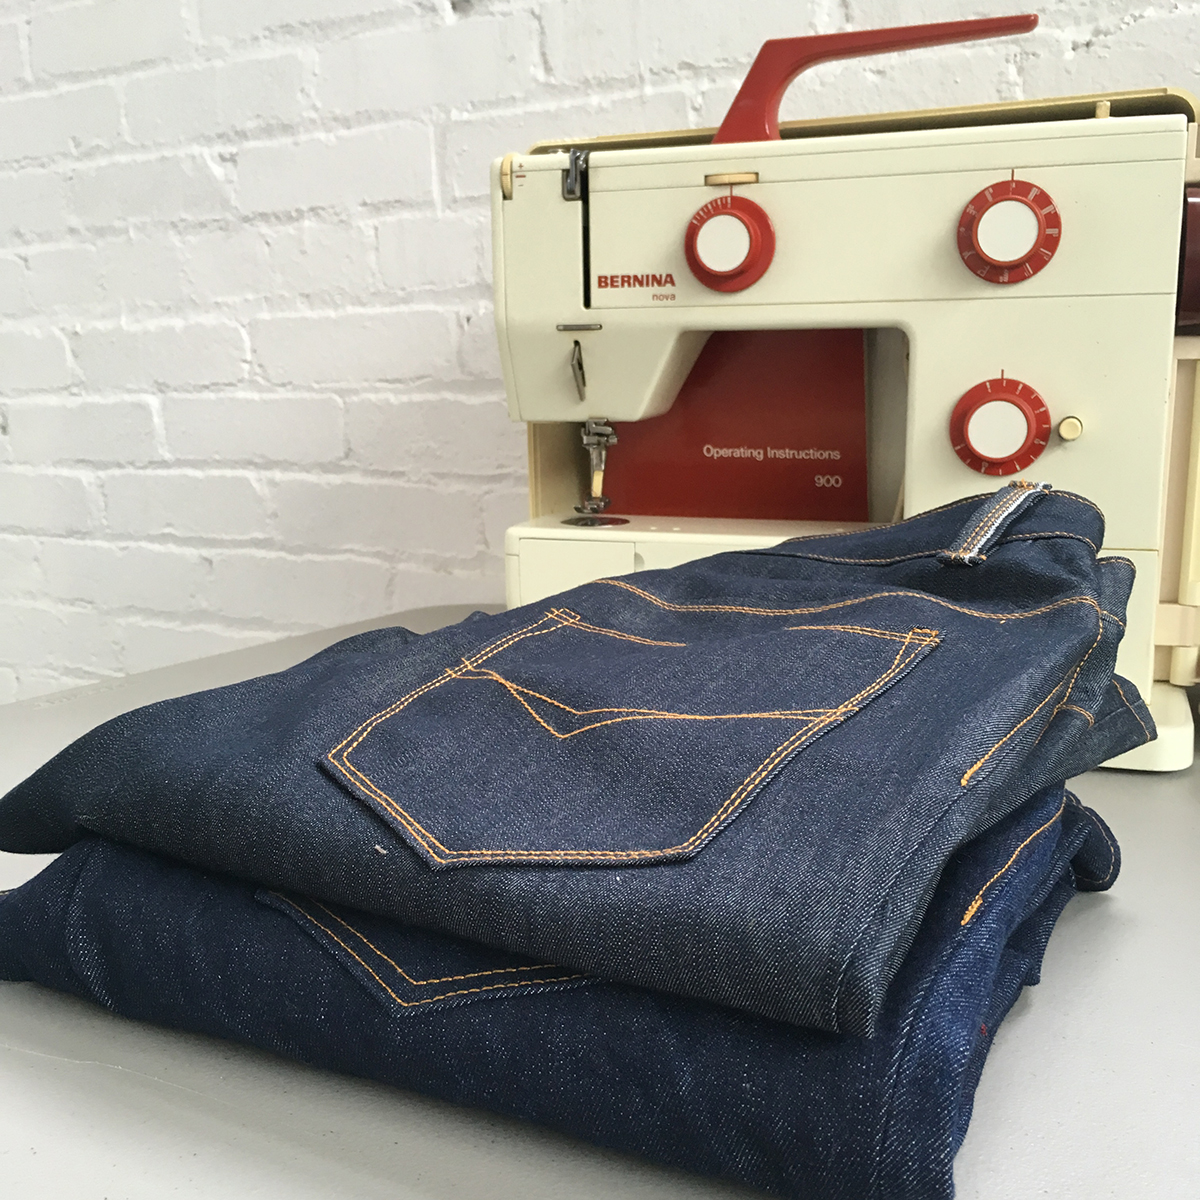
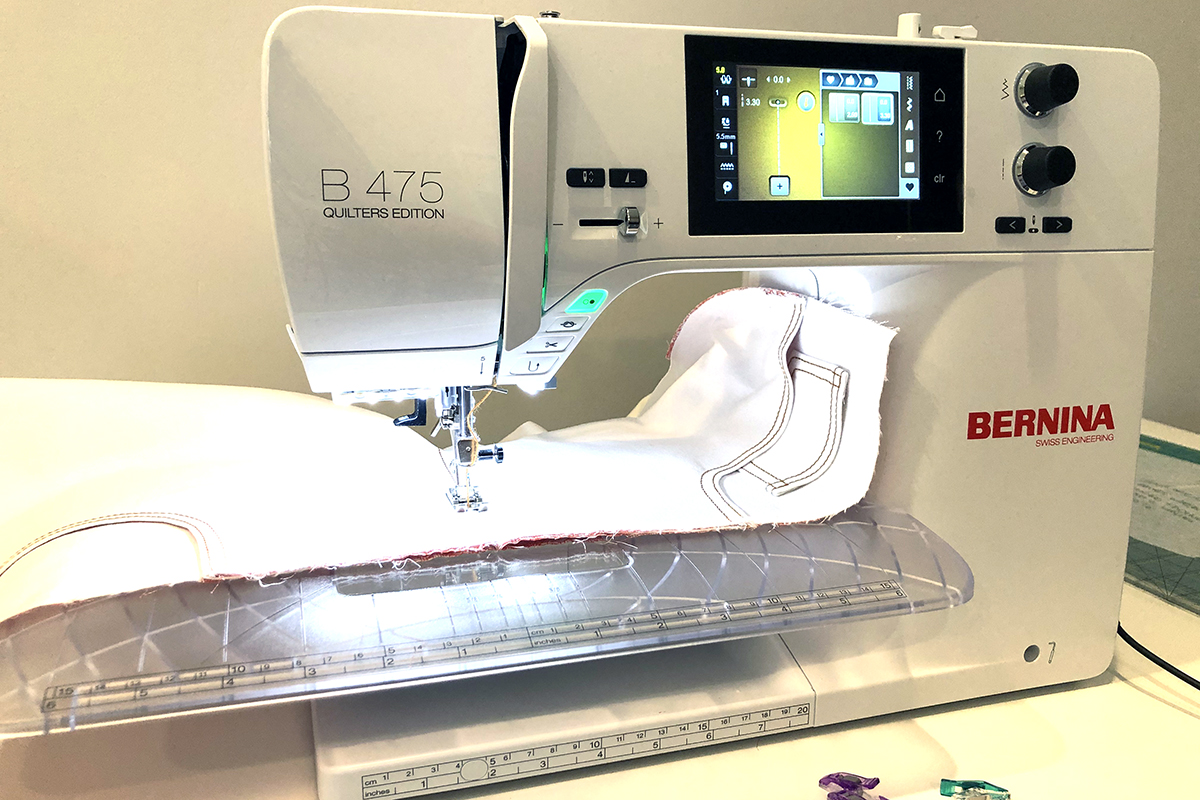
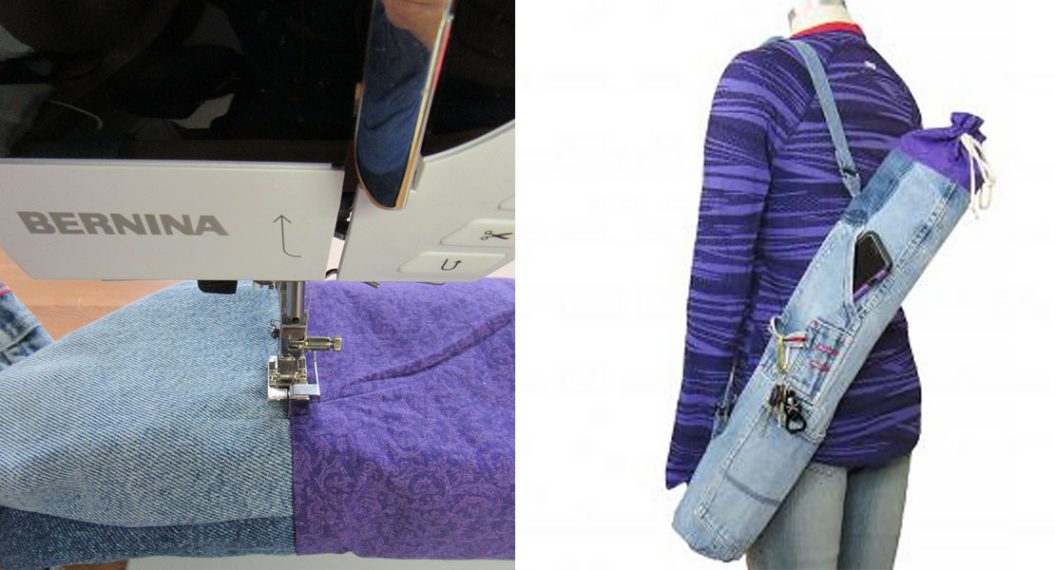
Sewing is all about the stitches and when you have a project like jeans, where the stitching is the star, it is super satisfying. Maybe it’s the architect in me, but there is nothing better than a great looking topstitch. With the precision and power of your BERNINA machine joined with a wide selection of top quality presser feet, achieving the perfect stitching is the fun part! Let me share with you some fun ways and tips for creating stunning stitch details on your jeans.
Topstitching Tips
The basic things you need for a great topstitch are: a topstitch needle, a thicker topstitch thread, a longer stitch length and a good presser foot.
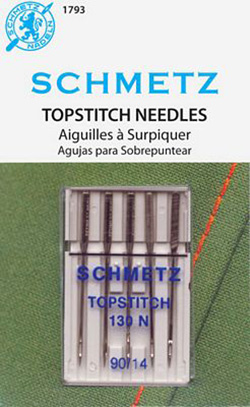
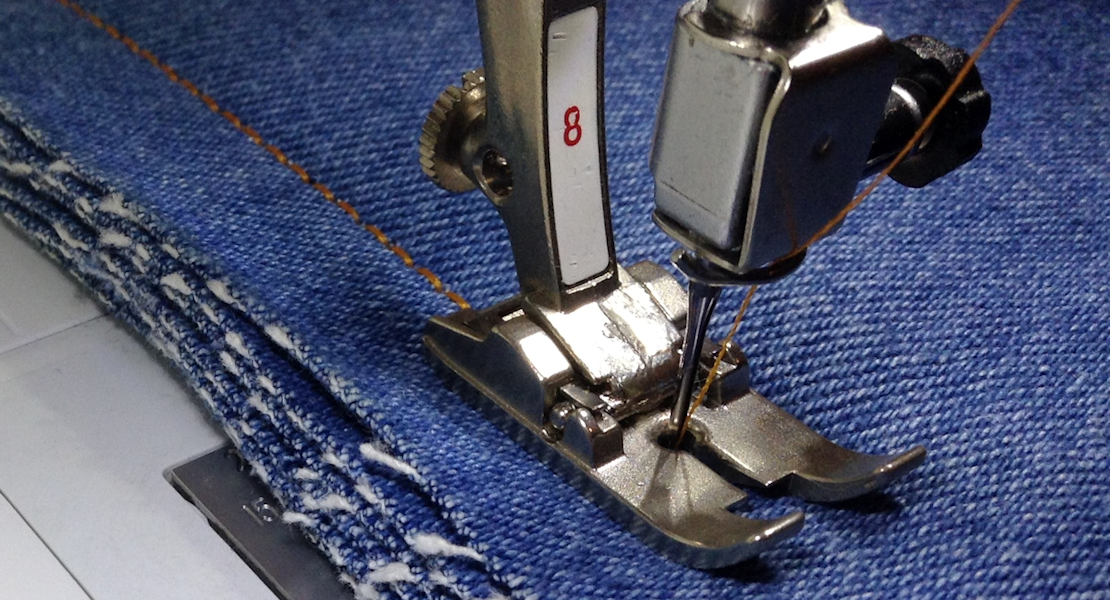
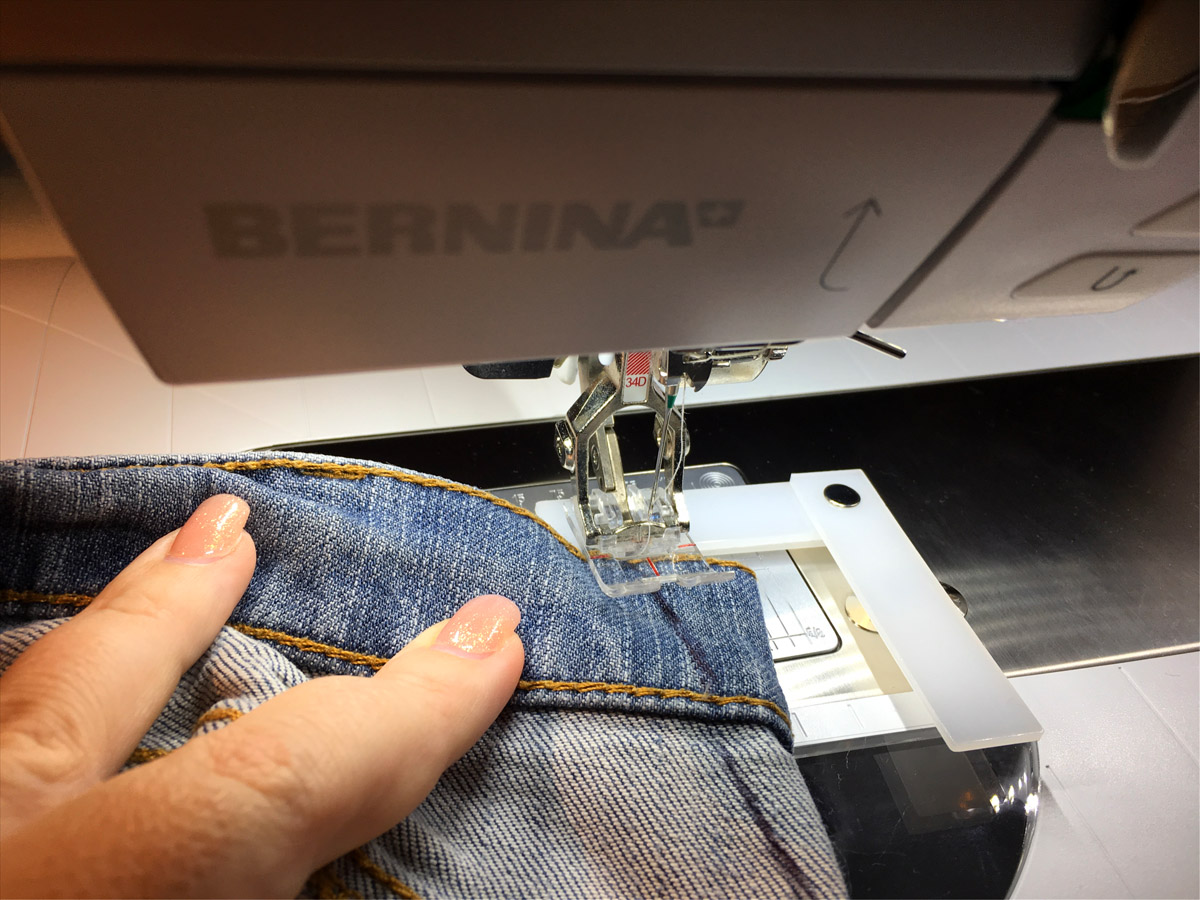
First of all, why use a topstitch needle and not a jeans needle? A topstitch needle has an elongated eye and larger groove on the front of the needle. This allows the thread to move easily through the denim without skipping stitches. In fact, oftentimes when you have skipping stitches, simply changing to a topstitch needle will fix the problem. The topstitch needle also has a sharp point, allowing it to penetrate the denim as easily as a jeans needle would.
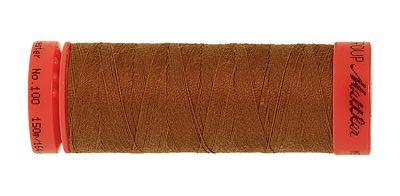
The whole intention of topstitching is for the stitching to show—so choose a thicker topstitch thread. I like YLI Jeans Stitch because it comes in a lot of colors, including jeans gold and topaz, and it is 100% polyester 12 weight thread. This means that it is strong and bold. I made the mistake of using a 12 weight cotton thread once. It didn’t take long for my beautiful stitches to start breaking and falling out of my jeans.

I do not recommend using the topstitch thread in your bobbin. Instead, use a matching standard polyester 40 to 50 weight. thread. Generally, the only side that is visible in topstitching is the top. So why have the hassle of setting a separate bobbin case up with the correct tension to sew thick thread if you don’t really need to?
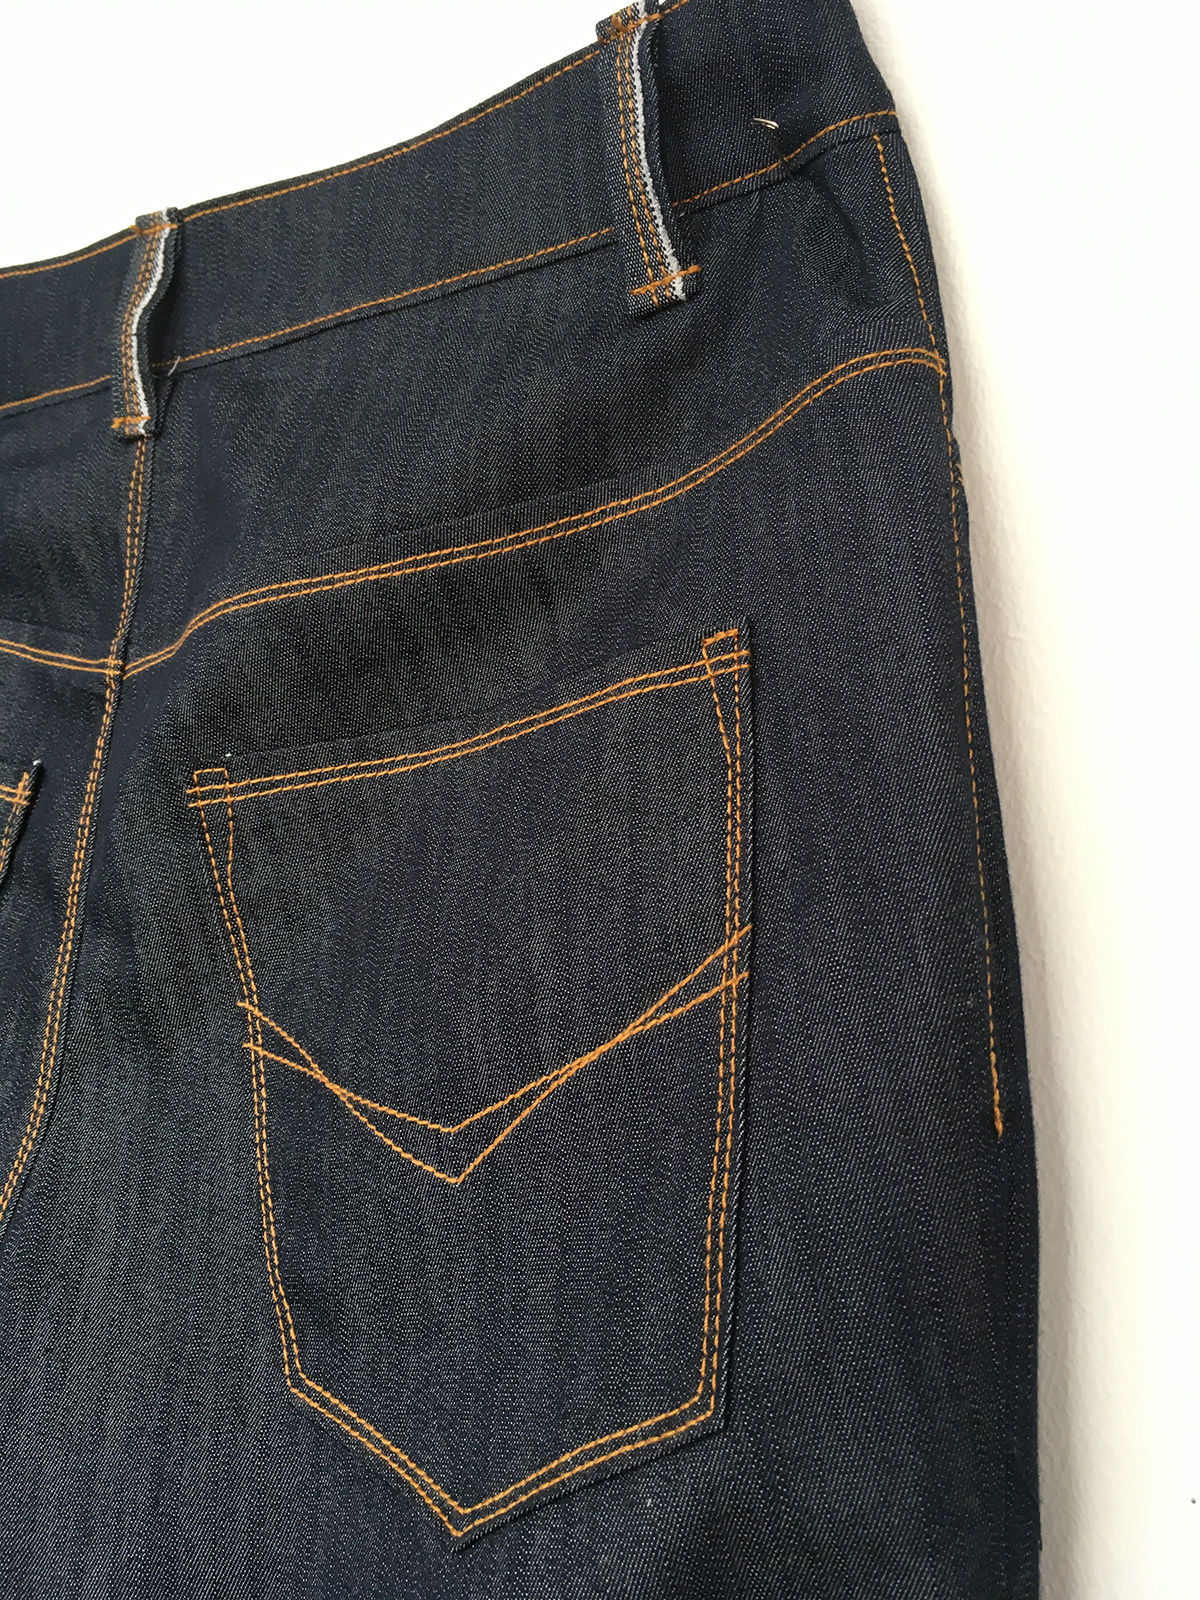
In addition to using a good needle and thread, a longer stitch length looks best. I prefer a stitch length of 3-3.5 for my topstitching. Remember this is not the construction stitch that is holding the jeans together, it is the pretty stitch that you see, so lengthening the stitch length will have more visual impact.
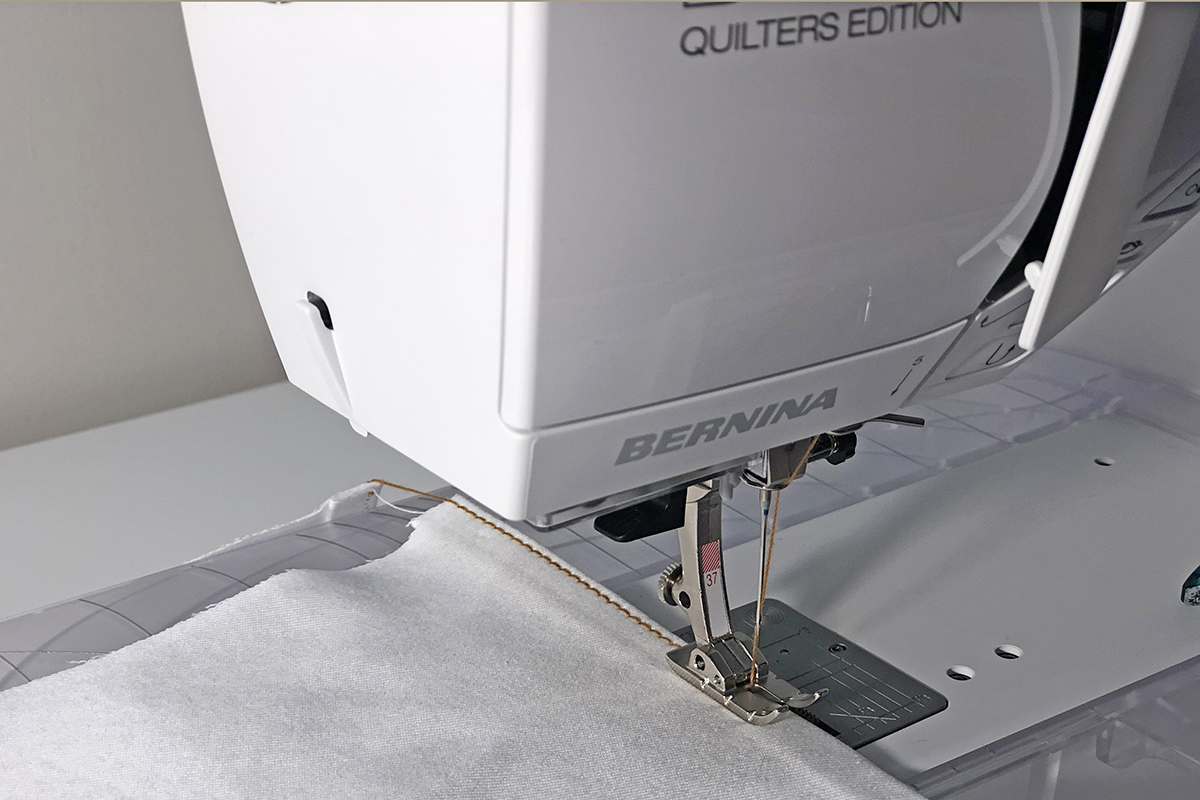
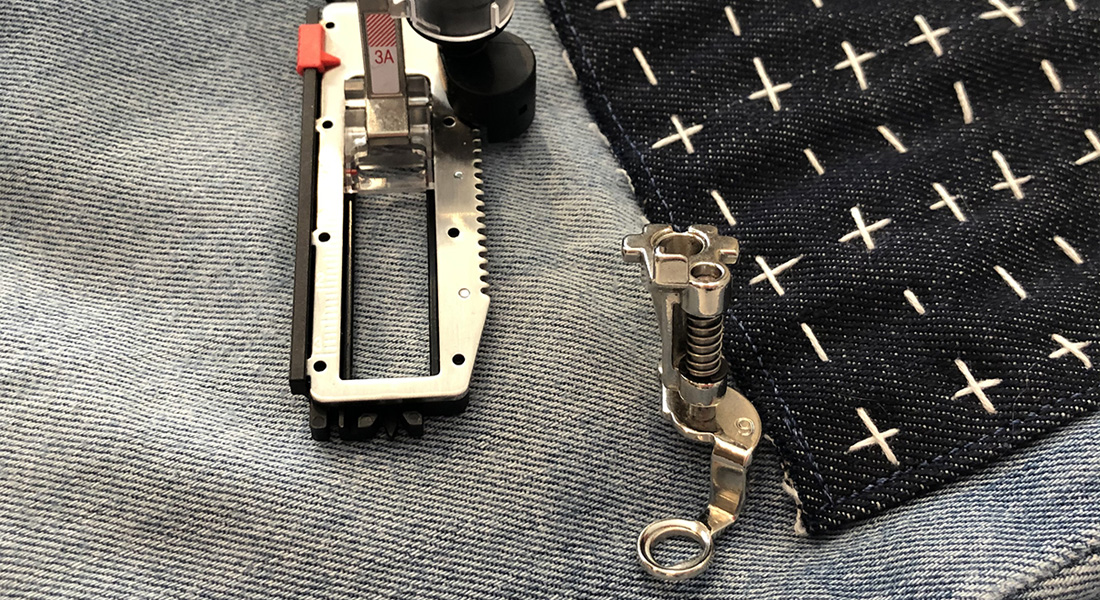
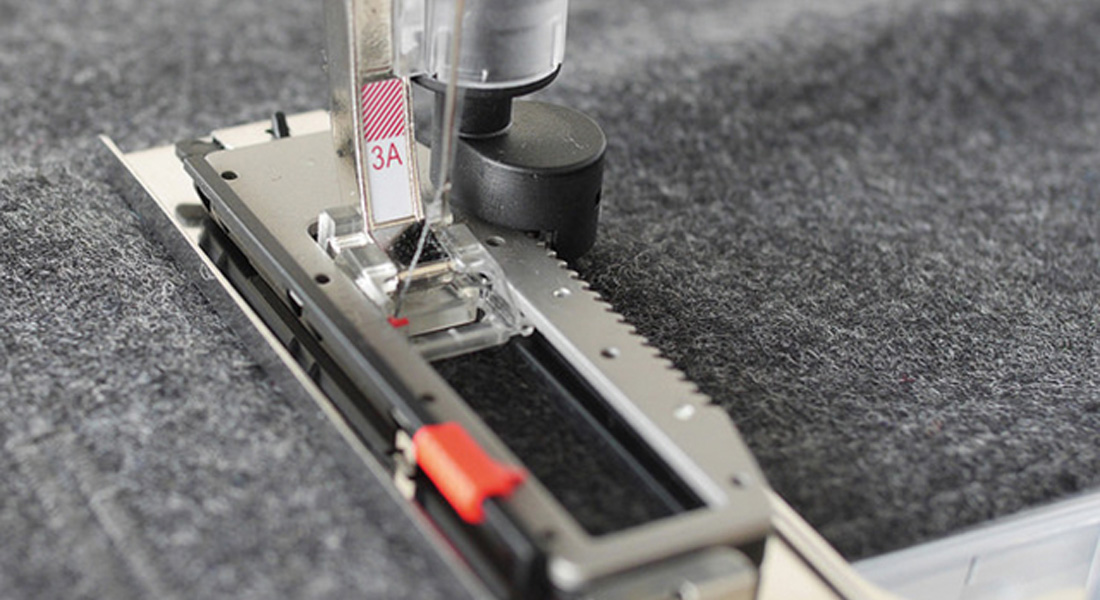
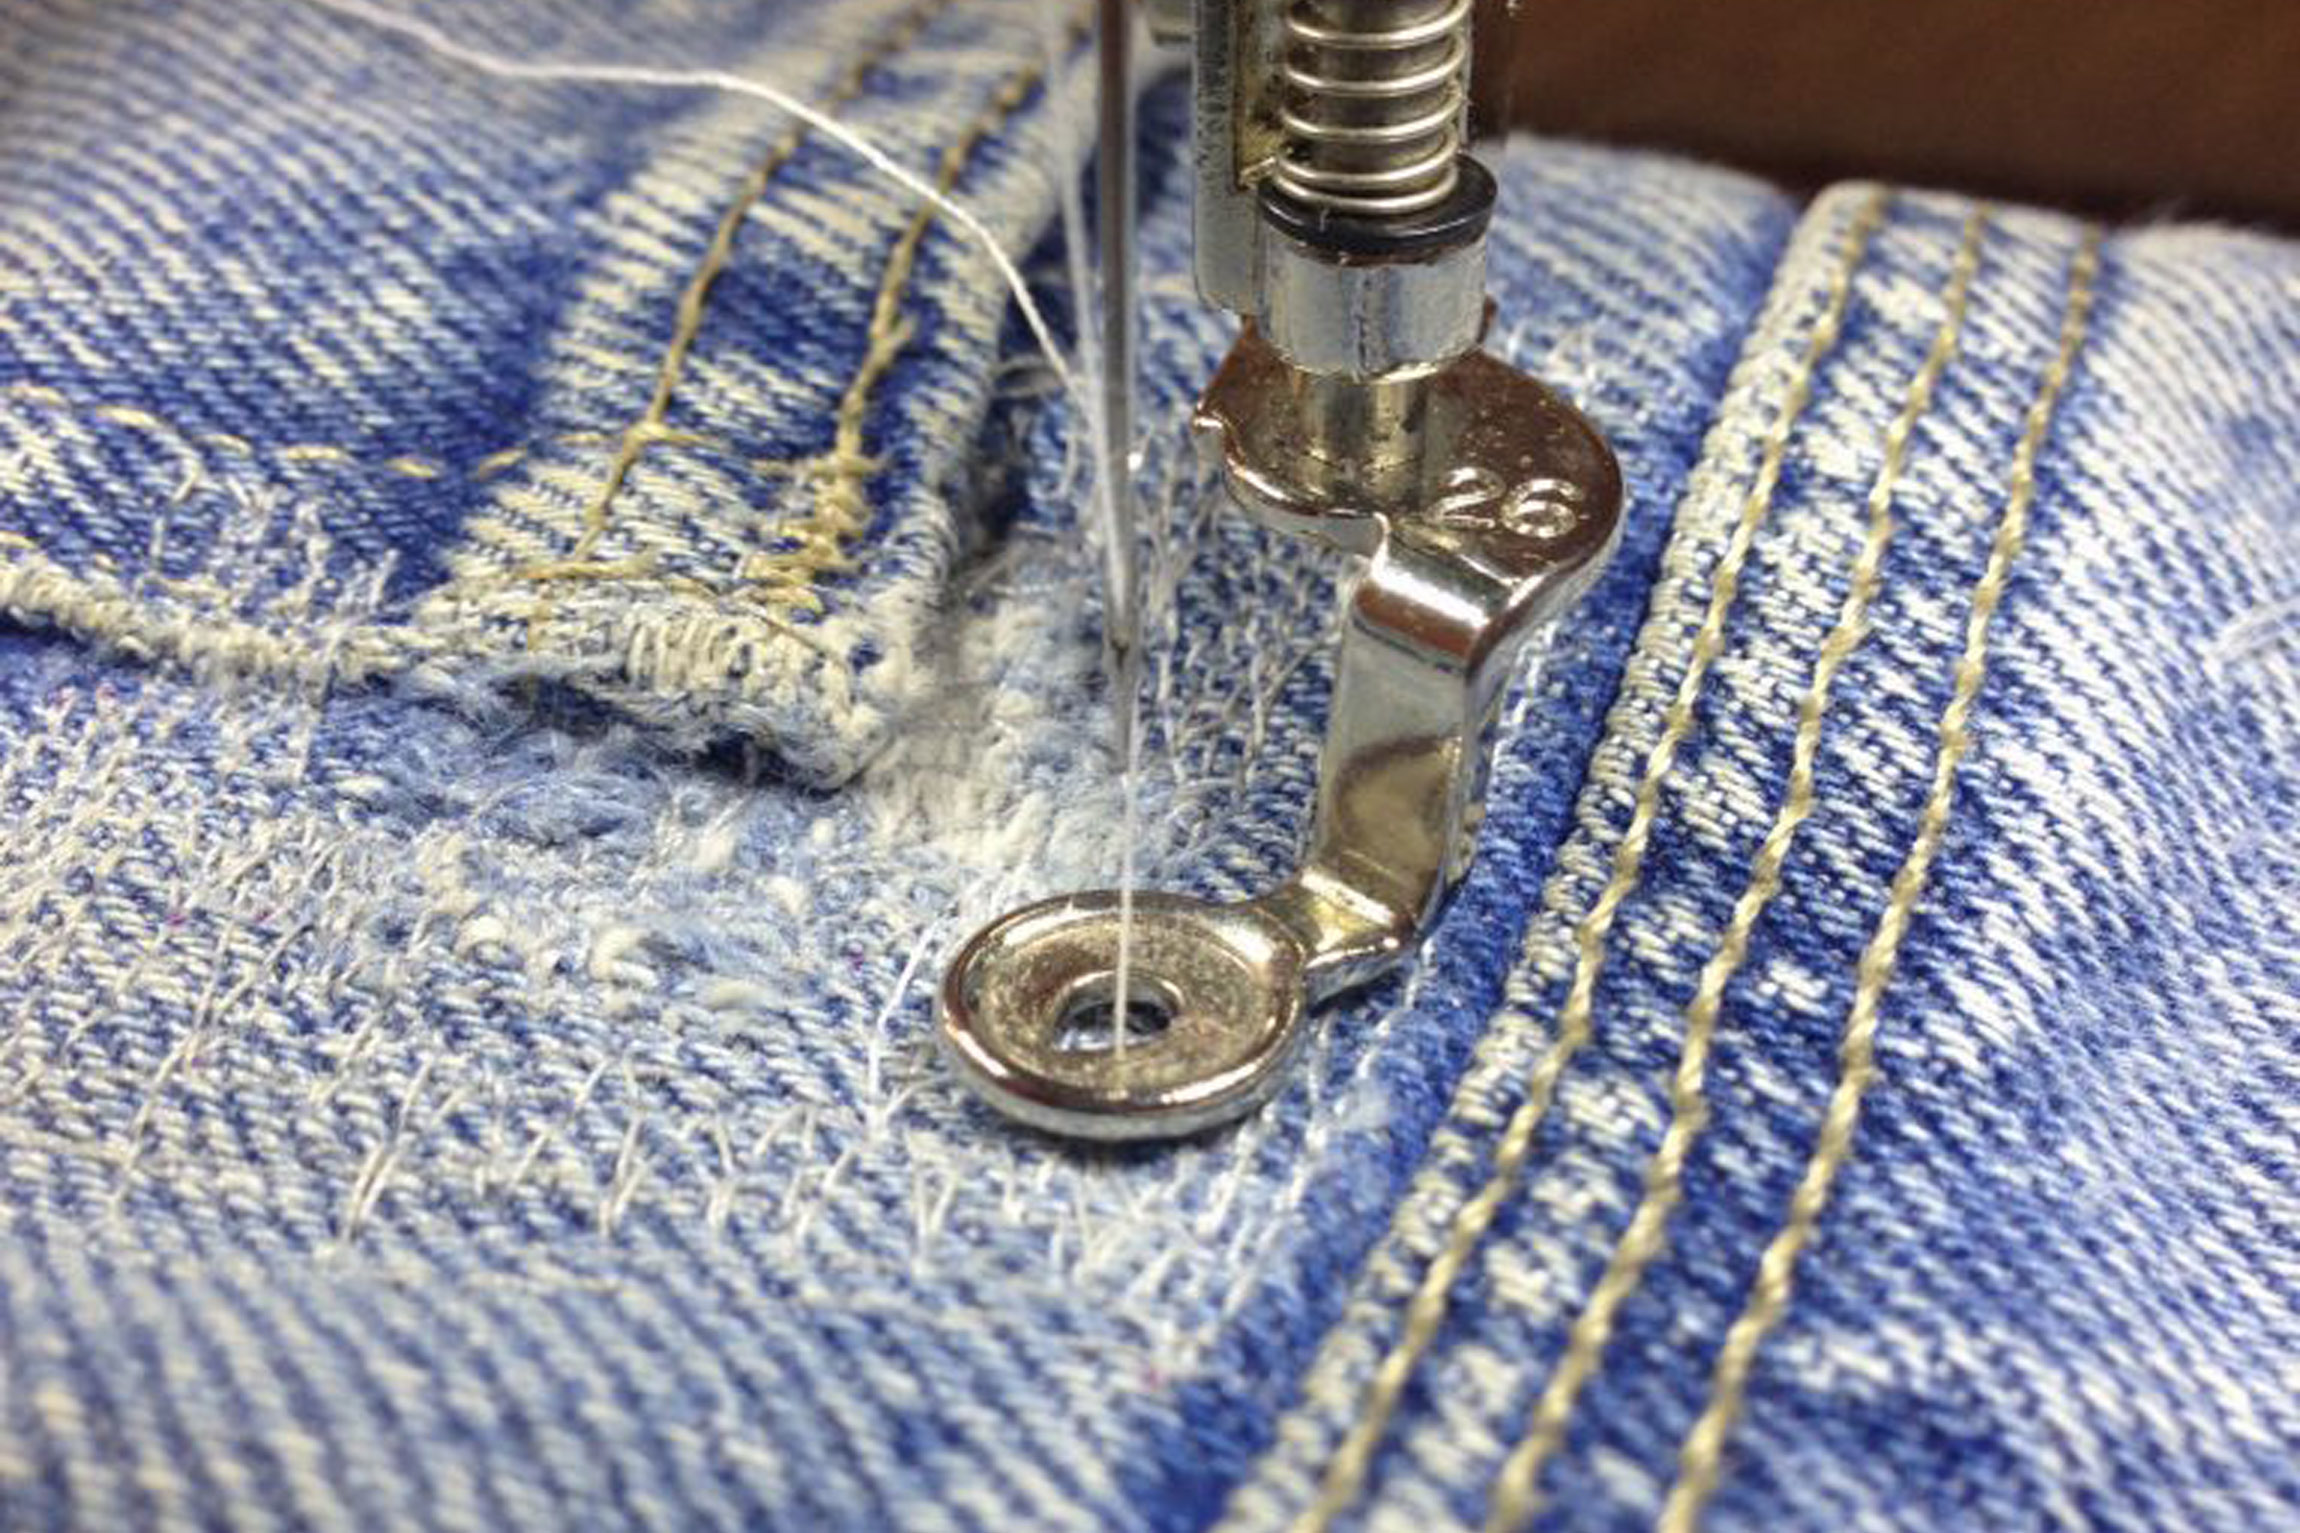
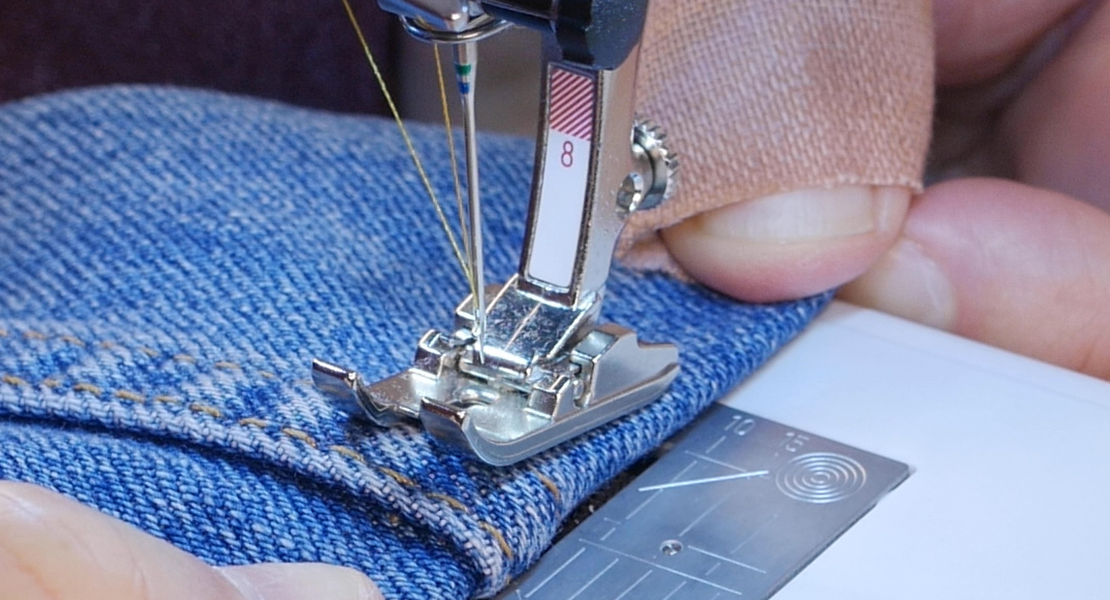
Lastly, choose the right presser foot. There are several options that make this job easier. My favorite foot to use for jeans topstitching is the Patchwork Foot #37—are you shocked by my choice? The reason I like this foot is the visual markings for both 1/8” and ¼” seams. Often with jeans, there are two rows of topstitching; the first 1/8” from the edge and then ¼” from this line of stitching is a second row. Using Foot #37, I don’t have to switch feet and change needle positions, I just use one foot to align my stitches. Also, because it is a straight stitch foot, I can use my straight stitch plate to get the most perfect stitching.
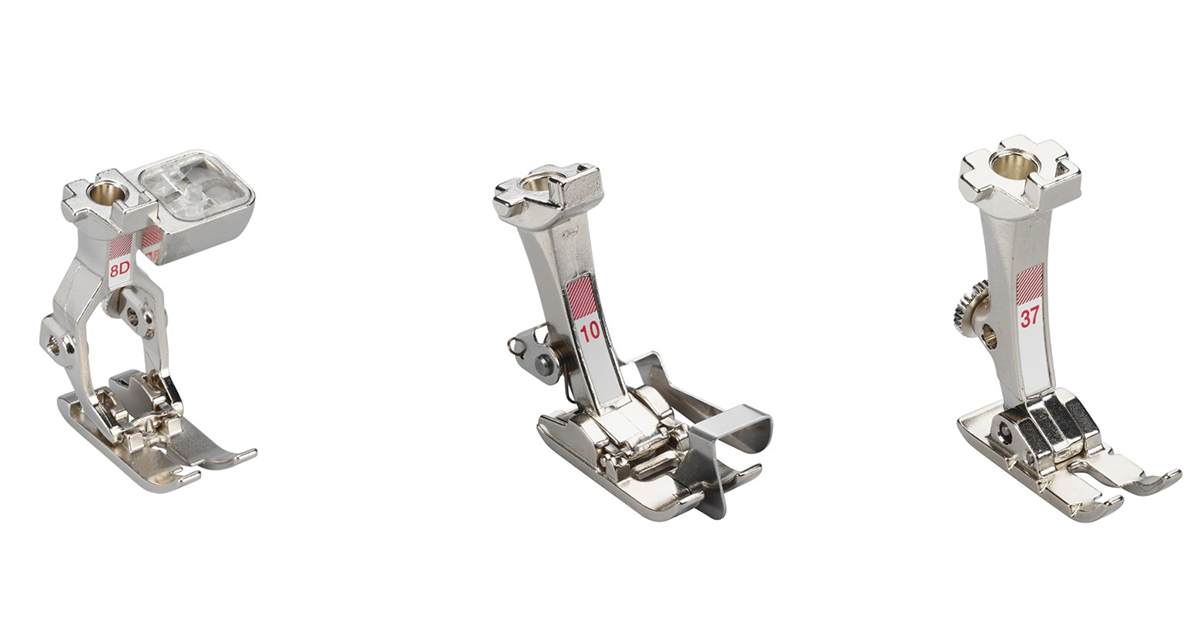
Other great feet options for topstitching jeans are: Edgestitch Foot #10/10C/10D or Jeans Foot #8/8D. If you are new to topstitching, the Edgestitch Foot #10 makes it easy to perfect that stitch line. Use the guide on the foot to align with the seam or edge of your fabric (hello belt loops) and simply move your needle position. This foot makes you look like a sewing wizard every single time! The Jeans Foot #8 is made for straight sewing over thick materials and multiple layers. It climbs hills and valleys easily while positioning the needle in the fabric straight and secure—no needle deflection means no broken needles. Try them out and see which foot is your favorite.
Tip: If you are lucky enough to have more than one sewing machine, it is ideal to have one designated and set up for just topstitching when making jeans. I have a few older mechanical BERNINA machines that do this job brilliantly. Then I can have my BERNINA 880 and L 460 Overlocker set up for the other jean making jobs.
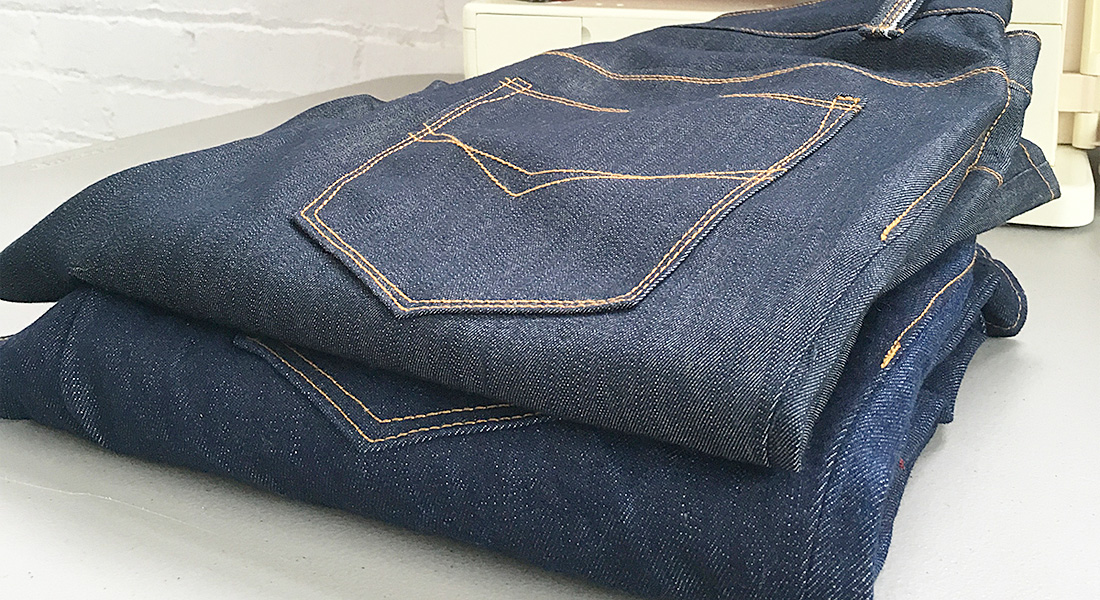
Pockets
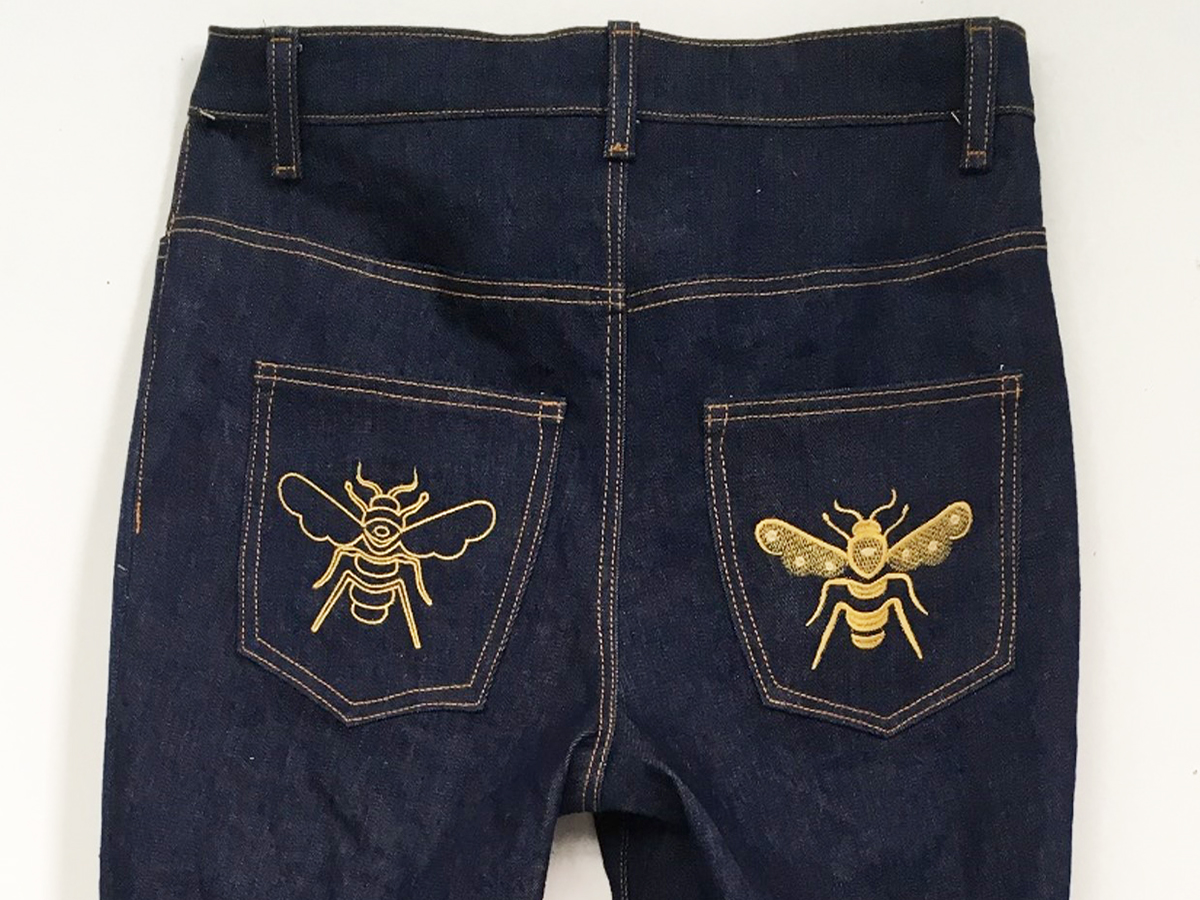
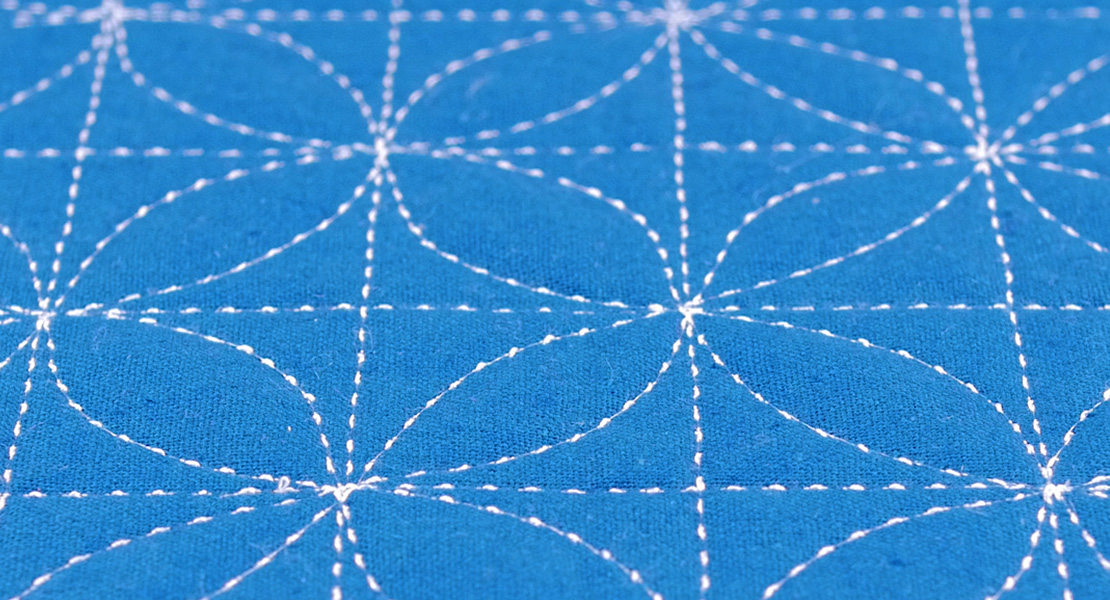
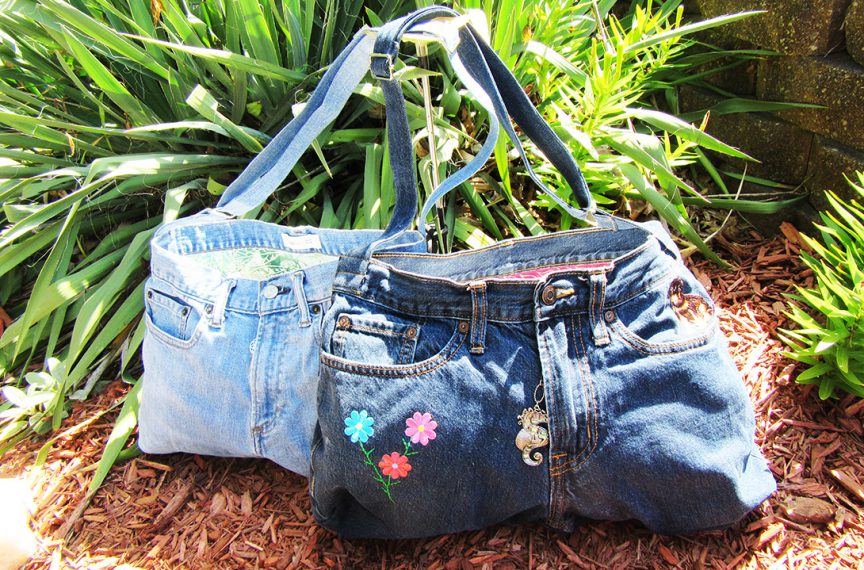
The pockets on jeans are a canvas for your creativity. Think about all the jeans you’ve ever owned and how the back pockets are often the signature of the maker—denoting brand or fashion trends. Consider the stitch pattern, embroidery or other embellishment such as Crystalwork that you could add to the back pocket.
I have done simple non-embellished pockets, to pockets with some angled lines, to pockets with embroidery. If you are stuck trying to come up with some design ideas, do a little hashtag searching on Instagram, or check out this helpful resource from Closet Case Patterns, 33 Back Pocket Templates, (password: sewjo) on the subject
Zippers and Inside Seams
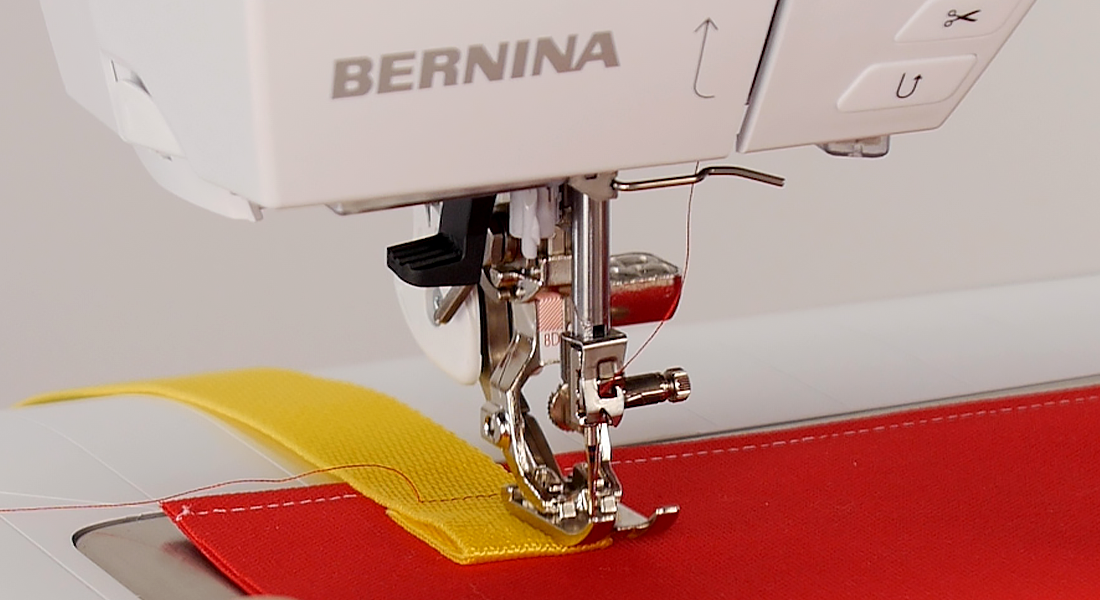
There is no reason why the inside of your jeans can’t also be fun and filled with a few surprise details just for you. I love to add some fun with colorful zippers, variegated or contrasting serger thread and fabric for the pockets.
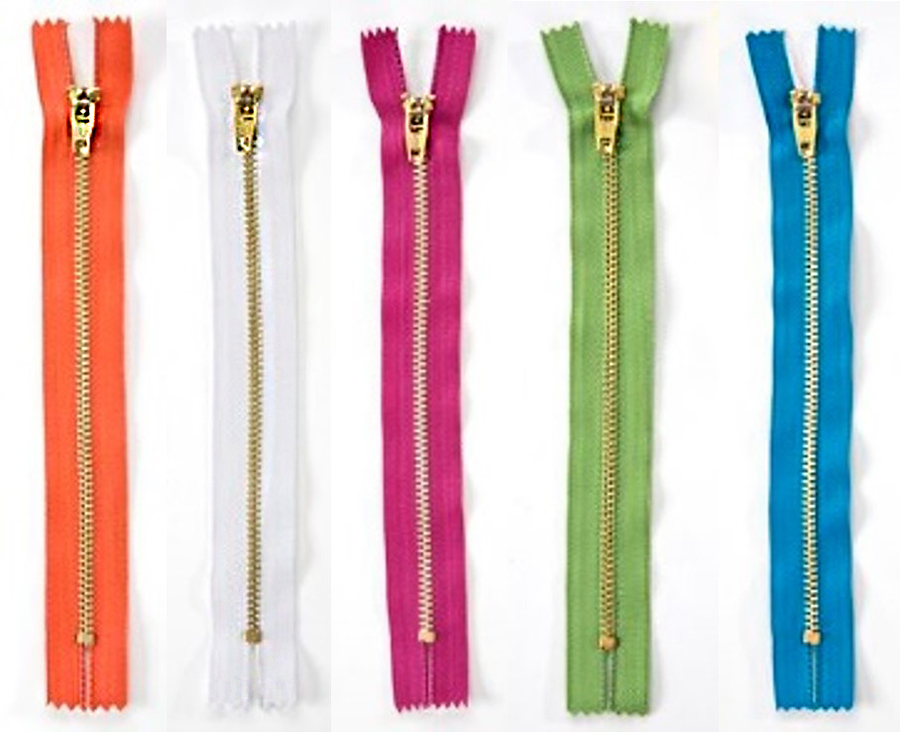
The zipper that you use for your jeans should be a metal jeans zipper. This part of the pants gets a lot of stress and use, so you need a zipper that is strong and will not fail. When ordering zippers, err on the side of longer than shorter. Invest in a pair of pliers that you can keep with your sewing supplies. Use the pliers to remove any additional zipper teeth that are in the waistband after sewing, then trim and sew the zipper tape as usual.
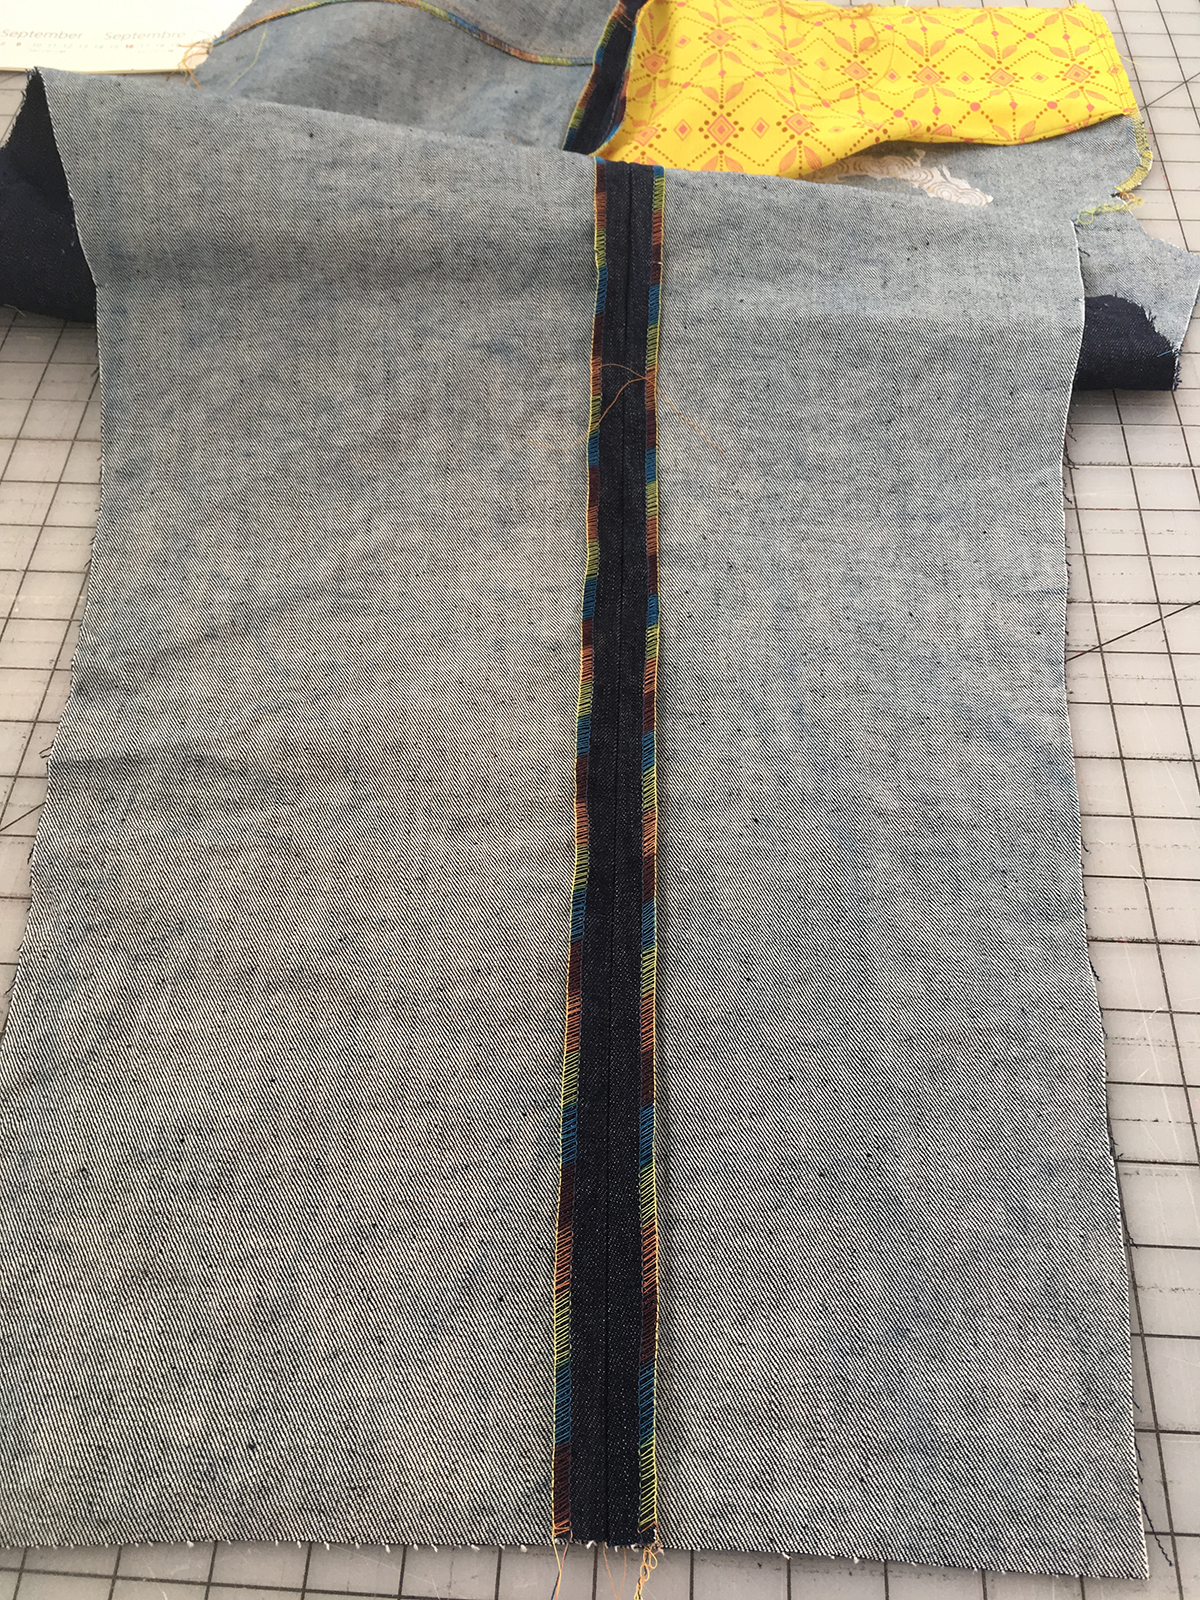
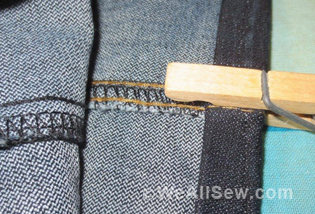
Using a fun thread in your overlocker is a great way to add a little visual interest to the inside seams, and if you cuff your jeans, it will add a unique detail. Jeans are constructing mostly using a sewing machine, then coming in with the overlocker to clean up the edges. A 3-thread overlock stitch is all you need to sew this seam, no sense in using extra needle thread with a 4-thread overlock when the sewing machine as already sewn the construction seam. I have used fuchsia thread with a matching zipper in black jeans, and a rainbow variegated thread on classic denim.
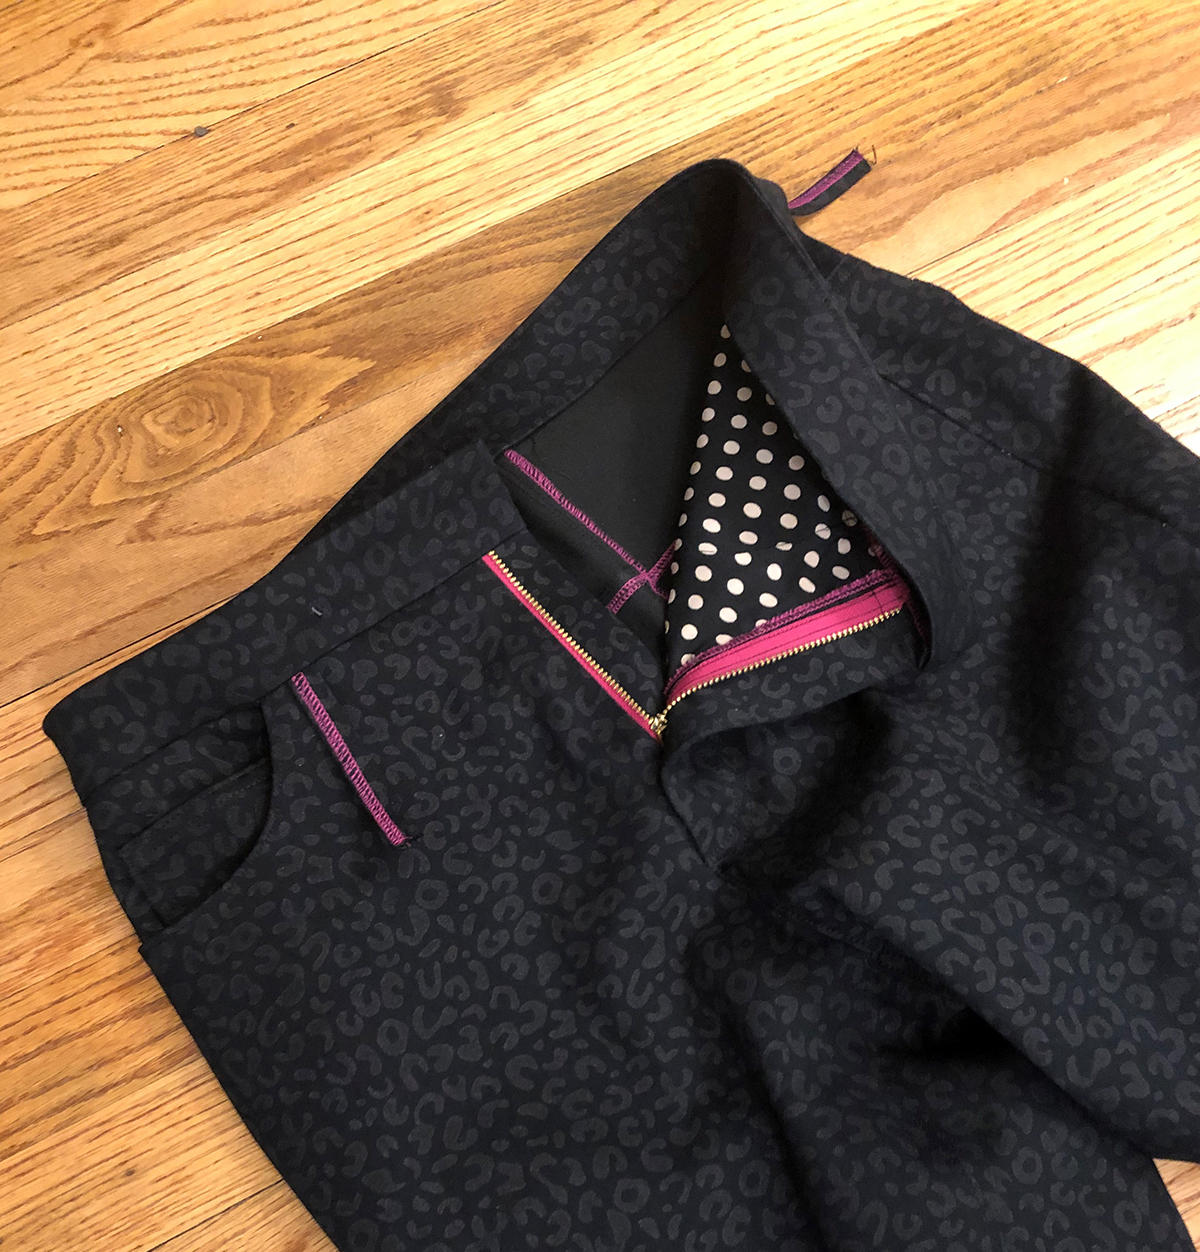
Then of course we have the inside pocket bags and even the waistband to consider. Because this uses a small amount of fabric, I like to search my scrap bins for the softest textiles I can find. I like to use rayon and cotton voile the most. Make it extra luxurious and use some Liberty of London fabric. The waistband lining (inside portion) can be made of denim, but if you prefer something softer use the same thing you are using for your pockets. This will reduce the bulkiness of the waistband, but remember that you still need structure here, so interface this piece. Trust me on this, I made the mistake of skipping the interfacing once and there is nothing more uncomfortable than a flimsy waistband.
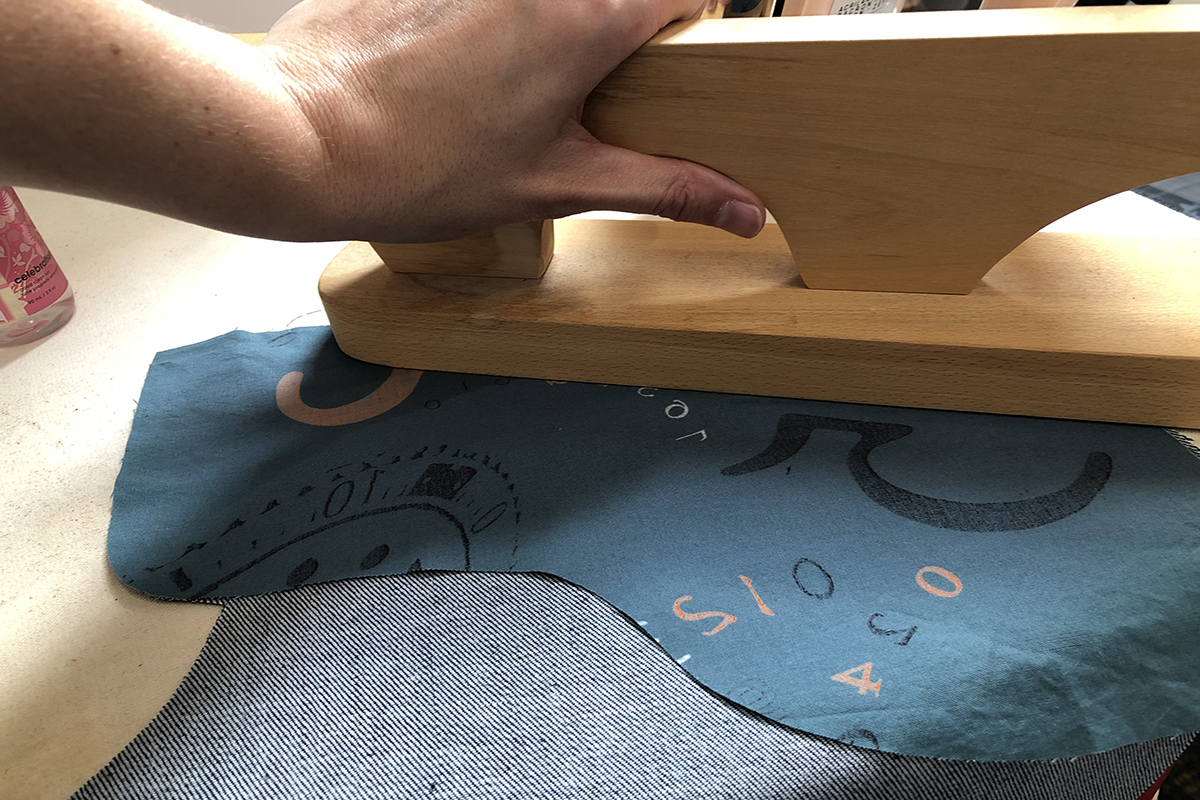
Tip: Use a clapper (I like the Point Press Clapper because the pointed part at the top makes pressing collars and seams easy) to help set your seams. Give the sewn seam a good smack after pressing and gently smooth the seam. This does two things: flattens the bulky seam and absorbs the heat from pressing, leaving you with a crisp workable seam.
Embroidery
Embroidery on jeans has been and is still a strong trend. A few years ago Gucci had a lot of bold and large embroidery designs all over their denim. I was inspired to create some embroidered denim of my own.
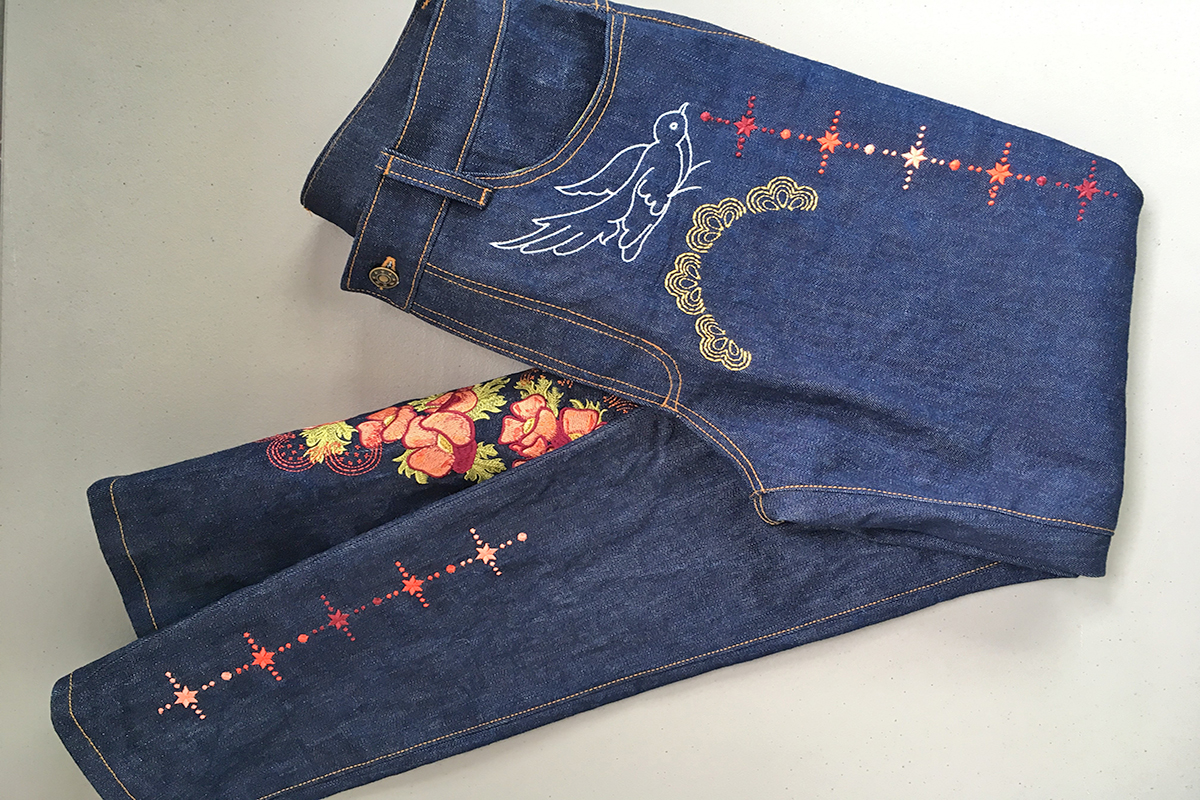
If you are making your own jeans, a little planning allows for you to add embroidery up and along the leg before the seam is closed. If you were adding this type of embroidery to a ready-to-wear pair of jeans, you would have to deconstruct to apply the design and then reconstruct the seam.
I also made a Grainline Moss (Jeans) Skirt with an embroidered band along the bottom. The embroidery designs used for both projects were: Seventy-Six by Alison Glass.

Join me in the next post of the series where I dive into the Buttonholes, Rivets, and Hardware!
Jeans Tips
Used Products

What you might also like


3 comments on “Jeans Tips: Stitching Details”
-
-
Have fun!
-
-
Very informative article. I learned a lot. I have a few questions.
Did you need to adjust your tension on topstitching or were the Bernina settings with the YLI thread fine? Based on dealer recommendations, I have been sticking with Mettler thread. Have you ever tried the Mettler Denim Doc or Cordonnet thread for jeans?
Did you overlock with a narrow or wide three thread overlock prior to sewing the seam? The picture shows the seam pressed opened which is why I ask. If so what is the easiest way to make sure both pieces are even when the construction seam is sewn after you overlock the pieces separately?
Did you use the YLI thread for embroidery or did you switch with embroidery thread and an embroidery needle? I have never done any embroidery but would like to try out the decorative stitches on my machine.
I just got my first Bernina 570QE and have tried making a pair of jeans. I wish I had this before I started. I am saving up for a jean foot as a first foot. I was surprised at your foot choice. Thank you!
Leave a Reply
You must be logged in to post a comment.

The bees and all the fun stitching is adorable! I need to get mine started! Thanks for the inspiration