Quilting in a Straight Line with Walking foot #50
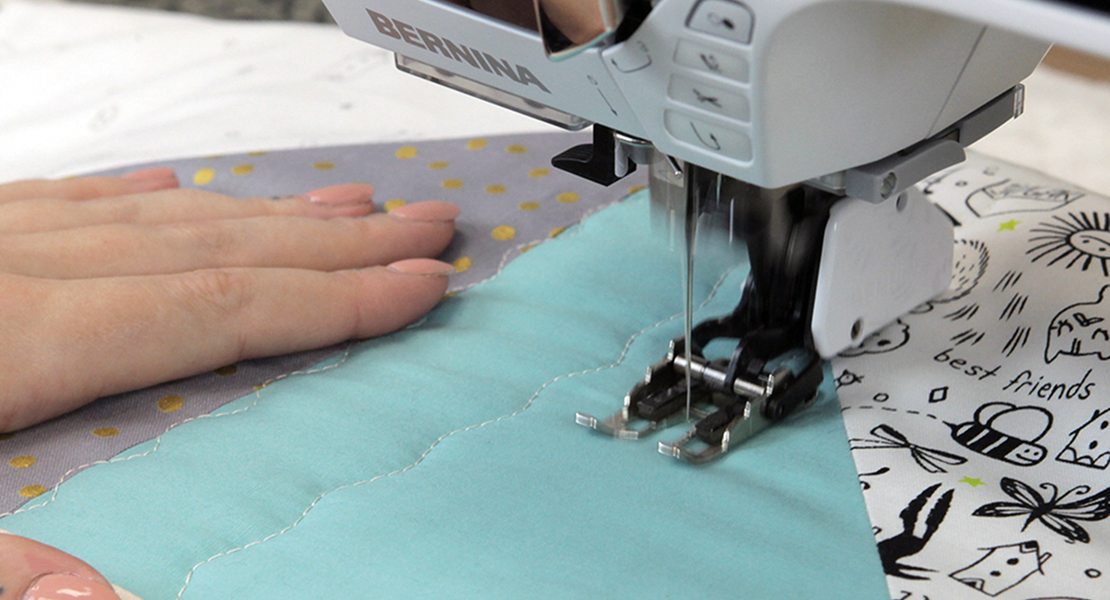
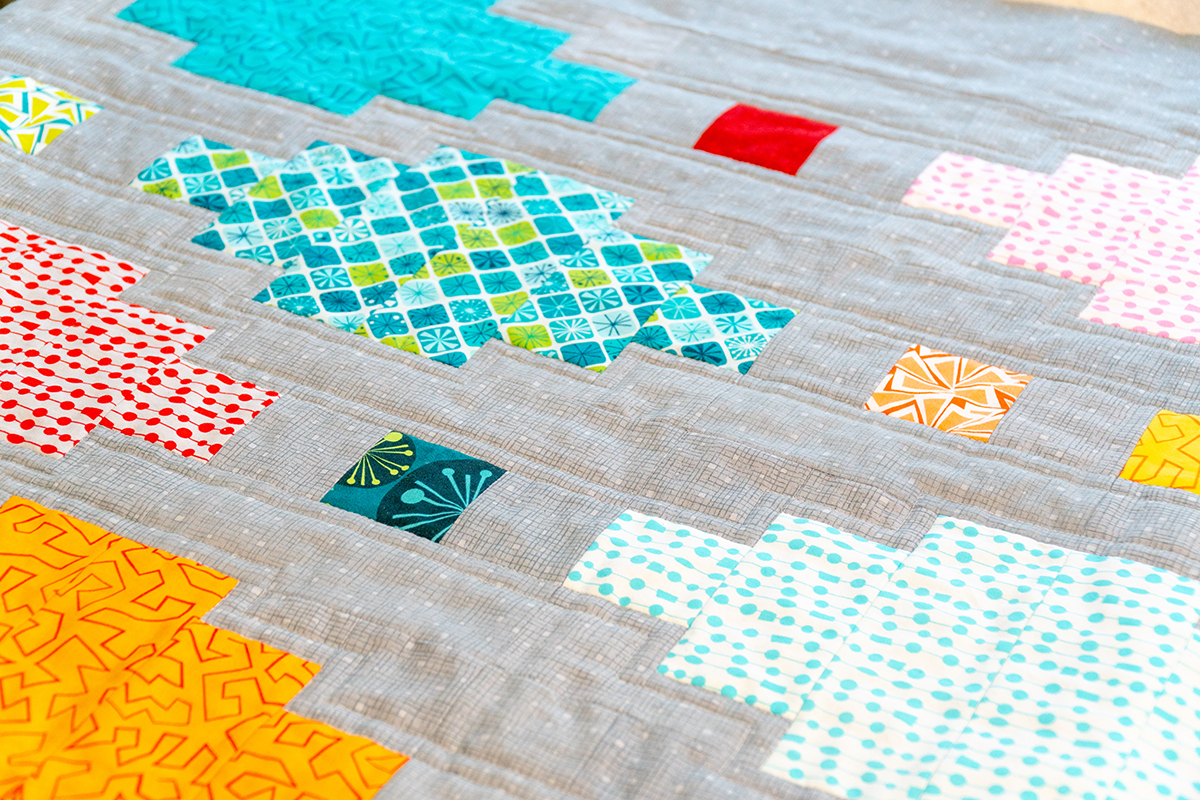
While I’ve been sewing a long time, I’ve only been quilting for a handful of years. Learning how to successfully machine quilt all those layers of pieced fabrics together with batting and backing was quite an experience! I prefer straight line quilting in my quilts as opposed to free-motion quilting, mostly because the straight lines compliment the simple, geometric designs in my quilts.
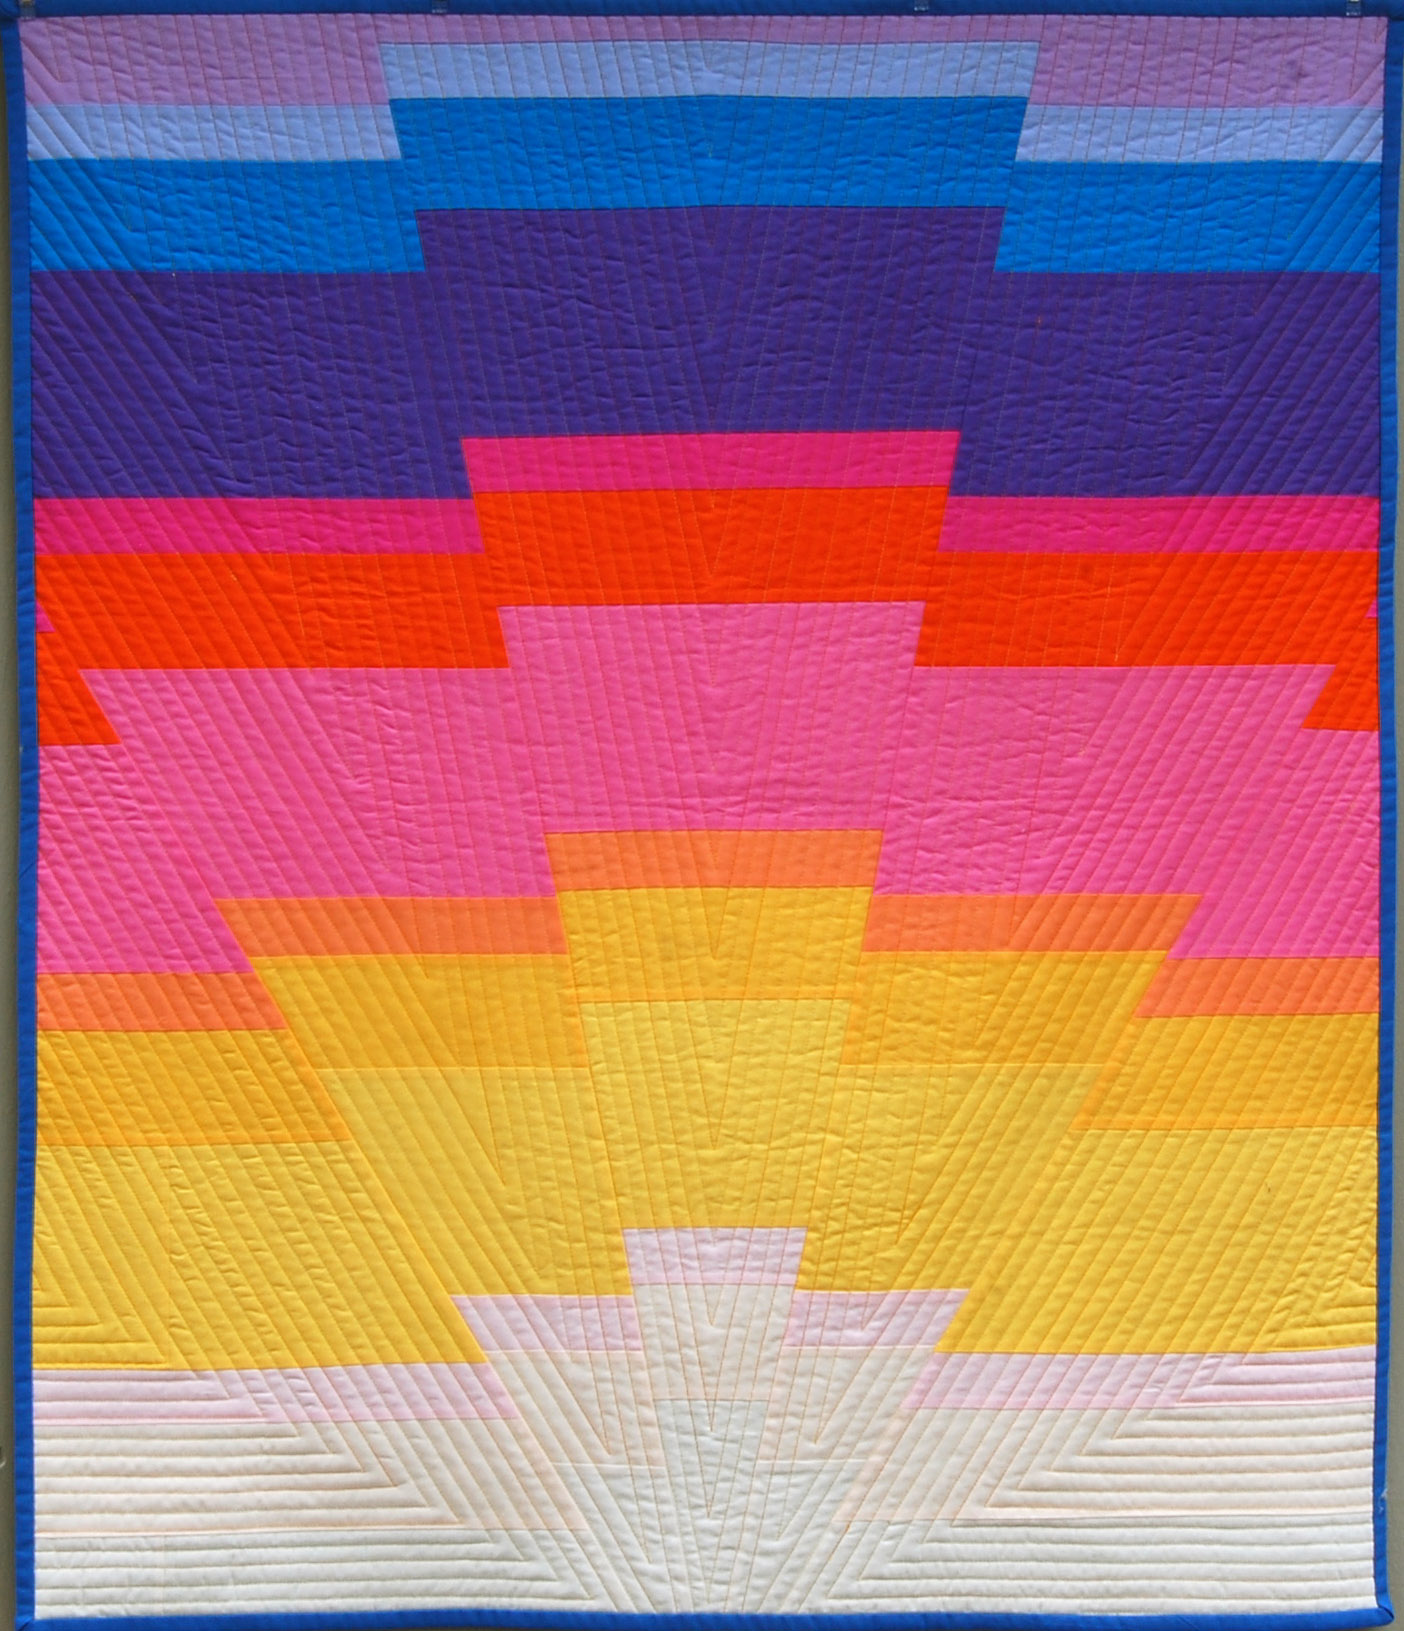
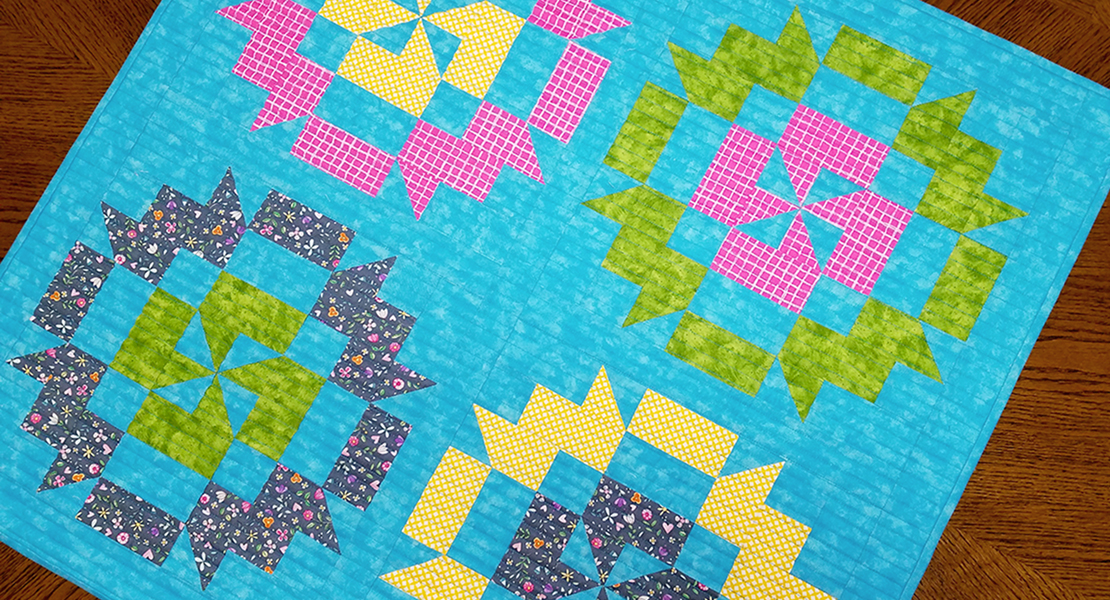
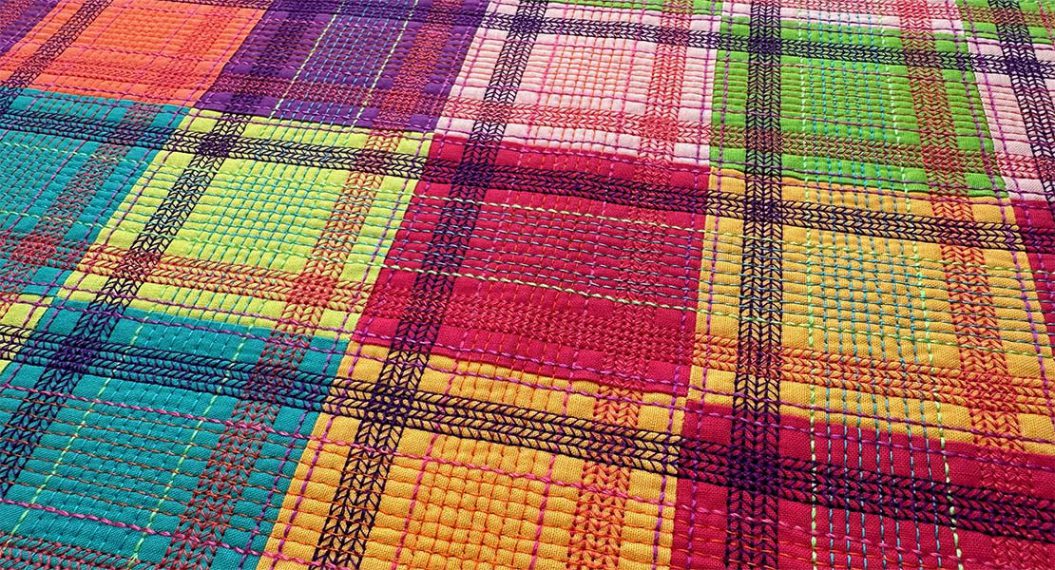
Like the quilting in the Sunrise Baby Quilt (find the free tutorial here), which has straight lines following along the rays out from the center.
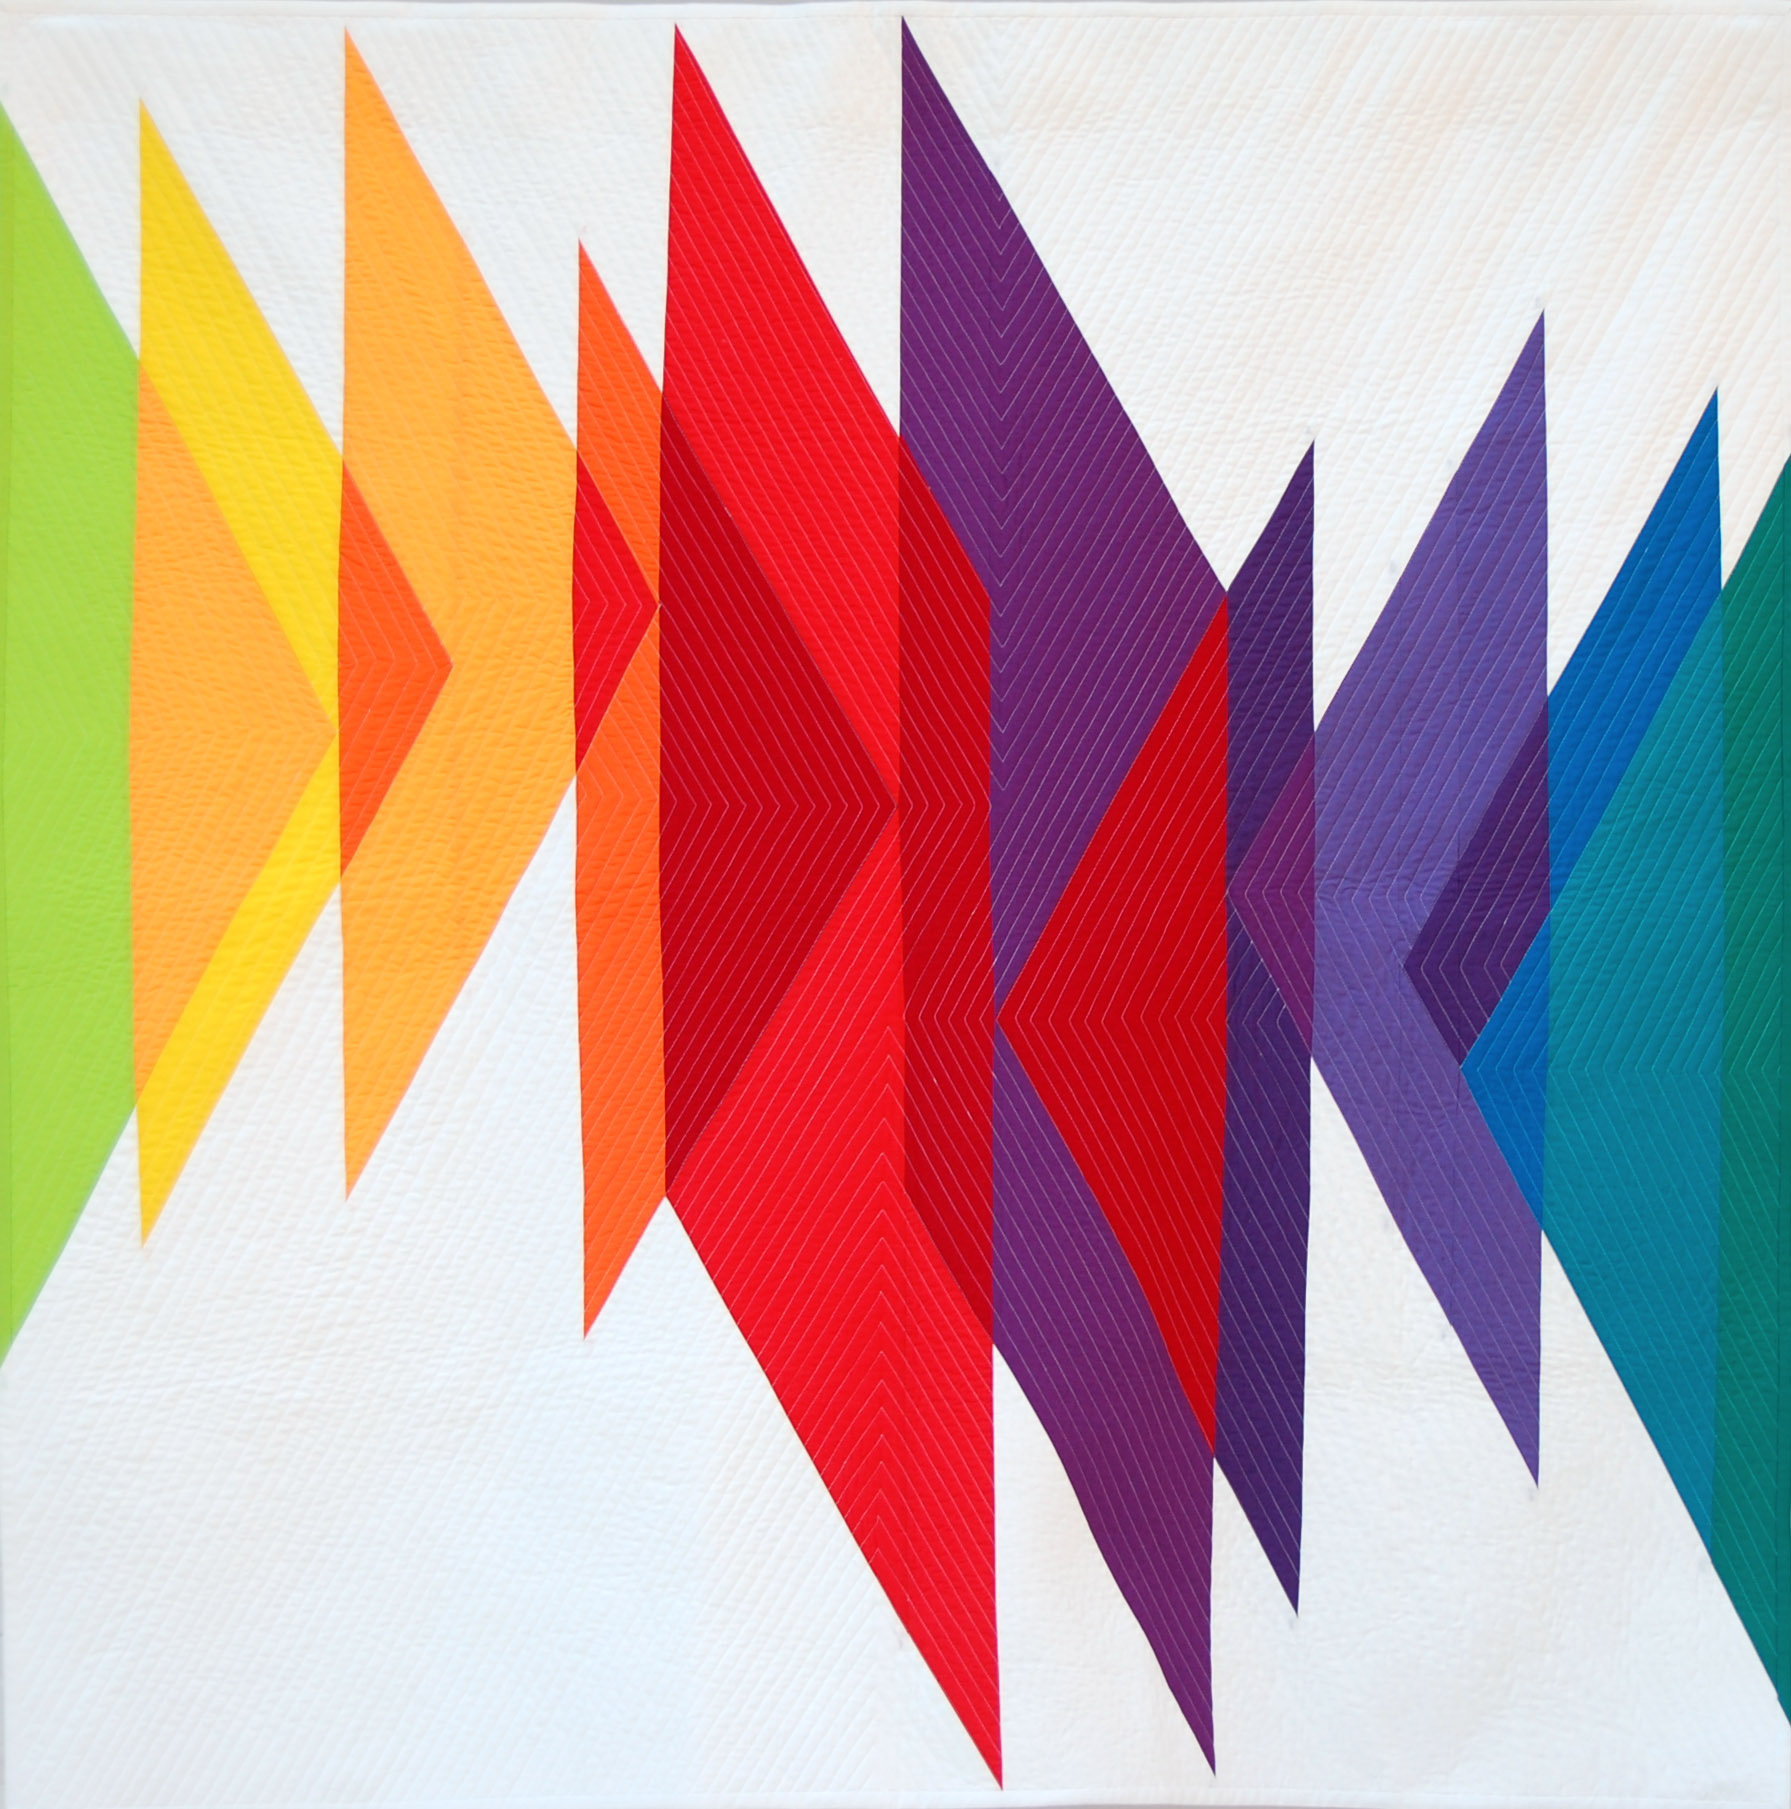
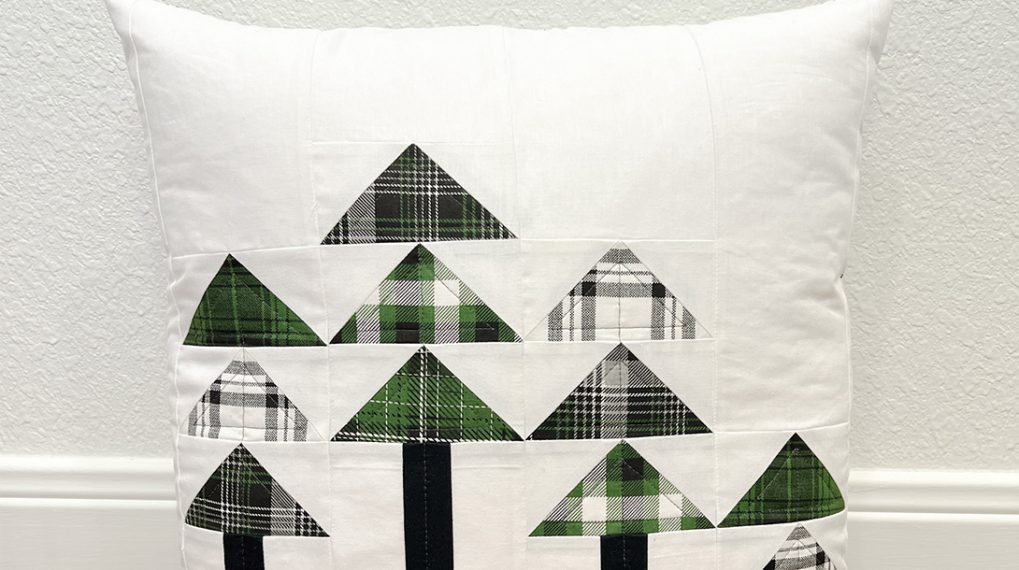
And the quilting in the Triangle quilt which follows along the leading edges of the shapes. I’ve learned many tips and tricks to help quilt in a straight line, and I’m sharing my top tips with you here today!
Meet The BERNINA Walking Foot #50
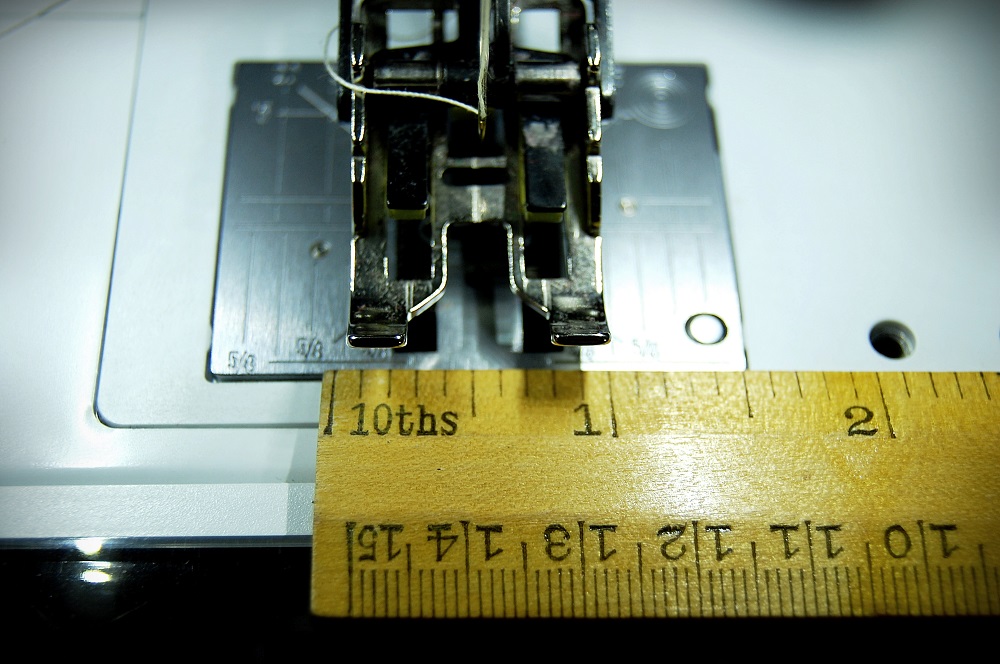
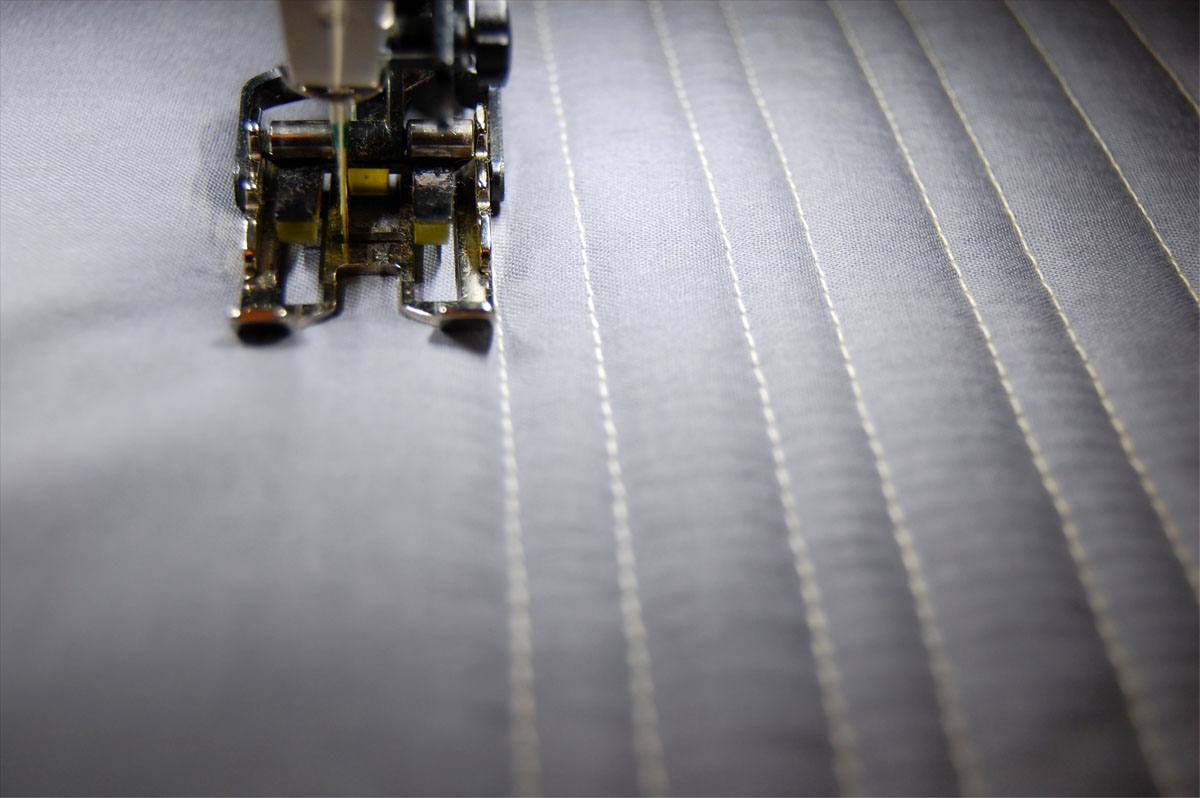
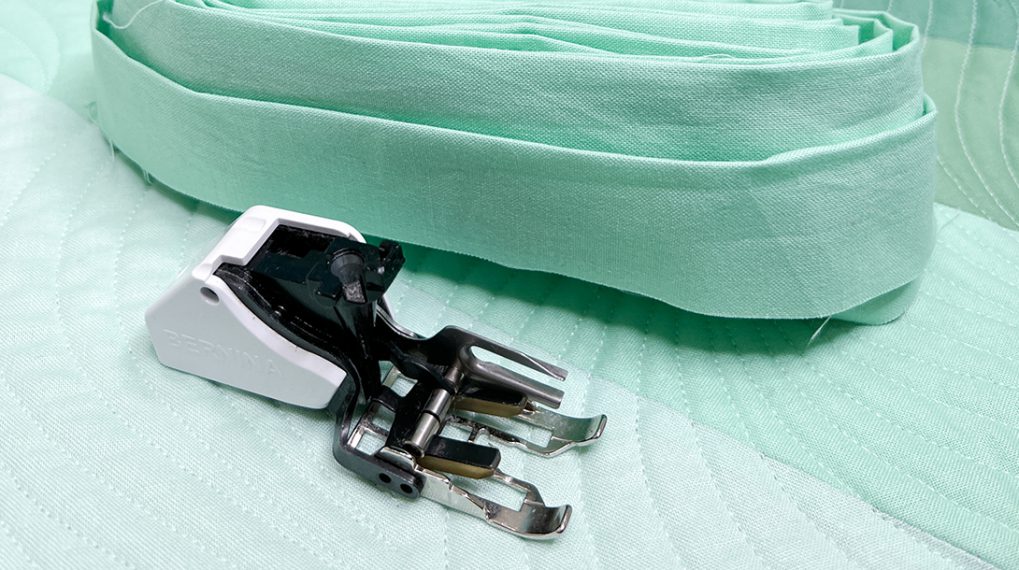
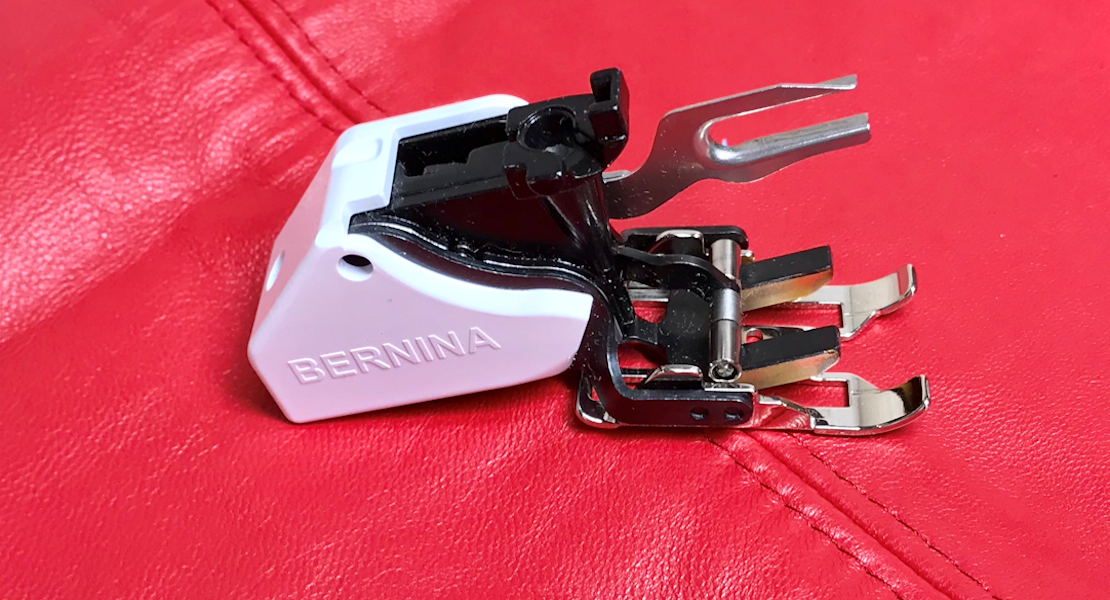
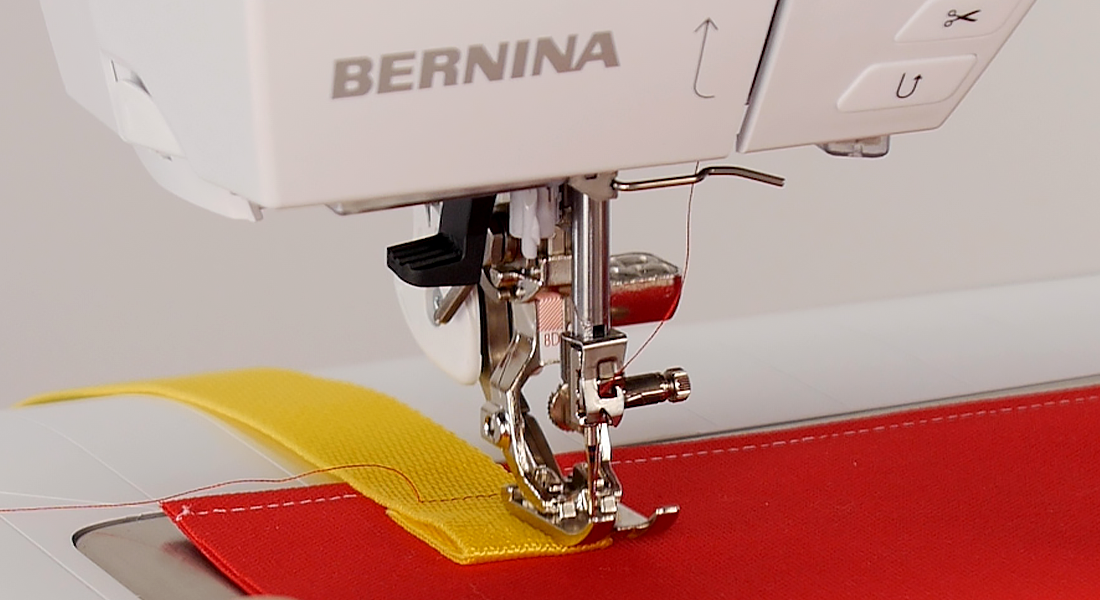
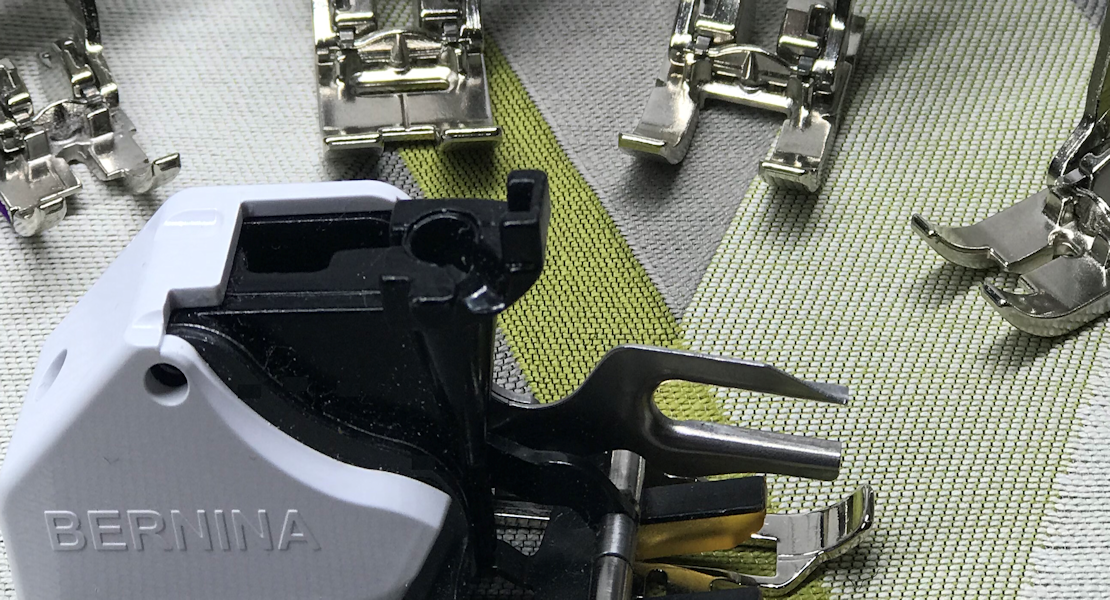
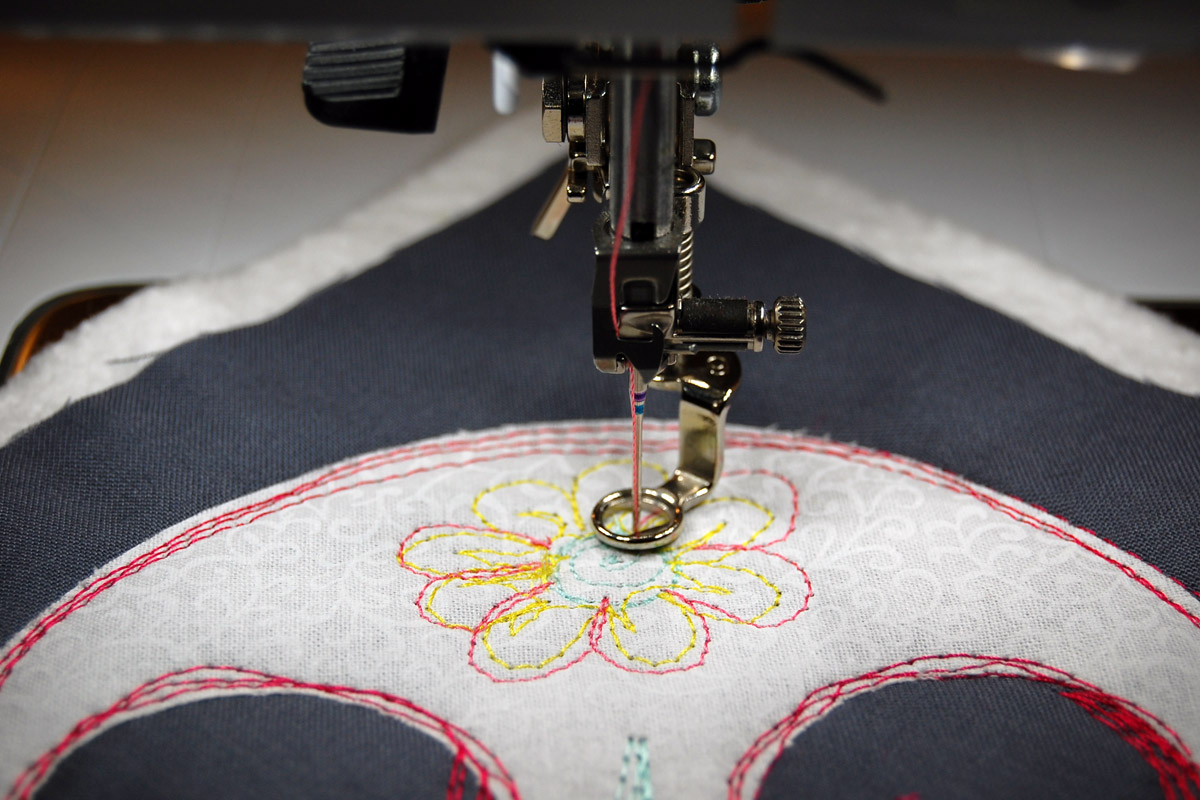
Hello there little Walking foot #50! This is one of my favorite and most used of all sewing machine feet and accessories. The BERNINA Walking Foot #50 has three interchangeable soles specifically made to help you perfectly space your stitches. The standard sole is closed around the needle, a special quilting sole is open in front to allow full view of the needle, and a sole with a central guide for edge-stitching and stitching in the ditch. Here I am using the standard sole, which is closed around the needle. The sole measures exactly 1/2″ from each side of the needle, and also includes a center needle mark, and 1/4″ marks.
There are several methods to use this foot with straight lines, these are the methods I like to use the most.
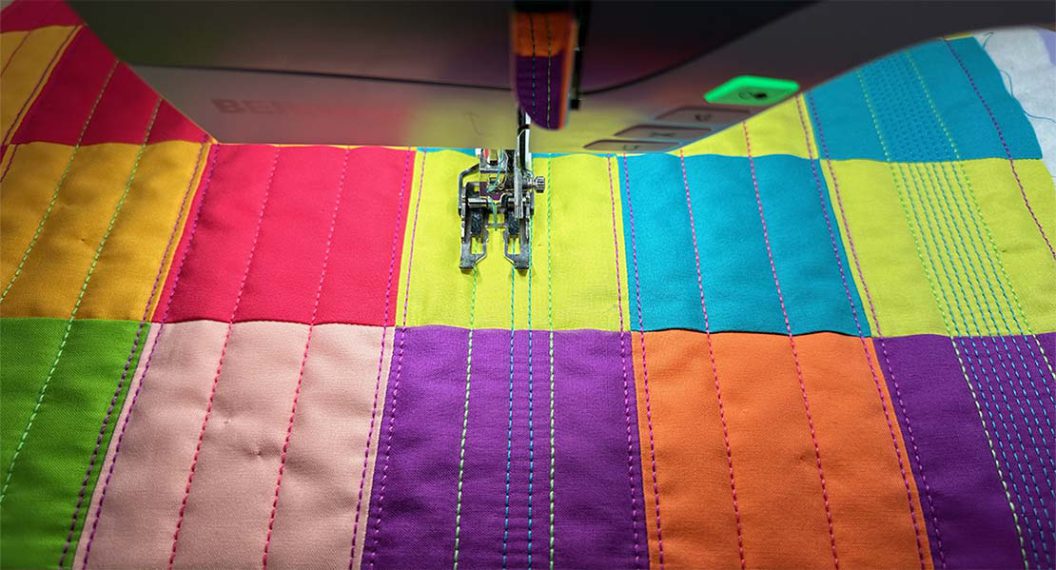
Quilting Half-inch Straight Lines
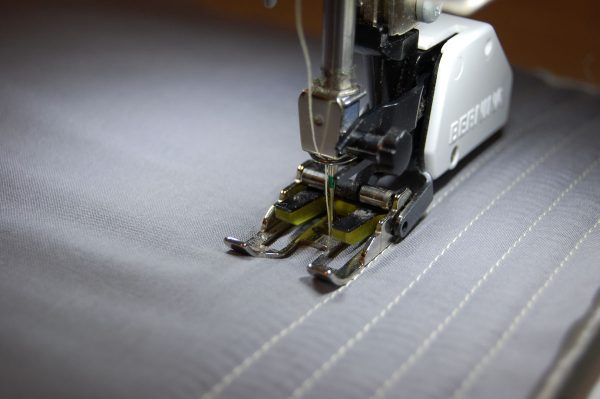
To get perfectly spaced 1/2″ quilting lines, use either side of your Walking Foot #50 sole to follow the previous line of stitching with the very edge of the foot. To make your first straight line of quilted stitching to follow, use one of the methods mentioned below. Or, you may have a straight line seam your quilt to follow along with.
Quilting Randomly Spaced Straight Lines
This method can create interesting straight lines that are not all the same width apart. Use the edge of the Walking foot #50 to guide you along the edge of the previous row of stitches, but change the needle position randomly to the left or right for each new row of stitching.
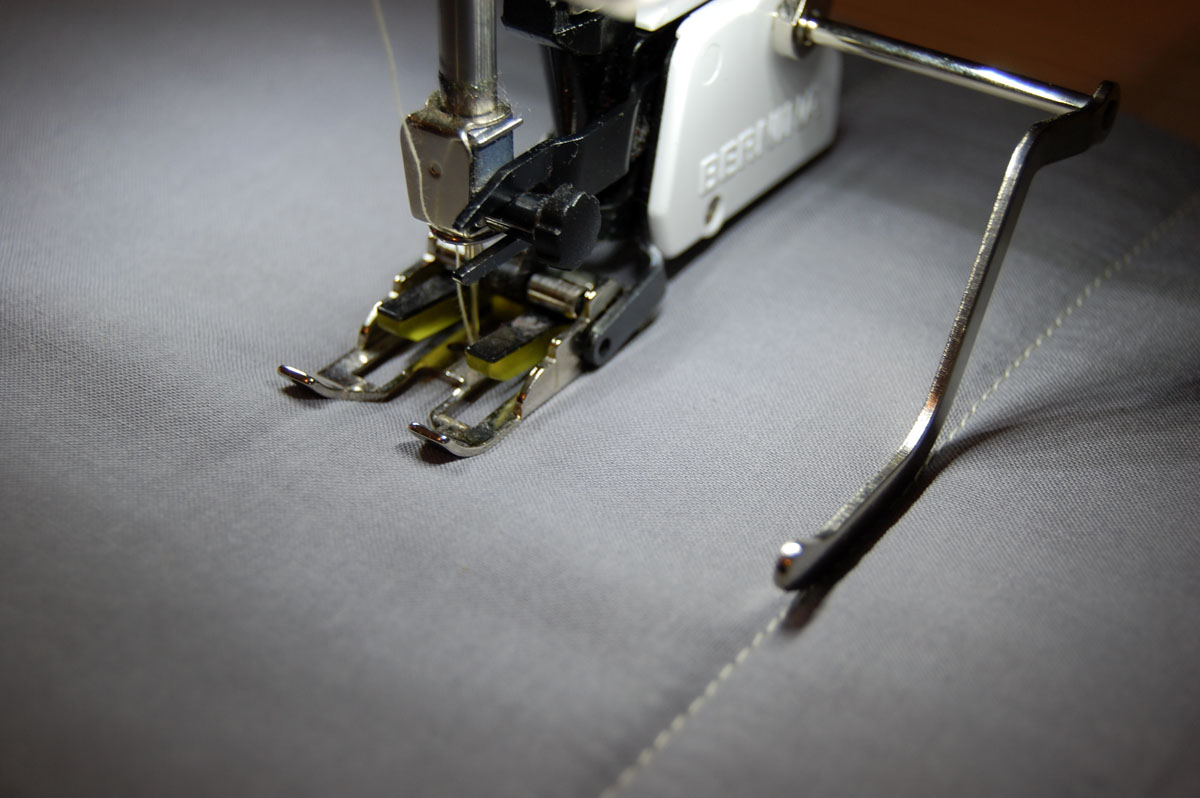
Quilting Straight Lines with the Seam Guide
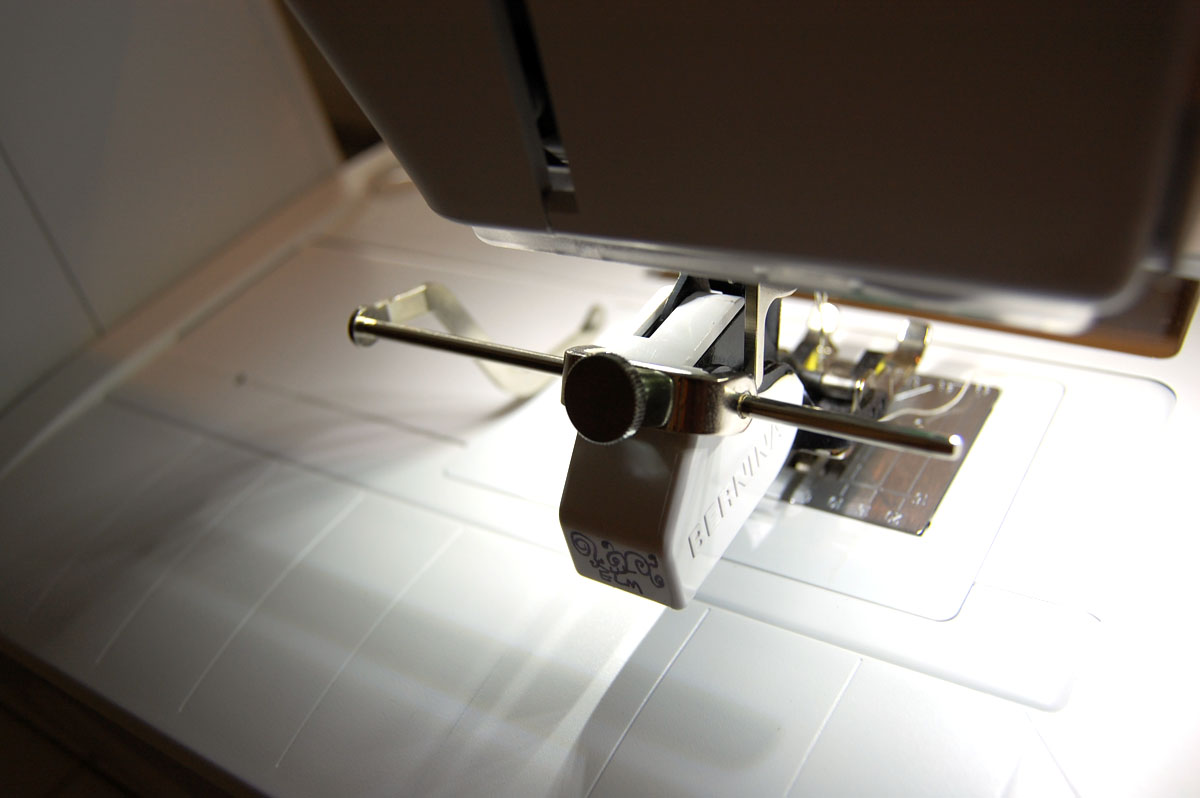
The BERNINA Walking Foot #50 comes with both left and right seam guides to help you follow along previously stitched lines. The guides attach on the back of the Walking Foot #50 with the thumb screw. And you might notice my “marks” on the back of my foot—made with a permanent marker so I can distinguish my foot from others at classes and retreats!
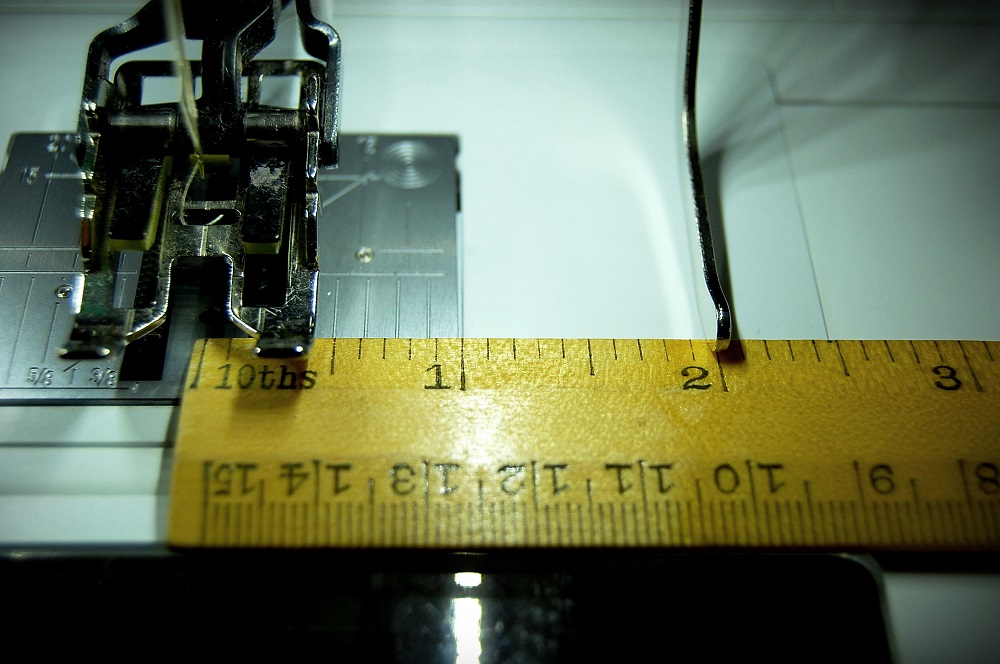
The guide rests down on the fabric with the blade flat on the surface (if you’ve accidentally installed the guide upside down, now is the time to flip it around!). Use a ruler to help you find the exact spacing to set the guide between stitching. Be sure to line the end of the ruler up with the needle.
This is a great way to get wider spaced straight line quilting, and I’ve used this method to finish many baby quilts!
Quilting Straight Lines with Painter’s Tape
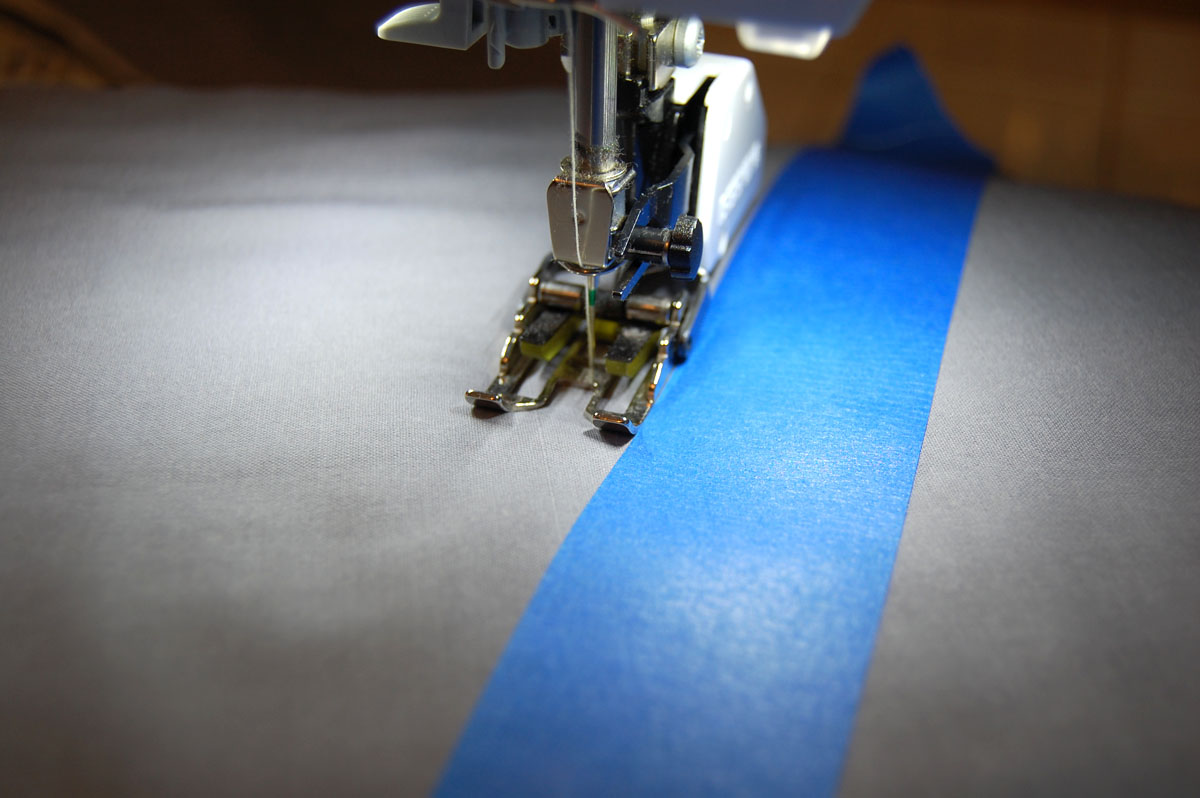
This tip may seem pretty self-explanatory, but I have learned a few tricks to this technique. First, it’s difficult to stitch with the needle right next to the tape. If you accidentally stitch over the tape, it can be near impossible to pull out those little bits stuck under your stitches! Instead, use the tape edge as a guide for the edge of your Walking foot #50. Secondly, if you are taping off a long straight line free-hand, the tape can wobble and not create a true straight edge. To make sure you are taping the line straight, take time to make sure it is smoothed flat on a table or flat work space. Then, use a long straight edge (like a yardstick or extra long acrylic quilting ruler) to mark where you want the tape line, and lay the very edge of the painter’s tape against the straight edge when applying to the quilt.
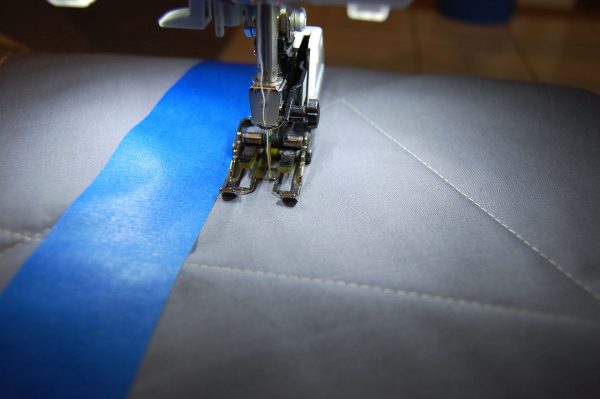
I have also used this method to make sure my multiple straight lines of quilting stay straight when using the edge of the Walking foot #50 to make half-inch stitching. I have checked my lines of stitching for straight by smoothing out the quilt on a flat surface, then checking my last stitched straight line with the straight edge. If it looks like it’s starting to go wonky, I apply a line of painter’s tape with the straight edge to follow along with my next pass with the Walking foot #50 to get me back on the right path.
Painter’s tape can also be used to mark totally random straight lines. Just pick a direction, slap down the tape, and follow the line with either edge of the Walking foot #50.
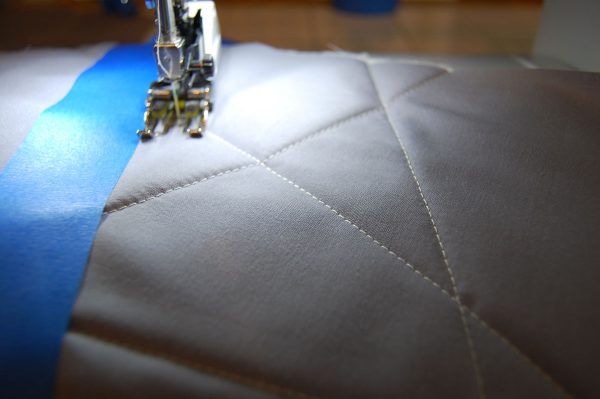
With this method you can quilt all kinds of random shapes, even stars!
I hope you will find some of these tips useful, and if you haven’t yet tried straight line quilting I hope you will give it a try!


What you might also like


14 comments on “Quilting in a Straight Line with Walking foot #50”
-
-
That’s great cheekycognoscenti, I hope you find some of these techniques that works for you – happy quilting in a straight line! – Erika
-
-
I registered just so I could tell you THANK YOU! I have also been quilting a “handful” of years, but my quilts are not as ambitious as yours. In addition, my machine quilting is…well, let’s just not describe it at all. Suffice to say, it needs help. I have machine quilted, straight line, several baby quilts. And they are respectable. Respectable means that the sometimes “off” lines are the imperfections of handmade. But now I’ve read your post, and I am so excited to machine quilt my next baby quilt (soon to be finished) and use your excellent technique. I have a Bernini 750QE. I have not been as adventurous in trying out things as my nature normally would have me do. I am intimidated, actually. I feel that it is too much machine for me. I guess I need to get over that and start experimenting. I, too, love straight-line quilting. And random straight line looks like it will be my new favorite. You have done a great service today to those of us who need a little extra help with our machine quilting. I am so grateful!
-
Hi dsuewp, I am so glad you found some tips to use in your quilting! I do like the random lines for little quilts, it goes quickly when using the painter’s tape method. Have fun getting to know your new B 750 QE, just take one step at a time and when you feel up to it try a new stitch, technique, or foot out. Happy quilting – Erika
-
-
I just purchased a B740 with a dual feed system. I was told I didn’t need a walking foot as this dual feed system would do the job. However, I can disconnect the dual feed system and attach a regular walking foot if necessary. Do I need to get a walking foot in order to do this type of walking foot quilting or can I subsitute the dual feed system instead? I was afraid when purchased the machine that I would also need a regular walking foot but was very discouraged from doing so. Should I go and get a walking foot. My dealer is far away from my house and it takes half a day to get there so I would rather not waste a trip if its not necessary. Thank you for any feedback.
Any thought?
-
Hello Daniel Becker, while you can quilt with the Dual Feed, it seems to be a matter of preference for which method people like to use best for quilting – the Dual Feed or Walking foot #50. You can certainly try using one of your Dual Feed compatible feet that can work in conjunction with the Seam Guides you see pictured in this post (you may need to purchase a set separately, these come in the box with the Walking foot #50), and you can also use the painter’s tape method with a Dual Feed foot. You would not be able to use the tips in this post that mention using the edge of the soles on the Walking foot #50 to achieve perfect 1/2″ space lines (which is the method I have used in my two quilts pictured above), as none of the other Dual Feed feet have this feature. The Walking Foot #50 also has many 1/4″ markings as well to help with making very closely stitched straight line quilting, often referred to as “matchstick” quilting.
The Dual Feed and Walking foot #50 work in slightly different ways; while the Dual Feed acts like an extra finger to help pull the fabric from behind while stitching, the Walking foot #50 has pads that push down and back in harmony with the feed-dogs while stitching. If you’re not sure which method you might like best, ask your BERNINA store to let you sit in the store and try stitching with the Walking foot #50 on a quilt sample. I’m sorry to hear that you felt discouraged from looking into the possibility of a Walking foot #50 to use with your BERNINA – perhaps mention that you saw these techniques at WeAllSew and would like to give them a try! Happy straight line quilting – Erika
-
-
I recently used the walking foot for diagonal grid quilting. One thing I have done to my walking foot to make it easier to see the 1/4″markings is to use a Sharpie Ultra Fine Point Marker ( I chose red) to color the indentations. I find them easier to see than the silver indentations. Clear plastic feet usually have markings but not the all-metal feet. Since the feet are metal, the markings are easily removed with alcohol if they are no longer wanted.
-
Hi jaw3046, that is a great tip! Thanks for sharing!
-
-
I have a B820 with Duel Feed but wouldn’t give up my walking foot for anything. My B440 is now used by my daughter-in-law who comes each Saturday for “together quilting.” Each machine has a Walking Foot and sometimes we are using them at the same time. I’m not a fan of “all over” motion quilting and believe it tends to reduce the beauty of the piecing that has been so carefully and lovingly stitched. It has its place and can be beautiful in moderation. I do a lot of stitch-in-the ditch and recently more and more straight line quilting. Thanks for the painter’s tape tip! I have also used my #37 1/4″ foot along with the Duel Feed and used in the right application works great.
-
I’ve used and loved my walking foot for years; however, I didn’t know that there are three soles! Is this something I should have or need to purchase? Please tell me more about them.
-
Just recently learned and practiced with my walking foot. I have a dinosaur….1090 quilting machine which I love. The walking foot is fabulous for so many things with this machine, which is my workhorse! Thanks for this very helpful post.
-
Thanks so much @crumprg! A BERNINA 1080, the little sister to the 1090, was my first official BERNINA sewing machine. They are great, I still have the little 1080 and my daughter sews with it. Happy straight line quilting!
-
Leave a Reply
You must be logged in to post a comment.

Wow, I feel like this post was meant just for me! I usually do FMQ with my BSR foot, but the quilt I’ve got under my needle today is one that really needs straight line quilting. Yes, I love my Bernina walking foot, and you’ve given me some great ideas about new ways to use it beyond just stitch in the ditch. Thank you!!