Quilting with the Walking Foot
Walk Into Modern Quilting
For many of us, sitting down to quilt a top you have pieced is the scariest part of making a quilt. Free-motion quilting feels like it has a steep learning curve and can be intimidating to learn and so often times, we stick to what we know—straight lines with our walking foot.
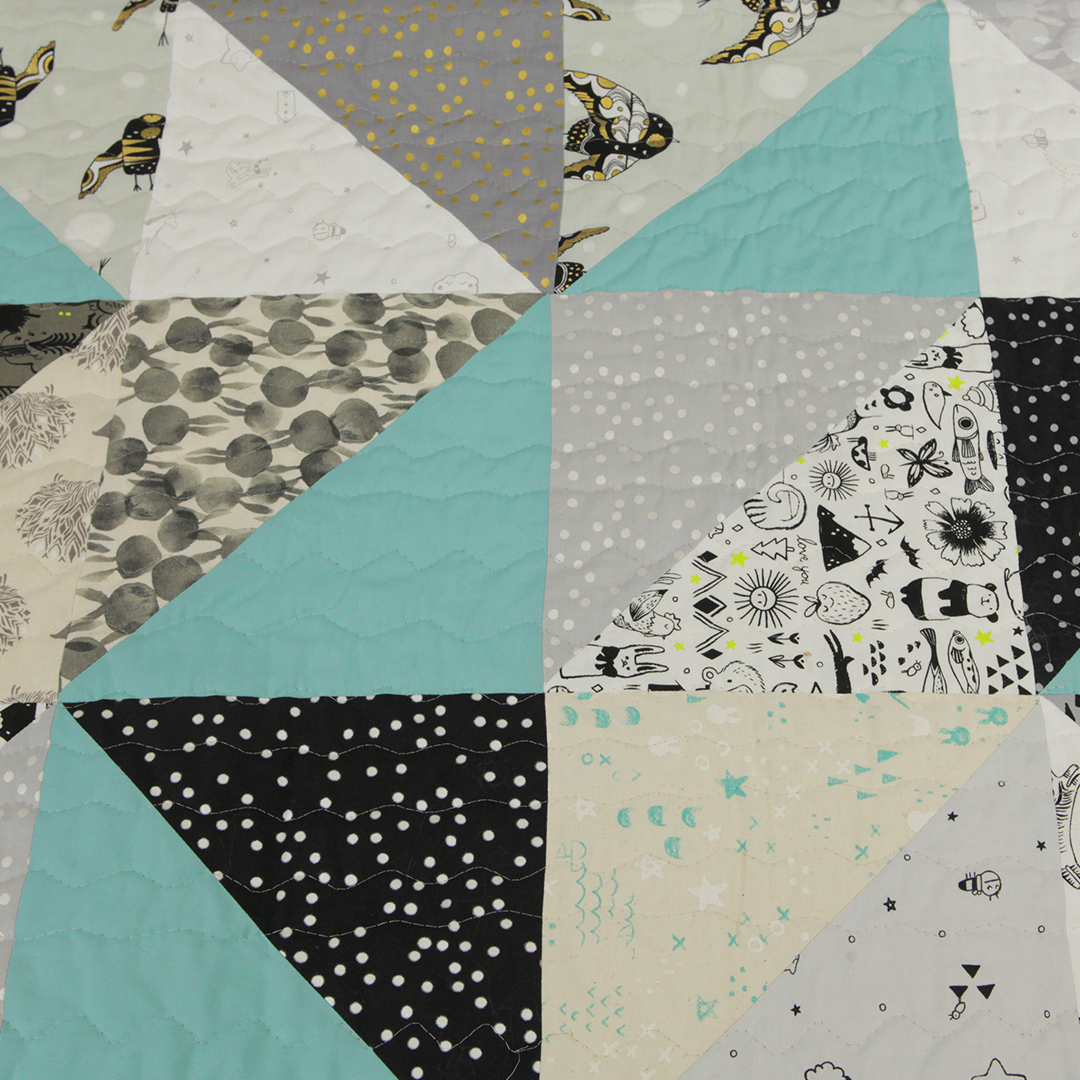
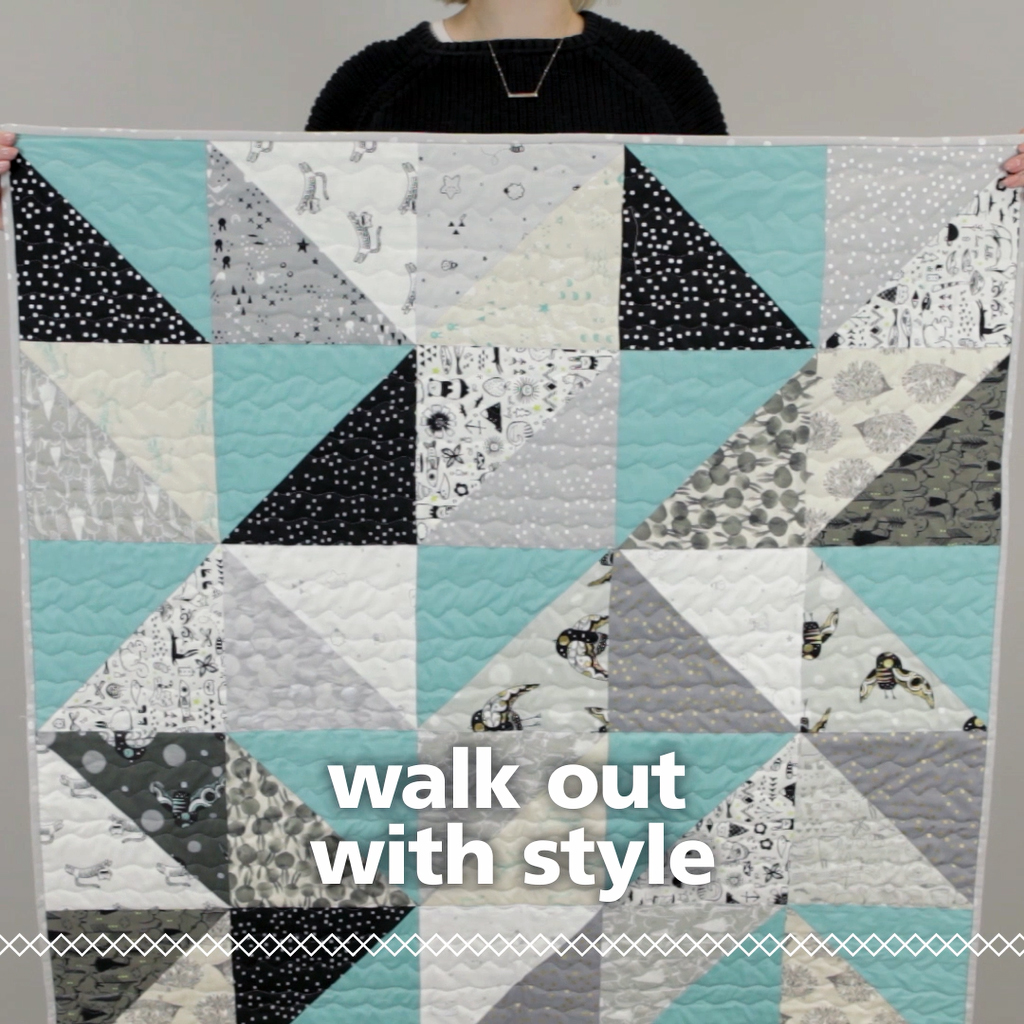
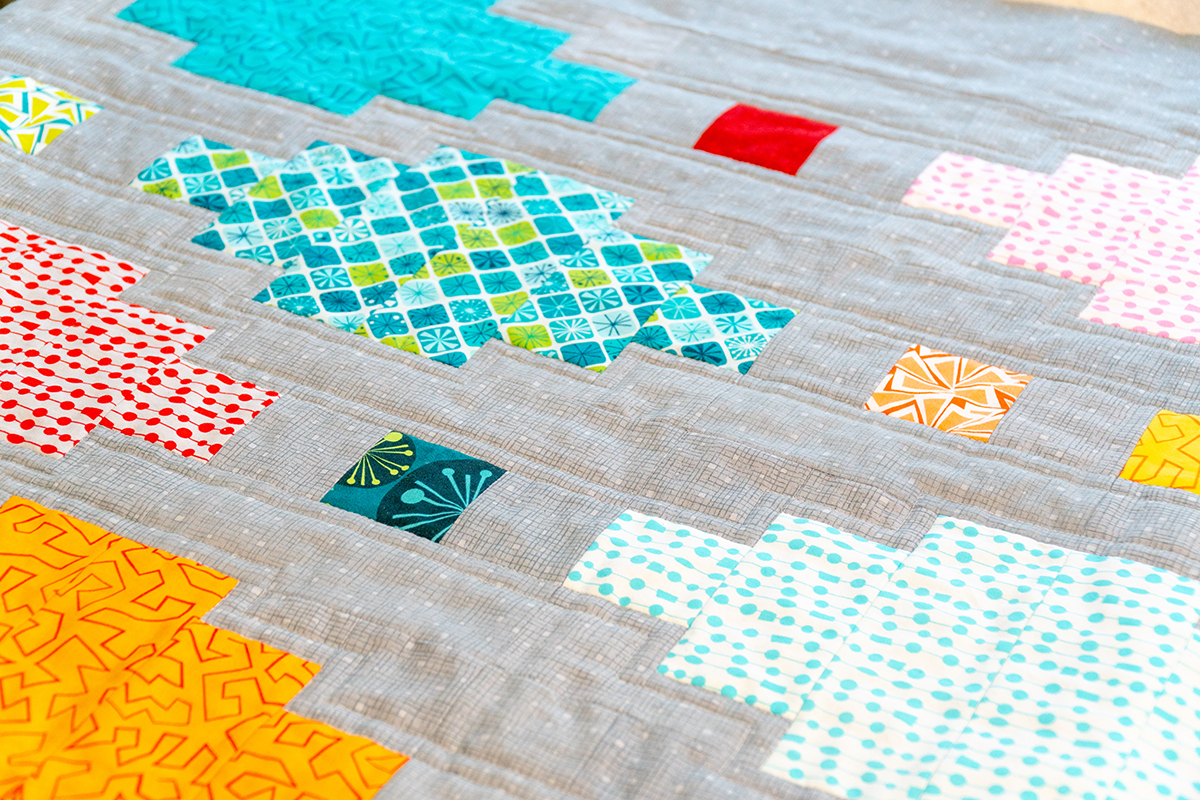
Do not get me wrong, I love straight line quilting! It’s clean and simple and does not distract from your beautiful piecing. But sometimes we need to change it up. Keep reading to discover a new way to bring more dimension and texture to your quilts without any added challenges. Plus, it’s super quick—this 36” x 45” baby quilt only took me about an hour and a half to quilt.
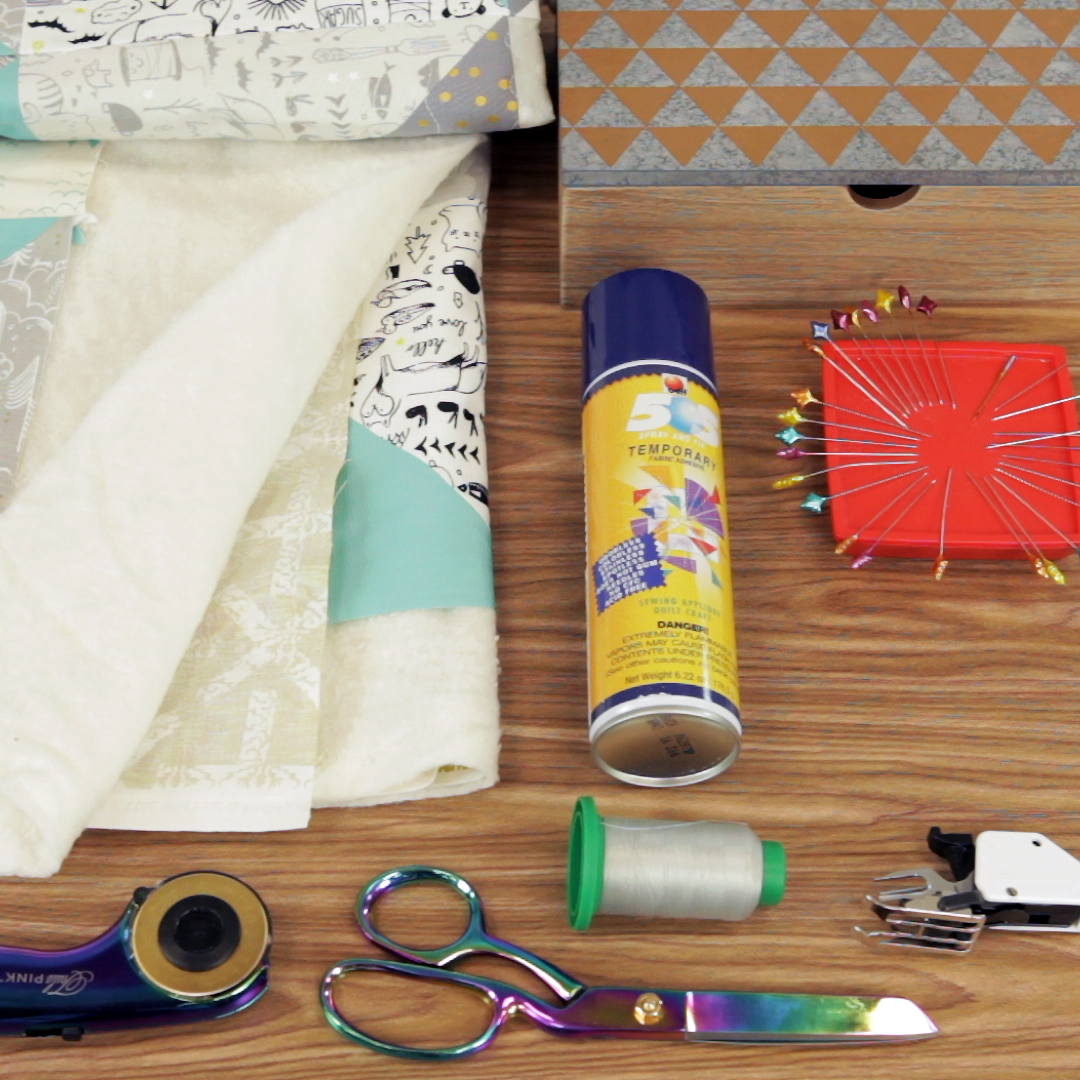
Materials for Quilting with the Walking Foot
- Pieced quilt top
- Batting (3-4” larger than your quilt top, in both directions)
- Backing fabric (3-4” larger than your batting, in both directions)
- Spray baste
- Iron
- Thread for quilting
- Rotary cutter
- Cutting mat
- Quilting gloves
- Some people like using special gloves for quilting to help them grip their fabric. I like them for larger quilts (anything bigger than a twin-size) but on something small, like a baby quilt, I do without.
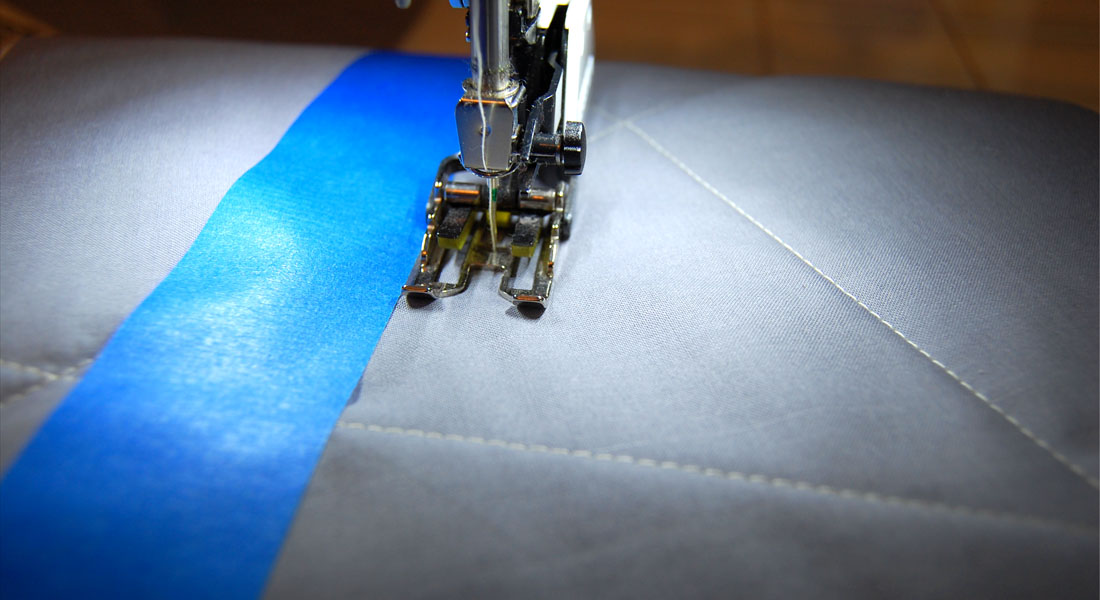
- Painter’s (or masking) tape
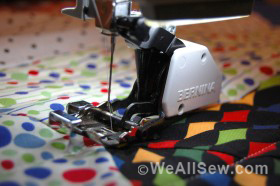
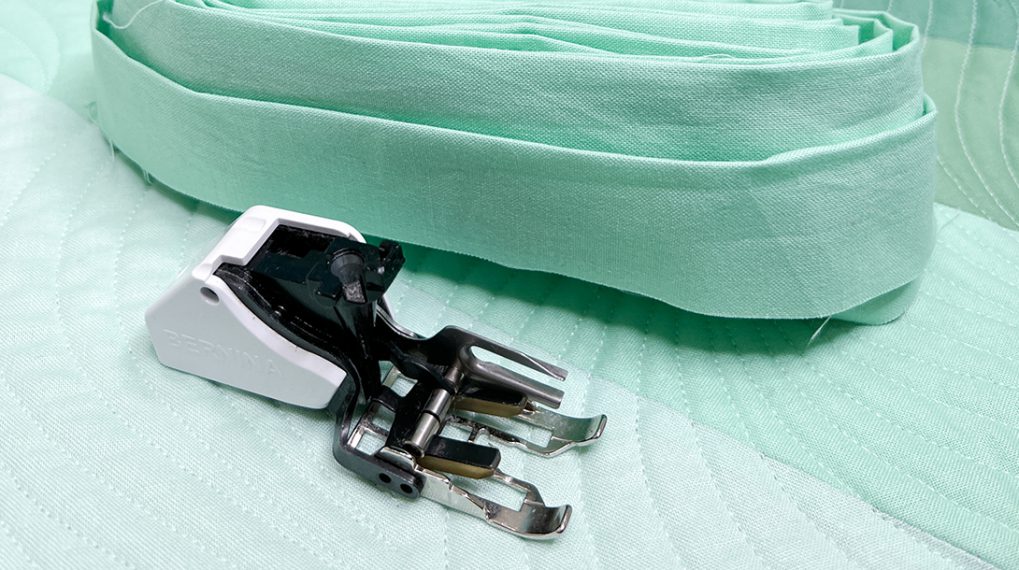
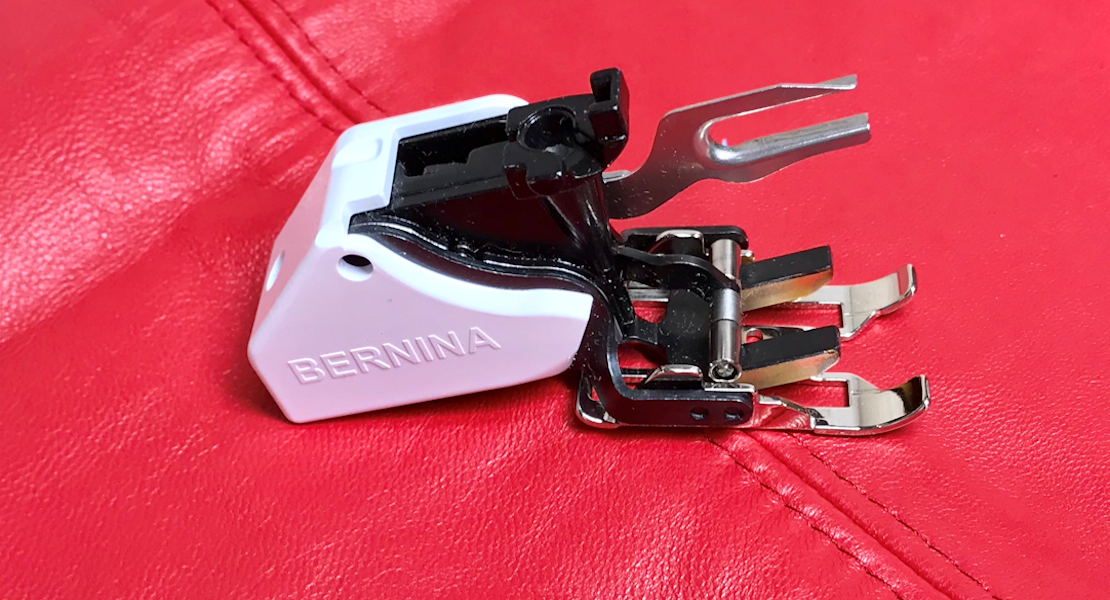
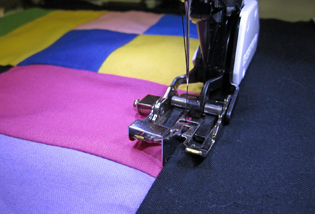
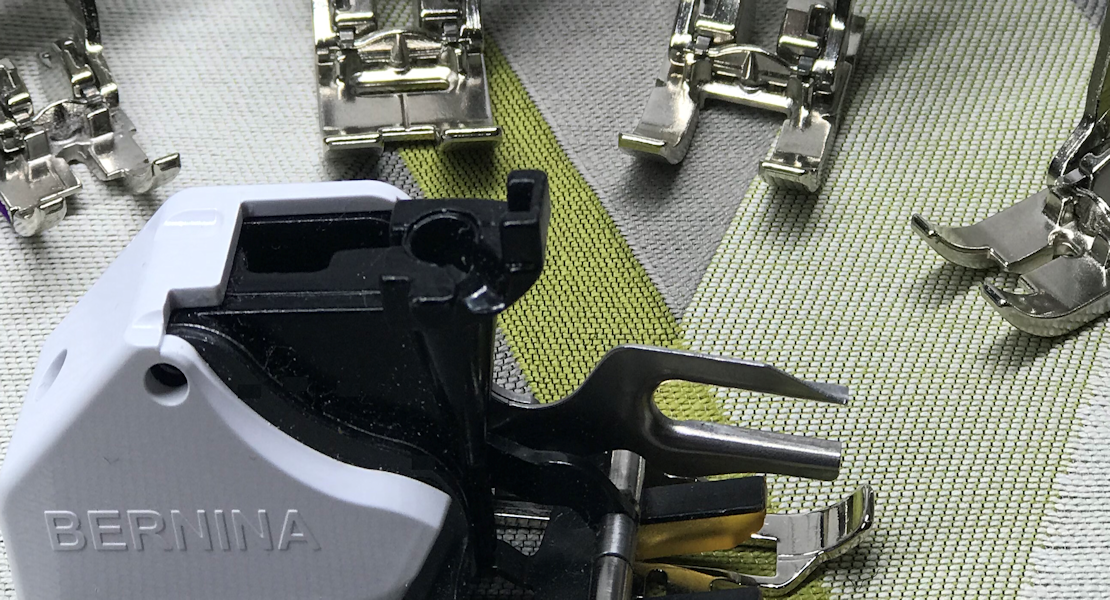
- BERNINA Walking foot #50
- BERNINA 790 PLUS
Steps to Quilt with the BERNINA Walking Foot
Step 1. Baste your quilt
Begin by assembling your “quilt sandwich”. Ideally, this is done on a smooth surface (like wood/laminate/tile floors) that is larger than your quilt back. Tape your quilt back right side down to this surface to keep it from shifting. If you do not have a workspace that large, use the same process but work in sections across your quilt on a table top. When working with spray baste, be sure to work in a well ventilated area or outside.
Next, lay your batting on top of the backing, smoothing from the center outward. Be sure there are no creases, folds, or puckers in your batting. When things are generally smooth, lift one corner of the batting at a time and use spray baste to secure in place, again smoothing from the center outward.
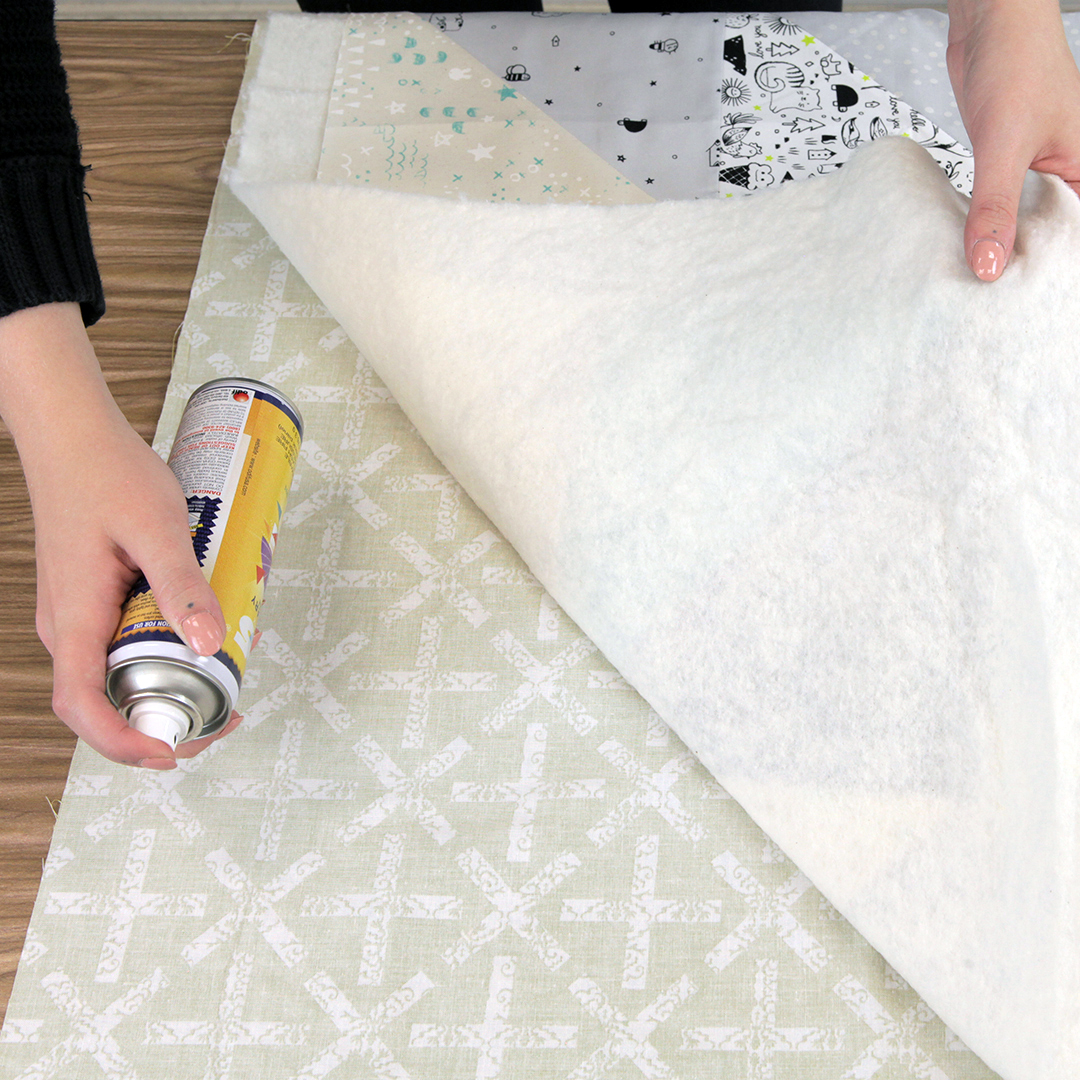
Finally, lay your quilt top centered and right side up on your batting. Again, lift sections to spray baste the top to the batting working from the center out.
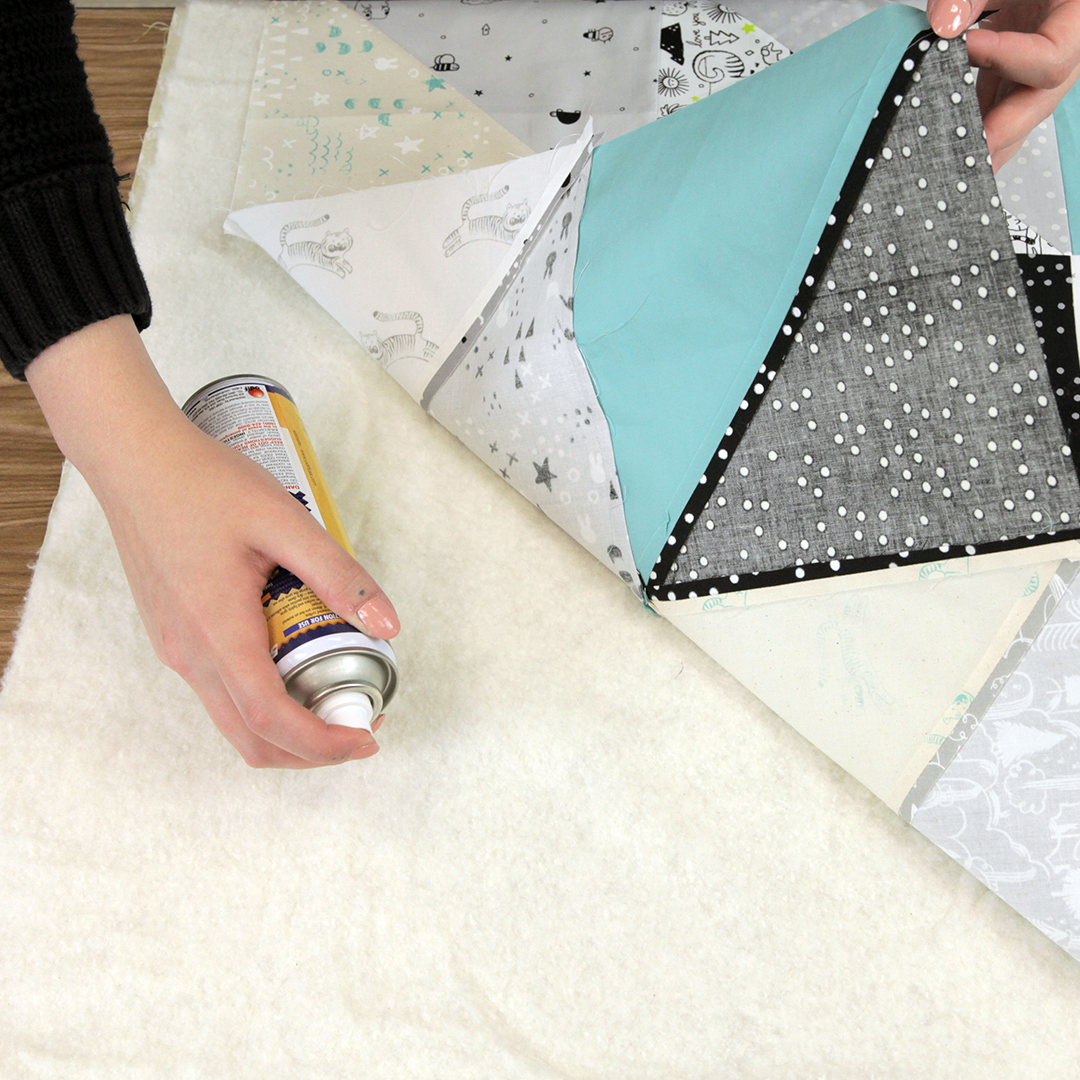
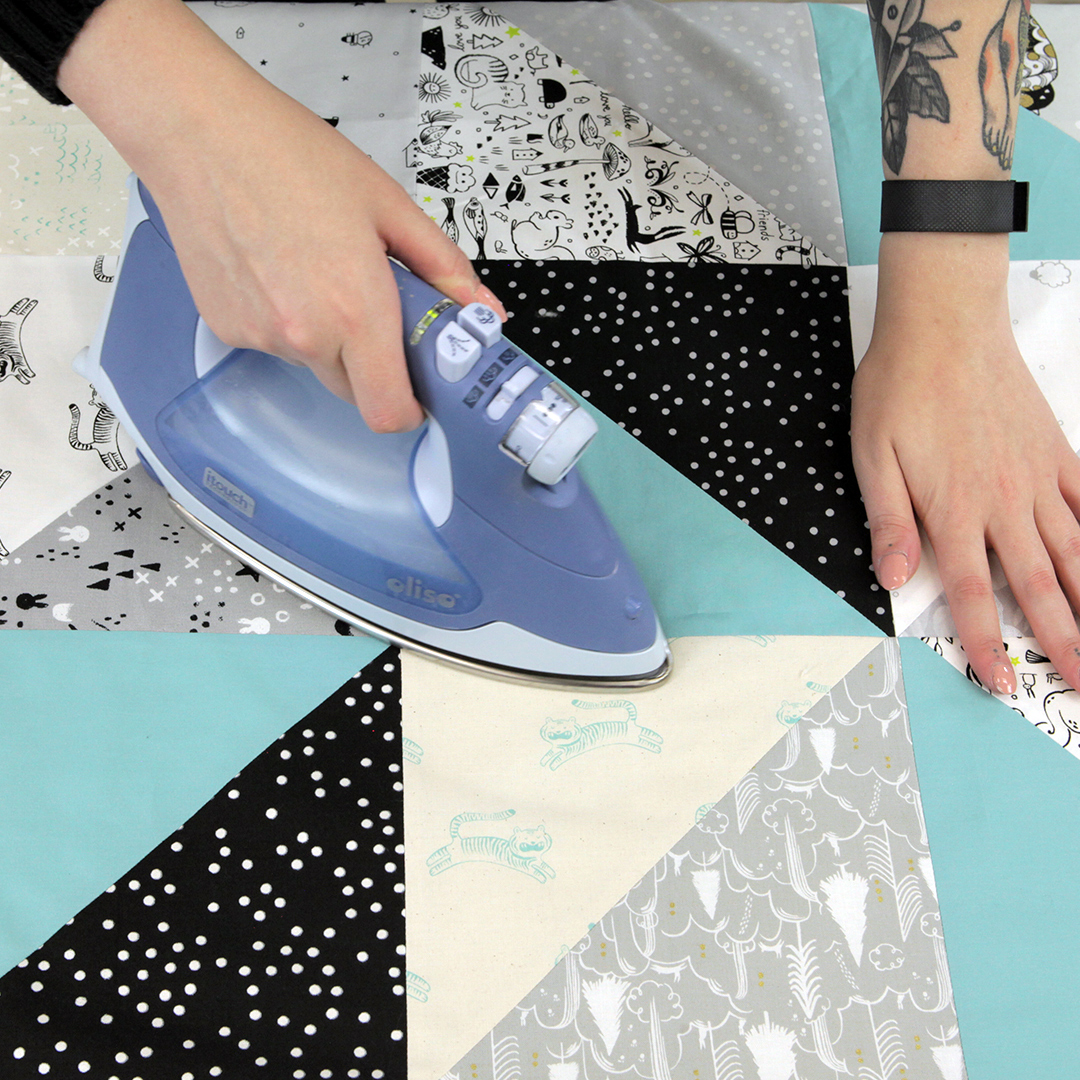
When all is sprayed down, untape or remove your quilt from the basting surface and take it to your ironing board. Give the whole quilt a light press with a dry iron now that it has been spray basted. This will just help make sure things are extra smooth and extra secure before you get to quilting.
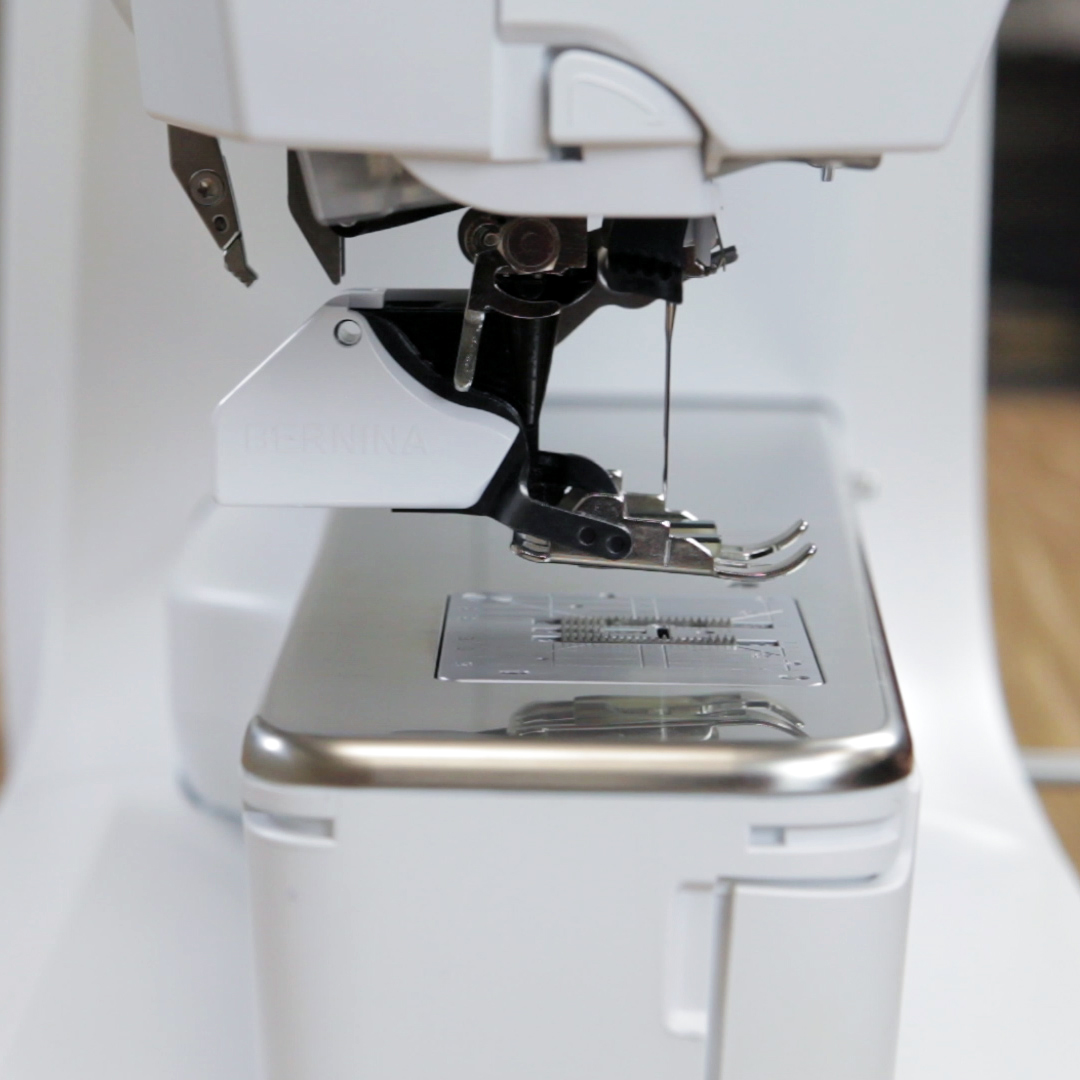
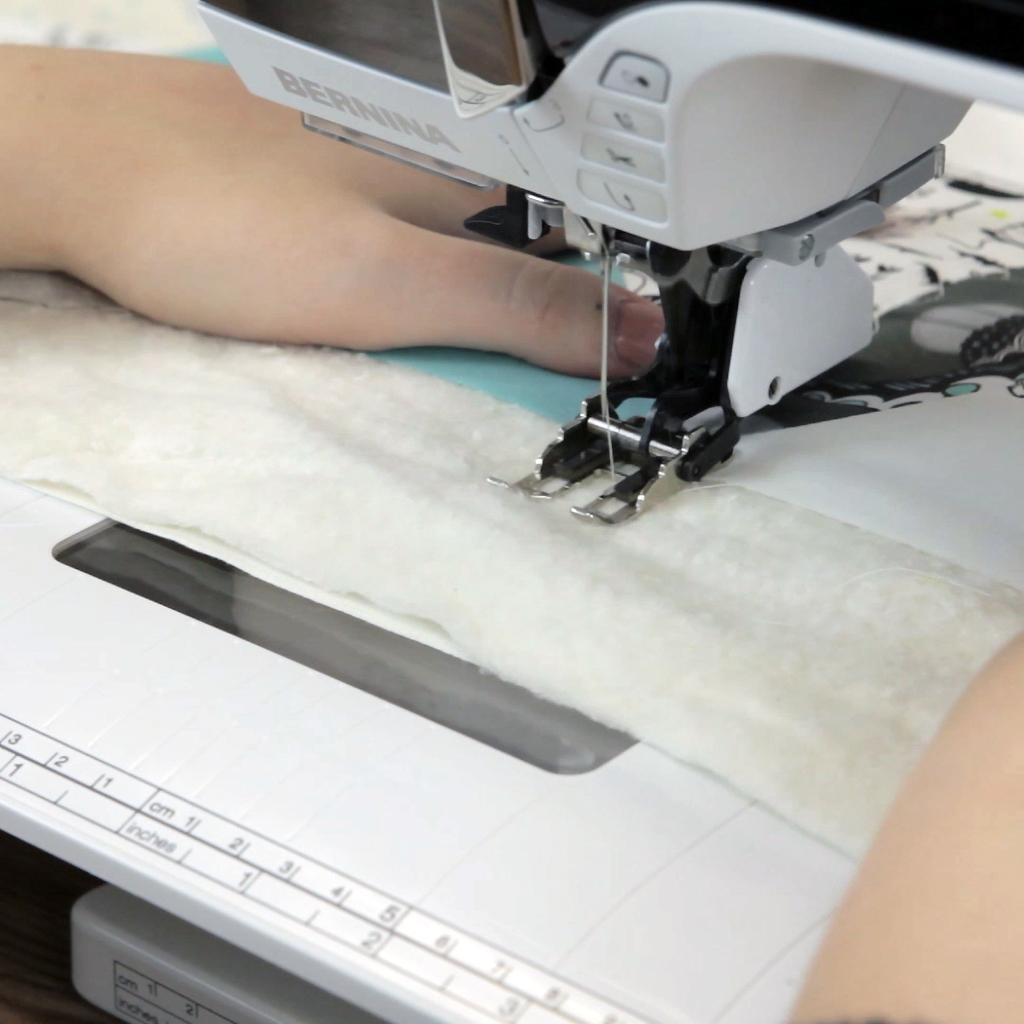
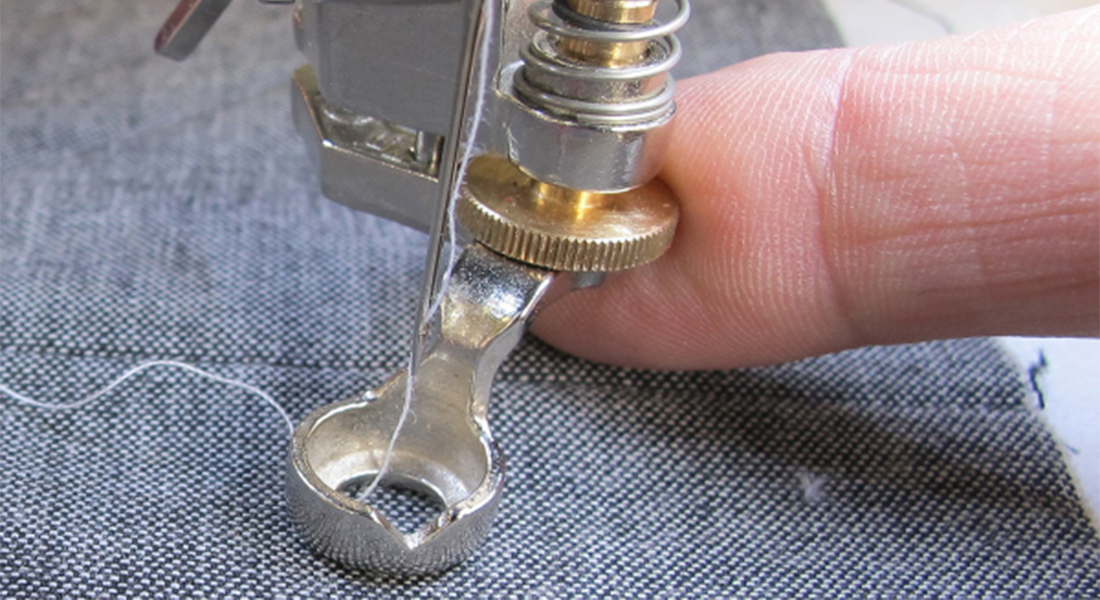
Step 2. Attach your walking foot
Next, prepare your machine for quilting by attaching your walking foot. If you have not used a walking foot before, this accessory might look a bit odd. There is a U-shaped arm reaching toward you on the right side of the presser foot—this U-shape needs slide onto and sit around the needle bar before securing the accessory with the clip, or lever, on the left side.
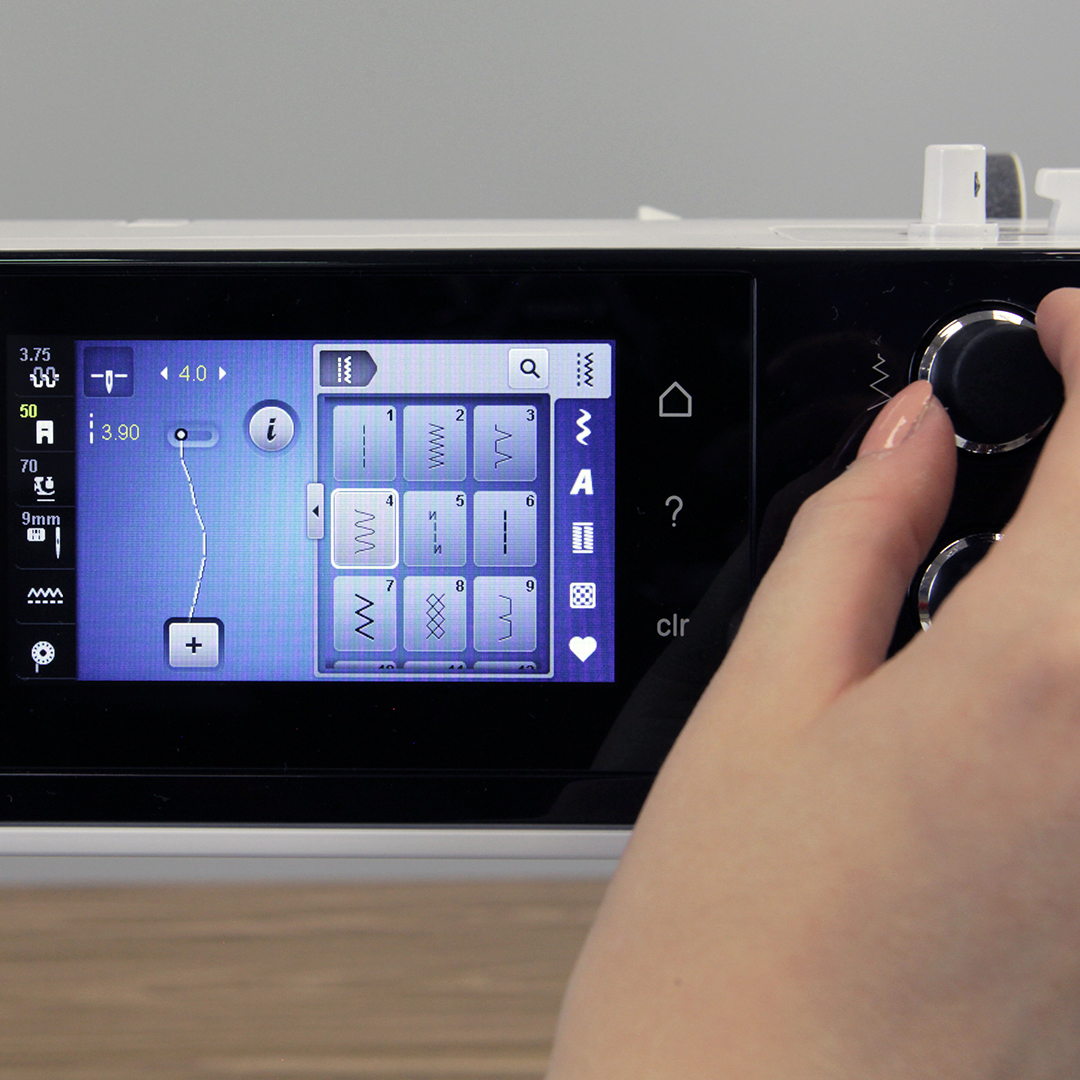
Step 3. Setup your stitch
After attaching your presser foot, be sure to select the BERNINA Walking foot #50 in your presser foot recognition, if your machine allows it.
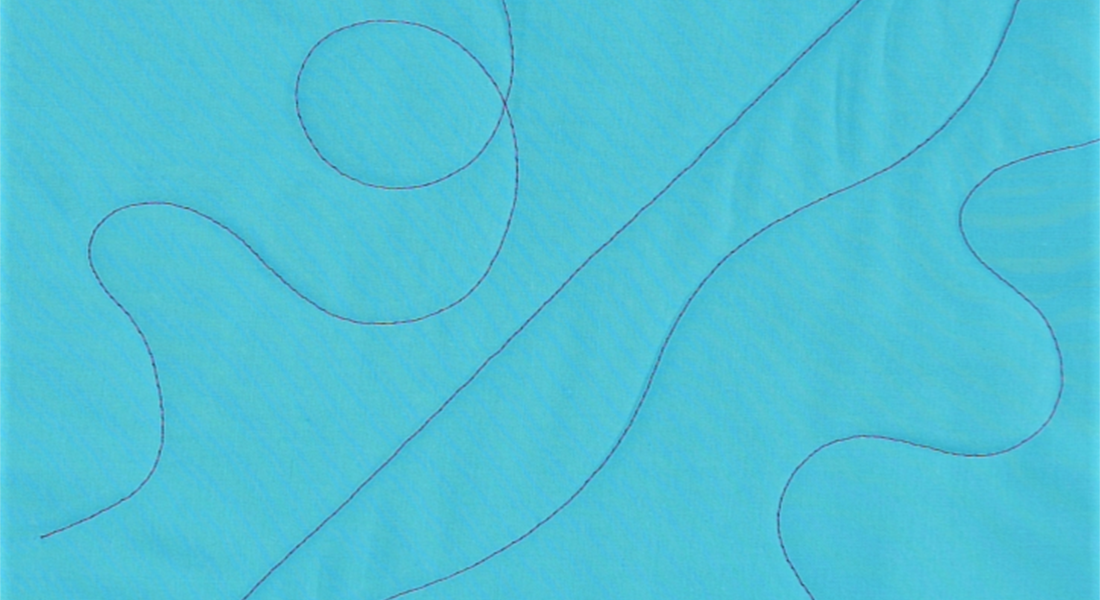
Select a running stitch (#4 in most BERNINA machines). This is a multi-stepped wavy line. Use your multi-function knobs to adjust the length and width of this stitch.
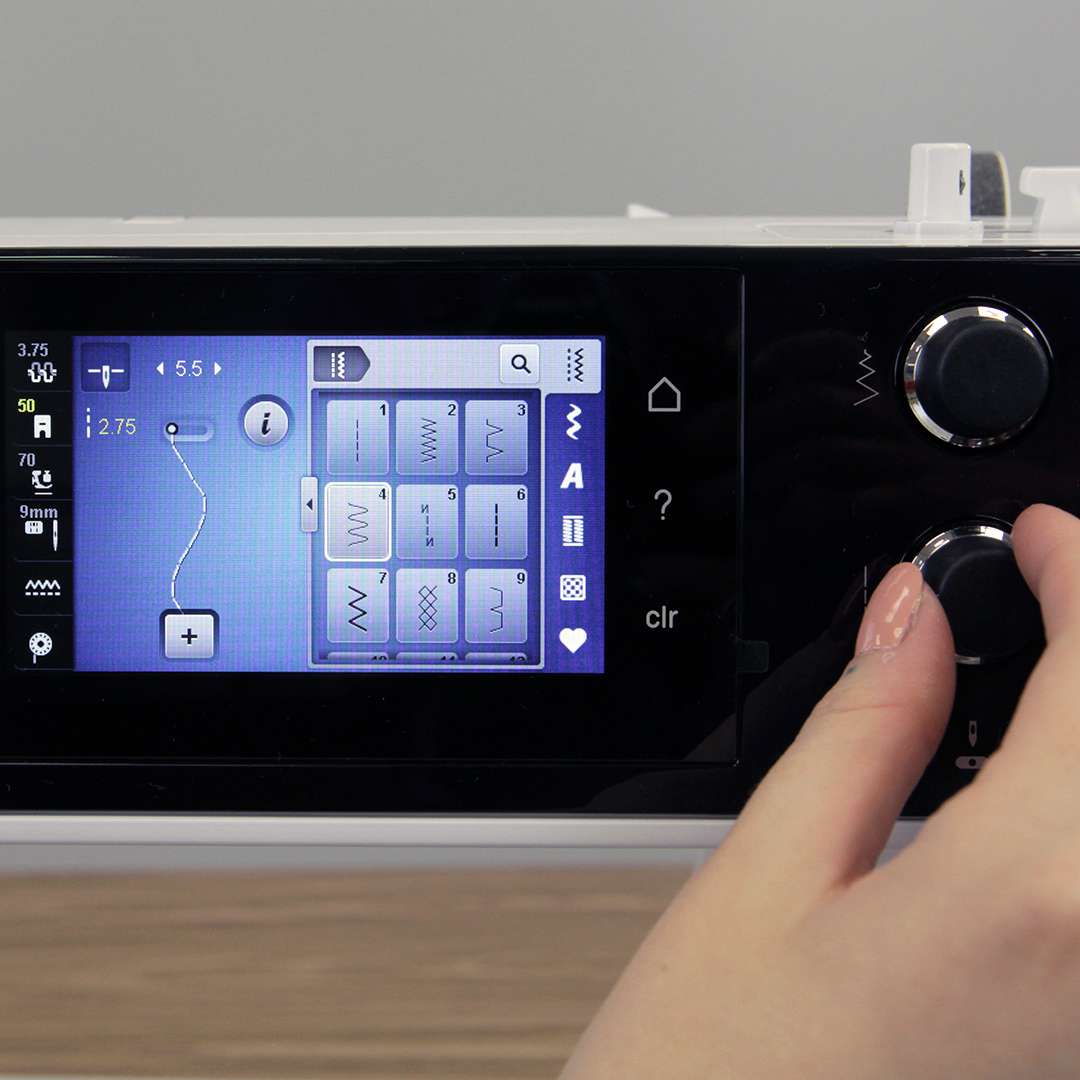
Changing the length of this stitch will, obviously, change the length of your individual stitches but visually you will see the distance between waves change.
Changing the width of the stitch will change the depth of the waves.
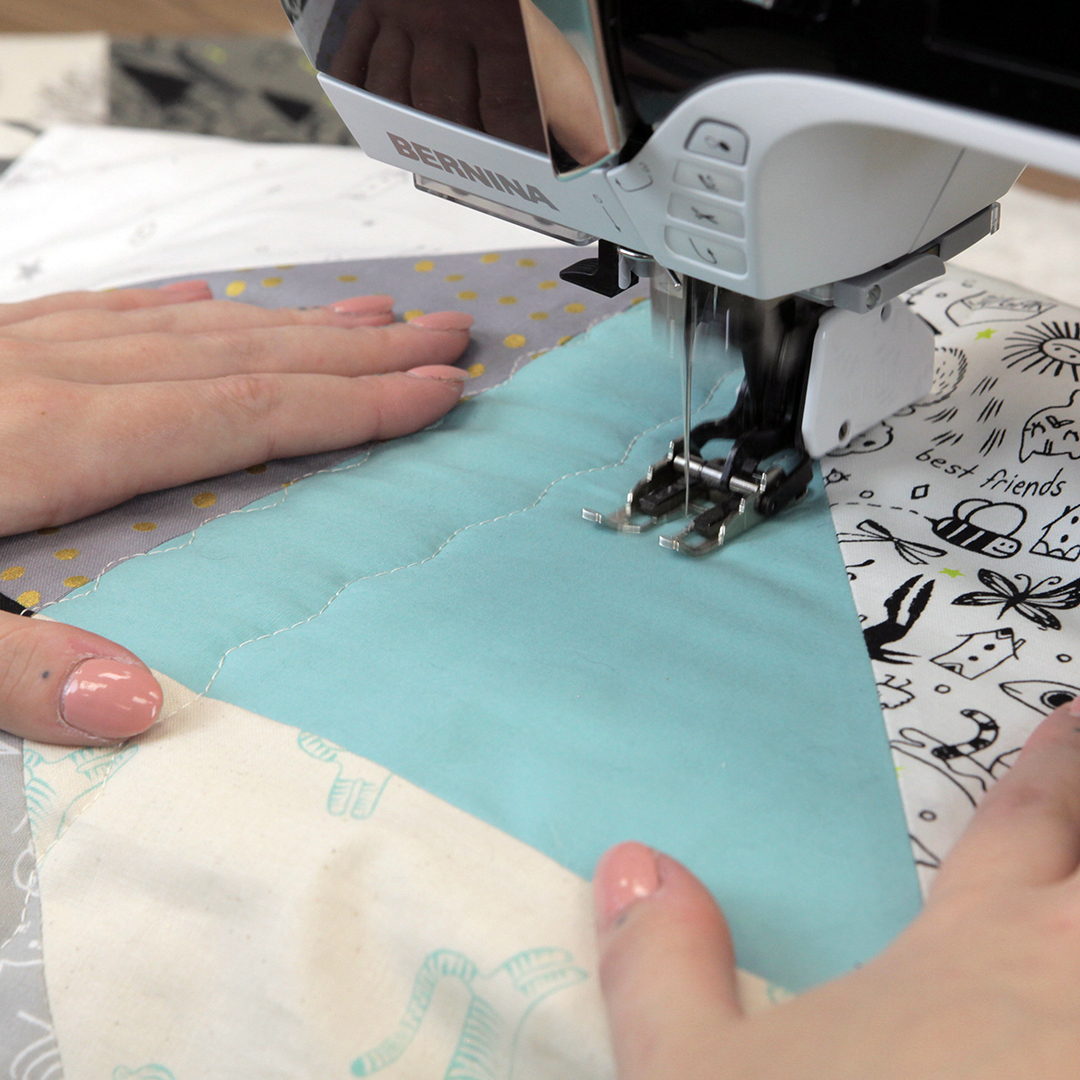
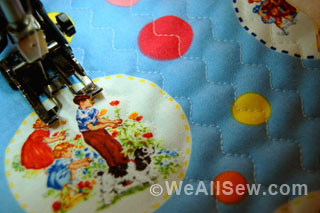
Step 4. Start stitching
Choose a point to start quilting your quilt. Some people prefer to work from the center out and some prefer working from one end to the other. Personally, I have tried both and both work! Just work in a consistent manner. On this quilt, I started in the center.
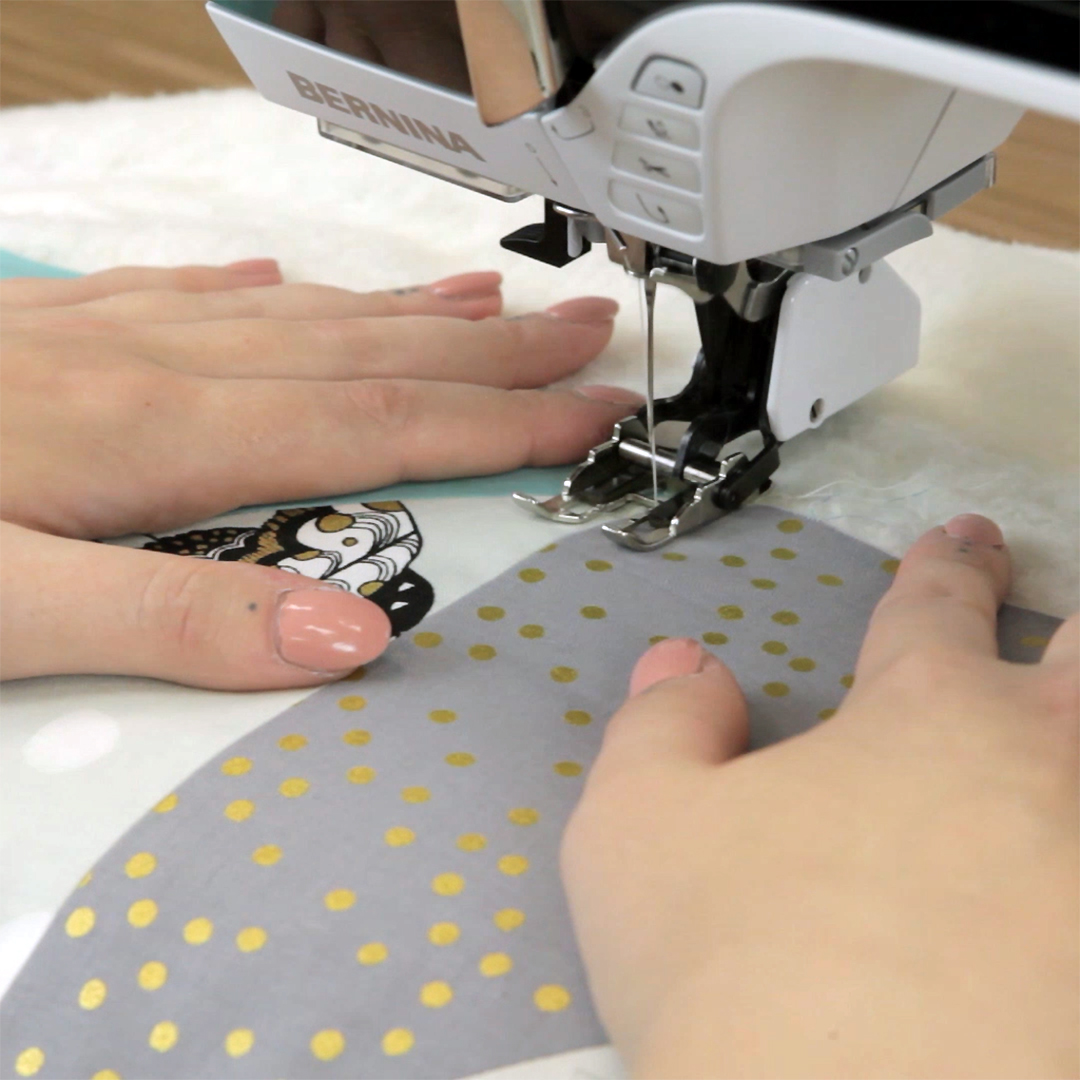
Start stitching off the edge of the quilt top and sew from one edge to the other. When you work from edge to edge, you do not need to worry about burying any threads!
When you reach the opposite end of the quilt, stitch off the edge of your quilt top and cut your threads. Return to the starting end of the quilt for your next row.
Repeat this stitch, with your current settings, in regular intervals per your block size (i.e. my quilt features 8” finished blocks so I will repeat stitching rows every 8” across the quilt).
Step 5. Change your stitch settings
Revisit your machine screen and change your stitch length and/or width. You can change just one or both, but changing that wave pattern in any way will help create texture across your quilt.
Step 6. Stitch again
Repeat the process from steps four and five, sewing from one end of the quilt to the other in regular intervals, varying your wave pattern each time you finish a full pass across the quilt.
Step 7. Finish it up
Once you have quilted your quilt to a density of your liking, it’s time for finishing! Square up your quilt, trimming away all the excess backing fabric and batting, bind, and label as desired. Ta-da! Quick, easy, and the finished project will make you look like a pro.
Used Products


What you might also like


14 comments on “Quilting with the Walking Foot”
-
-
That is correct! In my experience, it doesn’t matter much as to which layer you spray directly. Some people may have personal preferences to spray either the fabric or the batting but I don’t believe there’s a right or wrong way to go about it 🙂
-
Thank you for the reply and clarity.
-
-
-
Love my walking foot. Love my Brenina’s Ardiss Kunze
-
Thanks for the fantastic idea of using the wave stitch rather than the running stitch I have been doing with walking foot. 🙂
-
I have just finished my first quilt top and I will be trying to quilt it. Thanks for showing me this!
-
You wrote (i.e. my quilt features 8” finished blocks so I will repeat stitching rows every 8” across the quilt) but your rows appear maybe 2” apart or closer?
-
It’s true! So each time I make adjustments to the stitch width or length, I will sew a row every 8″ (or stitch one pass per row of blocks) so they’re evenly spaced, and then start over with a new adjusted stitch. With enough passes across the quilt, rows of stitching are eventually about every 1-2″. I learned this way of working across a quilt from BERNINA Ambassador Christa Watson and she gets a little bit more detailed in her book “Machine Quilting With Style”– I highly recommend it!
-
-
Is there a limit to the stitch width that can be used with the walking foot?
-
There is! The BERNINA walking foot is limited to a 5.5 mm stitch width.
-
-
After twenty years of failed attempts at free motion quilting, I gave up, and use only the walking foot now. This idea for the serpentine (#4 wave pattern) stitch is amazing. I just quilted a quilt using the above technique using variegated thread and it looks fabulous! On a second quilt, I used a longer serpentine down the wider rows and a much shorter version in the narrow sashing. Again, the result was a knockout. My quilt group agreed. Thanks ever so much and keep those new walking foot ideas coming.
-
Oh this just made my day!! I’m so glad you found success with this method. Quilting with the walking foot is also much more my speed than free motion. We will definitely be working on more tips and tricks for fellow walking foot quilters!
Two books that have helped me overcome my quilting anxieties are Walk by Jacquie Gehring and Machine Quilting With Style by Christa Watson– both ladies are BERNINA Ambassadors with just loads of knowledge and these books are chock full of walking foot insight 🙂
-
-
Hi Hayley I would love to give this a try. One question is that I noticed no markings on the quilt. How do you keep those wavy lines evenly spaced? Thanks
-
Thank you for the info! Question: I have a Bernette b77. Is there a walking foot for that model?
Leave a Reply
You must be logged in to post a comment.

Good, basic post. Thank you. One question: When spray basting, does it matter which layer you spray? For example, it looks like in the first layer you sprayed the backing fabric and second layer you sprayed the batting. Is this correct?