Quilting with BERNINA Leather Roller Foot #55
For smooth, organic lines of quilting, BERNINA’s Leather Roller Foot #55 is the ideal foot to use.
There are many ways to do a quilting stitch using the feed dog on your machine, especially if like me, you are not that proficient at free-motion stippling.
- The BERNINA Three-Sole Walking Foot with Seam Guide #50 is perfect for straight lines, including stitch-in-the-ditch and grid quilting.
- A variety of D (Dual Feed) feet can be used, especially on smaller and lighter projects. For instance, Reverse Pattern Foot with Clear Sole 34D lets you follow the markings you made on the quilt top.
Regular presser feet excel at straight-line seams, given that they match the surface area of the feed dog, which itself is best for straight line stitching (unless if you sew on a machine with sideways motion).
But what if you like curvilinear quilting patterns?
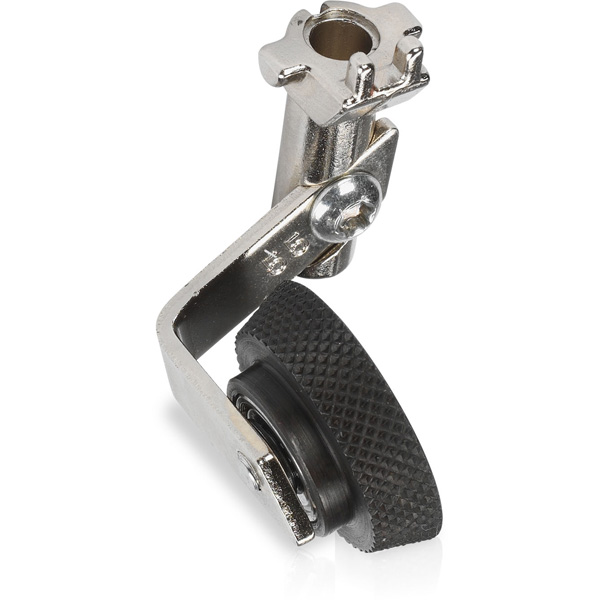
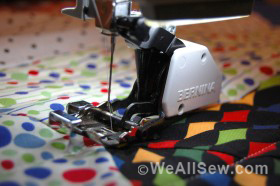
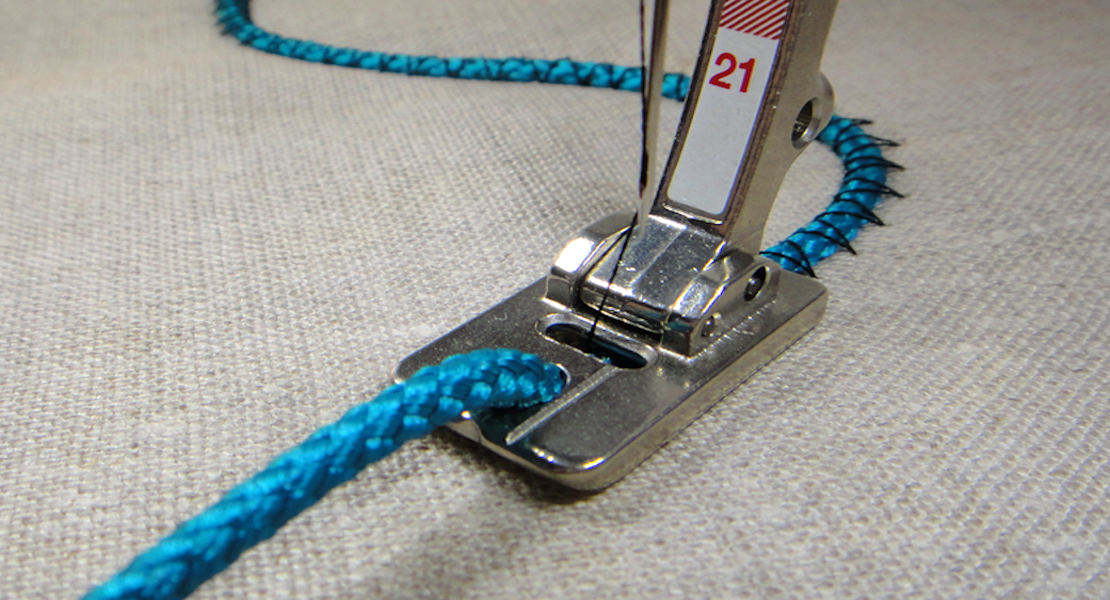
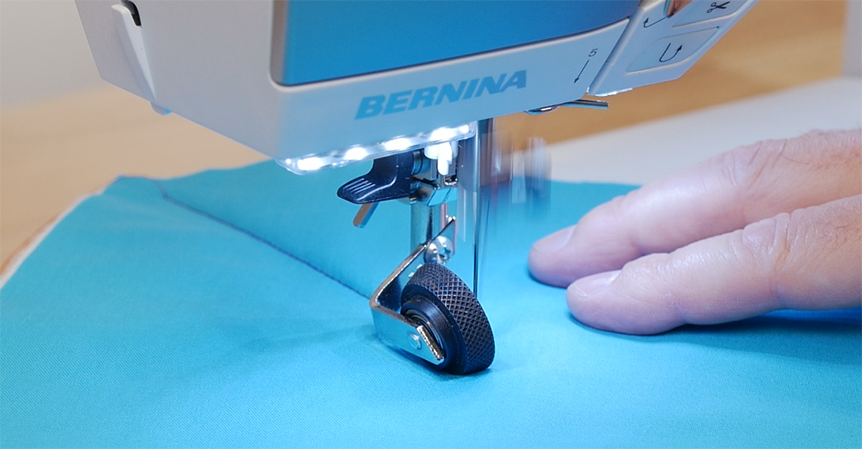
Now Enters Leather Roller Foot #55
This foot was originally created to stitch along the tight curves of ladies’ gloves (hence the leather part of its name). It can turn and let you pivot your project on less than a dime. This allows you to move the quilt project in a fluid fashion, creating curved lines of stitching. Oh yes, you can even do straight lines if you want to!
Without further ado, let’s take Foot #55 for a spin.
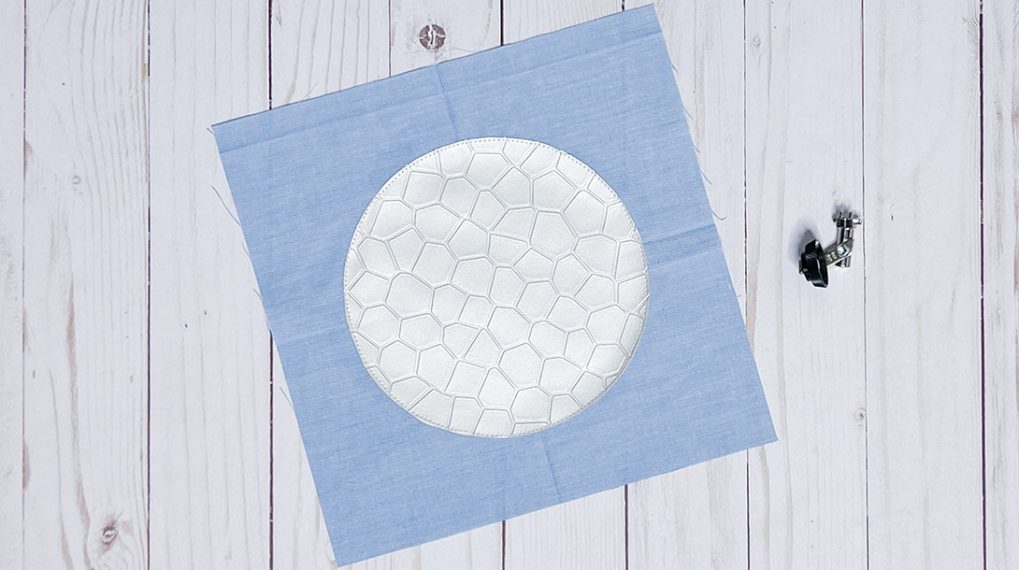
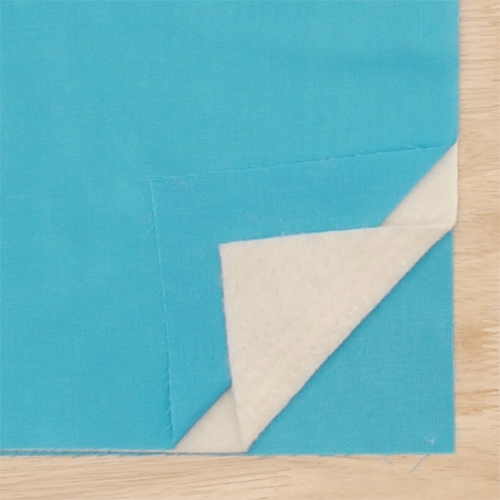
First, you’ll need a quilt sandwich.
- I like to start with a test piece, about 12 x 12 inches.
- I use a relatively thin (low loft) batting (e.g. cotton).
- Use a basting spray (e.g. Odif 505 Temporary Adhesive Spray) applied to both sides of the batting, one side at a time while layering.
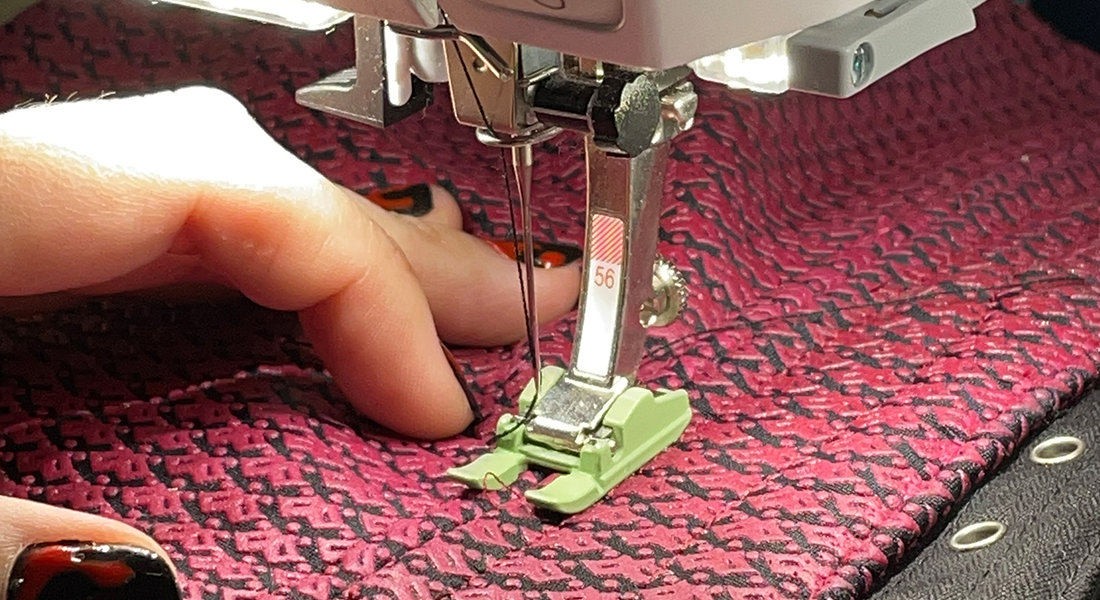
Before we start stitching, there are a couple of things to set up for Foot #55 to do its magic.
Note that Foot #55 is not coded, therefore even a 9 mm capable machine will restrict the stitch width and corresponding needle positions to 5.5 mm when the foot is attached to the machine.
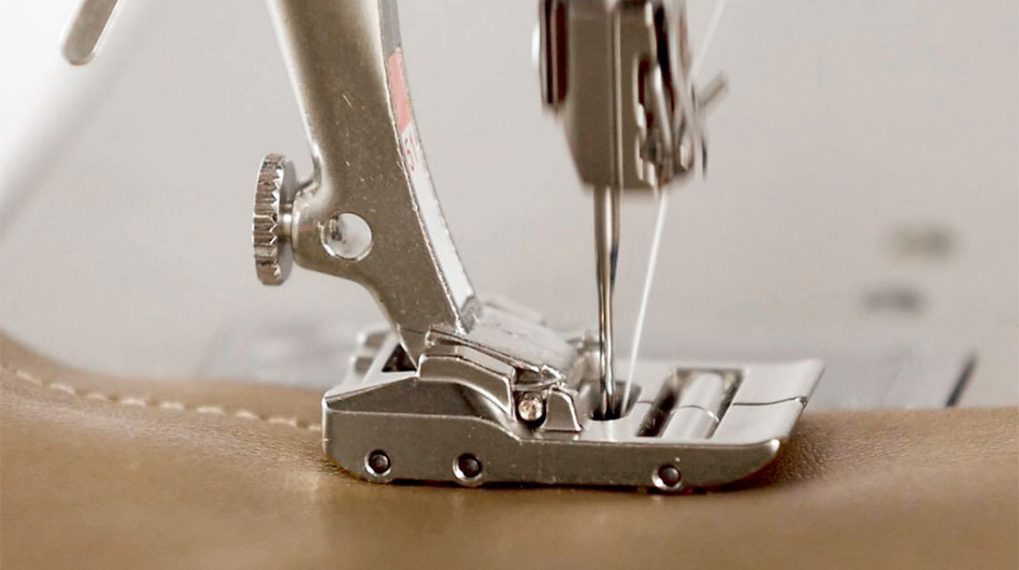
- Attach the 5.5 mm Stitch Plate for your machine. (This is an optional accessory on most 9 mm machines.)
- This plate will put the left edge of the stitch opening right next to the base of the roller on the foot for good fabric control.
- Select the corresponding stitch plate in the Stitch Plate Security Program if it is available on your machine.

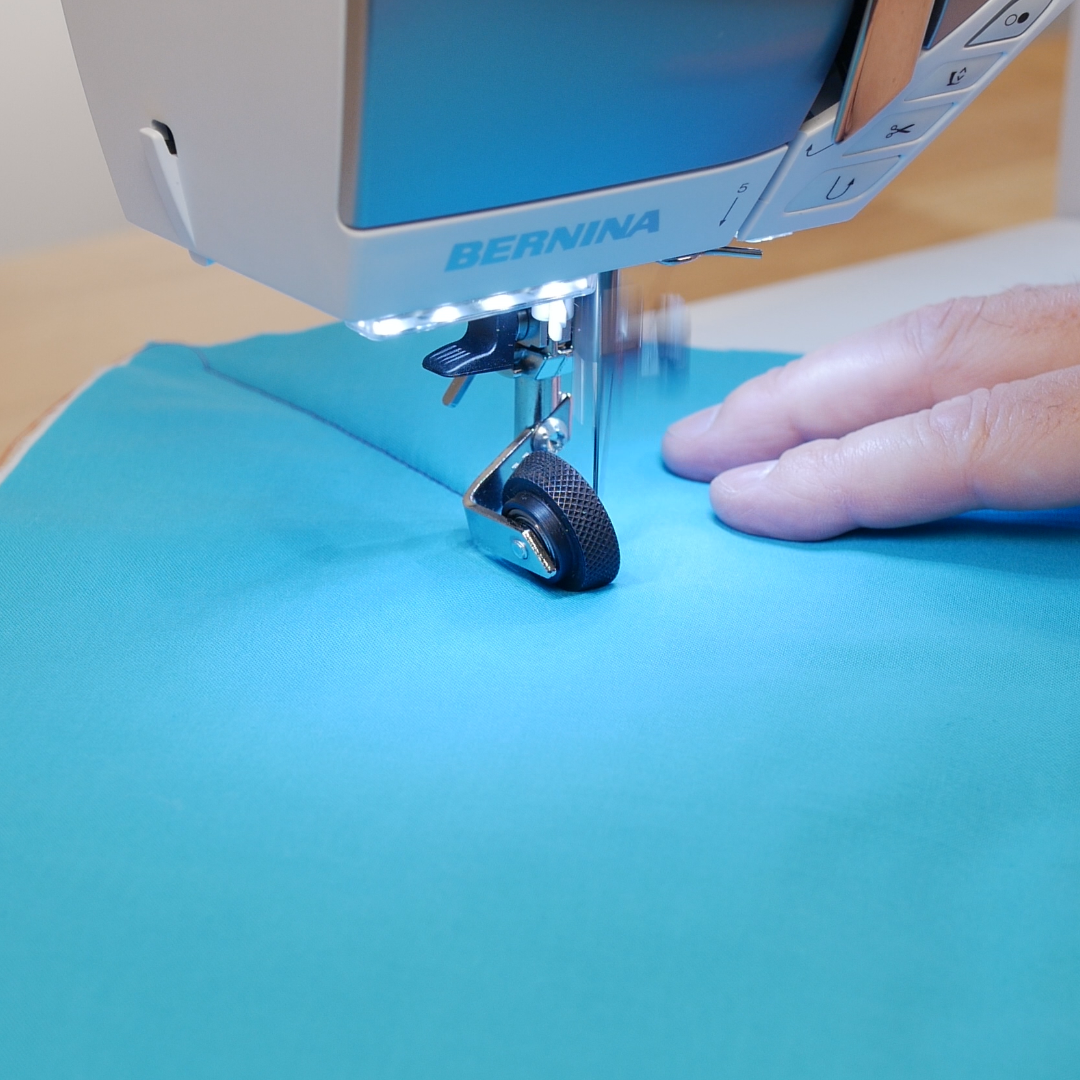
- Attach Leather Roller Foot #55 to your machine.
- If your machine has Presser Foot Recognition, select this foot on the screen.
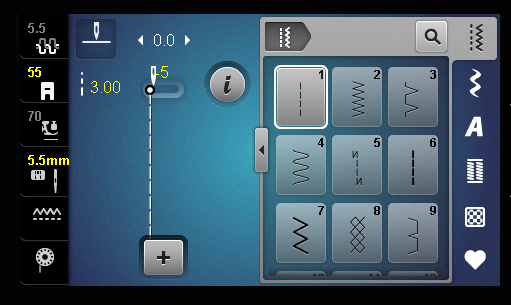
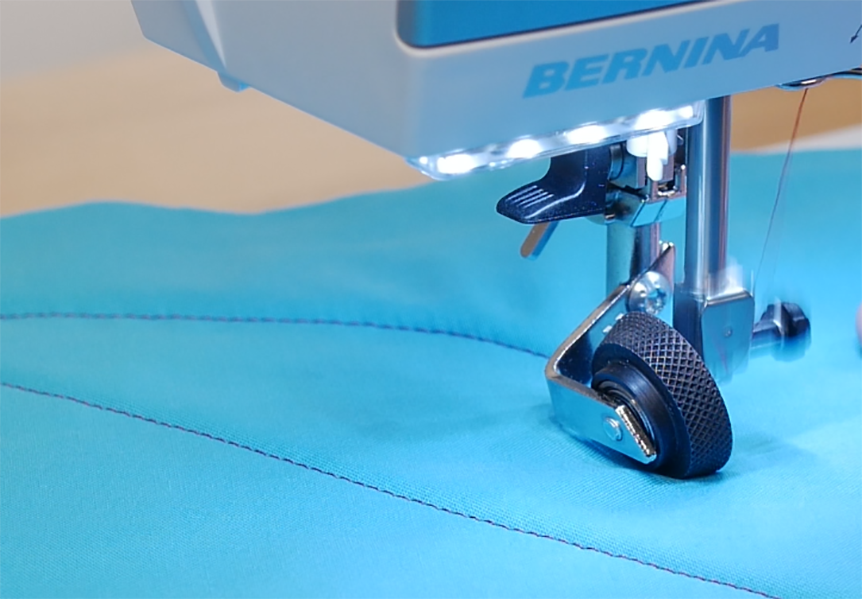
- Select Straight Stitch #1 and set the Stitch Length to 3.0 mm as a starting point.
- Move the Needle Position to the Far Left ( -5 )
- This step is key in stitching with Foot #55
- Since the foot does not have a sole over and around the stitch opening in the plate, the fabric would flag and stitches would be skipped if the needle is too far away from the foot’s roller base.
- By having the needle to the far left, the needle is right next to the roller base, where there is proper fabric (and layers) control to form a good stitch.
At this point, your machine settings should look like the following (here represented on a B 570 QE):
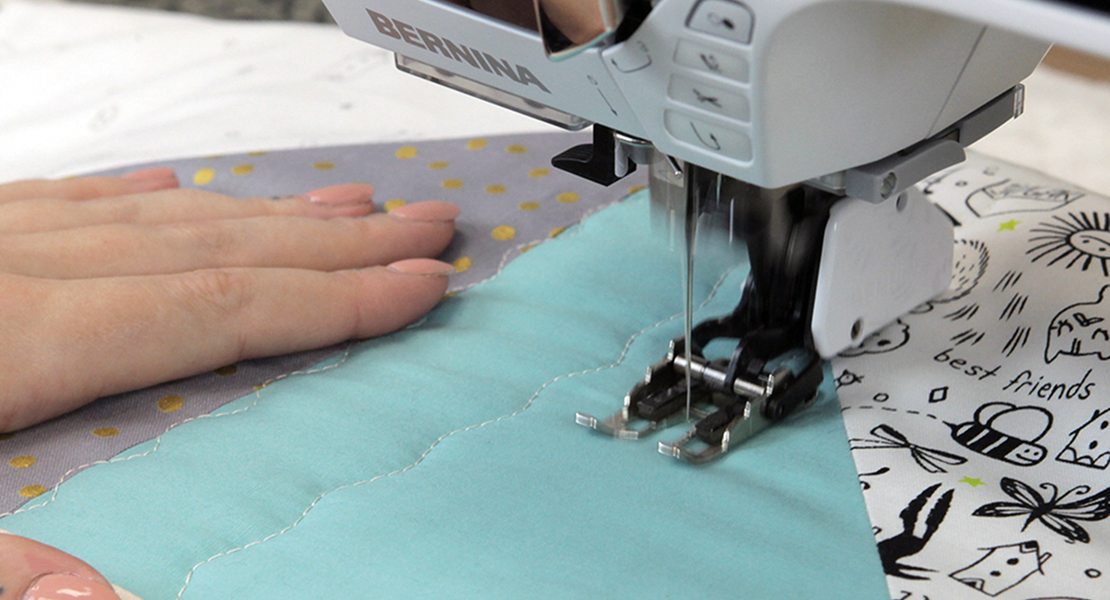
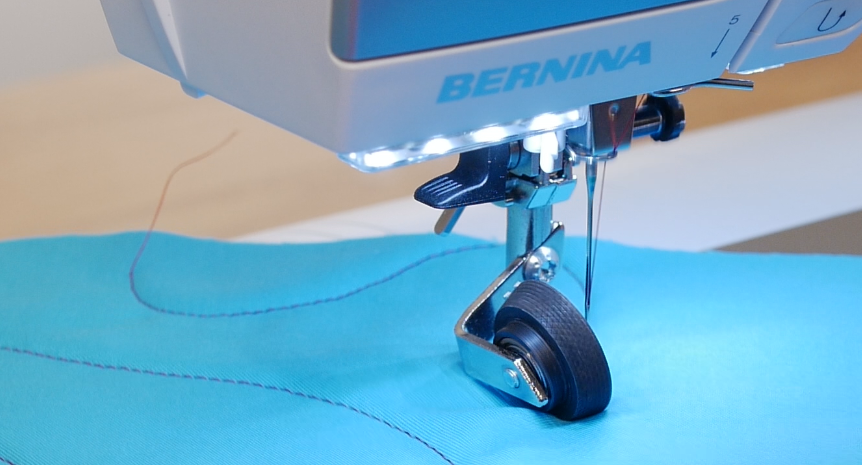
Now it’s time to stitch!
TIP: A moderate sewing speed (e.g. slide speed control at about half) will make for easier handling and smoother lines.
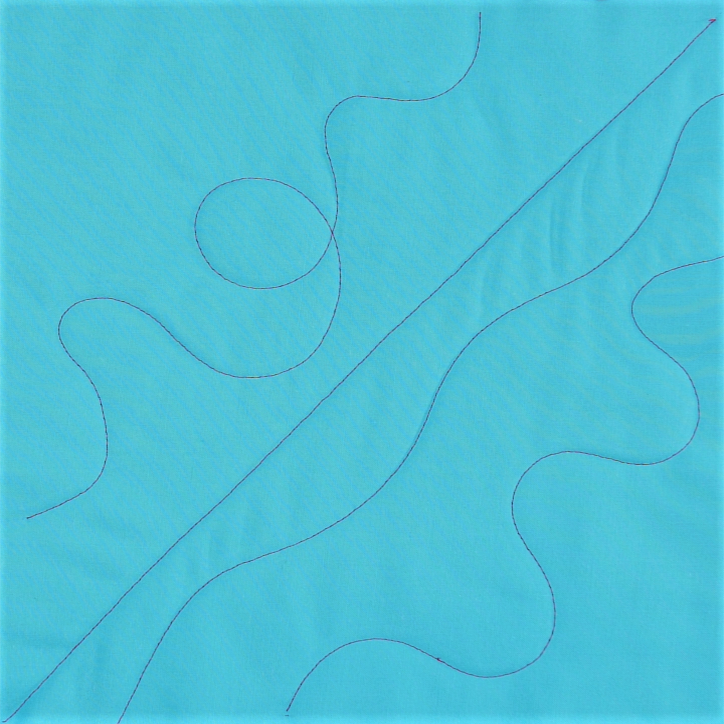
Straight lines:
If you want to practice stitching straight lines, you can draw a line on your fabric or simply aim visually as you feed the project under the foot.
Shallow Curves
These are the easiest. Rather than following a drawn line, I like to determine a band in which the curved lines need to stay and freewheel it from there.
Steeper Curves
These are still pretty simple. There’s a couple of considerations though:
- You’ll be ‘swinging’ (e.g. pivoting) your project more often and to a larger degree.
- You may find that you favor one direction over the other. I’m right-handed, and I find that it’s easier for me to turn the project under the foot in a clockwise direction, compare to counterclockwise.
Would You Like to Loop-the-loop?
For smaller projects, it’s easy to turn the piece on a dime (or less) and create loops along the way.

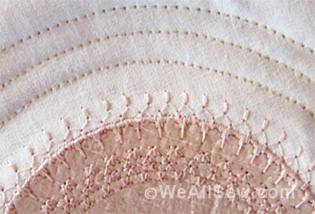
Here’s my sampler with the lines described above:
The above are just some of the possibilities in quilting with a Leather Roller Foot #55. It’s the closest thing to fluid, free-motion quilting while using the feed dog, with a form of stitch regulation included, since the feed dog is moving the project for you.
It takes the process of quilting into fun and play territory. Have fun along the way!