Overlocker For Beginners—Fast Finishing with Rolled Hems
Welcome back to our essential guide to overlockers! Today we’re going to take a look at a new stitch on our sergers—the rolled hem. If you’re just joining us, be sure to jump back and check out previous posts covering:
Rolled hems are the final unique stitch we’ll cover and it’s different from the previous stitches in a variety of ways. Most importantly, this stitch is specifically an edge finish or decorative touch, not a stitch to be used for seaming or construction. This stitch creates a narrow, dense, thread-wrapped edge on your fabric. Minor adjustments to this stitch can create a wide variety of decorative edges such as picot or lettuce edging.
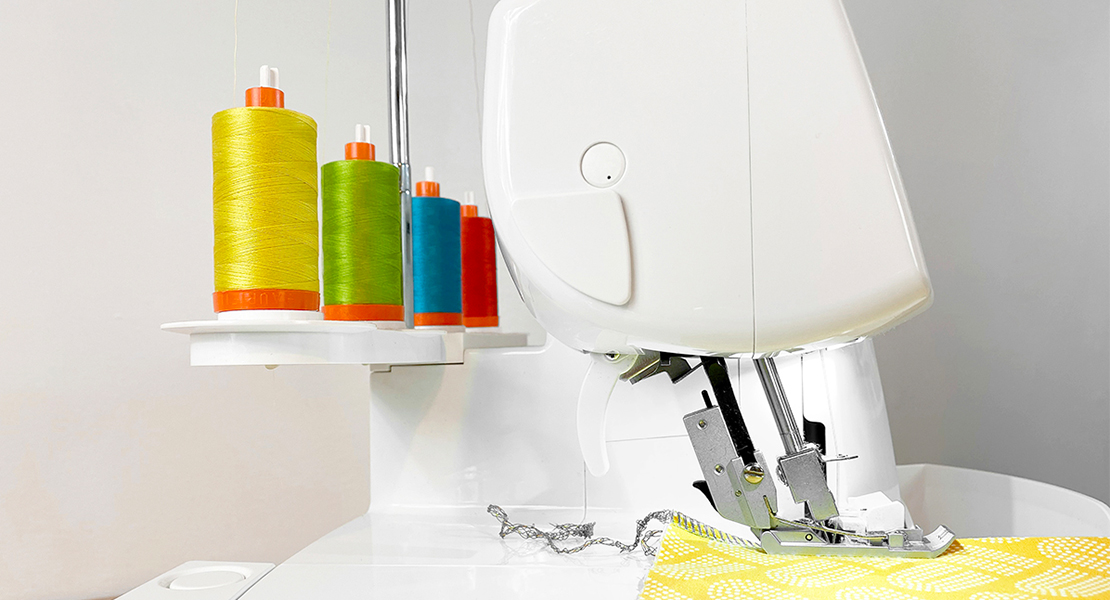
The look of the wrapped edge is created by the looper thread. This is an opportunity where a decorative thread such as Woolly Nylon (a texturized nylon thread) or other decorative threads can really shine. A shortened stitch length densely packs looper threads side by side so the thread you use in the loopers is really highlighted.
Anatomy of the Stitch: The Rolled Hem
A rolled hem is created with only one needle thread and one or both looper threads. The idea is to have one thread pulling the thread from the upper looper over to the back side of the fabric. In the process, a tiny bit of the raw edge of your fabric (maybe 1/16”) will get folded under as the thread wraps the edge.
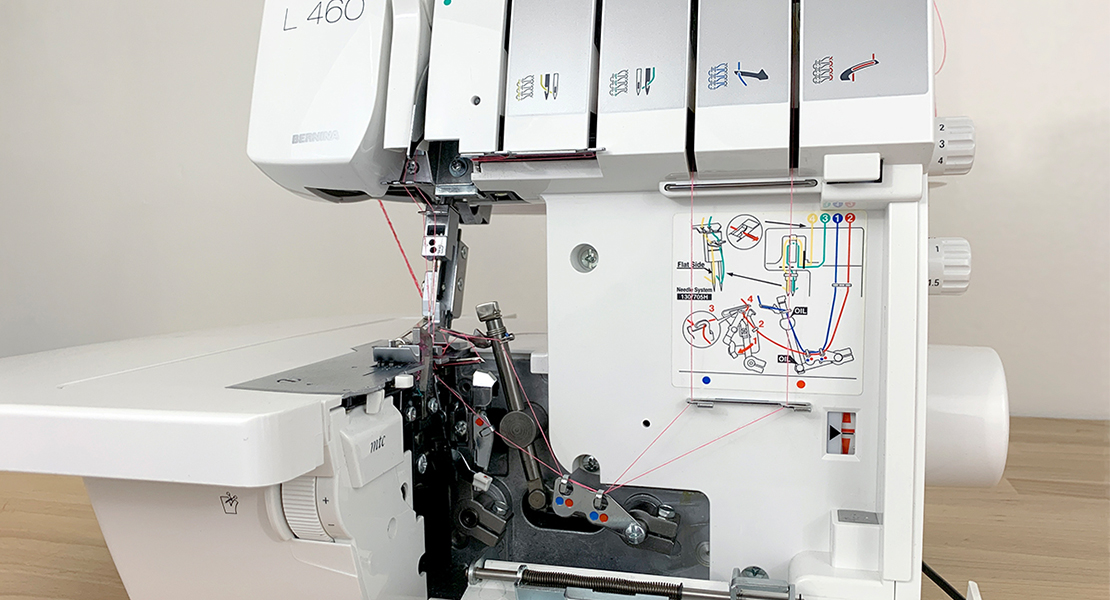
Up until now, we have specifically prevented this folding action—we adjust our Micro Thread Control (MTC) to move the stitch finger out and prevent puckering and tunneling in our seams. In previous stitches, recall that the stitch finger sits right under the raw edge of the fabric to support the seam at the point where our looper threads meet the edge, keeping the tension here even and smooth.
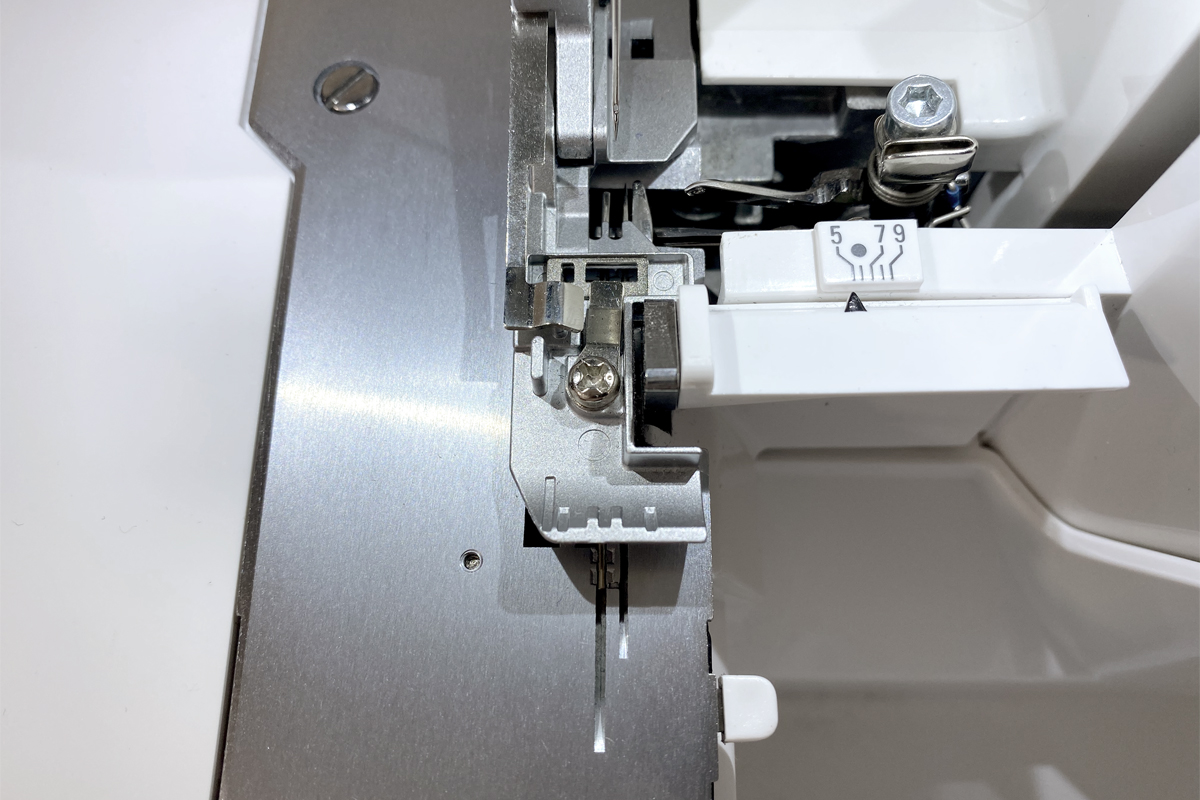
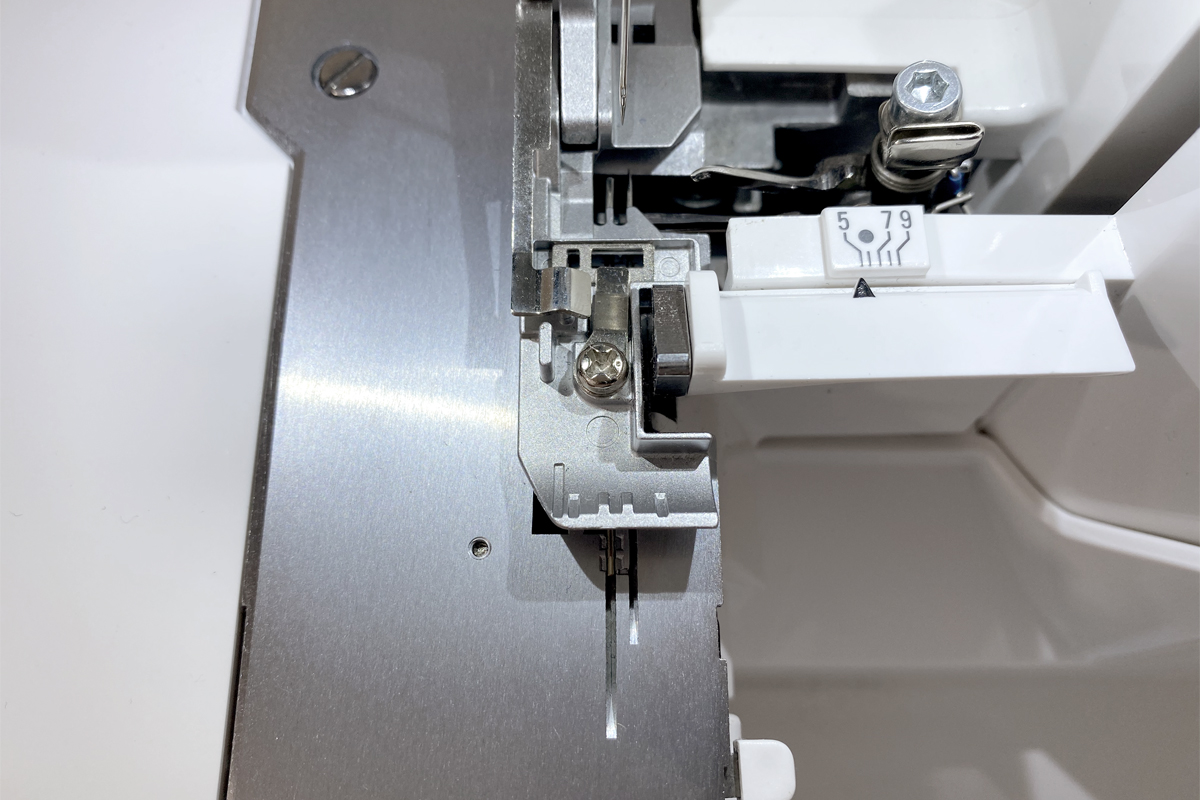
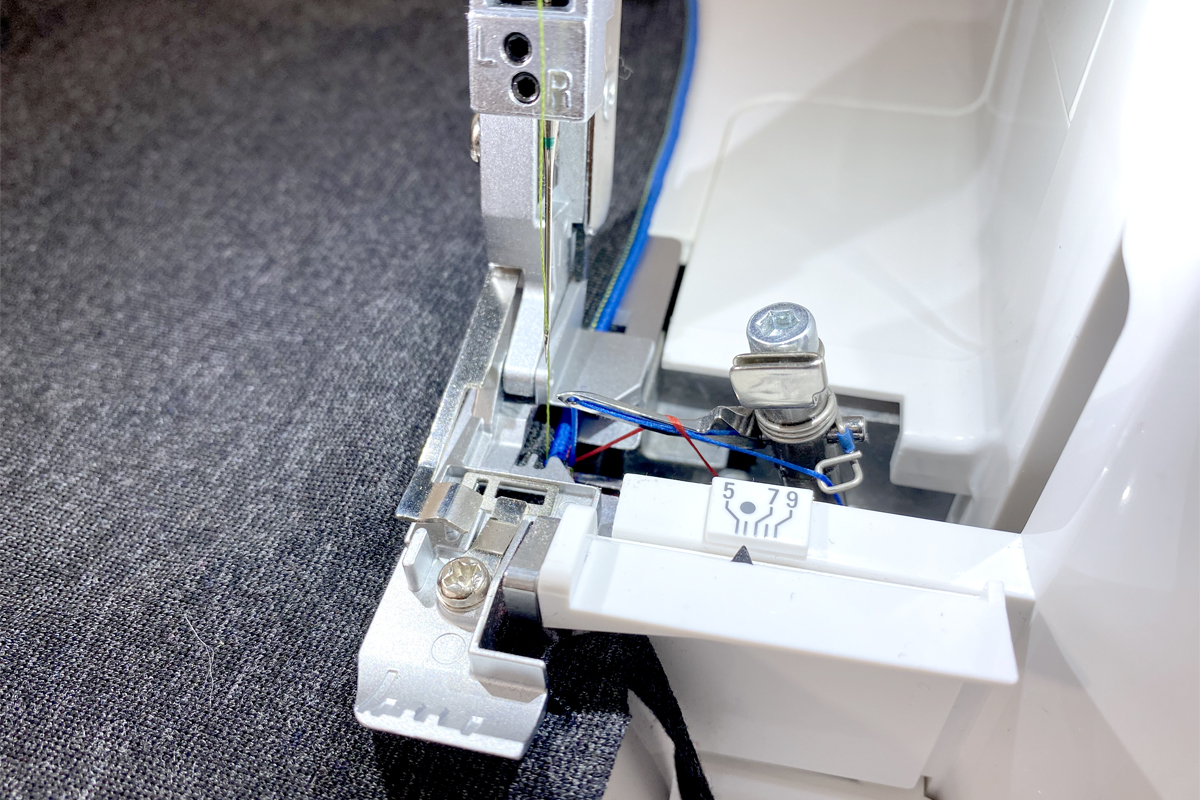
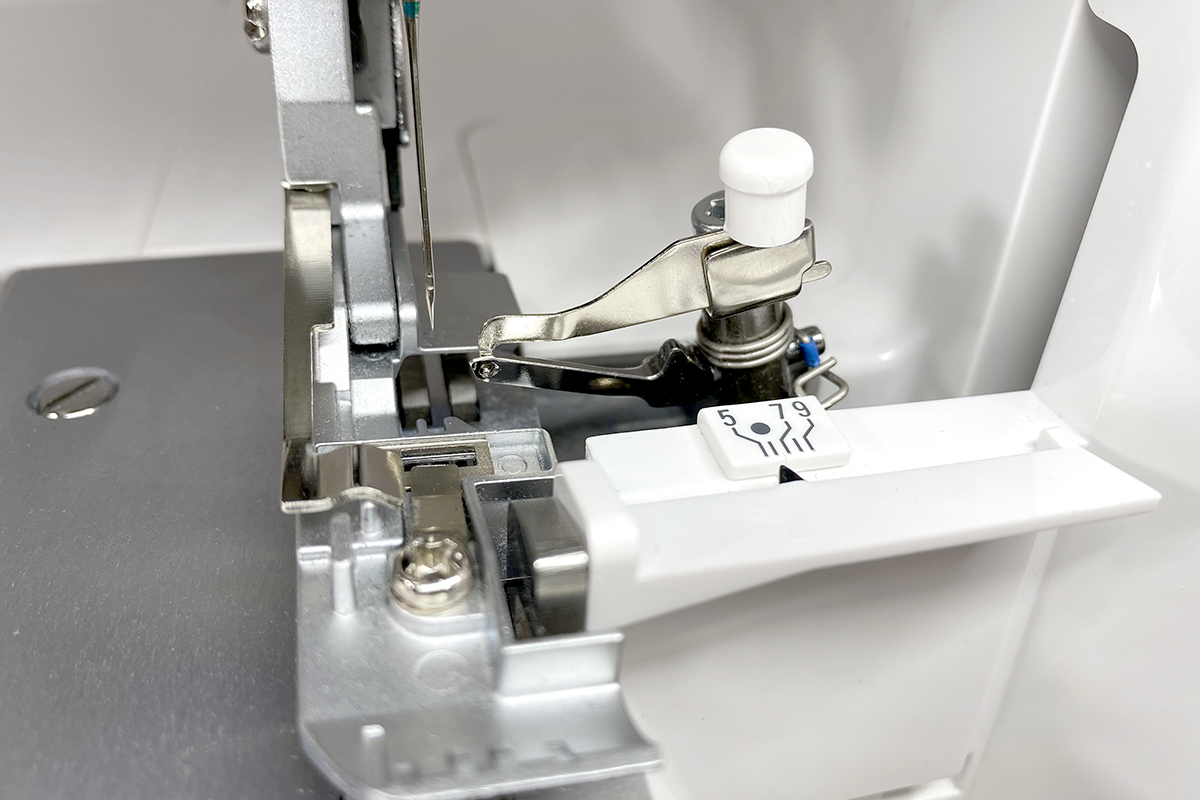
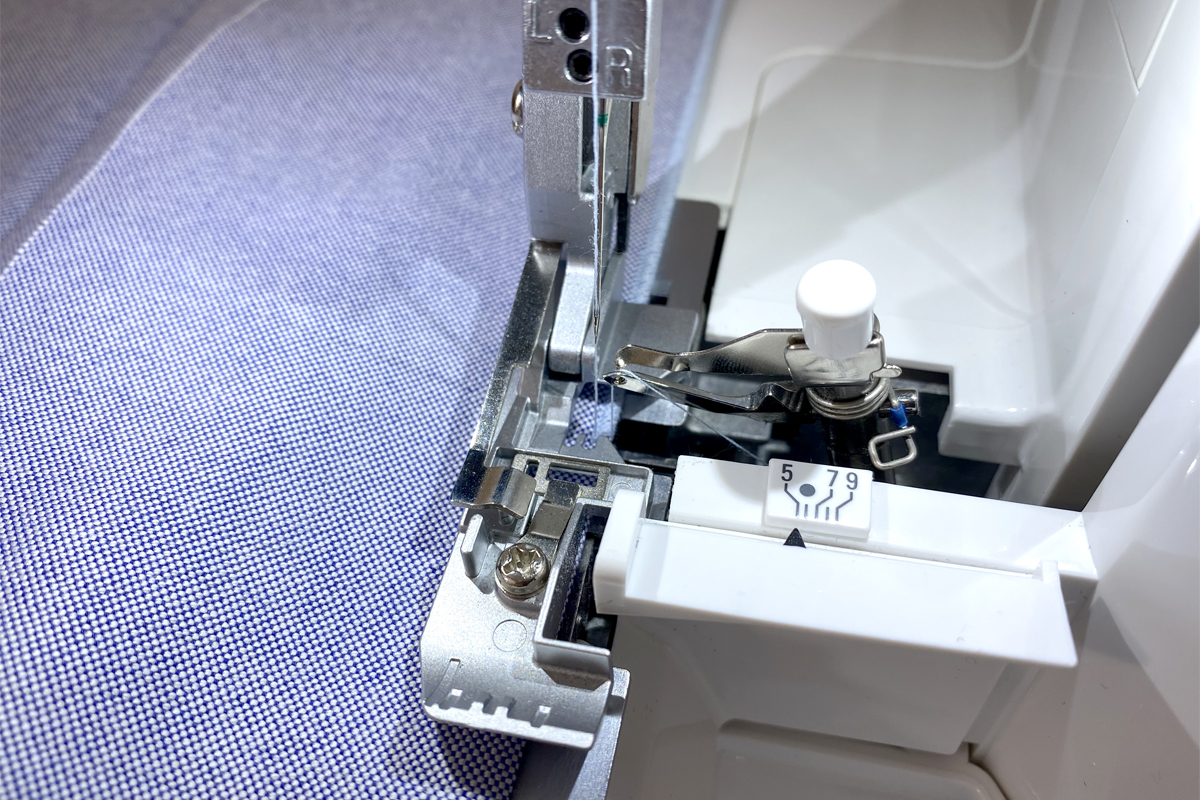
But this time, we’re really leaning into that folding. To do that, we’re going to completely pull back that stitch finger. On the machine, locate the Rolled Hem Selection Lever. Pull it all the way toward you. You will see the stitch finger pull back and out of the way of the needle area.
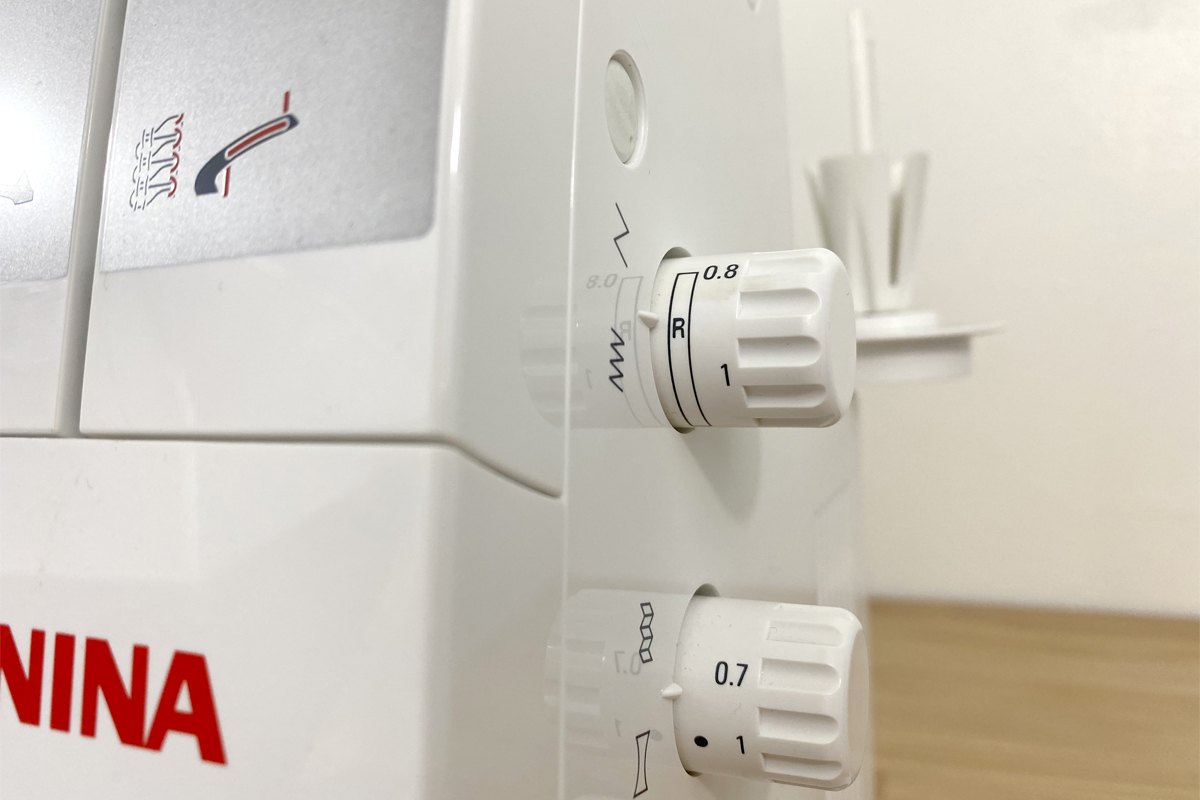
Another adjustment on this stitch to be aware of is the stitch length. The smooth, dense finish is created by a very short stitch length. On your stitch length dial, the rolled hem range is indicated by an R.
Less is (Sometimes) More
The rolled hem stitch can be sewn as either a three- or two-thread stitch. Because this stitch isn’t used for seams, you may be wondering what the difference is since we’re not relying on those threads for strength. The two things to consider here are: 1) your choice of fabric, and 2) your choice of thread.
For fine and lightweight fabrics, a two-thread hem will stitch beautifully. Because lighter fabric has less bulk when folded (or rolled) over, two threads should create just enough tension to create a smooth edge. Your thread choice may reflect this as well. You can use a finer thread on lightweight fabrics and end up with a clean result.
Medium to heavy weight fabrics will perform better with a three-thread rolled hem. Because there is additional bulk, the addition of a third thread will create more tension to fold and wrap the raw edge. Mid or heavy weight fabrics will also hold up to bulkier threads better than a lightweight fabric would.
Setting Up the Stitch
First, let’s start with a three-thread rolled hem. You will thread both loopers as well as the right needle, being sure to remove the left needle and tighten the needle screw in that slot. You should be getting pretty comfortable threading your machine by now!
Get your machine set to the following settings:
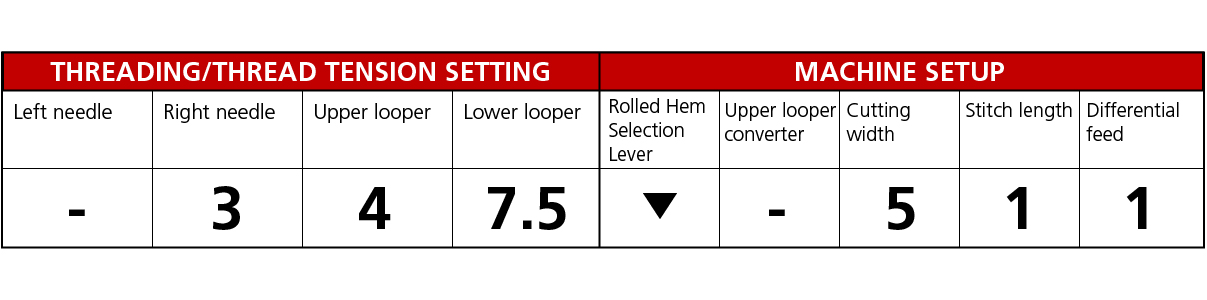
Pay careful attention to the Rolled Hem Selection Lever as well as the stitch length. These aren’t settings we have adjusted too much up until this point but they’re crucial here.
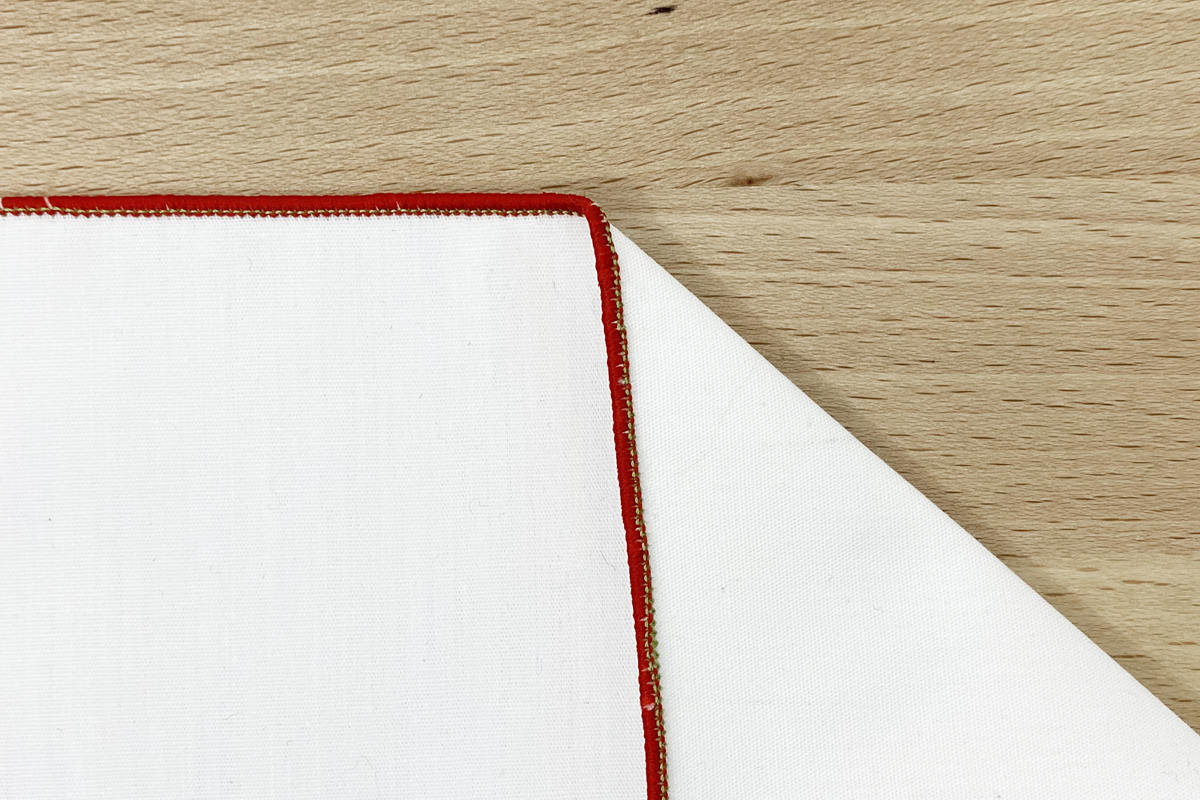
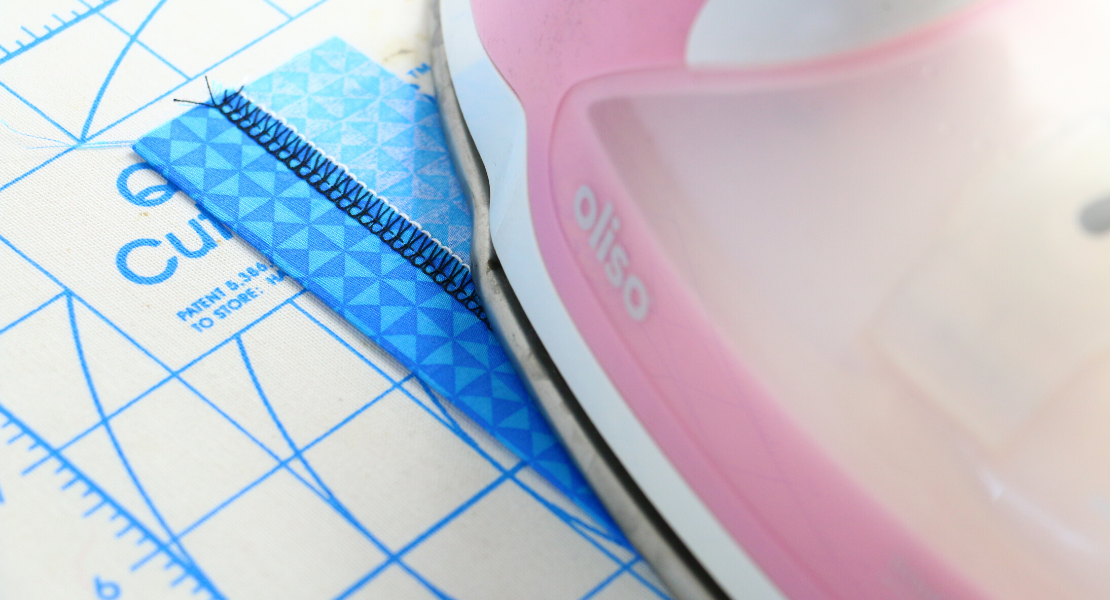
On a medium-weight fabric (like a quilting cotton or linen), stitch down the edge. Because the stitch length is so short, this will be a much slower process than previous stitches. Allow the feed dogs to move the fabric through the machine without pushing or pulling manually.
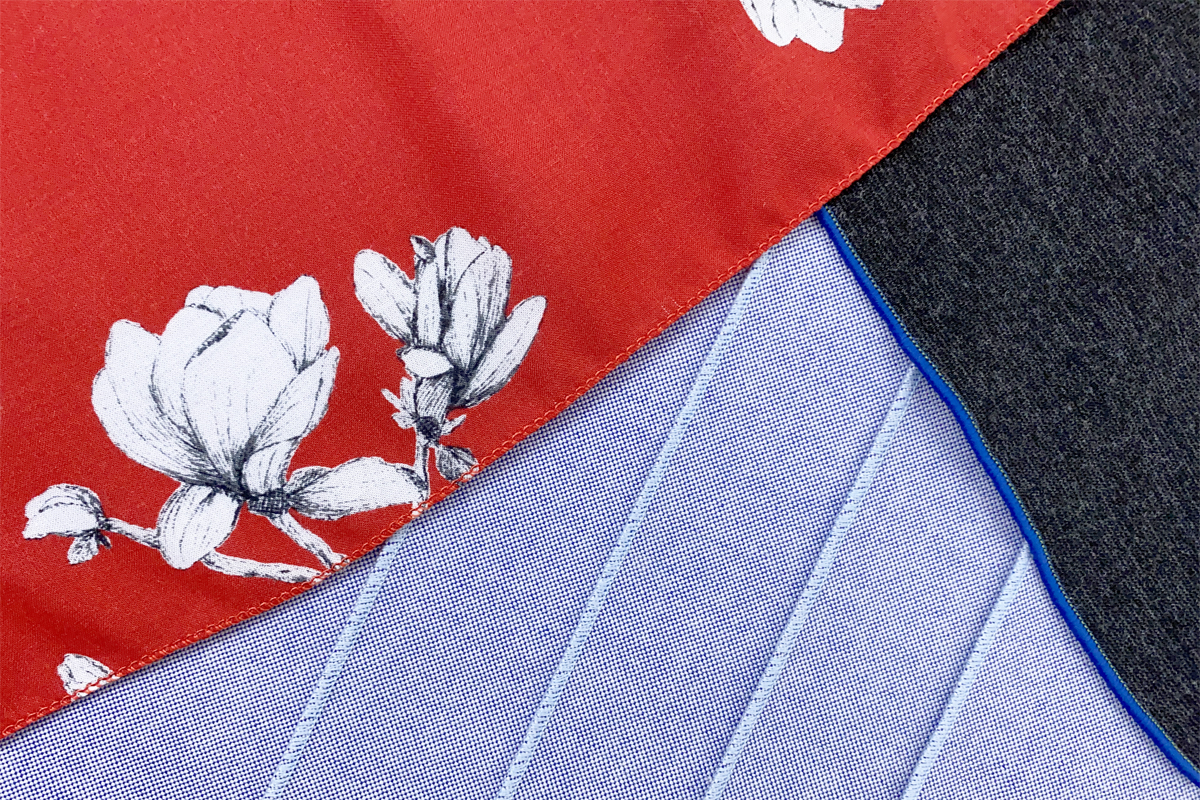
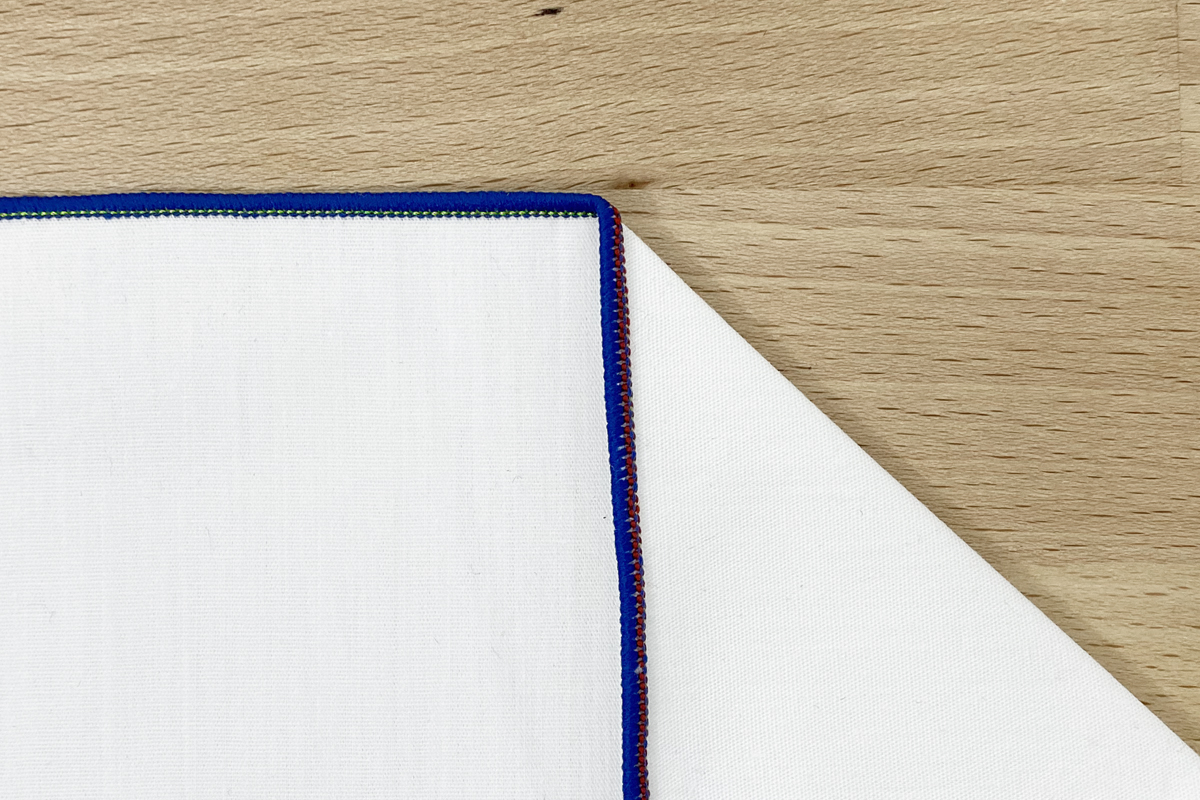
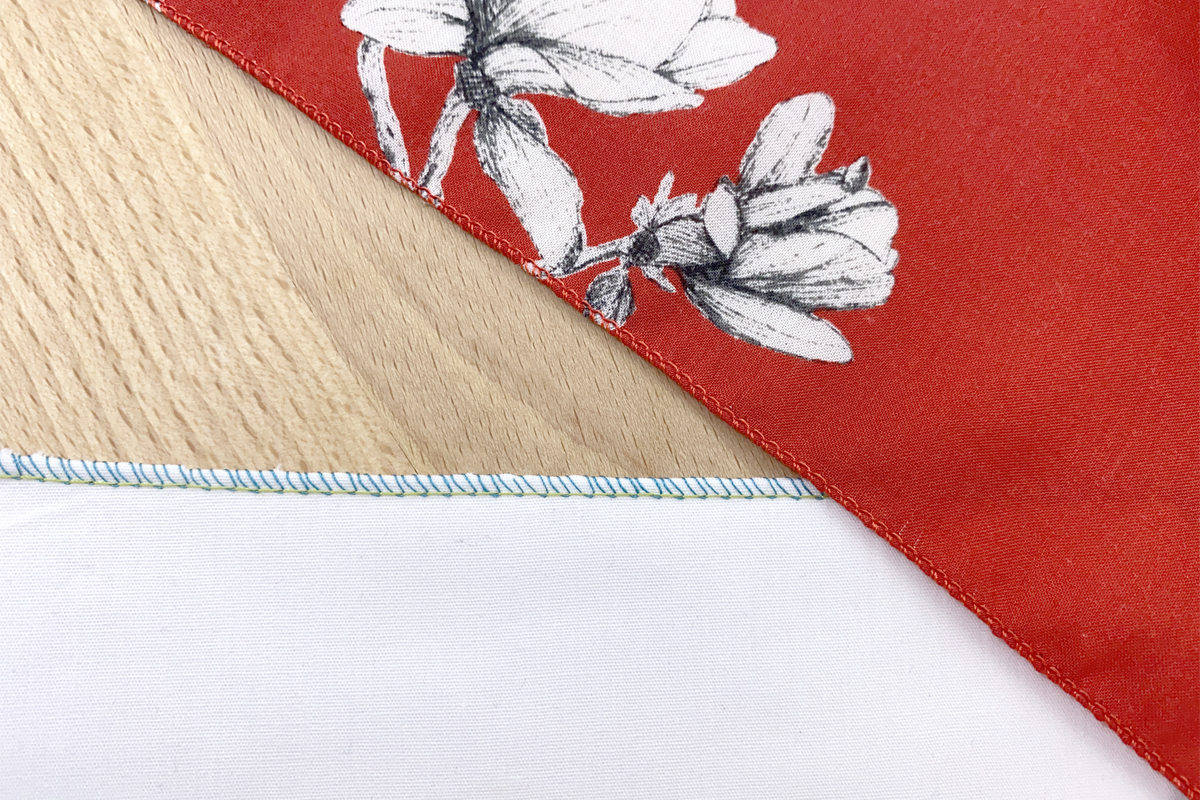
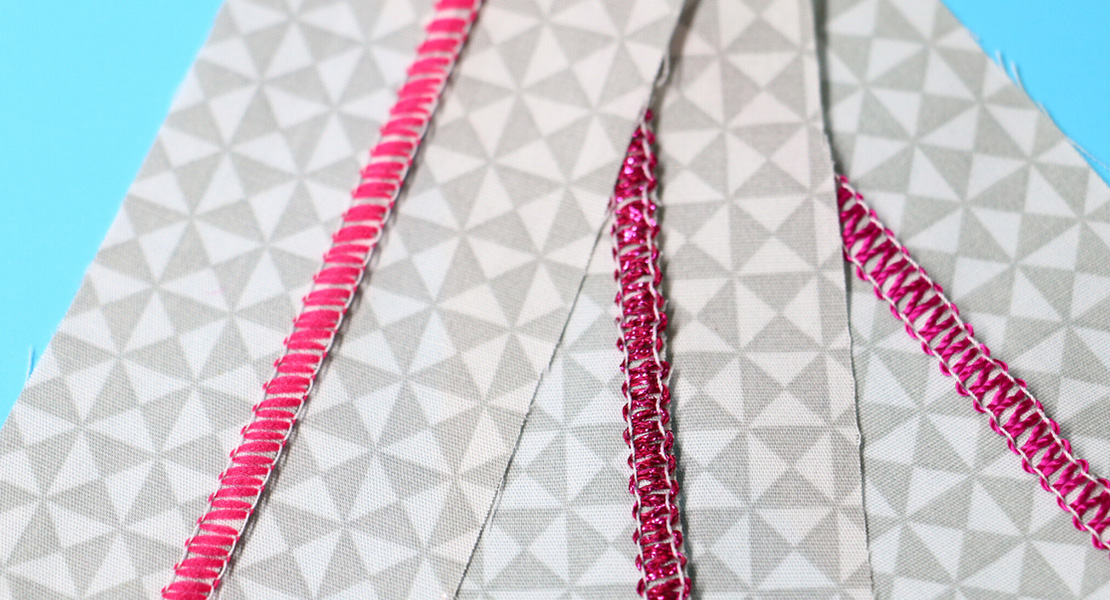
Now look at your stitch closely. On the right side, we can see a fine line from our needle thread where the upper looper thread dips into the fabric. On the back side, we can see another fine line from our lower looper thread pulling the upper looper thread around the edge.
Now let’s try the two-thread version. This time, we only need to thread the right needle and lower looper. Set your machine as follows:
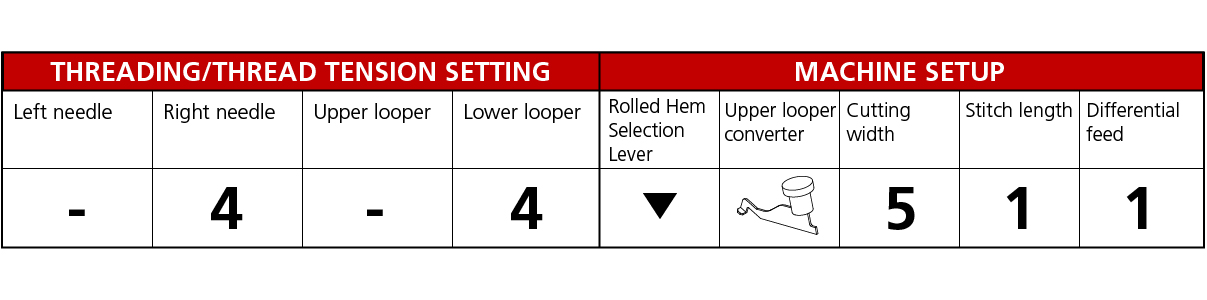
Notice here that since we aren’t using the upper looper, we need to install the upper looper converter (ULC). This is a tiny piece that stores in the looper door when the machine is opened up. Slide the blunt end of the ULC into the groove at the top of the looper.
Then, give the pointed end a careful pull around the back side of the looper to hook through the looper eye.
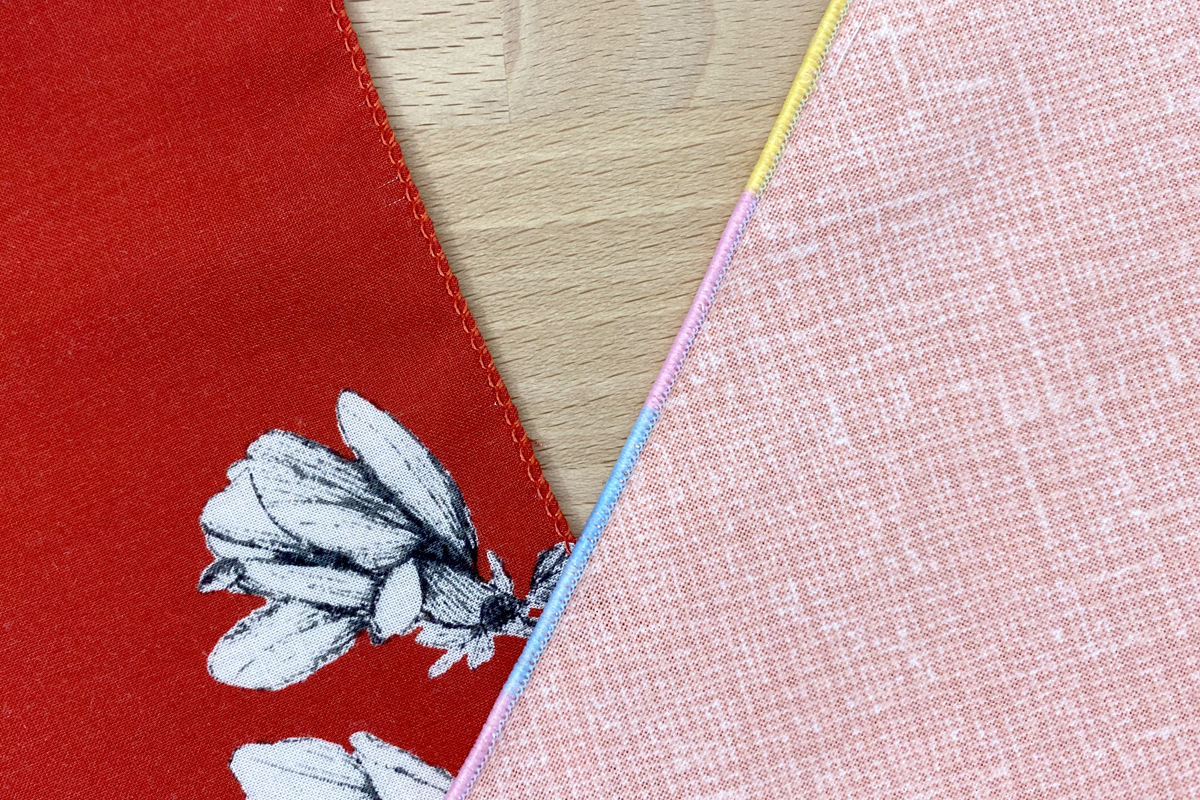
On a lightweight fabric (like a cotton lawn or rayon), stitch down the edge. Again, be sure not to pull fabric through the machine. Delicate fabrics will be much more sensitive to stress on this stitch.
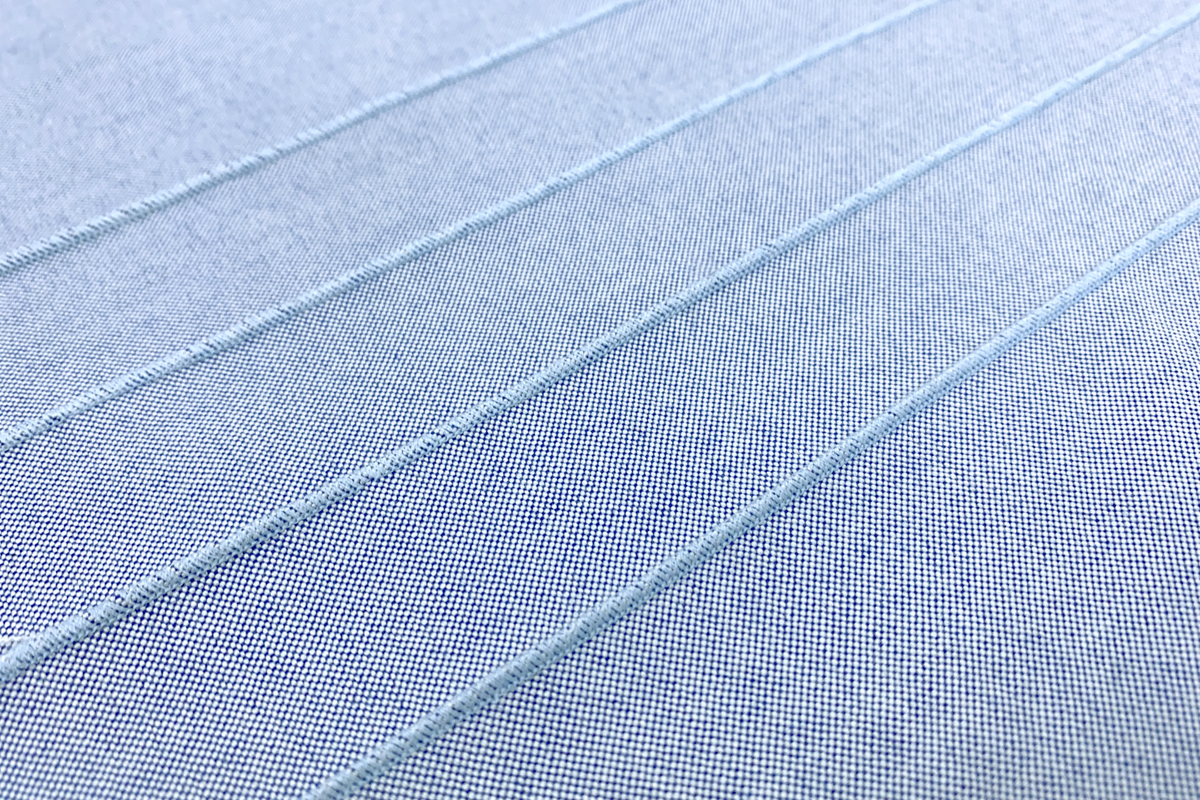
Inspecting this stitch, we can just see the fine line from our needle thread on either side but the focus is on the looper thread.
What a Difference a Thread Makes
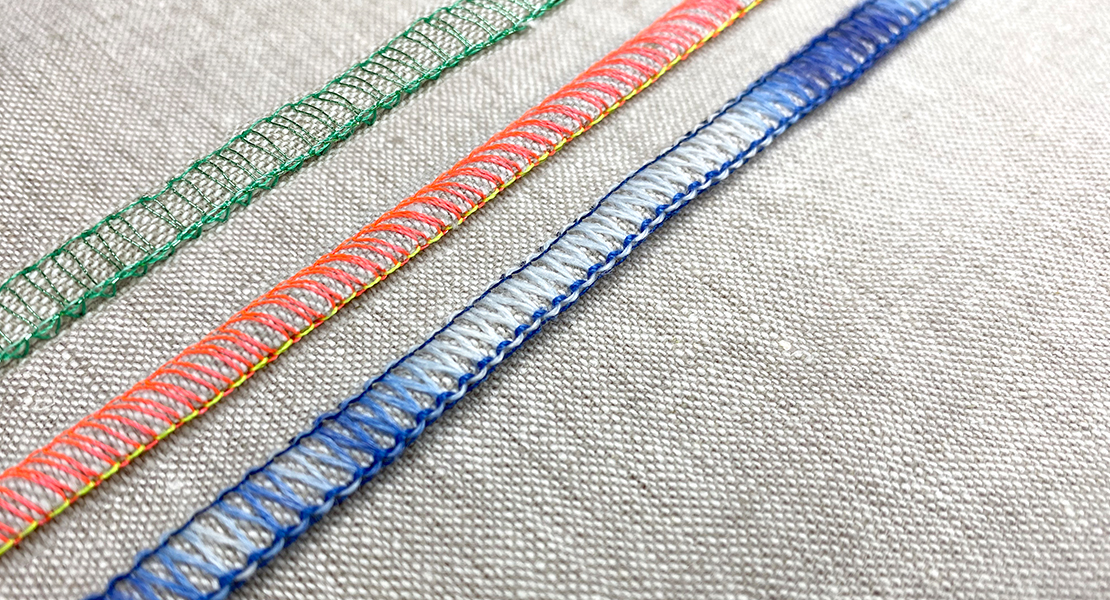
As I mentioned earlier, this stitch is a great time to employ your woolly nylon threads. The fluffiness of this thread results in a smooth and uniform-looking edge.

Other decorative threads can also be used in this to create different, unique trims. Heavier threads (30 to 12 weight) can create a more textured edge. Metallic threads can create their own sparkly look here as well. If you have a decorative thread that you really want to showcase, a rolled hem is a great opportunity for it.
As always, be sure to use the right size needle for your threads and test sew on a scrap before stitching on your project. Thicker threads may warrant a slightly longer stitch length to keep the bulkiness from bunching up under the presser foot.
Let’s Try Something a Little Different
A decorative take on this stitch is one you’ve probably seen before but couldn’t identify—that’s the lettuce edge. This wavy, frilly edge is used a lot on feminine kid’s clothes. It adds a cute flounce to hems and works best on knit fabrics.
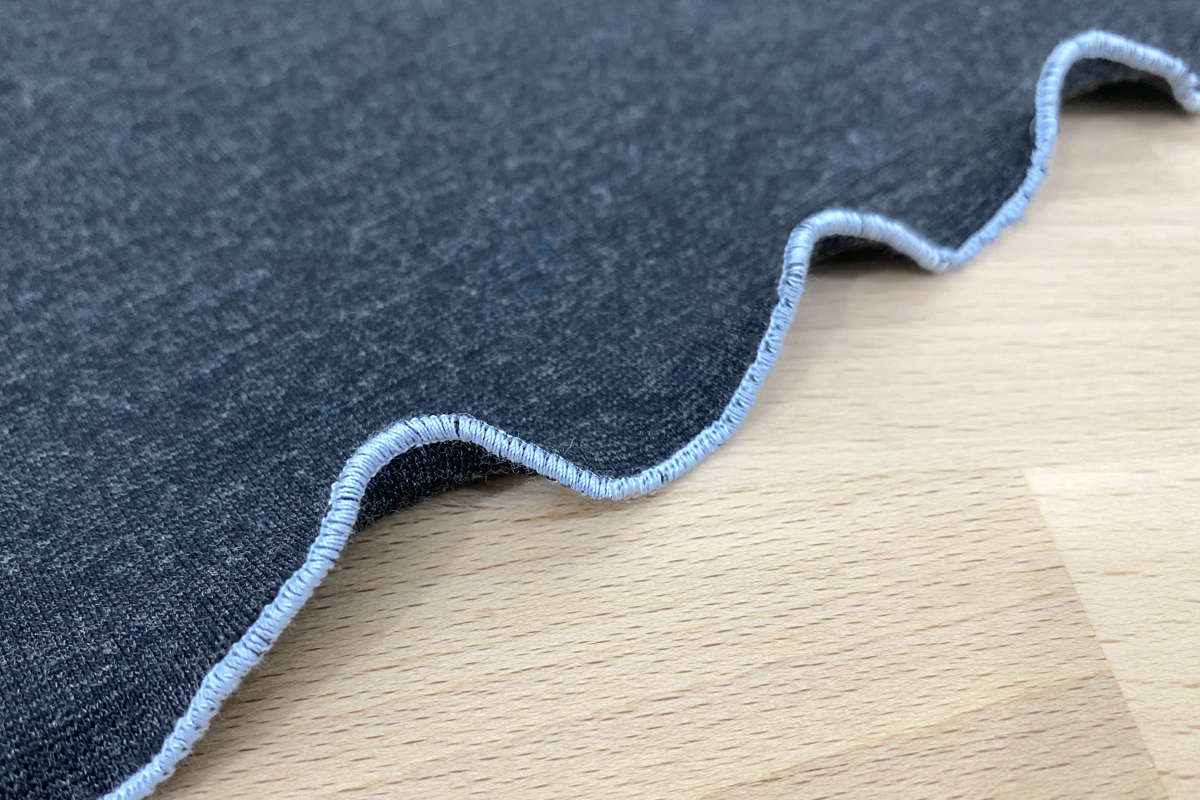
This finish is created by decreasing differential feed to stretch the fabric out as it stitches. You can also add more structure and stability to this stitch by inserting fishing line through the tape guide on the standard overlocker presser foot.
Alternatively, using setting differential feed for a flat finish, use the tape guide to insert fine wire into the seam can help you create wire edged ribbon. BERNINA’s Overlock Specialist Jaime David has a fantastic video and tutorial for that project over here.
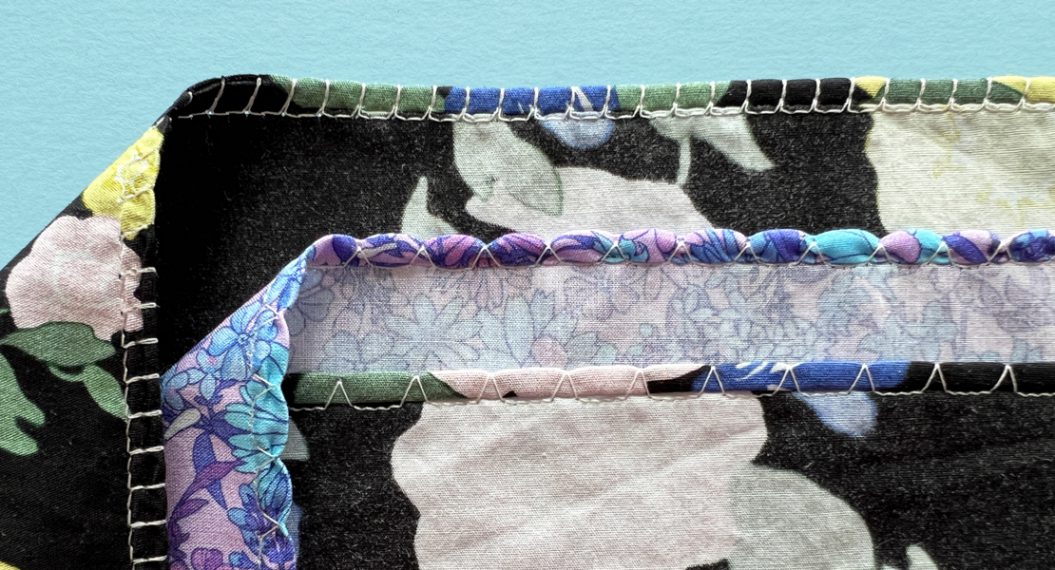
With the help of a blindstitch foot, the rolled hem stitch can be used to create pintucks in your fabric. The trick here is to fold and press the lines for your pintucks into the yardage and then stitch down the folds with the knife on the overlocker lowered (leaving the fold intact).
Your pintucks will stitch smooth and straight with the help of the blindstitch foot. Like the presser foot for your domestic machine, the overlocker Blindstitch Foot has a guide for you to align your fabric, ensuring smooth, straight lines of stitching.
The last variation I want to show you is technically a different stitch but it is set up very similarly to the rolled hem and is used in similar circumstances. The picot stitch creates a much more delicate hemmed edge and is often used on fabrics like silk and chiffon in bridal and lingerie. It stitches out much like a typical rolled hem, but with a longer stitch length (about 2.5 mm) so as not to densely pack threads around the raw edge.
Tips for Smooth Edges
I will leave you with a few tips for stitching out beautiful, smooth rolled hems:
- For neat rolled hems in the round (i.e. on a shirt or skirt hem), stitch the rolled hem before constructing side seams. Stitching in the round can leave you with uneven hems and it can be tricky to start and stop your seam neatly.
- Start your rolled hem edge with the fabric underneath the presser foot, or even a tiny bit (1/8”) behind the needle. These small stitches can be tricky to get moving at first and if the fabric doesn’t have good contact with the feed dogs from the very beginning, you’ll end up with bulky lumps of thread where the fabric can’t move smoothly, which in turn, causes the stitches in stitch in place—not so pretty.
- Remember Differential Feed. Because the stitch length on a rolled hem is so short, it tends to stretch fabric out and can lead to wavy edges where you might not want them. If your edge waving out and not lying flat, increase differential feed. For a refresher on how differential feed works, revisit Jaime’s post here.
- For a little extra finesse to your hems, you’ll find you have better results stitching a rolled hem on bias edges. The grain of the fabric will be more willing to fold and curl under smoothly when it’s cut on the bias. We know this with binding, of course it applies here as well! Keep in mind, however, that bias edges do mean stretchier edges. Pay extra close attention to differential feed here.
Overlocker/Serger for Beginners Series
Part 1: Overlocker for Beginners—An Introduction to Sergers
Part 2: Overlocker for Beginners—The Essential Overlock Stitch
Part 3: Overlocker for Beginners—The Flatlock Stitch
Part 4: Overlocker for Beginners—Fast Finishing with Rolled Hems
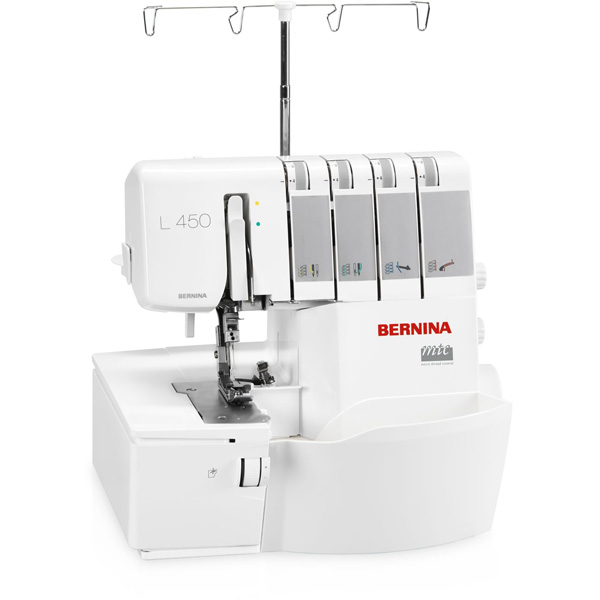
Used Products

What you might also like


One comment on “Overlocker For Beginners—Fast Finishing with Rolled Hems”
Leave a Reply
You must be logged in to post a comment.

Is this the only way to finish silk chiffon? Thank you.