How to Sew a Neck Gaiter
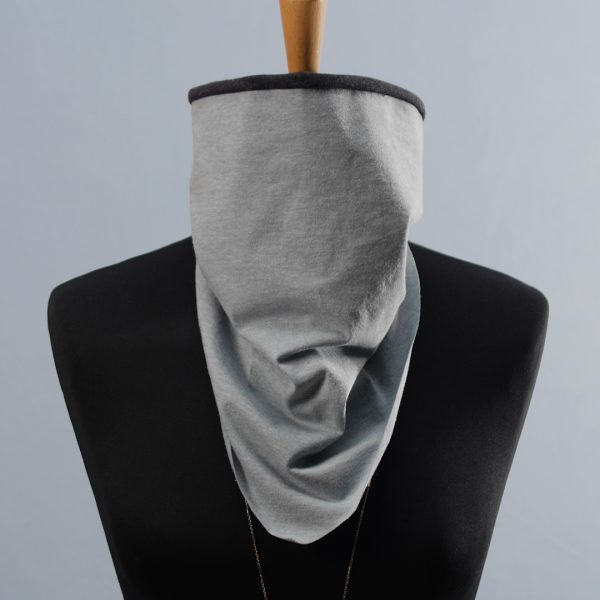
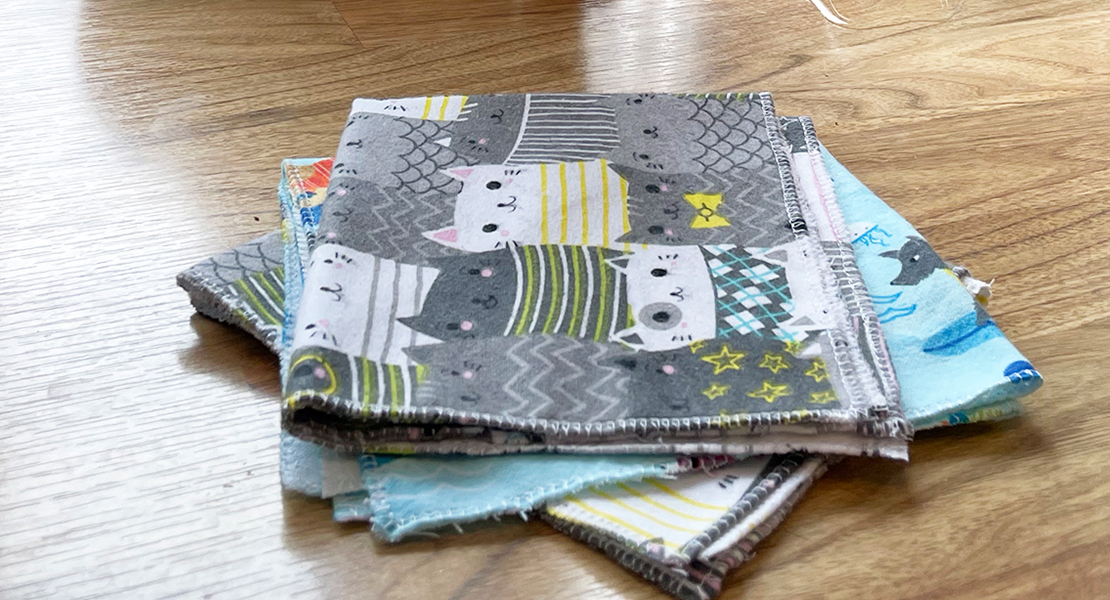
This bandana-style neck gaiter is a super fast and easy-to-make project on an overlocker. Wear it in your hair or as a cowl. It’s a great upcycle project, too.
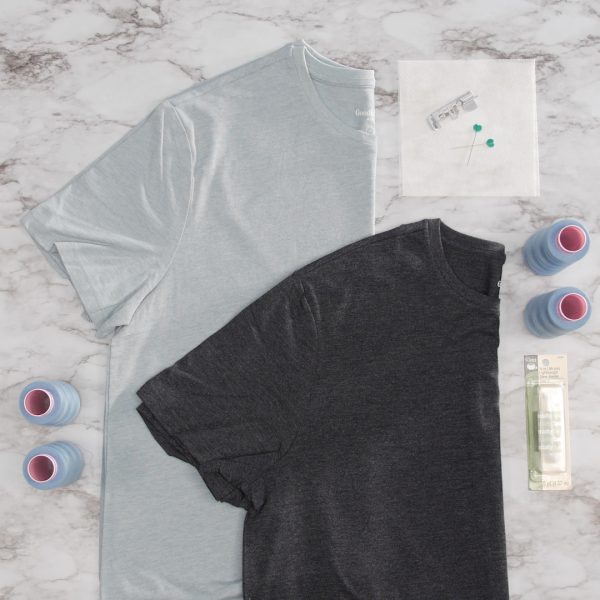
Materials to Sew a Neck Gaiter
- BERNINA L 460 Overlocker
- Seracor Serger Thread (4 spools)
- (2) T-Shirts
- Filter material 6” x 6”
- Flathead Pins
- Clear Elastic
- Downloadable Pattern

Steps to Sew a Neck Gaiter
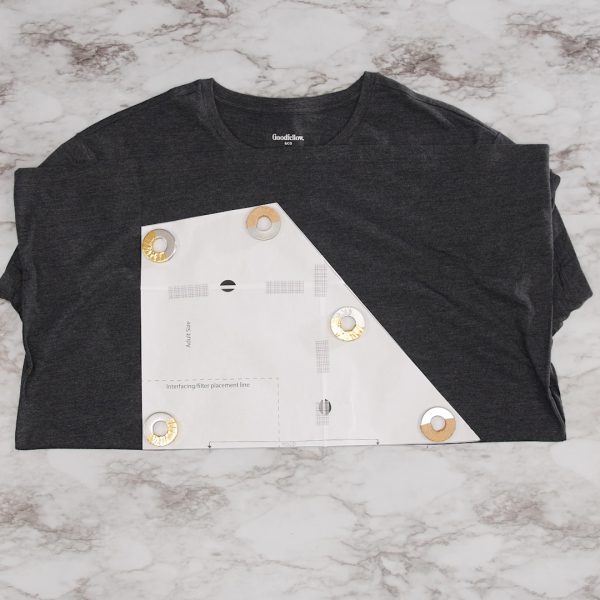
Step 1. Cut Out T-shirts
Print and tape the pattern pieces together. Cut t-shirts along a folded edge to yield two full bandanas. You can get a front and back from one large shirt—or you can make these in pairs. Grainline doesn’t really matter too much as long as you are using a knit material and it will stretch in the direction of the circumference.
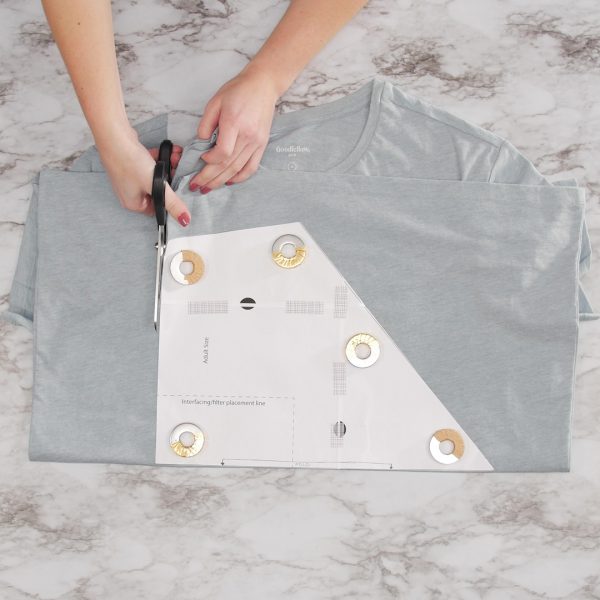
Repeat for shirt two.
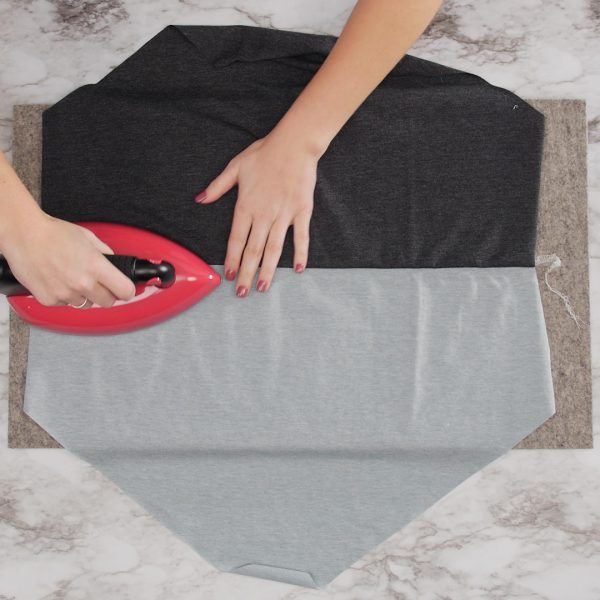
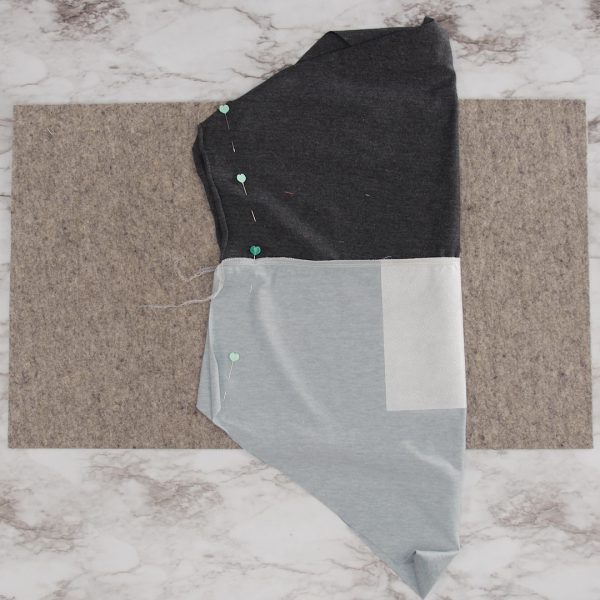
Step 2. Prepare the Fabric
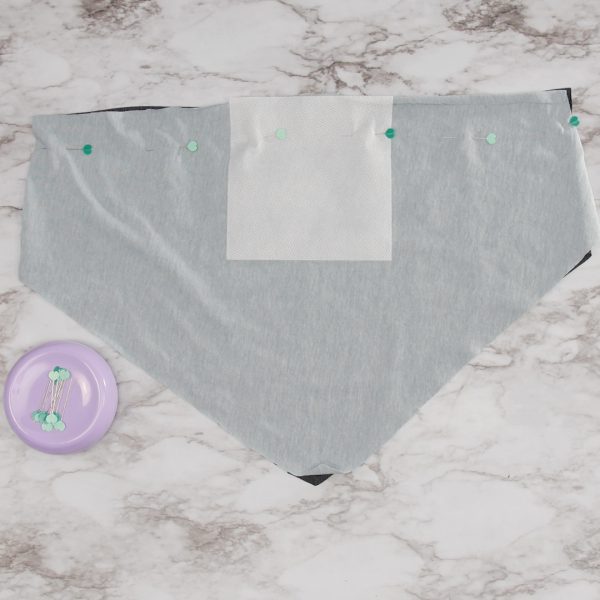
Place the fabrics RST (Right Sides Together) and pin with flathead flower pins parallel to the top edge about 1 ½” from the top edge. Center the filter material and pin it on top of the fabric.
Step 3. Setup the Overlocker
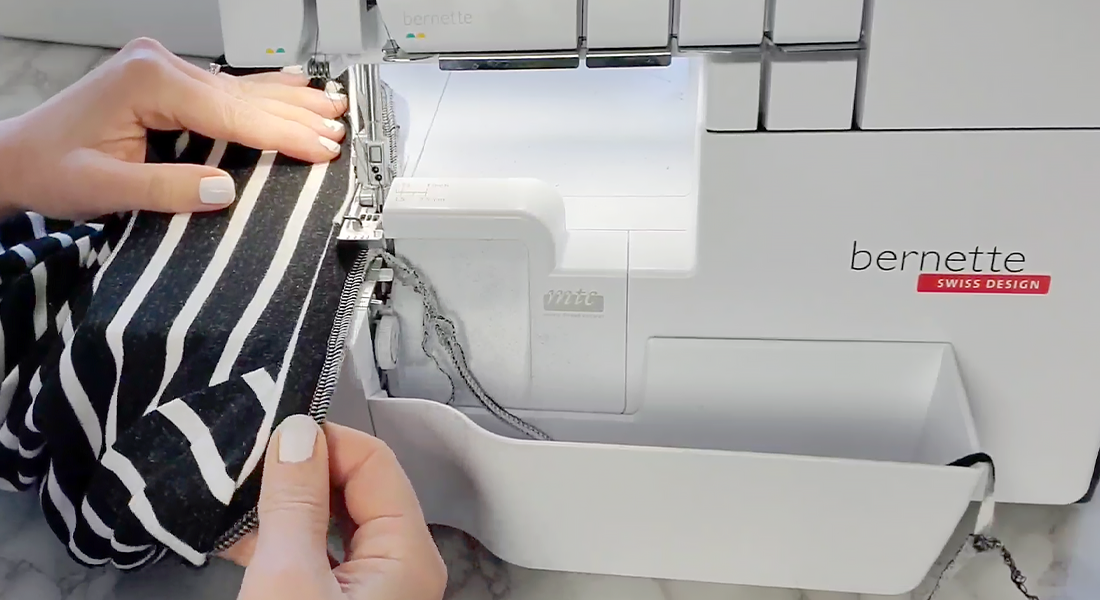
The standard presser foot on the L 460 has a built-in tape guide that can be used to help guide narrow elastic or twill tape into seams. This is a great way to insert some elastic into this seam while sewing the neck gaiter together.
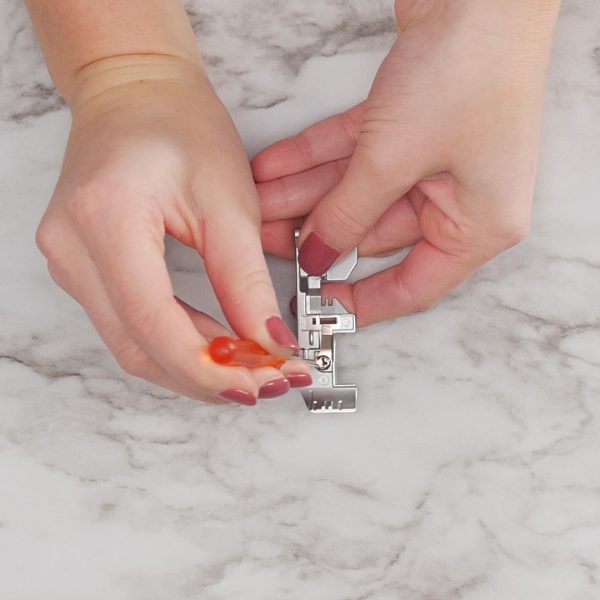
With the standard foot off of the machine, use the screwdriver and tweezers to remove the metal guide in the tape guide. This will allow for maximum width needed to accommodate clear elastic. Next, place the clear elastic into the guide of the foot before adding the foot onto the machine. Trust me, it’s easier to do this part when the foot is in your hand. Attach the foot onto the machine and begin with a tail of elastic extending behind the presser foot.
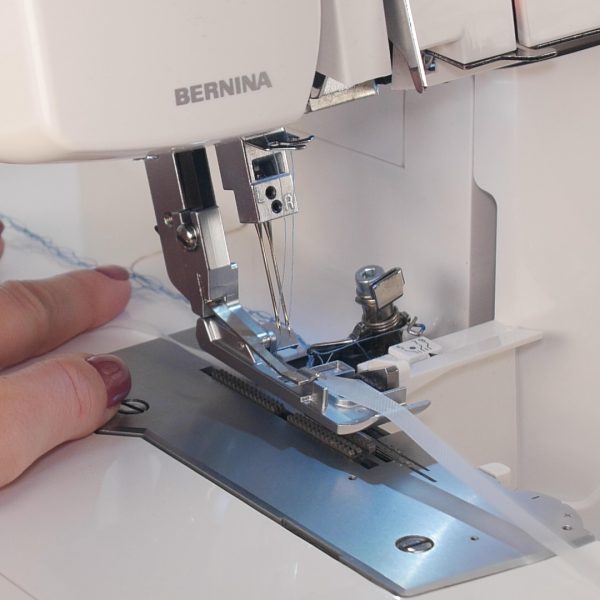
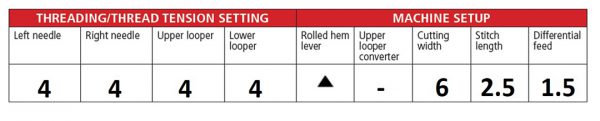
Set the machine for a 4-thread overlock. Test this on scrap fabric to ensure it is a balanced stitch and adjust differential feed if needed. Here is a post to learn more about that.
Step 4. Sew the Top Edge
Sew the top edge of the fabrics together, adding elastic into the seam as you go. This is so smooth and easy on the overlocker. The added stretch and strength of the elastic will make an effective and comfortable face covering. The flathead pins can stay in place as you sew—as long as they are positioned to the left of the presser foot. Once you have the seam in place, remove the pins. Remove the elastic from the presser foot. Give the seam a nice press.

Step 5. Sew the Side Seam
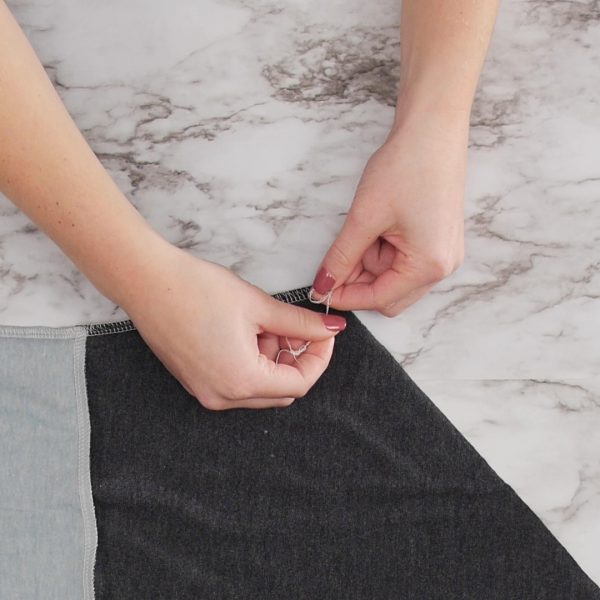
One last seam and you will be finished. With the fabric wrong side out, fold the right sides together along and pin the side seam together. I press the sewn top seam down and clip it together—so I can watch this seam as I sew it. Using the 4-thread overlock sew the side seam. Tie off the thread tails and trim. There is no need to worry about the raw edges of the t-shirt fabric as jersey knit will not fray.
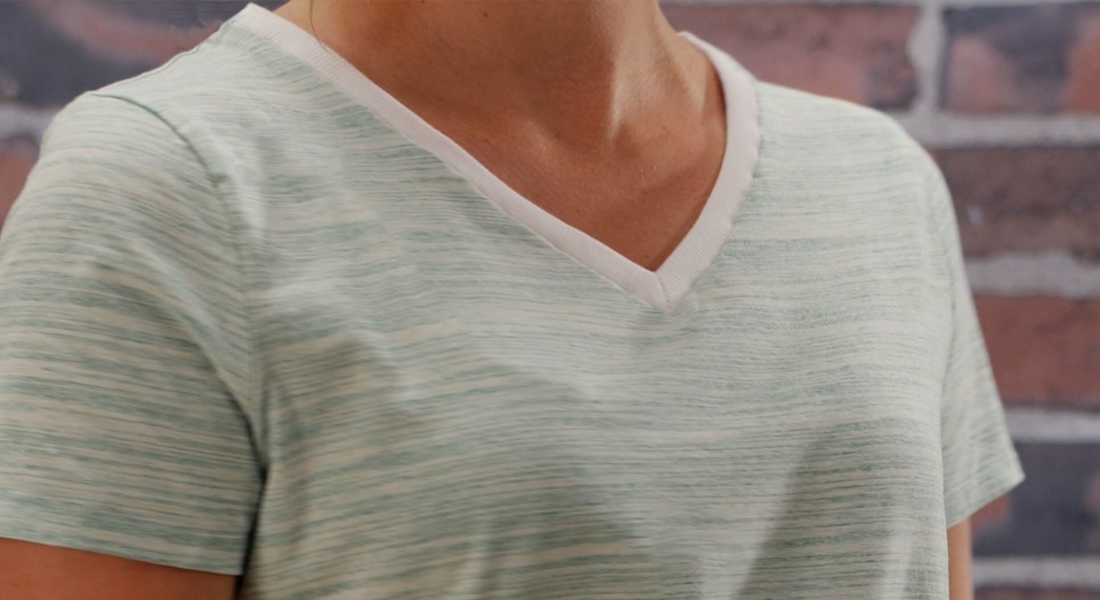
Now you have a versatile double layer bandana-style neck gaiter that you can pull up/down to wear as a cowl or in your hair.


I am a newbie to serging, but definitely want to make this. Any chance you can share a pattern/tutorial for a fleece hat?