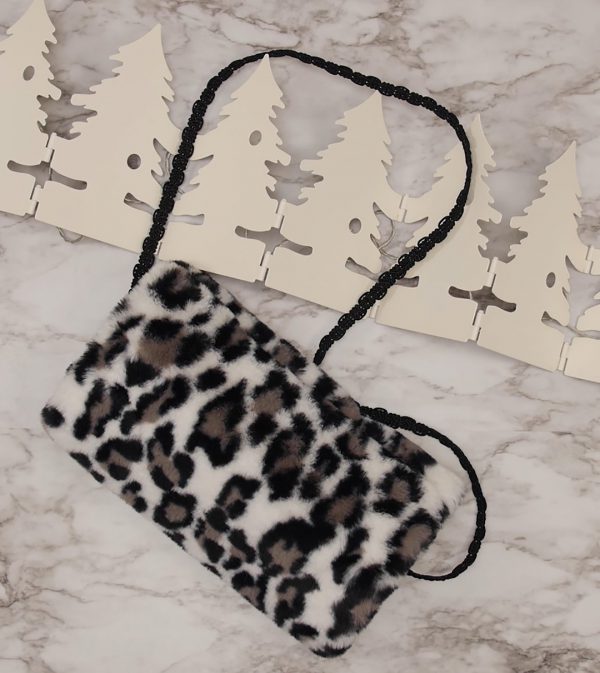
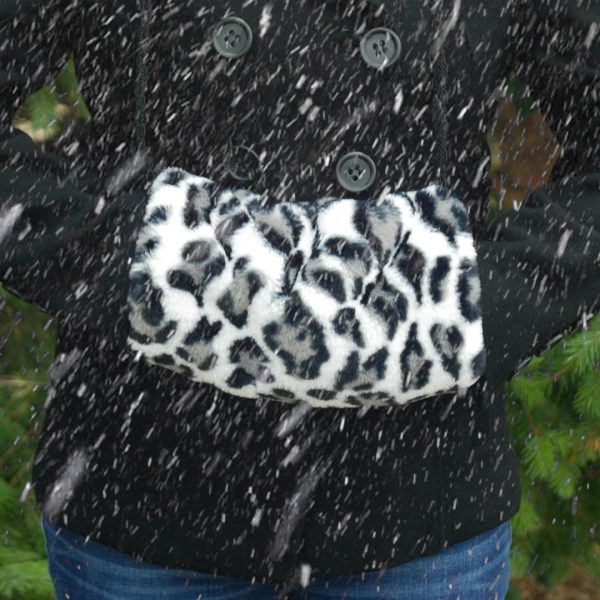
How to Sew a Hand Muff
Once again winter is upon us here in the Chicago area which means time to prep our warm clothing and accessories for a few months of snowy weather. Anything that I can make to keep me warm and happy during this time of possible -50 degree weather, is always a bonus.
Materials to Sew a Hand Muff
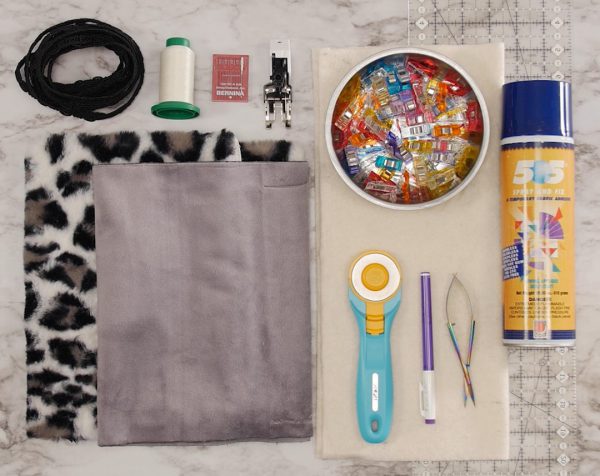
- BERNINA 770 QE PLUS
- Polyester Thread
- Jersey/Ballpoint Needle Size 80/12
- BERNINA Three-Sole Walking Foot with Seam Guide #50
- Wonder Clips by Clover
- Fabric Marking Pen
- Rotary Cutter
- 505 Spray Adhesive
- 6” x 24” Ruler
- Scissors
- Fabric
- Shannon Fabrics Luxe Cuddle® Seal Leopard White: 13” x15”
- Pay close attention to this cut if your fur is directional
- Shannon Fabrics Solid Cuddle® 3 Ash Lining: 10” x15”
- Batting Scrap: 13” x14”
- Cording: 42” (Cut to comfortable length of the person who will wear the muff)
Steps to Sew a Hand Muff
Step 1: Cut Out Fabrics
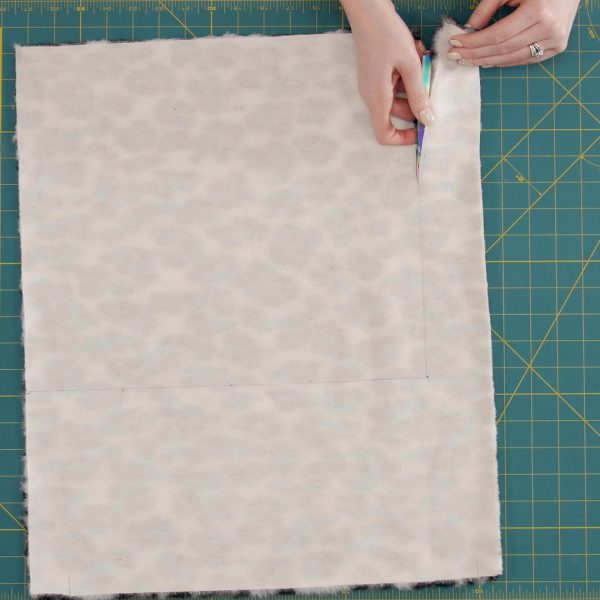
Shannon Fabrics Luxe Cuddle® Seal Leopard White: 13” x15”
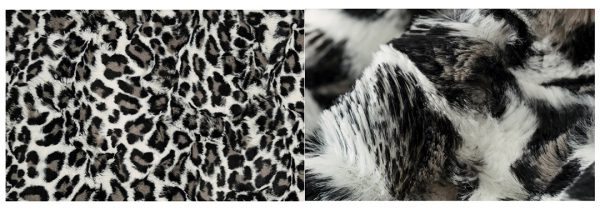
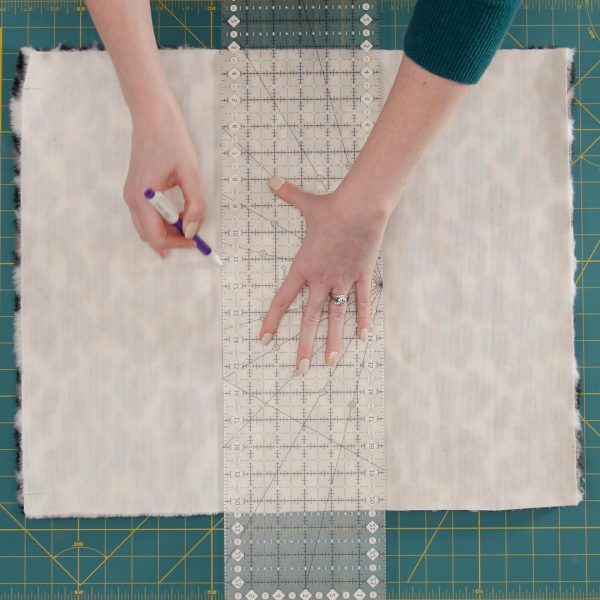
If your fur has a direction, make note that you should make the 15” sides run with the direction of the fur/pattern. When it comes to cutting fur, there is no exact way you’re going to get through this without getting a bit messy, but that’s ok! There’s nothing a lint roller or vacuum cleaner can’t handle.
My preferred method of cutting fur is to use tiny snips, that I can get the blade right next to the woven back and make little snips along the marked line. Gently pull the fur apart where you have cut and gather up any little fur pieces.
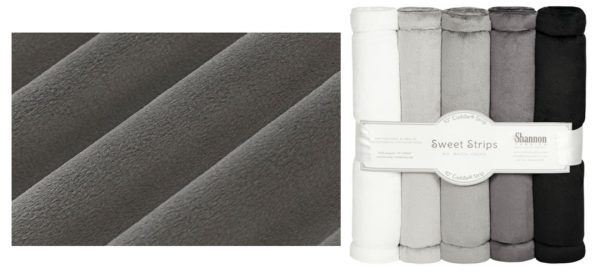
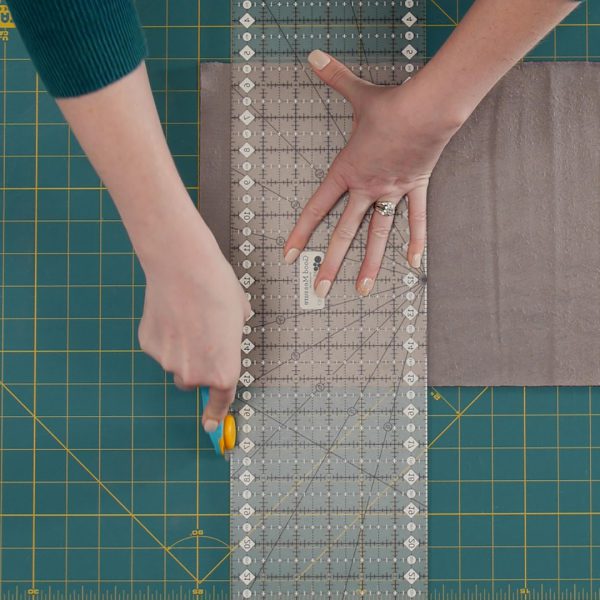
Shannon Fabrics Solid Cuddle® 3 Ash Lining: 10” x 15”
This pack of five Cuddle Strips is fabulous since we only have to make one cut. They come precut to 10” x 60”. This Cuddle you can cut with a rotary cutter and a ruler. There is minimal fuzz leftover from cutting.
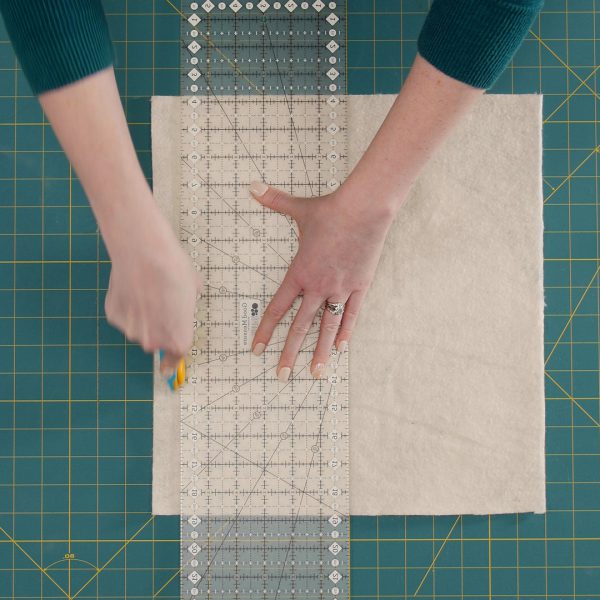
Batting for warmth and fullness: 13” x 14”
Batting is optional, but it does give the muff a bit more shape when hanging and in general appearance. I just used a piece of batting leftover from a previous quilting project. You can also use fluffier batting, like Poly-Fil Low Loft batting. This will make your muff have more structure.
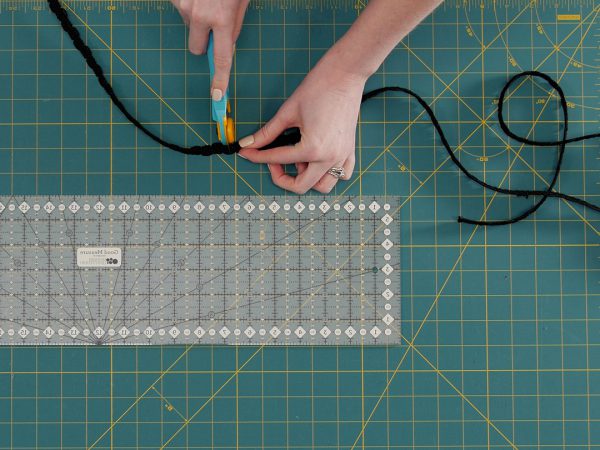
Cording: cut to 42”
I wanted a fun cording for the muff, so I ventured to the store and spent quite a few minutes finding something that I loved. I decided on a decorative black braided trim. To get the measurement I rested my hands comfortably in front of me as if my hands were in the muff already. Your hands might end up sitting just on top of your belly button. That length was for me 40”, add one inch on either side for sewing into the seam allowance, then cut the length at 42”.
Step 2. Assemble Layers
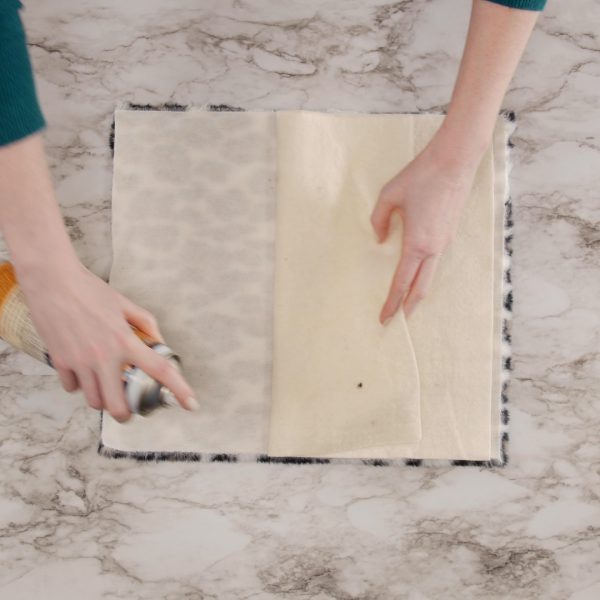
Gather your cut materials, 505 Adhesive Spray and Wonder Clips.
First, lay your fur right side down on your table, then take your batting and center it. Spray the batting with 505 and gently pat down the batting in place. Your batting should be 1/2″ short on two of the sides to lessen bulk for the final seam.
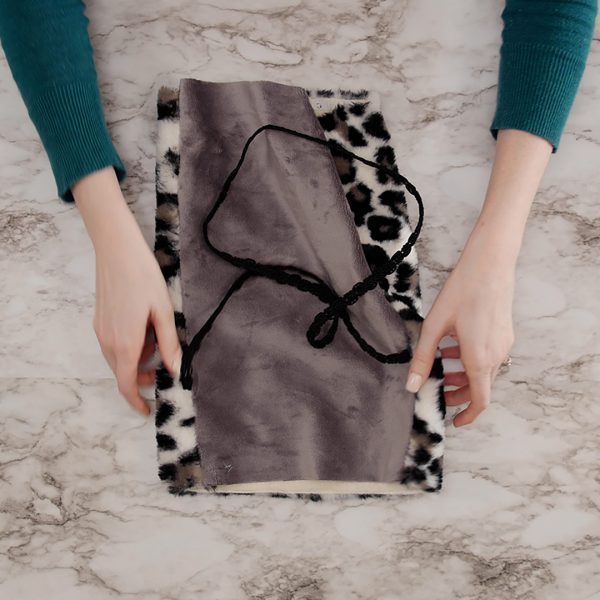
Now, turn over the layers so your fur faces right side up. Take your cording and measure 4” down from the 13” side and use a Wonder Clip to hold in place. Gather your cording and place it in the middle of your fur.
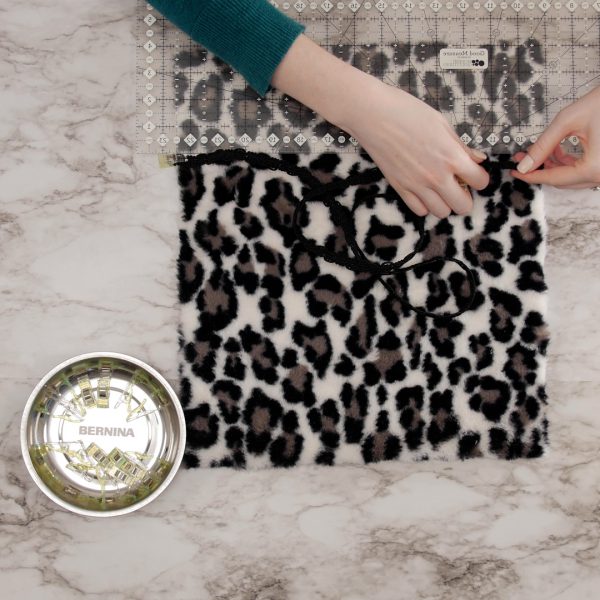
Next, place your ash gray lining fabric on, right sides together with the fur. Pin along one 15” side, remember when you get to your cording, unclip and re-clip all the layers and the cording at this point.
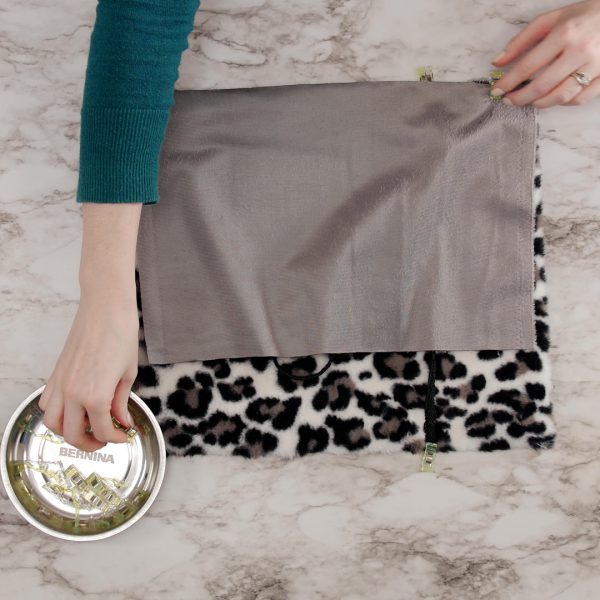
Clip the other 15” side, making sure to clip all the layers. Your fabric sandwich should now curl on your table.
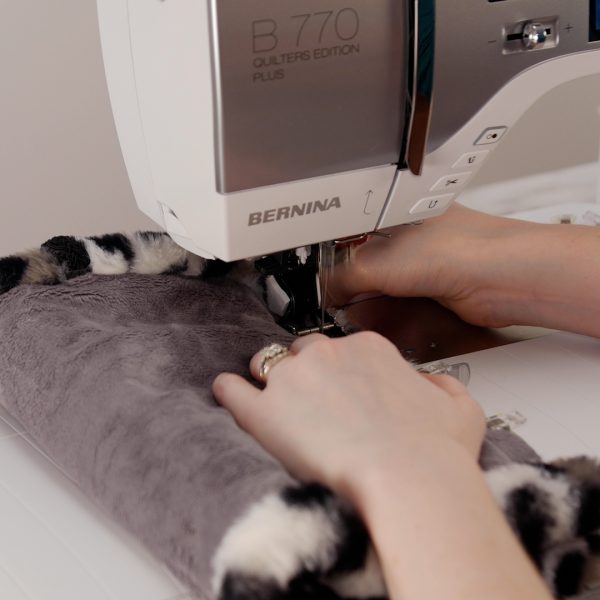
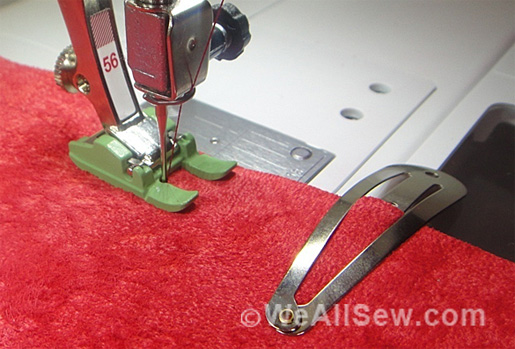
Step 3. Set Up Your Machine for Sewing
For sewing this warm hand muff, you will need to attach the Walking Foot #50 to your machine. The walking foot will help you so much by keeping all these thick layers together.
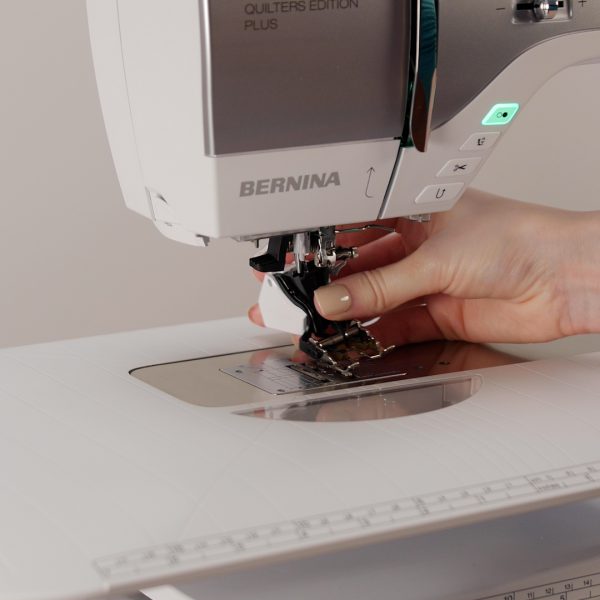
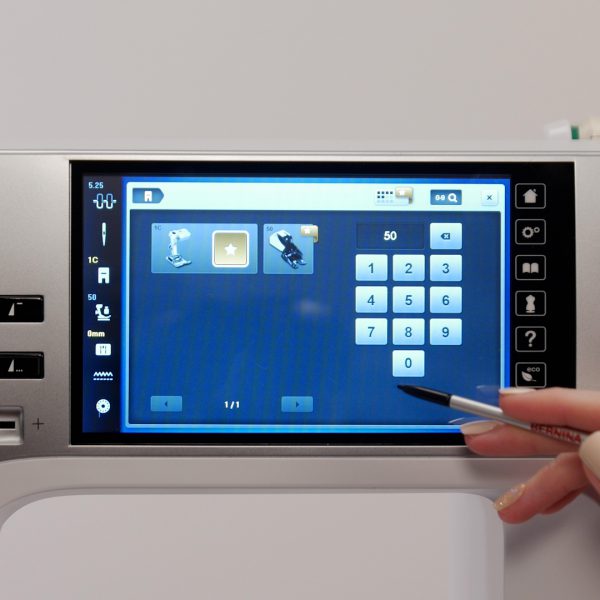
What’s great about the new 770 QE PLUS is now the machine has Presser Foot Selection. This is a nice security feature, click on your Presser Foot Selection icon to the left of the screen, and either type “50” in the search function or scroll till you find Walking Foot #50, select and close.
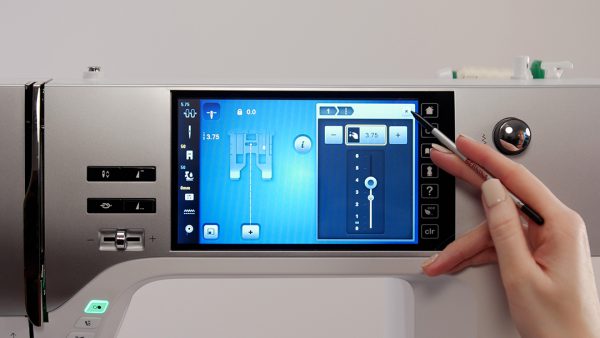
I found that using a size 80/12 ballpoint needle worked best for this material. Because of the bulkiness of the fabric, it also works best to lengthen your stitch length to 3.75. Do a little test sewing to determine the best settings for stitch length and presser foot pressure.
Once you have all these items set up on your machine, you can stitch both 15” sides with a 3/8” seam allowance.
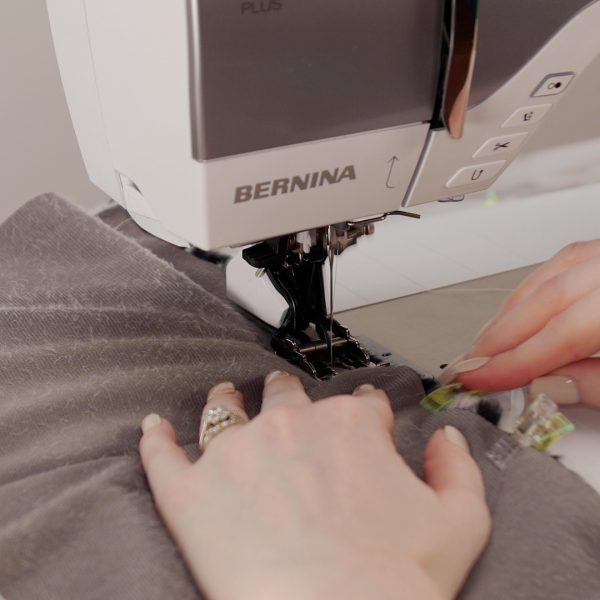
Start sewing on your hand muff and then backstitch to the edge to secure your stitches and continue on sewing. When you get to your cording, make sure to catch it and it doesn’t turn or get pushed by the foot.
Once you have your two sides sewn, now you will need to sew the final seam. To do so, turn your muff right sides out.
Take your muff and fold it in half, fur sides together, cording tucked inside; your raw edges should match. Wonder Clip the edge and take it to your machine.
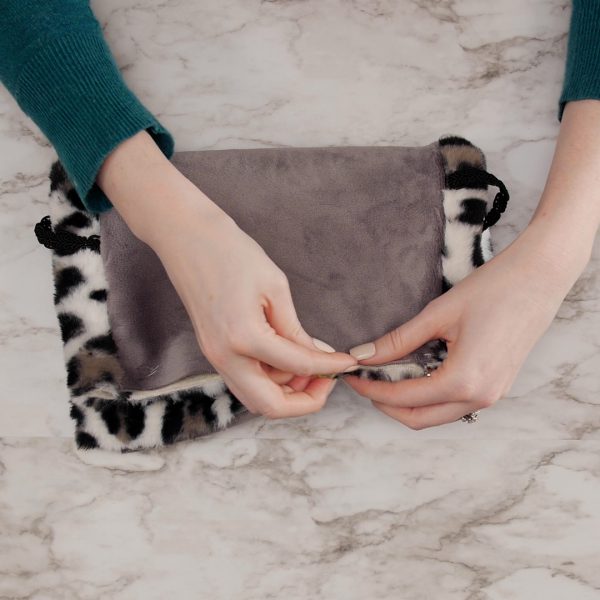
Sew a 3/8” seam allowance, backstitching at the beginning and the end.
Now it is time to reveal your toasty hand muff! Turn your muff right side out one more time.
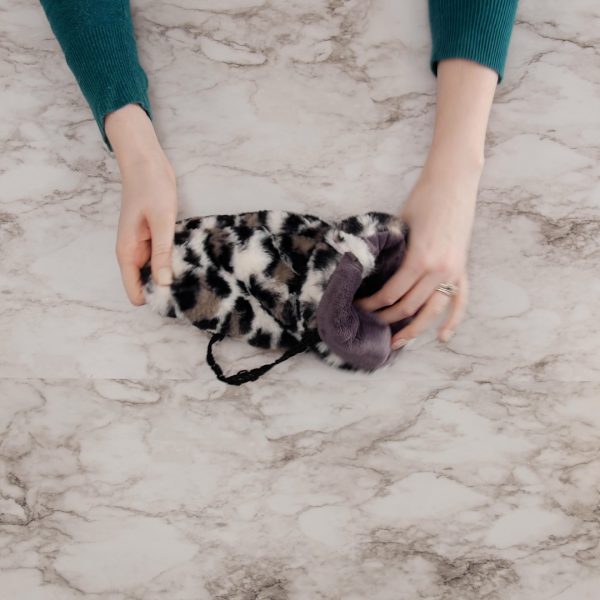
Historians conclude that the (hand) muff has been a winter accessory since the 1500s for both men and women! As the years went on, the muff was an exclusive for women. I was talking with my mom and showing her this project and she remembered having a white rabbit hand muff when she was little and loved wearing it everywhere. Thankfully now we have great alternatives to real fur so that our furry friends can keep warm and so can we.
Used Products

What you might also like


2 comments on “How to Sew a Hand Muff”
-
-
I made a muff for my daughter to take to football games. I put a zipper pocket into the lining for her ID, credit card and phone. no need for a clear bag.
Leave a Reply
You must be logged in to post a comment.

Love this! Thank you.