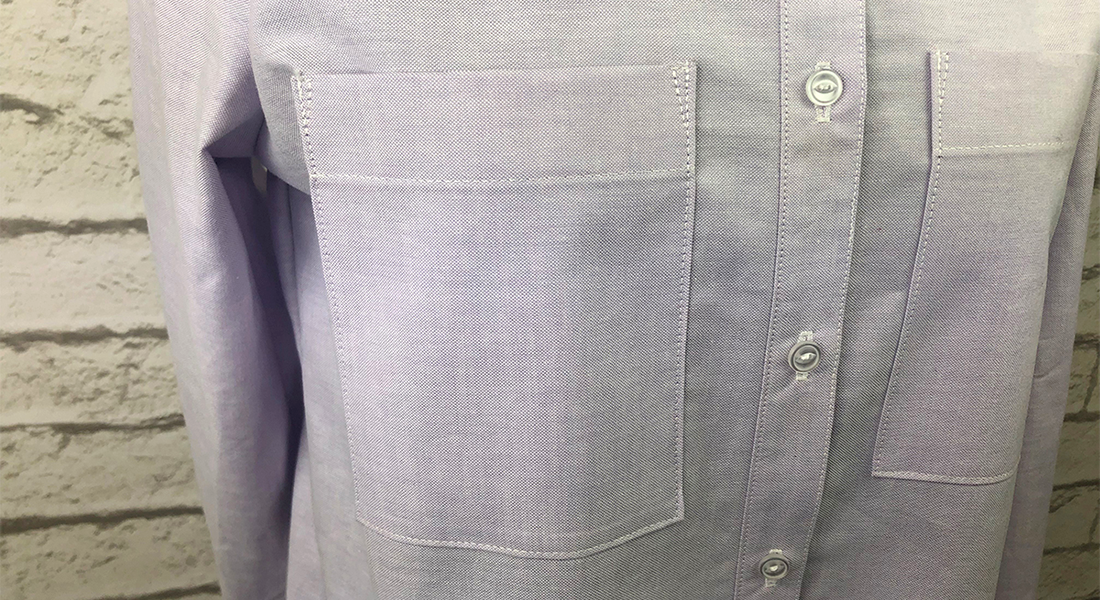
How to Sew a Welt Pocket
A welt pocket is a classic and beautiful finish on any garment. Whether it’s included on tailored pants or a structured coat, this finish always looks clean and professional. There are a number of ways to execute this technique and multiple variations of the welt pocket, but today we’ll sew out a simple single welt pocket.
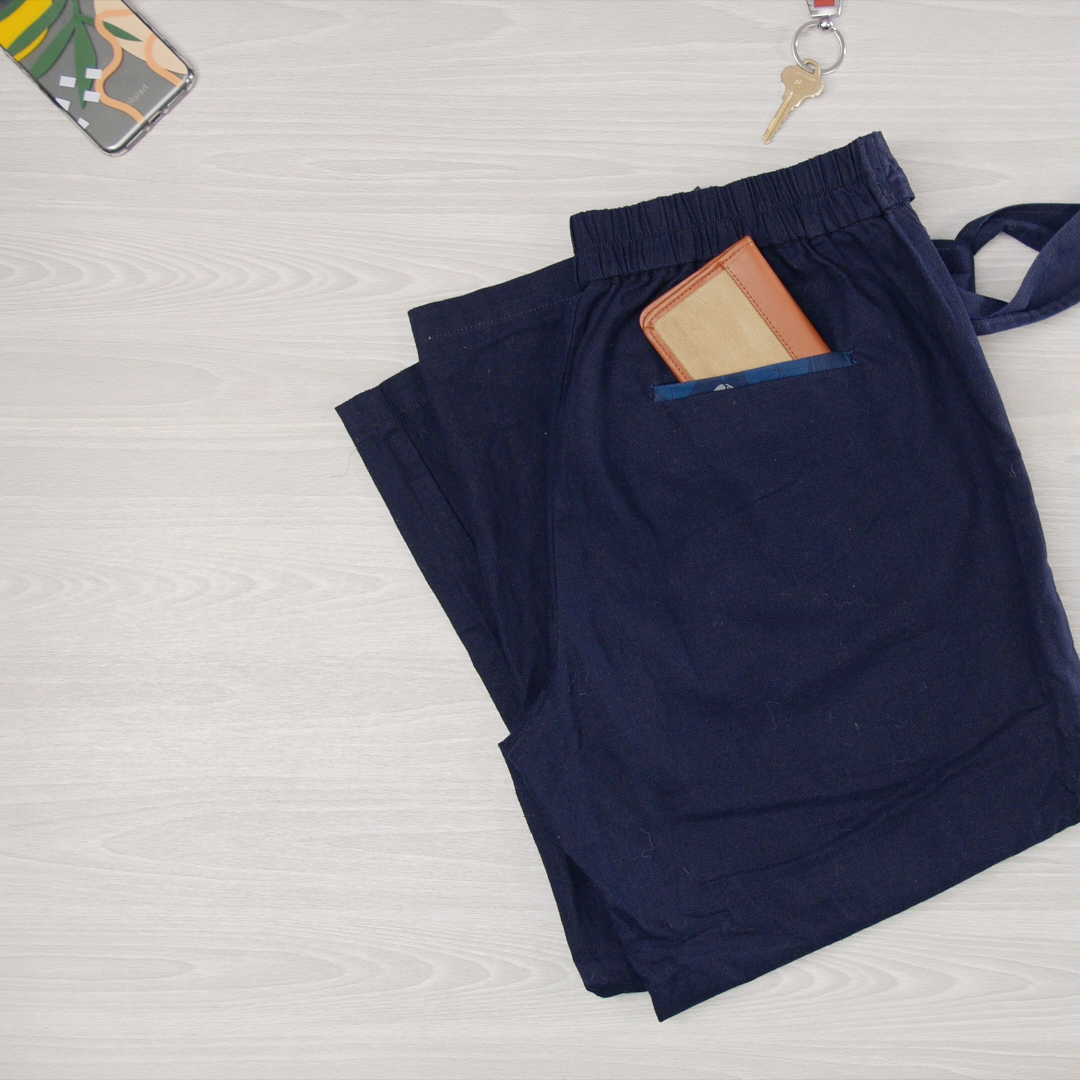
Let’s take a look at how to add a welt pocket to your projects! You can include this in a garment you are sewing from scratch or even add it to a ready-to-wear (RTW) item that is already in your closet, like I did. I hate wearing pants that don’t have a back pocket and this is a great way to add one in after the fact.
This process is a little bit abstract. It’s one of those things that will make a lot more sense after you sew it out once yourself. Trust the process! And maybe test it on scrap fabric before cutting into your clothes.
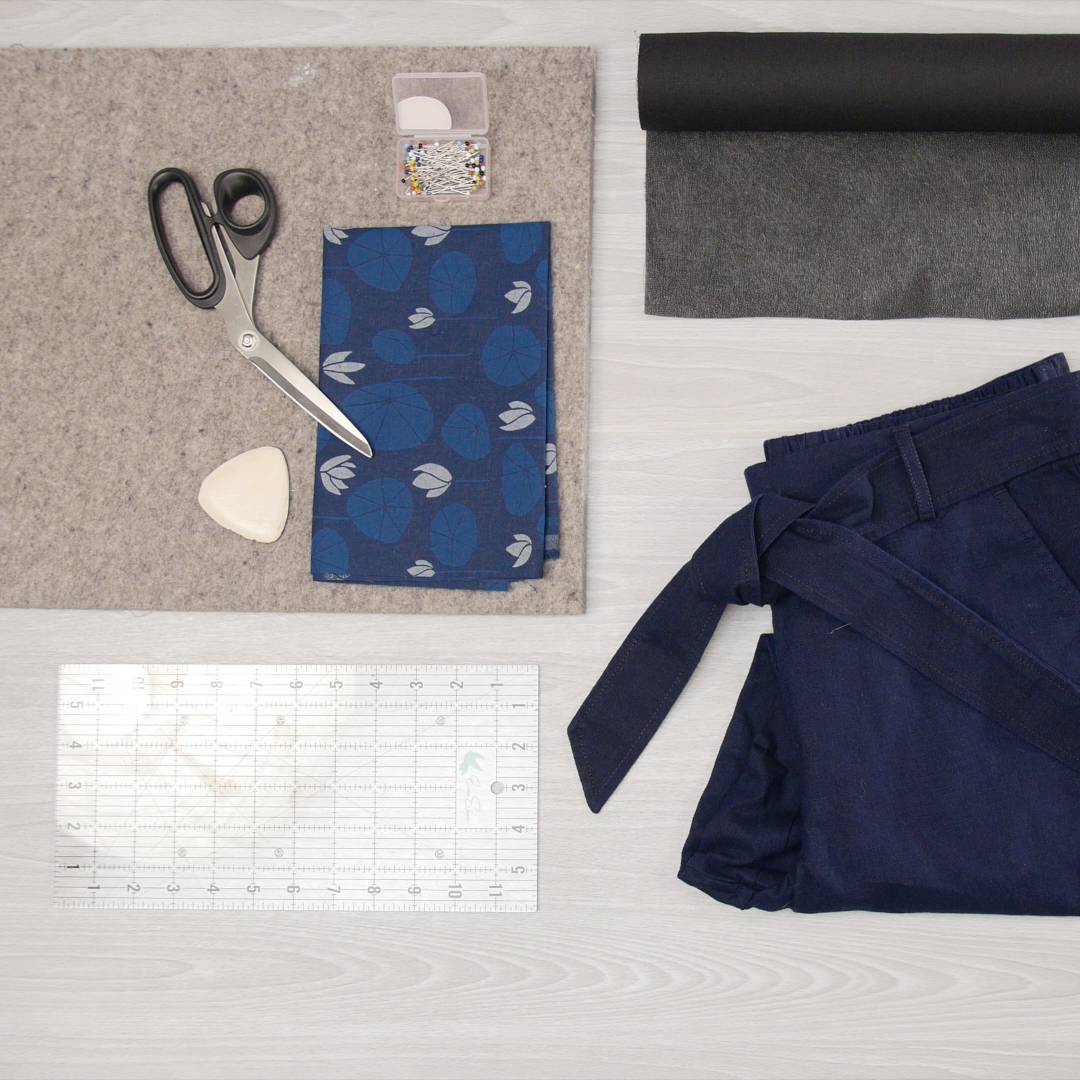
Supplies to Sew a Welt Pocket
- bernette 05 ACADEMY
- Woven fabric pants
- 1/4 yard of woven fabric for pocket (similar or lighter weight than pants fabric)
- 1/8 yard fusible woven interfacing (black or white, depending on fabric color)
- Matching polyester thread
- Chalk marking tool
- Pins
- Iron + pressing mat
- Rotary cutter + cutting mat
- Fabric scissors (be sure the tip is sharp)
Steps to Sew a Welt Pocket
1. Mark placement for pocket
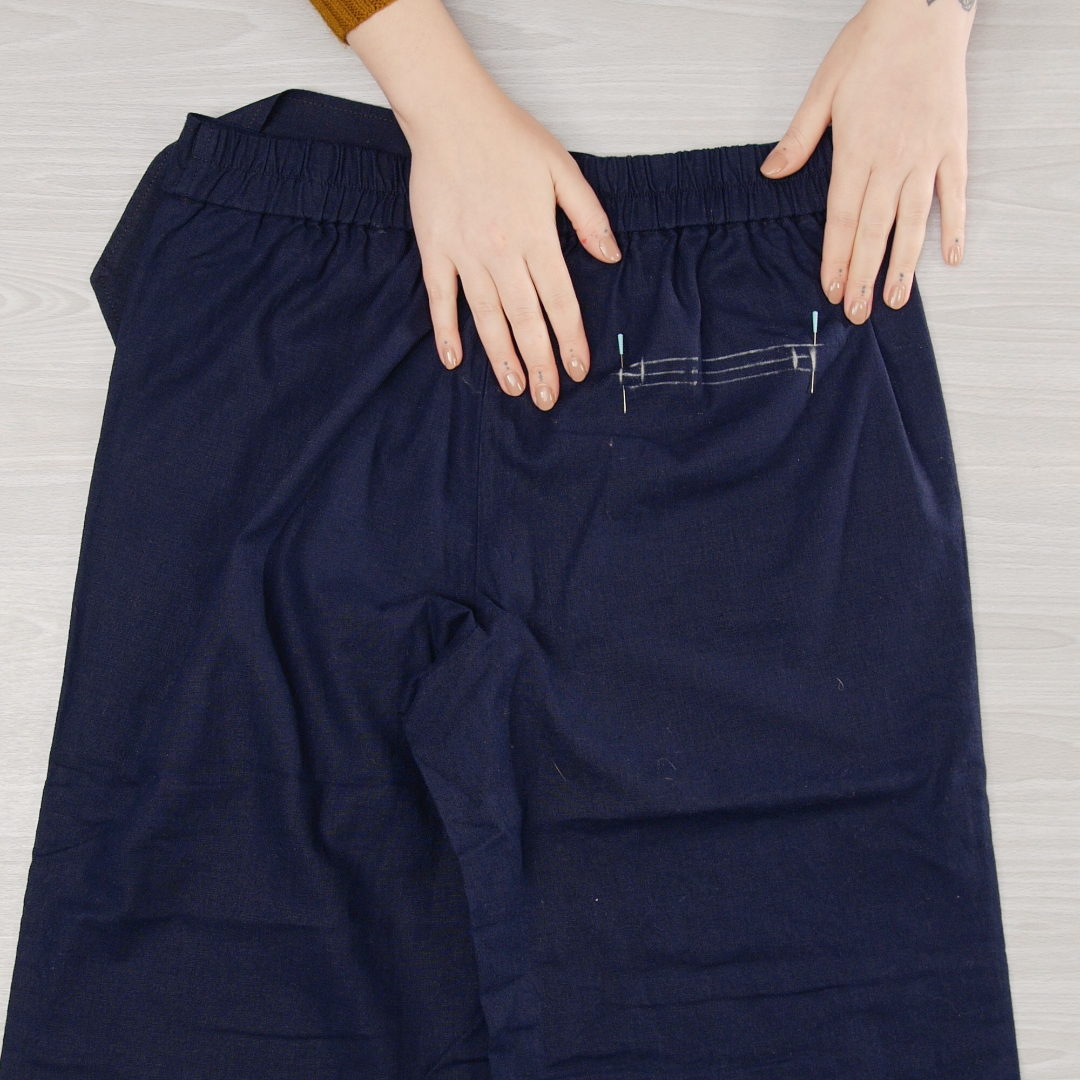
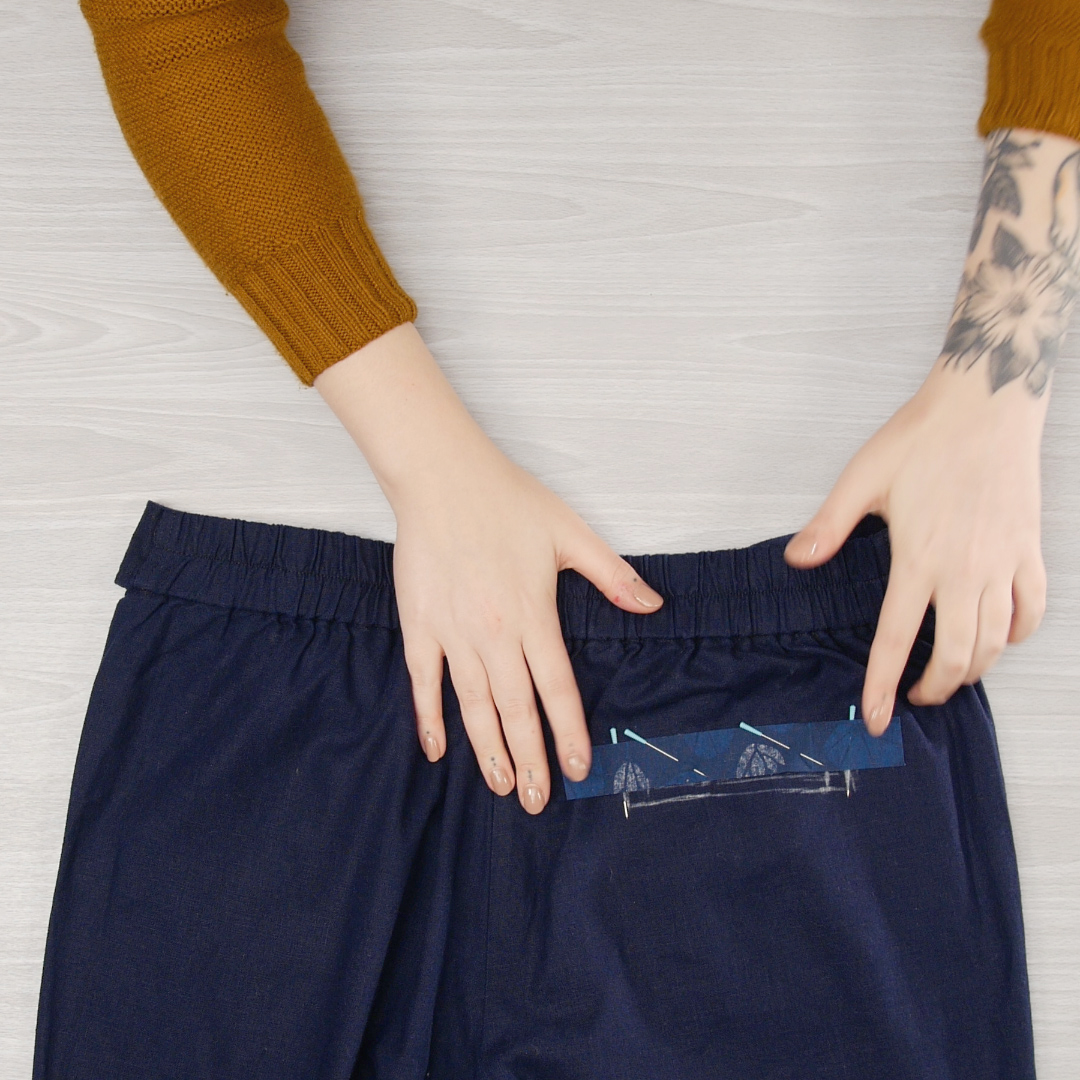
The first thing we need to do is decide where we want our welt pocket. This is really personal preference so if you are adding the pocket to RTW pants, try them on and mark a rough line for placement.
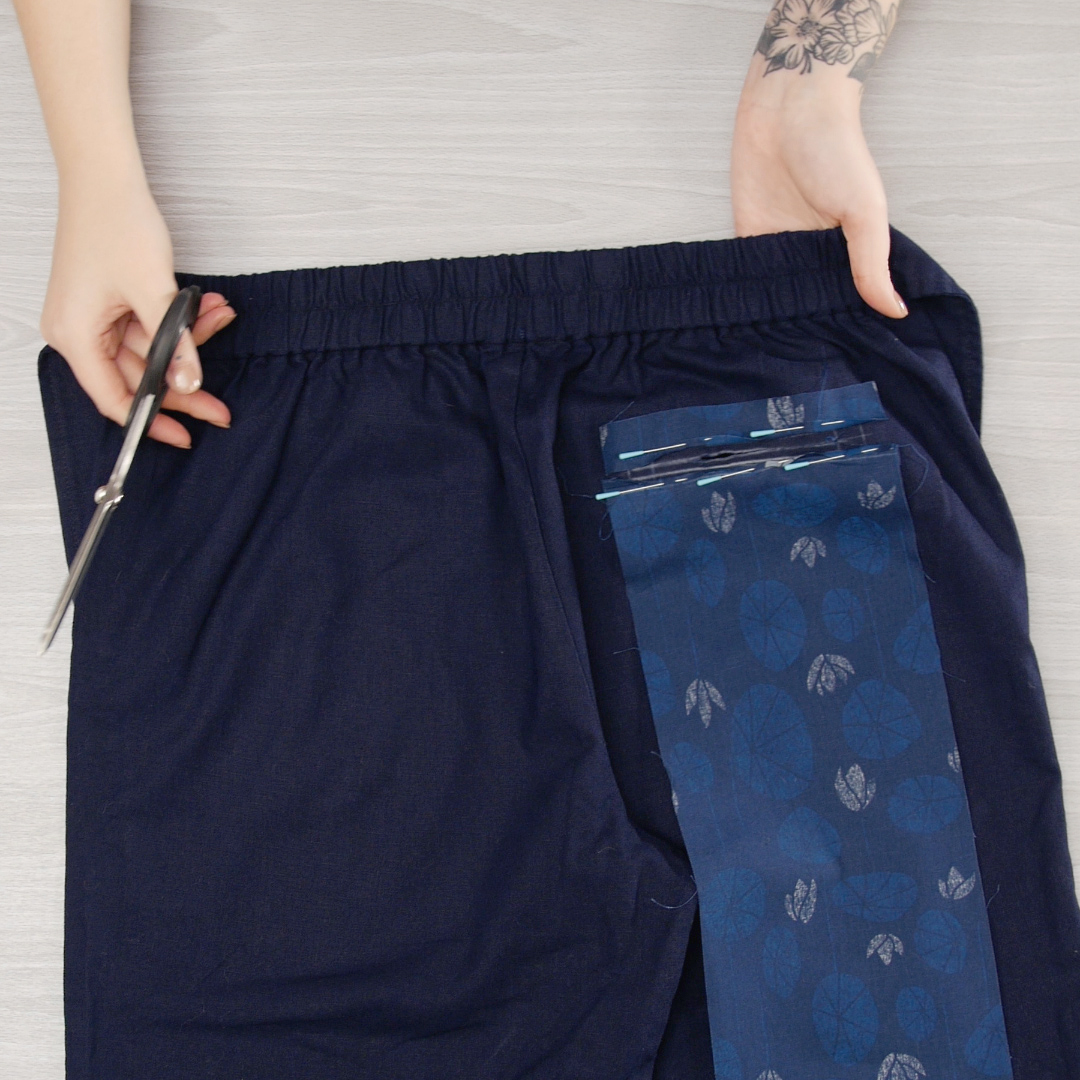
Lay your pants out flat. Mark out a rectangle with chalk, measuring 5” wide x 1/2″ tall, where you want your pocket to land. This will be our pocket opening.

You will also want to mark a line through the center lengthwise and a line 1/2″ in from the left and right sides. These will be our cutting guidelines. Insert a straight pin through the two short ends of your marking and turn your pants inside out.
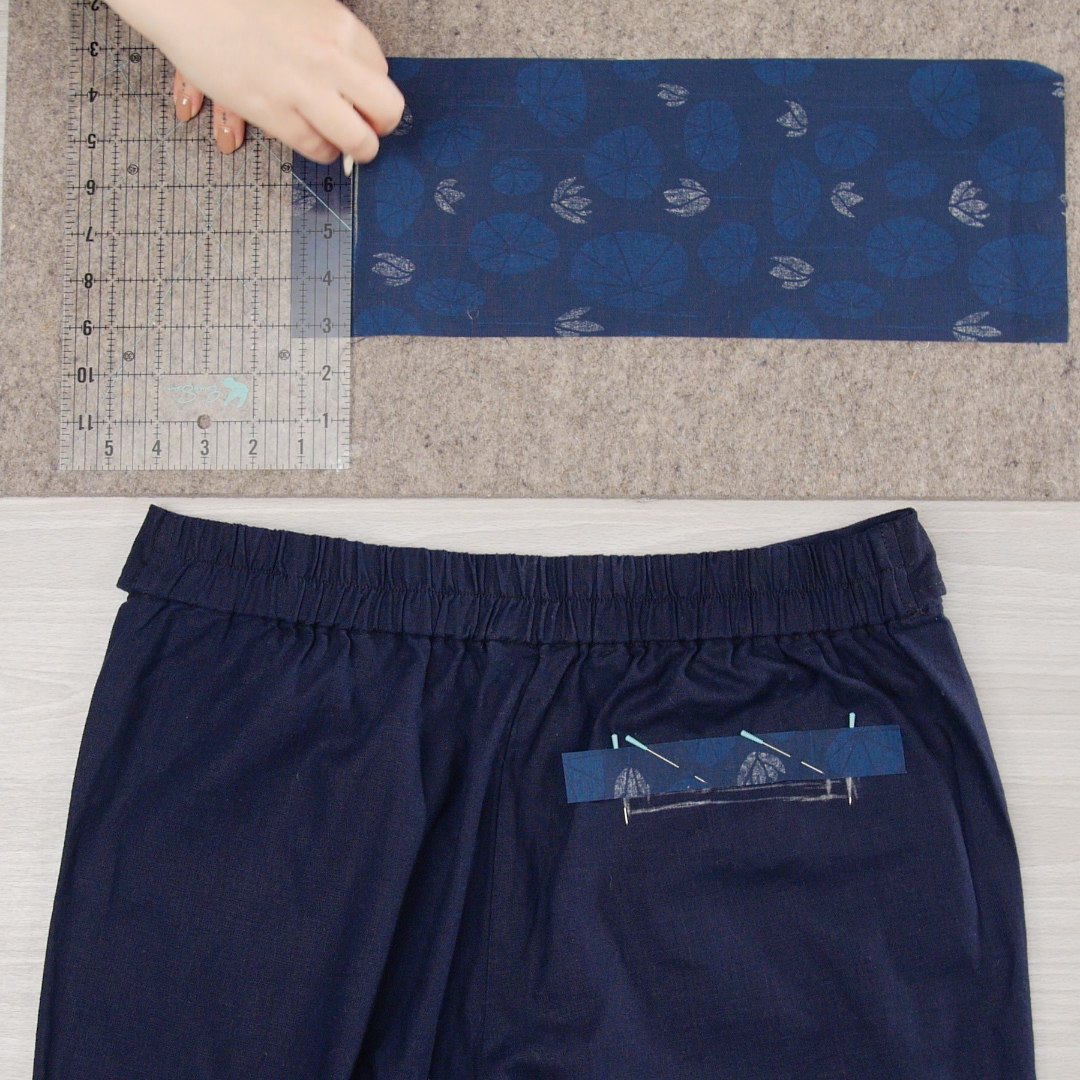
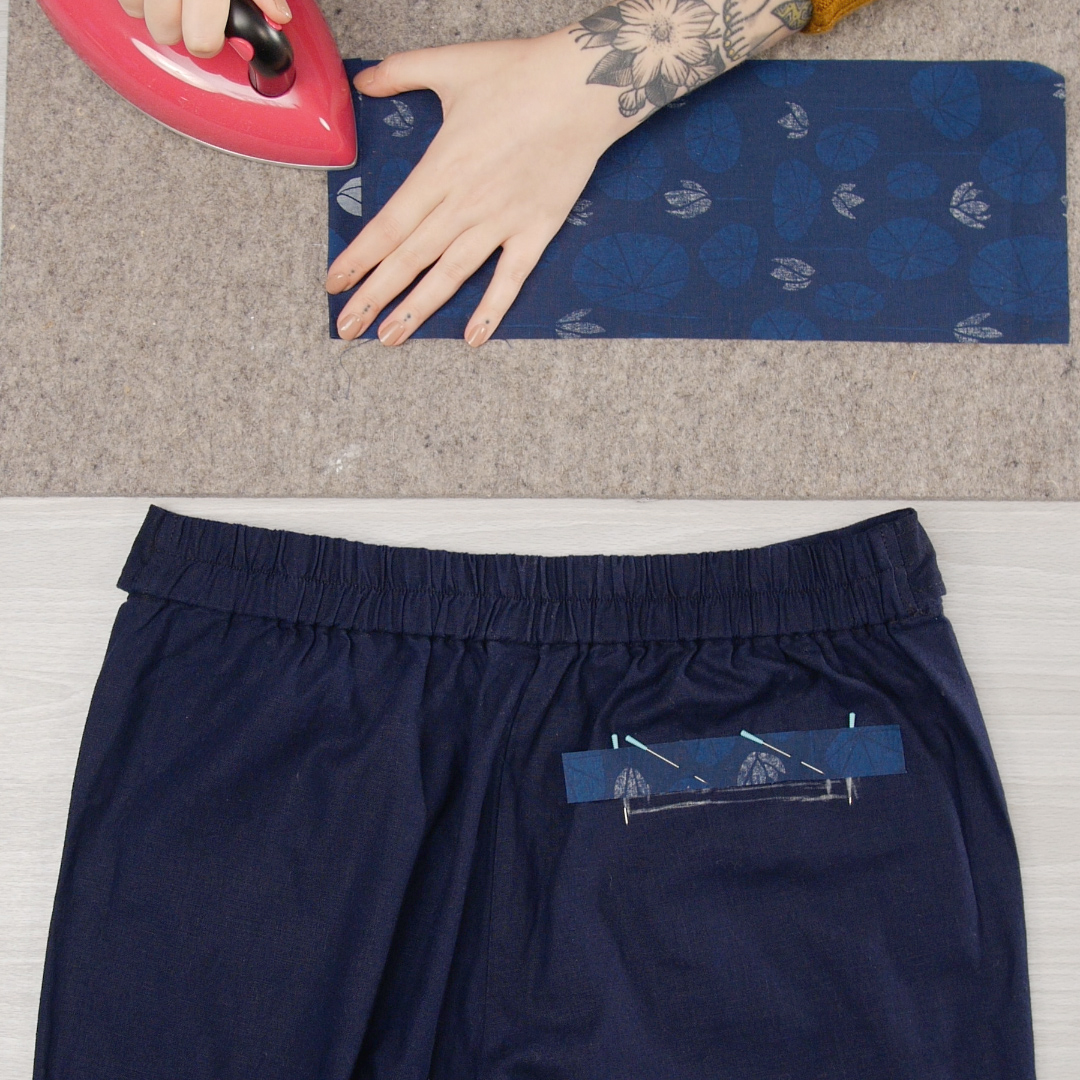
Cut a 6 1/2” x 2” piece of fusible woven interfacing. Place this adhesive side down on the wrong side (inside) of your pants, centered over your pocket markings. While you can’t see the markings themselves with the pants turned inside out, you can use the straight pins as your guide to line this up. Fuse the interfacing with a hot iron. A little bit of steam can help the interfacing adhere.
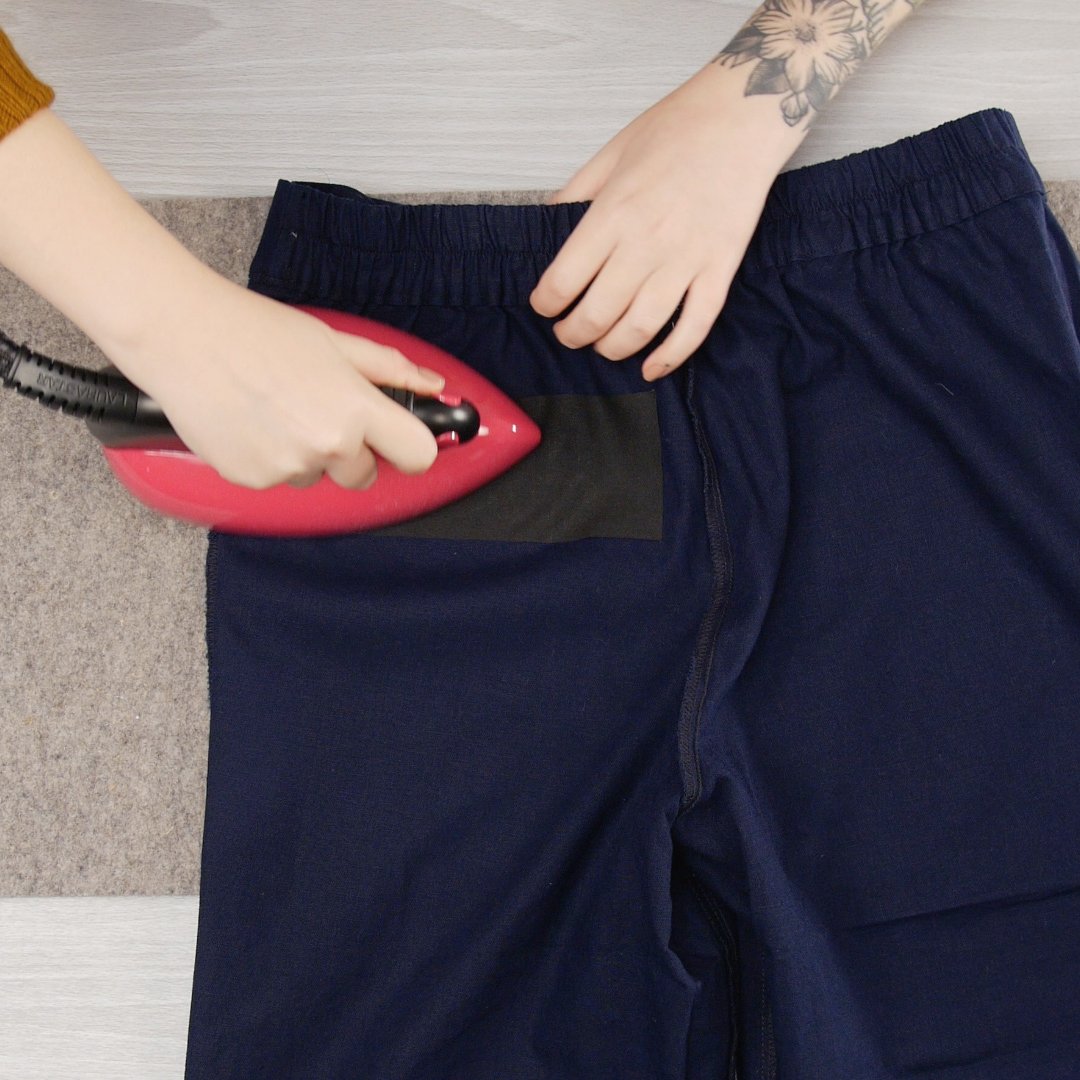
Once the interfacing has fully cooled, turn the pants back right side out.
2. Insert the Pocket
From your pocket fabric, cut the following pieces:
- One piece 7” x 1 1/2″ (top pocket lining)
- One piece 7” x 15” (pocket bag)
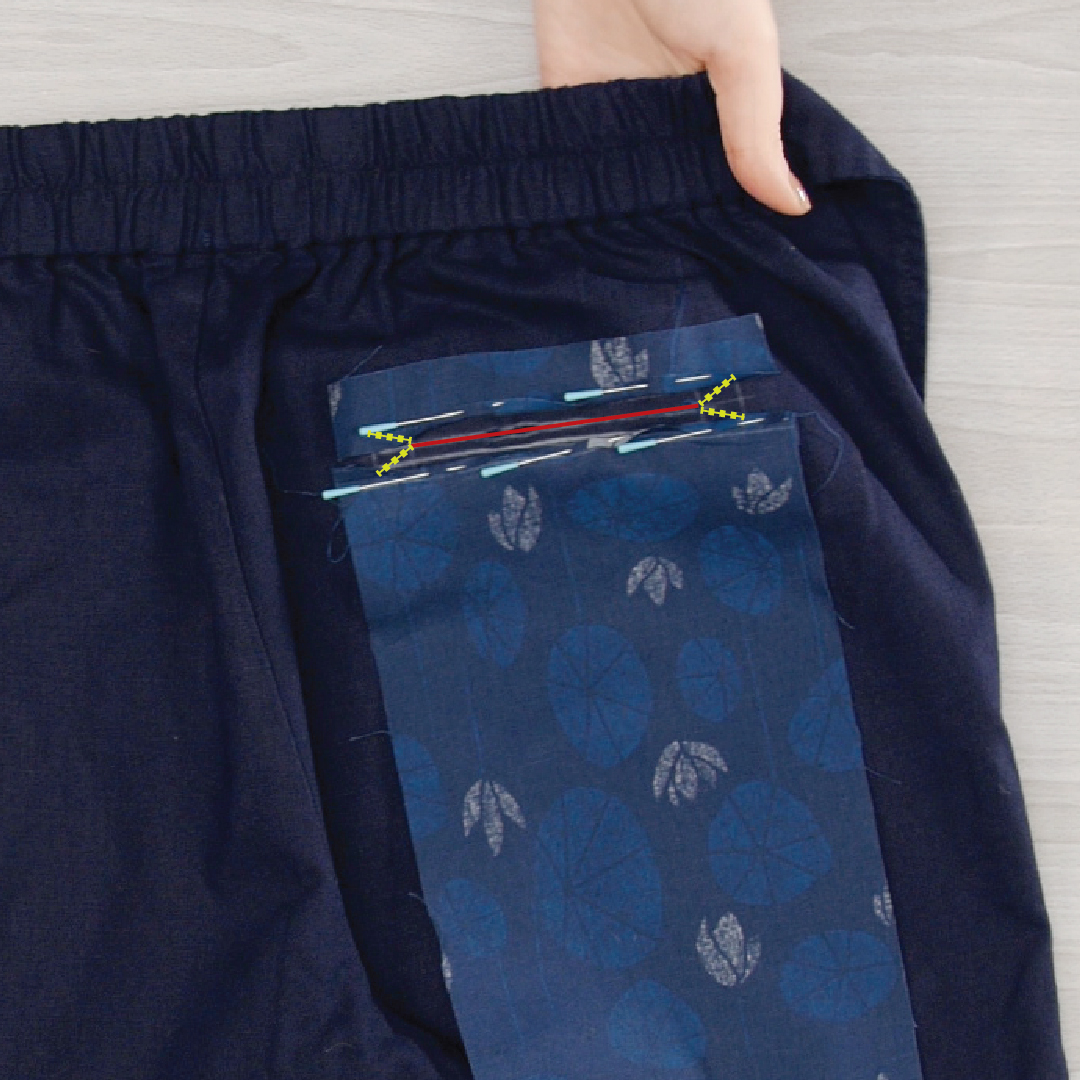
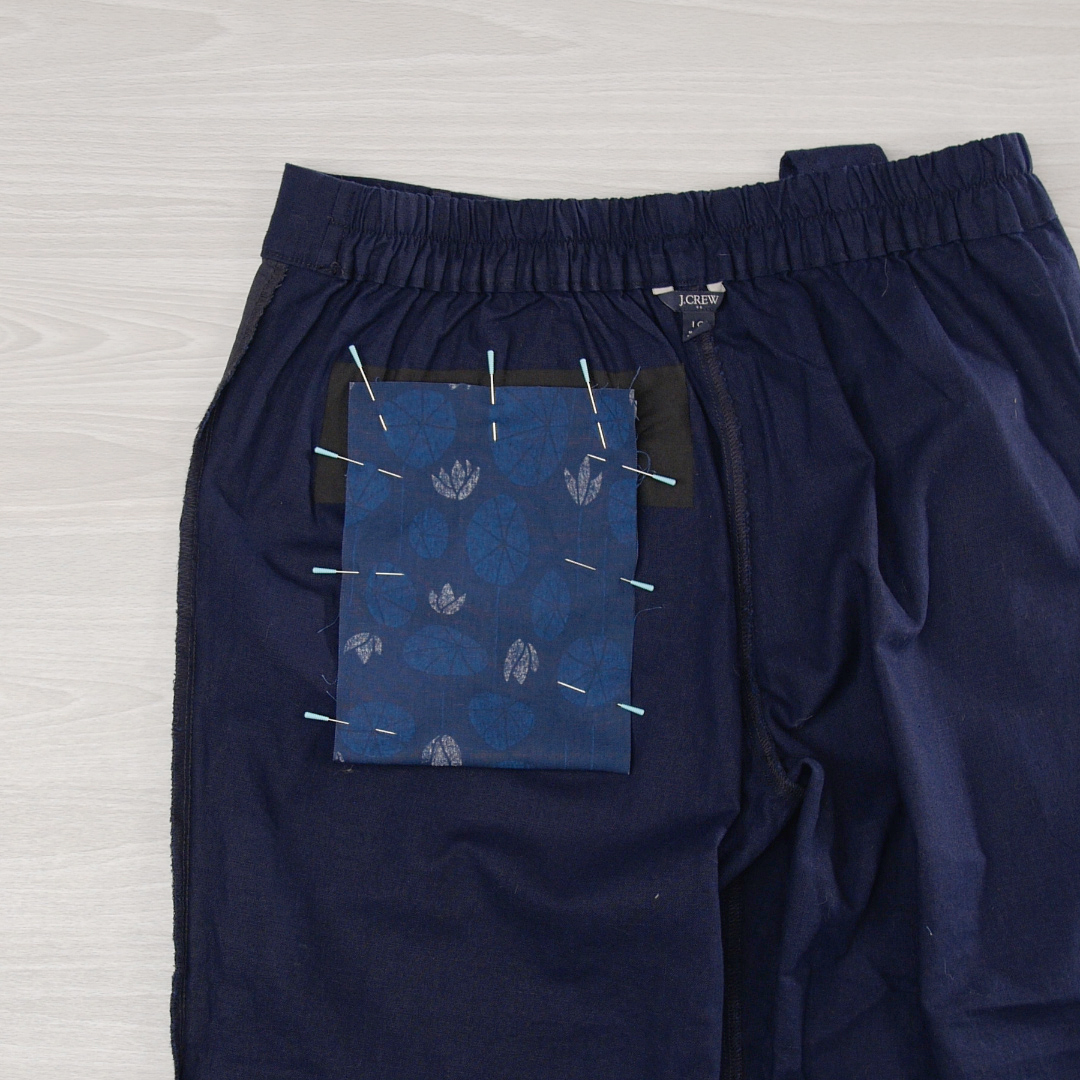
Place the top pocket lining piece right side down, centered over the pocket marking. One long raw edge should line up with the marking running horizontally through our pocket opening. Pin in place.
On the larger pocket bag piece, mark 1 1/4″ in from one of the short ends.
Fold the end over, with wrong sides together, so that the raw edge meets this marked line and press.
Place the pocket bag piece with the wrong side down (against the right side of the pants) with the raw edge of the side we just folded under aligned with the marking running horizontally through our pocket opening. The length of the pocket bag piece will extend up toward the waistband. The folded edge will land approximately 1/2″ below the marked pocket opening.

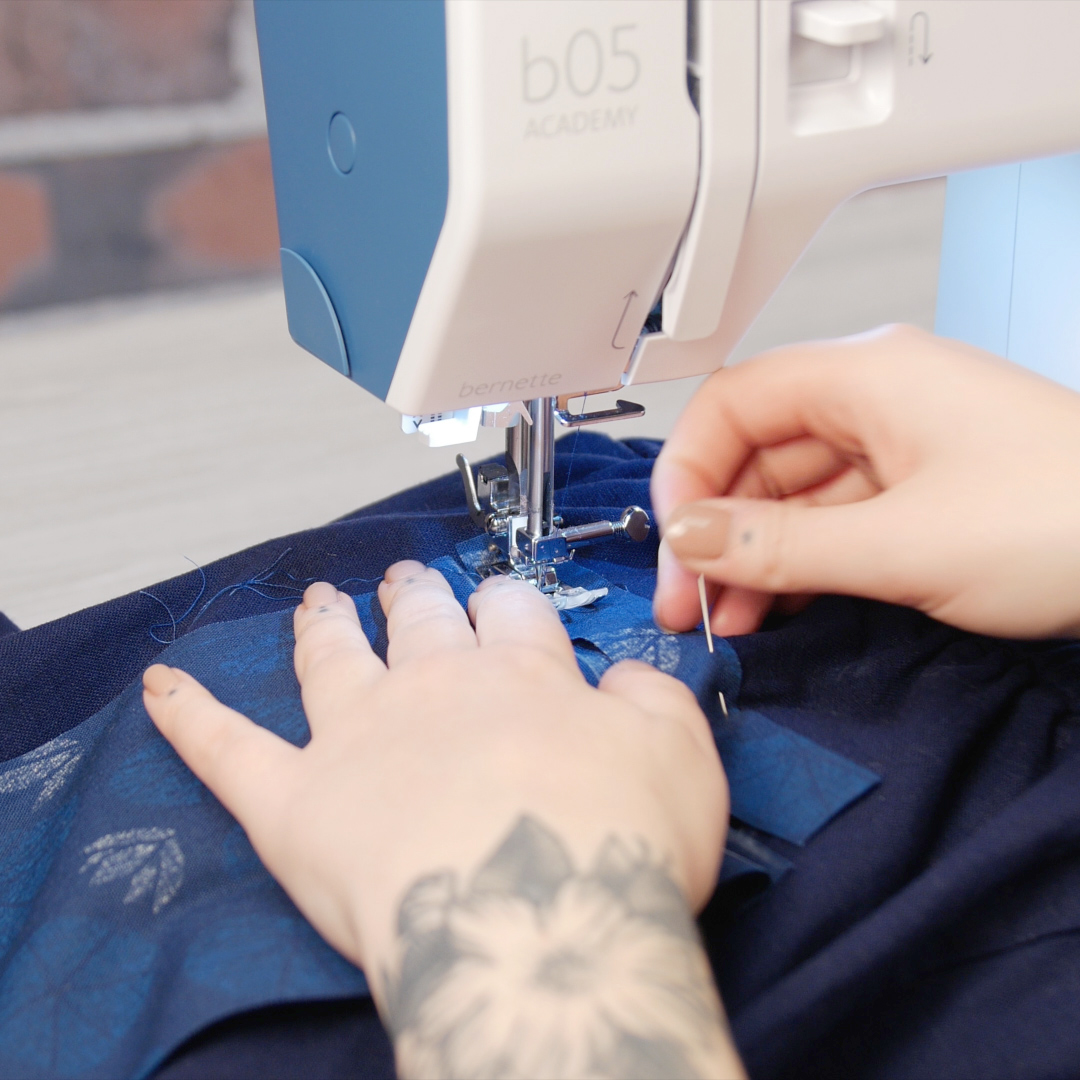
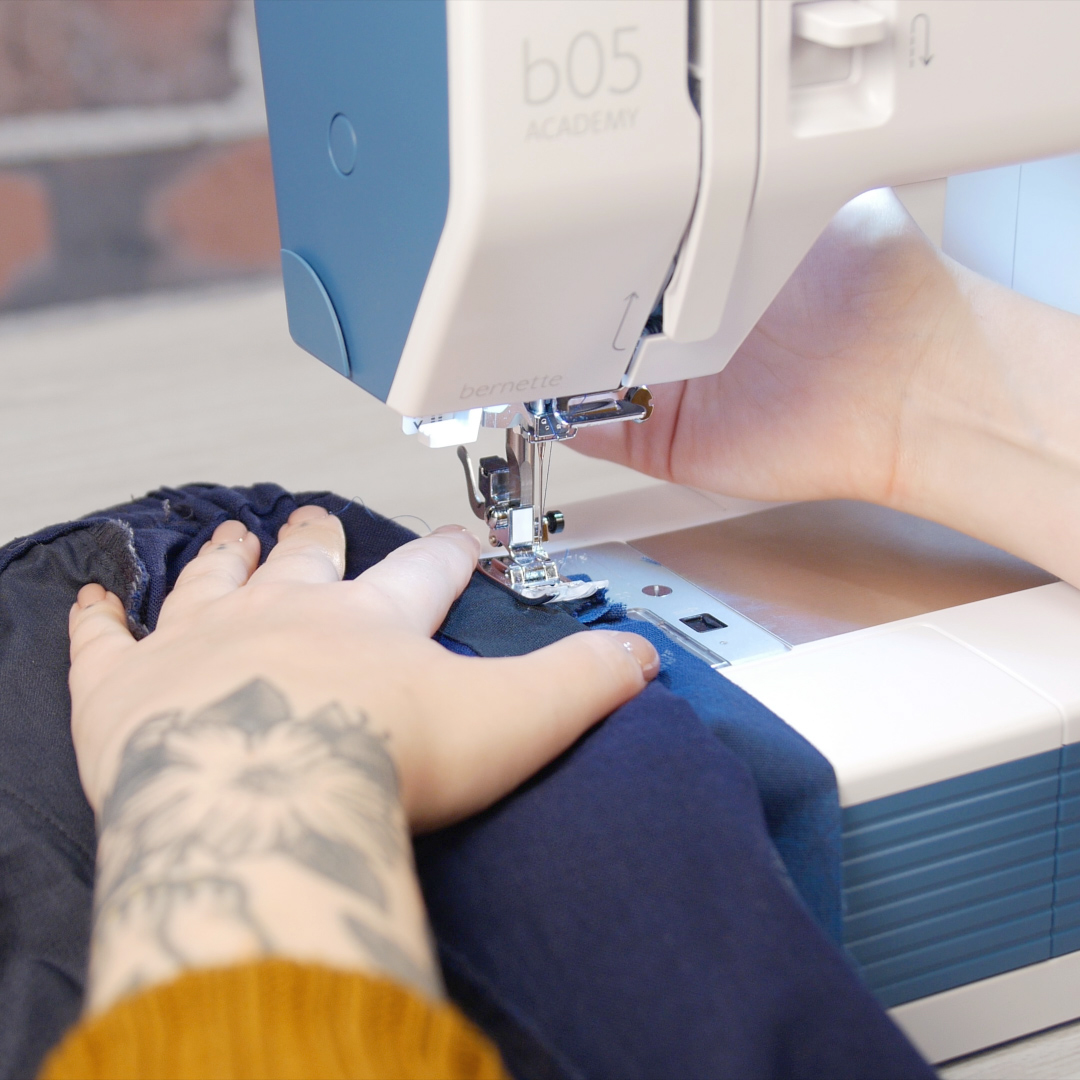
We are now ready to stitch these pieces in place. Thread your machine with a polyester thread in a color that matches your fabrics.
We will stitch the pocket bag first. Use a straight stitch to sew 1/2″ to the right of the folded edge. You should be stitching through three layers: the pants and two layers of pocket fabric. This seam should fall directly on the bottom edge of the pocket opening we marked at the beginning.

Now, fold the pocket bag down out of the way (toward the pant leg) so that we can sew the top pocket lining.
For this seam, sew your seam 1/4″ to the right of the raw edge. You should be stitching through only two layers: the pants and the top pocket lining. This seam should fall directly on the top edge of the pocket opening we marked at the beginning.
3. Open the pocket
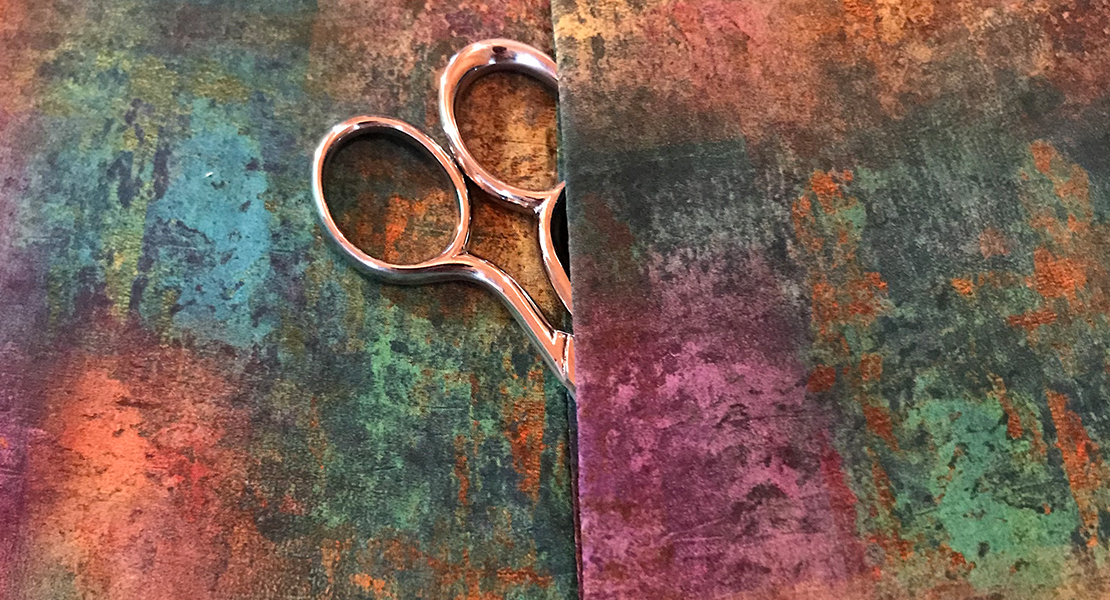
Now is the scariest part—cutting open your pocket. There is no turning back from this step! So make sure you are cutting carefully.
First, pin your pocket fabric pieces back to keep them out of the way of the cutting process. When you do that, you should be able to see your cutting guidelines: one horizontal line through the middle of the pocket opening and two vertical lines 1/2″ in from the left and right side of the outline.
Begin by cutting through your horizontal line only between the two vertical guidelines. (Note the red line in the picture below.)

Then, make four diagonal cuts—at each corner, cut from the horizontal line to the corner of the pocket opening. Be careful not to cut through any stitching at the corners. This creates small triangular flaps at the left and right sides.
4. Turn In & Secure
With the pocket opened, we can press our new welt pieces into place. First, turn the top pocket lining in to the inside of the pants. From the outside, this piece disappears completely. Press this top edge well.
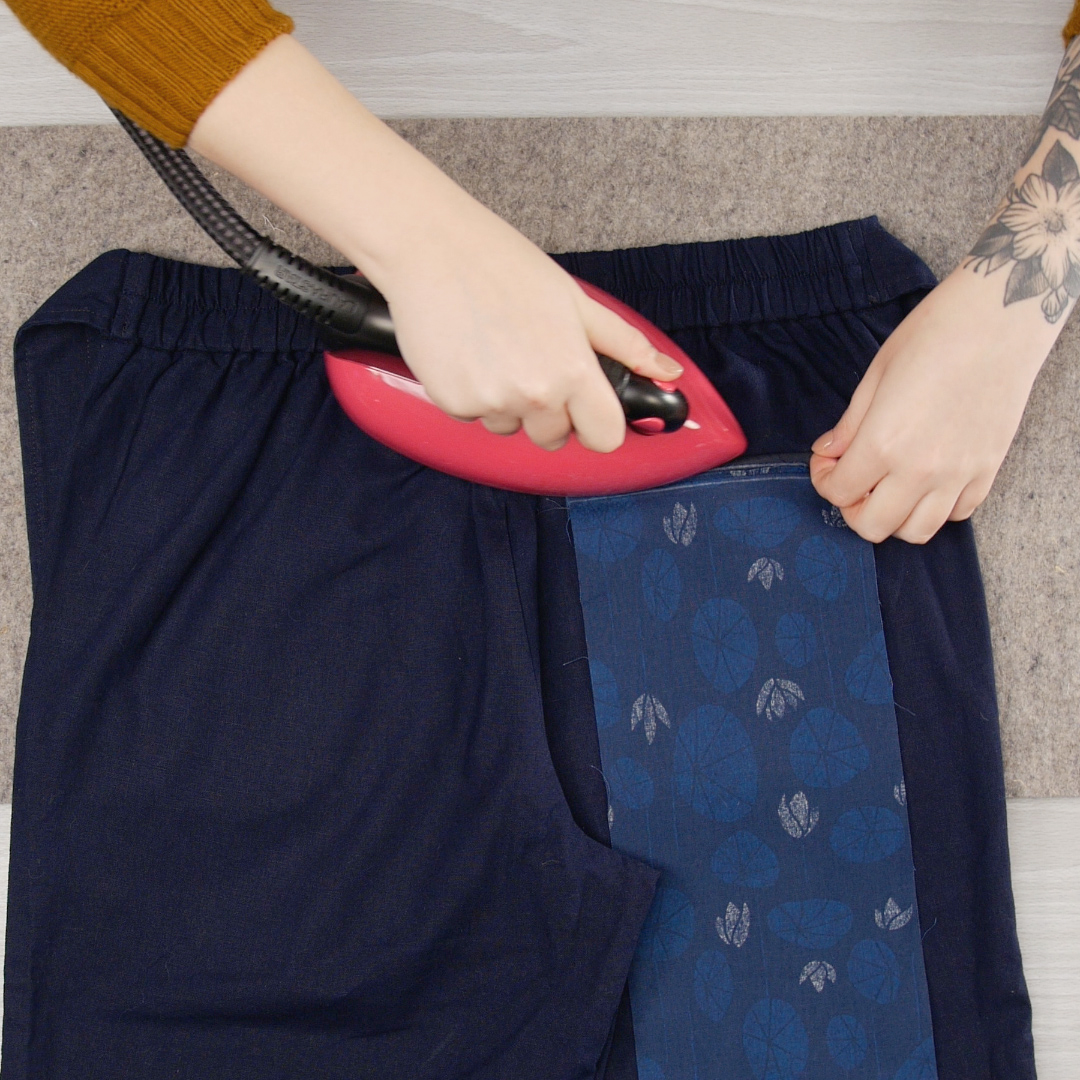
Next, pull the pocket bag through the opening to tuck that in as well. From the outside, you will only see a 1/2″ wide peek of our lining fabric, sitting perfectly within our pocket opening. Press this in place.
So far, we have just sewn the top and bottom of our rectangular pocket opening. Next, we need to sew the left and right sides.
Turn the pants inside out.
Fold the pants away from the right edge of the pocket pieces. You will see the small triangular flap we cut into the pocket opening. Align the bottom edge of the top pocket lining with the top edge of the pocket bag. The triangle flap should lay on top of where our pocket pieces meet. Pin to hold these layers together.
At the machine, sew from the top of the top pocket lining piece, down through the triangular flap, and down past the folded seam allowance of the pocket bag, stitching as close to the pocket opening as possible without sewing through the pants themselves.
Repeat for the left side of the pocket opening. We have now sewn all four sides of our welt pocket opening.
Close the Pocket Bag
The last thing to do is close the pocket bag! This is the simplest part of the process.
Fold the pocket bag piece up, aligning the short raw edge with the top raw edge of the top pocket lining. Pin all three raw sides: the left side, top edge, and right side.
With a straight stitch, sew along all three pinned sides with a 1/2″ seam allowance, being sure to only stitch through pocket fabric and not your pants. You will start at the bottom of one side, backstitch, sew to the top edge and pivot 1/2″ from the raw edge. Then, sew across the top edge, pivot 1/2″ before you reach the next side, and sew down to the bottom of the pocket, backstitching at the end.
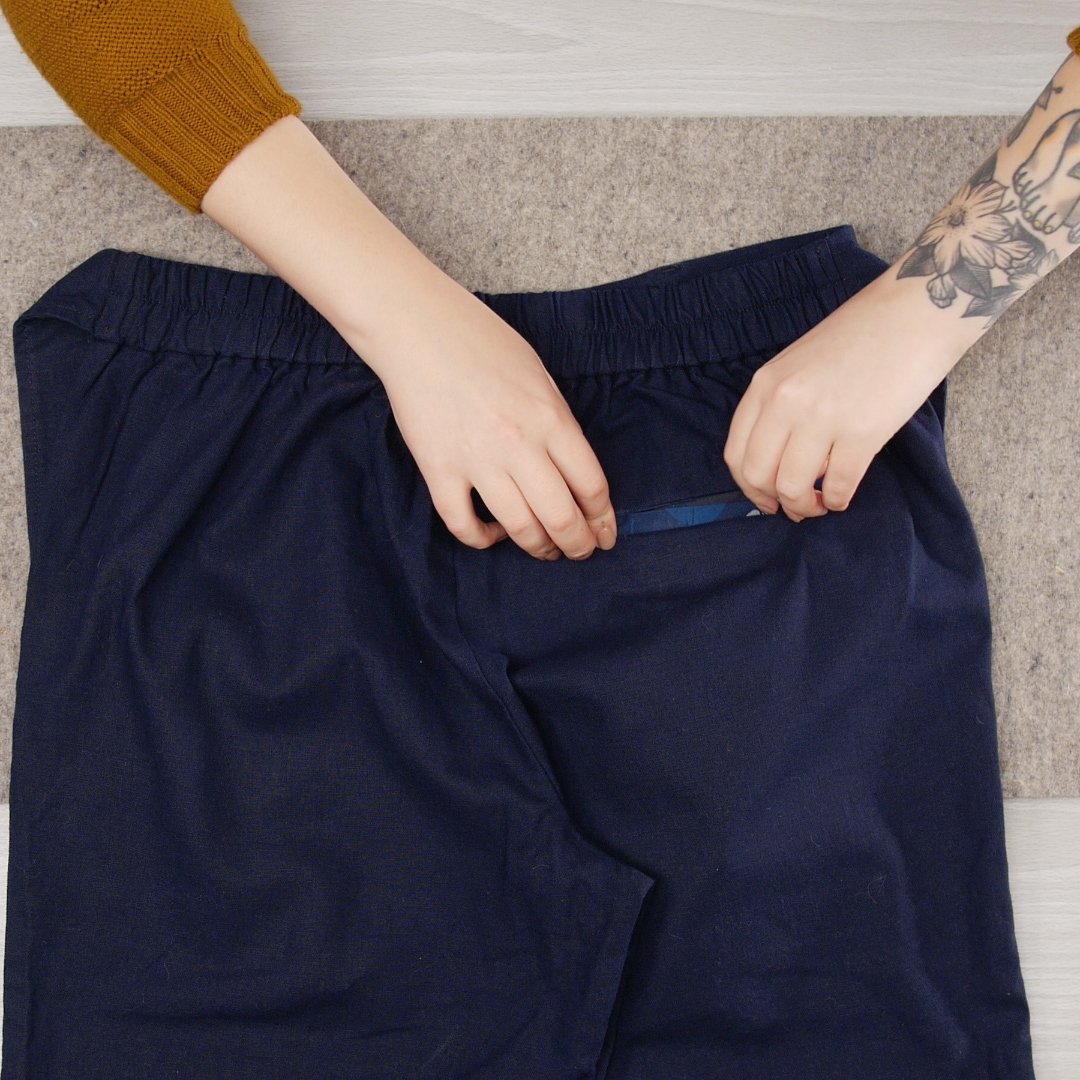
Your pocket is technically finished! Just finish off the raw edges however you’d like—I recommend using a 3-thread overlock stitch to keep the edges tidy, but you could also trim with pinking shears.
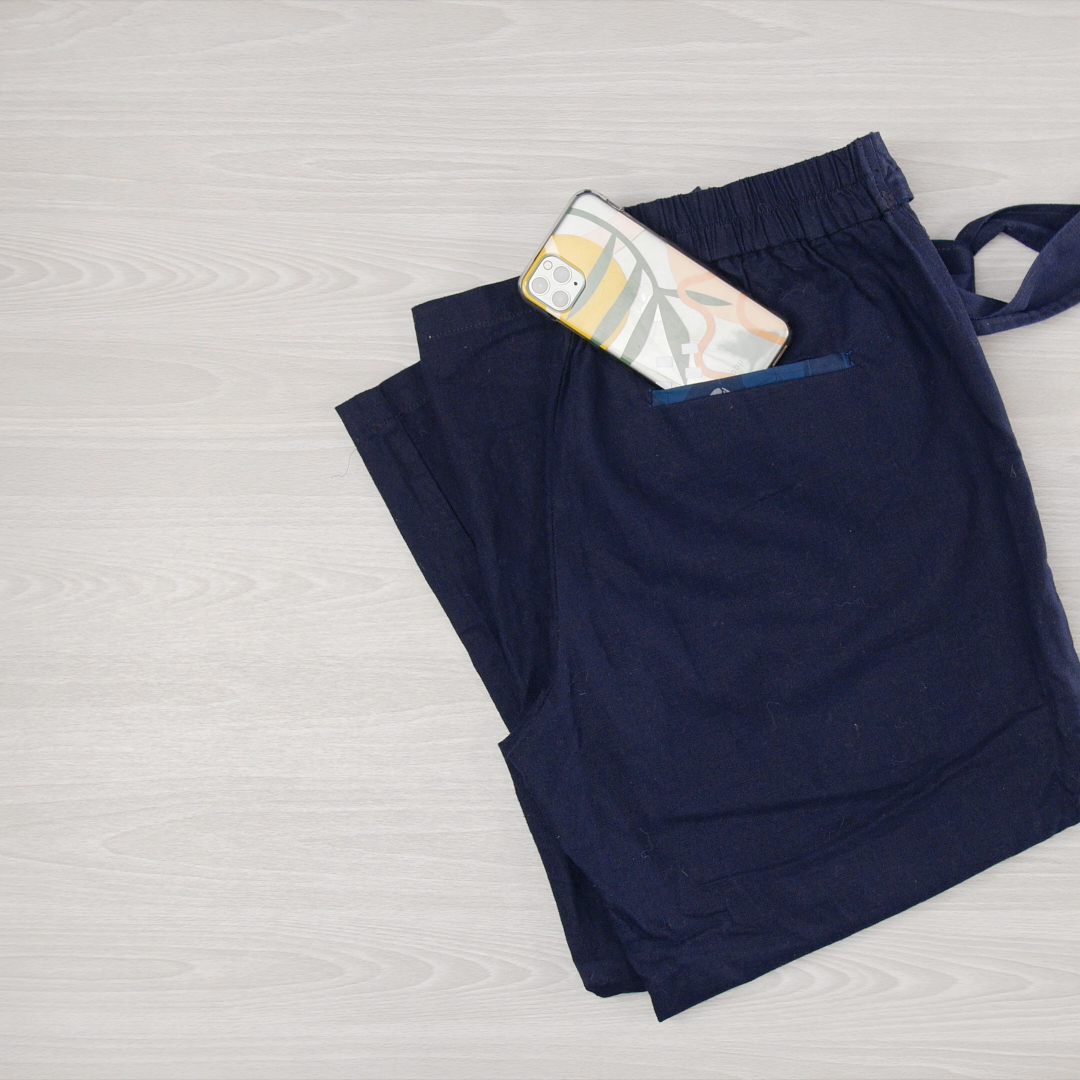


Love the idea of inserting welt pockets into RTW pants. Women pants never have enough pockets. We can all use more pockets in our pants, especially those pants without pockets to begin with! The video initially didn’t help since it was in FAST motion until I clicked on settings tab in the YouTube settings & slowed it way down(.50 speed) so I can follow along with the visual instructions. Good video.