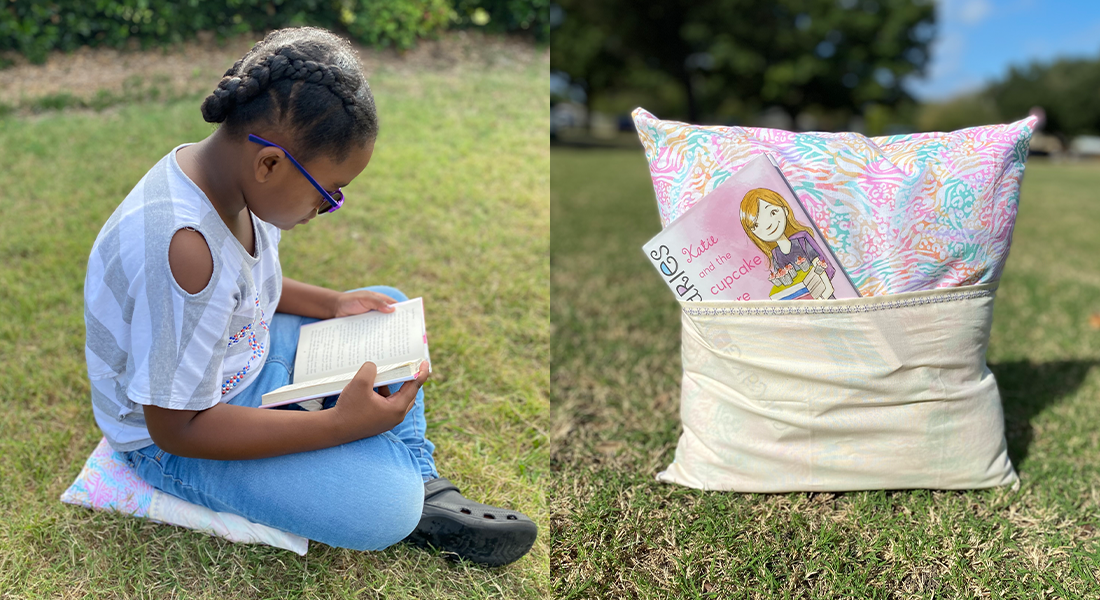
How to Transform a T-shirt with an In-the-hoop Pocket Peeker
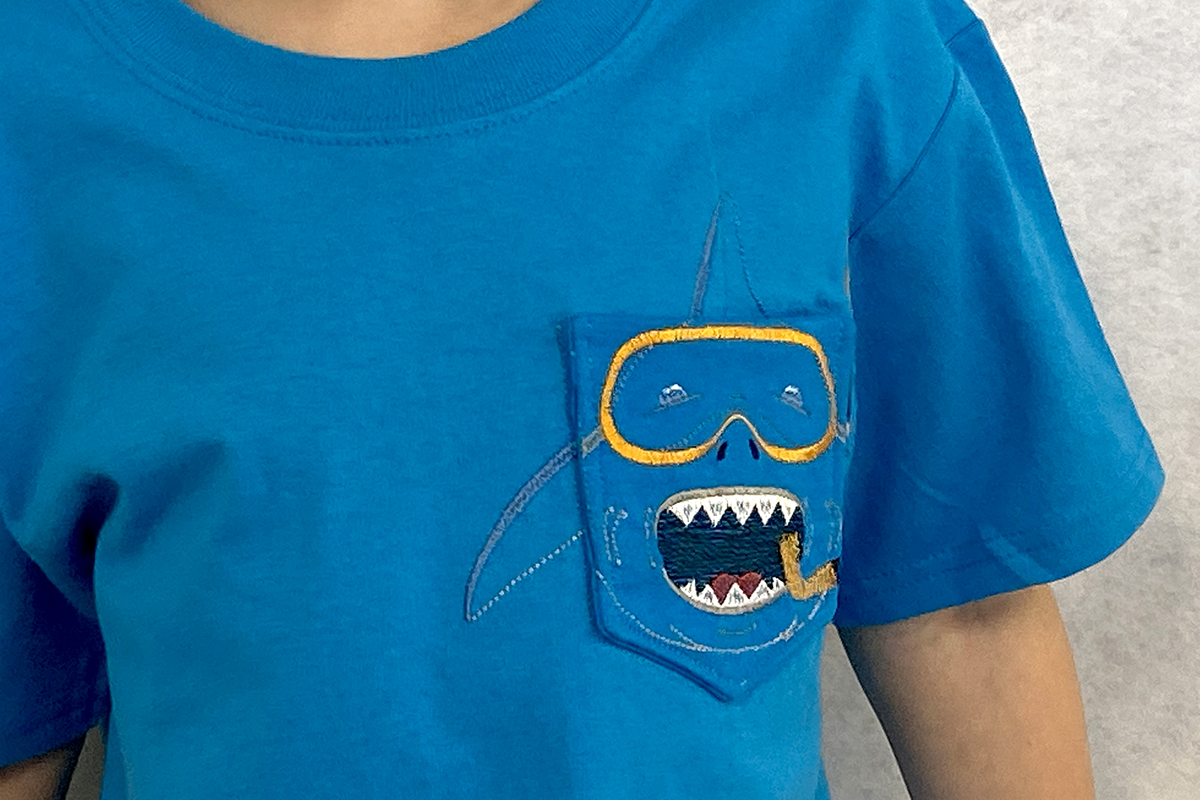
Let’s transform a plain T-shirt into something “one-of-a-kind” with an in-the-hoop Pocket Peeker. Controlling knit fabrics in the embroidery hoop can be challenging if not stabilized correctly. With a few tips on stabilizers, needles, and design placement, you’ll be successful at taming stretchy knits and embroidering those one-of-a-kind projects.
For this project, we will be using an in-the-hoop design from Scissortail Stitches, #51240 Pocket Peekers.
Supplies to Transform a T-shirt with an In-the-hoop Pocket Peeker
Machine
- B 880 PLUS
- Embroidery features Pinpoint Placement
Other BERNINA models that may be used for this project include: B 790 PLUS, B 770 QE PLUS, B 590, B 700, B 500
Feet and Accessories
Embroidery Files
- Scissortail Stitches Collection #51240 In the Hoop Pocket Peekers
- Stitch “n” Turn Shark Pocket Large #51240-11
- Shark Pocket Placement Large #51240-12
- Download and print #51240 In the Hoop Pocket Peekers PDF Project Instructions
Cutting
- Pocket fabric – cut one 6” x 6”
- Pocket lining – cut one 6” x 6”
- OESD Fusible Woven – cut one 5 1/2” x 5 1/2”
- OESD Fusible PolyMesh CutAway Stabilizer – cut one 15” x 10”, cut one 15” x 12”
- OESD StitcH2O – cut one 6” x 6”, cut one 7” x 6”
Notions
- Isacord Embroidery Thread
- Superior Threads Bottom Line 60wt thread
- Iron + ironing board
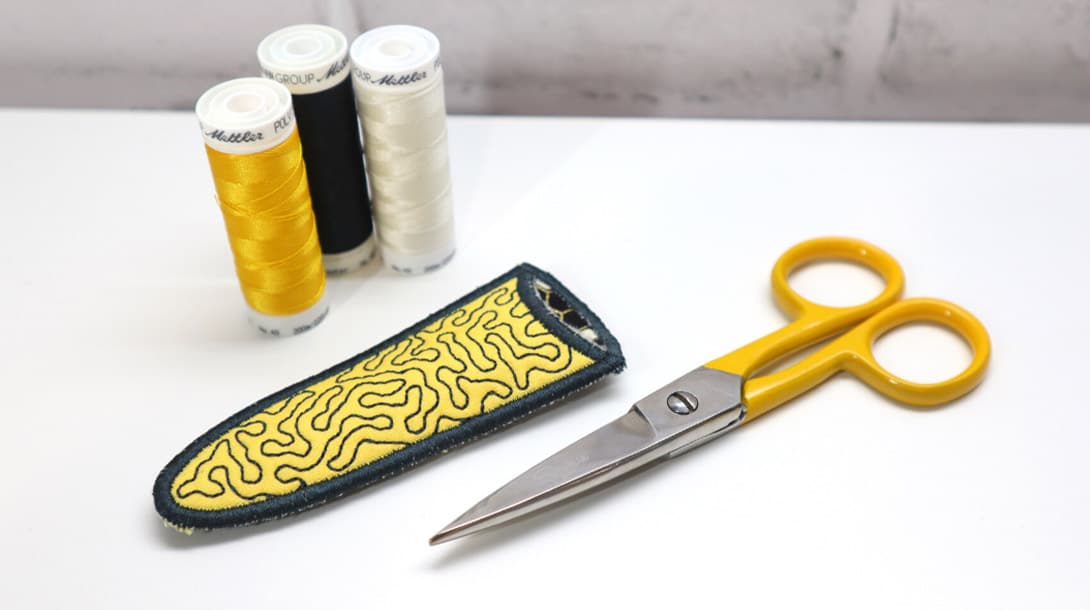
- Fabric scissors
- Thread snips
- Child’s T-shirt to place pocket on
- Knit fabric to match shirt or recycle an outgrown shirt
- OESD Expert Point and Press Tool
- OESD Expert Embroidery Tape Tear Away
Embroidering on Knit: Tips Before You Begin
Stabilizer
An important factor is that a knit be stabilized on both the wrong and right sides. Use a cut-away stabilizer if the item has stretch, such as a knit. Cut away stabilizer stays with and behind the design to support the stitches as the knit fabric is distorted through stretching. It will not be washed away or worn away with time; this will keep your embroidery always looking good. For this project, I am using Fusible PolyMesh Cutaway. PolyMesh has a soft hand and works well with T-shirt knit but still supports the stitches.
Add a water-soluble topping called StitcH2O on the top of the knit fabric. This helps to keep the stitching from “sinking” into the surface of the fabric. This is recommended for sweatshirts, fleeces, Minky, and any fabrics with a pile or a nap. It really improves the end results of the appearance of stitches.
Designs
Usually, a filled design or an applique, rather than a line design, will display a better result on a knit fabric.
Needles
A ballpoint embroidery needle is recommended for knit fabrics. Universal or regular embroidery needles have a sharp point that could potentially “cut” through a knit “link” as opposed to ballpoint embroidery needles which have a rounded point that will slide in between “links”. Stitches are more uniform when a ballpoint needle is used on knit fabric for seaming, and this is true of embroidering on knits as well. The size is dependent on the fabric weight: 65/9, 75/11, 80/12. I am using a 75/11 for this project.
Embroidery Backing
Since the back of the T-shirt will come in contact with sensitive skin, fuse a protective backing, like Gentle Touch covering the embroidery’s back stitches after all embroidery is complete. You can also pink these edges with pinking shears or pinking or wavy-blade rotary cutter before applying. This helps adhesion through washings, wearing and stretching.
Fabric Prep & Hooping
Cut the fabrics per the above cutting instructions. Follow the 51240 In the Hoop Pocket Peekers PDF project instruction sheet included with the design collection for cutting and preparing the fabrics.
Hoop one layer of Fusible PolyMesh CutAway stabilizer securely in the Large Oval hoop with the fusible side facing down. The reason for this is so that when the pocket is turned and pressed the pocket lining will be fused to the pocket front. Attach the hoop to the machine.
Stitching the Pocket Design
Insert the USB stick with the design files into the machine.
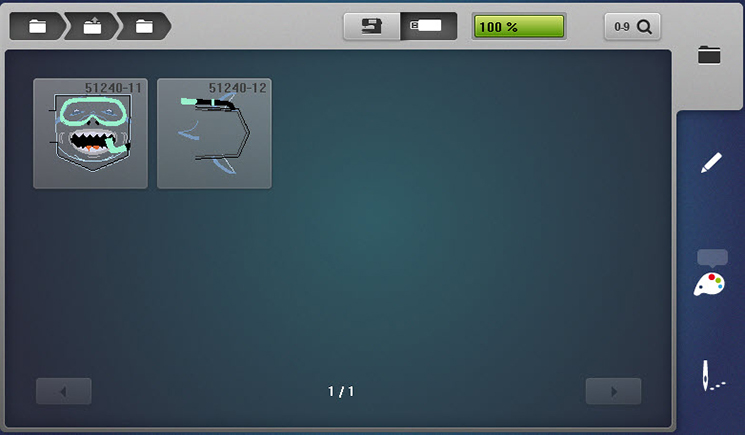
Open the design #51240-11 Stitch “n” Turn Shark Pocket Large from the USB stick.
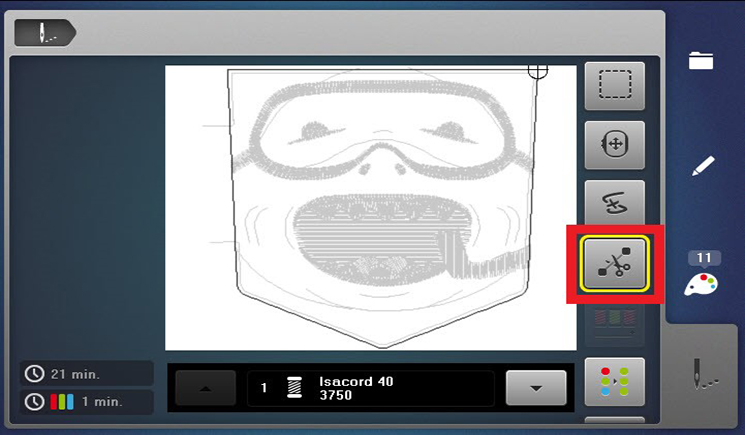
To prepare the machine for stitching, select OK (the needle icon) to move to the Stitching Screen.
![]()
Select Cut Connecting Stitches to activate cutting jump stitches.
Stitch Color 1, the fabric placement stitch, on the hooped stabilizer.
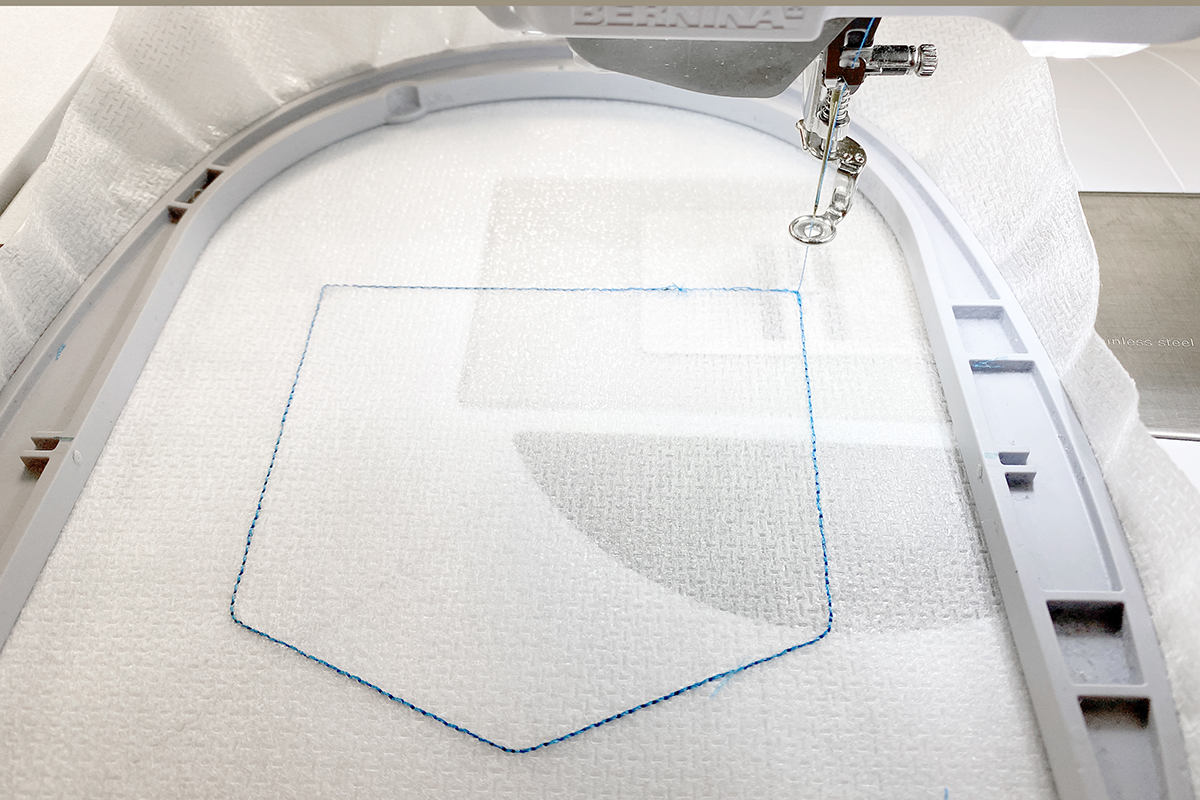
Place the pocket fabric over the placement stitch, right side up. Use OESD Tape TearAway to hold the fabric in place.
Place a piece of water soluble topping, like OESD StitcH2O, on the top of the knit fabric and tape in place.
Stitch Color 2, the fabric tack down.
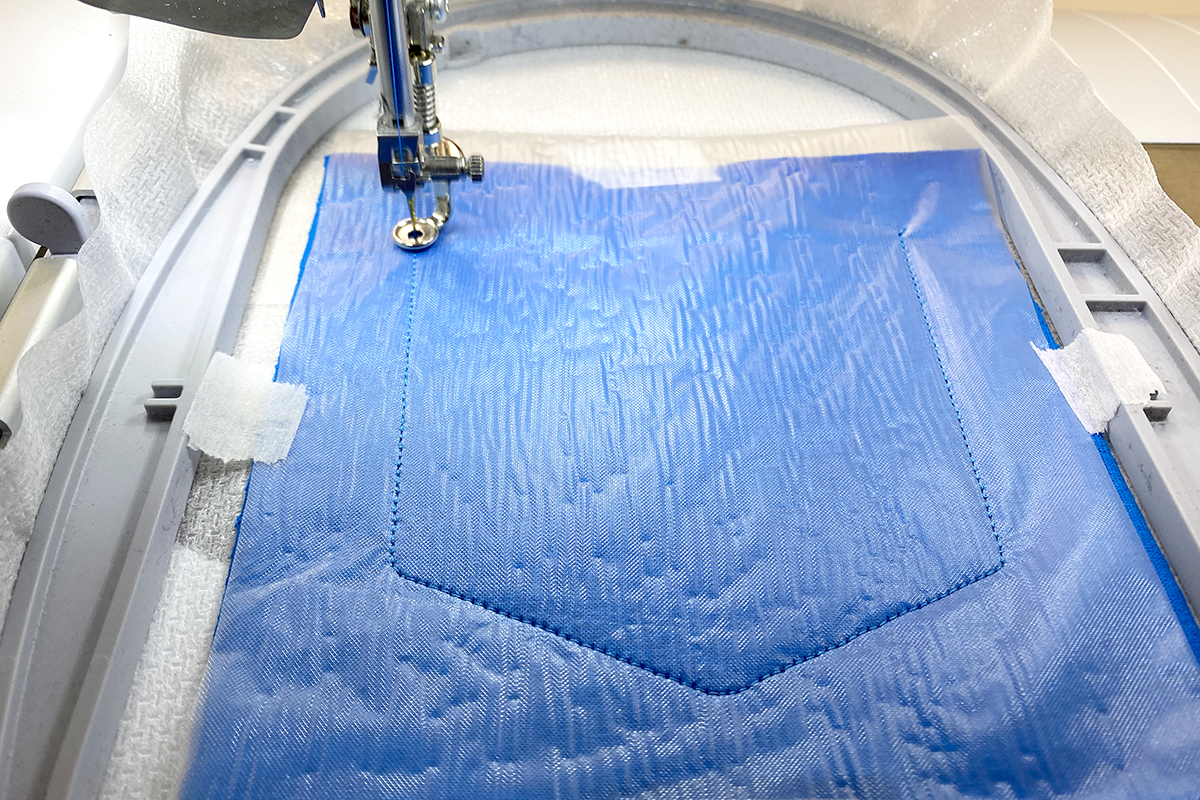
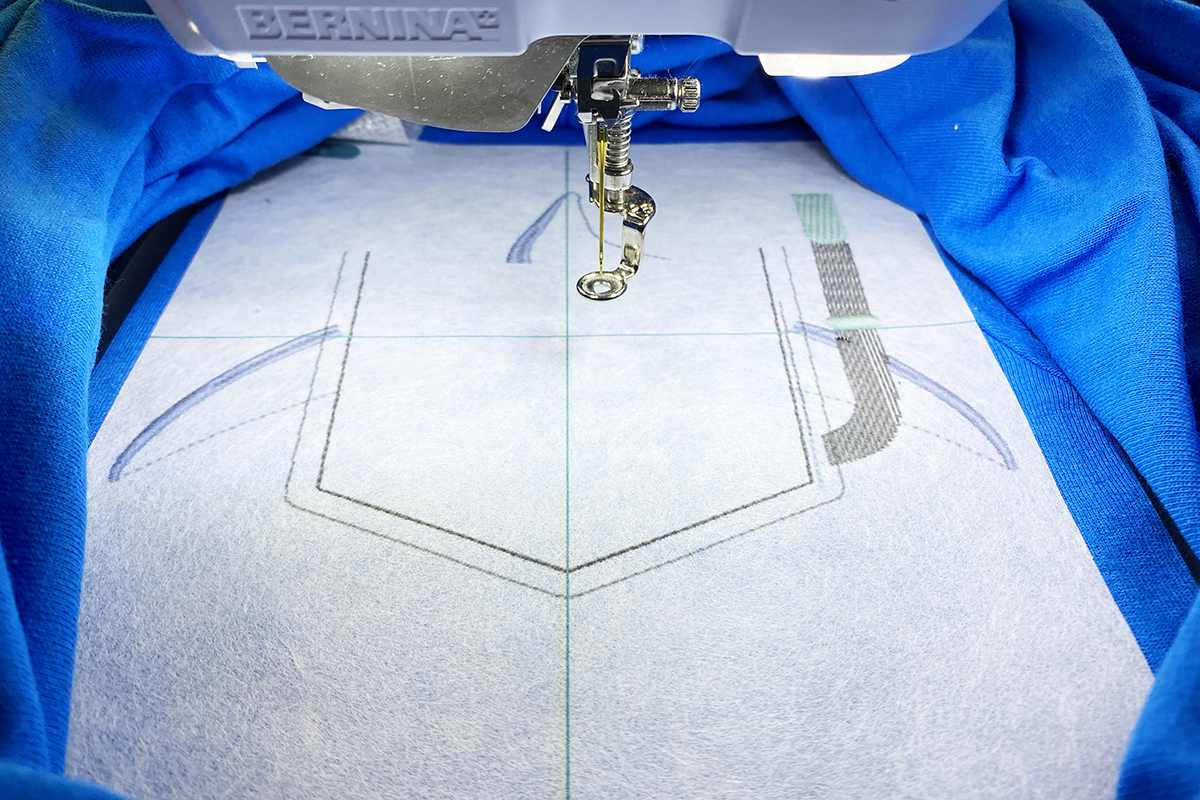
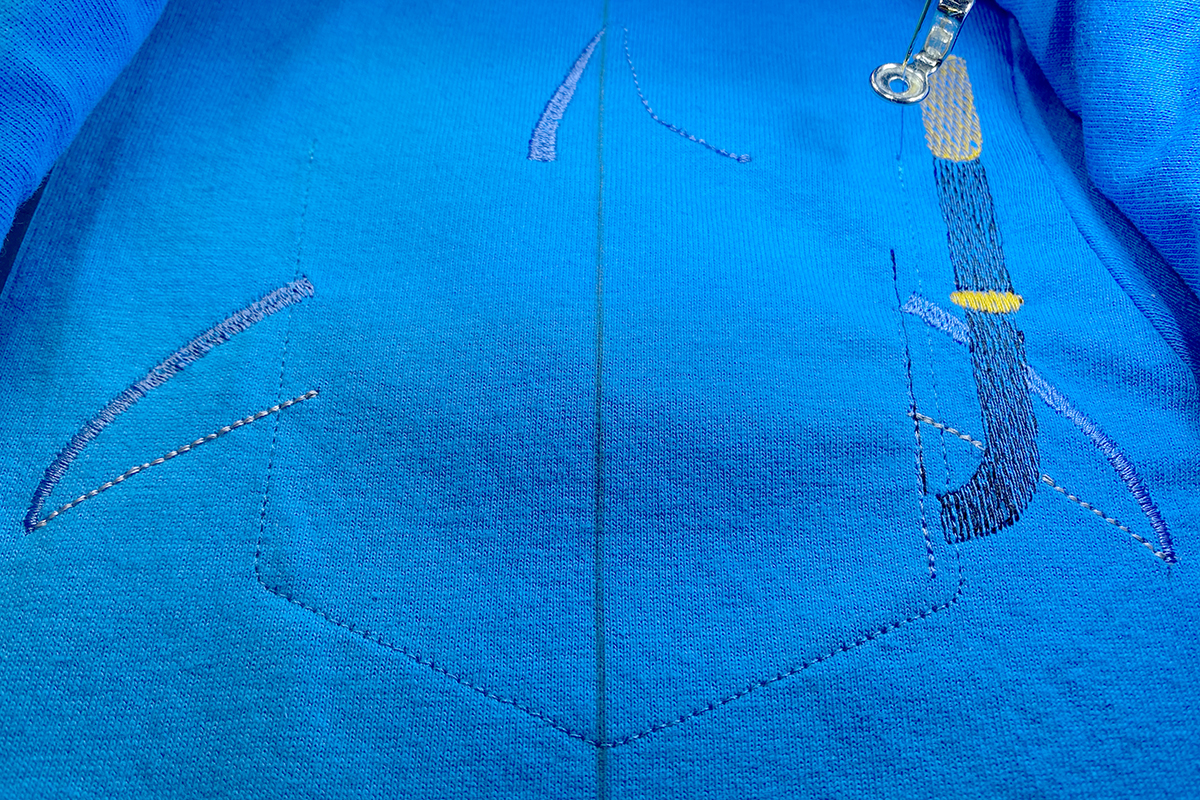
Continue stitching the design, stopping after Color 11. This is before the seam stitch of the pocket. In the next picture I stitched out the pocket without the topping for better viewing.

Place the pocket lining with the right side down over the stitched design, covering it completely. Tape in place and thread the machine with thread to match the pocket fabric.
Stitch the pocket seam stitching.
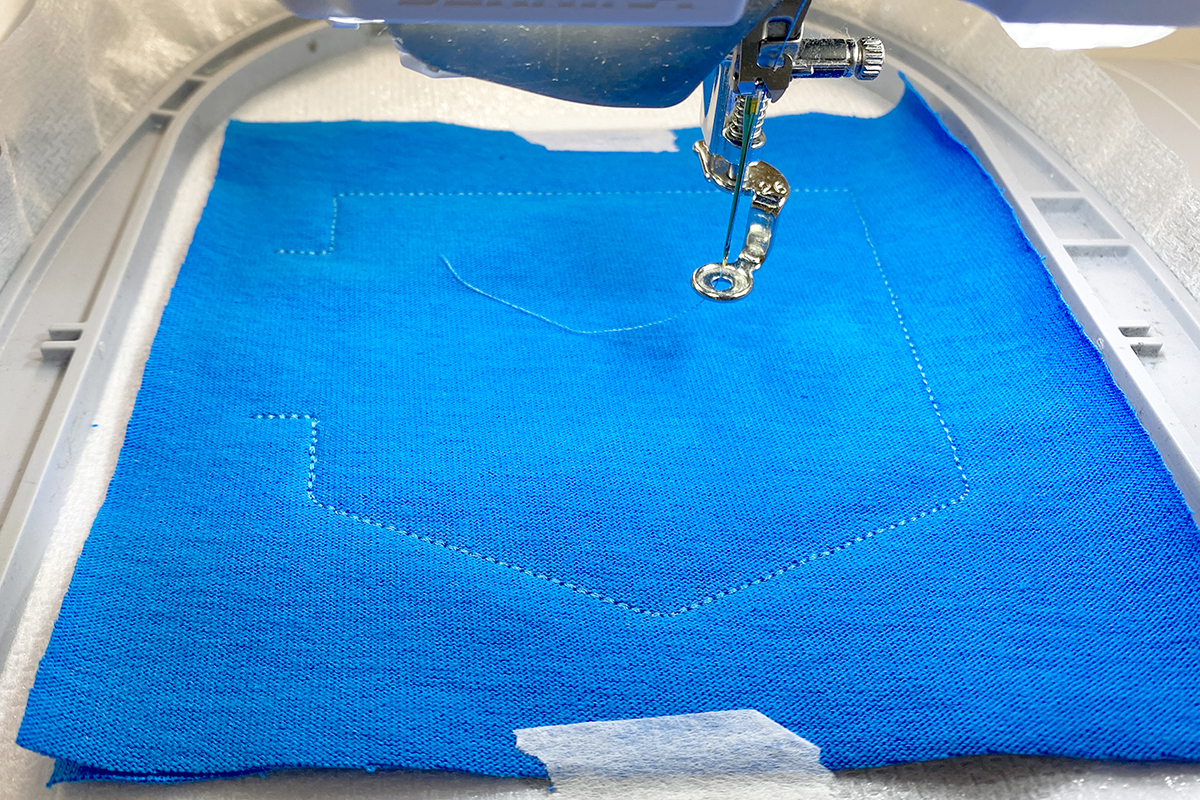
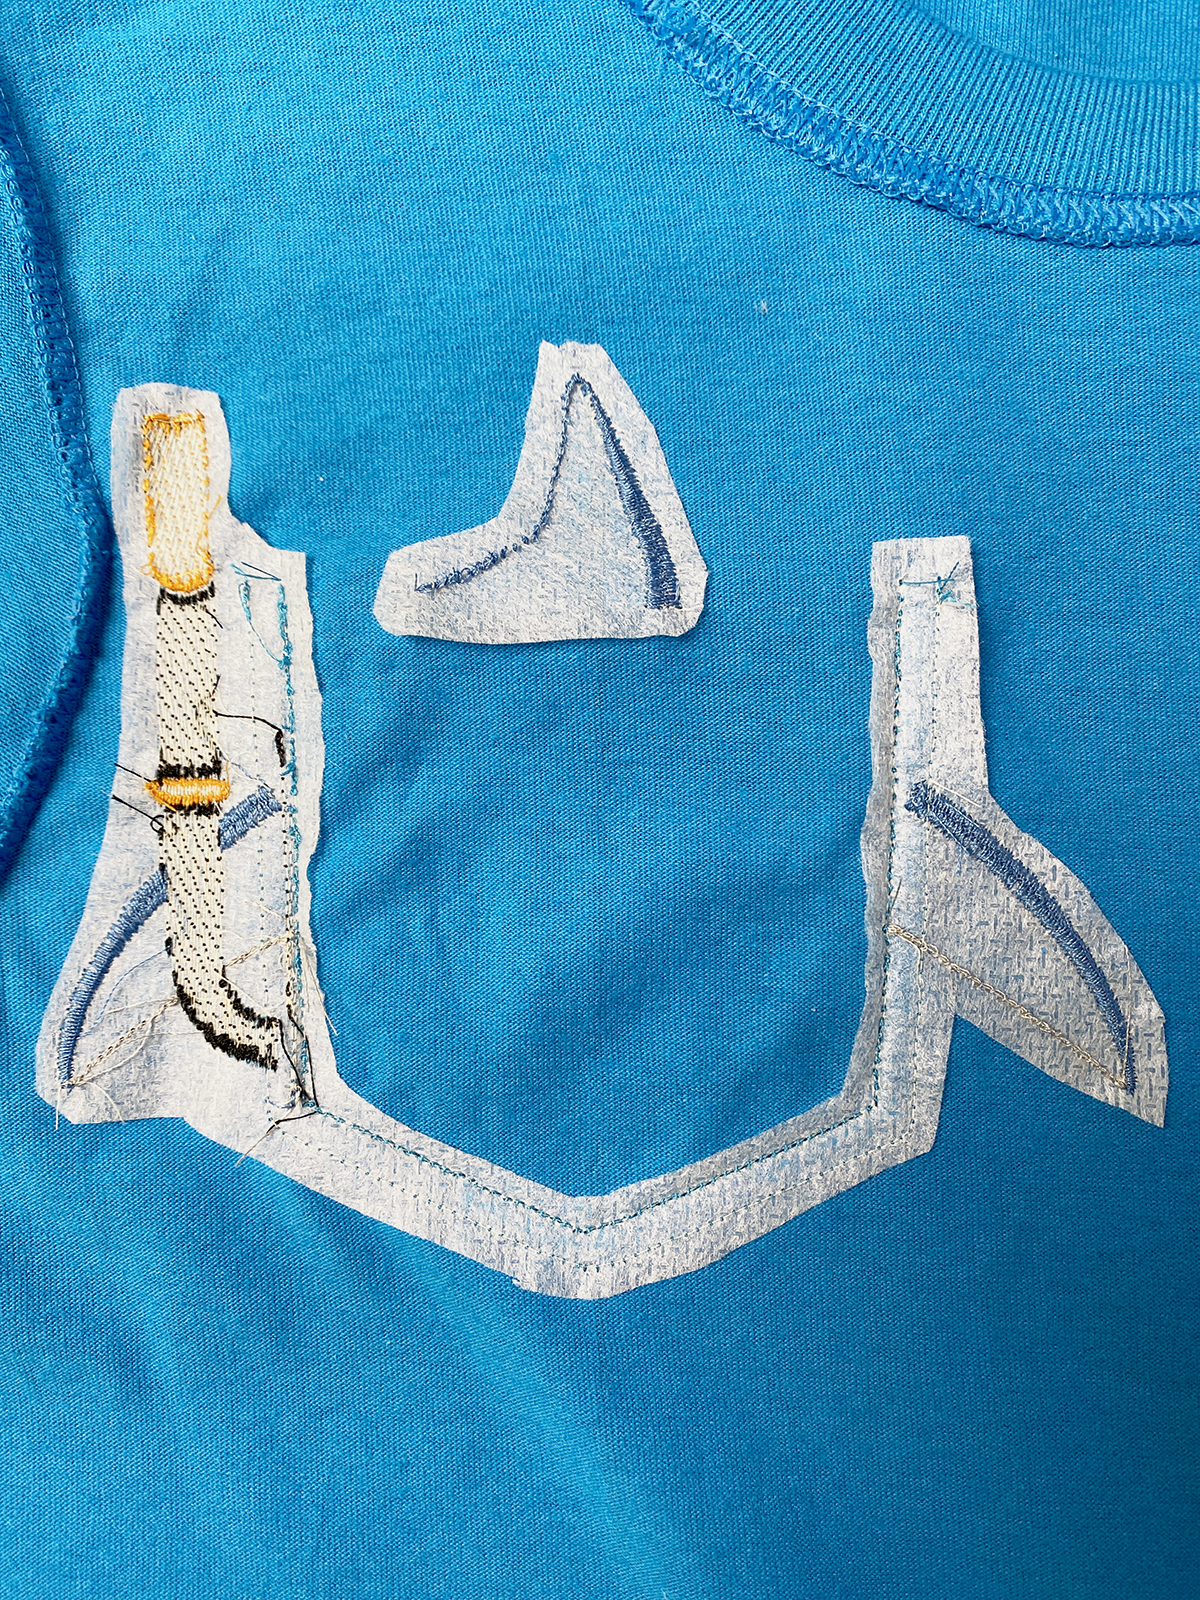
Remove from the hoop and trim excess fabric, leaving a 1/4” seam allowance. Do not trim off the “neck” of the opening. Clip corners.
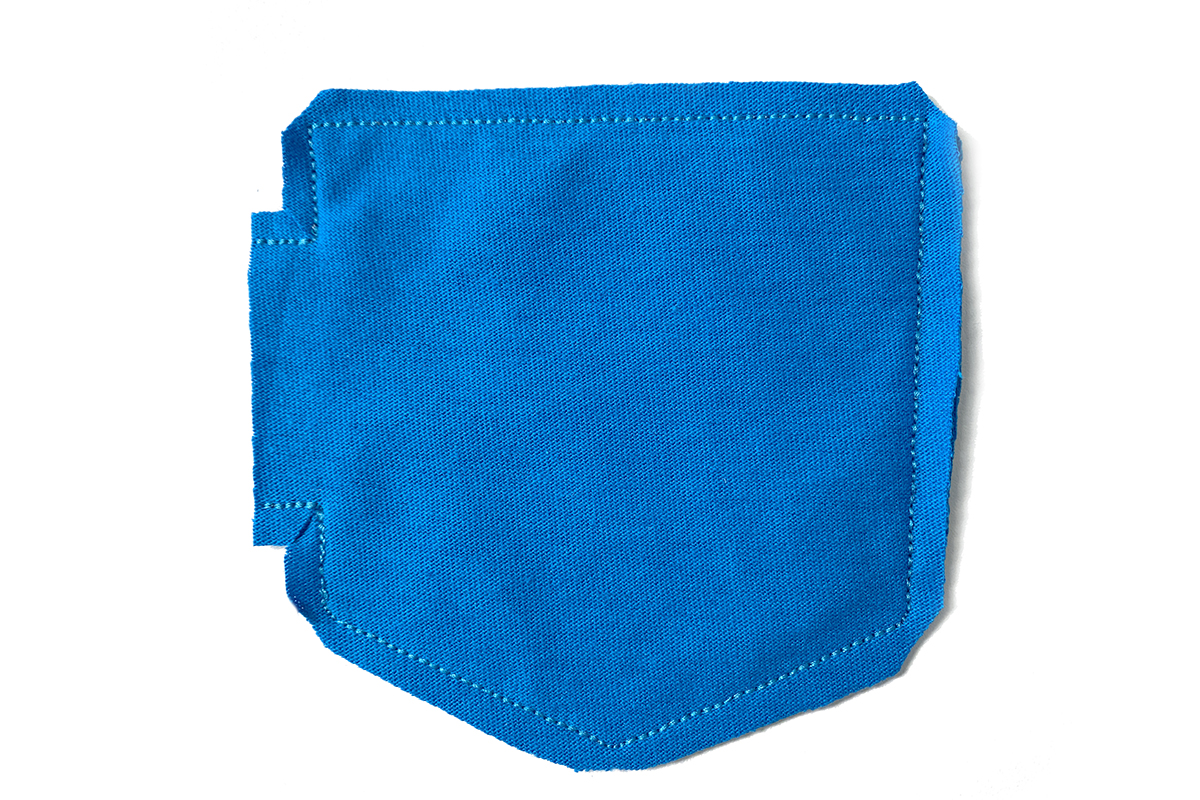
Turn the pocket right side out. Use the Point and Press Tool works to push out the corners. Turn in the opening edges on the side of the pocket.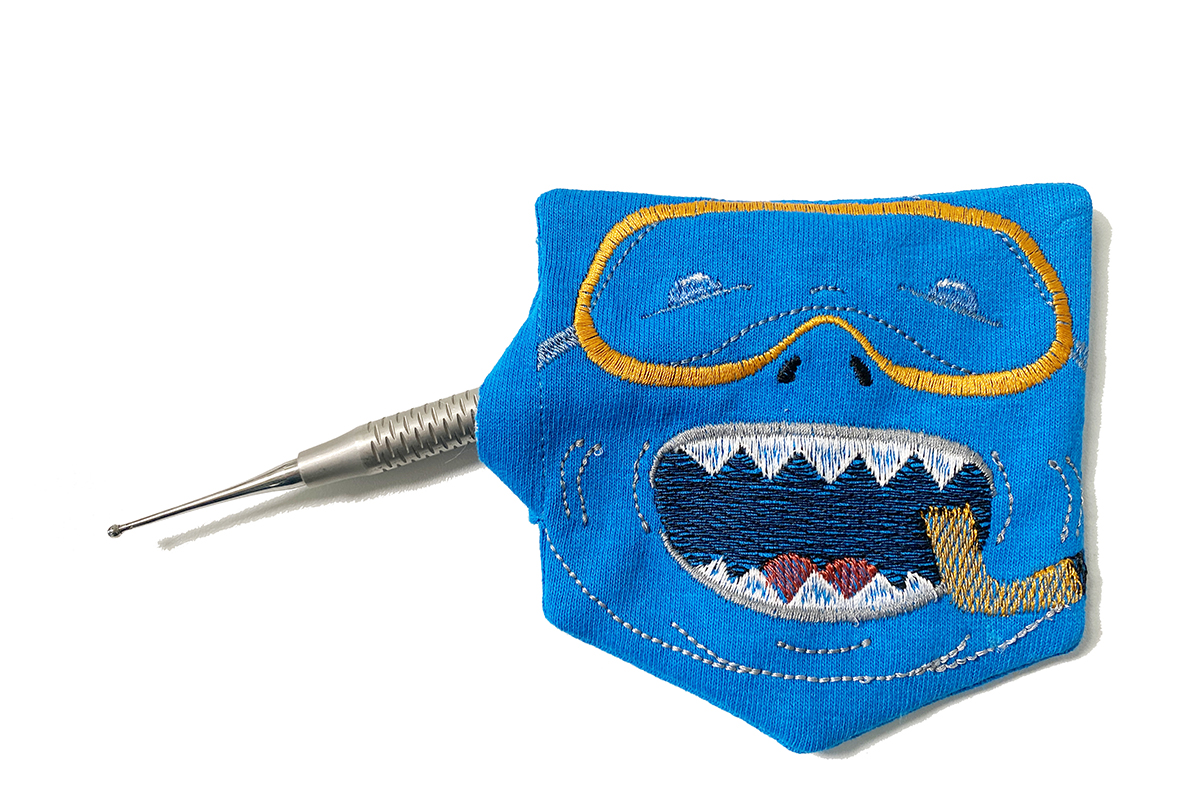
Place the pocket face down on the Perfect Press Embroidery Cloth and press.
Preparing the T-shirt for Stitching
Print the CenterPoint template from the project instruction PDF onto a Stabilstick Template Sheet. Print at a 100% scale. This is used for placement on the T-shirt. Trim around the template.
Fold the T-shirt in half, matching side seams. Place a piece of painters tape along this center fold.
Determine where the top of the design should be on the T-shirt. Then, measure down from this point half of the design’s height and place a mark. This will be the center of the design.
Mark a vertical line on the shirt at this point that is perpendicular to the center fold marking.
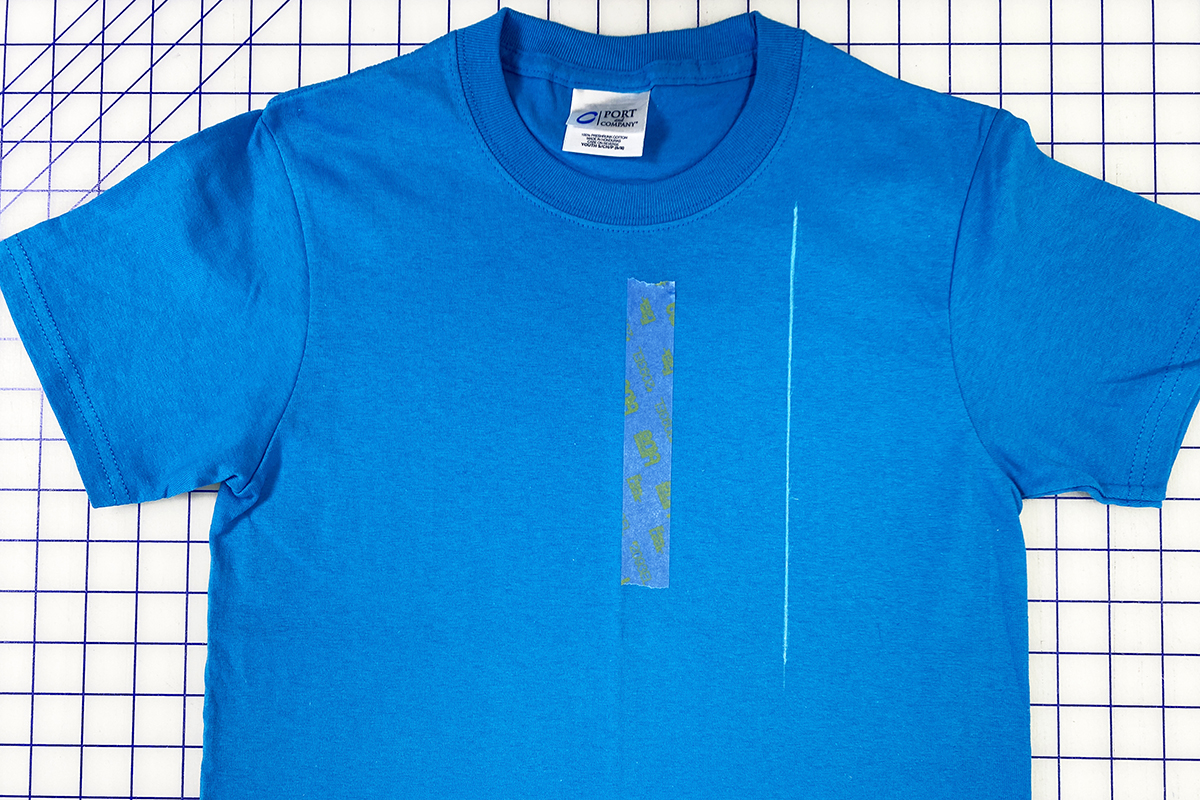
Remove painter’s tape.
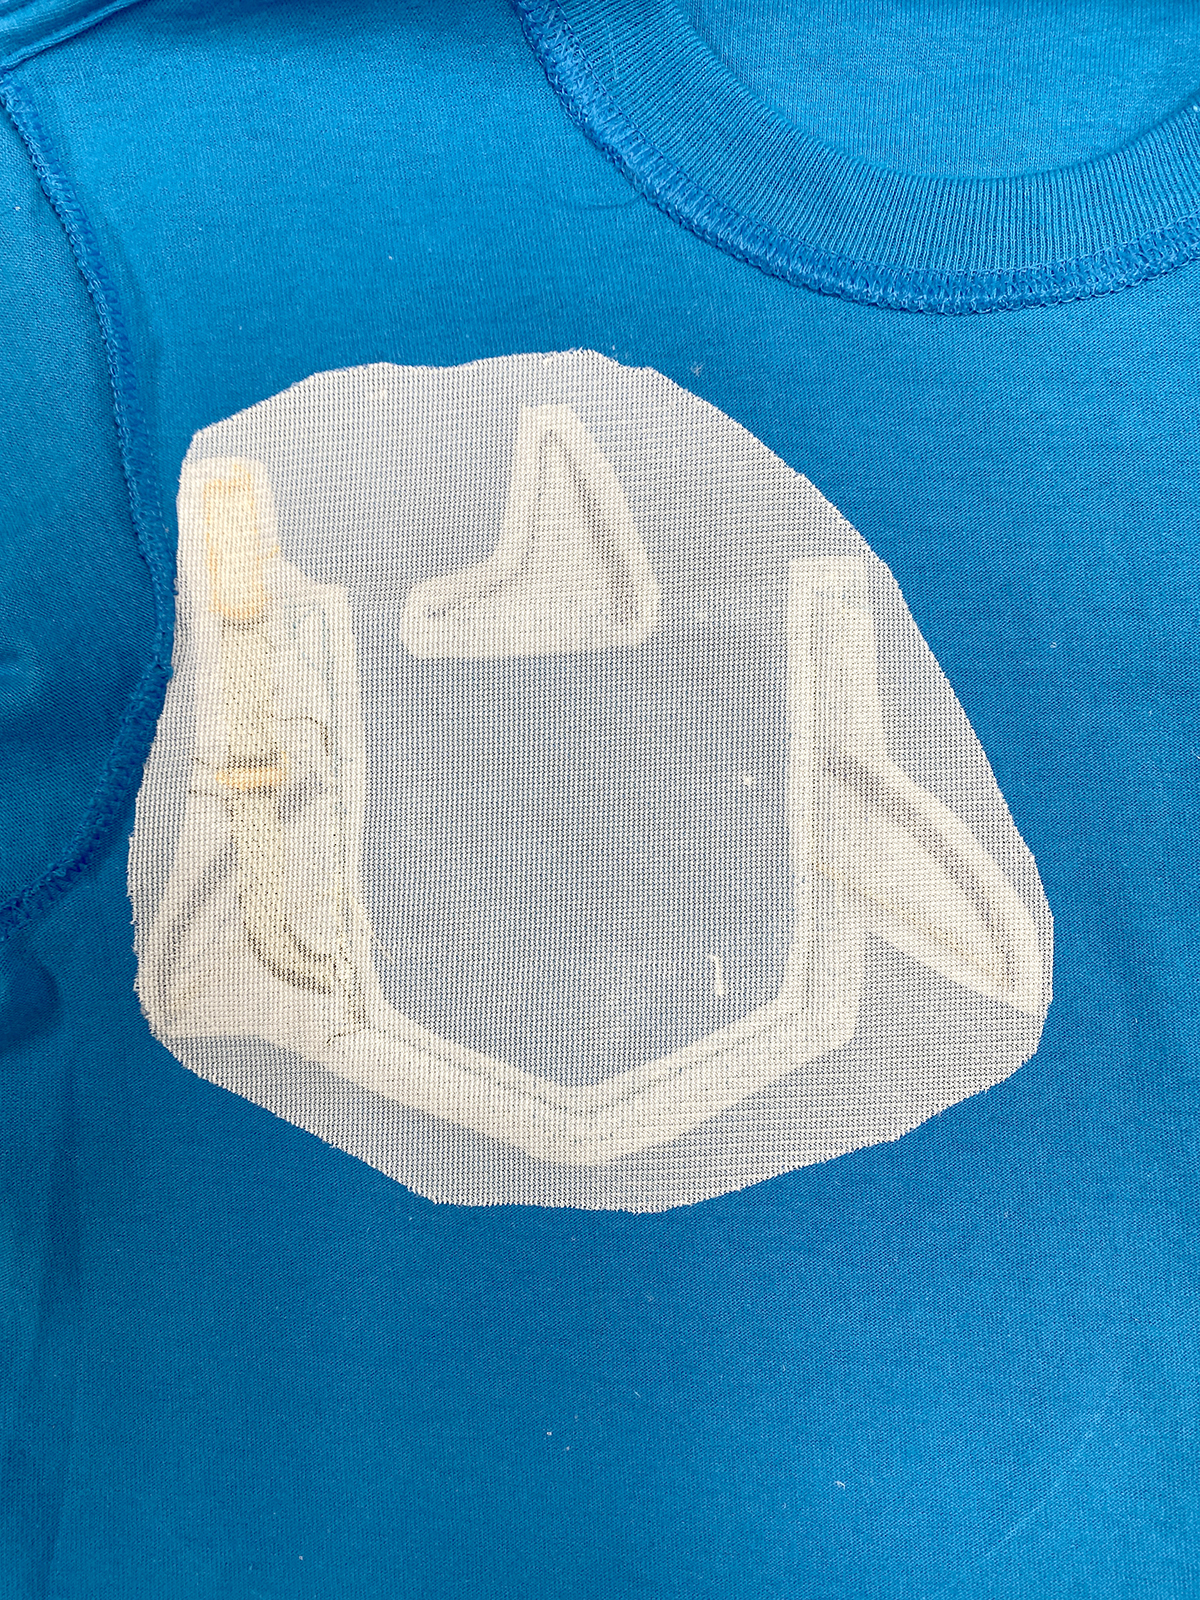
Turn the T-shirt wrong side out and iron one piece of Fusible PolyMesh to the wrong side where the pocket will be placed. Let it cool and then carefully turn T-shirt right side out.
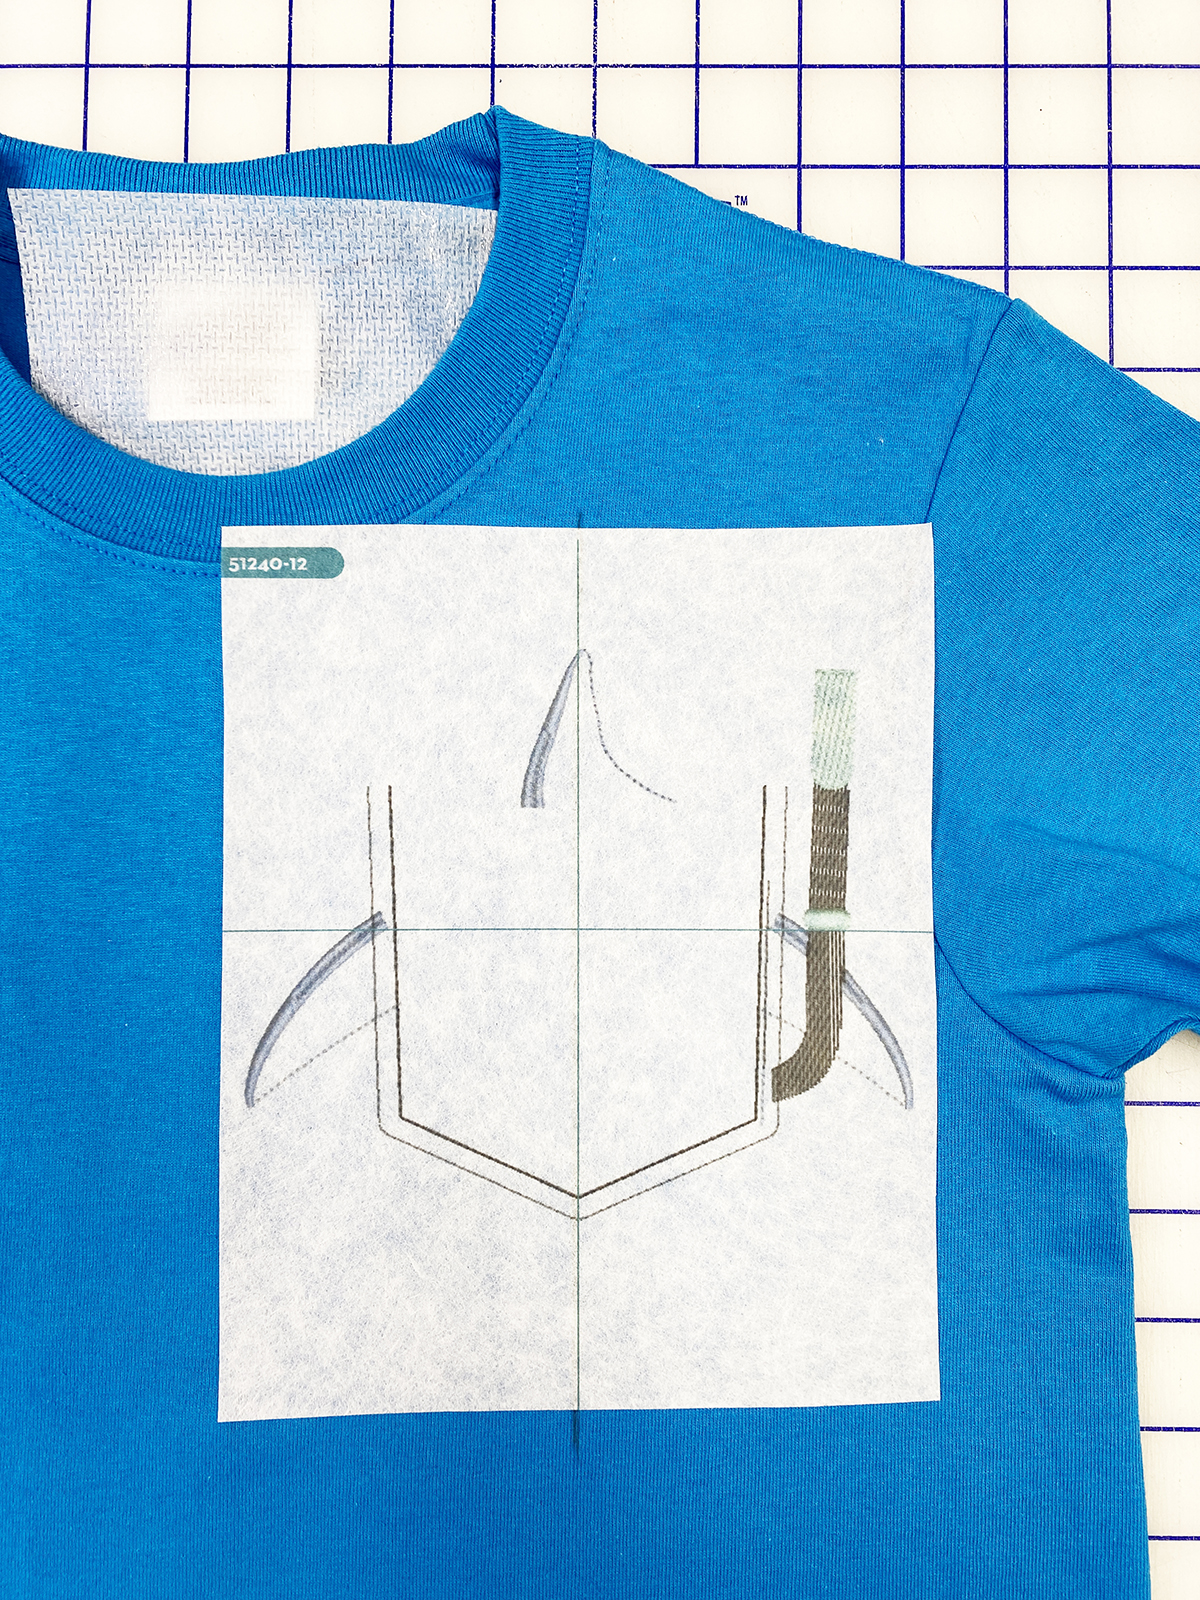
Peel the paper on the back of the printed template.
Position the template onto the T-shirt where the pocket will be placed, lining up the vertical line and center of design markings on the shirt with the printed template markings.
Insert the Hoop Template in the Midi Hoop and hoop the T-shirt.
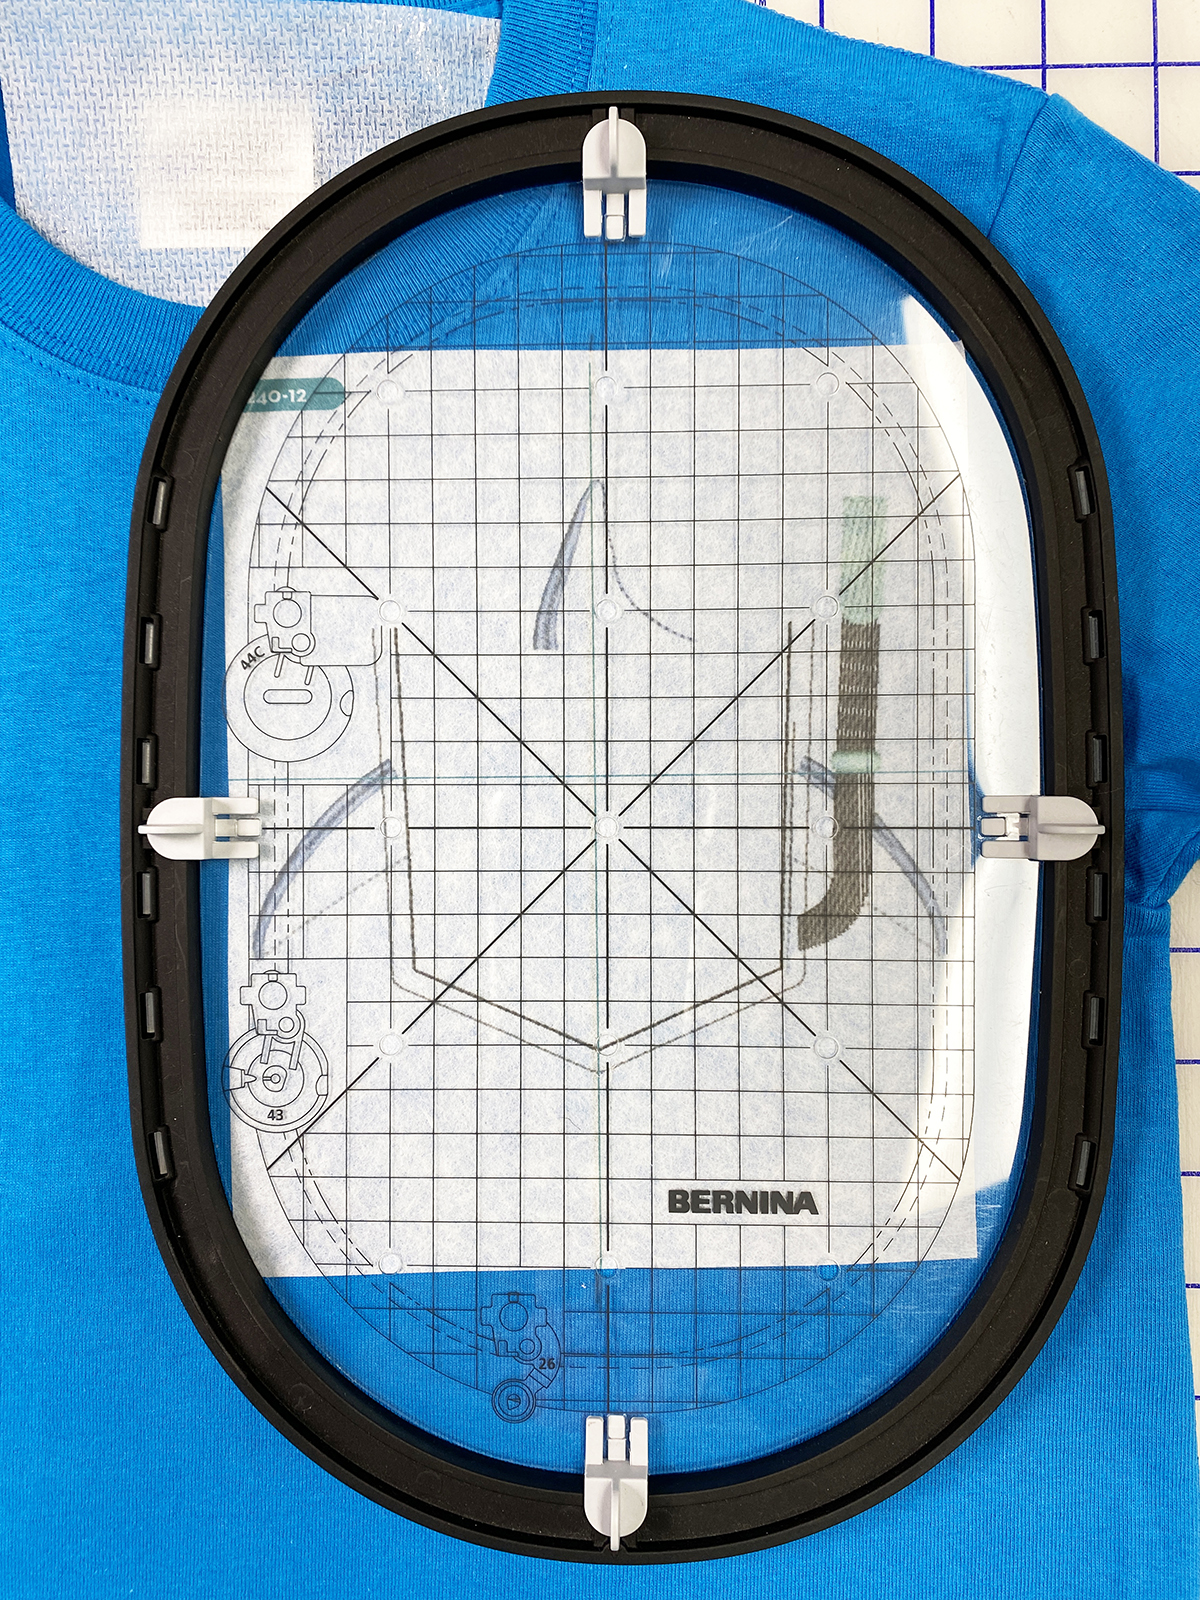
Carefully attach the hoop to the machine, making sure the excess T-shirt is not trapped under the hoop. Use Wonder Clips or TearAway Tape to hold the excess fabric away from the needle and design area.
Prepare to Stitch Pocket Placement
Select the checkered flag as the first part of the design (the pocket) is complete. The machine will return to the Edit menu. Select the Design Selection menu.
Open Shark Pocket Placement Large #51240-12 from the USB stick.
The Midi Hoop should be selected. If it is not, select the Midi Hoop as your active hoop.
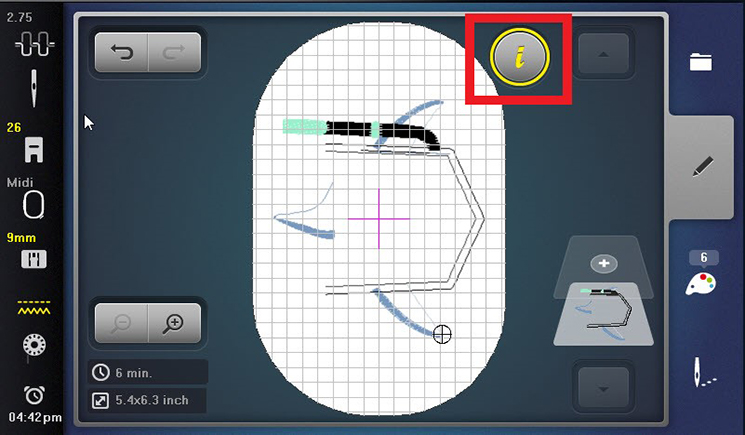
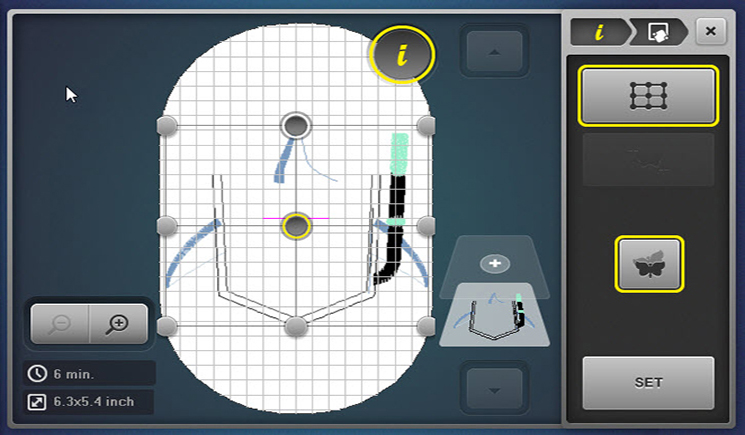
Select the Information menu.
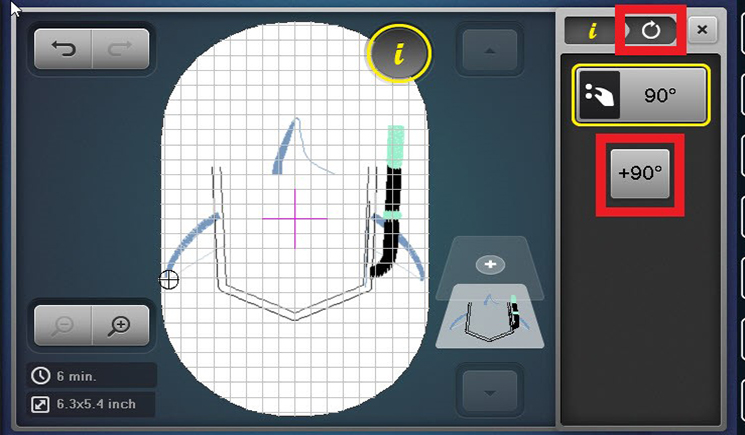
Select the Rotate icon and select Quick 90.
Return to the Information menu. To make sure the design is correctly placed, select Pinpoint Placement.
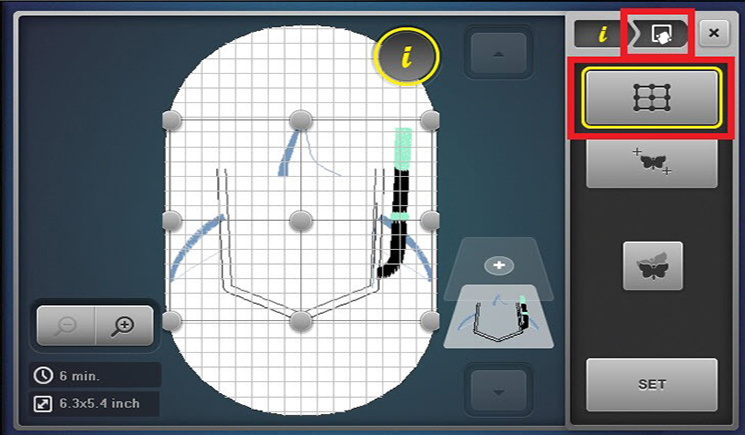
Activate the Grid and select the middle center dot.
Use both Multi-function knobs to move the needle to the vertical center. Select Set.
Select the top center dot. Use only the upper Multi-function knob to move to the vertical center.
Select the bottom center dot. Use only the upper Multi-function knob to move to the vertical center.
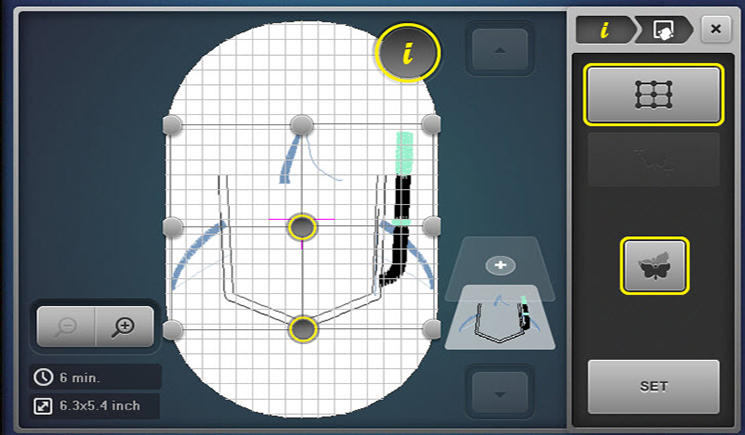
Select Set to anchor when completed and close Pinpoint Placement.
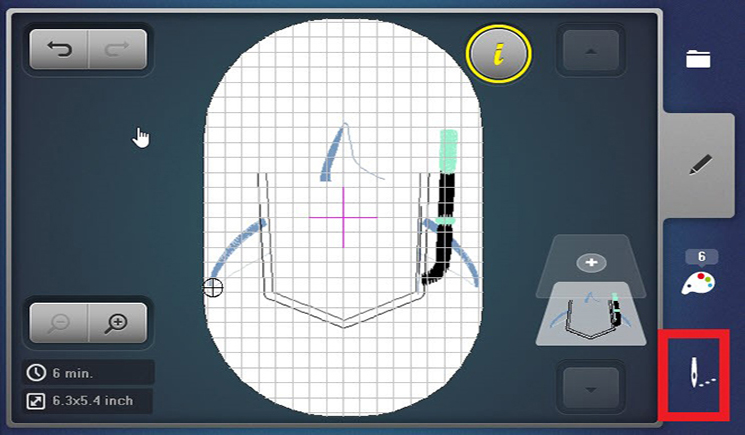
Remove the template from the shirt and place a piece of the StitcH20 on the top of the knit fabric, tape in place. Select the needle icon to move to the stitching screen.
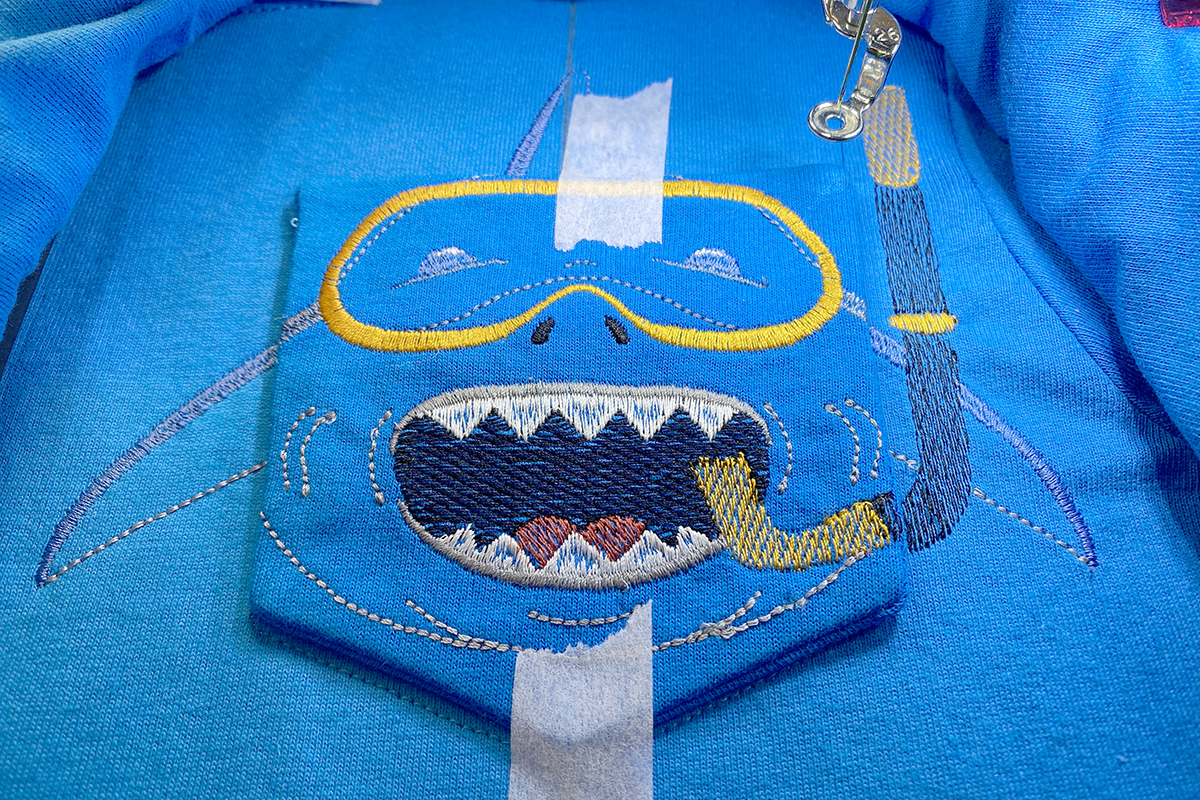
Stitch the T-shirt design color sequences 1-4. When those stitches are done remove water soluble topping. Thread the machine with thread to match the shirt fabric and stitch the pocket placement line (color sequence 5.)
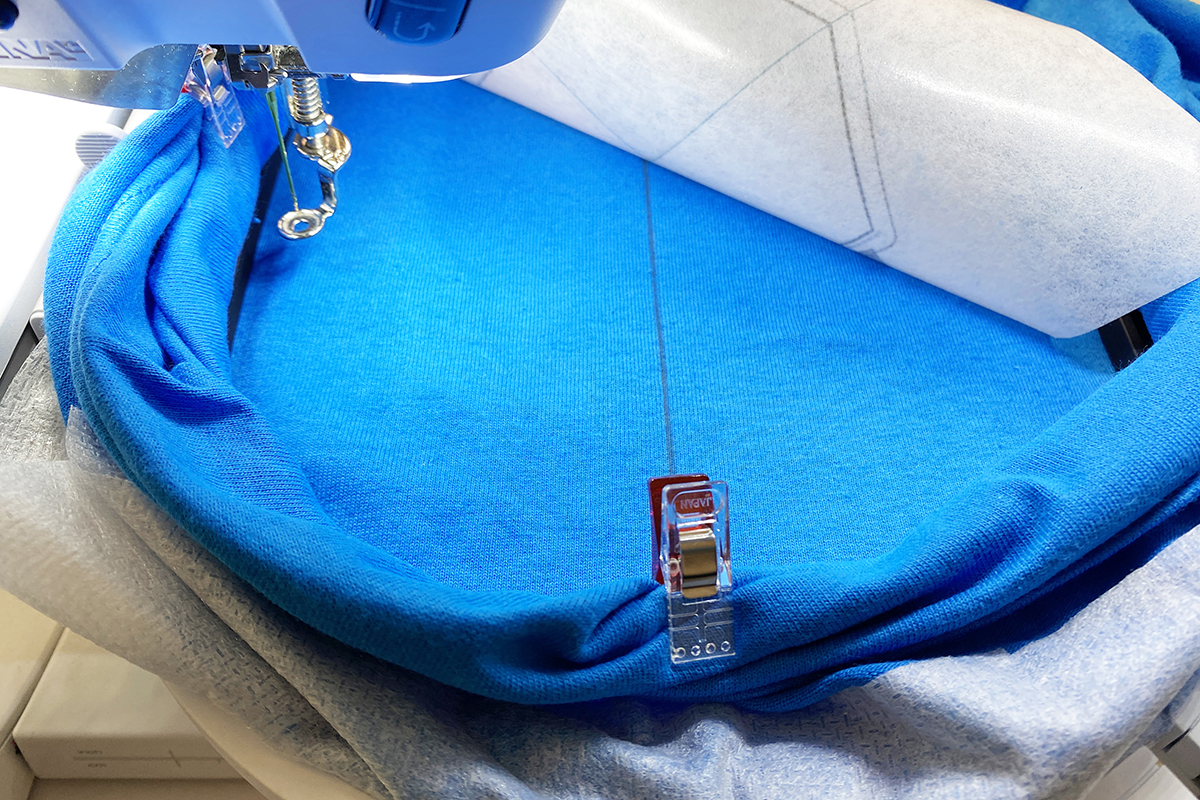
Position the pocket within the stitched placement line and tape it to hold it in place.
Attaching the Pocket
Before stitching we will make a change in the Embroidery Settings to reflect the increased thickness of the pocket we are about to appliqué. This results in changing the height of the presser foot to eliminate the presser foot from “pushing” on the fabric as it stitches the pocket to the shirt.
Select Machine Settings, select Embroidery and then the middle icon, Fabric Thickness.
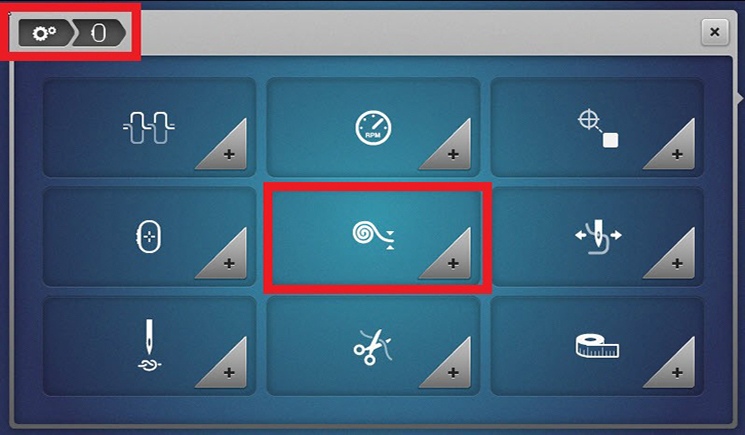
There are three options for the fabric thickness setting that will adjust the height of the presser foot and its contact with the fabric being stitched. Select 7.5 mm.

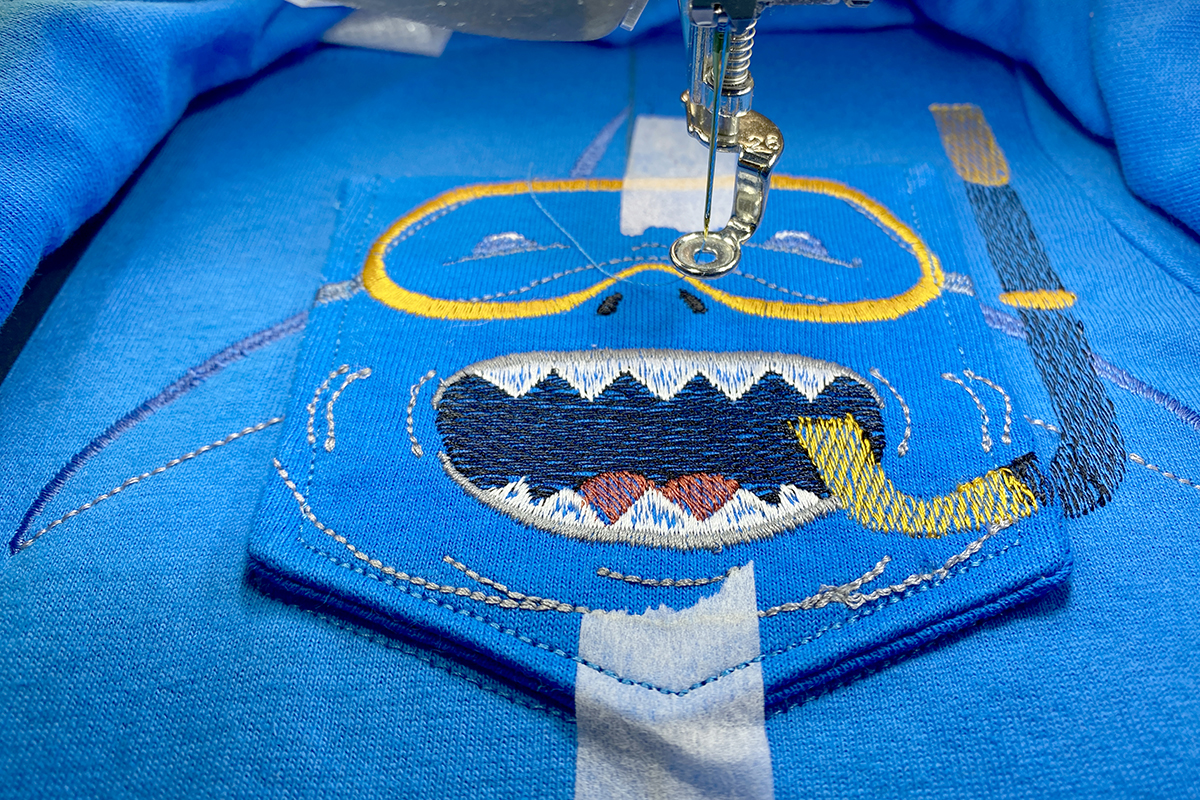
Close the Settings menu and stitch the pocket tack down stitch, the final color sequence in the design.
When stitching is complete, remove the T-shirt from the hoop and remove the excess tape on the front.
Turn the shirt inside out, press the stabilizer with a warm iron to heat and loosen the fusible adhesive. Lastly, trim excess stabilizer to about 1/4” away from the design, being careful to not cut the T-shirt.
Prepare a piece of OESD Gentle Touch that is cut larger than the design (approximately 7” x 6”) and with rounded edges. Place over the wrong side of the design with the fusible side against the fabric. Press with a warm iron. The Gentle Touch covers the back of the embroidery creating a softer contact with skin and prevents irritating sensitive skin.
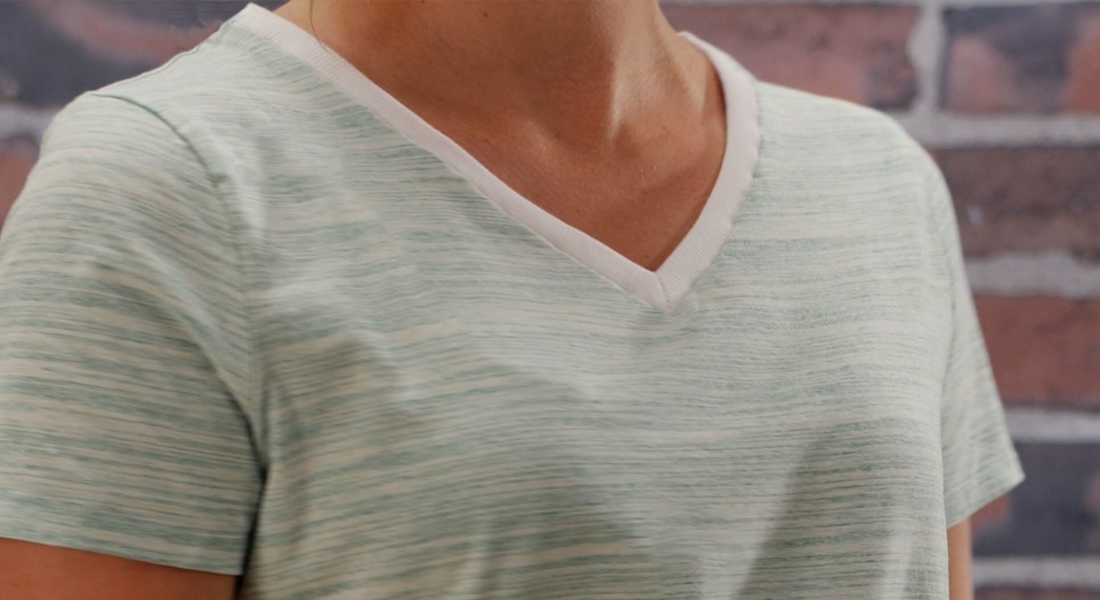
What a fun way to make a one-of-a-kind T-shirt!
Whether you purchase the T-shirt or construct one this will be a sure win and put smiles on little faces, or maybe big ones too!
I hope this has given you some inspiration to create your own version of Put A Pocket On It!