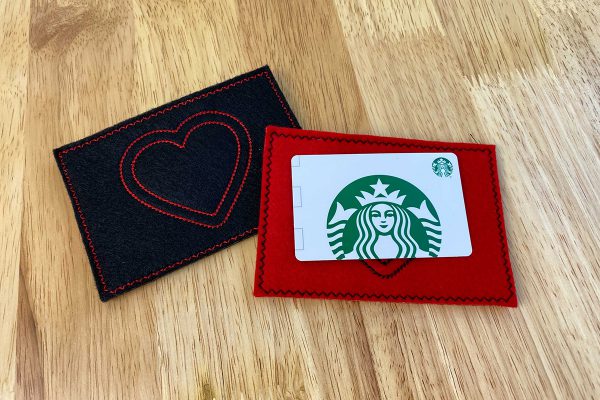
How to Make a Gift Card Holder In the Hoop
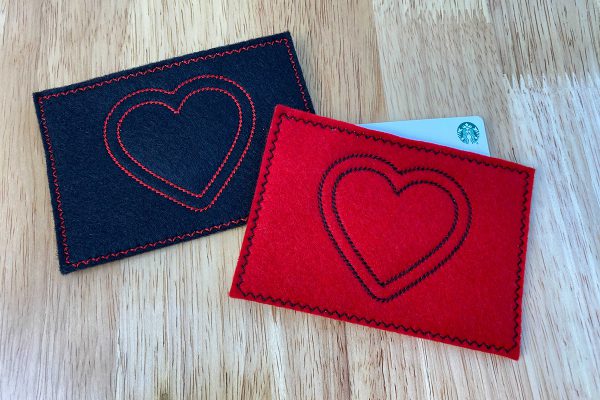
I will admit it…I love receiving gift cards! It’s as if I have been given permission to go on a little shopping spree or get myself a treat. I also love giving them. They are always the right size. I also LOVE giving hand-made gifts! So here is a fun little project to make a cute holder for the gift cards YOU want to give. Using felt makes it super easy…nothing to turn and tidy raw edges. Instead of a straight edge rotary cutter to trim, pull out those pinking shears! I even have some scalloped shears that I might try next time. I hope that you enjoy making this and gifting someone special in your life! (And they are reusable, so maybe you will get it back!)
Note: Design file is included if you don’t have software. Click HERE to download the file.

Supplies to Make a Gift Card Holder In the Hoop
- BERNINA Embroidery Software V8.2
- BERNINA Embroidery machine
- Large Oval Hoop
- Drop-Shaped Embroidery Foot #26
- Embroidery needle 80/12 sharp (I like Organ needles)
- Stabilizer: 9” X 14” piece OESD Ultra Clean and Tear
- Felt: 2 – 5” X 6” rectangles
- Isacord Thread: Contrasting color to the felt, same in top and bobbin
- Expert Embroidery Tape Tearaway by OESD
- Basic stitching supplies
Software Directions to Make a Gift Card Holder In the Hoop
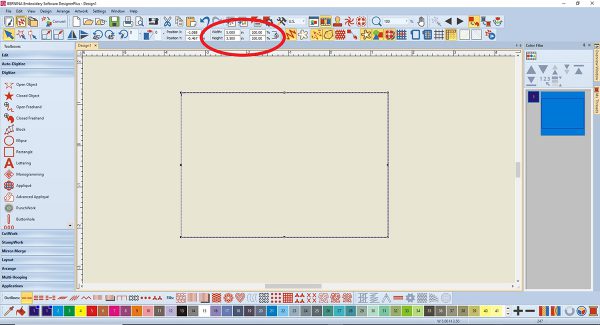
- Open BERNINA Software V8.2.
- Using the Rectangle Tool in the Digitize Toolbox and a Single Outline in the lower toolbar, draw a rectangle. Then use the Select tool to select it.
- Turn off Proportional Scaling and resize to 5 inches wide by 3.5 inches tall. Assign Color #1, dark blue. This will be the placement line for your fabric.
- With the rectangle selected, copy and paste. Assign Color #2, light blue. This is the tack down line.
- At this point, I would recommend that you save your design. Call it “ITH Felt Gift Card Holder”.
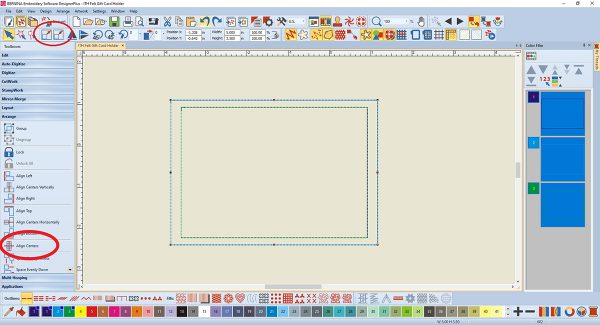
- Copy and paste the rectangle again. Assign Color #3, green. This will be the placement line for our decorative stitching.
- Reduce the size of the green rectangle by 20% by using the Size icon in the upper toolbar. Then select everything and center using Align Centers in the Arrange Toolbox on the left.
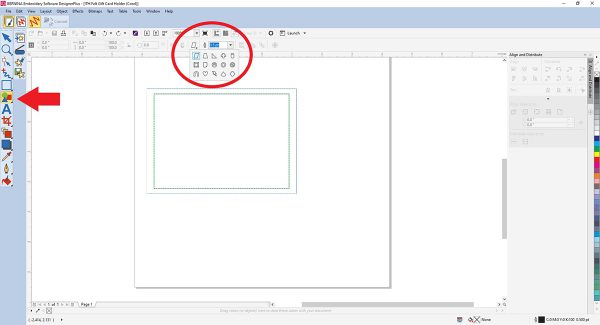
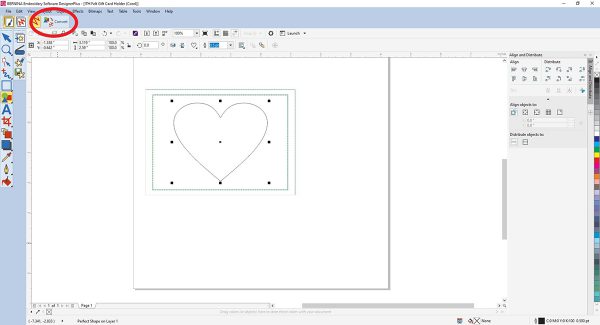
- The easiest way to draw a perfect heart is to use the tools in Artwork Canvas. Click on the icon in the upper left of your screen to open it. It looks like a paintbrush.
- On the left side of the screen select the Basic Vector Shapes icon. At the top of the workspace, look for the Perfect Shapes icon. When you click on the black triangle in the lower right corner a box will open with a variety of shapes. Click on the heart.
- Hover your mouse over the center of the rectangle on your workspace. Hold down the Shift key and left-click and drag to draw a heart. Because you are holding down the Shift key the heart increases in size from the center out as you drag. Release the Shift key and the mouse. The heart should be selected.
- With just the heart selected select Convert. The software will convert the drawn design to embroidery and you will be back on the main embroidery screen.
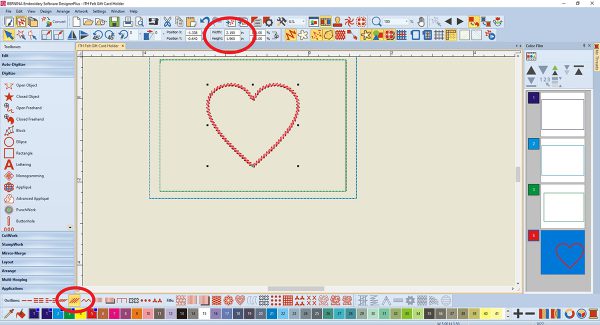
- With just the heart selected click on Stemstitch Outline in the lower toolbar. Assign Color #5, red.
- Resize the heart to 2.19 inches wide by 1.96 inches high.
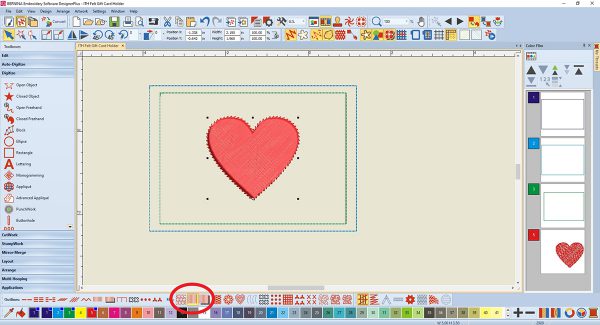
- Copy and paste the heart. While the copy is selected change to a Satin Fill by clicking on the icon in the lower toolbar.
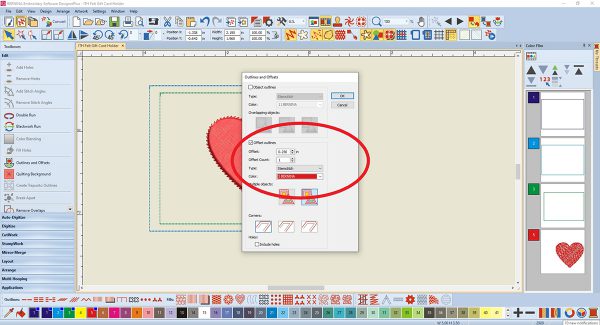
- While the satin-filled heart is selected, click on Outlines and Offsets in the Edit Toolbox.
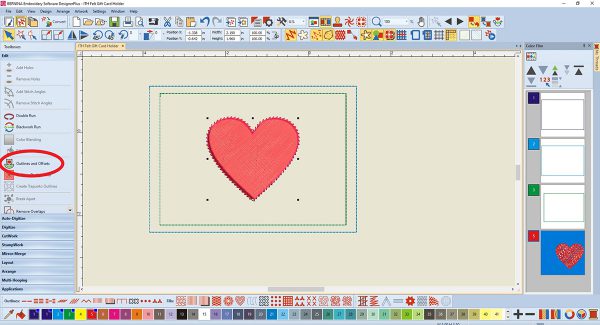
- Select only Offset outlines. Change the offset to 0.25 inches and the Offset Count to 1. The type of stitch is Stemstitch and the color is #5 red. Click OK.
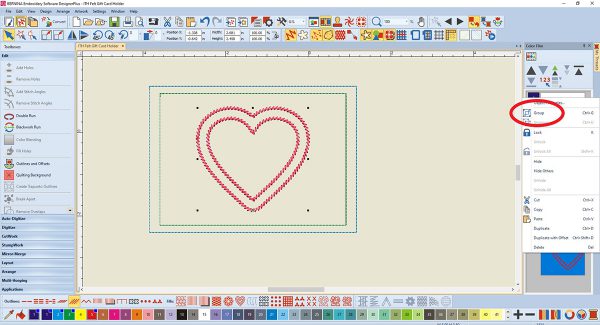
- Select the solid heart and delete. You should now have two heart outlines nested together within a stitched rectangle. In the Color Film, select Layer 4, the hearts. Right-click and select Group. Now the 2 hearts are grouped together, which is important for the next step…centering.
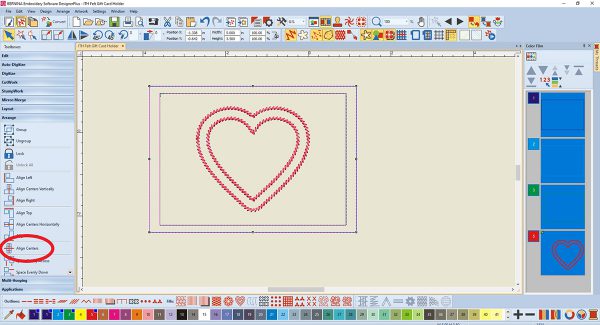
- Touch Ctrl-A on the keyboard to select everything. In the Arrange Toolbox select Align Centers. Now everything should be centered on your design. This is what your design should look like.
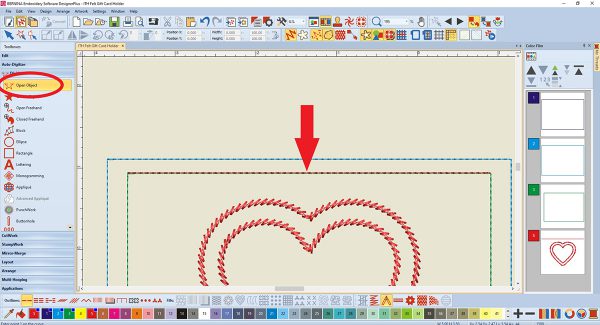
- Now we will add some decorative stitching. In the Digitize Toolbox select the Open Object tool. Then select Single Outline and Color #5, red. Left-click on the top left corner of the GREEN rectangle. While holding down the CTRL key click on the upper right corner of the green rectangle. Then press enter. A red line is now going across the top of the green box. Holding the CTRL key helps you keep the line straight.
- Select this red line. Open Object Properties. The Outline Stitch tab should be open. In the drop-down menu of Outline, type choose Pattern Run. Then click on Select next to Pattern set.
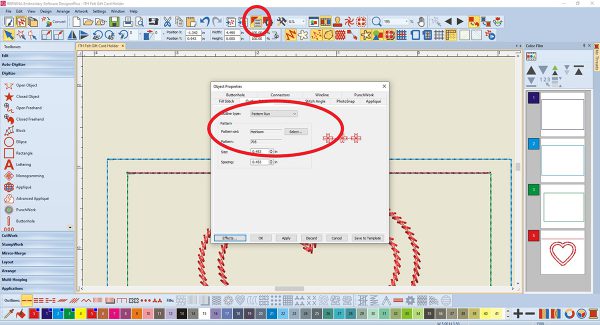
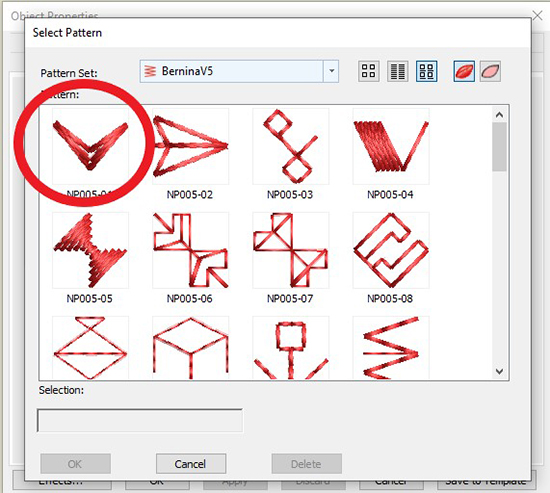
- In the BERNINAV5 set select NP005-01. Click on OK and then OK in Object Properties.
The line is now a decorative stitch.
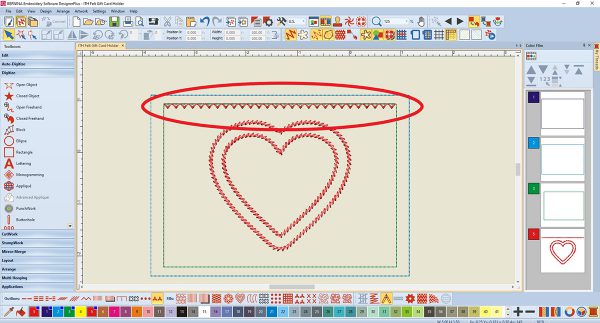
- Again, select the Open Object tool, Single Outline and Color #5. You will digitize the rest of the green rectangle, this time starting at the upper left corner. Then left-click on the lower-left corner, lower right corner and ending at the top right corner. Press Enter. Remember to hold the CTRL key to keep your lines straight. Change to the same decorative stitch as before in steps 20 and 21.
- So why not digitize the whole rectangle at once? The top line is a decorative element that will be stitched ONLY on one piece of felt. After the back piece of felt is added, the rest of the rectangle will be stitched, holding it all together. Because we want the machine to stop before the three-sided rectangle is stitched, change this part to Color #13, black.
- We no longer need the green rectangle that is in Layer #3 in Color Film, so delete it.
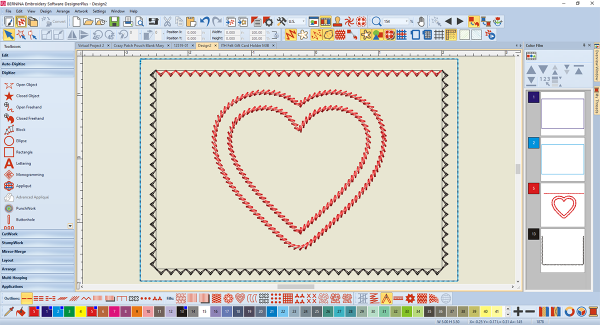
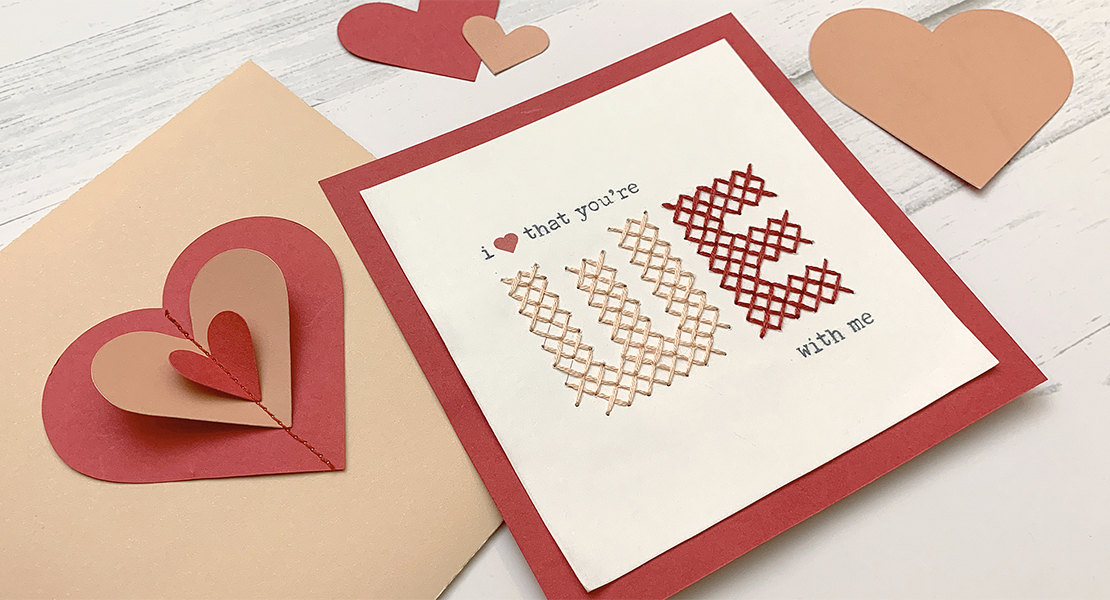
- This is what your finished design should be like. Export to your USB stick.
Directions to Stitch a Gift Card Holder In the Hoop
- Hoop stabilizer only in the oval hoop. Thread machine with matching thread in top and bobbin. One color will be used on the entire design.
- Stitch Color #1, Placement Line.
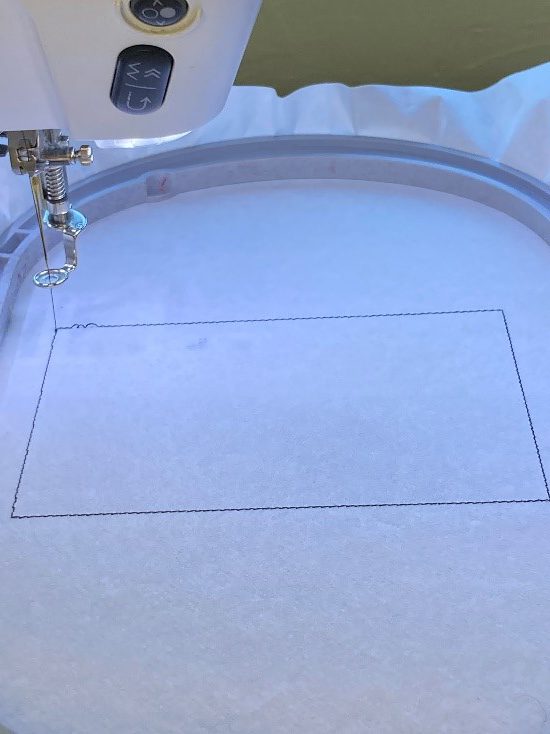
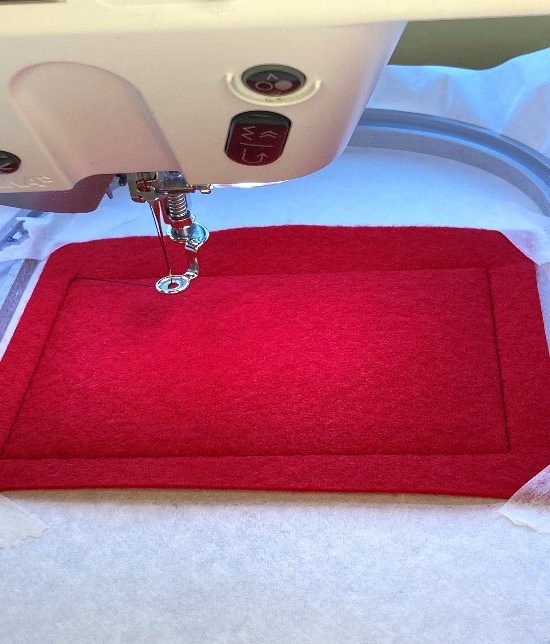
- Center one felt piece on the stabilizer, covering the Placement Line. Tape down the corners using OESD Expert Embroidery Tape.
- Stitch Color #2, Tack Down Line.
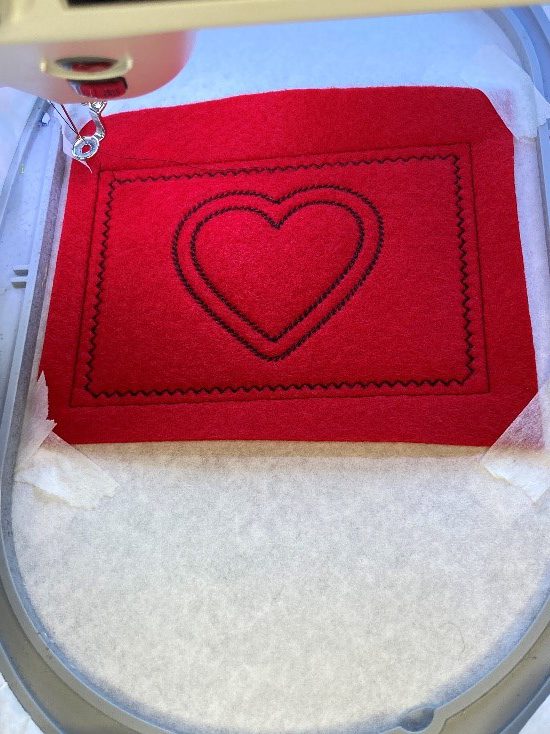
- Stitch Color #3, Heart and Upper Border.

- Remove the hoop from machine but DO NOT UNHOOP THE PROJECT. Center remaining felt piece on the back, covering all stitching. Tape down all 4 corners.

- Reattach hoop and stitch Color #4, Final Border.
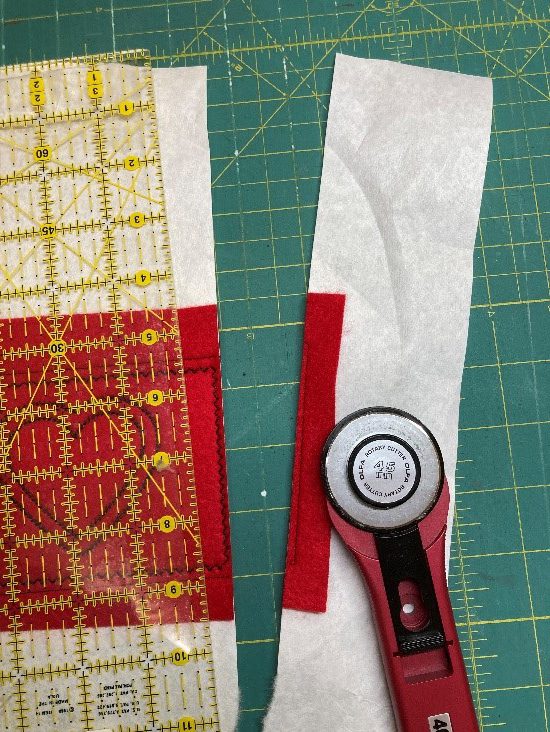
- Remove the hoop from the machine. Trim all 4 sides using a rotary cutter, cutting between the Tack Down Line and Borders. I would recommend placing your blade closer to the Tack Down Line.
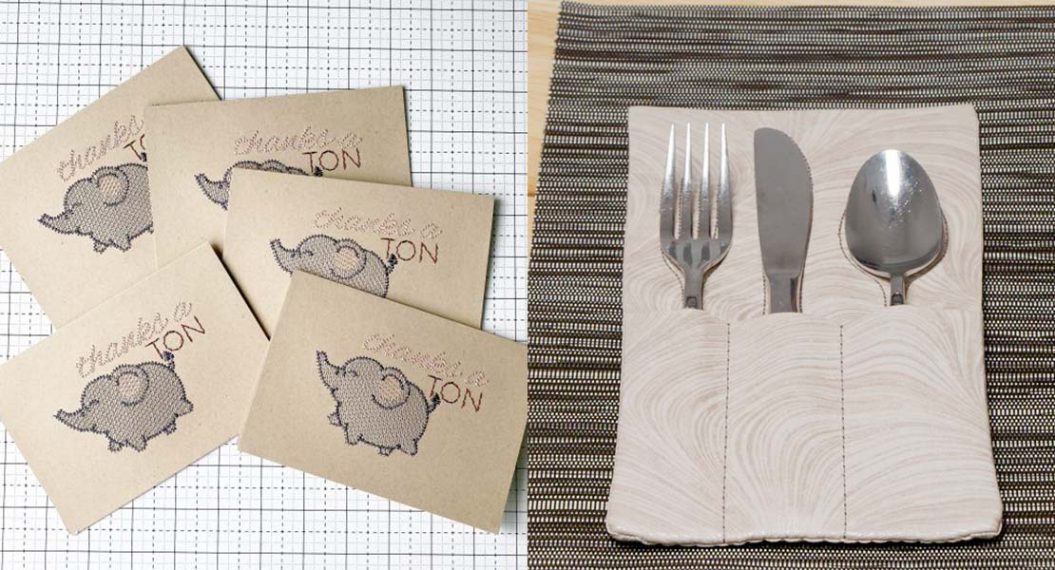
- Insert a gift card and spread some joy!
Used Products

What you might also like


6 comments on “How to Make a Gift Card Holder In the Hoop”
-
-
I plan to make gift card holders from the pattern in We All Sew. I plan to use Kraftex paper/fabric (at least I’m going to try to use that). If not, I’ll use felt.
-
Maybe I missed something – but where does the gift card get inserted?
Leave a Reply
You must be logged in to post a comment.

Hi! Can you tell me where in the software I can turn off “Proportional scaling? I admit I do not know all that I need to know about Bernina software 8.2. Thank you