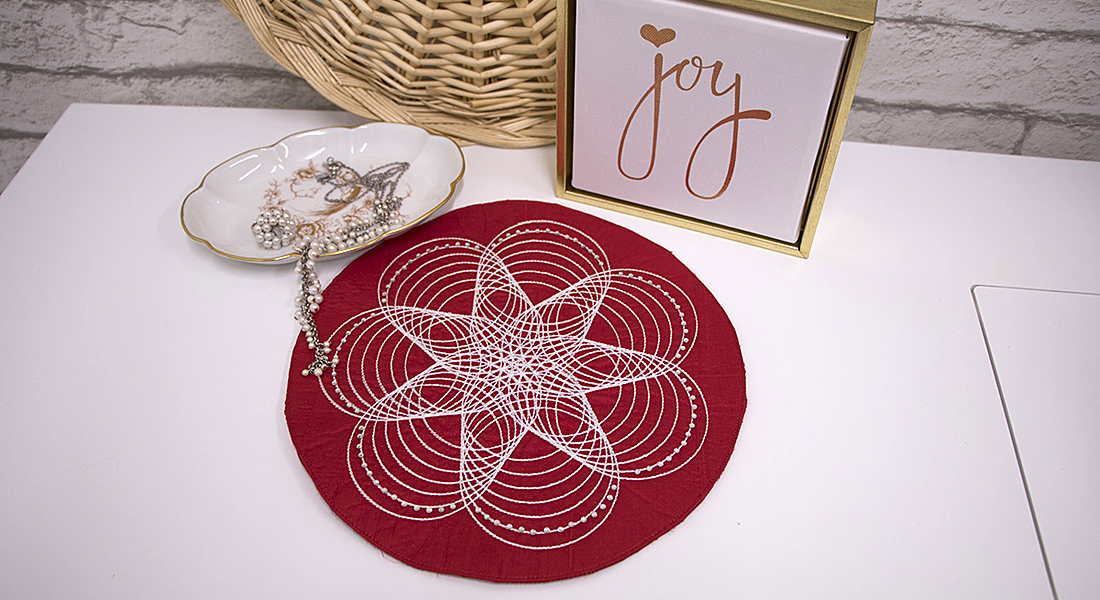
Edge-to-Edge Quilting in the Embroidery Hoop
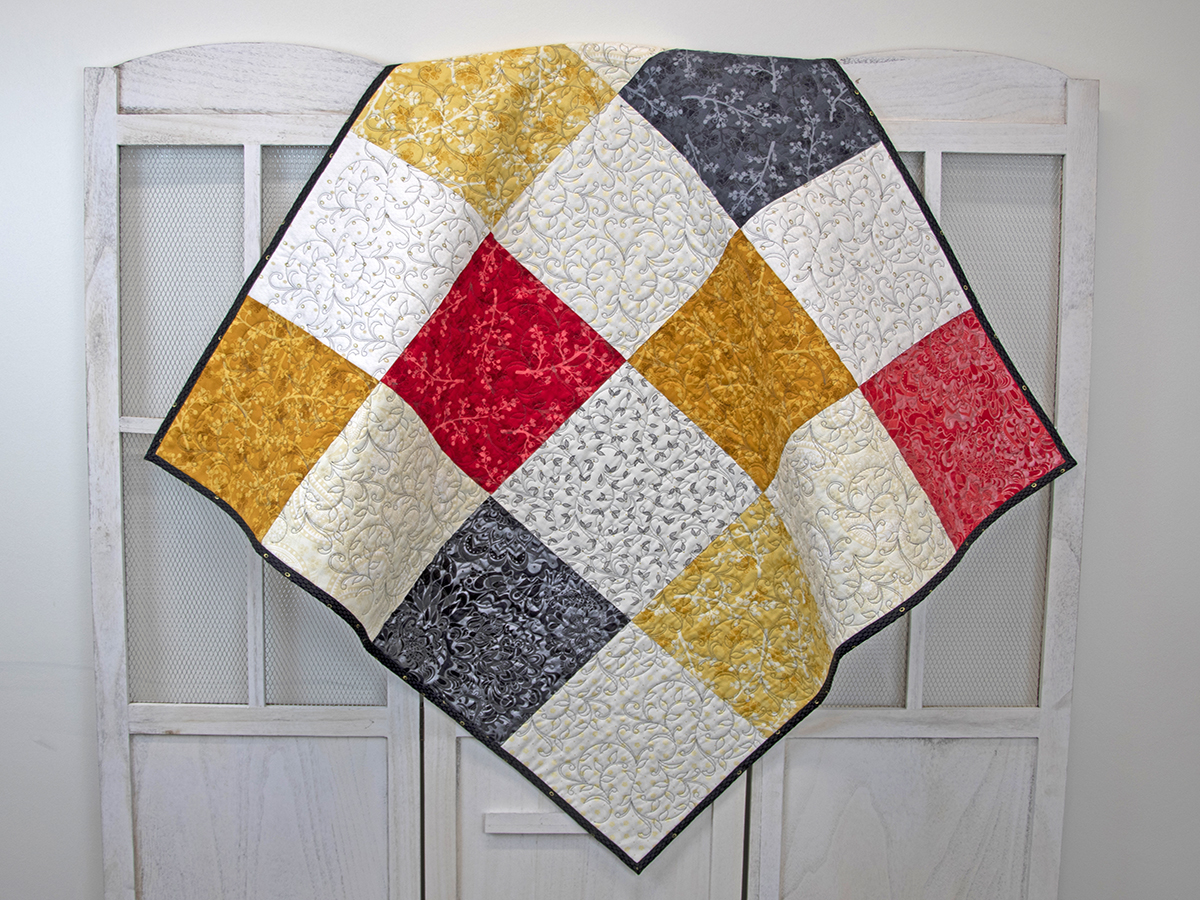
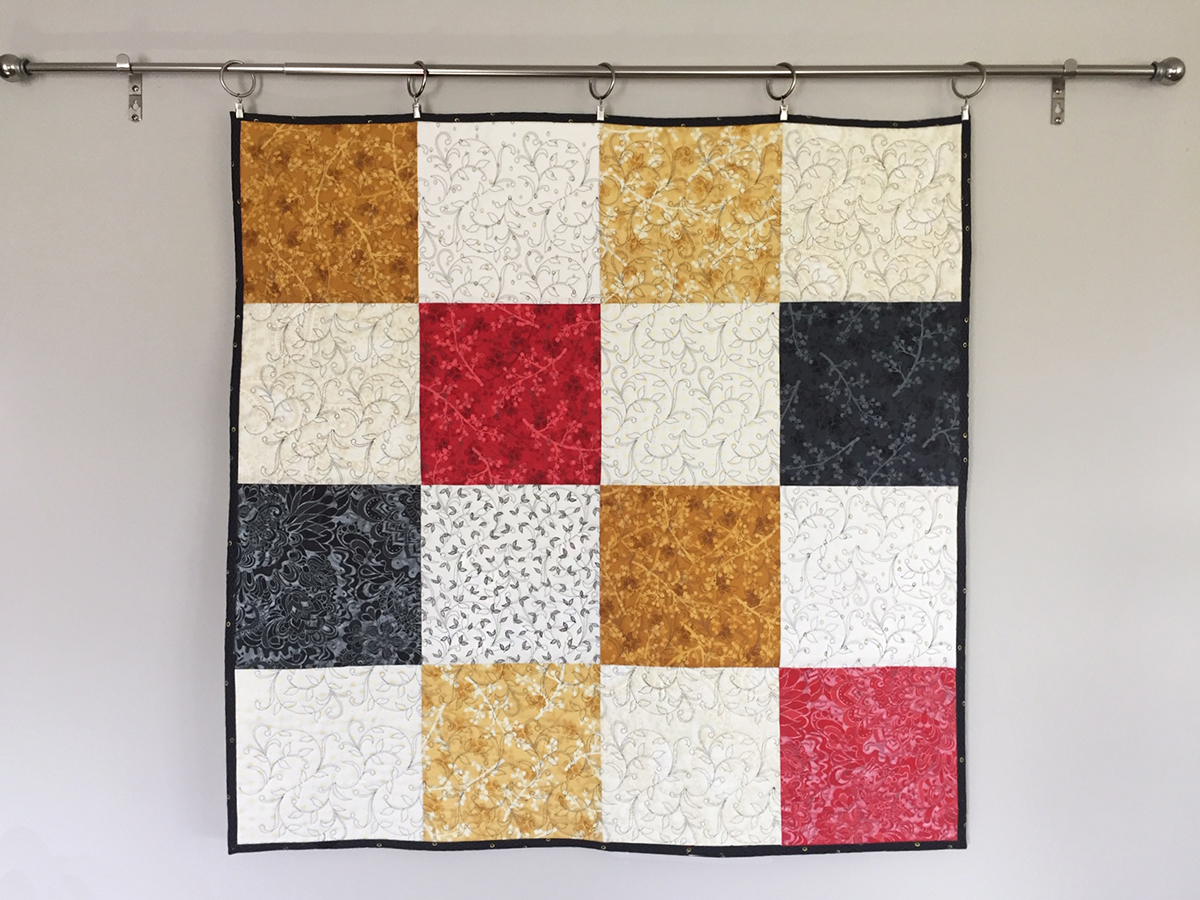
Finished size approximately 38” x 38”
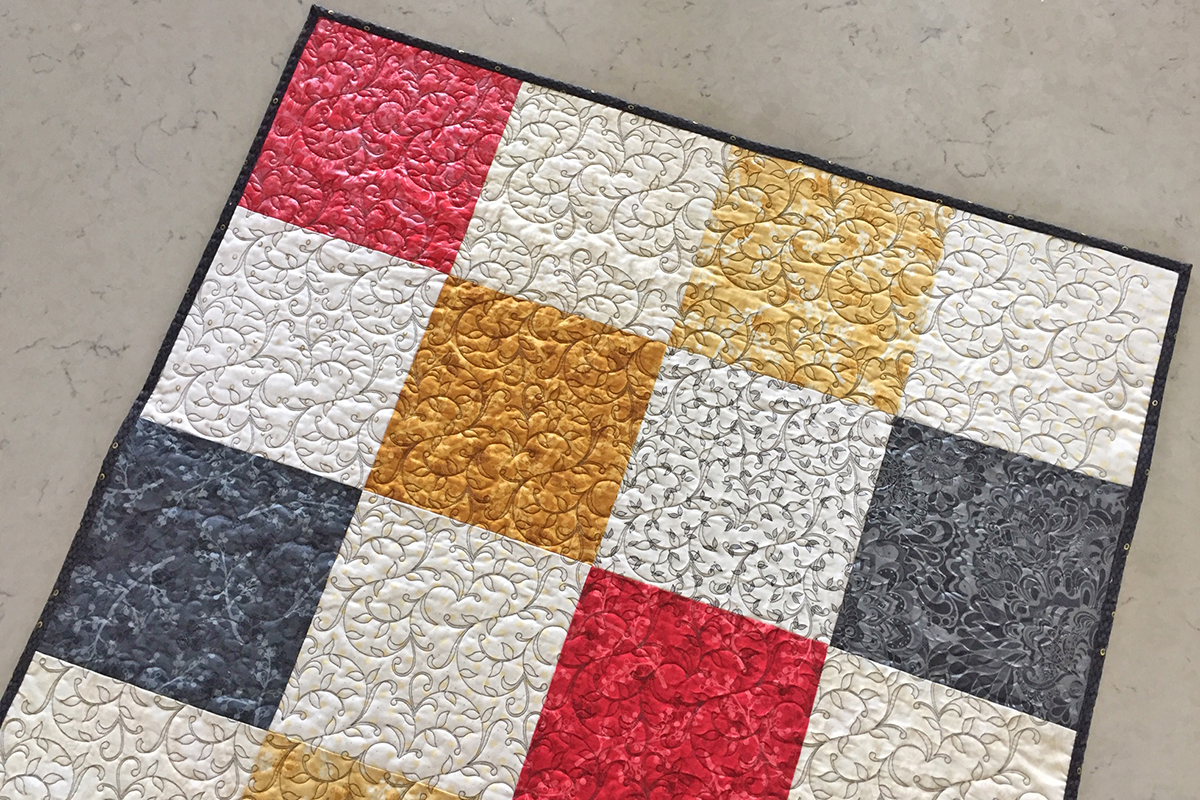
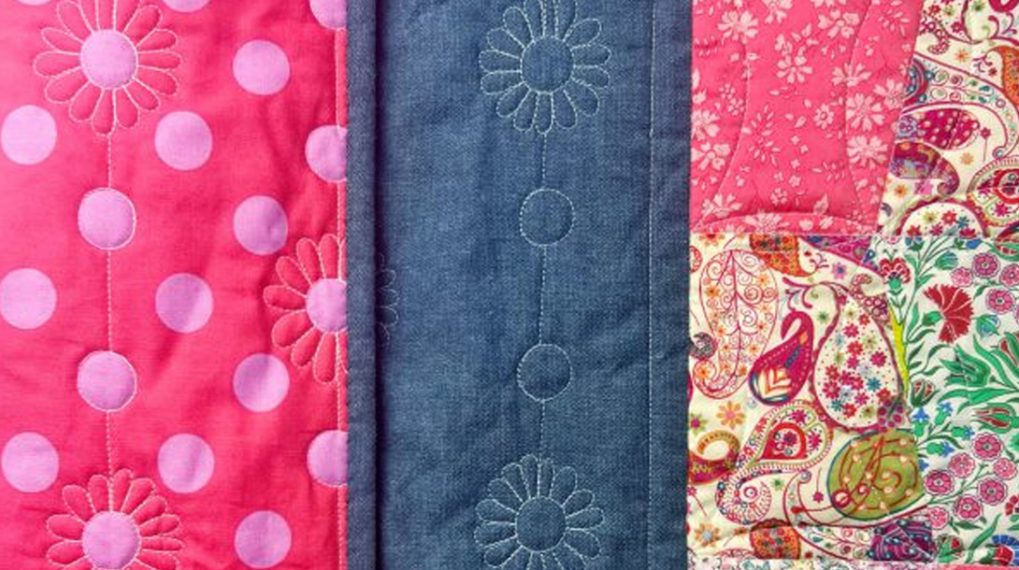
I just finished this small quilt project completely on my BERNINA 880 PLUS, from the piecing to the quilting. Yes, you can use your home embroidery machine to quilt large and small projects—it is ABSOLUTELY possible!
Many refer to this process as “quilting in the hoop”. I found some great quilting designs from OESD’s large selection of continuous quilting designs to create edge-to-edge quilting on this fun quilt project. By linking the designs together, this creates the continuous embroidery. The design I used was from the BERNINA Exclusive Design Collection Quilting by Design by Jessica Schick #80196. There are about fifty edge-to-edge continuous quilting designs in this collection that work perfectly with an embroidery machine.
My BERNINA embroidery machine has the Endless Embroidery feature to set up the design and stitch reference points that made it easier to line up the continuous designs in the multiple hoopings needed to complete the quilting on this small quilt. So, I thought I would share the process by giving you some step-by-steps to help you be successful in creating edge-to-edge quilting. I have also included some tips on how to keep the back of the quilt as pretty as the quilt top.
Supplies
- Fabric for quilt top:
- 16 – 10 inch squares of fabrics (Pre-cut 10” squares were used for sample)
- 8 light squares
- 8 medium to dark squares
- Fabric for backing
- 1 1/4 yards 45” wide fabric
- Batting
- 1 1/4 yards 45” wide batting
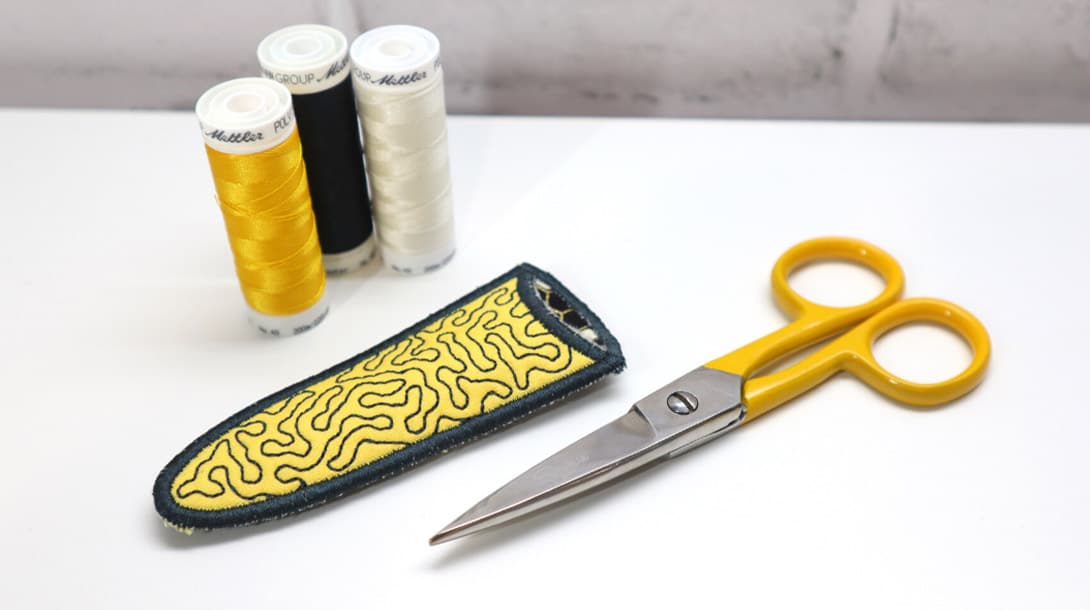
- Thread for piecing: Mettler Silk Finish Cotton 50 weight
- Thread for quilting: Isacord 40 Embroidery Thread in needle and bobbin
- 505 Temporary Spray Adhesive (optional)
- Removable marking pen (Dritz Quilting Heat Erase Pen was used in sample)
- Double-sided Adhesive Tape-1/4-inch wide (Wash-Away Wonder Tape was used)
- Scissors
- OESD Design Collection #80196 Quilting by Design with Jessica Schick (Design #80196-26)
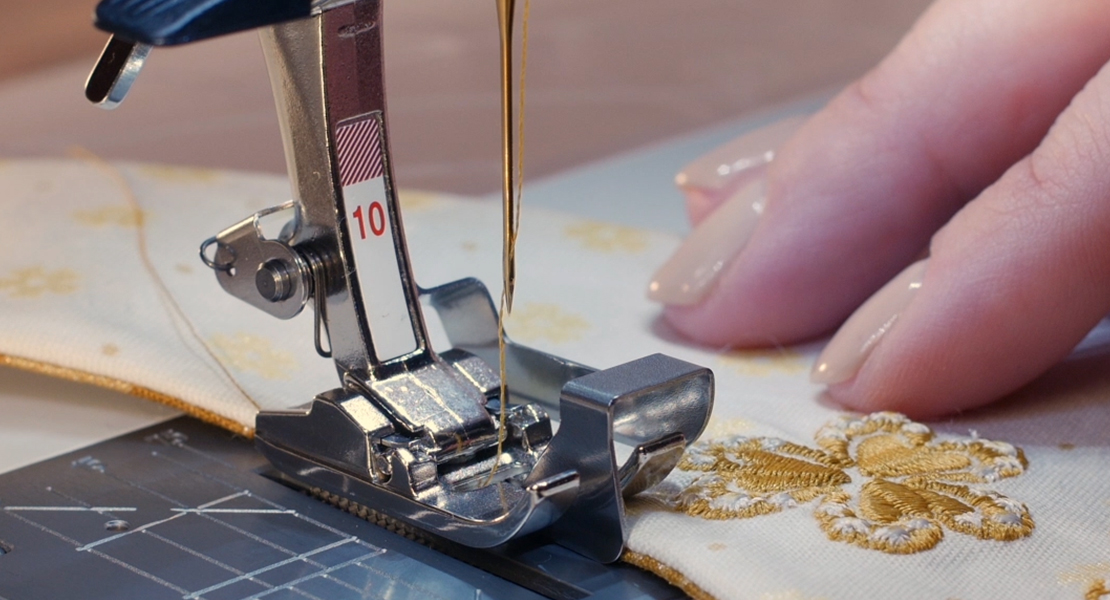
- Drop-Shaped Embroidery Foot #26
- 9 mm Patchwork Foot #97/97D
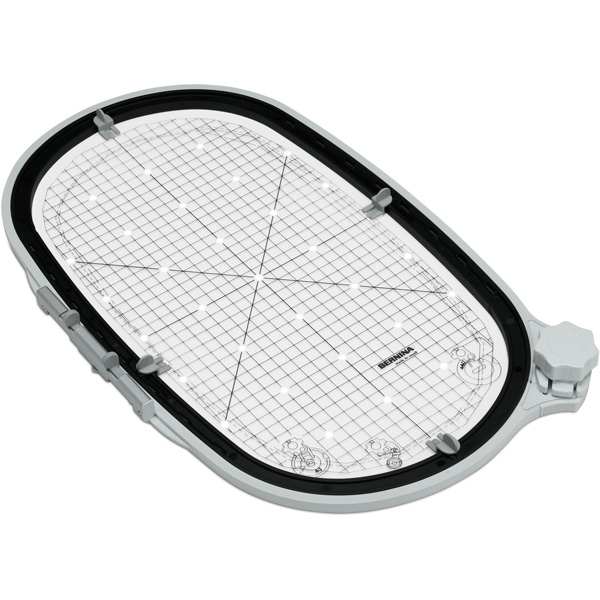
- BERNINA Maxi Hoop
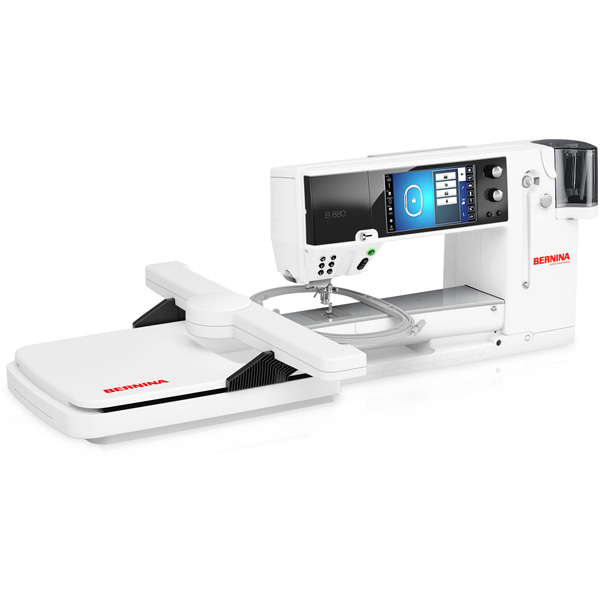
- BERNINA 880 PLUS (I used the B 880 PLUS, but the Maxi Hoop is compatible with the B 790 PLUS and B 700 embroidery machines also. All three machines include Endless Embroidery and Pinpoint Placement features needed for this project)
- BERNINA Embroidery Software 8.1, ARTlink 8 or other software capable of printing templates
NOTE: BERNINA ARTlink 8 is a free downloadable software program with the capabilities required for this project.
Preparing the Quilt Top
Attach the Patchwork Foot #97/97D to the machine. If attaching #97D, remember to engage the BERNINA Dual Feed Mechanism.
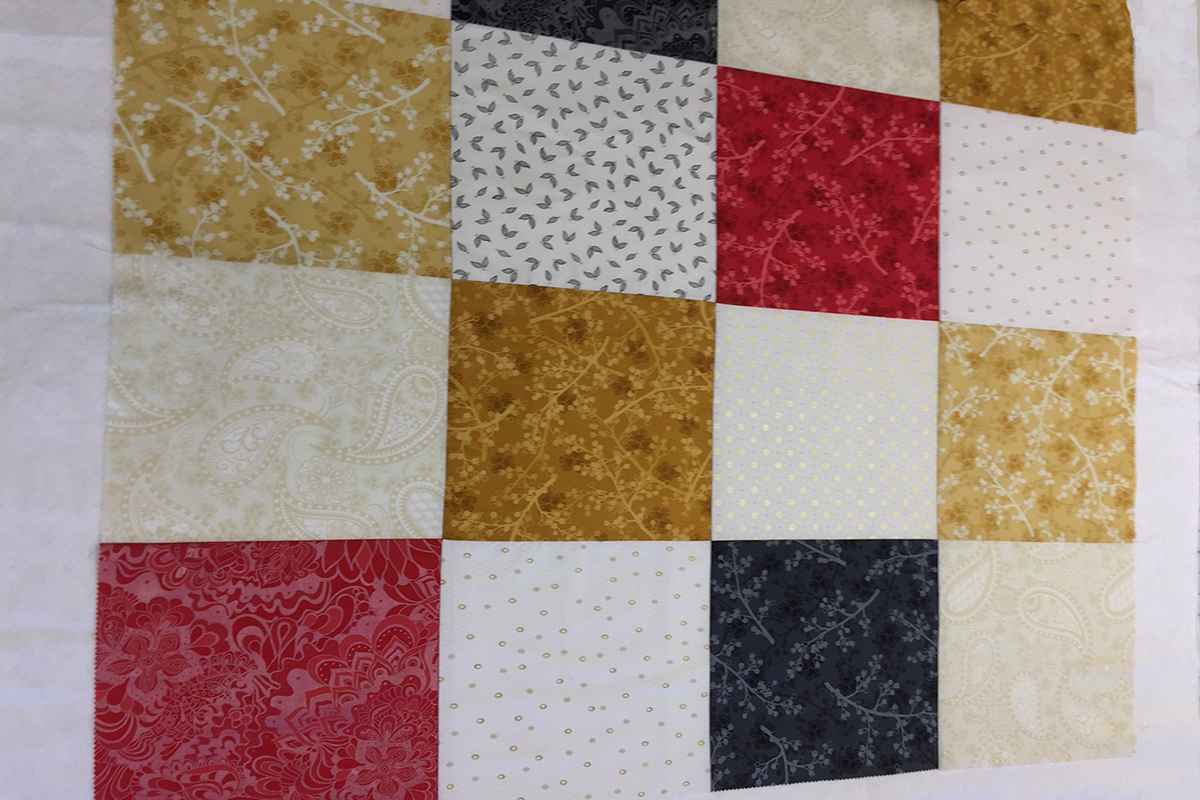
Stitch the sixteen 10-inch fabric squares together using a 1/4” seam allowance. There are 8 light squares and 8 medium to dark squares; arrange as desired. I have alternated the light and darks in my block layout.
Cut the backing fabric 45” x 45”. The backing is cut larger than the quilt top to allow for the shrinkage that happens as you quilt, but it will also give extra fabric needed when hooping the layers during the quilting process.
Cut the batting 45” x 45”.
To Prepare the Quilt for Stitching
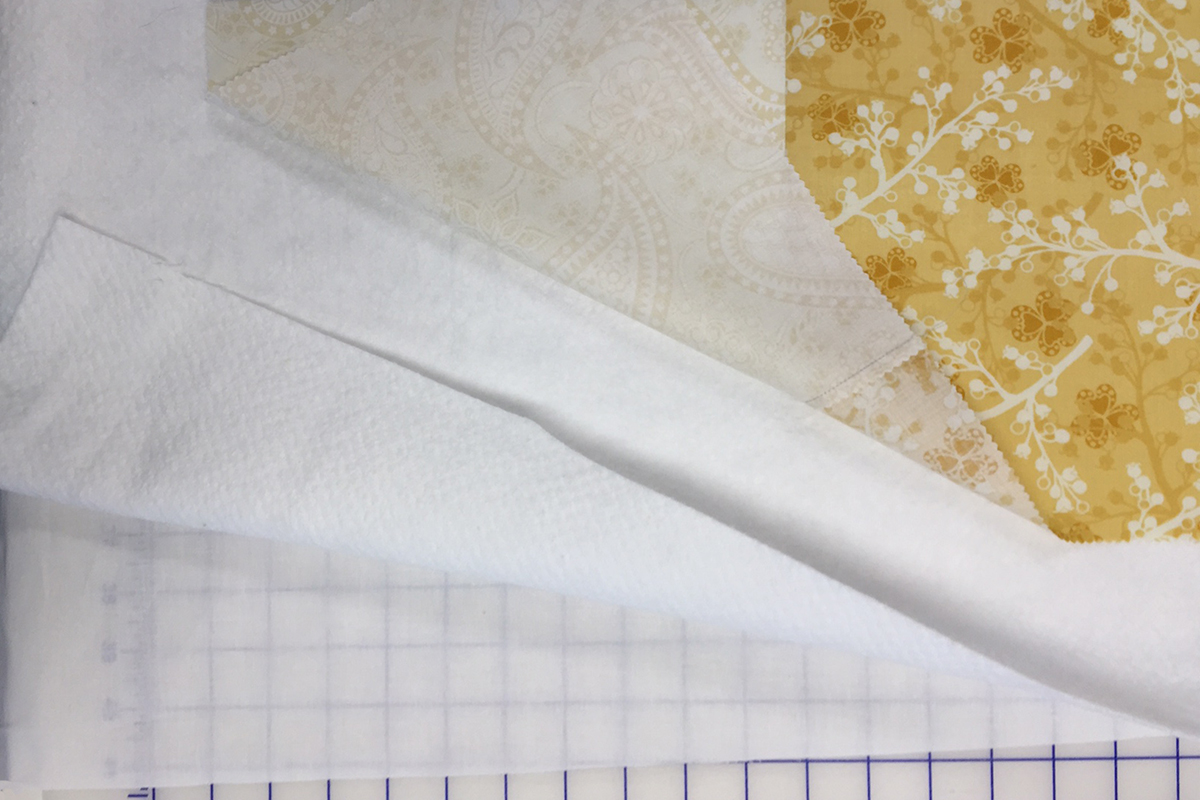
Place the quilt back wrong side up on a flat surface, position the batting on top of the backing fabric. Then center the quilt top right side up over the batting. There should be an equal amount of backing and batting around all four sides of the quilt top fabric.
Lightly spray baste each layer with temporary adhesive spray. This is an optional step, but it will help to keep layers from shifting during handling and embroidery.
Print Design Template
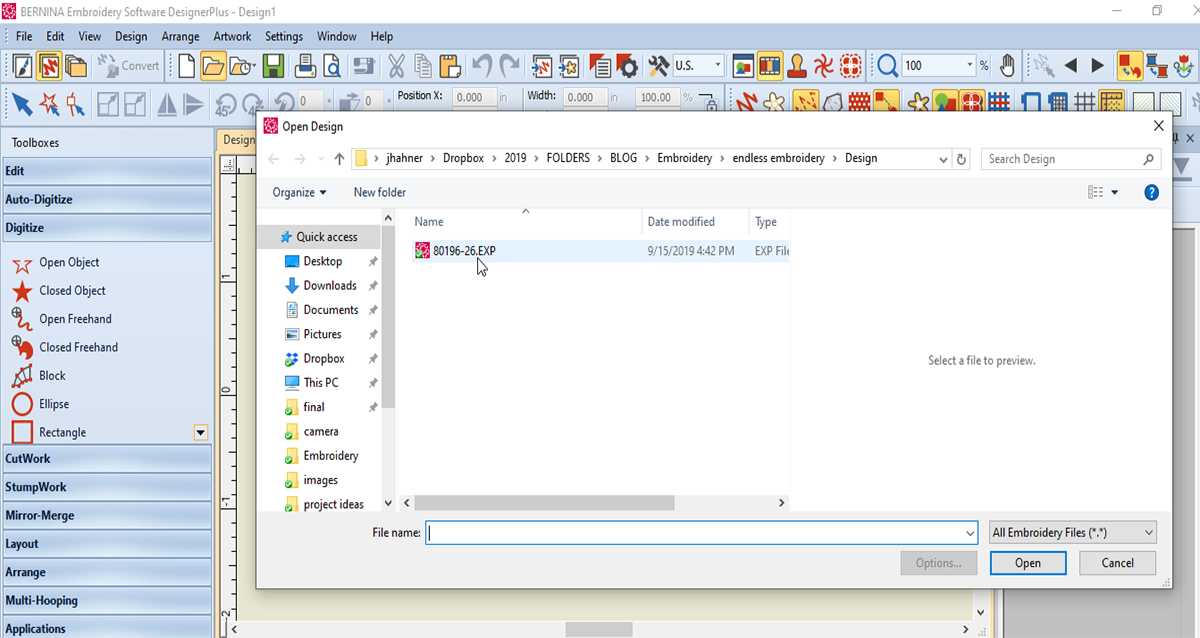
In BERNINA Embroidery Software V8.1, BERNINA ARTlink 8 or software with capability to print a template, select File > Open and navigate to the location of the design. Select design #80196-26 and select Open. (Note: the following screen captures are from Embroidery Software 8.1, but steps will be similar if using ARTlink 8.)
Endless_Embroidery_03_open_design_BERNINA_WeAllSew_Blog_1200x638px.png
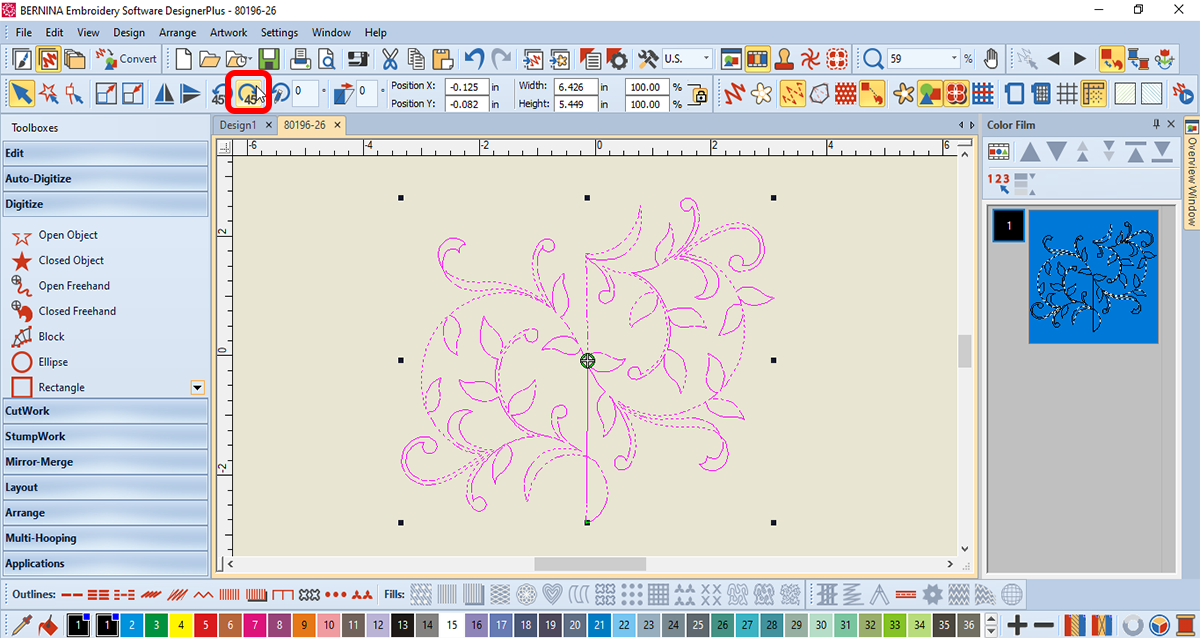
Right click on the Hoop Menu (1) and select the Maxi Hoop (2).
With the design selected on screen, click on Rotate Right 45° twice to rotate the design 90 degrees.
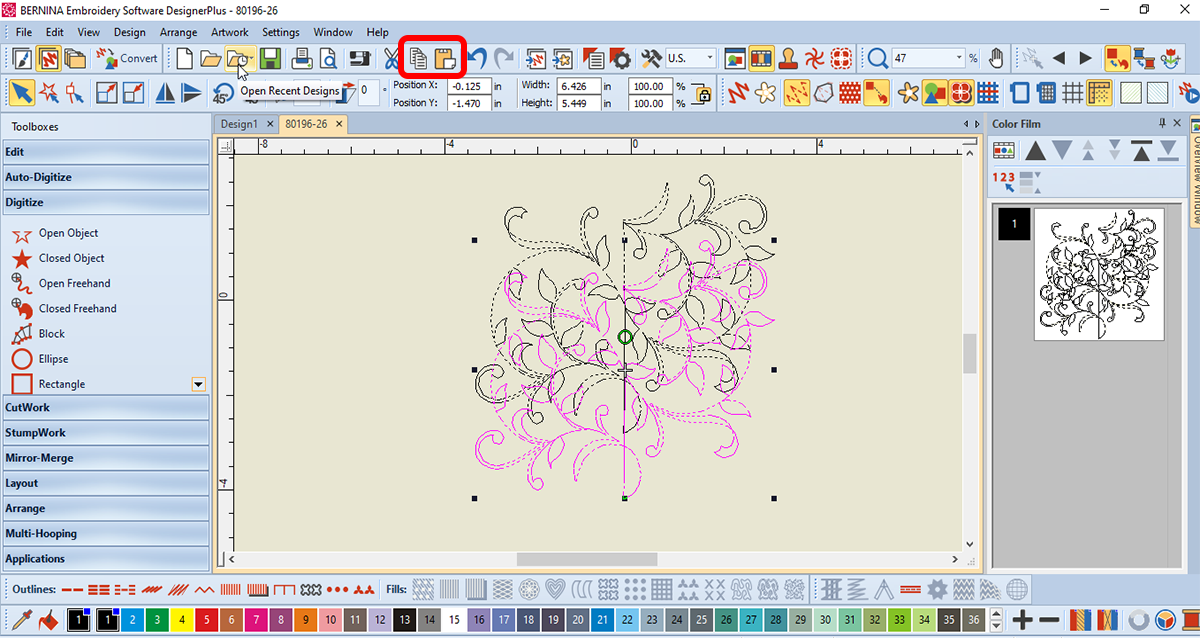
Click on Copy; then click Paste to create a duplicate. Move the pasted copy below the original.
 g
g
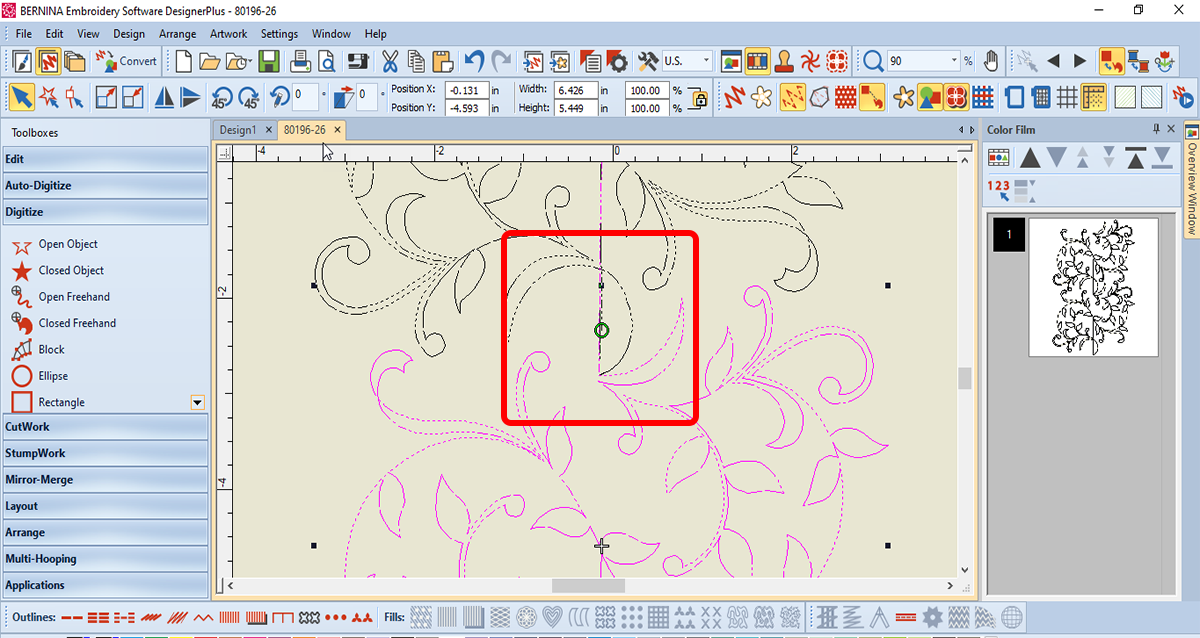
Move the duplicate design into position by aligning the start point of the duplicate with the end point of the first design.
To print design templates, click on Print Preview.
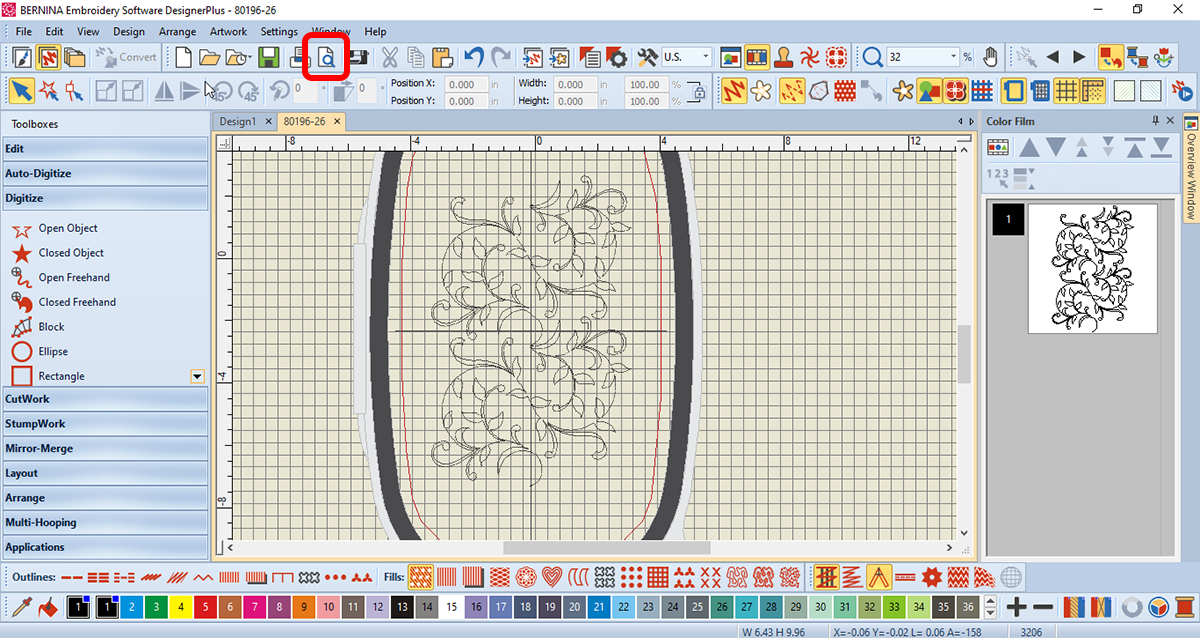
Click on Print Now.
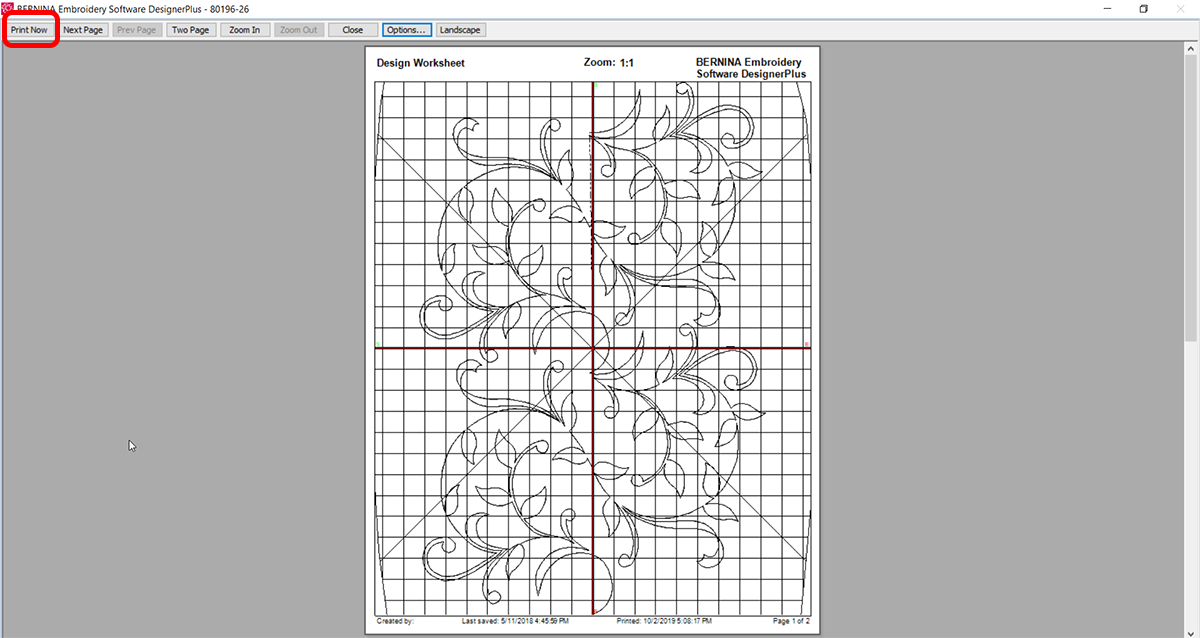
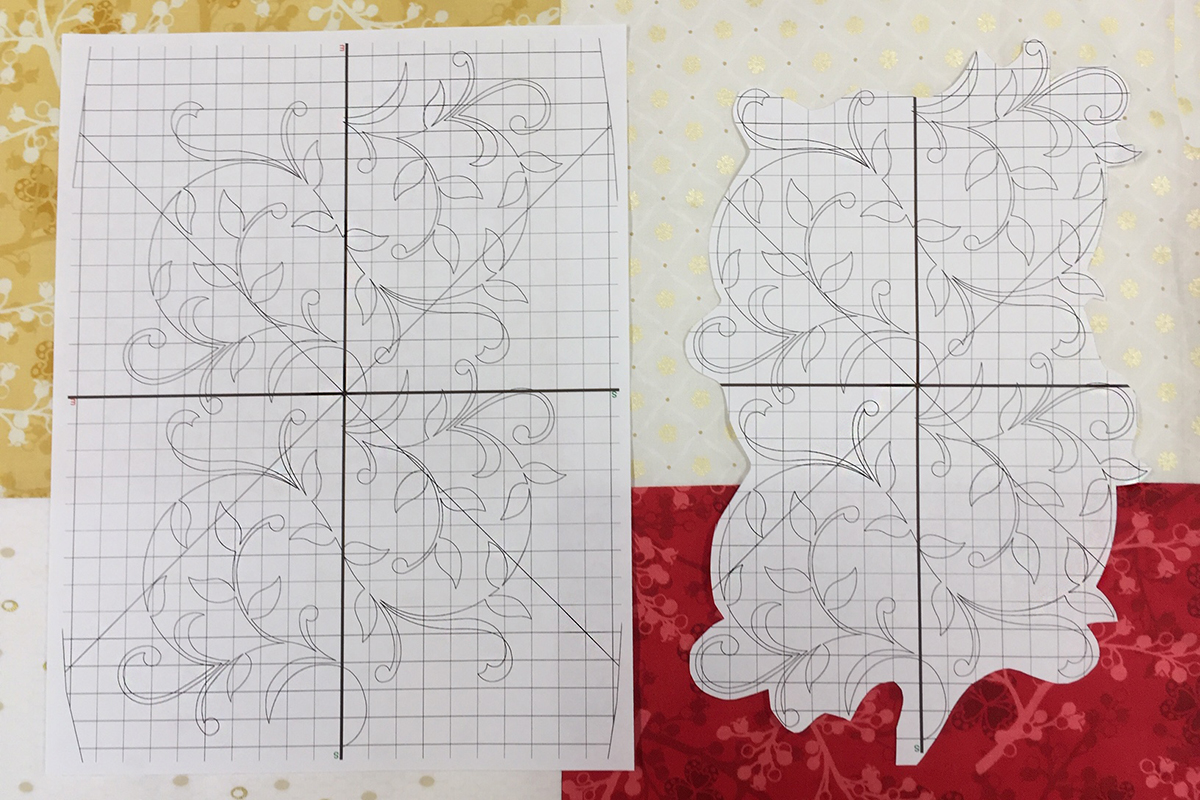
Print two design templates; one we will trim—this will help determine spacing of the edge to edge rows of quilting in the hoop. Printed templates are very helpful to give you a visual of the design and help determine spacing for the marked reference lines.
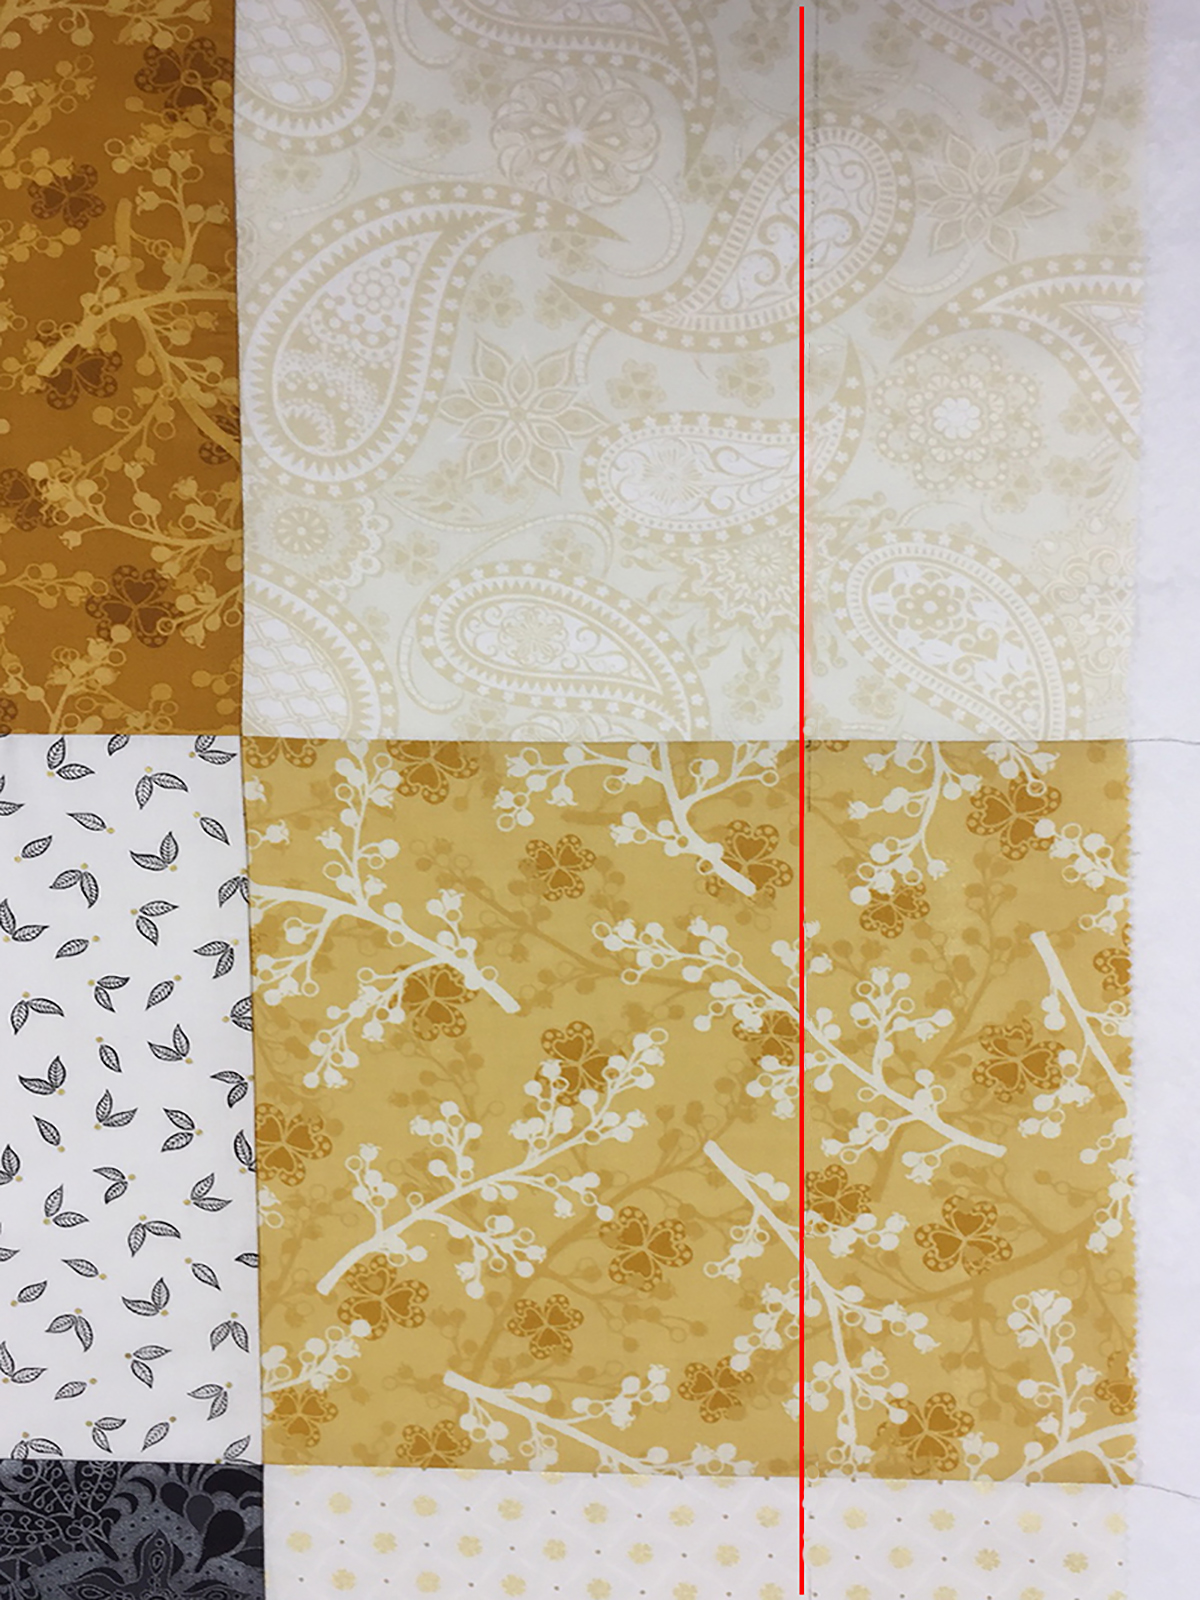
Mark the Quilt Top
Using a quilter’s ruler and a removable marking pen, mark a line 4 inches from the right edge of the quilt top. This will provide a straight line as a reference to assist in the vertical design placement of the first row of edge to edge stitching.
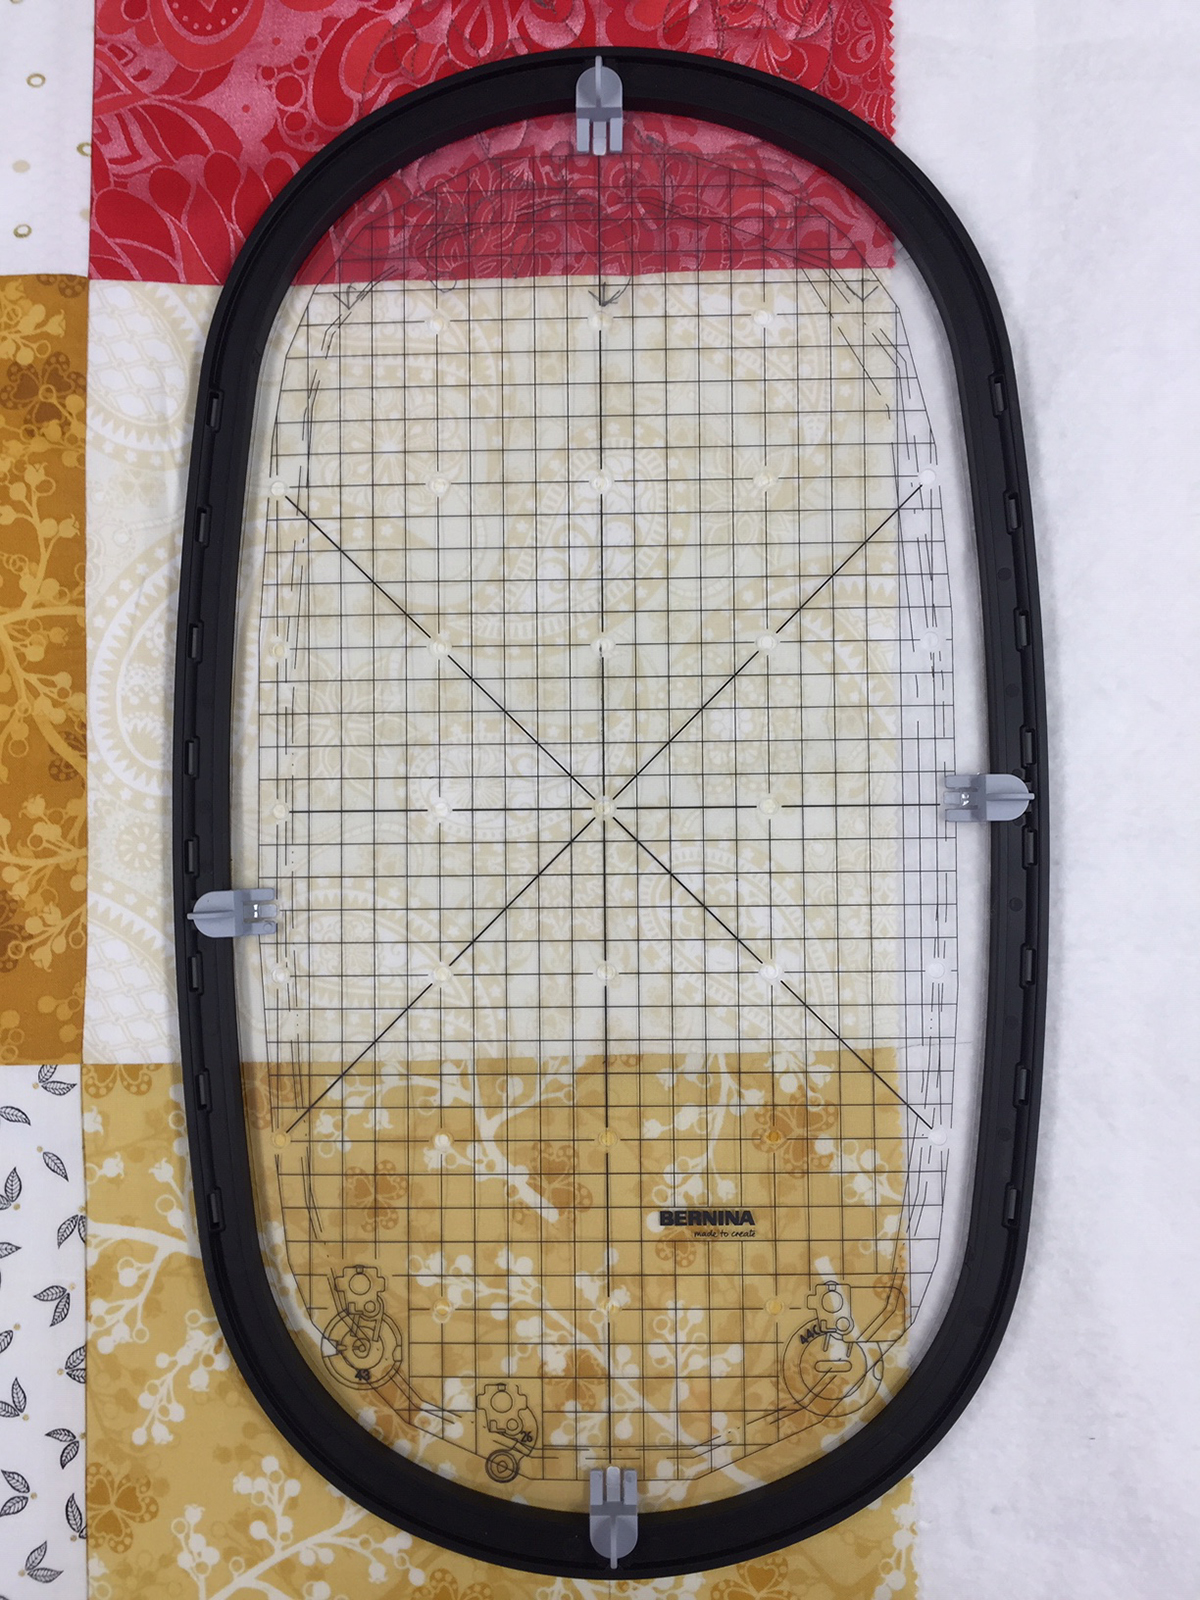
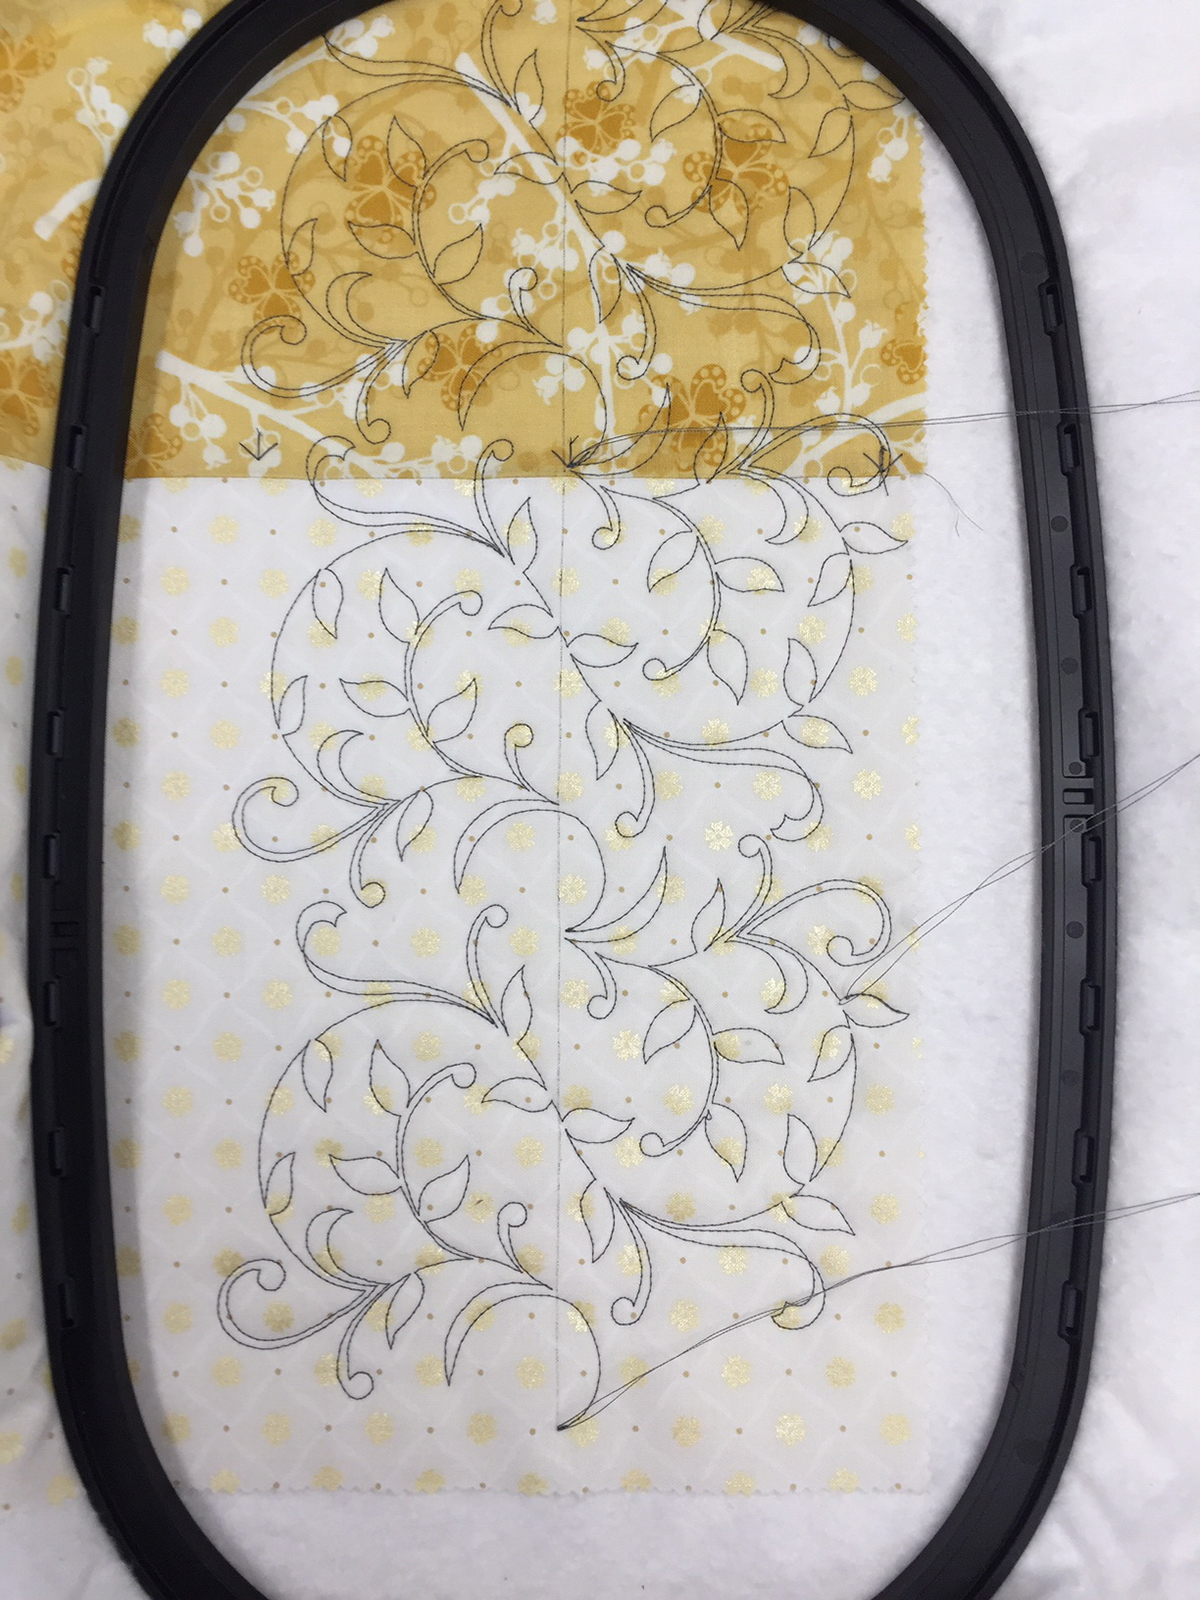
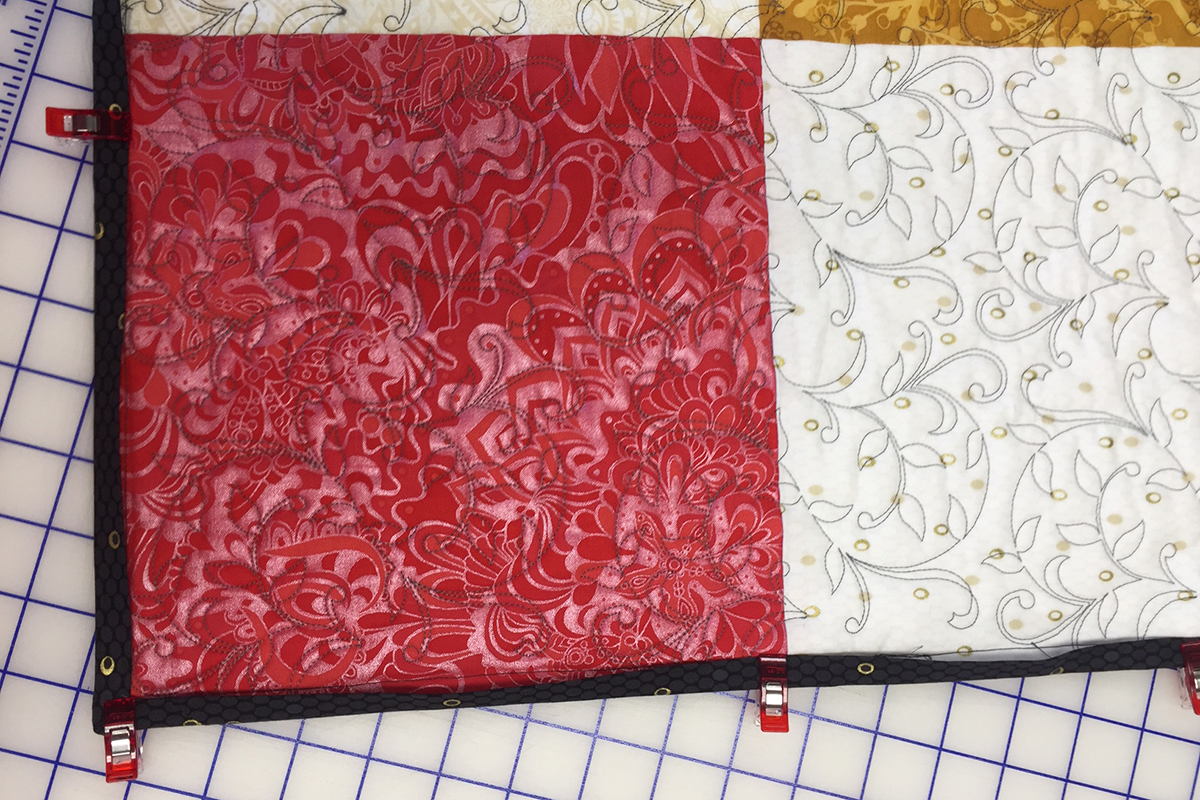
Hoop the Quilt
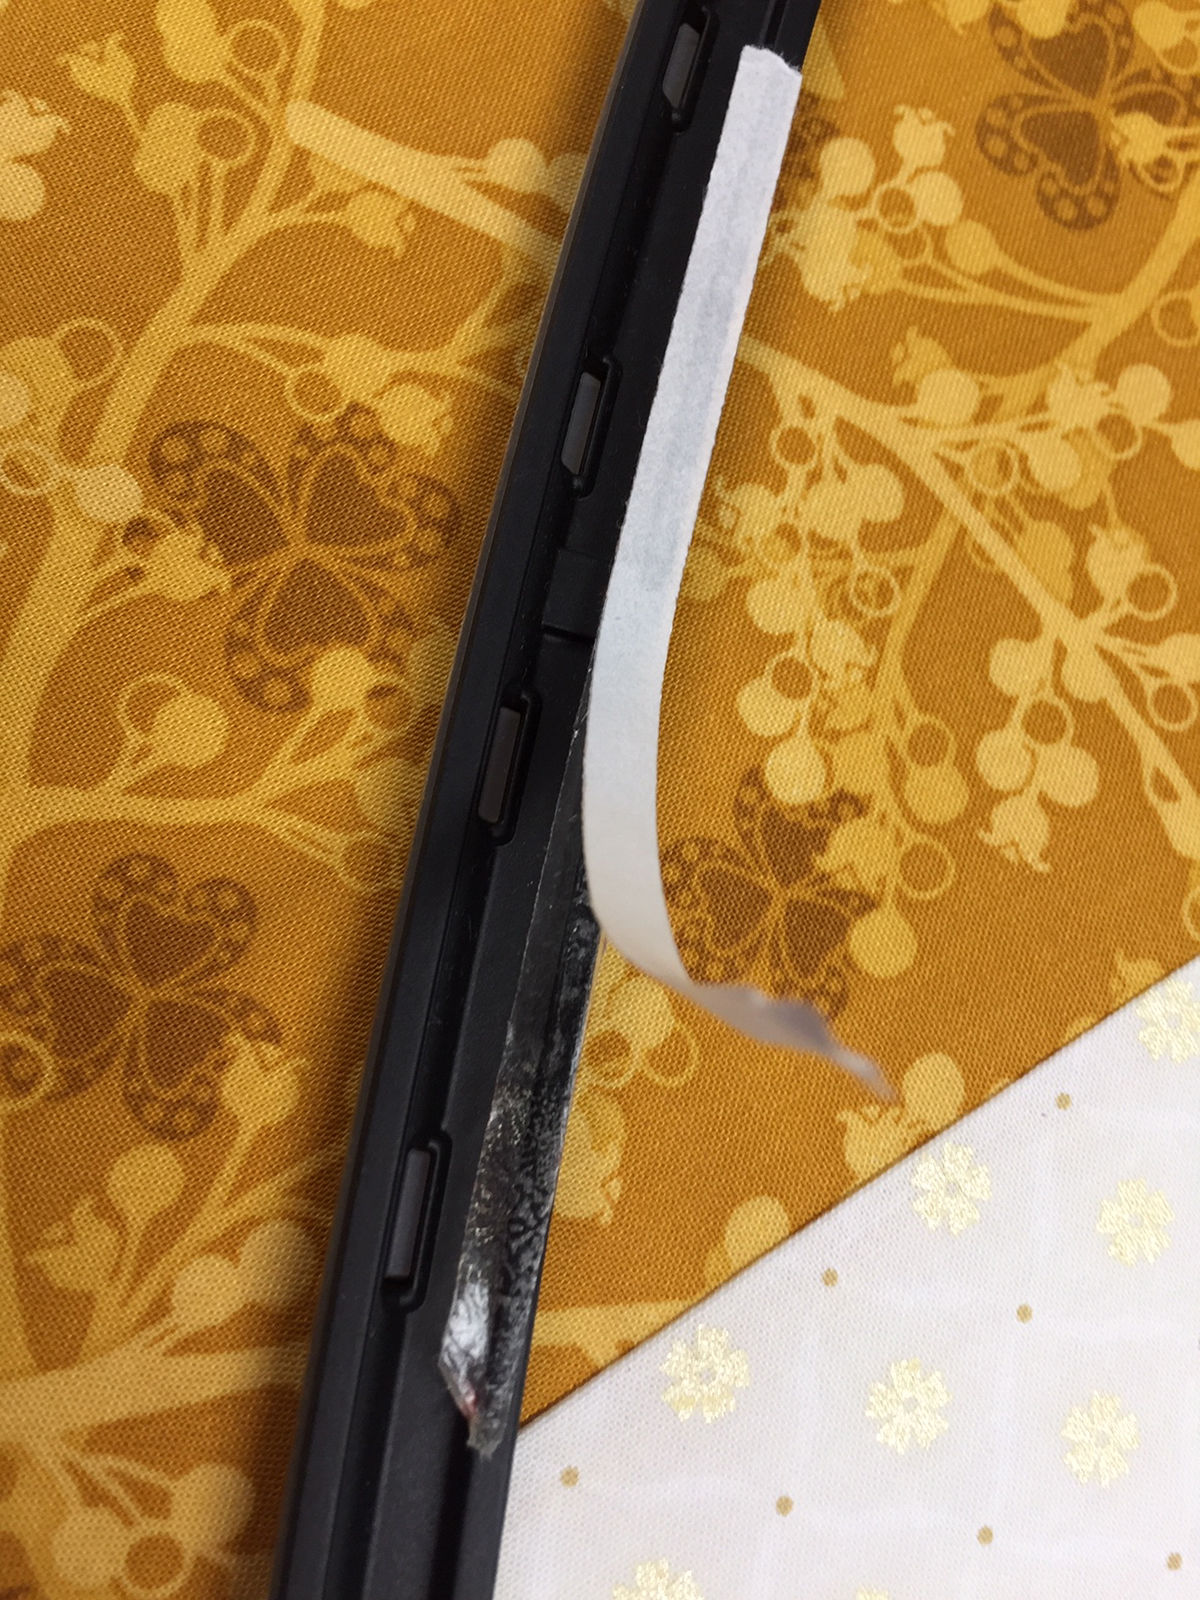
Cut 2 pieces of double-sided adhesive tape about 1” in length and 2 pieces about 3” in length. The 1” pieces will be for the top and bottom of the hoop’s inner ring and the longer 3” pieces will be for the sides. Peel paper away from one side and attach to the wrong-side edge of the inner hoop, then peel off other side of paper. The sticky surface will help keep the inner hoop from sliding when hooping the quilt sandwich.
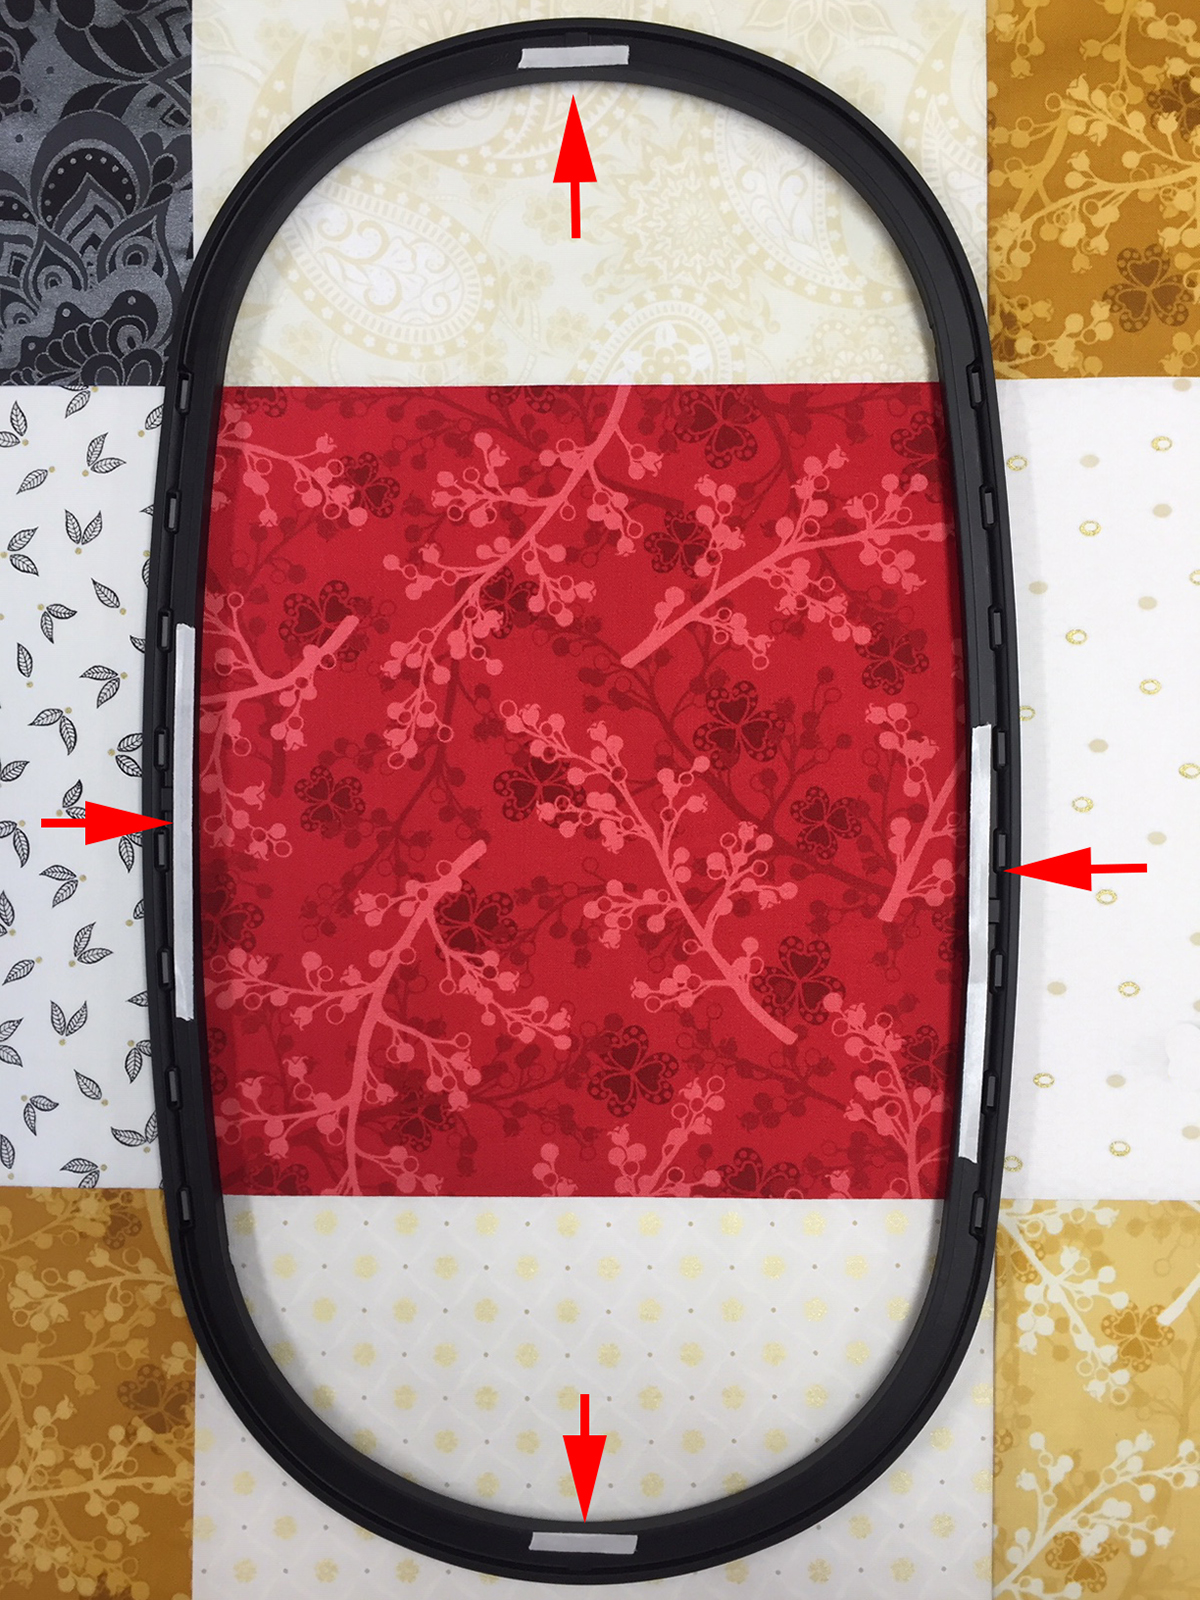
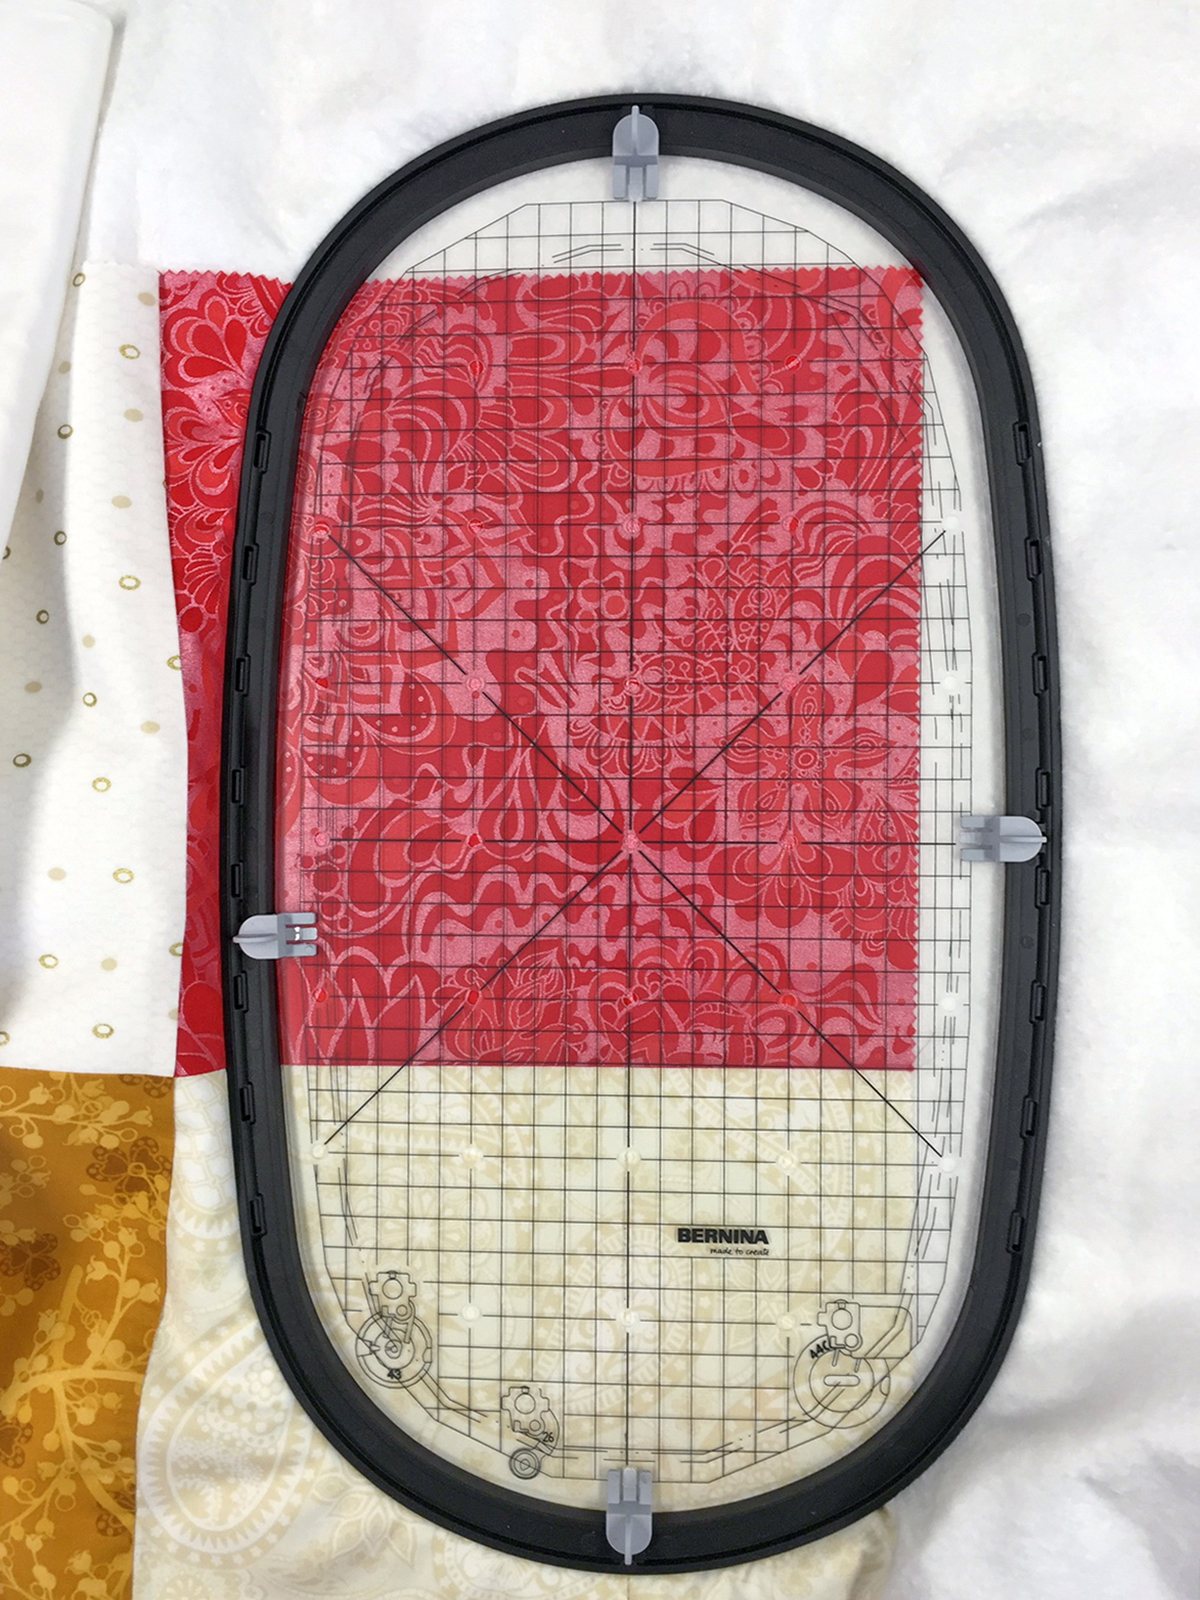
Place the hoop template into the inner ring of the hoop. Place the inner ring at the top right edge of the quilt; align the vertical center of the hoop with the line marked on the quilt top; the top of the quilt is approximately 2 grids down from top of the markings on hoop template. When the inner hoop is in position, press firmly on the areas of the hoop with the double-sided adhesive tape to adhere the inner ring to the quilt sandwich.
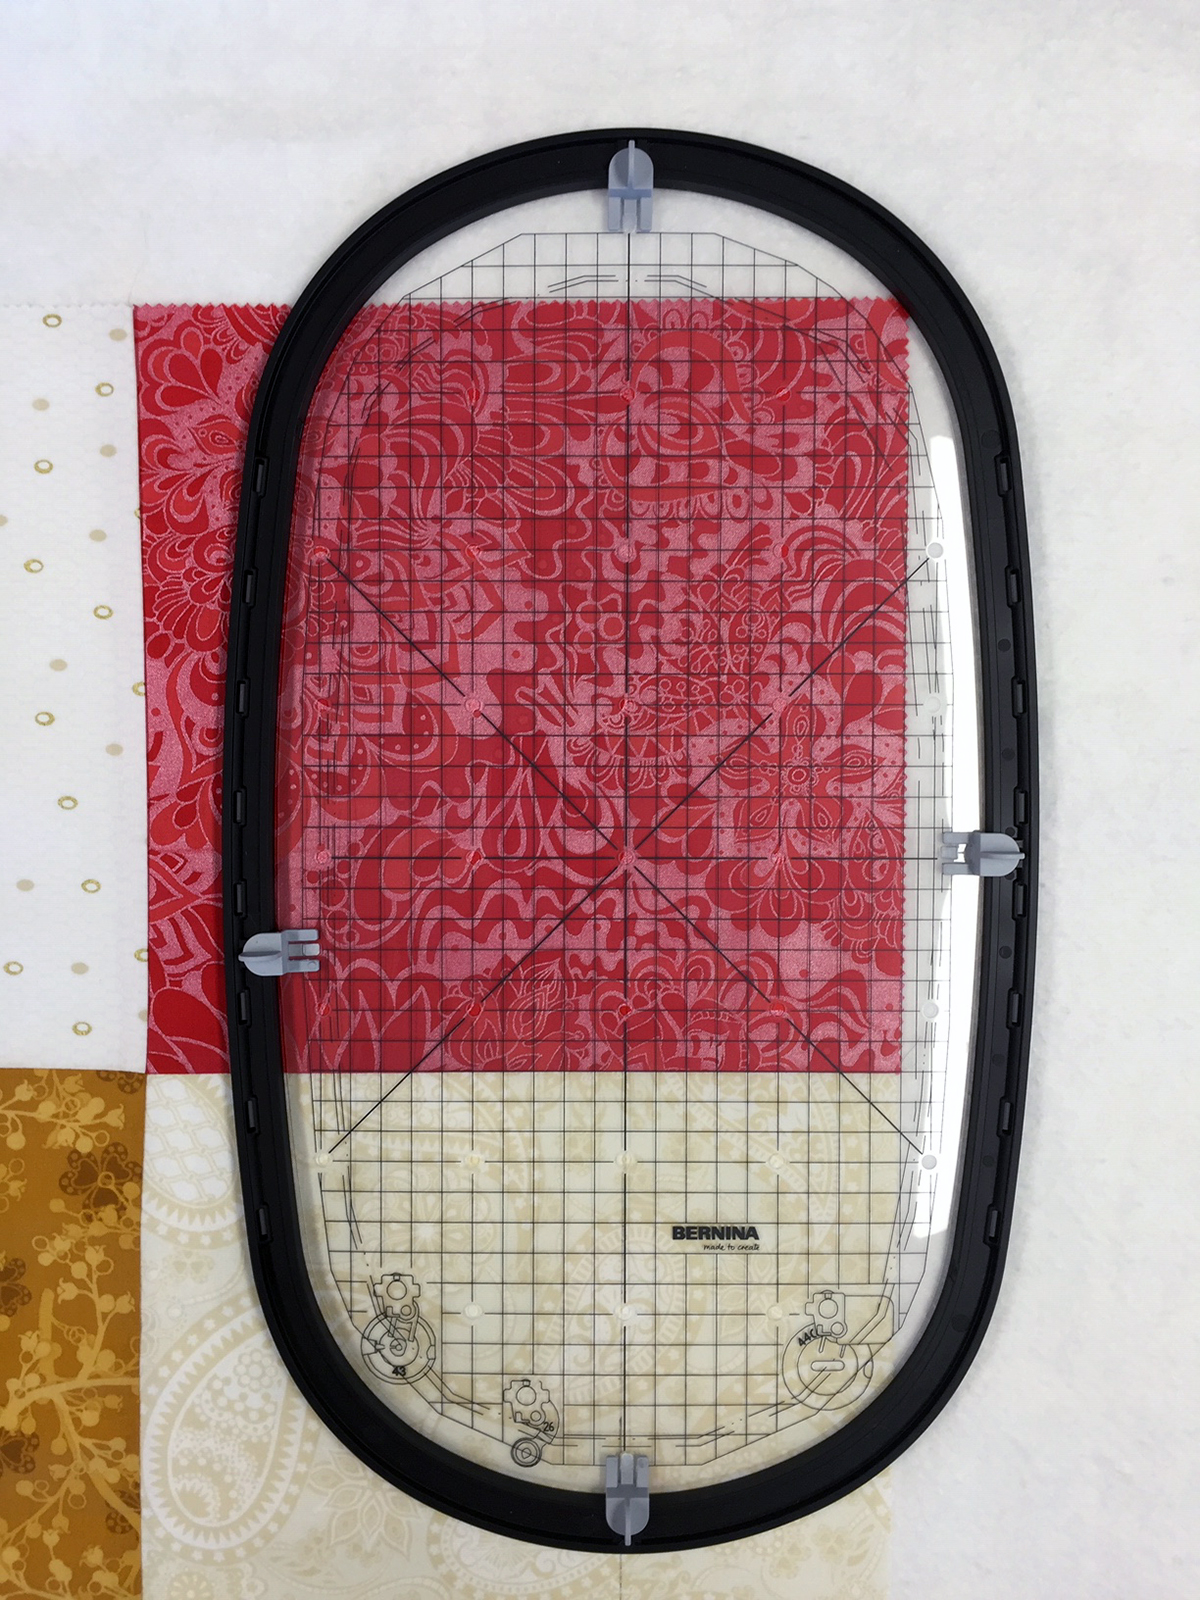
Slide the outer ring of the hoop under inner ring under the quilt sandwich. Insert the inner ring into the outer ring. Tighten the hoop.
At The Machine
Prepare the BERNINA machine for embroidery. Insert the Quilting by Design USB stick into the machine.
Open the design file (#80196-26) from the USB stick.
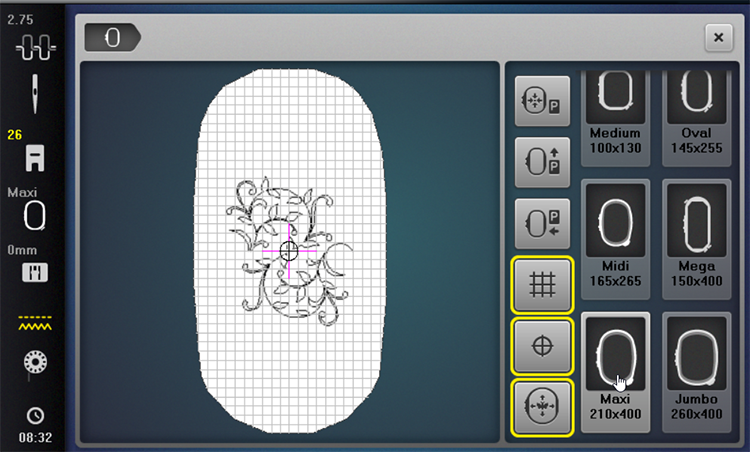
Touch the Hoop Indicator/Select Hoop icon.
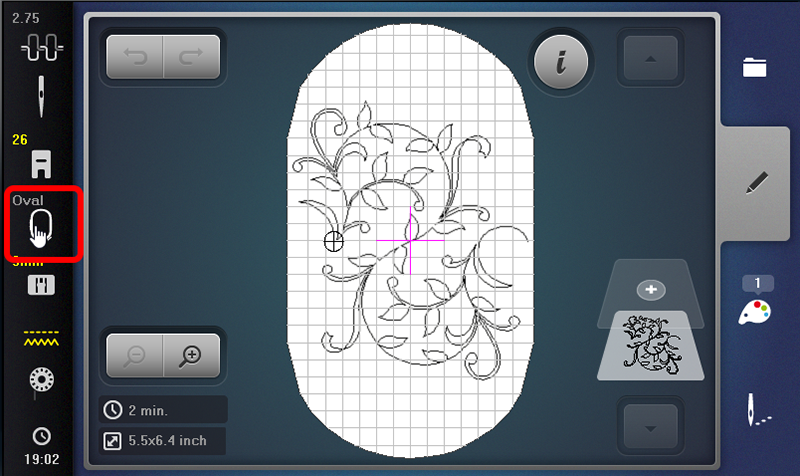
Select the Maxi Hoop and touch both the Grid and Hoop Center icons. Touch Close (x) to exit the display.
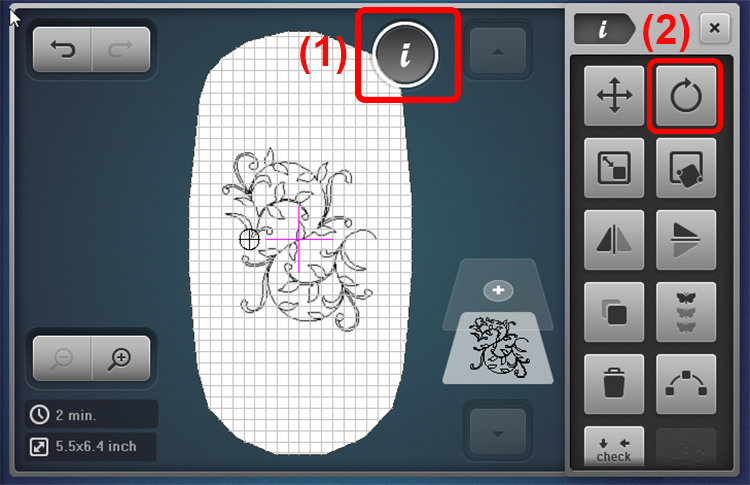
Touch the Information (“i”) icon (1); touch Rotate Motif (2).
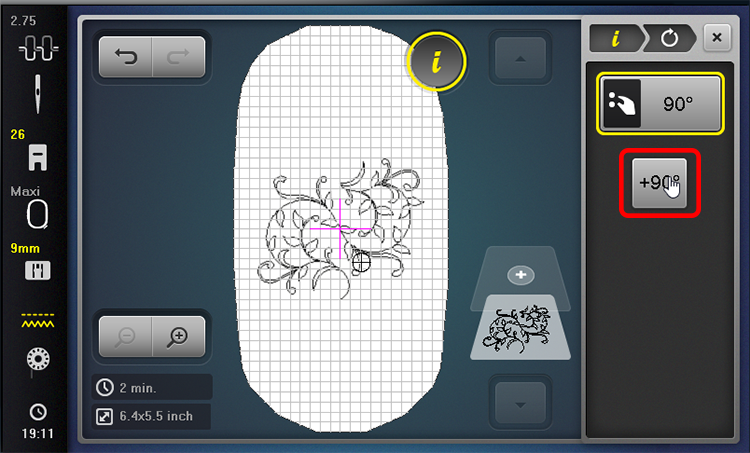
Touch Quick Rotate 90°.
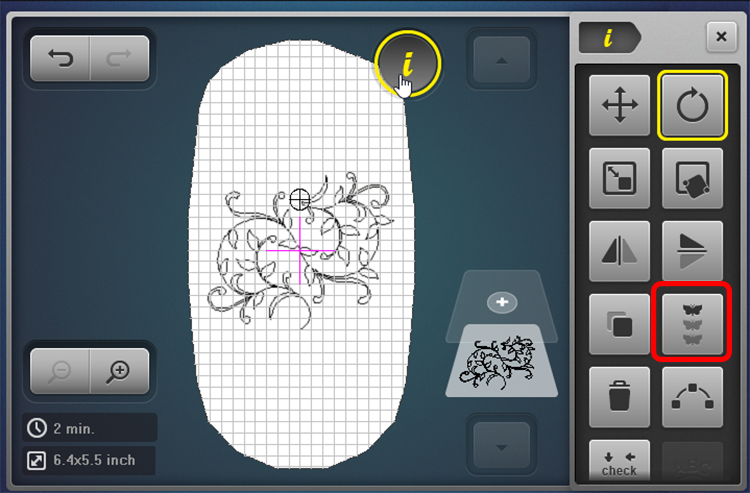
Touch the “i” in the breadcrumb path to return to the Information display.
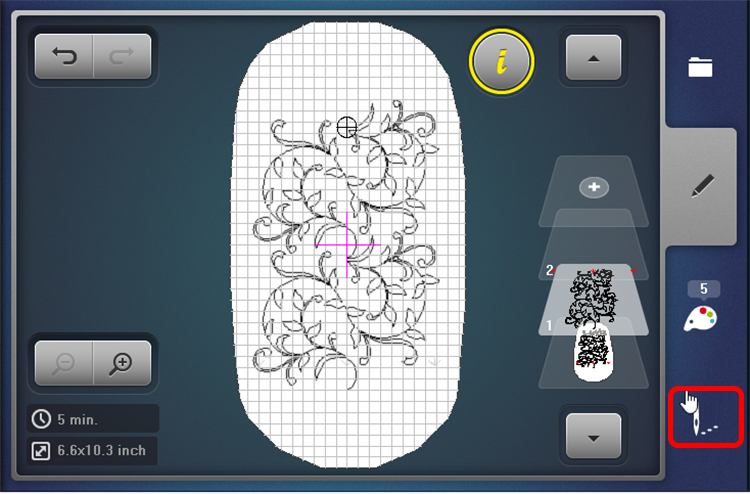
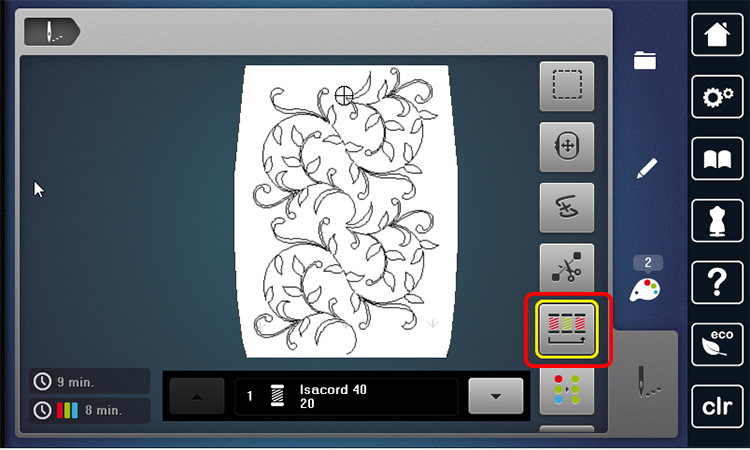
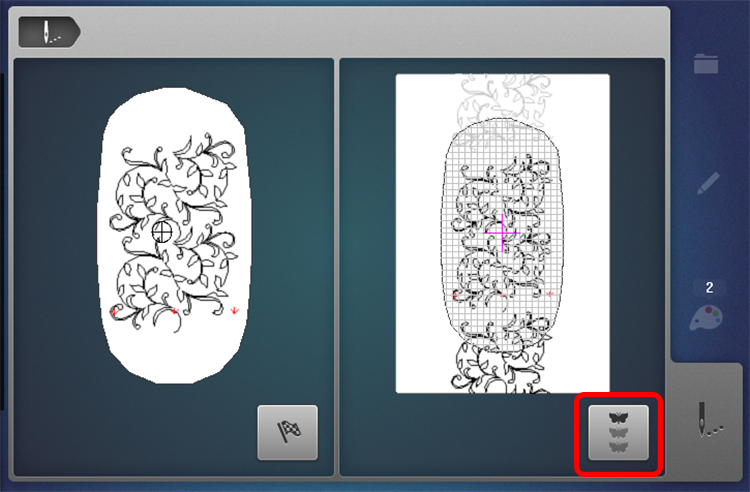
Touch Endless Embroidery.
The function will automatically add another design to the hoop, so now there are two designs that fit perfectly in the Mega Hoop at the desired size.
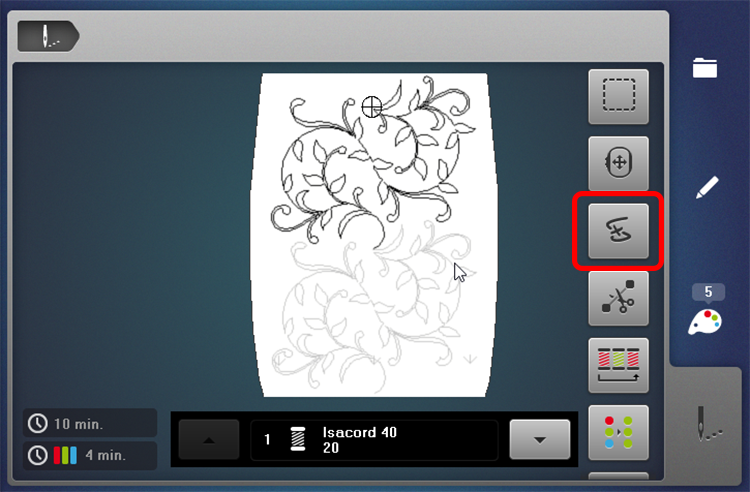
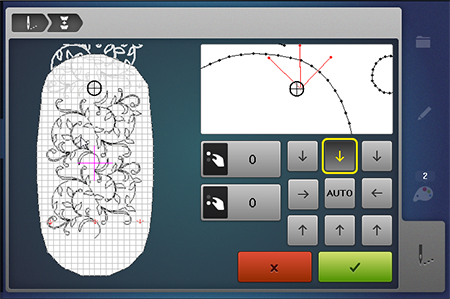
Touch the Decreasing space between motifs in the Endless Embroidery, touch the (–) icon. This will decrease spacing between the designs.
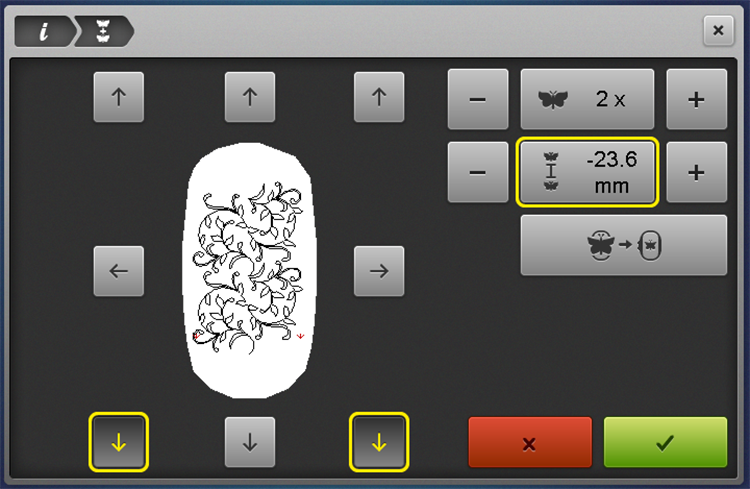
Decrease the space to approximately -23.6 mm.

The default reference points are the lower left and right arrows highlighted in yellow. (This can be changed, or you may select additional registration marks to stitch out for aid in positioning. They may also be deselected and not used at all.)
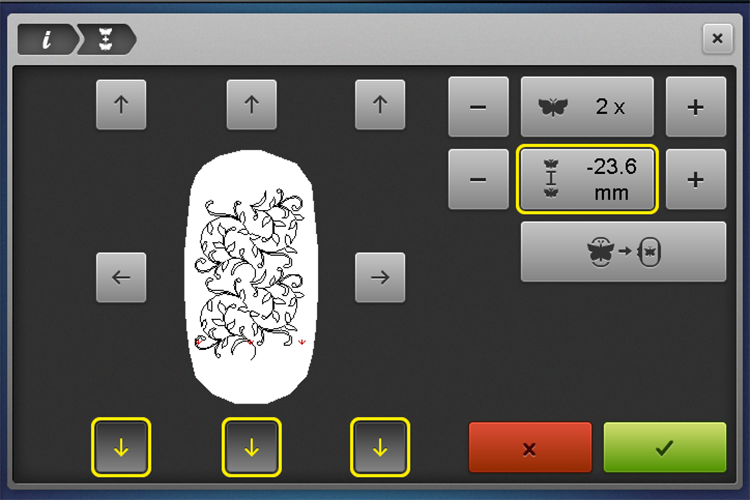
Keep the default reference points (yellow arrows) selected and touch the center bottom reference point (arrow), there are now three reference points (yellow arrows) selected to stitch with the design.
Touch Confirm (green check) to save changes and close the Endless Embroidery window.
Attach the hoop to the machine.
Design Placement With Pinpoint Placement
It’s time to make sure that the placement of the design will be in line with the placement marks on the hooped project.
Touch the Pinpoint Placement icon.

Touch Grid placement icon.
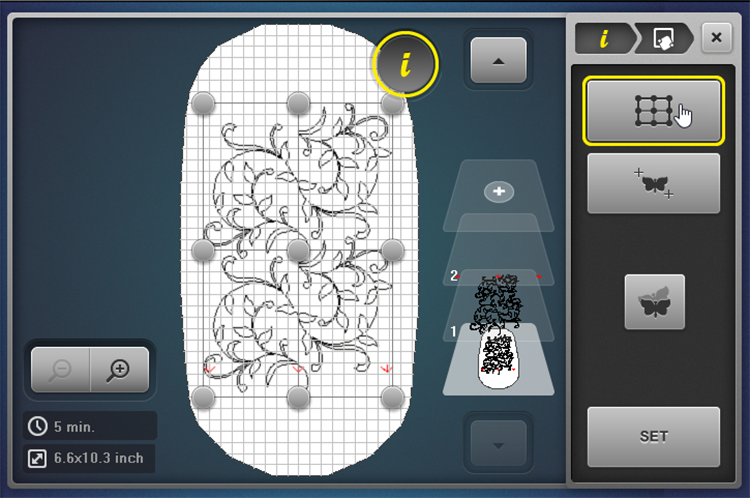
Touch the top center positioning dot on the design. The point will change to a darker color and is now active; the machine will move so the needle is now over the area of the hooped fabric that is displayed on the screen of the machine.
Use the Upper and/or Lower Multi-function knobs to position the needle directly over the marked line on the project. Use the handwheel to lower the needle to check the placement. Raise the needle back to the highest point after you have finished checking.
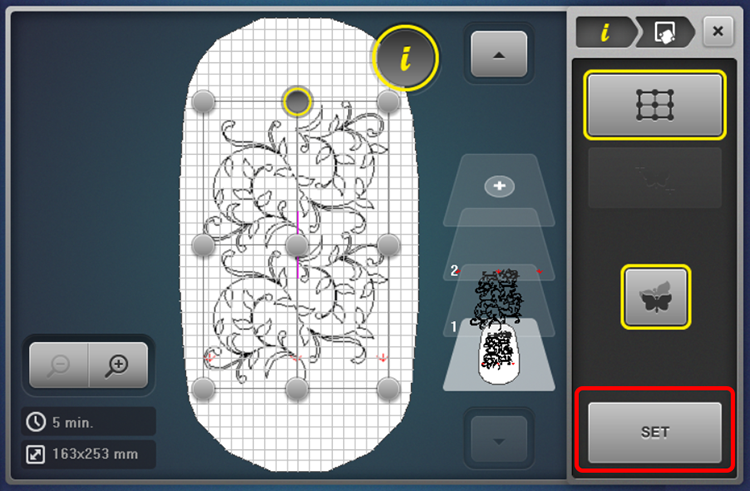
On the screen of the machine, touch Set to confirm the position. You will see that the dot now has a yellow highlight around it.
Touch the lower center dot. If needed, use the only the upper Multi-function knob to position the needle over the drawn line.
Touch Set to confirm placement. You will see that the dot now has a yellow highlight around it. Touch Close the exit the Information display.

The design is ready to stitch. Touch OK (needle icon) to open Embroidery Display
Since this is a continuous quilting design, we do not want the cut connecting stitches.
Touch the Cutting Connecting Stitches icon to deactivate the thread cutter; it is no longer highlighted in yellow.
Touch Color Resequence to activate, it is now highlighted in yellow. This will keep the machine stitching with like colors.
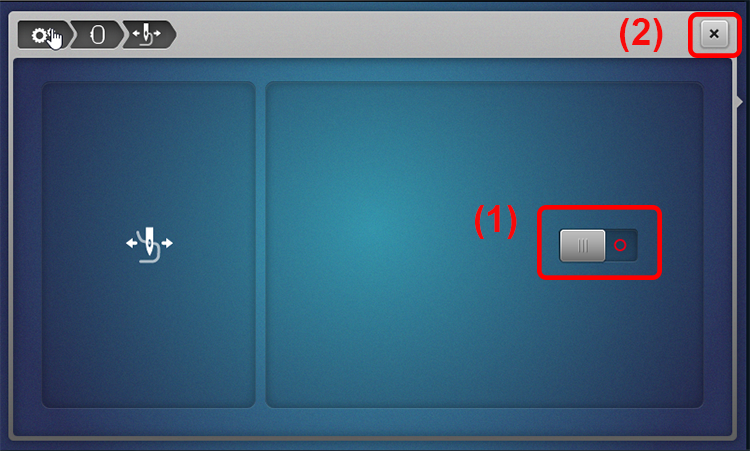
Turn Off Thread Away
Before you begin stitching, if you are embroidering with B 880 PLUS, 790 PLUS, 700, 590, 500, you will need to make sure that the Thread Away feature is deactivated.
Touch the Setup icon. (This is the gear symbol found to the right of the screen or found under Home > Setup. Consult you manual for details.) Touch Embroidery Settings (hoop) icon. Touch the Thread Away icon.

Touch the slider and deactivate the feature (red O) (1). Touch Close (2) to exit the display.
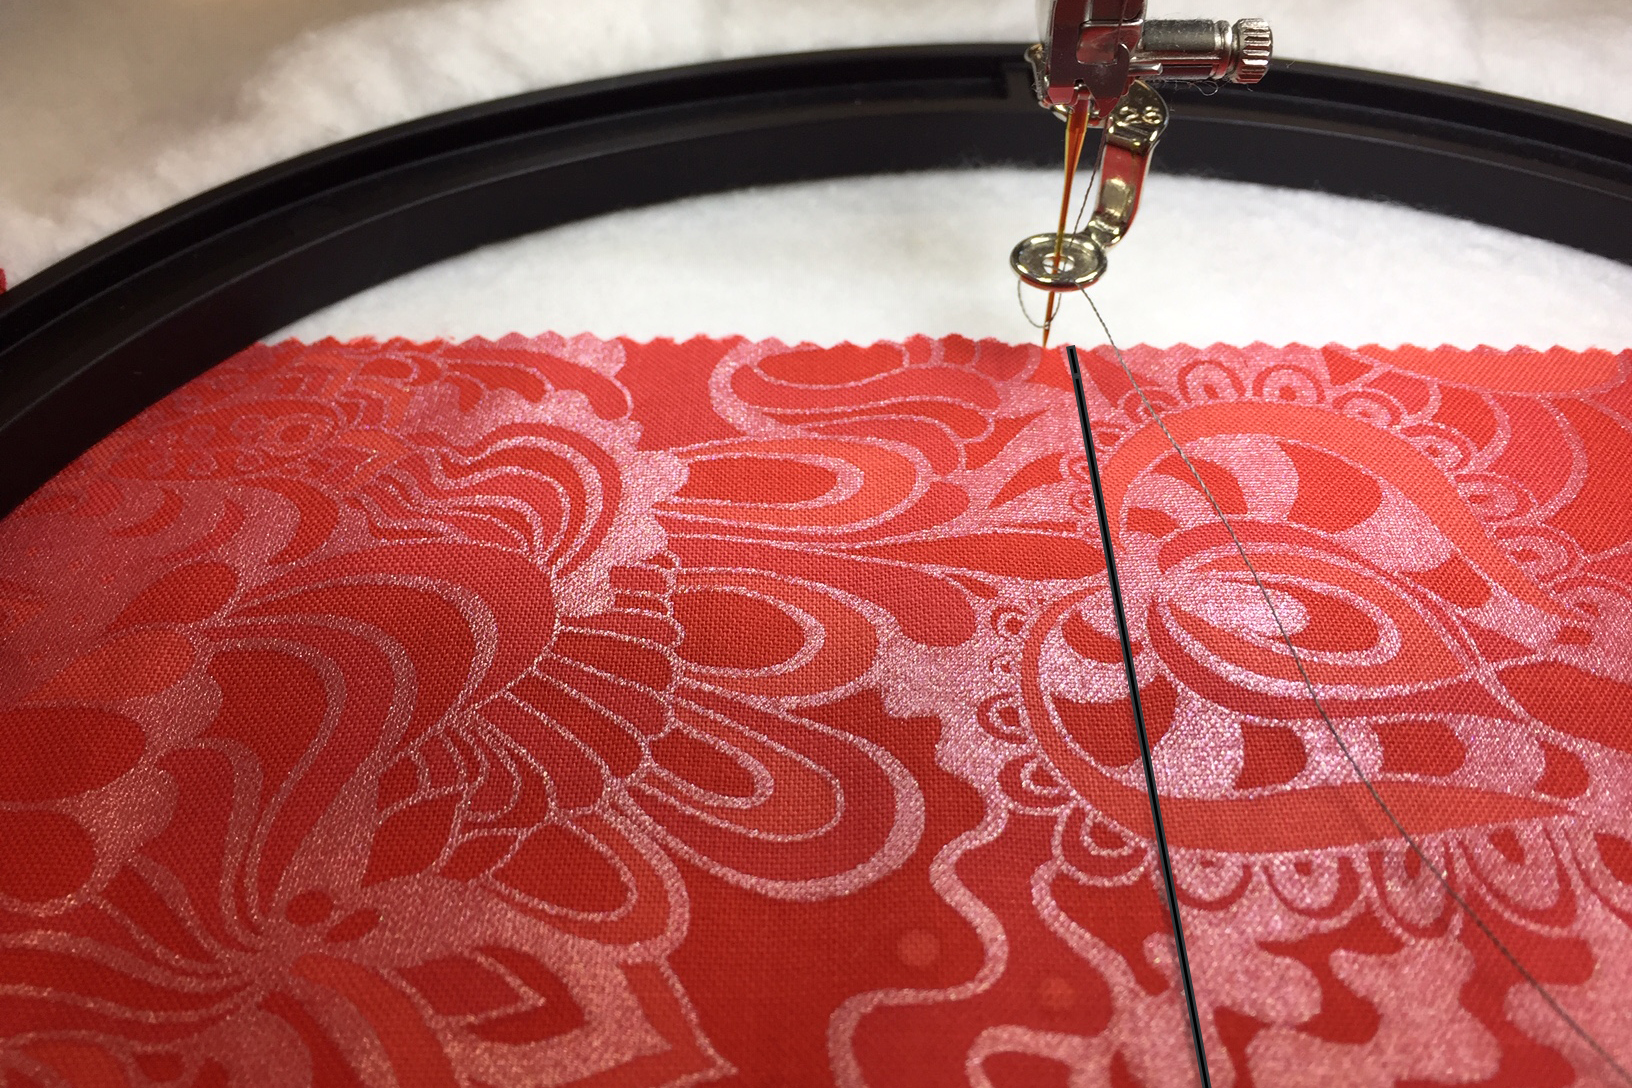
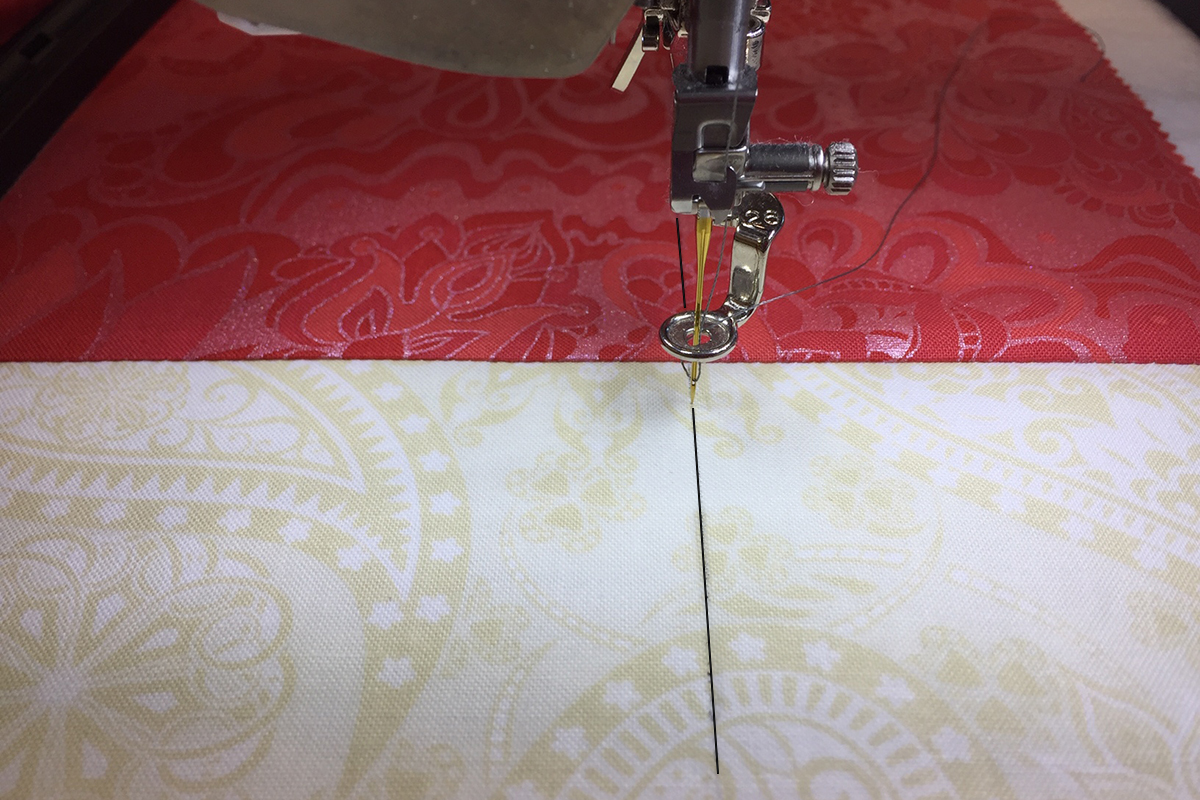
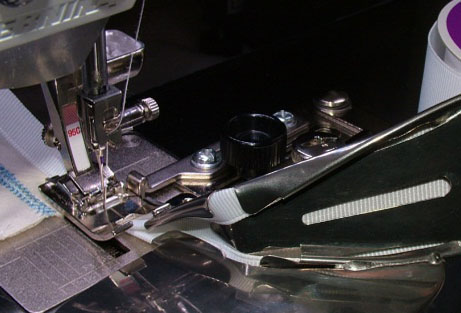
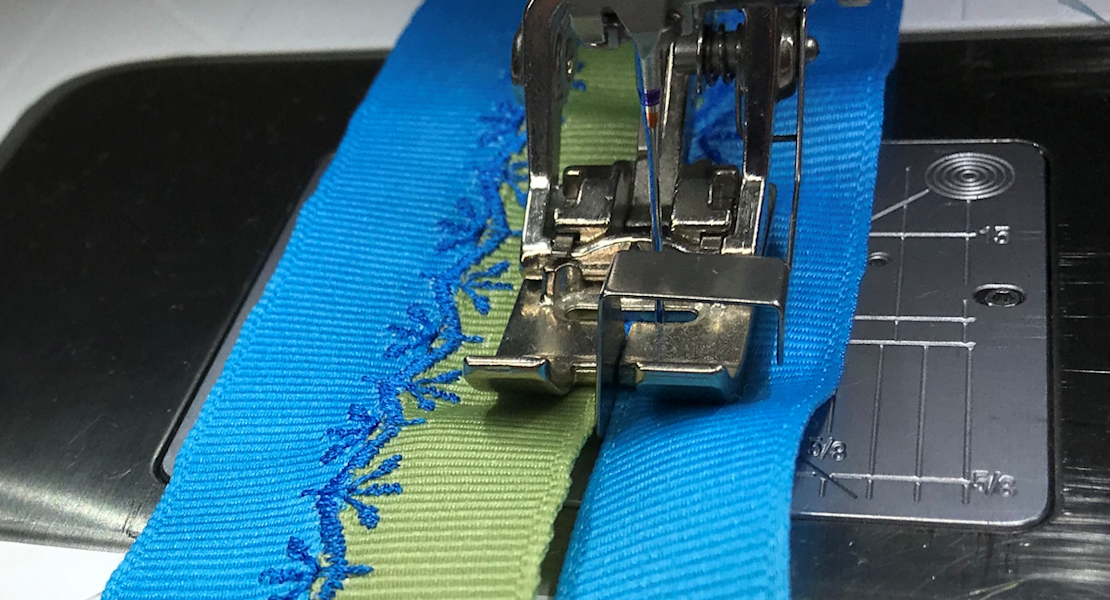
Stitching the design
Drop the needle and pull up the bobbin thread. Pull the threads to the side. They may be clipped after the embroidery begins or left intact and later pulled between the layers of the quilt. These designs include a locking stitch at the beginning and end of the design. This prevents the back of the quilt from having unsightly thread tails.

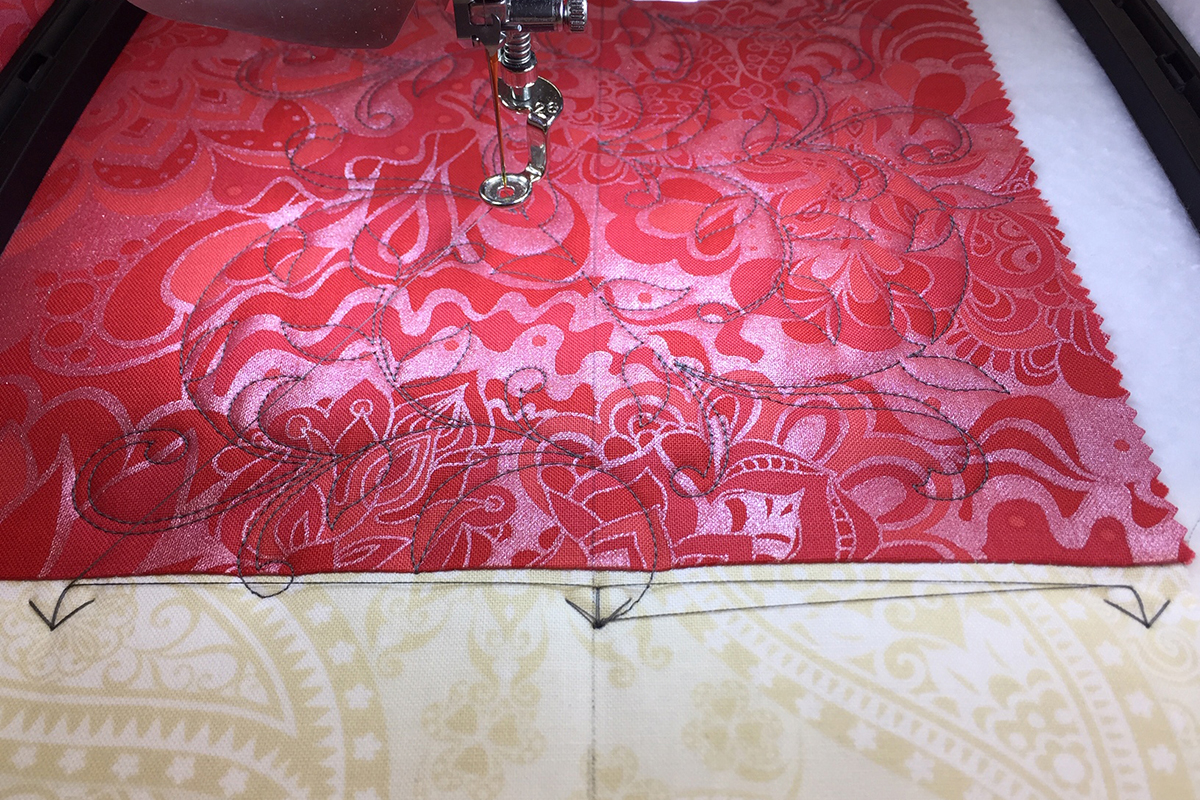
Stitch the design including the 3 registration arrows at the end.
Re-hoop for Endless Embroidery
The first hooping stitch out is complete after you have stitched the 3 arrows at the bottom of the design.
The machine screen displays the stitching option for Endless Embroidery, leave the machine at this screen until you have hooped for the stitch out #2.

Prepare the hoop for stitch out #2.
Trim away the thread tails, or you may choose to knot knot and bury between the quilt layers, a method used by many machine quilters.
Un-hoop the project gently to avoid disrupting the quilt sandwich and stitched registration marks.
Using the hoop’s plastic template and the marked placement line as guides, re-position the inner ring of the hoop. The stitched reference points (3 arrows) must be within the stitching area.
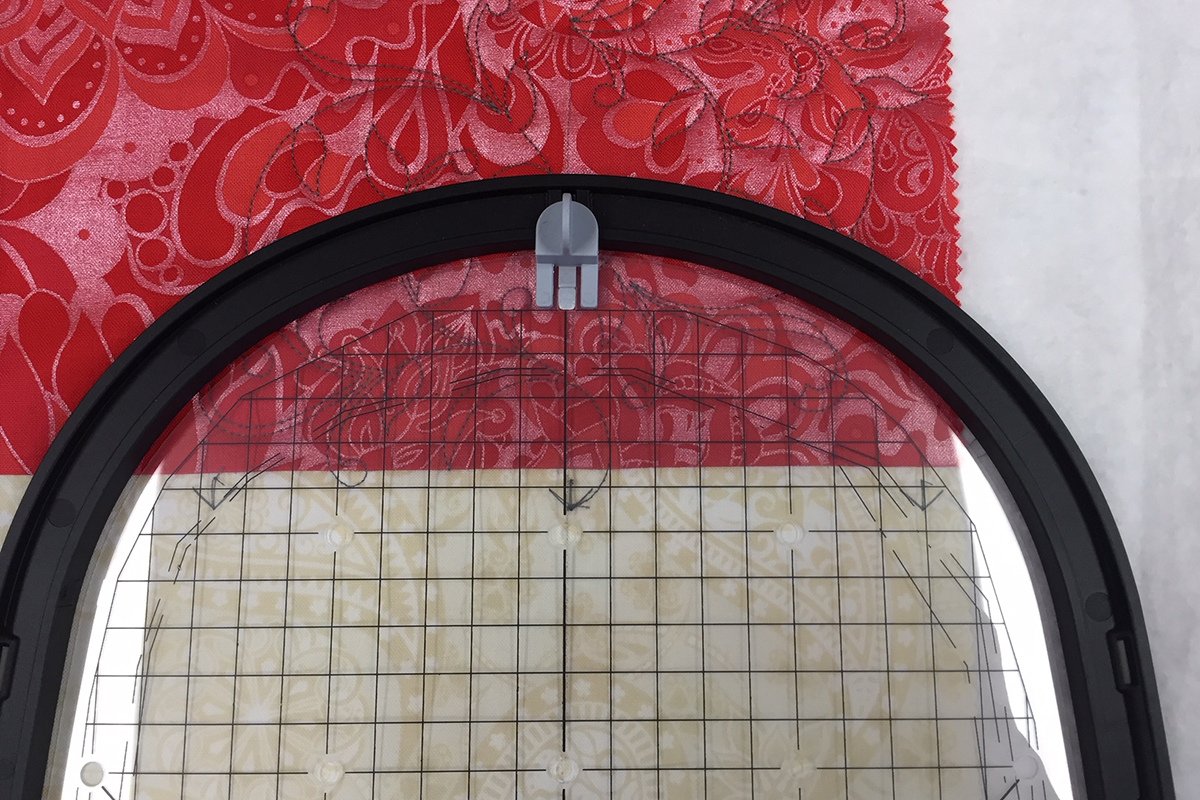
Carefully align the center vertical marking on the project with the hoop template’s vertical center.
Check to be sure you have aligned the center vertical mark of the hoop template with the marked line on the quilt so that the stitching will be straight.
Attach the hoop to the machine.
At The Machine
Touch Endless Embroidery on the machine screen.
Touch the green check to confirm that you have re-hooped the quilt project.
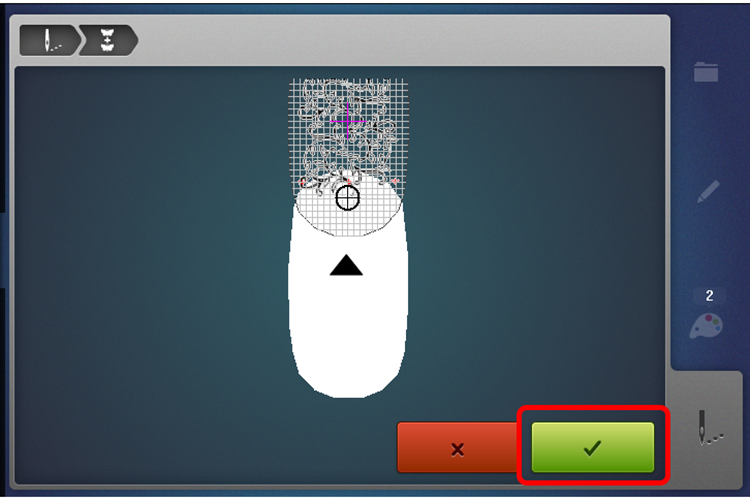
The hoop is moved near the last stitch. The Auto-point is the tip of the center stitched reference point.
Use the Upper and/or Lower Multi-function knobs to position the needle directly at the tip of the stitched center arrow. Use the handwheel to lower the needle to check for precise alignment and then return needle to the highest point.
Touch the upper right arrow and upper left arrow on the machine screen to align the left and right stitched reference points. Follow the same process as above to align needle point with stitched registration mark. Touch the green check to Confirm.
Note: Pinpoint Placement may also be used here to confirm that the quilt is hooped straight vertically if in doubt. Follow the steps above for using the Grid Placement to align with the marked line on the quilt sandwich.
Pull up the bobbin thread and pull the threads to the side. Stitch the design.
After the stitching is complete continue with the same process to complete the first edge to edge row of stitching.
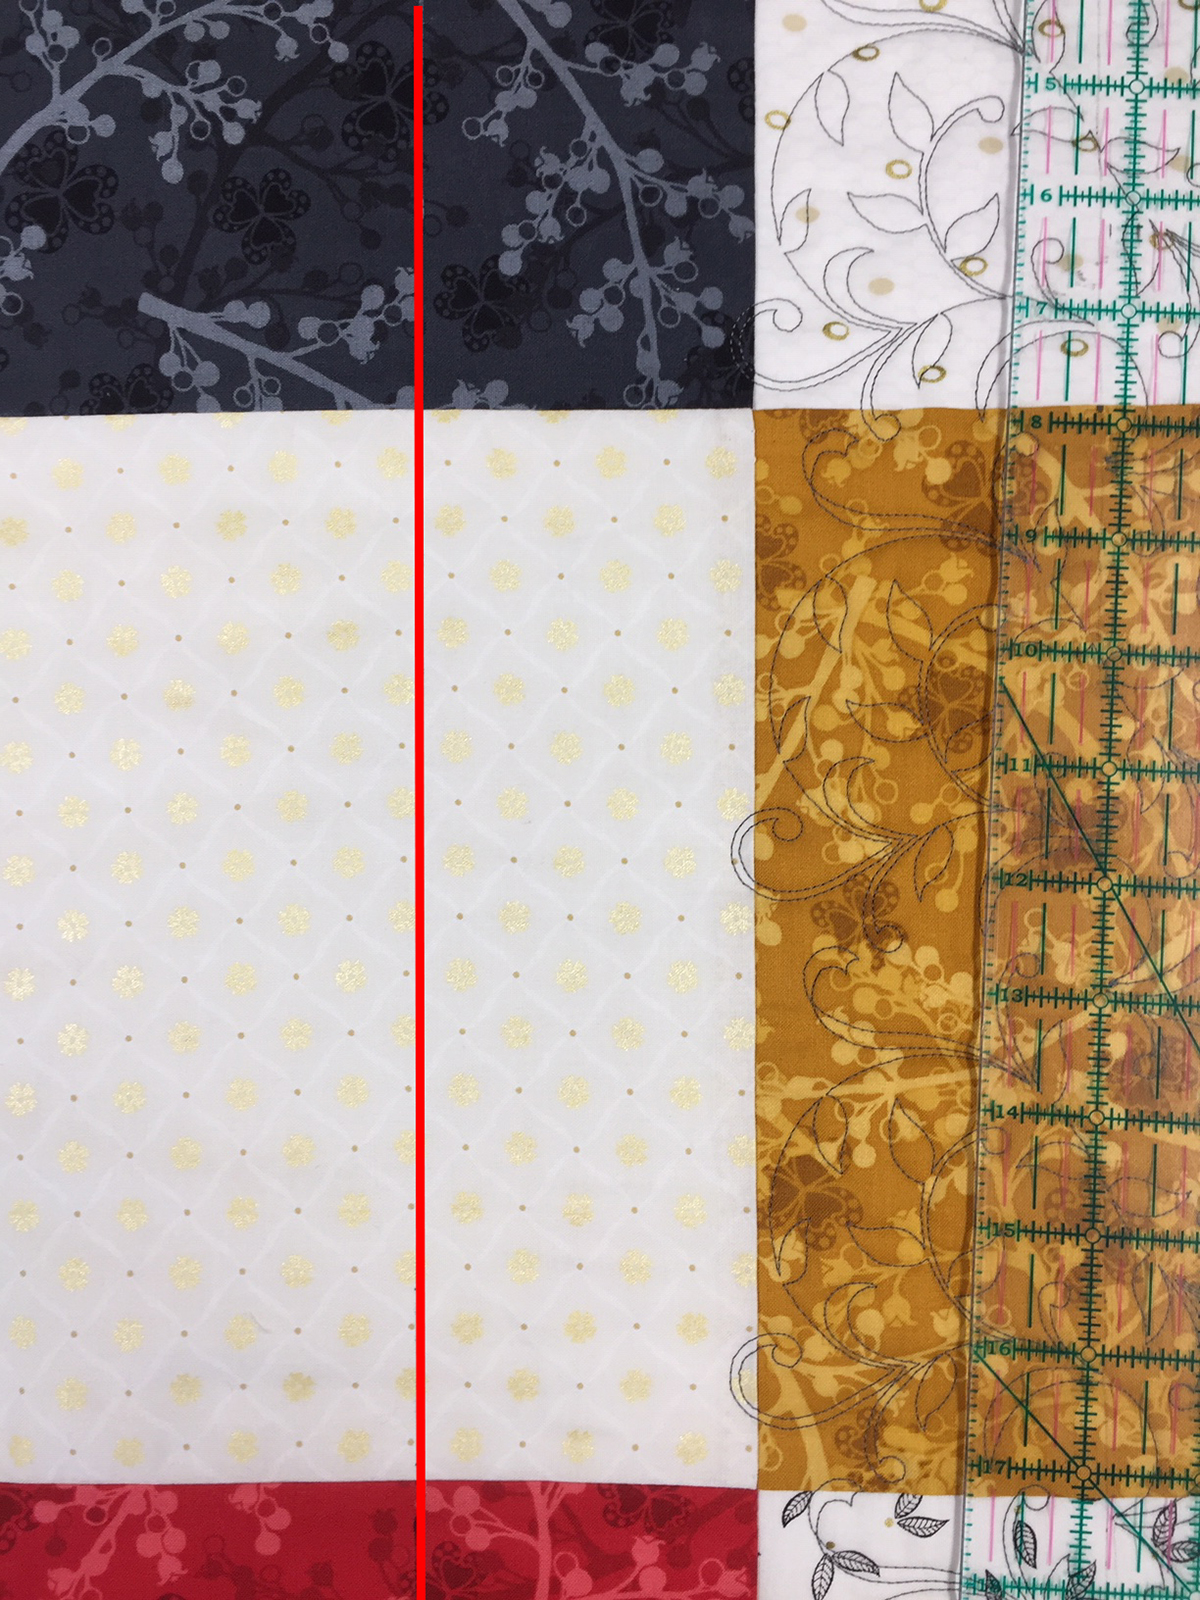
Edge To Edge Row 2
Remove the quilt from the hoop.
Position the trimmed design template on the quilt using the previously stitched row as reference for placement. Nestle the design template close to the previously stitched design so that there is not a large space between them. Measure from the edge of the stitched row to the vertical center of the design template, this will determine where you will mark the next vertical placement line on the quilt.
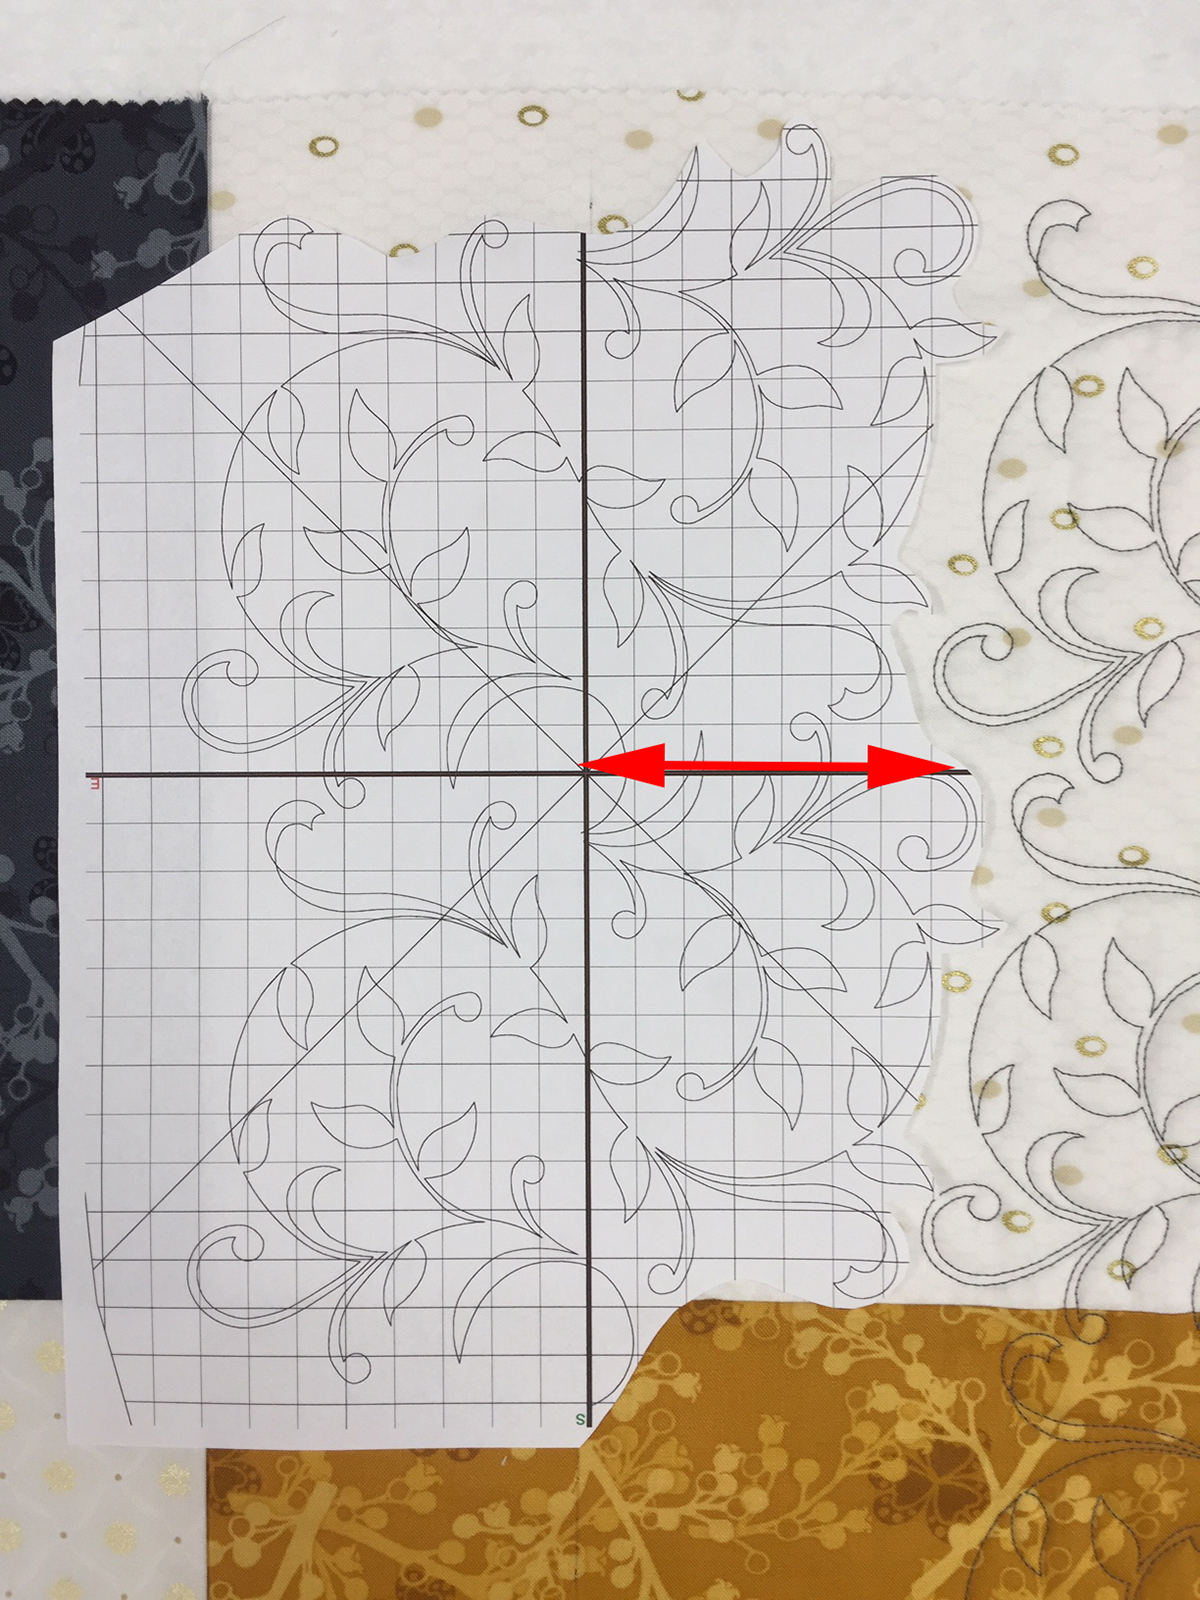
For the design I used it worked great to mark a vertical line that is approximately 2 3/4″ from the edge of the previous stitched row.
Hoop following the same process as in row 1, use Pinpoint Placement to place the first hooping of the design. Stitch the first design and then follow the steps for Endless Embroidery as used for the other designs in row 1.

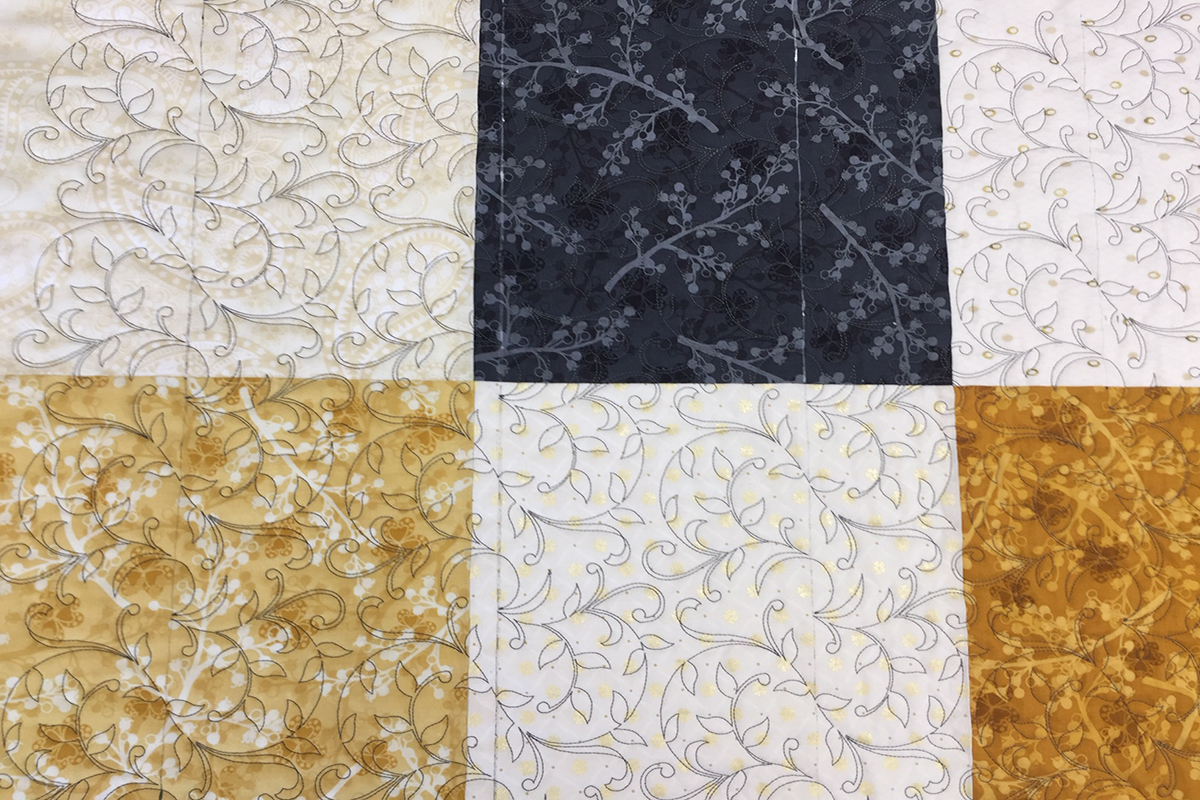
Follow this process until all the rows are stitched and you have now completed your Edge to Edge quilting in the Hoop!
Finish The Quilt
Prepare the quilt for binding, trim off the excess backing and batting.
Prepare and stitch the binding. For more information on binding refer to early blog posts.
Yes, you can quilt in the machine embroidery hoop, edge to edge with Endless Embroidery!
Used Products


What you might also like


13 comments on “Edge-to-Edge Quilting in the Embroidery Hoop”
-
-
Can this technique be adapted to a 590 with size adjustments, etc.?
-
I have a 830 with version 7 software. Can this still be done?
Great article. Your quilt is lovely.
Thank you for your post,
Mary -
Really do appreciate this detailed, comprehensive article. Thank you. Lots more like this please.
-
What would be the largest design that a 590 could accommodate? Great instructions and illustrations — I have played with PinPoint design but didn’t fully understand how to use it for this application.
If I have a border pattern that it too long for my largest 590 hoop, is it conceivable to go into the embroidery software and truncate it establishing a new starting point? What is the best way to go about this?
Thank you!
-
Would his be possible on a model without pinpoint placement? I have a 770QE.
-
Yes, I have the 770QE, how would you do this process otherwise 770QE? What changes in directions would be needed?
-
-
What changes in the directions would be needed for a 770? Thanks
-
Great tutorial — Would help to understand if this same technique could be used with other machines (e.g., I have a B580 with an Oval hoop that does ~ 5 x 9″ (I think it could/should but obvs would be a lot of re-hooping). Looking forward to yr response. Thanks _
-
Great article. I would also be interested in how you determined how many columns of the design would fit on your quilt especially if it didn’t work out to an exact size. Did you resize the design and how do you figure what size it would be? Thanks.
-
Where can I purchase this Quilt Design? I live in Toronto Canada
-
Just curious. I would love to see the answers to these questions, how can I view them?
Thanks!
-
Do I need to turn off the two knot settings in embroidery setup for edge-th-edge?
Leave a Reply
You must be logged in to post a comment.

Hello Judy,
This looks wonderful and I can’t wait to try it! However, I have a question. Can I do the same thing with a design off my machine? Thanks!