Edge to Edge with Q-matic
Edge 2 Edge quilting with the BERNINA Q-matic Longarm Automation Quilting System is so easy. The purpose of this blog post is to help you create an Edge 2 Edge layout and stitch it out with success using any pantograph design.
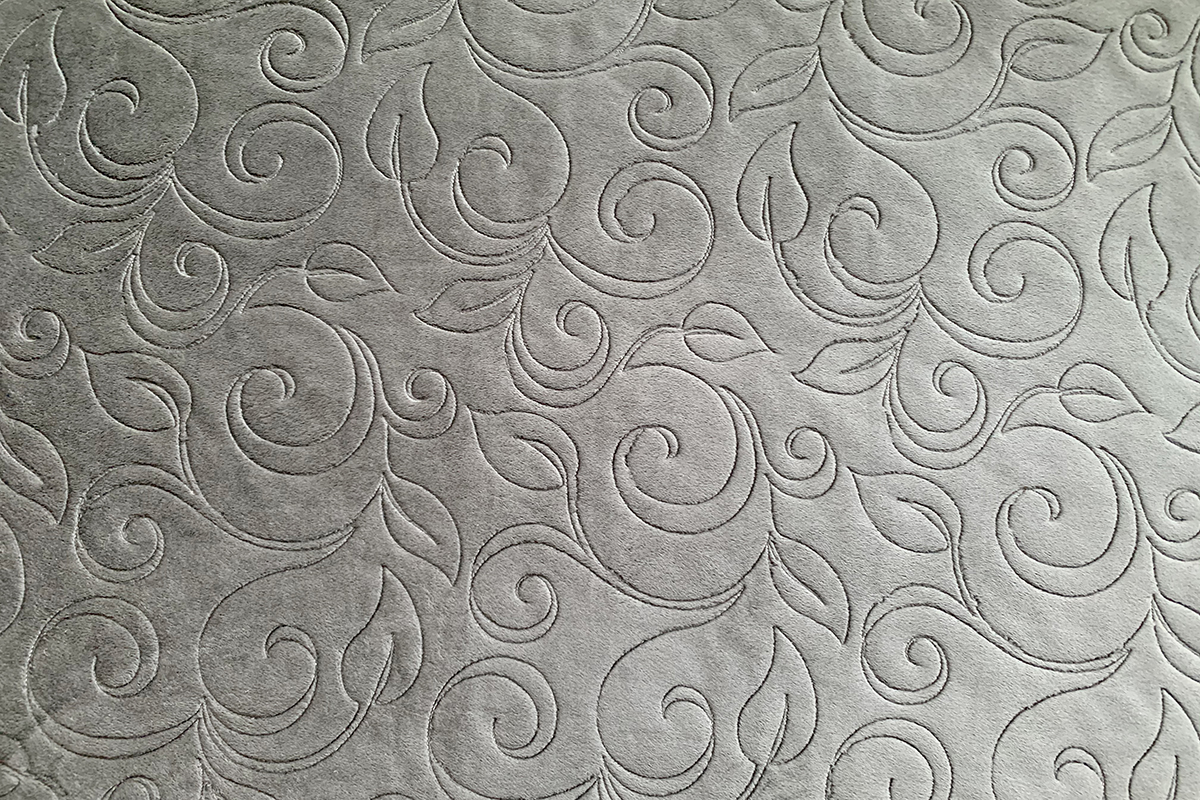
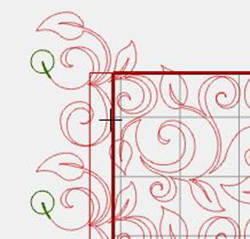
A pantograph design is a continuous line design that starts and ends on the same plane, and the design can be repeated to make a row any length. Sometimes Edge 2 Edge quilting is called all-over quilting or pantograph quilting. Any one of the three names means that the design will fill the quilt from side to side and top to bottom by repeating the design in a row and repeating the row. When first using E2E designs to create the layout, you will want to look for a point or corner that you can use to Realign the Safe Area so that your rows will be stitched out as evenly spaced as they look on the computer screen. In the example, I could use either the leaf point or the point in the swirl. If the design you are using has no point or corner, you could use any corner made by a trim or use the start point.
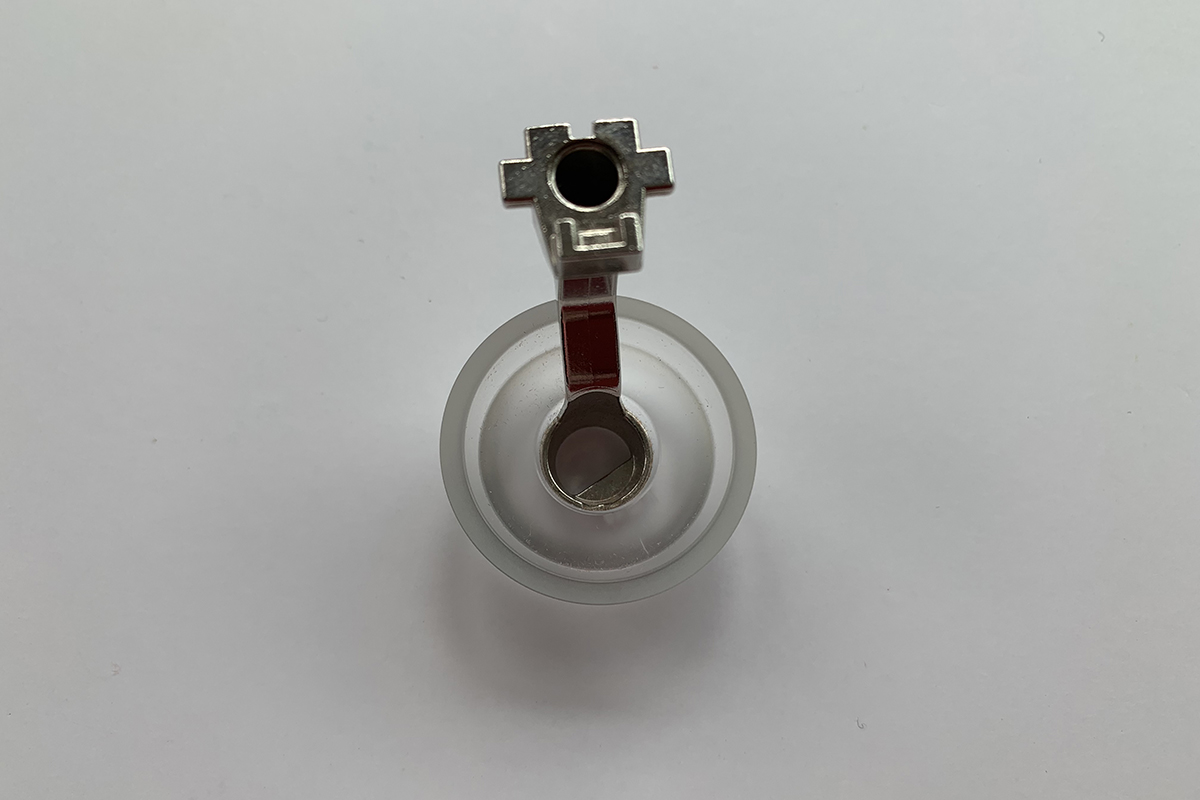
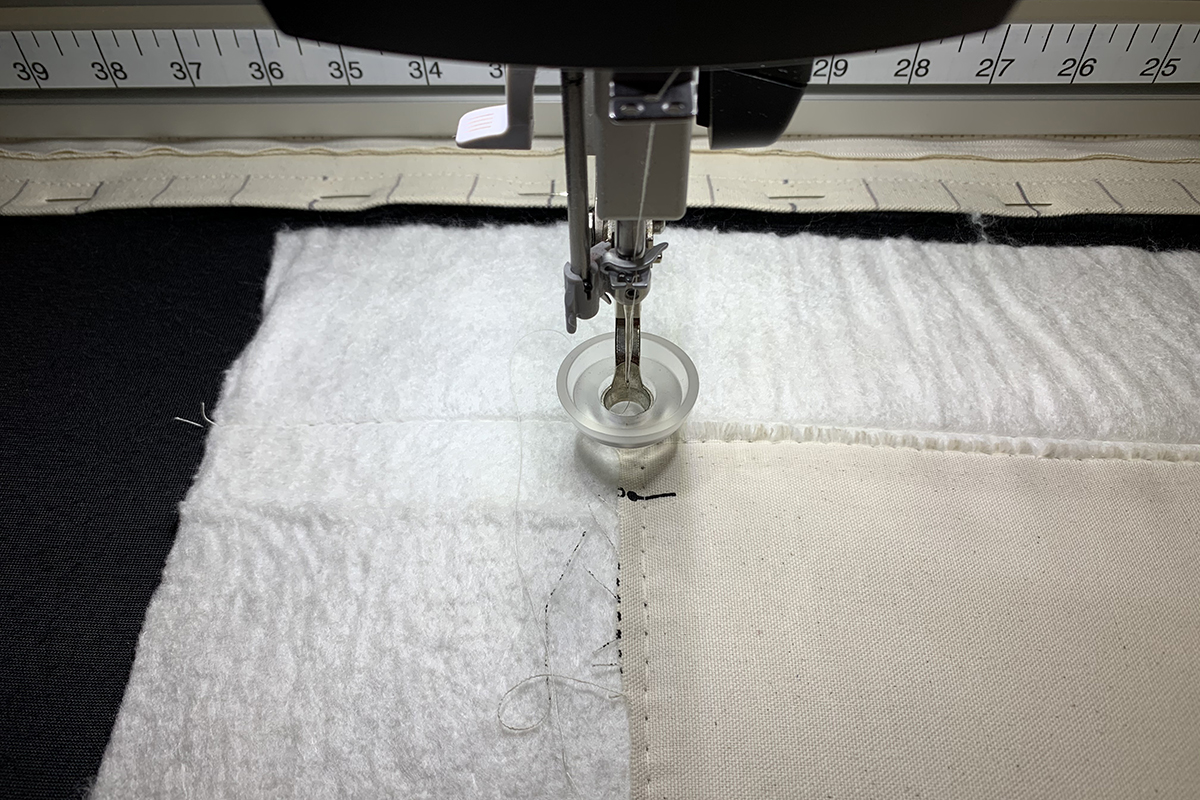
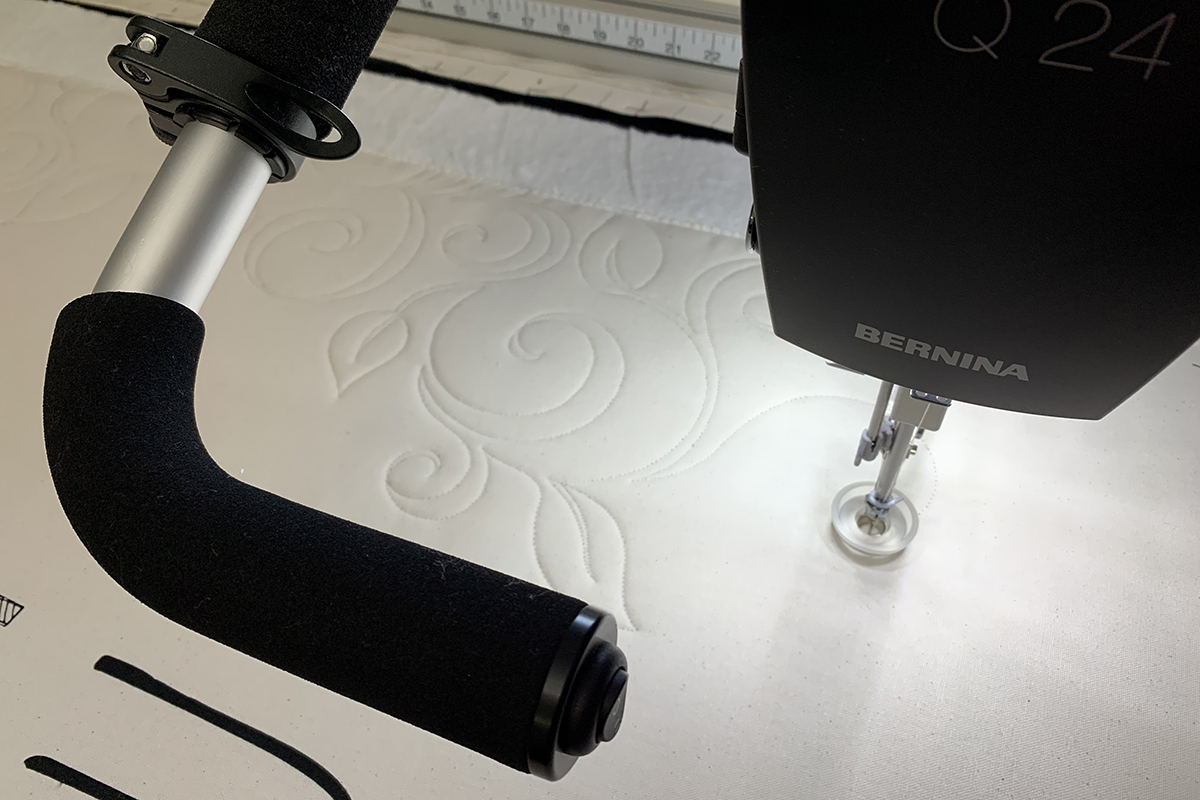
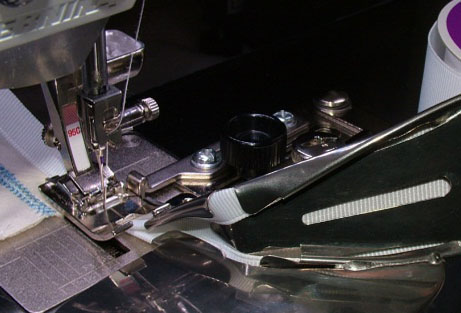
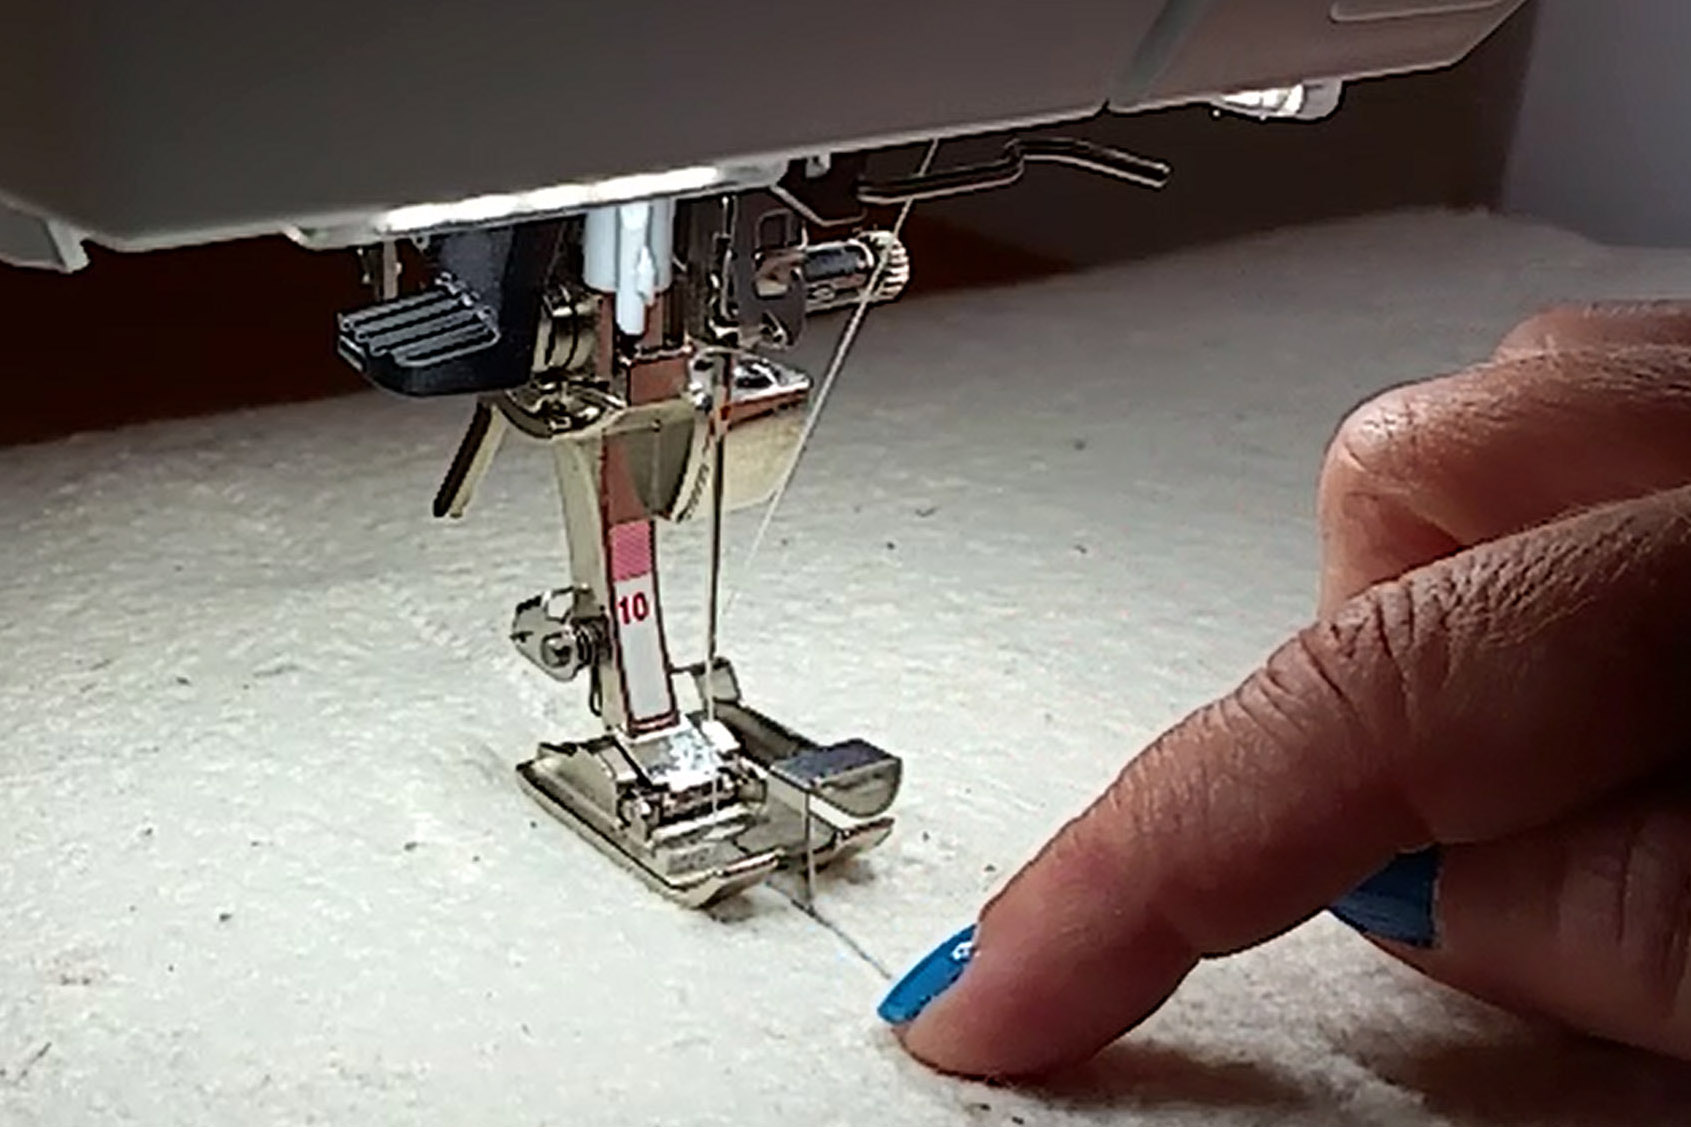
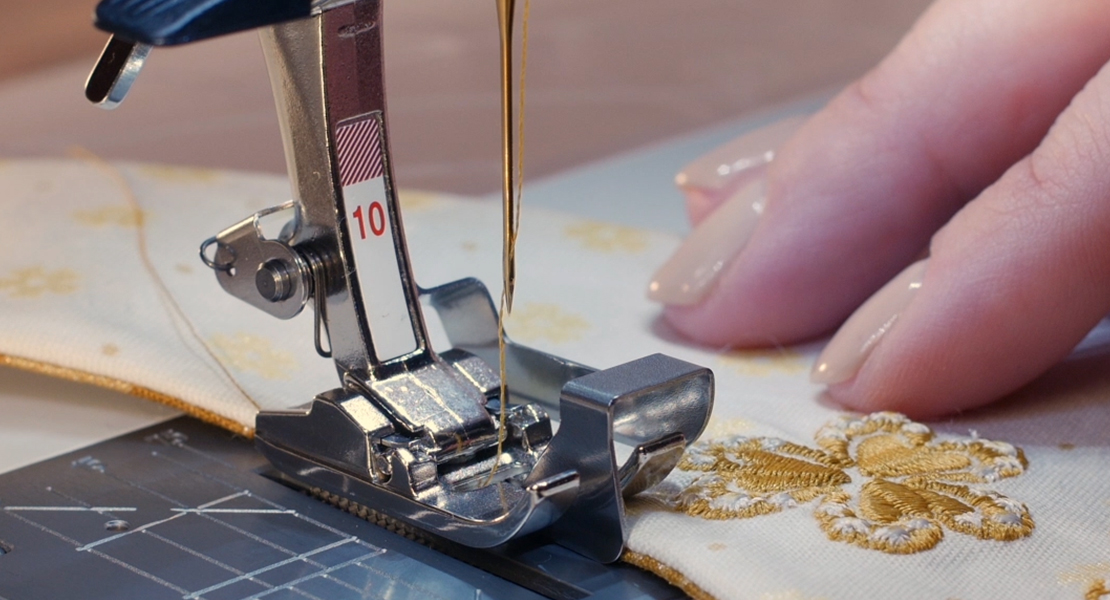
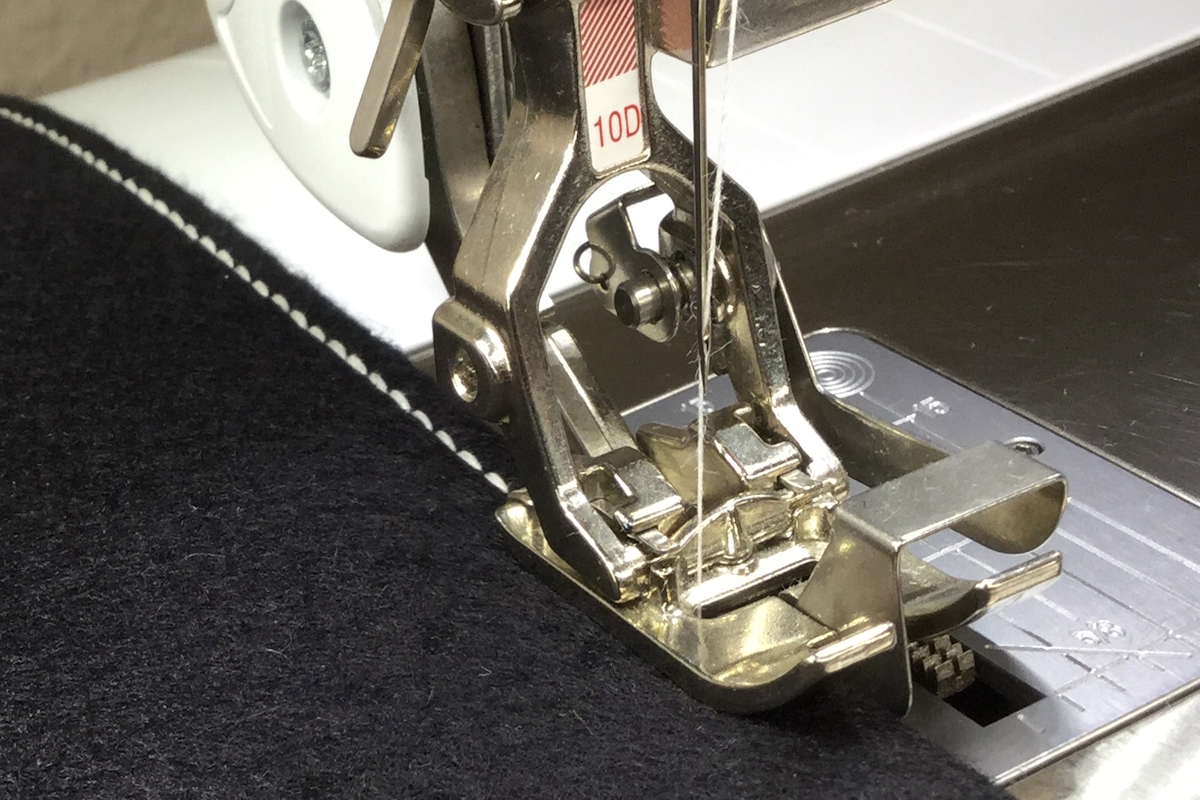
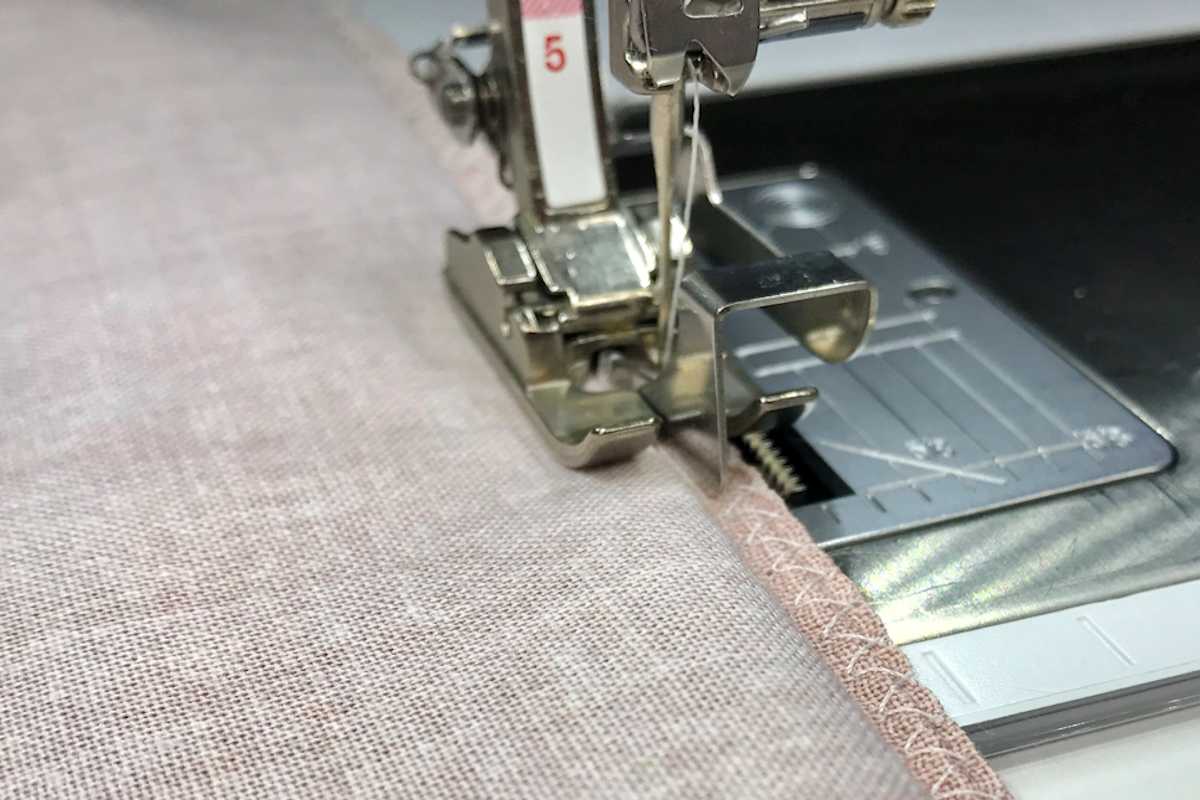
I used the Ruler Foot #96 with the Cup Clip attached. The Cup Clip is designed to keep the foot from sliding under the side of the quilt top so that it does not get hung during the stitching process. It can also be used for quilts that have very thick seams. The Cup Clip can only be used on Ruler Foot #96.
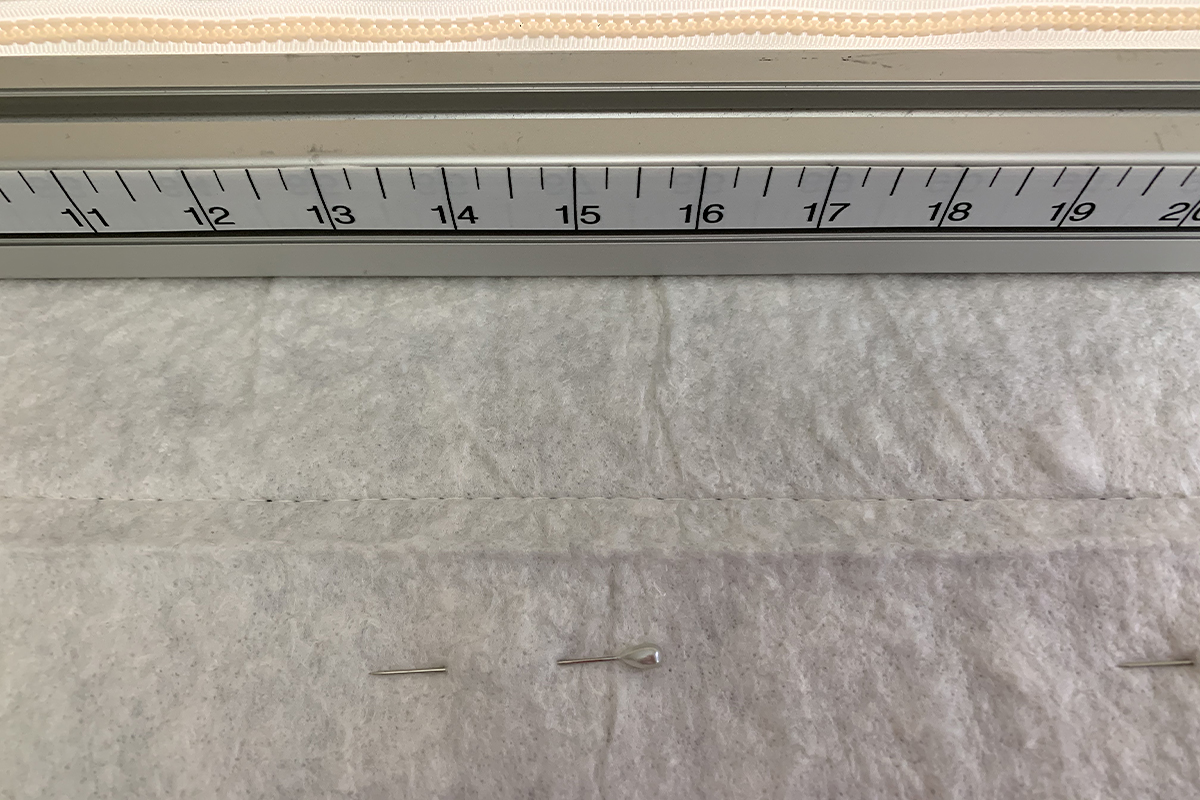
With your quilt top, batting and quilt backing loaded, you will want to baste a line across the top of the backing and batting so that you can line up the top of your quilt nice and straight. To do this, I used the built-in BERNINA Stitch Regulator mode number 3 (BSR3) with 4 stitches per inch selected (SPI 4). If you use pins, make sure they are out of the way when you stitch across, and then remove them before you pull up the quilt top.
Pull the quilt top up and align to the basting line just stitched.
Baste again across the top of the quilt. I again used BSR3 with SPI 4. Stitch really close to the edge; lock the belt that keeps the machine from moving from front to back to get that straight line where you need it. Be sure and remove pins if you are using them.
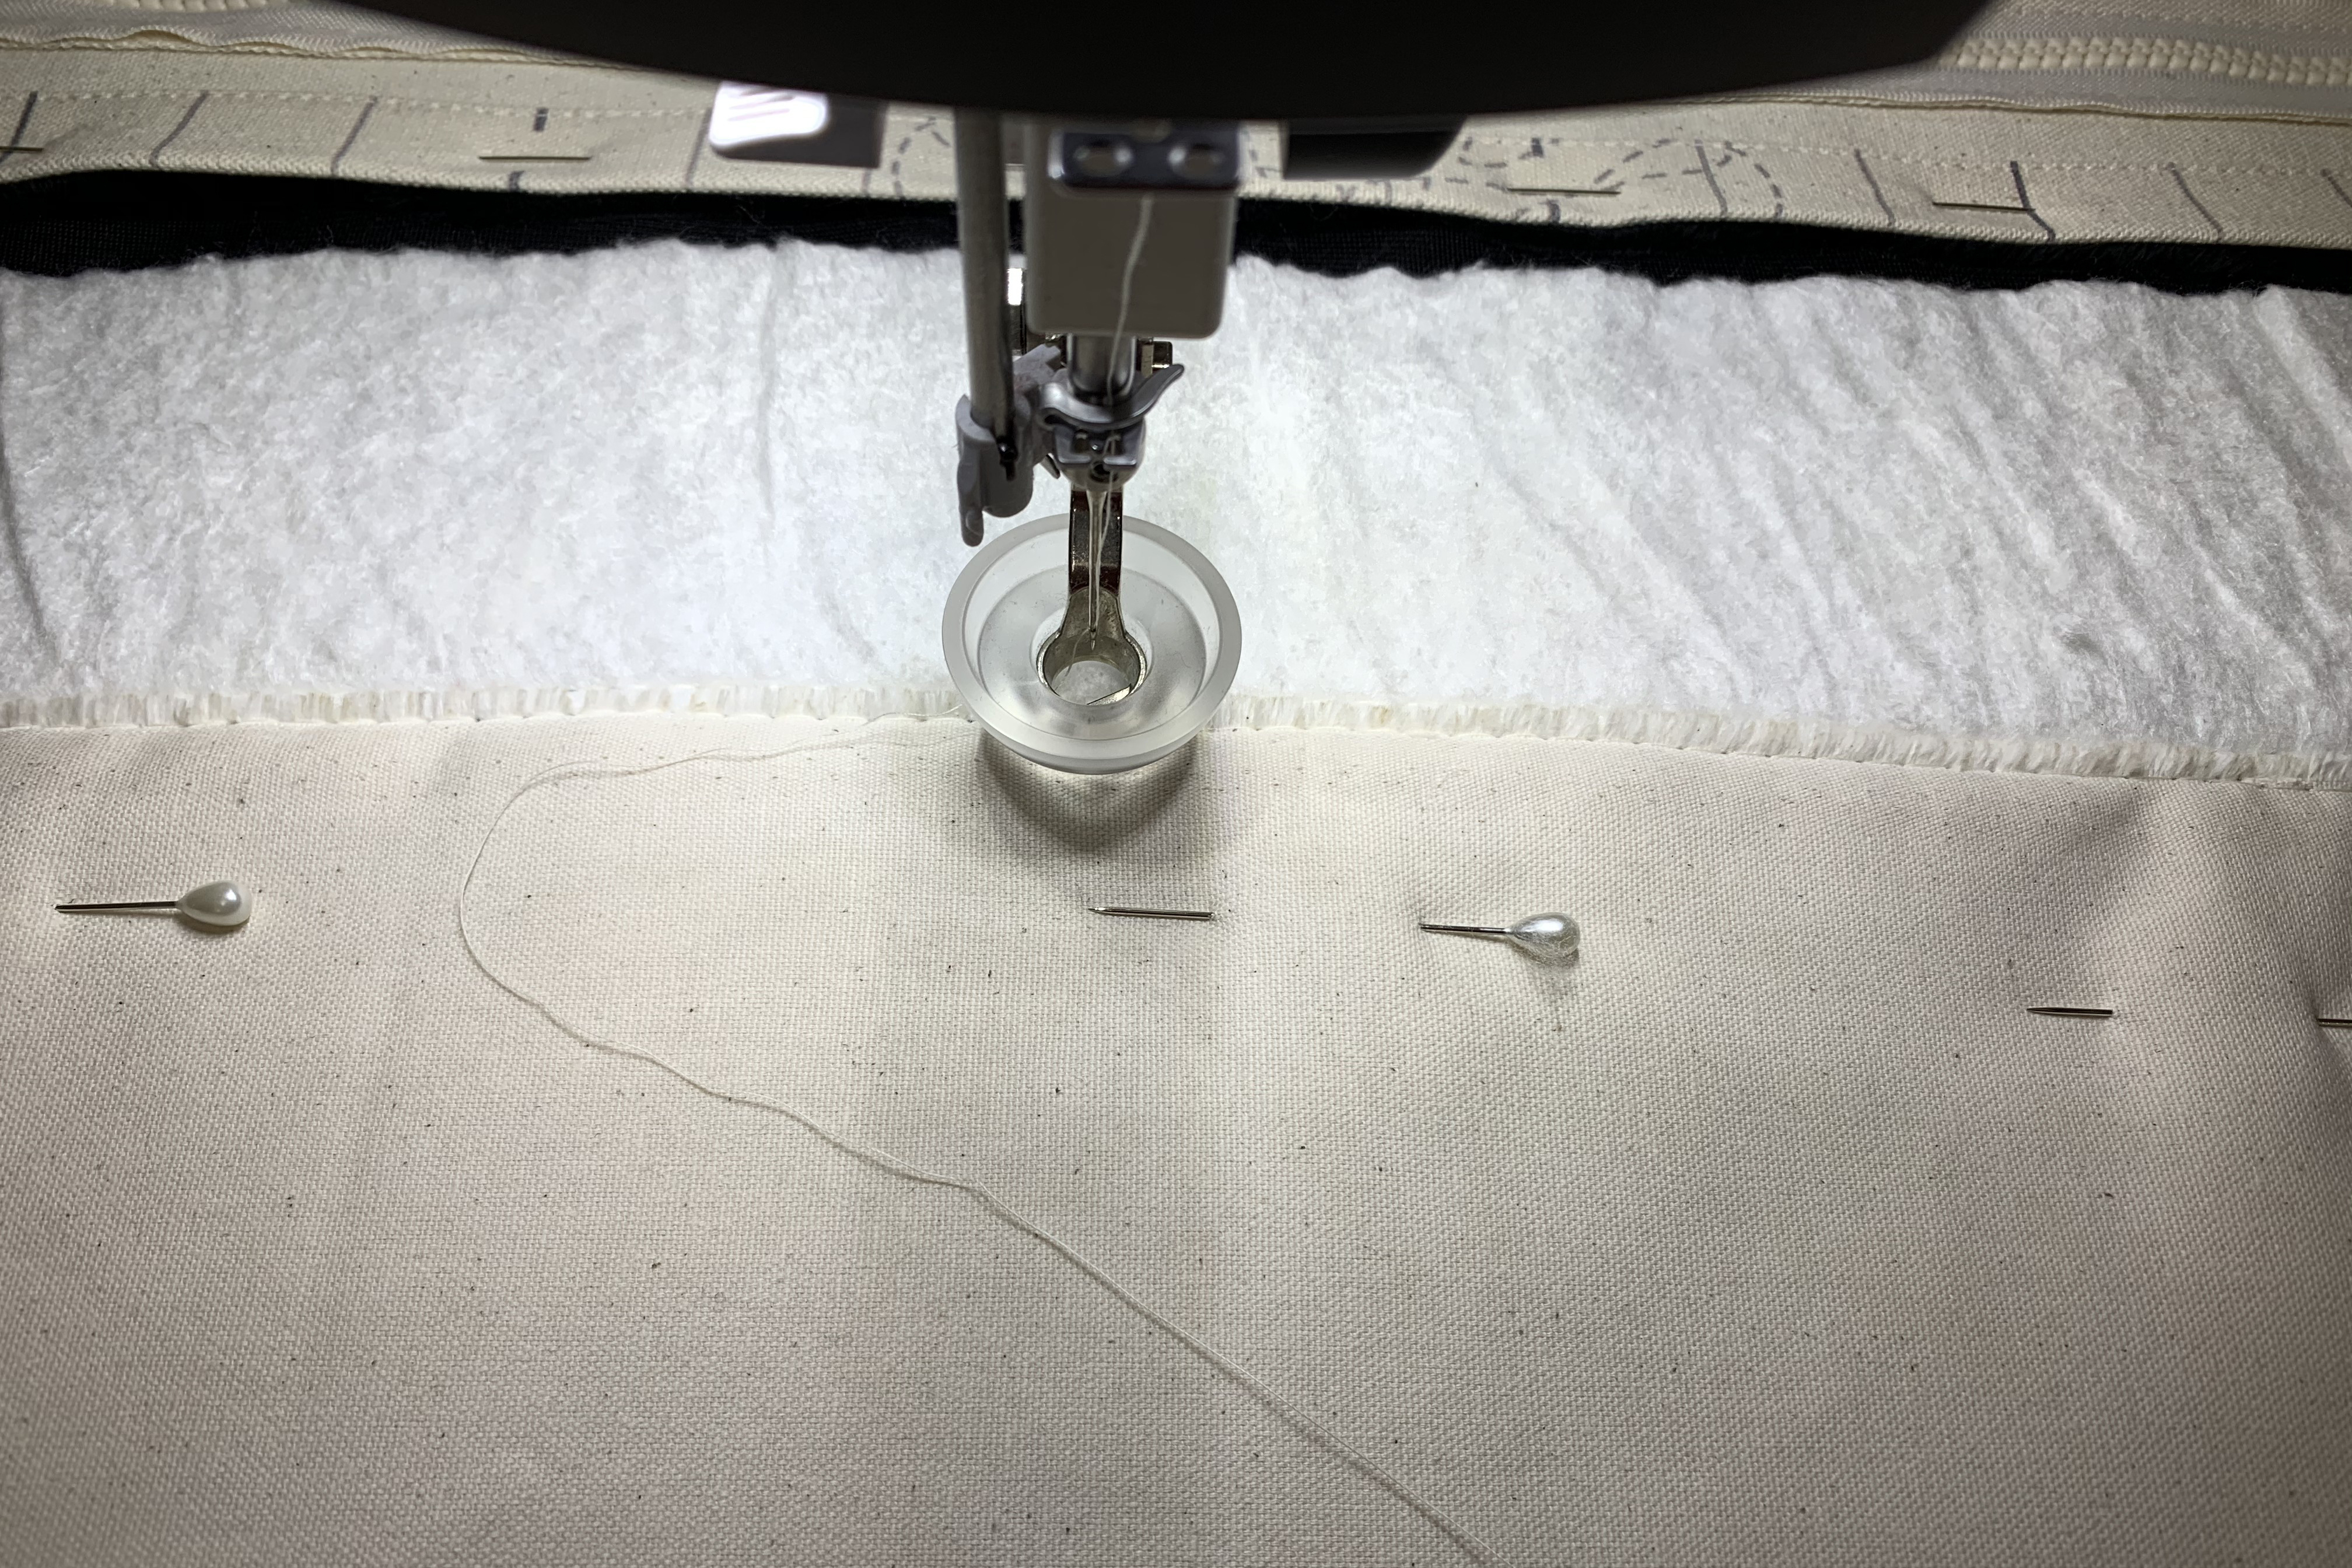
When you have finished the basting at the top, you will then baste down both sides close to the edge, but only what is inside of the Safe Area.
Make sure both clutch belt clamps are engaged.
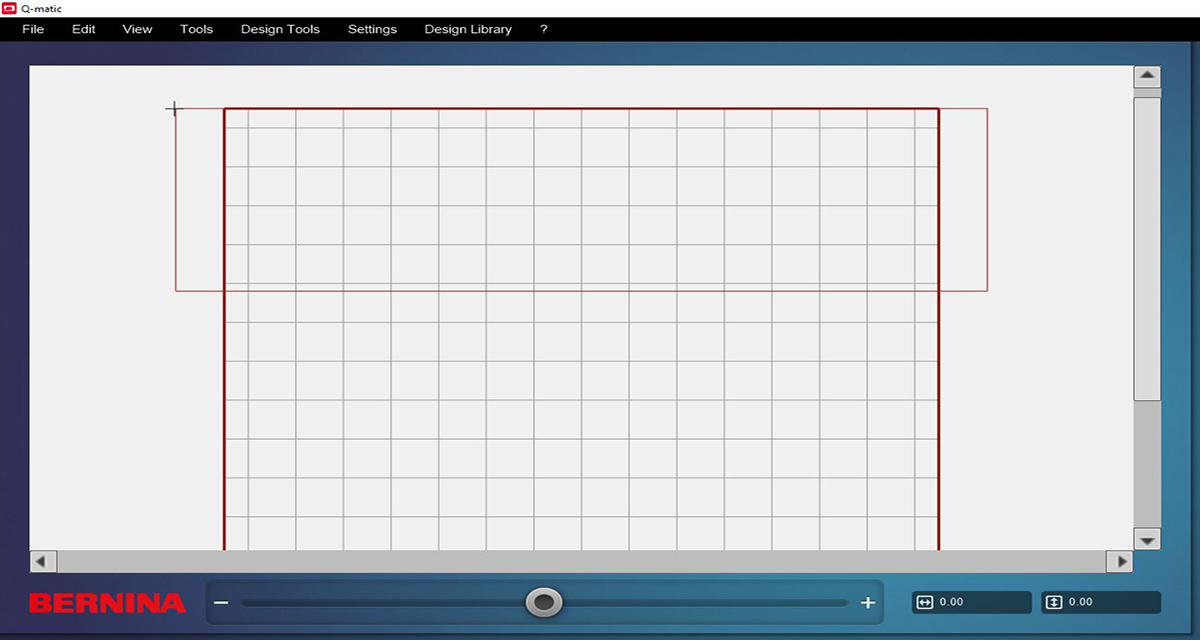
Now move to the computer to create the layout for a quilt. Open the Q-matic program and you will be prompted to set the Safe Area.
Do this now by moving the Sewhead to the upper left just outside of the quilt top on both the top and the left side. Touch SET on the Sewhead.
Now move the Sewhead at a steady pace to the lower right corner just outside of the quilt and as close as you can to the rail at the front. Tip: moving the Sewhead horizontally and vertically is the easiest way to move the Sewhead to where you want it.

As you set this Safe Area, you will see it on the computer screen. The Safe Area is the larger red rectangle the on screen. If you do not have a Safe Area set, the system will not stitch.
Open the Quilt Size icon in the Tool Center.
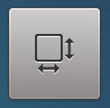
Enter the size of your quilt. Touch the Confirm icon (check mark in the green box) when finished.
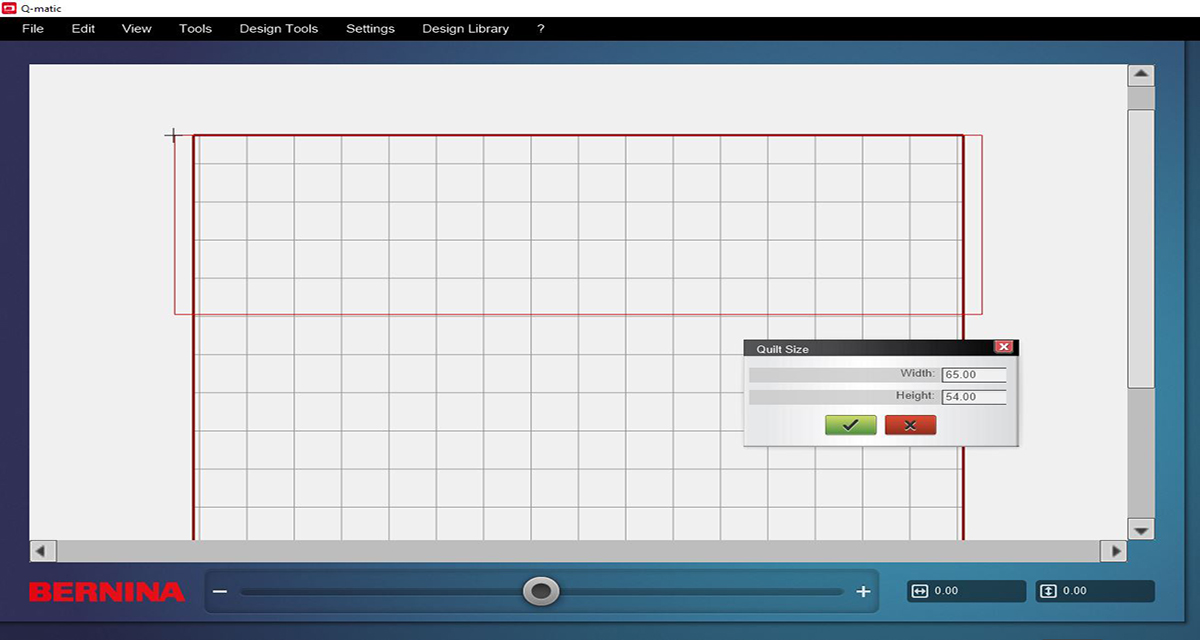
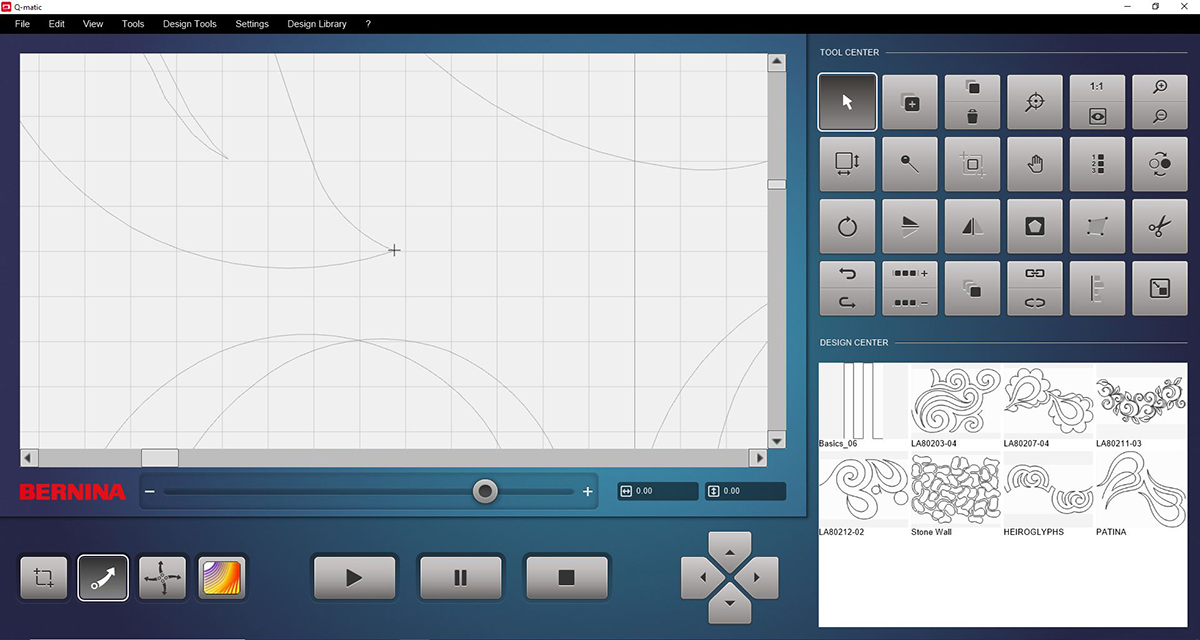
Place design in the Design Center use the Add Design tool in Tool Center.

Double click the design in the Design Pool you want to work with when the secondary window opens. It will move to the Design Center column. In the Design Pool, it will be greyed out. Close window at bottom of screen.
Double click on the design in the Design Center and place it on the Quilt Area. If resizing the design, now is the time to do that. I wanted my design to be approximately 14 inches high. This way I could easily stitch one row at a time. With the design selected, I opened Resize.
If you know the height or width that you want. Select the Keypad. I clicked in the height box (the second one) and entered 14. Click Apply to see the changes. There was no need to enter the width because Maintain Ratio was checked. Confirm when finished using the check mark in the green box. If you don’t know the size you want it to be, just use the green handle to pull and change the size as desired. Confirm.
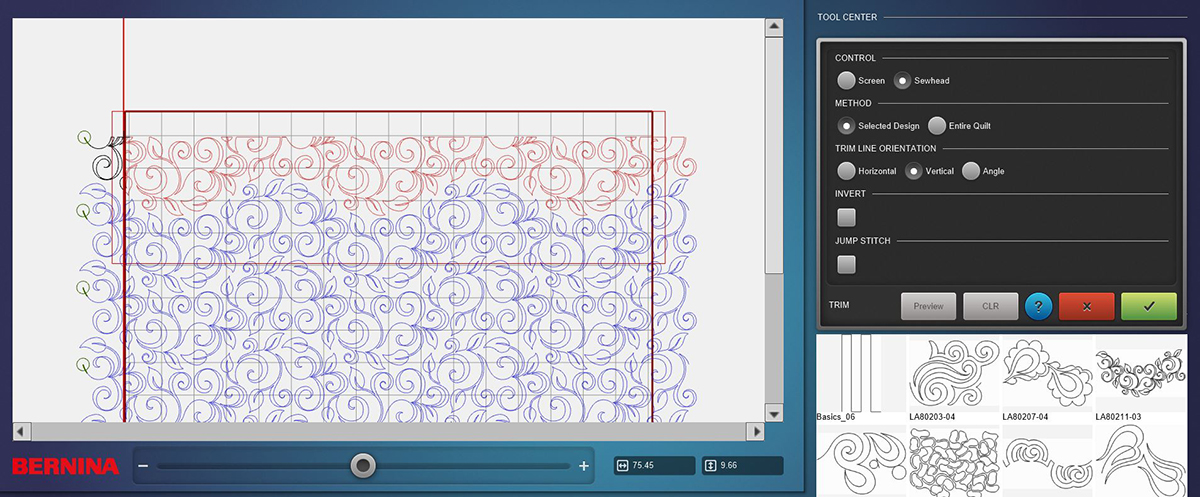
With the design still Selected (red), use E2E+ in the Tool Center to add designs. Use the top half of this icon.
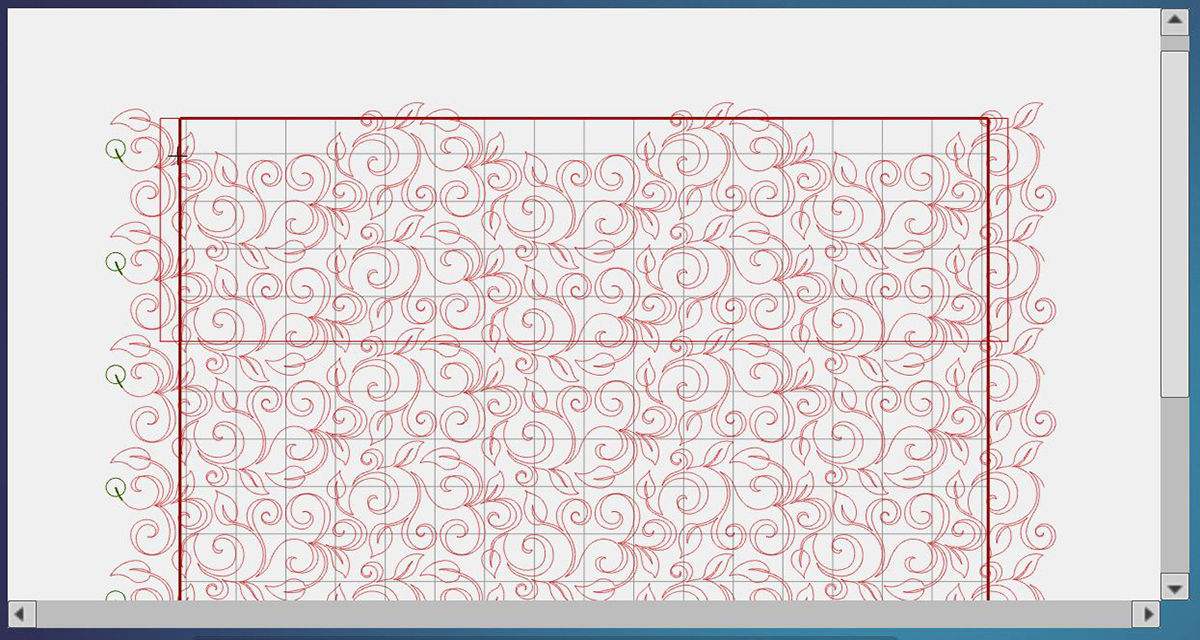
Add designs across the quilt grid until it is full with a little hanging out on each side. When using E2E+, the designs are attached to the one before it so there is only one start and only one stop in the row.
With the row selected open Multiply from the Tool Center.

When the secondary screen opens, add one row down to the screen.
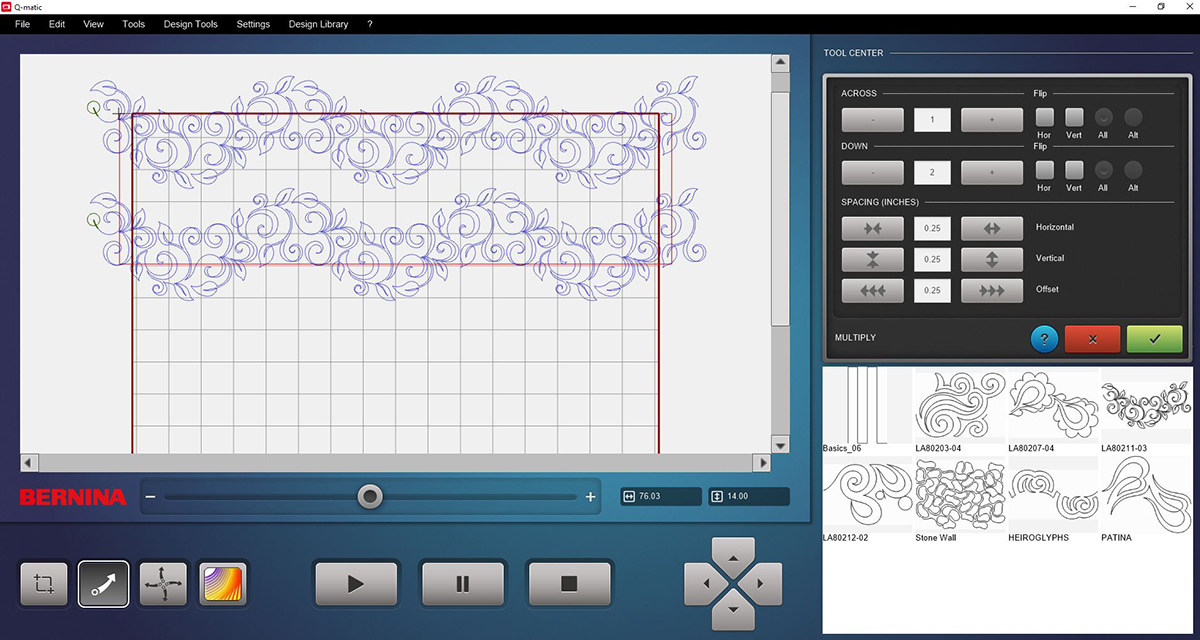
Under Spacing, click on the Vertical arrows that will move the second row up until you like the spacing between the rows. The number in the little white dialog box is the amount in inches that the row moves with each click. You can change this if you want, but I find .25 works well for me most of the time.

With the spacing the way you like it, use the scroll bar on the side of the Quilt Area, and scroll down to the bottom of the grid. Add enough rows to fill the grid with a little hanging out at the bottom.

When you have it just like you want it, select Confirm (check mark in the green box).
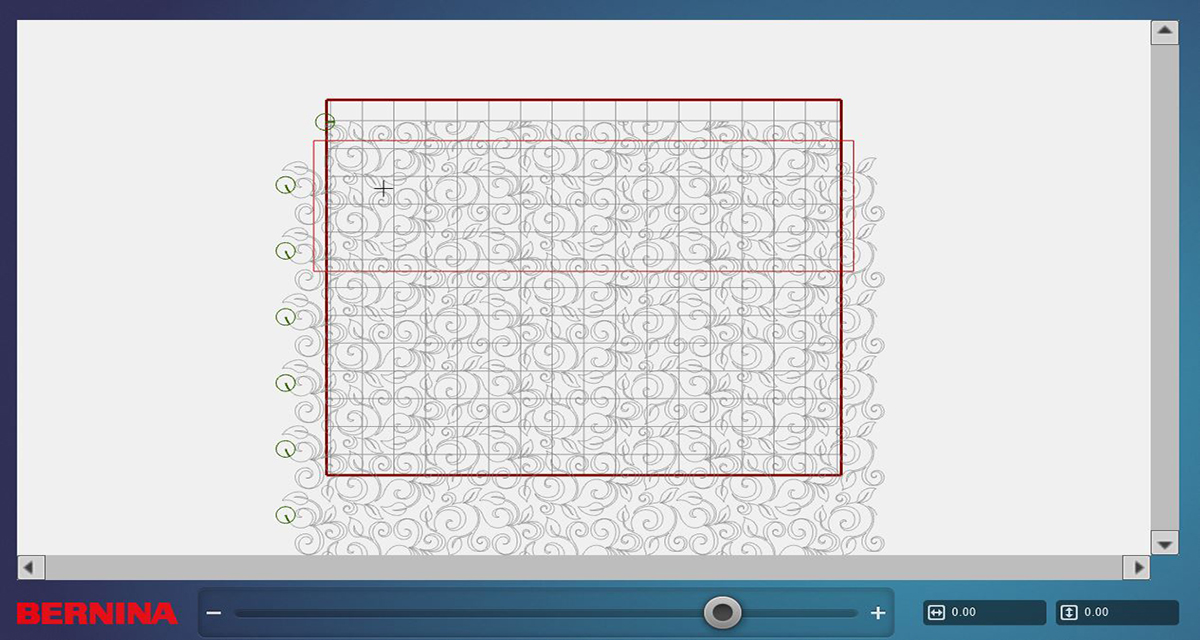
Place your Sewhead at the upper left corner of your quilt top. This may not be at the top of the grid, but that is okay. You will trim at the top of the quilt not the top of the grid.
Make any adjustments in the layout that is needed at this time while the rows are still connected. They will all move together and still have the correct spacing. Make sure that the line running horizontally through the crosshairs of the needle has designs in the area just below it so that there are no open spaces at the top of your quilt.
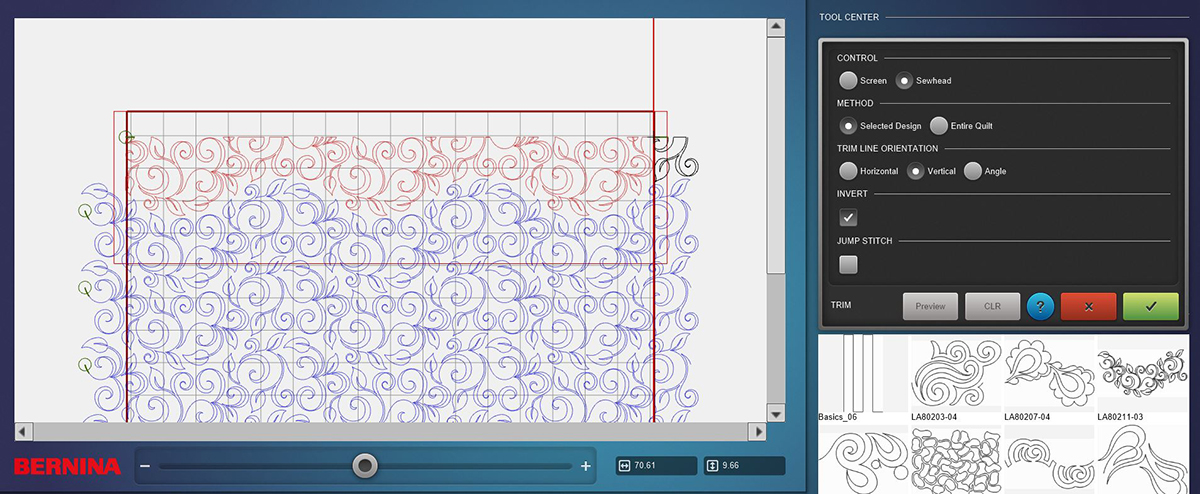
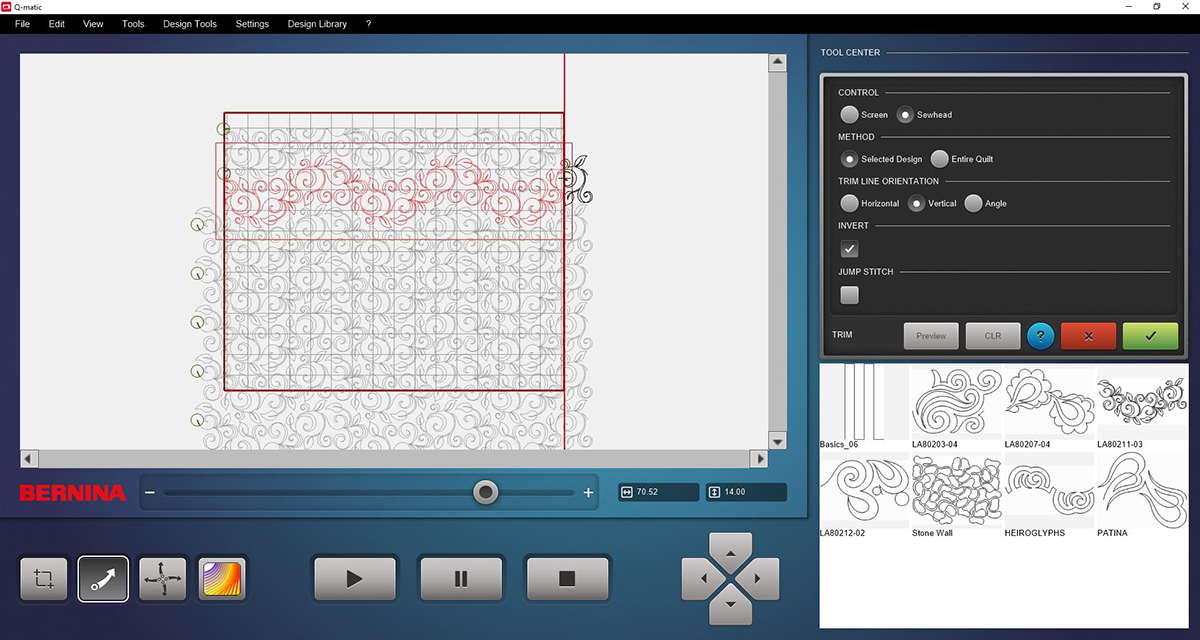
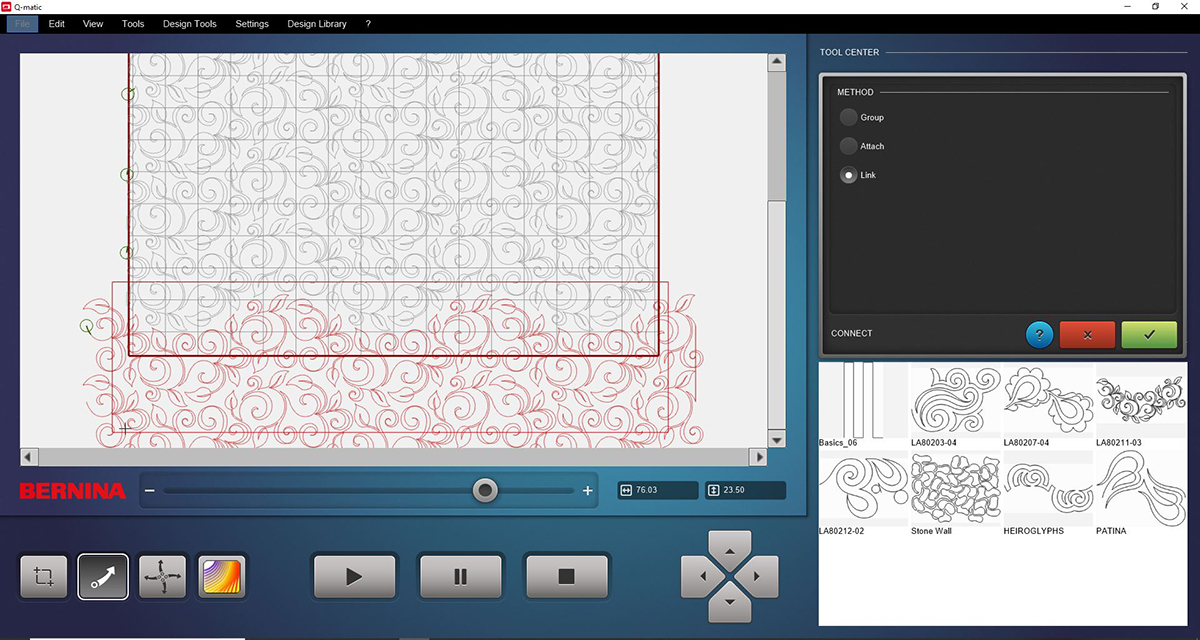
With the full layout still selected open Trim in the Tool Center.

When the secondary window opens under Control, select Sewhead. Under Method, select Selected Design. Under Trim Line Orientation, select Horizontal.
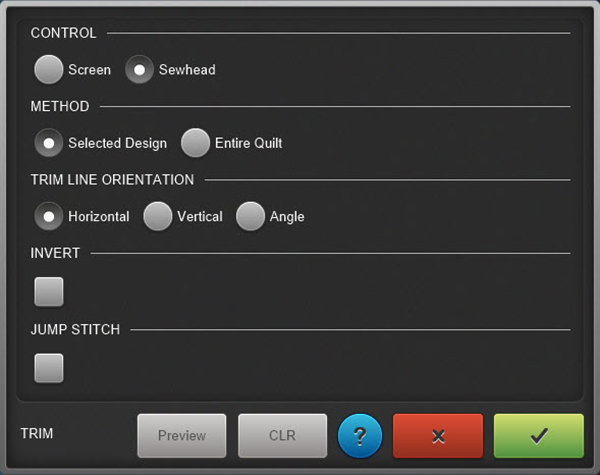
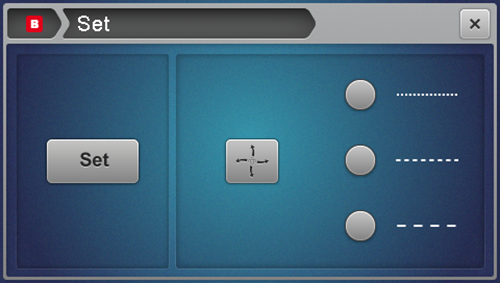
The Sewhead screen will have changed, and you will now see a Set icon on it. Touch it to set the line for trimming.
On the computer screen, you will now see a line with black parts of the design above it.

When you Preview the trim, you will see that the black areas have been trimmed away. Touch Confirm (check mark in the box) if that is what you want. If for any reason it is not what you want, you can click Clear and start the trim over. Don’t worry about not being at the top of the grid since we really only need to know where the top of the quilt is.
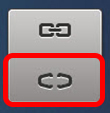
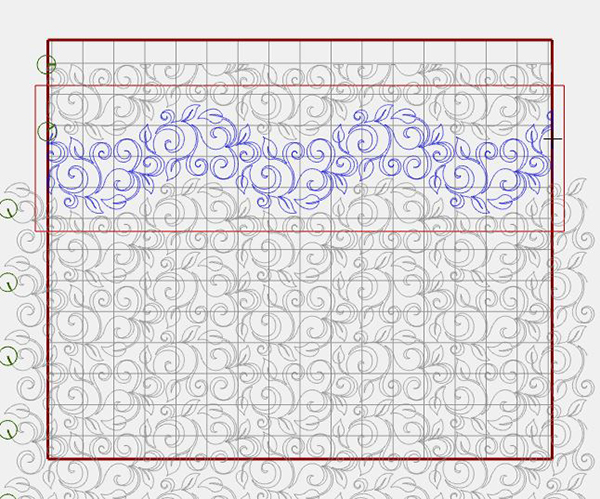
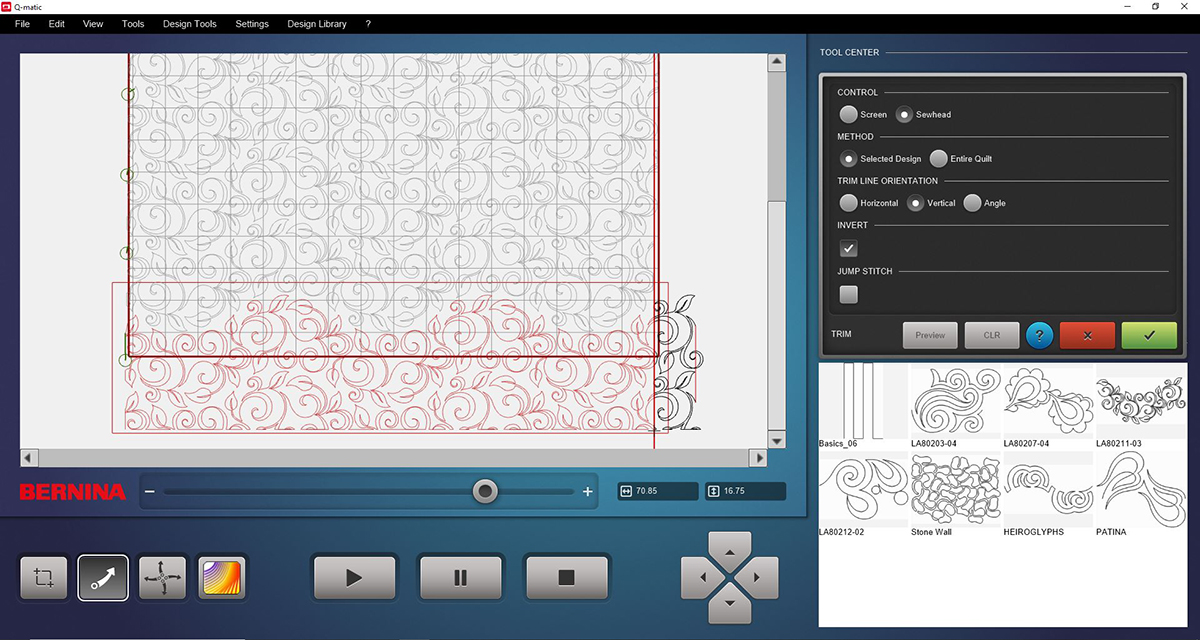
With the full layout still selected, click on Unconnect (bottom of icon) one time to unconnect the rows so you can work with them one at a time. After it is clicked, the designs on screen will be blue.
With all rows unconnected, select the first row and open Trim in the Toolbar.
When the secondary window opens under Control, select Sewhead. Under Method, select Selected Design. Under Trim Line Orientation, select Vertical.
Touch the Set icon on the Sewhead to place the line on the left. The Sewhead should still be placed on the upper left corner of the quilt top. You will see only the parts of the first row will be trimmed. Preview and Confirm.
Now move the Sewhead to the upper right corner of the quilt top and select the first row again. Open Trim and use all the same settings, but also add Invert to the selection. This will make sure that the correct side of the design is trimmed. Preview and Confirm.
Open Sew Options.
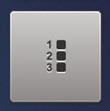
When we create a layout, add a design to the Quilt Area or make a change to a design on the Quilt Area, the program will Queue that design. We only want to stitch one row at a time, and we want to trim each row as we go. So this means we need to Dequeue all rows, and then we will decide what we want to stitch in the Safe Area.
Click Dequeue All and the designs on the screen will turn grey. Now click Queue and click the first row; it is the only thing on screen that is blue, queued and ready to stitch.
Confirm to close the window.
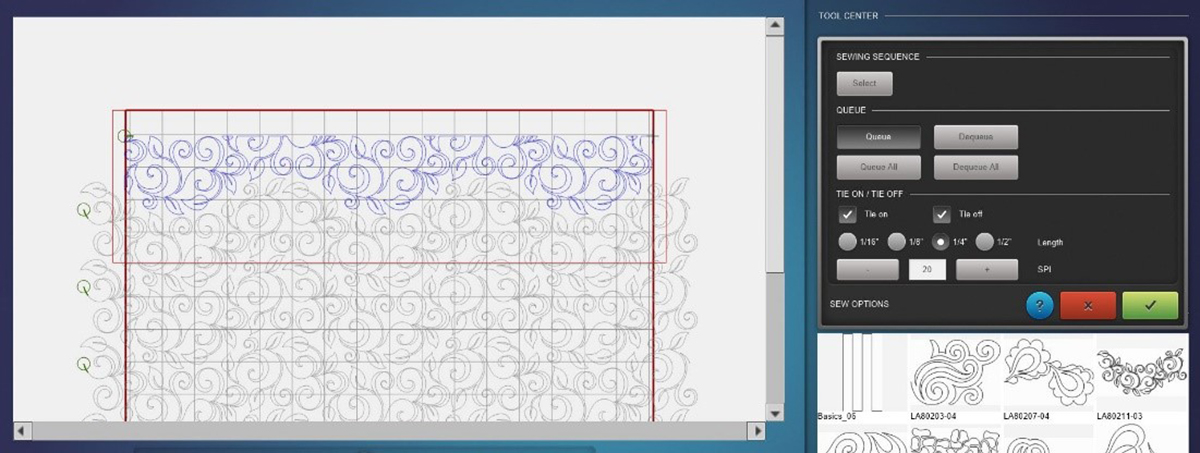
Press the Start Arrow on the computer screen.

You will then be prompted to select to select a start point. Select “At Start Point”. We always want to start a new row at the start.
The Sewhead will move to the first stitch of the design and the design will be green.
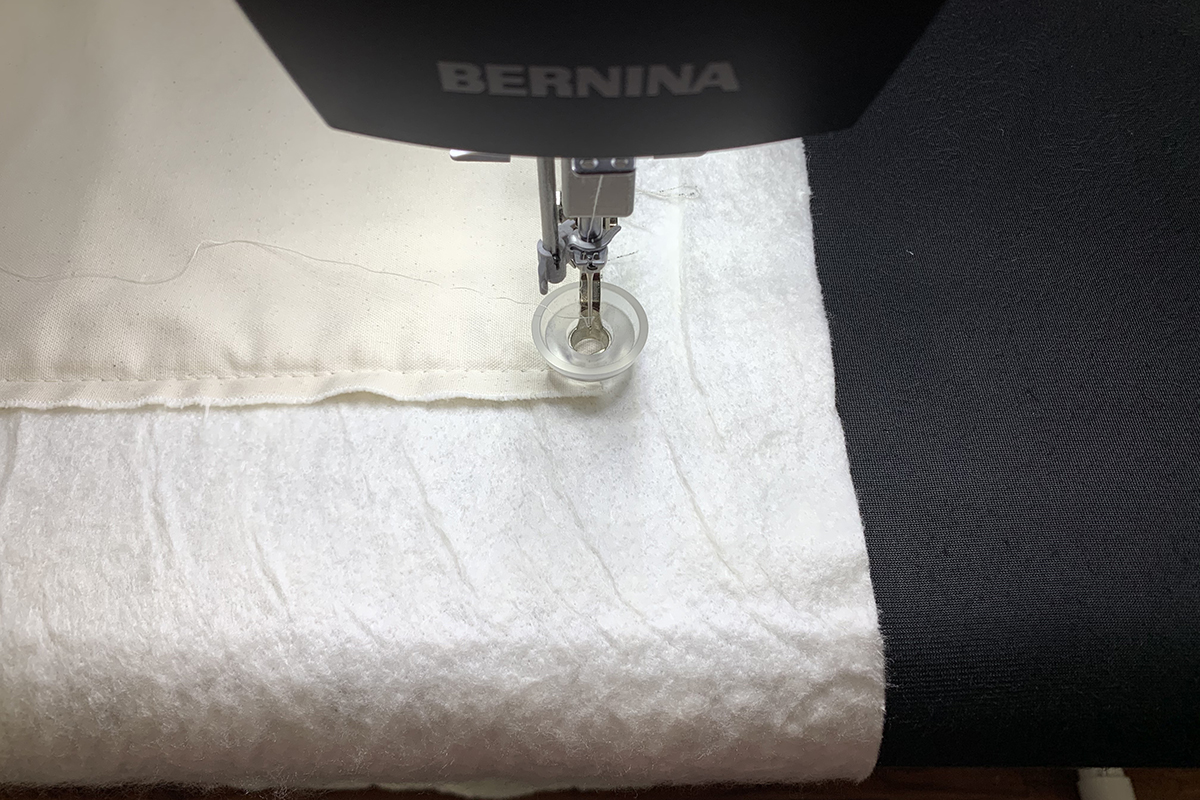
The Sewhead screen and the computer screen will prompt you to pull up the bobbin thread. You will want to do this at the Sewhead and use the Pull Bobbin icon on screen. When you Confirm after the thread is up and holding both threads, the Sewhead will stitch. The computer will take care of the tying on and tying off of the thread so you do not have to worry with this. The settings for how to tie on and off is under Sew Options in the Tool Center.

When the row is finished, you will use the toggles on the handles to pull up the bobbin thread and then cut.
You will also need to click OK on the computer screen that shows Sewing Complete.
Now it is time to Realign the Safe Area so that you can continue to quilt down your quilt and keep the rows evenly spaced as they appear on the computer screen. There is a blog on WeAllSew.com that covers realigning the Safe Area if you do not need all of this information about creating the layout.
It is found here: https://weallsew.com/q-matic-snap-to-point/
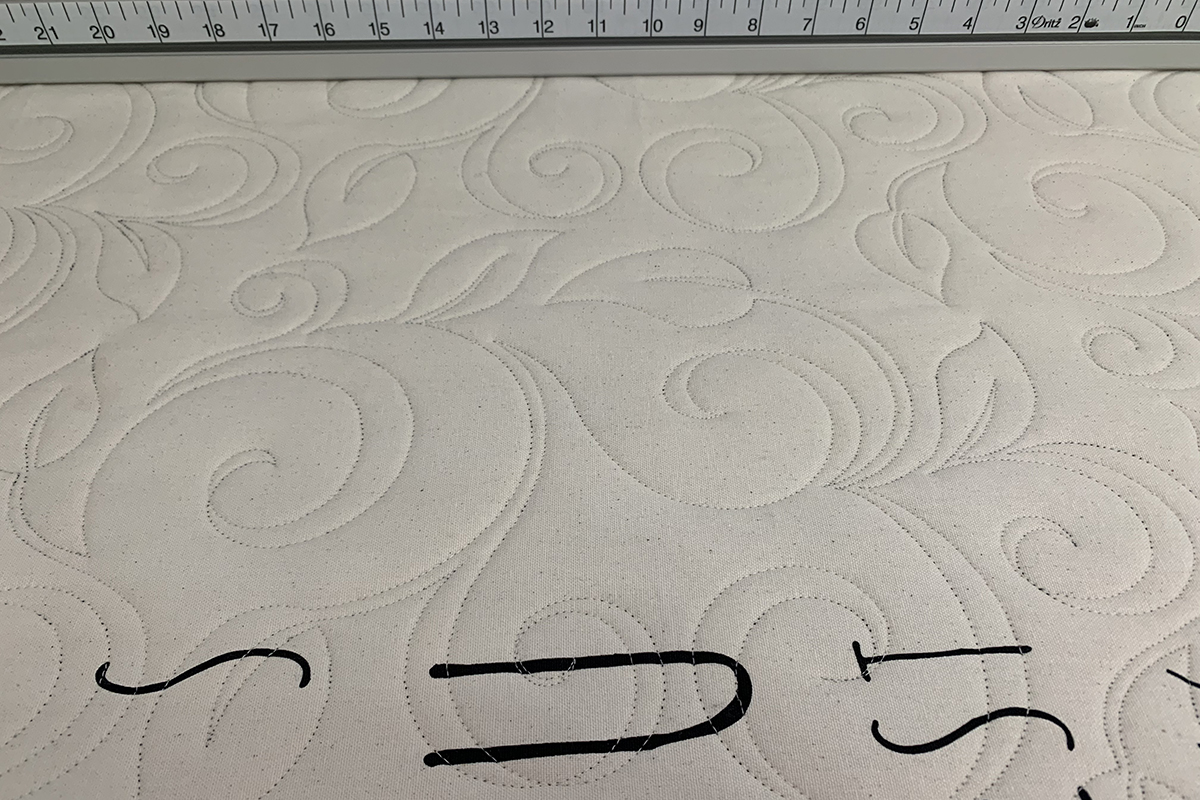
The first row is all finished.
We are going to use my favorite way to realign in this blog post. It is call Snap to Point. You will need to advance the quilt onto the Take-up Rail so that you can still see part of the row you just stitched. Baste down the sides and replace the clamps on each side. There is no need to disengage the clutch belt clamps to baste as the machine will move nicely with a gentle pull on the handles. Select the row on your computer screen that you just finished stitching. This is so that you know for sure which row you are using to realign to.
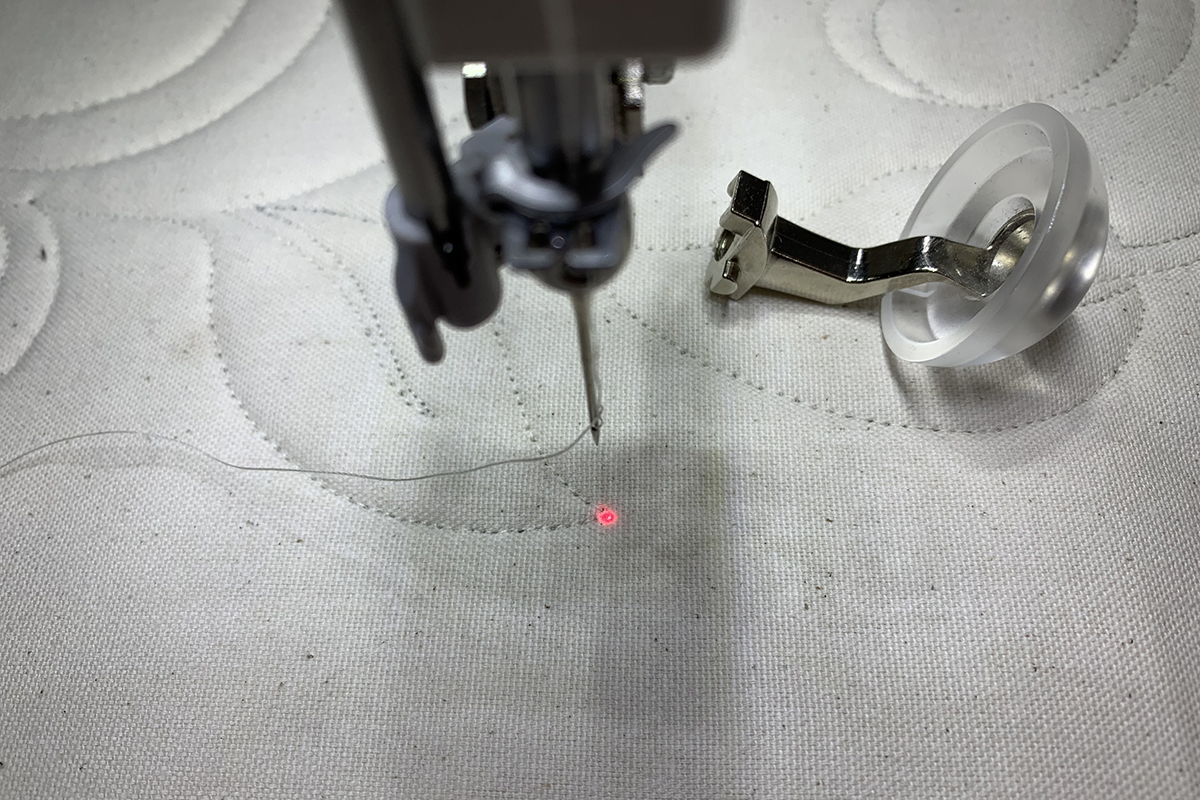
Select a point on the already stitched row that you can easily see on the computer screen. Place the Sewhead on that point. I removed the foot so that you could see better. Since it is so easy and quick to put the foot on and take it off, you may want to do that as well. I also have the optional Needle Point Laser installed on my machine which is the red dot you see here.
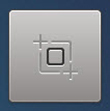
Looking at the computer screen, find that same point in the already-stitched design. Using Center Zoom in the Tool Center, click on the icon to activate the tool and then click on the screen where you want to align to. Each time you click on the screen, the point you clicked will move to the center of the screen. I like to zoom very closely.
When you have zoomed in as much as you want or need, click the Select Arrow to turn Center Zoom off.
Open Realign Safe Area in the Tool Center.
When the secondary screen opens, you will see a blue circle at the bottom of the screen; click on it and the help screen will open at the bottom. This help screen is available on many of the secondary screens when you open a tool and will explain how to use the tool.
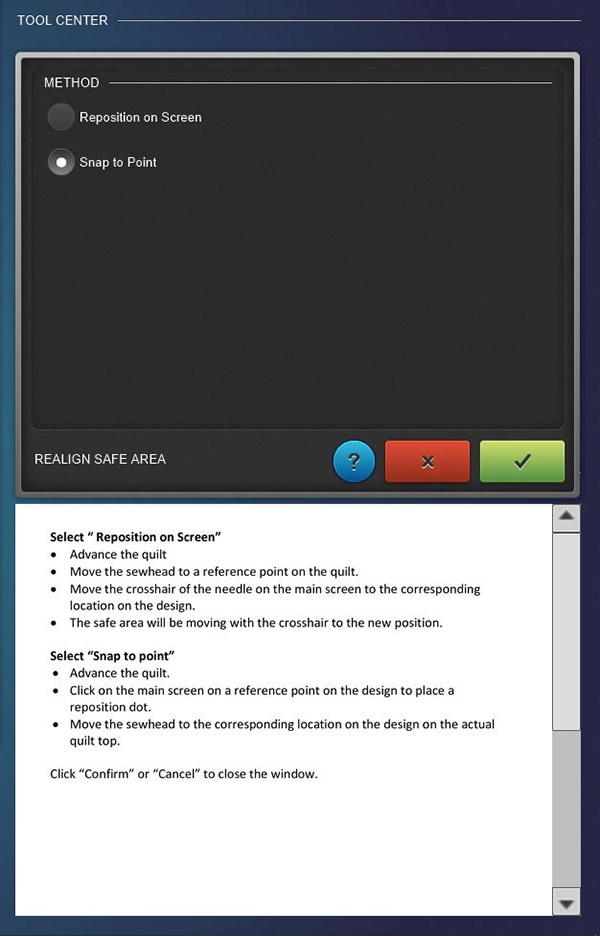
In the secondary window, select Snap to Point. Go to the computer screen and click on the point you want to align to. You will see a red dot on screen. If it is not right where you want it, just click again until you get it right on it.
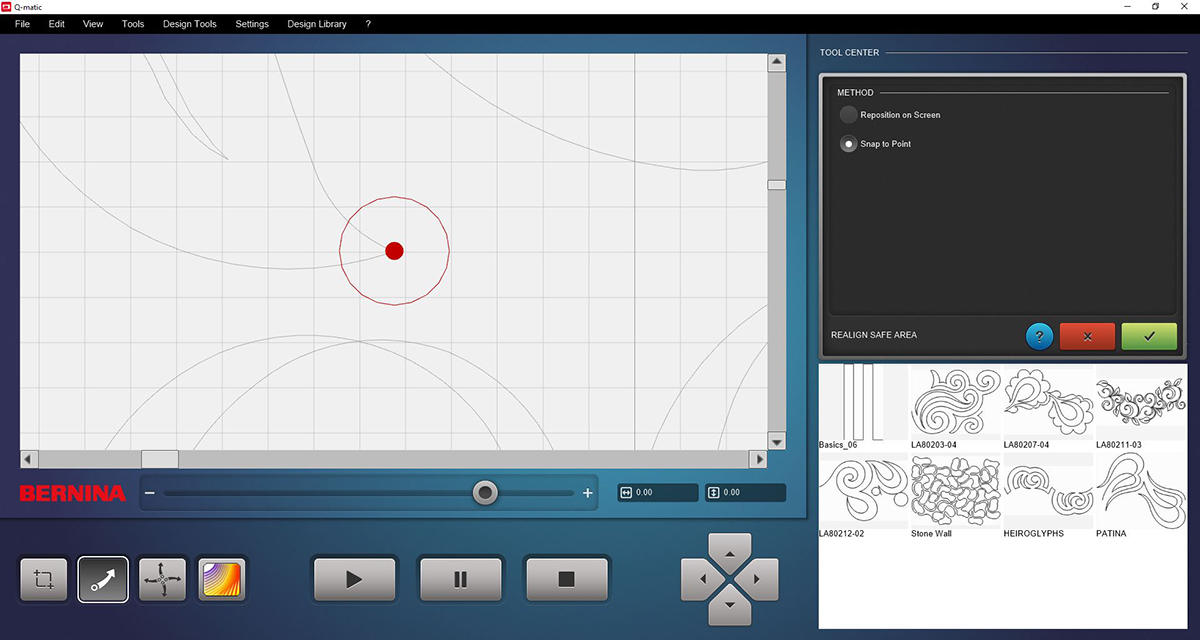
When you touch the Confirm icon (confirming that is what you want), you will then see the crosshairs of the needle at that same point.
Click on the Full View icon in the Tool Center to see that the Safe Area has moved down. Full View looks like an eye in the top row of tools.
Select row 2. Remember to make any changes to a design, it must be selected first for the needed tool to open.
Trim the left side using the Trim feature in the Tool Center. Confirm.

Trim the right side. Don’t forget to select Invert so the correct side of the design is trimmed away.
After you Confirm, the row will now be blue if you click away from it on the screen. This means it is queued and ready to stitch.
Press the Start Arrow and follow the prompts on screen as you did with row one.
You will continue advancing down the quilt, basting the sides, realigning the Safe Area, trimming the left and right sides, and then stitching each row.
When you get to the last row, you will need to trim the bottom as well. Advance the quilt, baste the sides, realign the Safe Area. If the leader is up on top, you will need to remove the pins and then baste the bottom edge too. I like to just move the pins up on the quilt top until I get it basted.

Place the Sewhead at the bottom of your quilt top. Anywhere along the bottom is fine unless the bottom is not straight. In that case, you would need to use the trim at an angle option.
With the Sewhead placed and the last row selected on screen, open Trim. If you want to place the Sewhead at the bottom left corner, you can trim both the left side and the bottom without moving the Sewhead after the design has been selected on screen. Just confirm after each edge is trimmed.
Then move the Sewhead to the bottom right with the design selected and trim that side.
The last row will be Queued to stitch, so just click on the Start button on screen.
When the sewing is complete, you can unload and bind your newly-quilted quilt in your favorite way.
Supplies used on the project
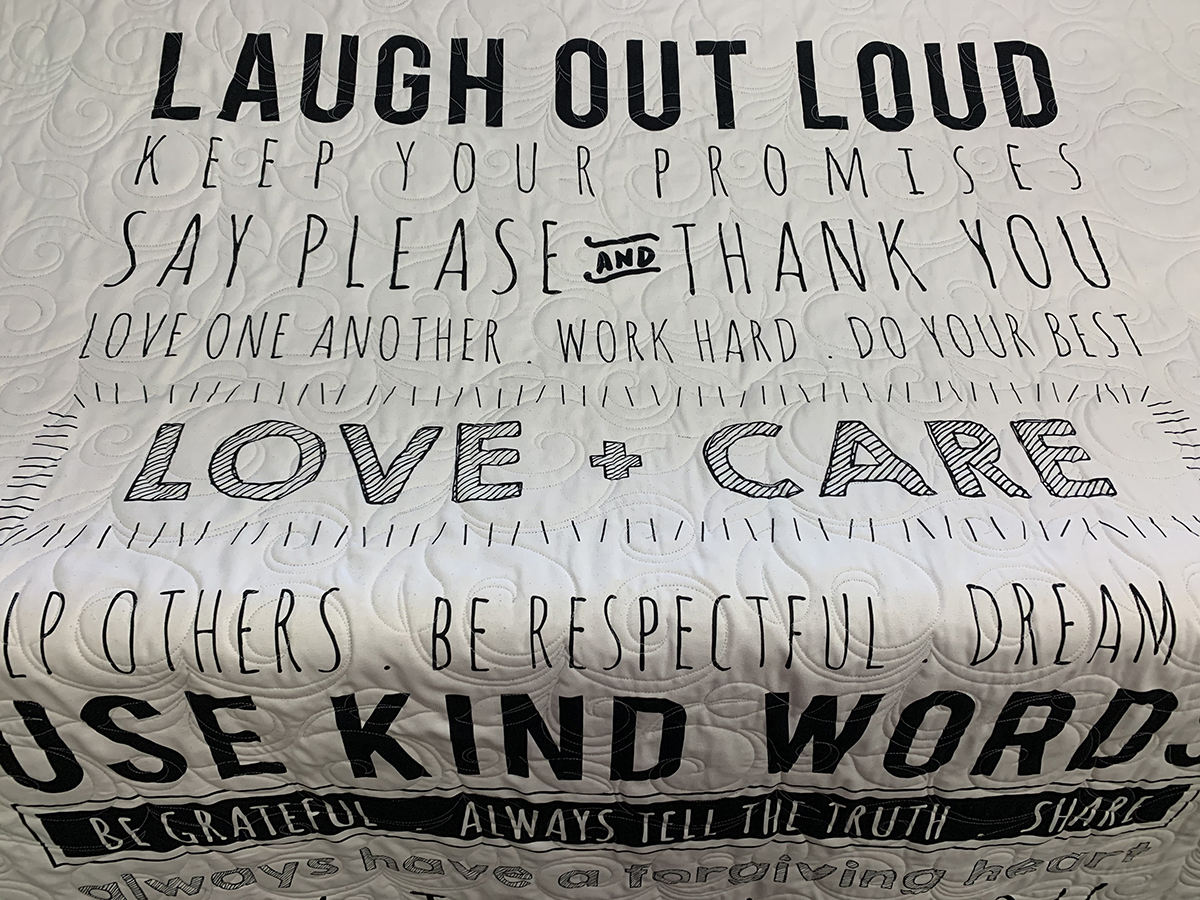
- Moda Panel-Use Kind Words-Sweetwater Printworks (it is printed on cotton canvas)
- Black Minky backing-2 yards of 90-inch wide
- EverSewn 100% Bamboo Batting
- Amanda Murphy’s design 80211-03 the Swirls on a Stem Pantograph sold by OESD.
- Amanda Murphy Longarm Collection Volume 10 #32135 Swirls on a Stem (Design #80211-03)
- Metter Silk Finish Thread #60 color 3612
- Ruler Foot #96 with Cup Clip attached
Used Products
What you might also like


3 comments on “Edge to Edge with Q-matic”
-
-
I bet you could do this. All you need is a Q 24 on the frame with Q-matic. The zipper is part of the leader that stays with the frame. I did not put it in the quilt. LOL
Happy Quilting,
Denise
-
-
Thanks Denise!! These instructions are so helpful and clear! I have been experimenting on my own for the past few months…but your instructions REALLY cleared up some of my struggles and mistakes! I really appreciate your posts! Kudos and hugs!!:)
Leave a Reply
You must be logged in to post a comment.

I am barely learning how to use a walking foot. This would be Advance or maybe I am Sub-Beginner, if there is such a category. Haha.
I wish to see the final result with the zipper.