Christening Bonnet Wedding Handkerchief
Learn to make this simple keepsake christening bonnet which becomes a wedding handkerchief on Baby’s wedding day!
Christening Bonnet Tutorial: Project Photo
Hi there! I’m Christina from Tennessee and I’m happy to share with you one of my favorite sweet and simple projects, a keepsake christening bonnet for baby that becomes a handkerchief for her wedding day. This tradition started in our family as our first child was baptized. My sister, our baby’s godmother, gave her this gift and who knew those years would go by so quickly? As Mary’s wedding day approached, I went to her baby box and pulled out the sweet bonnet used all those years ago. Her photographer captured the moment as the threads were snipped and we gave it a quick press. It came in handy that day as this daughter is the one who cries all the tears in all the happy moments.
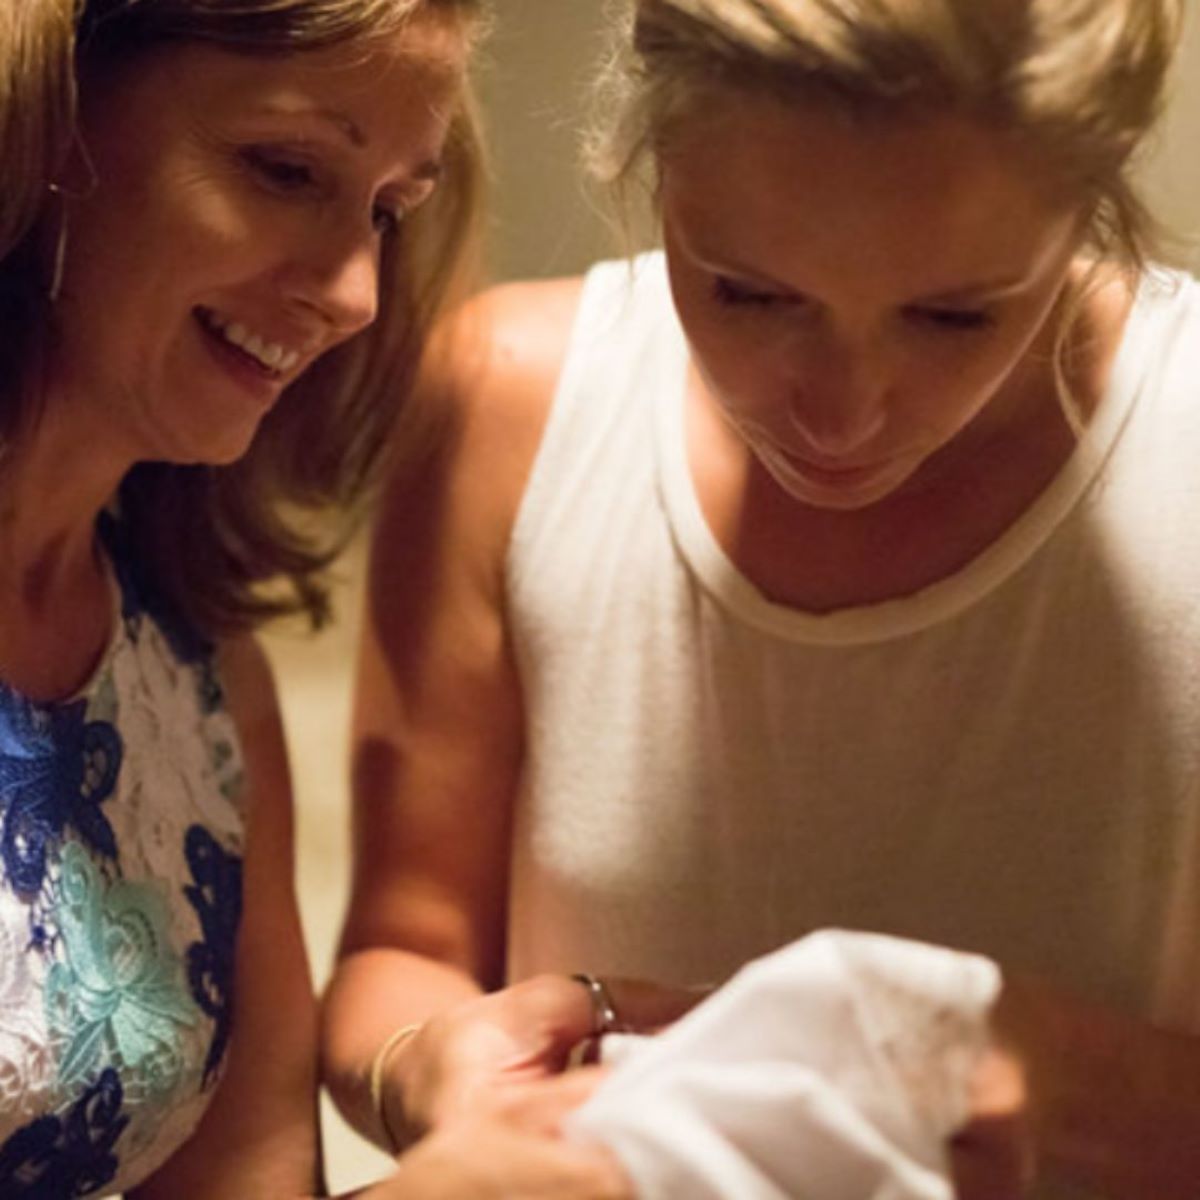
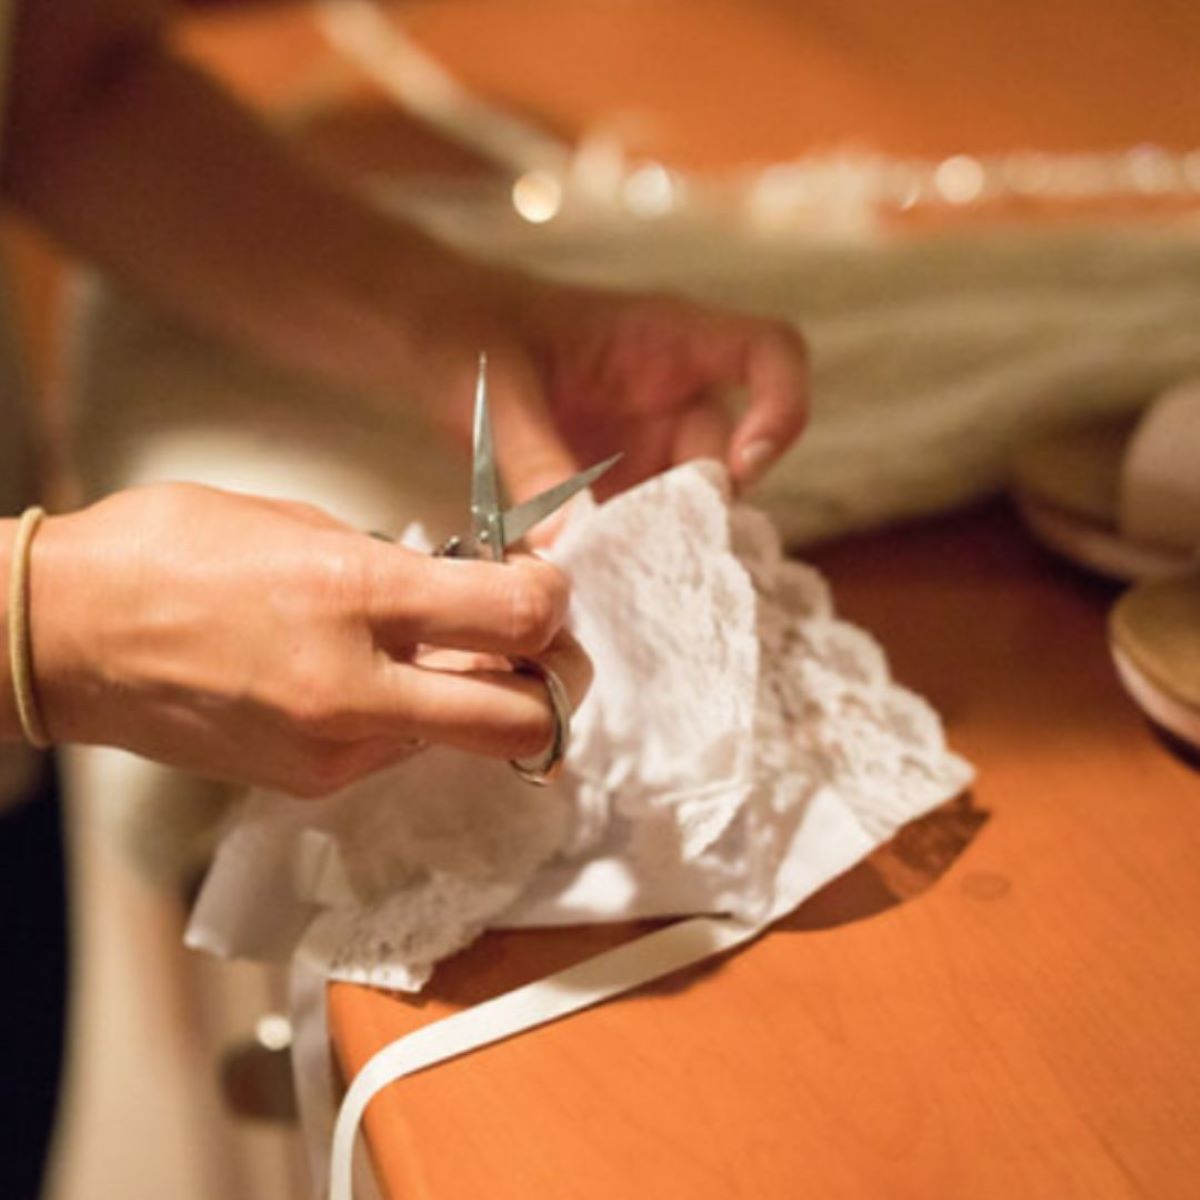
Christening Bonnet Tutorial: Bonnet to Handkerchief (Photo Credit: Larrison Photography)This passage of time and tradition inspired me to try my hand at this little christening bonnet/wedding handkerchief, which I have added to my Christening and Baptism collection at Lucy Rogers Designs, and I’m excited to share this project with you.
Materials to Sew a Christening Bonnet/Wedding Handkerchief
- Fabric- I like to use heirloom-quality cotton batiste because it is so soft and comes in many colors.
- X-Small (NB-3 mo) 12 inches square
- Small (3-6 mo) 13 inches square
- Medium (6-9 mo) 14 inches square
- Large (9-12 mo) 15 inches square
- Trim- I chose a ruffled lace and a flat trim, but two flat laces are very sweet too. The measurements below include allowances for turning corners and joining ends.
- X-Small 1 1/3 yards each
- Small 1 1/2 yards each
- Medium 1 1/2 yards each
- Large 1 2/3 yards each
- Ribbon- double-sided satin ribbon works best for the ties and the rosettes.
- 1 yard ribbon (1/4-1/2 inch wide). 2/3 yard will be used for the ties and the remainder for the bow at the back.
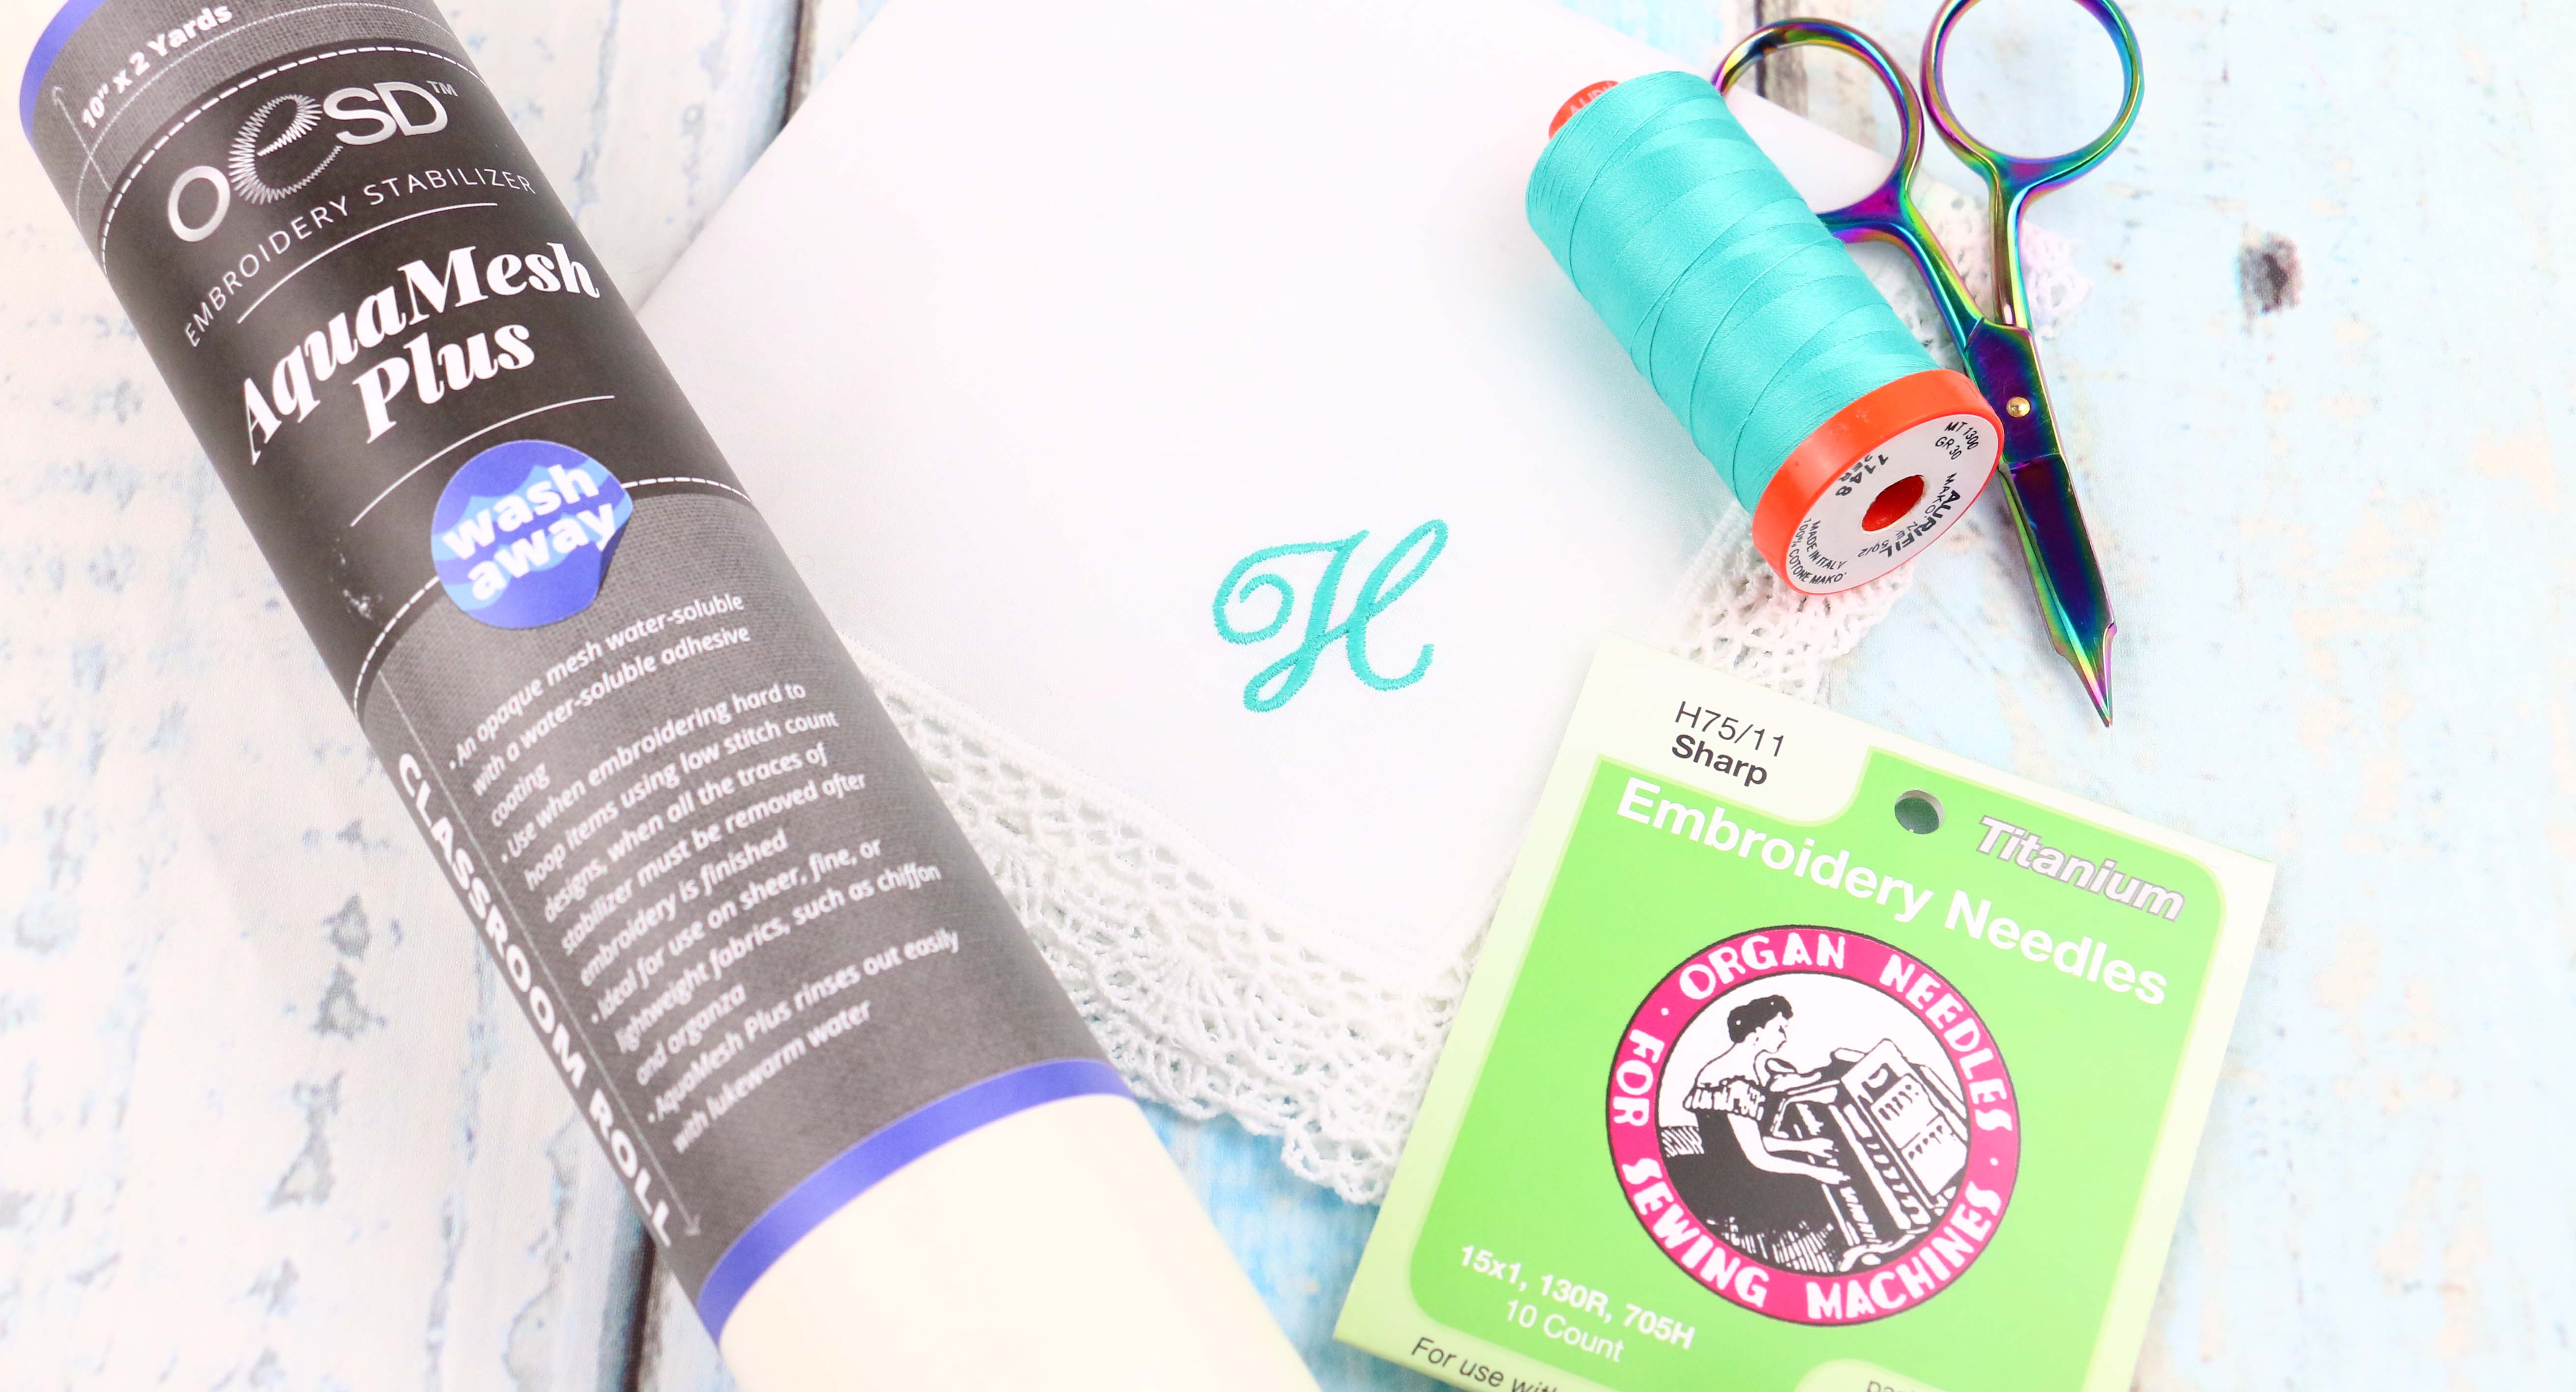
- Thread– I think it is important to high quality thread, so I use Mettler 60 wt for my heirloom projects and Gutermann for almost everything else.
Tools to Sew a Christening Bonnet/Wedding Handkerchief
If you’re new to sewing and would like to see examples of the tools I use, check out this handy list with links. (Note: These are my personal favorites. I do not receive any compensation for these recommendations.)
- Sewing Machine
- Fabric Scissors
- Trimming Scissors I prefer to keep my small scissors next to my sewing machine for close work rather than my fabric scissors. This way I can trim threads along the way and always know where my scissors are.
- Straight Edge I use a clear quilter’s ruler in order to help me line up the fabric on my mat properly when squaring it up.
- Seam Gauge I use mine all the time because it was my mom’s. It is way old school, but a treasure to me.
- Marking pen I love my purple disappearing ink pen! Maybe it’s because my brother is a magician and it makes me smile.
- Cutting Mat
- Rotary Cutter
- Straight pins Life is short. Pins are cheap. Get the ones that make you happy!
- Hand-sewing needle If you haven’t discovered these nifty self-threading needles, you’re in for a treat!
Instructions to Sew a Christening Bonnet/Wedding Handkerchief
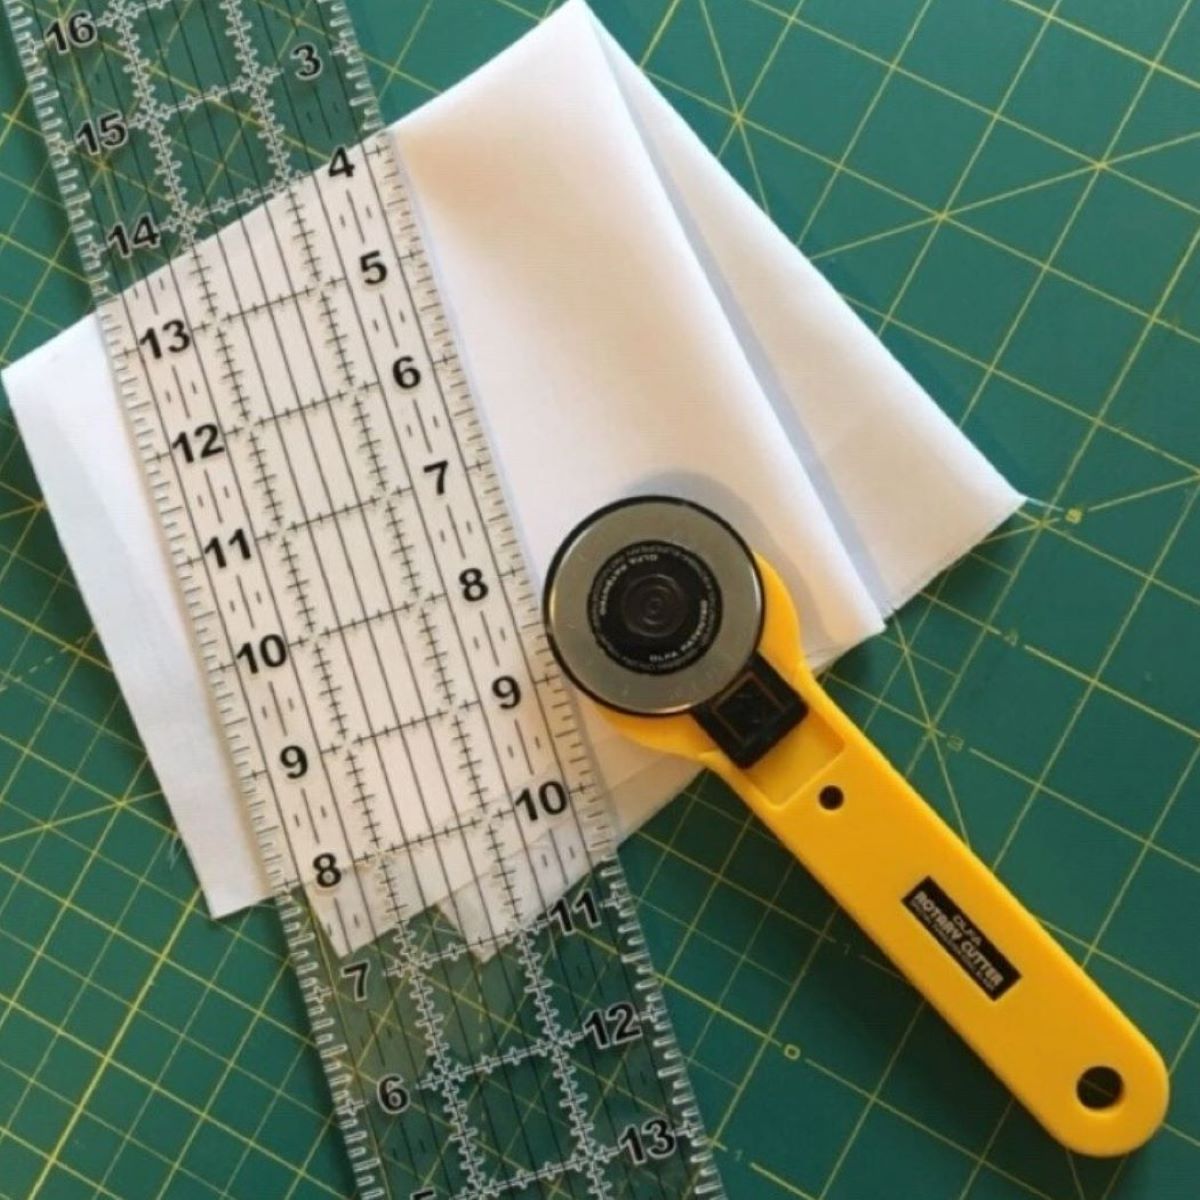
Step 1: Measure and Square up Fabric
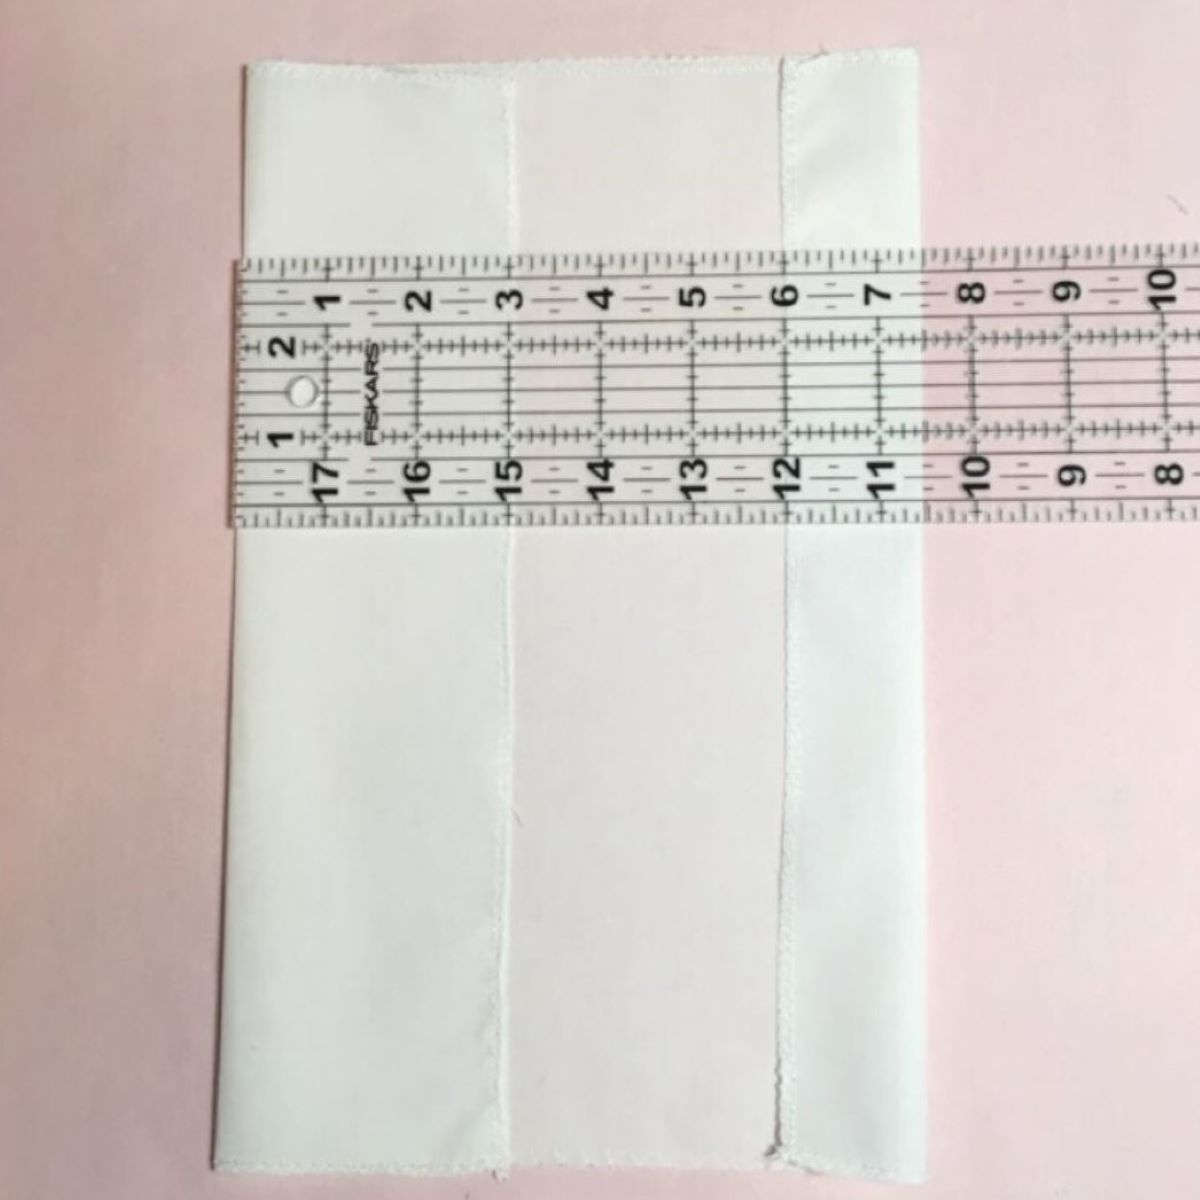
- Using the measurements for your desired bonnet size found in the materials list above, cut your fabric square.
Tips:
- I recommend pre-washing the fabric for this christening bonnet project in order to make sure it doesn’t shrink and also to wash out any sizing before baby wears it. Press and lightly starch as desired prior to cutting. This will make things easier when you get to the end of the project and only need to lightly touch up any small wrinkles.
- I usually cut the fabric slightly larger and square it up on a cutting mat because I find it to be more precise and efficient.
Step 2: Embellish
- Finish the edges of the fabric square with an edging stitch of your choice in order to protect them from fraying and to stand the test of time. I like using a double overlock stitch as found on the BERNINA 435 model because it gives it a professional finish that still looks decorative. If you’re lucky enough to have an overlock machine, you can do a rolled hem or simple overlock stitch. Because both sides of the fabric will show once it is folded into a bonnet, you may want to consider a decorative stitch as you hem the square. The heirloom stitches (category 700) on the 435 have some nice options for a professional finish.
- Press the fabric square before attaching the lace in order to mark your folding lines (see figure A). This will make it easier than when your bonnet is complete.
Fold over on two opposite sides using the following measurements (in inches):
X-Small 3″ and 1 1/2″
Small 3 1/4″ and 1 3/4″
Medium 3 1/2″ and 2″
Large 3 3/4″ and 2 1/4″
Note: the side with the wider measurement will be the front, the narrow will be the back
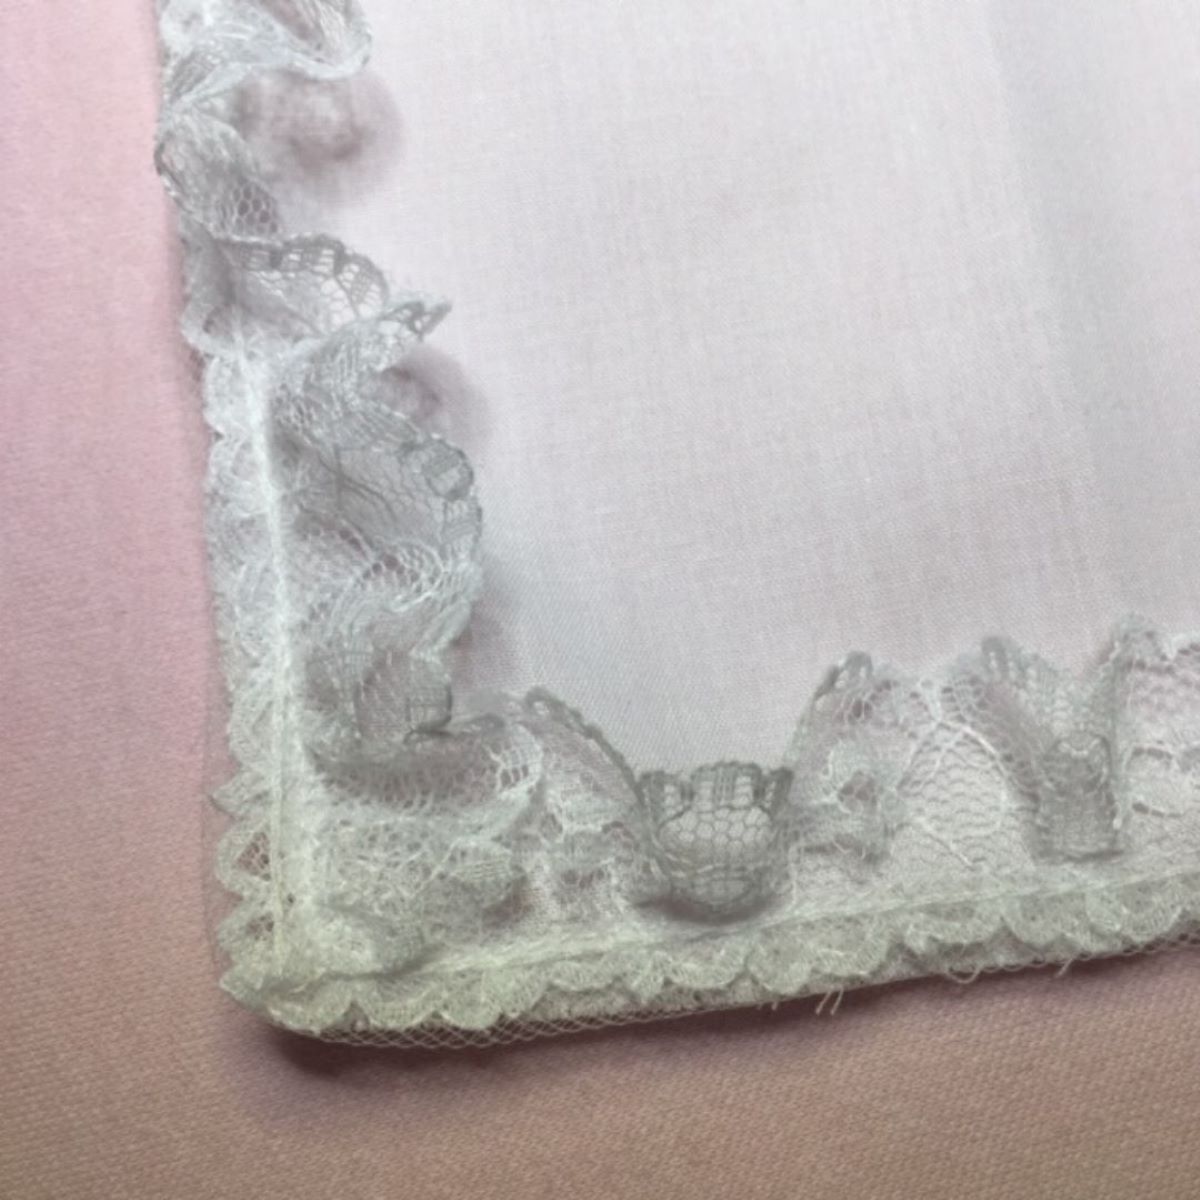
- Open the fabric so the right side* is facing up and then use a straight stitch to attach lace/trims to the outside edge of the fabric square as desired. Pin lace right side down as shown below (see Figure B). If using flat trim(s), open lace to outside and then stitch additional trim(s) (see Figure C).
*The RIGHT side of the fabric is where the outside of the fold lines face (see Figure D for a closer view)
Tip:
- This is where you can get creative with your bonnet! My personal preference is to keep things simple and classic in order to notice Baby’s beautiful face first, her bonnet second.

Step 3: Shape Christening Bonnet
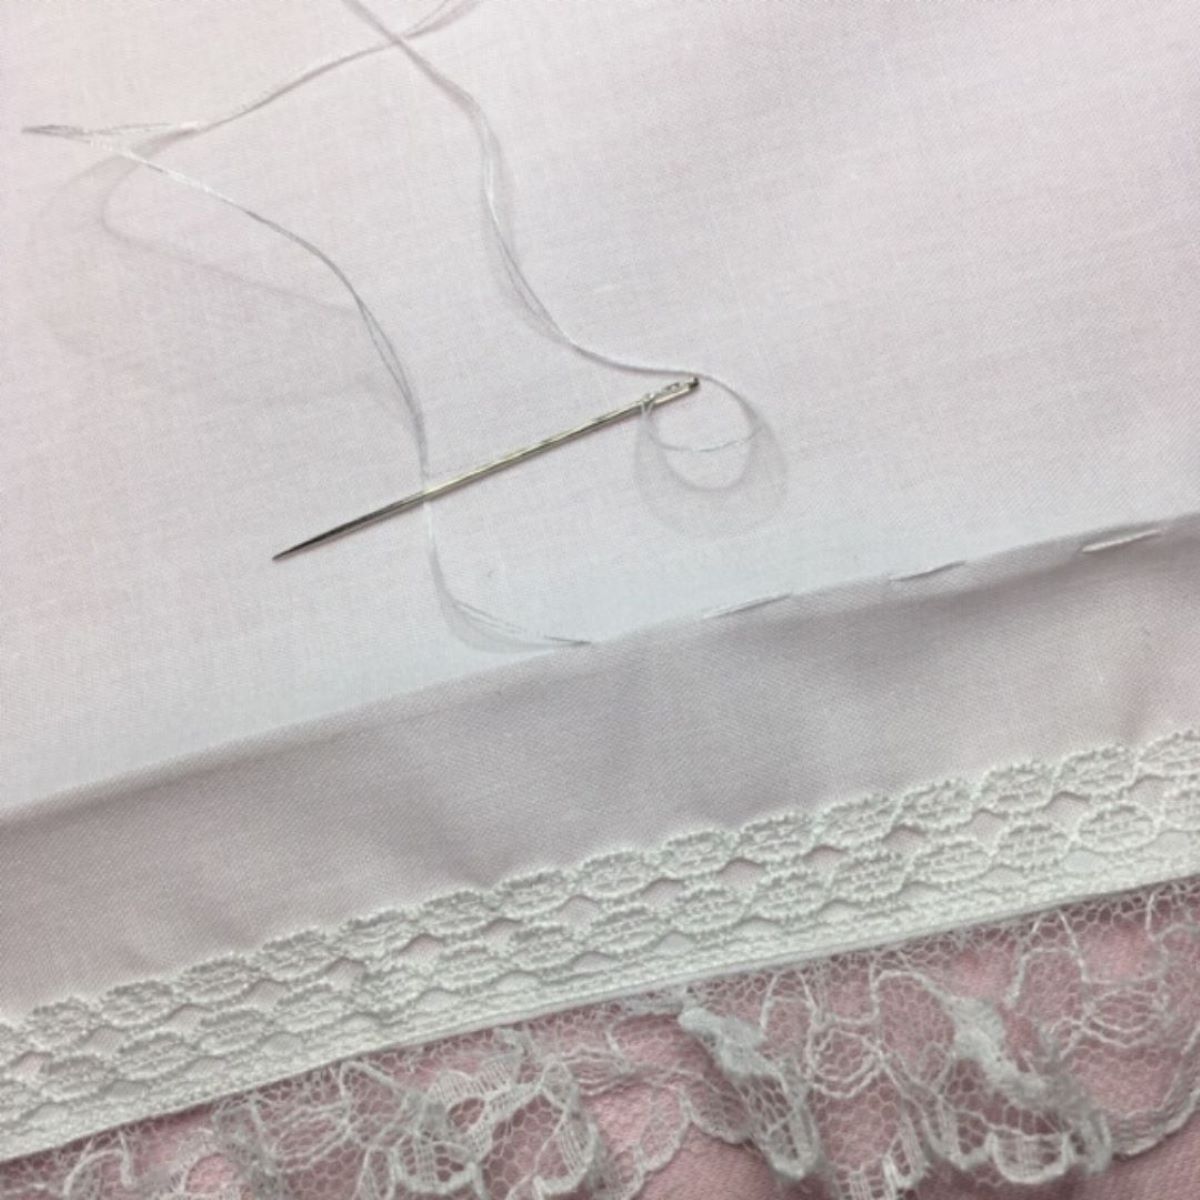
- Along the folded crease for the back side of the bonnet, run a gathering thread though from edge to edge (see Figure D).
Christening Bonnet Tutorial: Figure E Folds for Front and Back of Bonnet
- Leave a tail on each end as shown for pulling as you gather. Fold along creases on front and back to create a rectangle (see Figure E)
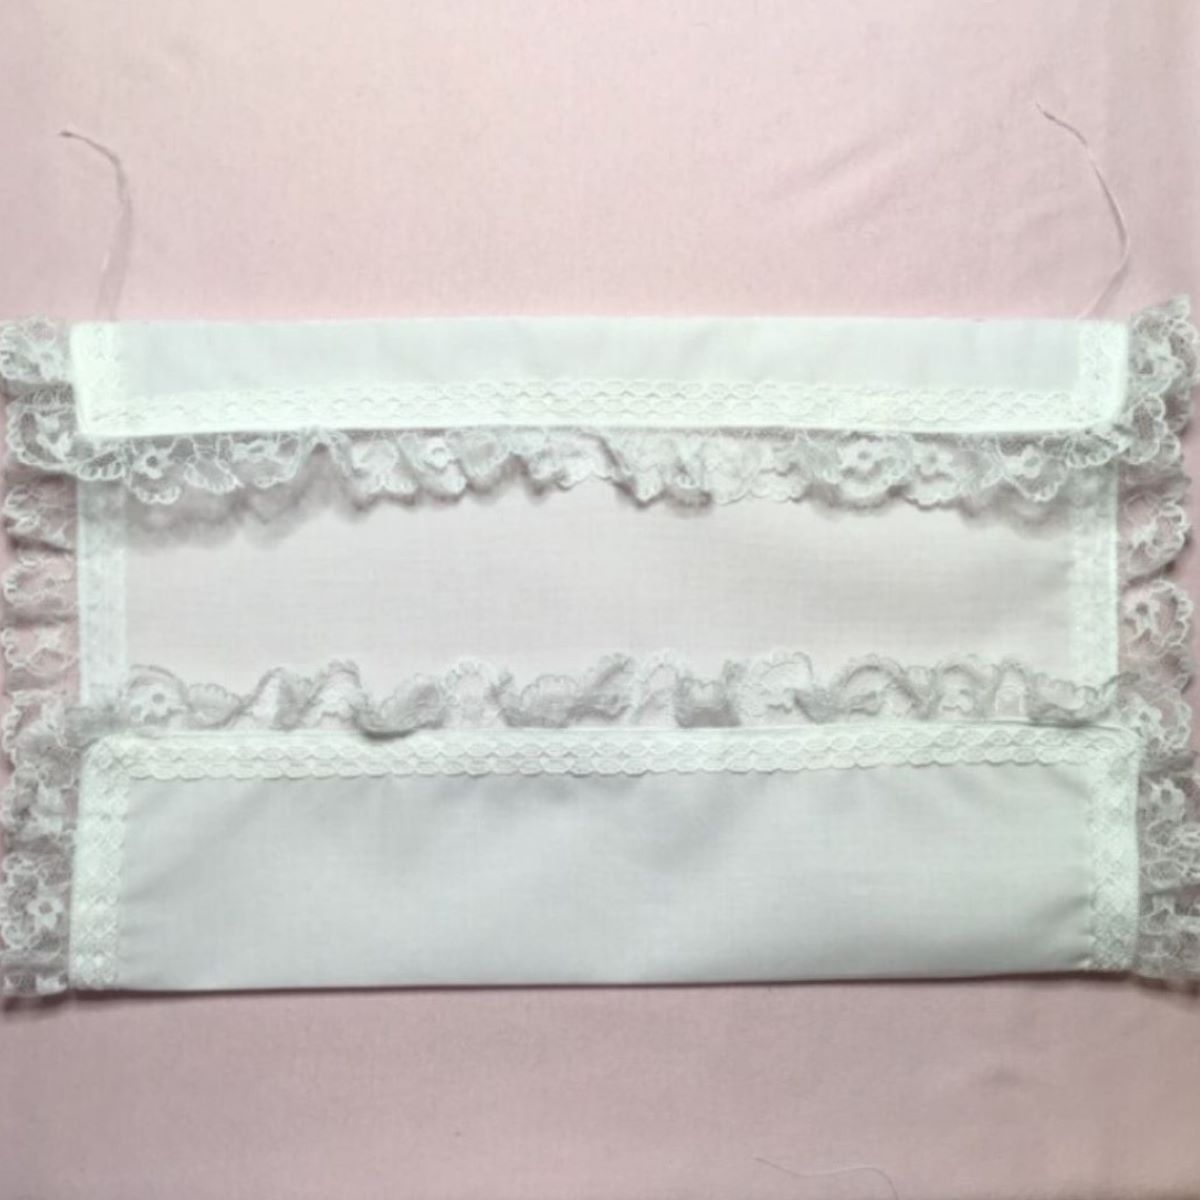
- On the two corners of the front side of the bonnet, fold a small triangle to the inside and pin in place. This will be the front sides which will frame baby’s face. Place a small basting stitch to secure (see Figure F).
- Pull basting thread ends to gather back of the bonnet and tie to secure. Clip extra thread.
Note:
- When the time comes, simply reverse these steps and the christening bonnet will be ready to become a wedding handkerchief, that “something old” on Baby’s wedding day!
Step 4: Add Ribbon Ties-the final special touch!
- Cut two lengths of ribbon 12 inches each. Place a mark at 3 1/2 inches on each ribbon. Close to the edge of the ribbon and using a threaded needle tied with a knot, run a gathering stitch from the end of the ribbon to the dot. (See Figure G) Pull up the thread to gather the ribbon into a rosette and secure over the basting stitch on the outside of the bonnet (see Figure H). Repeat for the second side. Trim ribbon ends as desired.
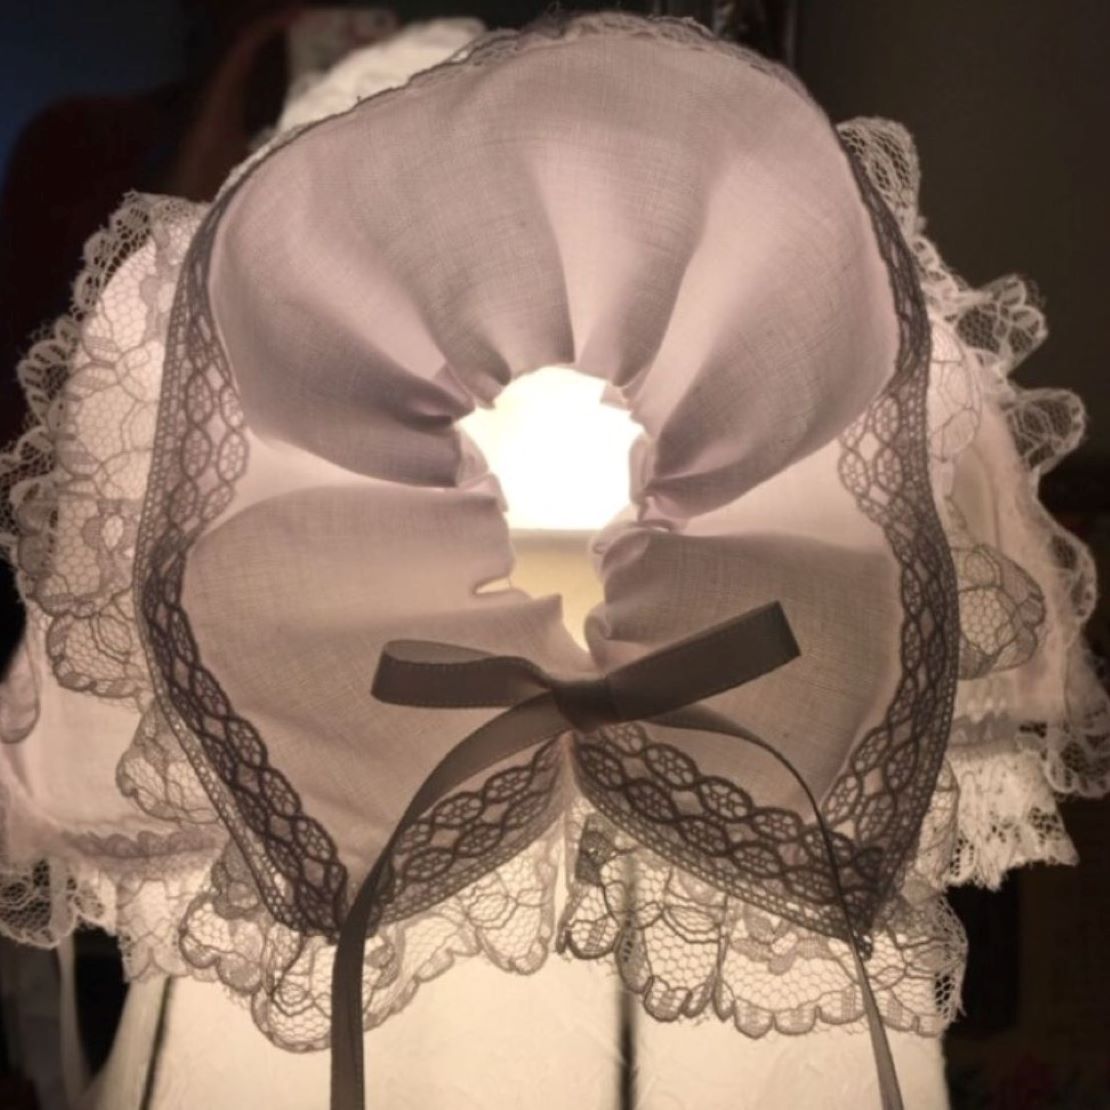
- Use the remaining ribbon to tie a bow and stitch to the back of the christening bonnet, joining the two ends of the gathered edge together. You will leave the gathering stitches in place. (See detail of finished bonnet below). Trim ends of ribbon.
Step 5: Final Touches
- Lightly press if needed and tie bows on front and back.
- Finally, I like to place tissue paper inside the bonnet to help keep its shape before placing in my gift box with a copy of a special poem explaining how this bonnet can be used later as a wedding handkerchief.
- For a copy of the poem I adapted to accompany the christening bonnet for Baby, click here.
Enjoy! ?
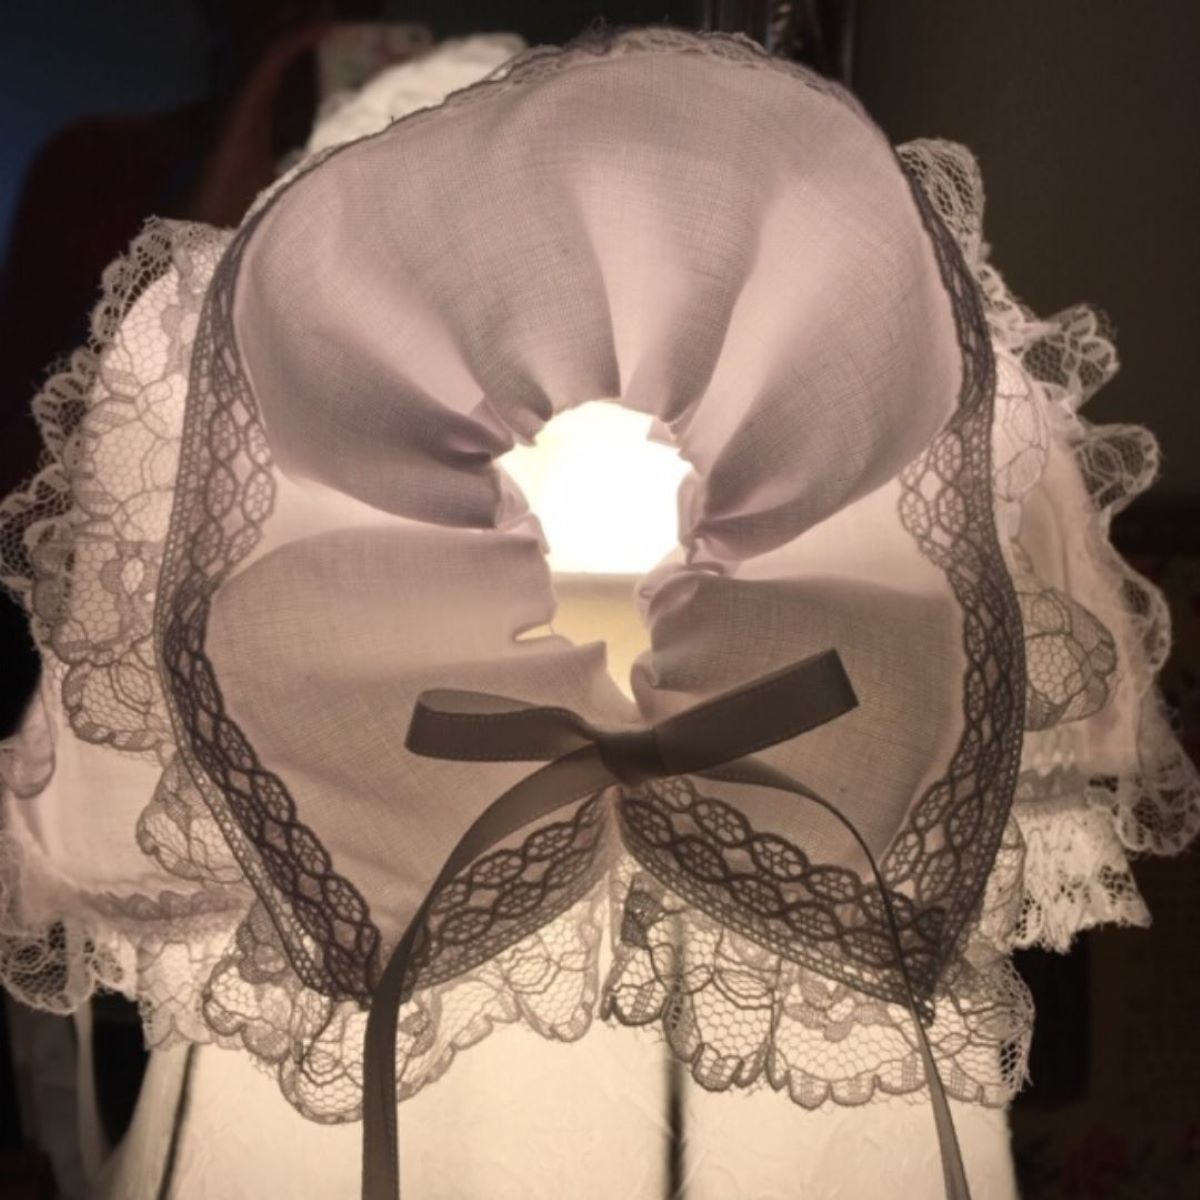
Christening Bonnet Tutorial: Completed Bonnet Back Detail


What you might also like


2 comments on “Christening Bonnet Wedding Handkerchief”
-
-
Hi there! We received one as a gift back in 1988 and it also came with a poem. I revised it a bit and there is a link to the poem at the end of the tutorial above. ?
Leave a Reply
You must be logged in to post a comment.

We used to do this in the 70’s and there was the sweetest poem that went with it! I wish I still had it!