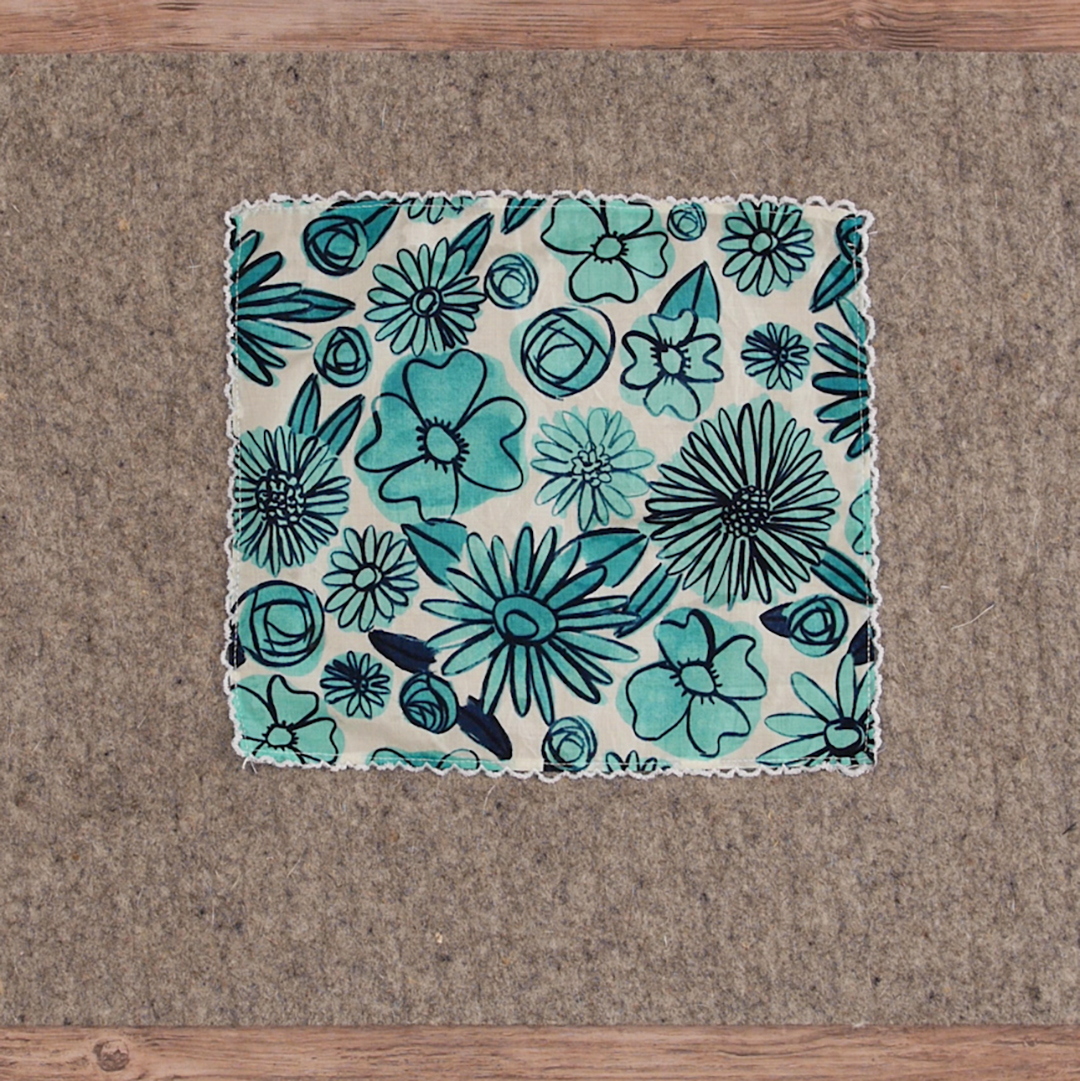
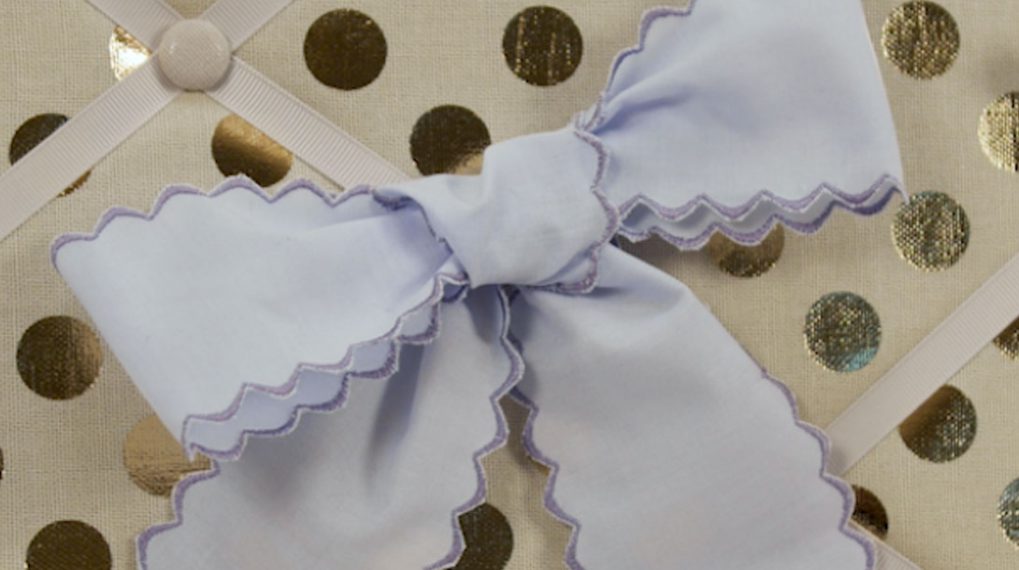
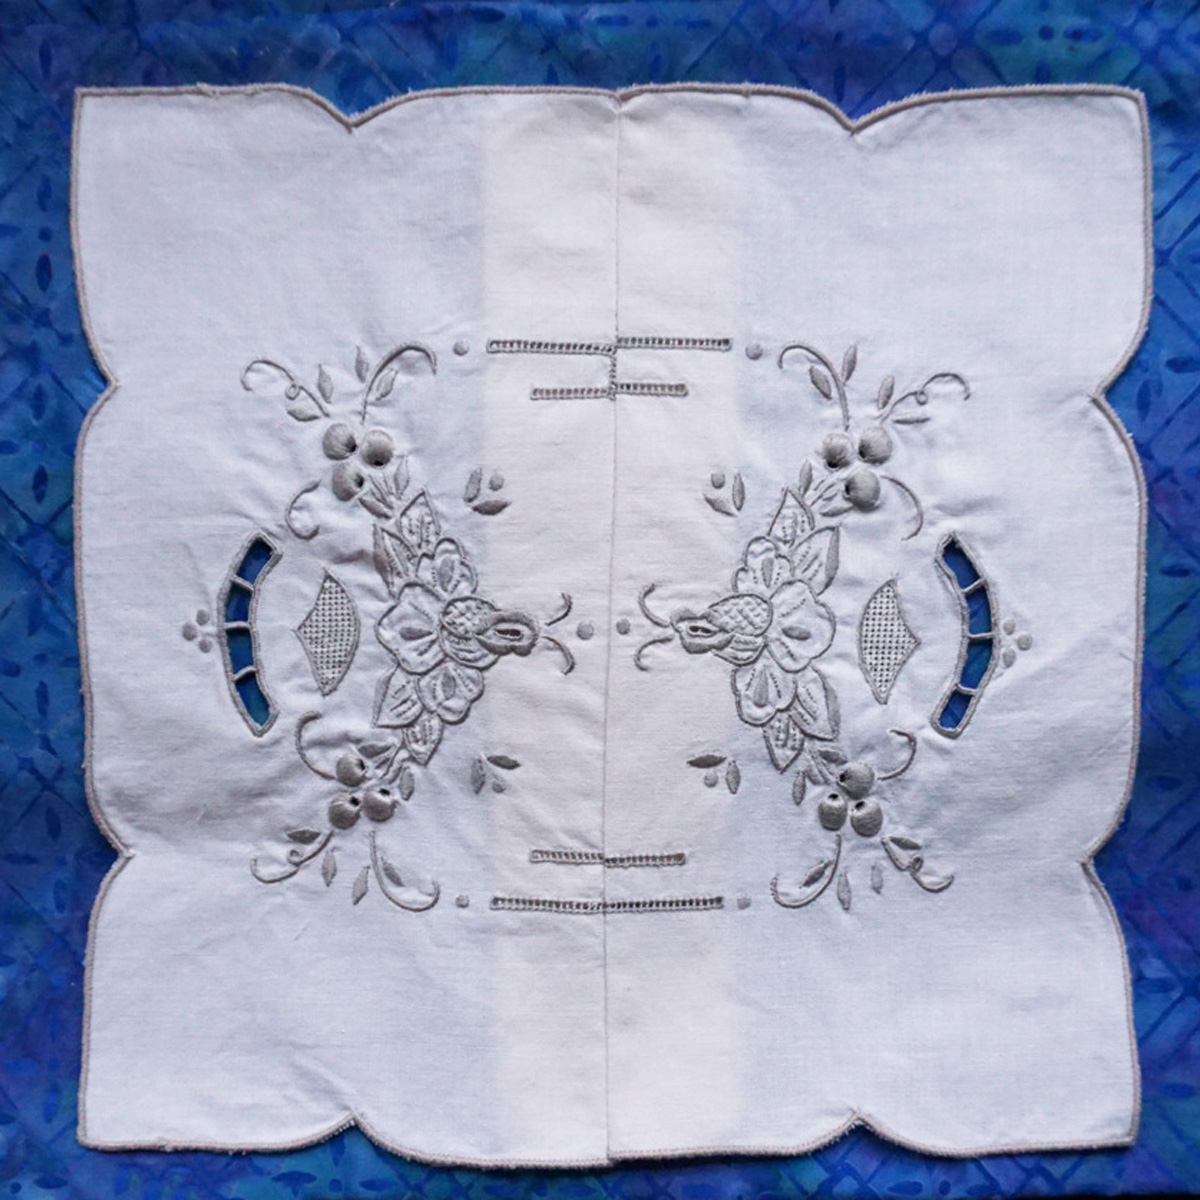
Lacey Edge Handkerchief
Looking for a quick, handmade touch for your summer wedding outfits? A decorative lacey edge handkerchief or pocket square adds an extra touch of personality to what you, or a wedding party, might wear. It adds a thoughtful, personal touch and makes a great gift for anyone’s special event.

The lacy trim on this kerchief is made by stitching off-edge scallops, and it can be done on a ready-made piece or made from scratch very simply. Keep reading for instructions and helpful tips on sewing out this decorative, heirloom-inspired technique!
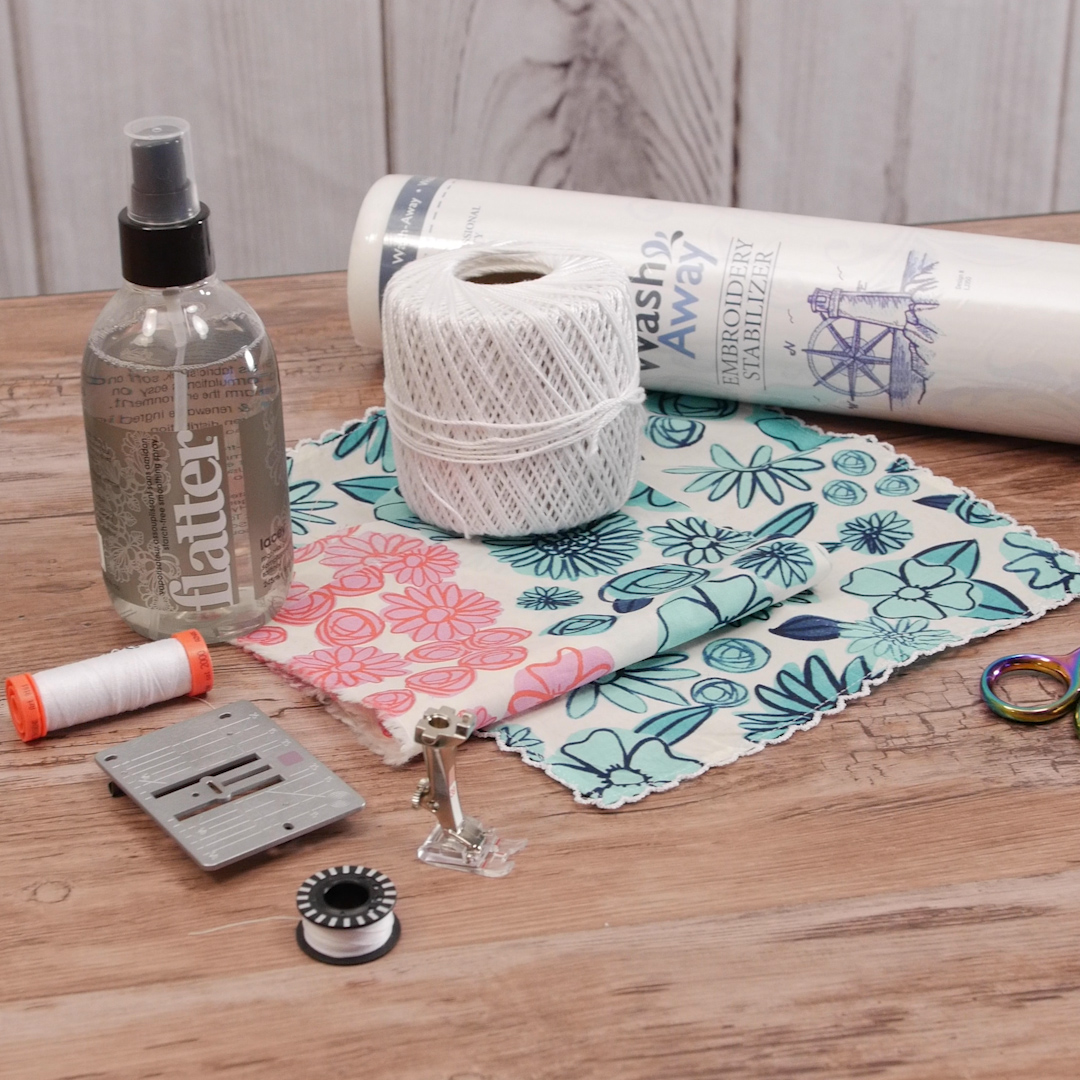
Materials to Make a Lacey Edge Handkerchief
- Handkerchief
- You can use a ready-made/RTW handkerchief or make your own
- To make your own, start with 16″ square of lightweight cotton or linen woven fabric (lawn, voile, kerchief linen, etc)
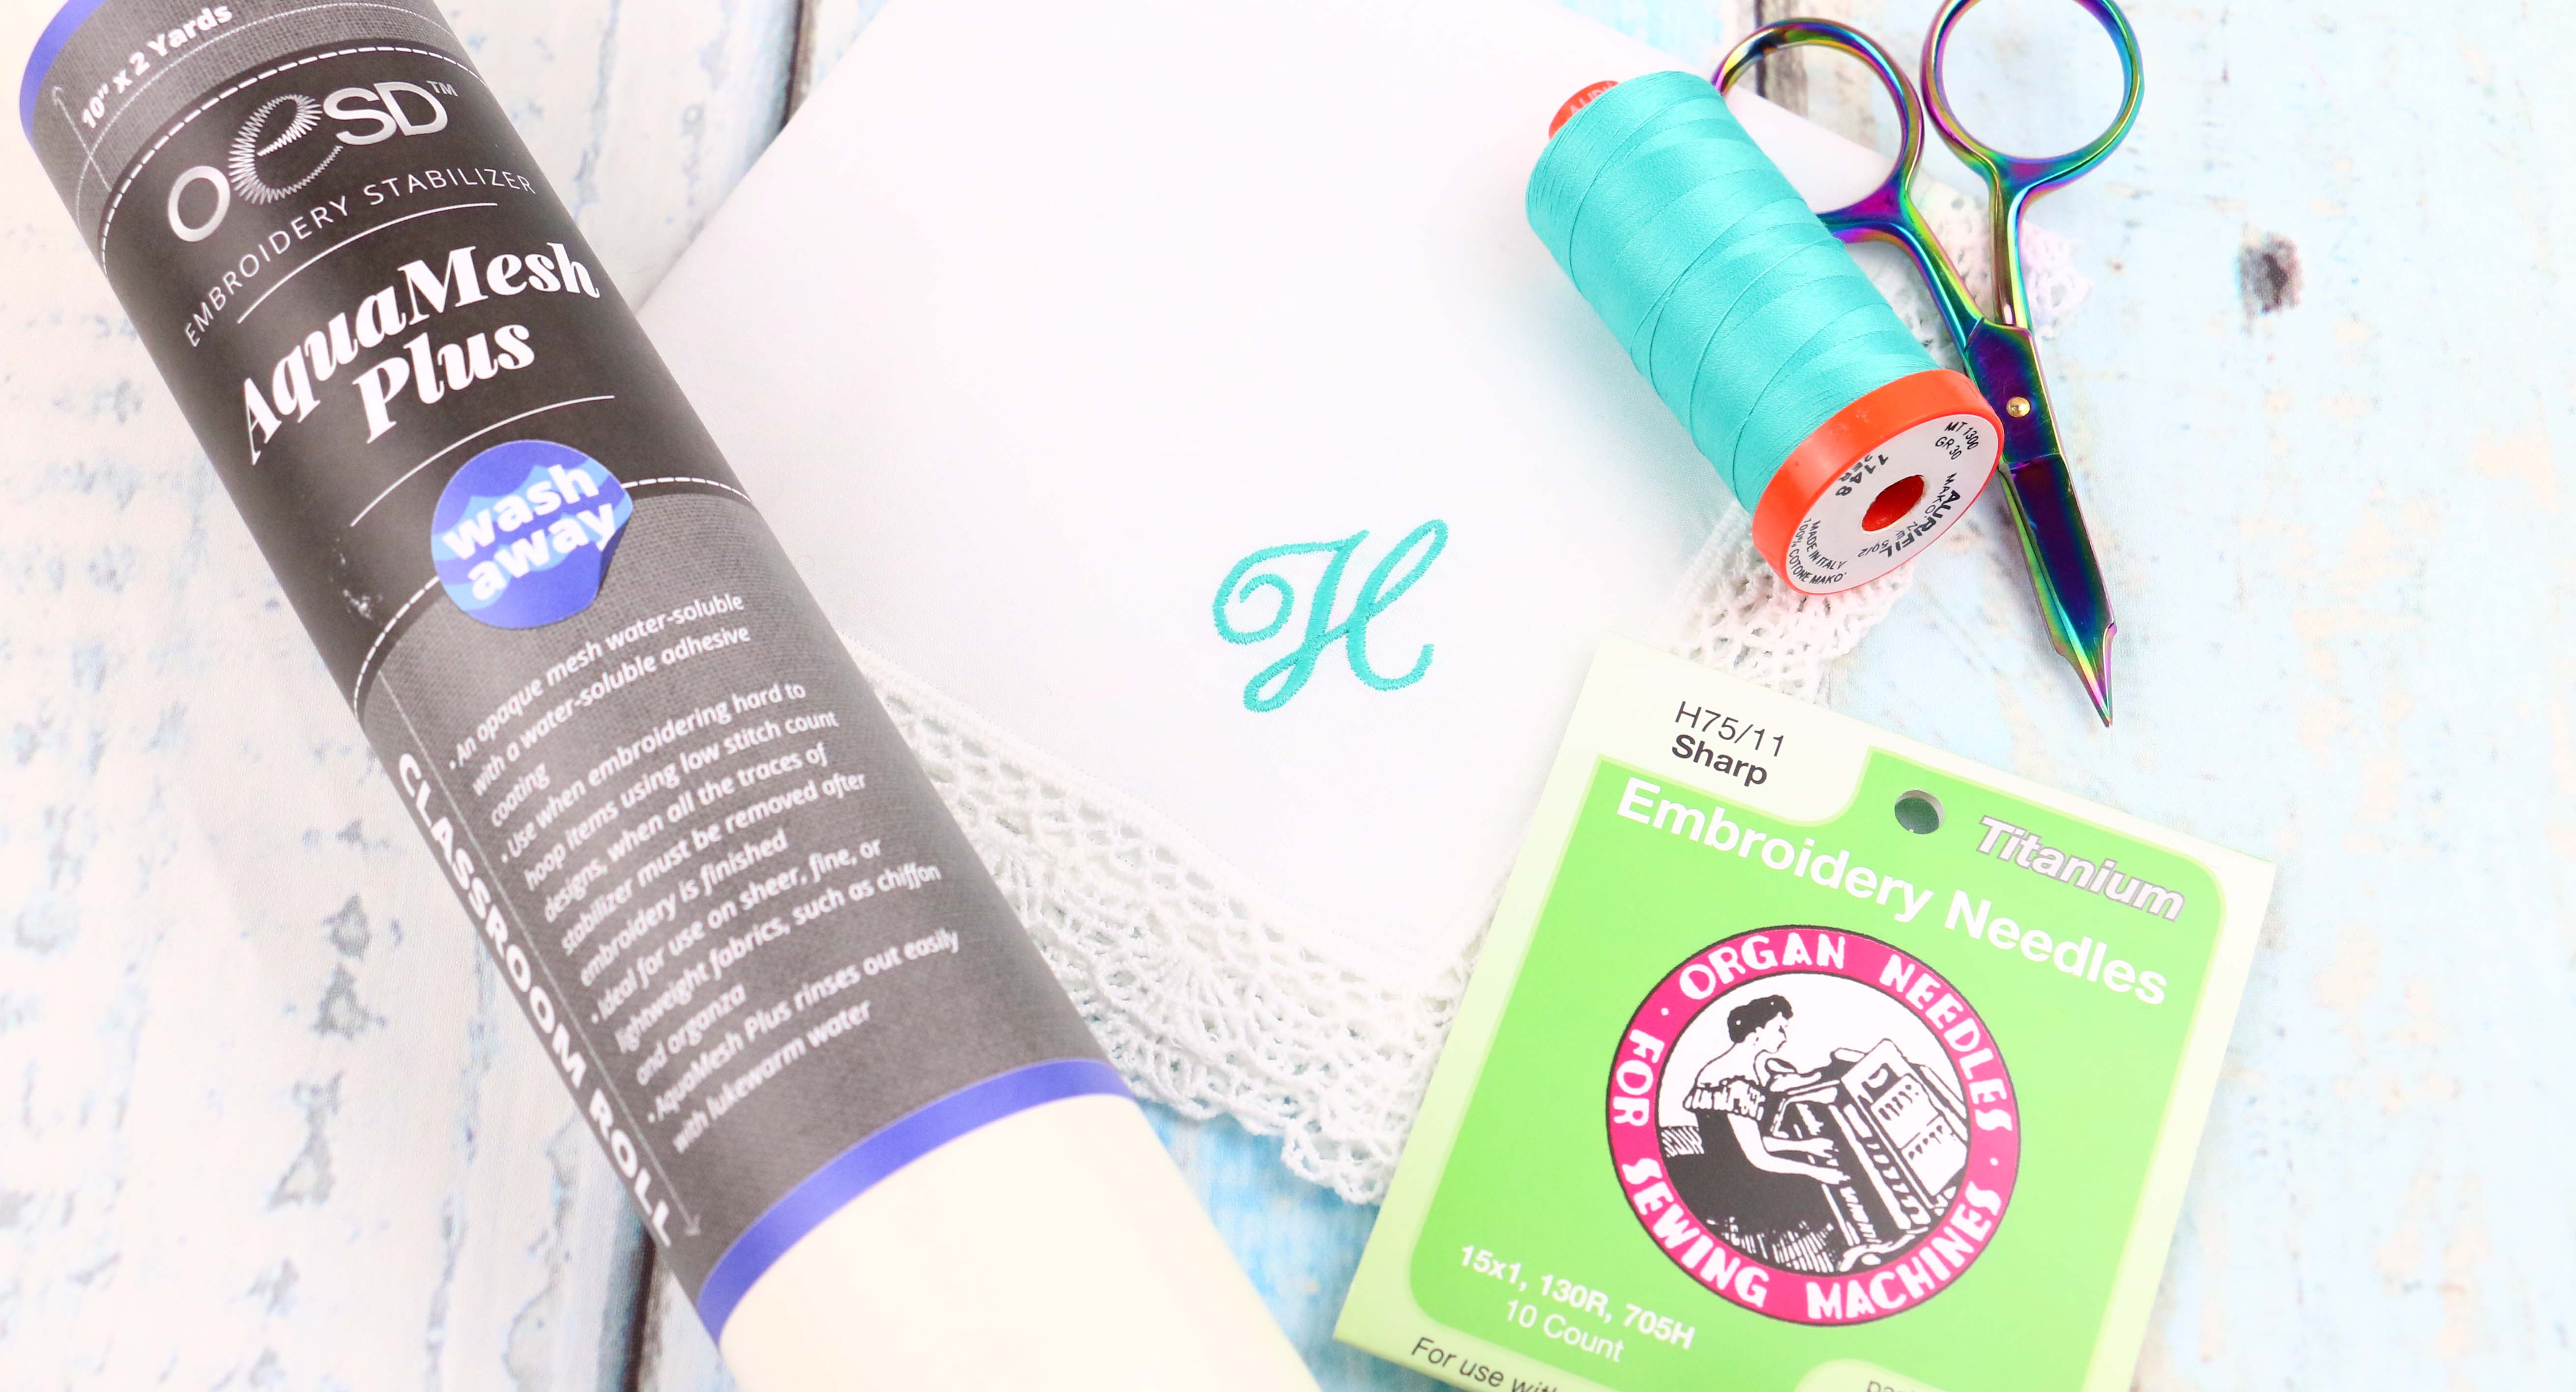
- Cording (Such as perle cotton, gimp cord, crochet cording, etc.)
- Polyester thread
- Flatter starch alternative pressing spray
- Fray Check
- Scissors
- Pins
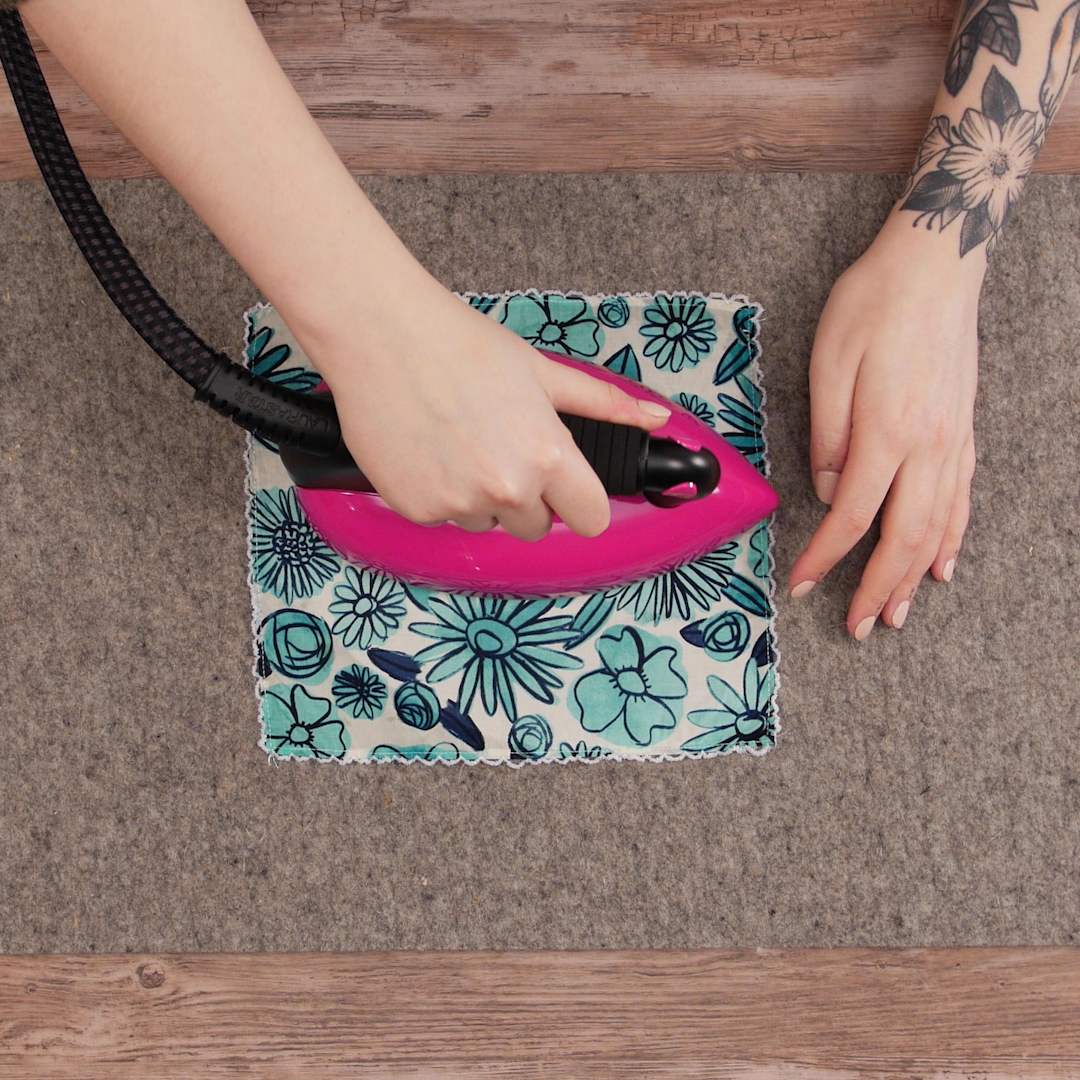
- OESD AquaMesh water soluble stabilizer
- Laurastar Lift iron
- Clear Embroidery foot #39
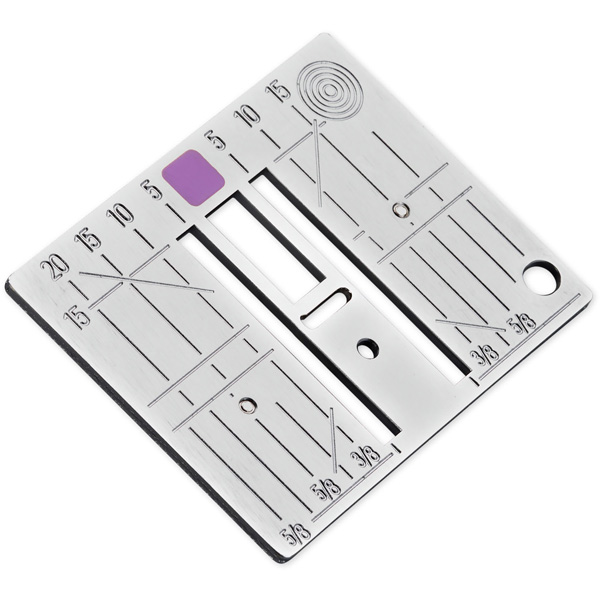
- 5.5 mm stitch plate for 9 mm machines
- BERNINA 570 QE: Tula Pink Special Edition
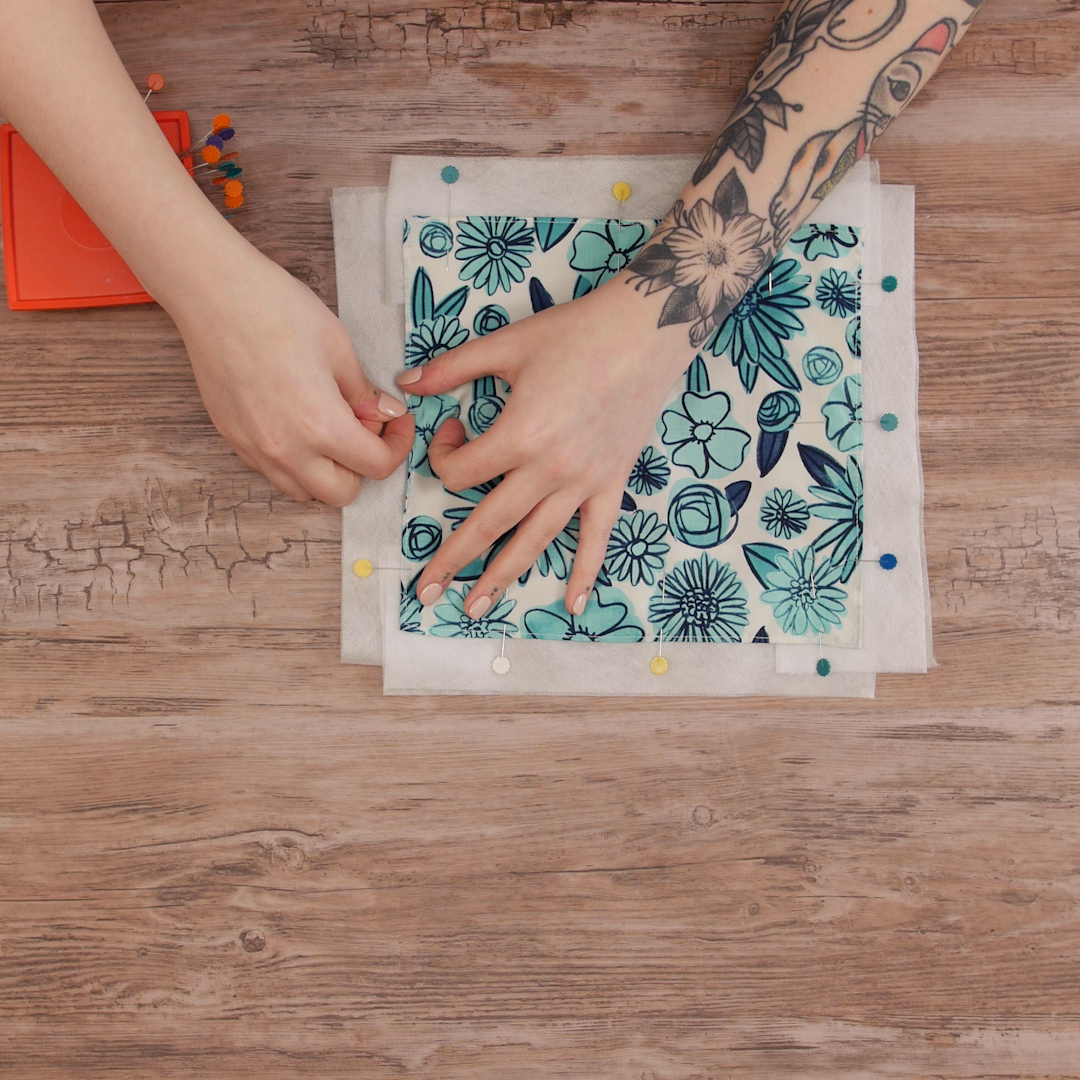
Step 1. Prepare the handkerchief
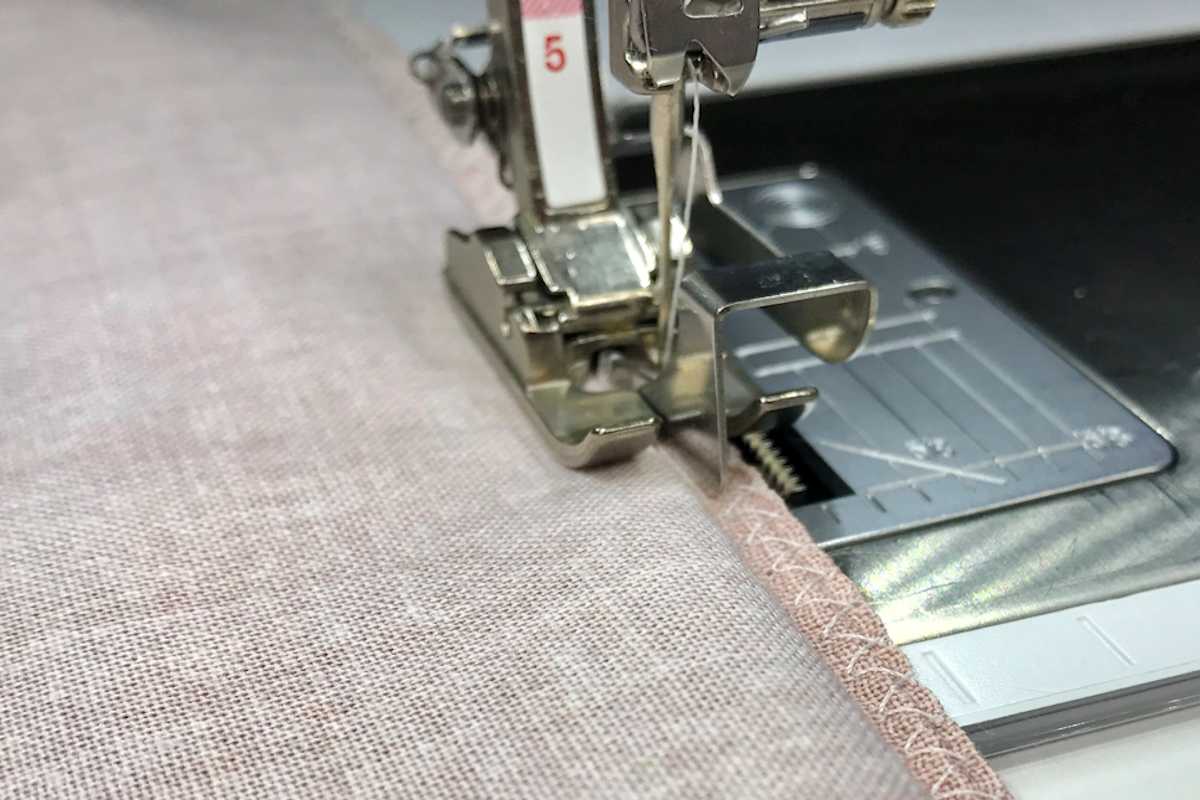
If you choose to use a ready-made handkerchief, the work is done for you! But you may choose to make your own. To do so, cut your fabric to a 16” square and add a rolled hem to the perimeter. My favorite method for doing this is using my L 460 Overlocker—you can read about how to do that here.
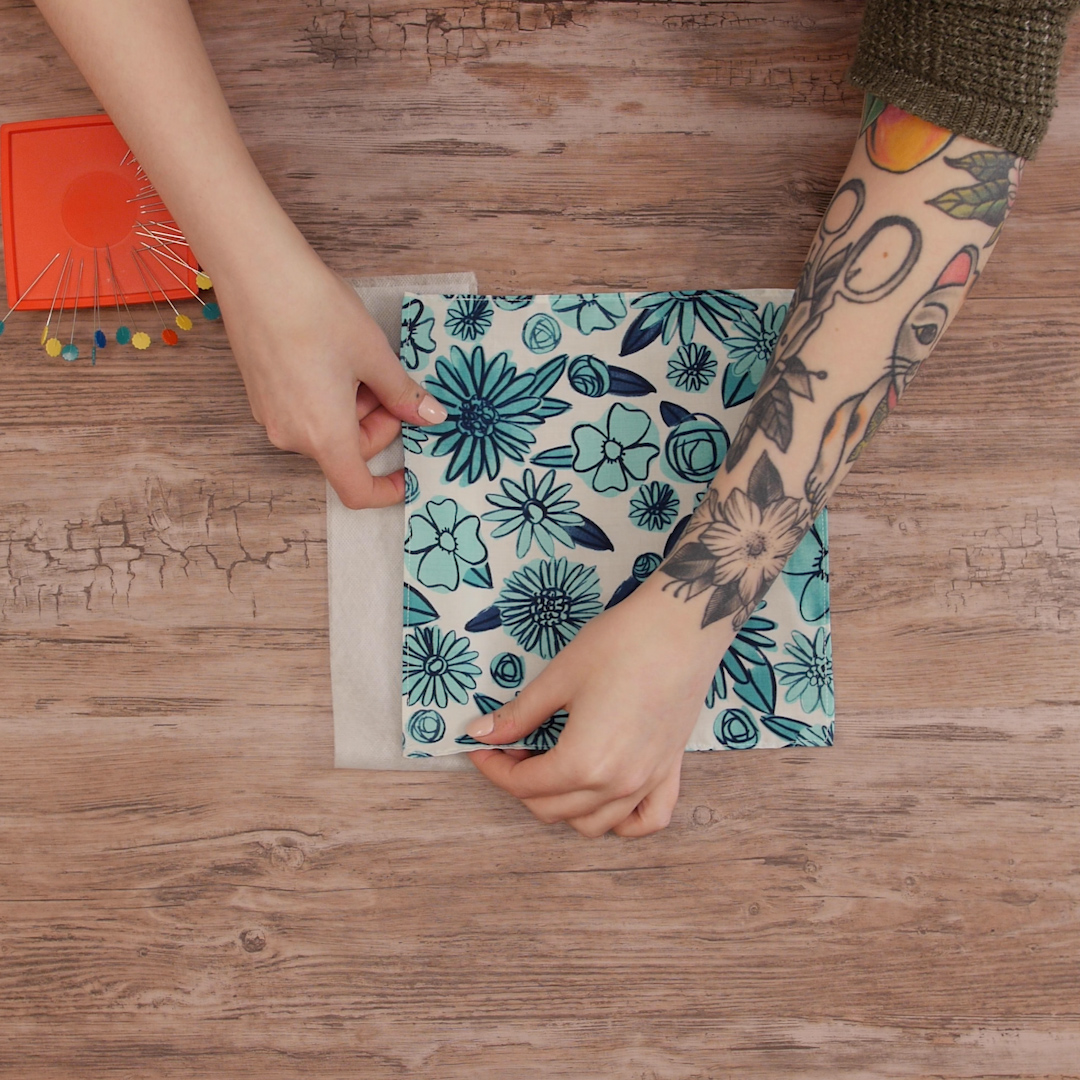
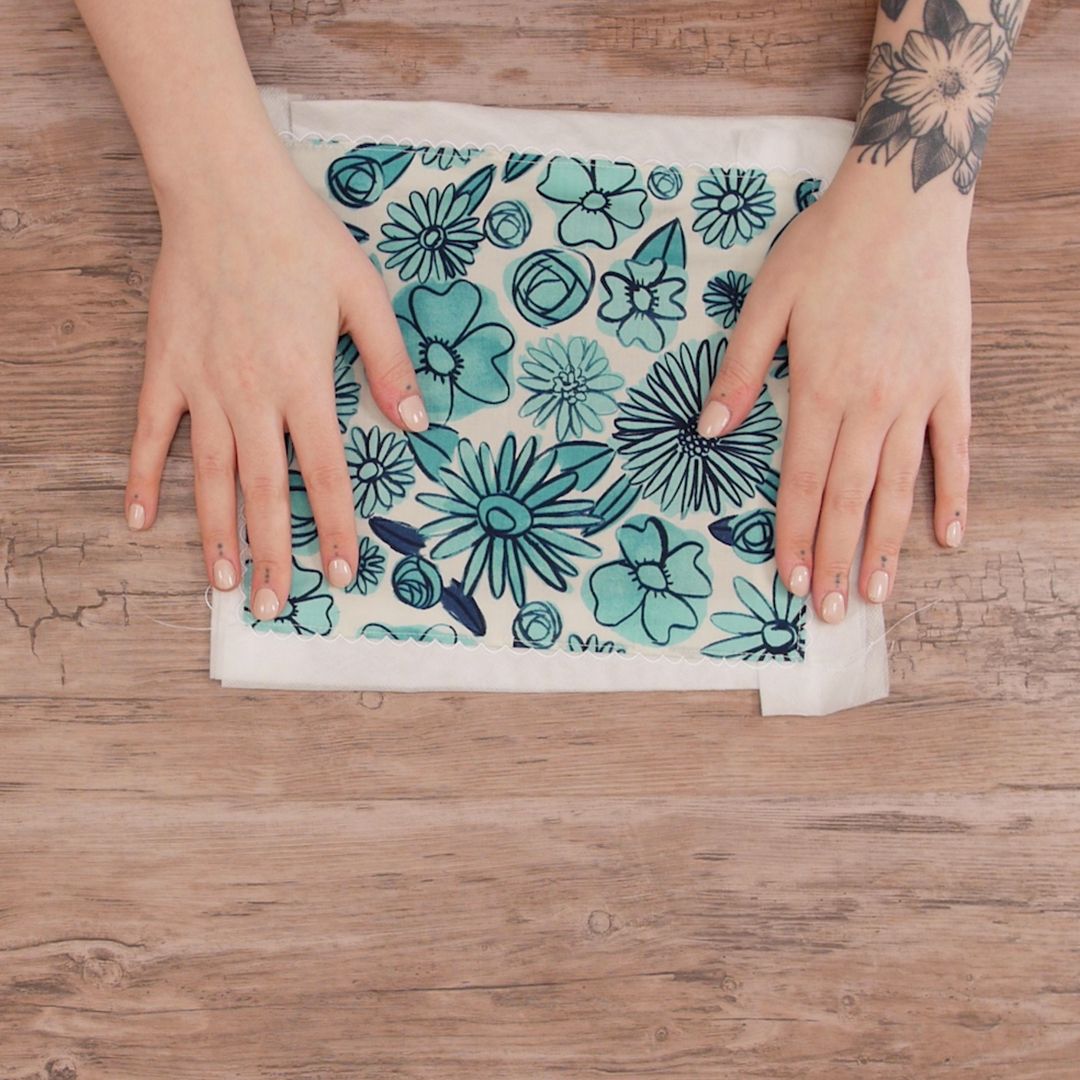
The next step is to add your AquaMesh stabilizer. Cut eight 2” wide strips of stabilizer. Layer two strips under each edge of the handkerchief and pin in place.
Step 2. Prepare the machine
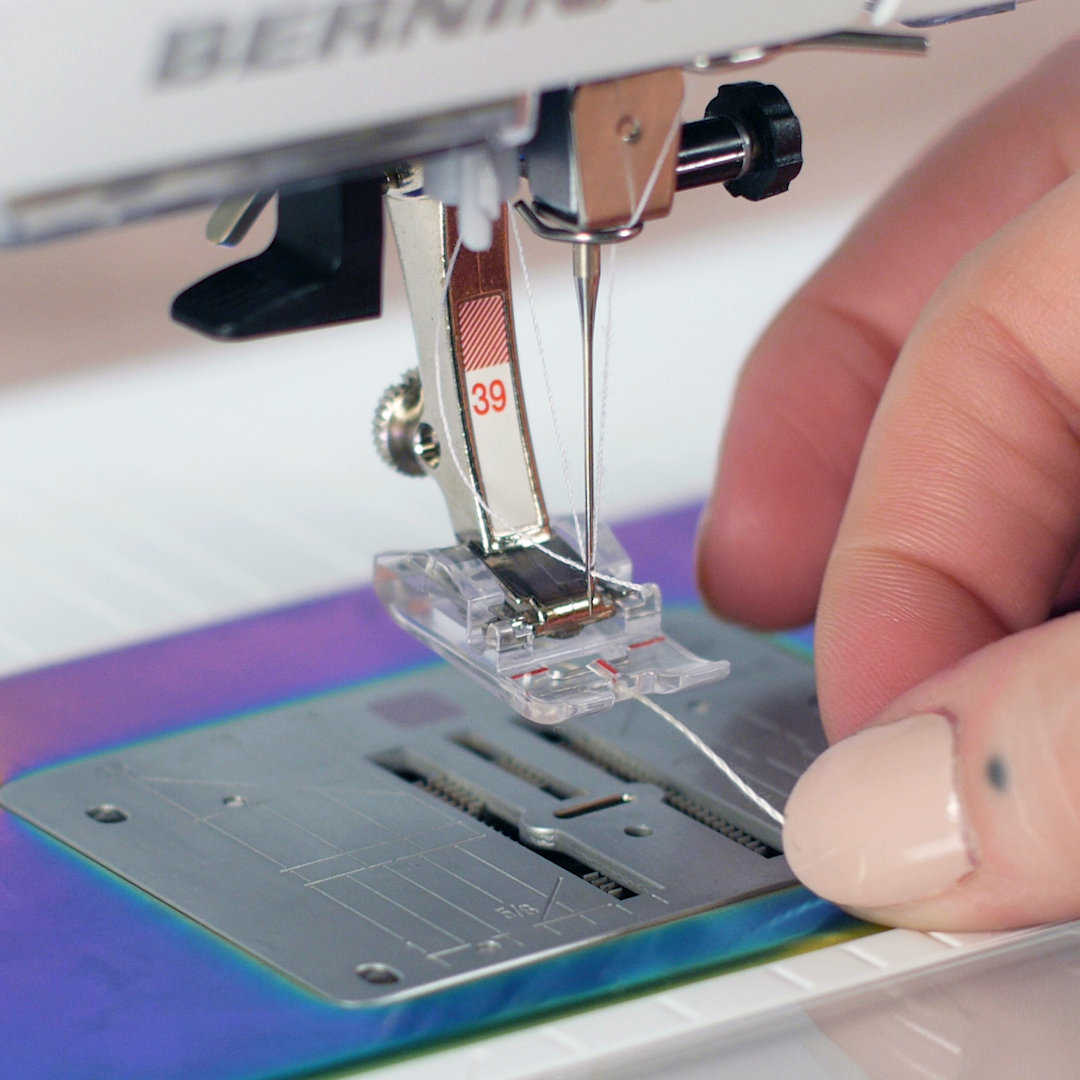
Wind a bobbin with the same polyester thread you will use in the needle and then thread the machine.
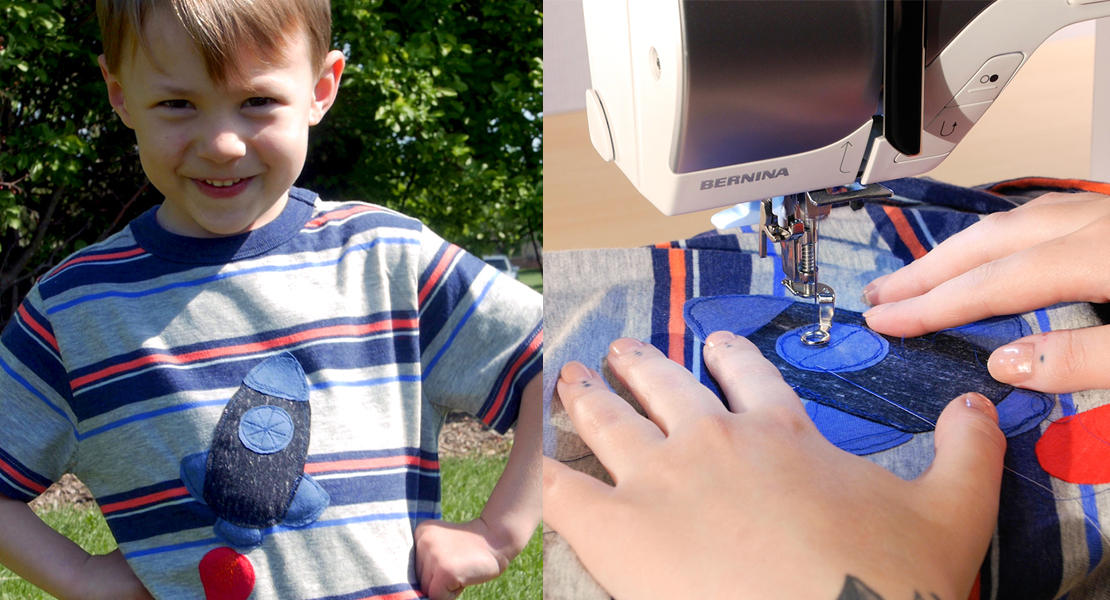
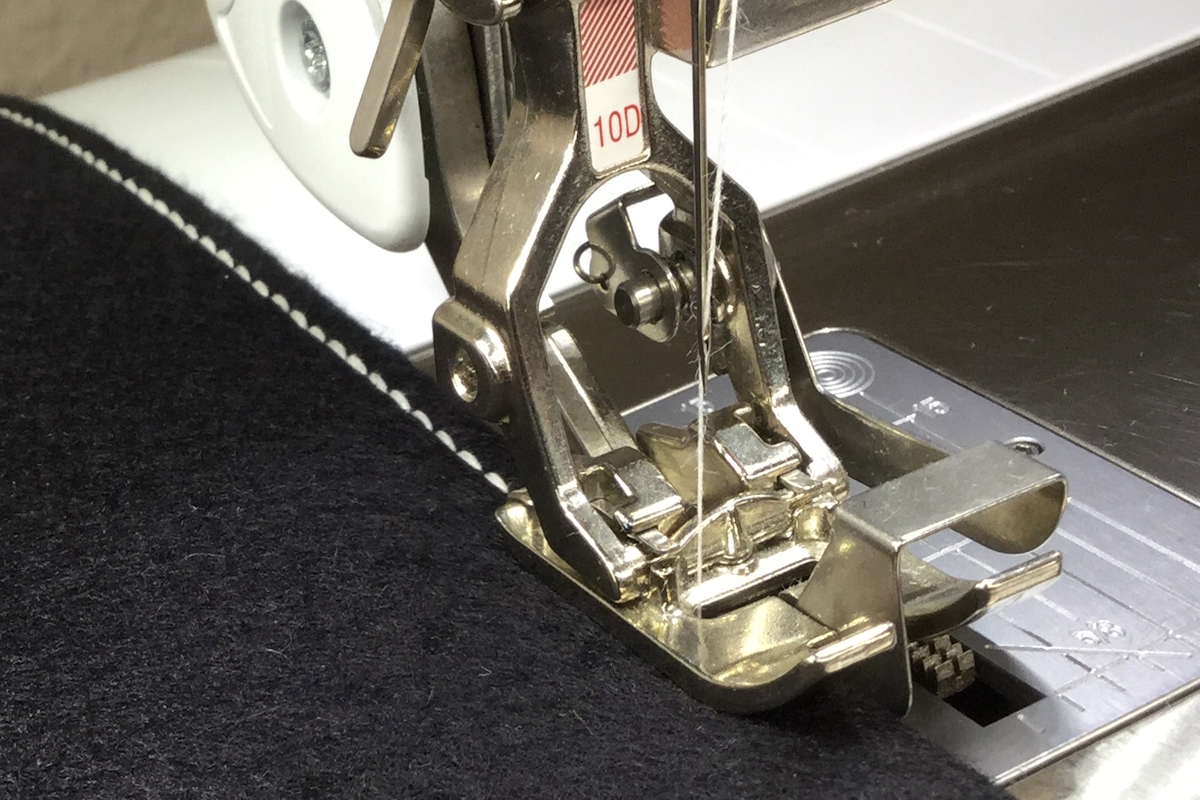
Remove the standard 9 mm stitch plate from the machine and replace it with a 5.5 mm width plate for 9 mm machines. This technique can be sewn with the standard plate but using the narrower plate gives this delicate technique better support. This optional specialty stitch plate is designed to fit the wider feed dog on our 9 mm machines but the actual stitch opening is limited for specialty techniques like this.
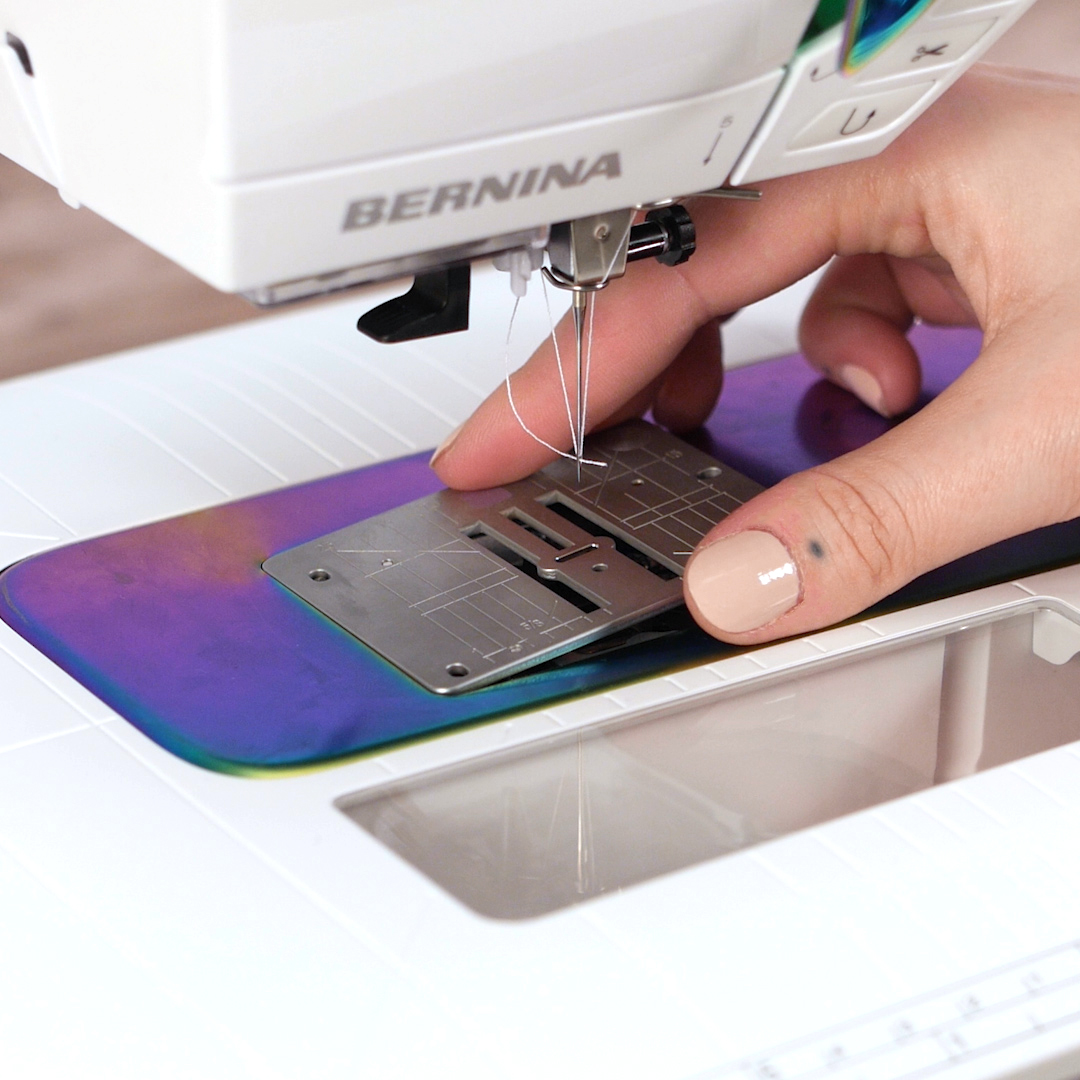
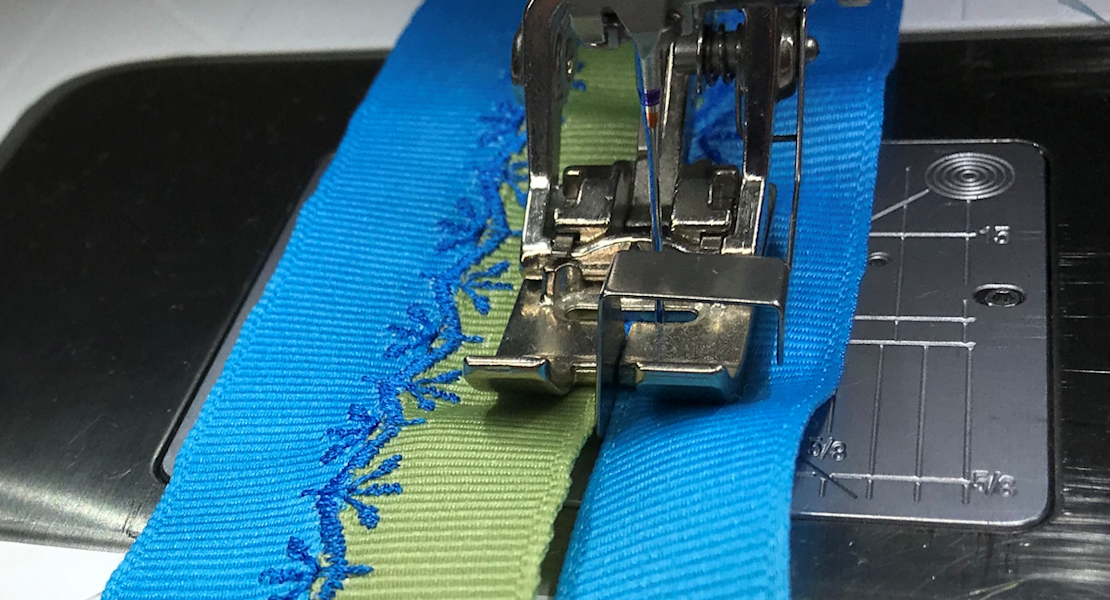
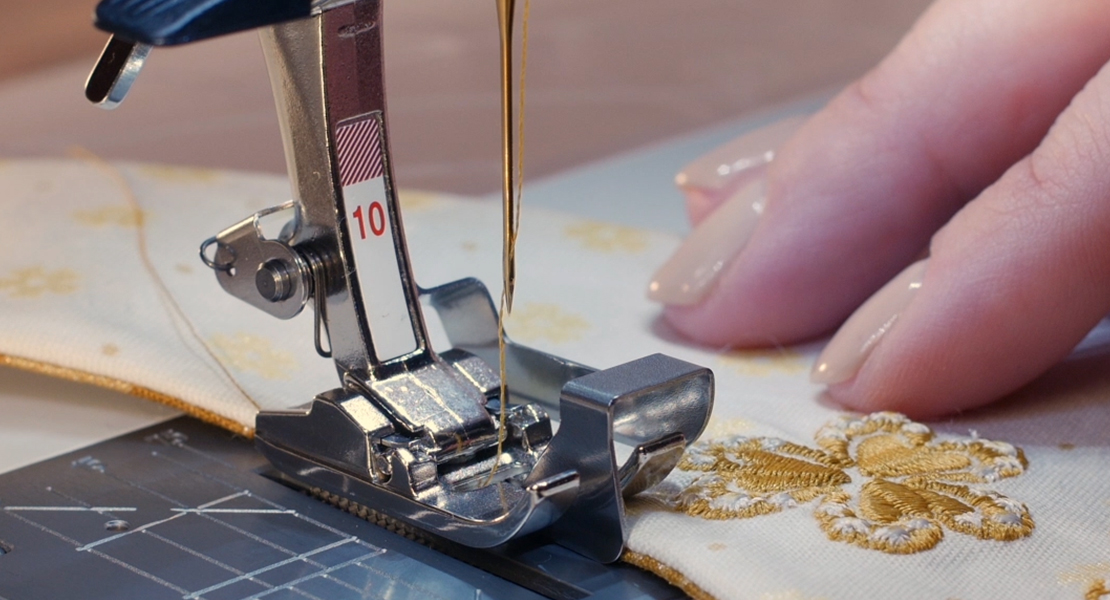
Attach the #39 foot to the machine. Thread the small hole at the front of the #39 presser foot with your cording. You may want to use a small wire needle threader to do this. Pull a few inches of cording to the back of the presser foot.
Step 3. Setup the stitch
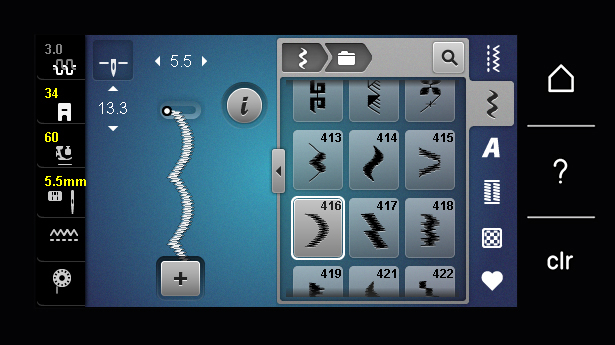
Set the machine to stop with the needle down. Navigate to the decorative stitch menu and into the satin embroidery stitches. Select the scallop stitch #416.
To fine tune this stitch, open up the Information Menu and then Elongation.
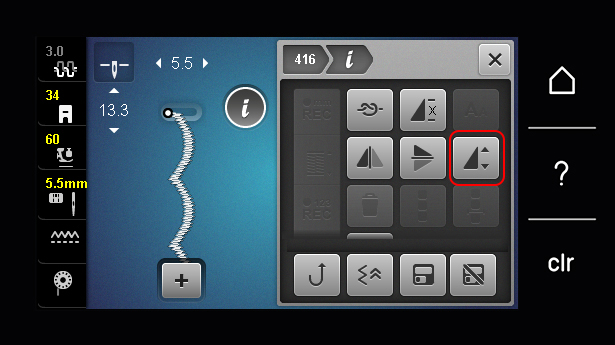
Use the Multi-function knobs to reduce to 90%. This will make the scallop motif smaller—rather than reducing the stitch length, as you might select out of habit, adjusting the stitch through Elongation will account for the density of this satin stitch and adjust accordingly.

Step 4. Start sewing
Place the kerchief and stabilizer underneath the presser foot, aligning the edge of the kerchief just inside the left toe of the #39 foot. For this technique, I recommend starting at a corner.
Sew down the first side of your kerchief. As you sew, make sure that when the scallop stitches to the left side, it is sewing through the edge of the kerchief. We want to make sure this decorative edging is actually connecting to the fabric. However, the bulk of the design will stitch out solely on the stabilizer.
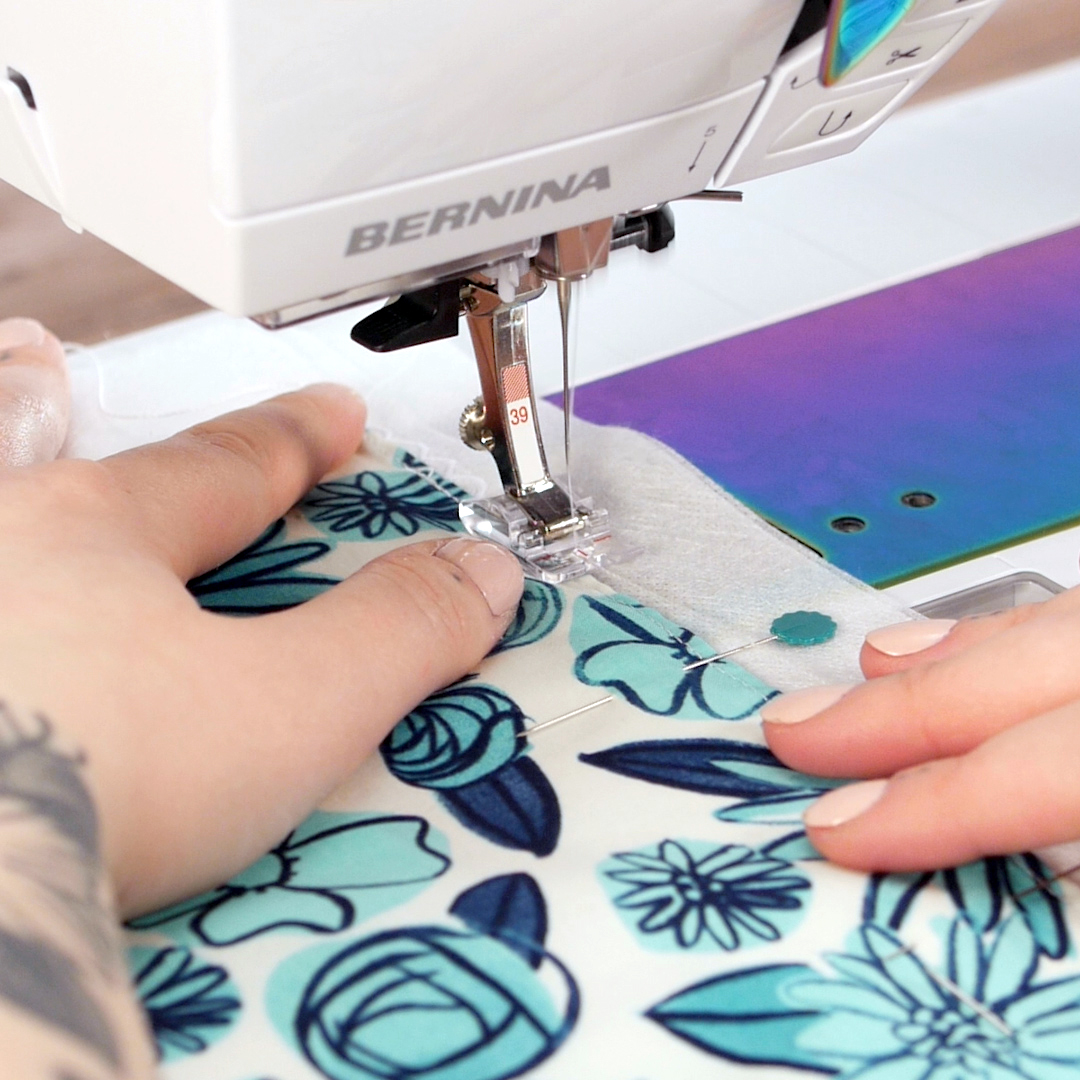
When you reach a corner, stop with the needle down, raise the presser foot with the Free Hand System, turn the fabric, and begin working down the next side.
Work your way around the kerchief. When you reach your starting point, secure your seam in the fabric then raise the presser foot, pull the fabric toward the back of the machine, and cut your threads and cording by hand.
Step 5. Secure your stitching
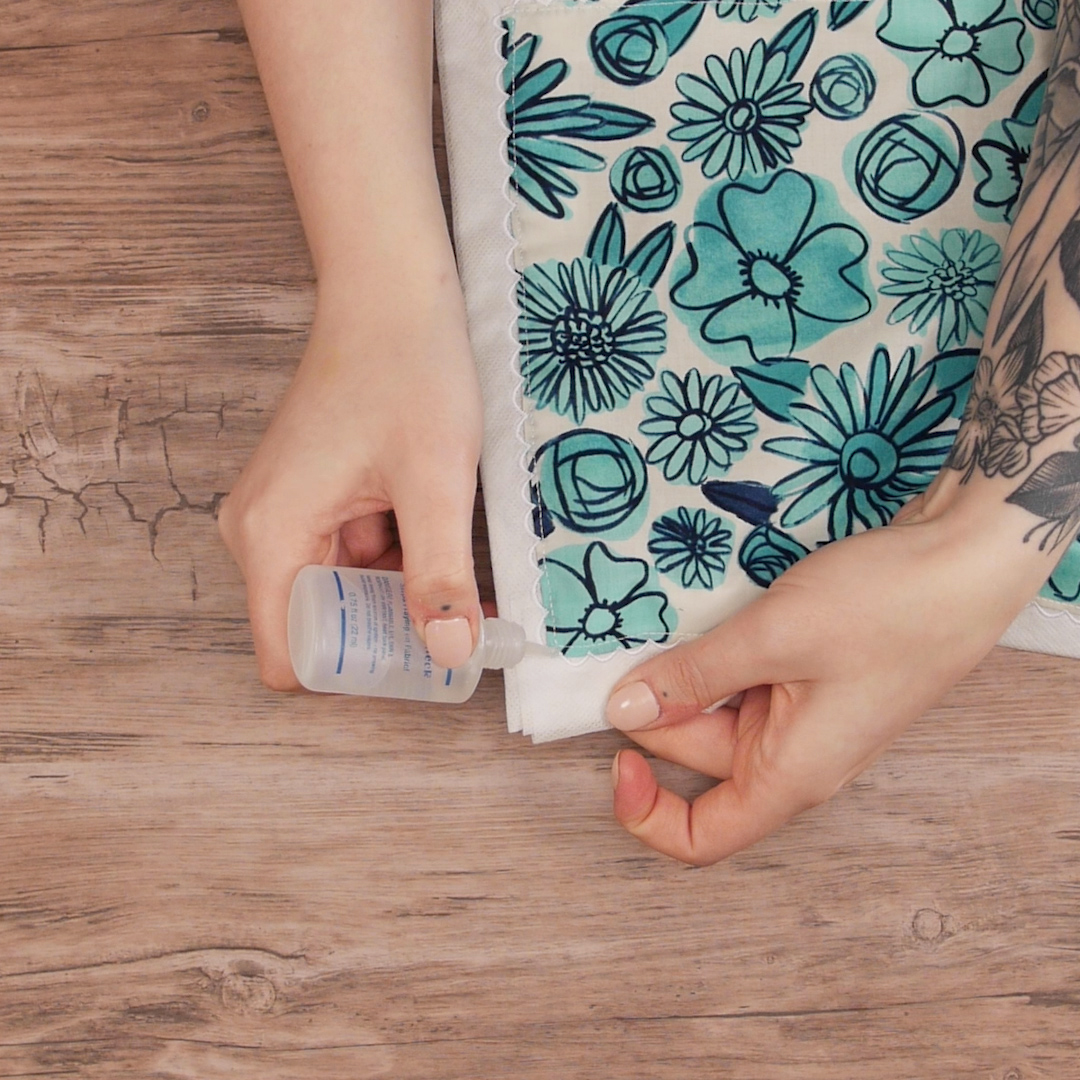
Cut your threads and cording as close to the fabric as possible.
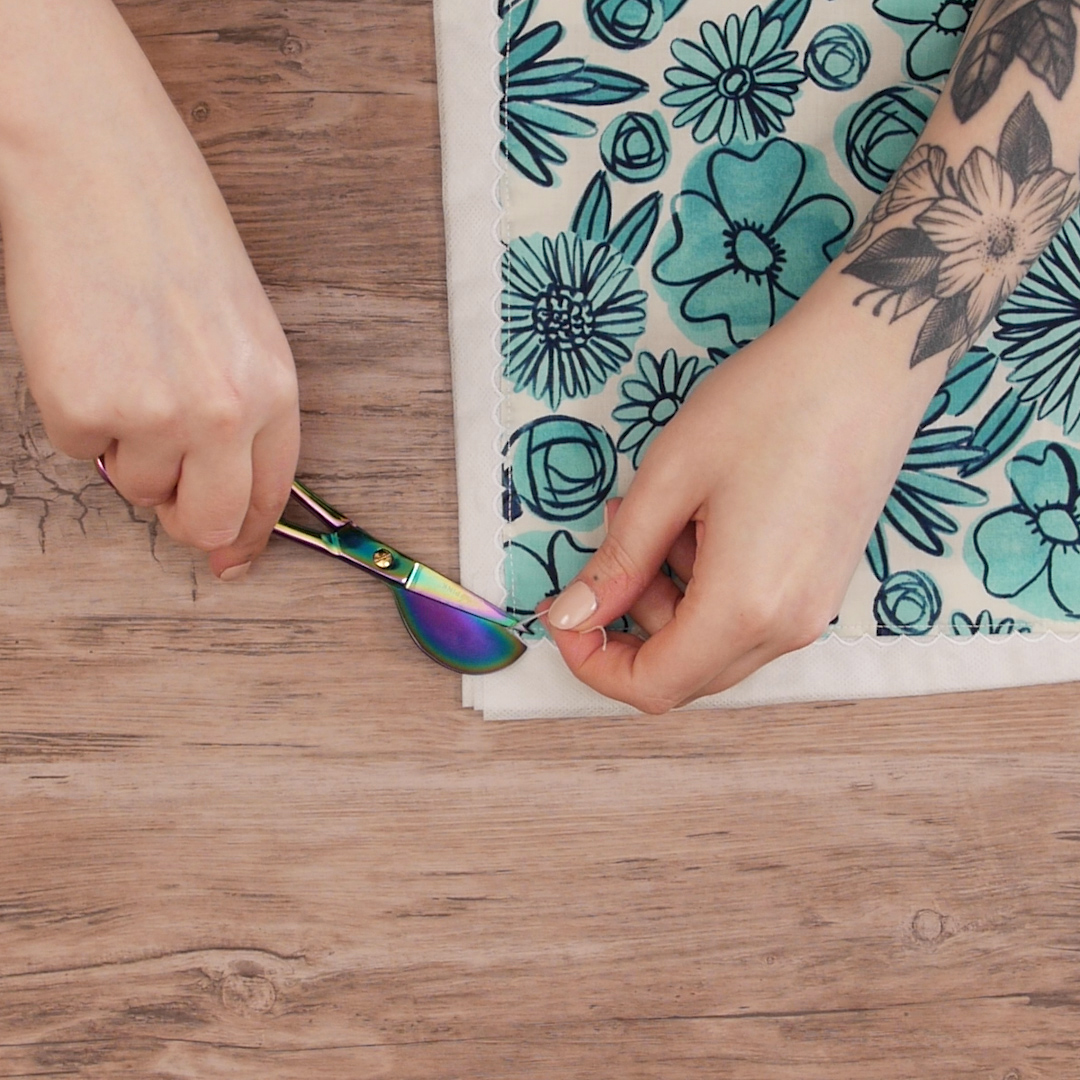
Secure the ends with Fray Check—this will keep your ends locked in place. Allow to dry completely.
Step 6. Remove stabilizer
Cut away the bulk of the wash-away stabilizer. While it does dissolve easily, you are better off removing as much as you can before you dissolve it.
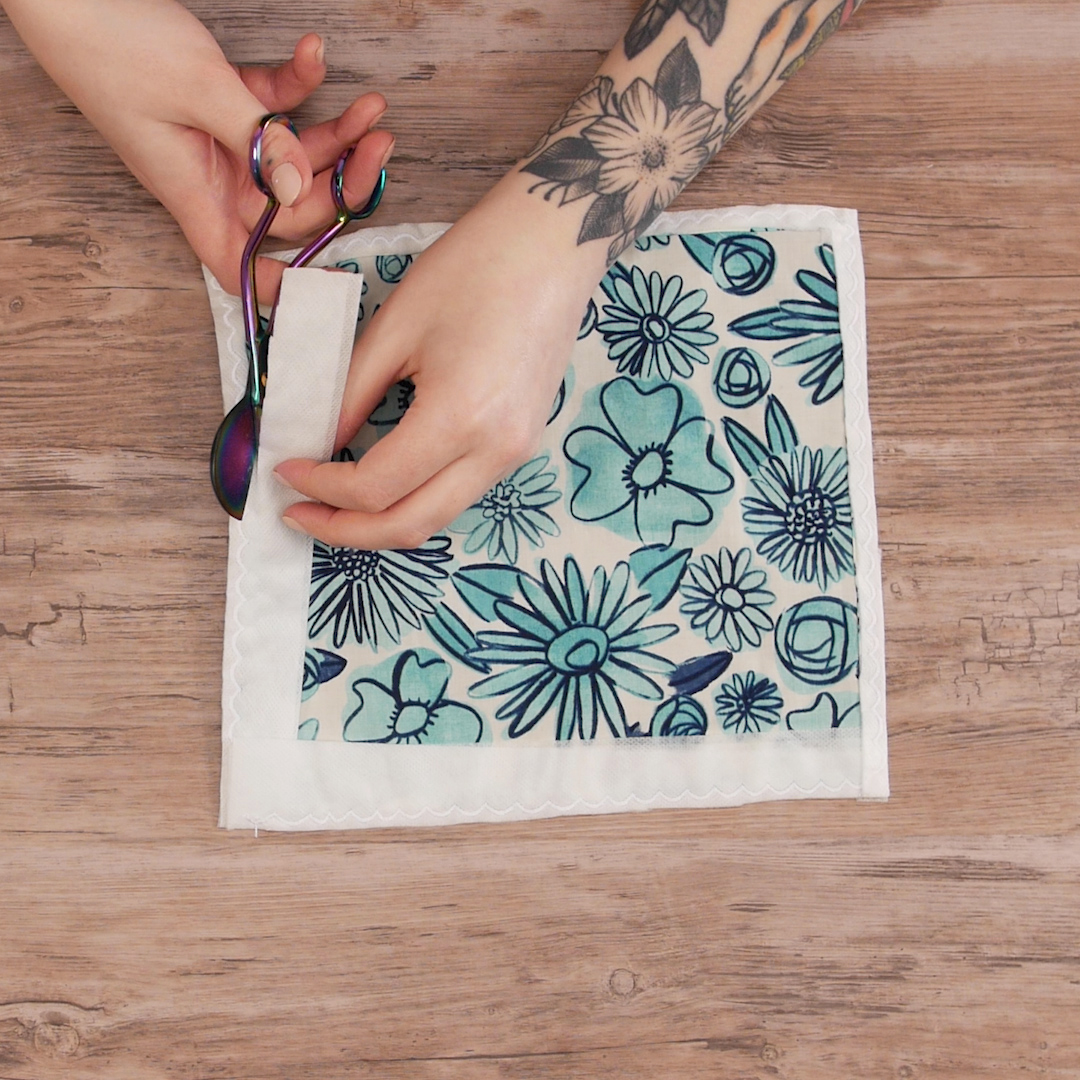
Then, rinse out all of the stabilizer with warm water. Gently agitate the edges of the kerchief to work the stabilizer out of the fabric and threads.

Lay the kerchief flat, blot out the excess moisture, and allow to dry.
Press the kerchief smooth and it is ready to wear and show off!


I love these! I have to give this technique a try.