How to Make a Scissor Case In the Hoop
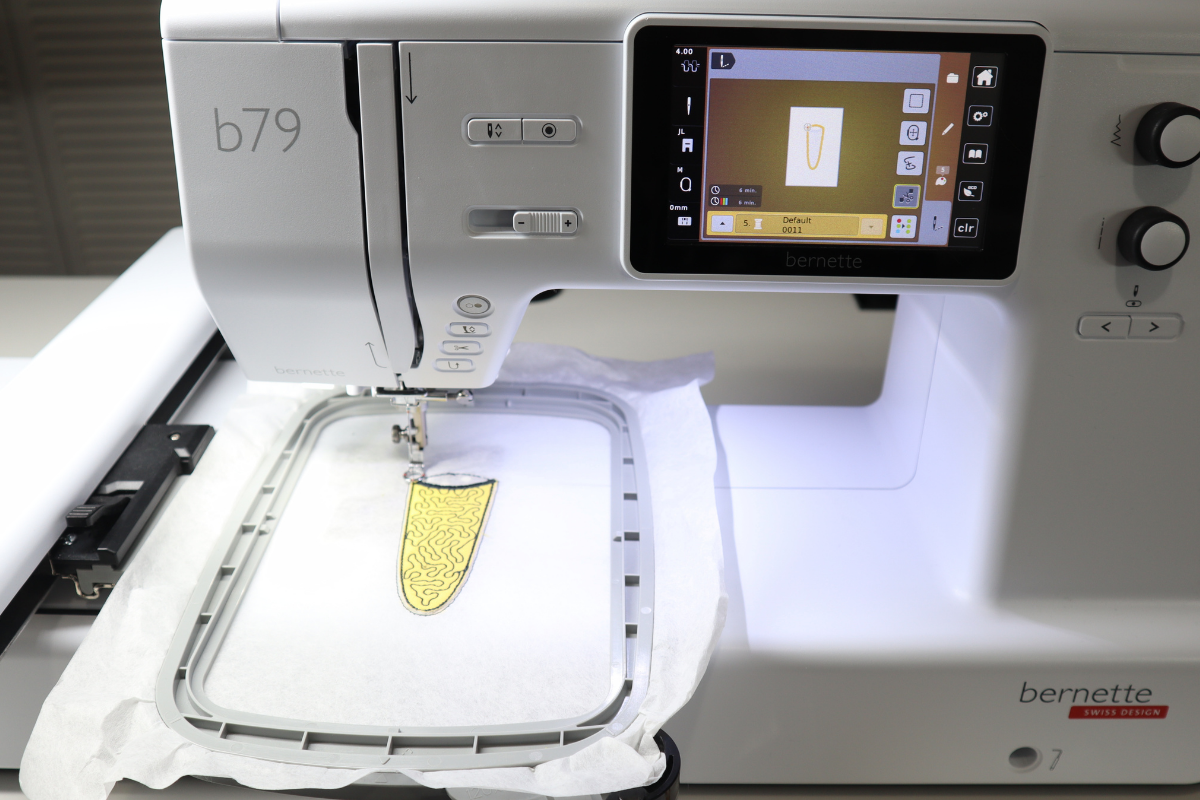
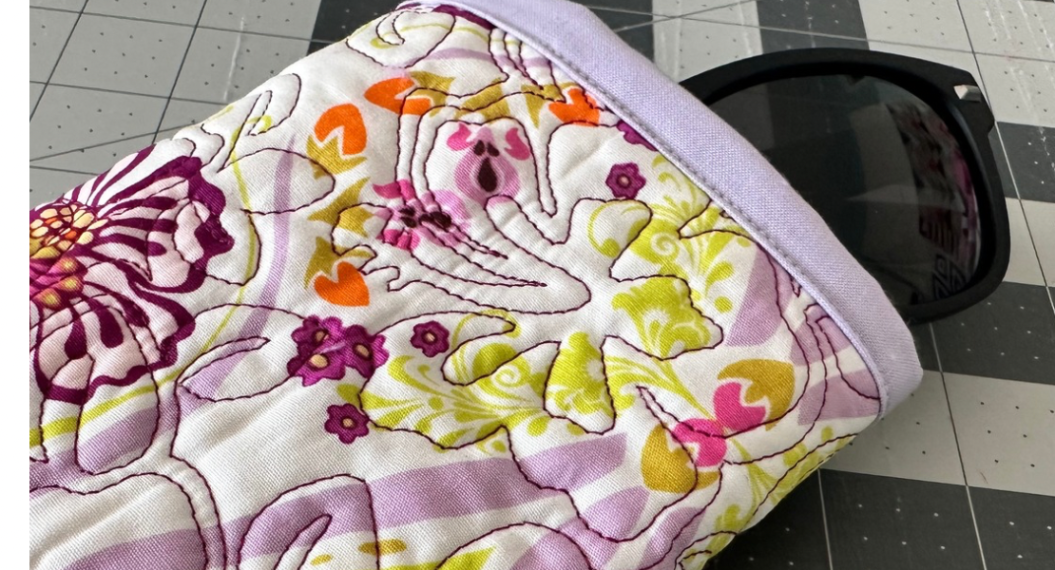
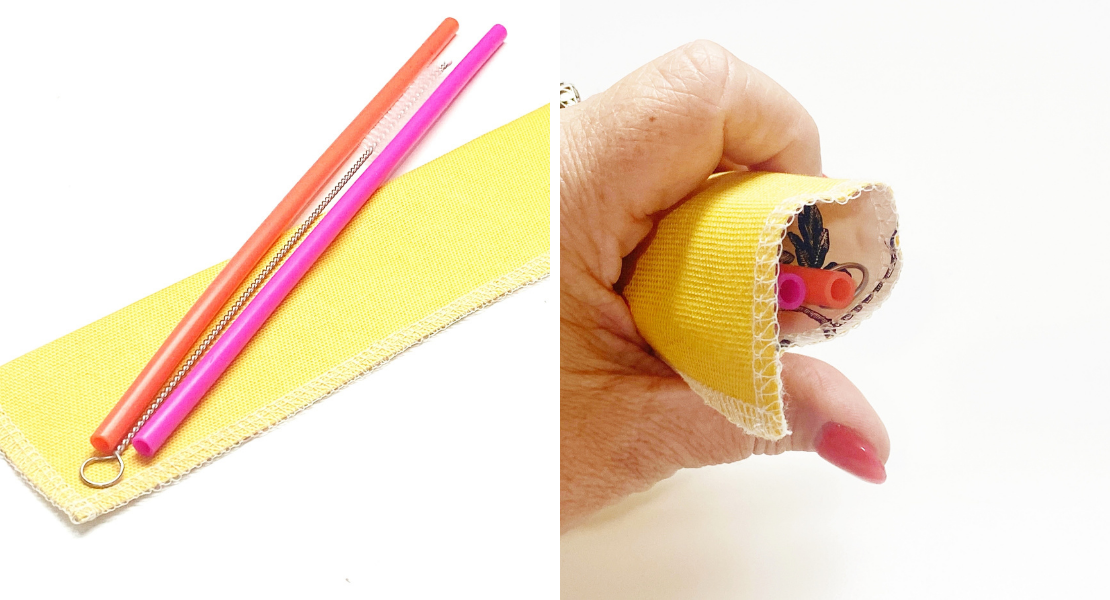
Scissors! We all have them and some of us have quite a collection. One thing for sure, we need different types of scissors for different applications and you want to protect them with a case. One of my favorite pairs of scissors are the 5.5″ All Purpose scissors from my Sookie Sews Scissor line and in todays lesson I’m showing how to make an In-the-Hoop Small Scissor case for that pair. The good news is that this case will fit most small scissors, snips, and even tweezers! You will need a hoop that is at least 4″x4″ (or 100×100 mm) so I’m using my bernette 79 , the Medium hoop, 120×180 mm.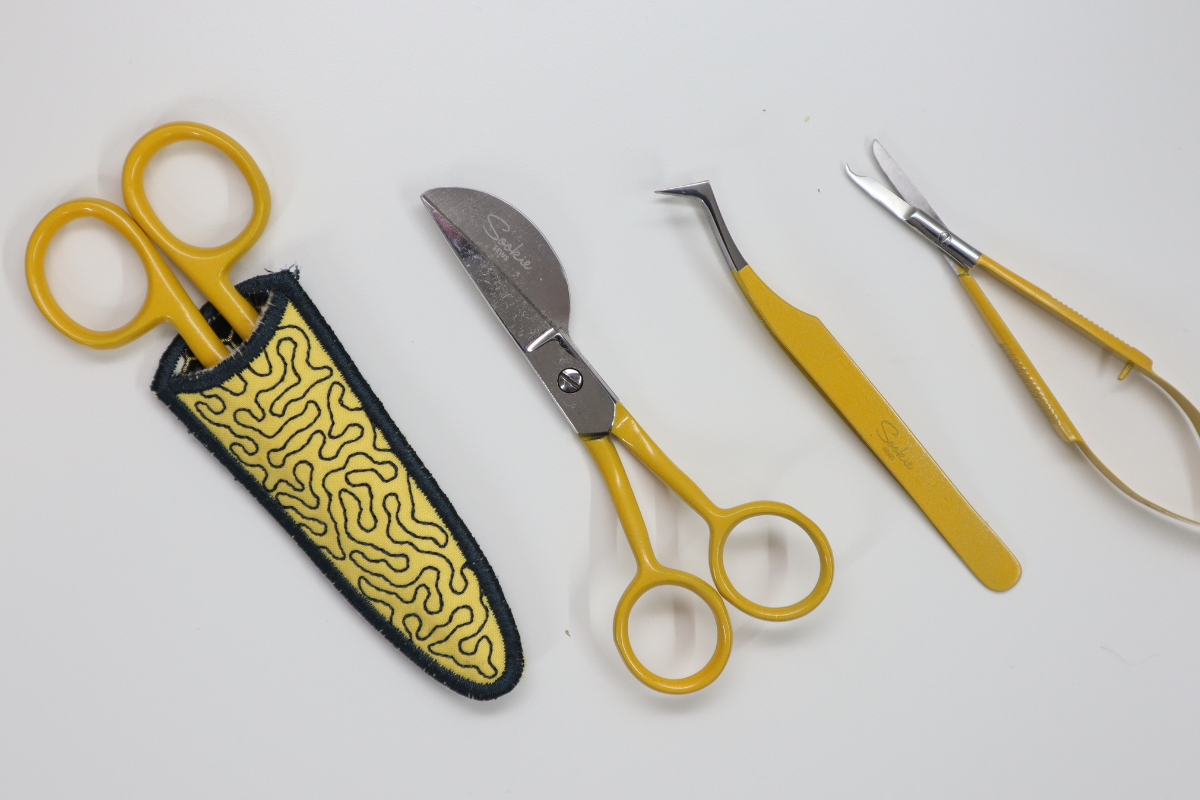
Hello my Sewing Bees, my name is Sue O’Very owner of Sookie Sews and BERNINA Expert. You can find me on Instagram at @SookieSews, my website SookieSews.com, and on my YouTube Channel SookieSewsTV.com where I have hundreds of sewing projects, machine sewing patterns, embroidery designs, and In-the-hoop projects. Ok, let’s get stitching!
Materials and Supplies to Make an In-the-hoop Scissor Case
Measurements are Width by Height
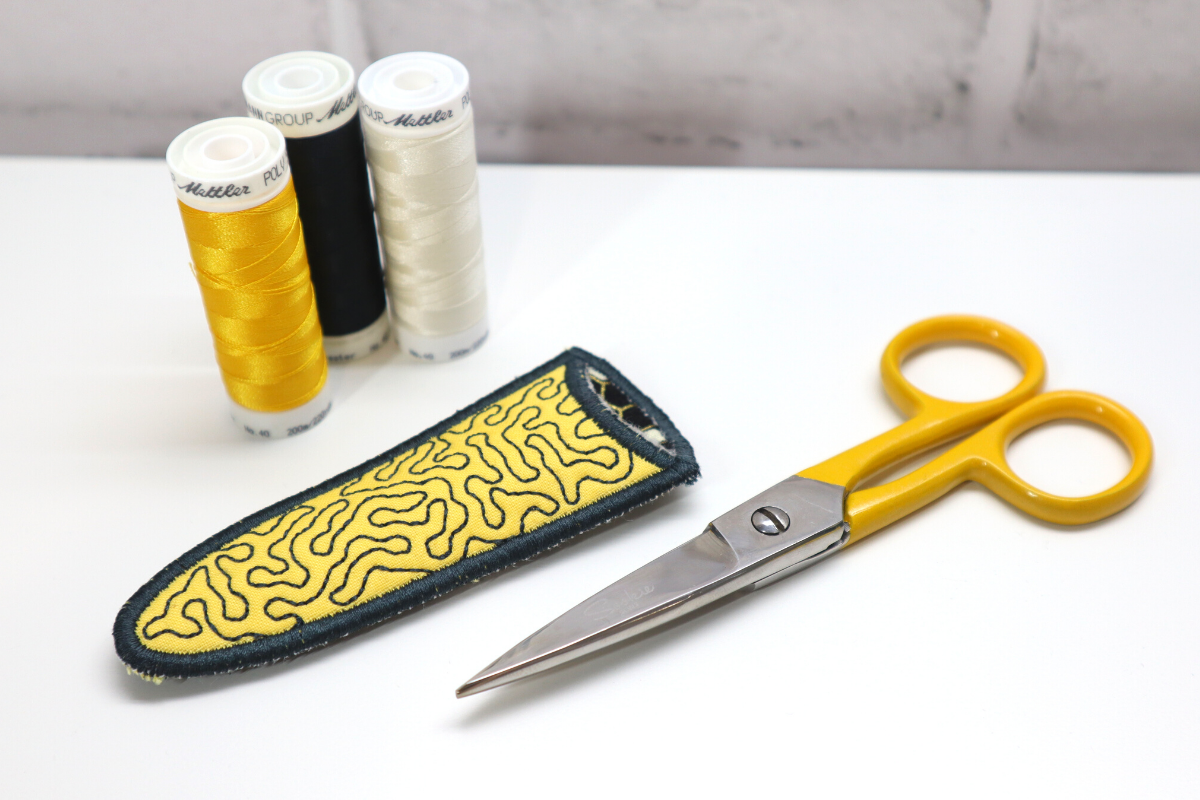
- Tear-Away stabilizer to fit hoop
- (2) 2″x5″ Front/Front Lining
- (2) 2″x5″ Back/Back Lining
- (2) 2″x5″ Thin batting
- Embroidery thread i.e. Mettler Polysheen with matching bobbin
- Embroidery needle 75/11
- Fabric Shears
- 5.5″ All-Purpose Craft Scissors i.e. Sookie Sews
- 4.5″ Duckbill Applique Scissors i.e. Sookie Sews
- EZ Hook n Snip i.e. Sookie Sews
- Angled Precision Tweezers i.e. Sookie Sews
- Clear adhesive tape

Steps to Make an In-the-hoop Scissor Case
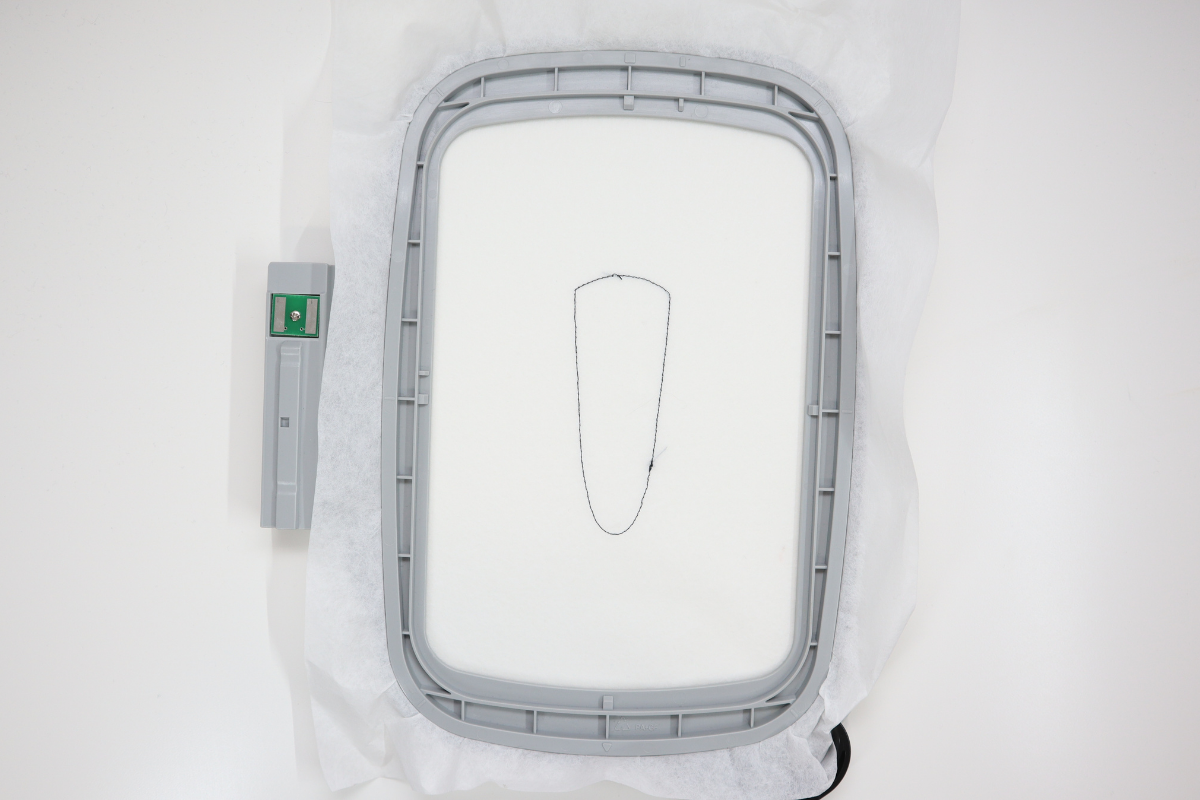
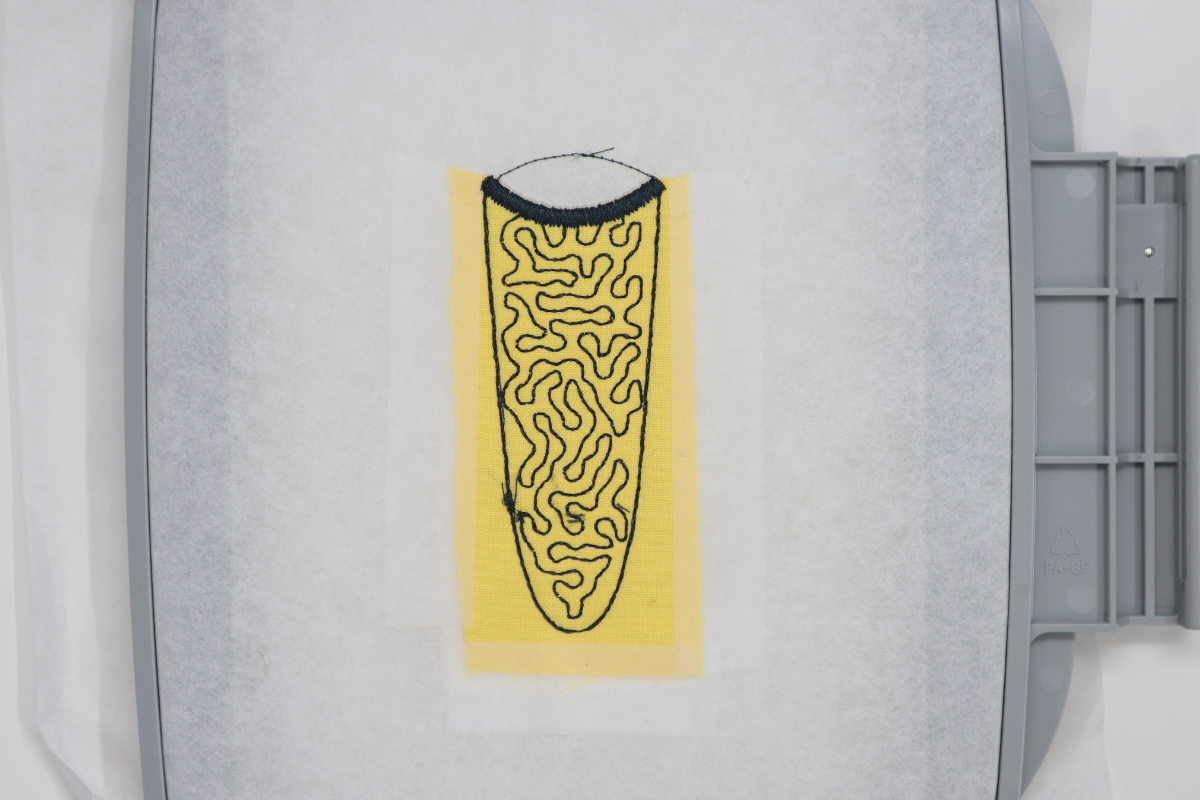
- Insert a brand new embroidery needle with embroidery thread on top and a matching bobbin. Hoop the Tear-Away stabilizer. Insert the hoop into the machine and sew stitch #1, the placement stitch.
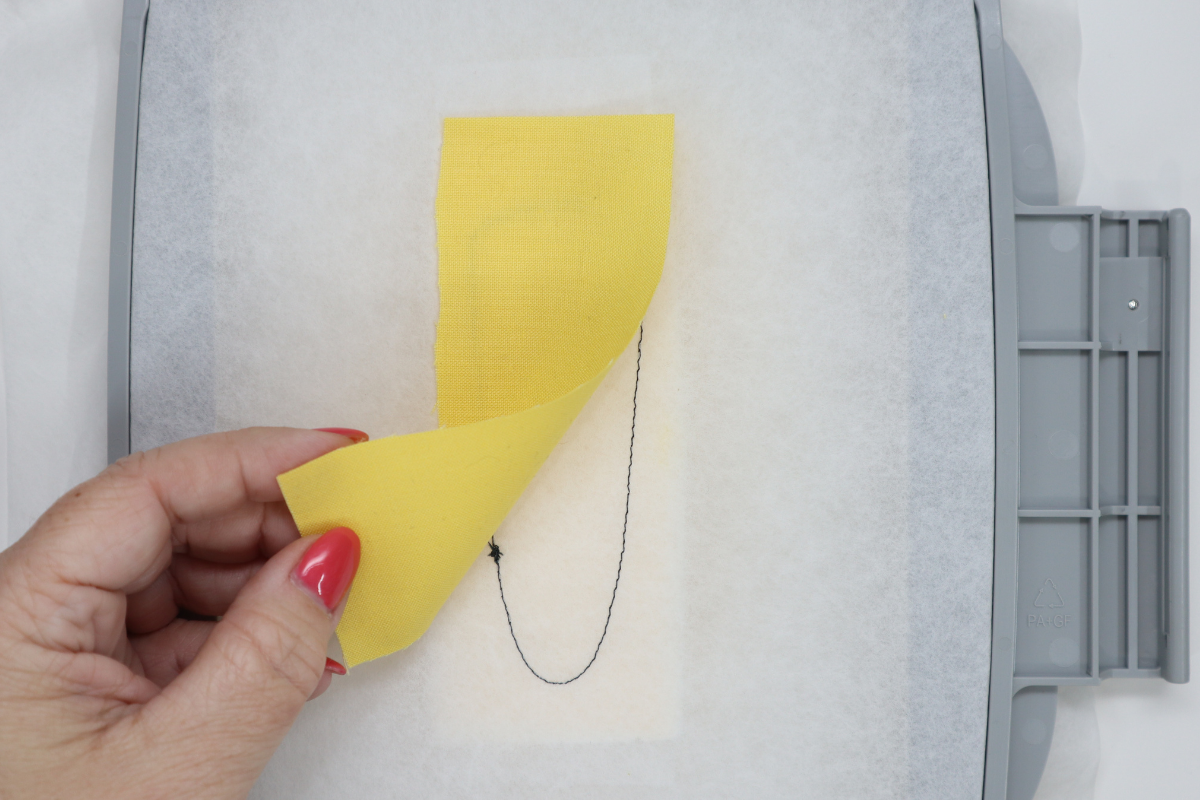
- Remove the hoop from the machine and place the hoop right side up on a flat surface. Place one Thin Batting over stitch #1 and the Front right side up over the Thin Batting. Tape along the top and bottom to secure.
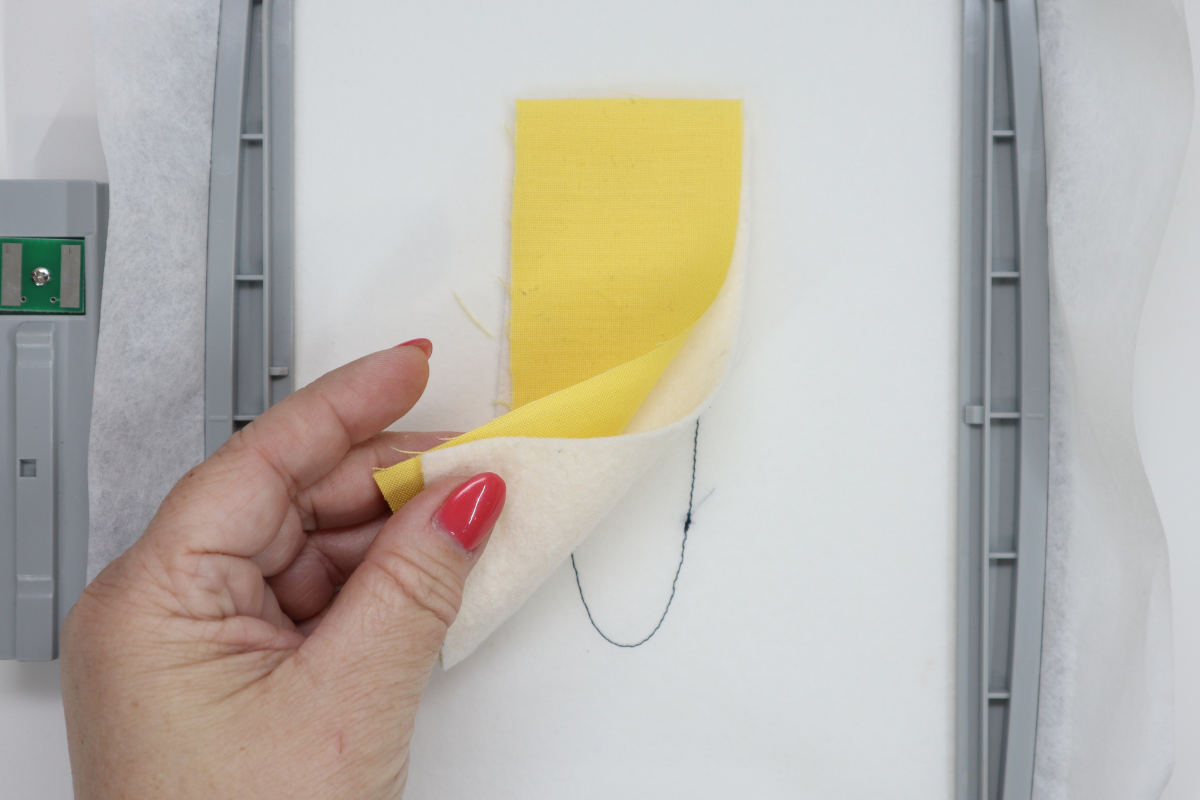

- Turn the hoop to the wrong side facing up. Place the Front Lining right side up and cover the stitching. Tape along the top, bottom, and two sides to secure in place.
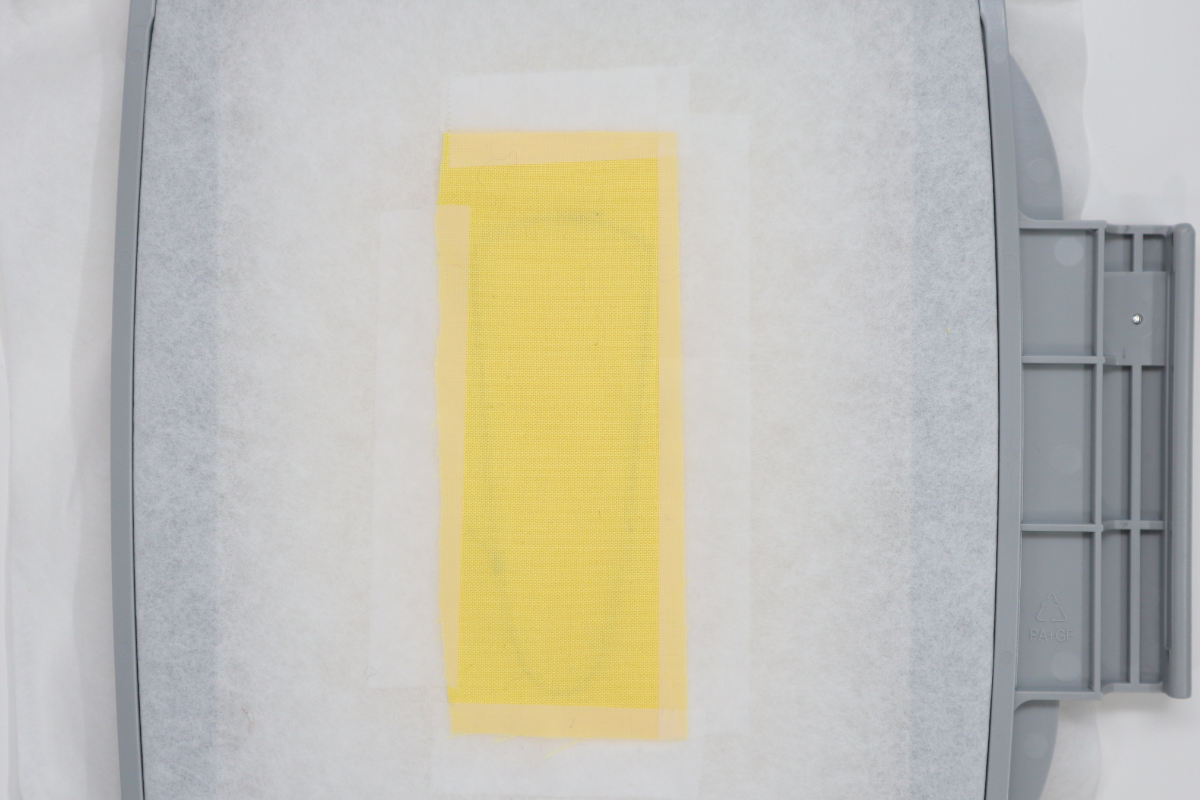
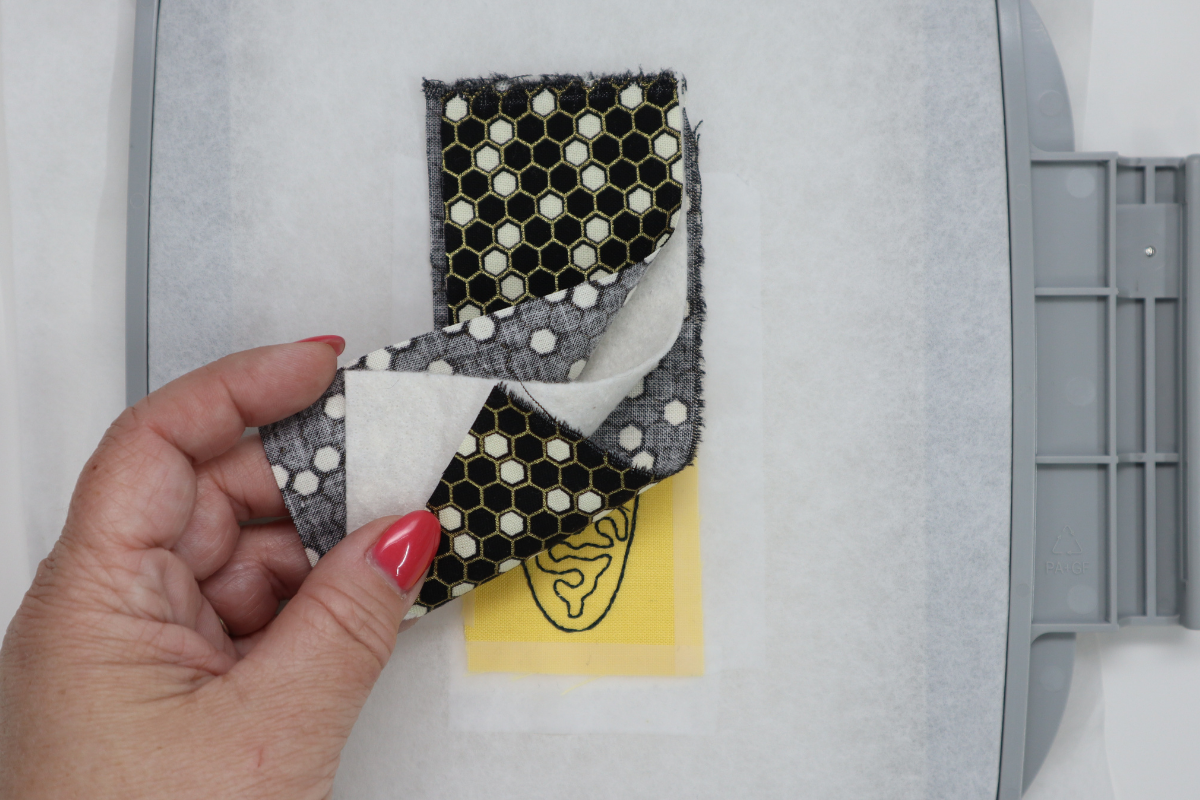
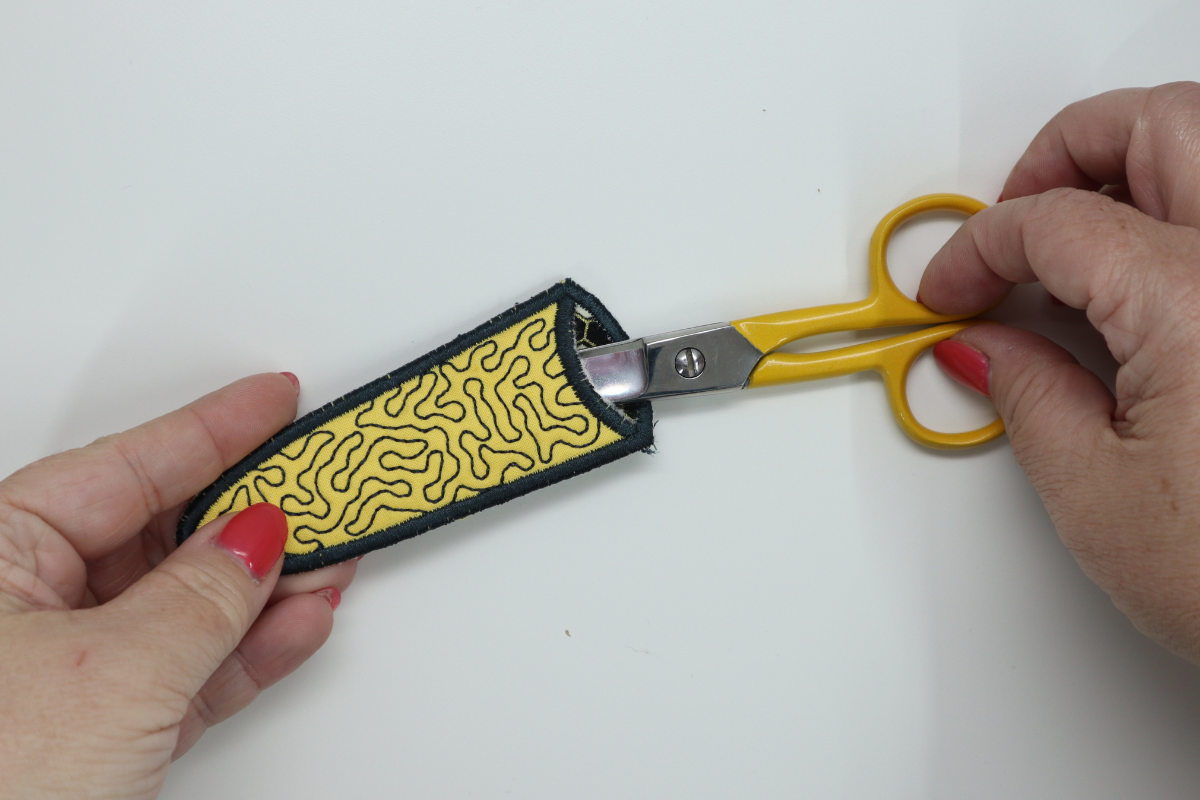
- Insert the hoop into the machine and sew stitch #2, the secure stitch and quilting stitch. Remove the hoop from the machine and place the hoop wrong side facing up. With 4.5″ Duckbill Applique Scissors cut away the Front Lining along the top. Do not cut the sides or bottom.

- Turn the hoop to the right side facing up and with the 4.5″ Duckbill Applique Scissors cut away the Front/Thin Batting along the top. Do not cut the sides or bottom.
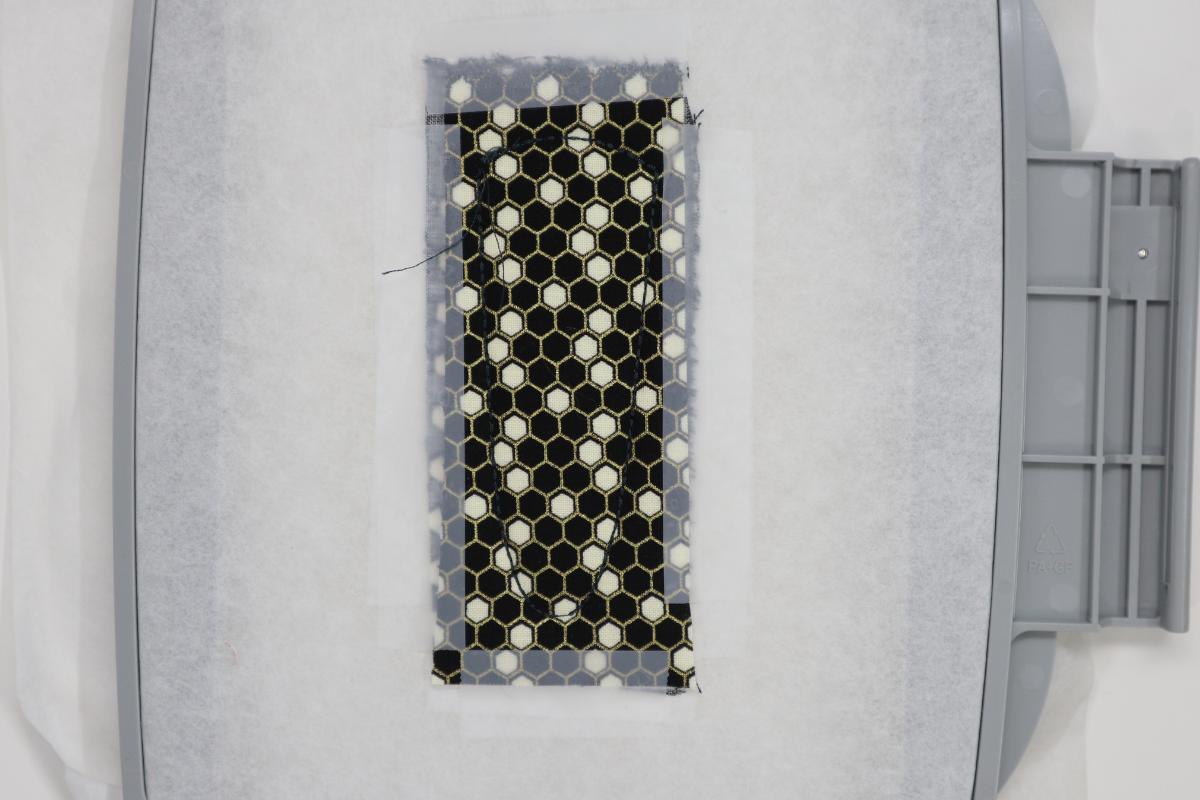
- Insert the hoop into the machine and sew stitch #3, the top satin stitch.
- Remove the hoop from the machine and place the hoop wrong side up. Place the Back Lining wrong side up with the Thin Batting on top of it and the Back right-side up covering over the stitching. Place tape on the top, bottom, and two sides to secure in place.
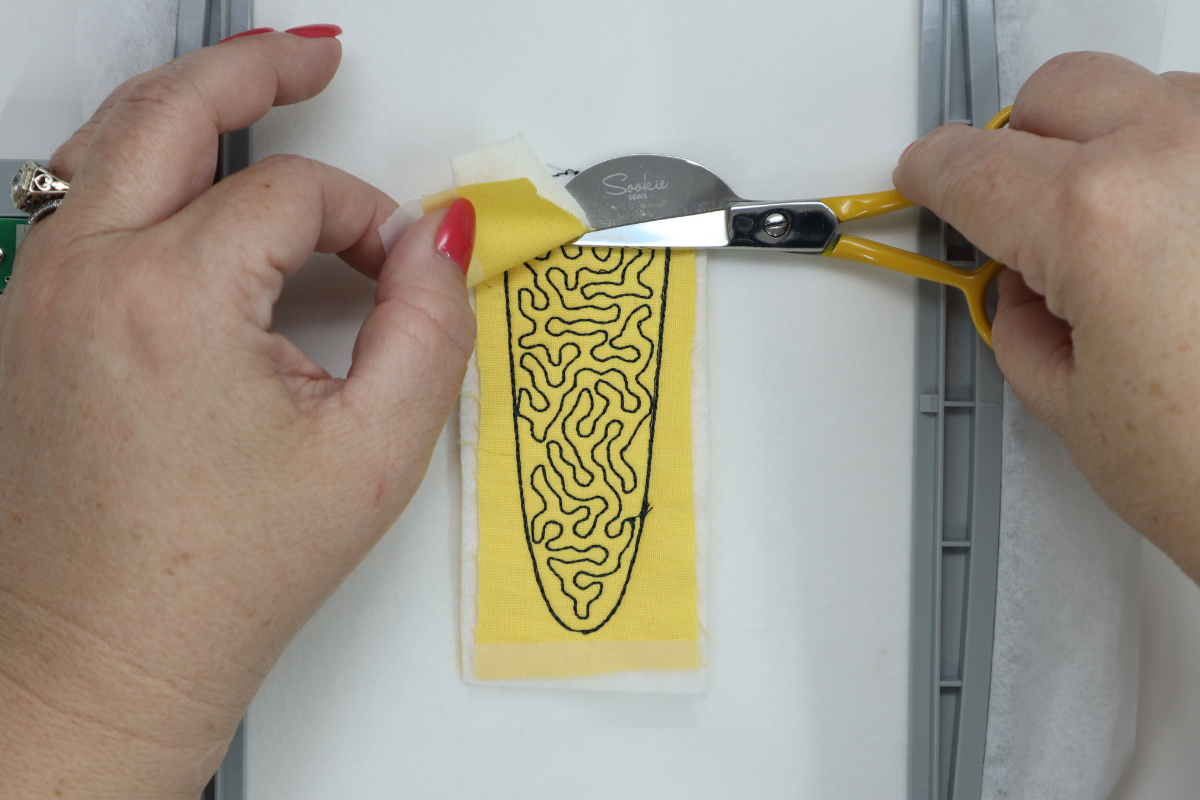
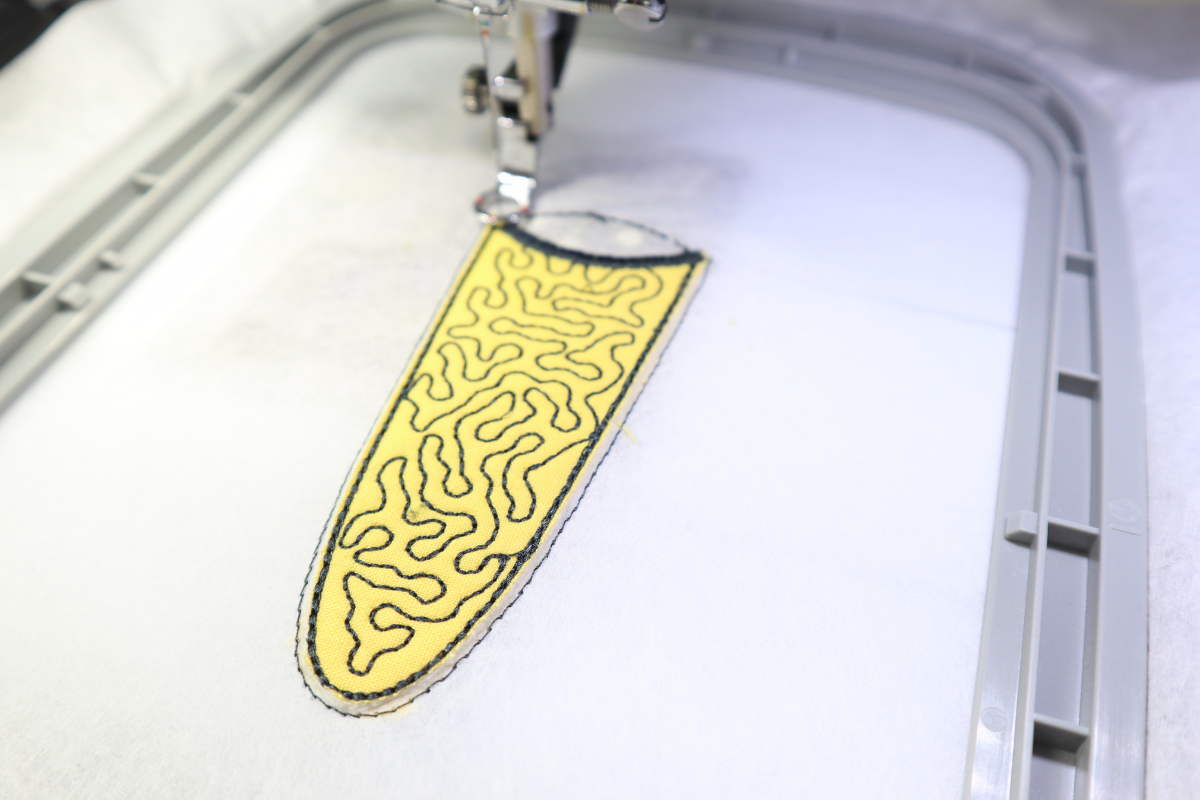
- Insert the hoop into the machine and sew stitch #4, the Back to Front secure stitch. Remove the hoop from the machine and place the hoop wrong side facing up. Remove the tape. With the 4.5″ Duckbill Applique scissors cut around the outside of the stitching cutting as close to the stitching as possible without cutting the stitching.
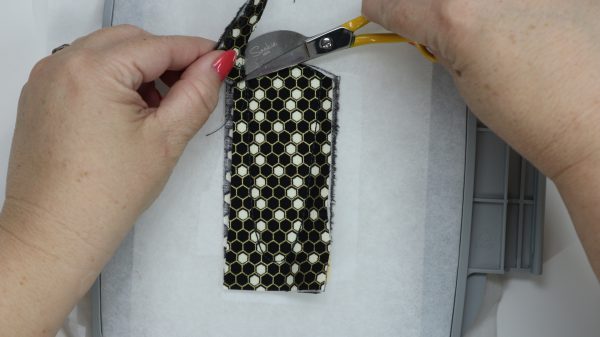
- Turn the hoop to the right side facing up. Remove the tape and cut around the Front materials side and bottom as close to the stitching as possible without cutting the stitching.

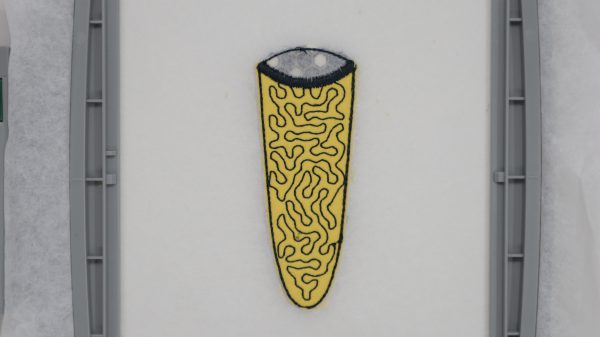
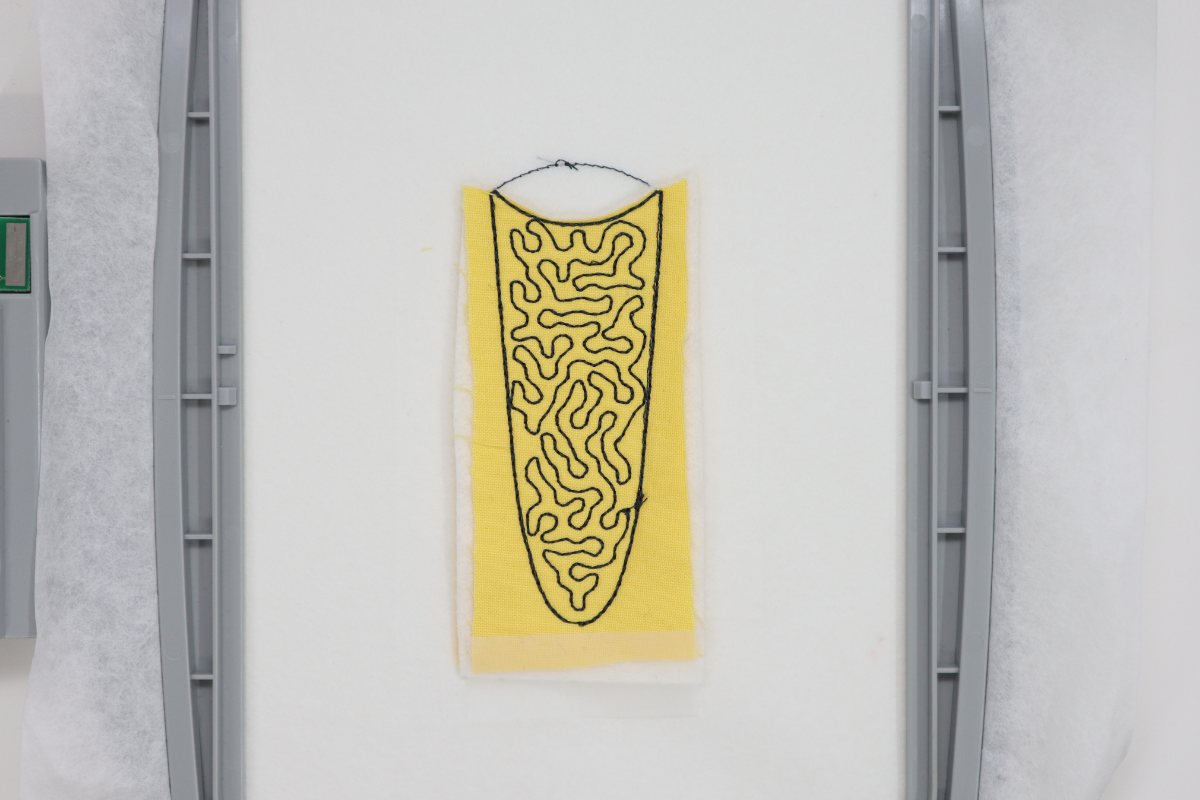
- Insert the hoop into the machine and sew stitch #5, the final outside sating stitching.
- Remove the hoop from the machine. Gently remove the scissor case from the stabilizer by pushing into the case, holding the stitches and removing the stabilizer. With the Angled Precision Tweezers, remove the center top area with stabilizer to reveal the opening for the point of the scissors to go into.

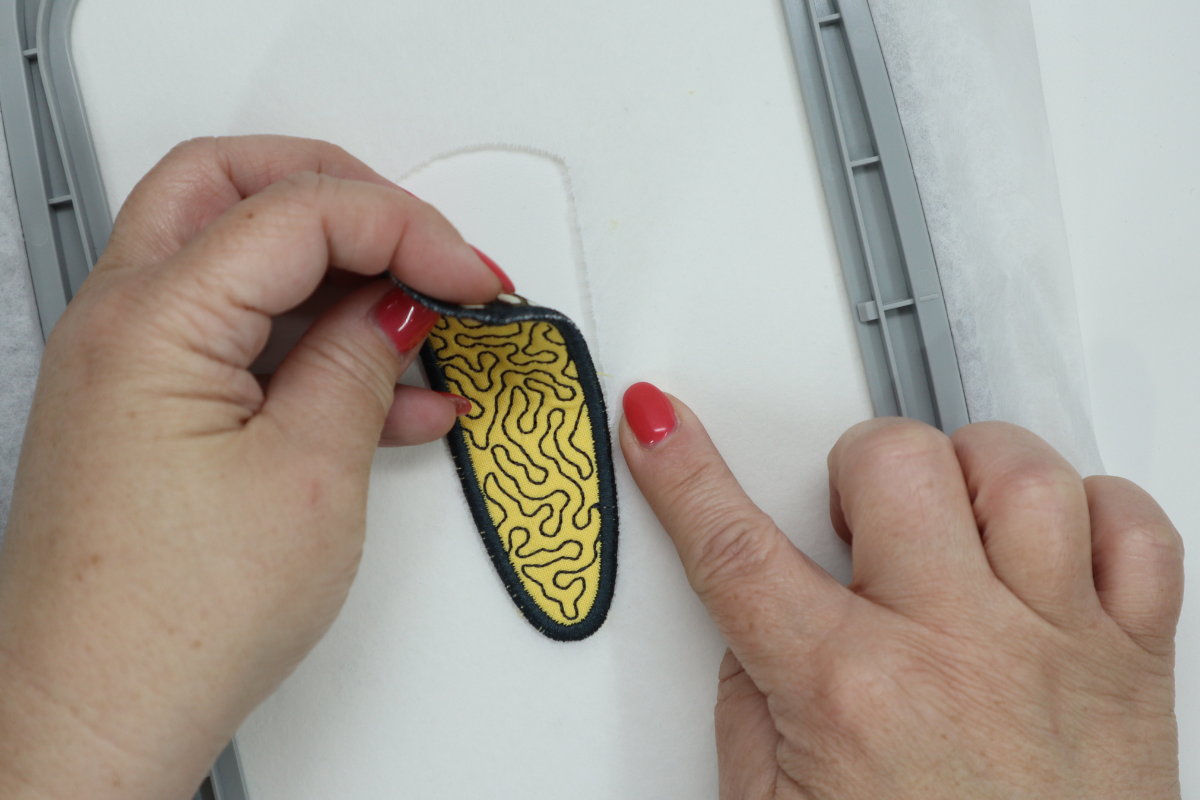


- Slip scissors into the opening and you are finished!

I hope you enjoyed this easy In the Hoop machine embroidery project and make many of these. When you make yours, please snap a shot and tag me @SookieSews and @BERNINAUSA!!
Used Products

What you might also like


2 comments on “How to Make a Scissor Case In the Hoop”
-
-
Made several of these in an afternoon! Love it!!
Leave a Reply
You must be logged in to post a comment.

This was fun to make, though I substituted an initial in place of the stippling. Not sure where to post the photo, though.