How to Make an Instagram Pillow
I’ve carried a camera with me just about everywhere for most of my life. At first was one of those long 1990s 110 cameras that sort of looked like hand-held tape recorders. Then my dad gave me his 35 mm and my love for photography grew. After that I got a Polaroid and became addicted to being able to see the photo I’d taken right away. Well, almost right away. I was one of those impatient people who would shake and wave the photo until the image appeared a mere 90 seconds later. My first digital camera solved my anxious shaking problem because now I could see the photo right away. The only bummer was that my digital camera was an SLR and it was heavy and I was always telling people to hold on just a second while I adjusted the light settings. Then came the iPhone and I finally met my camera soulmate. Even if I didn’t feel like lugging around my heavy DSLR with me, I always had my phone with me. My iPhone solved all my photo-obsession problems because it allowed me to not only take high-quality crisp photographs but also edit them immediately with an app like Instagram and make them look like Polaroids or blur the background for a SLR-ish effect.
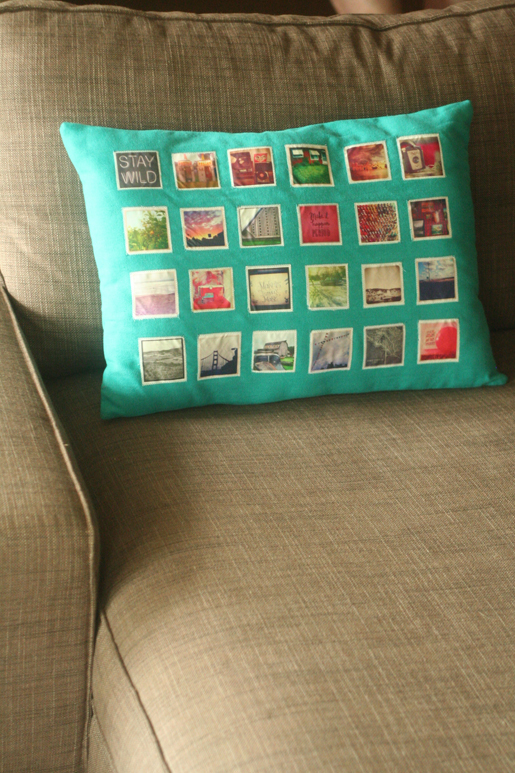
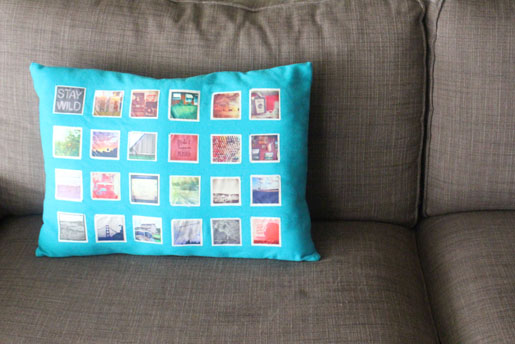
A few weeks ago I was looking through all my Instagram photos and feeling a bit sad that they only existed on my phone. I thought about printing them out and putting them in a photo album. BUT . . . how often do we sit down at the dining room table and pore over photo albums for hours? I wanted to create something with my photos that I could look at everyday. Recently, I bought a new couch that’s quite a bit bigger than my old one. I had a few pillows for it but they were plain and boring. I married my need to turn my Instagram photos into functional art and my desire to spruce up my new couch and I came up with this Instagram photo pillow DIY project. You don’t have to use Instagram photos. In fact, you can scan in photos of your family through the years and make an awesome present for your parents or another family member. I was thinking about how cool it would be to use photos of a couple and then give it to them for a wedding or anniversary gift. Now that I made this one, my mind is swimming with ideas for future pillows featuring themed photographs. The satisfaction isn’t as instantaneous a watching a Polaroid photo develop before your eyes, but unlike my Polaroid pictures that sit in a rarely-viewed photo album, I look at this pillow everyday.
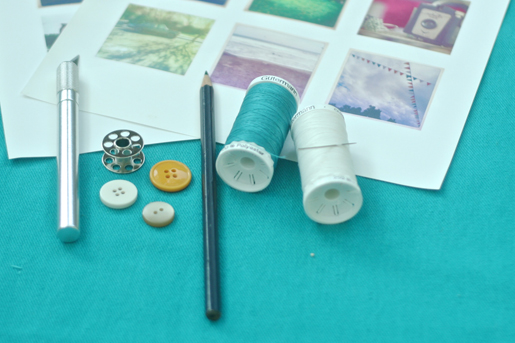
Supplies
- Ink-jet printer
- 2 sheets of ink-jet transfer paper
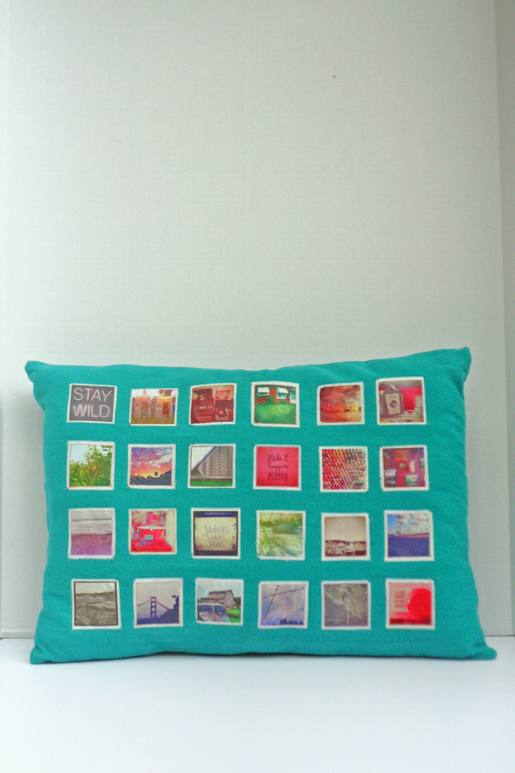
- 24 Instagram images or photographs that are square
- 1 piece of fabric for the front of the outside of your pillow, 17 x 22 inches (rectangle A)
- 2 pieces of fabric for the back (top and bottom) of your pillow, each 17 x 14 inches. (rectangles B and C)
- 2 pieces of white cotton fabric, each 8-1/2 x 11 inches
- Pillow stuffing
- 3 buttons for the pillow back closure
- Thread to match your fabric
- Scissors
- Hand sewing needle
- Ruler
- Pen
- Spray adhesive
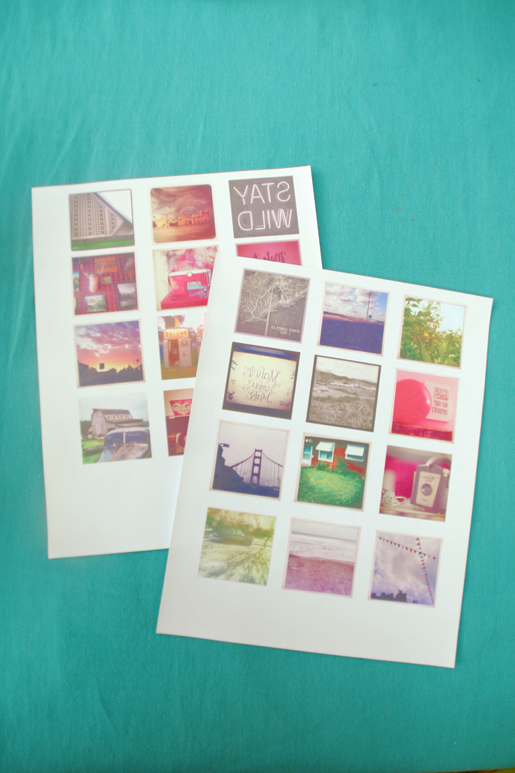
Step 1) Prepare your photos.
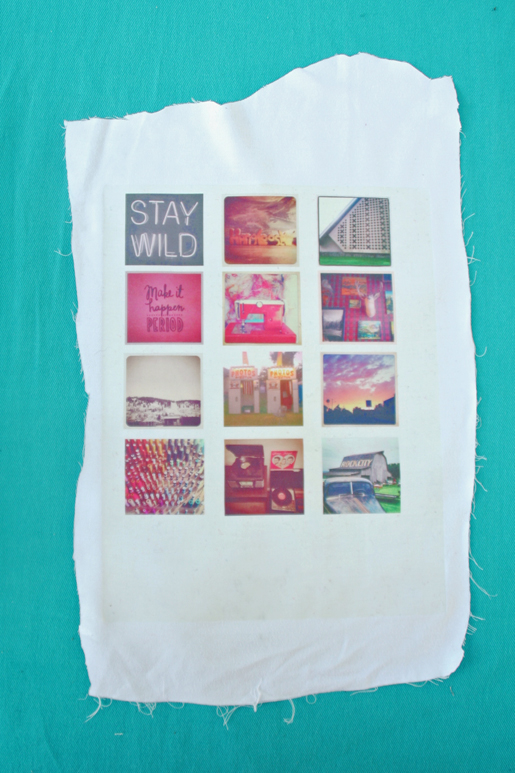
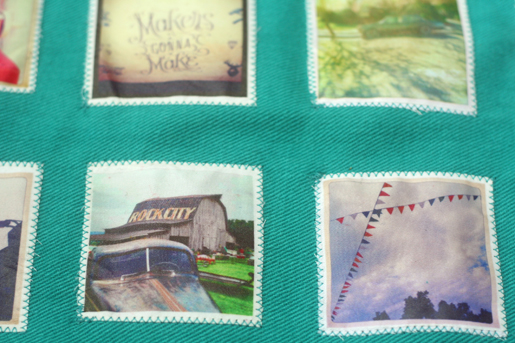
Size your Instagram images in a photo editing program like Photoshop so they’re in contact sheet form and each is 2.5 x 2.5 inches. Flip each image horizontally (side-to-side) so they’ll be reversed when you print them. Print out the contact sheets of your photo images on ink-jet transfer paper.
Iron the printed ink-jet sheets into the pieces of white fabric according to the ink-jet instructions.
Tip: Press hard and use both hands.
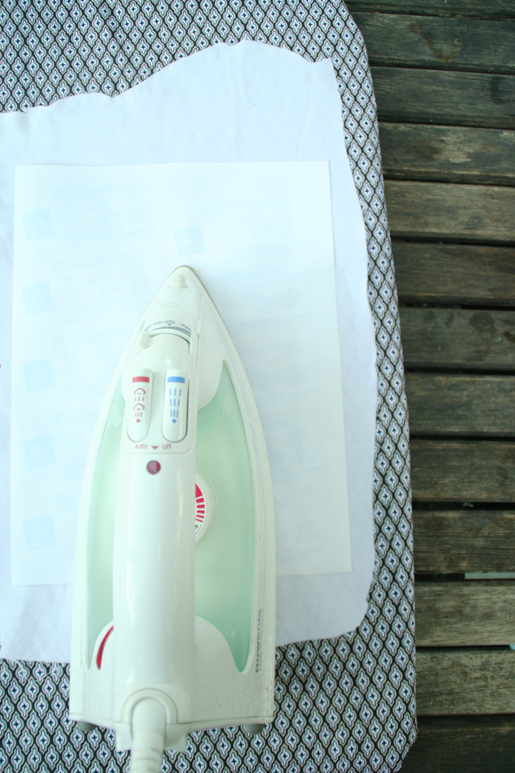
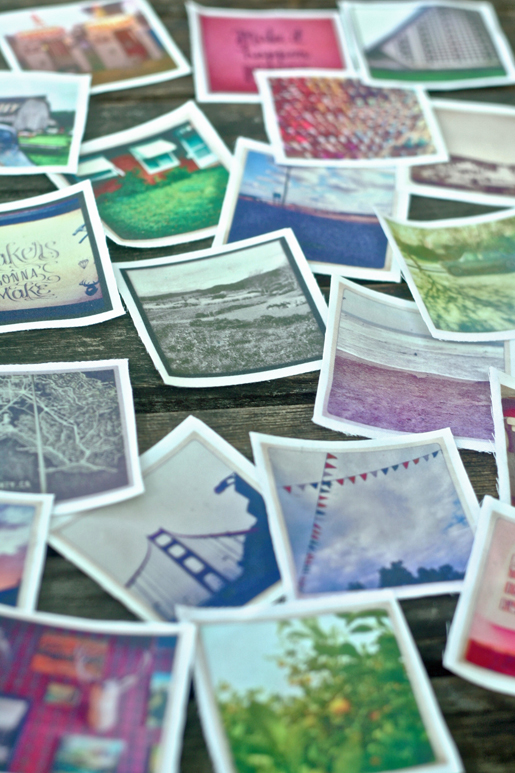
Wait for the fabric pieces with the sheets adhered to them are cool, then carefully peel back the sheets.
Cut out each image, leaving a 1/8 inch border around all sides.
Step 2) Create the Instagram pillow front.
Decide on the placement of the images on fabric piece A (this will be the front of your pillow), placing them in a pattern of 4 up/down and 6 across with about 1/2 inch between the top, bottom and sides of each photo.
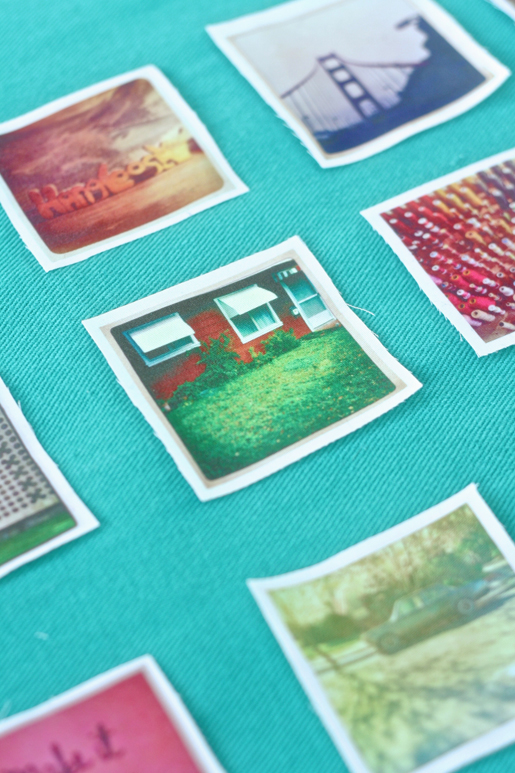
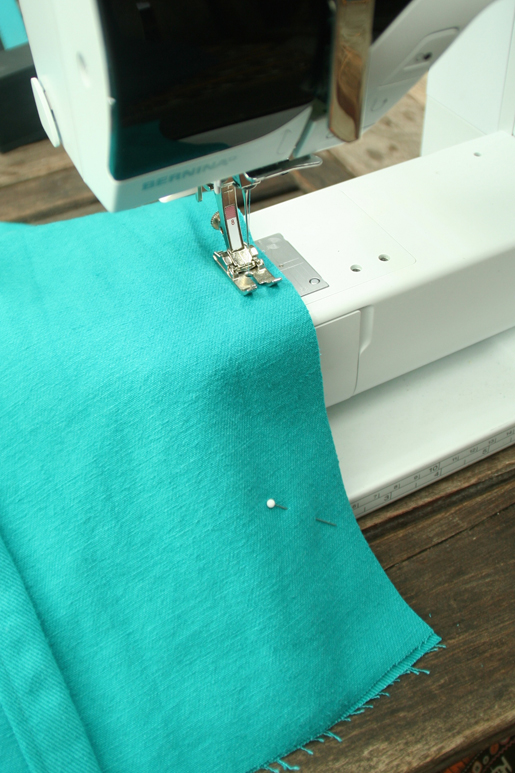
Adhere the images to your pillow by spraying the backs with spray glue and placing them back in position on the pillow front.

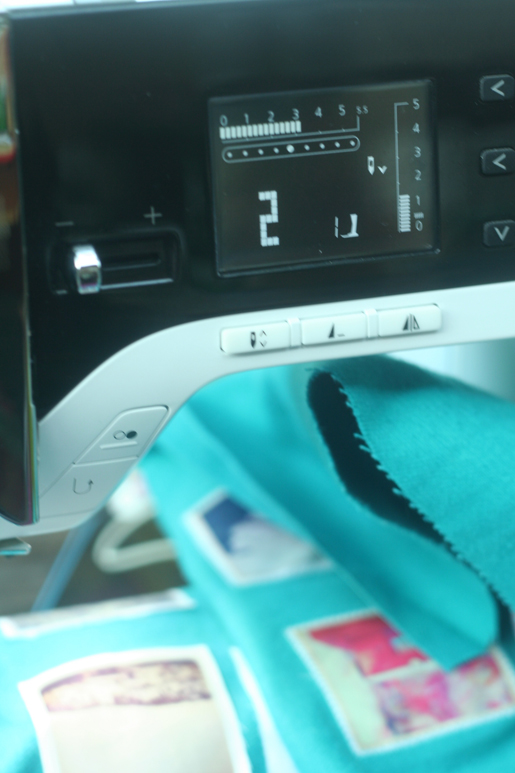
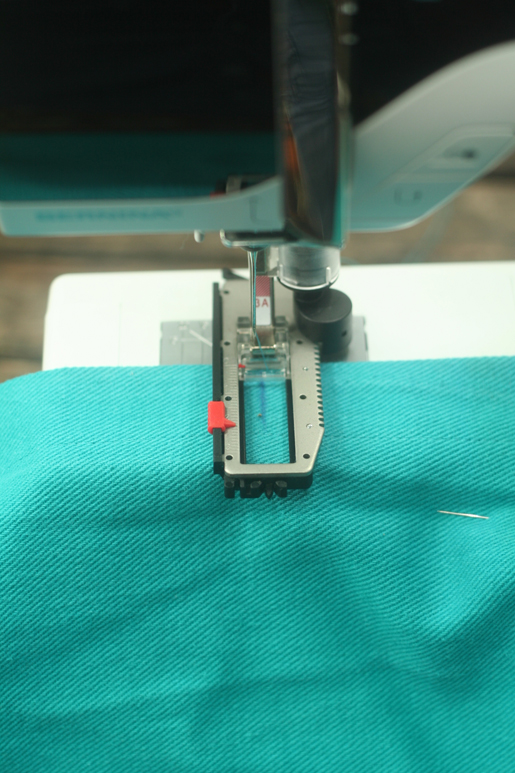
Using a zig-zag stitch that’s about 3 mm wide and 1.5 mm long, applique the photo images onto the pillow.
Step 3) Make the pillow back.
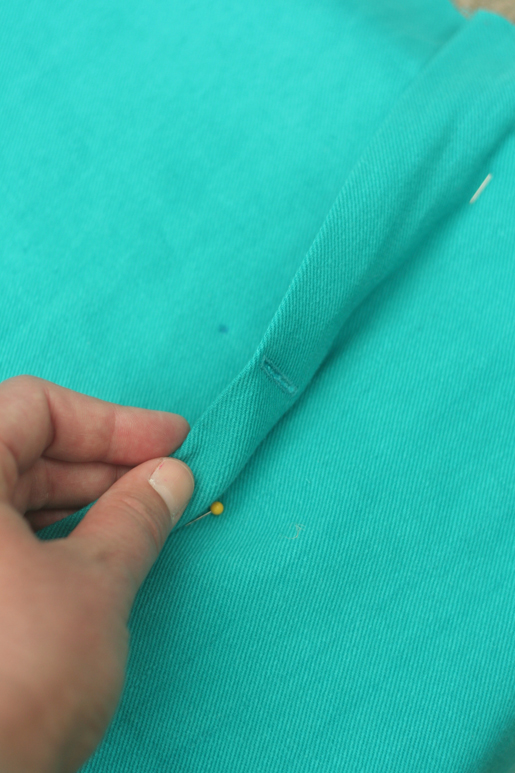
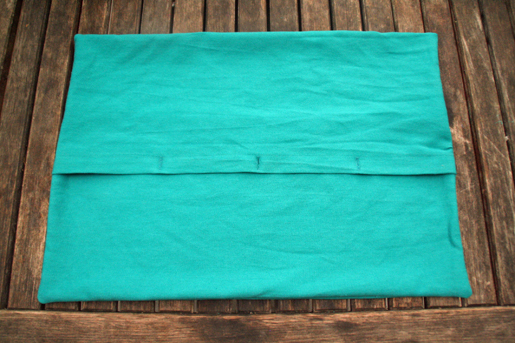
Fold over 1 inch along the upper edge of your B piece of fabric (part 1 of the pillow back). Iron the fold.
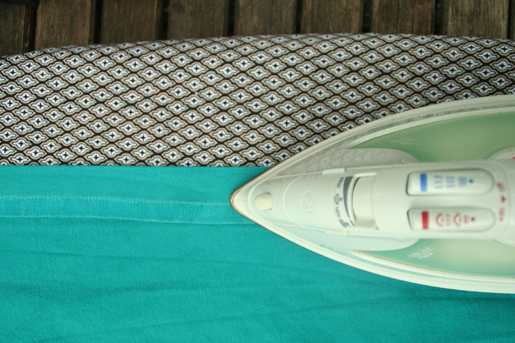
Fold it over again and press. Hem it using a straight stitch.
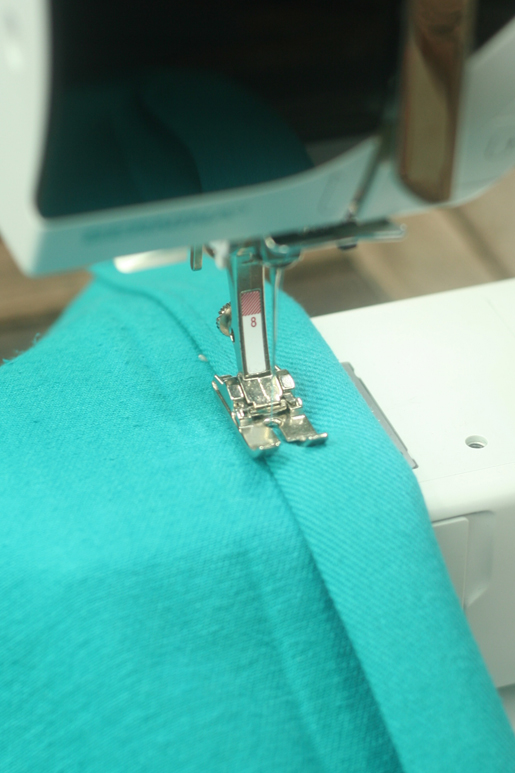
Repeat for the lower edge of piece C (part 2 of the pillow back).
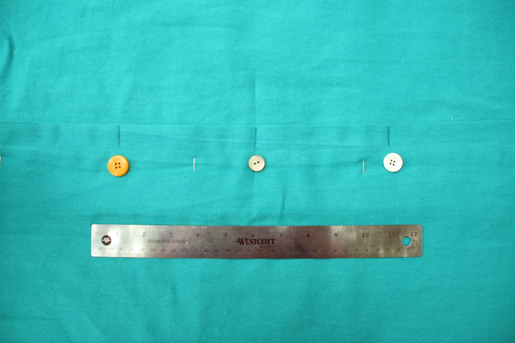
Create buttonholes on the hemmed section of the bottom piece of fabric (B) for the pillow back. For button placement: I started by putting the middle buttonhole in the middle of the pillow and then put the other ones about 4 inches to the right and left.
Tip: Use the automatic buttonhole feature if it’s available on your machine.
Use an X-acto knife or buttonhole cutter/chisel to open the buttonholes.
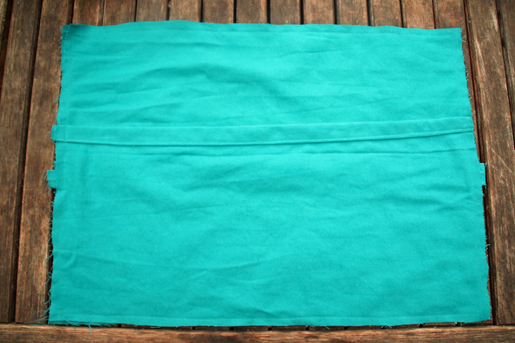
Lay down the back pieces (B and C) so they overlap and are the same height as the pillow front. Then mark the spots on piece C where you’ll need to place the buttons.
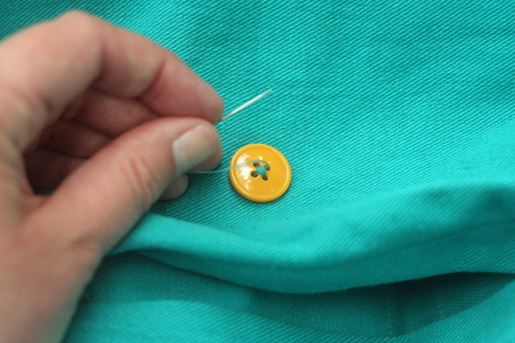
Hand sew the three buttons on piece C.
Step 4) Assemble the pillow.
Place piece A (front of the pillow) on the table or flat surface with the photos facing up.
Button together the two back pieces (B + C) on top of A, right side down. Leave the edges unbuttoned; you’ll need this opening to turn the pillow right side out later. If needed, trim the top and/or botto
m edges of the pillow back to match the pillow front. Pin all the pieces together.
Sew across all four edges of the pillow.
Turn the pillow right way out.
 Stuff the pillow and button the buttons.


What you might also like

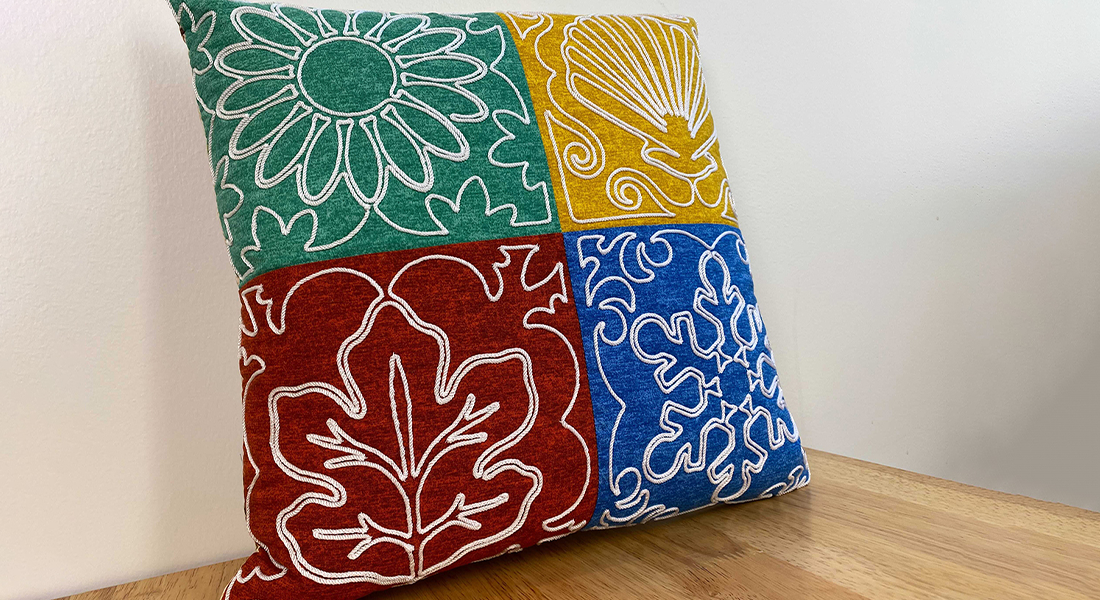

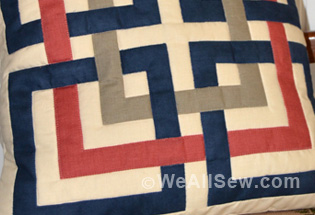
![Is that big, bold scrap of fabric staring at you? This quilt square is designed to let a large print fabric shine. This simple block is quick to make and easily stitched into a pillow. With a bit more fabric you can turn it into a placemat or table runner. The perfect project for turning fabric scraps into something bold and beautiful. Geometric Quilt Block Pillow Supplies Large scraps or fat quarters of 100% cotton quilter's fabrics: One large print One light solid or small print One medium solid or small print One dark solid or small print 1/2 yard of white cotton fabric for the pillow lining 1/2 yard of fabric for the pillow back Coordinating thread 14" square pillow form Universal or Sharp needle, size 75/11 1/4" foot (BERNINA Patchwork Foot with Guide #57) Straight stitch foot (BERNINA Straight Stitch Foot #13) Zigzag foot (BERNINA Reverse Pattern Foot #1) or overlock foot (BERNINA Overlock Foot #2) Rotary cutter and self-healing cutting mat Clear acrylic gridded ruler Download and print the Geometric Quilt Block Pillow Cutting and Piecing Diagrams: [download id="90"] Step 1) Cut the fabric pieces. Accurate cutting helps avoid crooked, puffy, or uneven seams in your quilt block. Use a self-healing mat, a clear acrylic gridded ruler, and a rotary cutter to cut the pieces for your quilt block. Rotary cutters Rotary Cutting Tips Self-healing mats come in different sizes. 24" x 36" is a good size to have, but if you don't have a dedicated sewing space or don't plan to use it often, try an 18" x 24" mat instead. Acrylic rulers also come in many shapes and sizes. A standard 6" x 24" ruler is a good start, and I've also found a 12-1/2" x 12-1/2" square ruler to come in very handy. Rotary cutters are measured by the size of the circular blade in millimeters. A 45 mm rotary cutter is perfect for making the kind of straight cuts needed for this project. Use the grid on your cutting mat to help square up fabric pieces when needed, but when measuring to cut the pieces be sure to use the gridlines on the acrylic ruler. Hold the ruler firmly on top of the fabric, and use a steady, firm, pressing motion when cutting with the rotary cutter. Cut one of each pattern piece from the corresponding fabrics (also see downloaded Cutting Diagram): Piece #1 - Light solid or small print, 4" x 3" Piece #2 - Dark solid or small print, 4" x 5" Piece #3 - Light solid or small print, 4" x 2-1/2" Piece #4 - Large print, 9-1/2" x 9-1/2" Piece #5 - Light solid or small print, 2-1/2" x 9-1/2" Piece #6 - Dark solid or small print, 14-1/2" x 2-1/2" Piece #7 - Medium solid or small print, 14-1/2" x 3-1/2" Step 2) Piece the block. Set your sewing machine for a straight stitch about 2.5 mm long. Attach a quarter-inch foot, such as BERNINA Patchwork Foot with Guide #57, to your sewing machine. The blocks will be sewn together using a 1/4"-wide seam allowance. Stitching an accurate 1/4"-wide seam will help your block come together with nice, straight seams and avoid pieces not fitting together as you sew on. Geometric Quilt Block Pillow Patchwork Piecing Tips Us a quarter-inch foot to help you keep the correct seam allowance width. The BERNINA Patchwork Foot #37 is designed specifically so that following the edge of the foot will create a 1/4"-wide seam allowance. BERNINA Patchwork Foot with Guide #57 is similar to foot #37, but adds a metal guide at the side of the foot to help you like up your fabric piece exactly at the edge of the foot. Attach a seam guide to the bed of your sewing machine along the 1/4" seam allowance mark on your stitch plate, then place the edges of your fabric pieces against the guide as you sew. Alternatively, place a piece of blue low-tack painter's tape along the 1/4" seam allowance mark on your stitch plate as a guide for your fabric. Piecing Diagram Geometric Quilt Block Pillow Start by stitching Piece #1 to Piece #2 along one 4" edge. Press the seam allowances to one side. Next, sew Piece #3 to Piece #2 along one 4" edge as shown in the diagram; press after stitching. Geometric Quilt Block Pillow Continue adding pieces to the block as shown in the diagram, pressing each seam as you go. Tip: When pressing seams, be sure to press DOWN with the iron as opposed to "ironing," or pushing the iron back and forth over the seam. Ironing (back and forth motion) can cause straight seams to go crooked. Pressing straight up and down with the iron will help your seams stay nice and straight. Press all seams again from the back of the block when finished. Geometric Quilt Block Pillow The finished block should measure 14-1/2" x 14-1/2". Geometric Quilt Block Pillow Step 3) Construct the pillow cover. Cut one 14-1/2" x 14-1/2" square of fabric for the pillow lining. Cut two 11" x 14-1/2" rectangles of fabric for the pillow back. Create a 2" hem along one edge of each 11" x 14-1/2" pillow pocket piece: Turn under 1" along one long edge; press. Turn under an additional 1"; press. Geometric Quilt Block Pillow Topstitch close to the inner edge of the folded hem with a straight stitch, using either a multi-purpose foot or a straight stitch foot. Geometric Quilt Block Pillow Layer and pin the pieces of the pillow together: Begin with the 14-1/2" square of white cotton for the lining. Add the finished patchwork block, right side up, matching all edges. Add one pocket pillow back, right side down, matching the raw edges. The finished hem will be about 5" from the other end of the pillow. Add the other pocket pillow back, right side down, on the opposite edge. The hemmed edges will overlap. Geometric Quilt Block Pillow Pin around all four edges of the pillow. Set your sewing machine for a straight stitch of 2.5 mm long. Stitch around all four sides of the pillow using a 1/2"-wide seam allowance. Trim all seam allowances to 1/4". Attach an overlock or zigzag stitch foot to your sewing machine. Set your machine for a zigzag or overlock stitch and sew over the raw edges to keep them from unraveling. Geometric Quilt Block Pillow Turn the pillow cover right side out, gently pushing each corner from the inside to turn it. Insert the 14"-square pillow form through the opening in the back of the pillow cover. If needed, use a little fiberfill to help fill out the pillow corners. Geometric Quilt Block Pillow Geometric Quilt Block Pillow](https://weallsew.com/wp-content/uploads/sites/4/2014/01/Geometric-Quilt-Block-Pillow-WeAllSew.jpg)
4 comments on “How to Make an Instagram Pillow”
-
-
This is a great idea. I cannot wait to get started on this project with wonderful photos I have of Montana. I’m going to make two with different photos. Love, love love it!
-
Definitely not a good idea to pour anything over photo albums! (The word is spelled “pore.”)
Inkjet-printable fabric mounted on paper backing is readily available to print the photographs directly without going through the three-step process of reversing the images, printing them on transfer paper, and ironing them onto fabric.
Leave a Reply
You must be logged in to post a comment.

Love it! So creative.