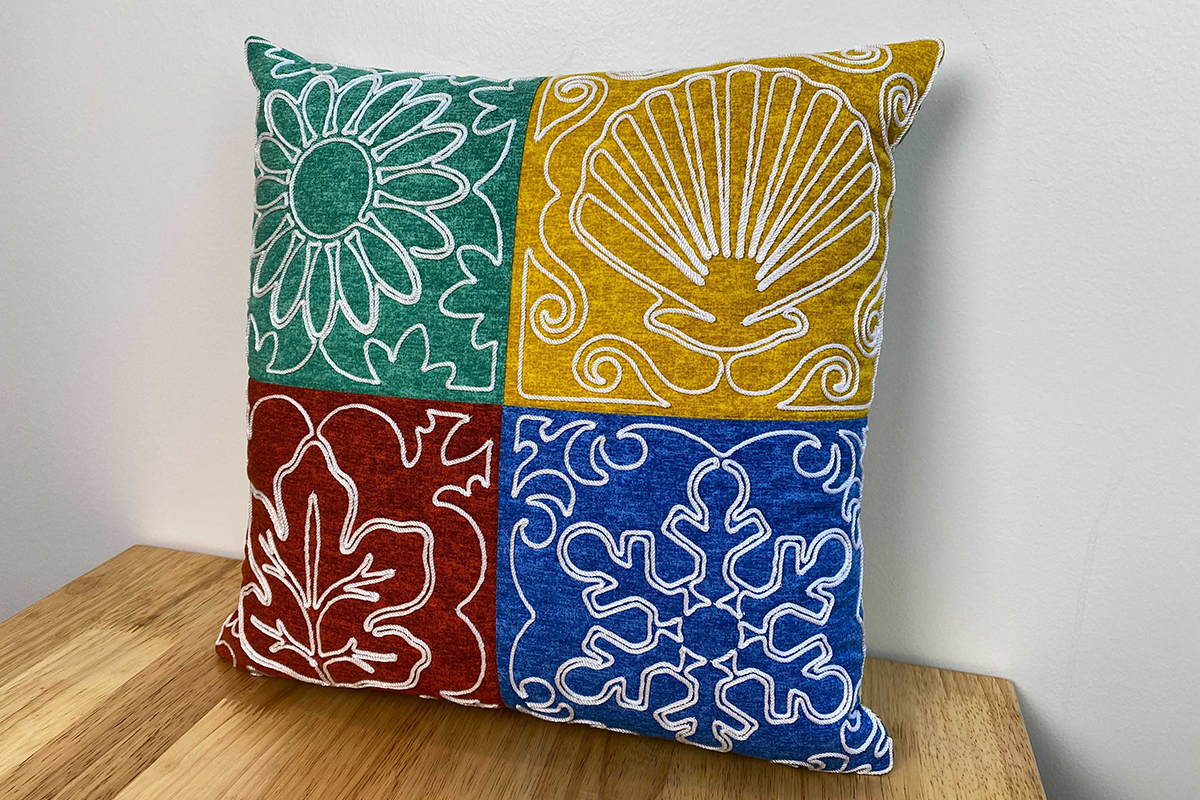
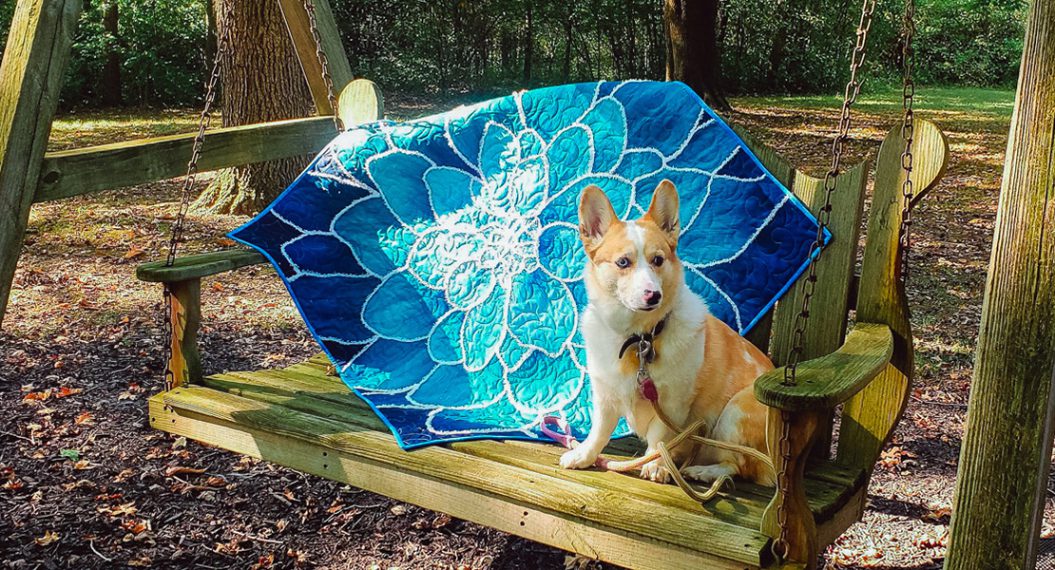
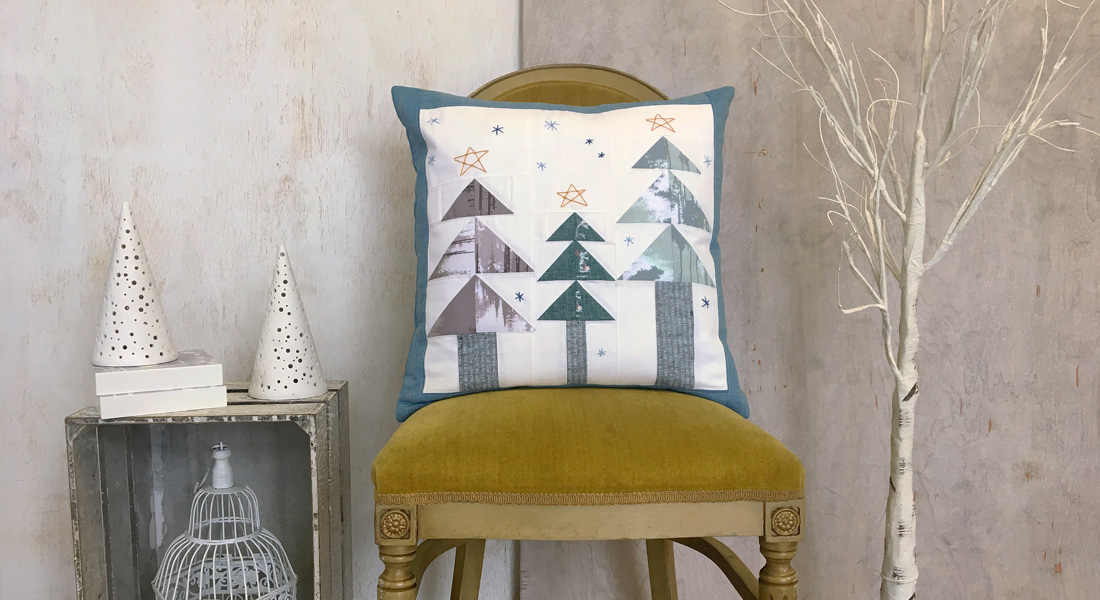
How to Make an All Seasons Couched Pillow
Quilting in the hoop is a fun and fast way to finish a quilt and there are some beautiful designs just waiting to be stitched. You can add some texture by converting the design to a couched quilting design, scale back the size of the project, and presto…you have a gorgeous designer pillow!
BERNINA Software is a great tool for designing this pillow. You can design the layout, test out colors and preview design placement before you even start stitching.
For this project, I used my Jumbo Hoop and the largest of the embroidery designs from the OESD Collection Four Seasons Quilting #12860 with a minor size adjustment. If you do not have a Jumbo hoop, use one of the smaller designs. Remember that the couching foot is bigger than the regular embroidery foot, so the working hoop space will be smaller.
The embroidery collection used has both single run and triple run designs. Be sure to use the single run designs for the embroidered couching.
Seam allowances are ¼”.
Supplies to Make an All Seasons Couched Pillow
- 4 – 8 ½” Solid Cotton Fabric Squares in 4 seasonal colors (I used Cotton Shot by Amanda Murphy for Benartex)
- 2 – 18” Cotton Batting Squares (I used Quilters Dream Select)
- 1 – 18” Cotton Fabric Square for pillow back in a coordinating color (I used a print from my stash)
- OESD Polymesh Cutaway Stabilizer – 20” wide
- 505 Temporary Adhesive Spray
- Frixion Pen
- Mettler Silk Finish 50 wt Cotton Thread
- Clear Monofilament Thread (I prefer the YLI brand)
- La Espiga Nylon Cord (I used white)
- Embroidery thread to match the cord (I prefer Isacord)
- Eversewn Polyester Bobbin Thread
- BERNINA B 880 PLUS
- Jumbo Hoop
- BERNINA Feet:
- 9 mm Patchwork Foot #97D
- Edgestitch Foot #10D
- Free-motion Couching Foot #43C
- Overlock Foot #2A
- Quilting foot of choice, such as the BERNINA Stitch Regulator, Adjustable Ruler Foot #72 or the Walking Foot #50
- Invisible Zipper Foot #35
- OESD Four Seasons Quilting #12860
- BERNINA Embroidery Software 8.2
- 18-22” Invisible Zipper (I used a 22” zipper)
- Basic sewing and embroidery supplies, including a chenille needle
- 16” pillow form
Designing the All Seasons Couched Pillow
Before I committed to cutting and stitching, I used a part of the BERNINA Embroidery Software called Quilter. You will find it in the Applications tab under Toolboxes. Click on this and a new window will open. There is a separate Help Manual that is very useful. You will find this at the top under “Help”.
![]()
Now click Quilt Layout. This will open a new window where you can set the size of your blocks, the number of blocks, sashing and borders. Change the settings to Blocks Across: 2; Blocks Down: 2; Width: 8”; Height: 8”. Click OK.

Let’s add some color to the blocks. If the Library Docker is not showing on the right side of the screen, click on the Library icon in the left tool bar. In the Library Docker, click on Colors.
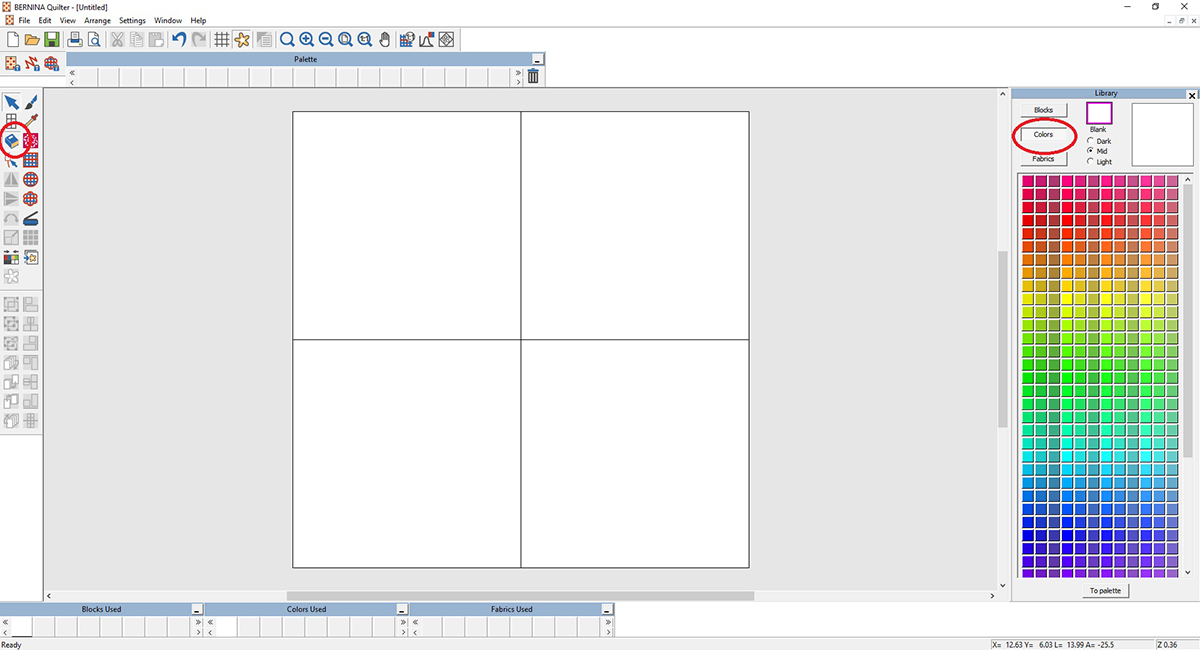
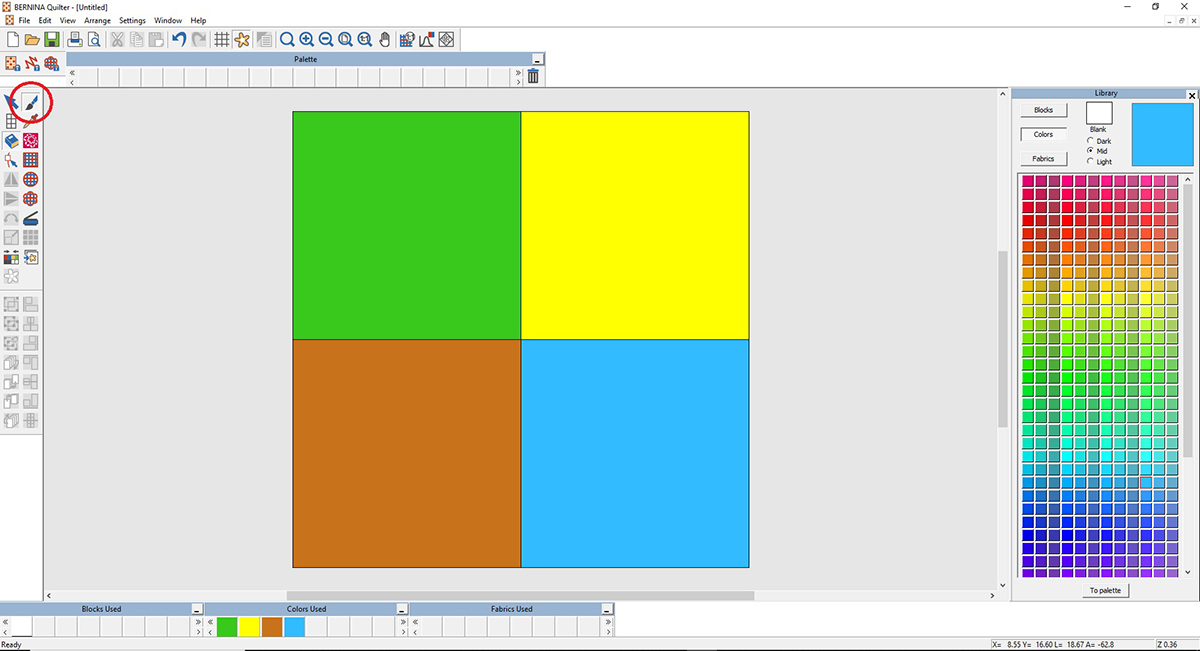
Next, click on the Paintbrush in the left toolbox. Click on a green color in the Library and then click on the upper left square of your quilt design. It will turn this block green. Click on a yellow color and then on the upper right square. Repeat this process to add a brown square and blue square. Each of the colors will represent a season. If you have picked out different colors for your project, use those!
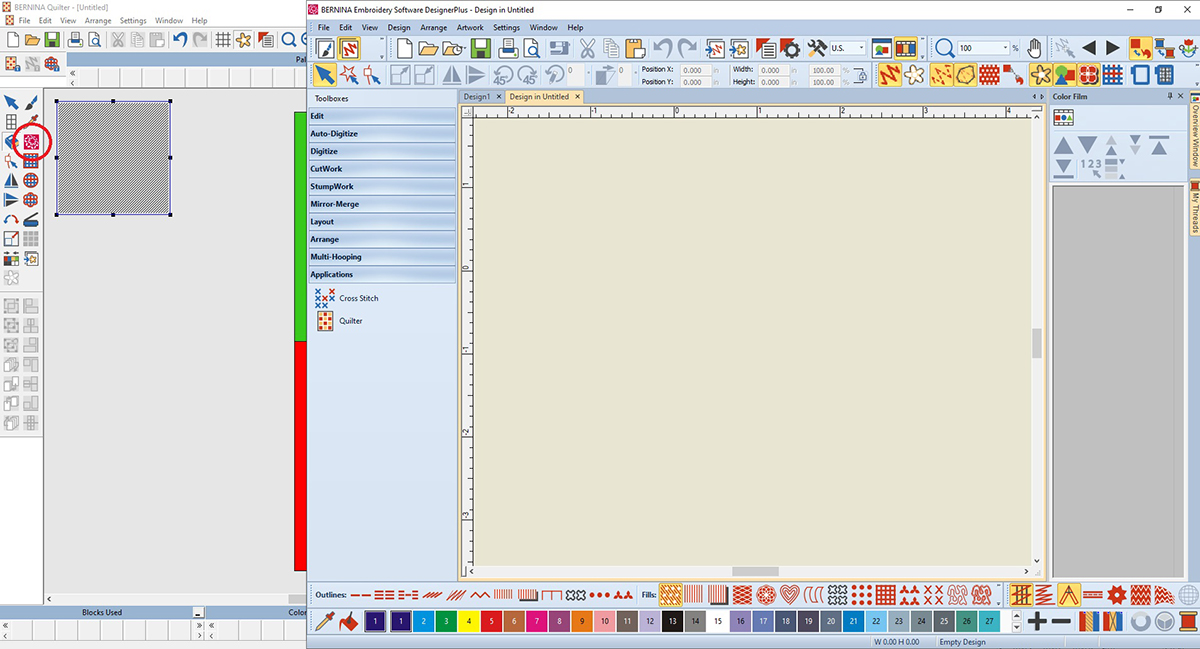
Now it’s time to place the embroidery designs. This is a great way to preview how the designs will look on your quilt! In the left toolbox, click on the Embroidery Window icon. The embroidery side of the software will open. Notice that you can still see a part of the Quilt Program and that there is a square in the quilt program that is highlighted. This is where your embroidery design will appear when you are ready to place it on your quilt.
Select Insert Embroidery. Navigate to where you have saved embroidery collection #12860 Four Seasons Quilting. Click on 12860-07L, the large flower. Click Open. The design will open in the Embroidery Program. This design is 8” square. If you are using a smaller hoop, you will want to select a smaller design. You will also see the embroidery design show up in the highlighted box in the Quilter Program.
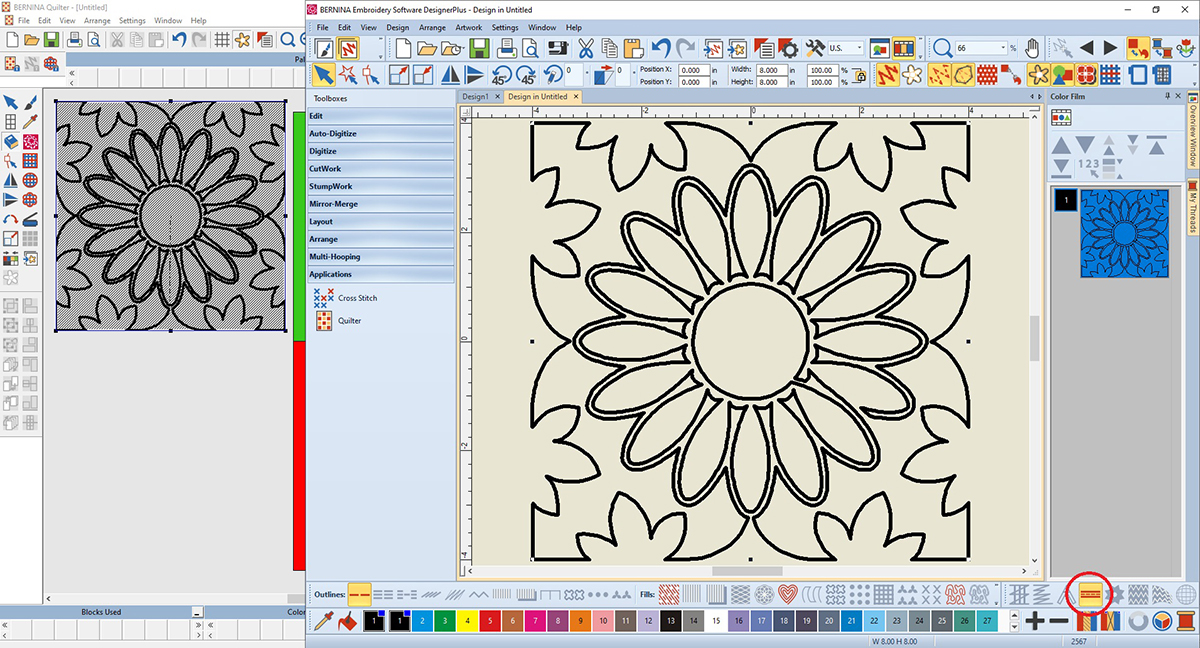
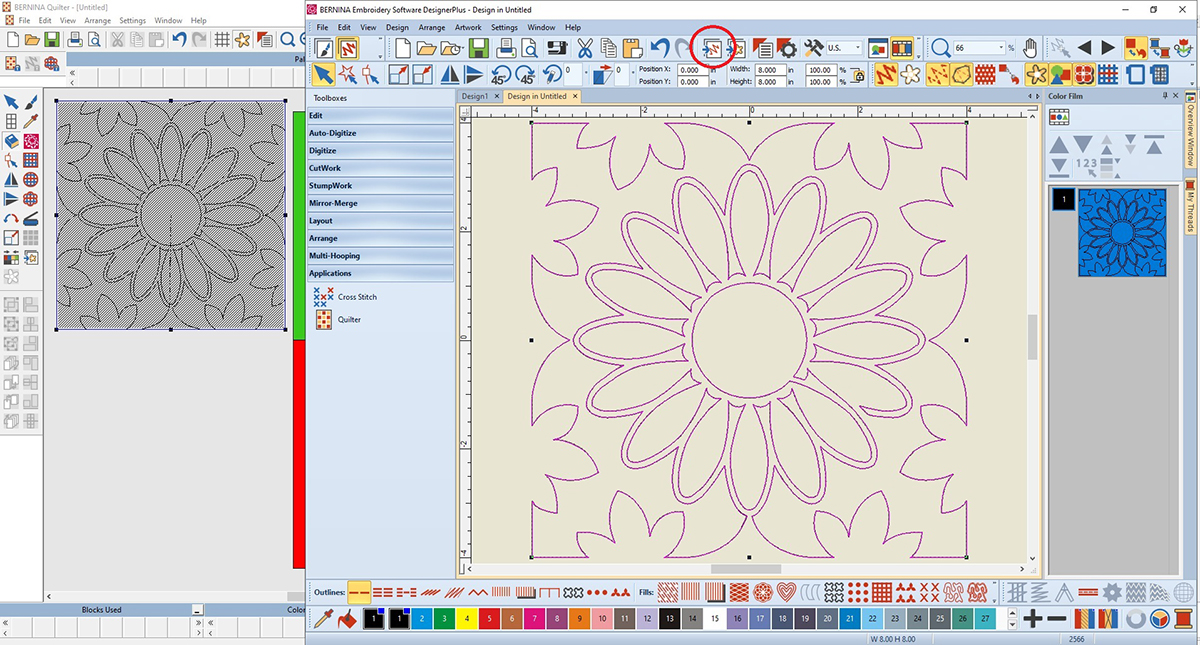 Let’s do some editing. While the design is selected, click on the Couching icon at the bottom of the screen.
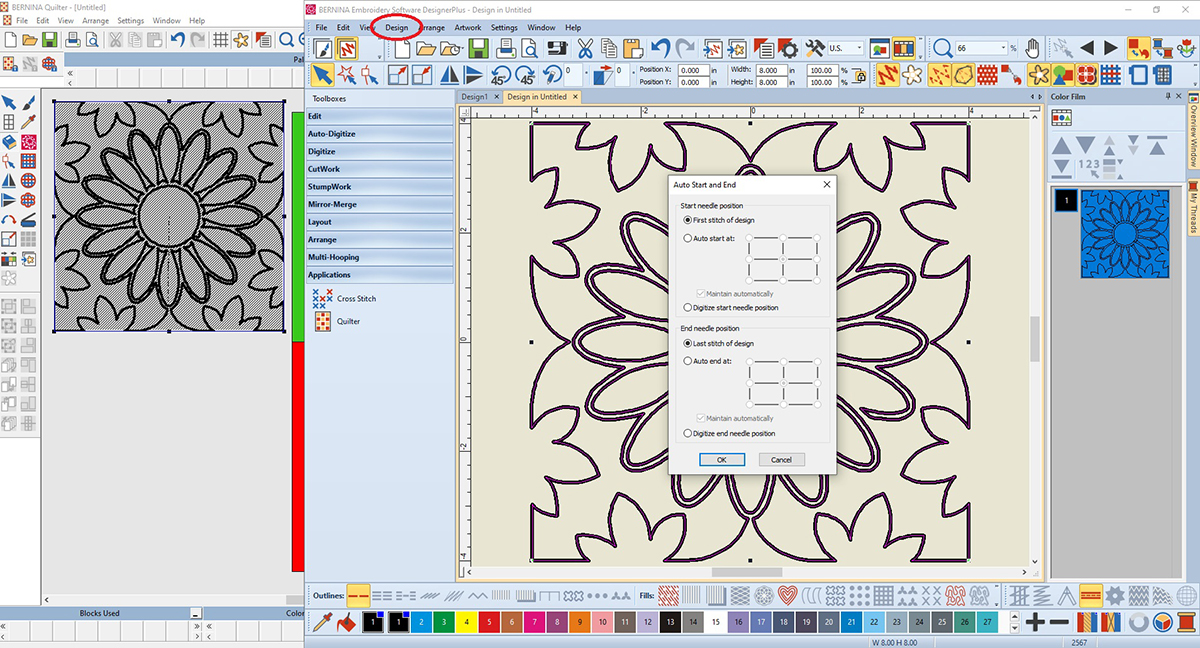
Then click on the Design icon in the upper toolbar and select Auto Start and End. Choose the options to have the Start Needle Position at the First stitch of the design and the End Needle position at the Last stitch of the design. Click OK.
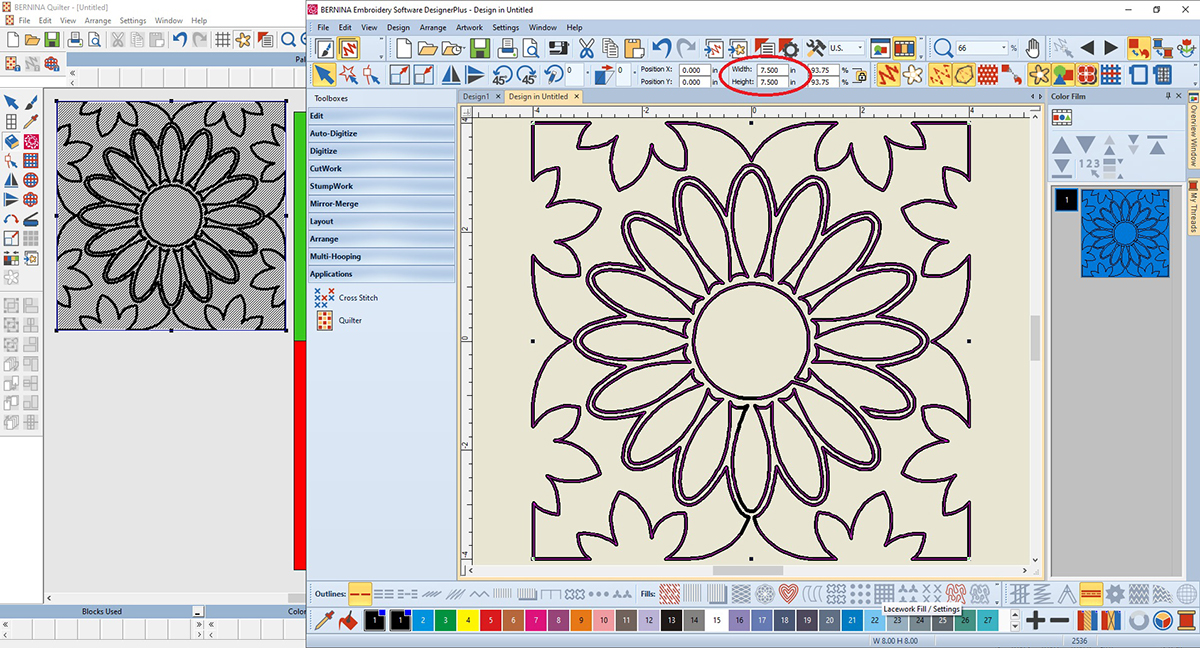
Next, resize the design to 7.5 inches in width and height.
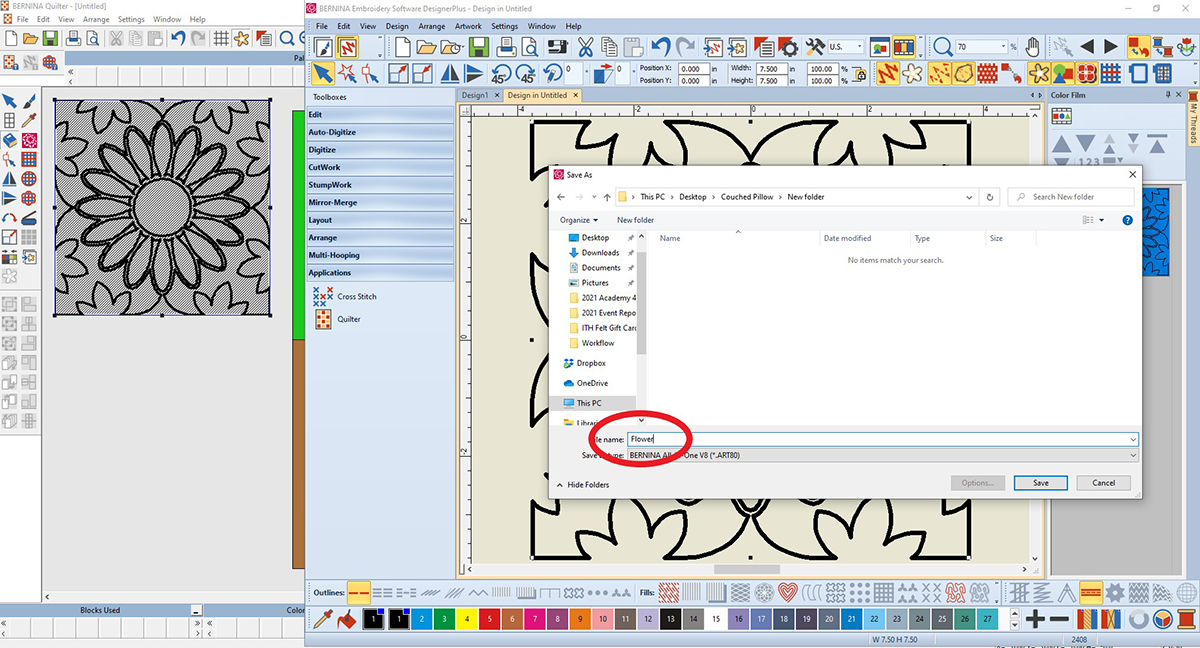
Finally, click on File>Save as and name the design “Flower”. You can also go ahead and export it to your USB stick at this time. If you wish though, you can save and export later by double clicking on the design on your quilt while in the Quilter Program. This will take you back to the Embroidery Program and the design will be ready for saving and exporting.
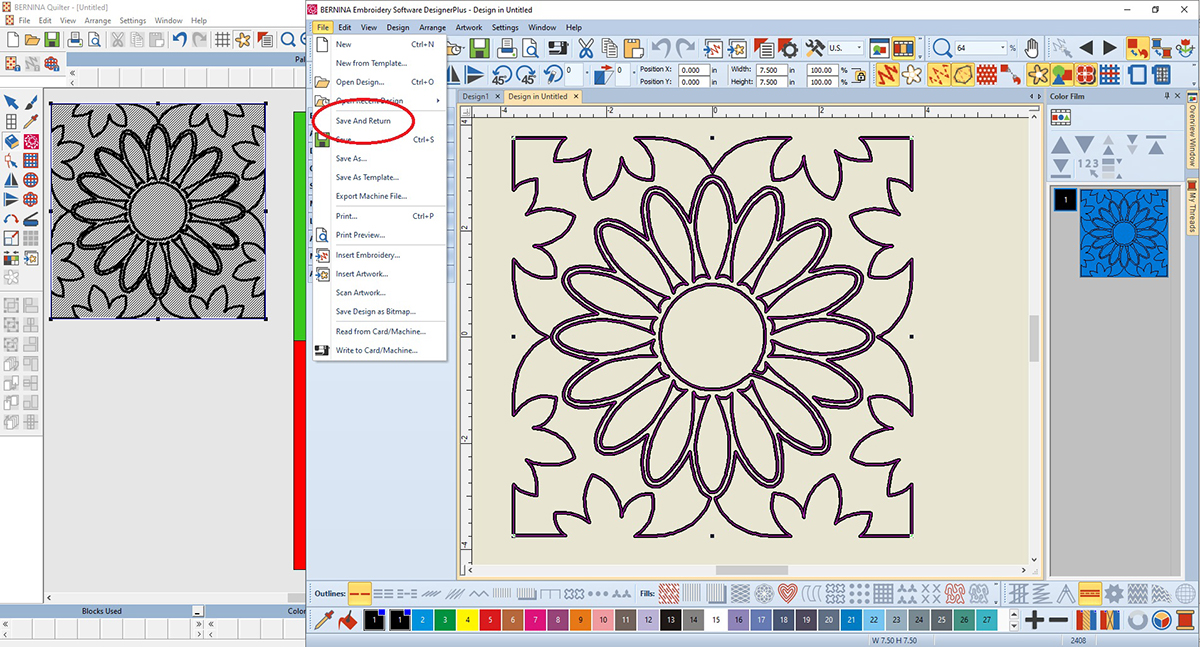
To return to the Quilter Program from the Embroidery Program, click on File>Save and Return.
Click and drag the embroidery design to move it to the green square. Visually center it. Deselect the design.

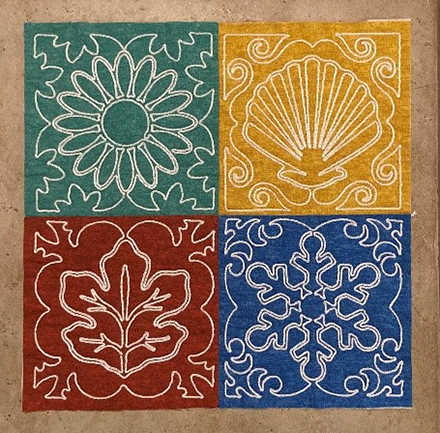
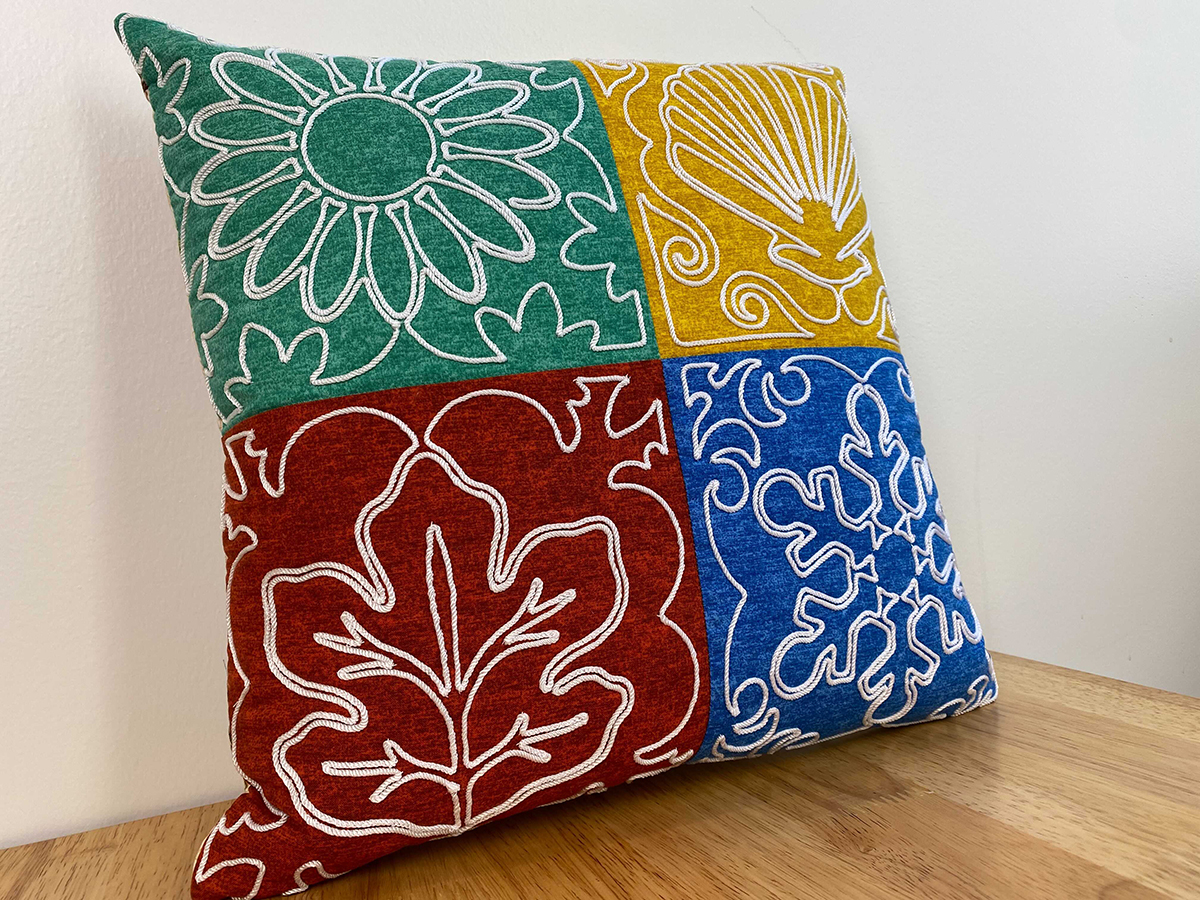
Repeat these steps to insert the following designs: 12860-12L (Seashell), 12860-17L (Leaf) and 12860-02L (Snowflake). In the Embroidery Program, convert all to couching, resize to 7.5 inches square and set the start and end needle positions at the beginning and ending of each design. Then save as “Seashell”, “Leaf” and “Snowflake”. Your design in the quilting program should look like this.
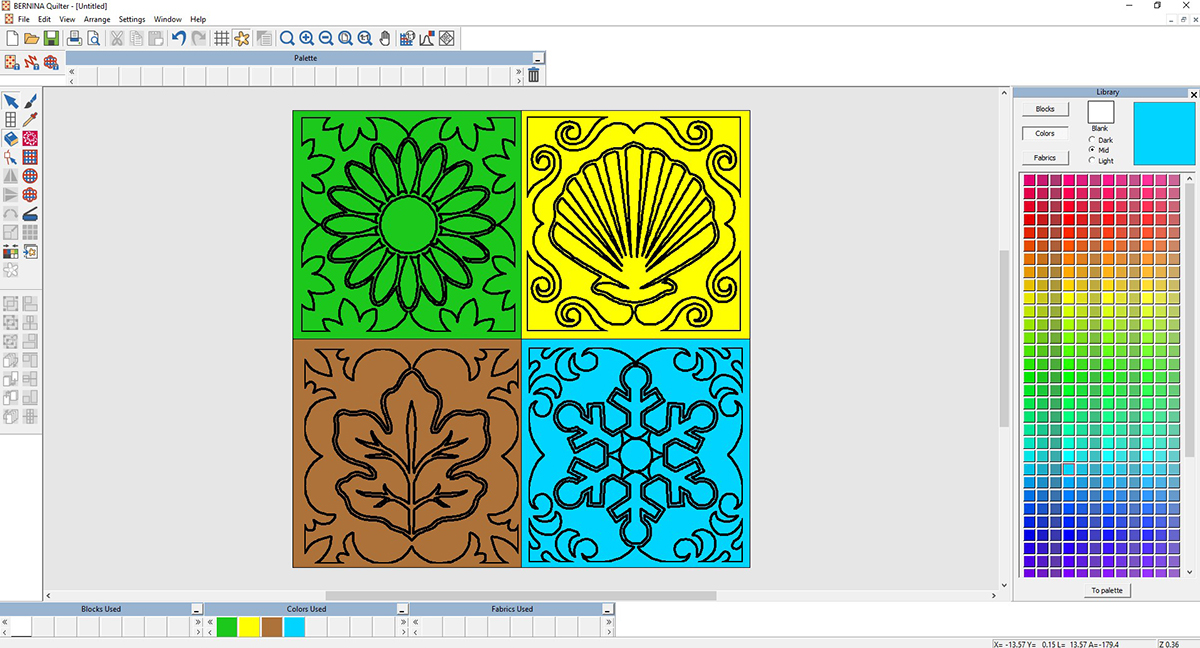
By resizing the designs, they fit nicely in the 8-inch finished squares. I like that I was able to preview the pillow design with the embroidery in the Quilter Program. I am going to be using white cording in my stitch out, and I could change the stitching to that color to preview that. However, black stands out better in the directions!
Be sure to save your project by clicking on File>Save as. Note that the file is saved as an “.arq” file. This is NOT a stitching file. Close the Quilter Program by clicking on the “x” in the upper right corner. The V8 Software will remain OPEN and in the main embroidery screen.
Directions to Sew the All Seasons Couched Pillow
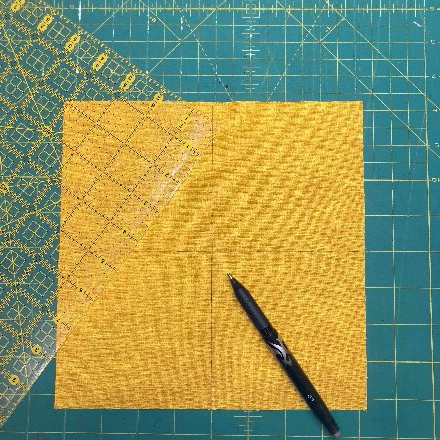
On the right side of each of your squares mark the horizontal and vertical centers.
Using Mettler 50 weight cotton thread in the needle and bobbin, use the 9 mm Patchwork Foot #97D to sew the squares together in a 4-patch, arranging the colors as you did in the software. Be careful when you press as to not remove the center markings if you used a heat erasable marker.
Layer the 4-patch right side up on the batting. Use temporary adhesive spray to temporarily hold the layers together if desired. Stitch in the ditch with the Edgestitch Foot #10D to hold all of the two layers together. I used clear monofilament thread in the needle and the Mettler thread in the bobbin.
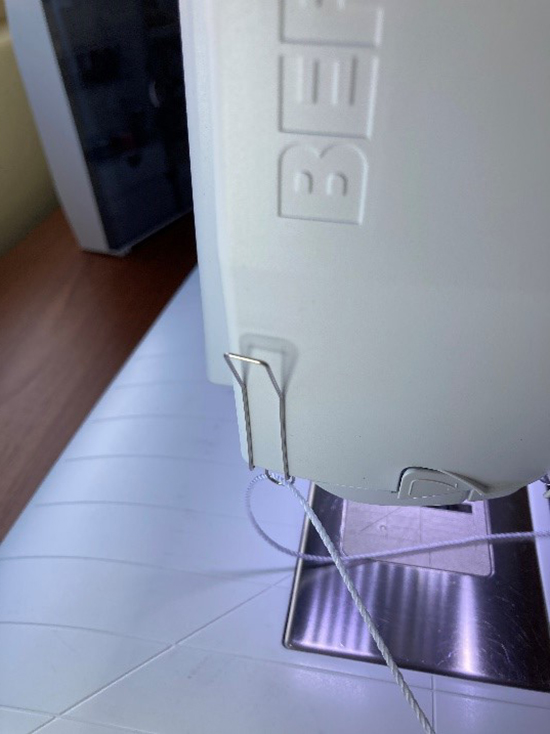
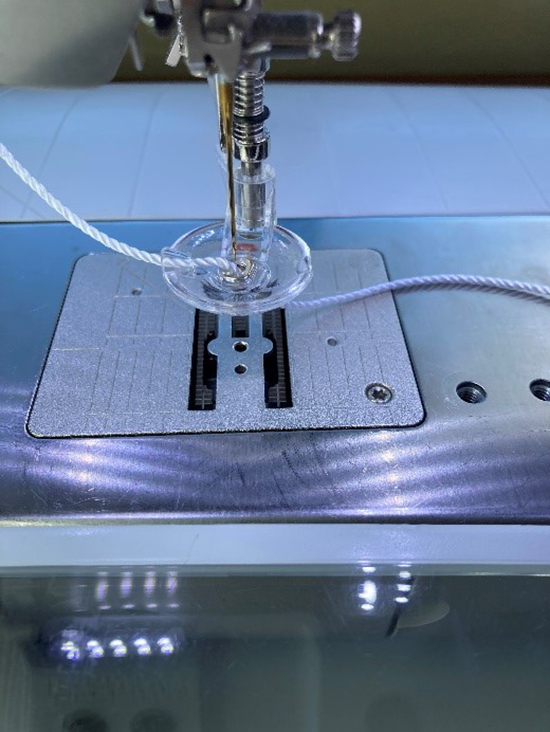
Install the cord guide appropriate for your machine (it comes with the foot). Thread the cording through this guide and then through the yarn guide on the Free-Motion Couching Foot #43 and down through the needle opening. Leave enough tail at the beginning to bury the cord when you are finished.
Hoop a piece of OESD Polymesh Cutaway Stabilizer. Spray some temporary adhesive spray on the stabilizer and center the green square of your 4-patch on top. Using Pinpoint Placement, center the design on your square. Engage the Basting Box.
Thread the needle with Isacord embroidery thread that matches your cording and bobbin weight thread in the bobbin.
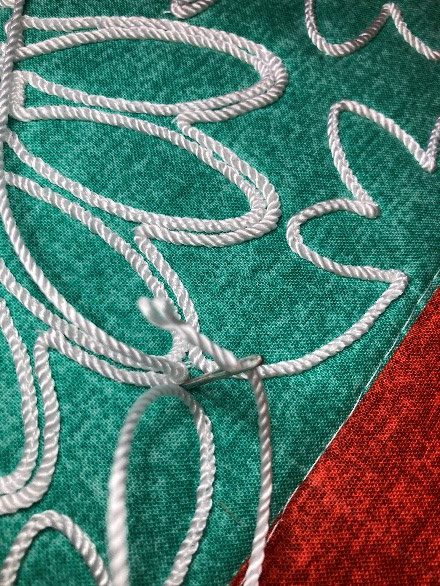
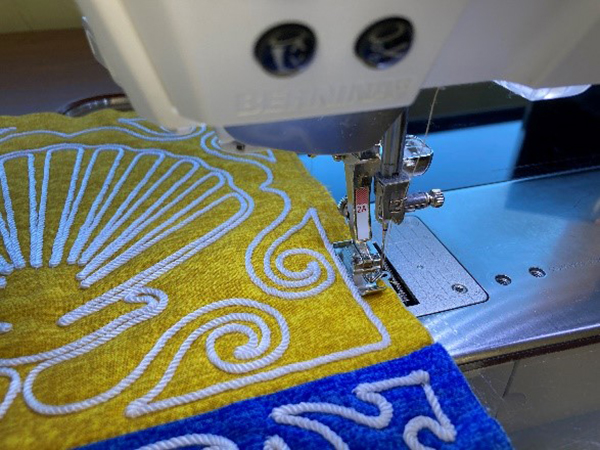
Slow your machine speed down to about half. Stitch the design. Make sure that the cording is loose and flowing freely through the guide and foot. When the design is complete, remove the hoop from the machine and cut the cording, leaving a long enough tail to bury.
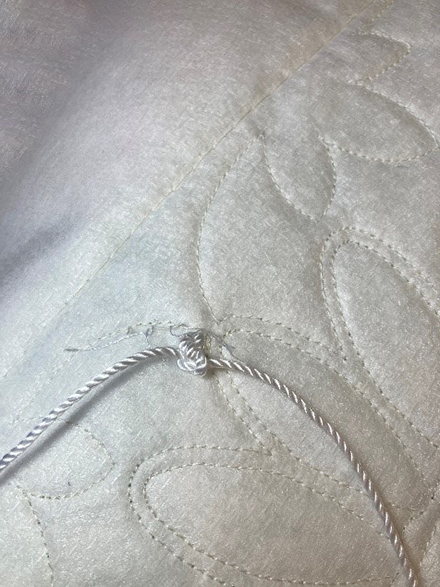
Using a chenille needle, take the cord ends to the wrong side of the project. Tie in a knot and trim ends to about 1”.
Repeat the above steps to stitch the couched designs in the remaining squares. Trim project to 16 ½” square. It is important to have a ¼” seam allowance all around and that the couching is NOT caught in the seam allowances. Note: Because the embroidery process tends to “draw up” the fabric, my project actually trimmed to 16” square. Not to worry! My 16” pillow form will fill in the corners even better with the pillow just a smidge smaller.
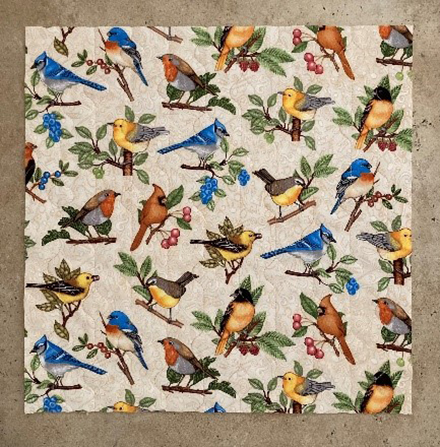
Layer the backing fabric and batting and quilt as desired. This was a great opportunity for me to sit at my BERNINA Q 20 and practice some ruler work. The Every Lollipop Rulers by Amanda Murphy were fun to play with! Trim the pillow back after quilting to the same size as the pillow front.
Using the Overlock Foot #2A and Vari Overlock Stitch #3, stitch all around the pillow front and the pillow back. This will hold all the layers together for the final steps. Using a 3-thread narrow overlock stitch with your overlocker is also a good option. (Do NOT stitch the pillow front and pillow back TOGETHER yet.)
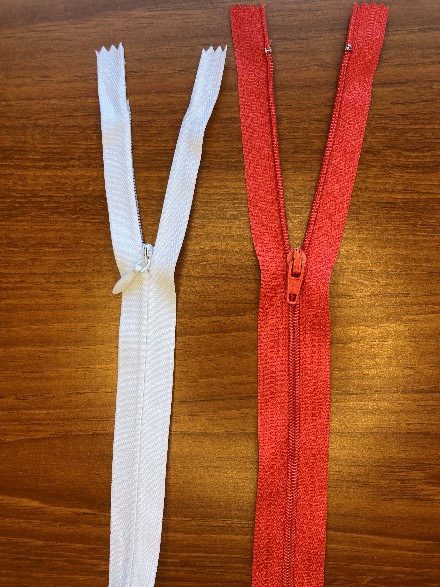
Now it is time to put in the zipper. DO NOT PANIC! You will be amazed at how EASY it is to put in an invisible zipper. Really! Take a look at the picture below. The one on the left is an invisible zipper. The one on the right is a regular zipper. See how they are different? The invisible zipper teeth are “hidden” and the regular zipper teeth are exposed.
When you read the directions on the zipper package, they tell you to press the zipper coils flat. No, no, no. Because we are using the BERNINA Invisible Zipper Foot #35, we do not need to do that! Hurray!
I also like to use a zipper longer than I need. In fact, if I hit a sale, I will stock up on the longest ones that I can find. I can always shorten a zipper, but I can’t make it longer!
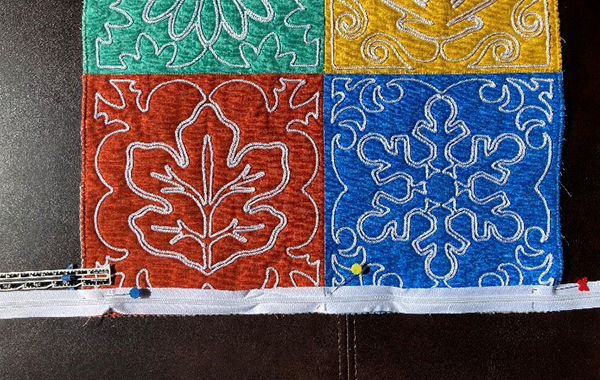
So, let’s get started. With the zipper closed, mark the center on the coil side on both sides of the coils. The coil side is the wrong side of the zipper. Placing right sides together, line up the mark on the zipper with the seam line between the leaf and snowflake designs (the zipper is going on the BOTTOM of the pillow) and pin. Pin the rest of the zipper down along the bottom edge. Measure an inch from each end and mark the zipper as shown in the photo below. The bottom edge of the zipper is even with the bottom edge of the pillow front.
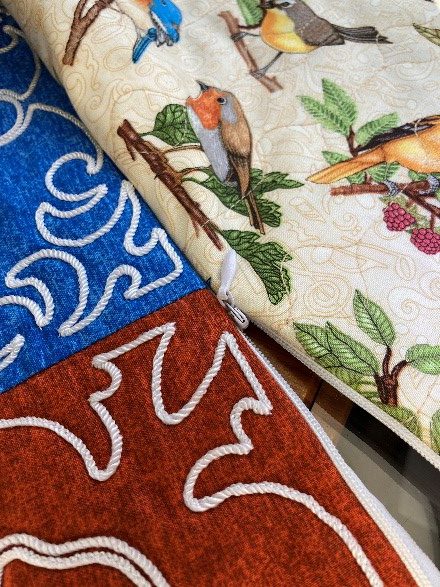
Unzip the zipper all the way. Place the zipper coil side up on the right side of the pillow, matching the center mark with the center seam, coils toward the pillow center, and clip in place. At this point, if you are starting to wonder what is going on, I would suggest you watch the Invisible Zipper Foot video on the BERNINA website.
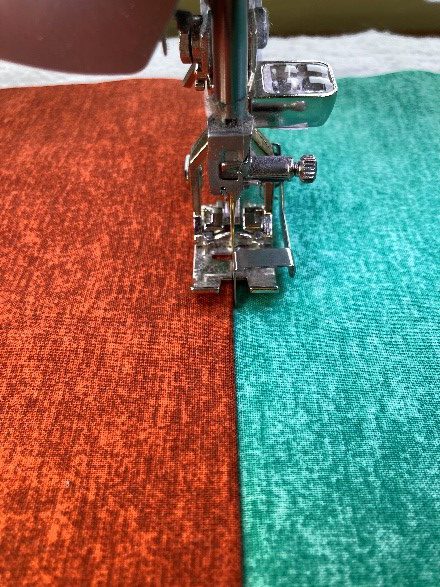
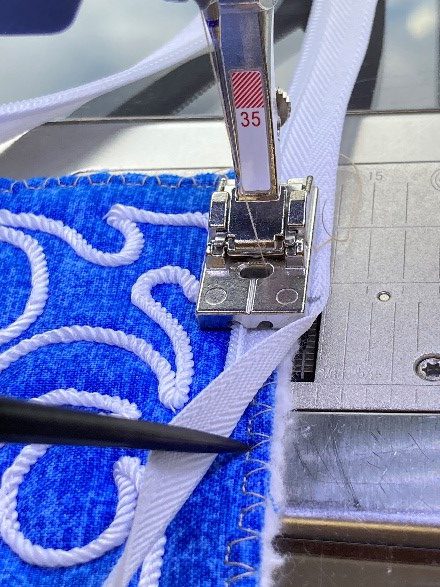
Start stitching at the mark made 1” away from the beginning edge. Here is where it will be tricky. The pillow seam allowance is ¼”, but the zipper tape is a little wider. Line up the raw edge of the pillow with the ¼” line on your stitch plate. Insert the zipper coil into the LEFT tunnel of the foot. The zipper tape is going to hang over just a bit as shown in the picture below. Back stitch at the beginning and then sew along the zipper until you get to the mark at the other end of the pillow. Backstitch again. One side done! And isn’t it neat how the foot curls the coil out of the way!
TIPS: I found it helpful to lower my presser foot pressure a little bit. I also went into my settings and turned off the hover feature. By doing this, my presser foot did not pop up and out of the coils when I paused in my sewing.
You are now going to repeat this process on the pillow back. Don’t forget to mark the center of the bottom edge of the pillow back. To keep the zipper from twisting, I closed it, clipped it to the pillow back and then opened it up again to sew it down.
By starting and stopping 1” from the beginning edge, there will be nicer corners when the pillow is turned right side out.
Once both sides are done, open and close the zipper to make sure it works smoothly. Are you impressed with yourself? You should be!
To finish, open the zipper halfway. Place the pillow front and pillow back right sides together. Clip to hold in place. Fold the zipper ends that weren’t sewn down away from the pillow. Stitch a ¼” seam all around the pillow, starting from one end of the zipper and finishing at the other end. Trim off the excess zipper ends, leaving about an inch at each end. Turn the pillow right side out, gently pushing out the corners.
Insert a 16” pillow form. You are done! You have a beautiful designer pillow, designed by you!
Used Products

What you might also like


2 comments on “How to Make an All Seasons Couched Pillow”
Leave a Reply
You must be logged in to post a comment.

What a beautiful project, Mary! Can you explain more about the purpose of those design edits you made in the software? What does “converting to couching” actually do to the design? Does it make the machine stitch the yarn down in more of a zigzag path instead of a run stitch, longer stitch length, “tell” the machine that you’ll be using a couching foot, or anything like that, or does clicking that Couching button just make the design preview look more realistic for couched yarn without actually changing anything about how the embroidery design will stitch out at the sewing machine? And why is it necessary to tell the software to start at the first stitch and stop at the last stitch — where else would it stop and start besides the beginning and the end? Or does that step in the software eliminate the usual automatic securing stitches at the beginning and end of each color change so that you can pull the yarn tails to the back of the work and knot off by hand?