Embroider-Along Part 7: Napped Fabrics
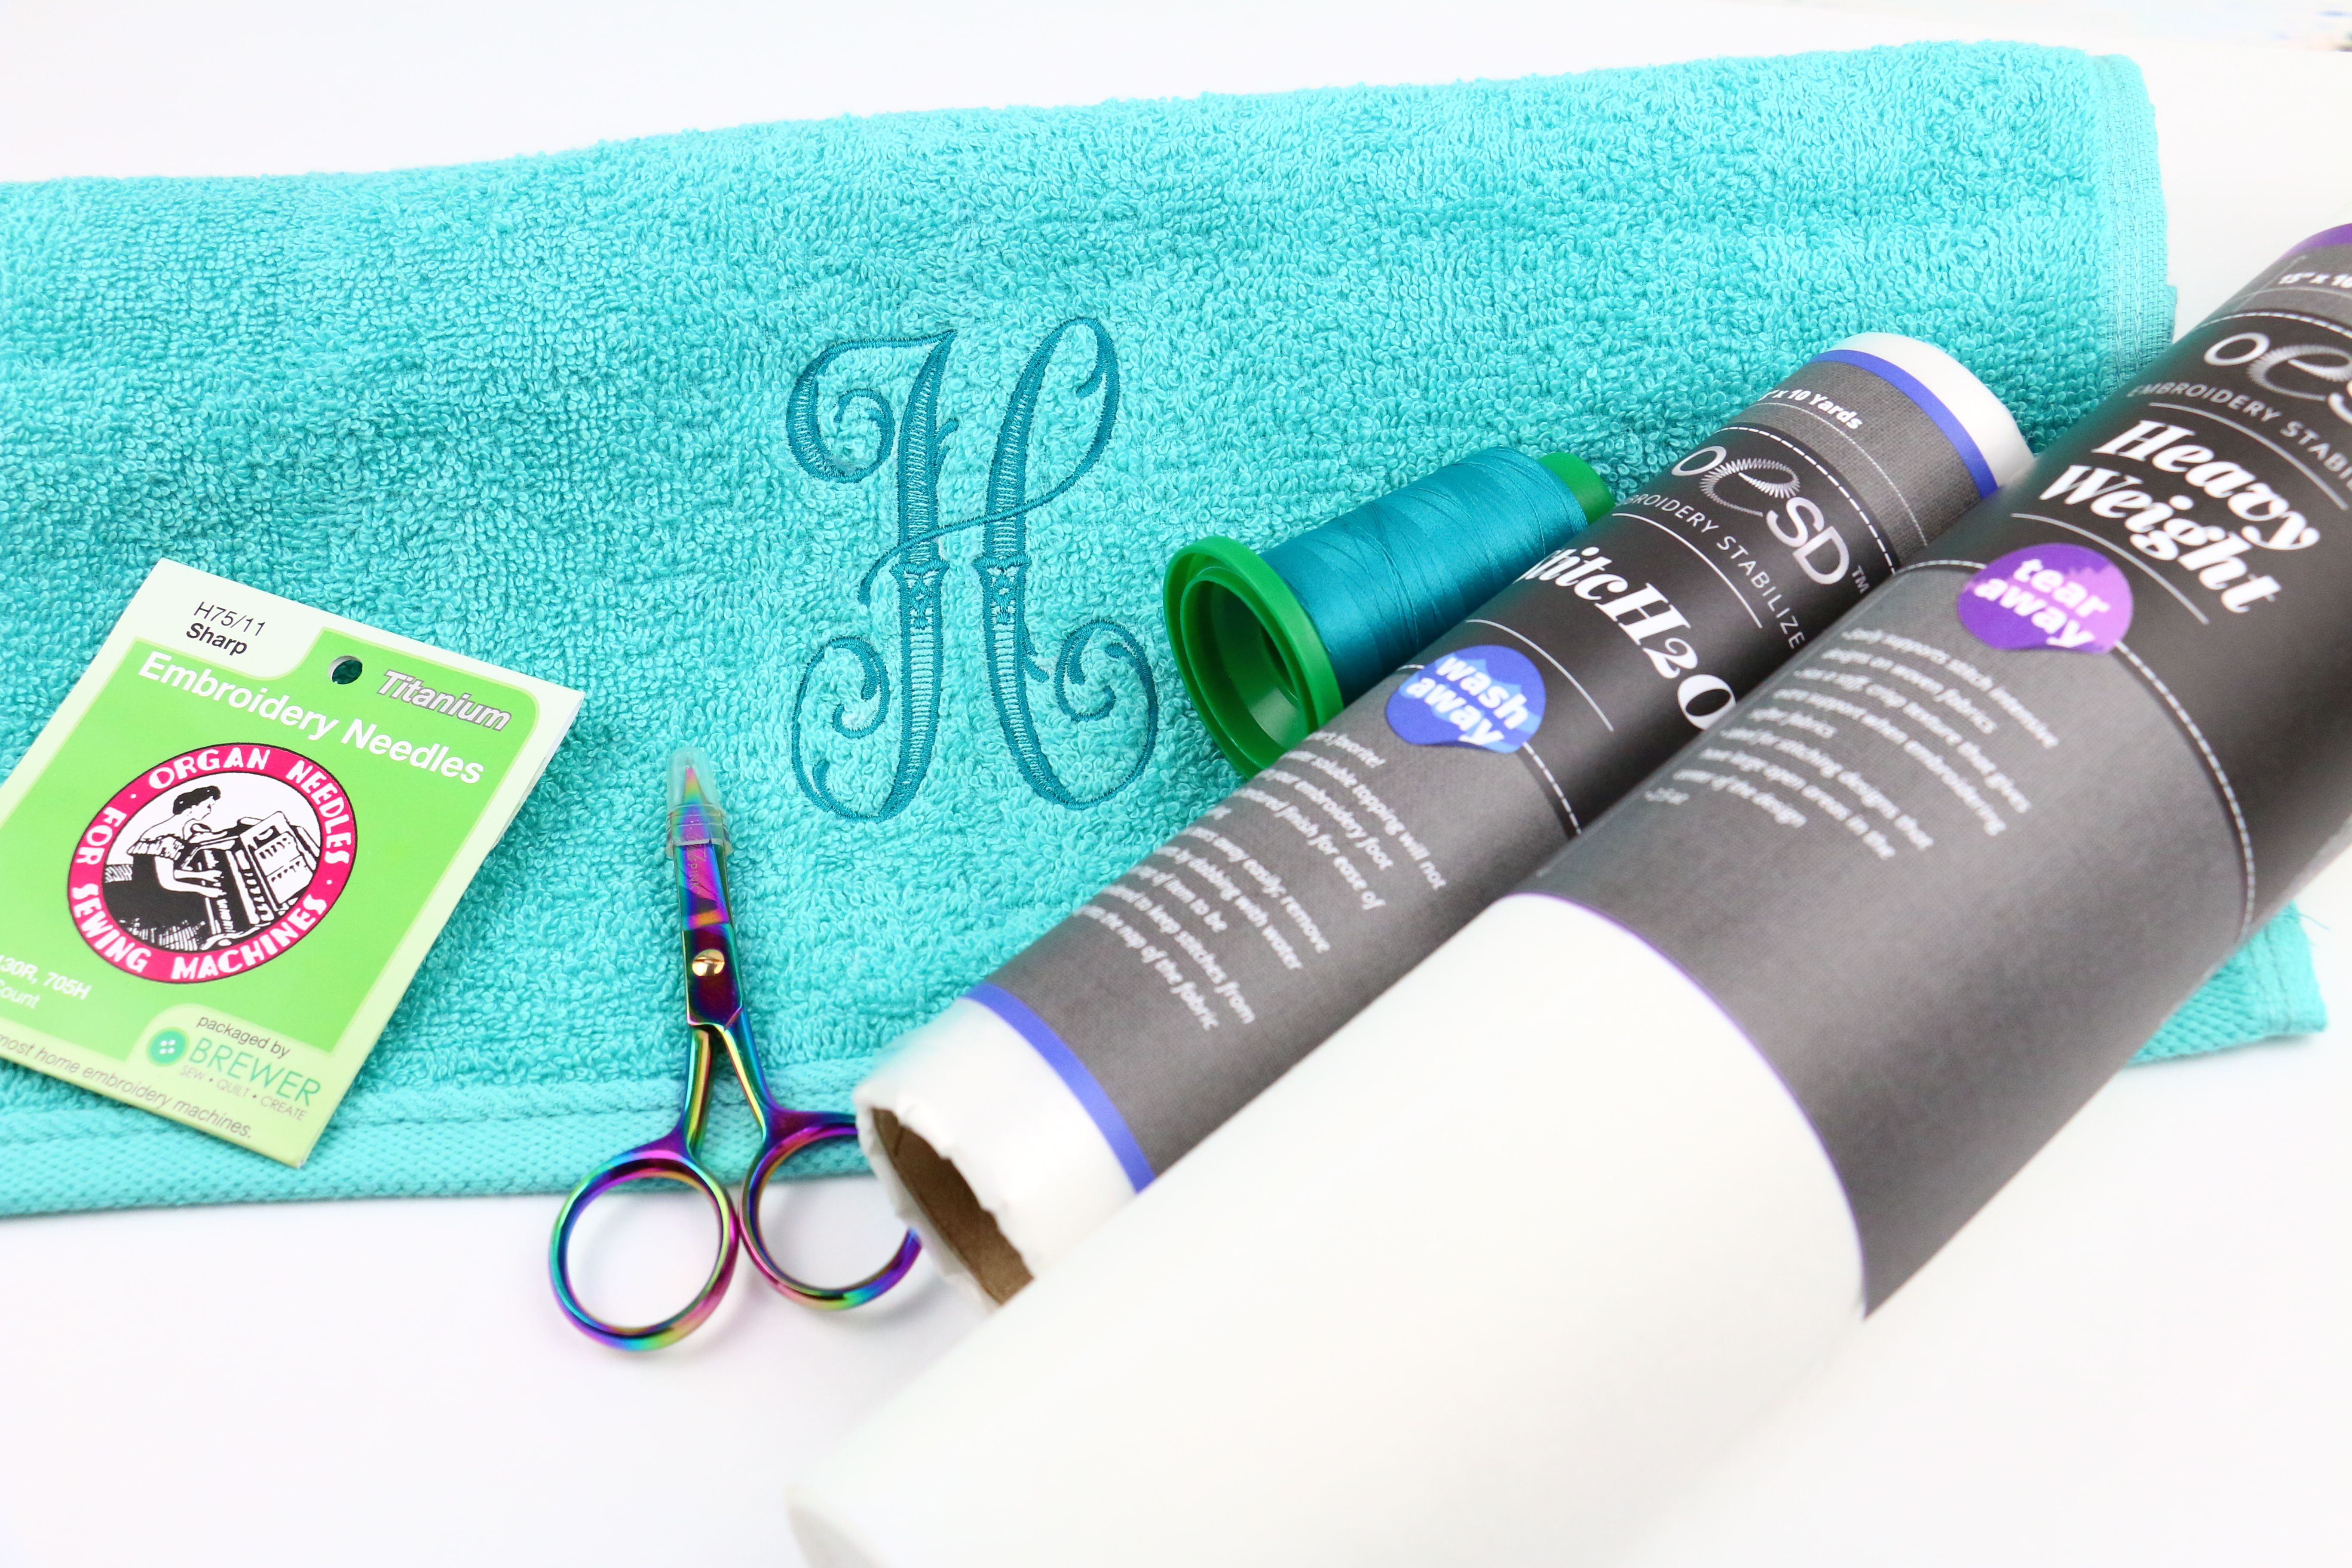
Welcome back to my Embroider-Along: Part 7. Hi, my name is Sue O’Very, BERNINA Ambassador and machine embroidery expert. The How to portion of the series continues with today’s topic of how to embroider on napped fabrics, as an example I will show you step-by-step how to embroider on a bathroom towel.
What is Napped fabric?
Napped fabrics are materials with a pile or loft. My go-to example is a bathroom towel. Another popular material for machine embroidery would be Luxe Cuddle® Rose by Shannon Fabrics. This fabric is super soft and makes beautiful things like blankets, pillows and even stuffed animals. There are a few other materials included in this category such as; felt, fleece and even velvet.

Stabilizers for Napped fabrics
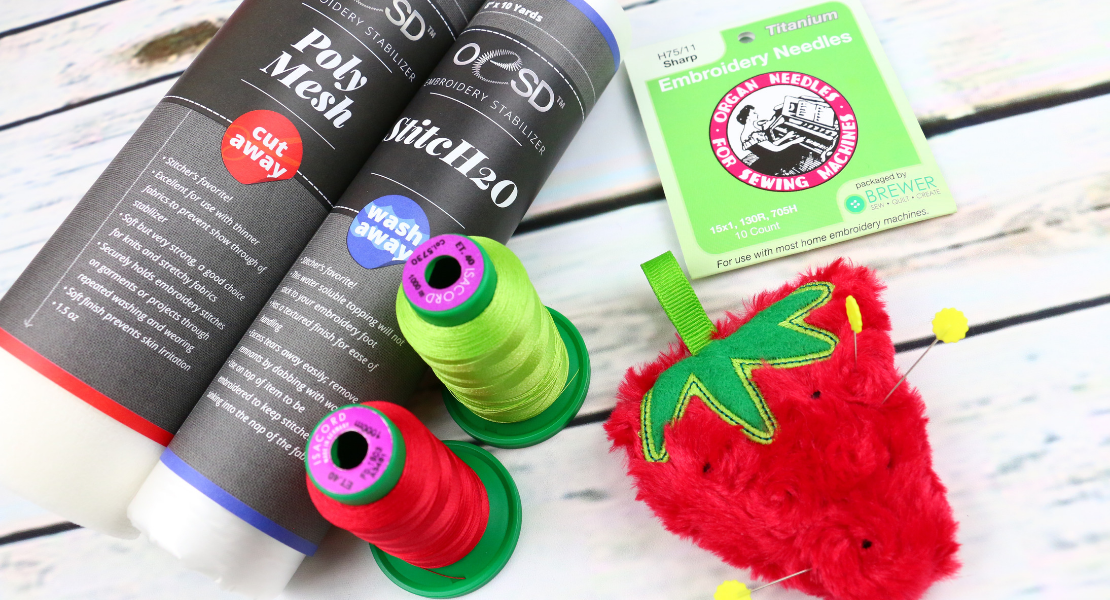
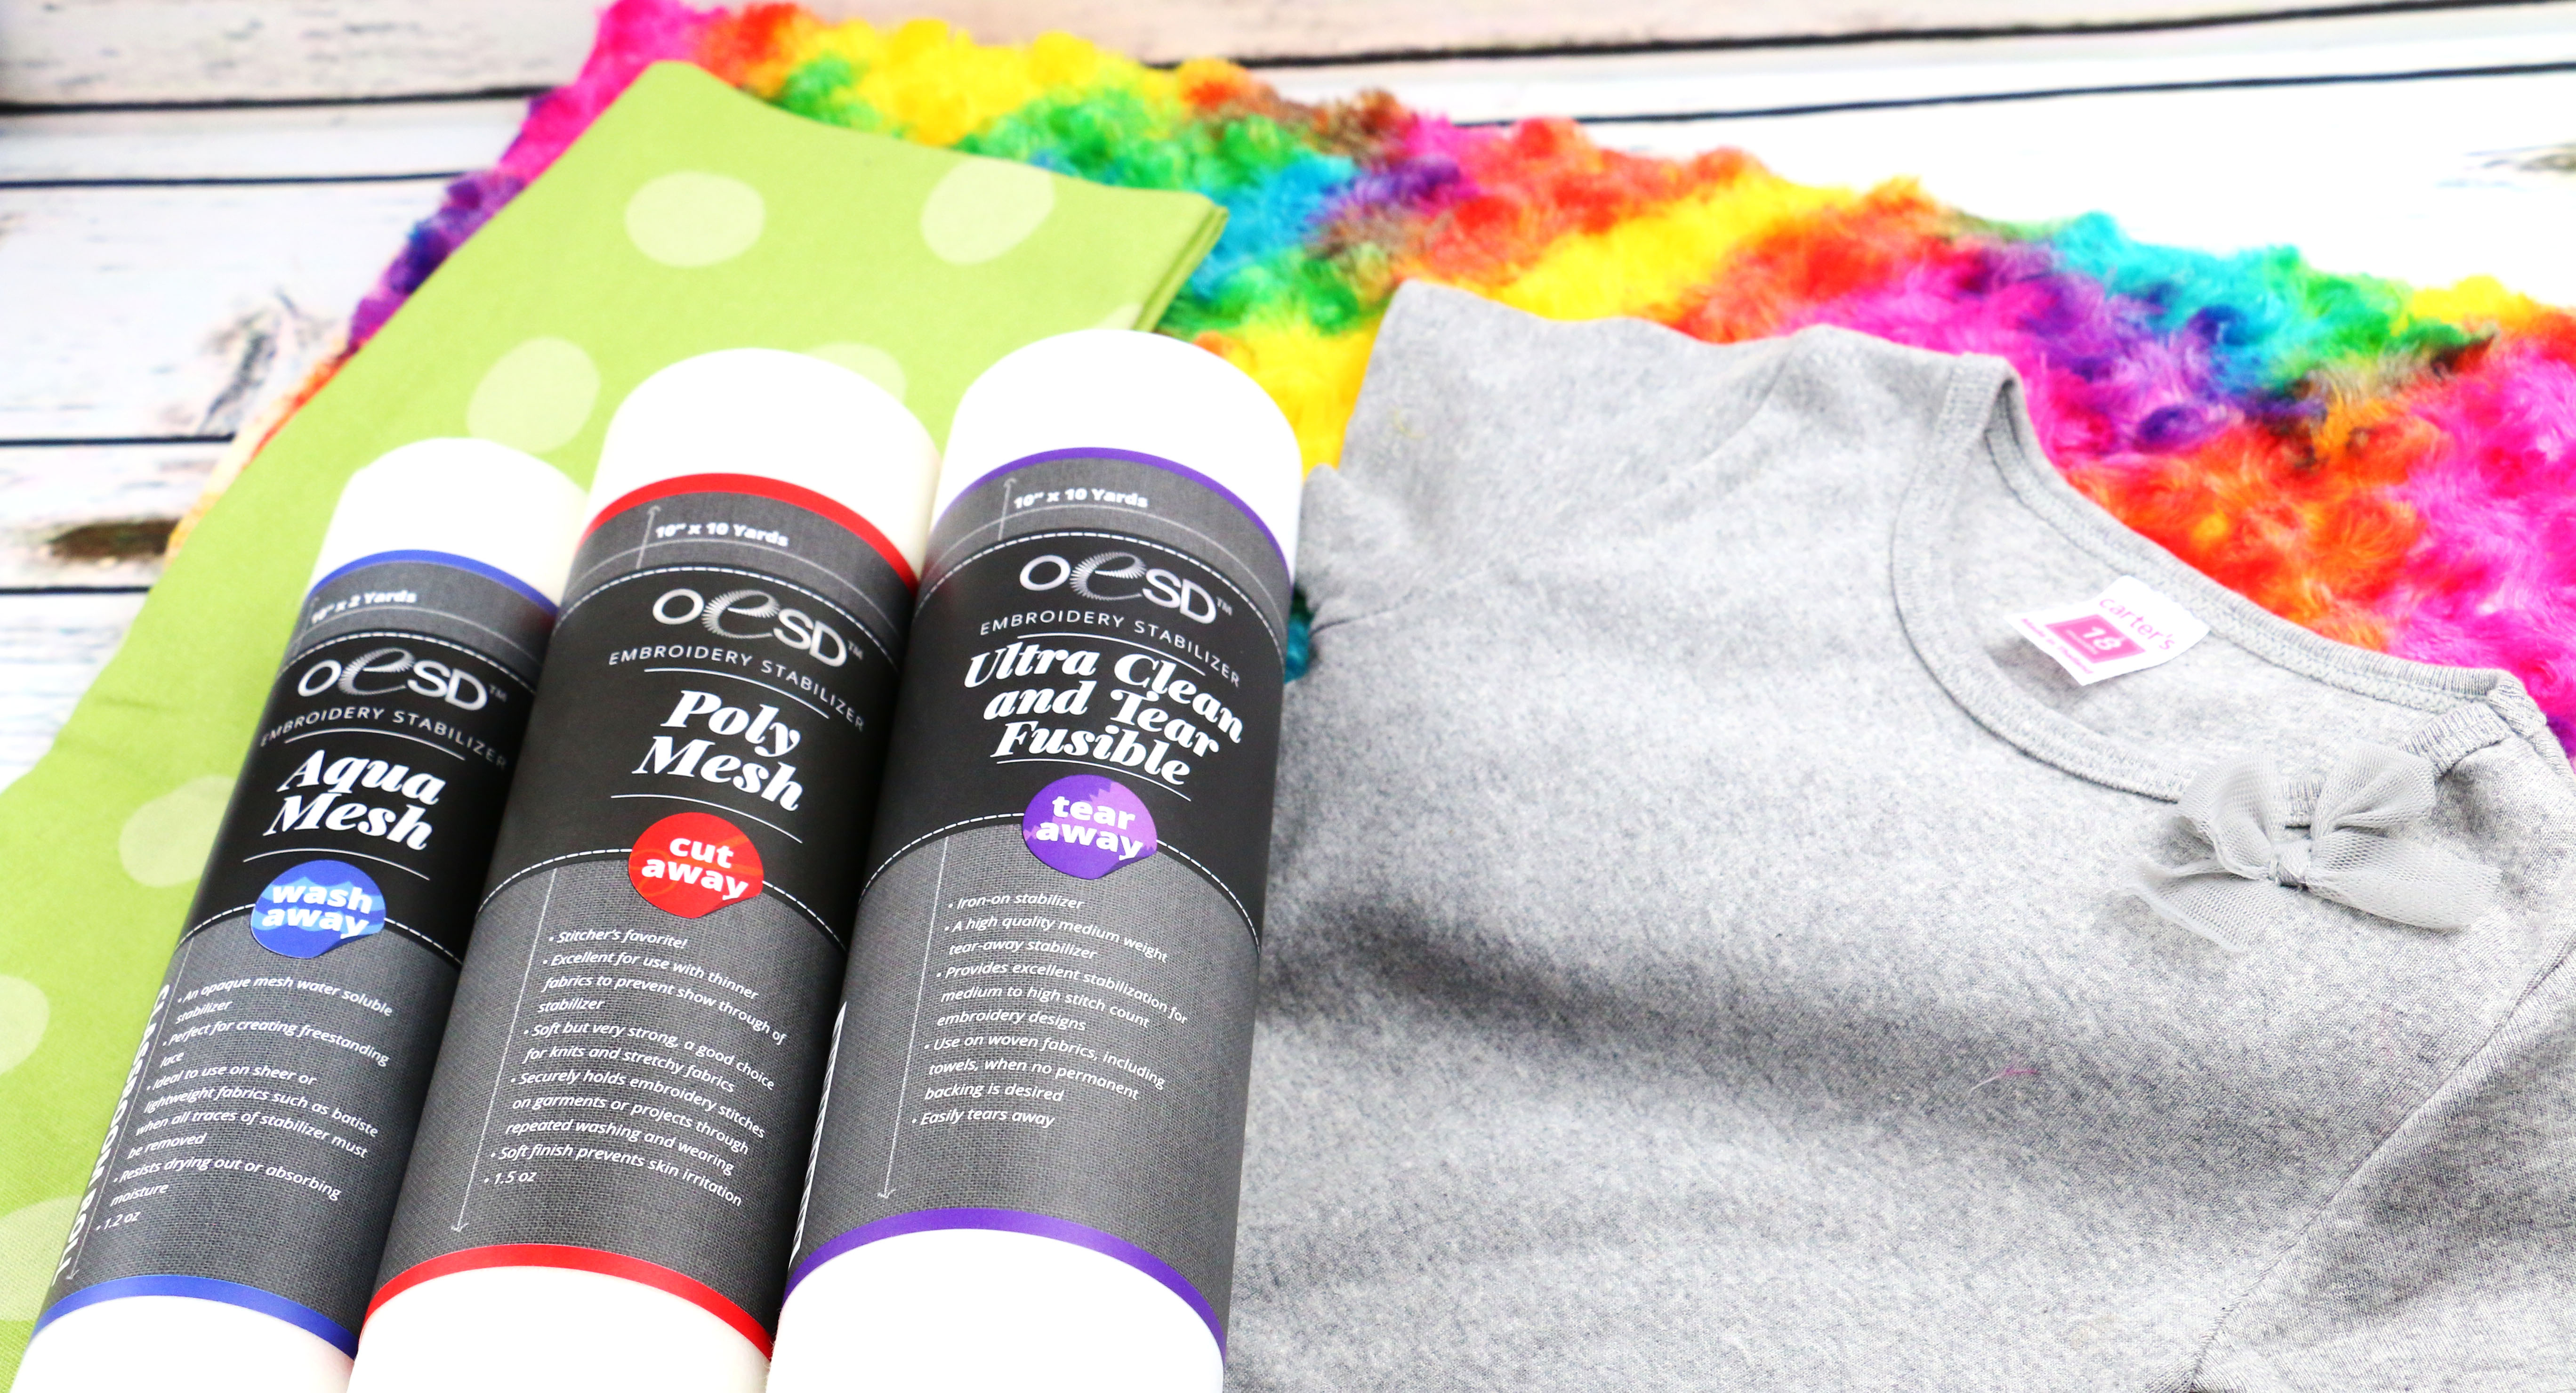
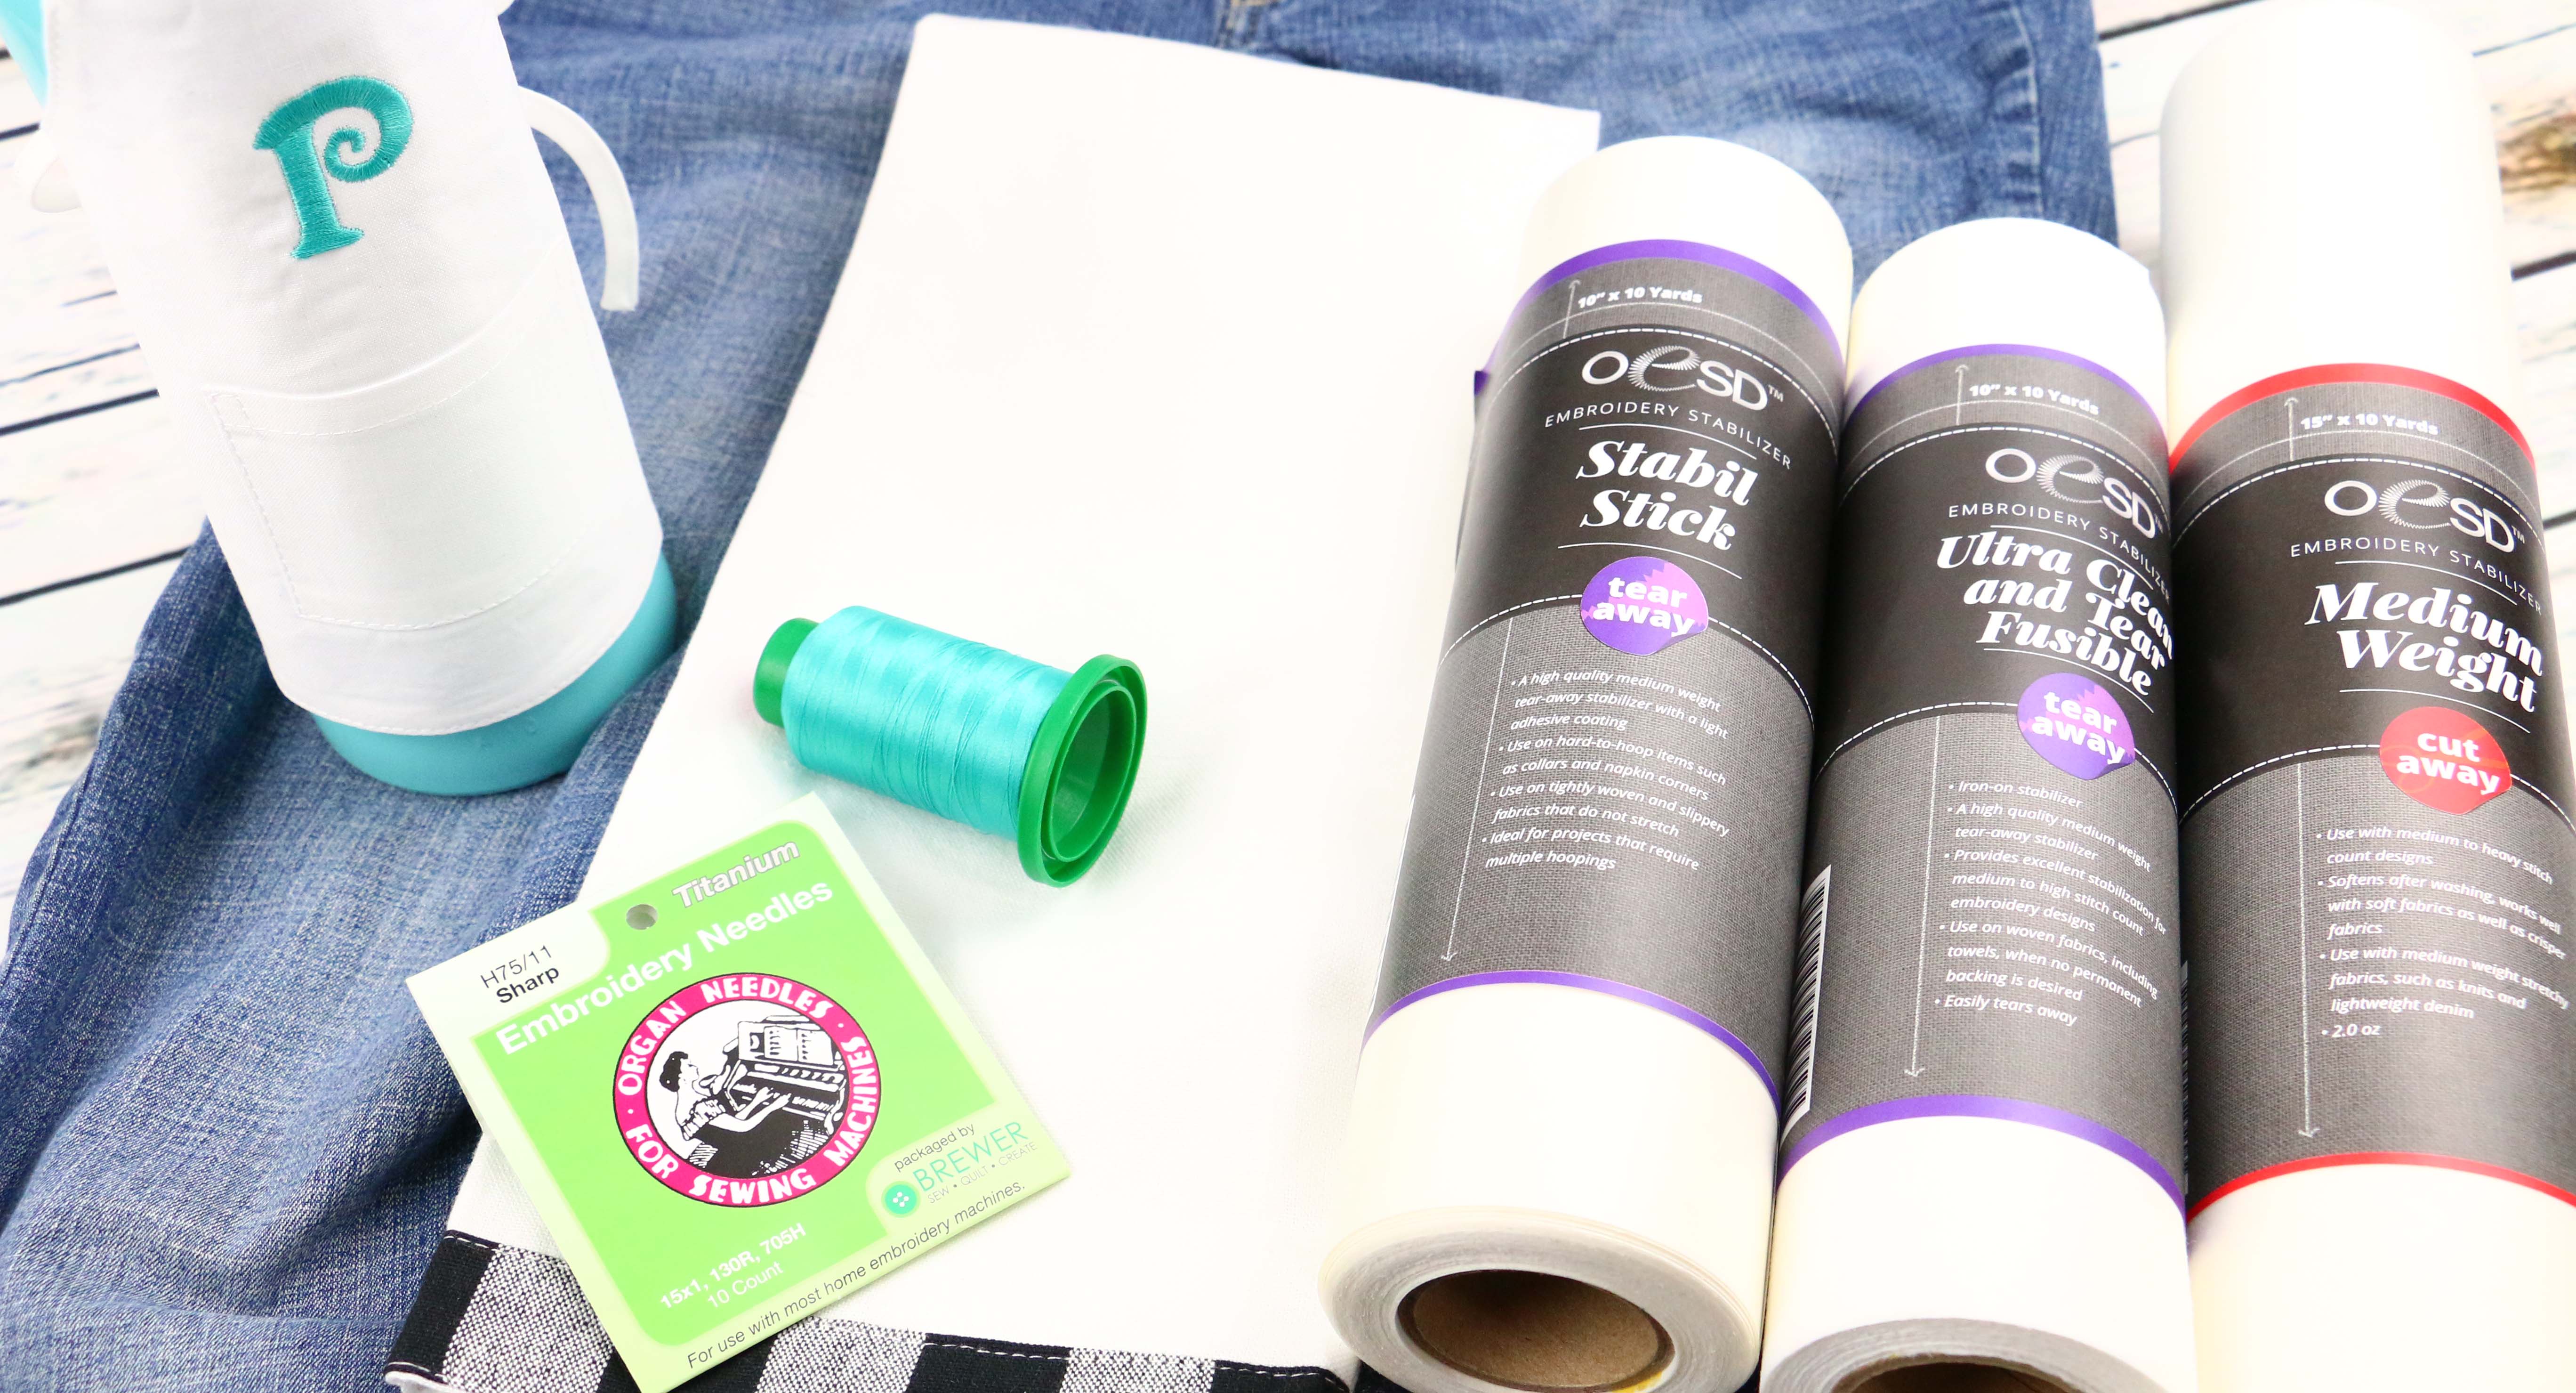
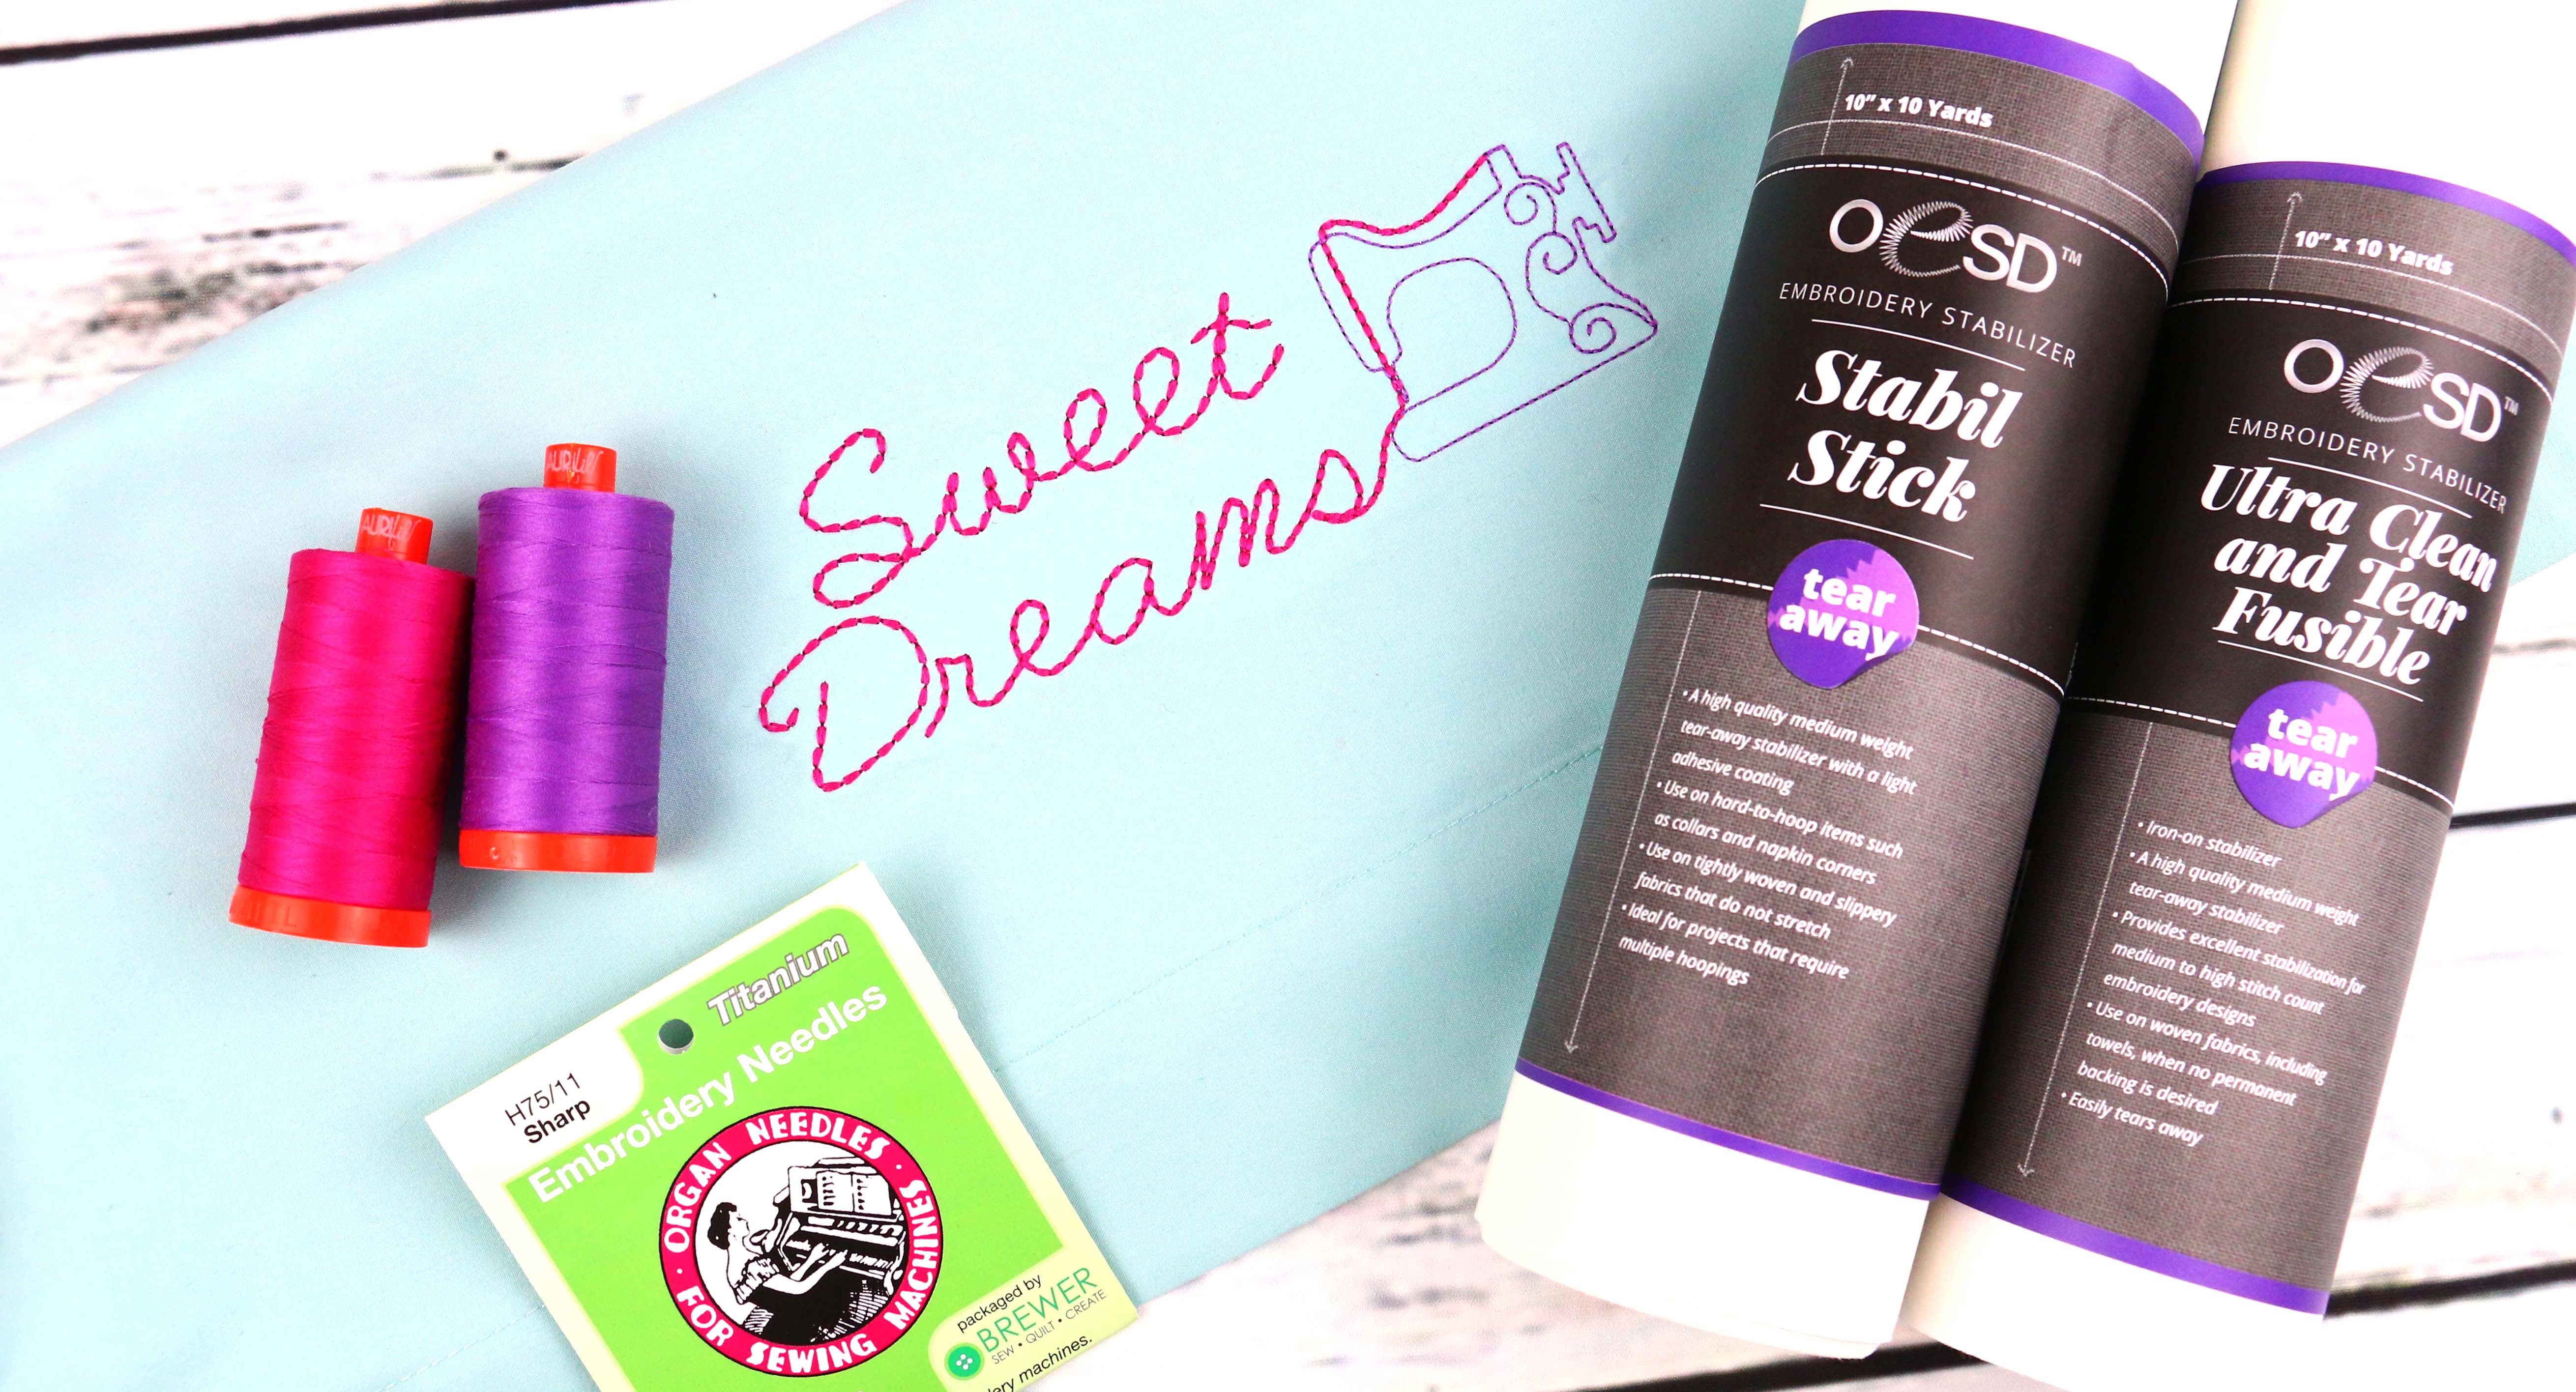
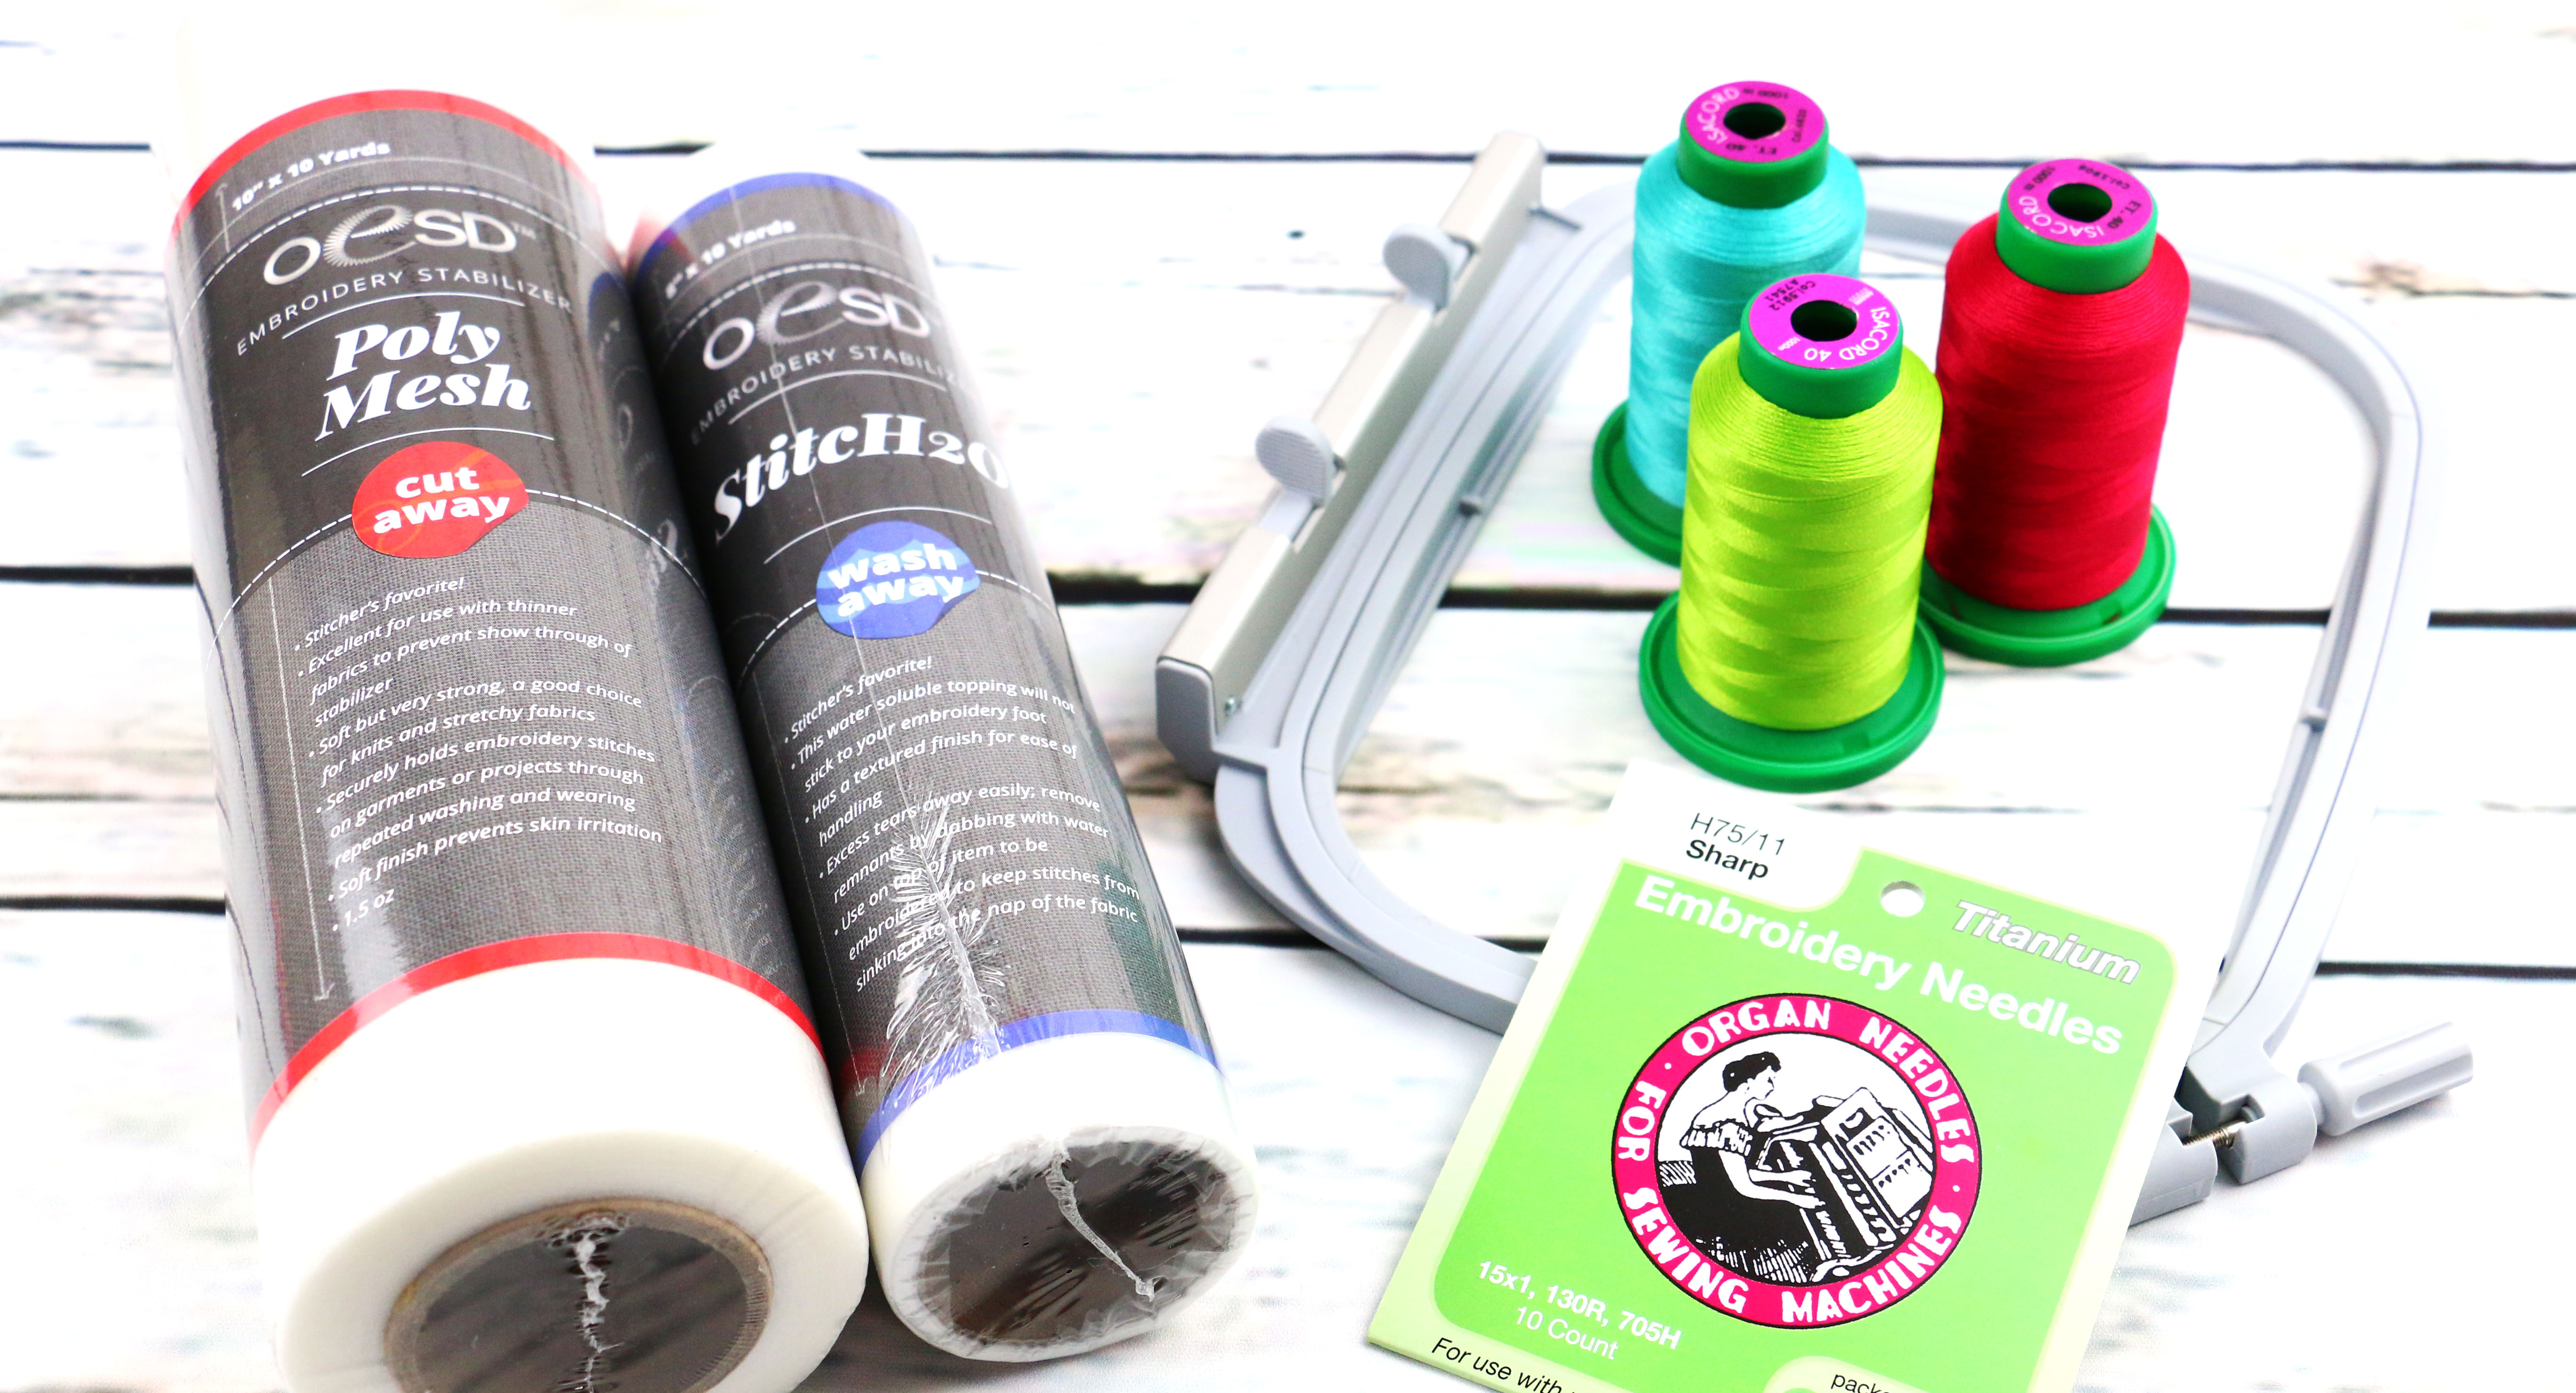
There are three types of stabilizers used for napped fabrics; Cut Away, Tear Away and Wash Away. In many cases you will use two of these three per project.
Cut Away
Cut Away stabilizer will be the most common with heavier napped materials such as felt, faux fur and velvet. These materials are often included or sewn into a project too and the backing won’t be seen. There are two types of Cut Away suggested: Poly Mesh (thin/light) or Medium-Heavy Weight (thick/heavy). Refer to Part 2 of the Embroider-Along for more details on stabilizers.

Tear Away
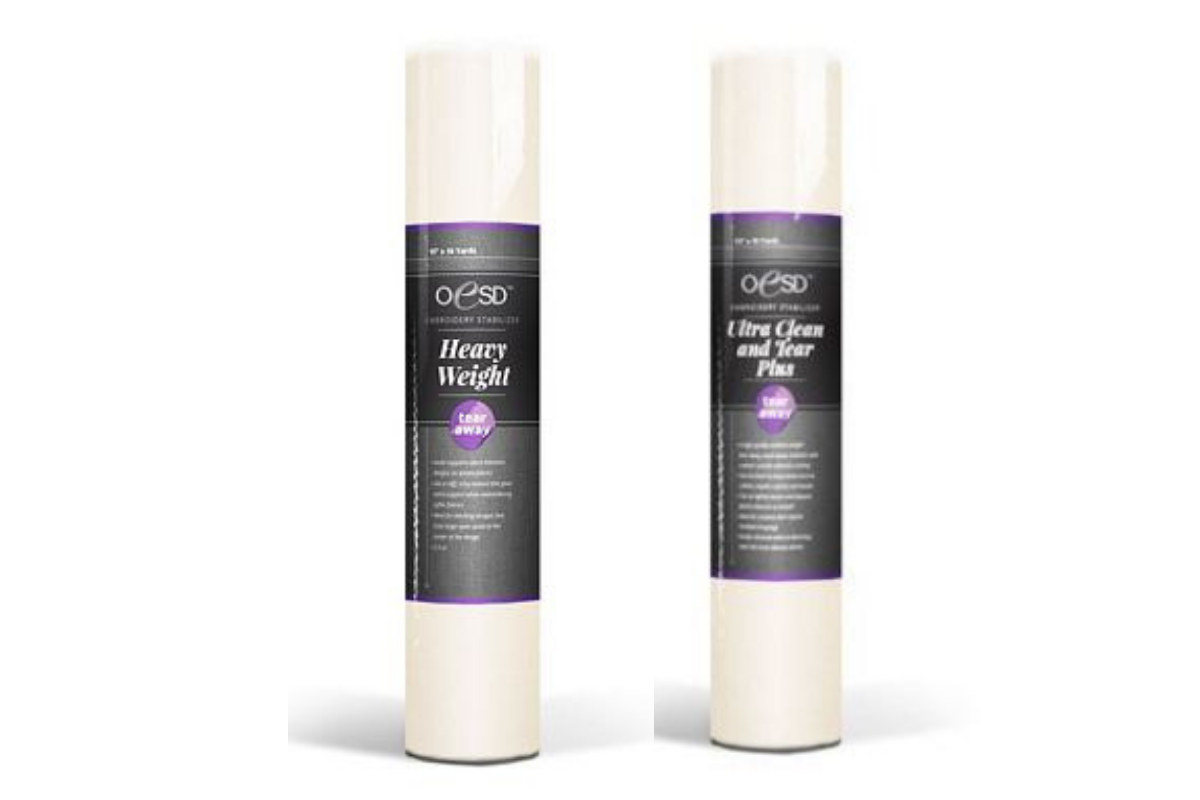
When the napped material is lighter weight or the back of the project will be seen, such as a towel, a Tear Away stabilizer would be a better backing.
- Tear Away Heavy Weight – Crisp and clean tear
- Ultra Clean and Tear Medium weight – Leaves a bit of fiber under the stitches
Wash Away
Wash Away stabilizer is necessary as a topper for napped materials for two reasons:
- To keep stitches from sinking into the nap or texture of the fabric
- To prevent the presser foot from getting caught into the texture
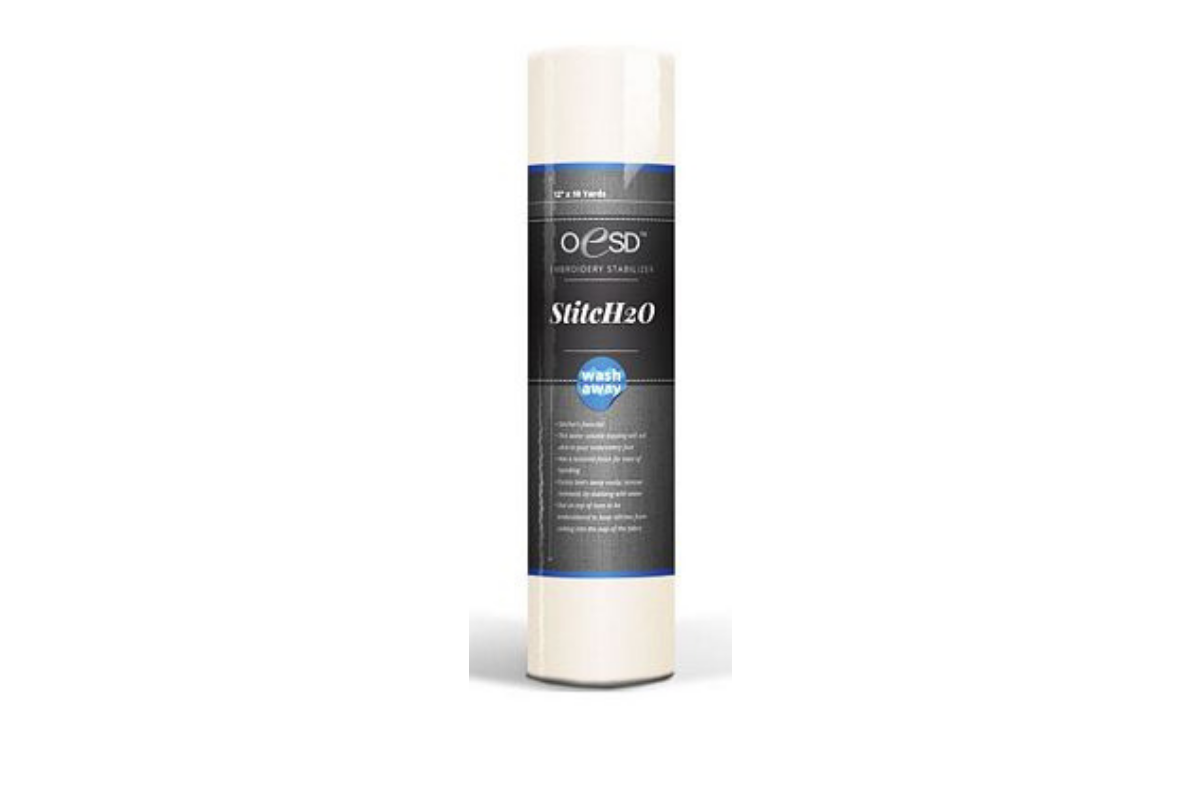
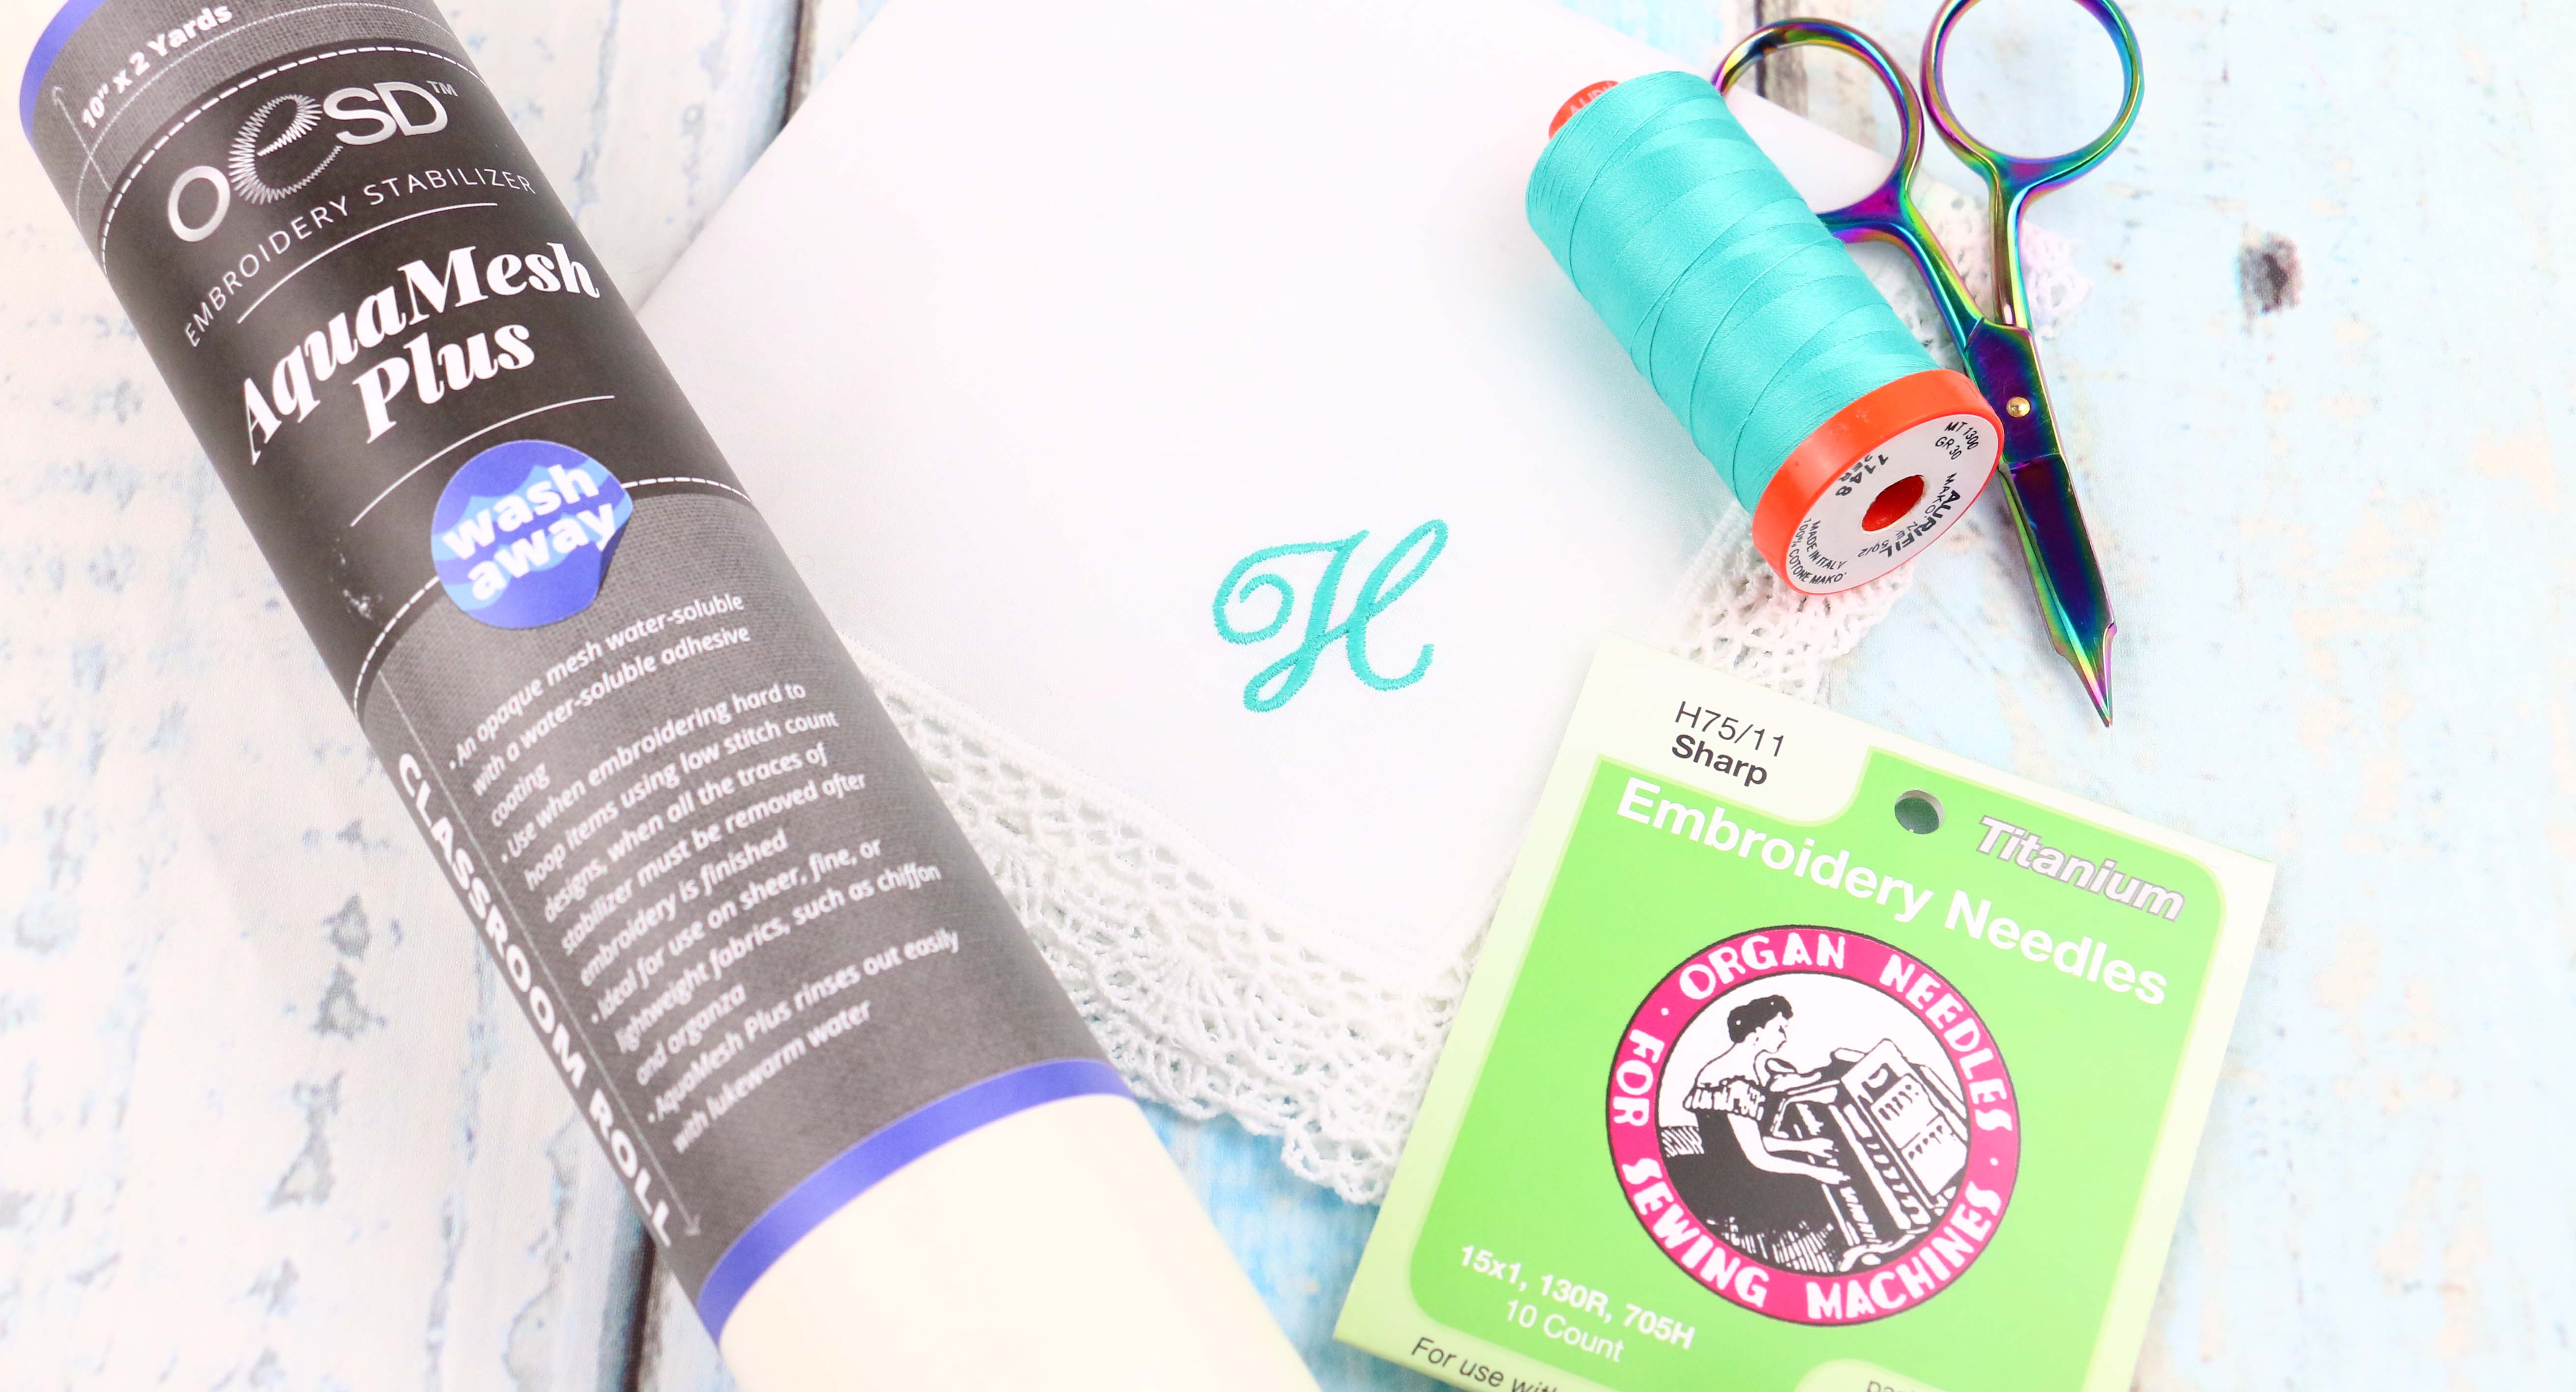
Most often the wash away will be a clear see through film such as StitcH20. This particular product is nice because it’s designed not to stick to the presser foot.
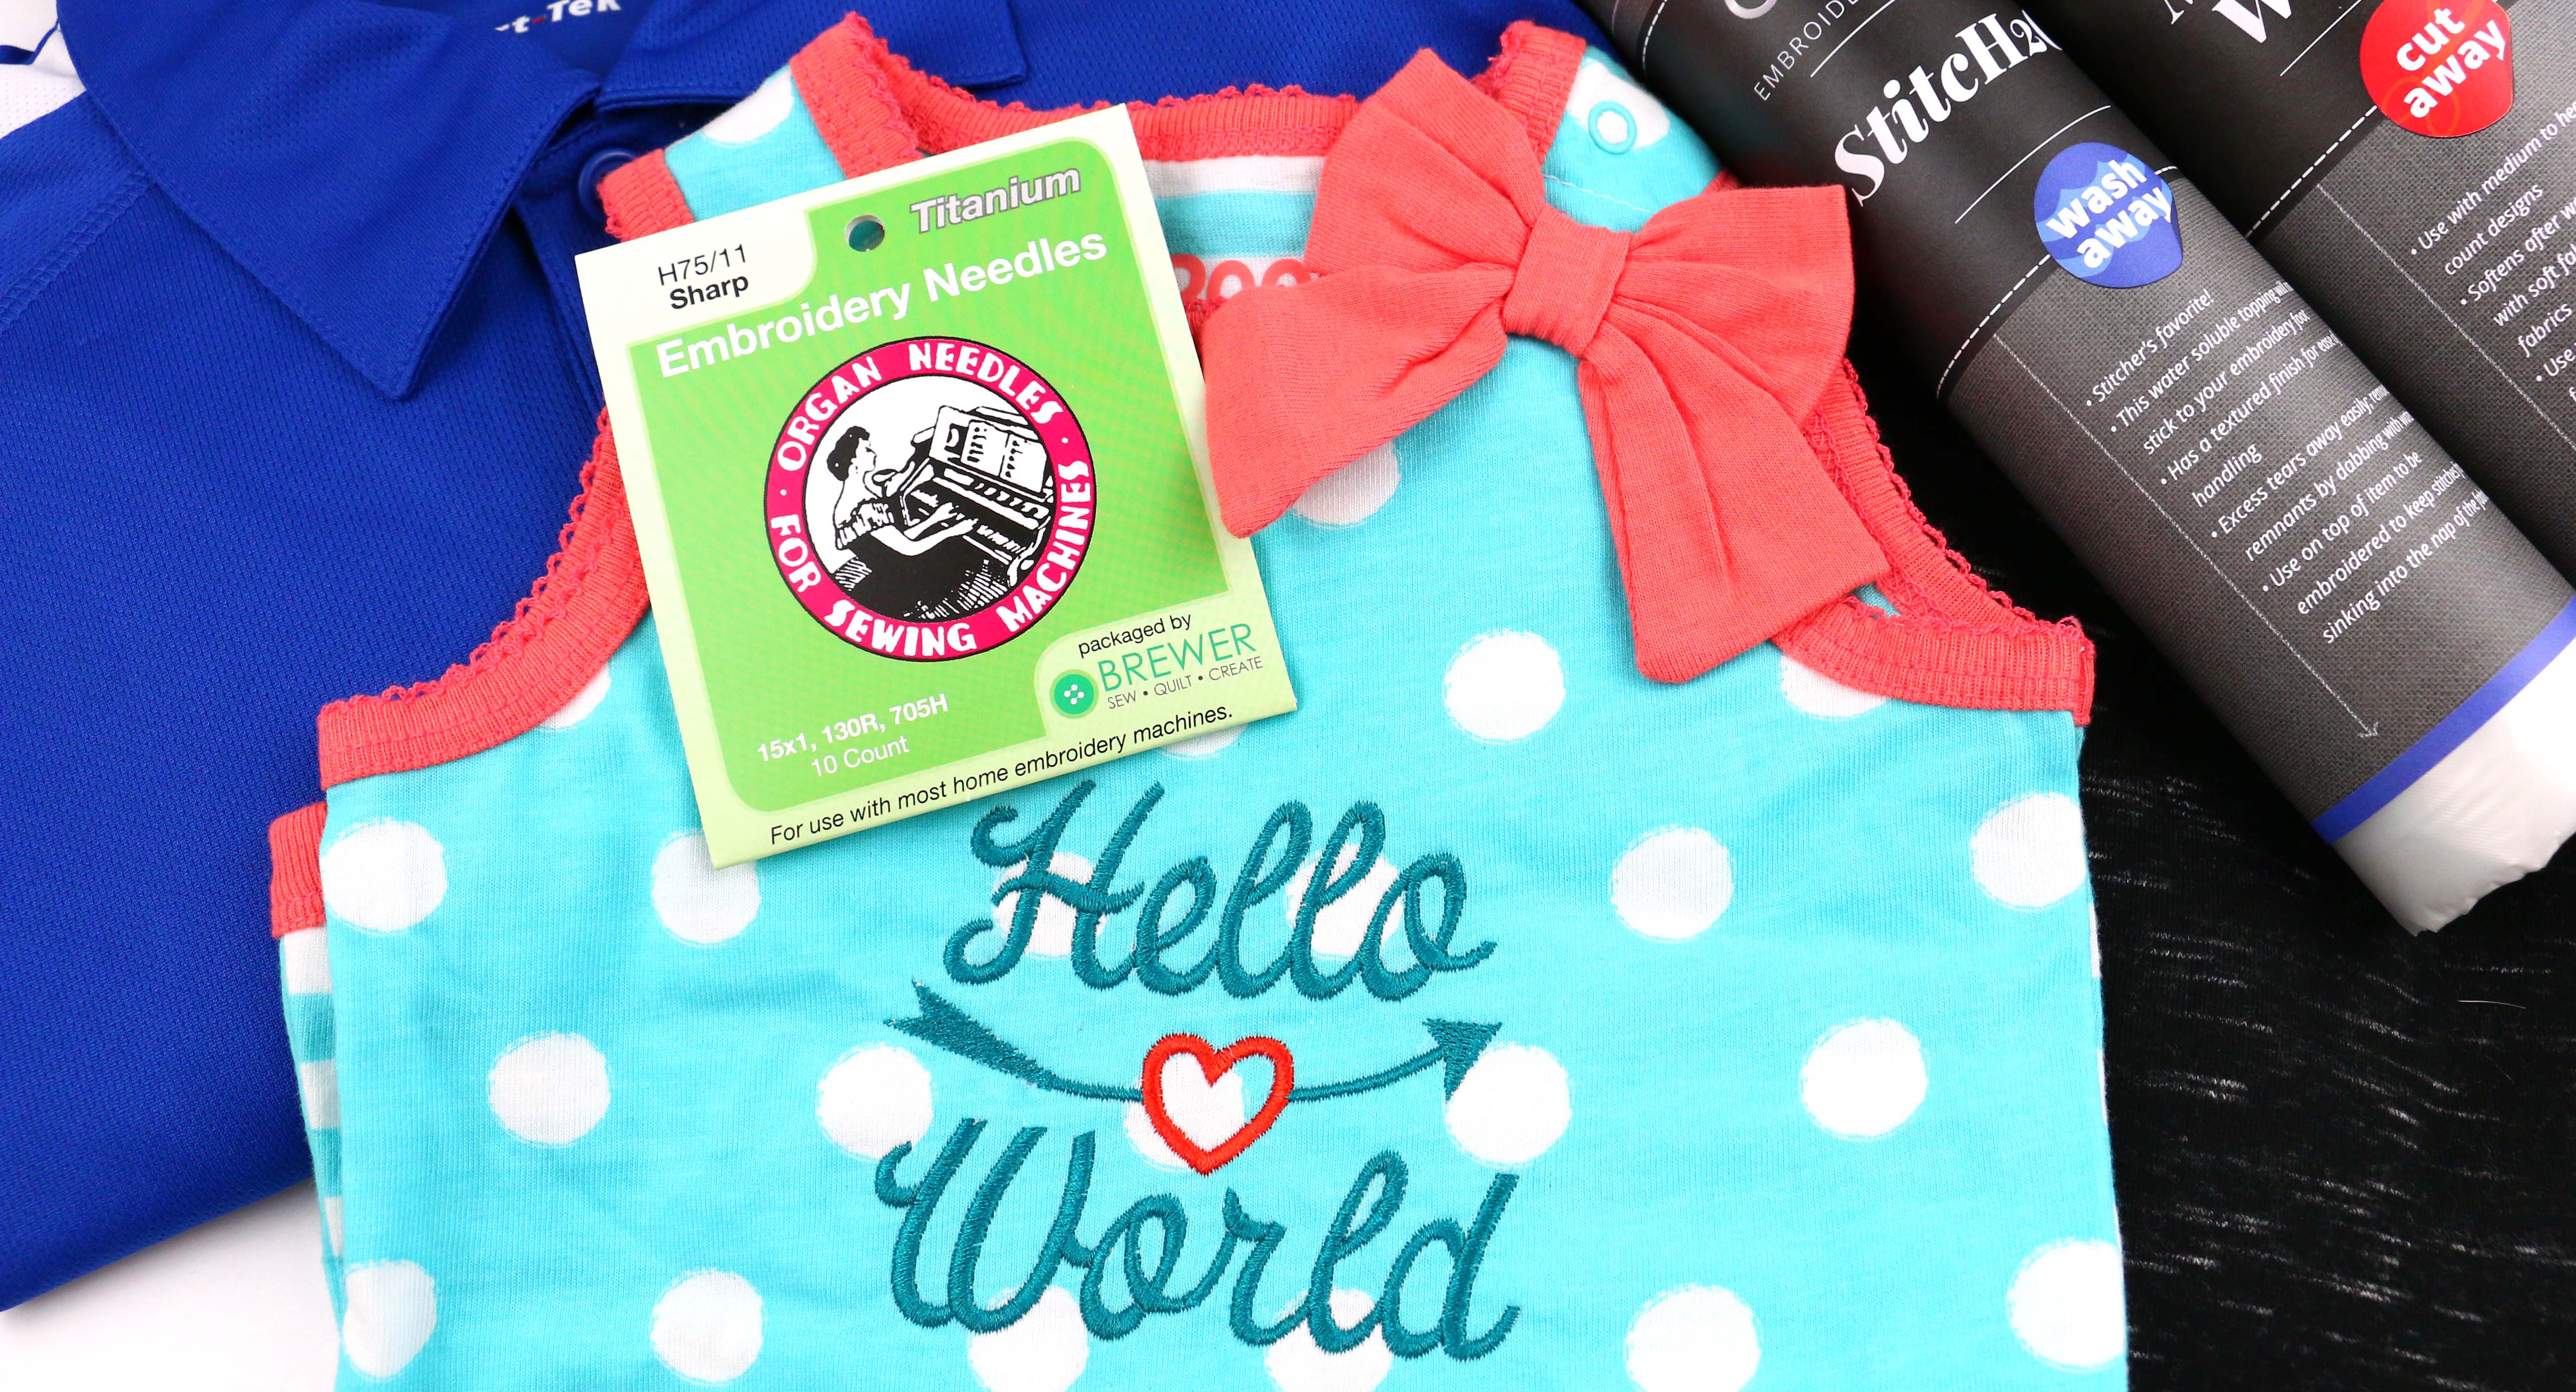
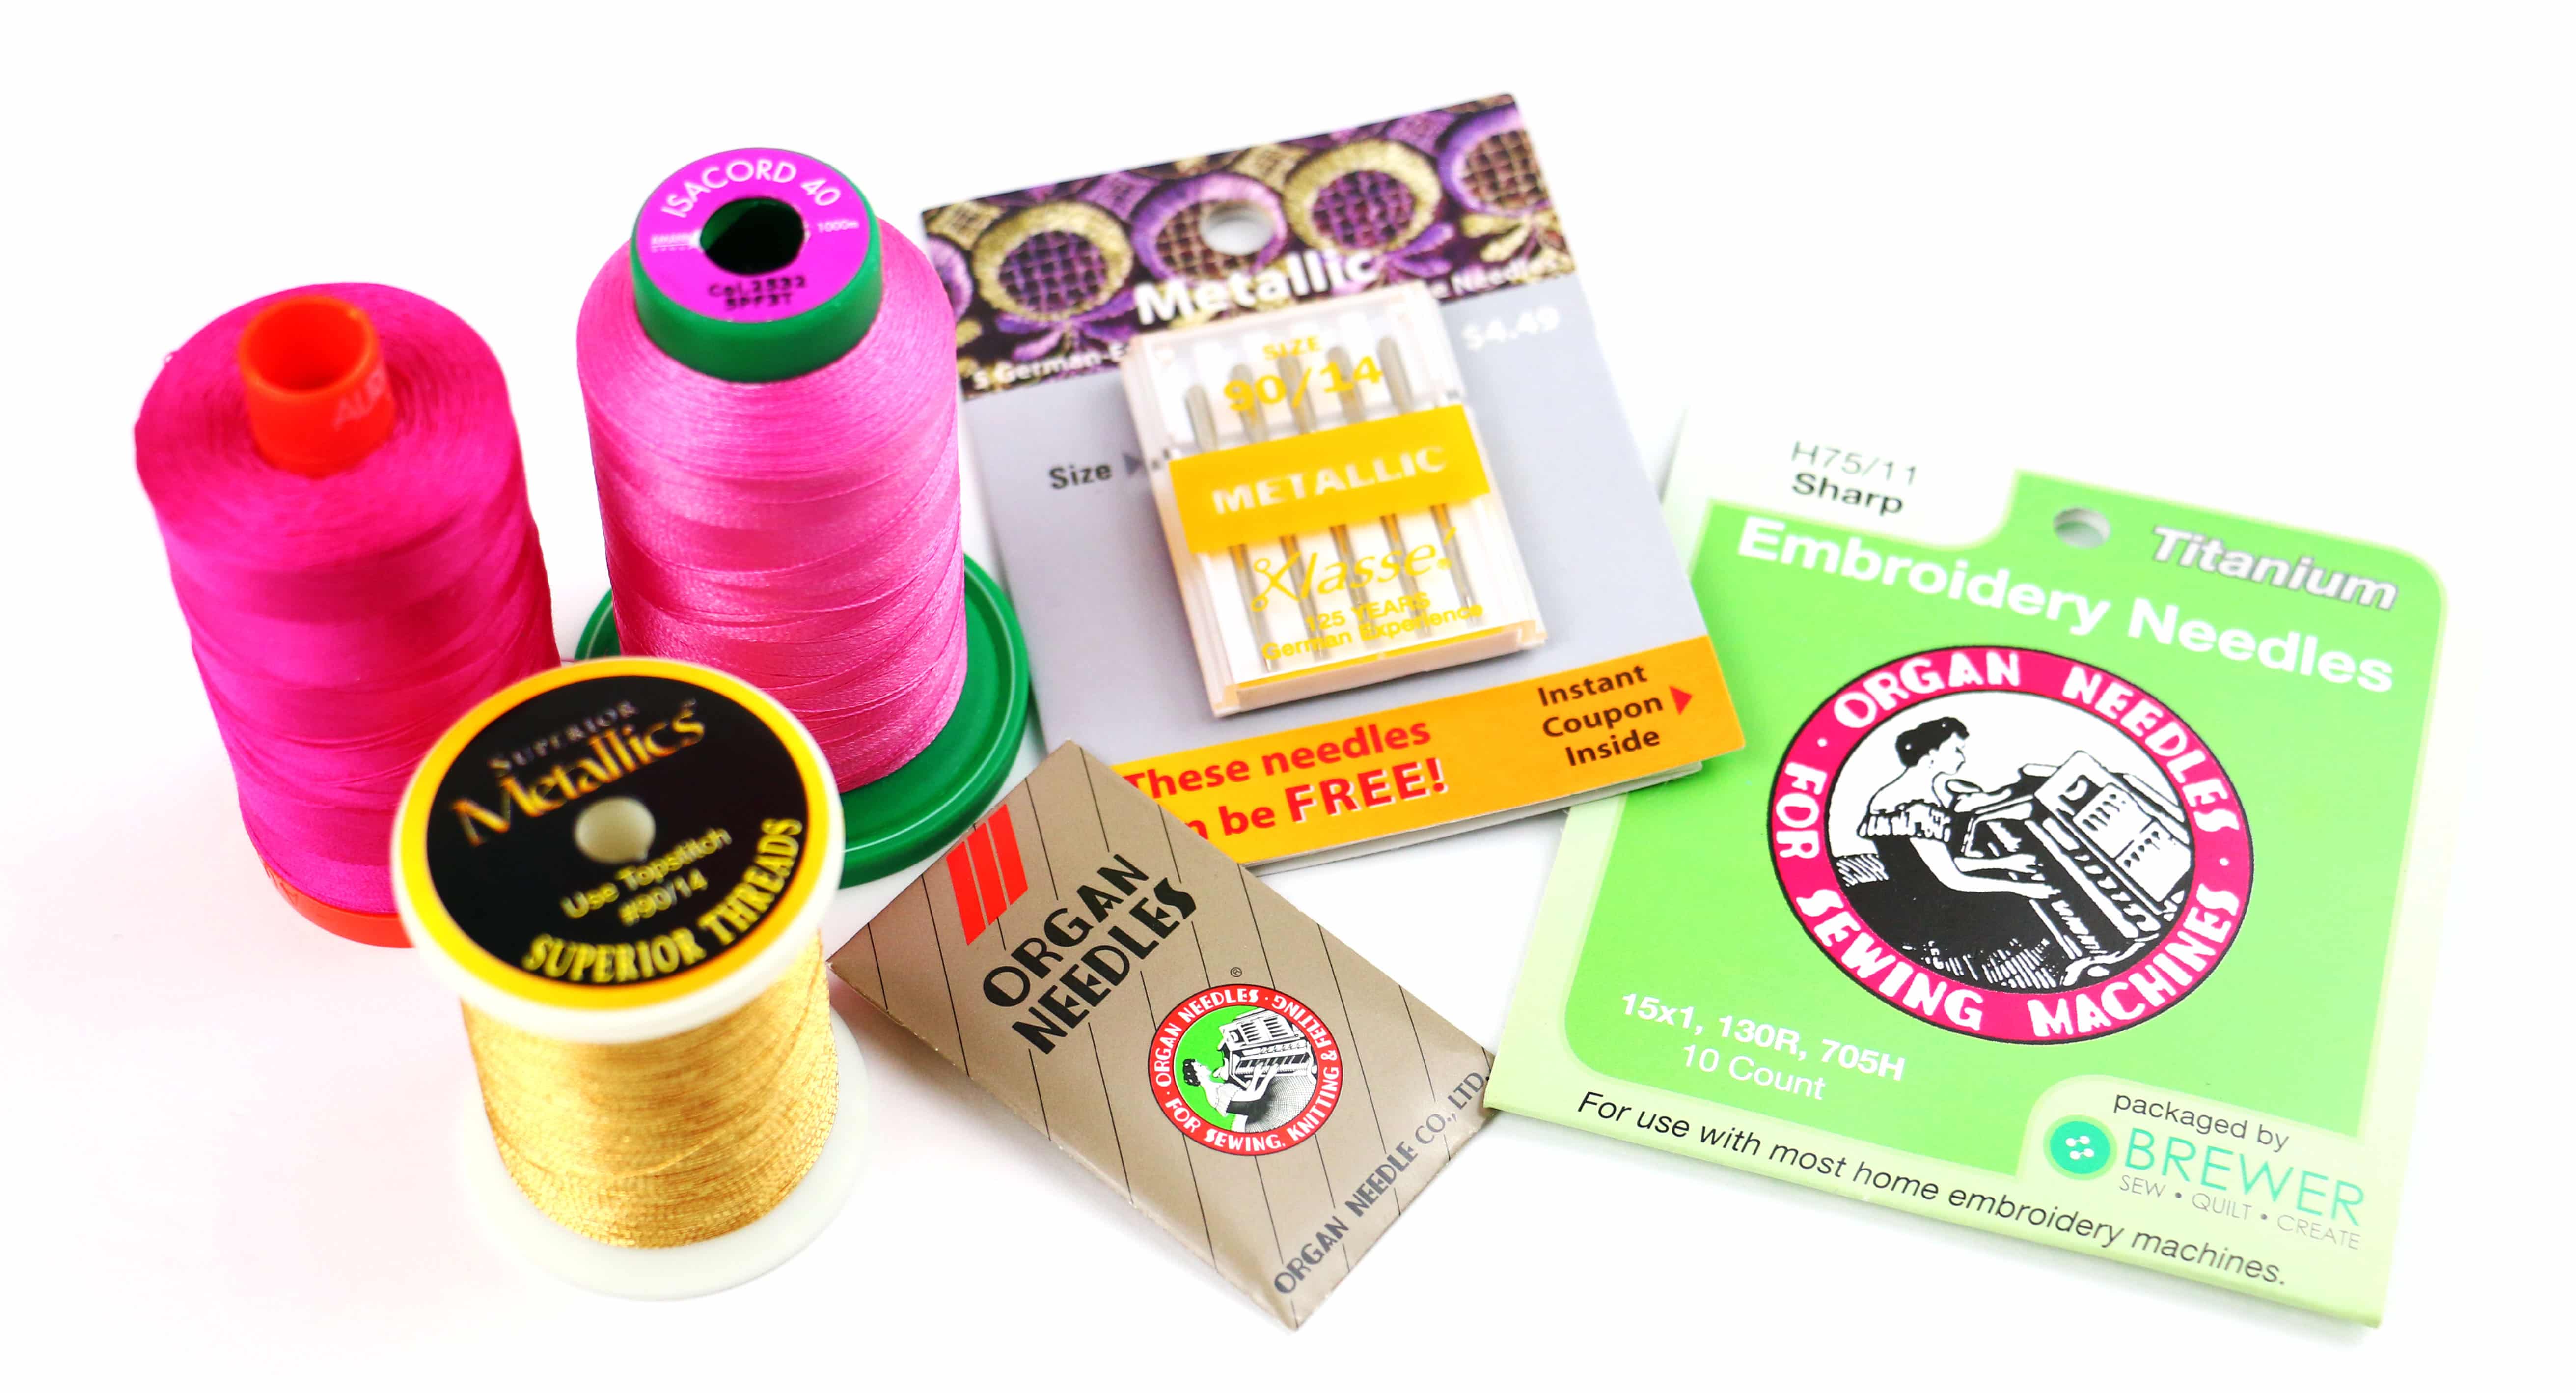
Thread and Needles for Napped fabrics
Thread is really going to depend on the design and desired effect. As far as needles, use an embroidery size 75/11 for most napped materials and use an embroidery needle 90/14 for thicker napped materials like a hotel style bathrobe. Refer to Part 3 where I talked about different types of threads and needles.
How to hoop Napped fabrics?
Part 4 on my Embroider-Along was all about hooping! There are two ways of hooping; hoop the material and stabilizer together or hoop the stabilizer and float the material on top. When it comes to embroidering on napped materials most times it will be necessary to hoop the stabilizer and float the material on top. Consider velvet for a moment, the material is thick short pile and easily crushed. When floating the napped material on top of the stabilizer it is important to keep the materials in place, reference the adhesive portion of Part 4 for various adhesive suggestions.
Type of designs for Napped fabrics
Try designs with wider satin stitches, motif patterns and fill stitches. Avoid designs with thin running or satin stitches. These types of stitches can get lost in the loft and pile.
Stabilizer Guide for Napped fabrics
Below is a basic guide for napped materials and the suggested stabilizers:
- Felt: Cut Away Medium hoop material and stabilizer (the pile is so short the hoop marks will most likely iron out).
- Fleece:
- Low density designs – hoop Tear Away Heavy Weight and float material on top. Use a water soluble such as StitcH20 over the top.
- High density designs – hoop Cut Away Medium and float material on top. Use a water soluble such as StitcH20 over the top.
- Luxe cuddle, Minkie, Faux Fur: Hoop PolyMesh Cut Away and float material on top. Use a water soluble such as StitcH20 over the top.
- Towels: hoop Tear Away Heavy Weight and float material on top. Use a water soluble such as StitcH20 over the top.
- Velvet: Hoop Cut Away Medium and float material on top. Use a water soluble such as StitcH20 over the top.
Embroidering on Bathroom Hand Towel
The bathroom hand towel is the most wonderful gift of all. Everyone needs one, they are available at every big box store, are easily personalized and stitch up fast and easy. Let’s go over step-by-step how to use a Tear Away Heavy Weight stabilizer with StitcH20 on top to embroider a bathroom towel.
Selecting the Stabilizer and Design
Based on my stabilizer guide above I would hoop a Tear Away Heavy Weight stabilizer with StitcH20 on top. Depending on how light or dense the design is you might find it necessary to add two layers of the Tear Away. You could also use the floating under the hoop technique you learned in Part 6 when embroidering on the Wine Bottle Apron. This beautiful font is built into my BERNINA 790 Plus. Check your user manual for built in embroidery designs or ask your local shop for additional monograms.

Preparing Bathroom Towel
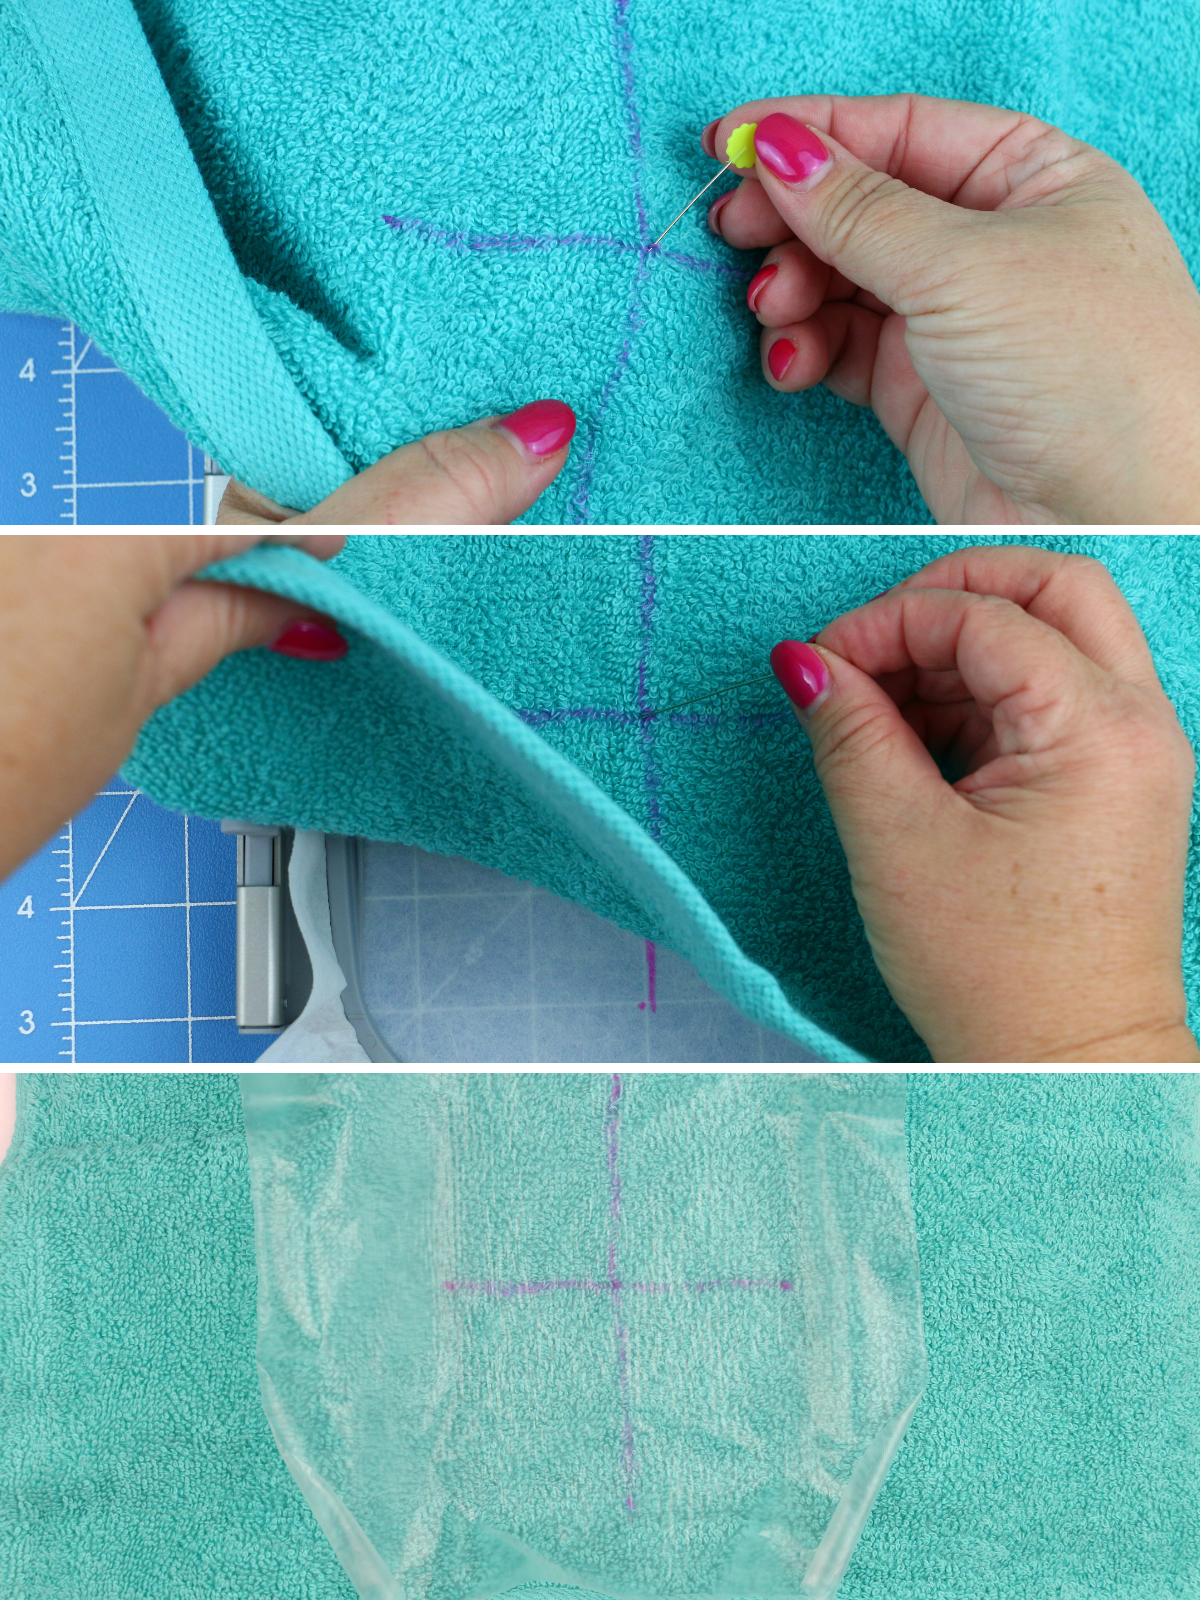
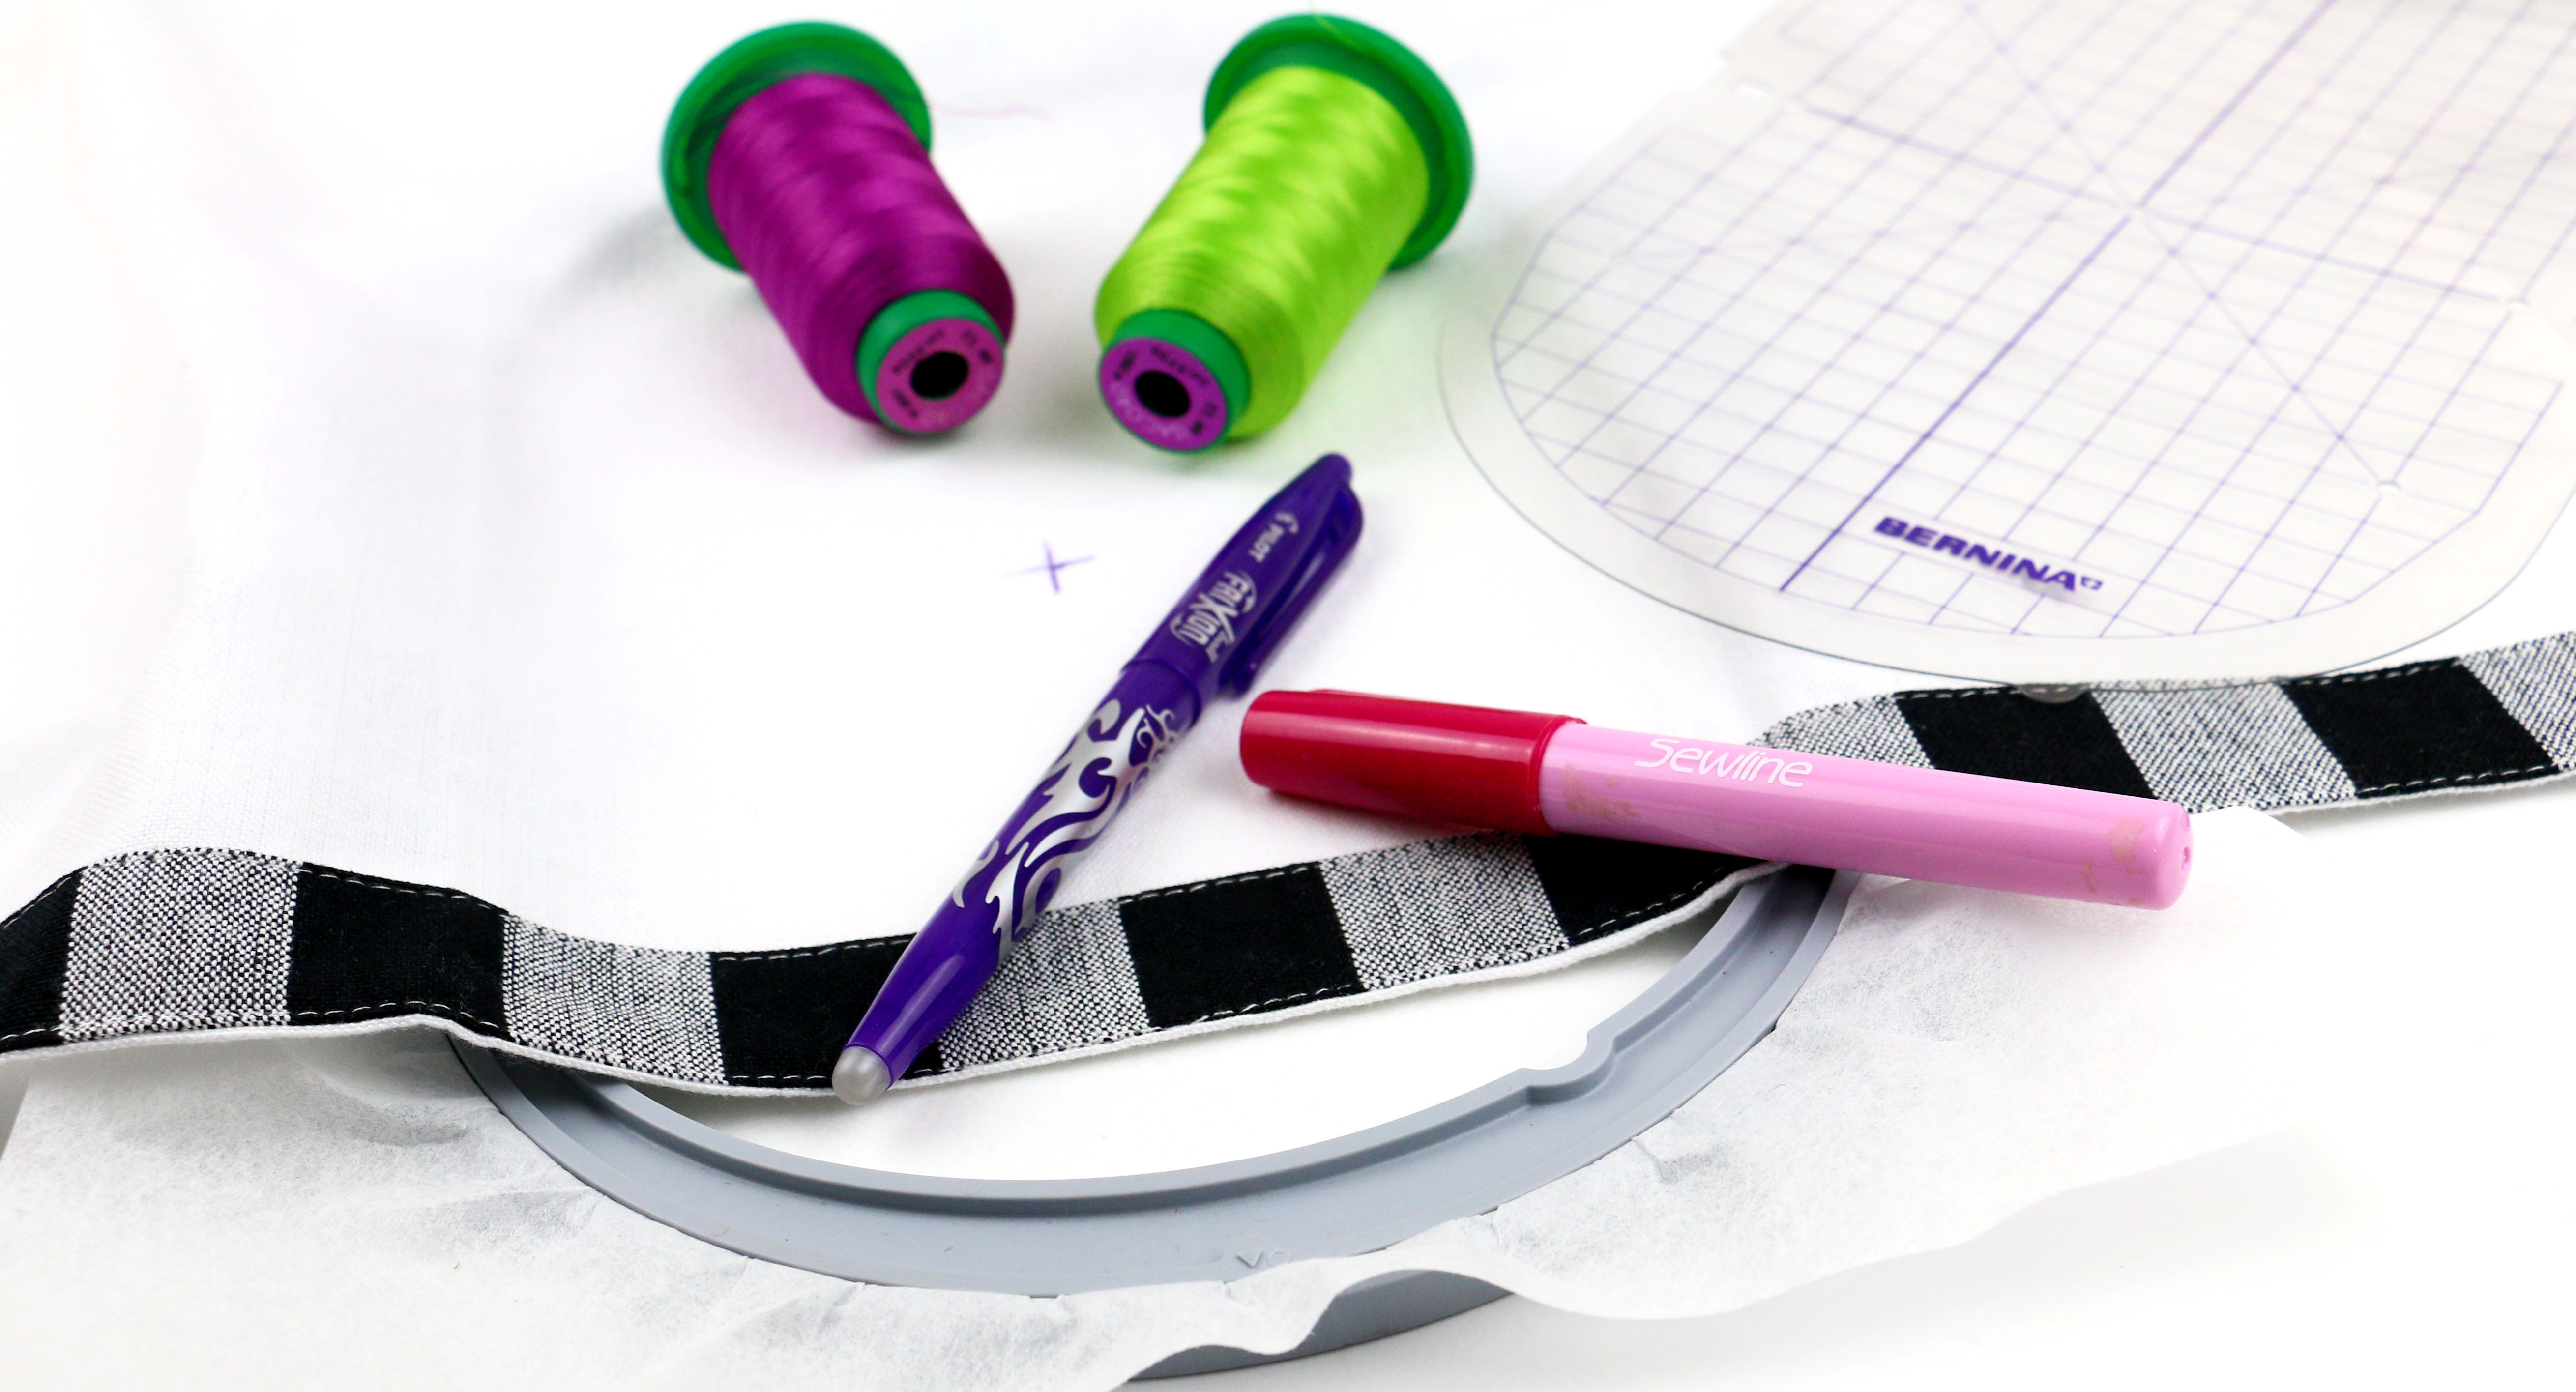
Find the center of the towel by folding it in half width wise, use straight pins to temporarily mark. Place the template over the center mark and use a marking pen through the holes on the grid. Connect the dots to mark center cross hair. I used the Frixion highlighters because removing is achieved with an iron and they leave no residue. You can also use a steam iron so the iron doesn’t crush the towel pile.

Mark Stabilizer
Use the hoops grid and marking pen. Mark directly onto the Tear Away Heavy Weight stabilizer. Connect marks to make a cross-hair line. Keep the center mark on the Tear Away Heavy Weight stabilizer over the center mark on the cutting mat, this will help align the towel. Reference Part 6 on the Wine Bottle Apron.
In a ventilated area, spray a light coat of spray adhesive over the center of the stabilizer. Avoid spraying onto the plastic of the hoop and near your machine.
Pro Tip: Use a rotary mat, Quilters Cut ‘n Press shown, to lay the hoop/stabilizer over. Use the lines from the rotary mat to help you connect your dots to form the cross-hair line.
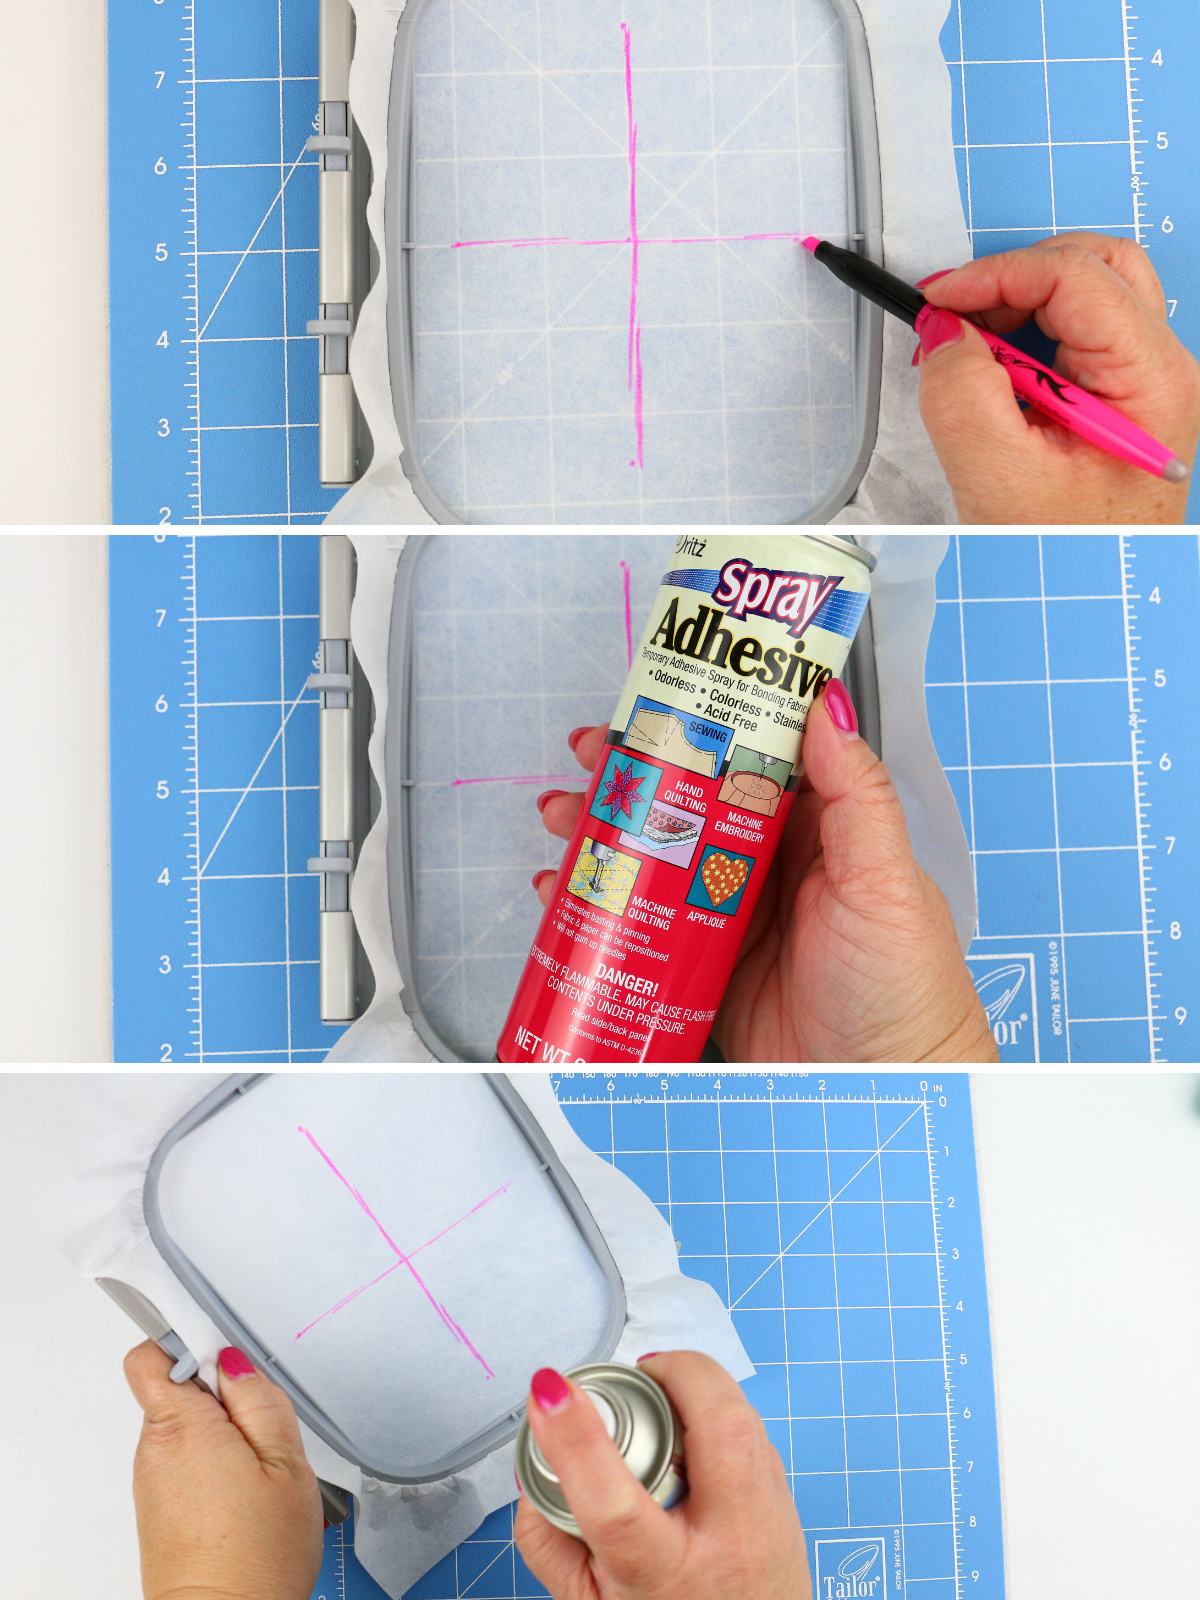
Place a pin through the center of the mark on the towel. Align mark on tear away stabilizer and press towel firmly to the stabilizer. Place a piece of StitcH20 over the hoop area.
Basting and embroidering
Choose design and add a basting stitch around the design. The basting stitch will help secure the wash away to the towel while embroidering preventing the wash away from shifting. Sew embroidery design.
Pro Tip: The basting stitch is a very long length stitch, and often times the doesn’t catch until after the machine has sewn about 5-6 stitches which leaves a gap. To ensure the basting stitch begins at the start, lower needle and bring the bobbin thread up toward the top of the material. Hold both top and bobbin thread with fingers and start sewing the basting stitch.
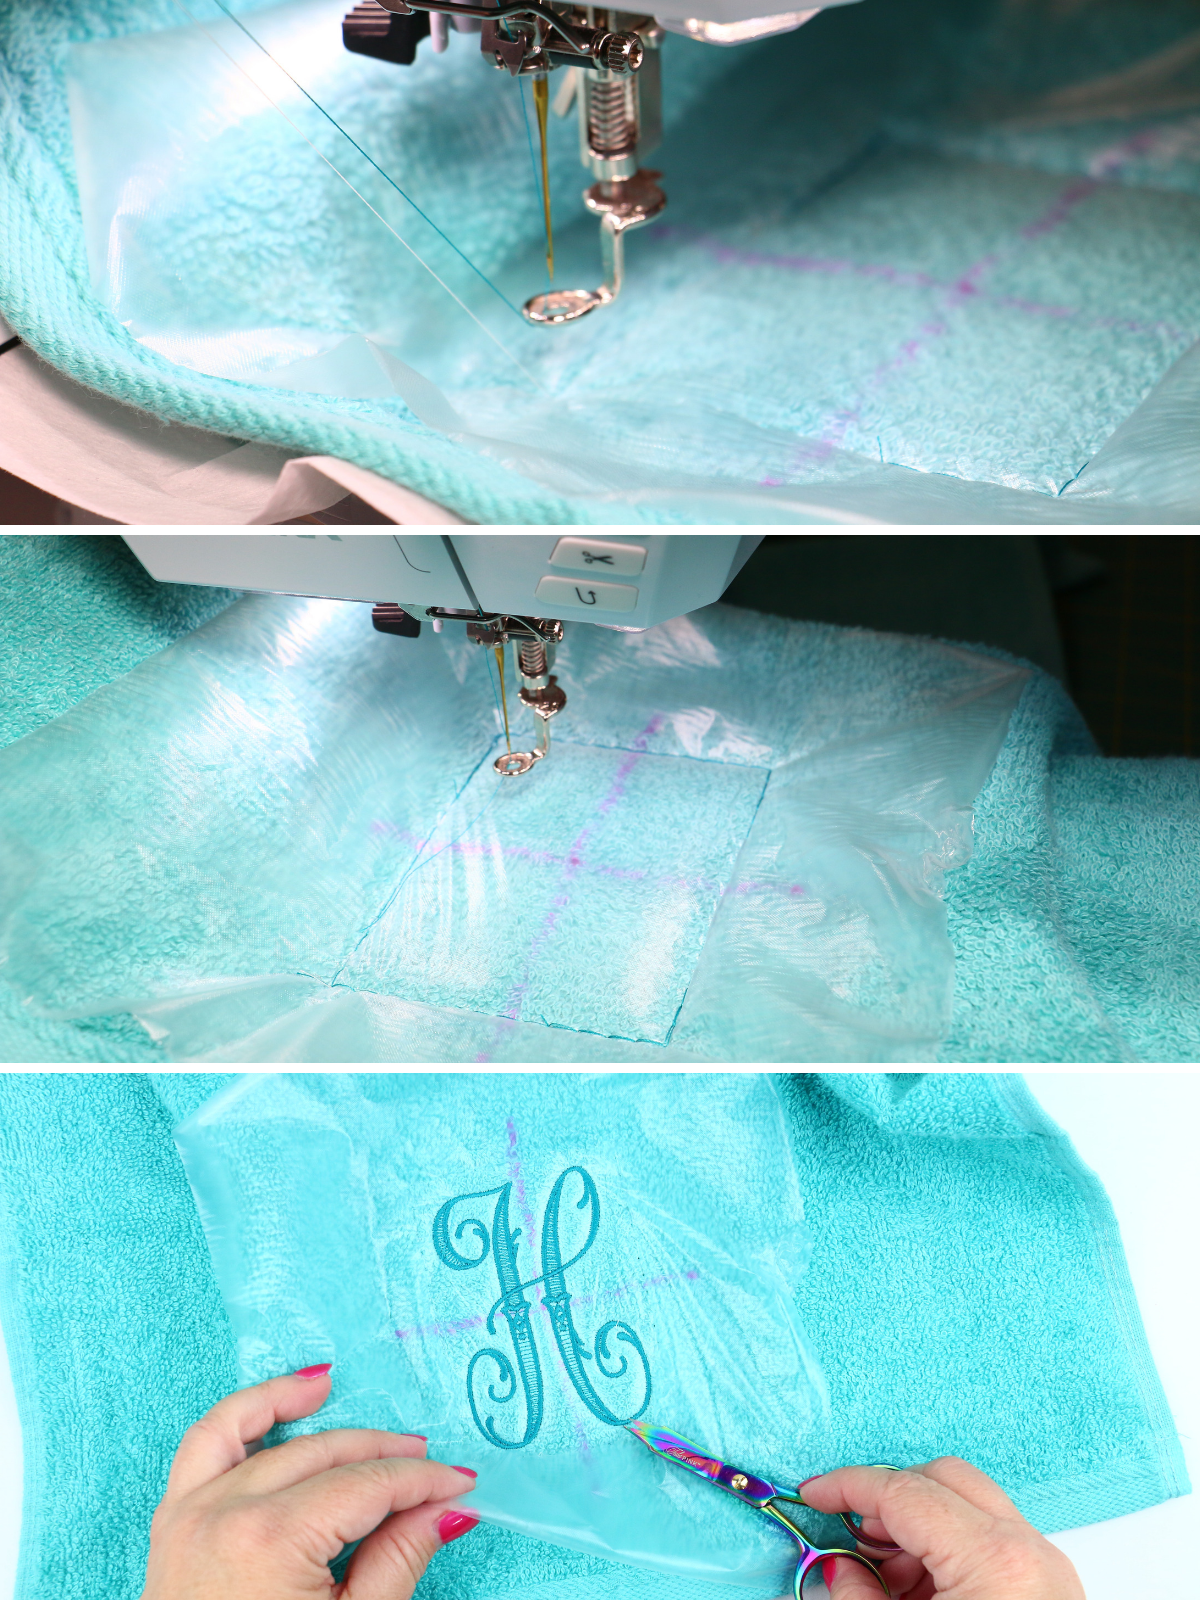
Remove stabilizer
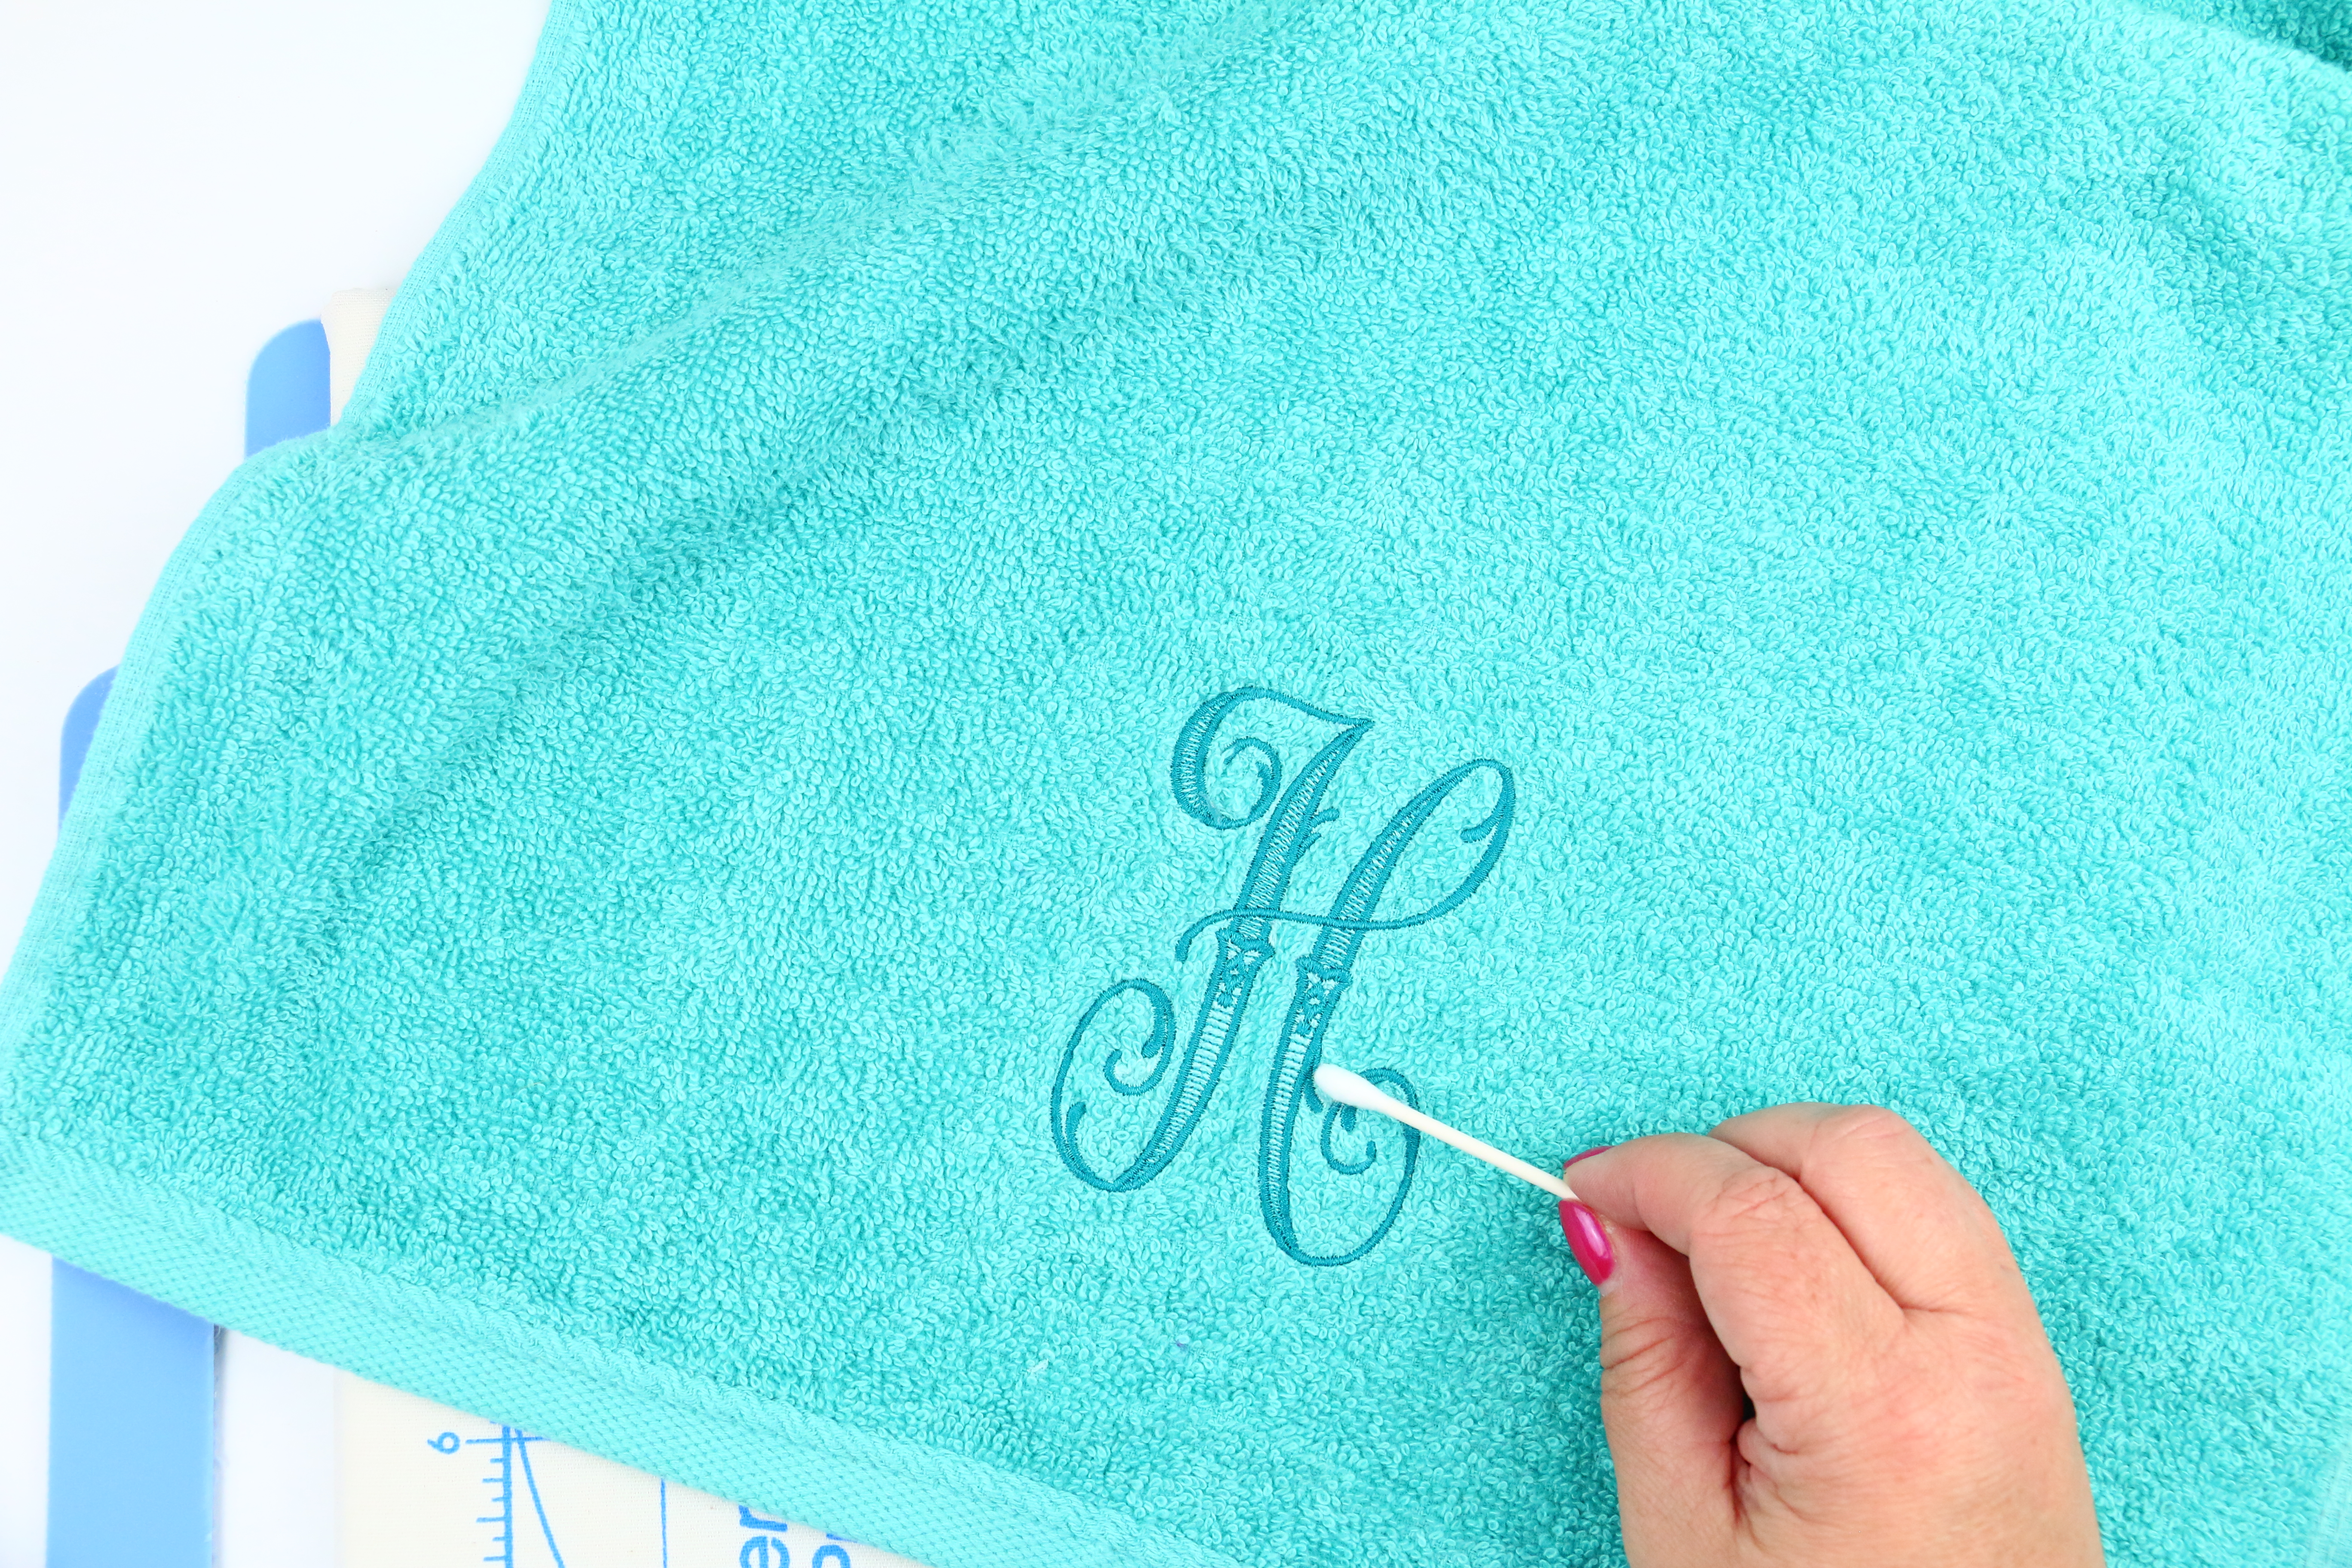
Once stitching is complete, remove hoop from machine. Gently remove the basting stitches with scissors. Consider these large ring micro tip scissors. Remove the wash away by holding the stitches and gently pulling the stabilizer. Turn hoop to the wrong side and gently remove the tear away stabilizer while holding the stitches. Use tweezers to remove all the tiny pieces of wash away. If there are any pieces difficult to remove try wetting a Q-Tip and rubbing the wash away stabilizer. Fold towel in thirds, add some bath salts or mini soaps and your about to make someone smile with a personalized embroidered gift.

What is next?
The next part of my Embroider-Along finish with the “How to” portion showcasing sheer materials. Then we will be onto the final four parts focused on more detailed step-by-step projects. Stay tuned there will be some fun designs for you.
What is your favorite type of material to embroider on and why? Let me know in the comments below and please ask any questions you might have about sheer materials for next weeks post. Be sure to keep following along here, you can also follow BERNINA on Instagram and Facebook to see the latest post!
Here is the Embroider-along schedule:
- Embroider-Along Part 1: Intro four most popular materials for machine embroidery
- Embroider-Along Part 2: Stabilizer and Materials
- Embroider-Along Part 3: Needles and Thread
- Embroider-Along Part 4: Placement and Hooping for Machine Embroidery
- Embroider-Along Part 5: How to Embroider on Knits
- Embroider-Along Part 6: How to Embroider on Woven materials
- Embroider-Along Part 7: How to Embroider on Napped Fabrics
- Embroider-Along Part 8: How to Embroider on Sheer Materials
- Embroider-Along Part 9: How to Embroider on a Ladies T-shirt
- Embroider-Along Part 10: How to Embroider on a Pillow Case
- Embroider-Along Part 11: How to Embroider on Luxe Cuddle® Rose
- Embroider-Along Part 12: How to Embroider on a Pet Screen
Until next time I hope you have a creative day, bye-bye!
Sue
Used Products

What you might also like


4 comments on “Embroider-Along Part 7: Napped Fabrics”
-
-
Hi
Great question. No, I didn’t do anything to density. Sometimes it is a matter of just stitching out the design to see how it will be. It can be hard to tell exactly on the screen. I do try to choose designs as mentioned in the blog which have some fill and wider satin stitches. Avoid running stitch designs since the thin stitch can get lost in the pile.Thanks for following
Sue
-
-
Hi Sue, thanks so much for the detailed instructions on embroidering on a towel or other similar fabrics. I often use netting to cover the top of a towel before embroidering on the towel in a matching color to help keep down the nap besides some wss. The extra netting usually just tears away from the design, but if not, you can trim the rest with a pair of scissors. I never thought of using a frixion pen on towels, but I often use one on other types of fabric, and now I have another use for my frixion pens.
-
Oh what a great tip. I will have to give that a try sometime. Thanks for following along
Sue
-
Leave a Reply
You must be logged in to post a comment.

I have a 790 plus also. Did you have to increase the density of the letter that you embroidered on the towel?