Creating a Border Design with BERNINA Toolbox
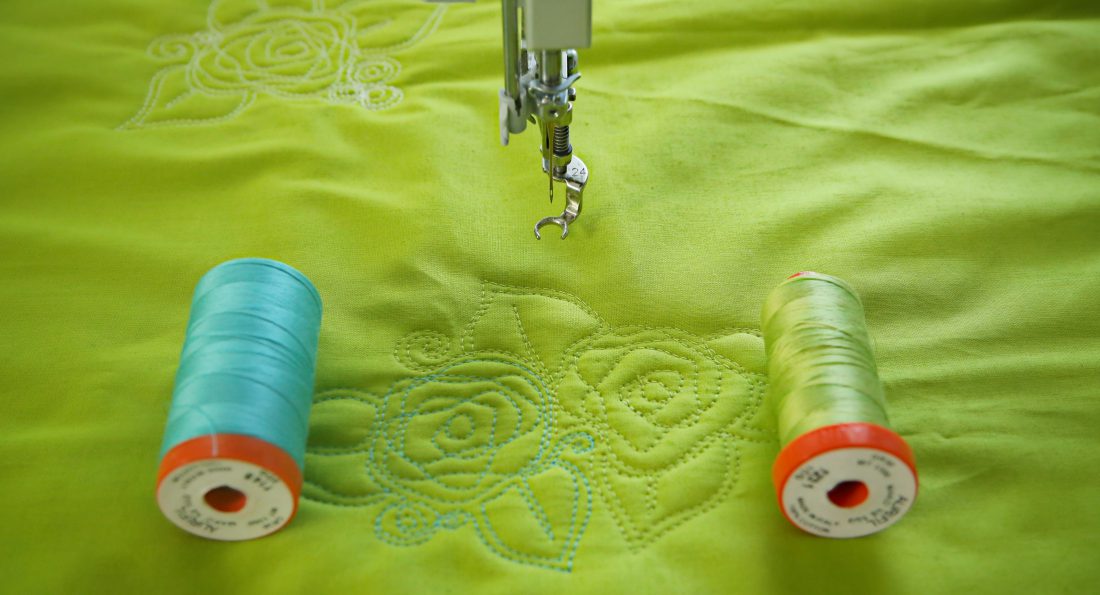
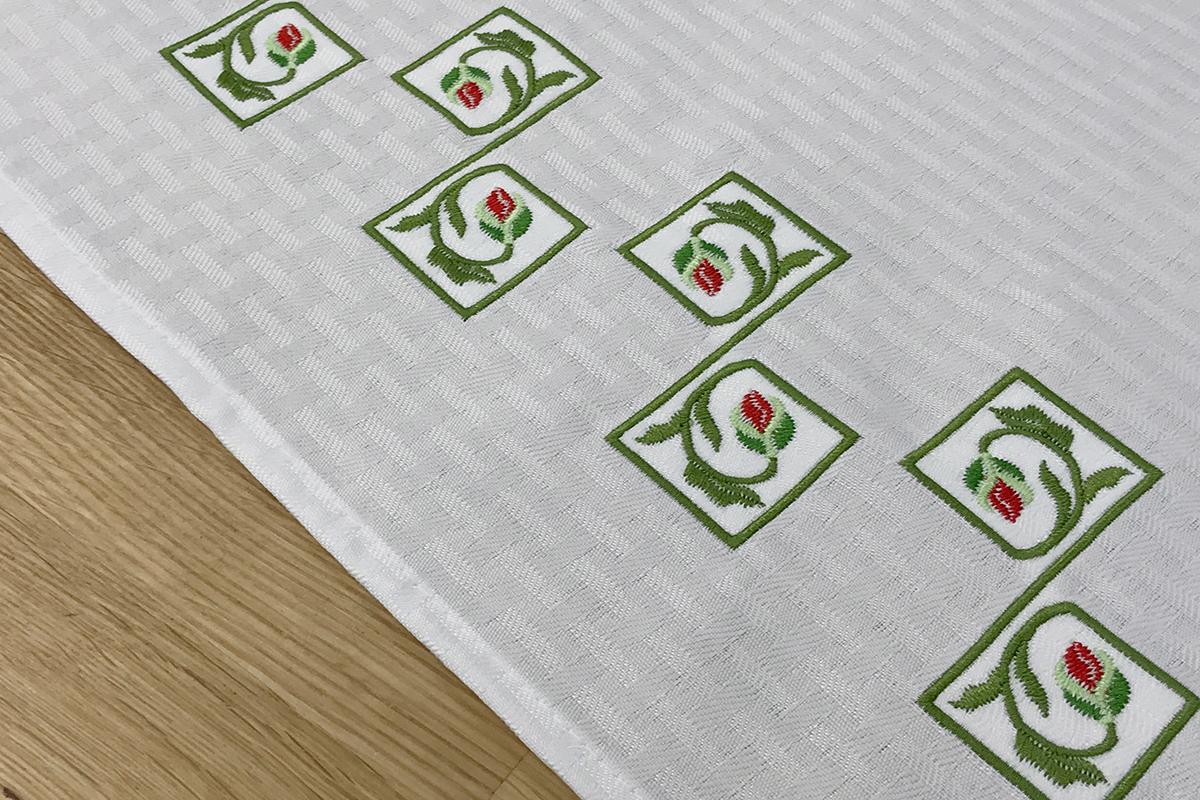
Floral borders have a unique way to turn a plain tablecloth or table runner into a striking décor piece. They can also set the tone for a meal or event. I like to start with a simple motif, tile it along the edge and let it do its magic. With BERNINA Toolbox software, it’s quick work to assemble a basic repeat of the border. After that, it comes down to stitching it out and rehooping as needed.
Preliminary design considerations:
- Most border designs are stitched rotated, to fit the long side of the hoop
- We will create the design horizontally (in its natural orientation) and rotate it left (counter clockwise) along the way.
- Why left? This way the bulk of a tablecloth (or other item) can rest to the left of the hoop (away from the machine) with the border area in the hoop. This avoids carrying bulk in the harp of the machine and makes the embroidery much easier.
- We will create a single copy of the motif, and then clone (copy) it to fill one hooping. You can repeat the hoopings as needed to fit your project.
- We will be working in metric units to simplify the math since it makes for round numbers with simple or no decimals.
- You can switch back and forth between Metric and US units in Toolbox by selecting My Toolbox > Settings > Measurements.
- In this project, we’re designing for a rectangular project (table cloth or table runner).
- I will be using a single design from the BERNINA Exclusive Design Collection #82021 Fashion de Fleur, available in a USB stick version from your local BERNINA dealer.
Let’s create a border design!
Start with a New design file.

- Type the file name: Floral Border.
- Click OK.
The main workspace screen of Toolbox will now open up.
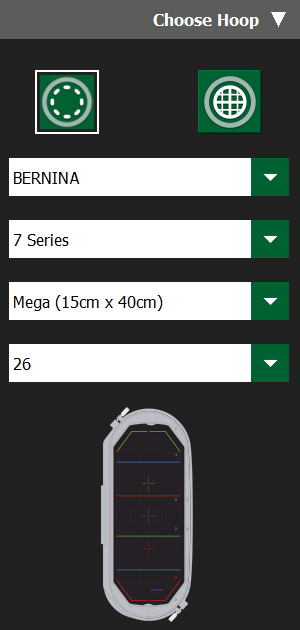
Hoop Set-up
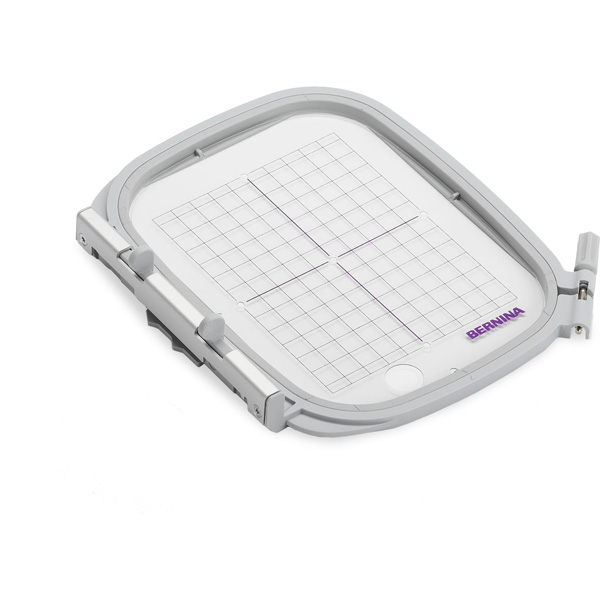
- Using the View Tool, in the Choose Hoop section, select the Mega Hoop (15 X 40 CM).
- The Mega Hoop is the best first option for embroidering running borders.
- We will consider other hoops later in this post.
- Note: when showing any hoop Toolbox will turn on the display of the Template by default: while this is very useful at the end of a designing process and in preparing for the stitch-out, it is preferable to turn off the display of the template while working with designs so that we can see the grid and origin lines
- Show your Grid and Origin lines (View > Grid/Origin).
- Drag the workspace to center it on your screen if necessary.
Your hoop settings should be like the following:
Let’s add the first motif.
Using the Add Design Tool:
Select Add design > Import Design > Import Design from PC.

- Navigate to the location of your USB stick for the BERNINA Exclusive collection Fashion de Fleur.
- Select Design # 82021-39.ART.
- Note: This format will make sure the original colors are maintained when you insert the design.
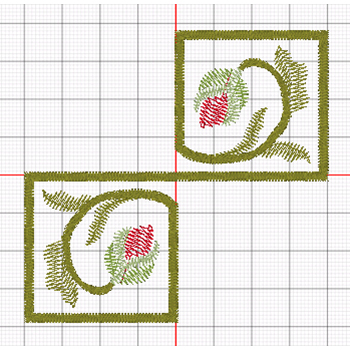
You should now have the following design on your screen: a florid Greek key element.
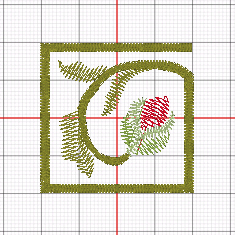
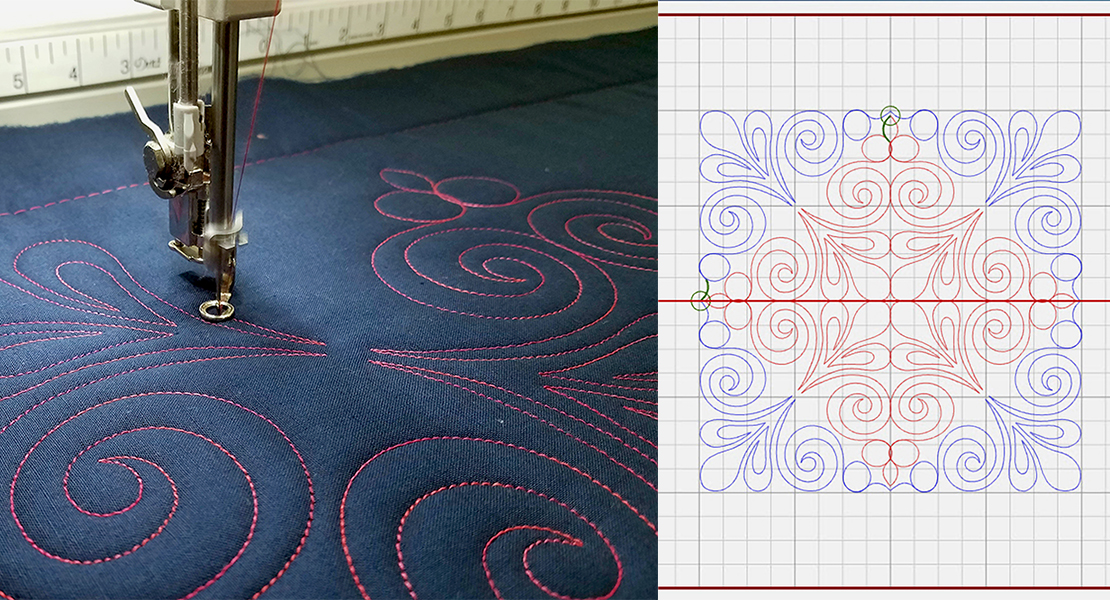
Making the full Greek key by combining 2 of the single motif
The following steps will rotate, copy and combine the key elements into a single arrangement:
Edit > Scale/Rotate > Rotate 90 degrees Right (You can do this by clicking twice on the Rotate 45º clockwise, or by typing 90 into the box.)

The design will now be rotated as illustrated below:
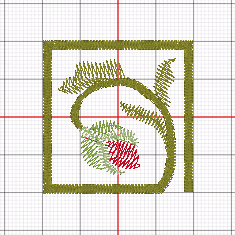
Edit > Copy/Delete/Group > Copy (Click the down arrow next to Scale/Rotate if you cannot see the icon.)

- Drag the new element down to the lower right side of the first.
Rotate it 180 degrees.

- Drag and drop to position so that the open-ended side lines up with the first one.
The result is as follows: (see the red arrows where the open lines overlap by about one stitch, without a gap).
This now constitutes the basic motif of the border.
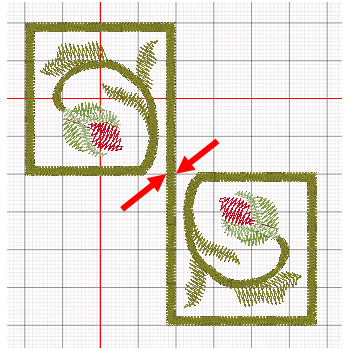
In order to keep everything together, Group the two designs together.
- Select > Select All (CTRL-A)
Edit > Copy/Delete/Group > Group (CTRL-G)

Notes:
- The basic motif is self-enclosed and does not need to connect to neighboring motifs.
- This lets us repeat the motif in any way we choose—in a continuous border or in groups of 2, 3, 4 with some separation.
- By knowing the size of the basic motif, we can calculate how many repeats we can have along a table cloth side.
To find out the size of the basic motif, review design information in the View > Design Information panel:

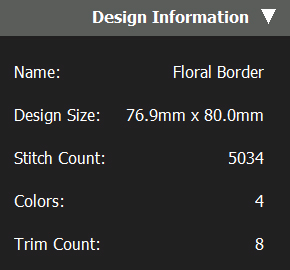
- The Width is 76mm (3 inches).
- The Height is 80 mm (3.1 inches).
- Once rotated to stitch out, these numbers will be transposed.
- Note: Most embroidery hoops have a width of 100 mm or more, so the motif on its side will fit in any hoop without any difficulty.
Let’s rotate the motif now so that we can start working with hoops.
- Select > Select All (CTRL-A)
- Edit > Scale/Rotate > Rotate Left 45º (twice)
- Drag to Recenter the design
Notes:
- Since it was rotated, the motif is now 80 mm wide X 76 mm tall.
- Allow a centimeter (10 mm) for spacing between the repeats of the motif.
Now… what hoop to use?
Medium Hoop: 130 mm tall X 100 mm wide (5.1 X 4 inches)
- It is clear that the motif can only fit once in the BERNINA Medium Hoop which is 130 mm tall.
- 2 copies of the motif with 10 mm between them would add up to: 76+10+76 = 162 mm.
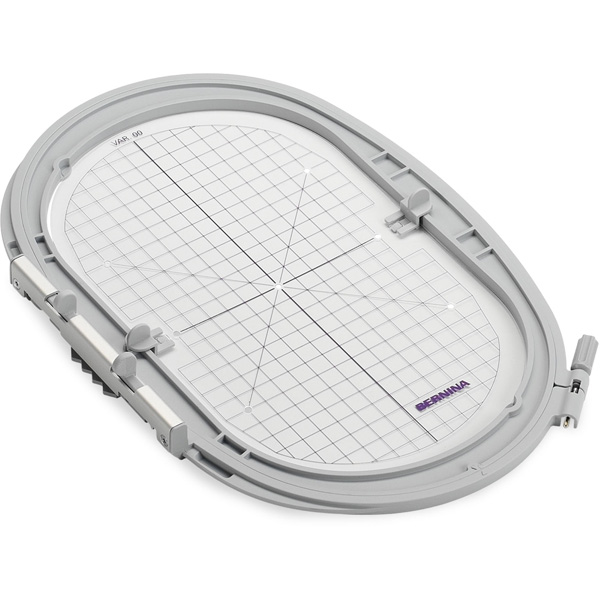
Large (Oval) Hoop: 255 mm tall X 145 mm wide: (10 X 5.7 inches)
- This hoop is plenty wide.
- It appears that we should be able to fit 3 repeats of the motif with two 10mm spacers which add up to: 76+10+76+10+76 = 248 mm, which is just shy of the maximum of 255. However, the rectangular nature of the motif will jut out in the corners as you can see below.
- So only 2 repeats would fit in the Large Hoop.
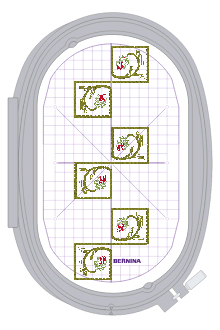
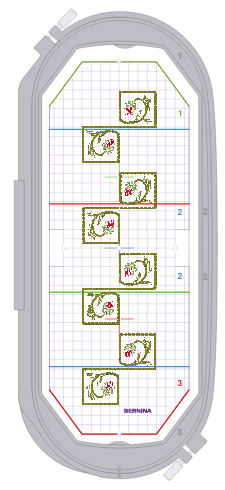
Mega Hoop: 400 mm tall X 150 mm wide (15.75 x 6 inches)
- This hoop allows models that can’t use the Maxi or Jumbo Hoop to leverage the same 400 mm height of embroidery as the Maxi and Jumbo Hoops.
- It is specifically designed to make border style embroidery faster and easier.
- Typically, using the Mega Hoop on many BERNINA machines will automatically split a tall design and stitch it out in sections (Positions 1, 2, 3), pausing when it’s ready for you to switch the hoop position. However, If you have a 7 or 8 Series BERNINA embroidery machine, it can stitch the entire hoop content in one pass without having to reposition the hoop.
- In total, we can fit 4 repeats in the Mega Hoop.
- NOTE: We can also fit the same 4 repeats in a Maxi or Jumbo Hoop, but as they are wider they would require the use of more stabilizer.
- So Mega Hoop it is for me!
Cloning the design to make 4 repeats:
With the original motif (pair of keys aligned and grouped) on your screen:
- Select > Select All (CTRL-A) if not already selected
- Edit > Copy/Delete/Group > Copy
- Drag the second motif down and to the left so that it is one grid square (10 mm) below the first
- TIPS:
- Zoom in on your work by rolling the mouse wheel upward so that you can see both the major and minor grid lines.
- Use the fine (minor) grid lines to space out the motifs (by 10 lines), especially if the edge of one is not quite on a major grid line.
You now have a pair of motifs. To make this 2 pairs (4 pairs in total):
- Select > Select All (CTRL-A)
- Edit > Copy/Delete/Group > Copy
- Drag the second pair down and to the left so that it is one grid square (10 mm) below the bottom of the first pair.
- Note: Your overall design will now likely reach below the bottom of the hoop. We will re-center it next.
To re-center your design:
- Select > Select All (CTRL-A)
- Drag the design so that its center meets the center of the hoop.
TIP: Use the Sizing (black square) and Rotation (black circle) handles to align with the horizontal origin (red) line. The small circle at the center of your selection should be right on top of where the origin lines intersect (i.e. on the origin).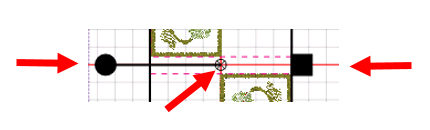
Your design is now composed and ready for embroidery prep and should look like the following:
It’s now time to optimize our design before exporting it for the machine.
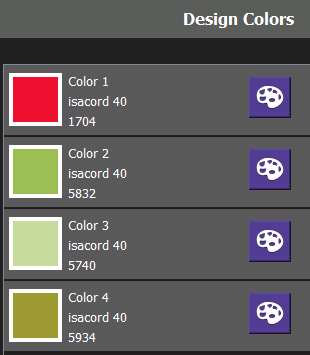
The original motif (82021-39) has 4 colors:
- By cloning (copying) the original design to make full Greek key we ended up with 8 color changes.
- By cloning (copying) the original full key to make a pair of keys we ended up with 16 color changes.
- By cloning (copying) the pair of keys into 4 pairs… we now have 32 color changes! Time to consolidate.
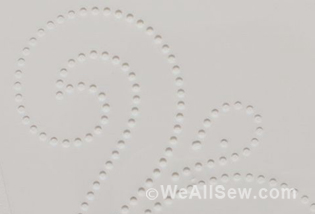
Note: If your machine has the Color Resequence feature (see image below), it can do this automatically and you can skip the next steps!

This design is simple enough that we can merge color stops so that we will have only 4 color stops in the end. The simplest way to do this is:
First, collapse the colors sequence listing to its simplest form by using the Sew Sequence Collapse tool.

Then, after the first sequence of colors 1, 2, 3, 4:
Select the second occurrence of Color 1 (red) and click on the Up Arrow 3 times to move it up until it merges with the first occurrence of red.
![]()
- Select the second occurrence of Color 2 (bright green) and click on the Up Arrow 2 times to move it up until it merges with the first occurrence of bright green.
- Select the second occurrence of Color 3 (light green) and click on the Up Arrow 1 time to move it up until it merges with the first occurrence of light green.
- At this point, the second occurrence of Color 4 (dark green) will automatically merge with the first
- “Rinse and repeat” until all colors are consolidated to just the original 4 colors as seen above.
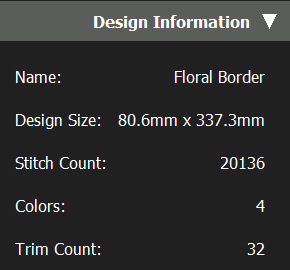
My Design information panel now looks like the following and my design is 3.2 X 13.3 inches (80.6mm x 337.3mm).
You are now ready to export the design to the machine file of your choice using the Export tool.

In addition, now is a good time to print a positioning template of your design by using the Print tool. This can be very helpful in accurately positioning the designs.

Layout considerations… aka how do I embroider this on the border of a tablecloth?
Here’s a few things to consider—especially in making your embroidery easier:
- Measure the length of the border on each side and count how many repeats of the 4-unit motif you can fit on each side.
- Allow 1 cm (10 mm) spacing between each hooping.
- This way, each hooping should be spaced 347 mm … so 350 mm or 13 ¾ inches will make a nice and easy number to work with (and nobody will notice a 3 mm difference).
- Mark a line along the length of the border, at the desired distance from the edge.
- Draw a cross mark where the center of each hooping needs to be.
- TIP: It is often easier to start from middle point of the border and work out.
To embroider a complete rectangle (e.g. even at the corners) or NOT!
I like to simplify the process where I can without sacrificing style. Luckily for us, this is not only achievable, but also desirable in this case. I will only embroider the border on the sides, stopping shy of the corners.
- This will allow the corners of the table cloth to drape more freely and more softly.
- The embroidery will stand out more on the sides.
- If the border side is not long enough to accommodate a last full design hooping, simply.
- Create a copy of the design (by closing, reopening as a copy)
- Delete the number of repeats in the motifs that are in excess.
- Stitch out the shorter version of the design to complete the length of the border.
- For the stabilizer, I chose to use 2 layers of OESD Ultra Clean & Tear Stabilizer, a medium weight tear away stabilizer with a very soft hand or feel.
- TIP: If you’d like to practice on a smaller scale, try a placemat first or a table runner.
For more helpful information on using templates for multi hooping, Check out the eBook Just Embroider It – Multi Hooping with Templates on bernina.com.