CrystalWork Software: Creating a Design Template
Another DesignWorks lesson from Sarah Vedeler, this one on the CrystalWork Software and Tool.
It’s time to learn how to create a CrystalWork template; later we’ll use the template to apply crystals to a project.
Creating the Design
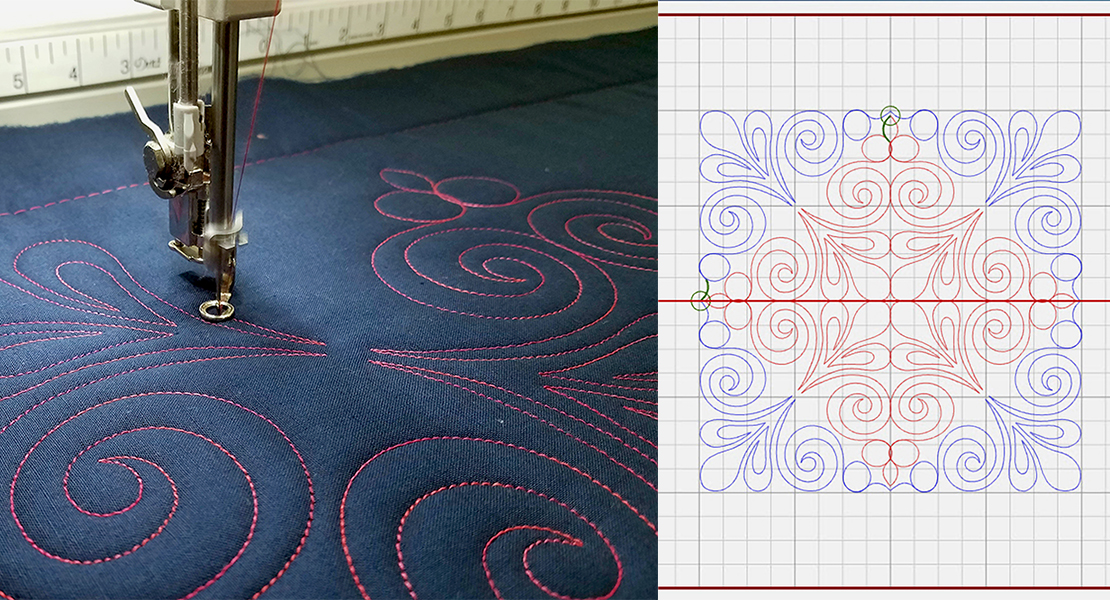
The CrystalWork design is created in the DesignWorks software.
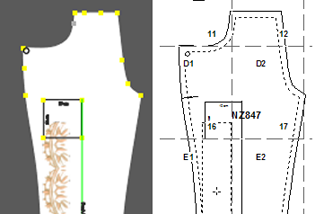
I imported the outline of a design from my Jazzilicious collection and did a rough trace around it using the Create Freehand Shapes tool. I then used the Edit Shape Nodes tool to perfect the shapes. Now, with the shapes selected, I selected the Crystals option from the Pen Properties tab. The default crystal size for a new shape is 6SS (2.0mm) and the default spacing is 1.5mm.
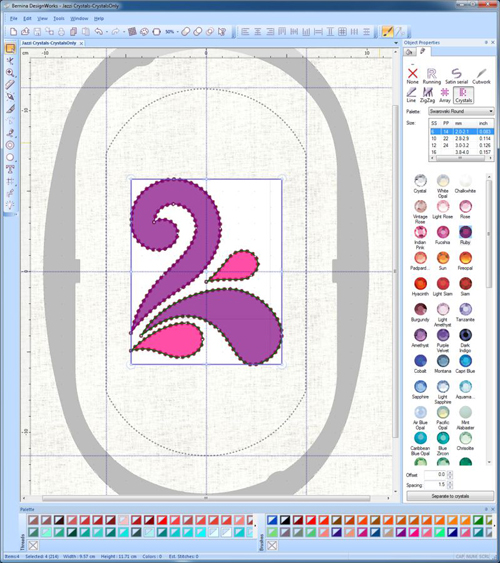
I saved the file as a .DRAW file and then did File – Export – Crystals to Machine to save the .EXP file to my USB stick.
Getting ready to Stitch
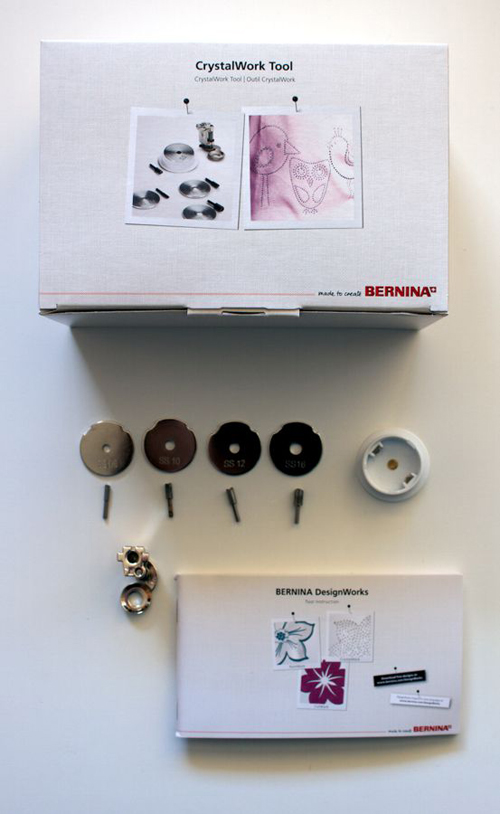
First let’s take a look at what you get in the CrystalWork Tool box.
- The BERNINA DesignWorks instruction booklet
- CutWork Foot #48
- A collection container
- 4 punches of varying sizes (6SS, 10SS, 12SS, 16SS)
- 4 punch plates, one to match each of the punches
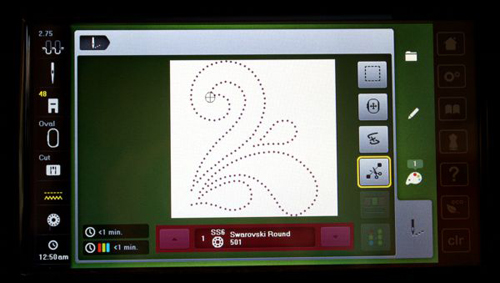
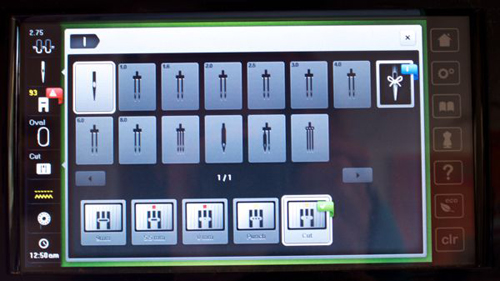
Loading the design into the machine will give you a lot of information about what you need to do!
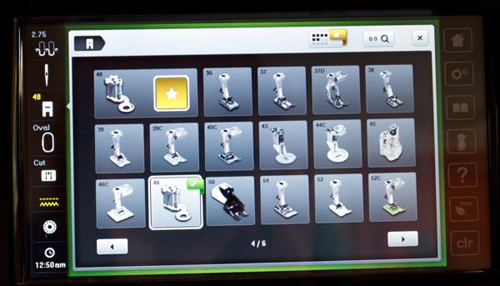
Underneath the design, on the color bar, you can find out that you need to attach the CrystalWork tool for size SS6 crystals. On the left hand side of the screen you can see that you need to make sure you attach the correct presser foot and the correct stitch plate.
The punch part of the tool is a needle-like cutter that is inserted into the machine in exactly the same way as a regular sewing needle. It even has a flat side on it to indicate how it should be inserted – i.e. flat side goes towards the back.
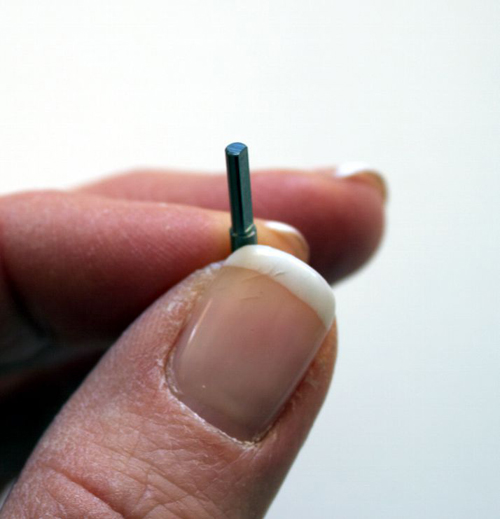
You can just about see in the photo above that the punch does have the size engraved onto it, in this case the 6SS.
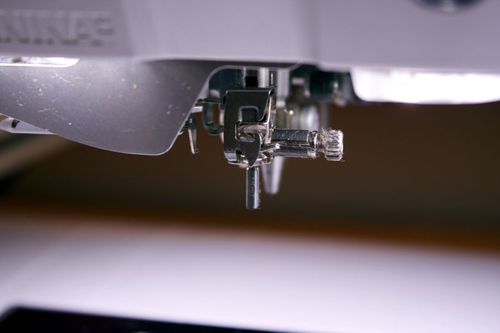
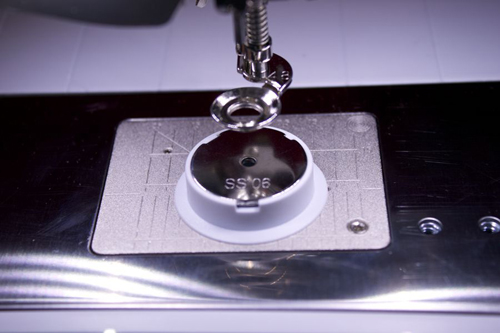
Having inserted the punch part of the tool you will need to attach the CrystalWork Foot #48 and the cutwork stitch plate, identified by the orange square at the back.
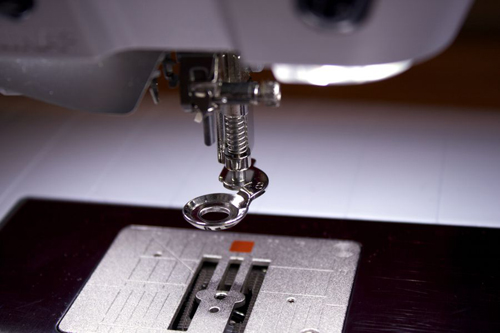
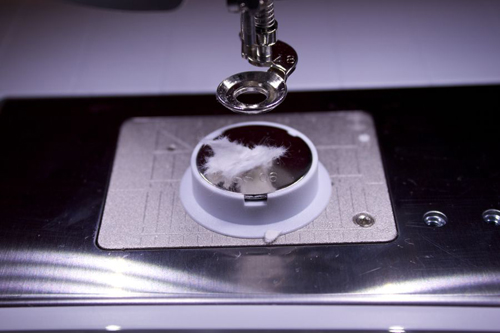
The collection container has a short pin sticking out the bottom and this needs to be inserted into the center hole in the stitch plate.
The punch plate (in this case the SS 06) can then be attached to the collection container. The grooves ensure that the plate is aligned correctly, and magnets hold it in place.
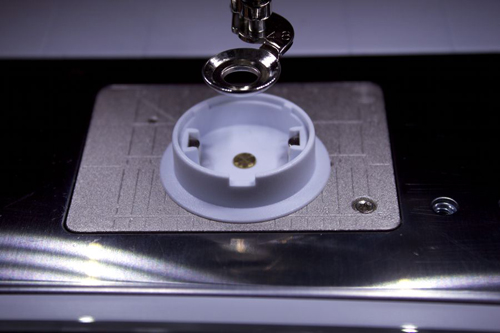
It’s always a good idea to make sure that the punch you have inserted is in fact the correct one to work with the punch plate. Lower the presser foot and the needle using the buttons on the front of the machine and then use the hand wheel (on the right side of the machine) to guide the punch down and into the punch plate.
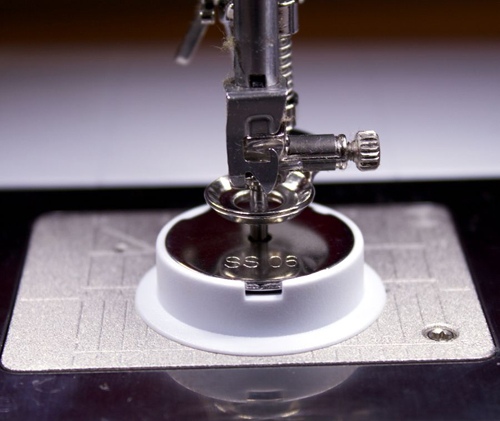
Make sure that you have told the machine that you have inserted the cutwork stitch plate and the #48 presser foot.
Now you are ready to stitch!
How NOT to do it!
Before embarking on this project I knew that stabilizer had to be put in the hoop upside down, but in my rush to be done I didn’t really think about what kind of stabilizer I should be using, so I put my regular trusted embroidery stabilizer in the hoop – OESD Ultra Clean & Tear, a medium-weight tear-away stabilizer.
Getting the stabilizer in the hoop was mildly challenging. What worked for me is:
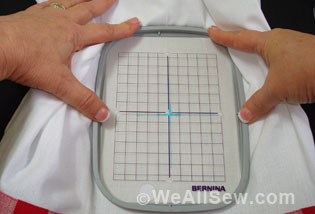
- Putting the inner hoop on the table.
- Placing a piece of stabilizer on top of the inner hoop.
- Then pushing the outer hoop over the inner hoop and tightening it.
Now trim away the excess stabilizer from around the bottom of the hoop (not shown in the photos – largely because it didn’t occur to me as necessary to do until I had finished! I did fold the stabilizer by the hoop attachment mechanism out of the way in order to get the hoop onto the machine.)
I did not have any template material on hand so I decided that a piece of heavyweight card stock would probably do the trick.
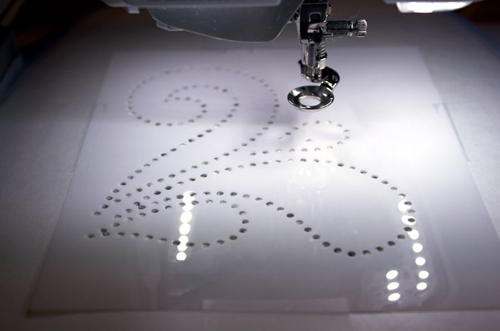
I was very surprised at the speed of the cutting – it took less than a minute to complete the design!
On removing the hoop from the machine I discovered that the tearaway stabilizer had torn quite substantially, and hence probably is not a good choice for this job.
Closer examination of the card when it had been removed from the stabilizer showed a lot of badly cut holes.
Last but not least, the collection container had a pretty big piece of stabilzier stuck in the hole – probably contributing to the bad cuts for the holes.
The moral of this part of the tale… Don’t use a tear-away stabilizer, and cardstock is not the greatest choice of material for the template!
How to do it properly!
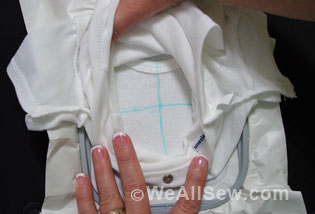
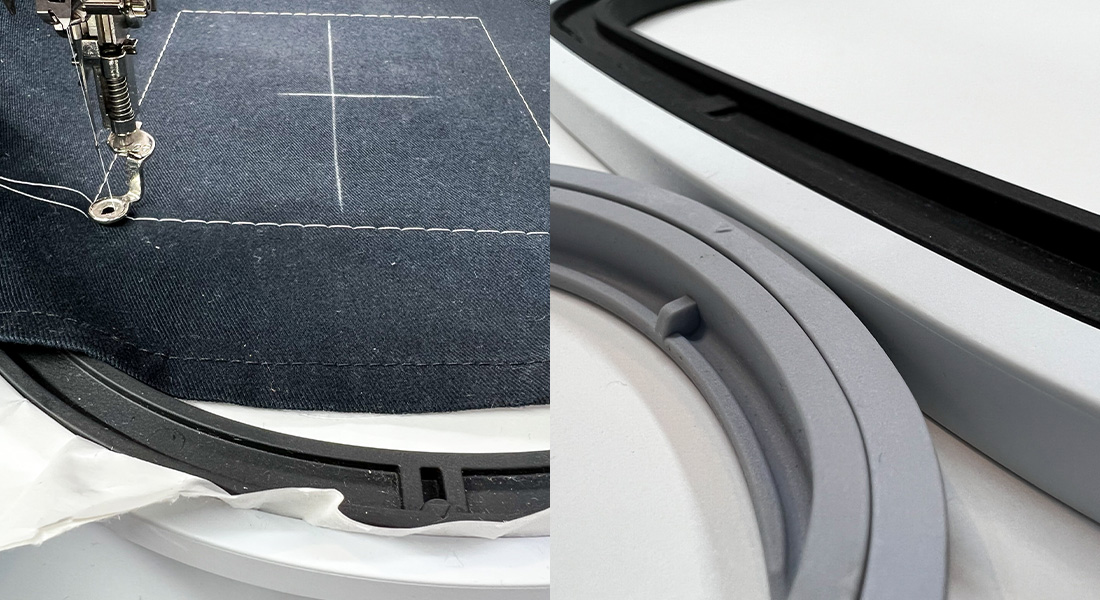
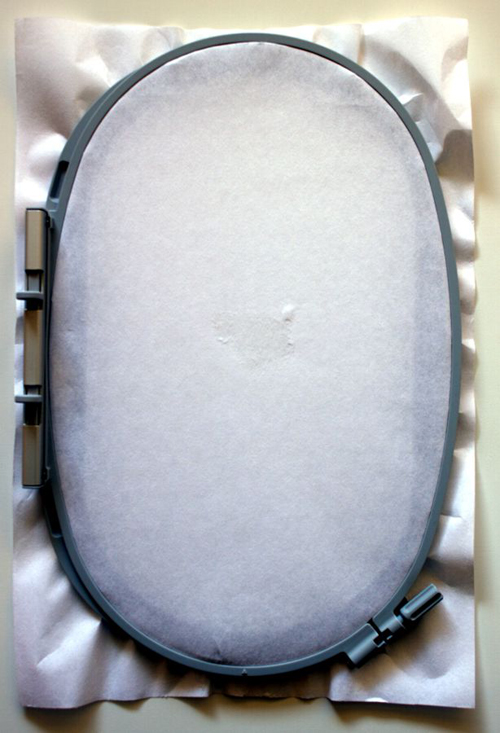
Hoop a piece of cutaway stabilizer – or parchment paper. The only cut-away stabilizer I had on hand was OESD Stabil-Stick Cut-Away. I usually hoop sticky stabilizers without the backing paper as it gives me much better results than hooping with the backing paper on and then scoring the backing paper to remove it from the center of the hoop. I’m really good at scoring all the way through the stabilizer, ending up with a giant hole 🙂 I found it to be just about impossible to get the stabilizer in the hoop so that the sticky side was up without the backing paper on it, and so I did end up leaving the backing paper on. It did make for a solid foundation for cutting!
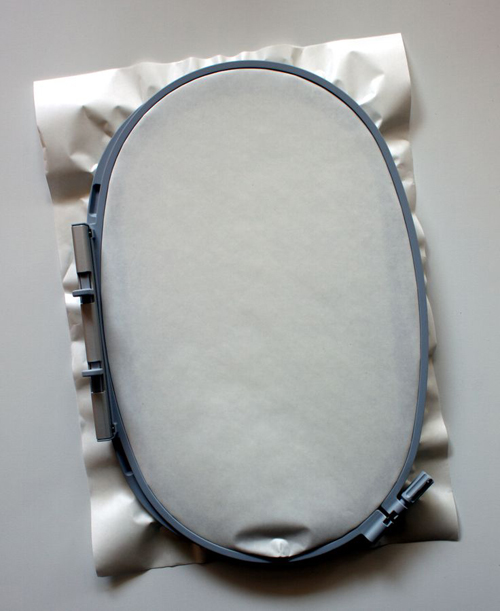
Trim all the excess stabilizer from around the edge of the hoop.
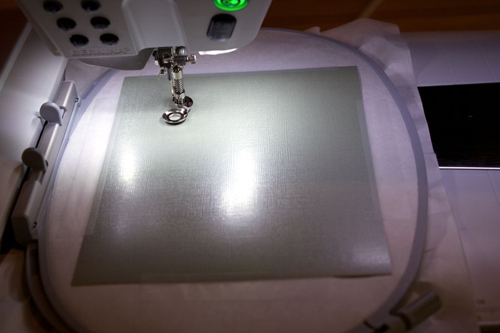
Place a piece of template material that is slightly larger than the design in the center of the hoop. I used stencil plastic held in place with Scotch tape on each side.
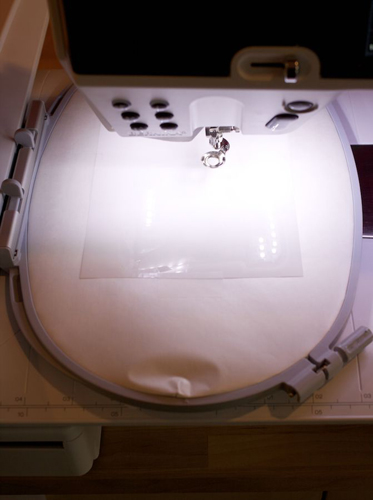
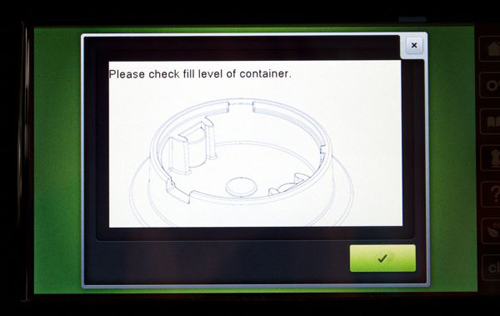
Reloading the design brought up a message to check the fill level of the container. I had just emptied this so I was ready to start stitching.
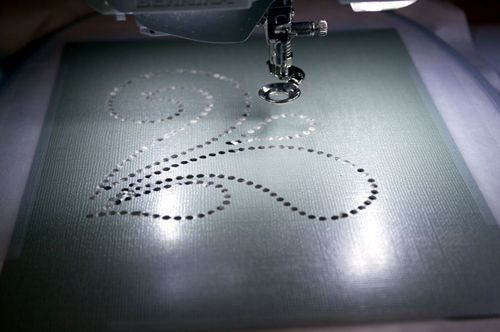
This time the cuts were super clean!
Tip: How to empty the container: Use the tiny yellow screwdriver that comes with your machine to remove the punch plate from the collection container so that you can empty it.

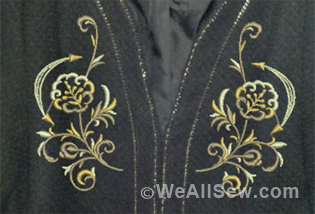
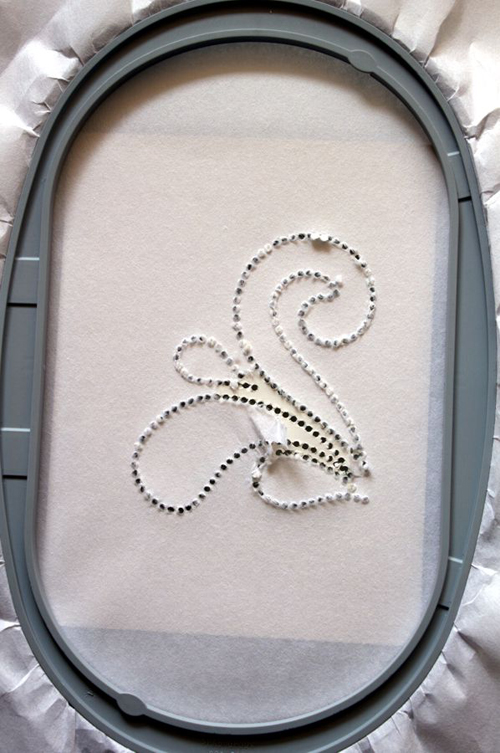
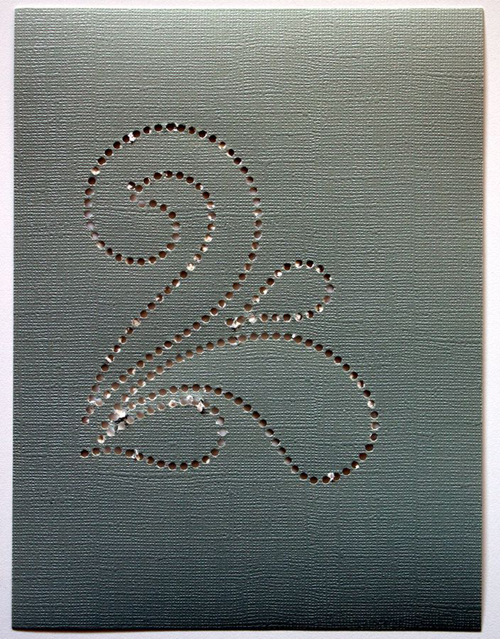
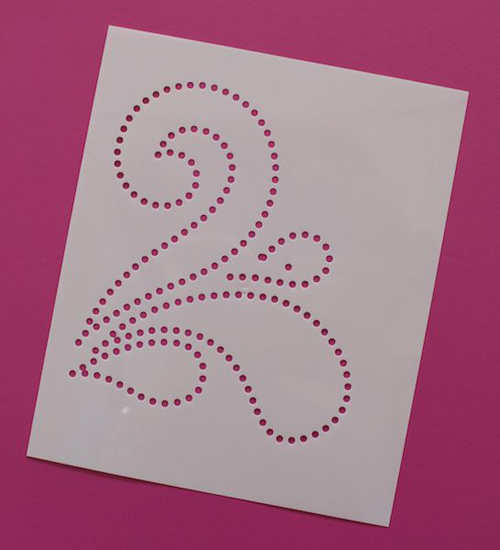
Now I have a perfect template to use for applying crystals to a project! Actually, it looks pretty good all by itself on a piece of colored card that accentuates the holes that make up the design!
Coming soon: How to use the template to apply crystals to a project. In the meantime, enjoy creating your template with the design shown here. There are two versions, one using 6SS (2mm) crystals, the other using 16SS (4mm) crystals. To download JazzyCrystal files, click HERE or visit bernina.com > What’s New > Free Downloads.