Creating a Quilt Label in BERNINA Embroidery Software 8.2
Creating a quilt label with your embroidery software makes it possible to get fancy without spending too much time. It also handles lettering very well resulting in a polished professional look.
While you can design a label by individually typing lettering and adding design(s) to decorate it, you will have to manually do the layout work, all while keeping an eye on proportions and label size.
Good news! There is an easy way to coordinate all the label designing work while simplifying the process. Using the Monogramming tool in BERNINA Embroidery Software 8, you can quickly create you quilt label by:
- Adding your label Text
- Adding Ornament(s) (decorations) and laying them out automatically around the text
- Adding a Border around the label to finish it up
It couldn’t be simpler!
Let’s review the steps shown in the companion video :
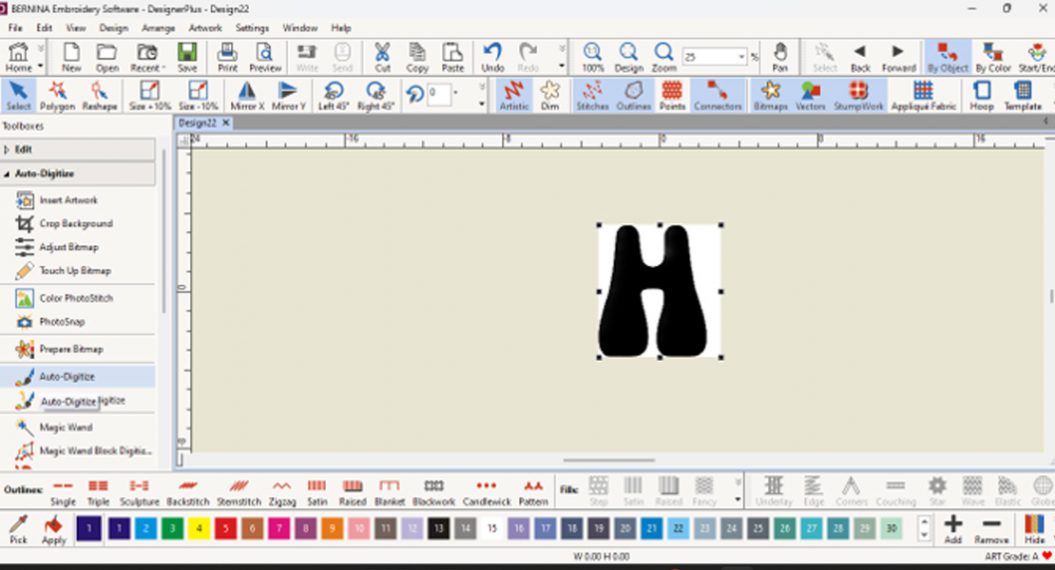
In the Digitize Toolbox on the left of the screen, Click on the Monogramming Button.
![]()
The Monogramming Docker will open to the right of the screen, opened to the Designs Tab. These are convenient preset styles for monograms. For a quilt label, we will exercise our options.
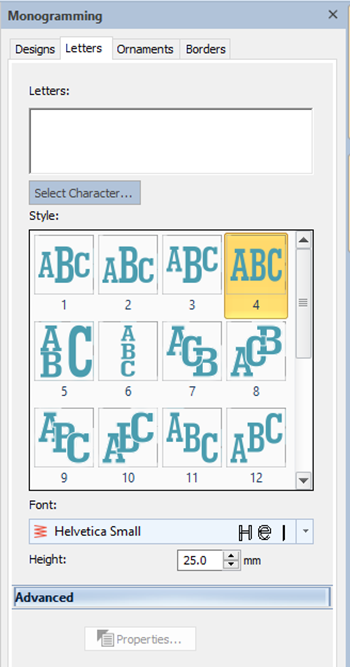
- Click on the Letters Tab.
- Adding the text for your label
First thing to do is to type in the desired text in the Letters input field.
Note: Press Enter between lines of text to form a ‘paragraph’.
TIP: You can click on the Advanced button to expand lettering options such as height, width, italic, etc. Click on the Properties button to open the lettering dialog box if you wish to manipulate the text further (e.g. for justification, baseline, etc.).
Next: Choose a small font: e.g. Micro Block or Helvetica Small and set the Height to 0.3 in (8 mm).
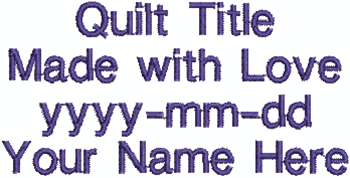
Your label should look like this so far: (Using Helvetica Small).
- Adding Ornament(s)
Click on the Ornaments tab and click on the Add drop list and select From Designs.
In the next dialog box, you get to pick a design from the Embroidery Library – e.g. from the Floral and Garden folder.
Select the design: e.g. Dogwood 2 and click on Open.
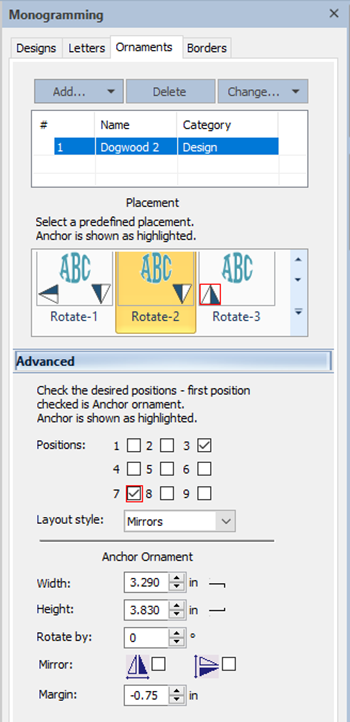
In the Advanced area, select what position(s) you want the design to occupy relative to the monogram text.
- g. click in positions 3 and 7.
- Set the Layout style set to Mirrors.
- The ornament will be added in twice, at the indicated positions, each instance mirroring the other.
Adjust the spacing of the ornaments relative to the text using the Margin control.
- If the ornaments are too close to the text, increase the margin.
- If the ornaments are too far away, decrease the margin. You can decrease to a negative number if necessary.
See the image below for a sample of the ornament settings used in this example.
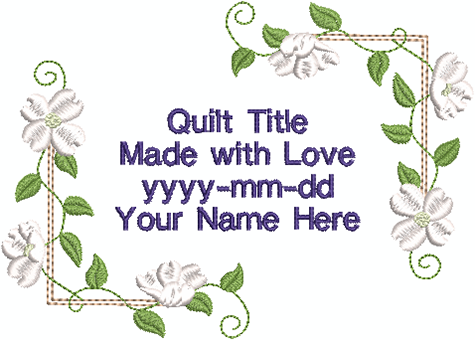
Your quilt label should now look like the following:
- Add a Border
Click on the Borders tab and click on the Add button.
The Select Border dialog box will open with the Borders option pre-selected in the Border Set drop list (at the top).
Select the KB2 style and click on OK.
The border is placed in relationship to the text (just around and close to it), so it will need to be enlarged to include the ornaments within its contour.
Increase offset to enlarge the border until it is large enough to frame the whole label (text and ornament(s) (e.g. here: 3.15 in).
Note: In this case, to make the border large enough to frame the whole label, it turns out to be too wide when it is just tall enough.
To fix this, simply click and drag the width sizing handles (the ones on the sides) to bring the sides in toward the center.
- You can do this for each side separately if the label is asymmetric.
- Or, you can hold the SHIFT key while click-dragging one of the side handles and the sizing will be done on both the left and right hand sides simultaneously and symmetrically.
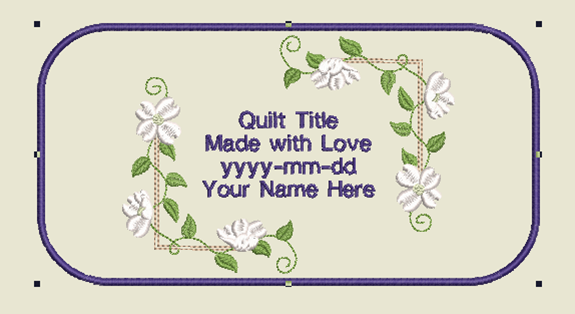
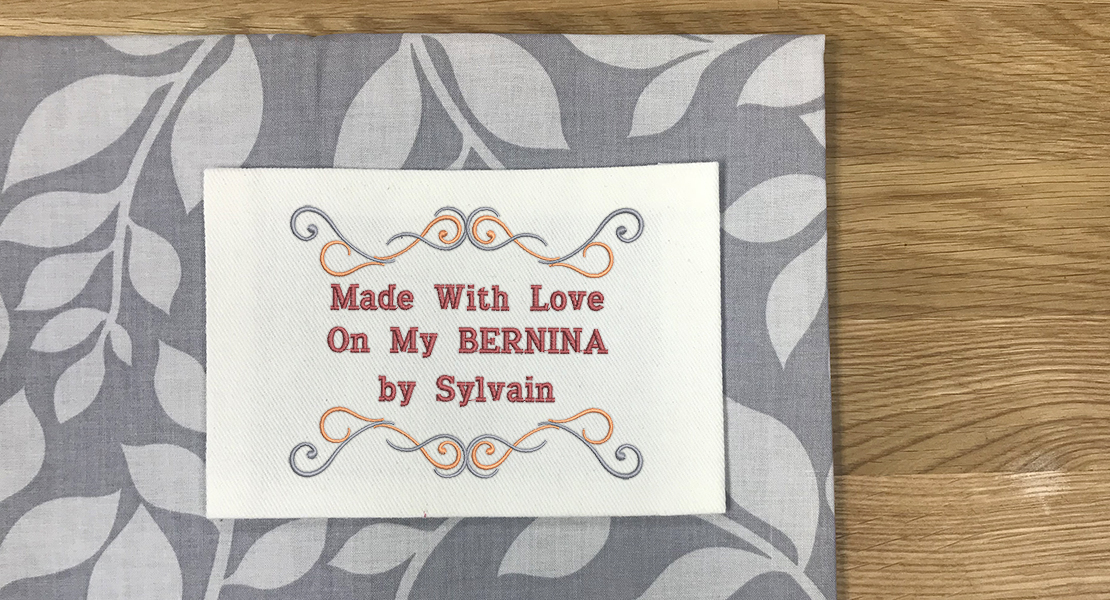
When done, your label will look like this:

Note: Optionally, you can change the stitch type that will form the border. The default is a satin stitch; however, you can use any of the Outline stitch types available in the drop list.
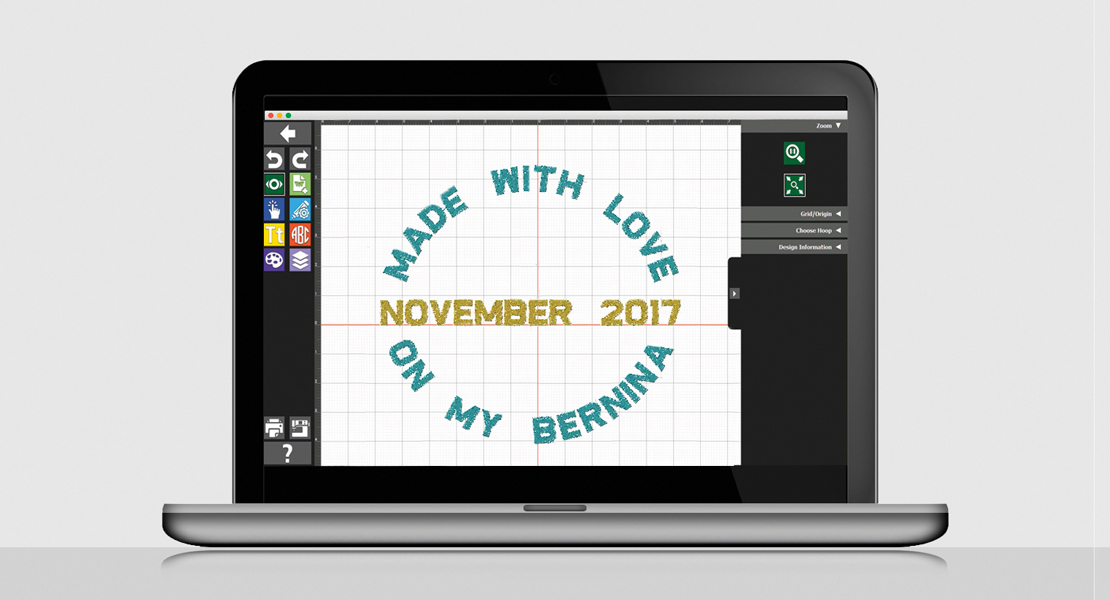
Final step: rotating the hoop
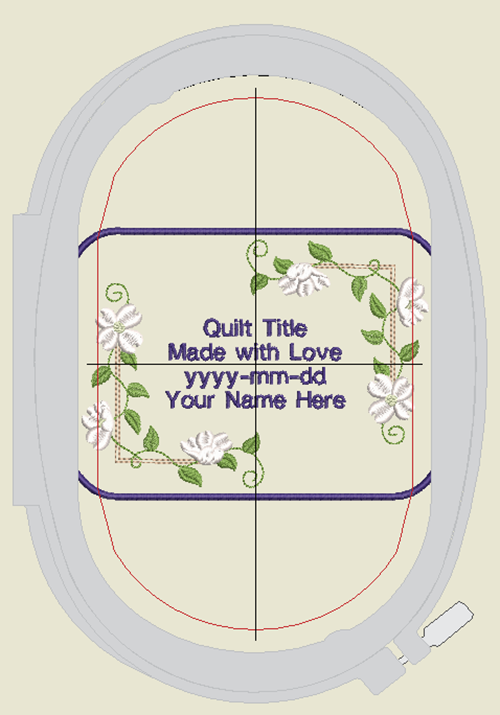
Since most embroidery hoops are taller than wide, it’s no surprise that we will need to rotate the design by 90 degrees so it will fit, here in a Large Oval hoop.
The design currently looks like this in the hoop:
In order to embroider the design in a rotated position in the hoop, you have two options:
Option 1: Rotate the design itself
Pro: quick and easy
Con: harder to read the label on screen
- Select All.
- Rotate by 90 Degrees Counterclockwise by clicking on the Rotate Left 45º tool twice
(located in the Transform toolbar at the top of the screen).
![]()
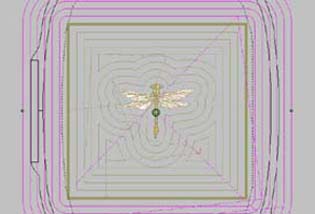
If using Option 1, your design will look like the following in the hoop:

Option 2: Rotate the Hoop
Pro: keeps the design in its ‘natural’ (aka easily legible) orientation
Con: a couple more clicks
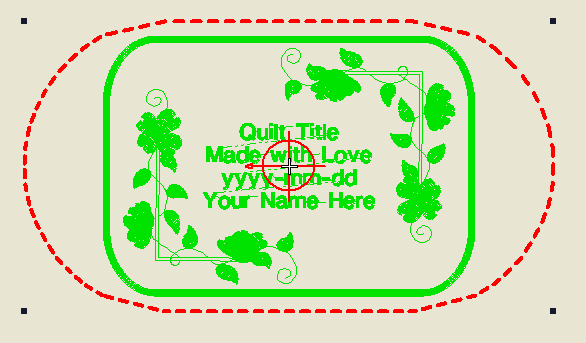
- Click on the Multi-Hooping Toolbox on the left of the screen
- Notice the red dashed hoop outline, with central marker pointing to the top of the hoop (with the arrow).
- Any object currently covered by the hoop is in green.
- Objects in Black are not currently covered by the hoop and wouldn’t be stitched out.
- Select the red hoop outline by clicking on it.
- Rotate the hoop by 90 Degrees Counterclockwise by clicking on the Rotate Left 45º tool twice
(located in the Transform toolbar at the top of the screen).
The rotated hoop will look like the following: (while the Multi-Hooping toolbox is open).
And it will look like the following when in regular Edit mode (click on the Edit toolbox):
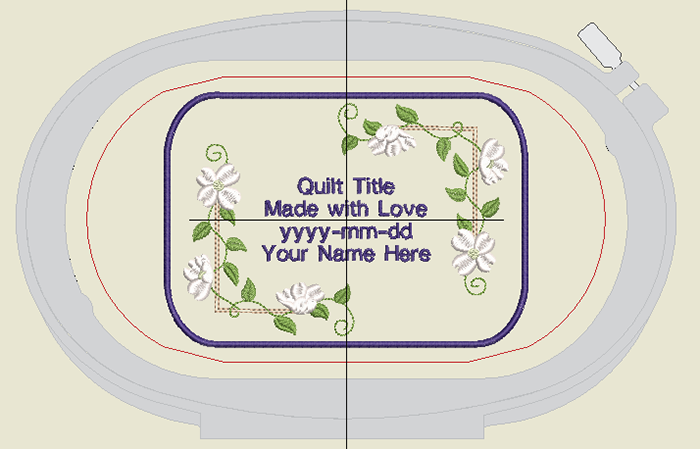
With either option, your design is now ready to Export Machine File to a USB stick.
That’s it! You now have a quilt label, complete with decorations and a border for maximum impact… and minimum work!
Practical tips:
- Using a dedicated small font like Micro Block or Helvetica Small is preferable when creating small lettering. These specialized fonts have a reduced stitch density so that at their smallest recommended sizes the fabric will not be needle-punched excessively.
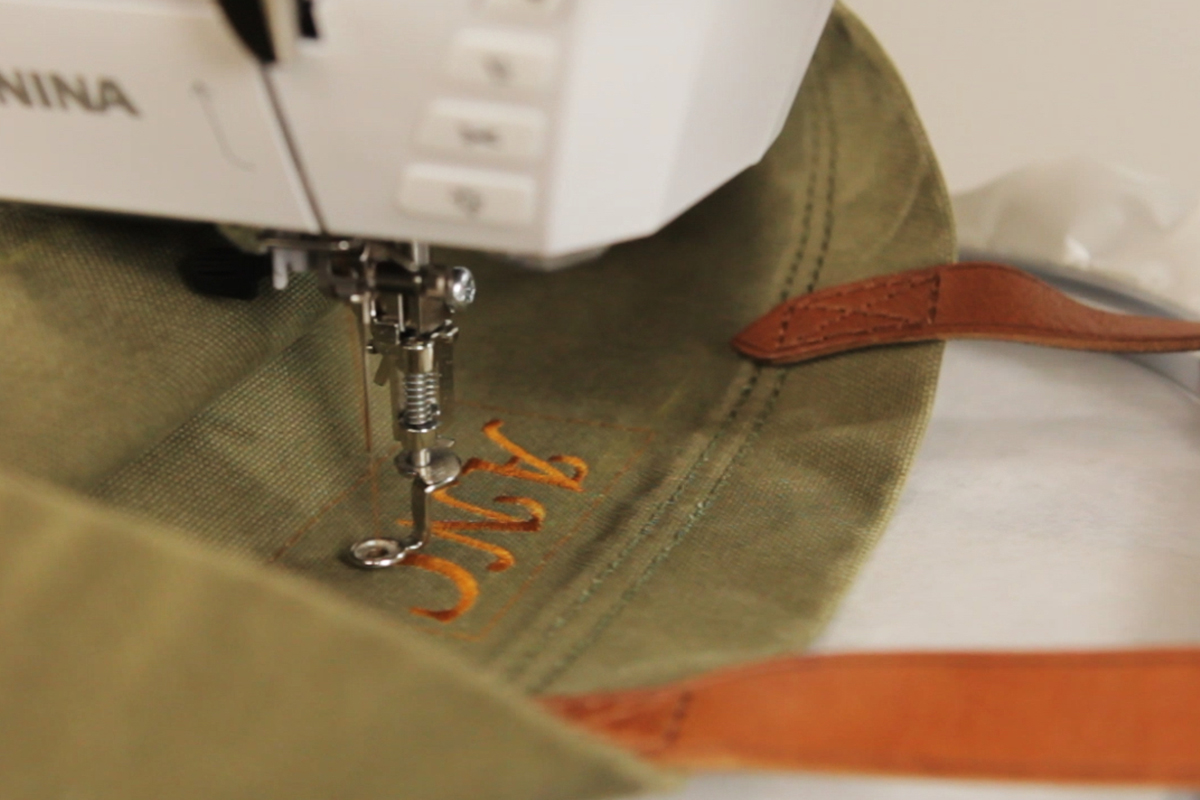
- Always test your label on a well stabilized muslin first. If it doesn’t work on a good muslin, you should adjust the stitching properties. Bonus: Since many of us use muslin anyway for our quilt labels, it really saves time.
- I like to fuse a layer of OESD Fusible Polymesh to the back of the label fabric. It keeps it flat after the embroidery.
- I only fuse a piece large enough to cover the embroidery area. I will cut the label with an ‘unfused’ margin (only fabric) to turn under the edges before stitching to the back of the quilt.
- I use a piece of OESD Lightweight Tear-Away stabilizer sprayed with 505 Temporary Adhesive Spray that fills the hoop to control the fabric at embroidery time.
- After the embroidery is done, I tear away the excess Tear-Away stabilizer, rotary cut (with a margin) around the fused Polymesh (around the label), turn under and press the edges before stitching the label to the back of the quilt.
Used Products
What you might also like


7 comments on “Creating a Quilt Label in BERNINA Embroidery Software 8.2”
-
-
The smallest alphabet in Toolbox is Knit Block at 6 mm (1/4 inch) height.
Note: you can click on the preview button at the right of each alphabet name to see the recommended Min/Max size for each one. In general, small block letters (sans serif and without slant) will work best at small sizes like 6 mm.
at 7mm:
* Military BlockOther options have a letting height of 9 mm (~ 3/8 inch) or close. These include:
* Bold Block
* Full Block
* Micro Times
* Micro Block (10 mm)-
Thank you!!!
-
-
-
Thank you, Sylvain!
-
This is a great tutorial that introduced me to several features I’d not yet discovered in my v8.2 software. The thing I’m most excited about? I hadn’t been able to figure out how to rotate my hoop on my screen since upgrading to v8 — no more twisting my neck sideways to proofread my label text! Thank you! 🙂
-
I have a B790plus. Do I need all this software to make a quilt label? Or is any of it in the machine?
-
You can create quilt labels directly in the machine. It’s simply a manual process. You can combine decorative designs with lettering on the machine screen.
The advantage of the software is that it offers tools optimized to package formatted lettering (like using the monogramming tool in this article) and lay out the whole label in one pass. It also allows you to change the font even after you’ve laid out a label, in case you prefer a different style after evaluating the whole label.
Another advantage of the software is that it can create a border for your label.
Leave a Reply
You must be logged in to post a comment.

I have the full version of Toolbox, not Software 8. What is the smallest font available in text for a quilt label? I could only find 1/2″ not 1/4″.