Reusable Clothing Labels with Machine Embroidery
Spring is finally here in Northern Wisconsin but I can’t help but daydream about summer. If you’re anything like me, those few glorious months of sunshine are filled with as many outdoor activities as possible and trying to keep up with my active kiddo.
This year will be their second year at sleep-away camp. It’s four jam-packed days filled with canoeing, lake swims, mud hikes, and friends. All of that to say that there are about 10,000 opportunities for them to lose at least one (if not all) of the items they brought with.
Like with school, the camp recommends labeling all of the items we send with to keep them straight. I always run into the challenge of how to label items that we will want to donate, resell, or pass down so they can continue to be loved. Writing permanently in the items helps last through washing but doesn’t allow for the next family to remove the name and while some stickers hold up, they are single use and constantly ordering more can become expensive.
This year I’m prepping for summer camp, and ultimately back to school, by using my bernette 79 to embroider reusable labels. These can be sewn into clothing or other cloth items while you have them, but easily removed with your beloved seam ripper when it’s time to pass them along.
Materials to Embroider Reusable Labels
- bernette 79
- 5/8″ polyester ribbon
- BERNINA embroidery software
- Mettler Polysheen thread
- Scissors
- OESD StabilStick TearAway stabilizer
- Magnetic Embroidery Hoop Snap Hoop Monster
- Tweezers

Instructions to Embroider Reusable Labels
Step 1. Design the label
In your design software, use your preferred font to type out the name. I like to also add an additional simple graphic that showcases my kiddo’s interests. For younger kids that may not know how to read their name, you can also use a simple design that represents them, like a rainbow, soccer ball, truck, or flower. Because the label will be fairly small, designs that are simple are ideal. For today’s tutorial, we will use one thread color however, you can expand your design to incorporate multiple colors in your design software.
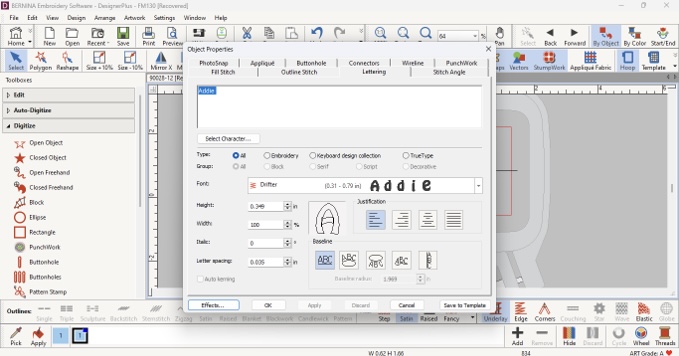
Once you have all of the elements of your design laid out in the embroidery software, group the objects together to keep the sizing consistent.
Keeping in mind the size of your ribbon, adjust the size of the design. My ribbon is 5/8″ (.625″). To center my design, I resized it to .4″ (2/5″).
The last step to creating your design is to export. While BERNINA and bernette machines read multiple design formats, .exp is the native format. Save your design to a USB drive to transfer to your machine.
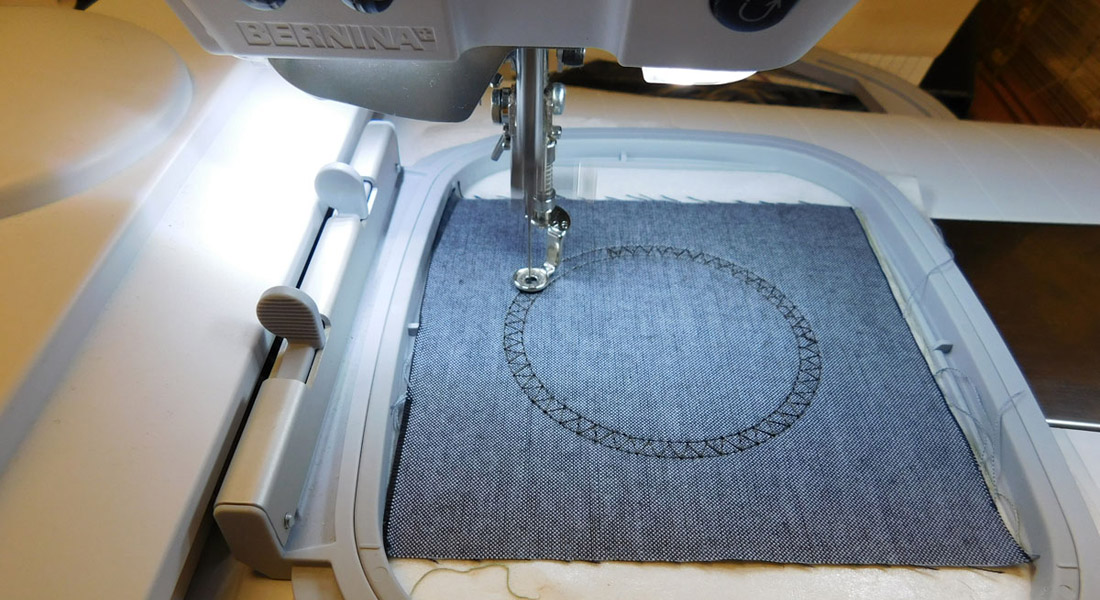
Step 2. Preparing Your Hoop
For this project, we will use a technique called “floating”. Floating is used when you have material that is difficult to hoop (such as wovens) or when the shape of the item you are stitching on makes traditional hooping difficult (some clothing items like baby onesies are great opportunities to use the floating technique).
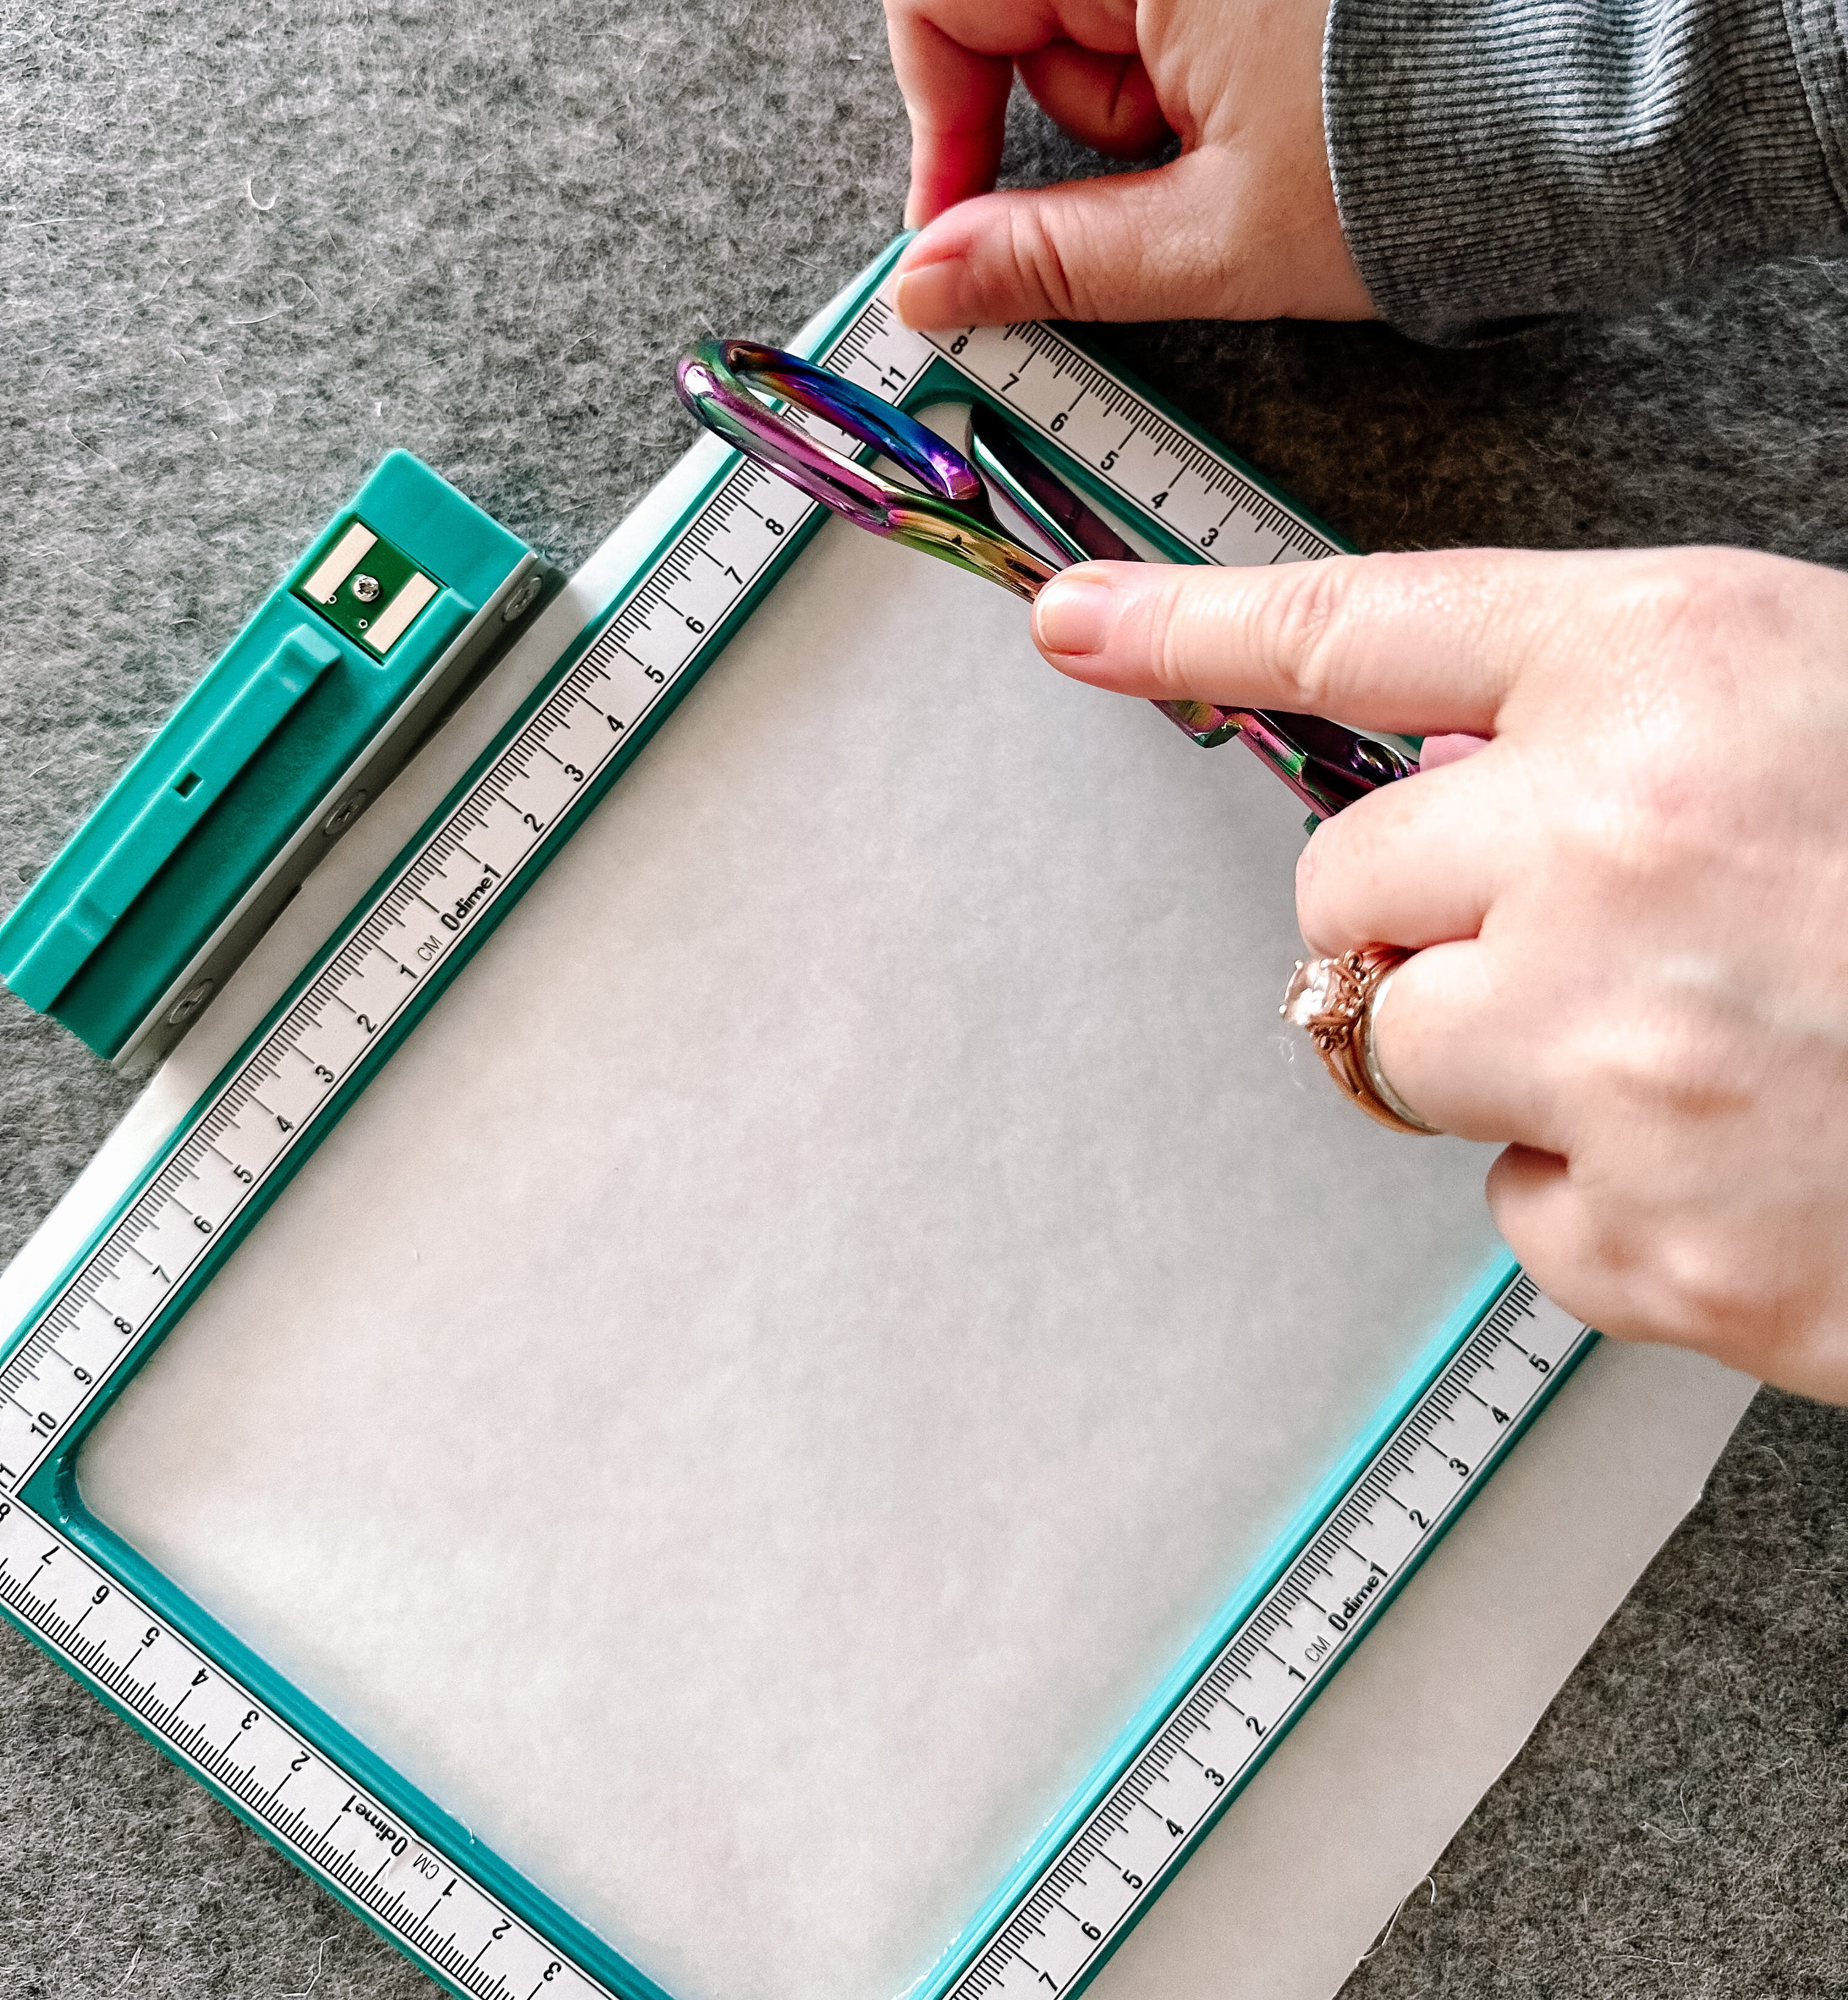
The first step is to cut your stabilizer at least 1″ larger than your selected hoop.
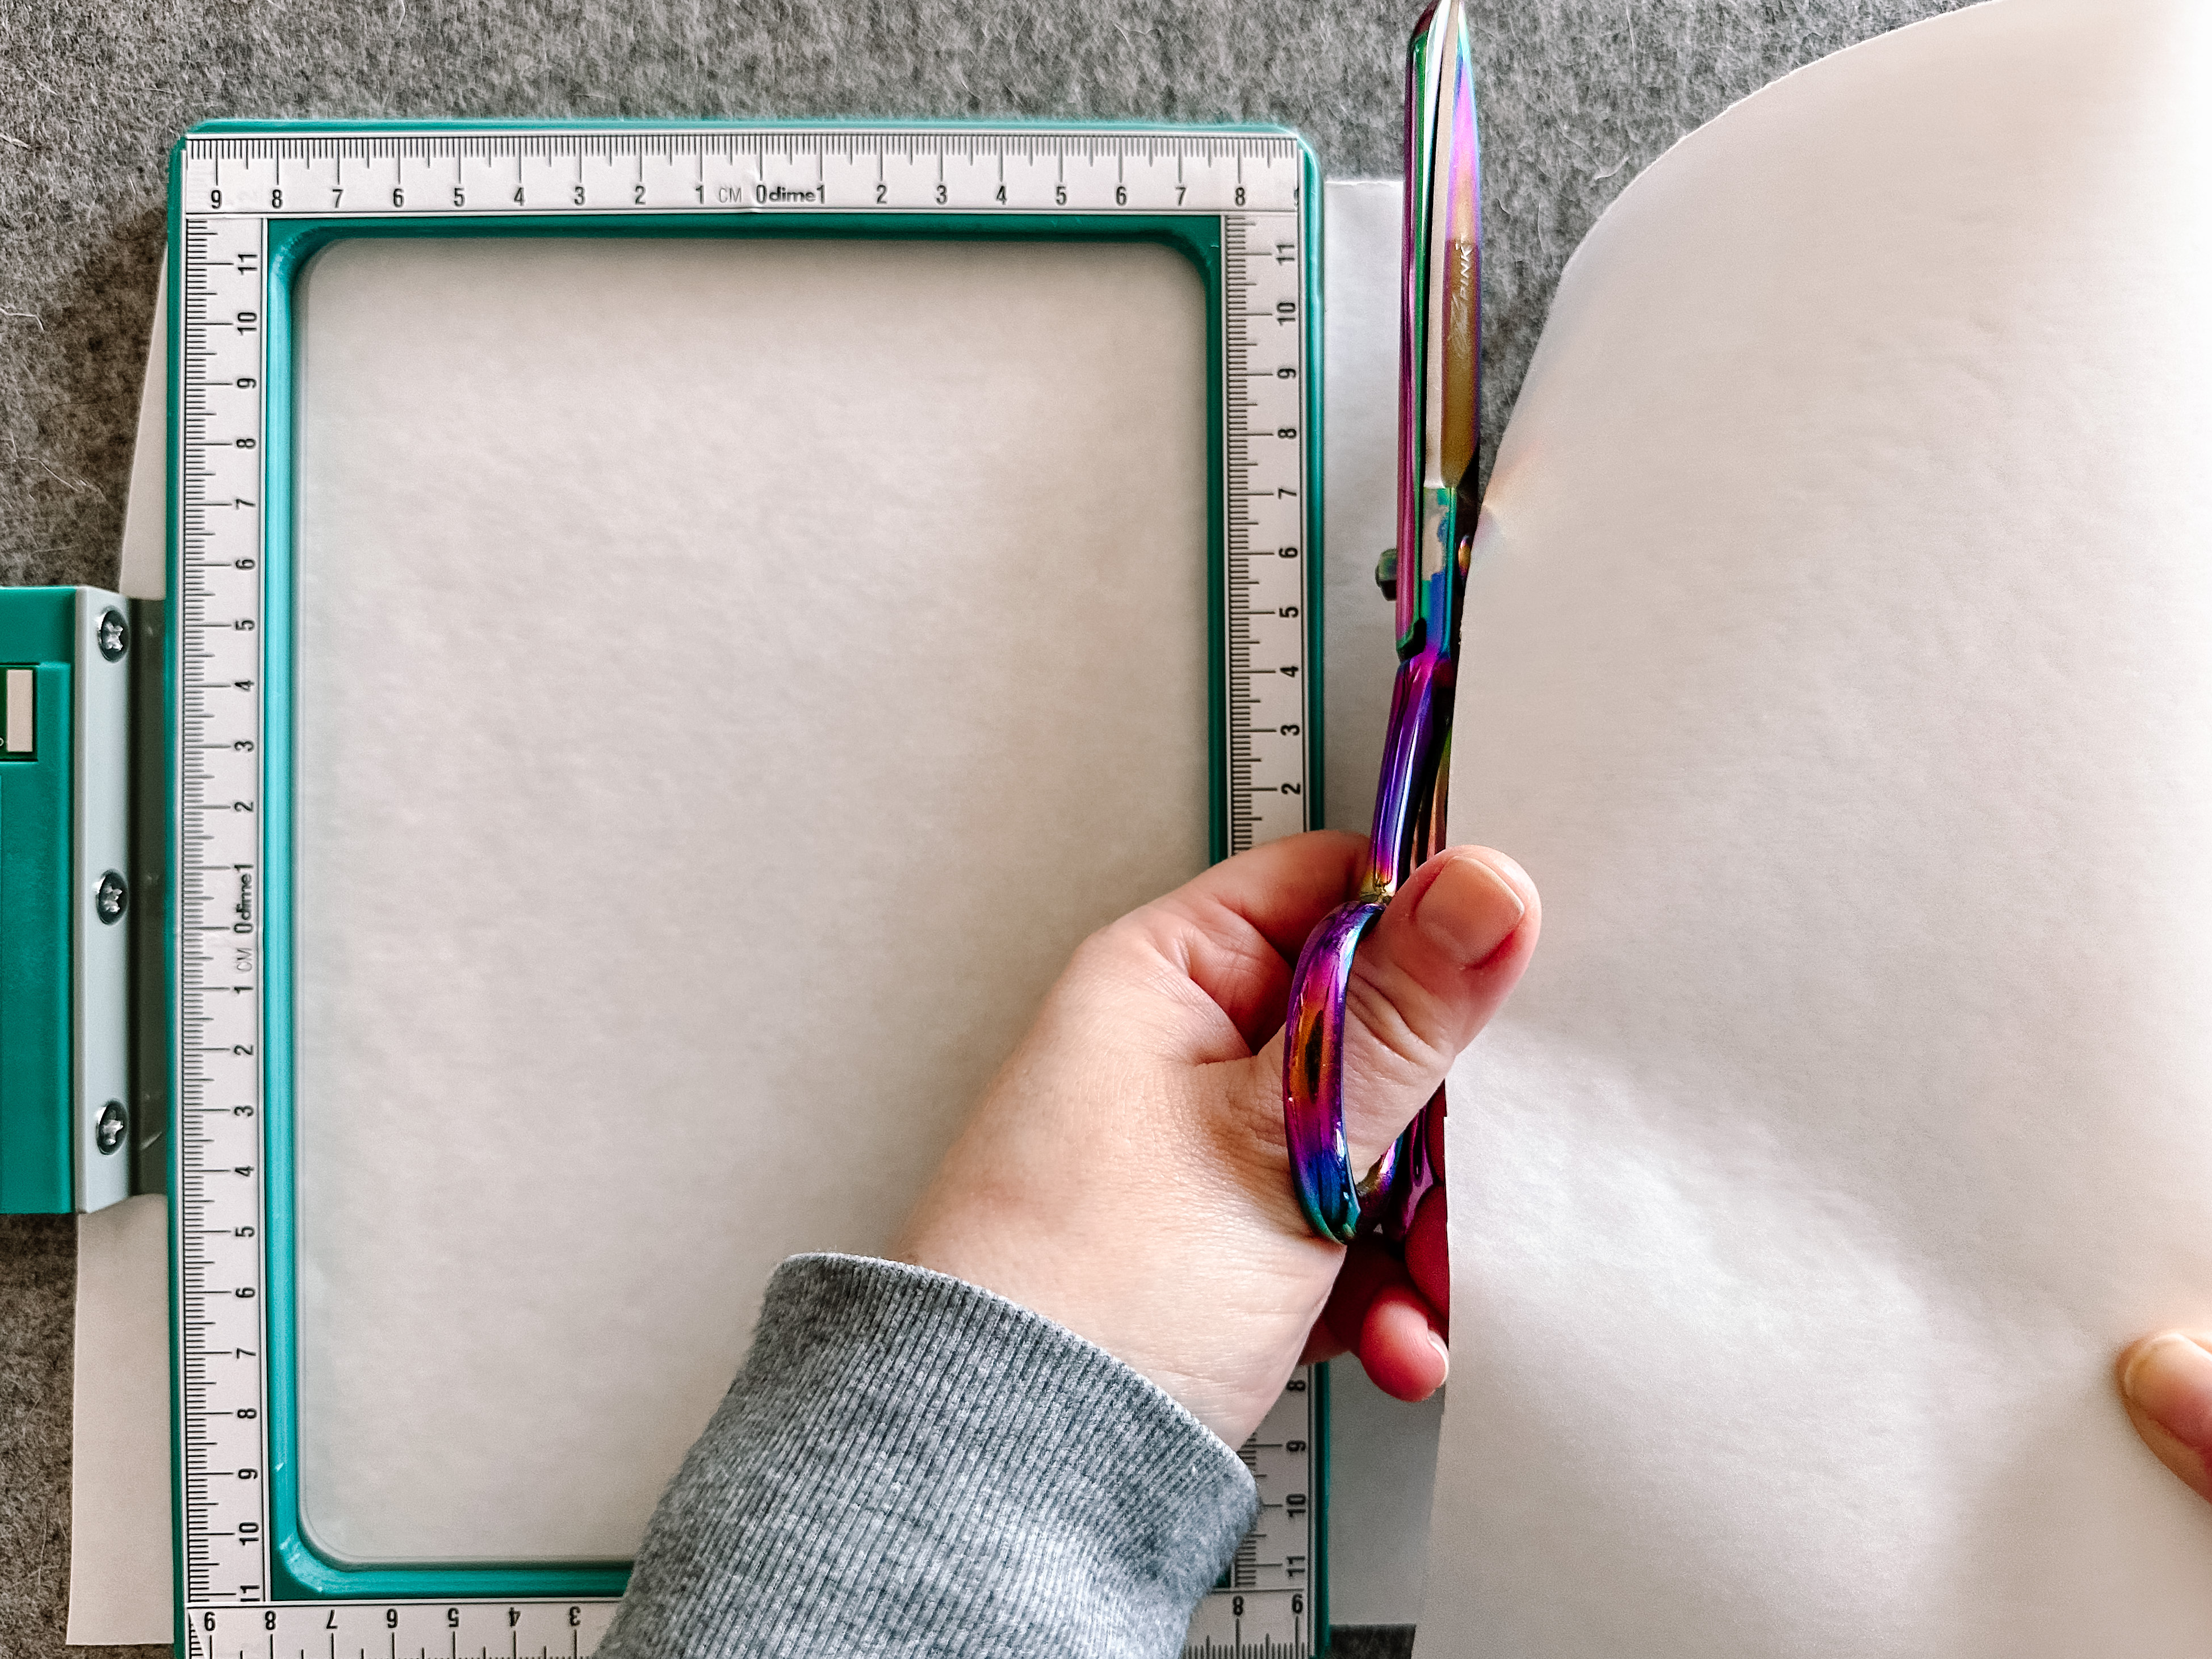
You’ll notice that there are two distinct sides to the StabilStick, a rough paper backside and a smooth paper front. The smooth side is removable to expose the adhesive and should be facing up as you place it in the hoop.
Once your stabilizer is in the hoop, carefully use a sharp object such as a pin or scissors to score the smooth paper along the inside of the hoop without going through the stabilizer layer. Score an “x” in the middle of the stabilizer to assist in pulling away the paper to reveal the adhesive. I like to use angled tweezers to help pull the paper back.
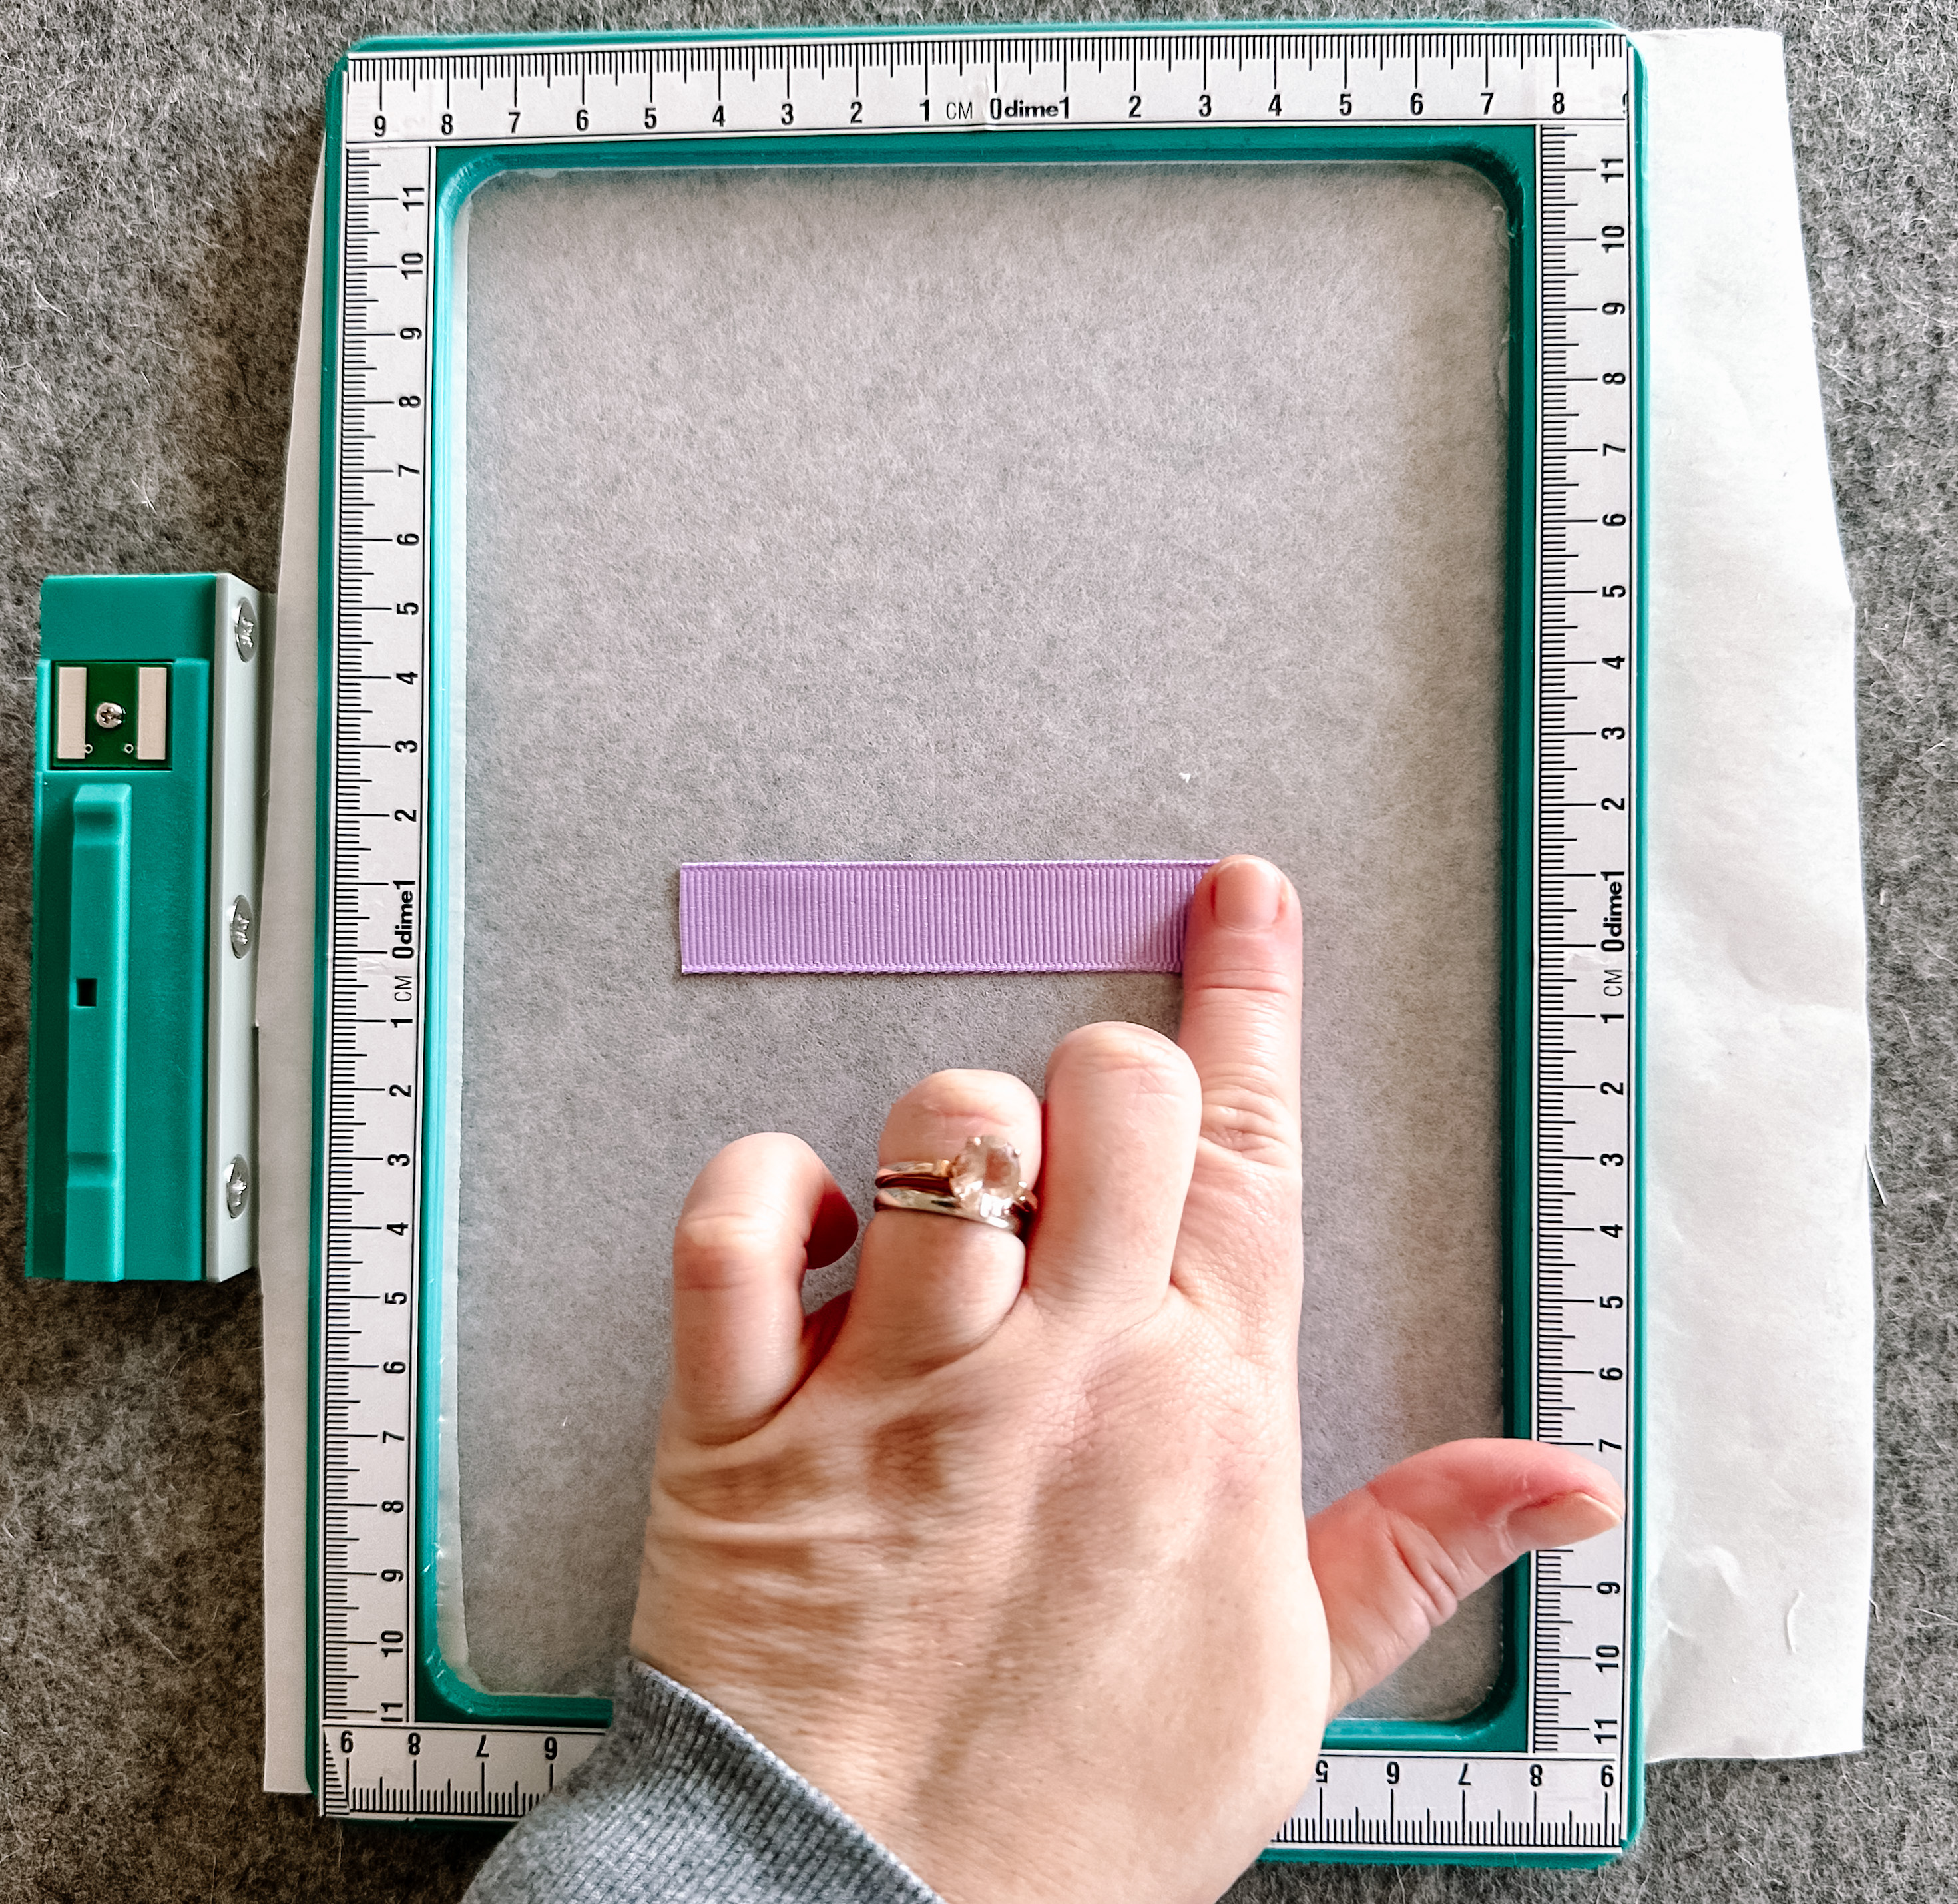
Cut the length of your ribbon at least 1″ longer than your design. For my example, my design is about 1.5″ long, so I cut my ribbon at 2.5″. Using your hoop’s measuring template, place your ribbon right side up in the center of your hoop and gently press it to the adhesive.
Step 3. Load the Design
Connect the USB stick used in Step 1 to your machine and open the file. On the left side, select the embroidery hoop display/selection icon and select the hoop that you are using.
If needed, use the embroidery functions to rotate your design to align with the ribbon.
Step 4. Stitching the Design
Ensure your machine is threaded with your chosen thread. I prefer Mettler Polysheen and like to use a color that is highly contrasting with the ribbon color.
Attach your hoop by raising the needle and the embroidery foot. Push the embroidery hoop into the module until it clicks into place.
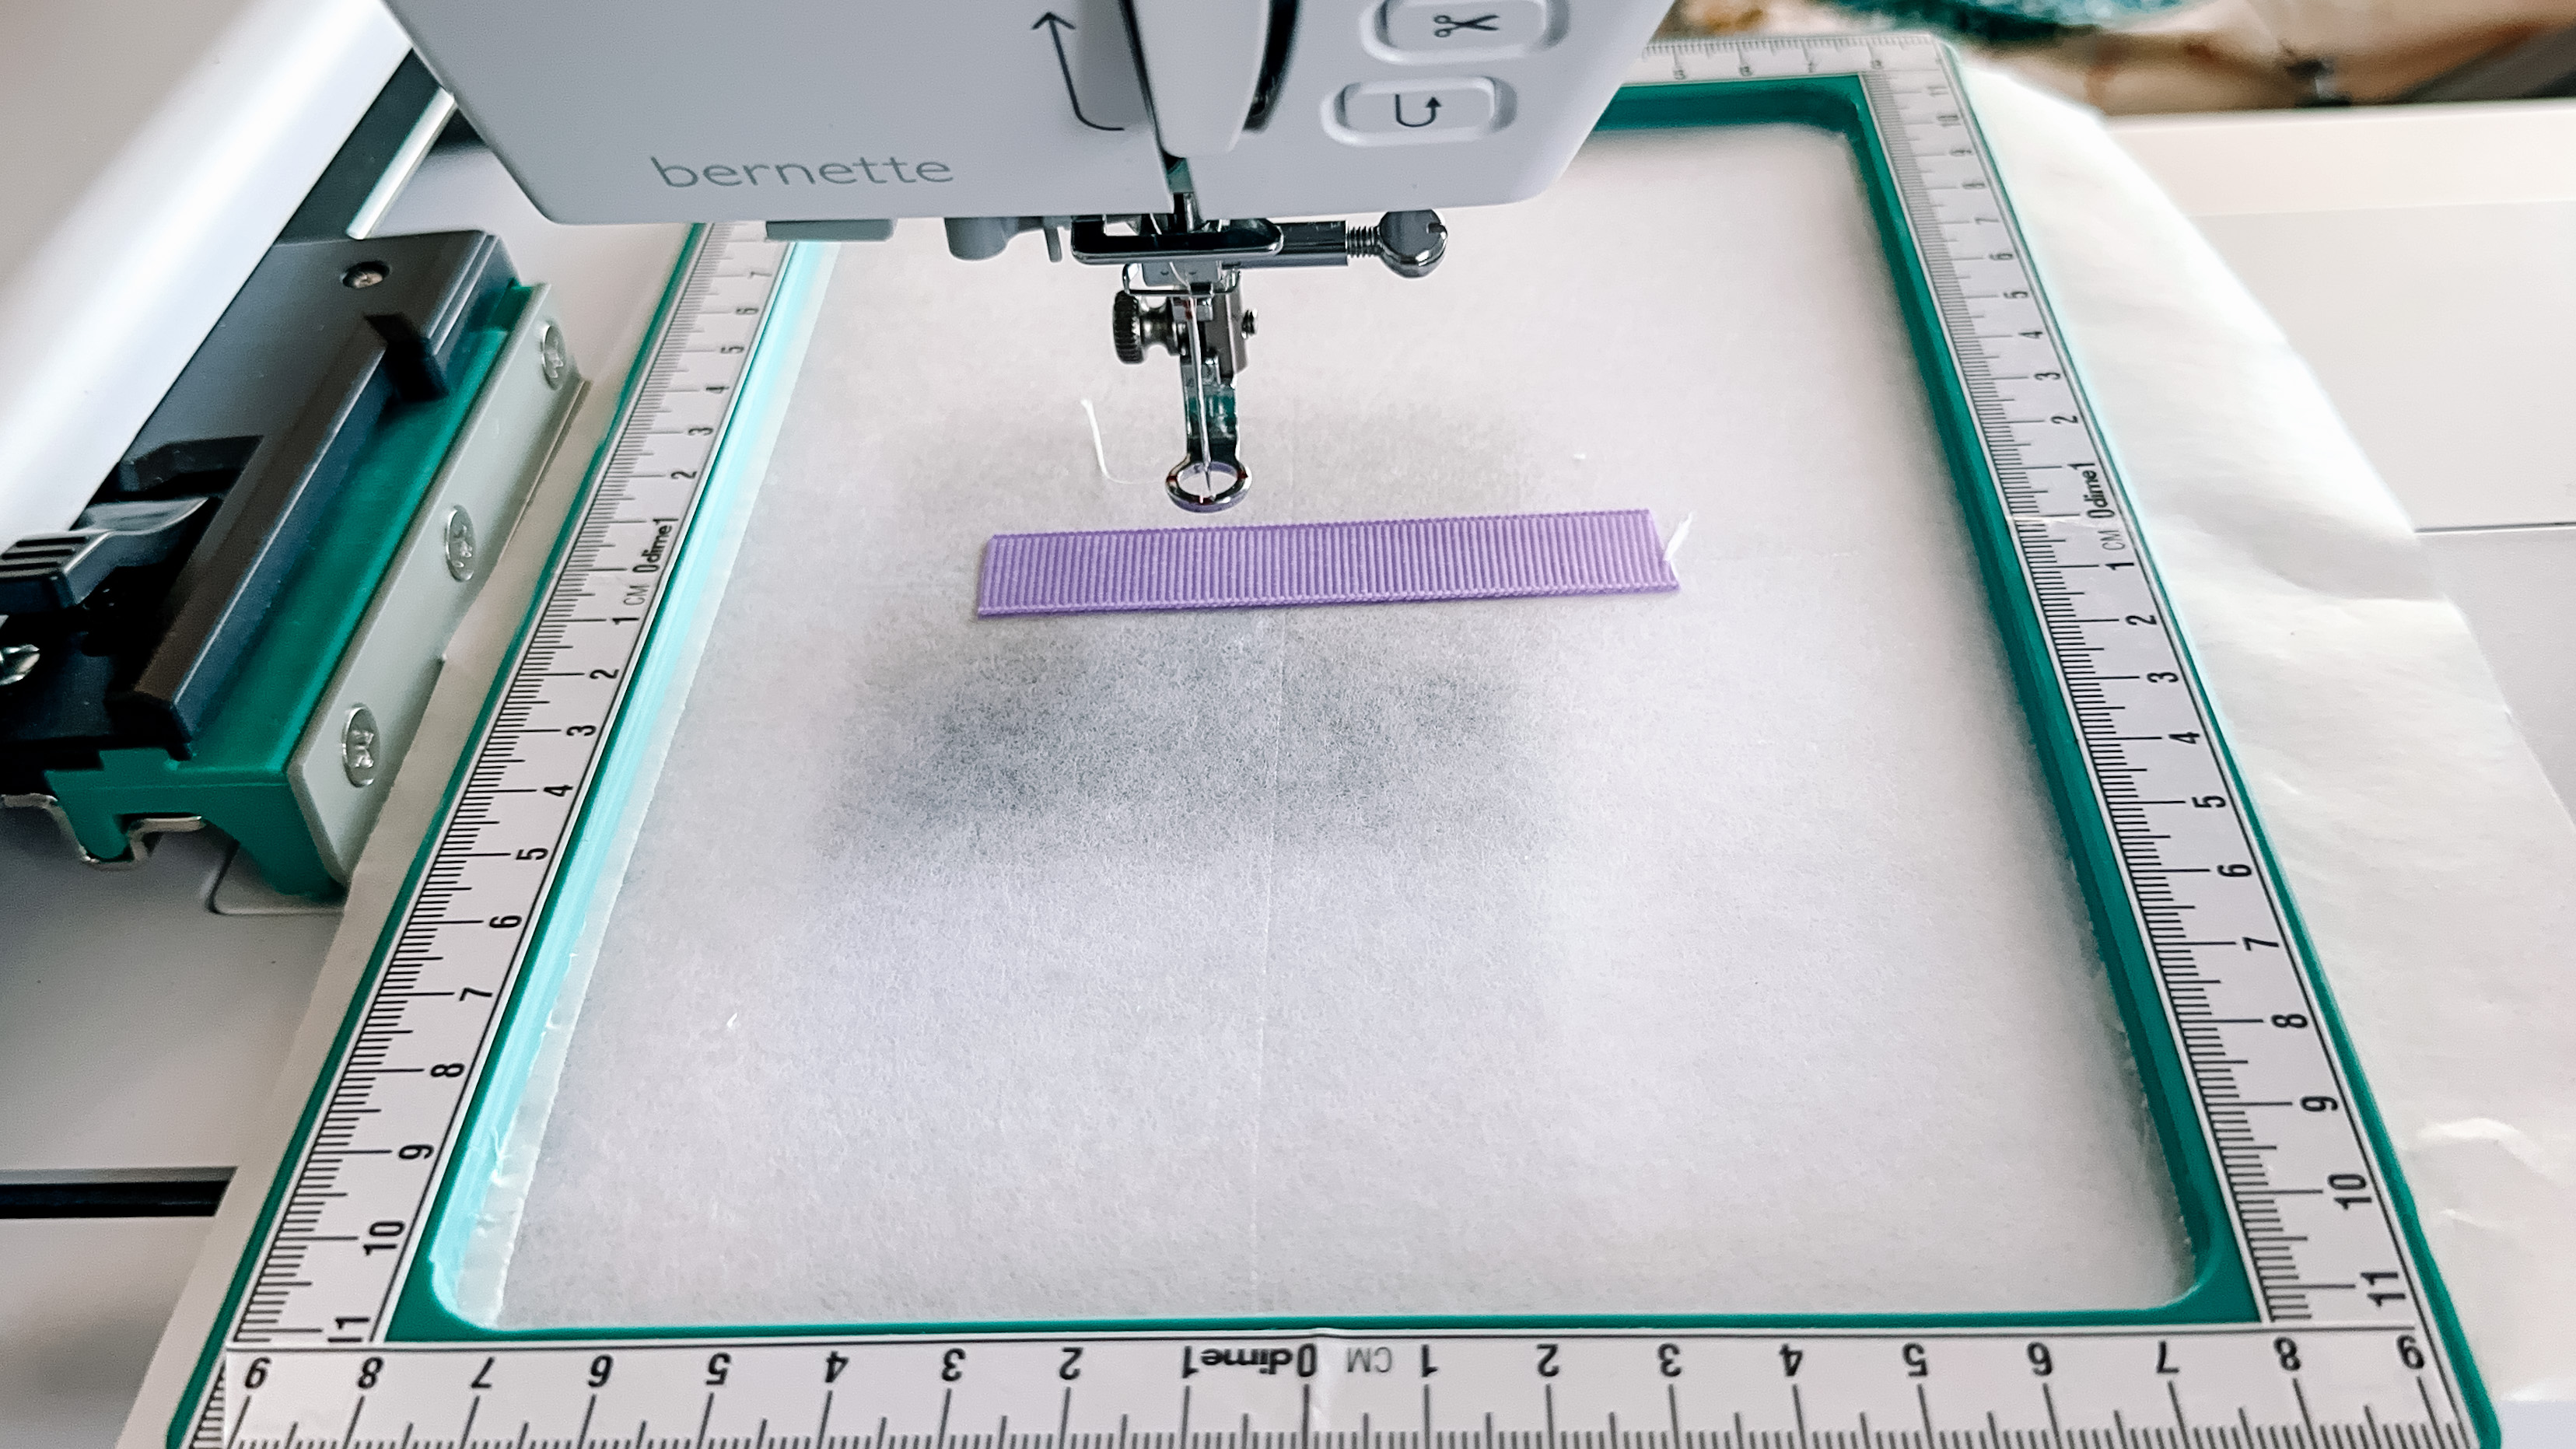
On the screen, select the needle icon to move to the stitch out screen. Stitch the design.
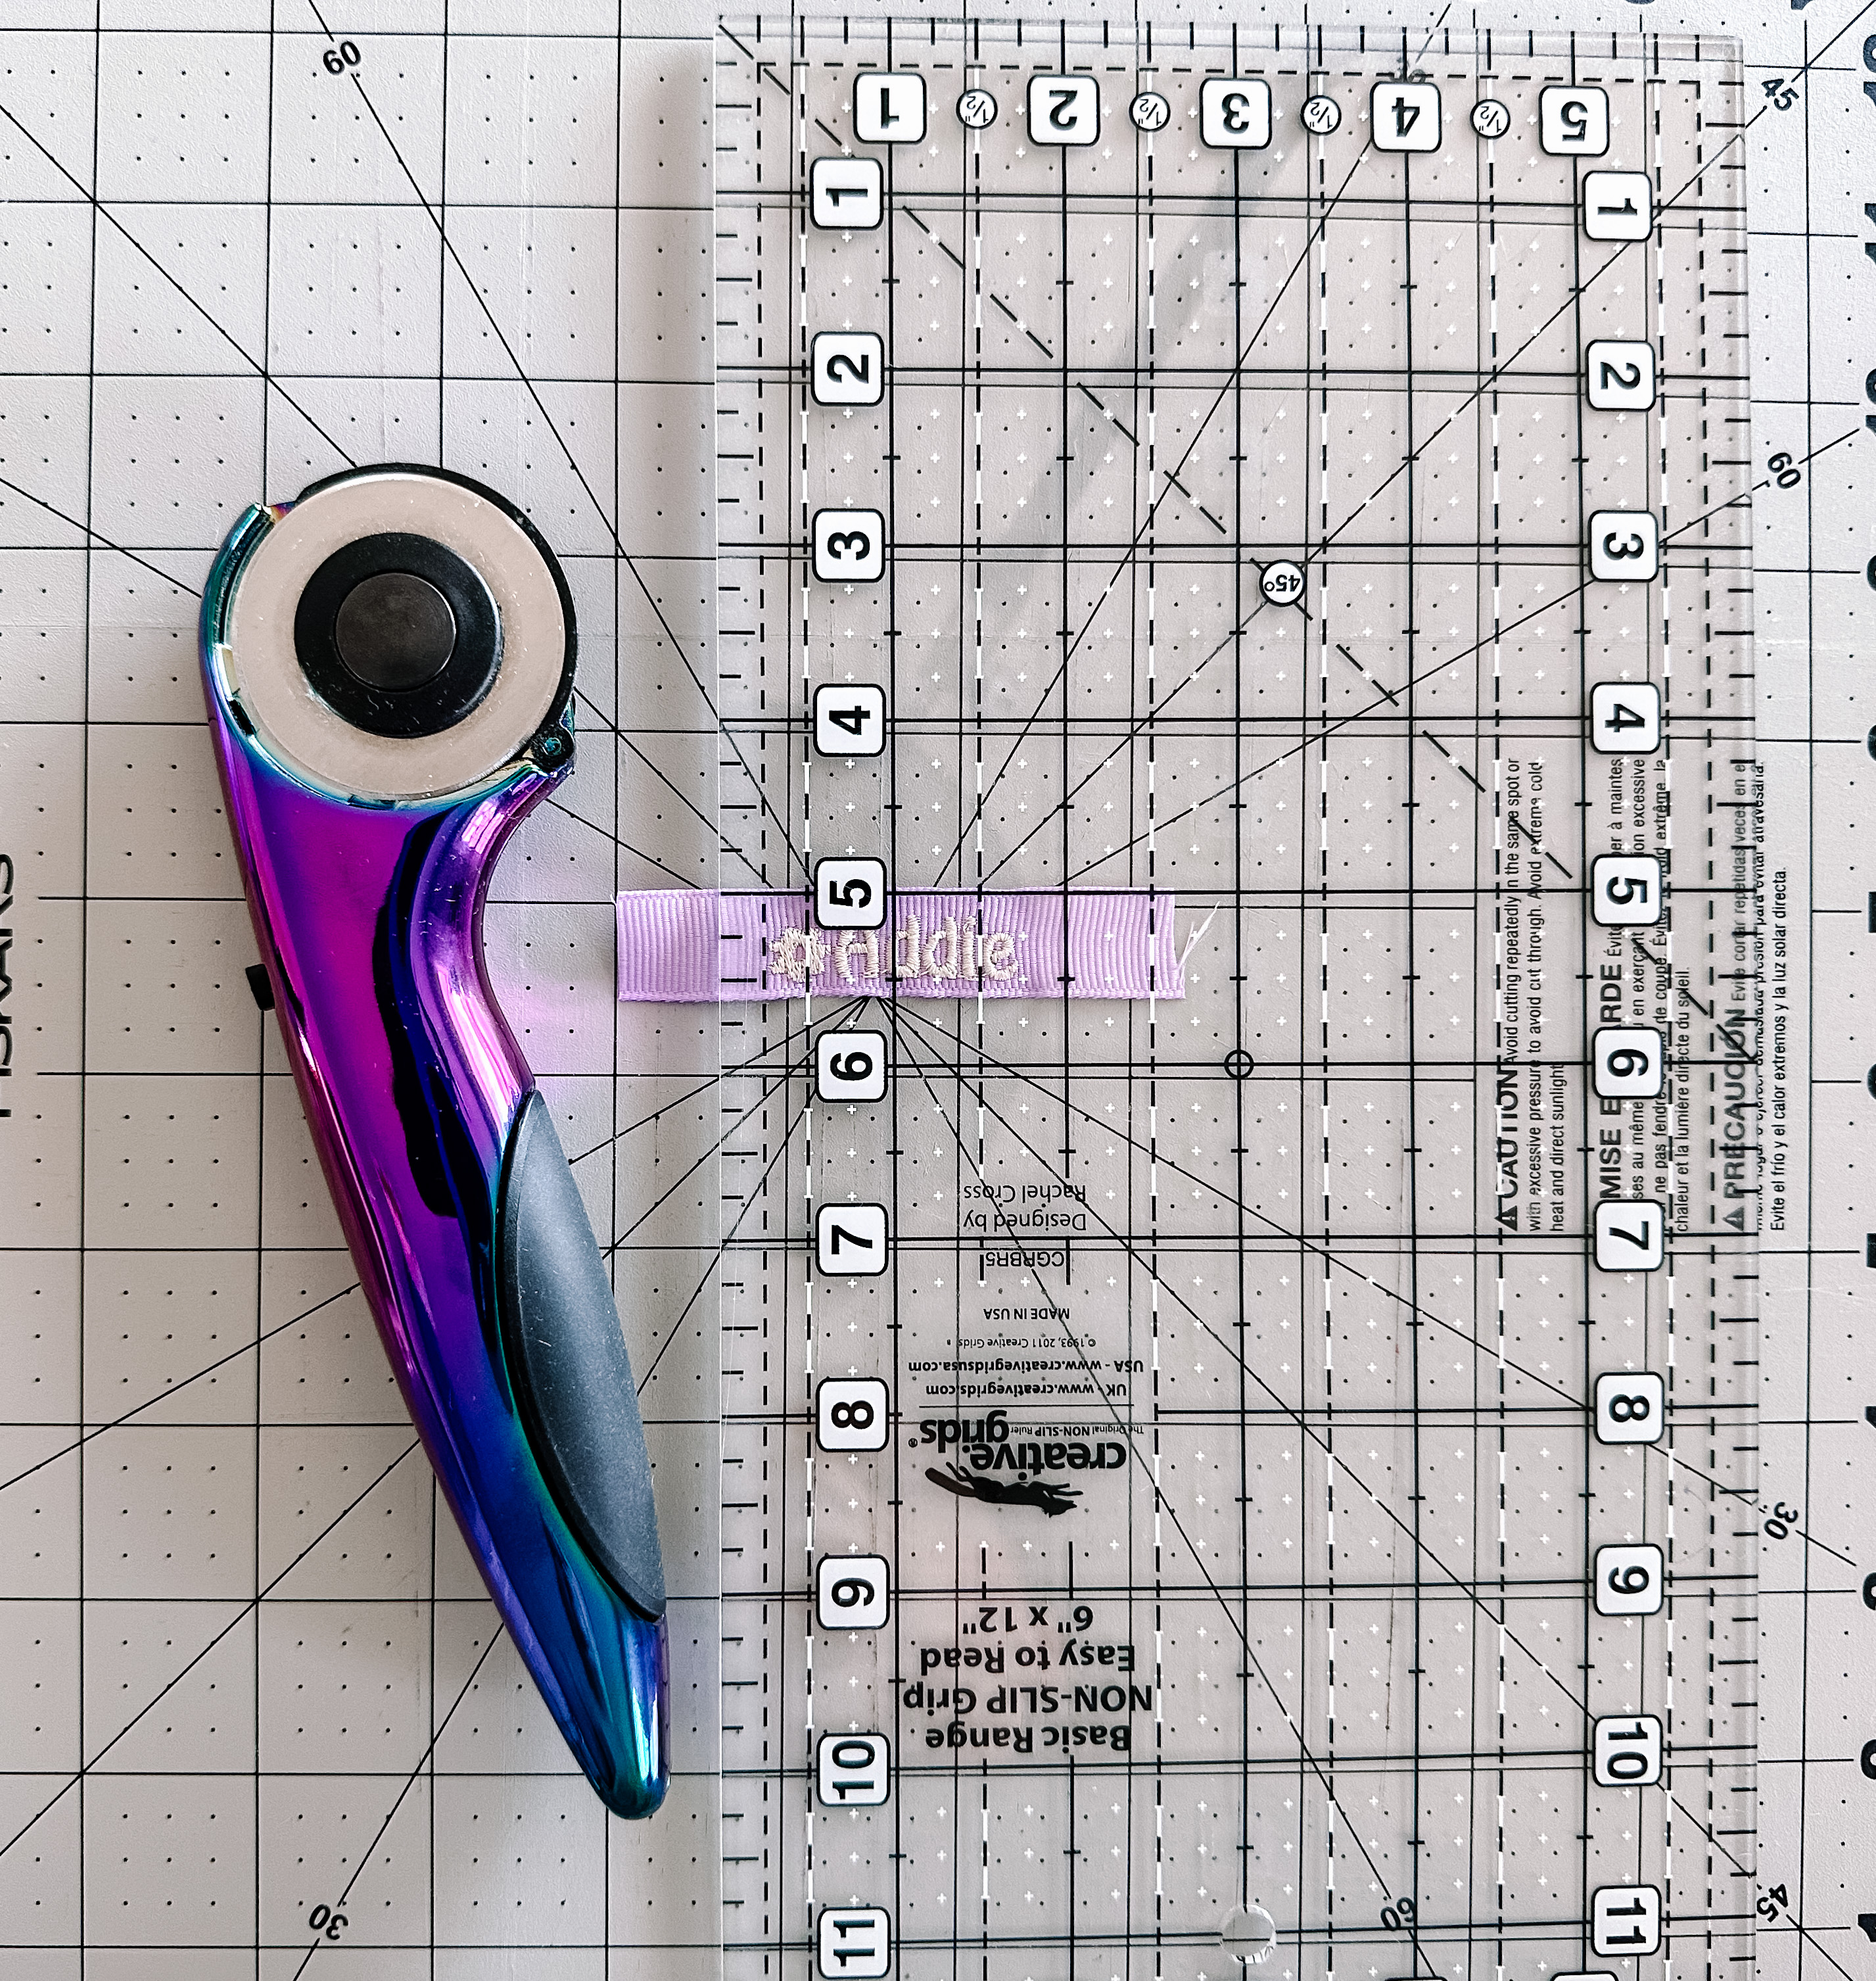
Step 5. Finish the Label
Remove the label from the StabilStick by peeling it gently off. Use tweezers to remove any remaining stabilizer from the back on the label.
Trim the ends of your label and finish the ends by either:
- Trim the excess ribbon, leaving at least 1/2″ on either side of the design. Fold the raw ends to the backside and securing them with a stitch
- If your ribbon is a synthetic material, trim the excess ribbon, leaving at least 1/4″ on either side of your design. Carefully use heat to melt the ends of the ribbon to prevent fraying (the ribbon will be hot, be careful!).
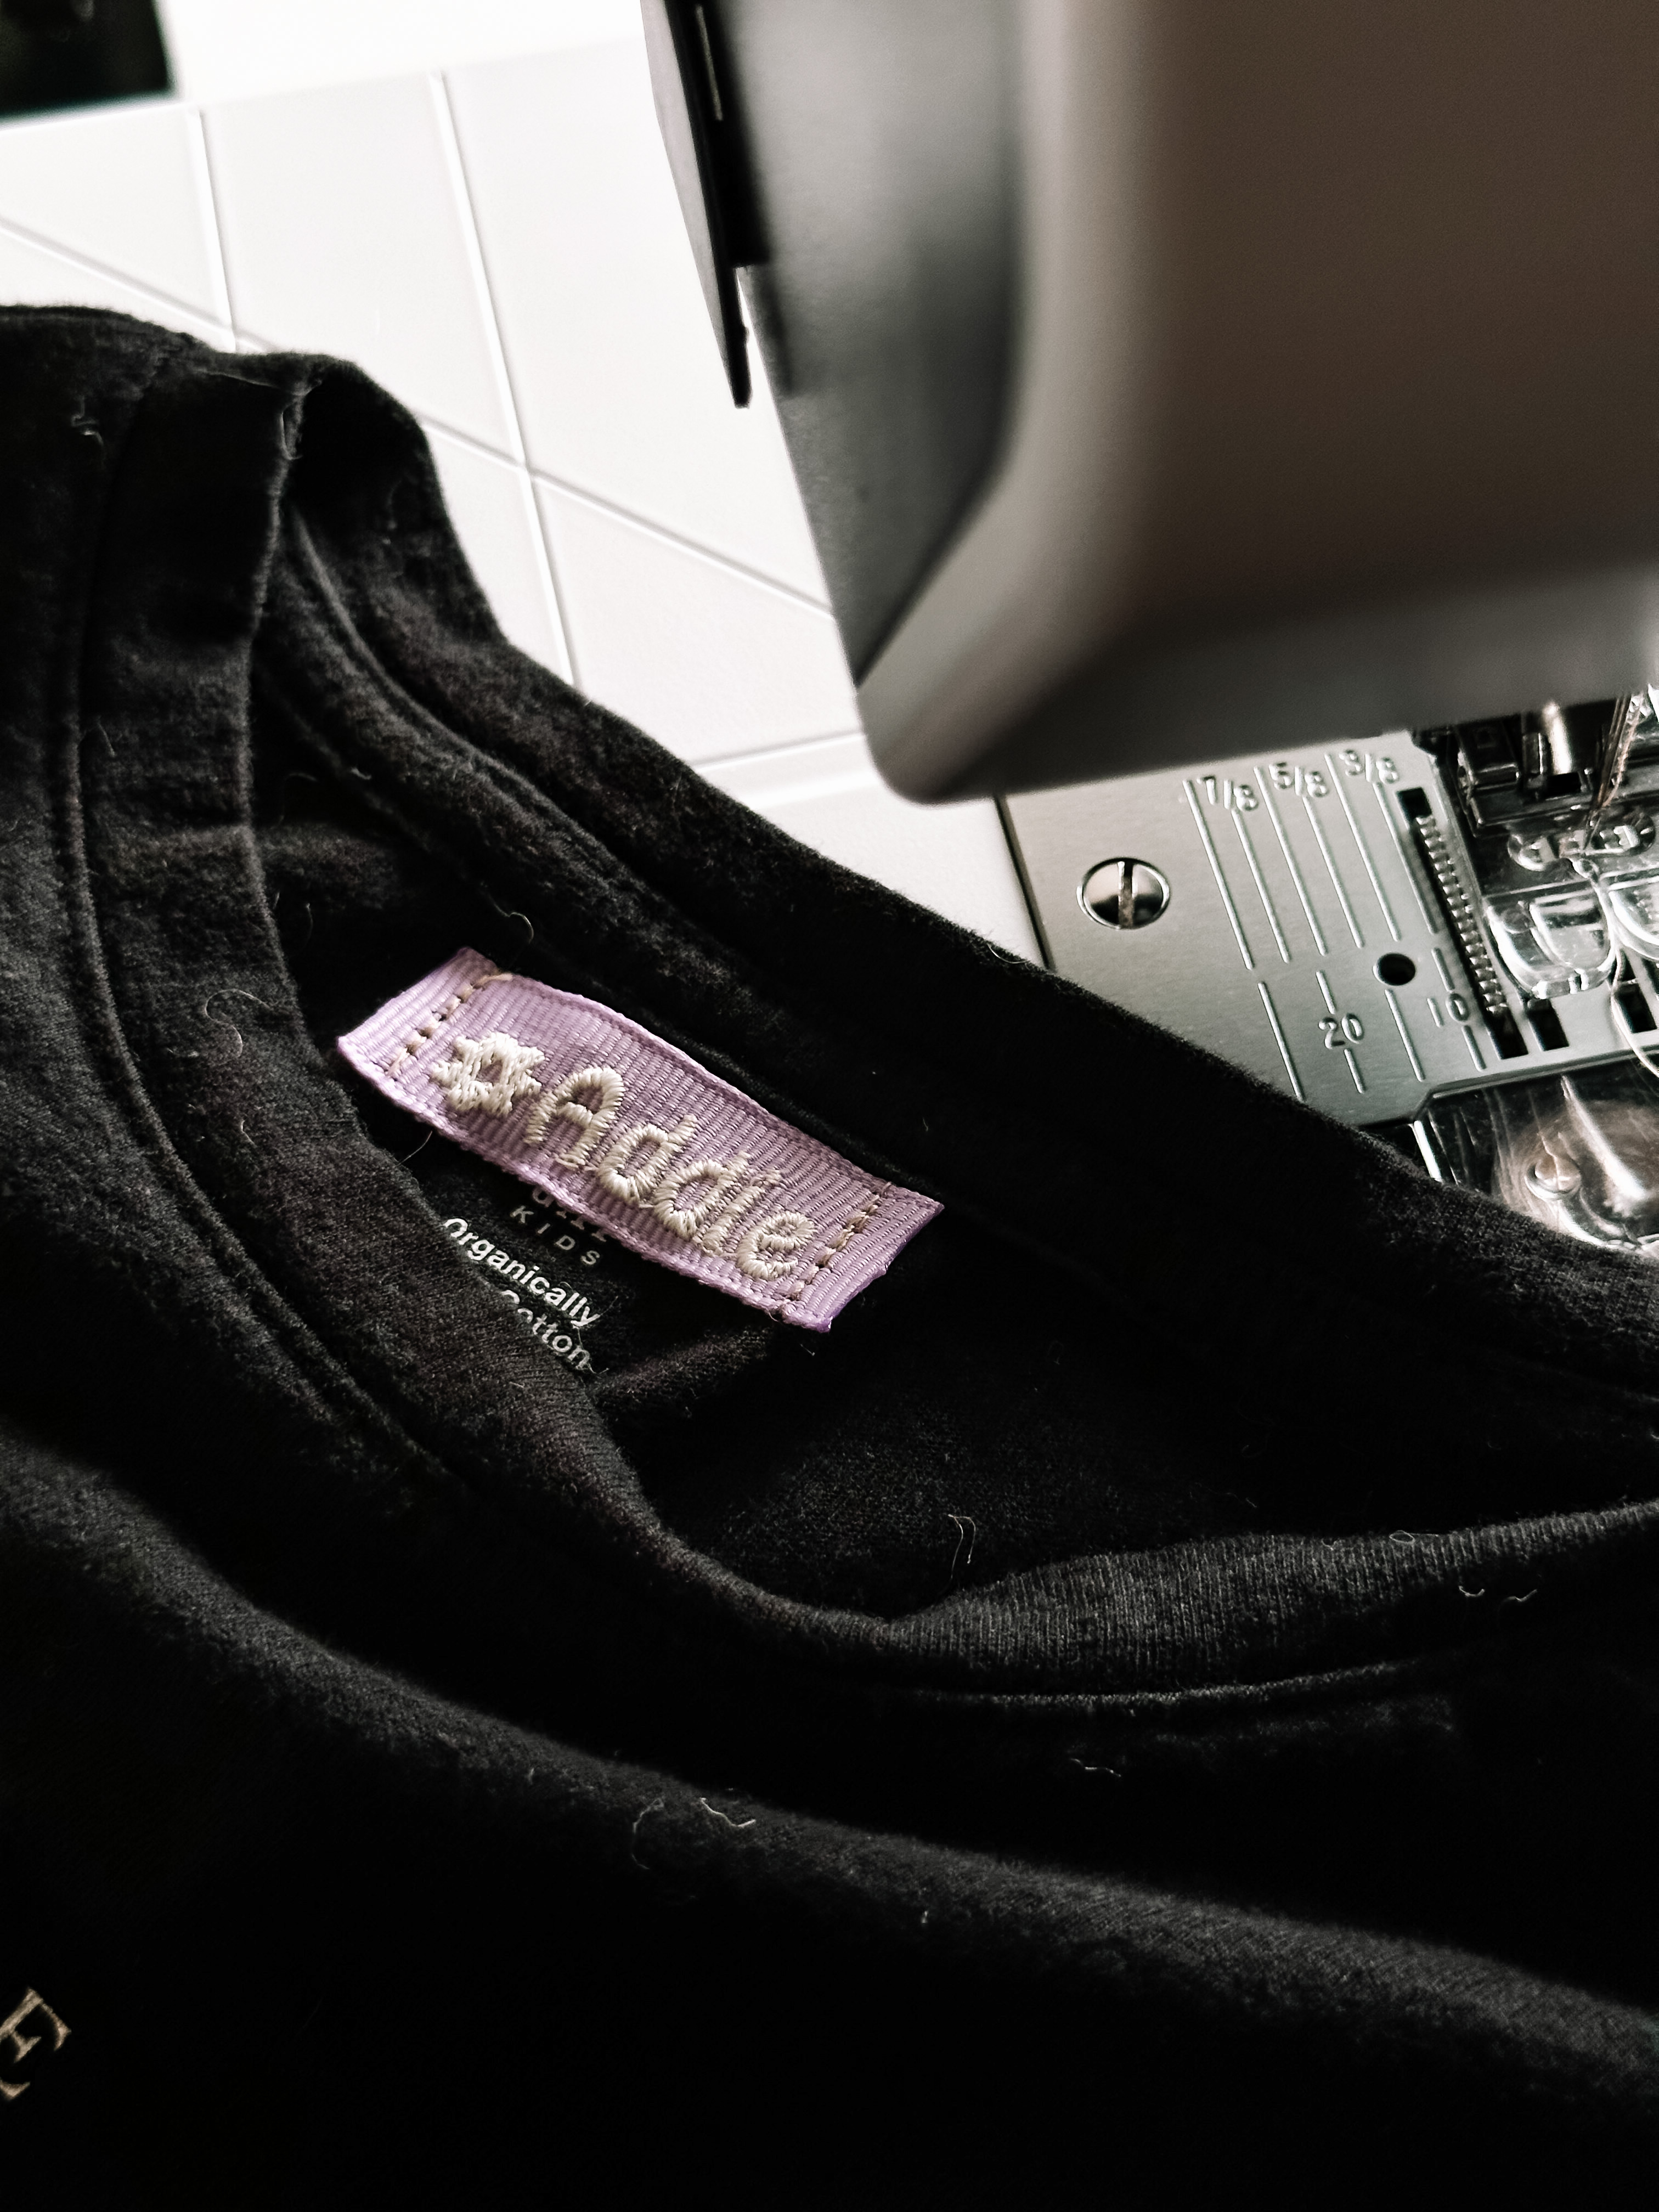
Using a coordinating thread, sew your label into clothing using a straight stitch. When you are ready to pass the clothing on, remove the stitches with a seam ripper and reuse your label in the next item.
Used Products

What you might also like


5 comments on “Reusable Clothing Labels with Machine Embroidery”
-
-
Hello! We’re sorry to hear you’re having trouble with the print option. Please try printing from another browser if possible.
-
-
Print button doesn’t work. 😞
-
Hello! We’re sorry to hear you’re having trouble with the print option. Please try printing from another browser if possible.
-
-
The “Print this Page” button works for me, but does send to “Microsoft Print to PDF” queue. This works great for me since I don’t always want to actually print to physical paper.
Leave a Reply
You must be logged in to post a comment.

The “print this page” option never works for me.