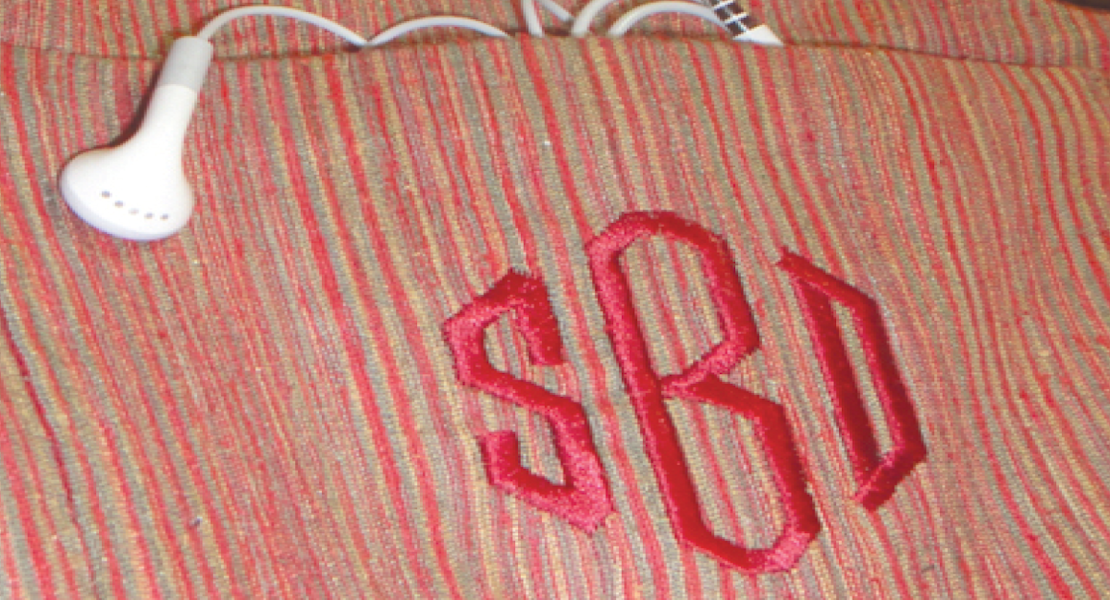
Embroidery with Word Art
Hello everyone! I’m Kate Toney from Tough Kitten Crafts, and I empower sewists to become confident with machine embroidery.
I love to take something pre-made and add a personal touch. From embroidering on a ready to wear garment to adding some decorative stitches to a store bought tote bag, I love adding my own unique touches to all types of items.
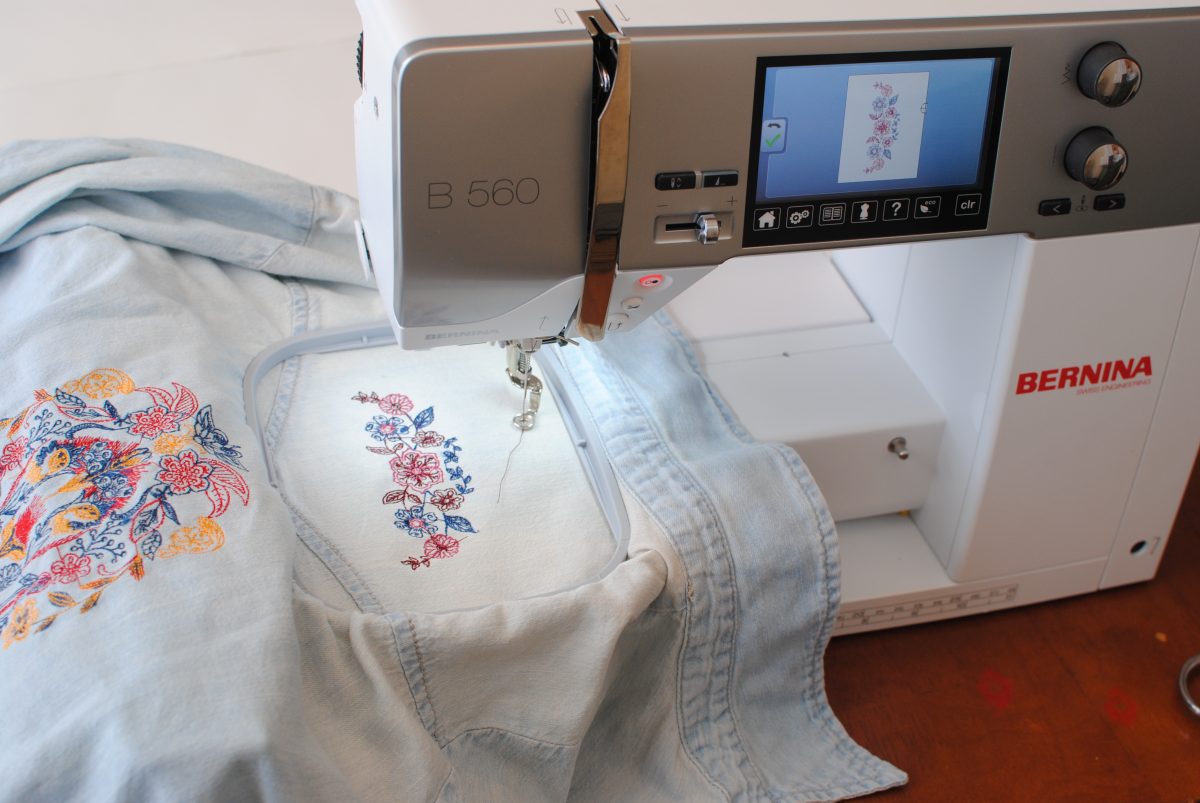
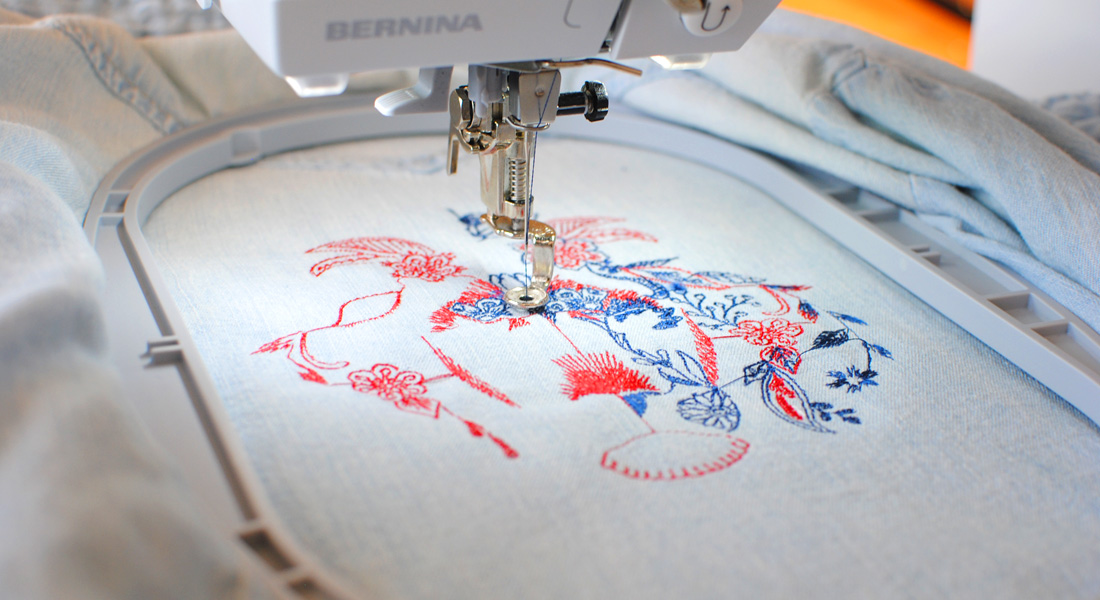
There are so many gorgeous and professionally digitized embroidery designs in the world, why not use them to personalize gifts, clothing, accessories or home décor? Today, I am going to to show you how I add lettering to purchased embroidery designs using the impressive embroidery features in my BERNINA 880 PLUS Embroidery Machine.
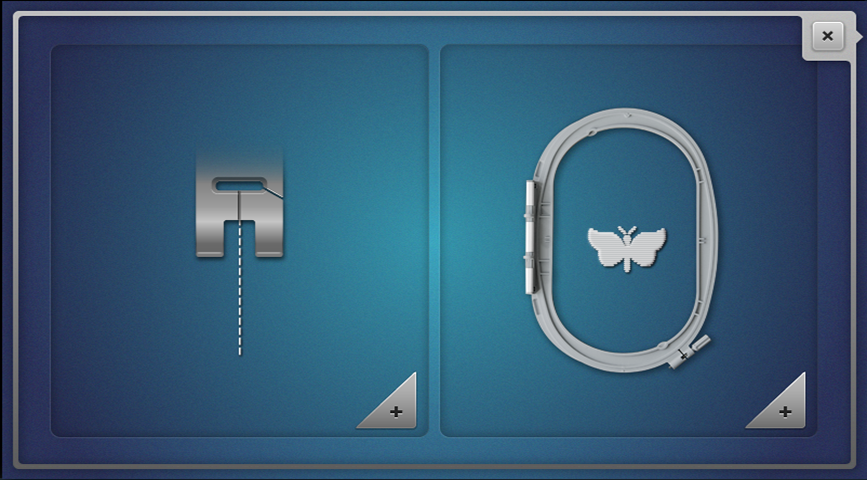
We are going to get started by choosing the Embroidery Mode (the hoop icon) on our machine.
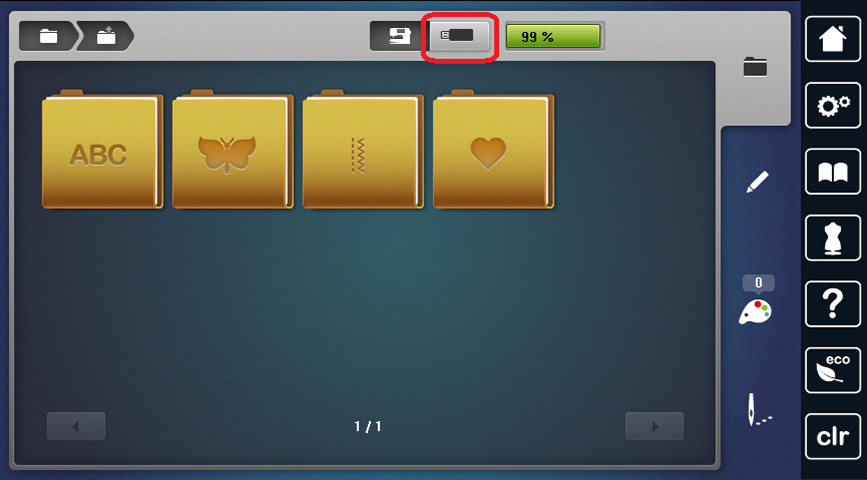
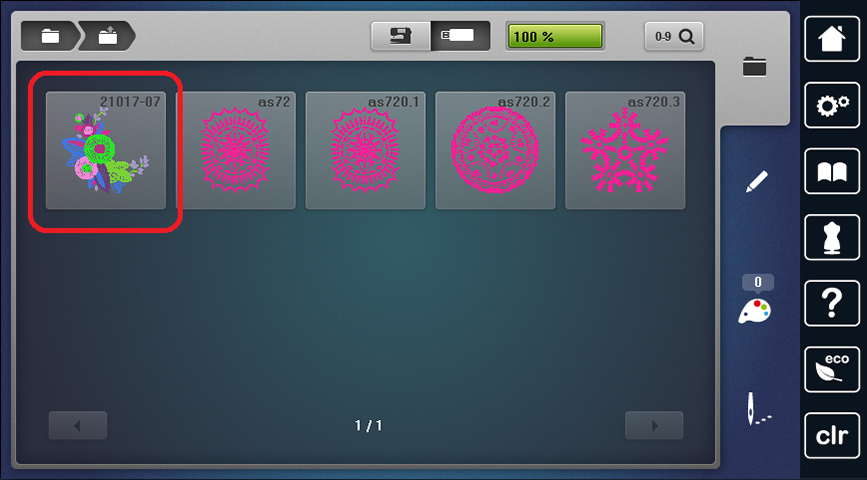
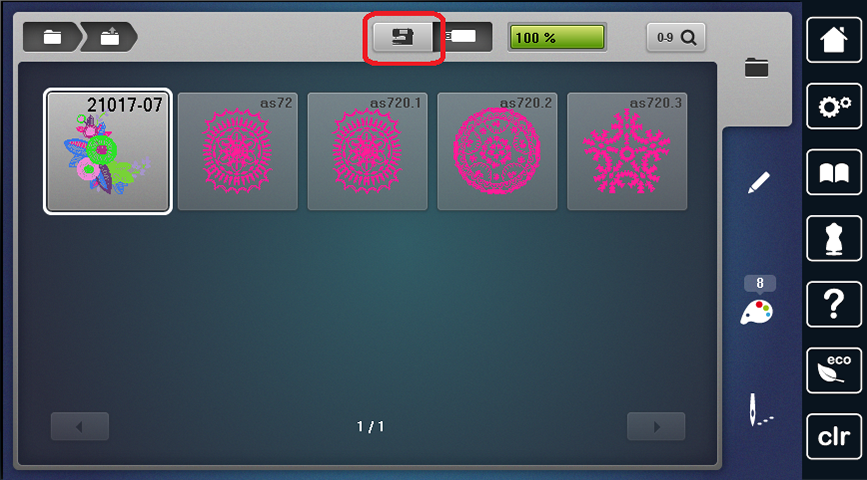
Select the USB icon to bring up a file from the USB stick in the machine. If you have already saved the design on the machine, select the Machine icon and then find it in the My Motifs folder (heart icon).
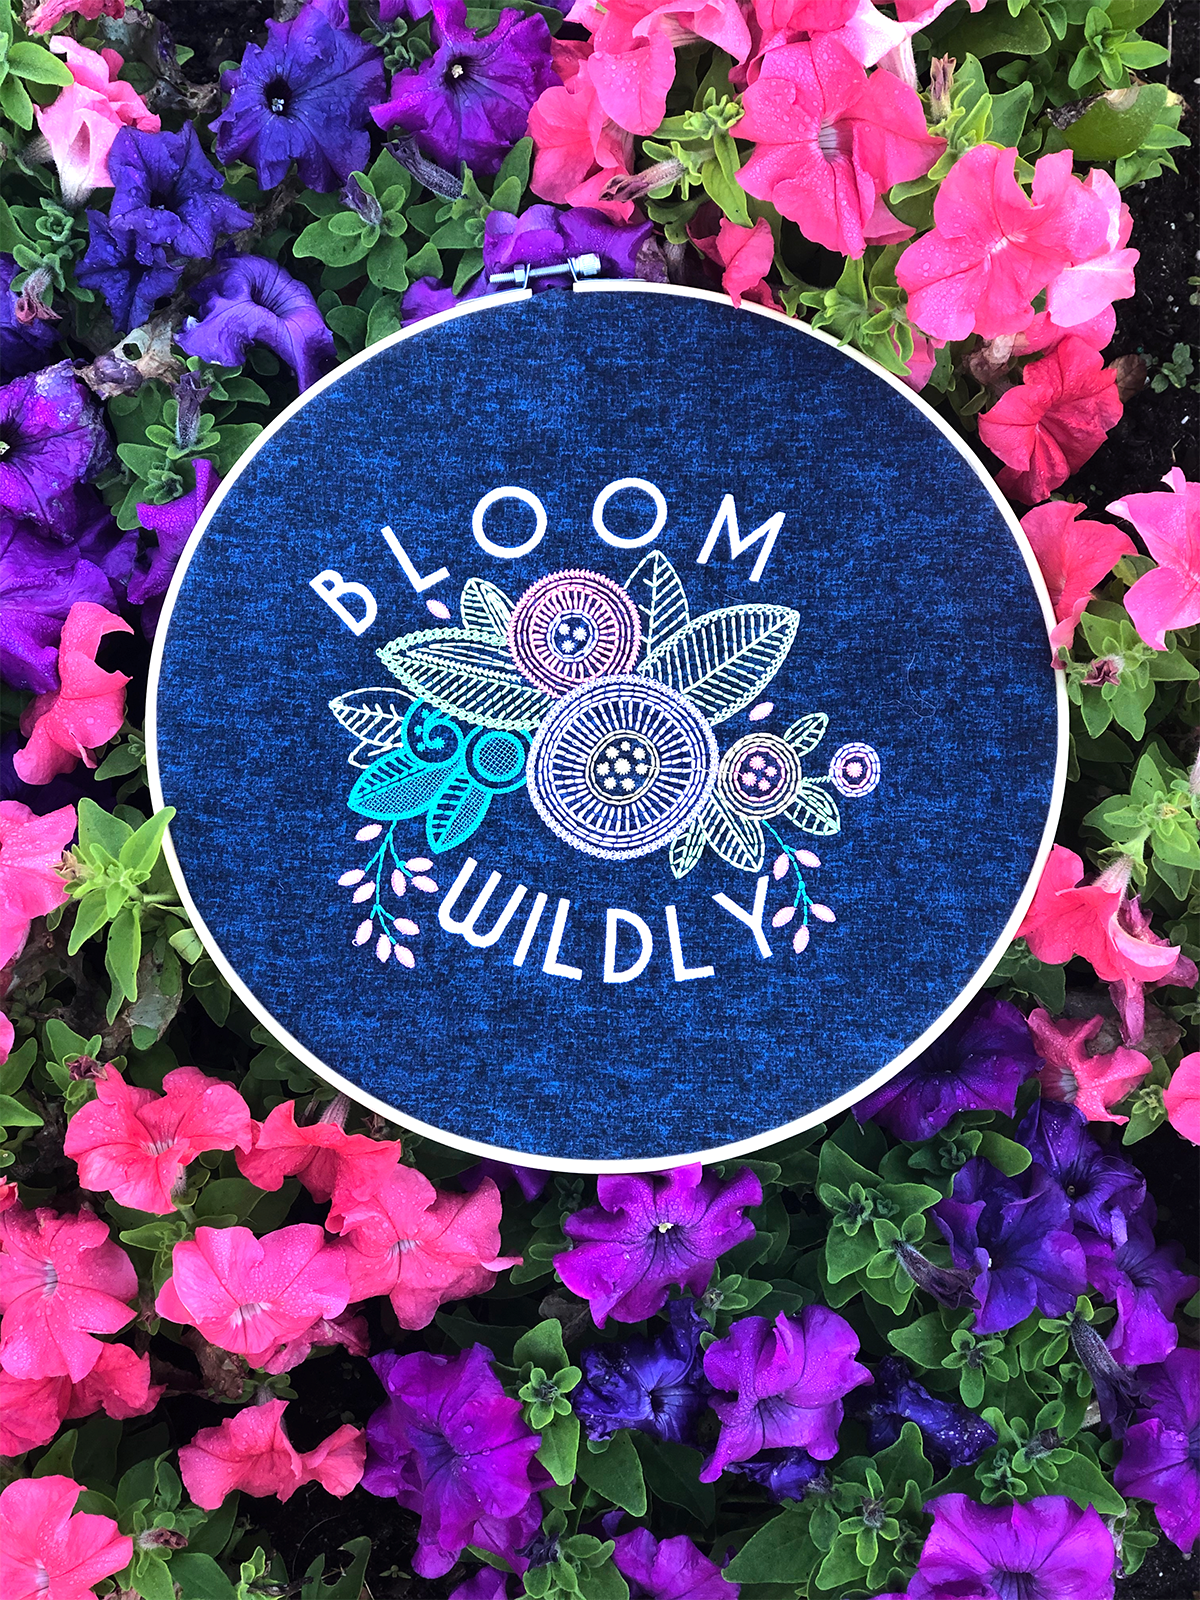
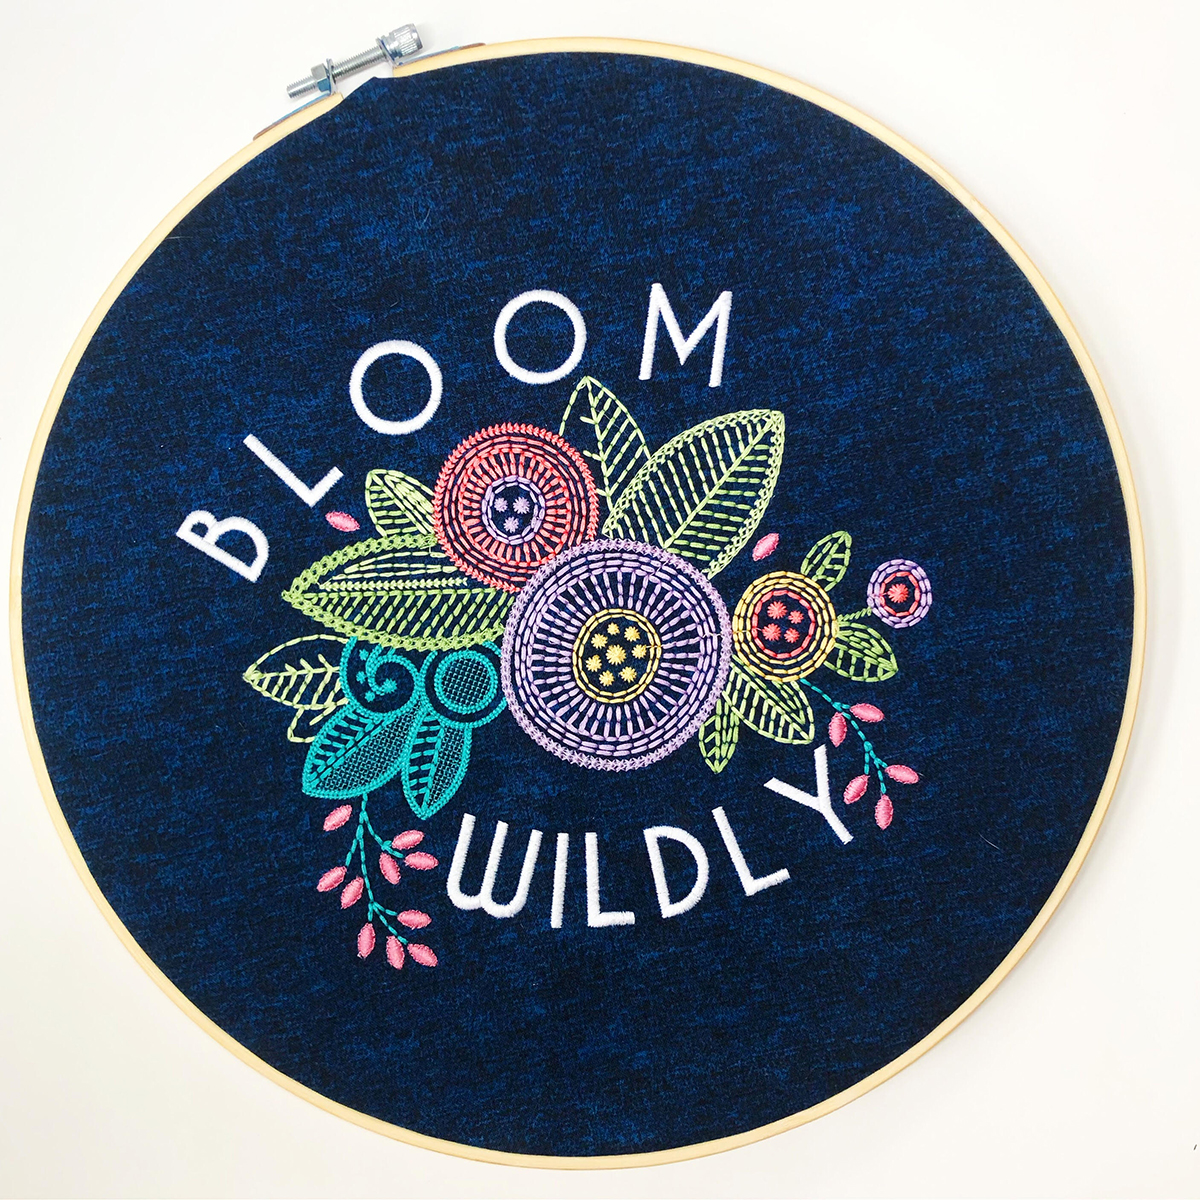
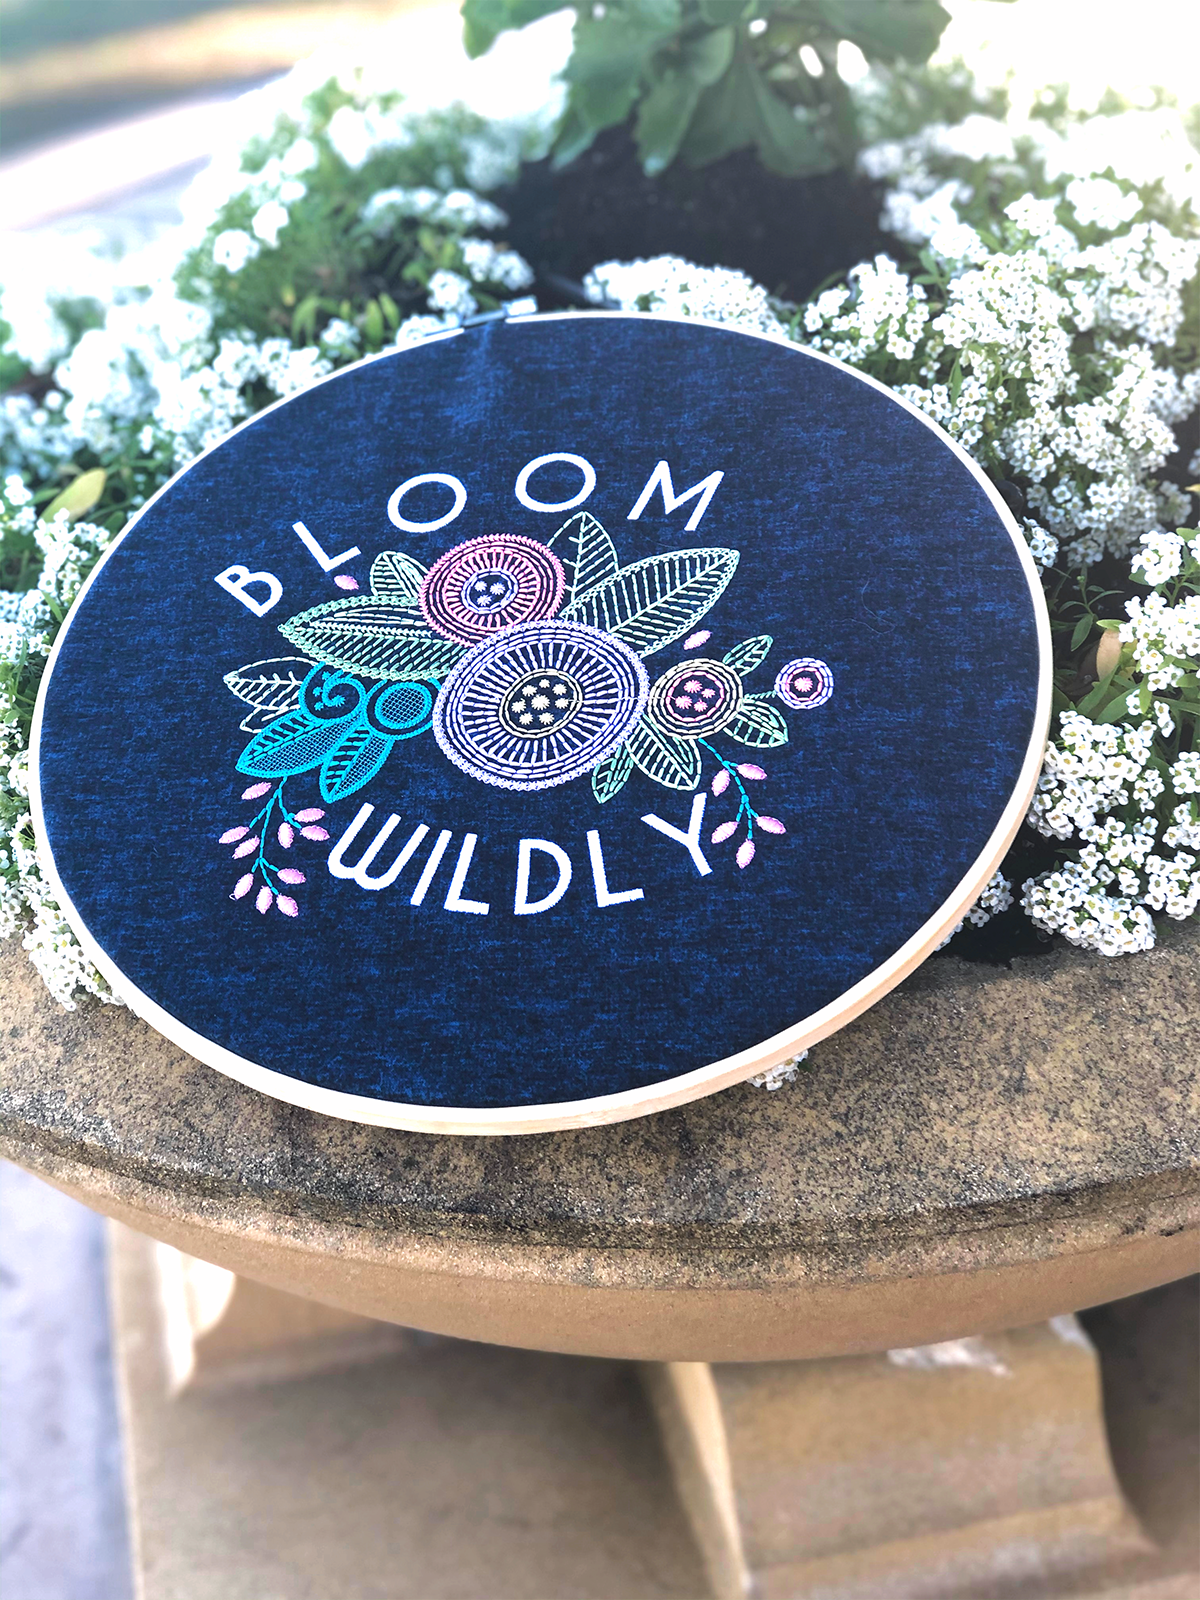
Select your design. This is from one of my favorite colletions ever; it’s OESD Collection #21017 Sun Blooms. The design I chose was 21017-07 Sun Blooms Jumbo from that collection.
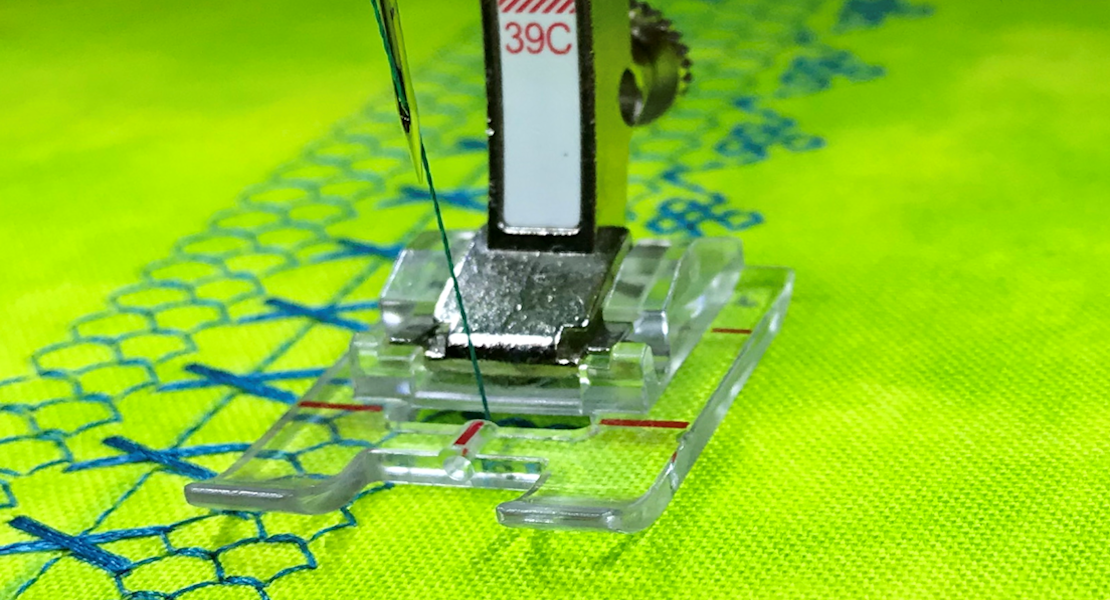
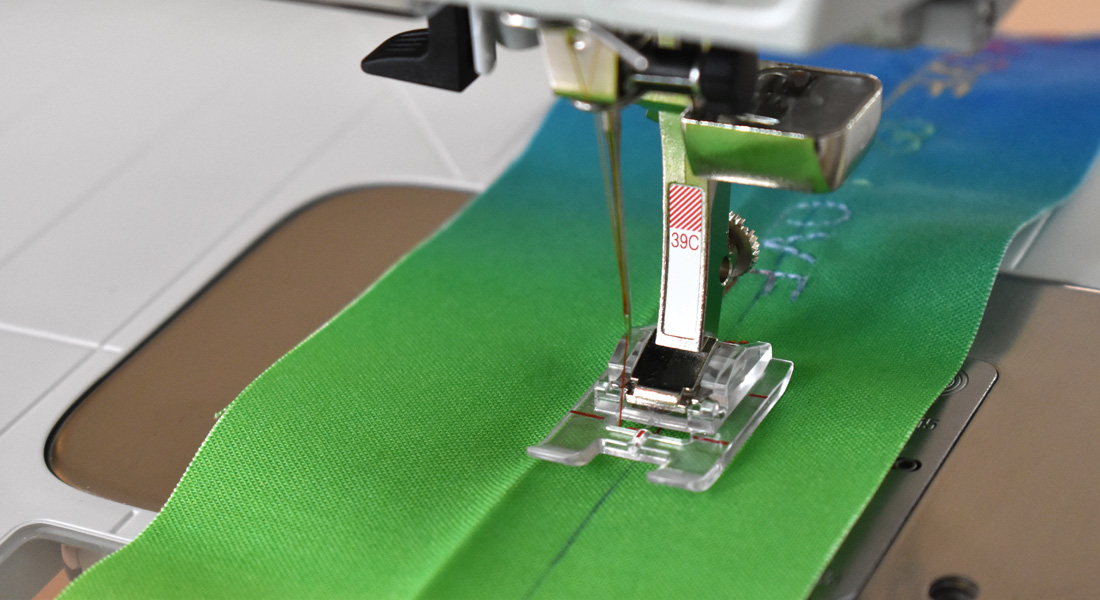
At this point, I always make sure my machine is properly set up and double check that I have told my machine everthing: 75/11 Embroidery Needle, #26 foot on, 0 mm stitch plate and selected the Jumbo Hoop. As an added bonus, I know my feed dogs are already dropped because my B880 PLUS does it automatically when I do things like embroider, use the Bernina Stitch Regulator or put on my #72 Ruler work foot.
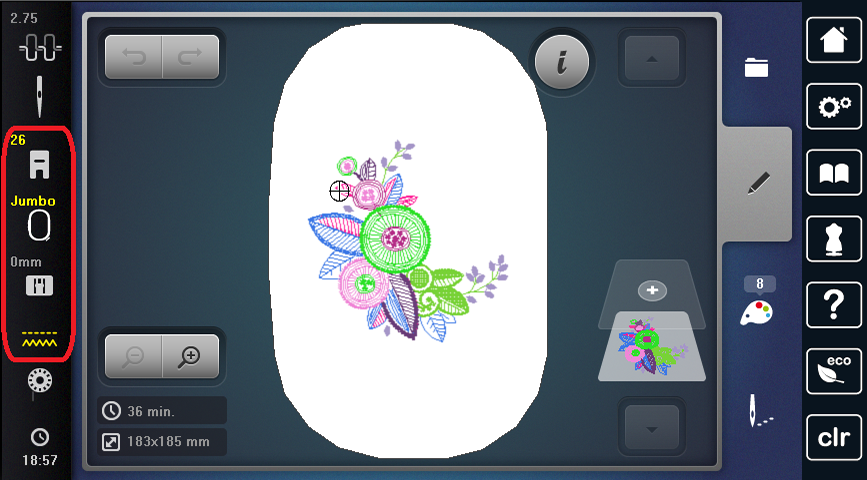
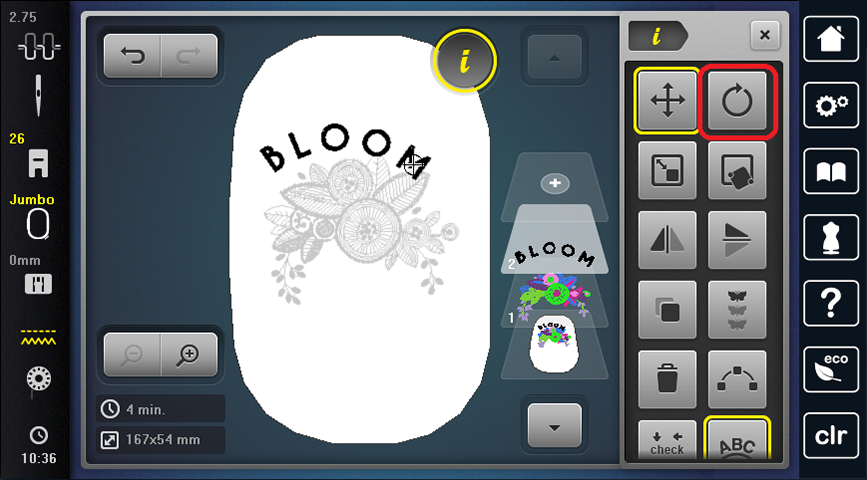
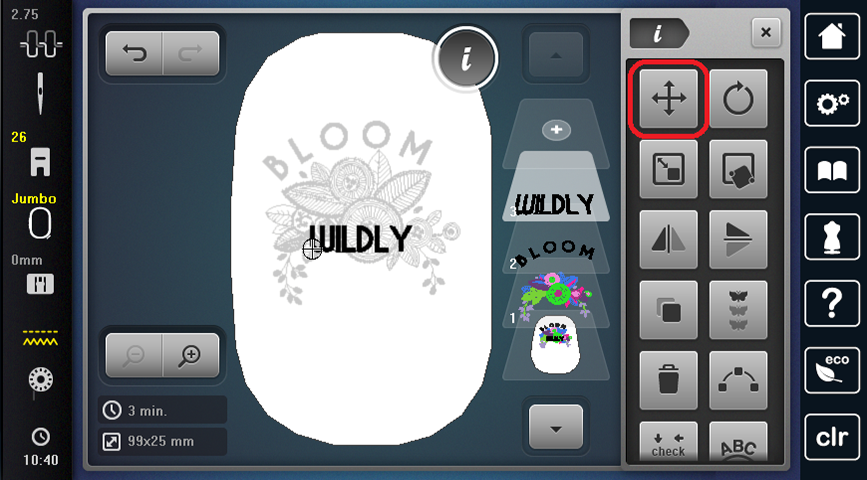
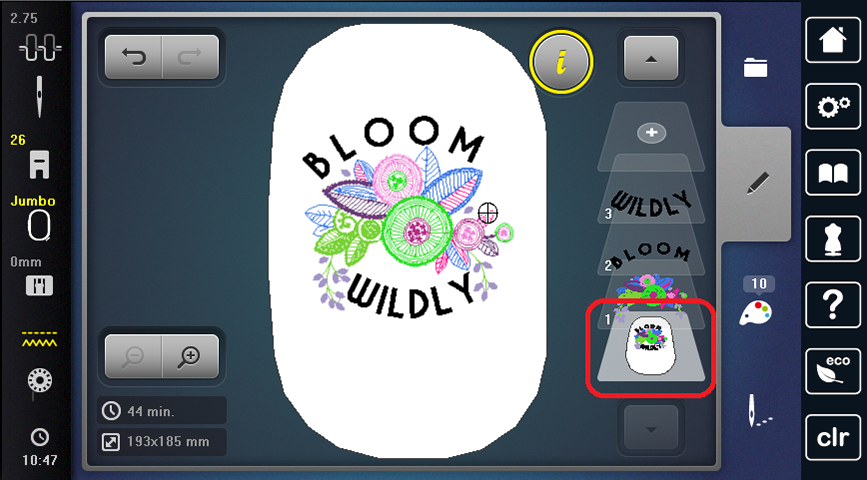
Alright! Now that we know we are set up correctly, let’s start making this design! Tap the Information icon.
![]()
First thing we are going to do is rotate the design. Tap the Rotate Motif icon.
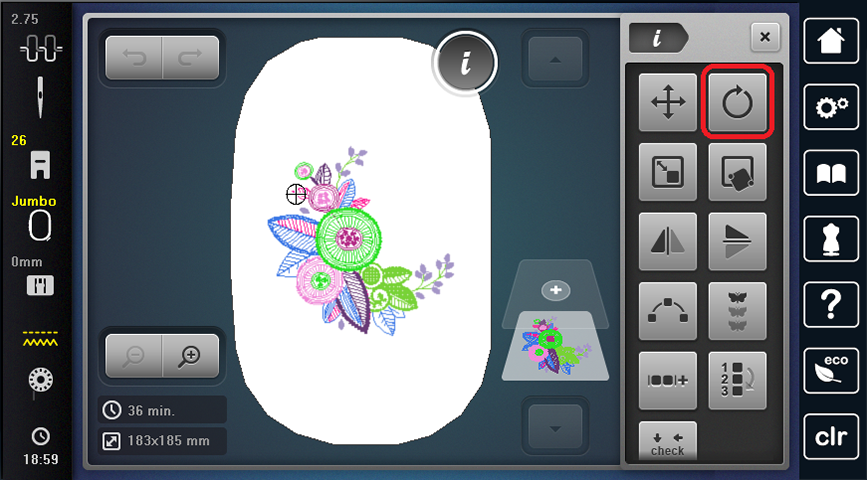
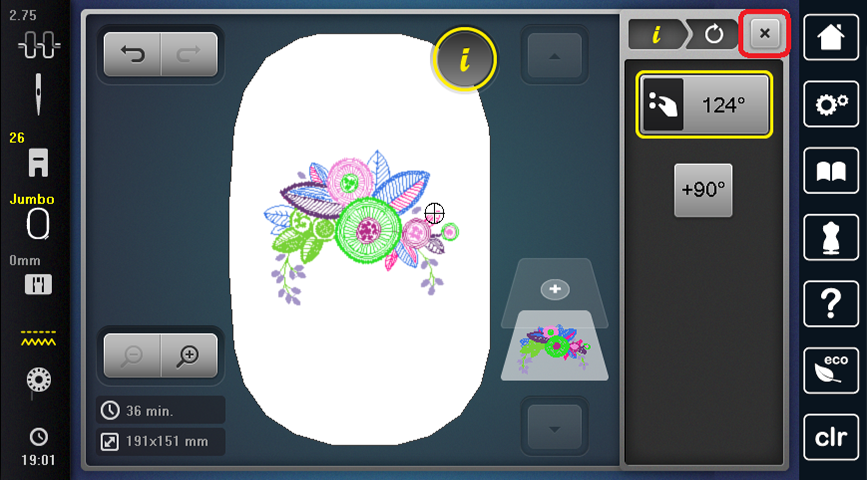
Rotate to 124 degrees using either Multi-function knob on the front of your machine.

Exit out of the Information menu.
We are going to add our lettering layers now by tapping the Add icon (the plus sign at the top of the Layer Panel).

Tap the Machine icon to access the designs that come with the machine, as well as the My Motifs folder.
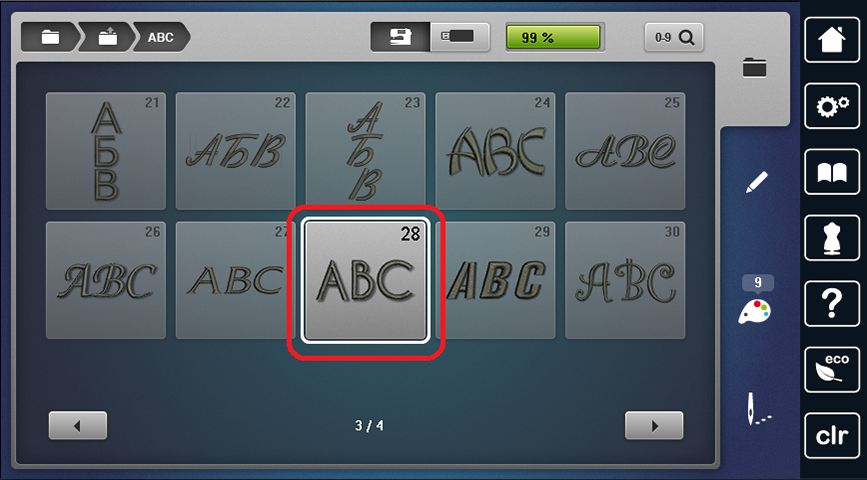
Choose the Alphabets folder.

We are going to be using Alphabet #28 Art Deco Block. It’s my favorite in my B 880 PLUS, but feel free to use whatever alphabet you like most in your machine.

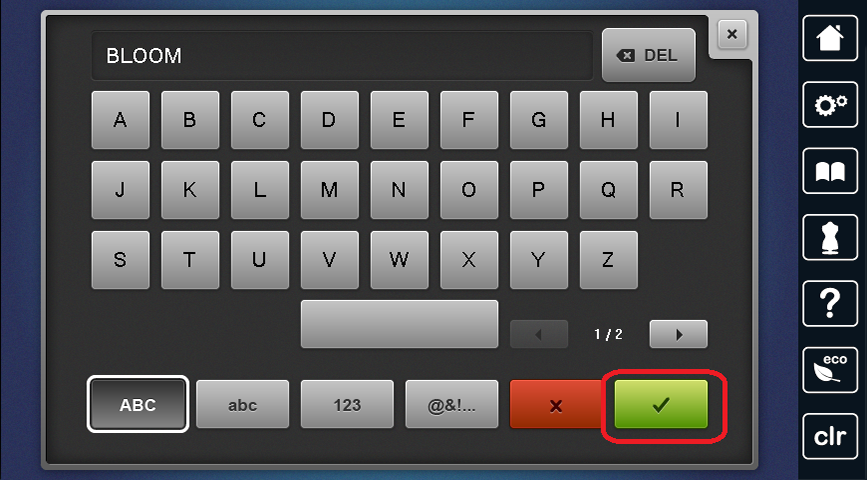
Once you select an alphabet, a keyboard will appear. Here, we will type “BLOOM”; then tap the Confirm icon (green check).
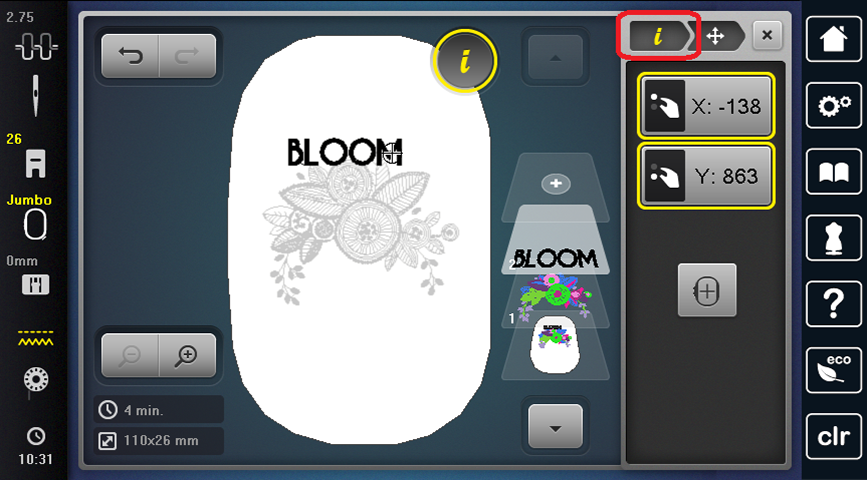
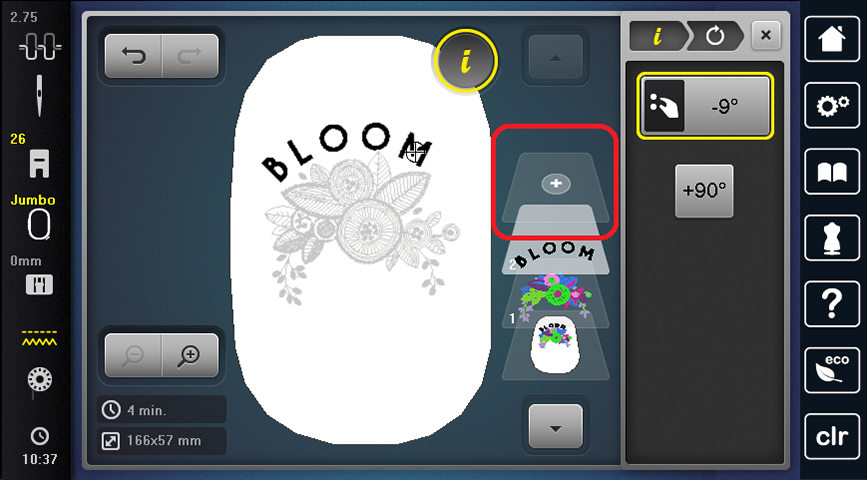
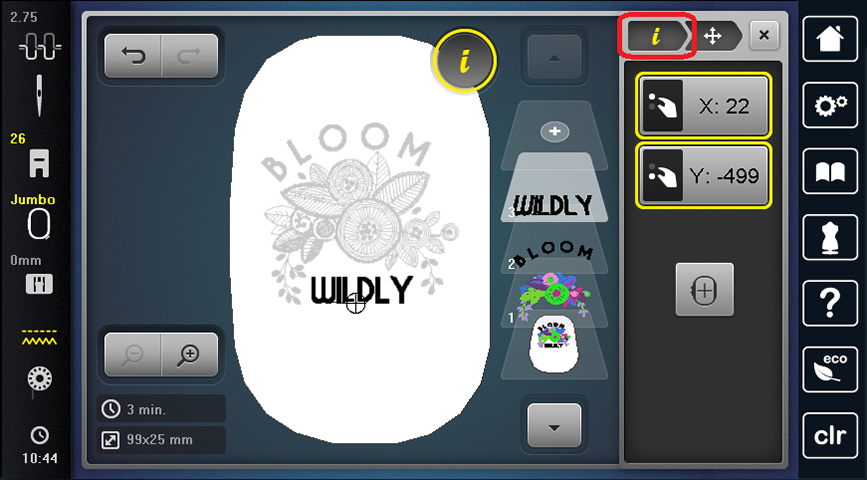
Looking great! But since new designs come in centered, we need to move that “BLOOM” out of the way. So, let’s tap the information icon again.
![]()
Select the Move Motif icon, and using the Multi-function knobs, move your design to X: -138 and Y: 863. Then head back to the Information menu using the breadcrumb path at the top of the Move Motif menu.
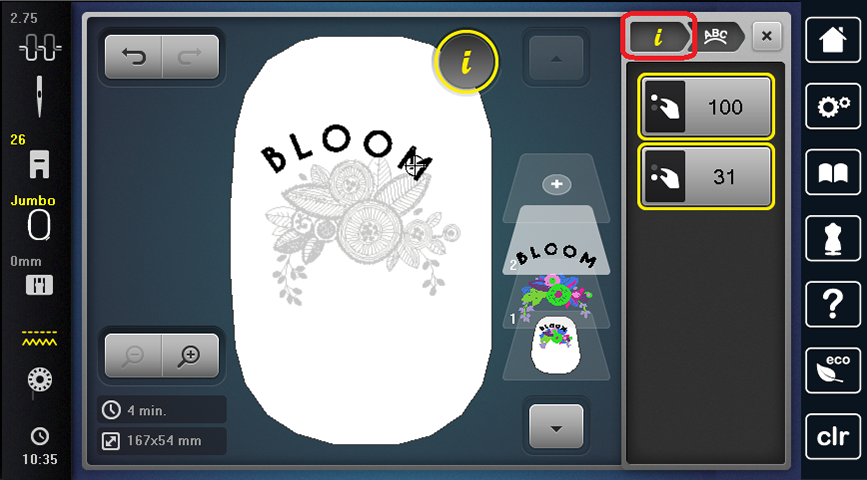
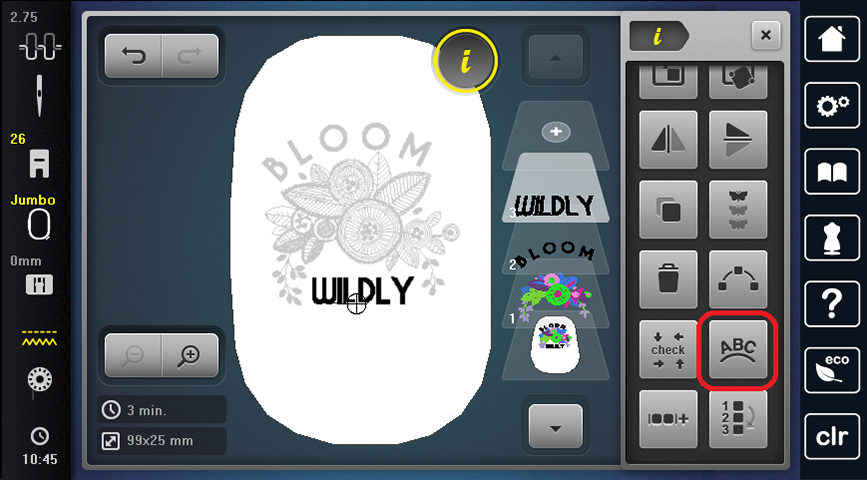
Now we are going to select the Word Art menu. This will allow us to edit the spacing and curvature of our words.

Using the Upper Multi-function knob for spacing and the Lower Multi-function knob for curving, adjust your letters to 100 spacing and 31 for curvature. Then head back to the Information menu in the breadcrumb path.
Select the Rotate Motif icon again.
Using either of the Upper or Lower Multi-funtion knobs, rotate the design to -9. Then we are going to tap the Add Motif (plus sign) again to add our next word.
Your Alphabet menu should come back up, and you can tap #28 Art Deco Block again.
Now you can type “WILDLY”, and then tap Confirm (the green check mark).
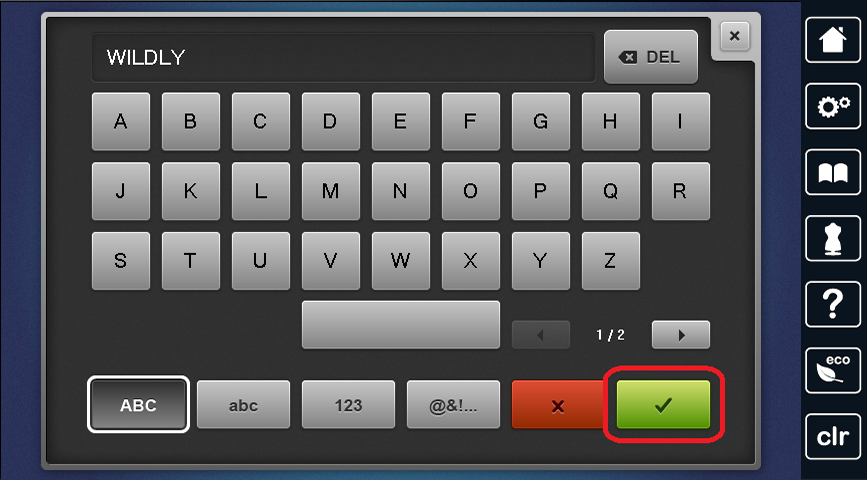
Yay! Looks fanstastic! Well, you know the drill now. We are gonna repeat the same edits we did with “BLOOM” so let’s first tap the Move Motif icon.
Move “WILDLY” to 22 on the X axis using the Upper Multi-function know, and to -499 on the Y axis with the Lower Multi-function knob. Once finished, head back to the Information menu via the breadcrumb path.
Hint: You can tell which knob moves which number because the icon has a hand and two knobs. The knob that affects that number is lit up in white. If both are white, than either knob will work.
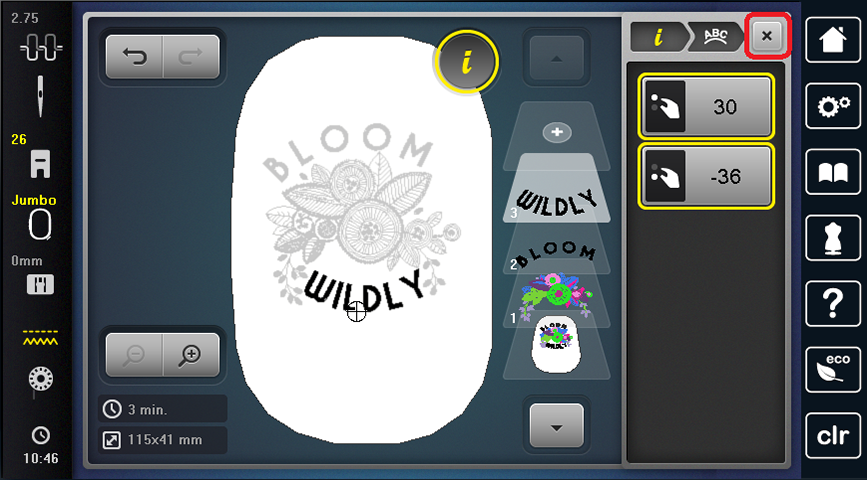
Select Word Art in the Information menu.
Using the Multi-function knobs, we are going to change the spacing to 30 (Upper Multi-function knob) and curvature (Lower Multi-function knob) to -36. Once finished you may exit out.
Select the bottommost layer—the one that shows your whole design. Doesn’t it look great!? I want you to look the design over and make sure it’s how you like it. If you want more curvature, spacing, moves a little this way or that way, then go for it! Now is the perfect time. Just select the layer from the Layer Panel and use the edit features to move as you like!
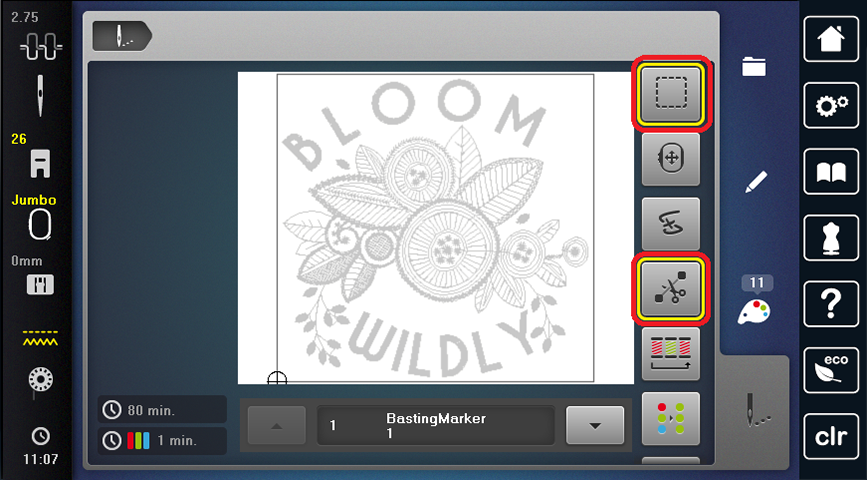
Once you have everything set exactly how you like it, tap the Colors Tab.
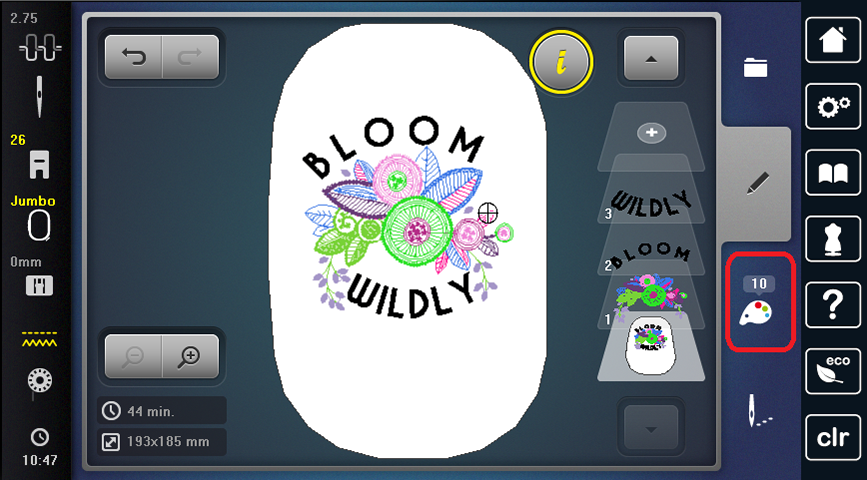
This is how our design uploaded in the machine, but we are going to add the specific Isacord colors we are going to use. I love this step because I can audition thread colors to see what works best in my design AND the machine will keep the information for me while my design stitches out. This means when it’s time to change colors it gives me the exact thread color number, so I don’t have to remember the specific color I wanted for that part of the design, I get to do all the planning one time. Start by Selecting the Alter Color/Brand icon to the right the top color bar.
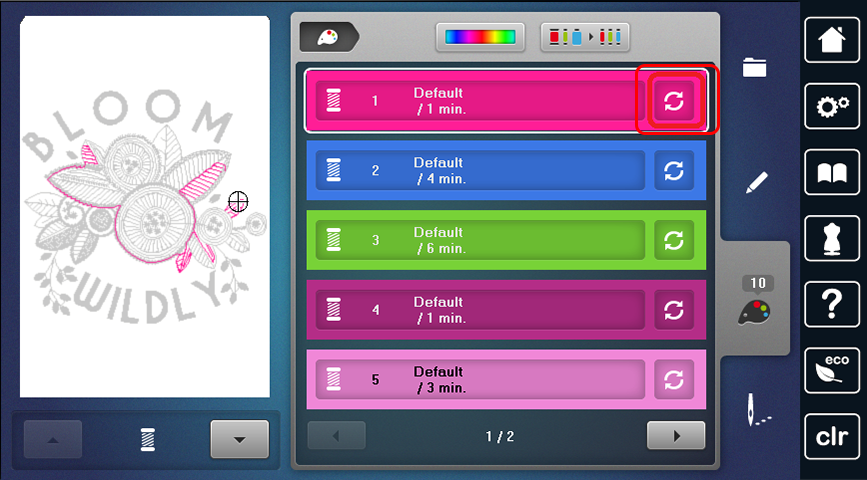
SO let’s add our specific colors…
You can change thread companies by using the left and right scrolling arrows next to the brand name. Today I am using Isacord on this design.

Once you have selected your brand, you can tap the Select Thread Brand icon. This will change all the threads in the design to this brand, so you don’t have to find the brand you are using for each element in the design.
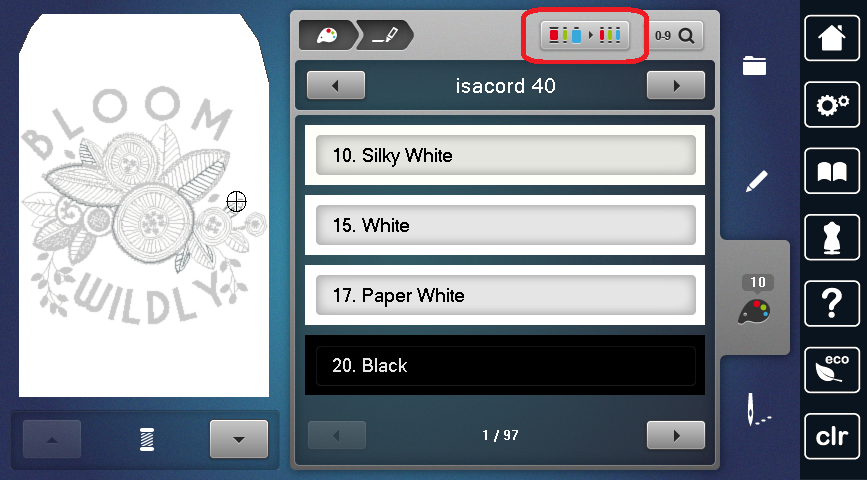
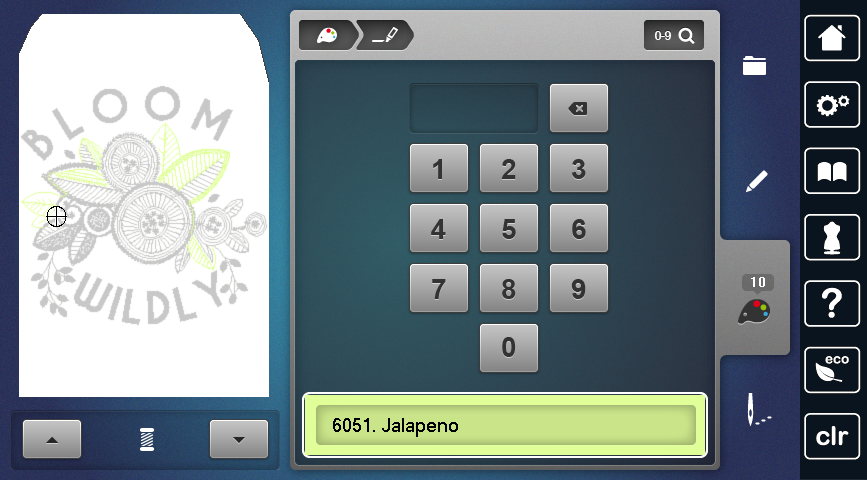
Now you can tap the search icon to search for your threads by their numbers.
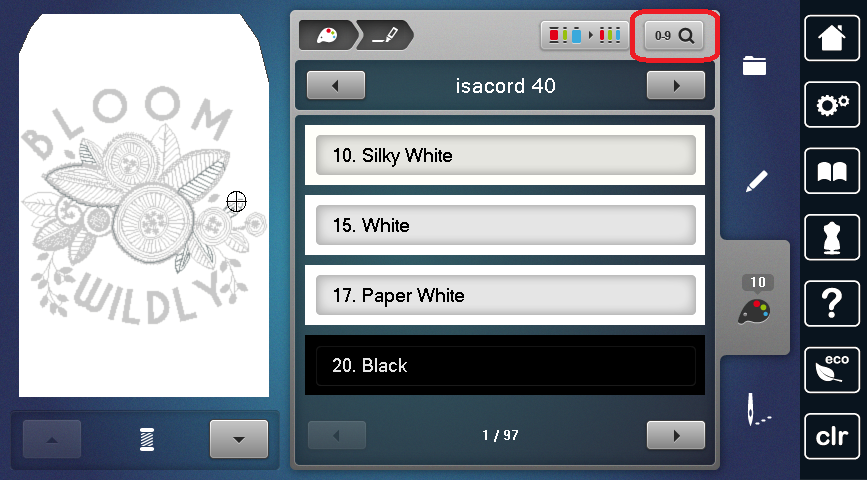
Type in the number from your thread spool and the color will pop up at the bottom. You just tap that color bar to confirm that’s the one you want in your design. When you are ready to select your next color, tap the down arrow that’s underneath your design. This arrow is how you can page up and down through the layers.
![]()
Continue to select all your colors.
This is what I chose for my design but feel free to choose colors that reflect your style and thread collection.
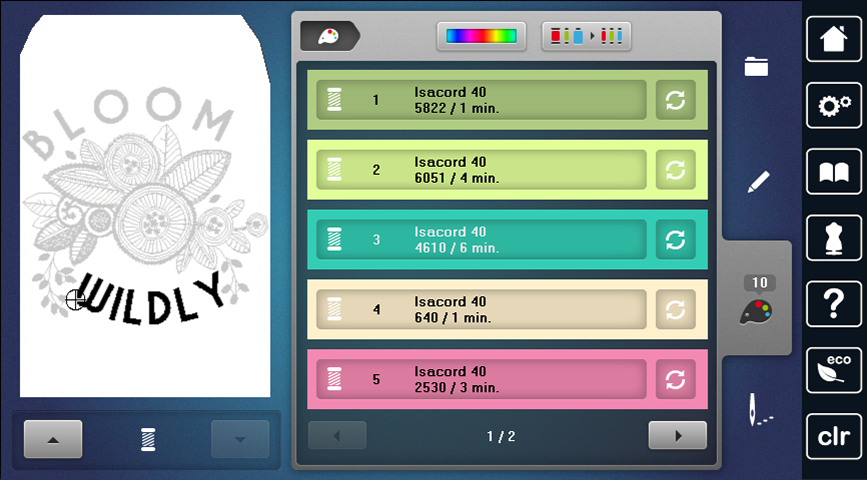
Note: On the actual design, I used white for the lettering, but I left it black in the machine so it was easy to see during the editing process and throughout this tutorial.

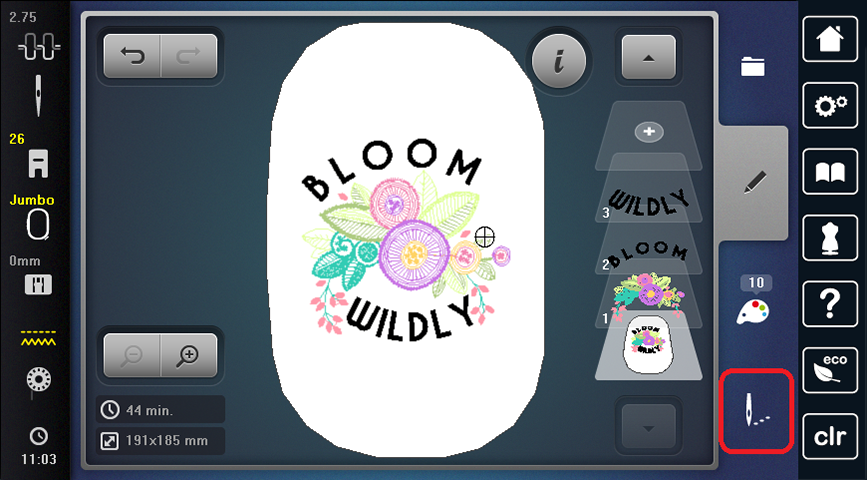
Once I am done, I like to head back to the Edit screen (the pencil icon between the Selection folder and Colors tab). This allows me to double check that I like the way all my colors look together and gives me once last chance to edit anything I might want to touch up.
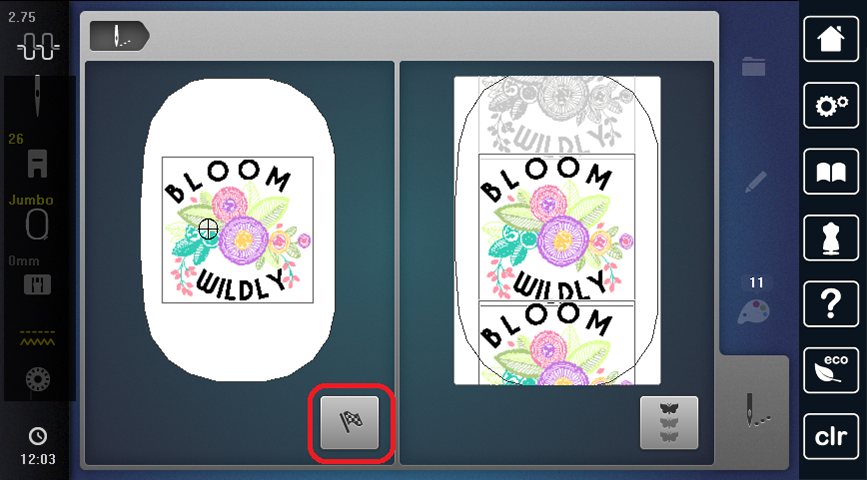
I think this looks so cute. Once you’re done editing and ready to get embroidering…tap the OK embroidery icon at the bottom right of the screen.
Be sure you have the Cut Connecting Stitches icon selected as well as the Design Basting box. You know when these items are selected because a yellow box will appear around them. When you are ready, press and hold the green flashing button on the front of your machine and proceed stitching out your entire design.
Note: It’s a really good idea to stay close by your machine when you embroider so you can keep an eye on everything happening and remedy any issues immediately. I like to sit by my machine and work on blog posts, scroll through WeAllSew blog posts or knit. I rarely have any issues while embroidering, but when I do, the most disastrous problems always seem to happen when I leave my machine on its own. It’s like it knows or something!
Once your design has finished you can tap the checkered flag to let your machine know you are done embroidering for now.
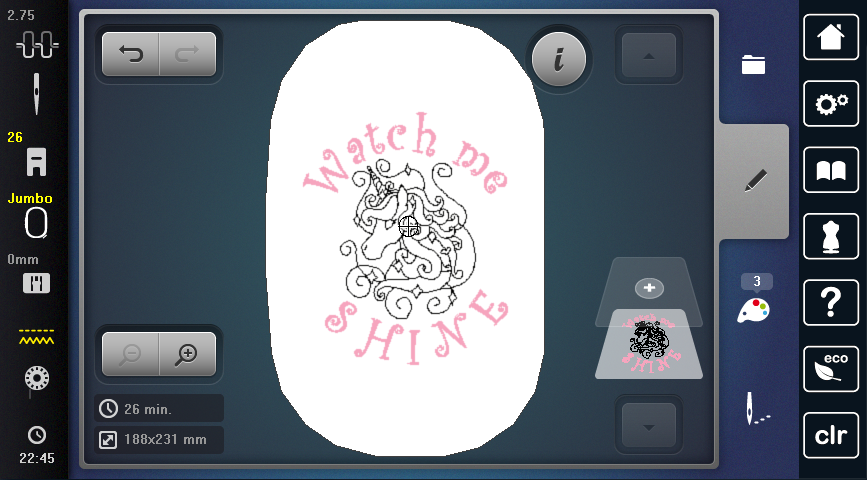
Here is another cute design combination I created on my machine. This one uses a purchased design from Sue Overy’s Enchanted Unicorn collection. I personalized this one for my step daughter; it’s a quote we both love, and her unicorns are her favorite.
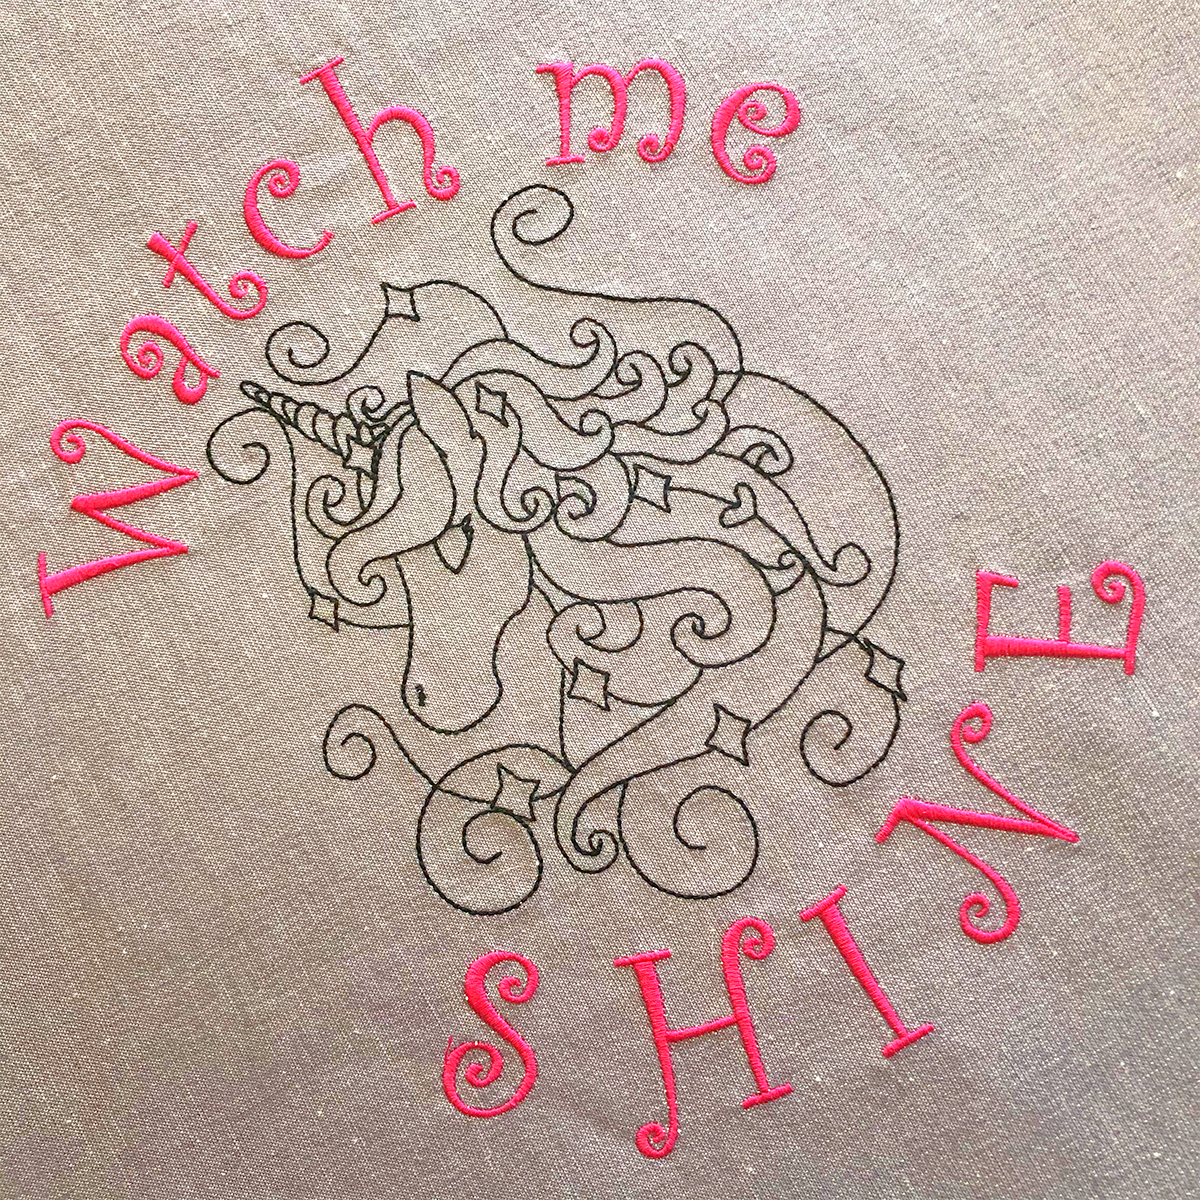
I finished mine off by adding them to wooden embroidery hoops from my favorite craft store, but you can make them into pillows, banners, table toppers, you name it! I cannot wait to see what you come up with.
Don’t forget to tag me on Instagram (@ToughKittenCrafts) so I can see the awesome designs you made in your machine. I can’t wait to see what you create and how you personalize your embroidery designs.
Used Products
What you might also like


9 comments on “Embroidery with Word Art”
-
-
Thanks for the kind words. I am SO glad you liked to tutorial!
-
-
What lettering did you use on your unicorn design?
Thank you-
This lettering is alphabet number 30 in the 880.
-
-
were is the giveaway
-
I’m sorry, what giveaway are you referring to?
-
-
I really appreciate the step by step description of how to get through the embroidery process. It is really a god-send when working on a new machine. I will watch for more lessons.
-
I’m so glad! We will definitely be doing more step by step tutorials here and on my own blog.
-
-
I love this design, however, I have the 770 QE Plus and wondered if you have any tutorials on embroidering on that machine? I would very much appreciate any links that you may offer.
Thank you!
Leave a Reply
You must be logged in to post a comment.

I have just read through your instructions. I am so appreciative of your explanation and pictures! I really feel I could do this by doing this step by step. Thank you so much.