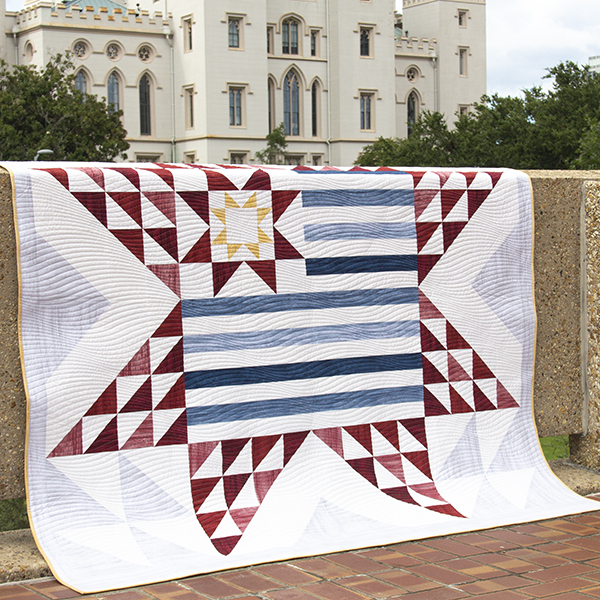
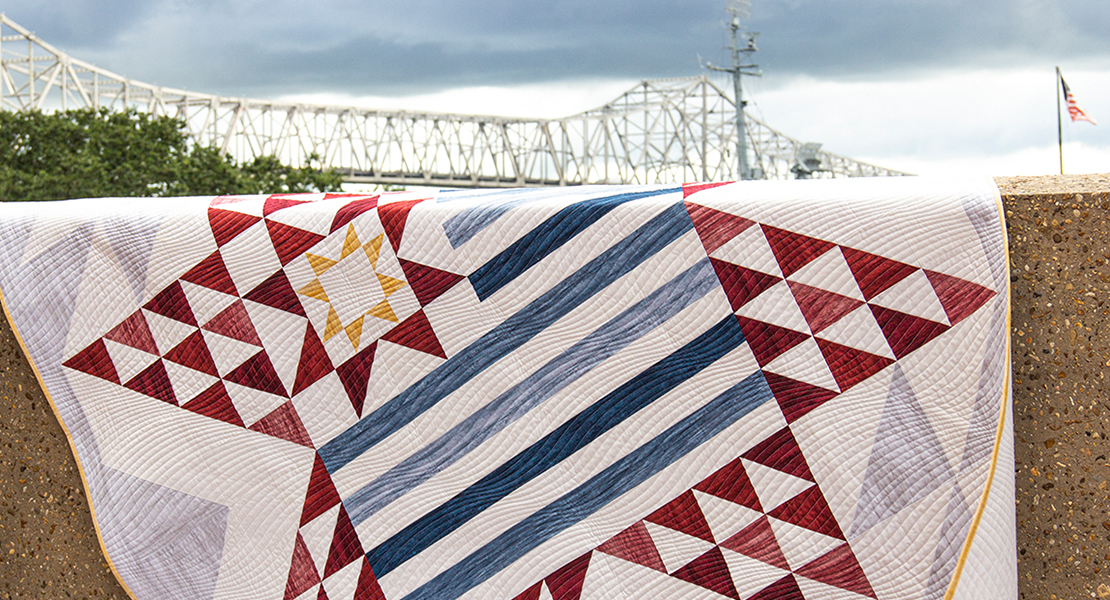
Stars & Stripes
Quilts of Valor is a wonderful group that awards quilts to service members and veterans touched by war. I’ve supported the group through the years and today I’m so honored to share this easy to sew Stars and Stripes project and perhaps encourage you to make a Quilt of Valor for a service man or woman. The throw finishes at 68″ x 74″.
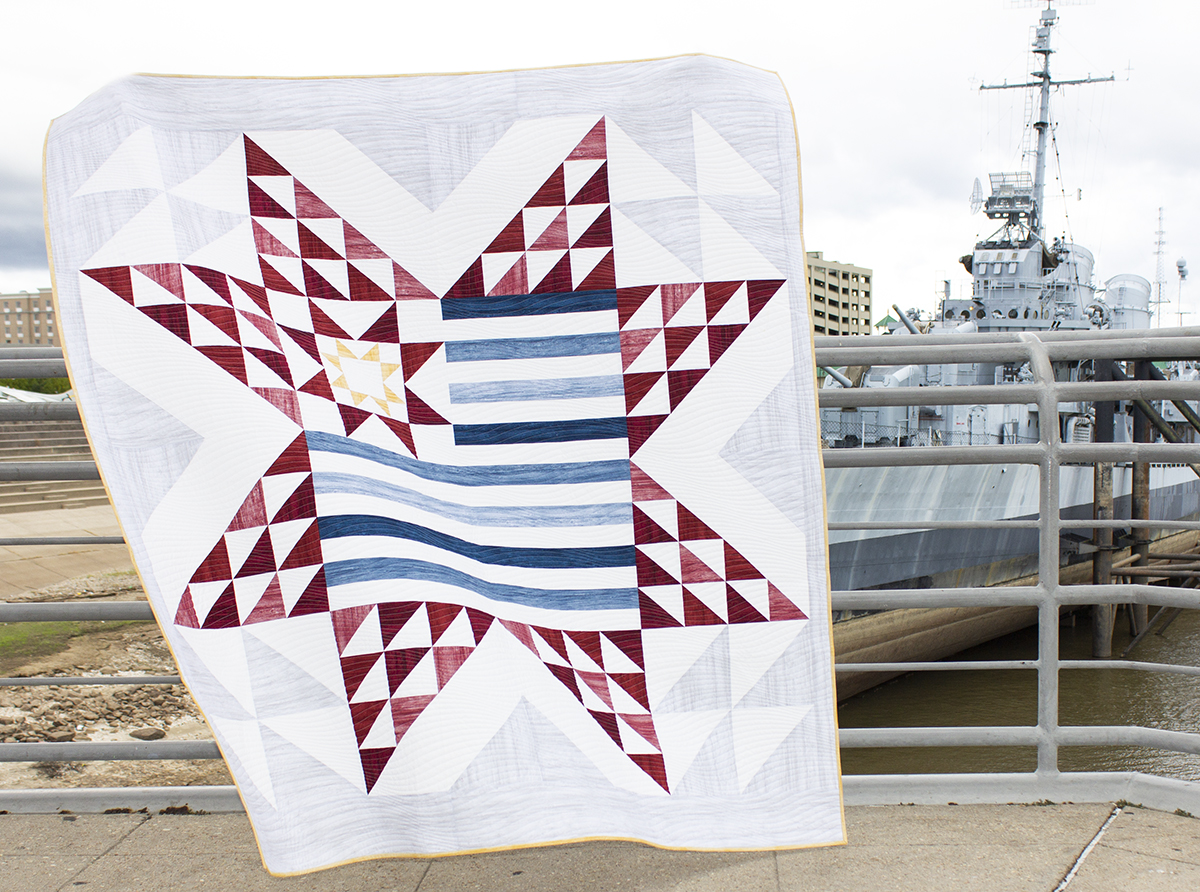
I love quilts with stars and while playing with the fabrics and color placement, loved both of these colorways. Version one with the star points in blue and version two with the star points in red; the steps in the tutorial feature version two.

Materials to make Stars & Stripes

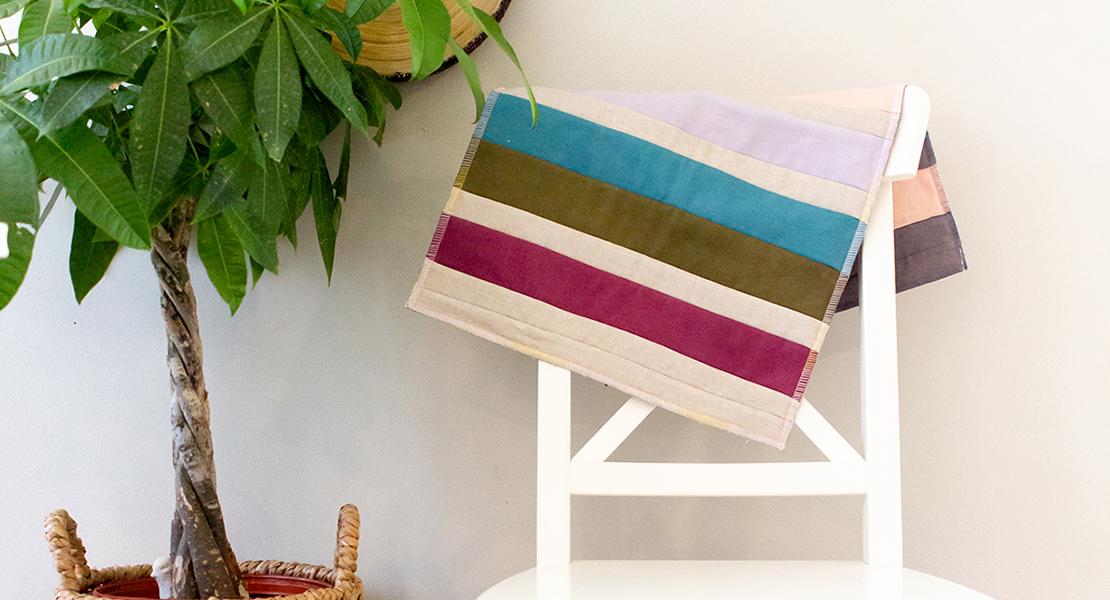
Fabrics: the sample quilt features the Contempo Studio of Benartex fabric line Washed Wood and the white from my latest group Planted With Love. I also used these fabrics to make this Red, White & Blue mini.
- 2/3 yds yellow/gold – block and binding
- 2 2/3 yds white – blocks
- 1/2 yd dark red – blocks
- 1/2 yd medium red – blocks
- 1/2 yd light red – blocks
- 1/4 yd dark blue – blocks
- 1/3 yd medium blue – blocks
- 1/4 yd light blue – blocks
- 2 yds light grey – blocks and borders
Additional supplies:
- White or light grey piecing thread
- Cutting mat, ruler, rotary cutter
- Batting: twin size; sample quilted with Eversewn bamboo batting
- Backing fabric: 4 1/2 yds
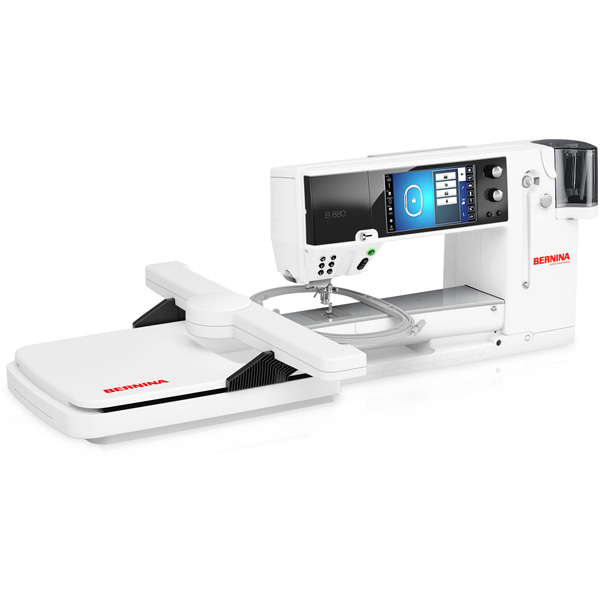
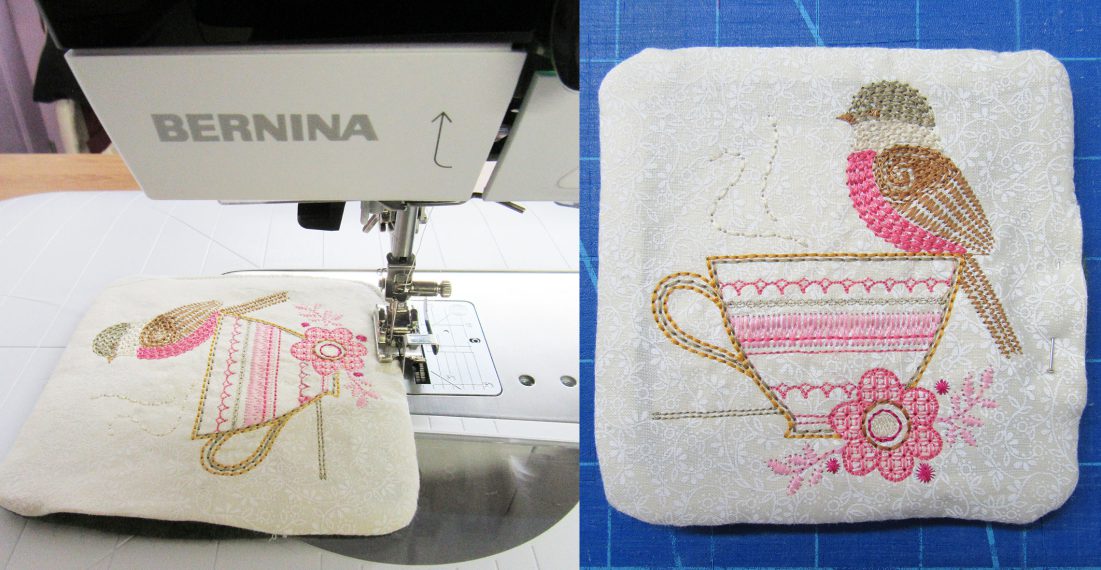
- Sewing machine (I used a BERNINA 880 Plus)
Let’s get started!
All seams are 1/4″ unless otherwise noted. WOF = Width Of Fabric salvage-to-salvage

Step 1: Cut and label all fabrics
Yellow/gold fabric:
(1) 3 1/8″ x WOF strip sub- cut into (4) 3 1/8″ x 3 1/8″ – B
(8) 2 1/4″ x WOF strips – binding
White fabric:
(3) 9 1/4″ x WOF strips sub-cut into:
(12) 9 1/4″ x 9 1/4″ – E
(4) 3 1/8″ x 3 1/8″ – B
(6) 5″ x WOF strips sub-cut into:
(44) 5″ x 5″ – D
(3) 4 1/2″ x 4 1/2″ – A
(3) 4 1/2″ x WOF strips sub-cut into:
(18) 4 1/2″ x 4 1/2″ – A
(6) 2 1/2″ x WOF strips sub-cut into:
(4) 2 1/2″ x 32 1/2″ – G
(4) 2 1/2″ x 16 1/2″ – F
(4) 2 1/2″ x 2 1/2″ – C
Dark red fabric:
(2) 5″ x WOF strips sub-cut into:
(16) 5″ x 5″ – D
Medium red fabric:
(2) 5″ x WOF strips sub-cut into:
(16) 5″ x 5″ – D
Light red fabric:
(2) 5″ x WOF strips sub-cut into:
(12) 5″ x 5″ – D
Dark blue fabric:
(2) 2 1/2″ x WOF strips sub-cut into:
(1) 2 1/2″ x 32 1/2″ – G
(2) 2 1/2″ x 16 1/2″ – F
Medium blue fabric:
(3) 2 1/2″ x WOF strips sub-cut into:
(2) 2 1/2″ x 32 1/2″ – G
(1) 2 1/2″ x 16 1/2″ – F
Light blue fabric:
(2) 2 1/2″ x WOF strips sub-cut into:
(1) 2 1/2″ x 32 1/2″ – G
(1) 2 1/2″ x 16 1/2″ – F
Grey fabric:
(3) 9 1/4″ x WOF strips sub-cut into:
(12) 9 1/4″ x 9 1/4″ – E
(4) 5 1/2″ x WOF strips – border I
(4) 2 1/2″ x WOF strips – border H
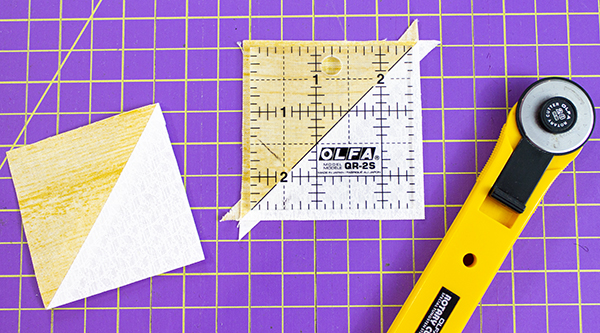
Step 2 – Half-Square-Triangles
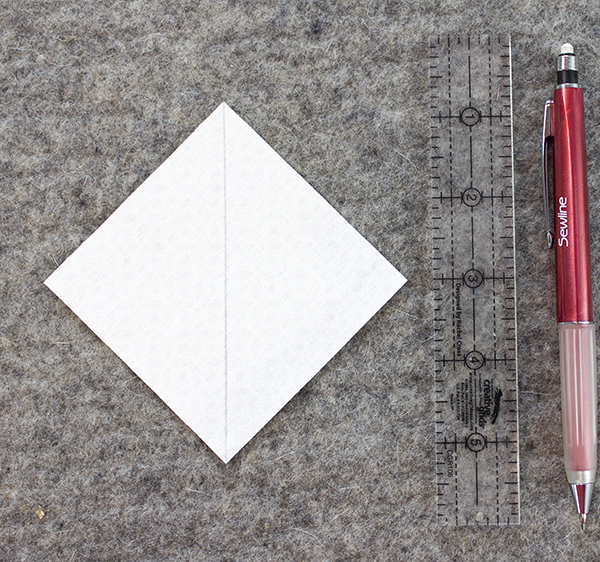
Gather the (4) yellow 3 1/8″ x 3 1/8″ B and the (4) white 3 1/8″ x 3 1/8″ B squares.

With a pencil or water soluble pen, draw a diagonal line on the wrong side of the white squares.
Place a marked white square over a yellow square, right sides together, and pin together.

Optional, but highly recommended when piecing, is to sew with a straight stitch needle plate on your sewing machine.
And in my 880, I am selecting the straight stitch needle plate.

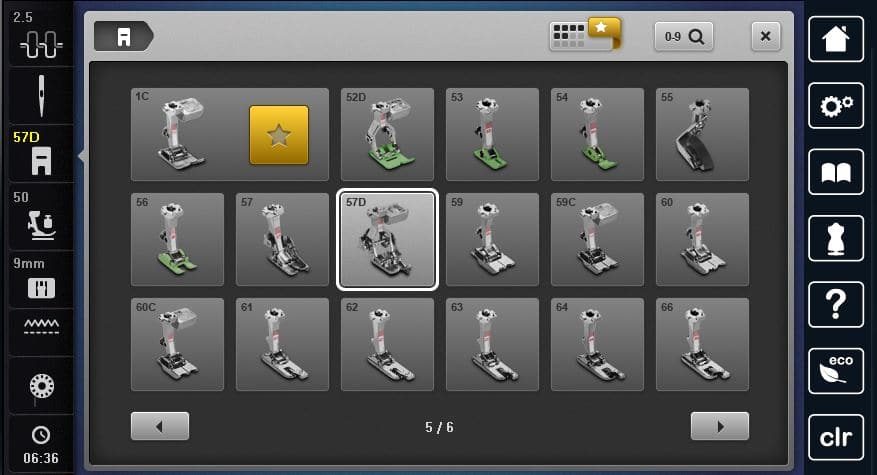
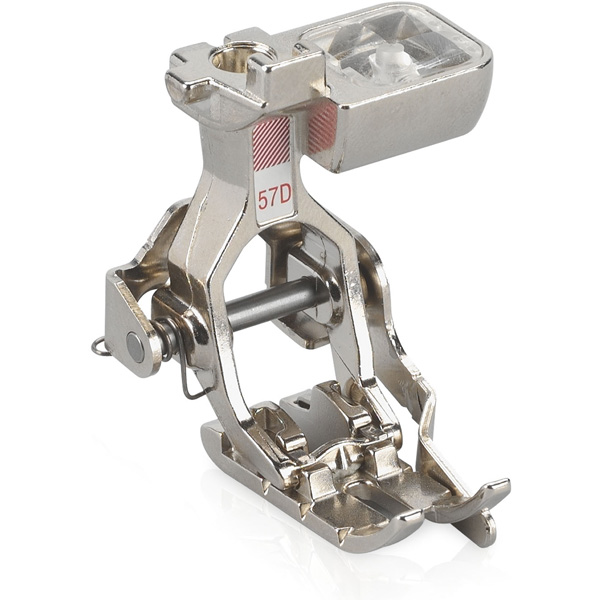
For accurate 1/4″ seam allowances, install a 1/4″ presser foot on your machine; I’m using 57D.
Thread the machine with a white or light grey thread and sew on either side of the marked square with a scant 1/4″ seam allowance.

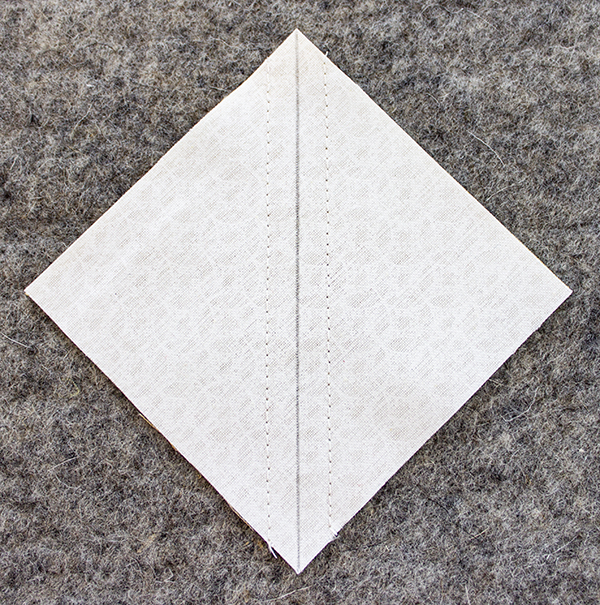
Cut the sewn square on the marked line.

Gently, press the diagonal seams open.
Trim the squares to measure 2 1/2″ x 2 1/2″. Each white/yellow sewn unit yields two HST (half-square-triangle) blocks. Repeat with the (3) remaining yellow and white squares for a total of (8) B/B HSTs.
You may also want to read this fabulous tip by Erika on HSTs.
Step 3 – Block 1
Follow the diagram as a placement guide to sew (2) B/B HSTs together. Sew a total of (4) B/B units.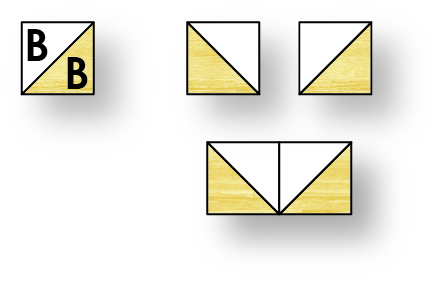
Sew white 2 1/2″ x 2 1/2″ C squares to the left and right edges of a B/B unit; make a total of 2 C/B/B/C units.
Sew B/B units to the left and right edges of a white 4 1/2″ x 4 1/2″ A square.  Sew the C/B/B/C units to the top and bottom edges of the B/B/A unit to make the yellow star block.
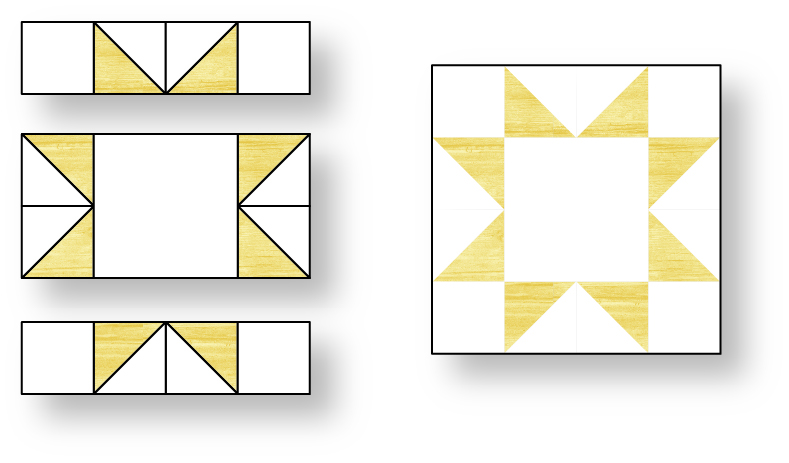
Gather (2) 5″ x 5″ D dark red, (2) 5″ x 5″ D medium red, and (4) white 5″ x 5″ D squares to make white/red HSTs. Make a total of (4) white/dark red and (4) white/medium red HSTs; press seams open and trim the HSTs to measure 4 1/2″ x 4 1/2″.
Sew white/dark red and white/medium red HSTs together to make a D/D unit; make a total of (4) D/D units.
Sew white 4 1/2″ x 4 1/2″ A squares to the left and right edges of (2) D/D units; Sew D/D units to the left and right edges of the yellow/white star.
Sew the A/D/D/A units to the top and bottom edges of the yellow star/D/D unit to complete block 1.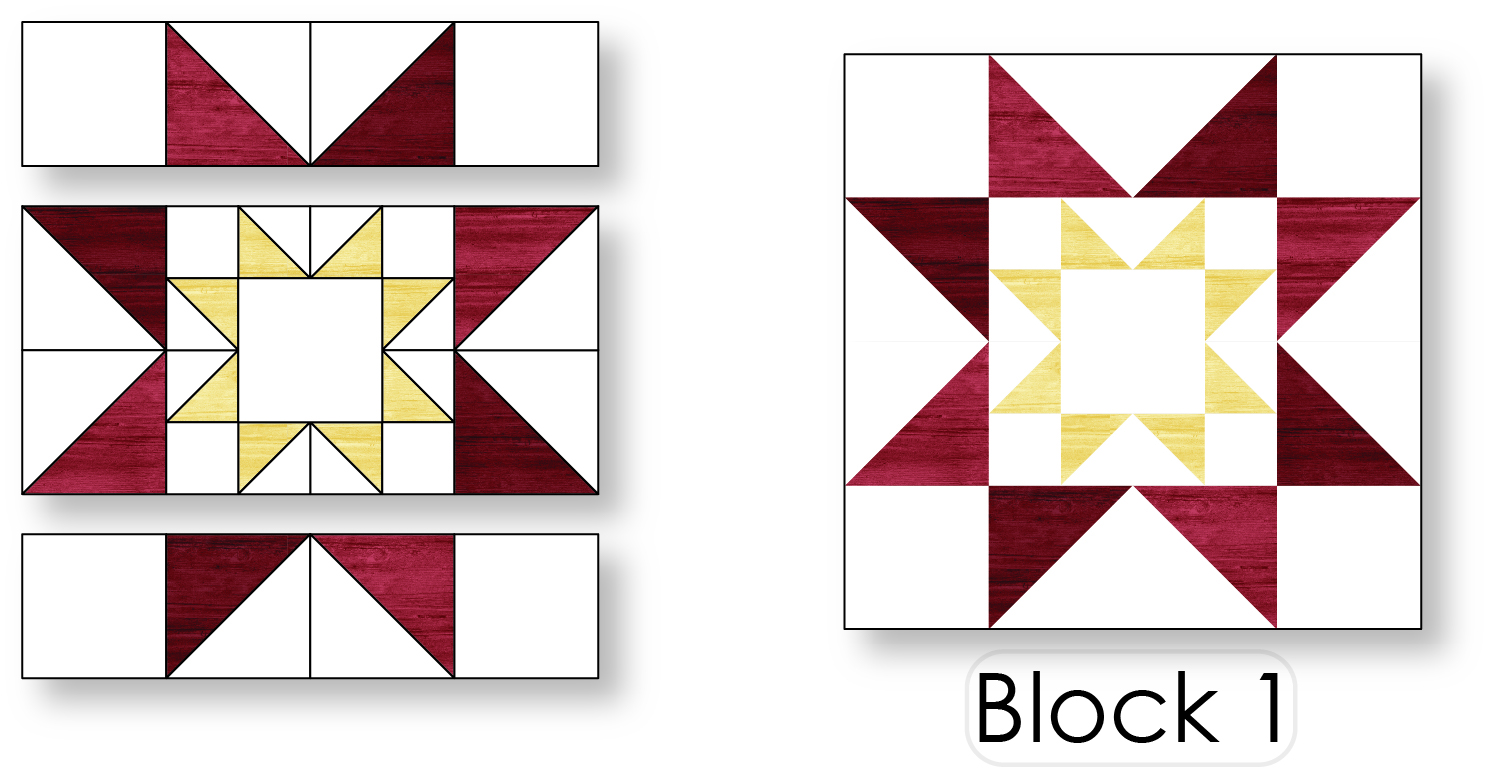
Step 4 – Unit 1
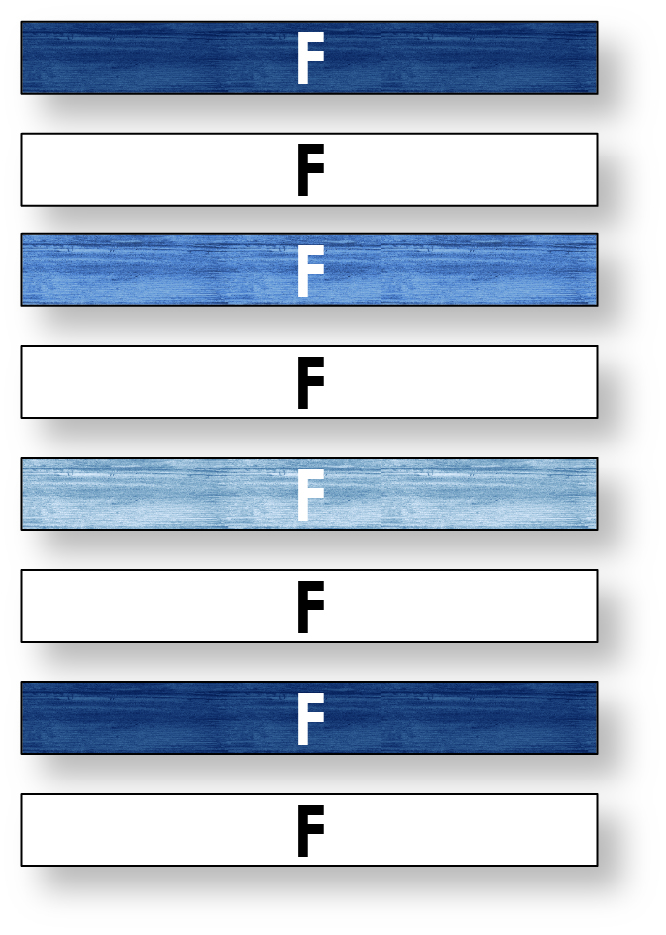
Gather the (2) dark blue, (1) medium blue, (1) light blue, and the (4) white 2 1/2″ x 16 1/2″ F strips; follow the diagram as placement guide and sew the F strips together to make block 2.

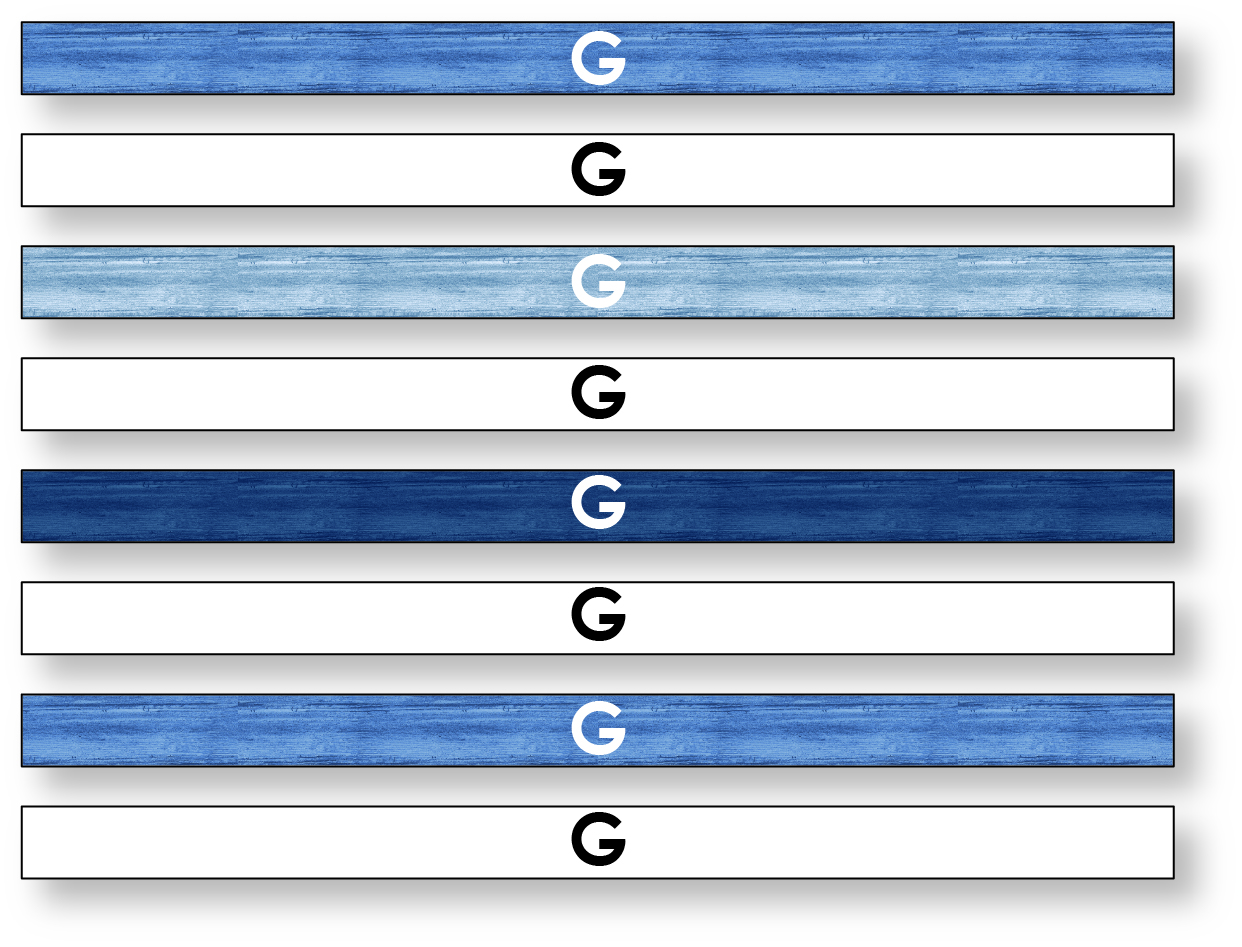
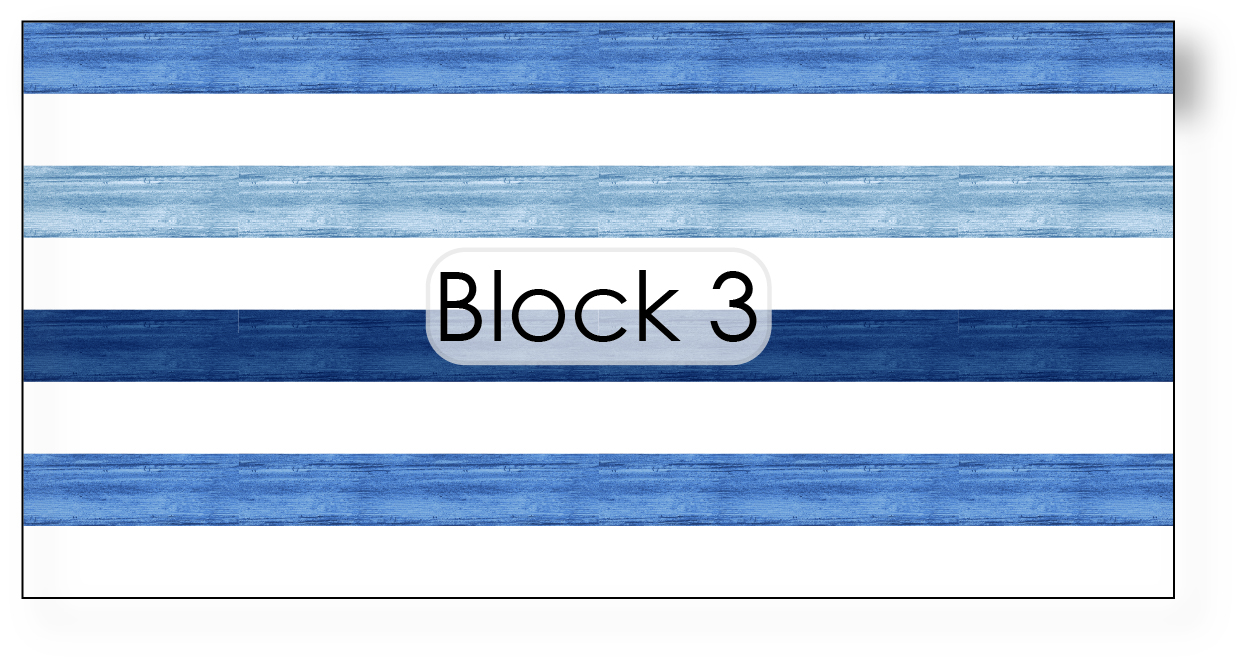
Gather the (1) dark blue, (2) medium blue, (1) light blue, and the (4) white 2 1/2″ x 32 1/2″ G strips; sew the G strips together to make block 3.
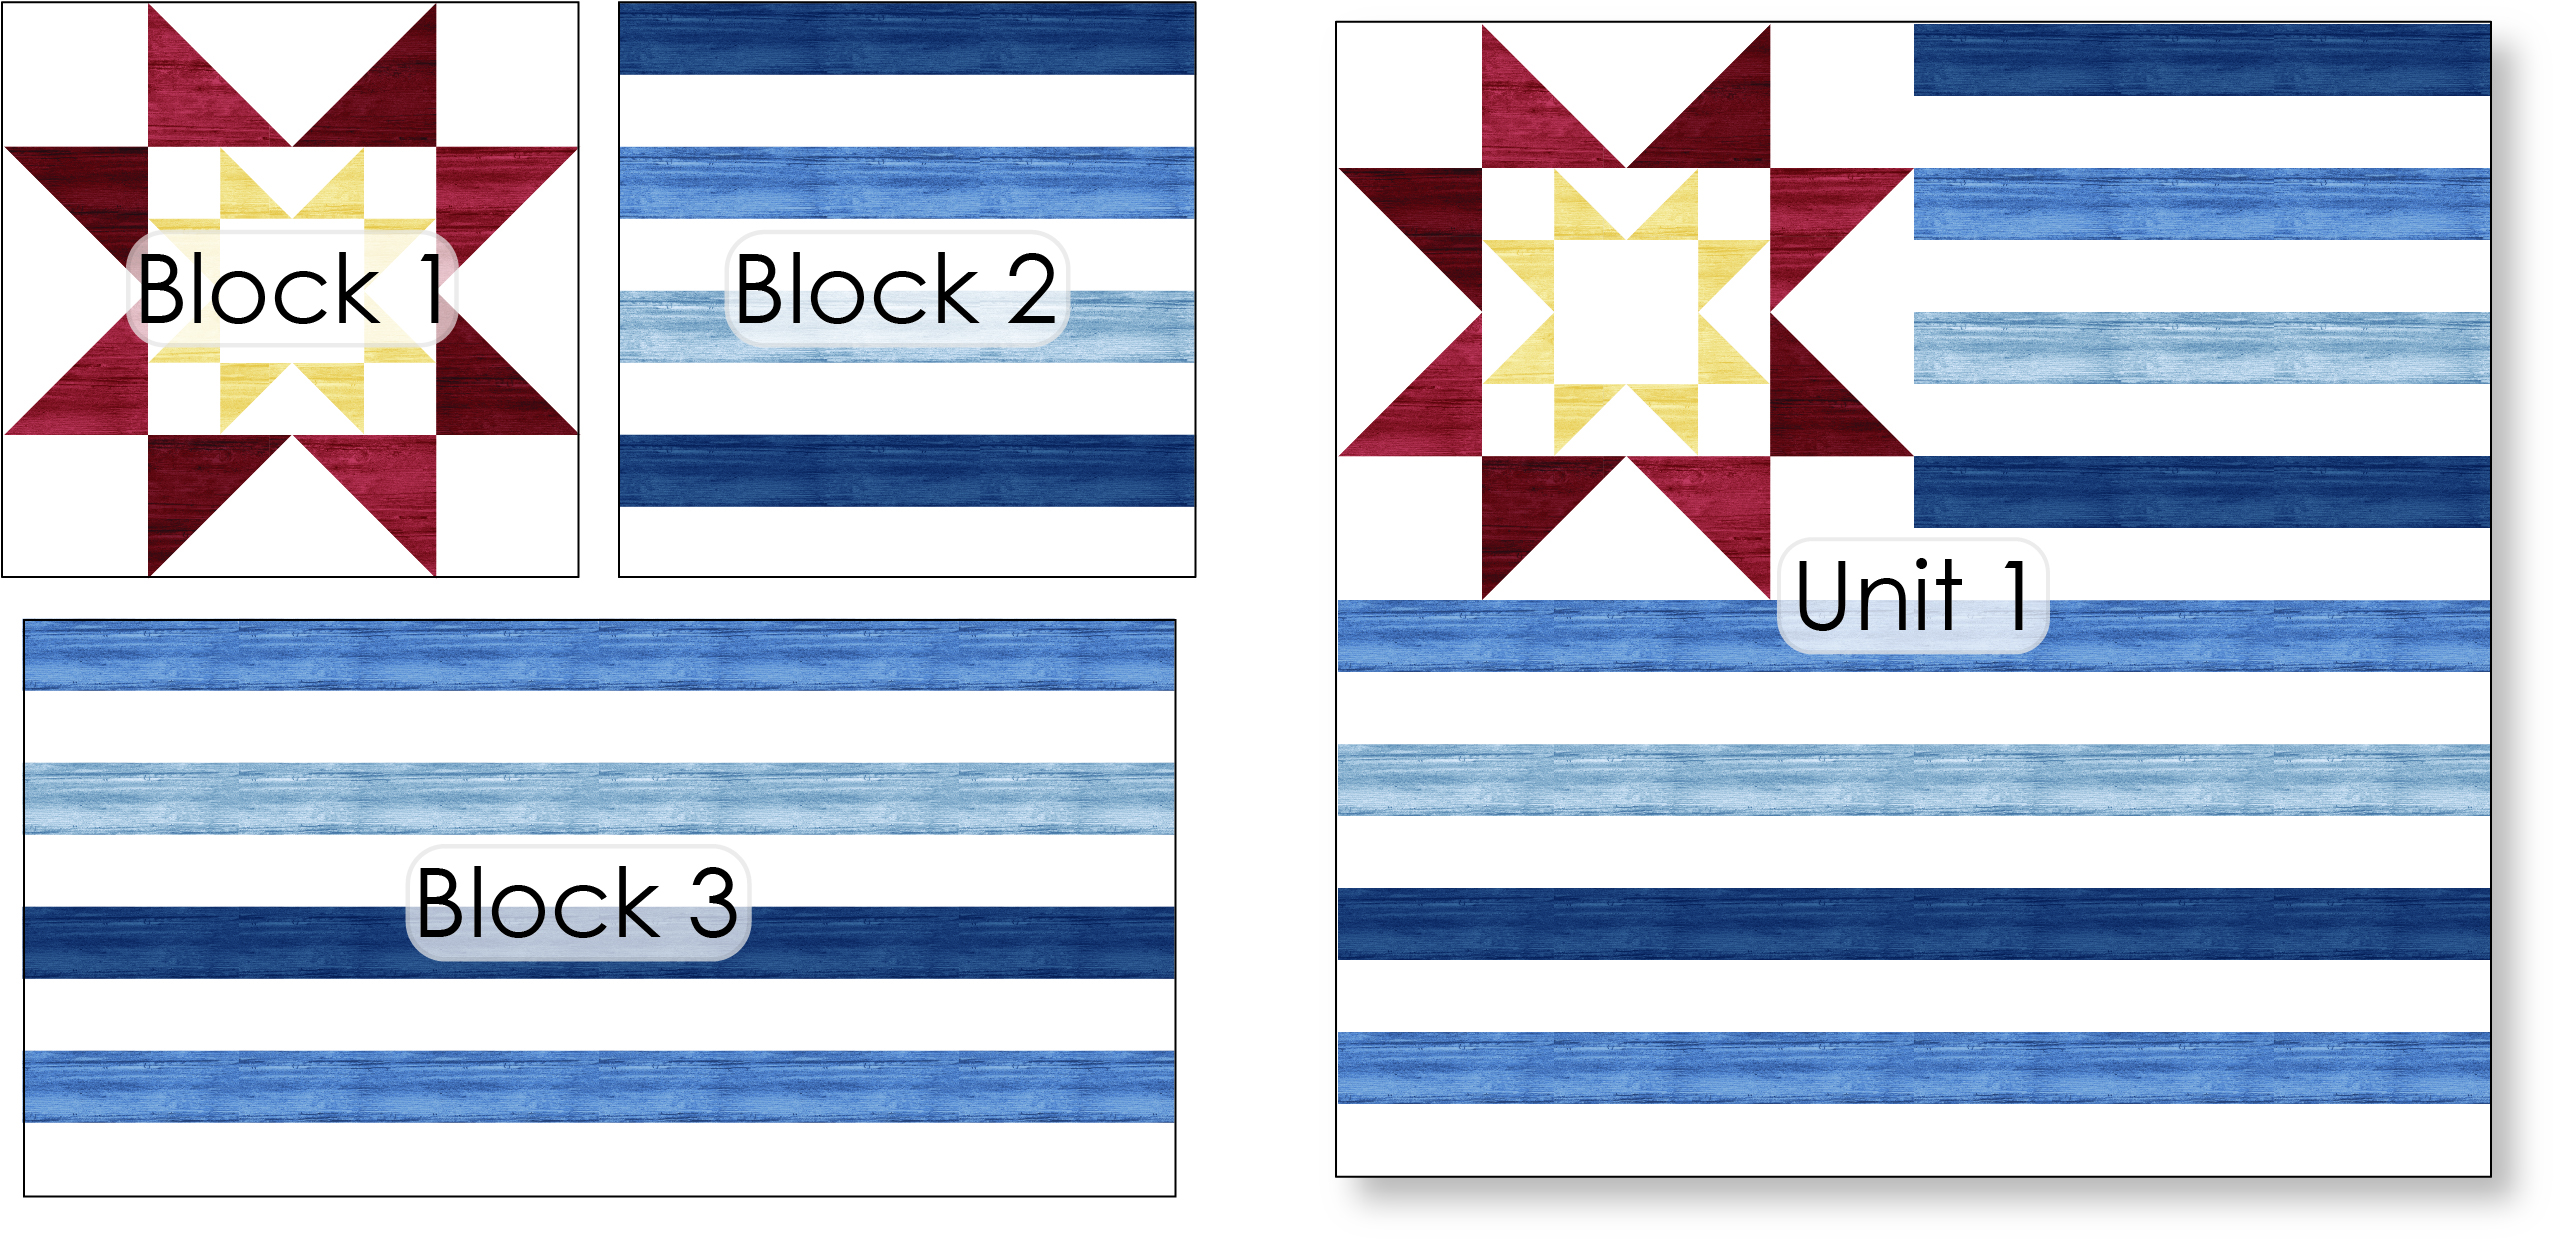
Sew the stars block 1 to the left edge of block 2, then sew this unit to the top edge of block 3 to complete unit 1.
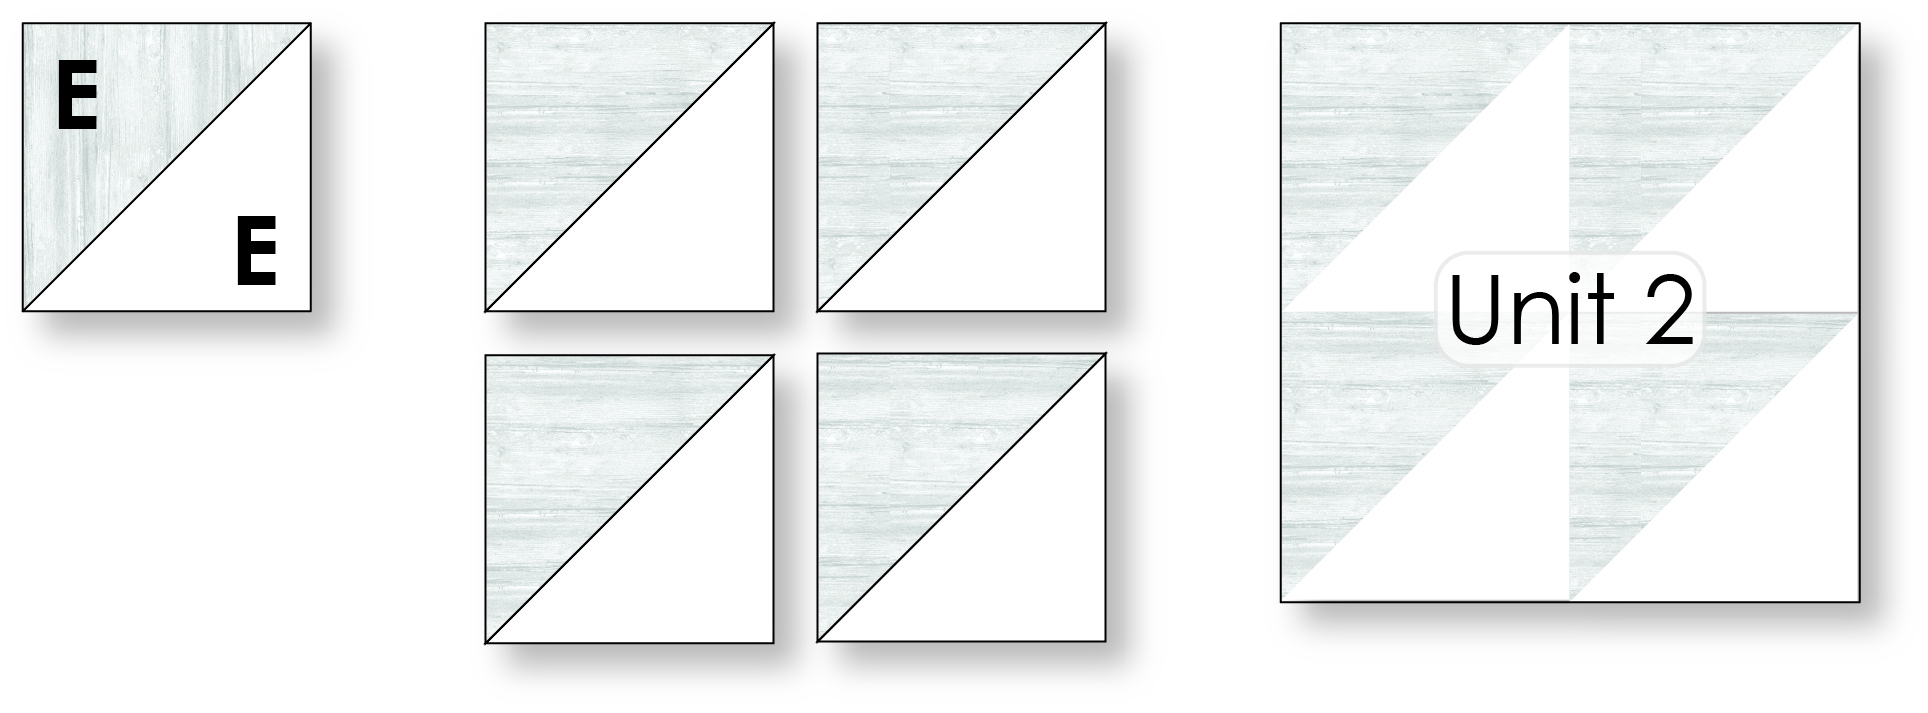
Step 5 – Unit 2
Gather the (12) white and the (12) grey 9 1/4″ x 9 1/4″ E squares and make a total for (24) white/grey E HSTs. Press seams open and trim the HSTs to measure 8 1/2″ x 8 1/2″.
Sew (4) white/grey HSTs as follows to make a unit 2; repeat for a total of (4) units 2.
Step 6 – Unit 3
Make (80) white/red HSTs with the remaining (40) white 5″ x 5″ D squares and the (14) dark red, (14) medium red, and (12) light red 5″ x 5″ D squares; press seams open and trim the HSTs to measure 4 1/2″ x 4 1/2″.
Follow the diagram below to assemble block 5 using a combination of (4) white/red HSTs; repeat for a total of (8) blocks 5.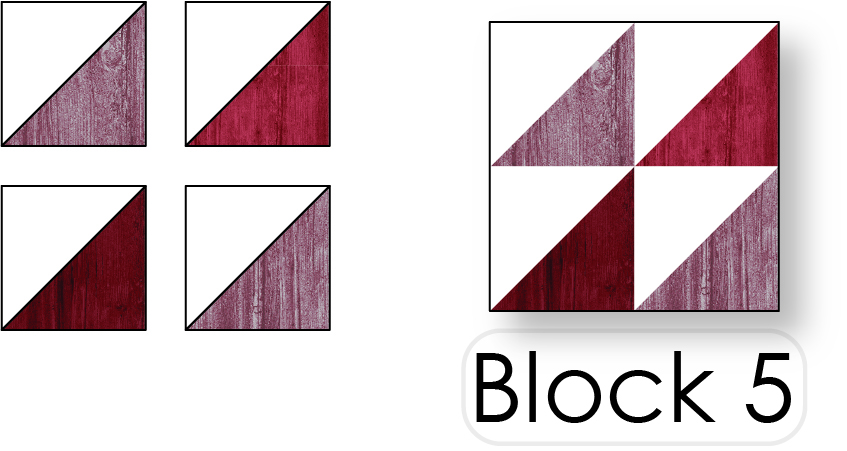
To assemble block 6, sew (3) white/red HSTs and a white 4 1/2″ x 4 1/2″ A square; make a total of (16) blocks 6. 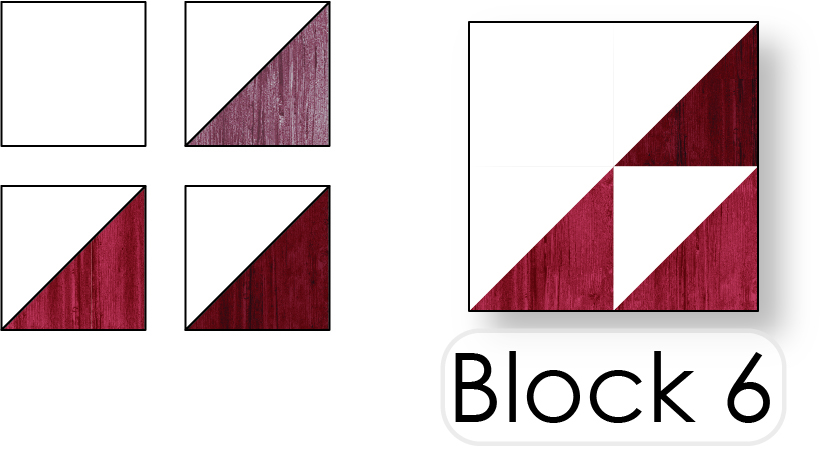
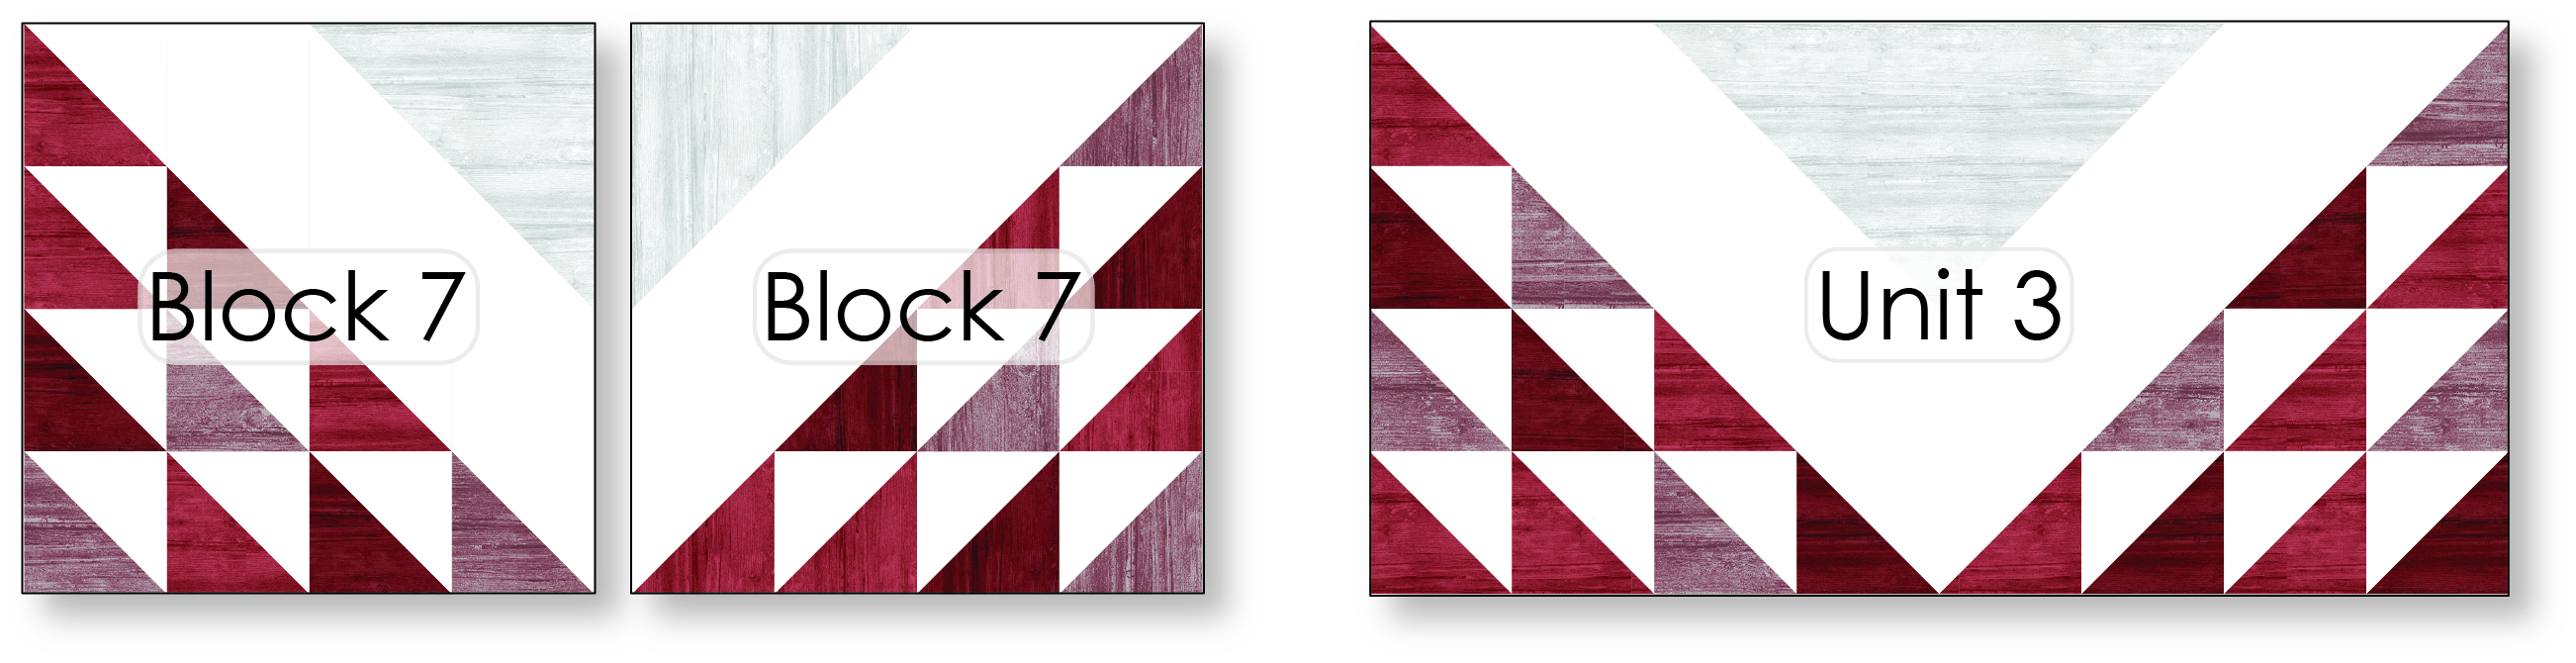
Sew a white/grey E HST, (1) block 5 and (2) blocks 6 to make a Block 7; repeat for a total of (8) blocks 7.

Sew (2) blocks 7 to make a unit 3; make a total of (4) units 3.
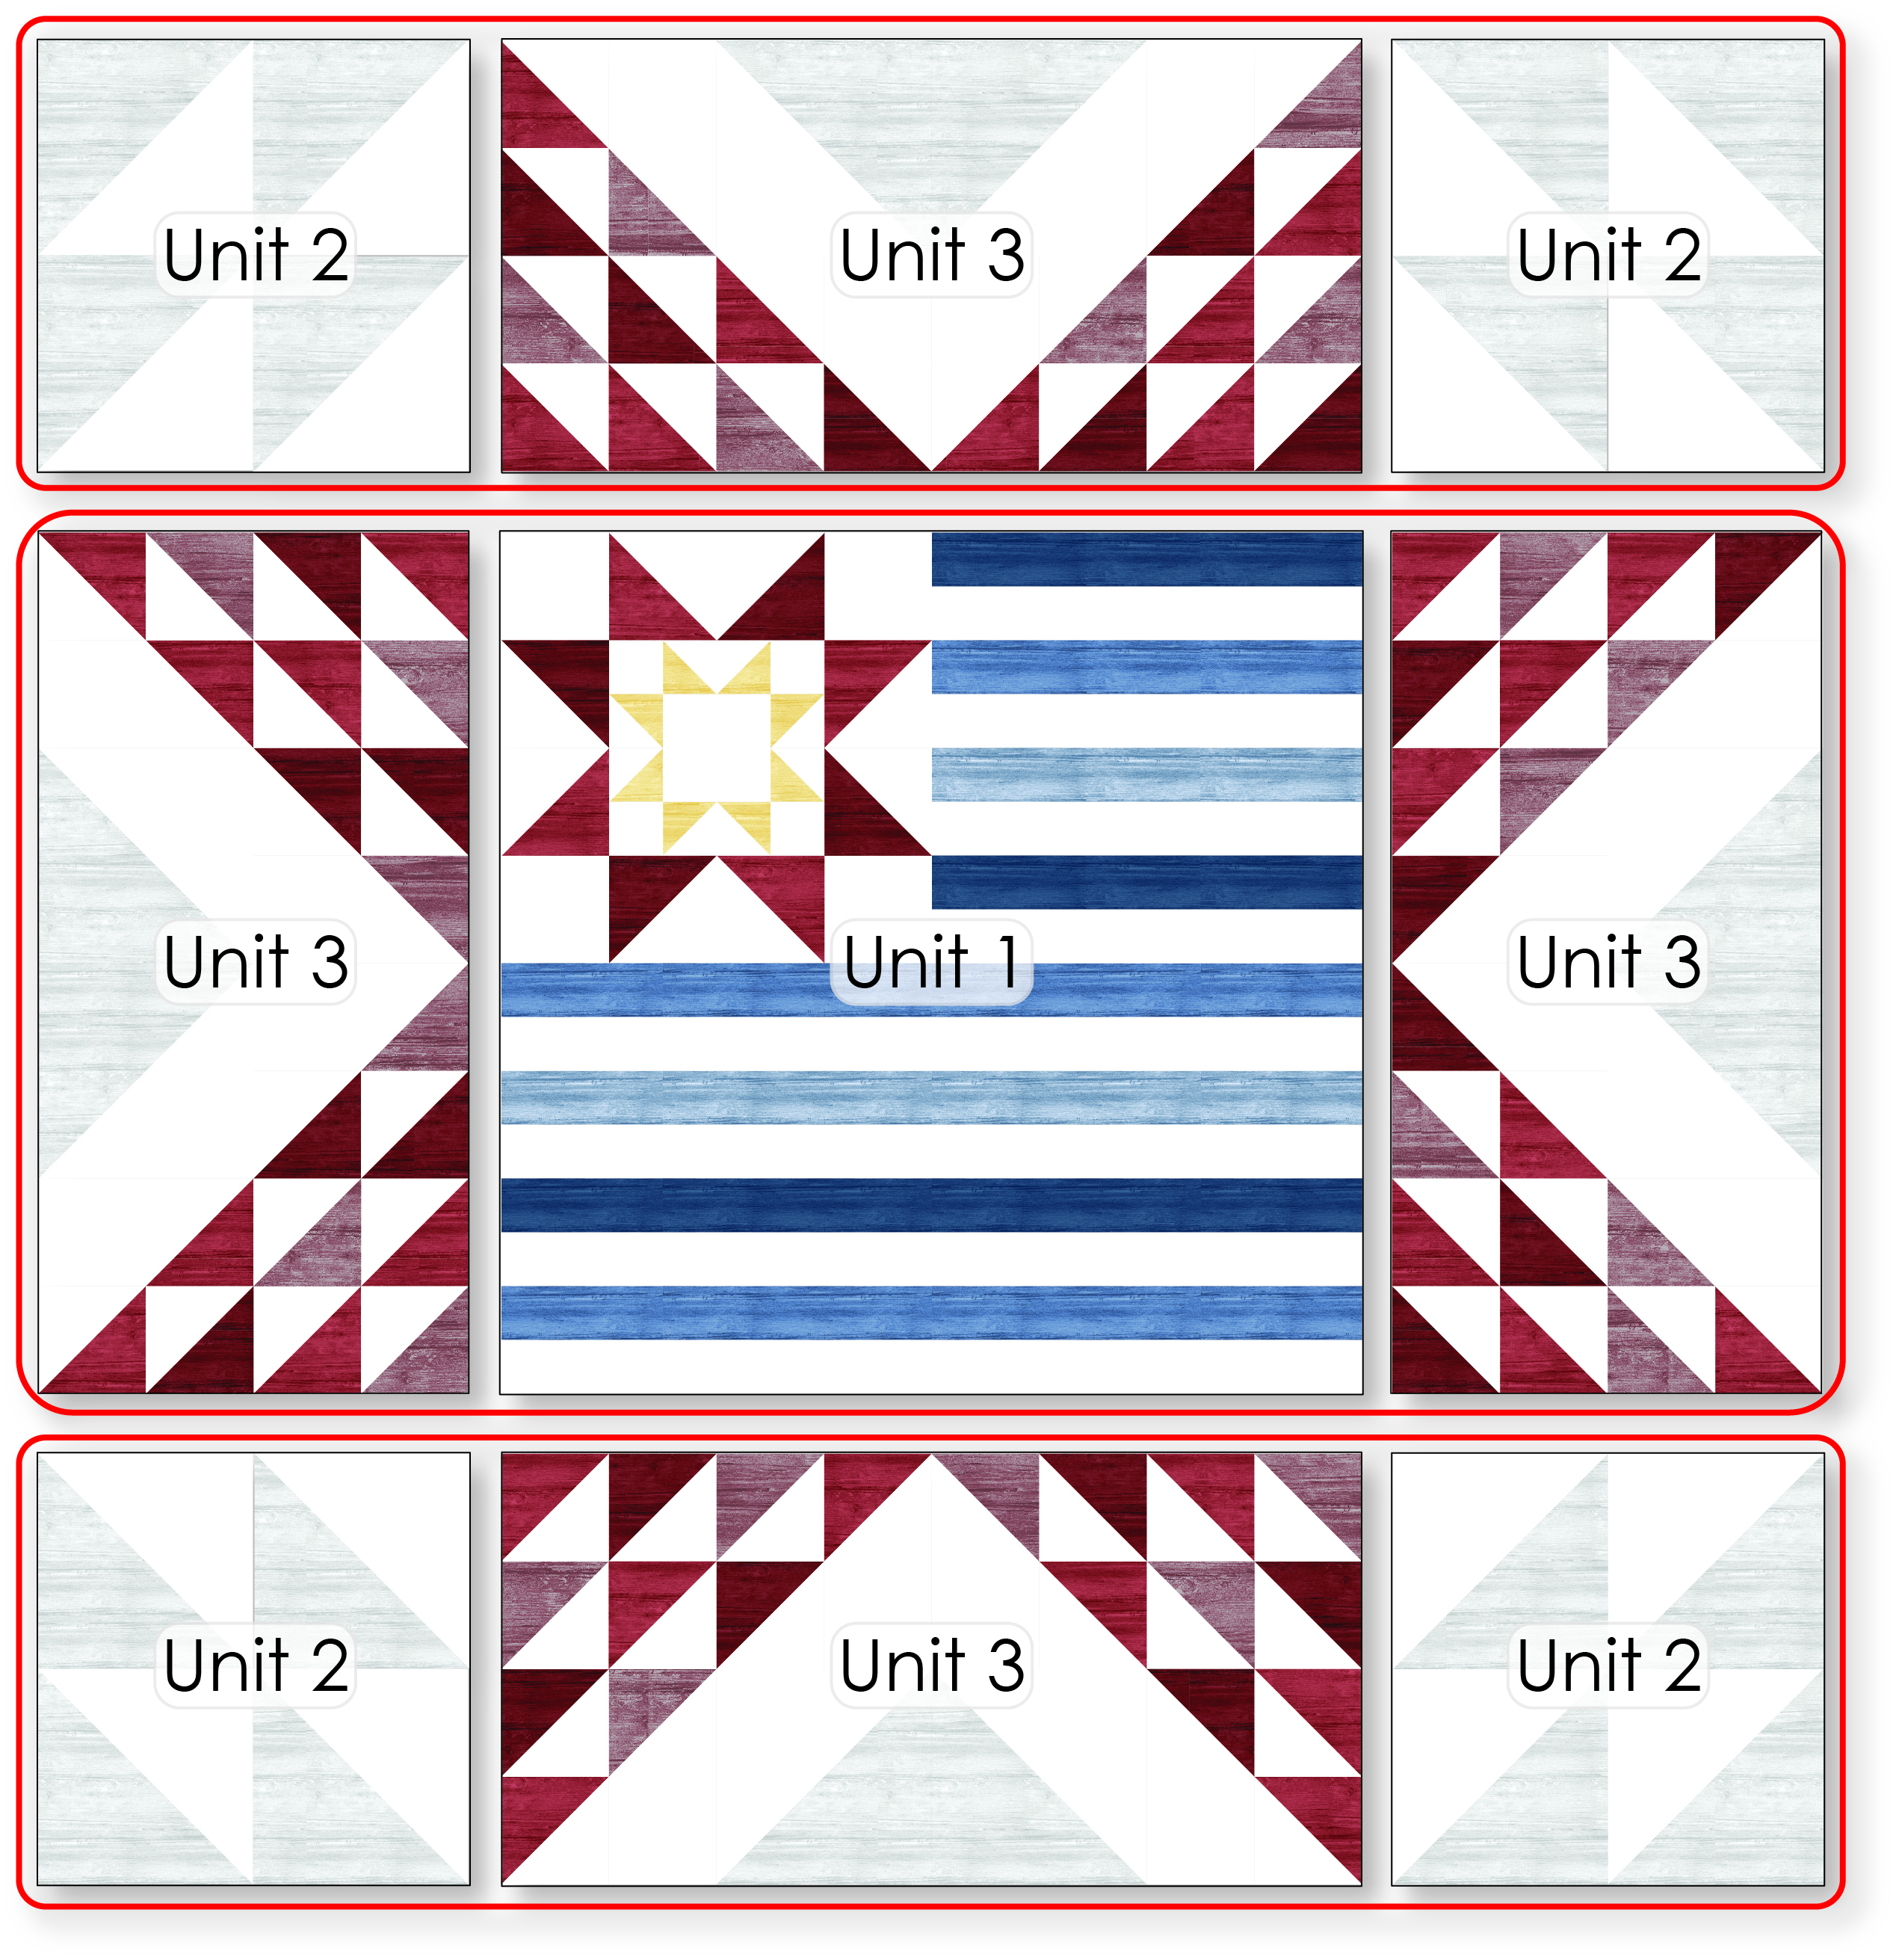
Step 7 – Quilt Center
Follow the diagram below as a placement guide to assemble the quilt center.
Sew a unit 3 to the left and right edges of unit 1 to make the center unit.
Sew units 2 to the left and right edges of a unit 3; repeat for a total of (2). Sew onto the top and bottom edges of the center unit.
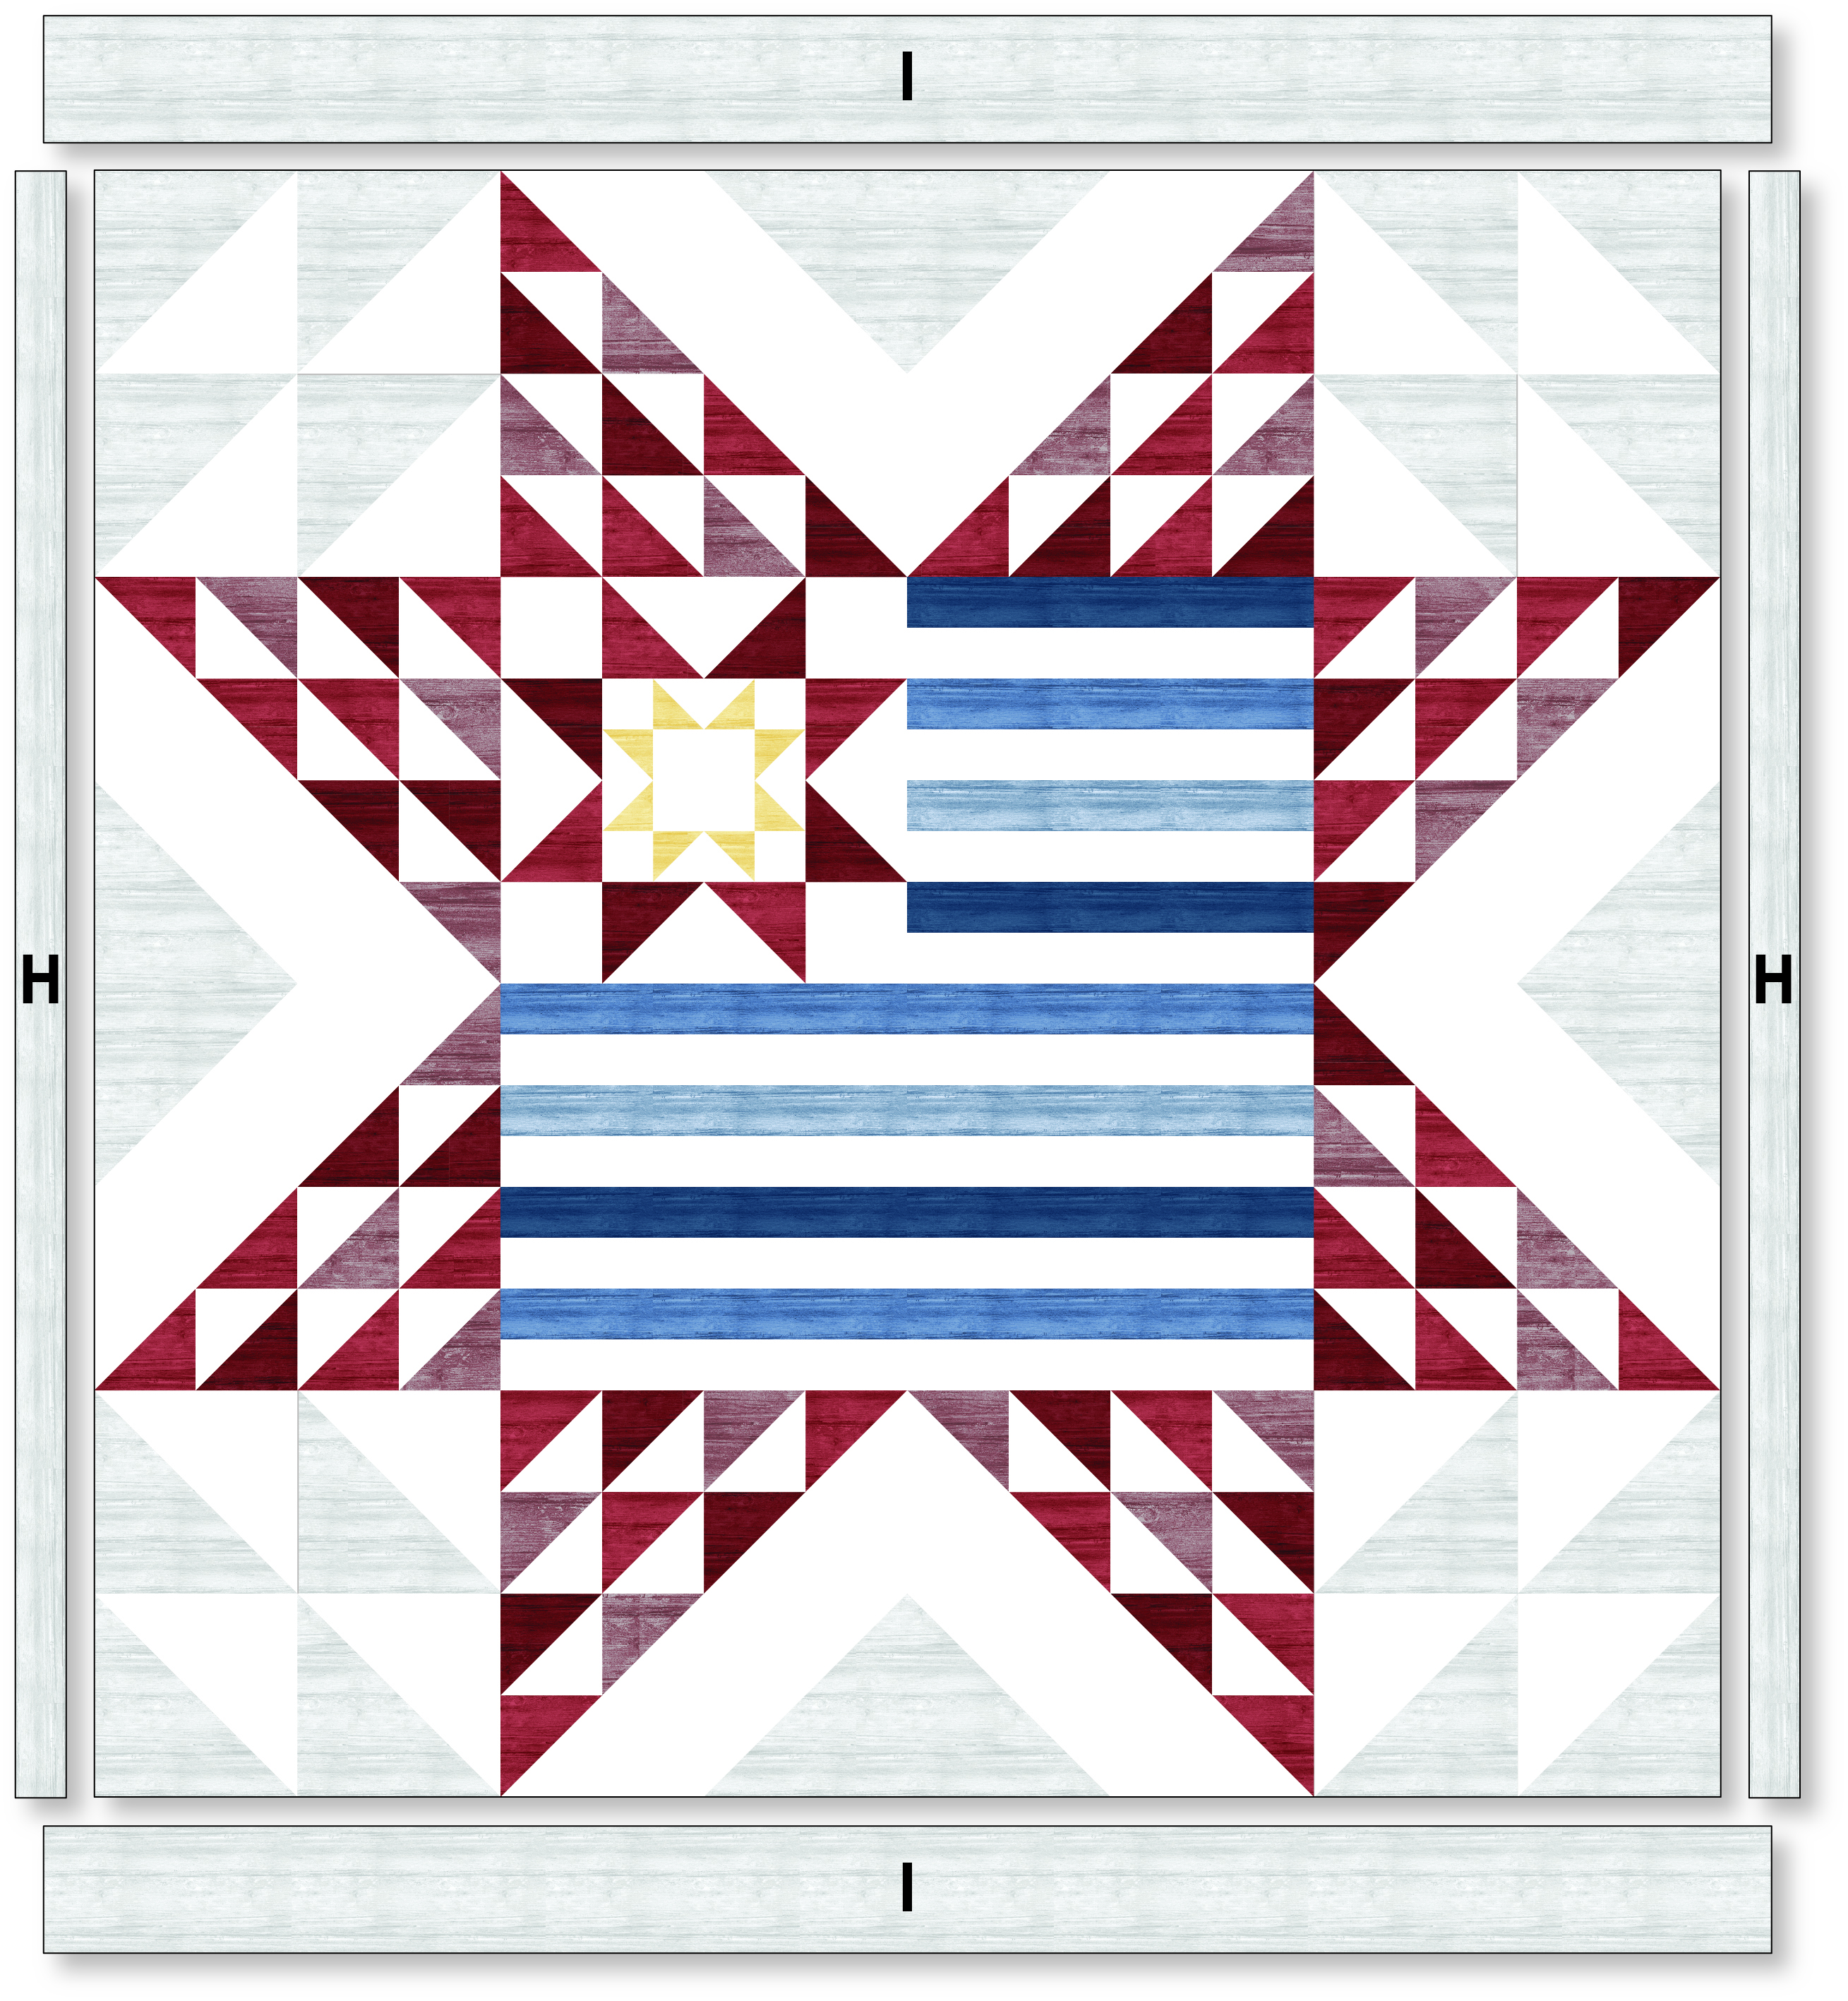
Step 8 – Borders
Sew (2) 2 1/2″ x WOF border H strips end to end and cut into a 2 1/2″ x 64 1/2″ H border strip; repeat for a total of (2). Sew onto the left and right edges of the quilt center.
Sew (2) 5 1/2″ x WOF border I strips end to end and cut into a 5 1/2″ x 68 1/2″ I border; repeat for a total of (2). Sew onto the top and bottom edges of the quilt center.
Step 9 – Finishing
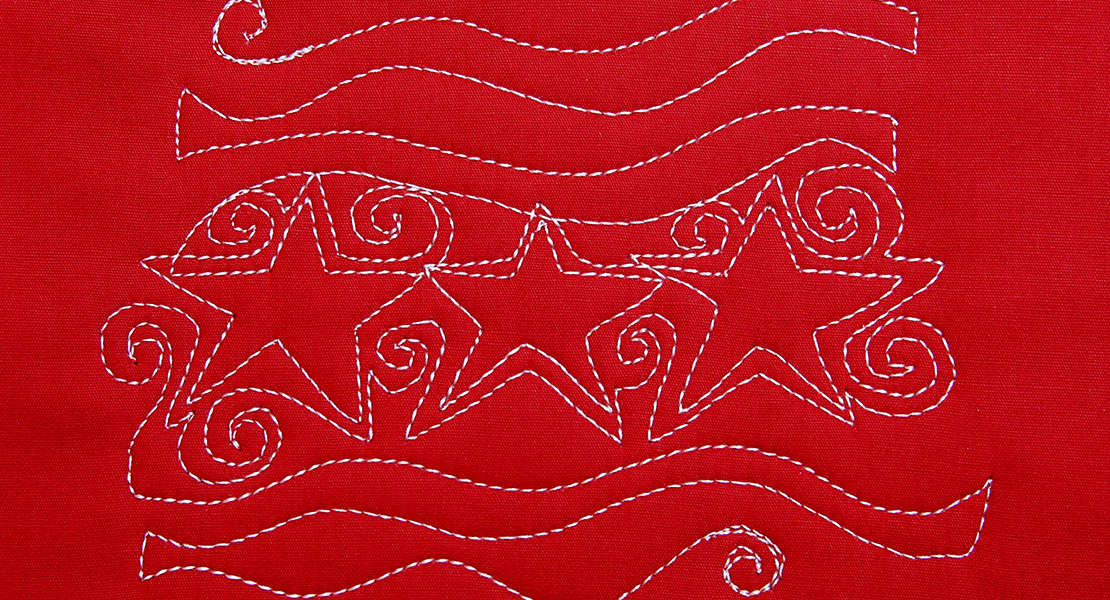
Layer the quilt top, batting and backing fabric, and quilt as desired; trim the excess batting. For a great tutorial on quilting starts and stripes, see this post by Lori.
Sew the (8) yellow/gold fabric 2¼ x WOF binding strips end to end, fold in half, and sew onto the top edge of the quilt top. Fold the sewn binding to the back of the quilt and stitch down.
I hope you enjoy making a Stars & Stripes quilt to share as a Quilt of Valor.
Cherry
Used Products


What you might also like


15 comments on “Stars & Stripes”
-
-
If you select the entire article and click the control and c keys (for copy), then control and p keys (for print), you should be able to get it to print nicely that way. Hope this helps.
-
-
Is there a printable PDF version of this? Would be greatly appreciated, thank you.
-
Was hoping there was a way to print this out since the computer is no where near my sewing area. Love the quilt and would like to make it
-
hello: try command P. it worked for me. Bernina suggested control C Happy Creating.
-
-
I would love to be able to save Bernina instructions as a PDF file.
Would you please consider making that available?
Thank you. -
I have the rulers I just need yo sit down and learn to use them!
-
To make a PDF copy of an article, add the Print Friendly extension to your browser. It’s easy to use. There may be other PDF-making extensions, but I’ve been using Print Friendly for a long time.
-
Is the fabric yardage correct for either colorway? Thanks
-
On my MacBook I just select PRINT and I have an option to select PDF instead of my printer, then save it to the computer and print when ready to use.
-
So very beautiful. Thank you.
-
What is the name of the fabric you used for your quilt? It’s a perfect choice.
-
Are there directions for making this a wall hanging instead of a quilt?
-
The center gold square does not match up!!!! The units are off….is there a correction sheet anywhere?
-
Did you ever figure out? I’m about to start quilt??????
-
Leave a Reply
You must be logged in to post a comment.

Is there a way to print the instructions and fabric list?