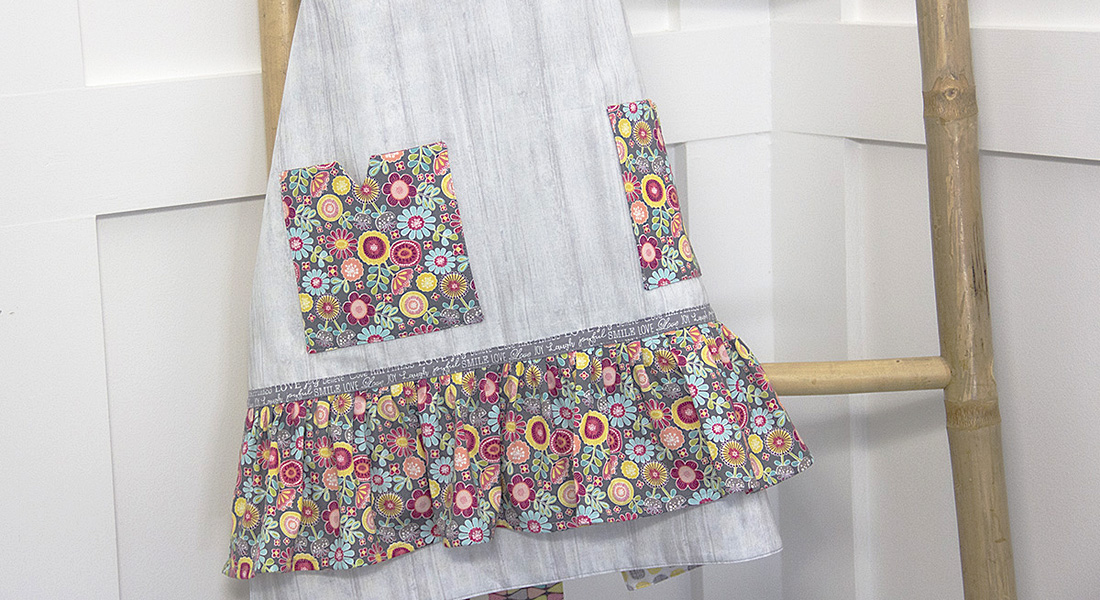
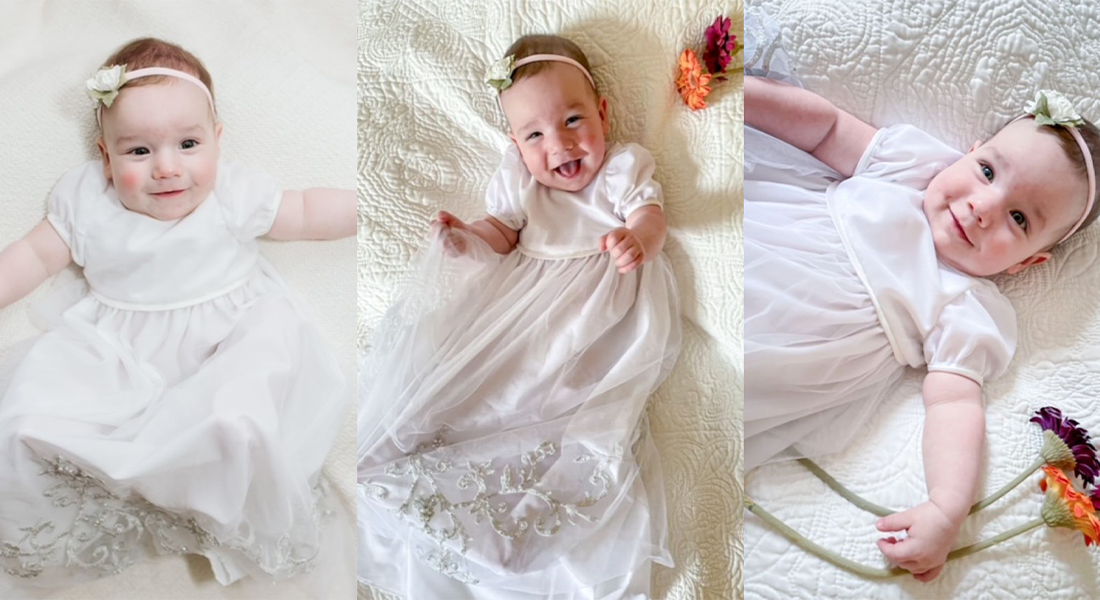
Vintage Dress by Simple Simon & Company for WeAllSew
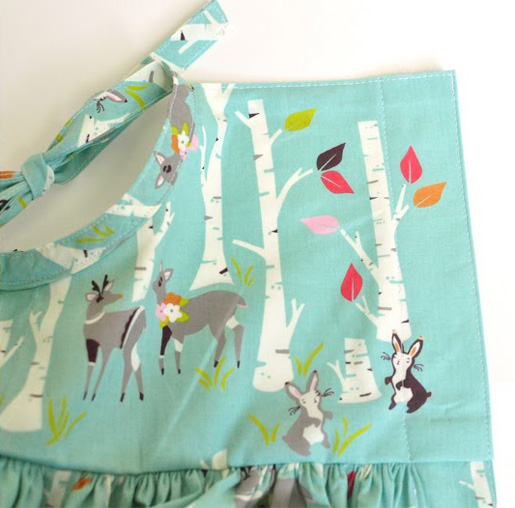
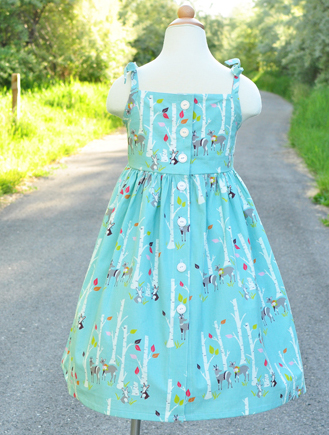
A timeless classic for a new generation. Combining simple construction with a fresh cotton print, this vintage-inspired pattern is the perfect template for your little one’s summer wardrobe. Your little girl will grow up, but the fond memories of making something this special for her will never grow old.
The pattern is made to fit girls size 3-8 and will look adorable on any little girl in your life.
Vintage_Dress_-_Simple_Simon__Co_-_122714.pdf
Visit Simple Simon & Company at their blog: simplesimonandco.com.

Supplies
- Fabric
- Sizes 3-4: 1-1/2 yards of main fabric; 1/2 yard of lining fabric
- Sizes 5-6: 1-3/4 yards of main fabric; 2/3 yard of lining fabric
- Sizes 7-8: 2 yards of main fabric; 2/3 yard of lining fabric
- 3 yards of 1/2ʺ-wide double-fold bias tape, store-bought or handmade (add 1/2 yard of fabric if making your own bias tape)
- Thread to match main fabric
- Thread to match bias tape
- 3/4ʺ to 1ʺ-diameter buttons
- Sizes 3‒5, six buttons
- Sizes 7‒8, seven buttons
Select a pattern based on the child’s chest measurement:
- Size 3 = 20”
- Size 4 = 21”
- Size 5 = 22”
- Size 6 = 23”
- Size 7 = 24”
- Size 8 = 25”
Step one: Cut the fabric pieces.
Download and print the appropriately-sized pattern pieces. Vintage_Dress_-_Simple_Simon__Co_-_122714.pdf
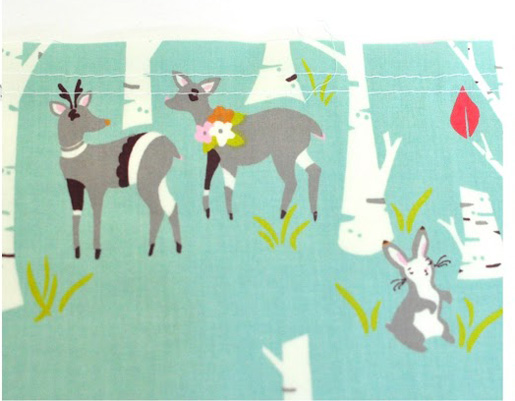
Cut one front and two backs from the main fabric, leaving a large rectangle of fabric for cutting the skirt later.
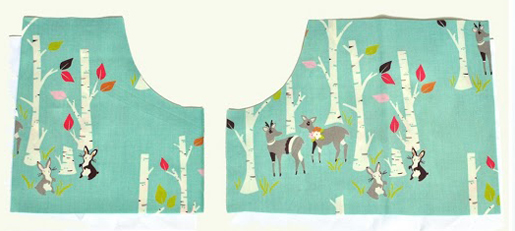
Cut one front and two backs from the lining fabric.
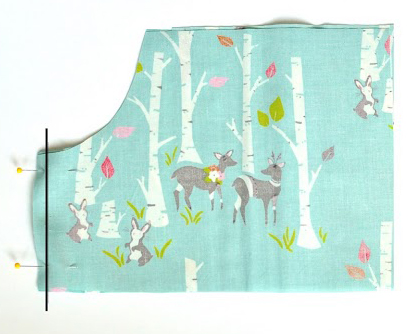
Step two: Make the bodice.
With right sides together, pin the main fabric backs to the main fabric front at the underarm seams.
Stitch using a 1/2ʺ-wide seam allowance.
Repeat, stitching the lining backs to the lining front.
With right sides together, pin the upper edge of the lining front to the upper edge of the main fabric front.
Stitch using a 1/2ʺ-wide seam allowance.
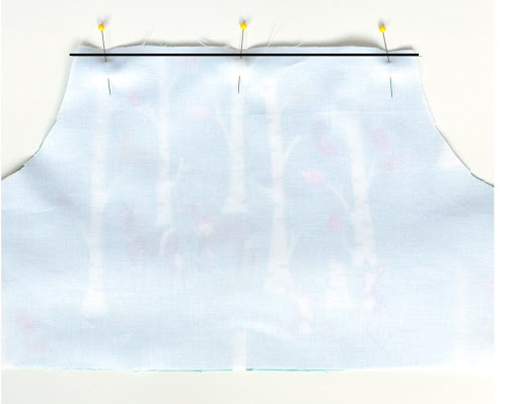
Repeat, joining the upper edges of the lining back to the upper edges of the main fabric backs.
Turn the bodice right side out and press.
Tip: To keep them from shifting later, pin the lower edges of the bodice and baste them together using a long straight stitch (length = 5 mm).
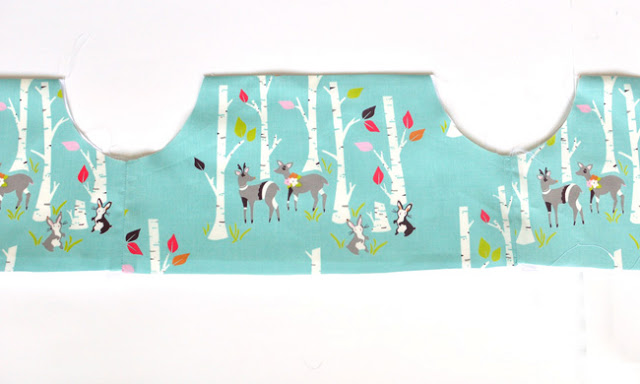
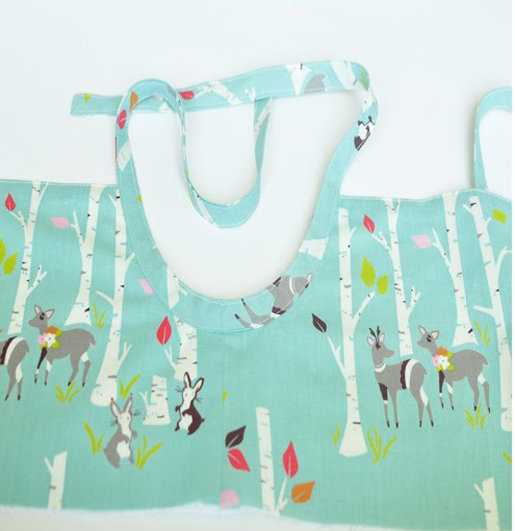
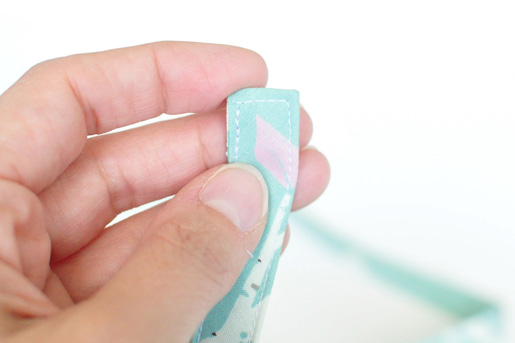
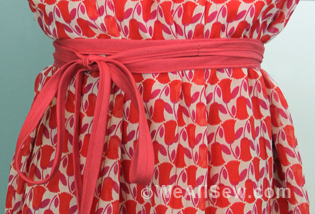
Step three: Bind the armholes.
Cut the bias tape into three 36ʺ-long pieces.
Unfold and mark the middle of one piece of bias tape and the middle of one armhole. Pin the bias tape to the armhole, right sides together, matching the marks.
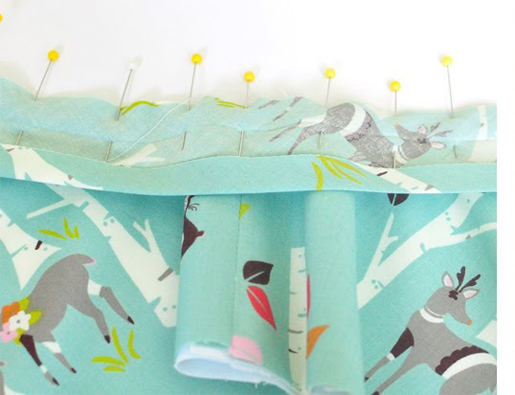
Machine baste in the crease left by the first fold, using a long (5 mm) straight stitch.
Refold the bias tape along the creases. Fold the bias tape around to the wrong side of the armhole; pin in place.
Unfold each end of the bias tape and fold under ½ʺ. Refold the bias tape; pin the layers together.
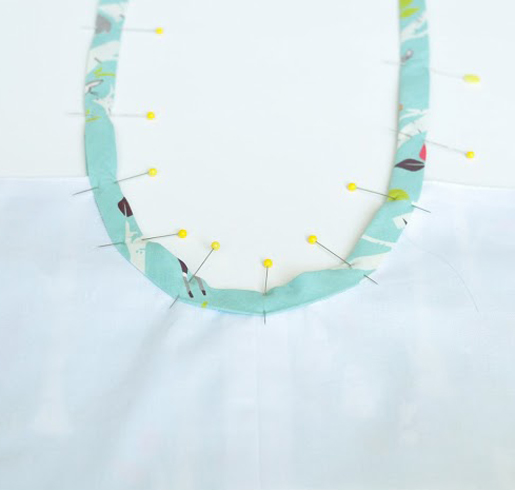
From the right side, beginning at the underarm seam, edgestitch close to the inner fold to secure the binding to the bodice.
Continue stitching past the top edge of the bodice, stitching the folded edges of the tie together. At the end, pivot around the corners as shown in the photo.
Continue stitching along the edge, around the armhole, around the opposite tie, and back to the armhole underarm seam.
Step four: Make the skirt.
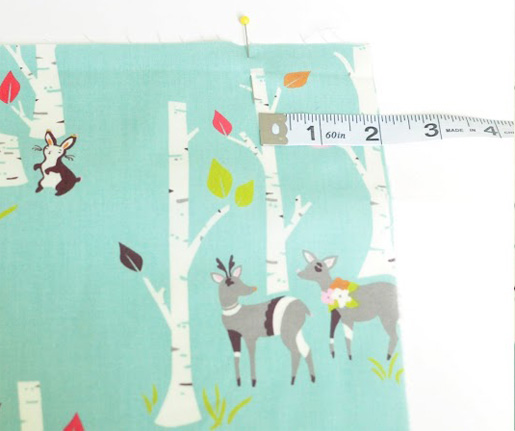
For the skirt, cut
- Sizes 3 and 4: one 18ʺ x 45ʺ rectangle
- Sizes 5 and 6: two 20ʺ x 45ʺ rectangles (for a less full skirt, cut only one 20ʺ x 45ʺ rectangle)
- Sizes 7 and 8: two 22ʺ x 45ʺ rectangles
For sizes 5/6 and 7/8, cut one of the fabric rectangles in half vertically.
Stitch the three pieces together with the large piece in the middle to make one large rectangle.

Place a straight pin 2ʺ in from edge end of the upper edge of the skirt. This part of the skirt will not be gathered and will later form the button placket on the back of the dress.
For basting, set your sewing machine for a straight stitch with a stitch length of 5 mm.
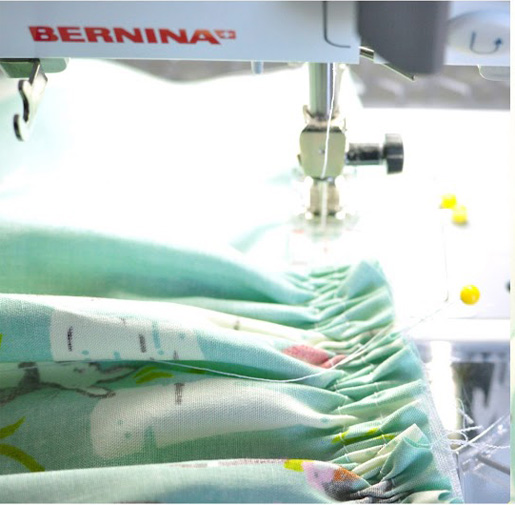
Sew two lines of basting stitches along the upper edge of the skirt, one 3/8ʺ from the raw edge and the other 5/8ʺ from the raw edge.
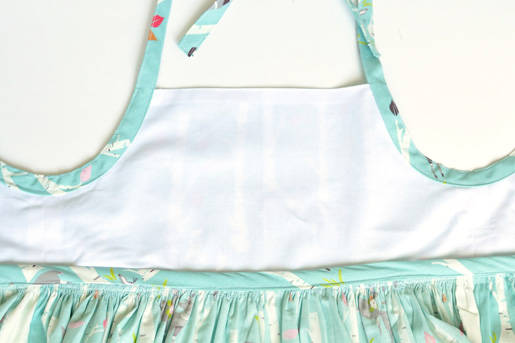
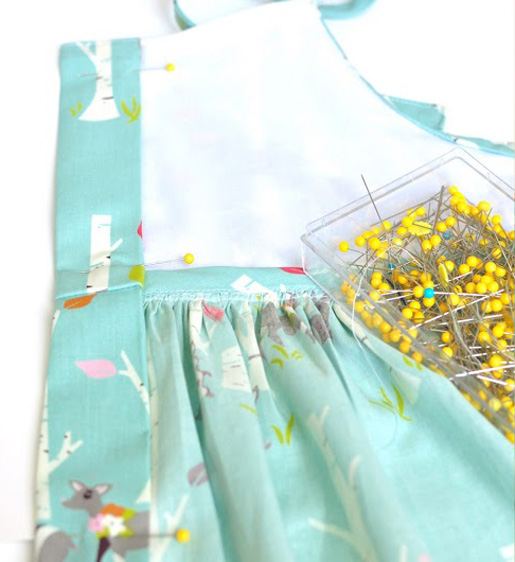
With right sides together, pin the upper edge of the skirt to the lower edge of the bodice at the side seams and center front.
Gather the skirt to match the bodice, being sure to leave 2ʺ of skirt and 2ʺ of bodice ungathered at the center back. Pin in place.
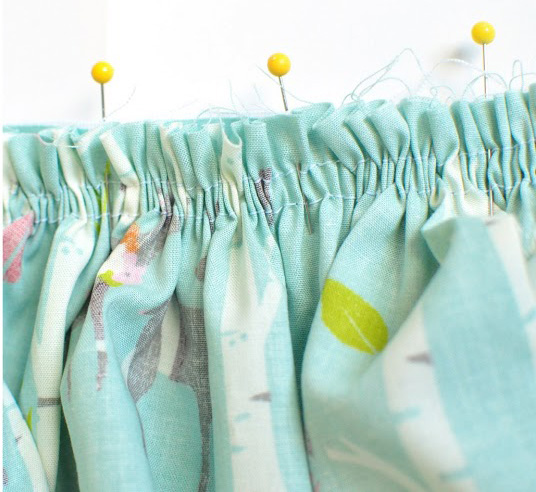
Stitch using a 1/2ʺ-wide seam allowance; the stitches will fall between the two rows of gathering stitches. Make sure there are no gathers or pleats in the 2ʺ-wide sections.
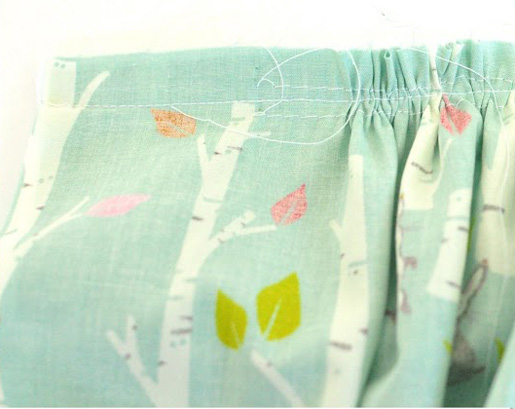
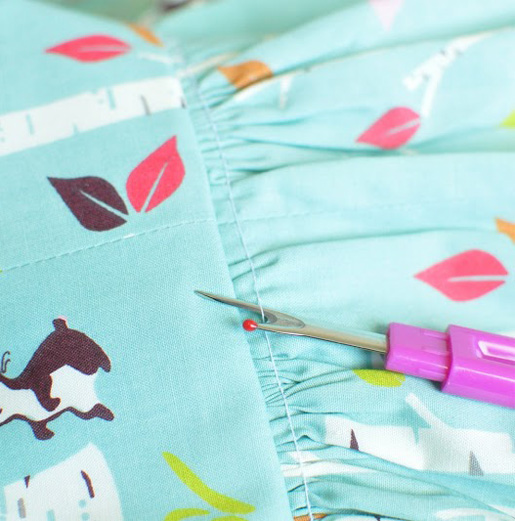
Using a seam ripper, remove the gathering stitches that are 3/8ʺ from the raw edge (the ones that show on the outside of the skirt).
Wrap the third piece of bias tape around the seam allowances; pin.
Sew only through the binding and seam allowances, close to the inner folds
Step five: Stitch the placket.
Fold the edges of the two back bodice pieces under 1/2ʺ (where the back button plackets will be); press well.
Fold under an additional 1-1/2ʺ; press well.
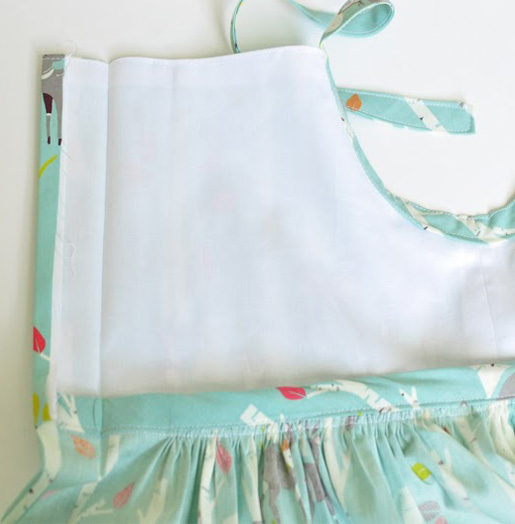
Edgestitch along the folded edge of each back button placket, sewing it to the bodice back.
Stitch buttonholes through the overlapping bodice back placket (the buttons will go on the bodice back placket underneath). On sizes 3/4 and 5/6, stitch three buttonholes on the bodice and three on the skirt; on size 7/8, stitch three buttonholes on the bodice and four on the skirt.
Stitch buttons to the other back placket.
Tip: Don’t try to sew though the bulky seam allowances and gathers at the waist seam. Instead, place the buttonholes above and below the seam and seam allowances.


20 comments on “Vintage Dress by Simple Simon & Company for WeAllSew”
I’m very confused on this dress! I’ve made it through step 14 but after that I’m completely lost. Plus I think my bias tape is a little bigger then you mentioned because that’s what walmart had. Anyway, can someone please explain in overly detailed form what to do from here? This is the first dress I’ve made completely on my own and I don’t want to botch it like I have before! Thanks so much!!!
I haven’t made this dress, but I think I can explain what to do. Step 15 is a little different from what most dresses call for (they’d overcast the edges together), but makes a much nicer finish on the inside. You’ll bind this edge just like you did the armholes in step 6, but because it’s on the inside it doesn’t have to be so perfect. If your bias binding is a little wide, unfold it, then refold the sides a little longer and press. (If it’s VERY wide, you might want to trim the sides and refold and press.)
I haven’t made this dress, but I think I can help explain what to do. Step 15) This is different from most dress patterns, but makes a nice finish on the inside of the dress. What you’re doing is encasing the seam allowances inside a strip of binding. In Steps 16 and 17 you’re creating the plackets on each side of the center back, where the buttons and buttonholes will go. Turn each side under 1/2″, then another 1-1/2″. Press well, then stitch along the inside folds to hold everything in place. In Step 18, the buttonholes are sewn; that’s something your sewing machine manual probably tells you how to do. Then sew the buttons on by hand or machine. Does that help a little? Jo
I think I may have already messed up. I understand what to do now, but what I thought I was supposed to do before was to 1) only placket one side so the button side is not placketable, and 2) to not gather the skirt in that remaining 2 inches on the button hole side. Because it sounds like I may have been supposed to gather the skirt to the stopping point on the bodice on both sides. Am I going to have to take the whole skirt apart? I wanted to finish it in time for Christmas, but with 5 girls 6 and under having a hard time. Plus I realized I was short on gift so I’m trying to get a few more made by Thursday. ….oi…thanks so much for your help!
It looks like, according to Step #10, both sides of the skirt back need to have 2″ to form the plackets on both sides – one side for the buttonholes, and the other side for supporting the buttons. Not sure if you need to take the entire thing apart, you may only need to rip out that portion of the dress to gain back the 2″ of fabric for the placket. Best of luck to you with your projects!
I do not understand where the three pieces for the skirt come from for a size 3/4. Can someone help please?
Thanks
For the skirt Sizes 3 and 4: you are going to cut one 18ʺ x 45ʺ rectangle, then follow step 4….hope that helps! The older sizes have three skirt pieces (as to not have one seam down the front middle of the dress)–the size 3/4 only has one piece.
Super cute dress. On the back button placket though…don’t you have to not gather the skirt for 3.5 inches for this to really work? If you fold under a half inch and then another inch and a half, don’t you need another 1.5 inches so that your placket is flat? I gathered my skirt with exactly 2 inches at the edge and when I fold it over I end up with gathers on the placket. I’ve had to pluck out and redo it. Also, I can not find any hem information. I’m assuming it doesn’t have a deep hem based on the look, but since I don’t have the child in my home that this is going to I would love a general idea of what sort of hem was used. Thanks for the pattern!
I read the instructions for completing the sun dress. I would recommend instead of adding the bias tape around the seam allowance at the waist, to press the seam allowance up (serge if you like), and sew it in between the lining and the outside fabric. It will provide a much cleaner finish and look more professional, and eliminate the need for more bias tape!
Exactly how I did it and it makes a very clean professional finish.
I love these free ideas from Bernina. I made the pillowcase sun dress for my granddaughter last year. She wore it for Easter, and made my day. I also made the pin tuncked women’s top. Keep on providing these great ideas!!
Hi
I was wondering if the buttons could be the front of the dress?
Not clear how to finish back seem and placket.
This is confusing. Is there a video how to do it?