Embellish a shirt with Embroidery
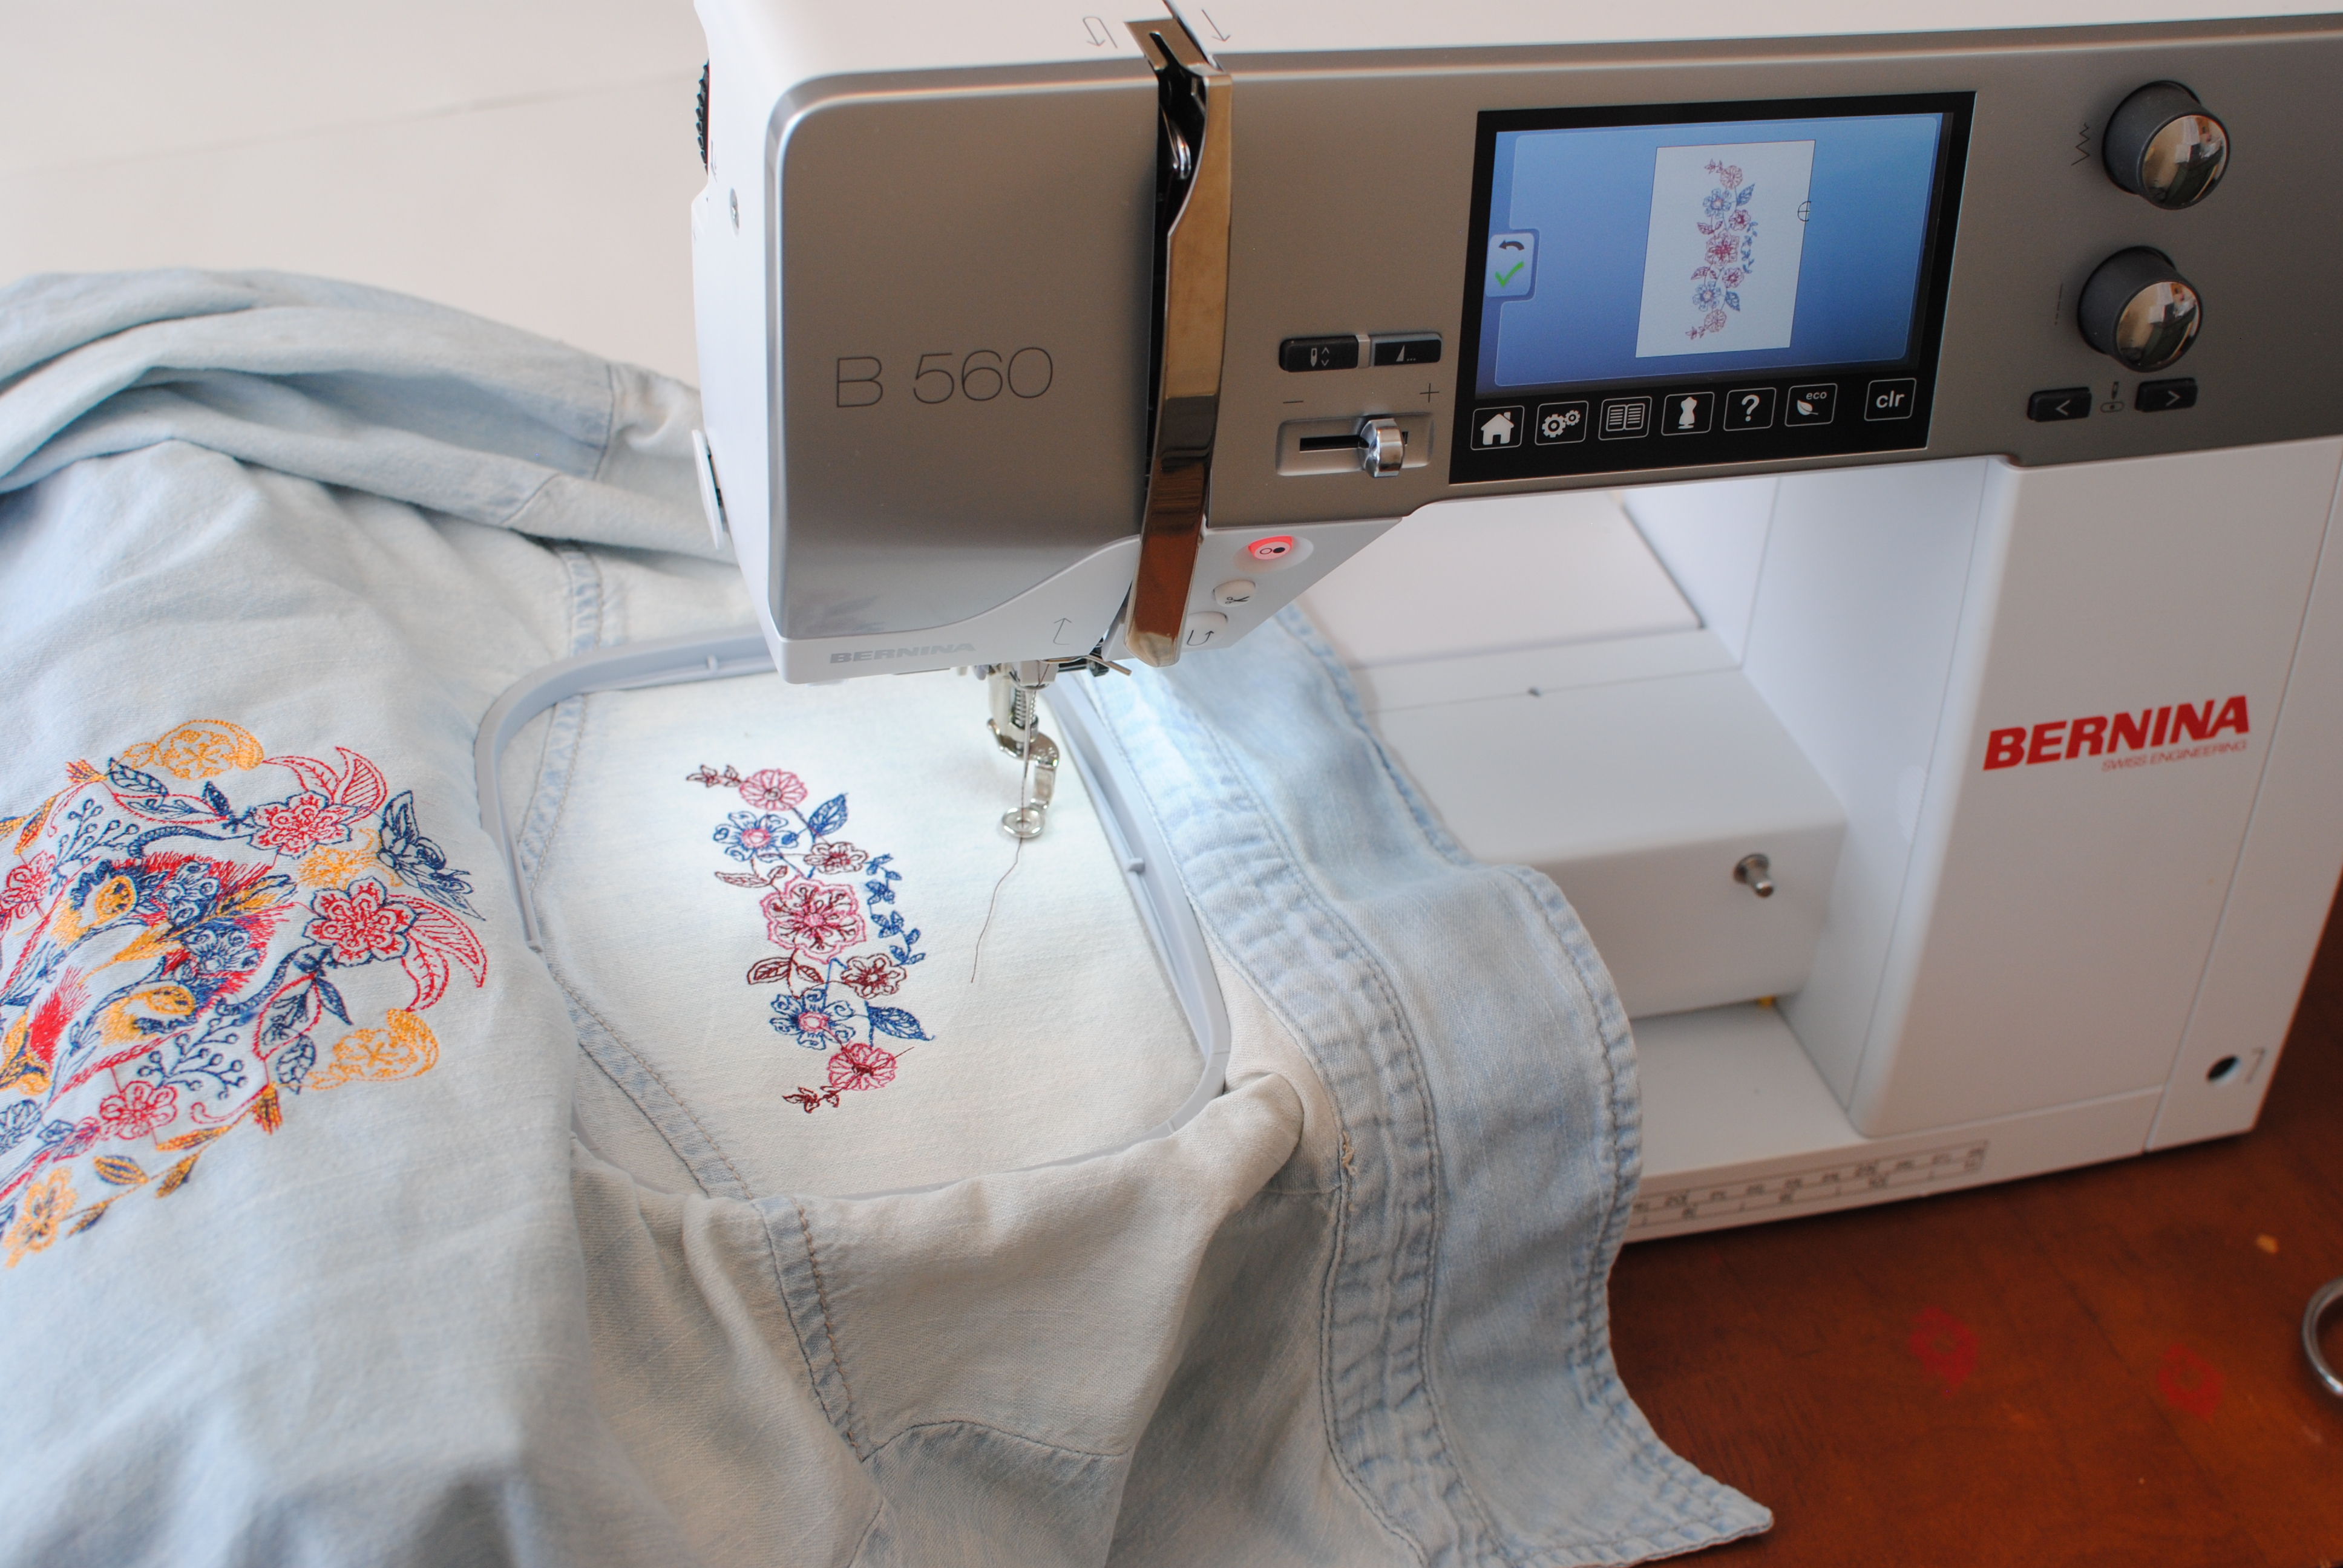
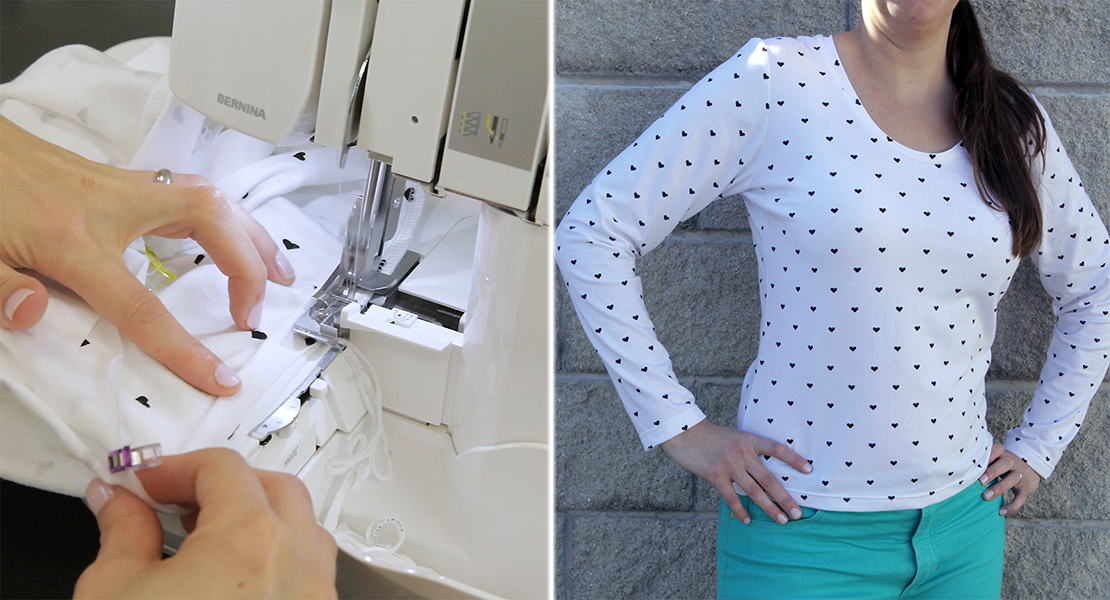
Hello everyone. Laura here from Trash to Couture. For this tip post I will share with you how to update an old collared shirt by adding embroidery with my BERNINA 560 and the embroidery module. I’ve been wanting to get an embroidery machine for as long as I’ve been sewing, so this was a dream. Because I’m new(ish) to using one it was a little tricky at first. I had to practice and get help from my local Studio BERNINA. I learned quickly that proper stabilizer, thread, and needles were important to have a successful outcome. Once I got the hang of it, it’s become a nice edition to my designs.
Top designers showcased their Spring 2017 lines with intricate appliqué and embroidery. Some of my favorites were Gucci’s wild garden patterns with snakes, butterflies, floral, and tigers. It’s a great update to boring clothing, so for this post we will be showing you tips on how to do your own.
Supplies to Embellish Your Shirt with Embroidery
- Embroidery machine (I use a BERNINA 560 E)
- Large oval hoop and template
- Medium hoop and template
- Embroidery foot #26
- Stabilizer is a necessity. Chose the best one for your material.
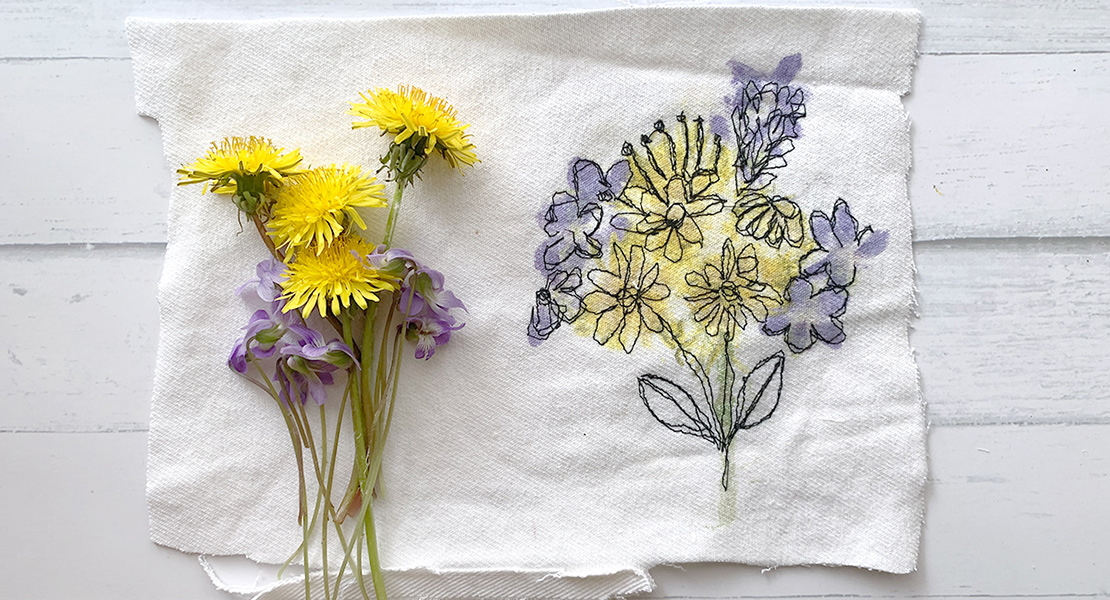
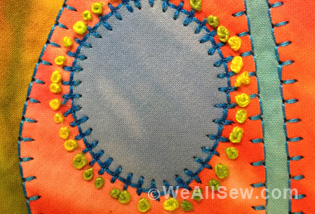
- Thread: I used a 40 wt rayon embroidery thread. I mixed the colors from red, blue, and orange tones
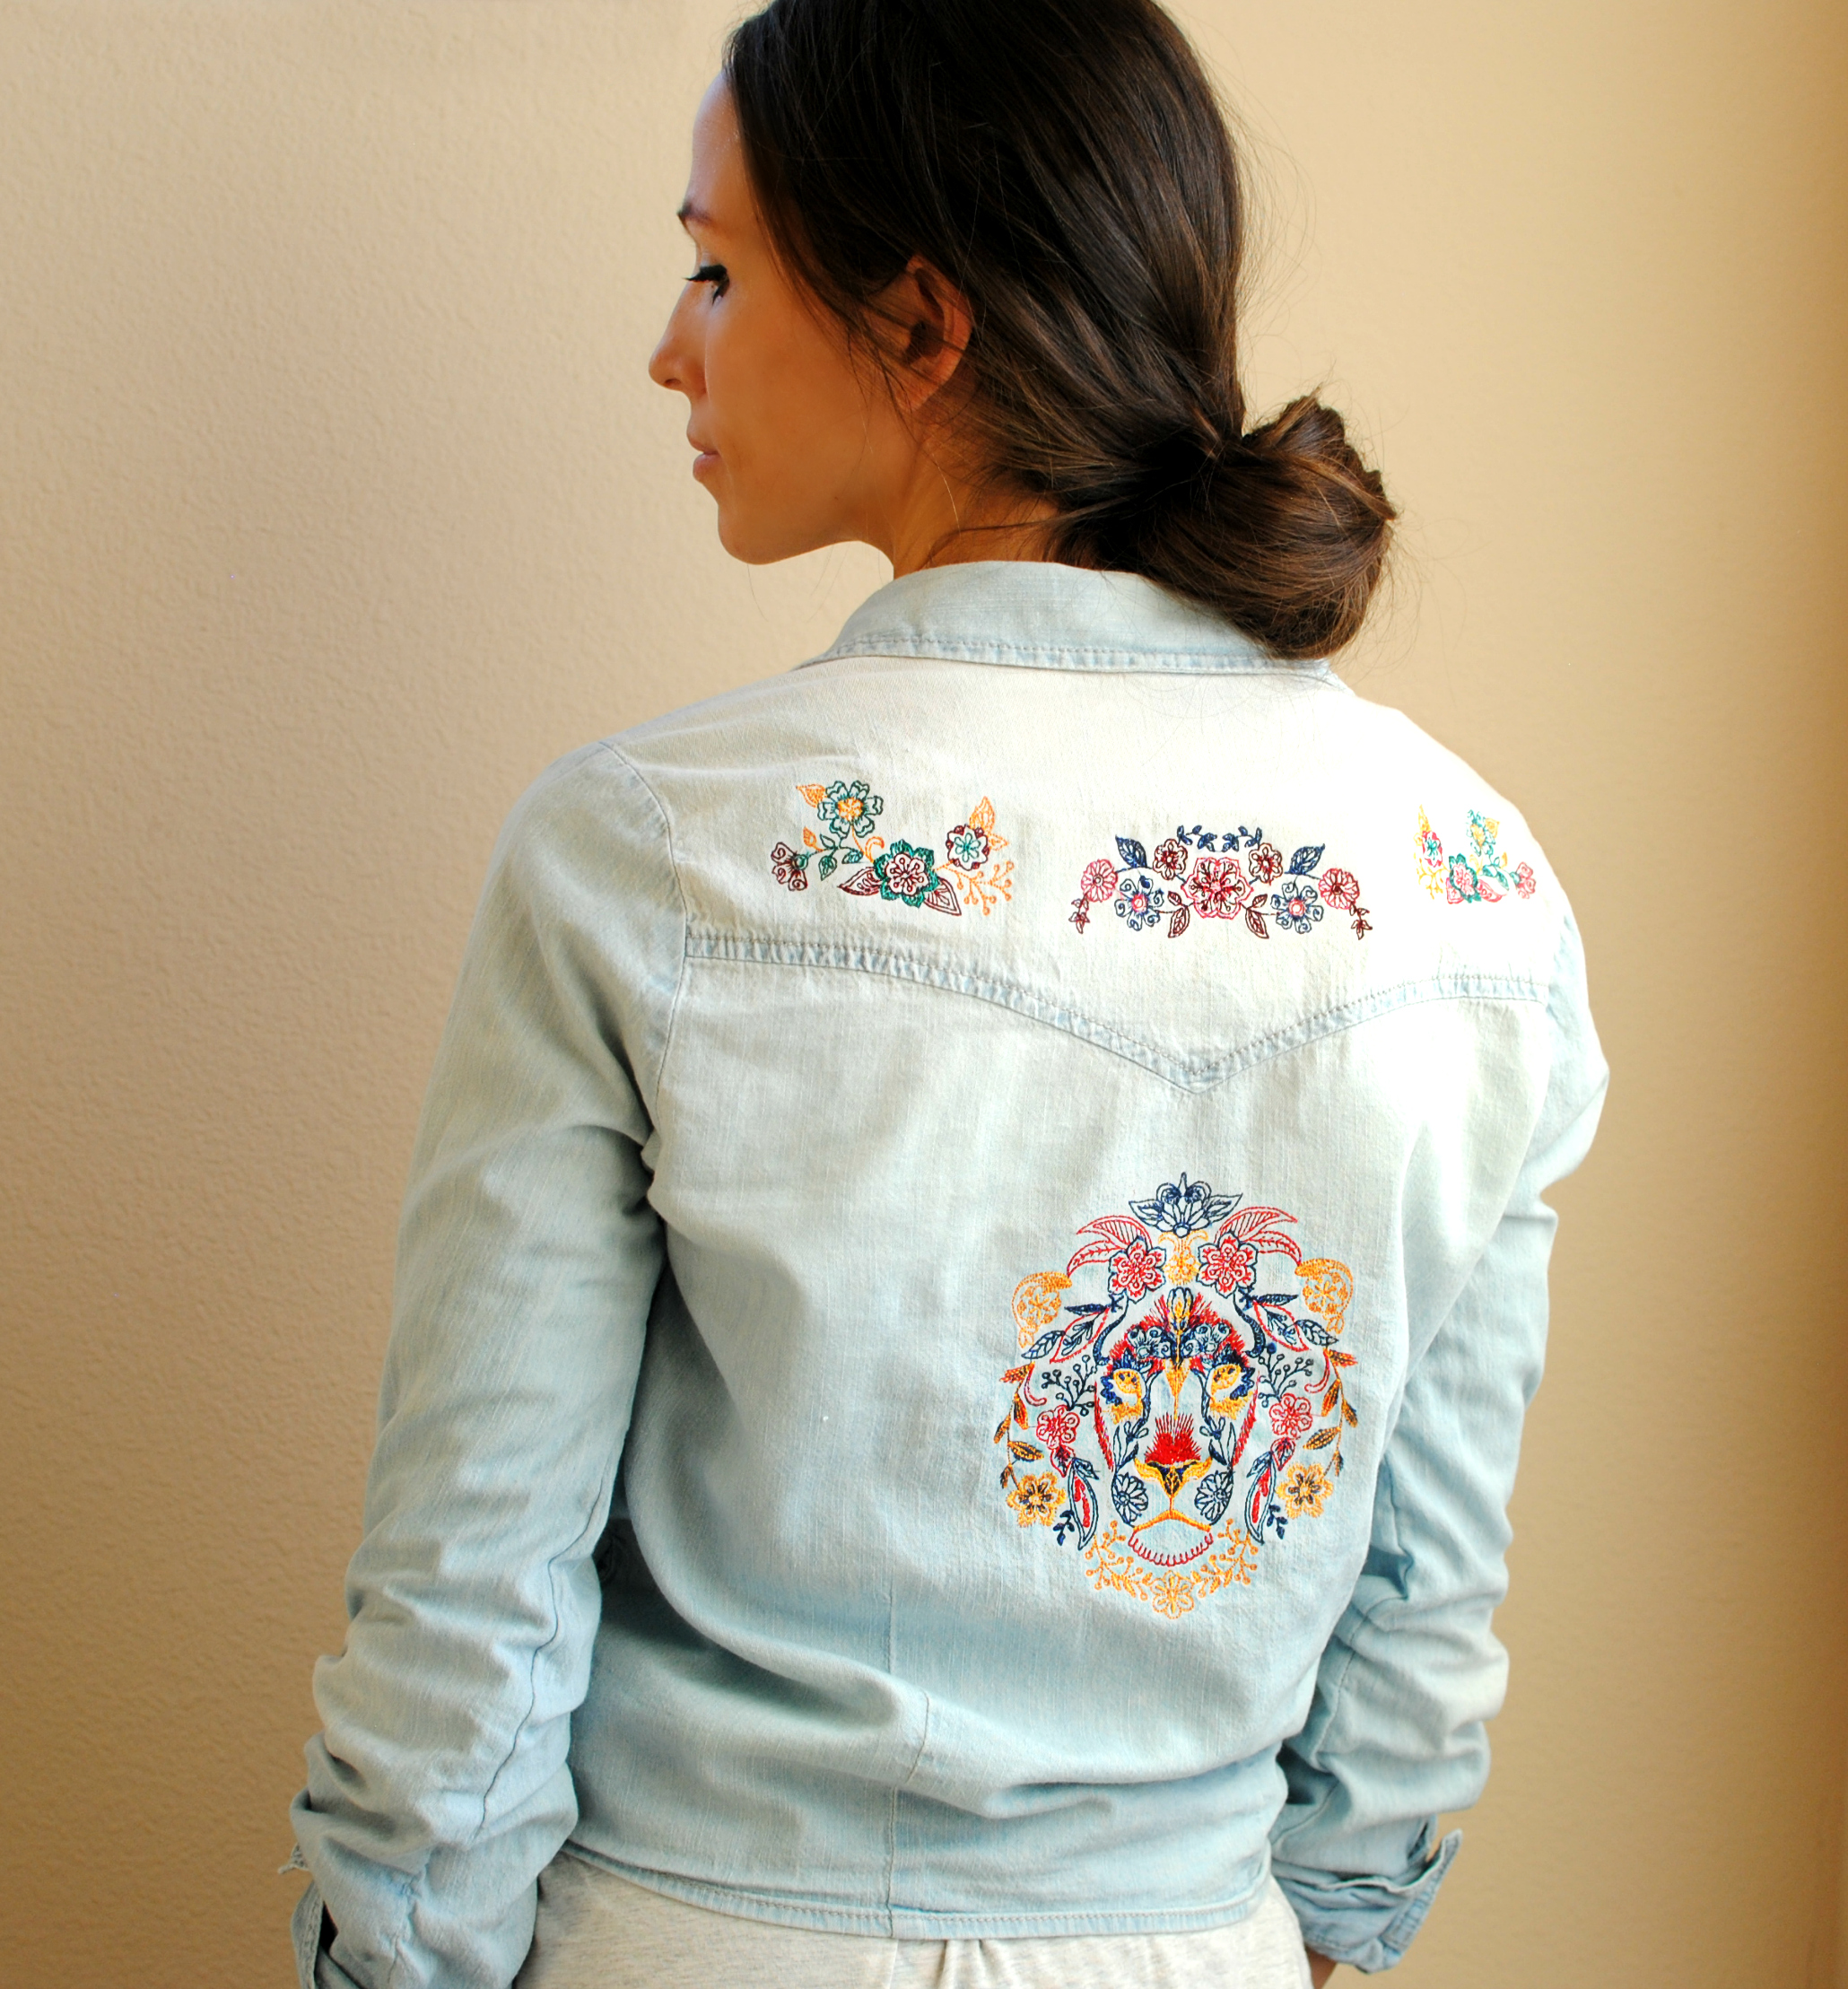
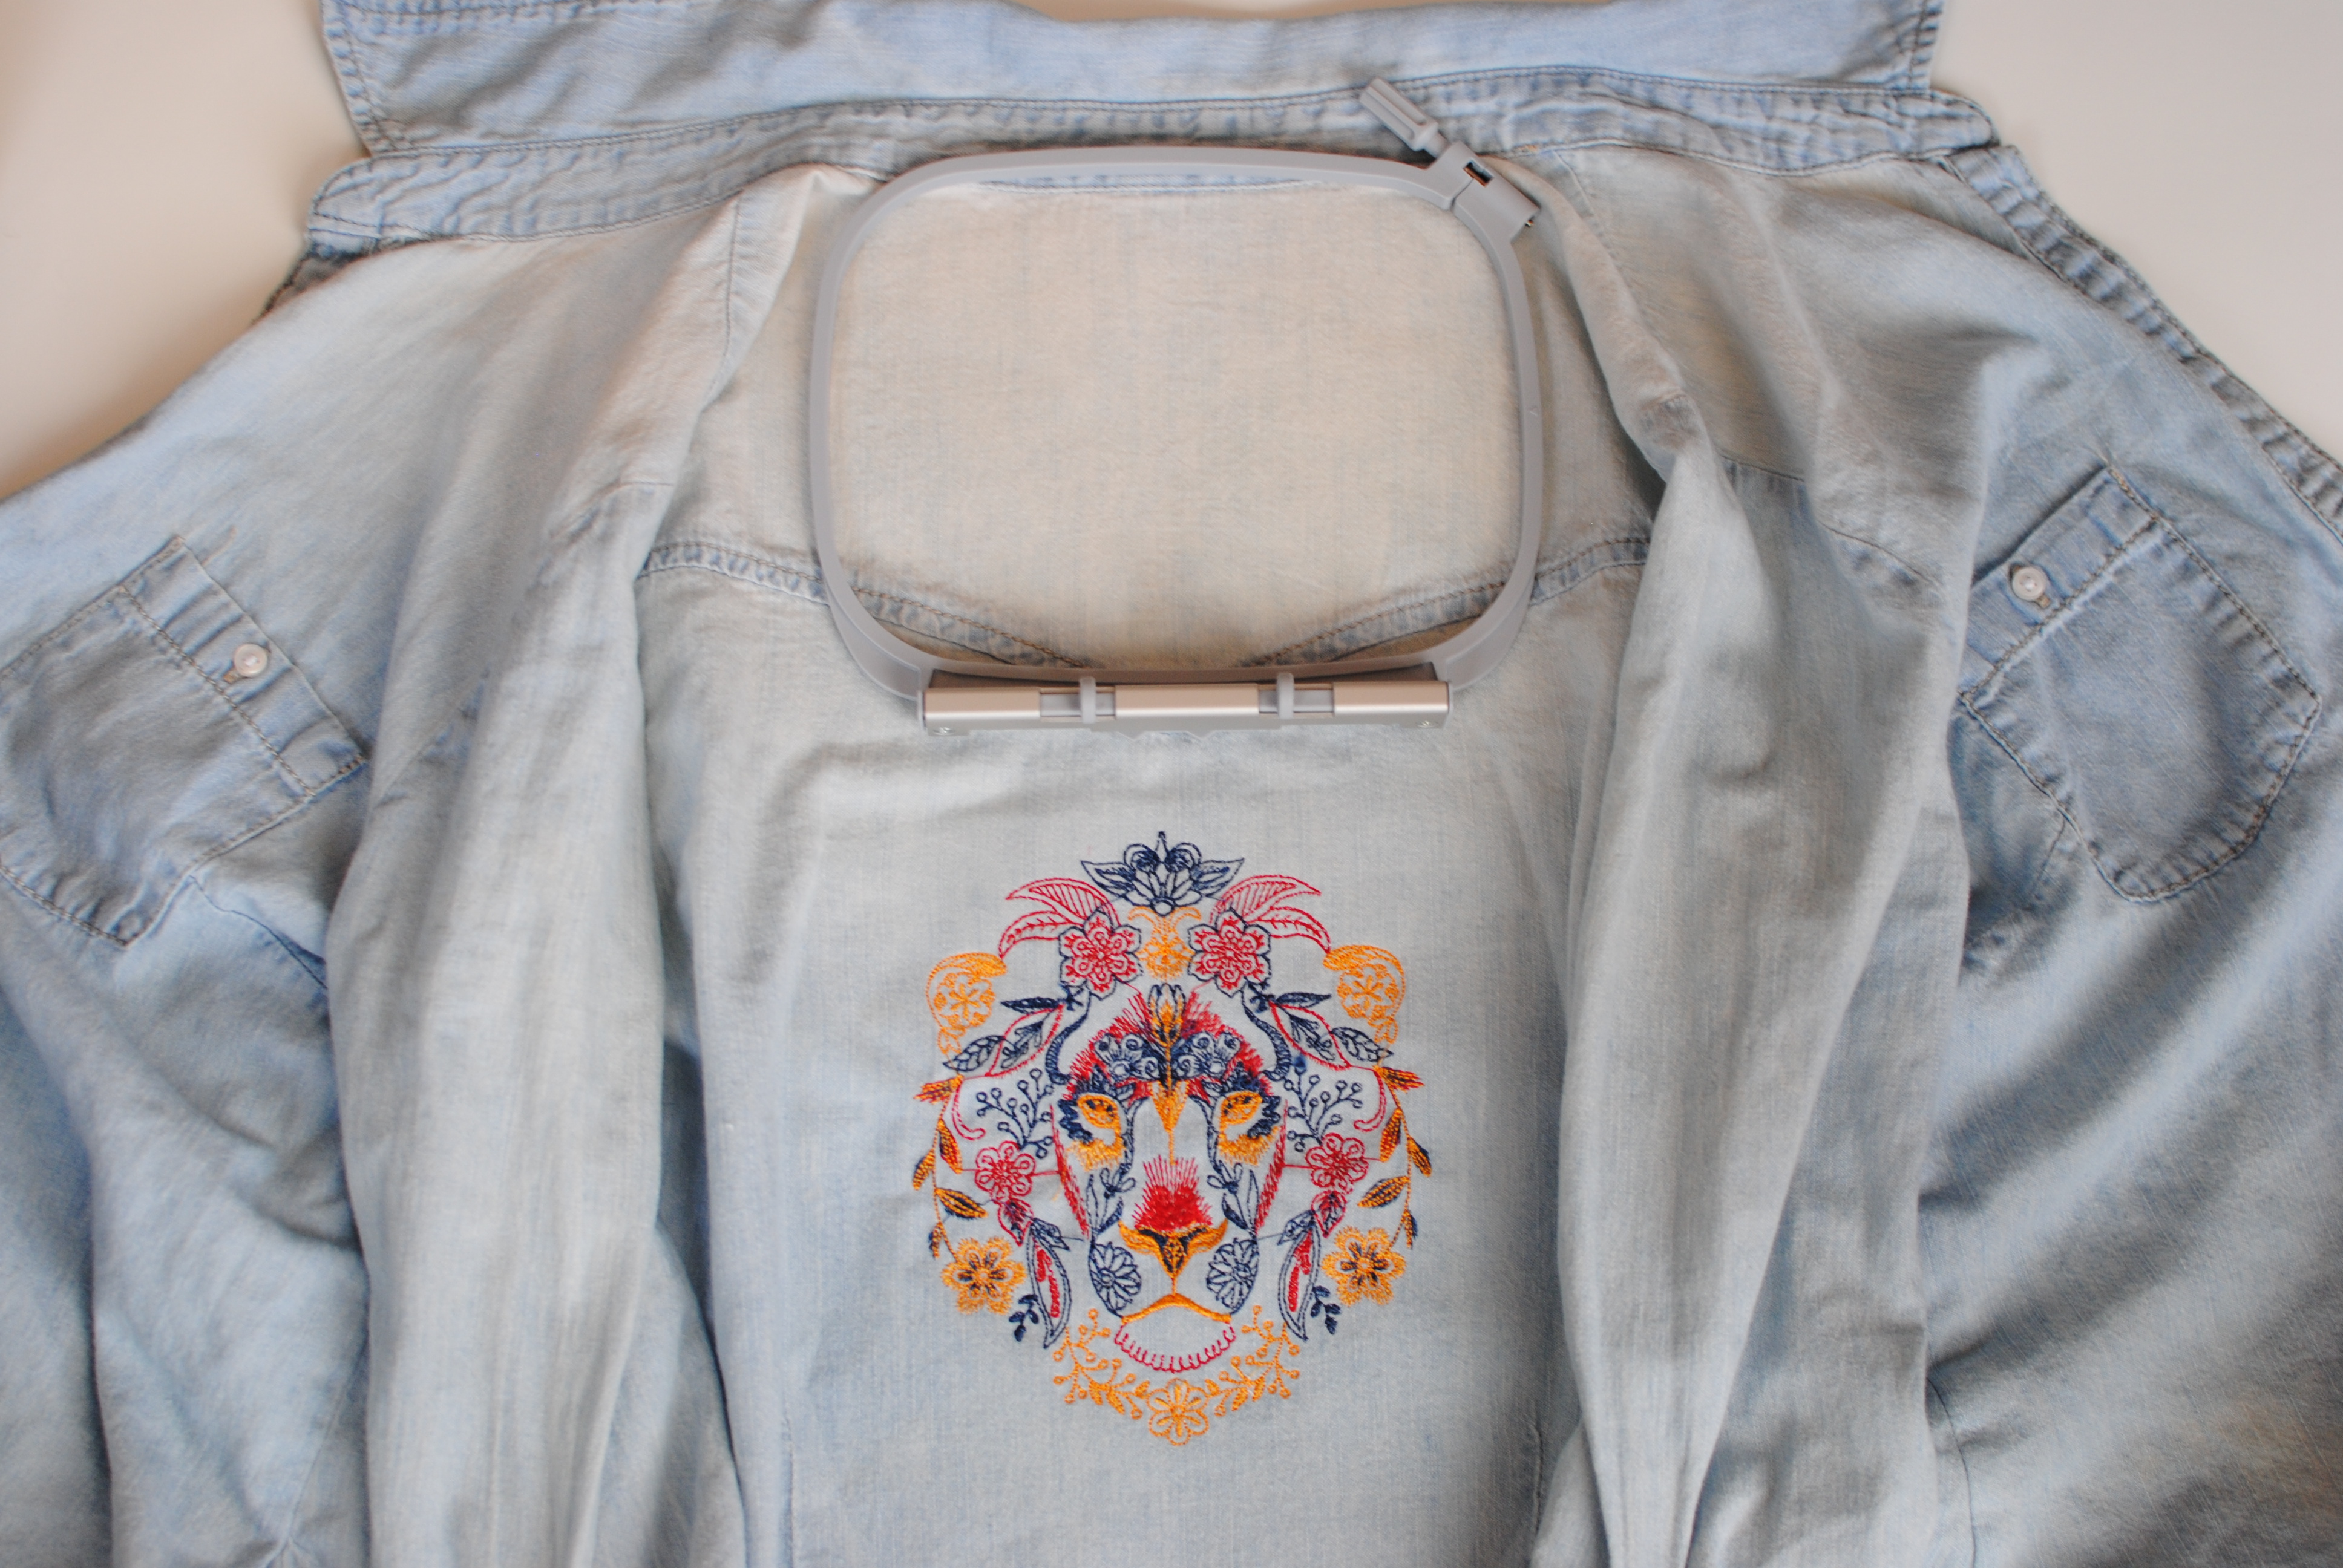
- Embroidery pattern: I fell in love with this lion and floral pattern Wild Flora by OESD here. I also like that it only involves 3 shades of colors.
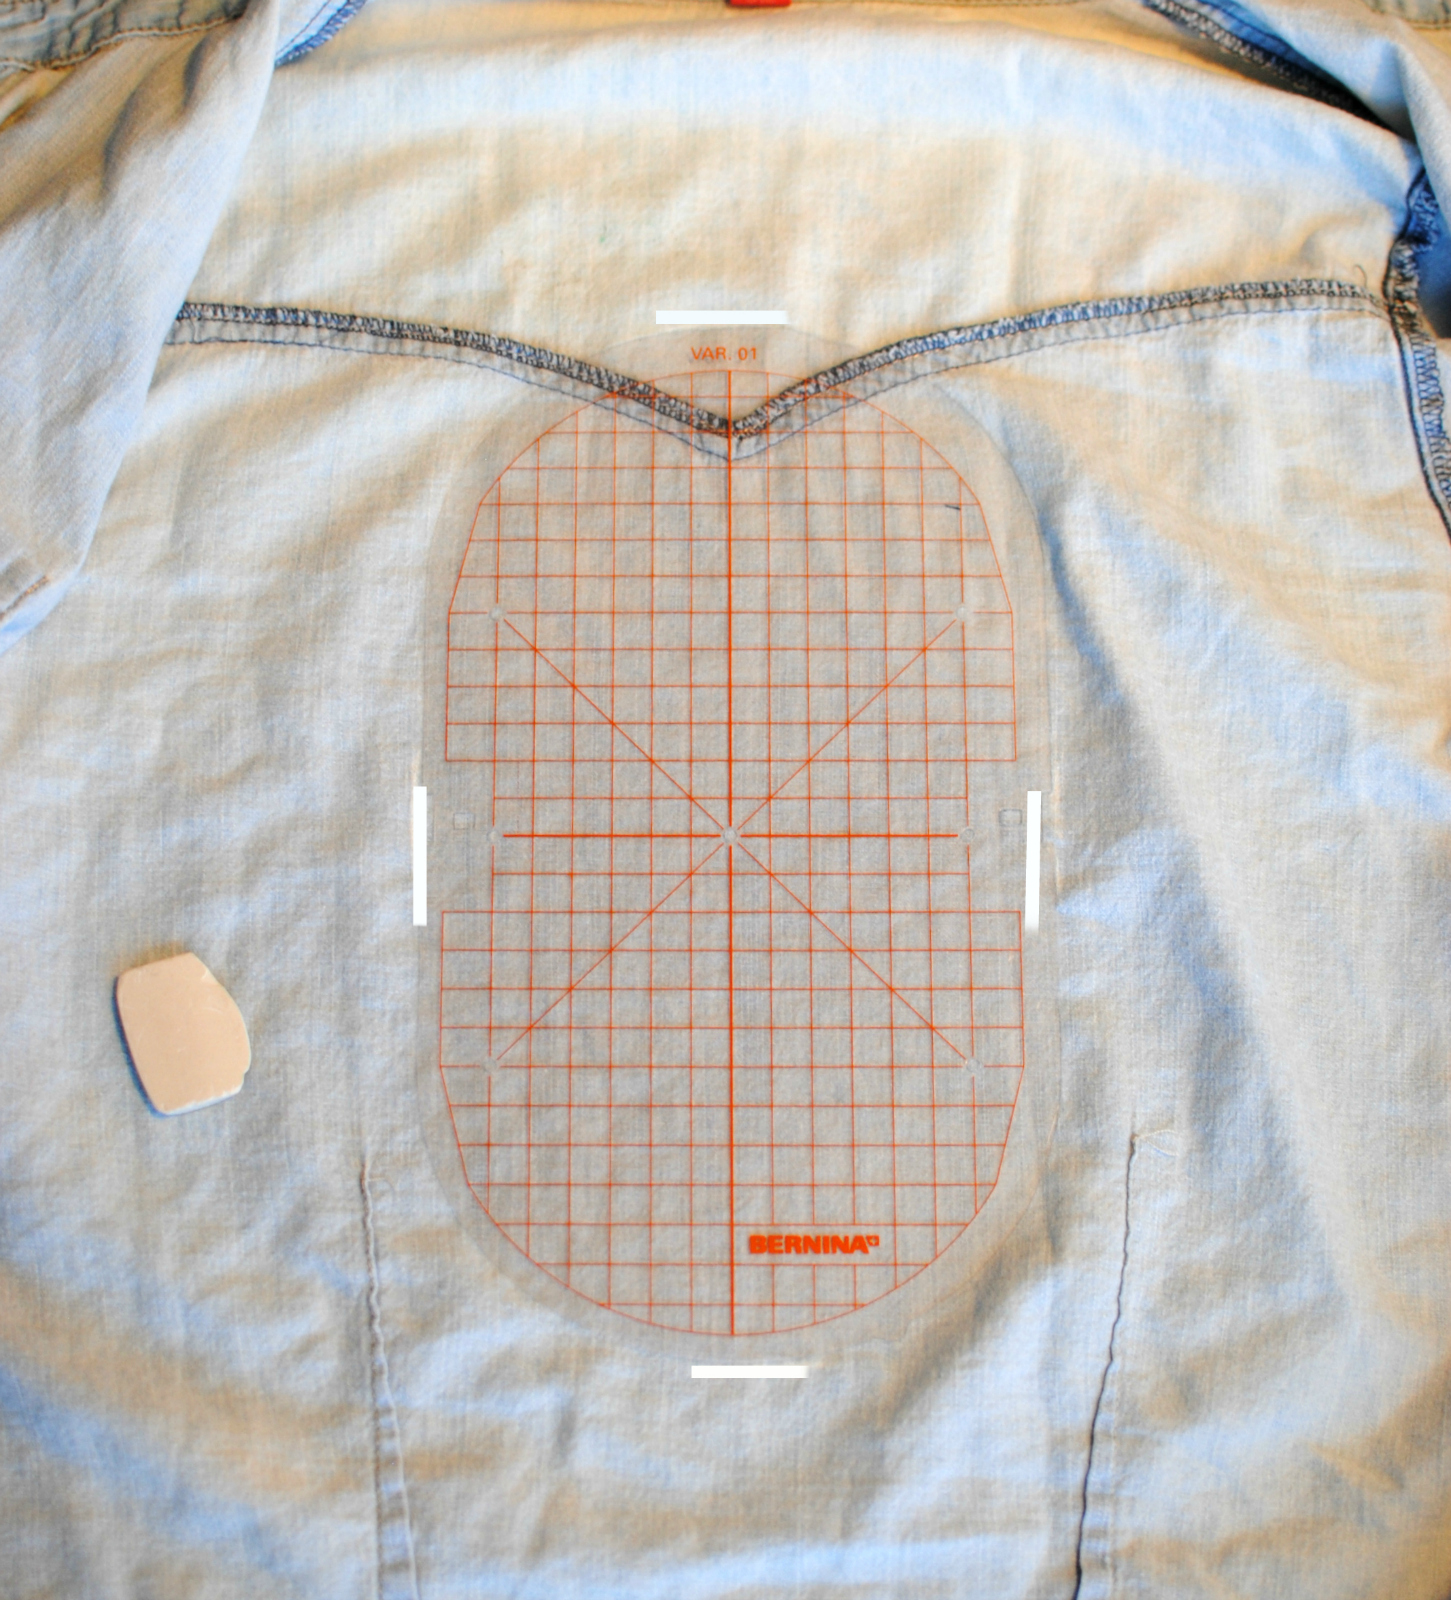
Begin by pressing your garment. Then use your large oval template to mark with tailor’s chalk where you want your design to be. I mark both and right and wrong sides. Choose an area of the shirt that is flat. For this design I will be using the yoke and the back panel.
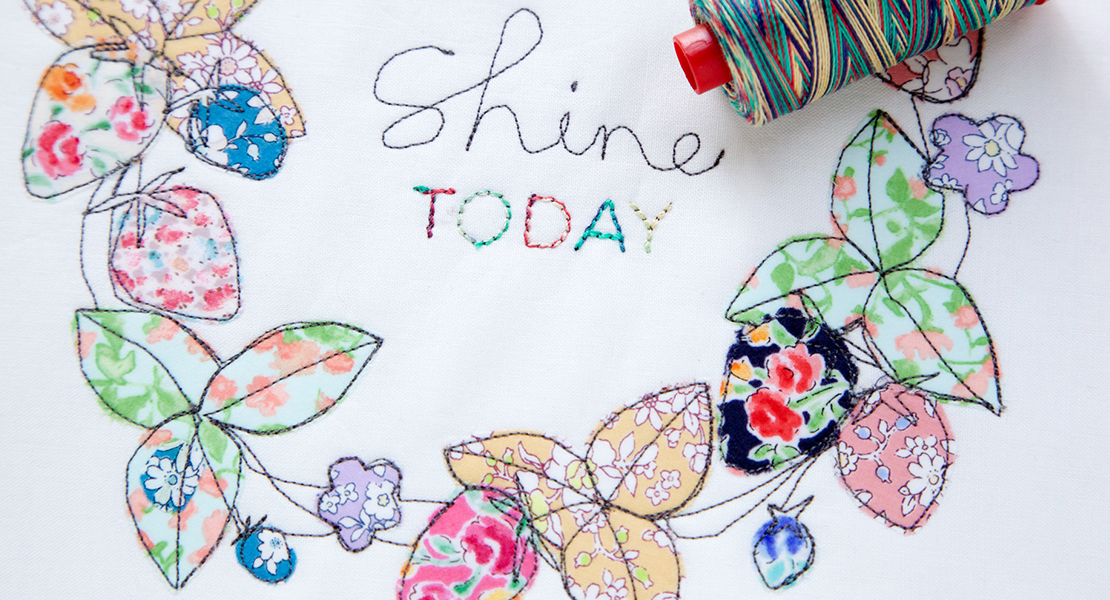
I always do a sample stitch out of the design even though it’s time consuming. I like to place it on the final piece and see if I will want to change up sizing, placement, and colors. I use the sample for other projects . . . maybe a quilt one day. We sometimes hoop them and free-motion little poems around them or my kids names and use them as home décor.

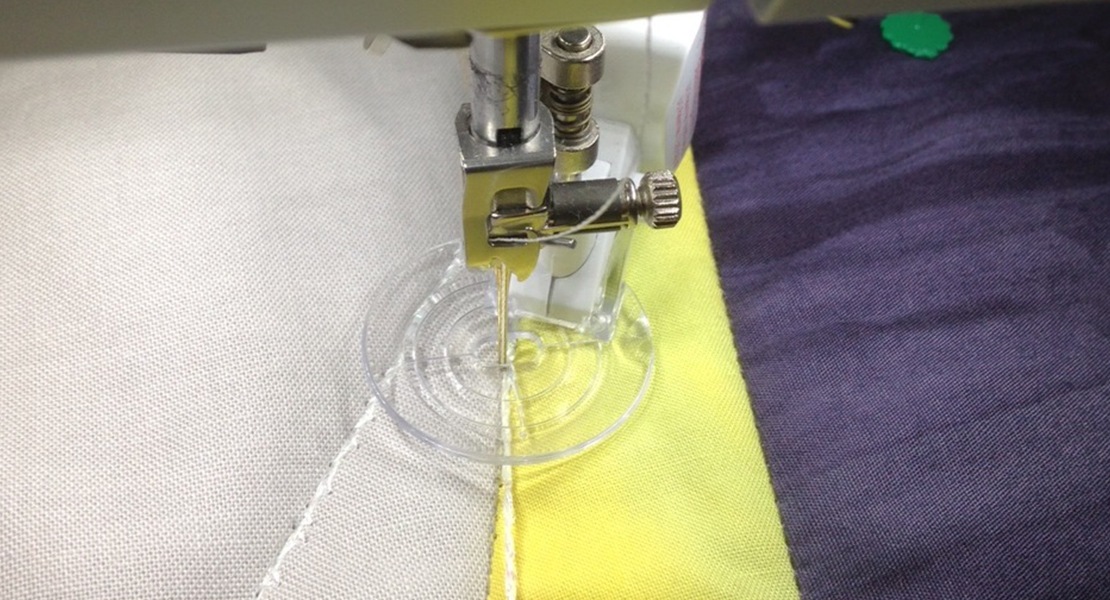
Use a stabilizer that works with your fabric to place at least 1 inch over the markings. I love the ones that you can cut to measurement, peel and stick it right on. Then hoop it so the fabric is on top of the part you will connect with the module. That way you can lay the excess fabric out over the module.
Hooping tip: You don’t want it too tight or too loose. It should sound like a drum when tapping it.
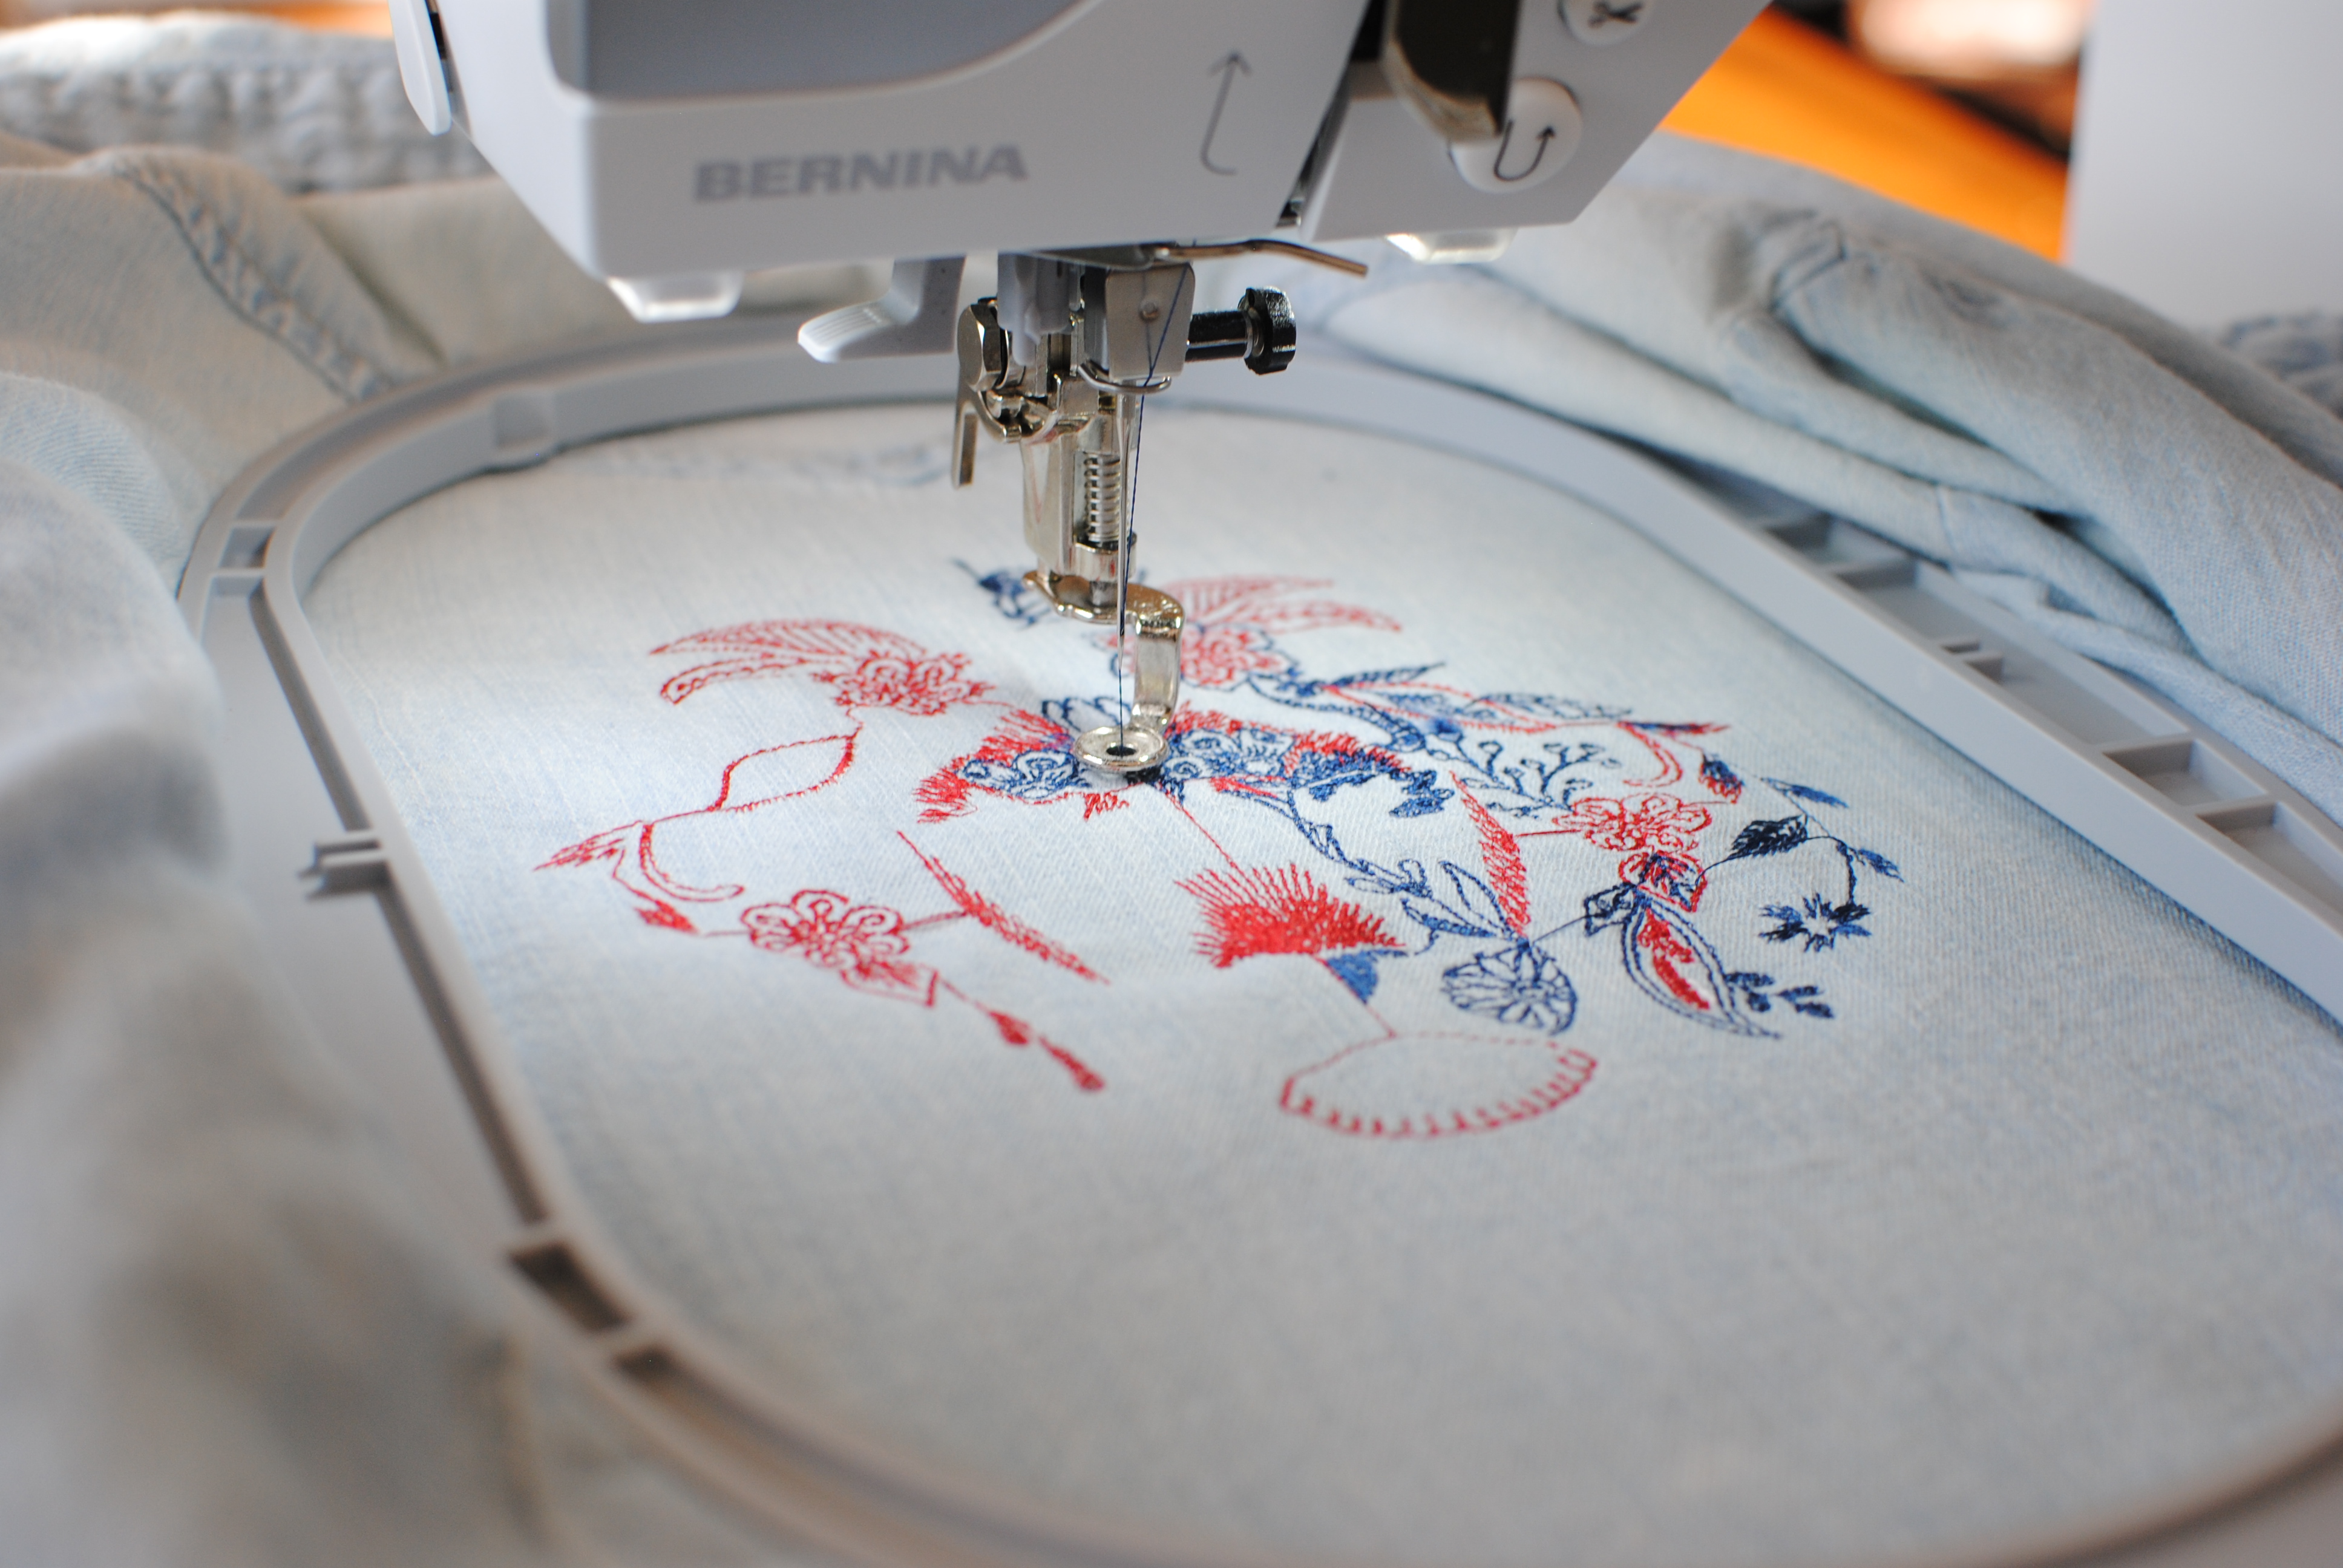
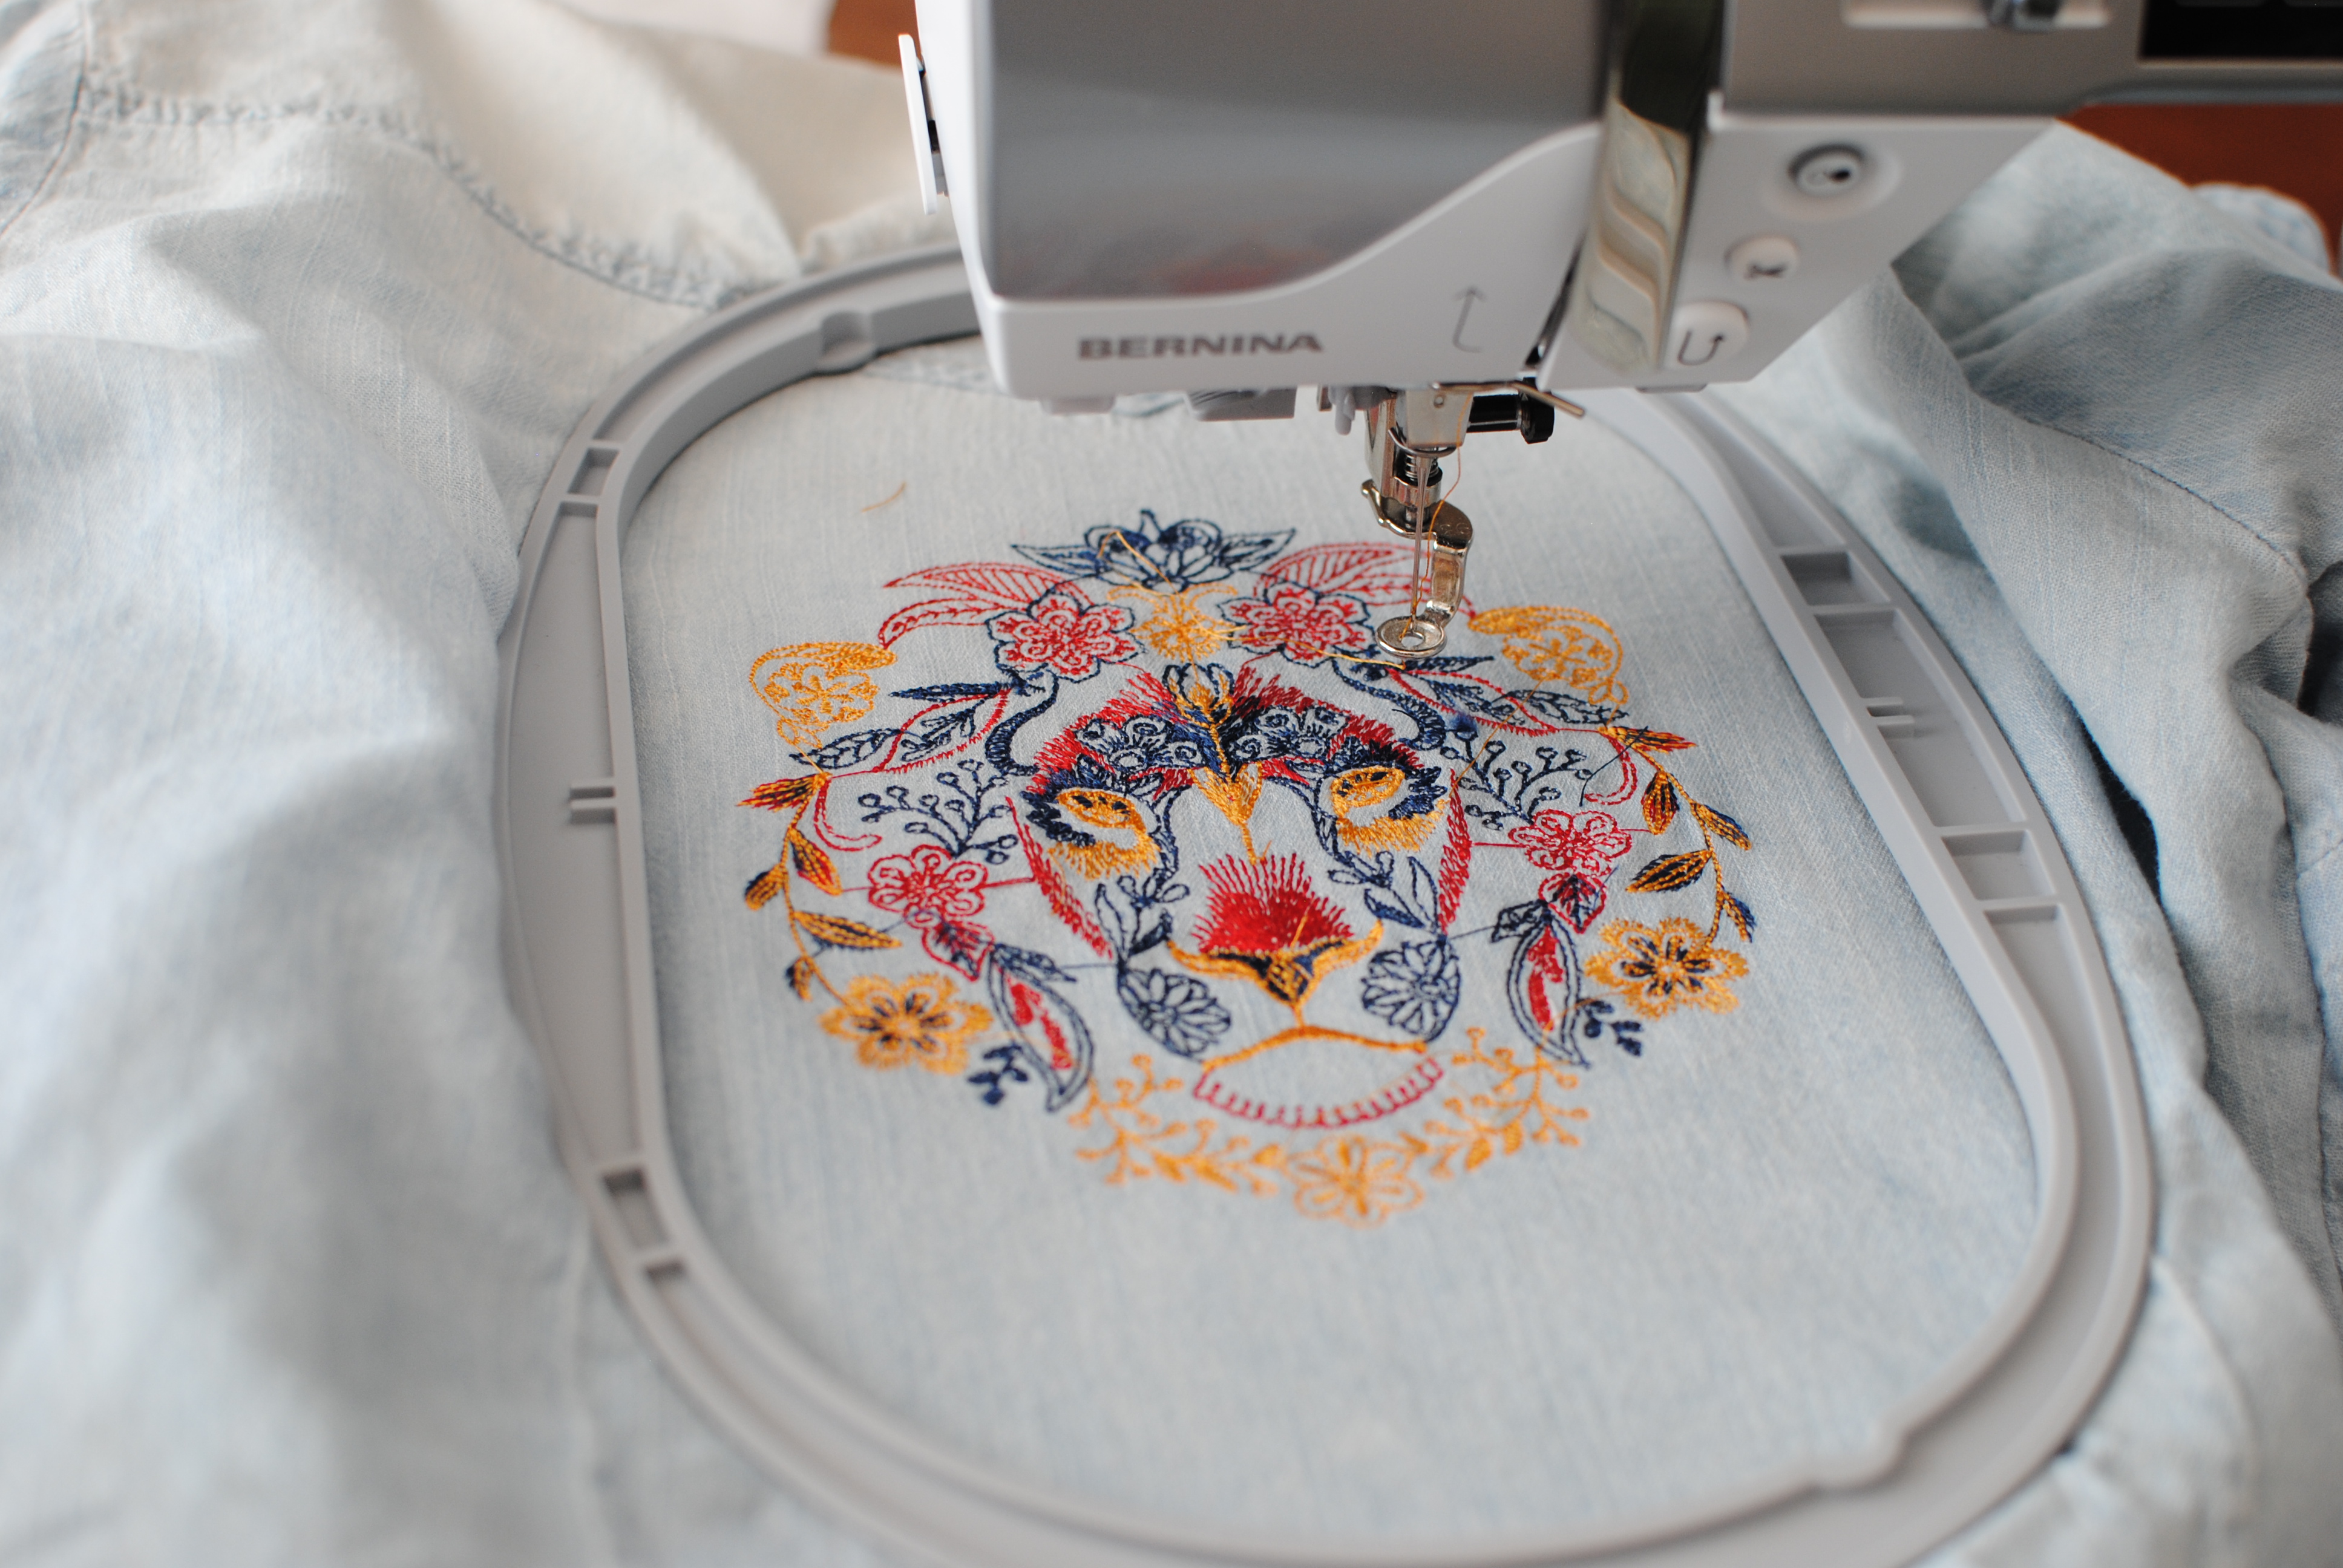
Begin your embroidery.

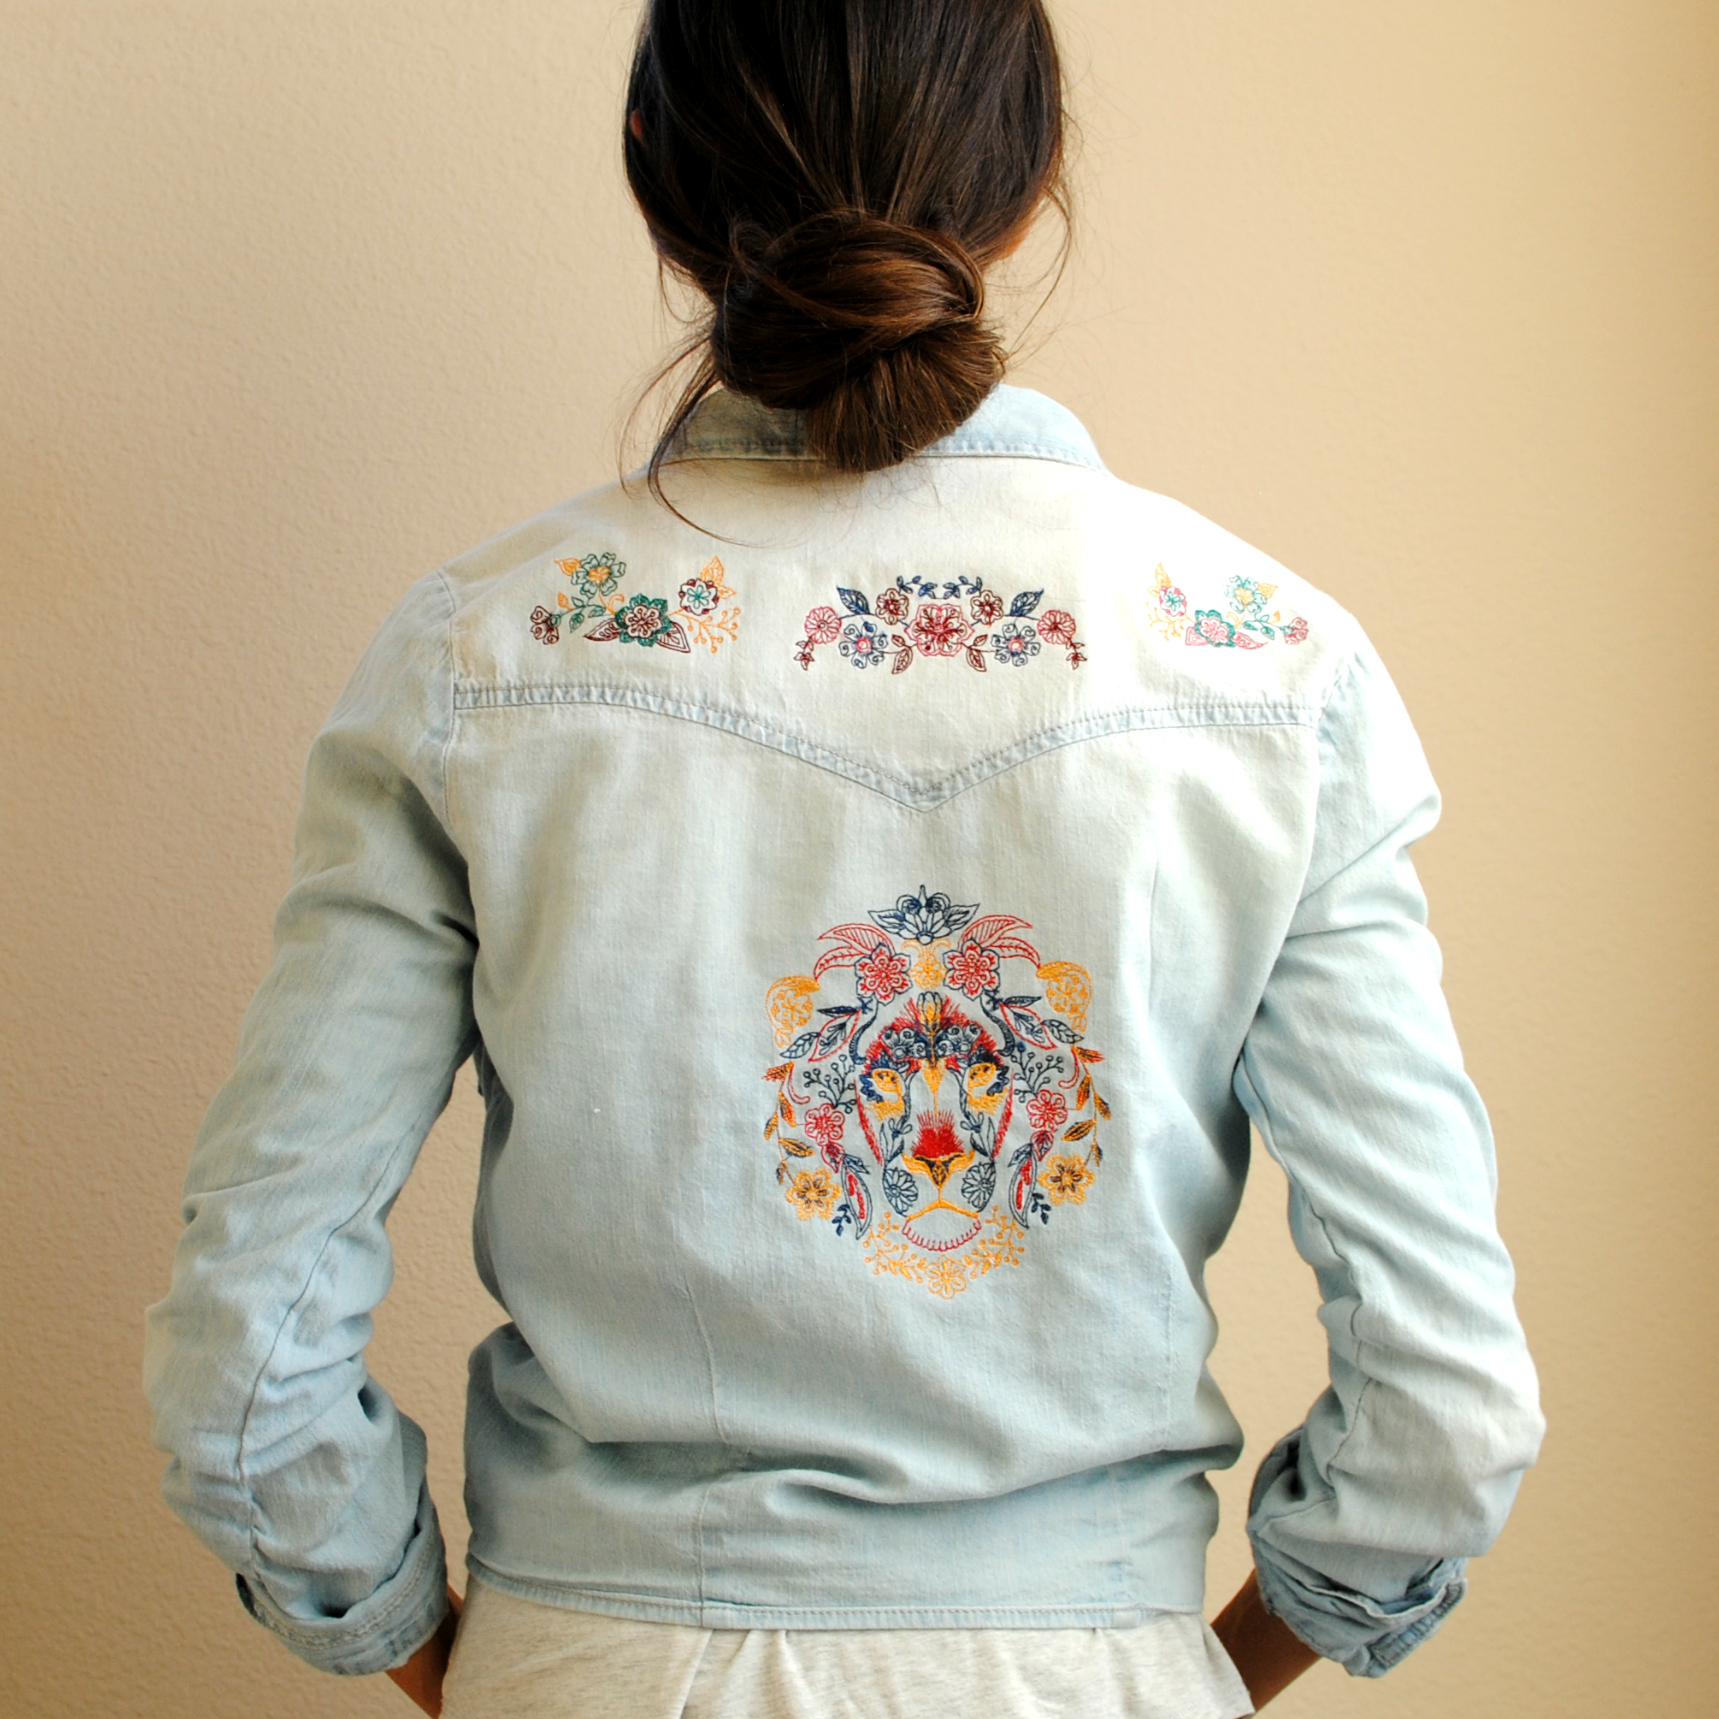
This Lion though . . .
Repeat around the shirt. I chose a floral set to add to the top portion.
How cool is this final piece? I could have continued but I had to stop myself.

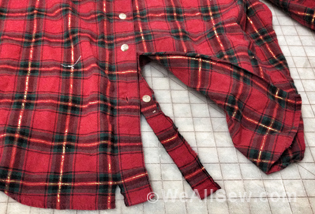
I also did this with a men’s shirt and turned it into a New Years dress here. The ideas are endless…
Watch my video to get the steps on how to embellish your shirt with embroidery:


What you might also like


One comment on “Embellish a shirt with Embroidery”
Leave a Reply
You must be logged in to post a comment.

I’m always challenged at the stabilizer choice. Love and own the pictured designs. What stabilizer would work on a flannel shirt to enable embroidering the lion on the back? Tear away would be difficult to remove. I used the “No Show Mesh” cutaway but it wrinkles in the dryer. Thanks for any suggestions!