How to Embellish Your Free-motion Embroidery with Flower Pounding
Flower pounding and embroidery are a winning combination—even for the greenest of beginners. In fact, if you’ve ever wanted to try your hand at free-motion embroidery, but felt intimidated, afraid of how it might turn out and unsure where to start—this flower pounding embroidery project is the perfect place to start. Not only is the final result effortlessly gorgeous, but it’s also nearly entirely fail-proof. Plus—it’s eco-friendly and the supplies are likely right under your nose!
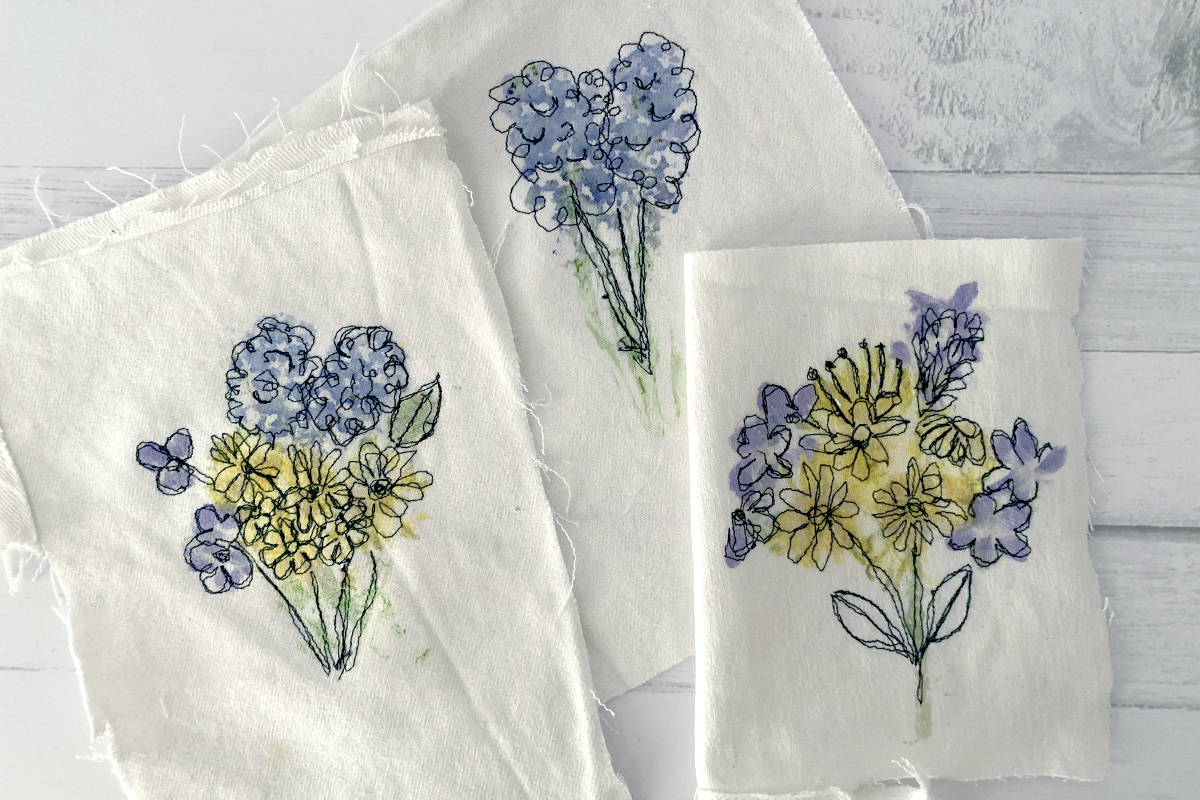
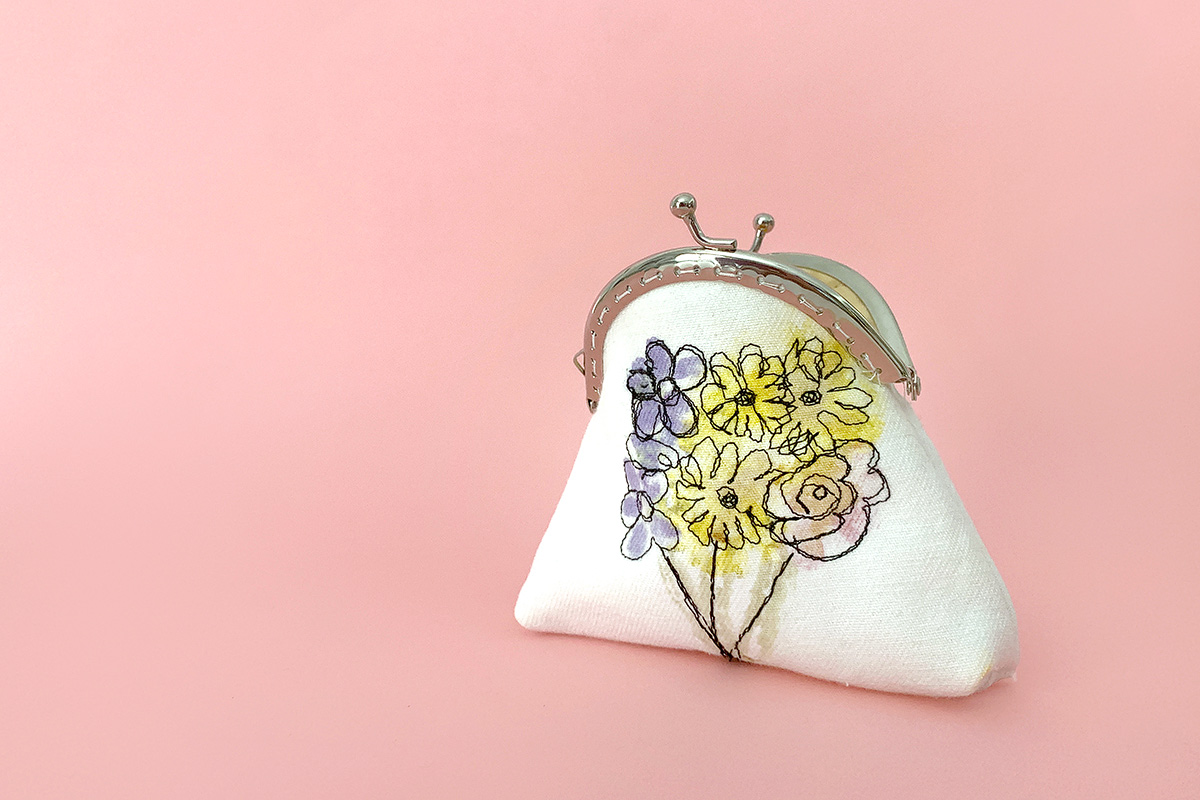
A great project for mom, a teacher gift or just to celebrate spring, you’ll be surprised how easy it is to get great results when combining flower pounding with embroidery, how quickly it works up, and how infinite the possibilities are. Just pull some weeds, hammer out their natural pigments, embroider over the top of it and boom—you’ve got something special that can be sewn into a fabric vase cover, a tote bag, a one-of-a-kind pouch and anything else you can come up with! The messier and less “perfect” it is, the more charming it will be. (In other words, it’s my kind of project!) ?
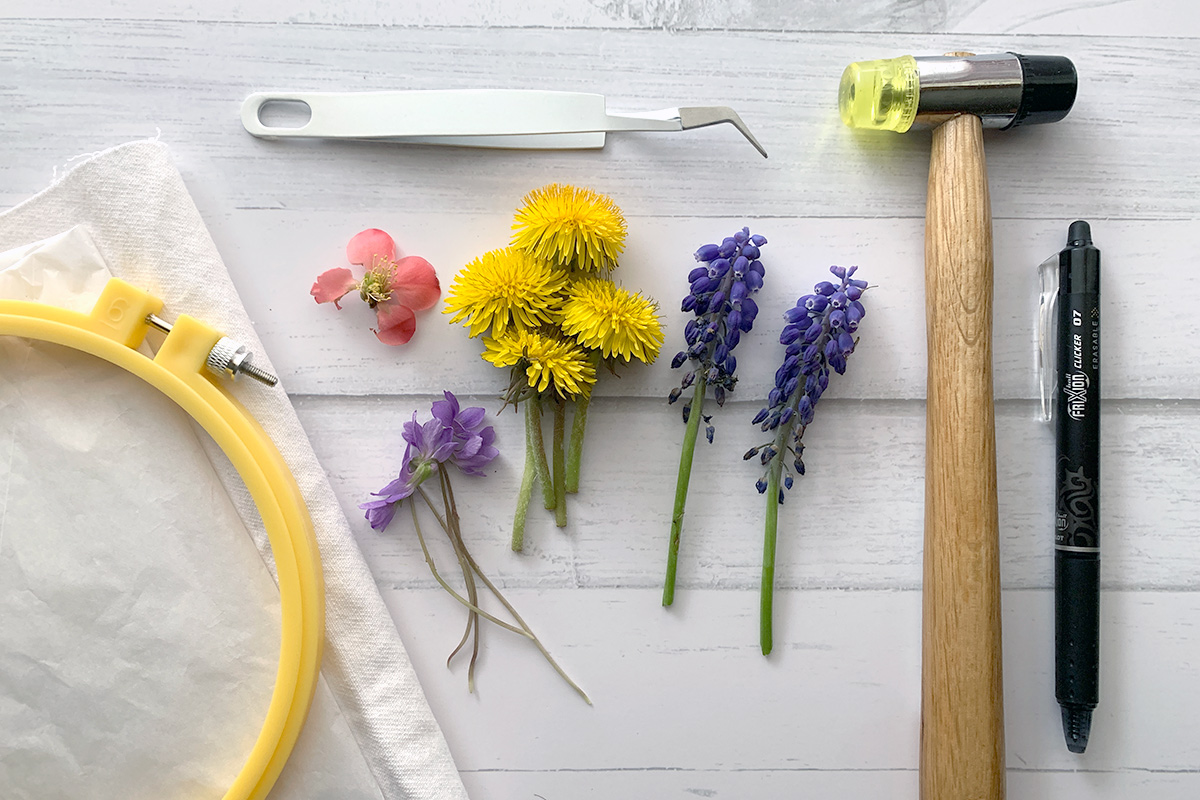
Materials for Flower Pounding Embroidery
- Solid, light-colored fabric (I used the backside of natural canvas)
- Tissue paper
- Embroidery hoop
- Erasable pen/marker
- Tweezers
- Hammer
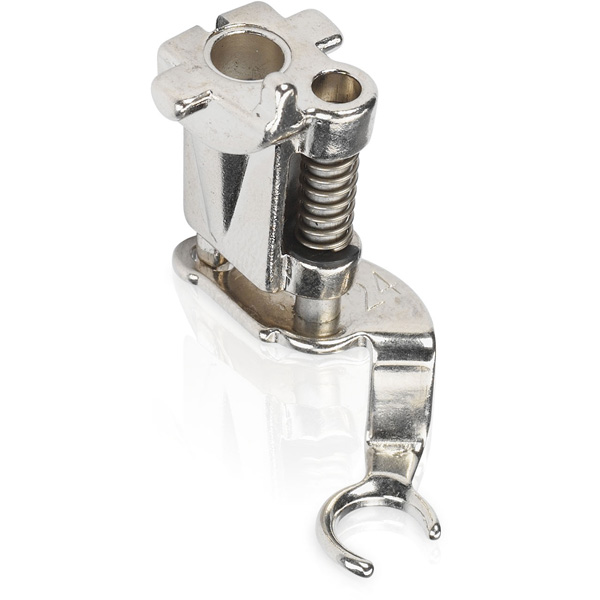
- bernette b79/Free-motion Embroidery Foot
- Coordinating thread (I used black)
Instructions for Flower Pounding Embroidery
Part of the fun of flower pounding on fabric (or paper, or anything else for that matter) is the unexpected and improvisational nature of it all. So far, every time I’ve done this, I’ve been pleasantly surprised by how forgiving the whole process is. So much so, that even when I thought I was just making a “test” print, I ended up loving it and wishing I had used a bigger piece of fabric! I think you’ll be surprised too.
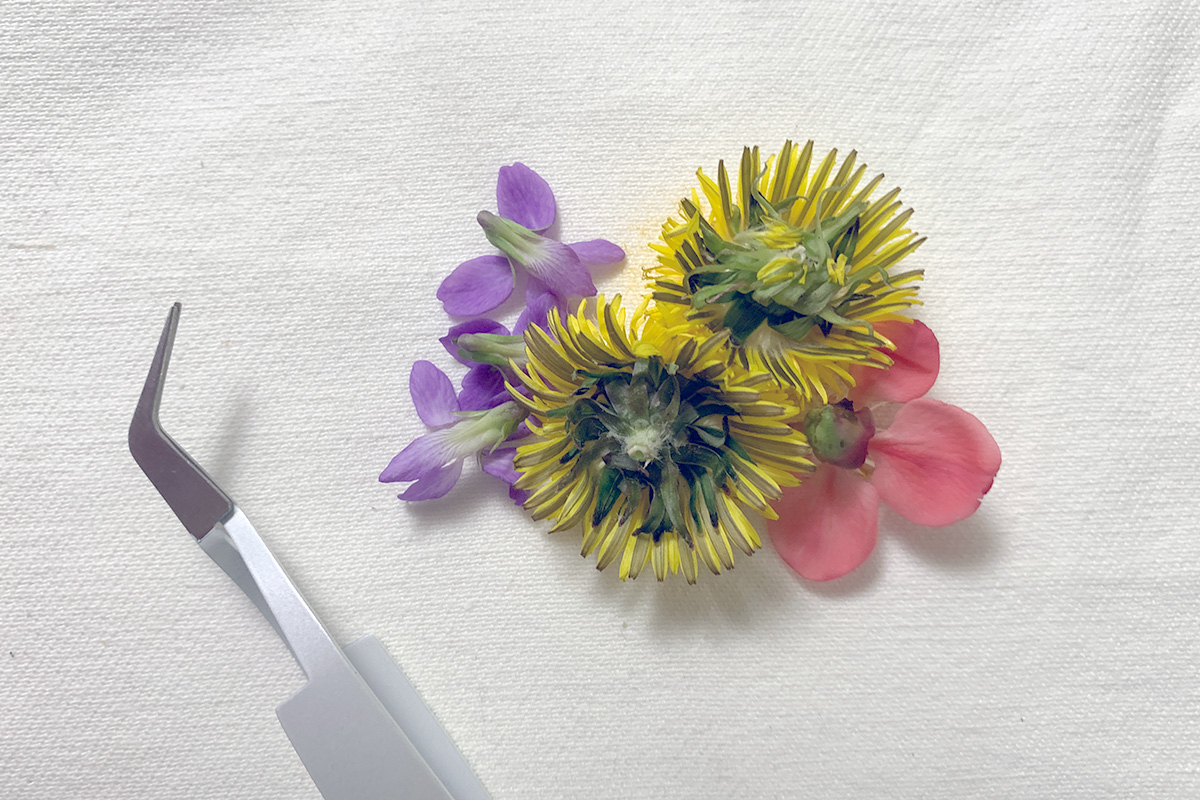
Step 1: Gather Your Flowers (Weeds Work Great Too!)
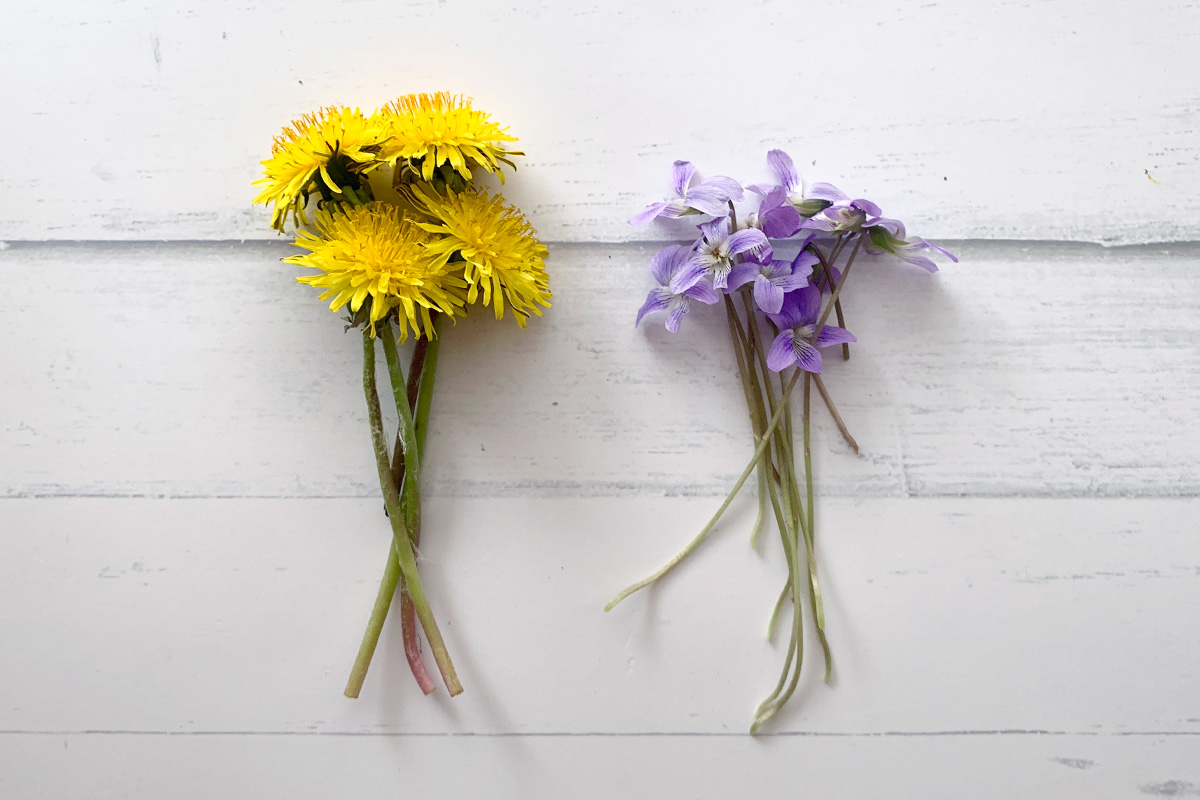
You’ll have to experiment to see which type of plants work best for flower pounding embroidery, keeping in mind that the answer may surprise you. For example, some flowers may appear one color, but the marks they leave on your fabric maybe another. The pink magnolia petals I hammered left brown marks, while the purple weeds I pulled looked turned my fabric blue. Some won’t leave much color at all, and others will be highly pigmented. I’ve found dandelions and wild violet to work reliably well.
Don’t forget to include greenery to “paint” some stems and leaves (if that’s what you’re after). You’ll likely find that the leaves themselves offer very little pigment, with much more color coming from the stems, so don’t overlook them!
In addition to what you pick/pull, you can use petals, flowers, and buds that have already fallen off too if they’re still relatively fresh. Plan to use whatever you pick soon after as the plants will dry out quickly and be much less useful over time.
Step 2: Create Your Flower Pounding Composition
Arrange the flowers to find a composition you like, snipping off leaves, stems, or any other extra bits and pieces as needed. Experiment with different groupings and shapes. Will you build a tall composition or a wide one? Think about how you plan to use the finished, embroidered piece and make sure to leave room around your composition for any necessary seam allowance, etc. You can build the whole composition at once, or work in pieces, pounding the different flower sections as you go. (I like to focus on the flowers first and add the leaves and stems in afterward.)
Step 3: Hammer Away (Gently)
Once you’re happy with the composition, turn the flowers over, face down onto the fabric, and carefully cover with a couple of layers of tissue paper (I like to use two). As you start gently start tapping with your hammer, you’ll see the pigment begin to release.
Continue until you’ve hammered over the entire composition. Then, gently lift the tissue paper to check and see how things are looking. You may find that you need to hammer over some areas more/longer than others, in which case, gently lay the tissue paper back down and continue pounding.
If you’ve not pounded your greenery yet, do so now.
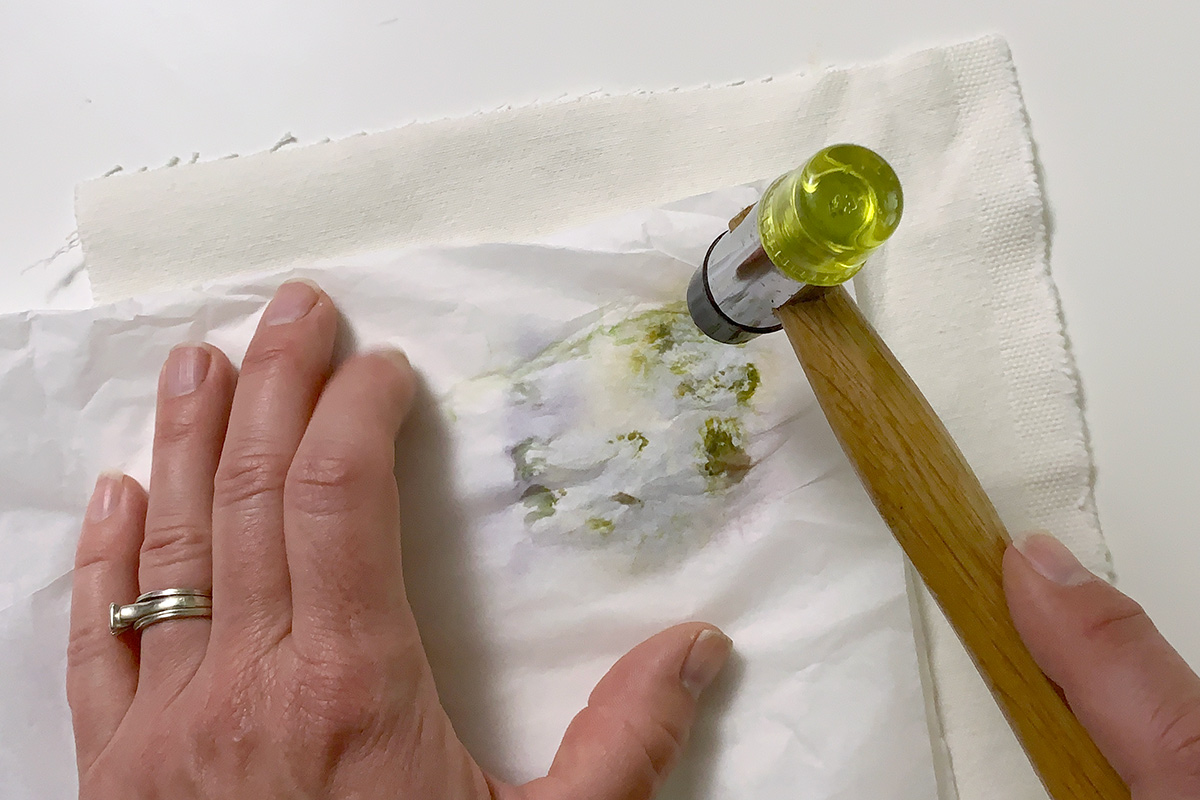
Step 4: Let Dry
Remove the tissue paper and use the tweezers to pull away the smooshed and sticky bits, being careful not to smear them. (You could also just leave the smooshed flowers in place while the whole piece dries, but I’m too impatient.) Let dry.

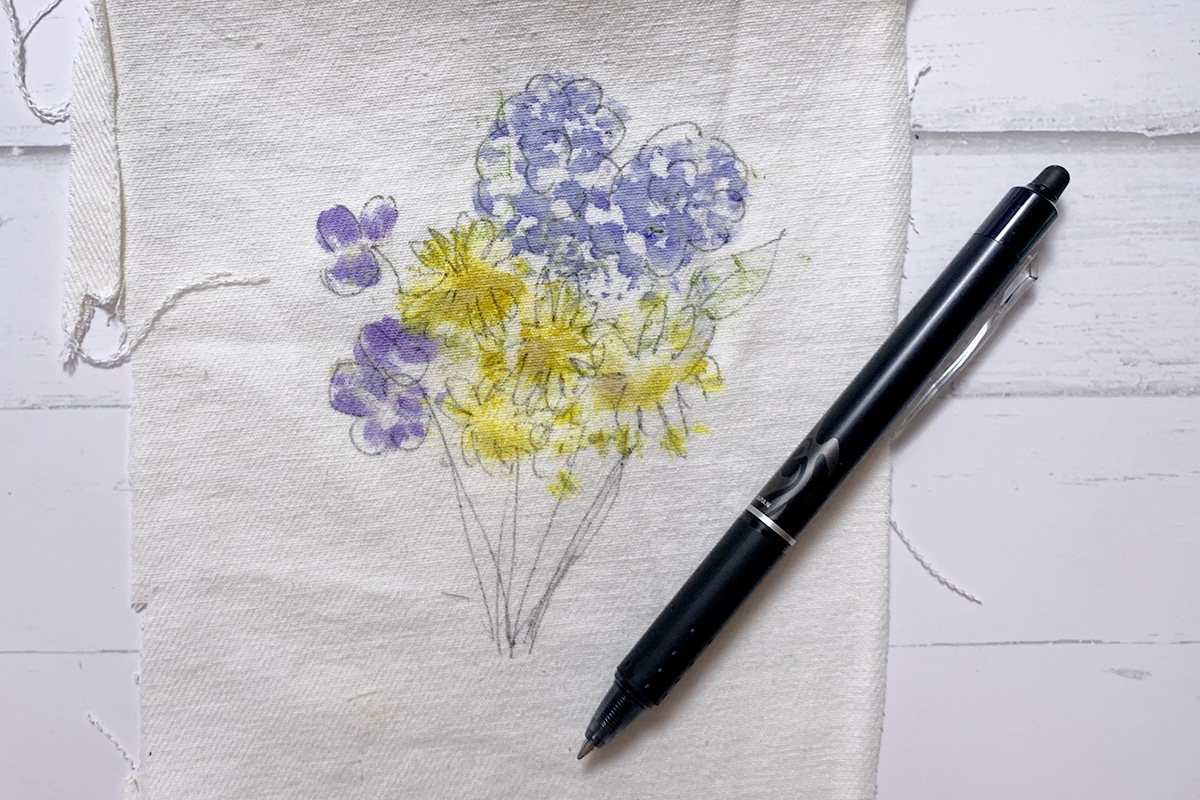
Step 5: Sketch Your Embroidery Design
Using an erasable pen or fabric marker, draw over the pounded flowers to sketch out a rough idea of your intended embroidery design. You can wing this if you prefer, but personally, I like to at least make a rough sketch before stitching—even if I end up straying far from it later. (My version of “free” motion embroidery is heavy on the “free” part. ?)
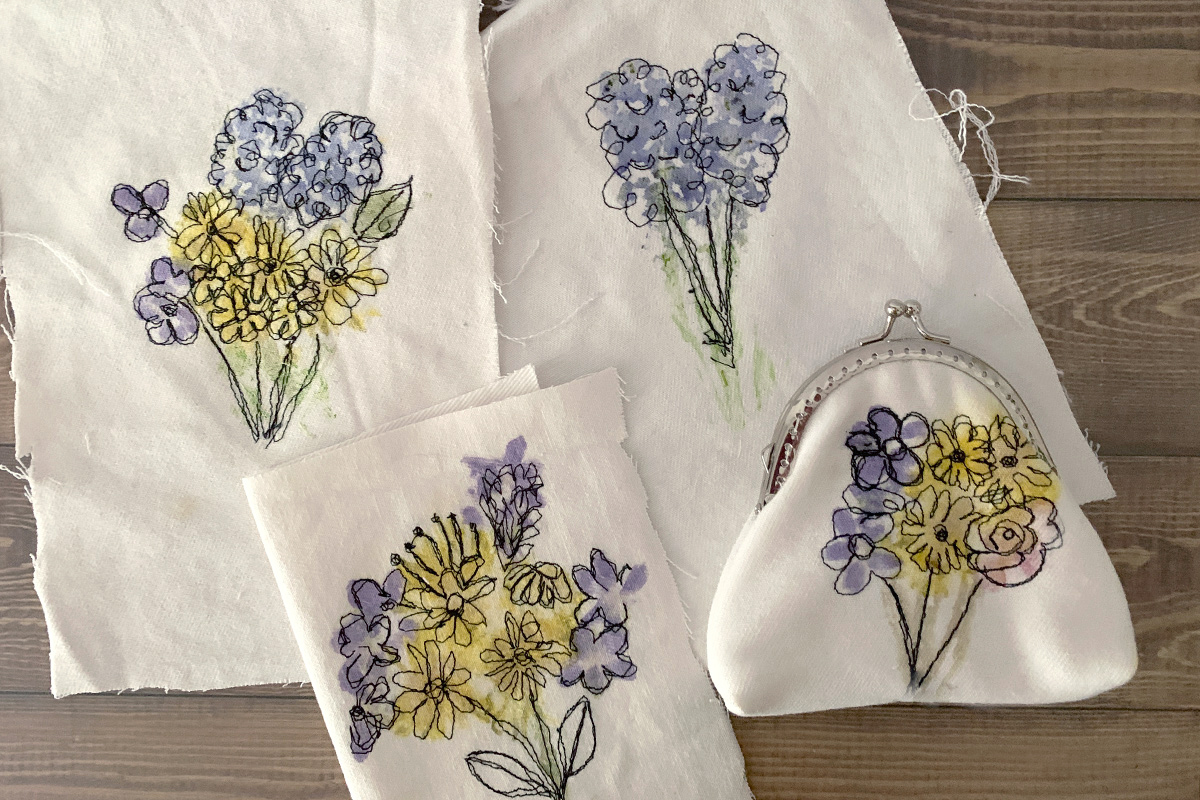
Step 6: Embroider Over Your Flower Pounding
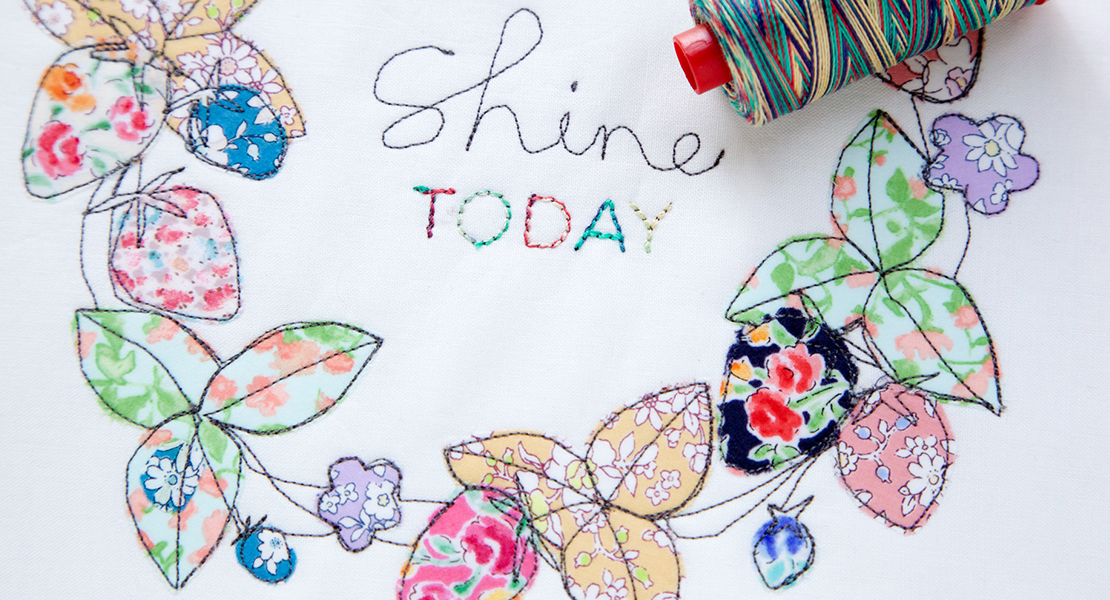
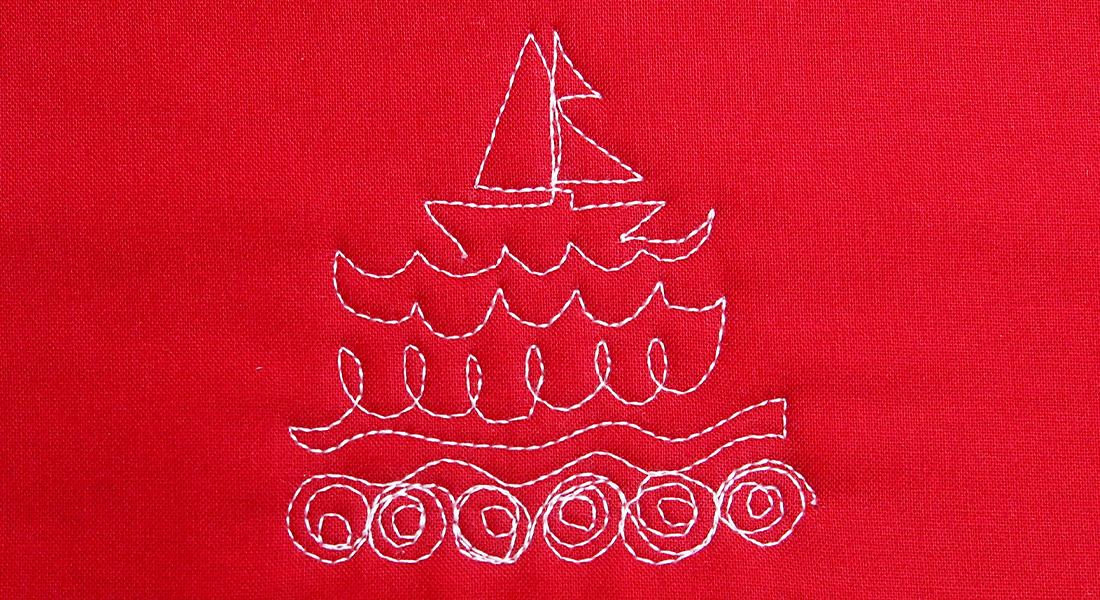
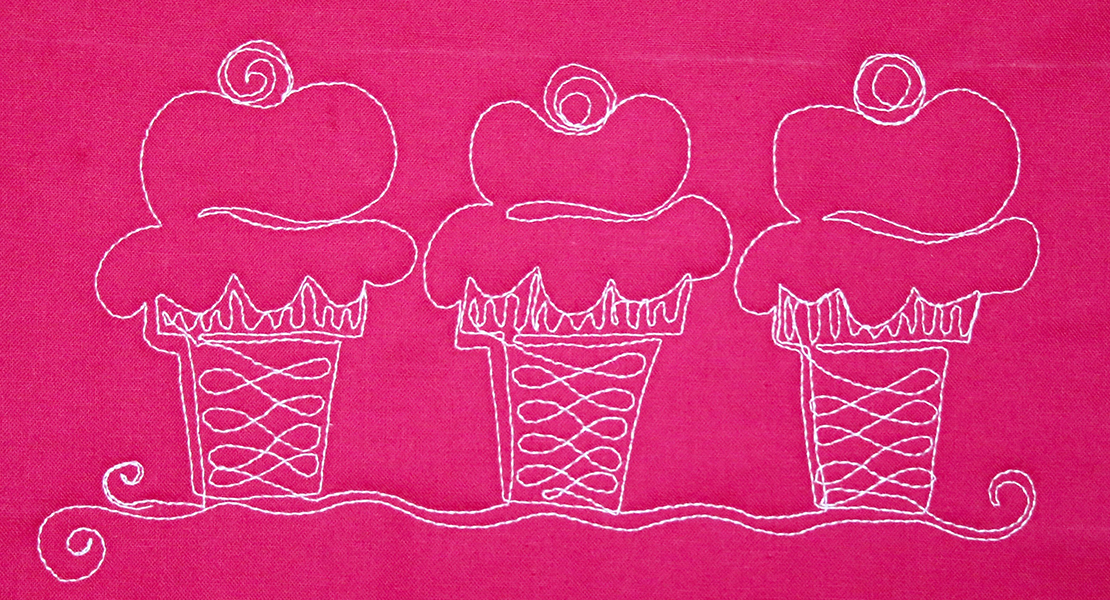
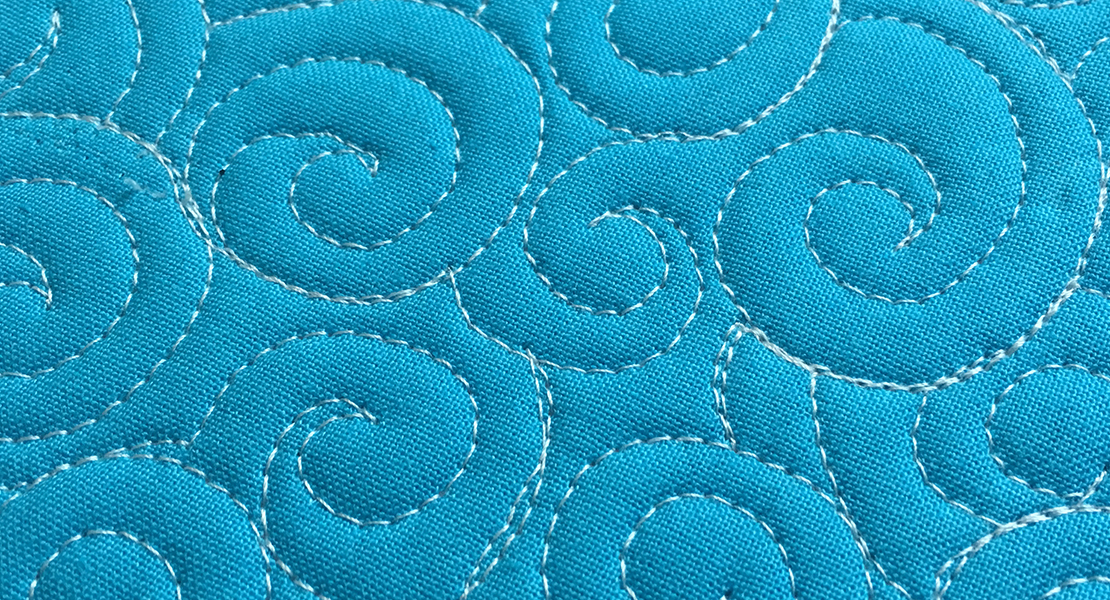
Place your fabric in an embroidery hoop with the stitchable side facing down so that when hooped, the design is right side up when looking at the backside of the hoop. Then, attach your free-motion embroidery foot, drop your feed dogs, slip the hoop under your needle and get to it. It’s not an exaggeration to say that imperfection is really part of the charm here. I don’t have much experience with free-motion embroidery, and I’m quite happy with how my pieces turned out. If I can do it—anyone can.
Depending on your design and the size of your hoop, you may find that you need to rotate your hoop or even re-hoop the fabric to avoid running into the edges of the hoop with your needle.

Step 7: Enjoy Your One-of-a-Kind Flower Pounding Embroidery
When finished, snip any thread tails and you’re ready to use the fabric in your sewing project or finish the back of the hoop and put it on display or give it as a gift! Are you surprised how easy it was to embellish your embroidery with flower pounding? You’ll never look at the weeds in your yard the same way!
Used Products

What you might also like


7 comments on “How to Embellish Your Free-motion Embroidery with Flower Pounding”
-
-
Great question! I definitely recommend heat setting with an iron… but so far, I’ve not washed any of the pieces I’ve pounded (that phrase cracks me up). I would suspect it’s not the most permanent of pigments, so probably best on pieces that won’t need to be washed… Looking forward to input from anyone who has put a pounding through the wash!
-
-
Is it possible to use the my #72 Adjustable ruler foot ?
without the hoop for this?-
Possibly! If you feel like you have enough control and get good results…. then…. that’s all that matters! 🙂
-
-
Is there a pattern for the cute little coin purse ? and if so where do I find it?
-
You can find the free pattern here: https://so-sew-easy.com/how-to-sew-coin-purse-with-a-sew-in-purse-frame/
-
-
great project. I like how this mixed-media type project turns out. Took a minute to figure out why instructions state to place the fabric right side now in the hoop but I get it now, since the process uses a hand embroidery type hoop instead of a machine emb hoop!
Leave a Reply
You must be logged in to post a comment.

This is such a clever idea! Just wondering how ‘permanent’ it is? Do you need to heat set? Can these items be washed? Thanks!