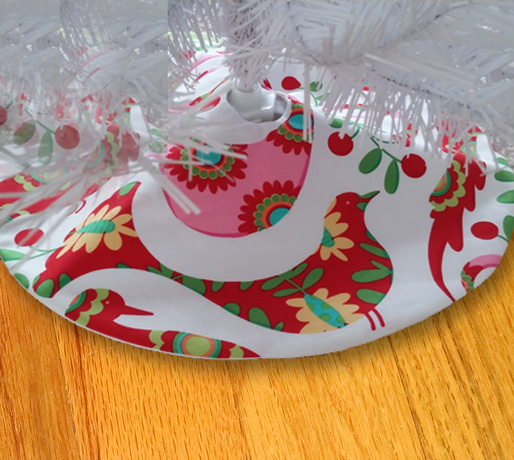
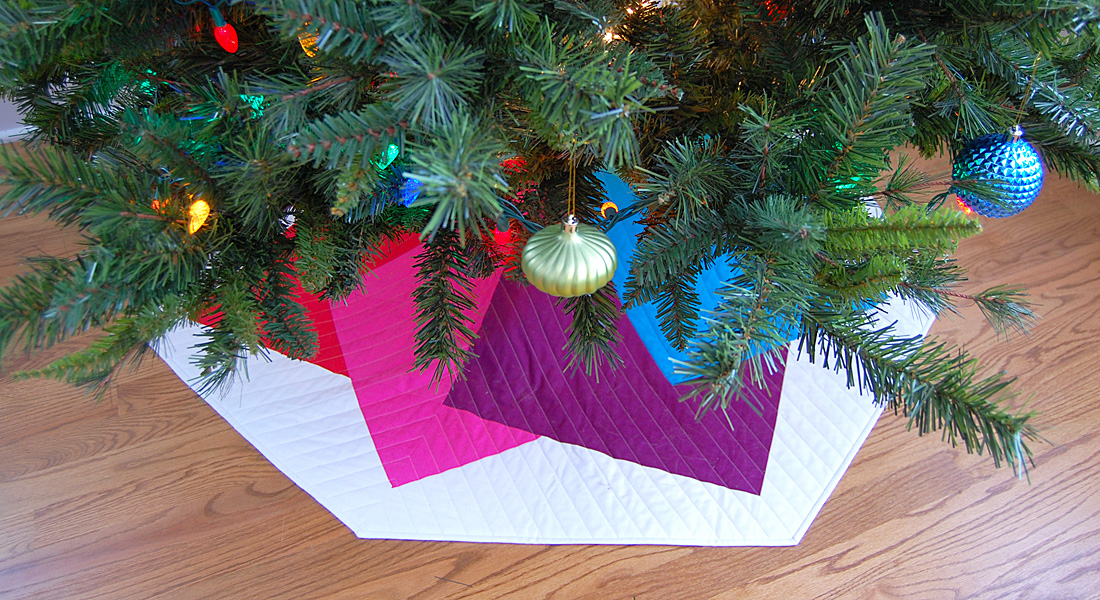
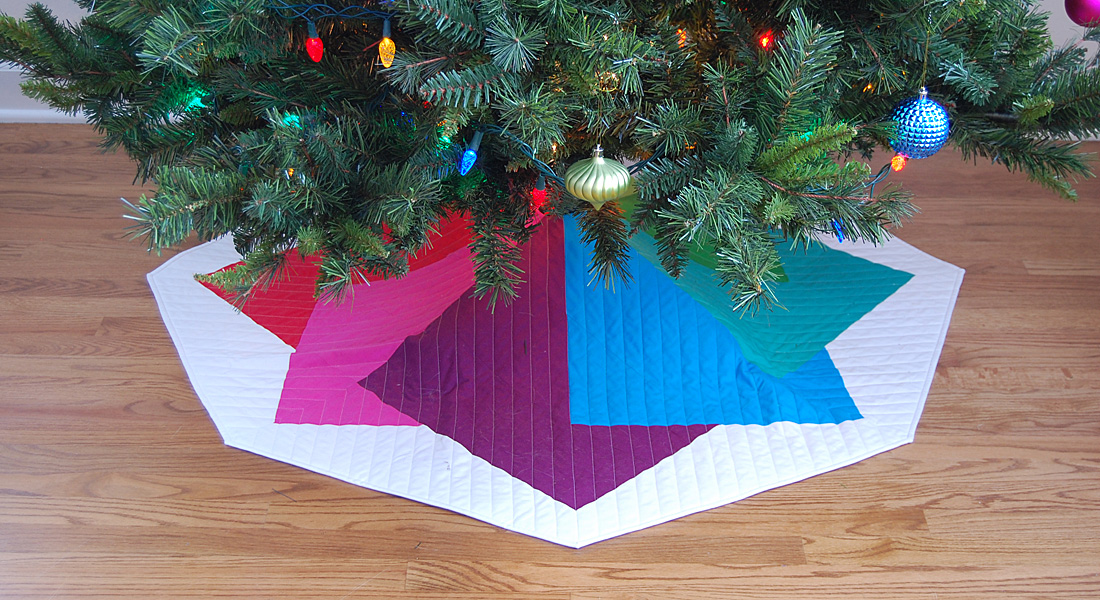
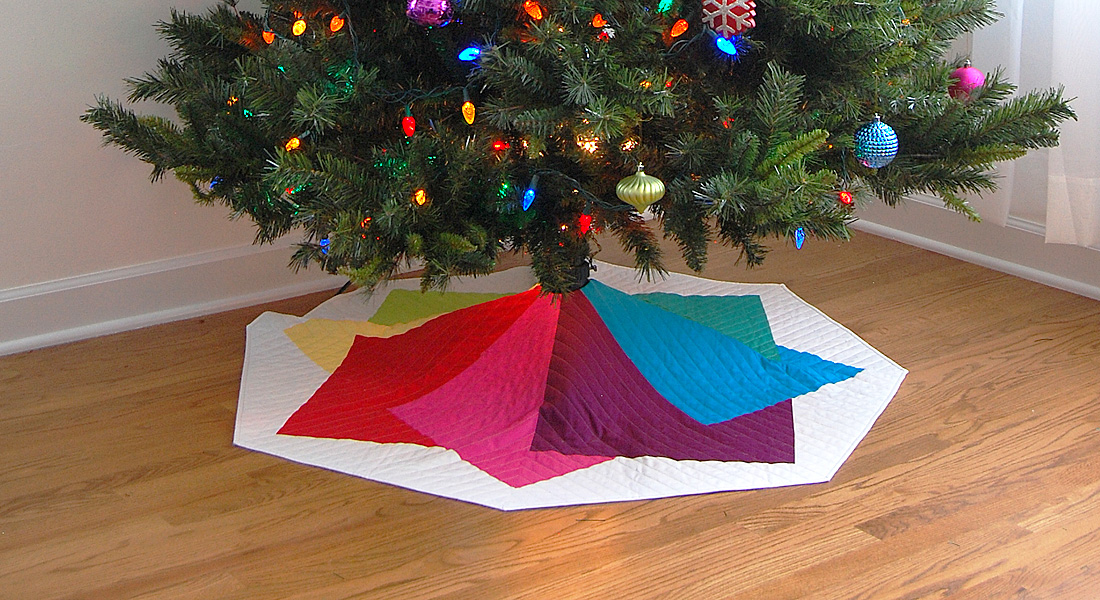
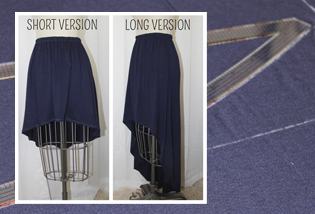
DIY Mini Holiday Tree Skirt
You don’t have to have a giant tree in your home to celebrate the holidays in style. This mini-sized skirt fits tabletop trees and is a great way to dress up your home with just a little fabric.
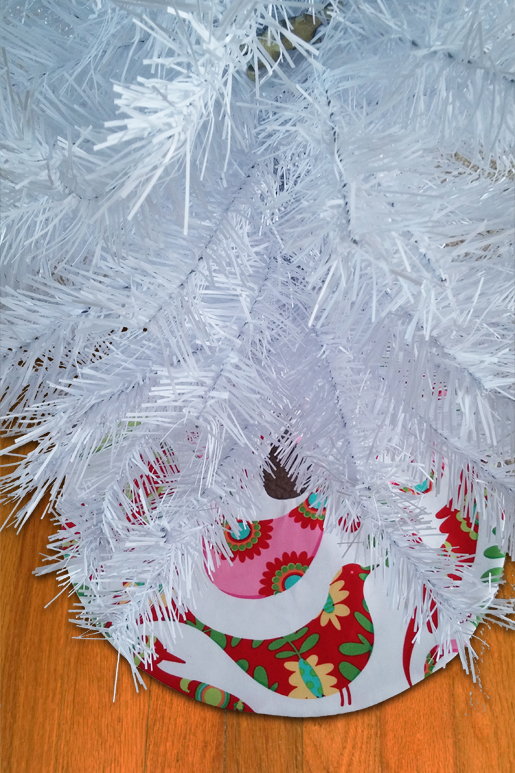
Finished size = 14″ diameter
Supplies
- 1/2 yard fabric* or one fat quarter
- 1/2 yard lining fabric* or one fat quarter
- Thread to match
- Two 1”-long strips of hook-and-loop tape
- Scissors
- 1/4″ foot (BERNINA Patchwork Foot #37)
- Piping foot (BERNINA Piping Foot #38 or Edgestitch Foot #10)
* If working with 1/2 yard of fabric, additional lining fabric does not need to be purchased unless desired; the same material can be used to create the underside of the tree skirt. Materials such as brocade have just as beautiful designs on the “wrong side” of the material as the exterior so the reverse print can easily be used as well.
Step 1) Prepare the fabric.
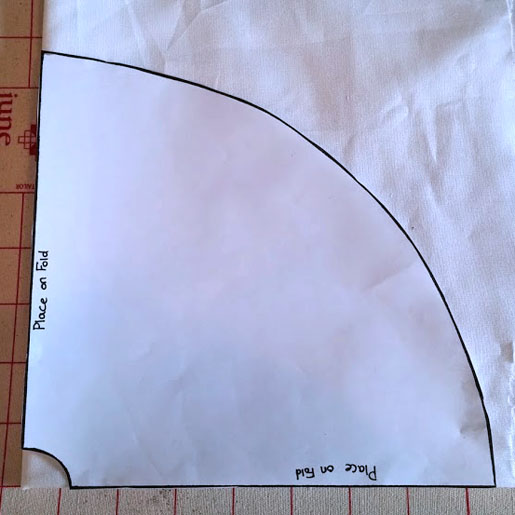
Download and print the Mini Tree Skirt template. Mini_Tree_Skirt_Pattern.pdf
Fold the fabric in half lengthwise and then fold it in half crosswise. Your fabric should now be folded in fourths or quarters.
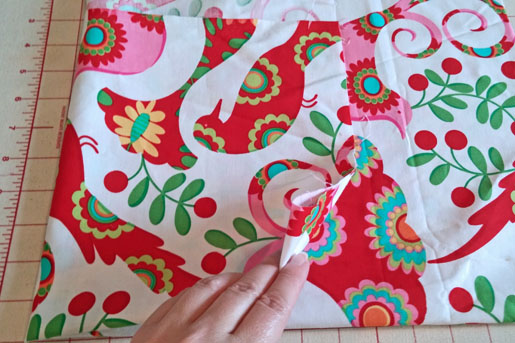
Place the tree skirt template on the fabric along the fold lines as indicated.
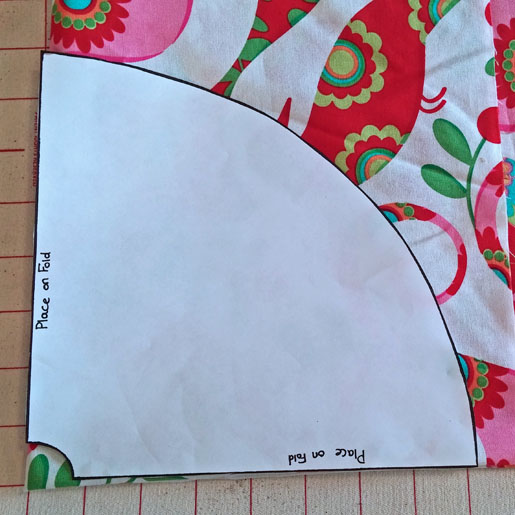
Cut along the CURVED EDGE ONLY.
Open up the folded tree skirt. You should now have a donut-shaped piece of material. Cut a slit from the outer edge to the hole in the middle, perpendicular to the outer edge.
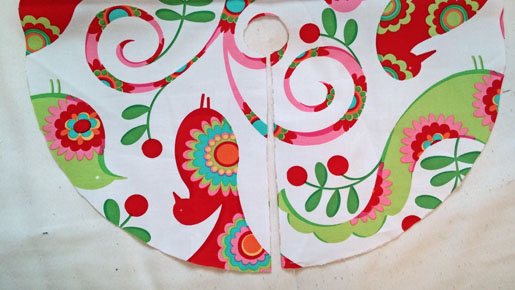
Repeat the above steps to cut out the lining fabric.
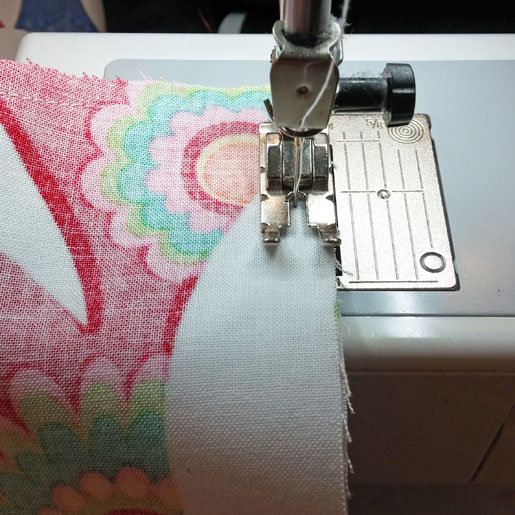
Step 2) Sew the seams.
All seams allowances are 1/4″-wide unless otherwise specified.
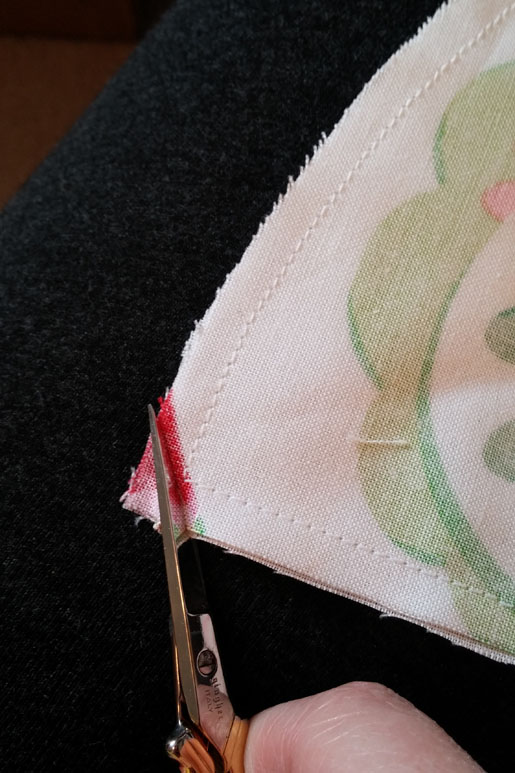
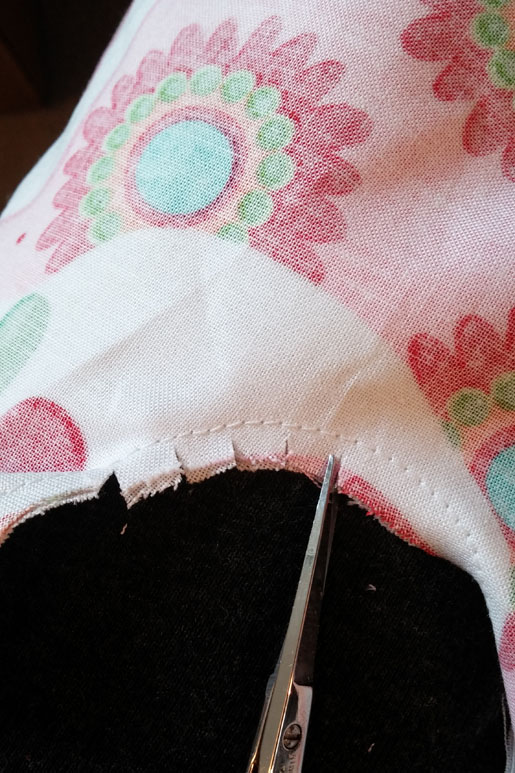
Place the two fabric pieces right sides together and sew around the entire edge, pivoting at the corners. Leave a 3″-long opening for turning in the middle of one straight edge.
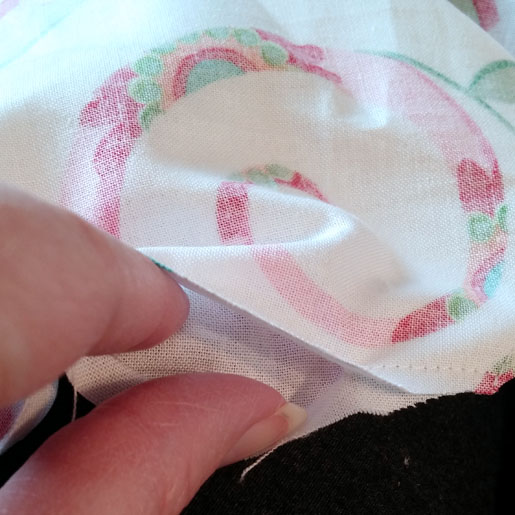
Clip the corners, notch the curves, and turn the tree skirt right side out through the opening.
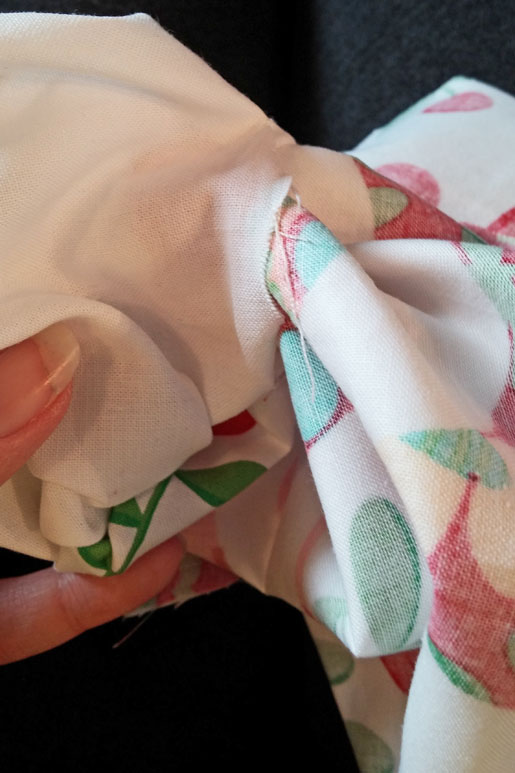
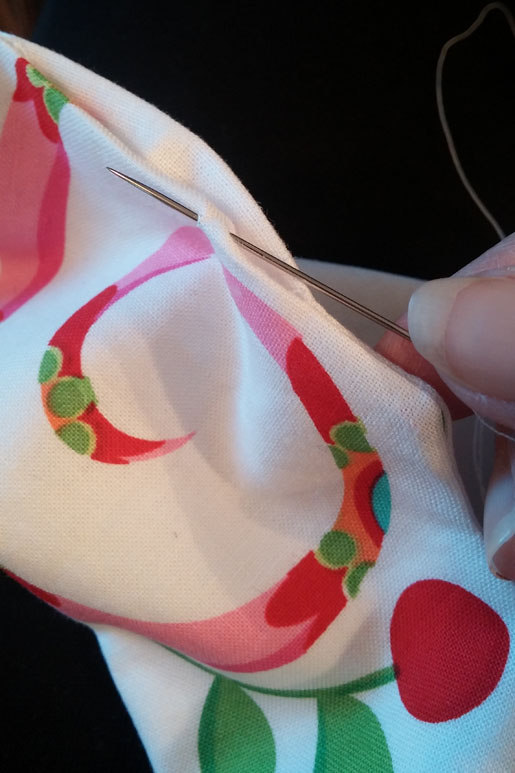
Topstitch if desired or slipstitch the opening closed by hand.
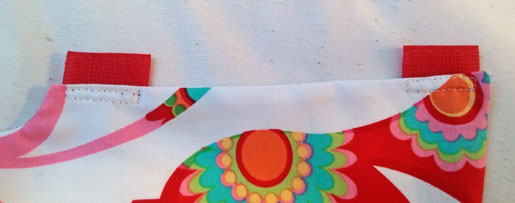
Step 3) Add the hook-and-loop tape closure.
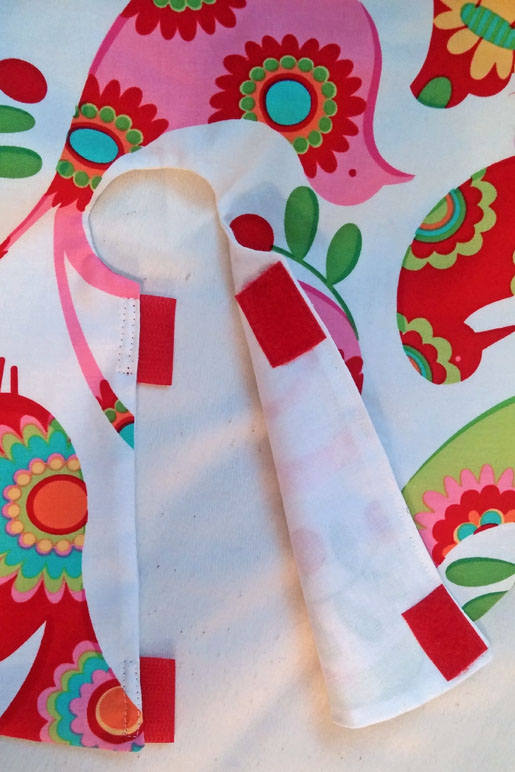
The hook-and-loop tape closure is designed to be hidden and allows the tree skirt edges to come together without overlapping.
Attach the piping foot to your machine. Select a straight stitch and move the needle (or the guide on the foot) to one side so the needle sews a scant 1/8″ from the edge.
With the right side of the tree skirt facing up, place the “scratchy” (hooks) side of a piece of hook-and-loop tape under the tree skirt at the top of one straight edge. Position it so that 1/2″ pokes out from under the finished edge.
Sew it in place with a long rectangle. Repeat for the second “scratchy” piece, placing it at the inner edge of the tree skirt.
On the opposite short edge of the tree skirt, place the wrong side of the “soft” (loops) side of the hook-and-loop tape under one corner of the tree skirt on the right side of the lining, matching the raw edges. This piece should NOT hang over the finished edge. Repeat for the second “soft” piece, placing it at the other corner of the short edge.
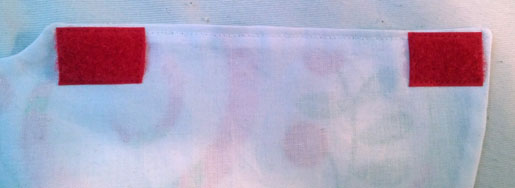
To join the two edges, place the “soft” pieces over their “scratchy” counterparts and press into place.
Done!

Variations
- Have a fun, colorful tree? Use a whimsical print material and embellish it with miniature ball fringe or other trim. For this you’ll need 1-3/8 yards of trim and a piping foot.
- For an elegant, modern look, use white velvet fabric and trim it with gold piping. Depending on the size of the piping you may want to use a zipper foot (BERNINA Zipper Foot #4) or larger piping foot (BERNINA Bulky Overlock Foot #12 or Double Cording Foot #59 or #60).
- Embroider a solid color skirt with miniature designs such as OESD’s Christmas Minis #1 (collection #11929), Holiday Minis #1 (collection #11634), available from Embroidery Design Studio and embroideryonline.com.
- Keep your mini-tree out all year and make a wardrobe of seasonal and special occasion tree skirts, such as this Day of the Dead tree skirt.


4 comments on “DIY Mini Holiday Tree Skirt”
Great idea! I looooove that fabric.
It’s me again….please tell me what the name of the colourful fabric with the birds… I’d love to get some. Thanks!
Hi Michele!
It’s Michael Miller’s Pretty Bird (in the Santa Red colorway). I believe it is out of print, but you can still find some sellers that have some yardage on Etsy and Ebay. Hope that helps!