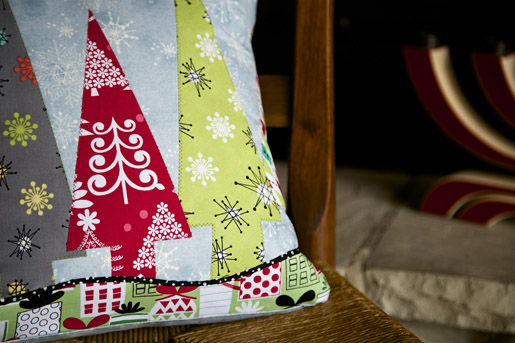
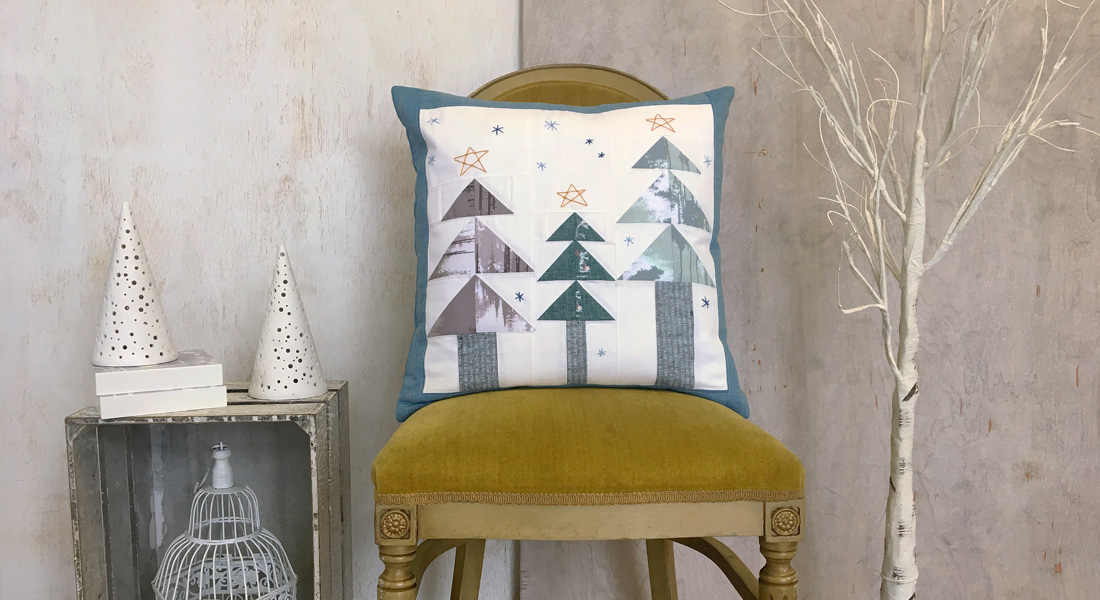
DIY Holiday Trees Pillow Cover
A fun and easy-to-make holiday project from fiber artist Sue Bleiweiss. Sue’s Tutti Frutti City Skyline won second place last week in the Whimsical Art Quilt category at this year’s Houston International Quilt Festival. Congratulations, Sue! Visit Sue at her blog, www.suebleiweiss.com.
I like to dress up my sofas and chairs for the holiday season by switching out my everyday pillows with holiday themed ones. Pillows can be hard to store from season to season because they take up a lot of room so rather than having a separate set for each season I have one set and I make easy changeable covers for them. This envelope style pillow is really easy to make, goes together really fast and has the added benefit of being easy to take on and off the pillow form for washing and storing.
My directions are to cover a small 12″ pillow form. If you are making a larger pillow you will need to adjust your measurements accordingly.
Supplies
- A selection of holiday-themed fabrics for the trees
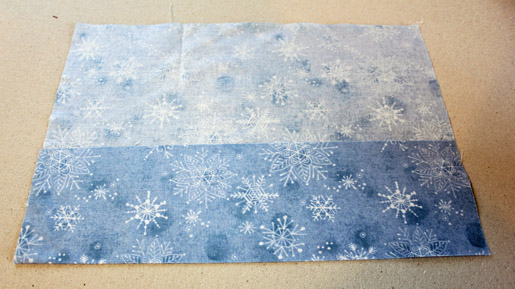
- 1/2 yard of fabric for the background and the pillow cover backing (Note that this is for a 12” square pillow cover; if you are covering larger pillows you will need more fabric.)
- One 14″ square of non-woven interfacing
- One 2-1/2 yard package of Mistyfuse fusible web
- Craft paper (optional)
- Tracing paper (optional)
- 1/4″ foot (BERNINA Patchwork Foot with Guide #57)
- All-purpose foot (BERNINA Clear Foot #34)
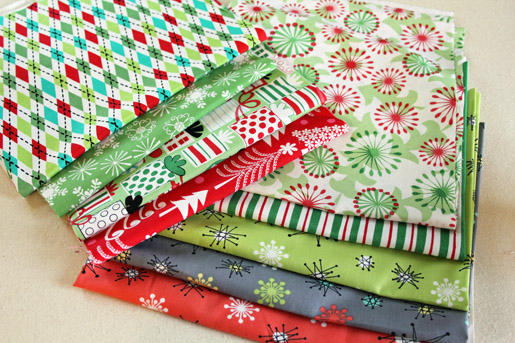
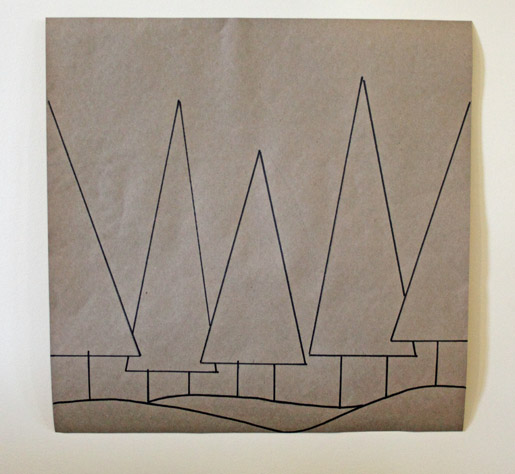
I always begin my projects by making a full-size pattern drawing first. This not only saves me a lot of wasted fabric but it gives me a chance to adjust the scale of my design so that I can make any changes before I start cutting into my fabrics. I also take the time to pre-fuse all of my fabrics by putting a layer of Mistyfuse on the wrong sides. Then once I am ready to start cutting my fabrics I don’t have to stop to add any fusible.
Step 1) Prepare the drawing.
Cut a piece of craft paper 14” x 14” and draw your design. I kept my tree shapes simple and varied their height. Once I was happy with my design I traced it onto tracing paper and cut up the copy for templates for cutting the pieces out of fabric. This allows me to save and re-use my craft paper copy.
Tip: Use a pencil and straight edge to draw basic triangles as I did below, or change the tree shape to a more traditional fir tree shape or a whimsical wonky shape.
Step 2) Prefuse the appliqué fabrics.
Cut pieces of Mistyfuse large enough to accommodate your tree and landscape pattern pieces.
Fuse the pieces to the wrong side of your tree and landscape fabrics following the manufacturer’s instructions.
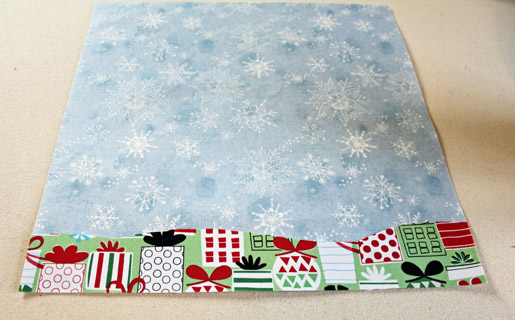
Step 3) Cut the pillow front and back pieces.
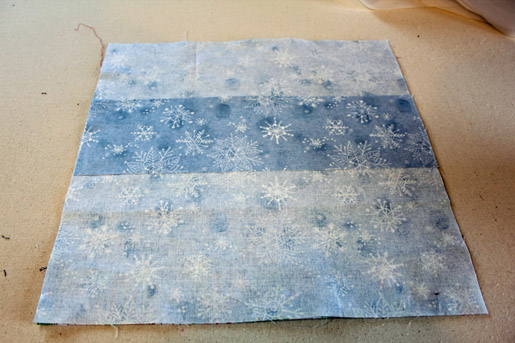
Cut three 14″ squares from your background/backing fabric. Set two of the pieces aside to be used later for the pillow backing.
Fuse a layer of interfacing to the wrong side of the third piece. This is the pillow front.
Step 4) Create the appliqués.
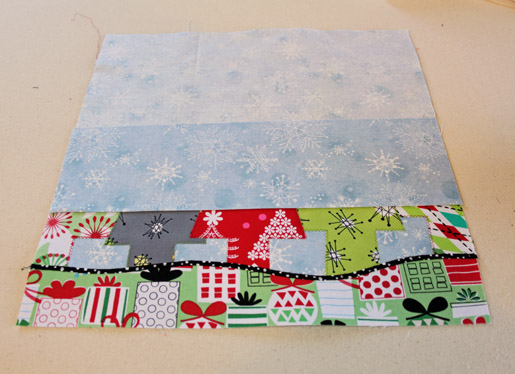
Use your tracing paper copy to cut out the shape of the hills along the bottom of the pillow. Fuse the hills onto the pillow front.
Use your tracing paper copy to cut out the shapes of the trees and fuse them in place onto the pillow front.
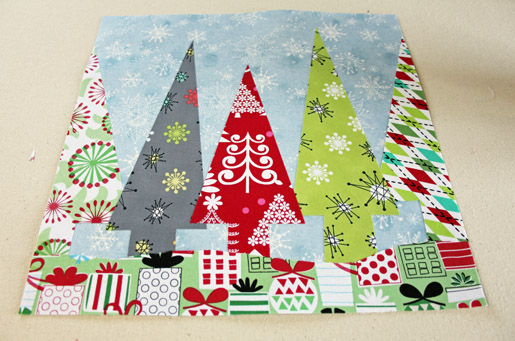
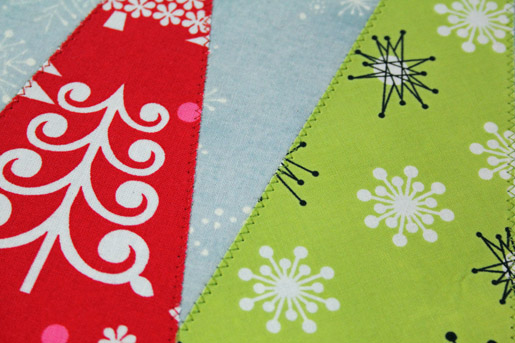
Set your machine for a narrow zigzag stitch and sew along the edges of the trees and the hills.
Step 5) Add a decorative outline (optional).
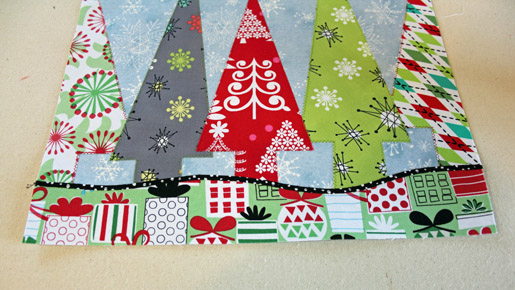
I wanted to create an outline for the hills so I fused a 1/4″-wide strip of polka dot fabric along the edge and then I stitched over the strip using a straight stitch right down the center with black thread.
Set the pillow front aside while you prepare the back pieces.
Step 6) Construct the pillow cover.
With the wrong side of one of the back pieces facing up, fold one edge over 4″, wrong sides together. Repeat this step for the other back piece.
Place the pillow front on your table right side up. Place one of the backing pieces on top, right side facing the pillow top, aligning the top raw edge of the backing piece with the pillow front.
Place the other backing piece on top, right side facing the pillow front, aligning it along the bottom raw edge.
The folded edges of the pillow backings should overlap in the middle of the pillow front. You may want to use pins to keep everything from shifting while you sew.
Sew along all four edges using a 1/4″-wide seam allowance, Trim the corners diagonally to reduce bulk.
Turn the pillow cover right side out, gently pushing out the corners with a point turner.
Insert your pillow.

There are many ways you can customize this simple tree design to make it your own:
- Add some button embellishments to the trees.
- Add some sparkling beads or heat-set crystals to the background to give the appearance of falling snow.
- Change the tree shape to a more traditional fir tree shape or give your trees a more wonky shape.


4 comments on “DIY Holiday Trees Pillow Cover”
Thanks for the inspiration. I am making mine 18X12. In the process of making 9 of them as gifts for my sisters and sister-in-laws.
I am planning to use this on a child’s sweatshirt front. Looks like a fun component for a table runner with some other winter/holiday blocks as well.
Does anyone know what the fabric collection is called? Love it and the pillow! Thanks!