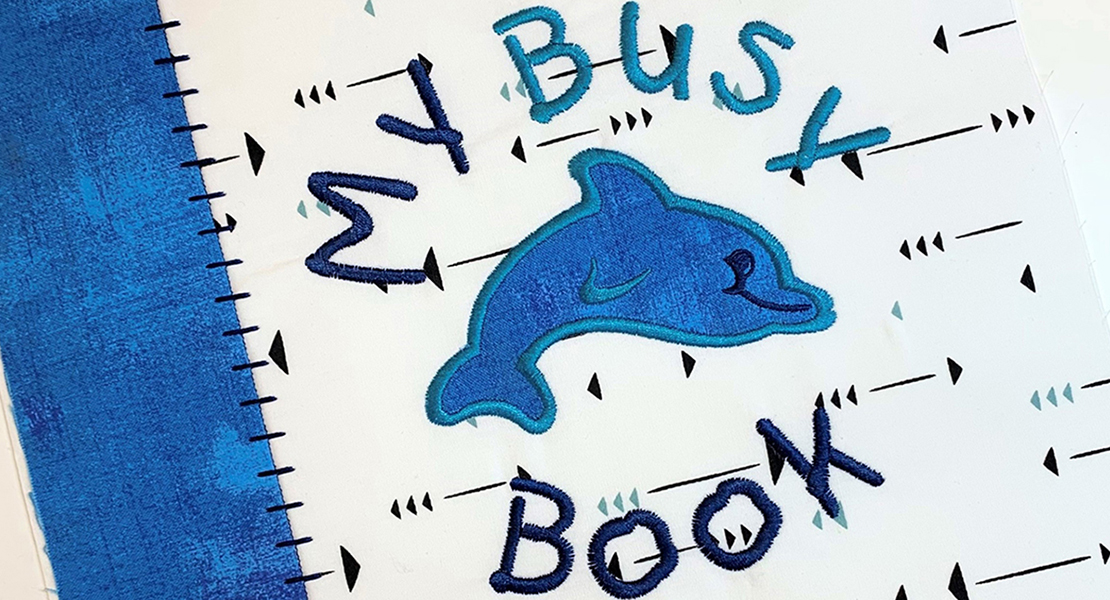
Kids Busy Book Series, Part 7: 2 for 1 Shapes and Colors

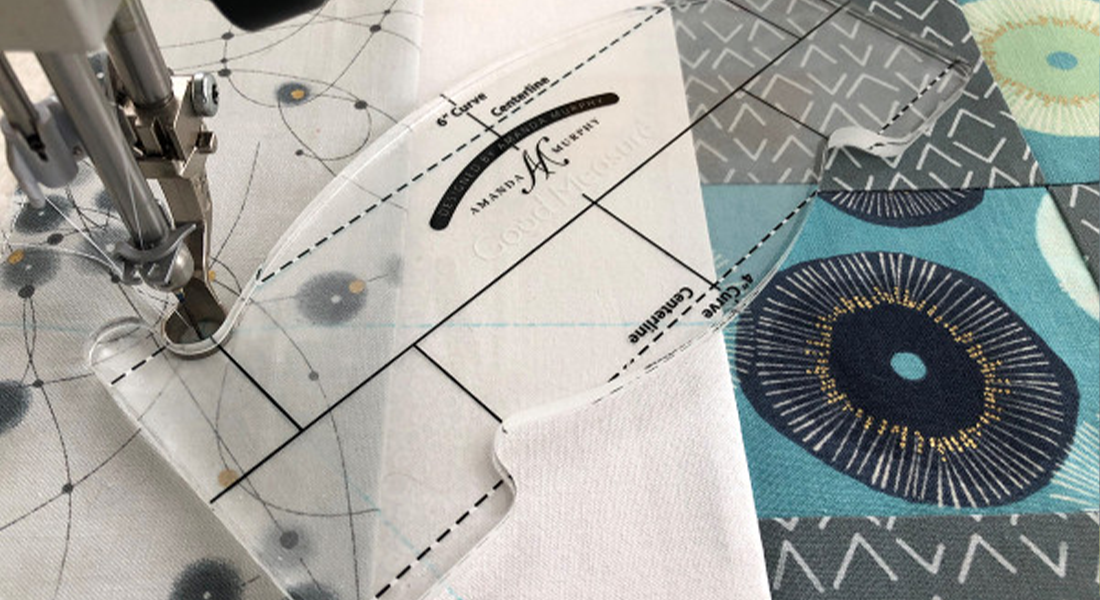
Welcome to Kids Busy Book Month 7! I hope you have learned many new techniques and tips over the last few months. If you want to go back to a previous busy book page, the links are at the end of this post. This month we will complete one busy book page using two background fabric pages back-to-back. I am going to demonstrate the BERNINA Eyelet Embroidery Set—this set is incredible when it comes to making eyelets! But, you don’t have to have this set to make the page. I will show how to stitch eyelets using your machine’s built-in eyelet stitch also. However, I have a feeling the Eyelet Embroidery Set will be on your wish list after seeing it in action! If you have the BERNINA Big Book of Feet, you can find more information about this set and the many ways to add eyelets to your future projects.
We’ll also make felt shapes for this page using the embroidery module. In previous tutorials, we have made felt shapes by tracing and cutting. This month, we are going to let the machine do the work for us. I have included a file with 7 different shapes. I created the shapes in my BERNINA Embroidery Software 8.2. I think you’ll appreciate the speed and ease of this method. When we have finished, I’ll show two different activities for this page. It’s a 2 for 1! Let’s get started!
It is helpful to read entire post before starting project.
Machine Set Up
- BERNINA 590 E
- Open Embroidery Foot #20C/20D or Eyelet Embroidery Set #82 with Eyelet Foot #92
- Download the Shapes and Eyelets designs and load them on the USB Stick
- BERNINA Oval Embroidery Hoop
Materials to Create the Shapes and Colors Page for the Kids Busy Book
- 2 – 10” x 10” background fabric
- 2 – 10” x 10” OESD Heavy Weight CutAway or Ultra Clean & Tear Fusible Stabilizer
- Temporary adhesive spray, such as 505
- Stiletto
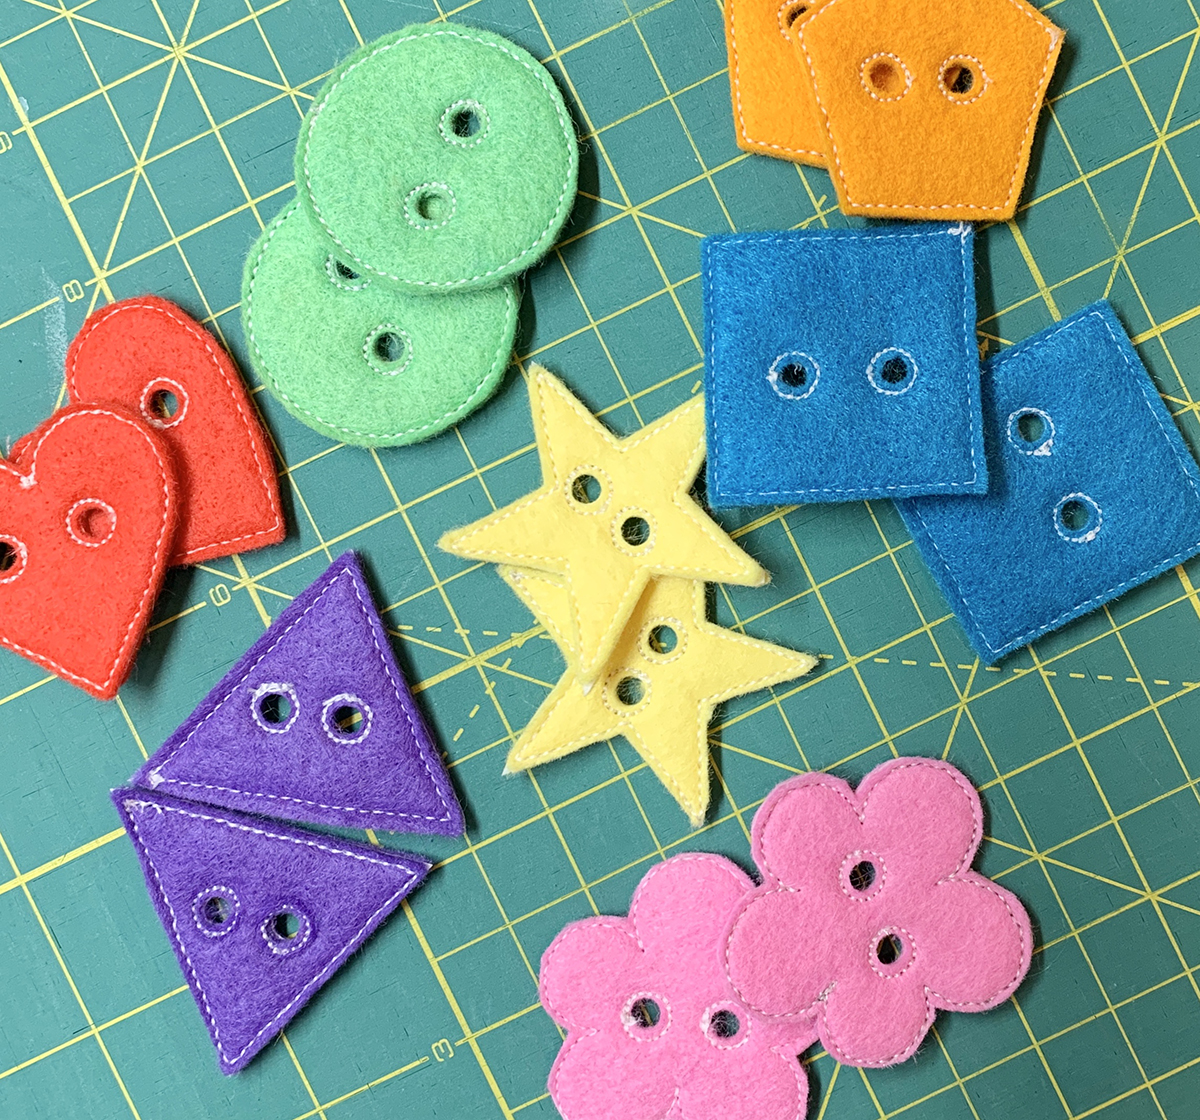
- 4 – 2” x 2” felt in each color – red, yellow, orange, purple, blue, green and pink
- 40 or 50 wt thread – red, yellow, orange, purple, blue, green and pink
- 40 or 50 wt thread – white
- Awl or fabric hole punch (included in the Eyelet Embroidery Set)
- 1 shoelace
- Optional: chenille stems (pipe cleaners)
Background Page Prep
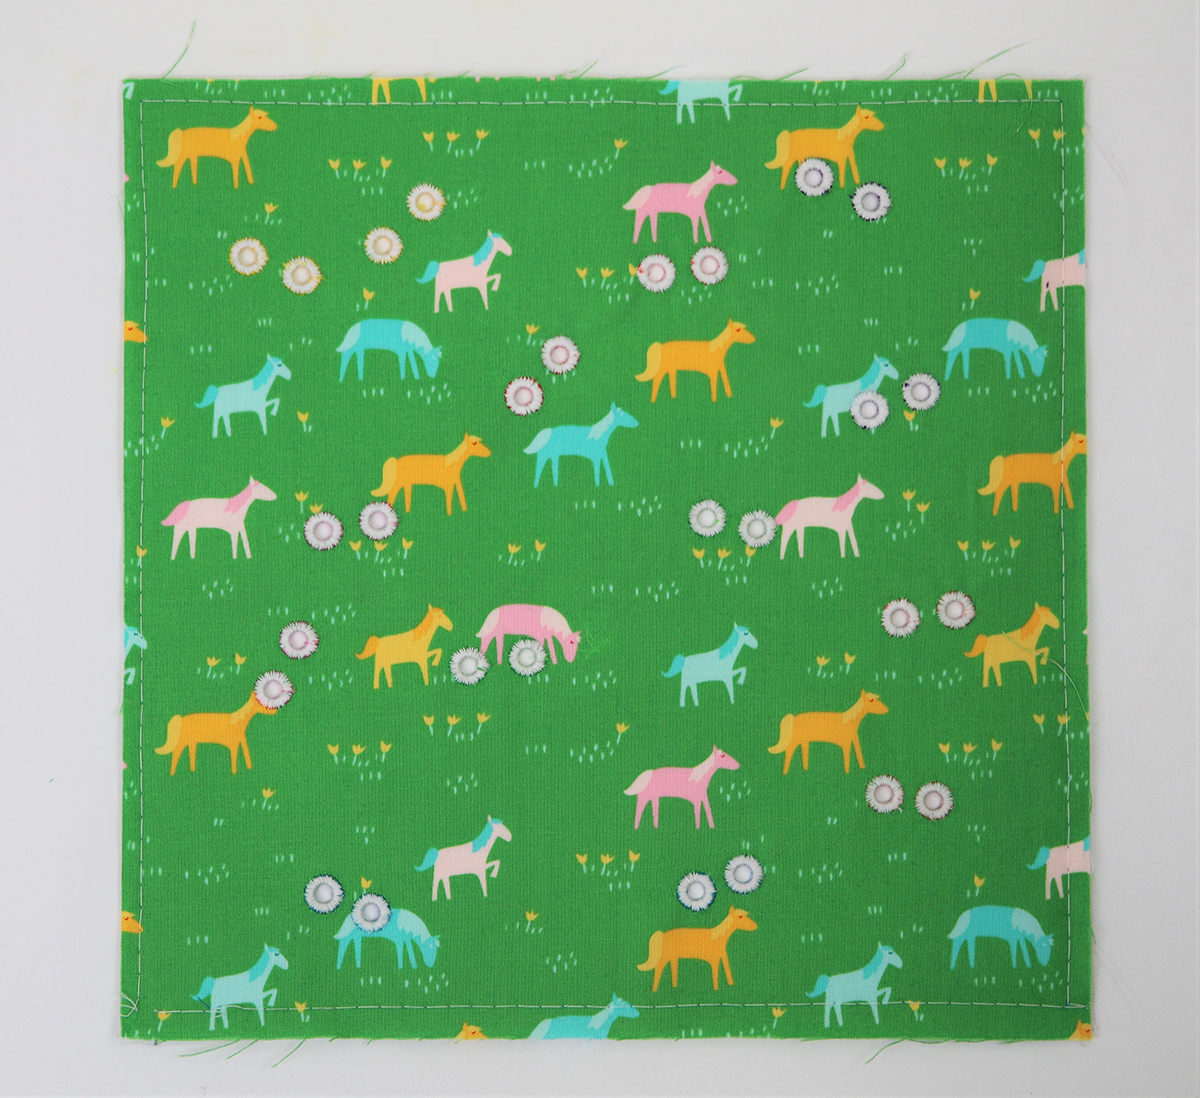
This month instead of using the fusible stabilizer, let’s try the OESD Heavy Weight CutAway Stabilizer. I thought we might experiment with a different stabilizer, but feel free to use the fusible stabilizer again. The Heavy Weight CutAway is not fusible so we’ll use a temporary adhesive spray to adhere the fabric to the stabilizer. I use an empty cardboard box to contain the spray. Place your fabric in the box right side down and spray. Then place the fabric on top of stabilizer.
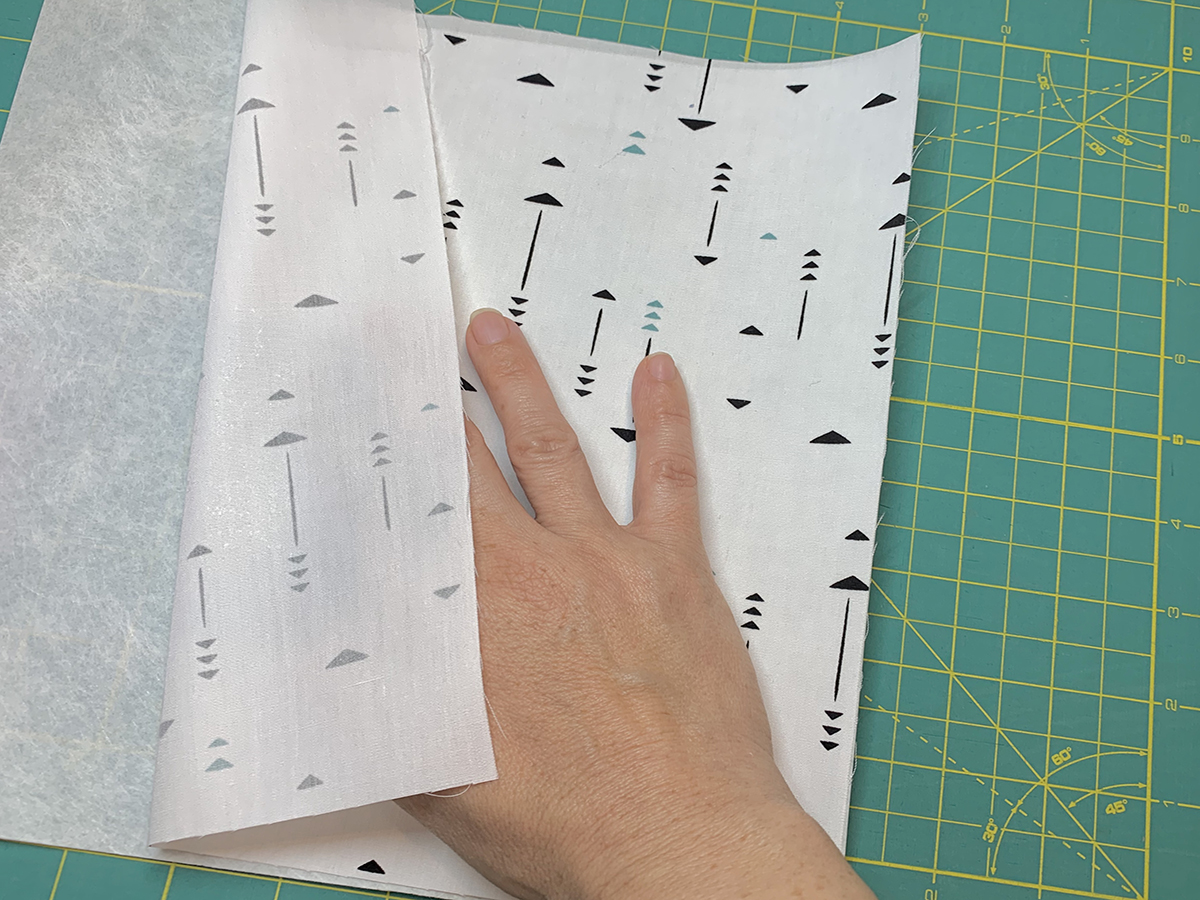
Do the same for the second background fabric page. I am using a fun fabric since its only purpose is to be the back of the busy book page. If you have never made eyelets before, you might want to make a practice piece now to experiment with first.
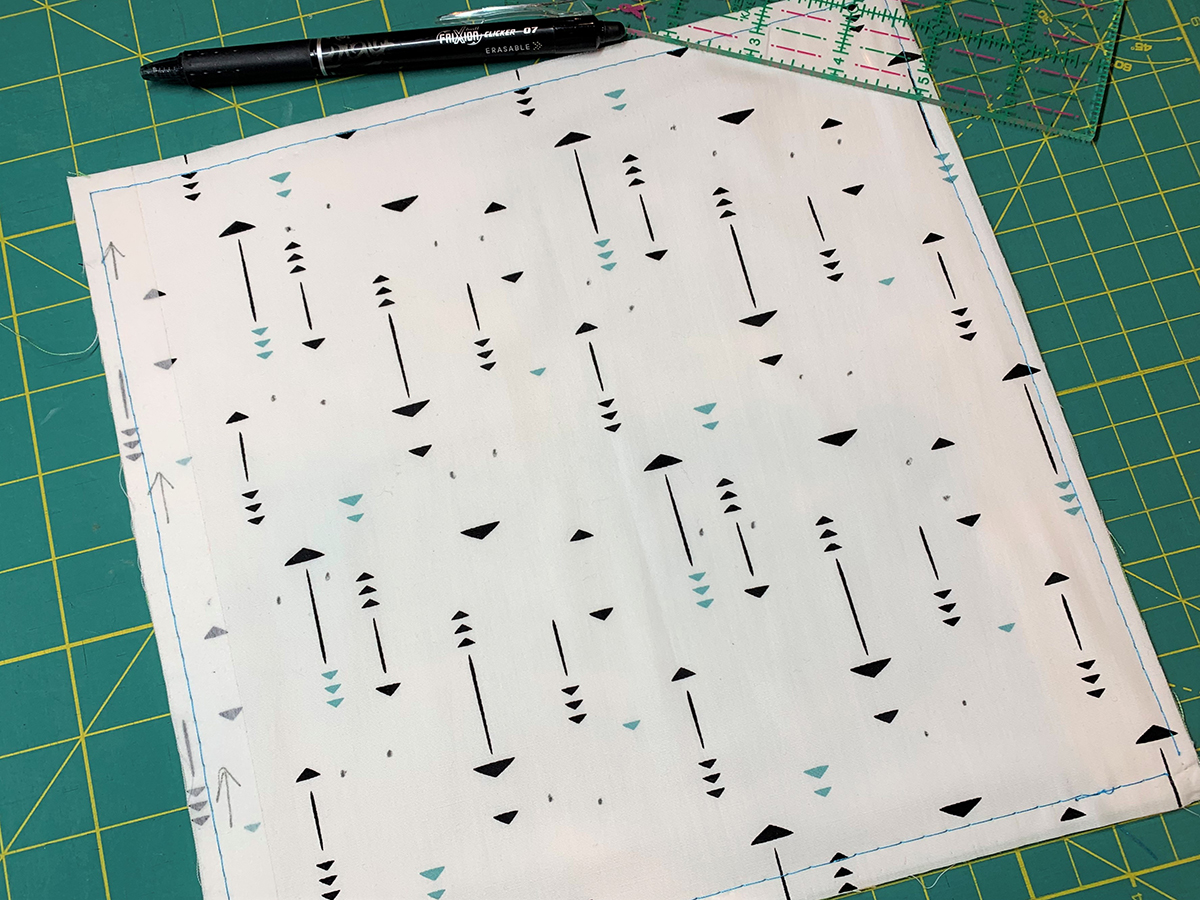
Now, we want to secure the background pages together back-to-back. You have three options: spray baste, binder clips, or basting stitch. I did a basting stitch. Add temporary tape down one side where the buttonholes will eventually be stitched. This will remind you not to stitch the eyelets in this area.

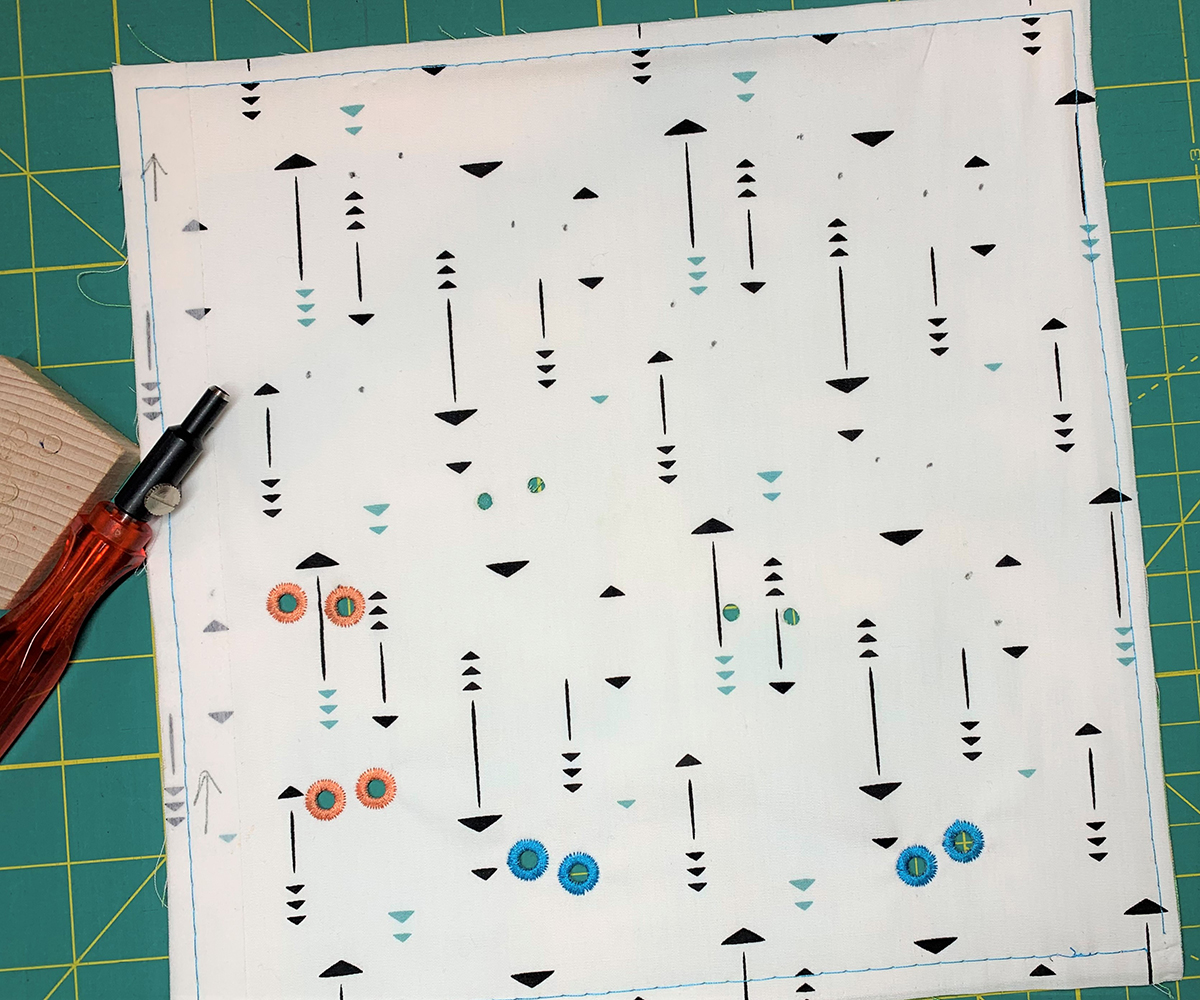
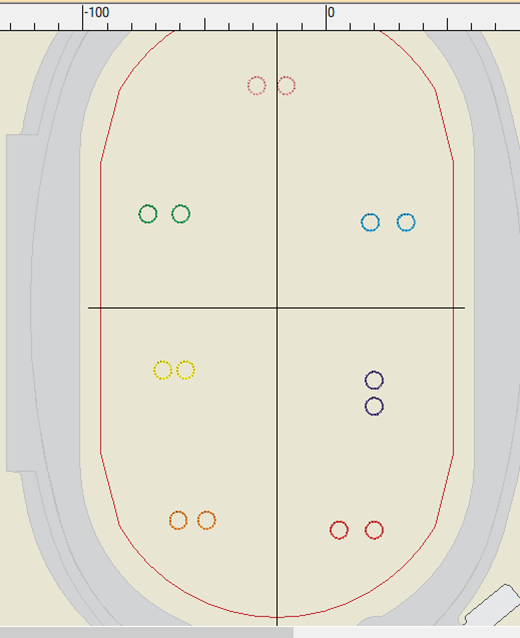
At this point, you need to decide where to sew the eyelets. You will need 2 pairs of eyelets in each of the 7 colors for a total of 28 eyelets.
2 pairs of eyelets = 4 eyelets x 7 colors = 28 eyelets
If you want to practice sewing eyelets, this is a great project! Before marking the 28 eyelets, there is one rule. Make the second mark in a pair 1/2” from the first mark. This is the distance between eyelets in each felt shape. It doesn’t matter how far apart pairs are from one another, just the distance between eyelets in a pair.
Eyelets
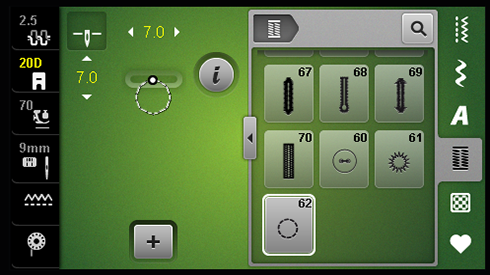
Option 1: Eyelets with Open Embroidery Foot #20C/20D
At your machine, attach Open Embroidery Foot #20C/20D. Go into the Buttonhole Program Menu and select Eyelet #62. Change the Stitch Width and Stitch Length to .7 mm on the machine screen or by using the Multi-function knobs. Eyelet #61 is a nice eyelet also but it is too small for this project.
Select your first color thread. Decide where you want to add the first 2 pairs. You can have them close together, at opposite ends, or anywhere in between!
Remember to change thread color every 2 pairs! Continue until you have all eyelet pairs sewn in the 7 colors. Using an awl or hole punch, make the eyelet holes avoiding the stitches.
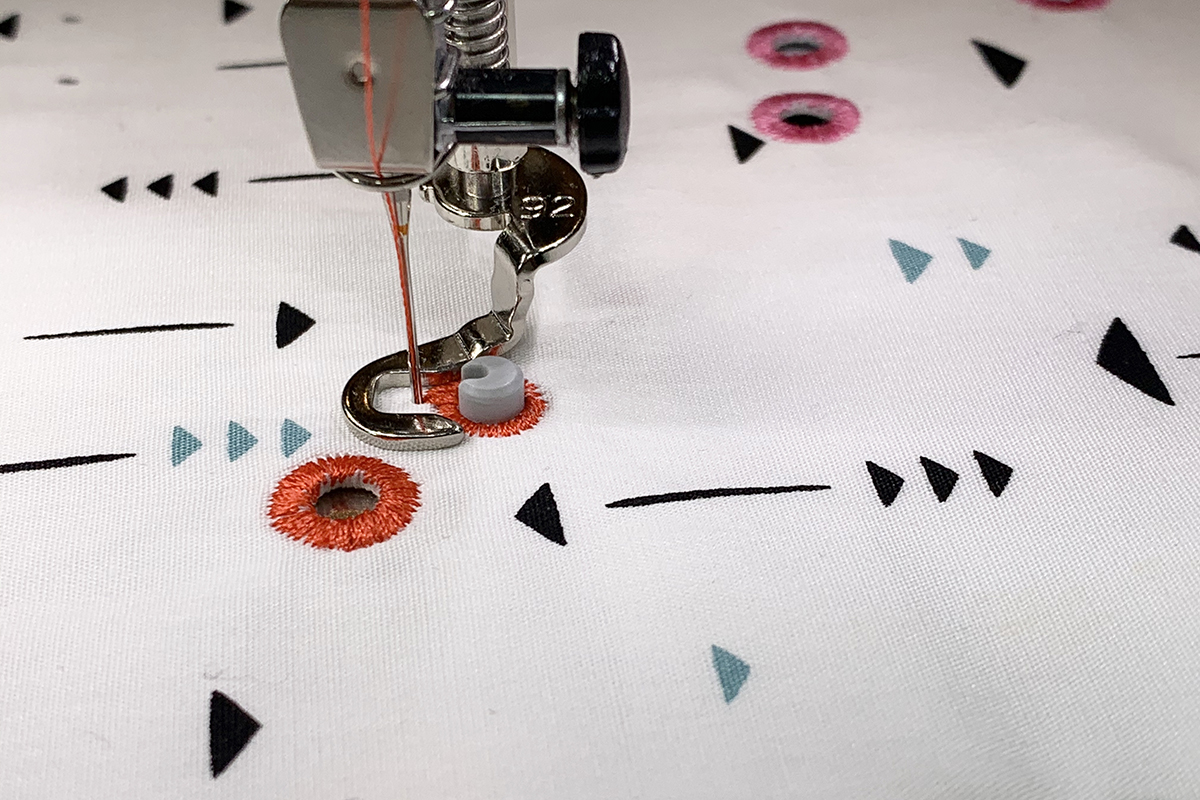
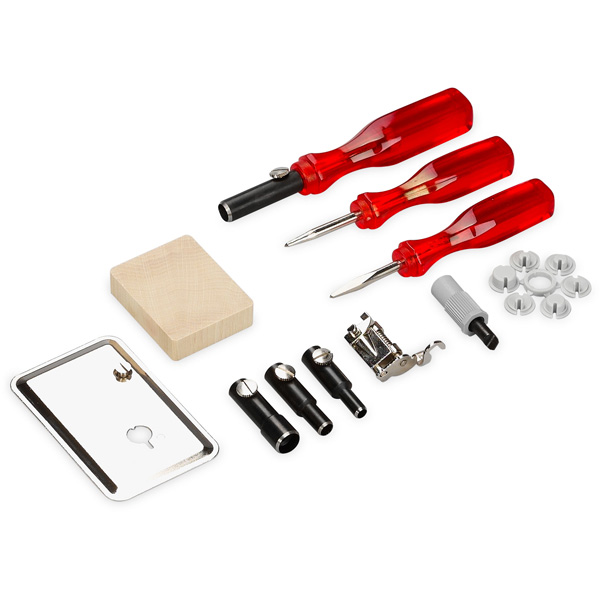
Option 2: Eyelet Embroidery Set #82 and Eyelet Foot #92
At your machine, select foot #92 and a 9 mm stitch plate. Select Zig Zag Stitch #2 and change Stitch Width to 2 mm. It doesn’t matter what the stitch length is set at since the feed dog is lowered. Change the Needle Position to 2. Go ahead and lower the feed dog.
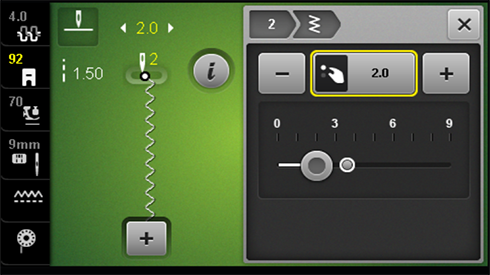
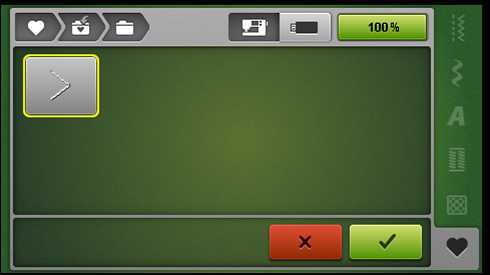
With this eyelet method, we need to go back and forth between a 2 mm stitch and a 4 mm stitch. Since we are repeating this 28 times, let’s save these stitches in our Personal Memory Tab to speed things up. Select the Personal Memory Tab (heart icon). Select Save Stitch Folder (icon with arrow pointing into folder) and choose one of the 4 folders. Tap the green checkmark.
Do the same for Zig Zag Stitch at 4 mm and Needle Position at 2.
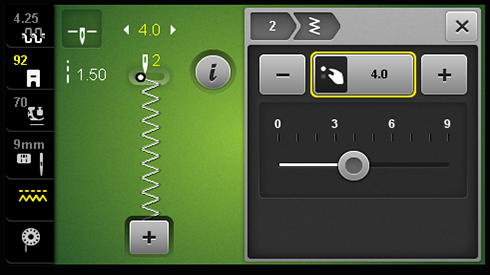
Now with this screen up, you can select 2 mm and 4 mm stitch easily and quickly.
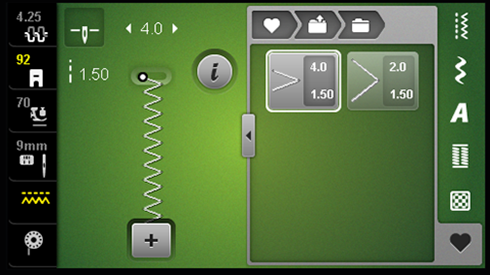
Notice the red number that indicates a needle position change does not show up in Personal Memory. However, the needle is in the position that we saved it. If you want to double check the needle position, simply move the needle to the left or right.
The Eyelet Embroidery Set includes the following:
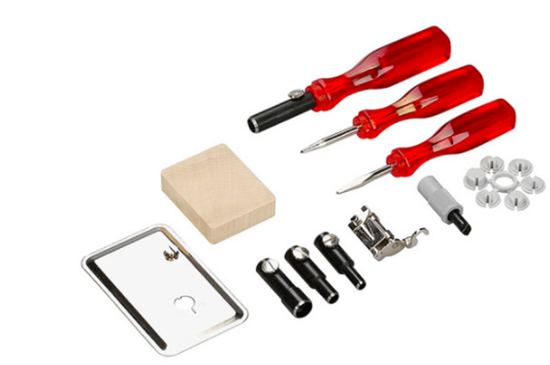
- Eyelet Posts – six sizes that correspond with the sizes of eyelets
- Eyelet Plate with Screw – this plate holds a post and attaches to the bed of the machine with a single screw
- Screwdriver – designed to fit the included screw; use it to tighten the screw and secure the plate
- 2 Awls – used to make holes in the fabric before stitching the eyelets
- 4 Punches – to make holes in the fabric and other materials such as leather and vinyl
- 1 Punch Handle – put the desired size punch on handle; tighten the screw to secure the punch
- Wood Block – place under the fabric before punching holes.
Select the 5 mm post. From the bottom of the plate, push the post into the opening on the plate, aligning the slot on the post with the slot on the plate. Position the plate on the bed of the machine and secure with the screw. Attach Eyelet Foot #92.
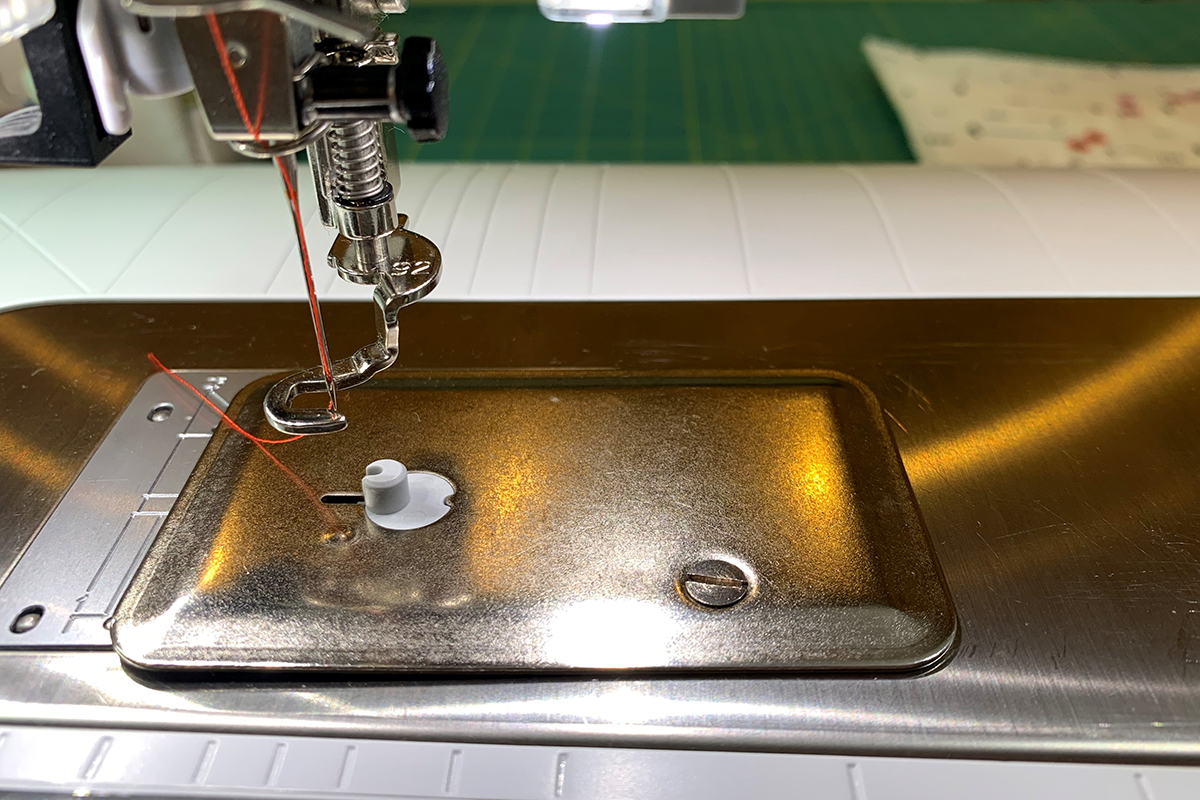
Select your first color thread. I am using white in the bobbin but you can match bobbin with top thread. Decide where you want to add the first 2 eyelet pairs. You can have them close together, at opposite ends, or anywhere in between!
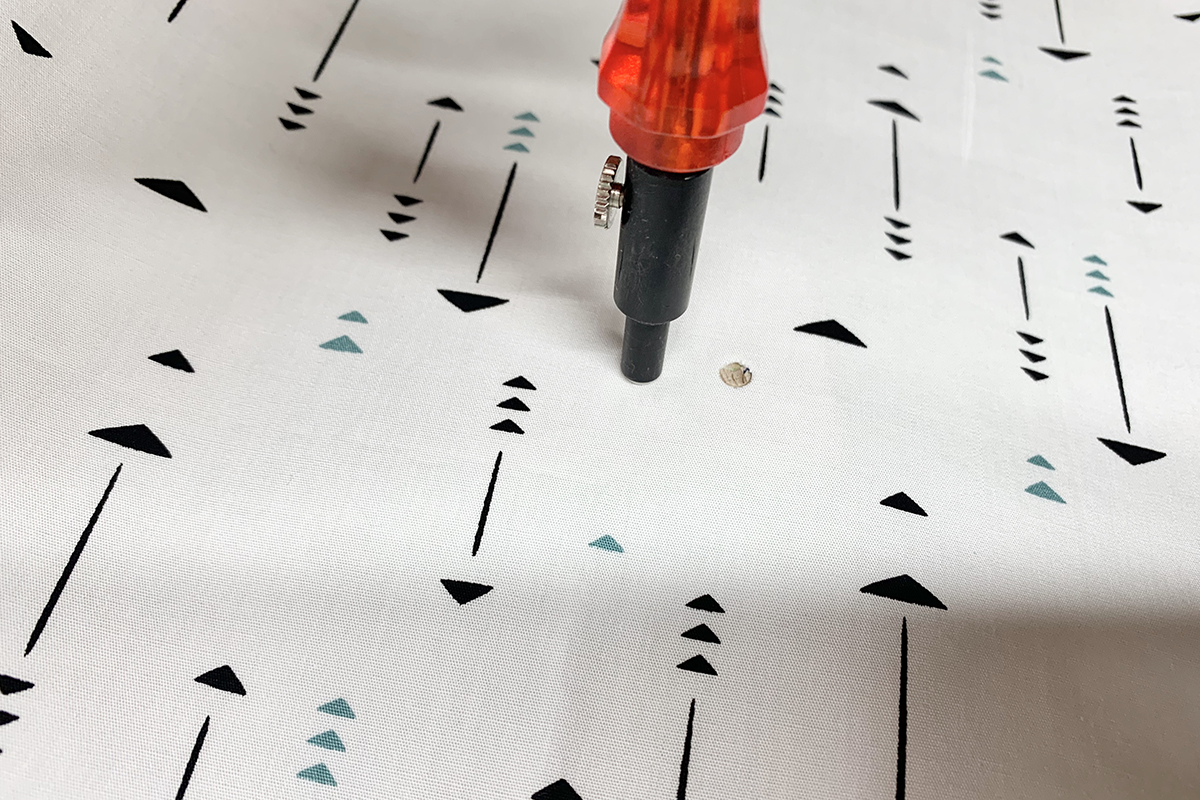
Place the wood block under your first eyelet mark. Using the punch for the 5 mm eyelet, make a hole. You will need to press down firmly since you are going thru two layers of fabric and stabilizer. I found it helpful to apply pressure while standing up. Punch through the other 3 eyelet marks. I am only punching out two pairs at a time so I don’t forget to change thread color!
Place the punched hole over the eyelet post until the fabric is flat on the machine bed. Select the 2 mm Zig Zag Stitch saved in your Personal Memory.
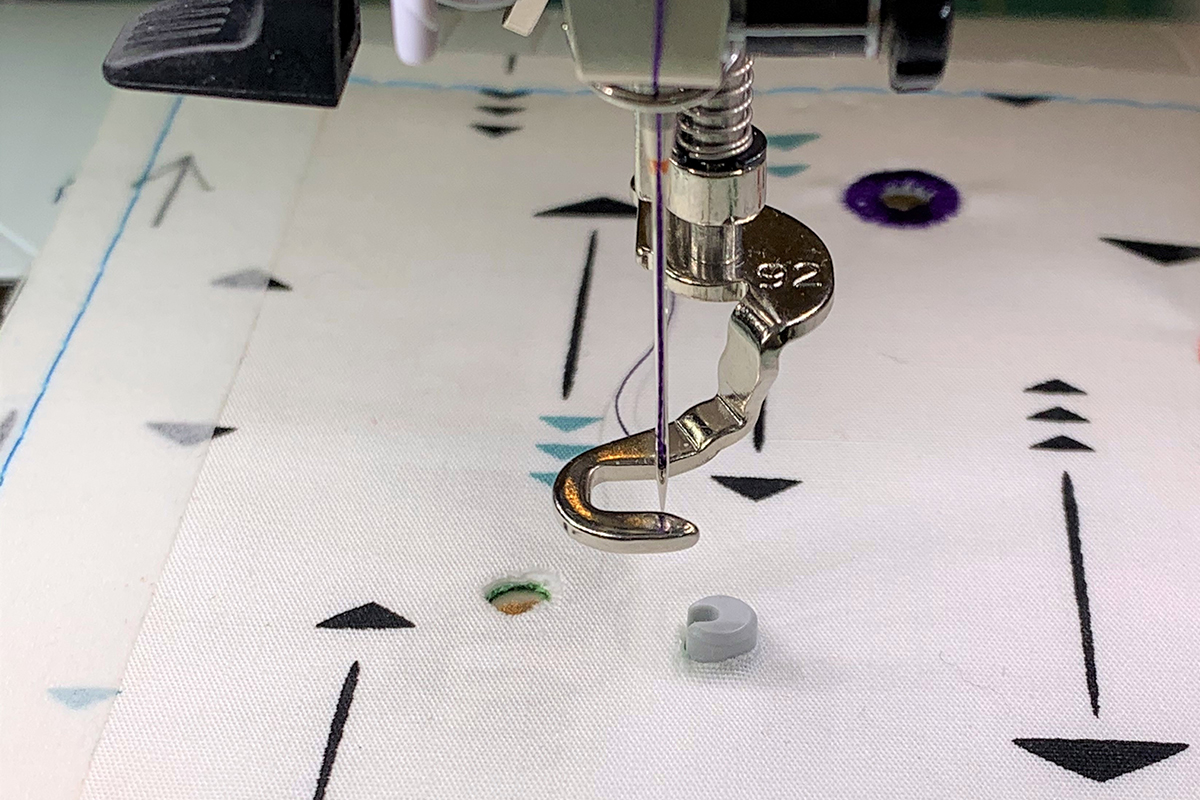
Pull up the bobbin thread and hold the thread tails. Begin stitching and rotating the fabric at a steady speed. I find it helpful to adjust the speed control dial to the middle to slow down the needle. This step stabilizes the raw edge of the hole.

When you are half way around, cut the thread tails, and continue sewing until you reach the starting point. Next, select the 4 mm stitch in your Personal Memory and stitch around again. Adjust the speed dial, if necessary. If the eyelet is not as full as you’d like, stitch around again and fill in the gaps. Free-motion eyelets are very forgiving and easily adjusted.
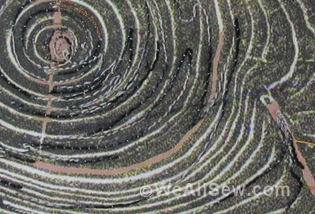
The density of the eyelets are controlled by two factors: the stitching speed and the fabric movement. The two factors have an inverse relationship. Increasing the stitching speed and slowing down fabric movement = dense eyelet. Decreasing stitching speed and increasing fabric movement = airy eyelet. This is a good time to play around with the eyelets and different looks. Here is a picture of my first two colors complete and holes punched out for the next thread color.
Eyelets done!
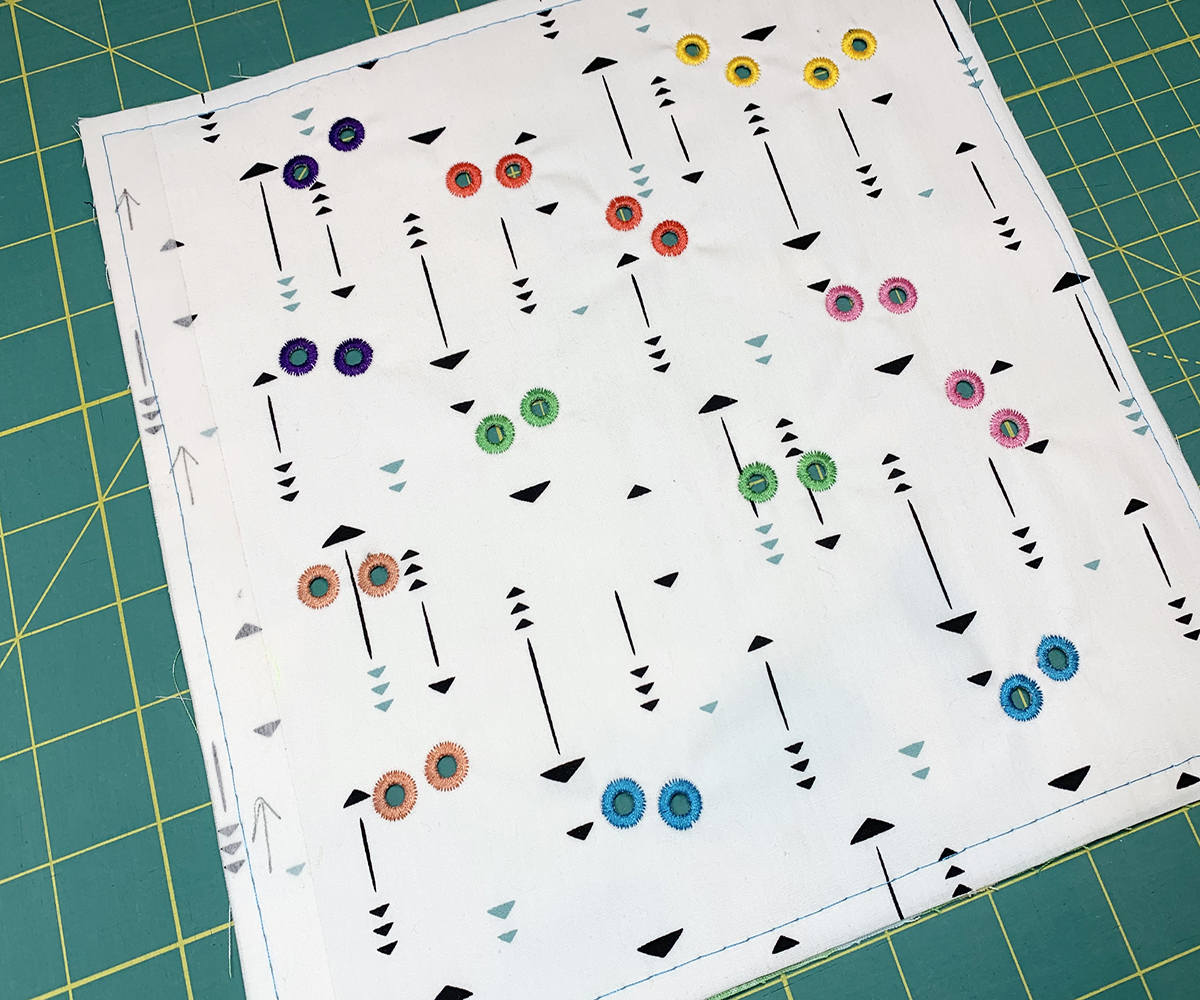
Back of page…
I stitched samples of the different eyelet sizes that I can make with my Eyelet Embroidery Set to keep as a reference. It saves time to have this handy for various projects. I can also change the stitch width and density but the purpose of this sample is to showcase the eyelet hole sizes.

Felt Shapes
Because I have BERNINA Embroidery Software 8.2, I designed the shapes for you. This way you can see for yourself how stitching them in the embroidery module is a much faster method. If you have the software at home, play around and design your own shapes! My shapes are 1-1/2” – 2”.
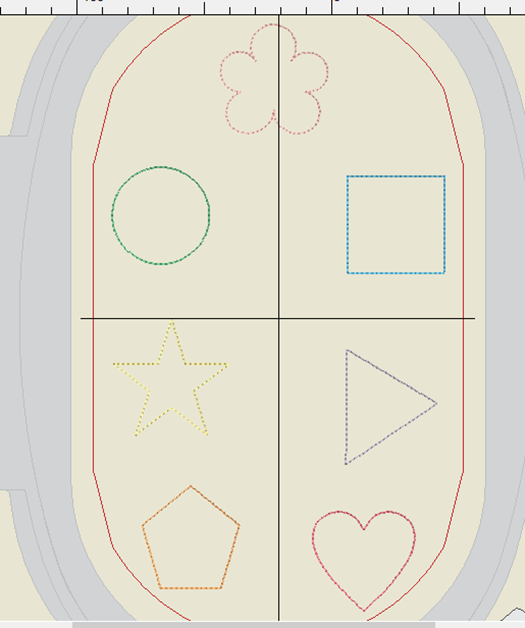
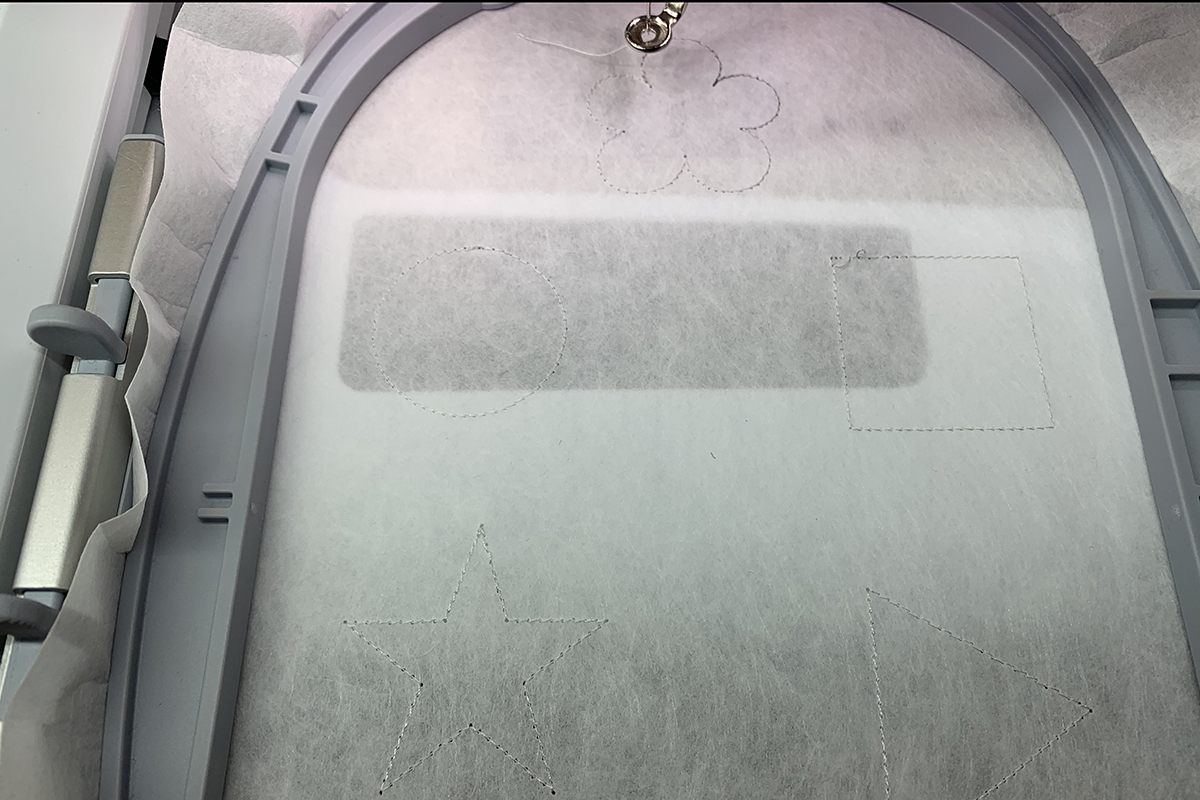
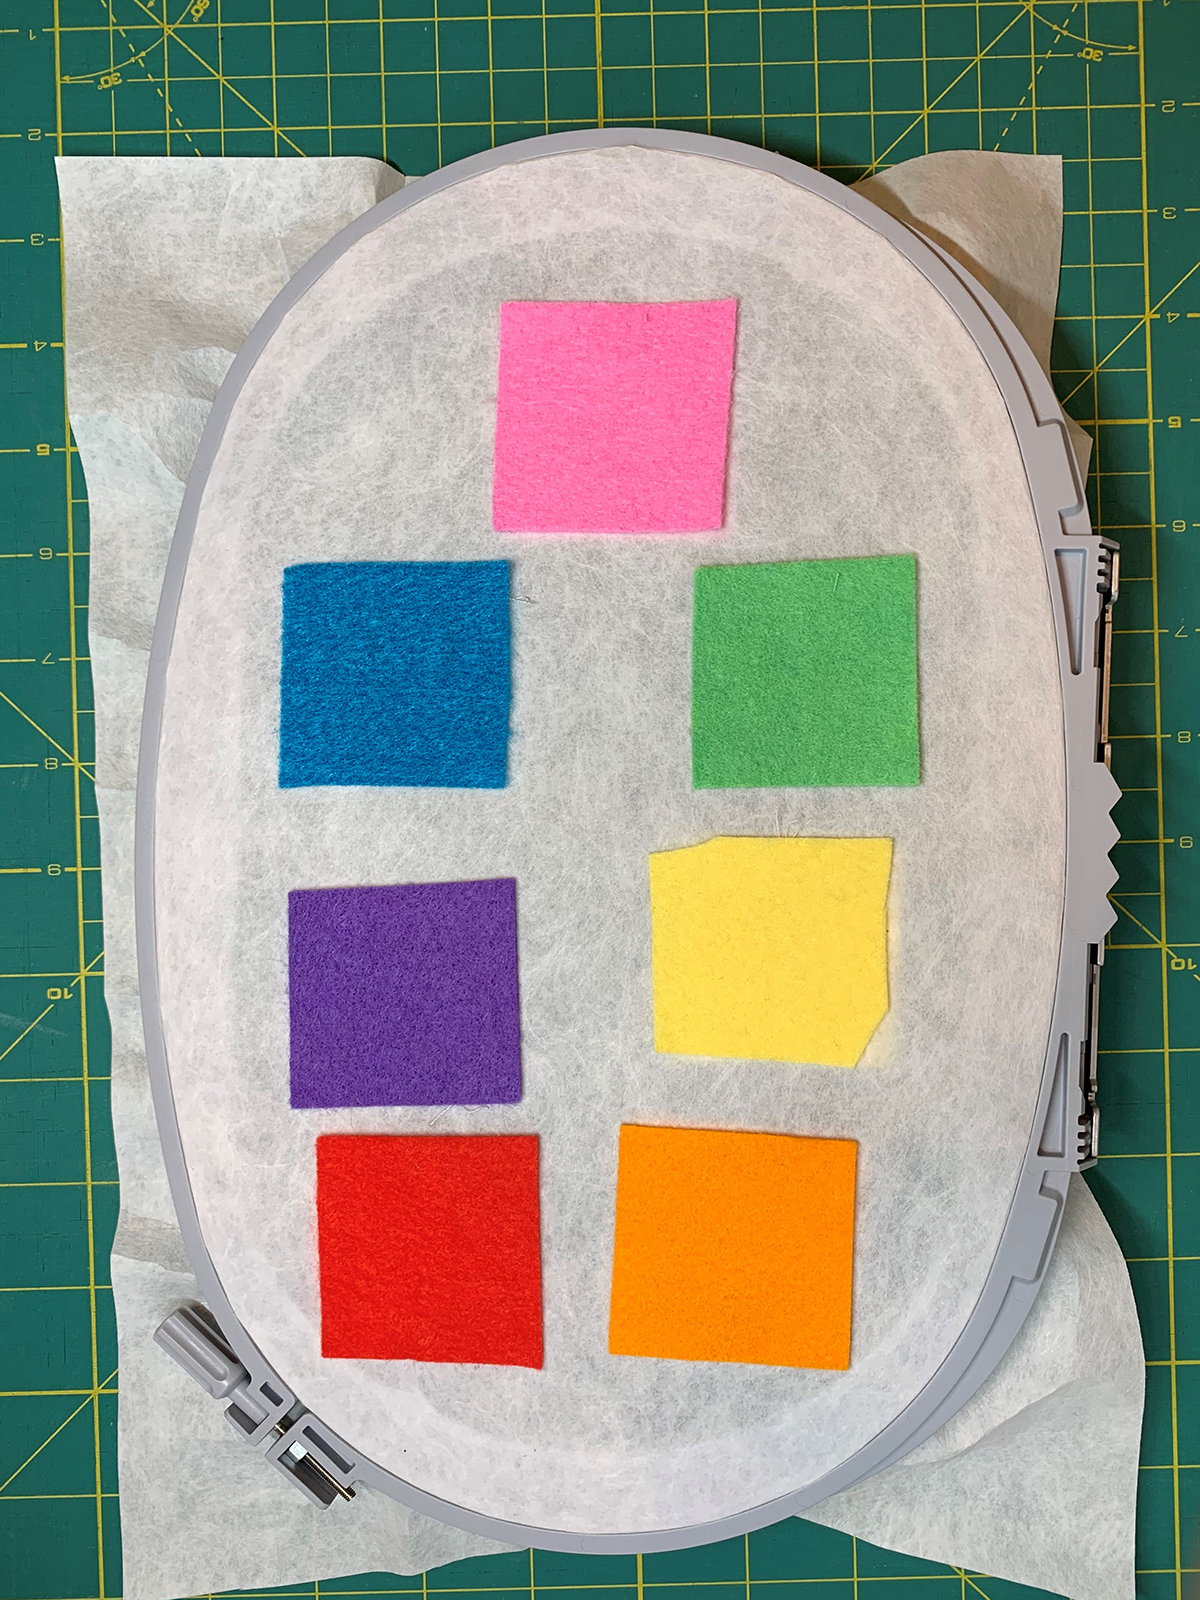
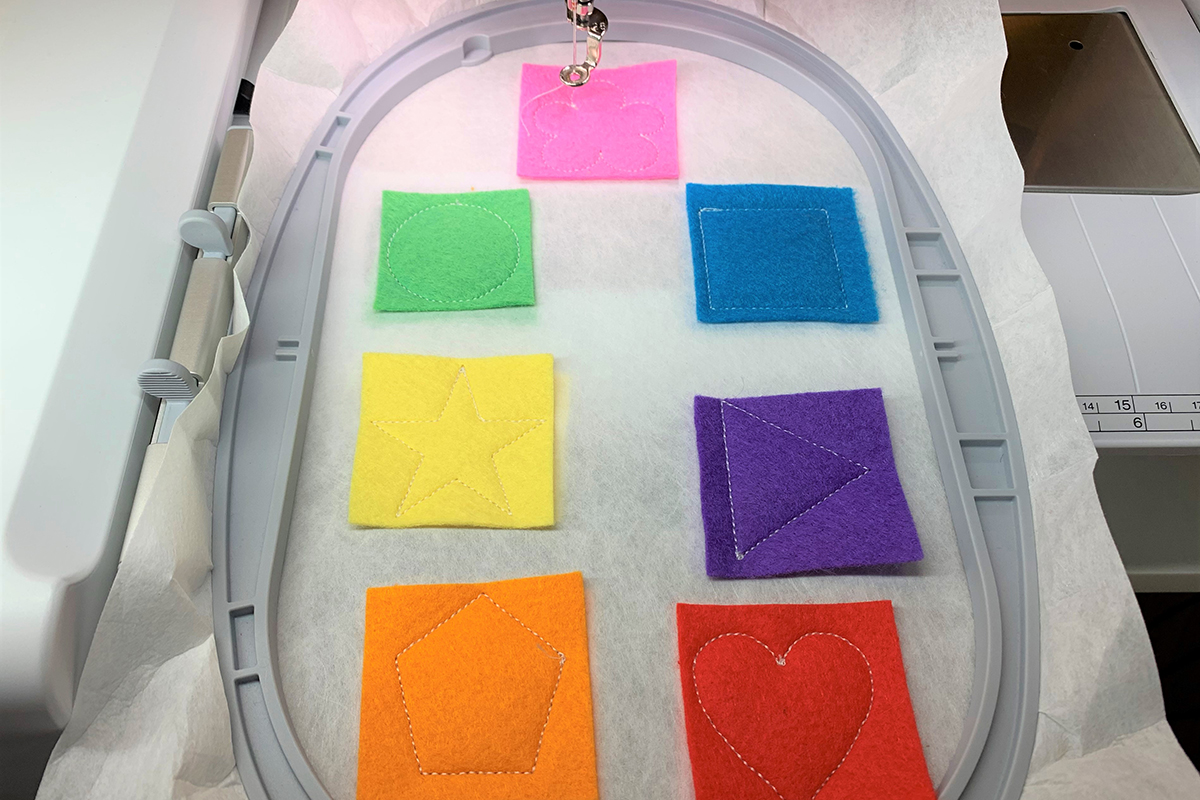
Insert your USB stick with the uploaded files into your sewing machine. Upload the Shapes and the Eyelets files to your machine. You should have two separate files. Set up your machine for embroidery, select the Shapes file and hoop stabilizer by itself in the oval embroidery hoop. I am using white thread for all the stitching at this point rather than matching colors. We will stitch out Shapes three times: 1 – placement lines; 2 – tack down; 3 – final stitching. For the placement lines (1), select Single/Multi Color Icon so all the shapes will stitch out without stopping between thread colors. When it is selected, it will be outlined in yellow.
Notice how the flower shape stitches out first and then the design stitches out in clockwise order.
Gather your 2” felt squares. The flower is the first shape that stitches out so place 1 pink felt piece over the placement line. Deselect Single/Multi Color Icon. You want the machine to stop stitching after each shape so you can add the next felt color. Stitch.
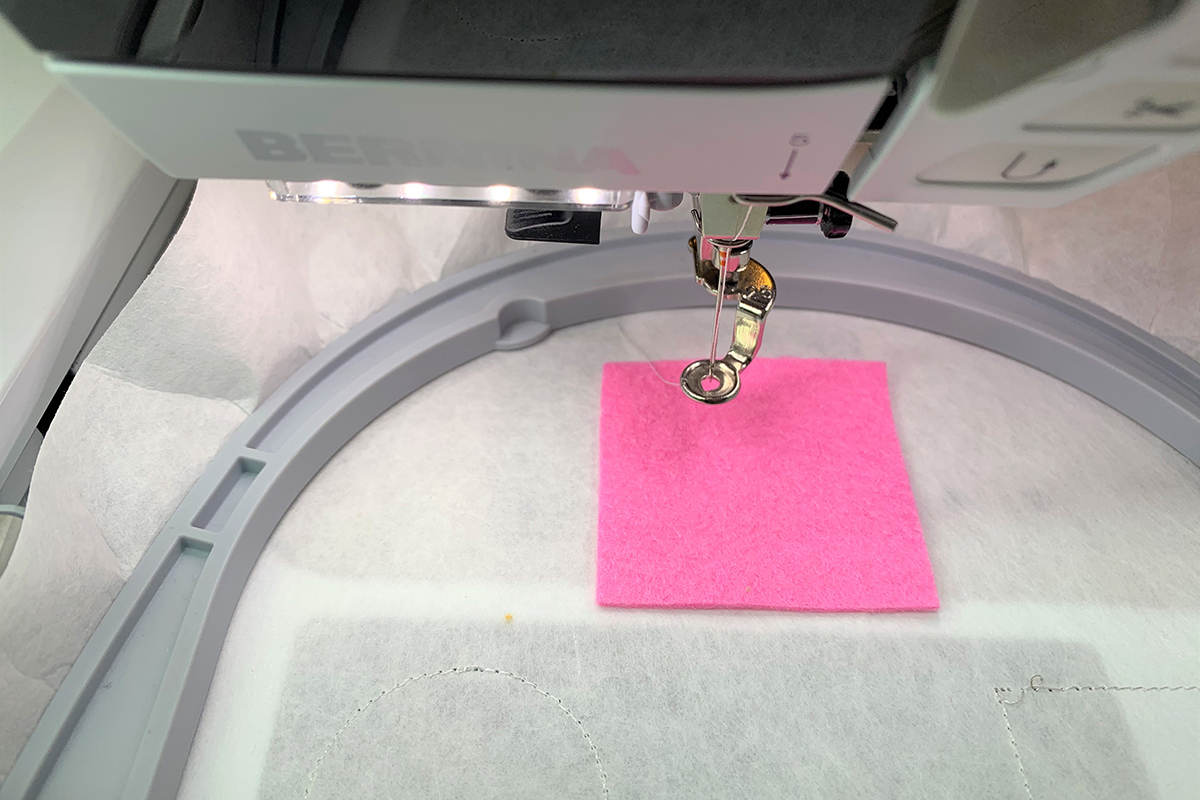
After each shape is done stitching, add the next felt color. Use a stiletto to hold felt in place while stitching.
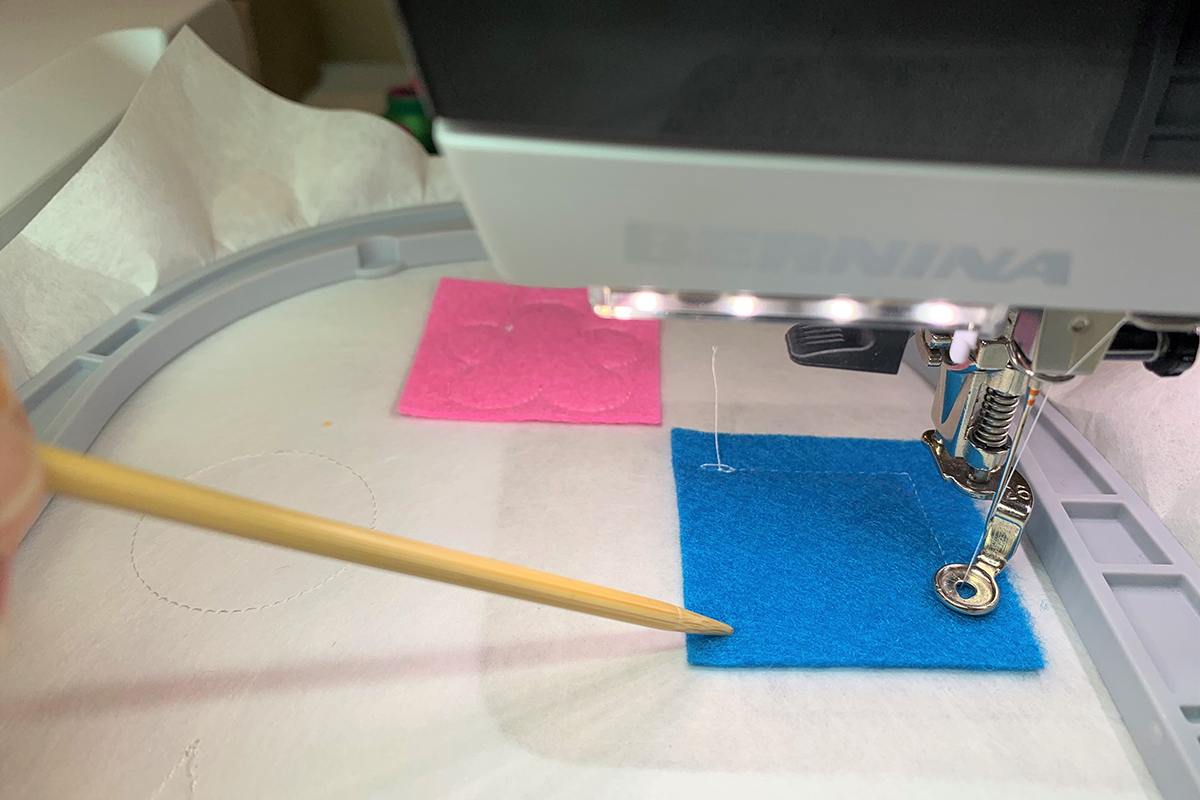
I stitched everything in white thread but if you don’t mind the thread changes, coordinate your thread with the felt colors. Continue until you have every shape stitched out.
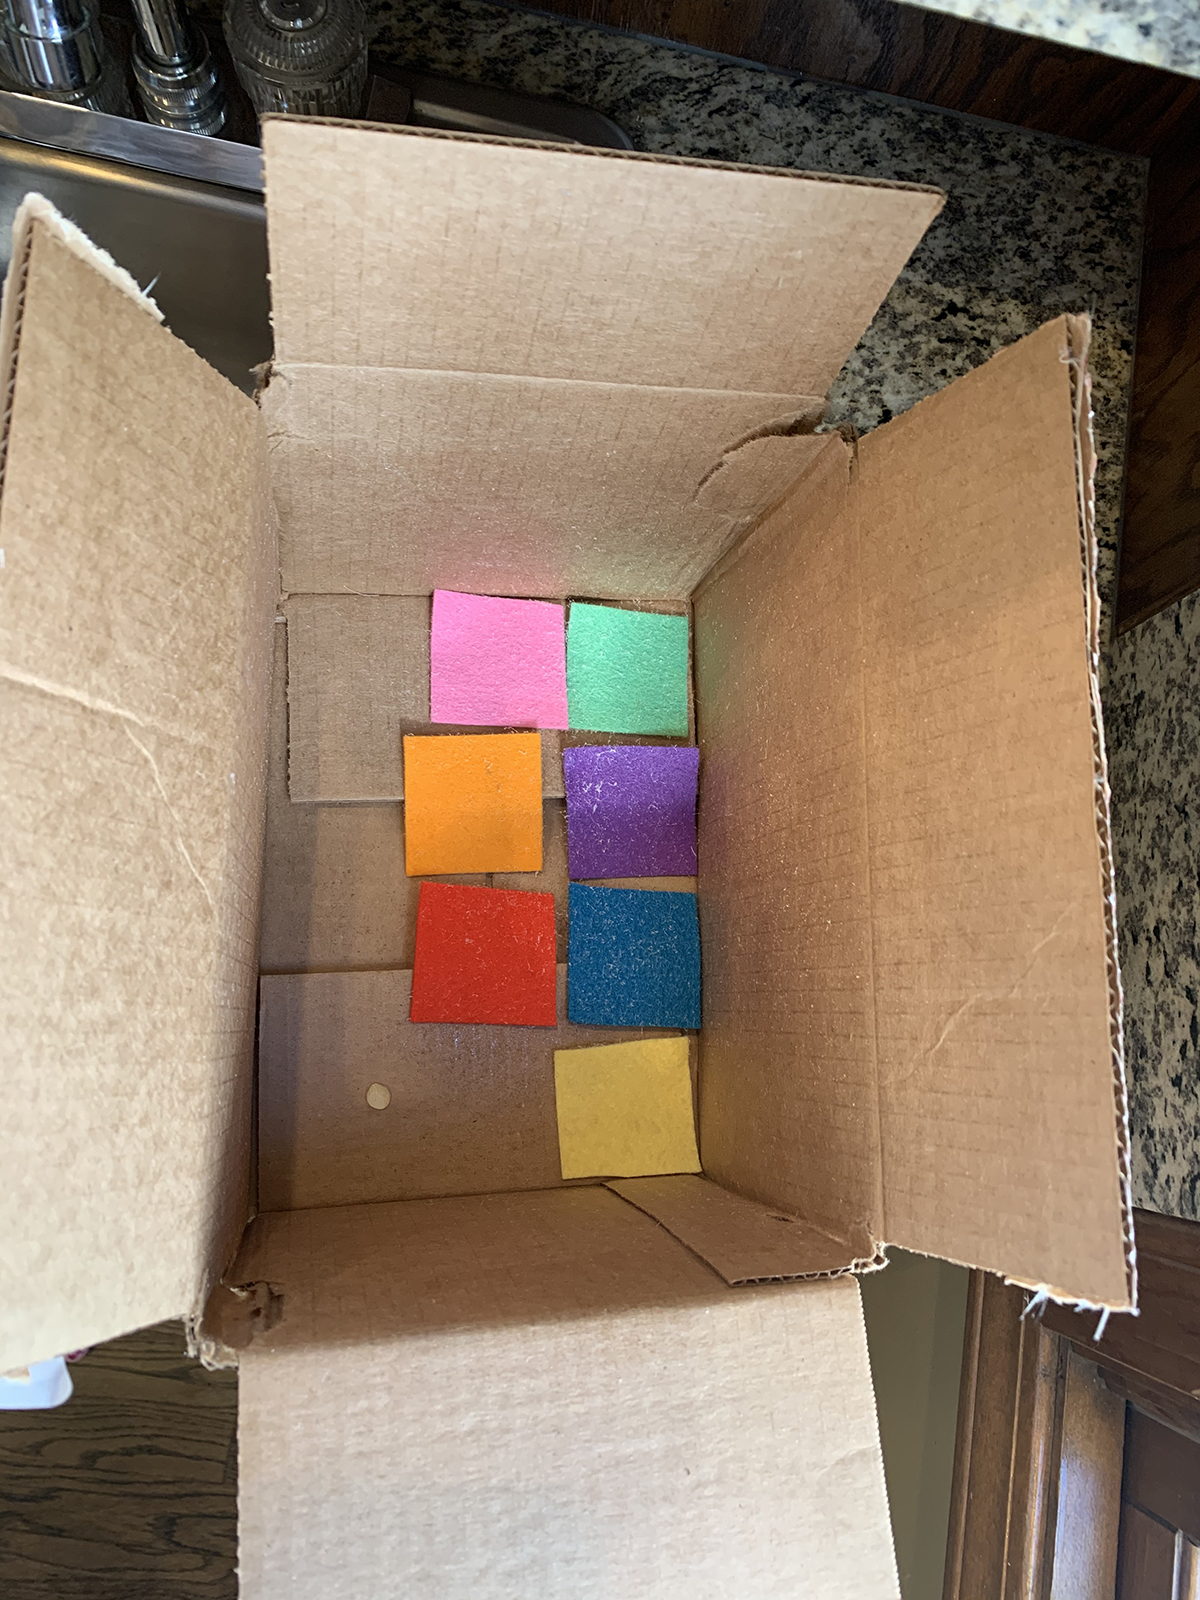
Now, remove oval hoop from machine but do not take stabilizer out. Spray baste 7 felt pieces – 1 in each color. The box helps contain the excess spray.
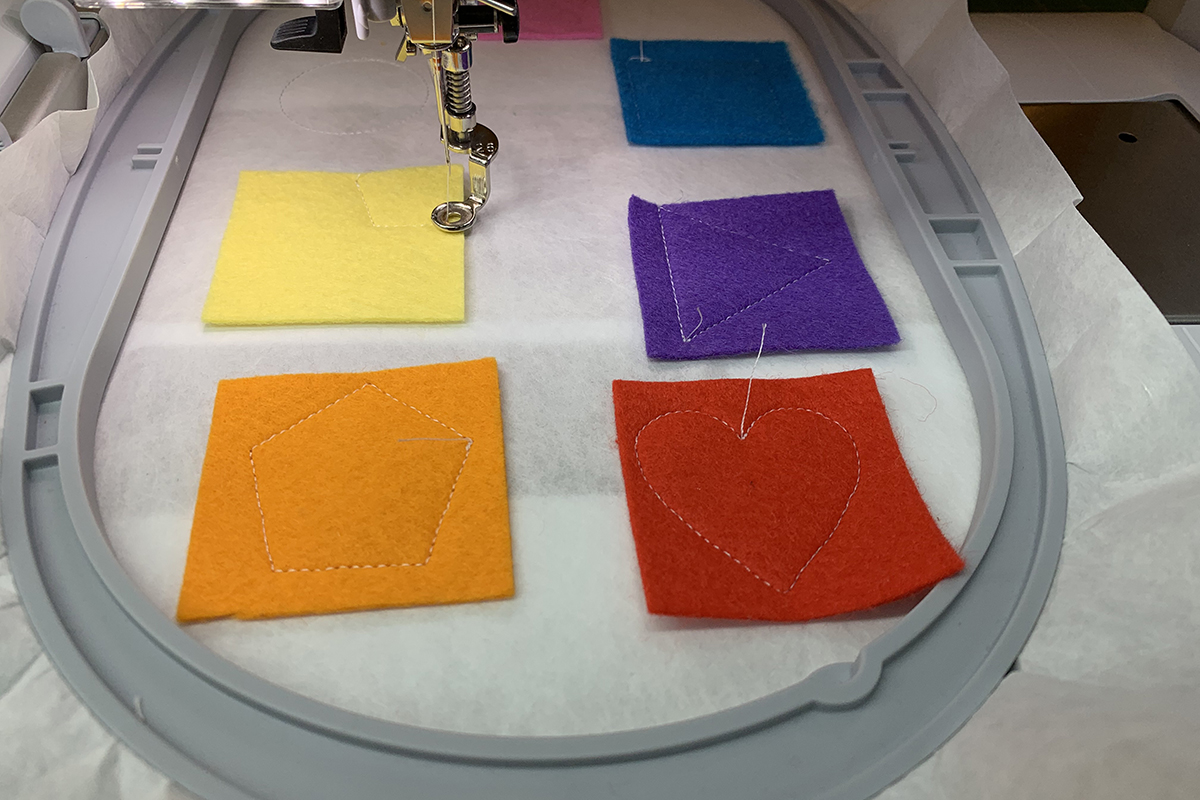
Turn hoop upside down and add coordinating colors to each outline covering the entire outline.
Carefully attach hoop to machine and stitch all the shapes again. When you are done do not take out of the hoop!
Every shape needs two eyelets. You can do this with your machine by using the Eyelet Stitch #51 and change the Stitch Width and Stitch Length to .7 mm. Or you can use the Eyelets File that I made on my BERNINA Embroidery Software 8.2. Basically, I made one circle with a triple stitch about 7 mm in diameter and copied it 13 times. Then, I placed 2 circles in each shape. (Or you can make one pair, copy six times and place in each shape.) Lastly, I copied the design to new template and removed the shapes to create the Eyelets File.
Stitch out the eyelets keeping an eye on any excess felt that might get caught under the foot. Keep your stiletto handy.
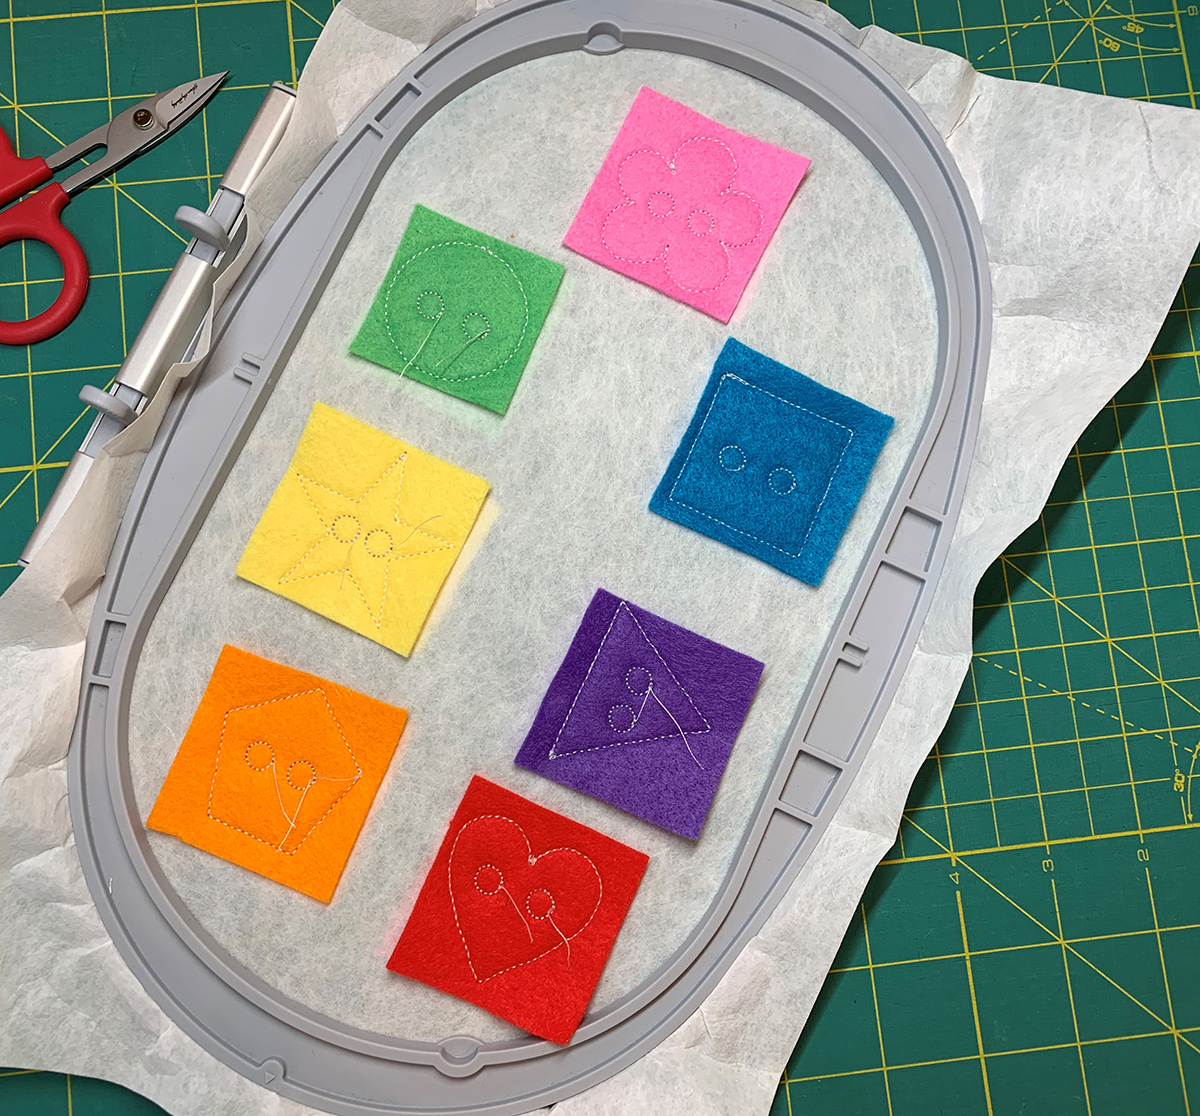
Remove the hoop. Now you can take out the stabilizer! Wasn’t that fast and fun? With your second set of felt pieces, follow the same steps so all the shapes have partners.
Using the 5 mm punch tool, punch out the eyelet holes being careful not to cut the stitches.
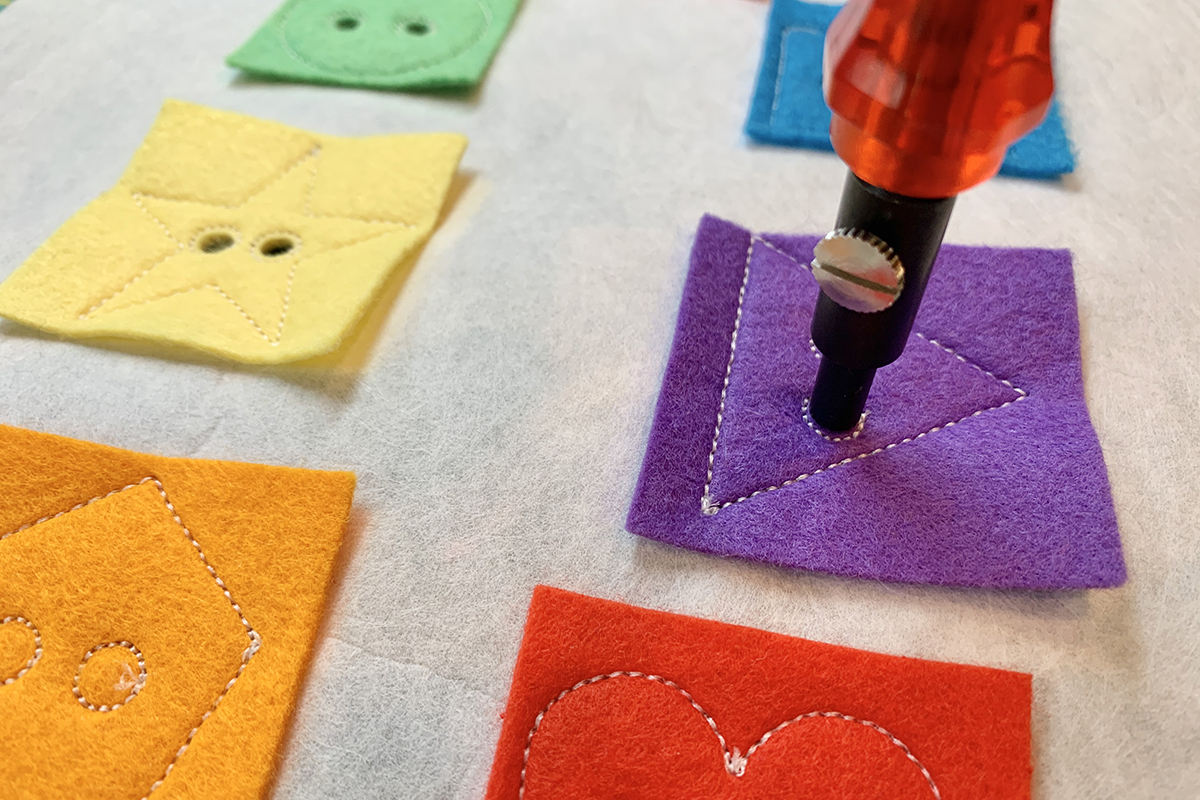
Lastly, cut out shapes about 1/8” – 1/4” from the stitched outlines.
Putting it all Together
This busy book page is a 2 for 1 because there are two possible activities! The first activity involves matching shapes and colors with a shoelace. Take the shoelace and cut in half. Here are instructions to secure the cut ends using thread and glue. A standard shoelace is 33” and I felt it was too long for a small child to handle easily. Now the fun begins!
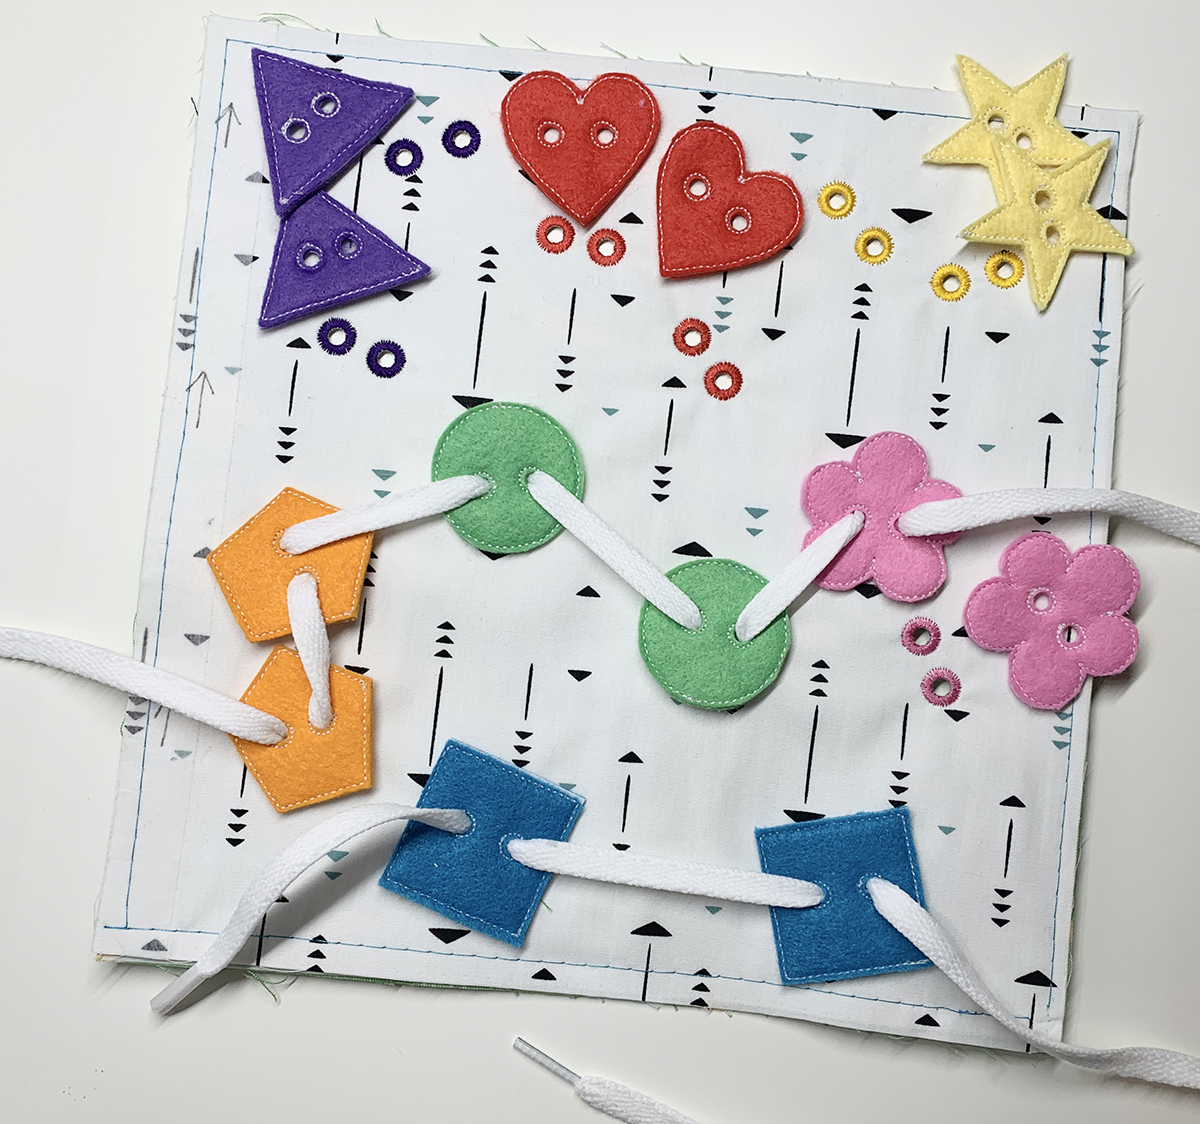
The second activity involves matching eyelet colors with chenille stems. For this one, set the shapes aside.

Congrats on your completed busy book page and making eyelets! I hope you enjoyed creating this page and learning how to make eyelets. I love how this page can be used in two different ways. If you come up with a different activity for this page, let us know in the comments section! Also, if you would like to share your finished pages, upload pictures to the Community Tab on weallsew.com. Enjoy!
Kids Busy Book Series
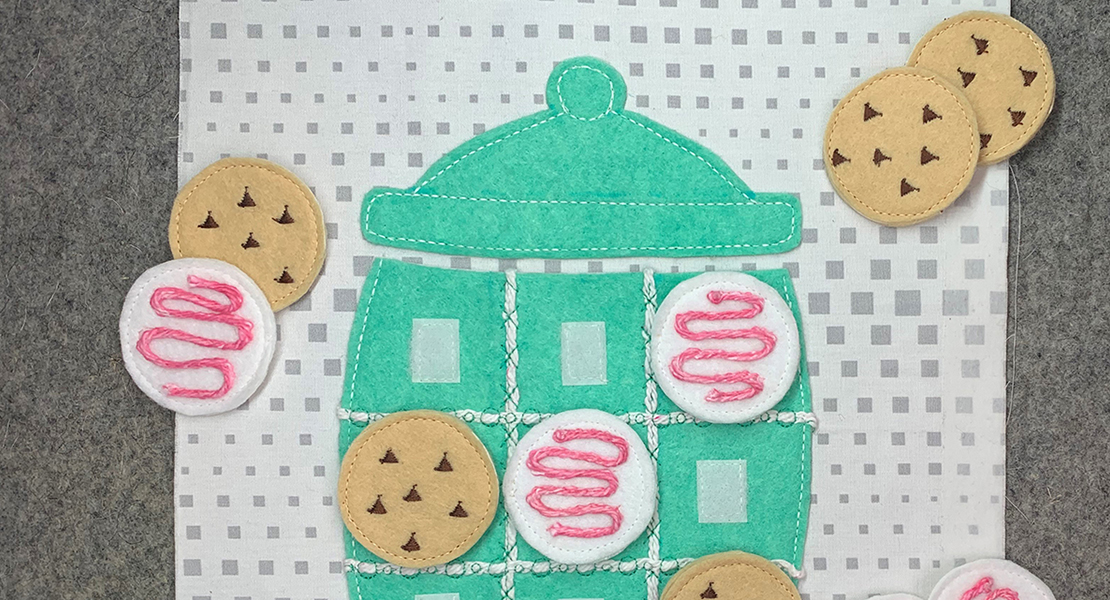
Part 4: Cookie Jar Tic Tac Toe


What you might also like


3 comments on “Kids Busy Book Series, Part 7: 2 for 1 Shapes and Colors”
-
-
Hello! So glad you are having fun with my busy book pages! I have finished the title page and hope it posts beginning of December but I can’t say for sure. The series was thrown off a bit with the pandemic. I am having a Busy Book Webinar on Dec. 4th. Check out BERNINA.com soon for the registration link.
-
-
Love these embroidered patches on book pages. For exciting custom embroidered patches you can visit our site.
Leave a Reply
You must be logged in to post a comment.

I’m loving these pages and learning so much about my Bernina ! Thank you so much . I’m planning on my book as a Christmas gift for a 9 month old and will continue to add pages as they are posted after Christmas. With Christmas in mine though, was wondering if you will post a clever title page in early December so that we can include it with our initial book? Understand if it’s not possible … Do appreciate all the skills I’m learning !