Union Square Big Block Quilt-Along Part 1
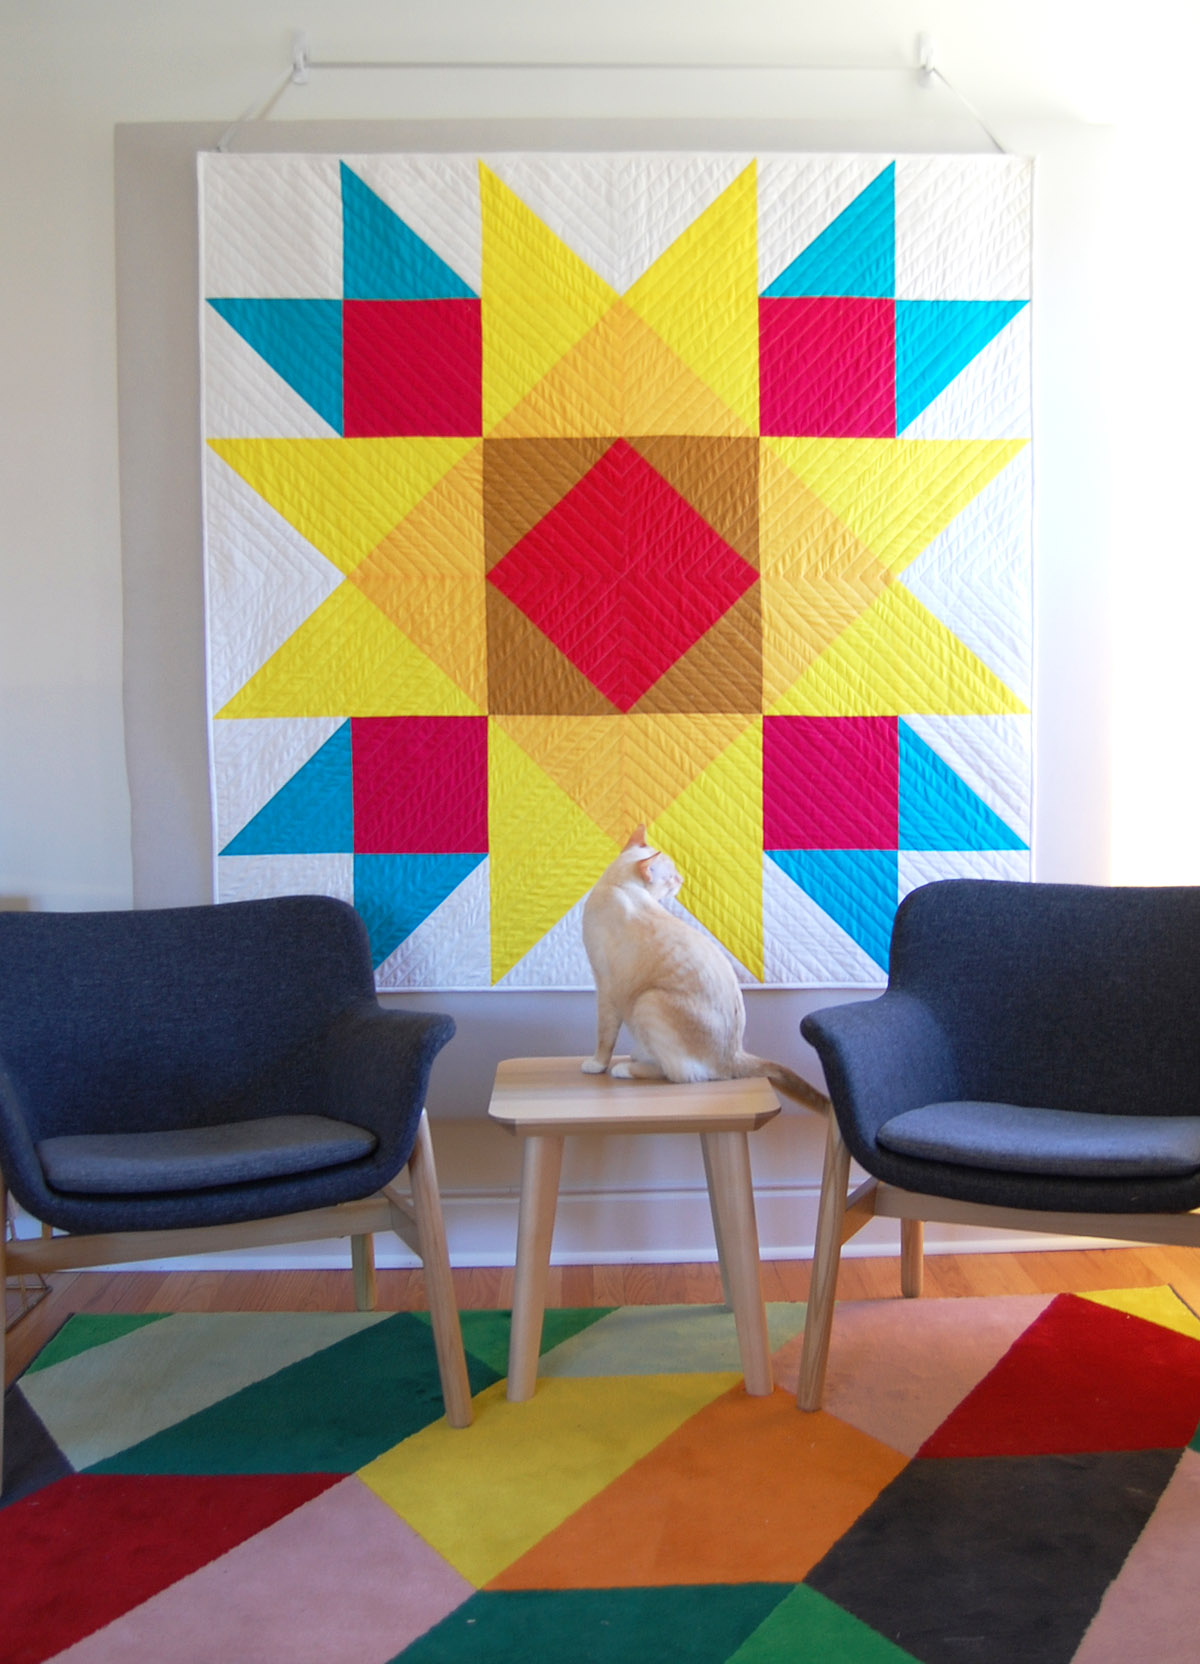
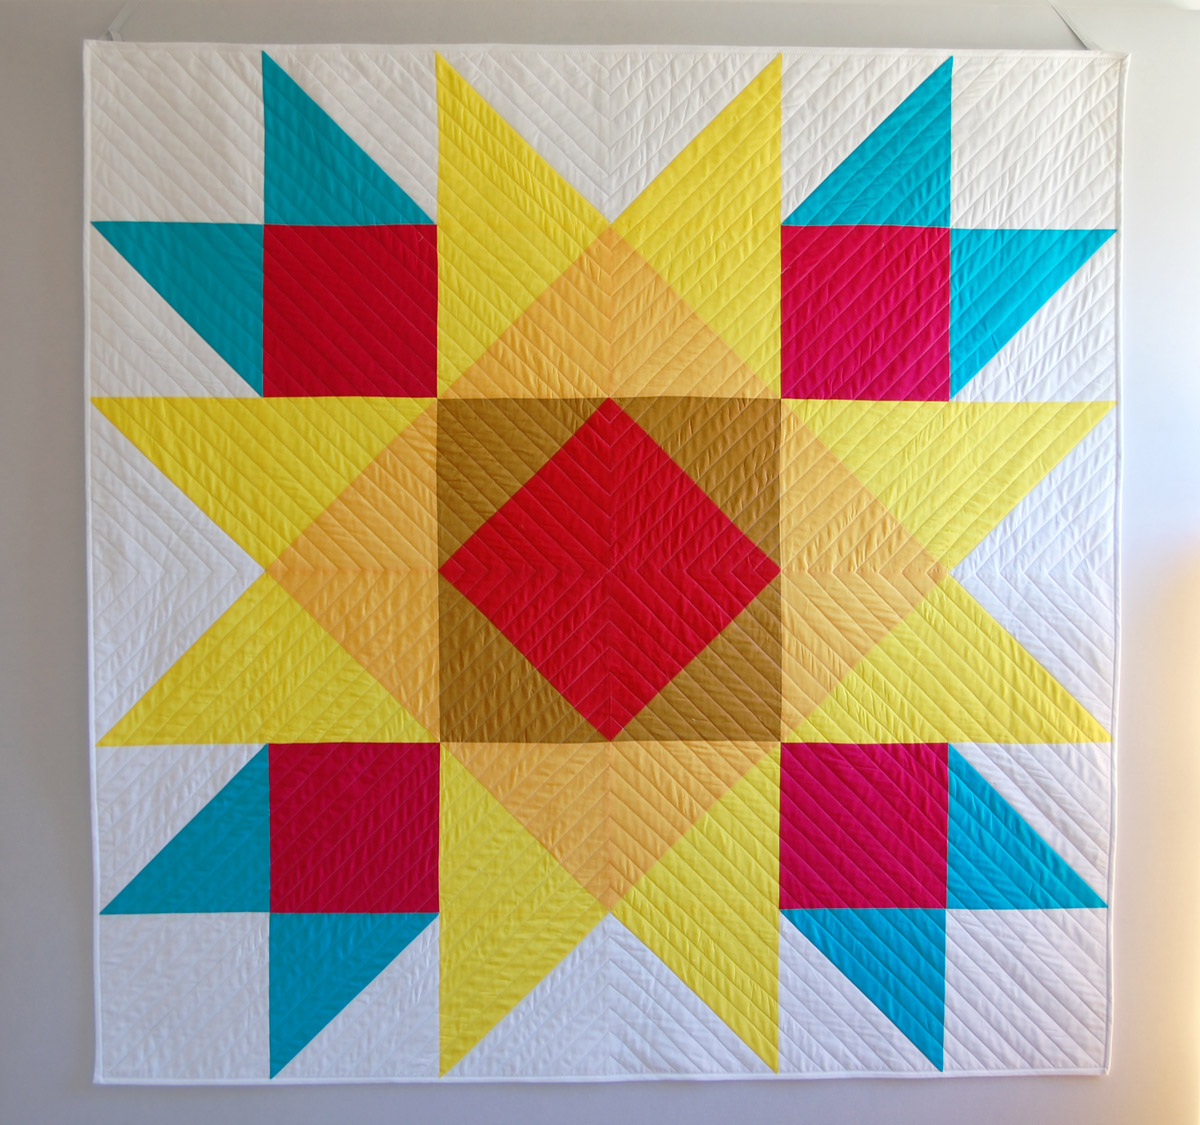
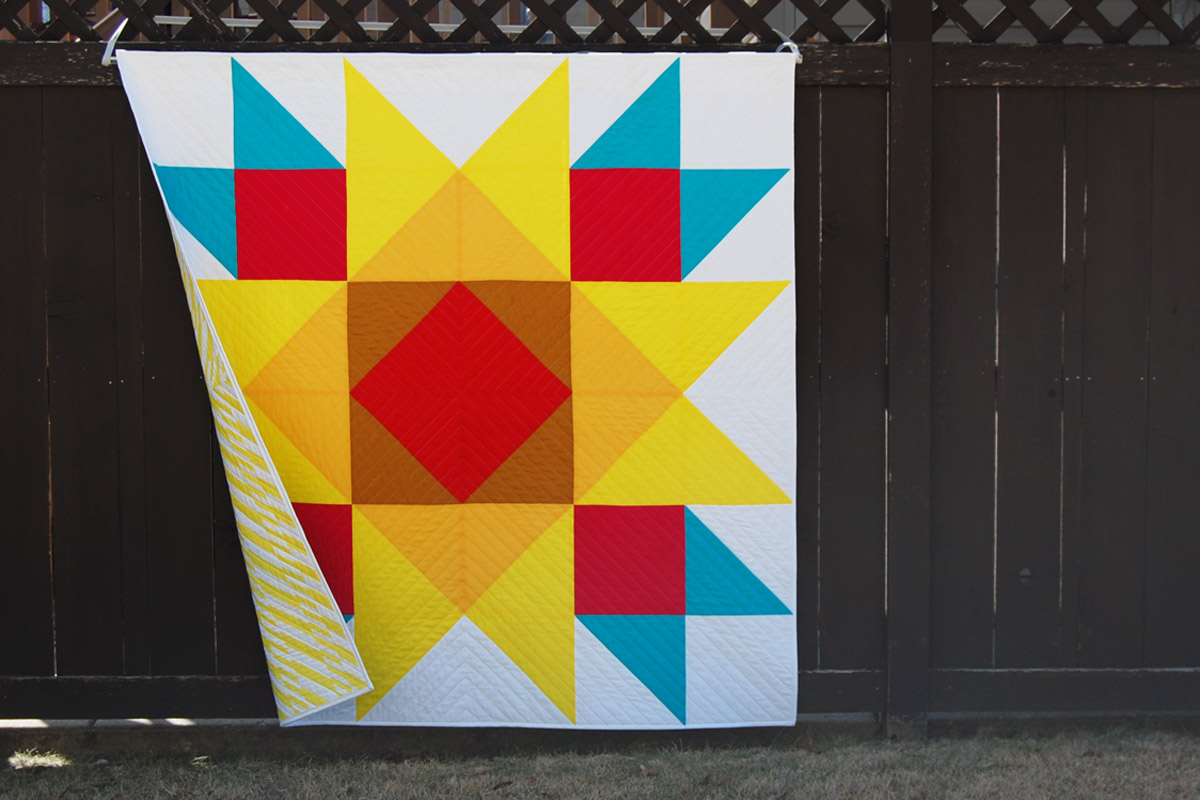
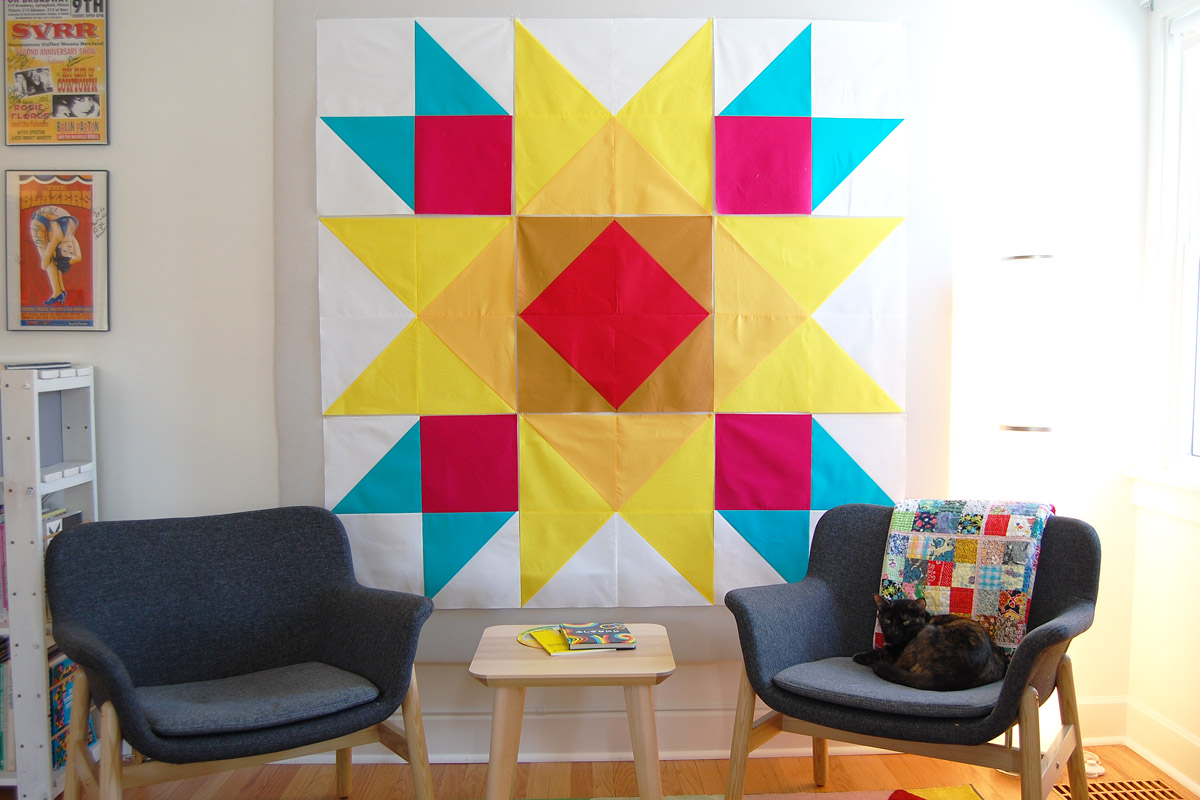
This Union Square Big Block quilt measures 60″ x 60″ when finished, and makes the perfect sized lap quilt to cuddle up while reading a good book or watching your favorite show on the tube. Or, hang it on the wall to add a bright spot to any room.
Sewing large-scale blocks may look simple, but it can be tricky! If your patchwork pieces are not cut and sewn precisely, it will definitely show in the finished quilt with wonky lines and mismatched points. You’ll find tips and tricks throughout the quilt-along to help you sew large-scale blocks successfully. In Part 1, find a complete list of tools and materials you will need to complete the quilt, and learn how to prepare your fabric to sew the top together in Part 2.
Union Square Big Block Quilt-Along Schedule
- February 28, Week 1: Materials list and fabric cutting guide
- March 7, Week 2: Half-square triangle block construction and piecing the top
- March 14, Week 3: Quilting and binding
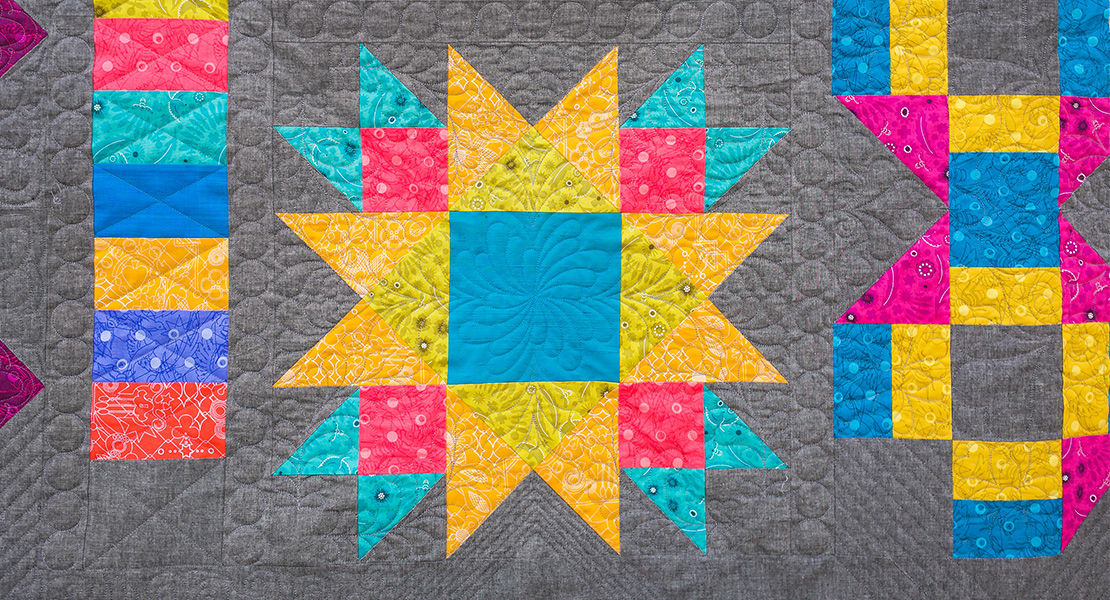
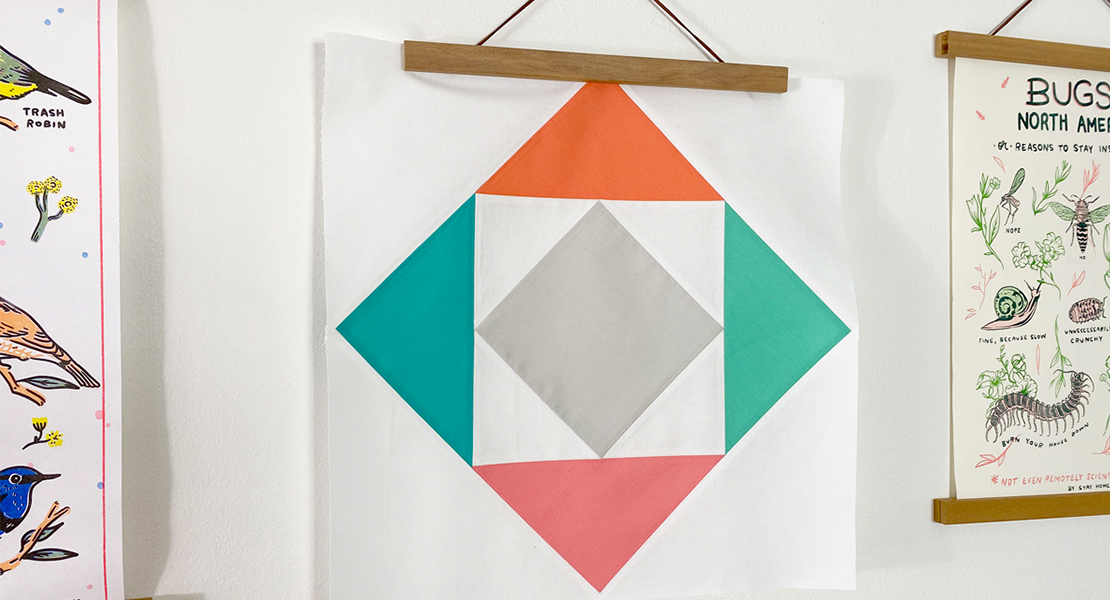
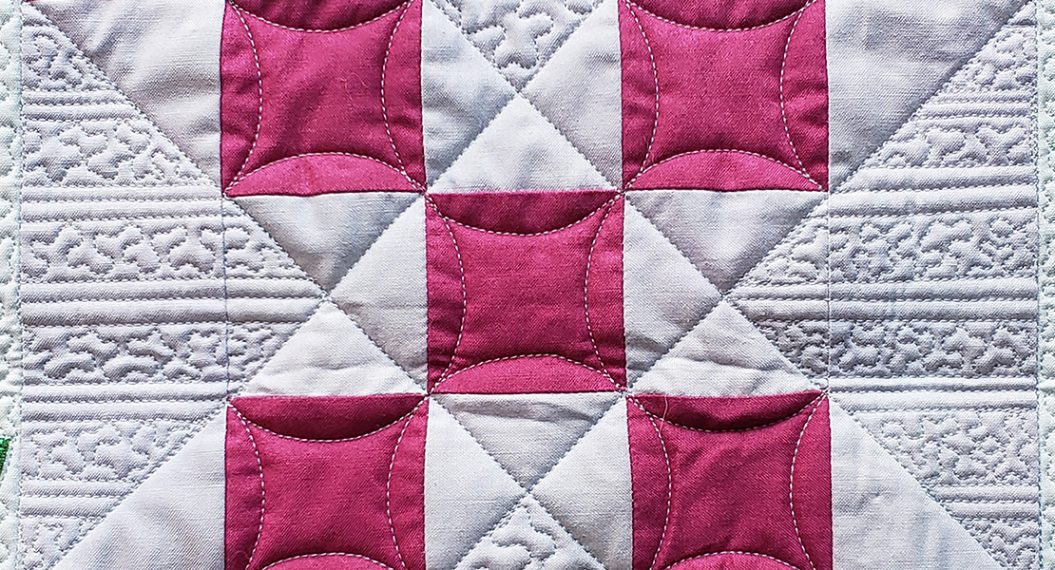
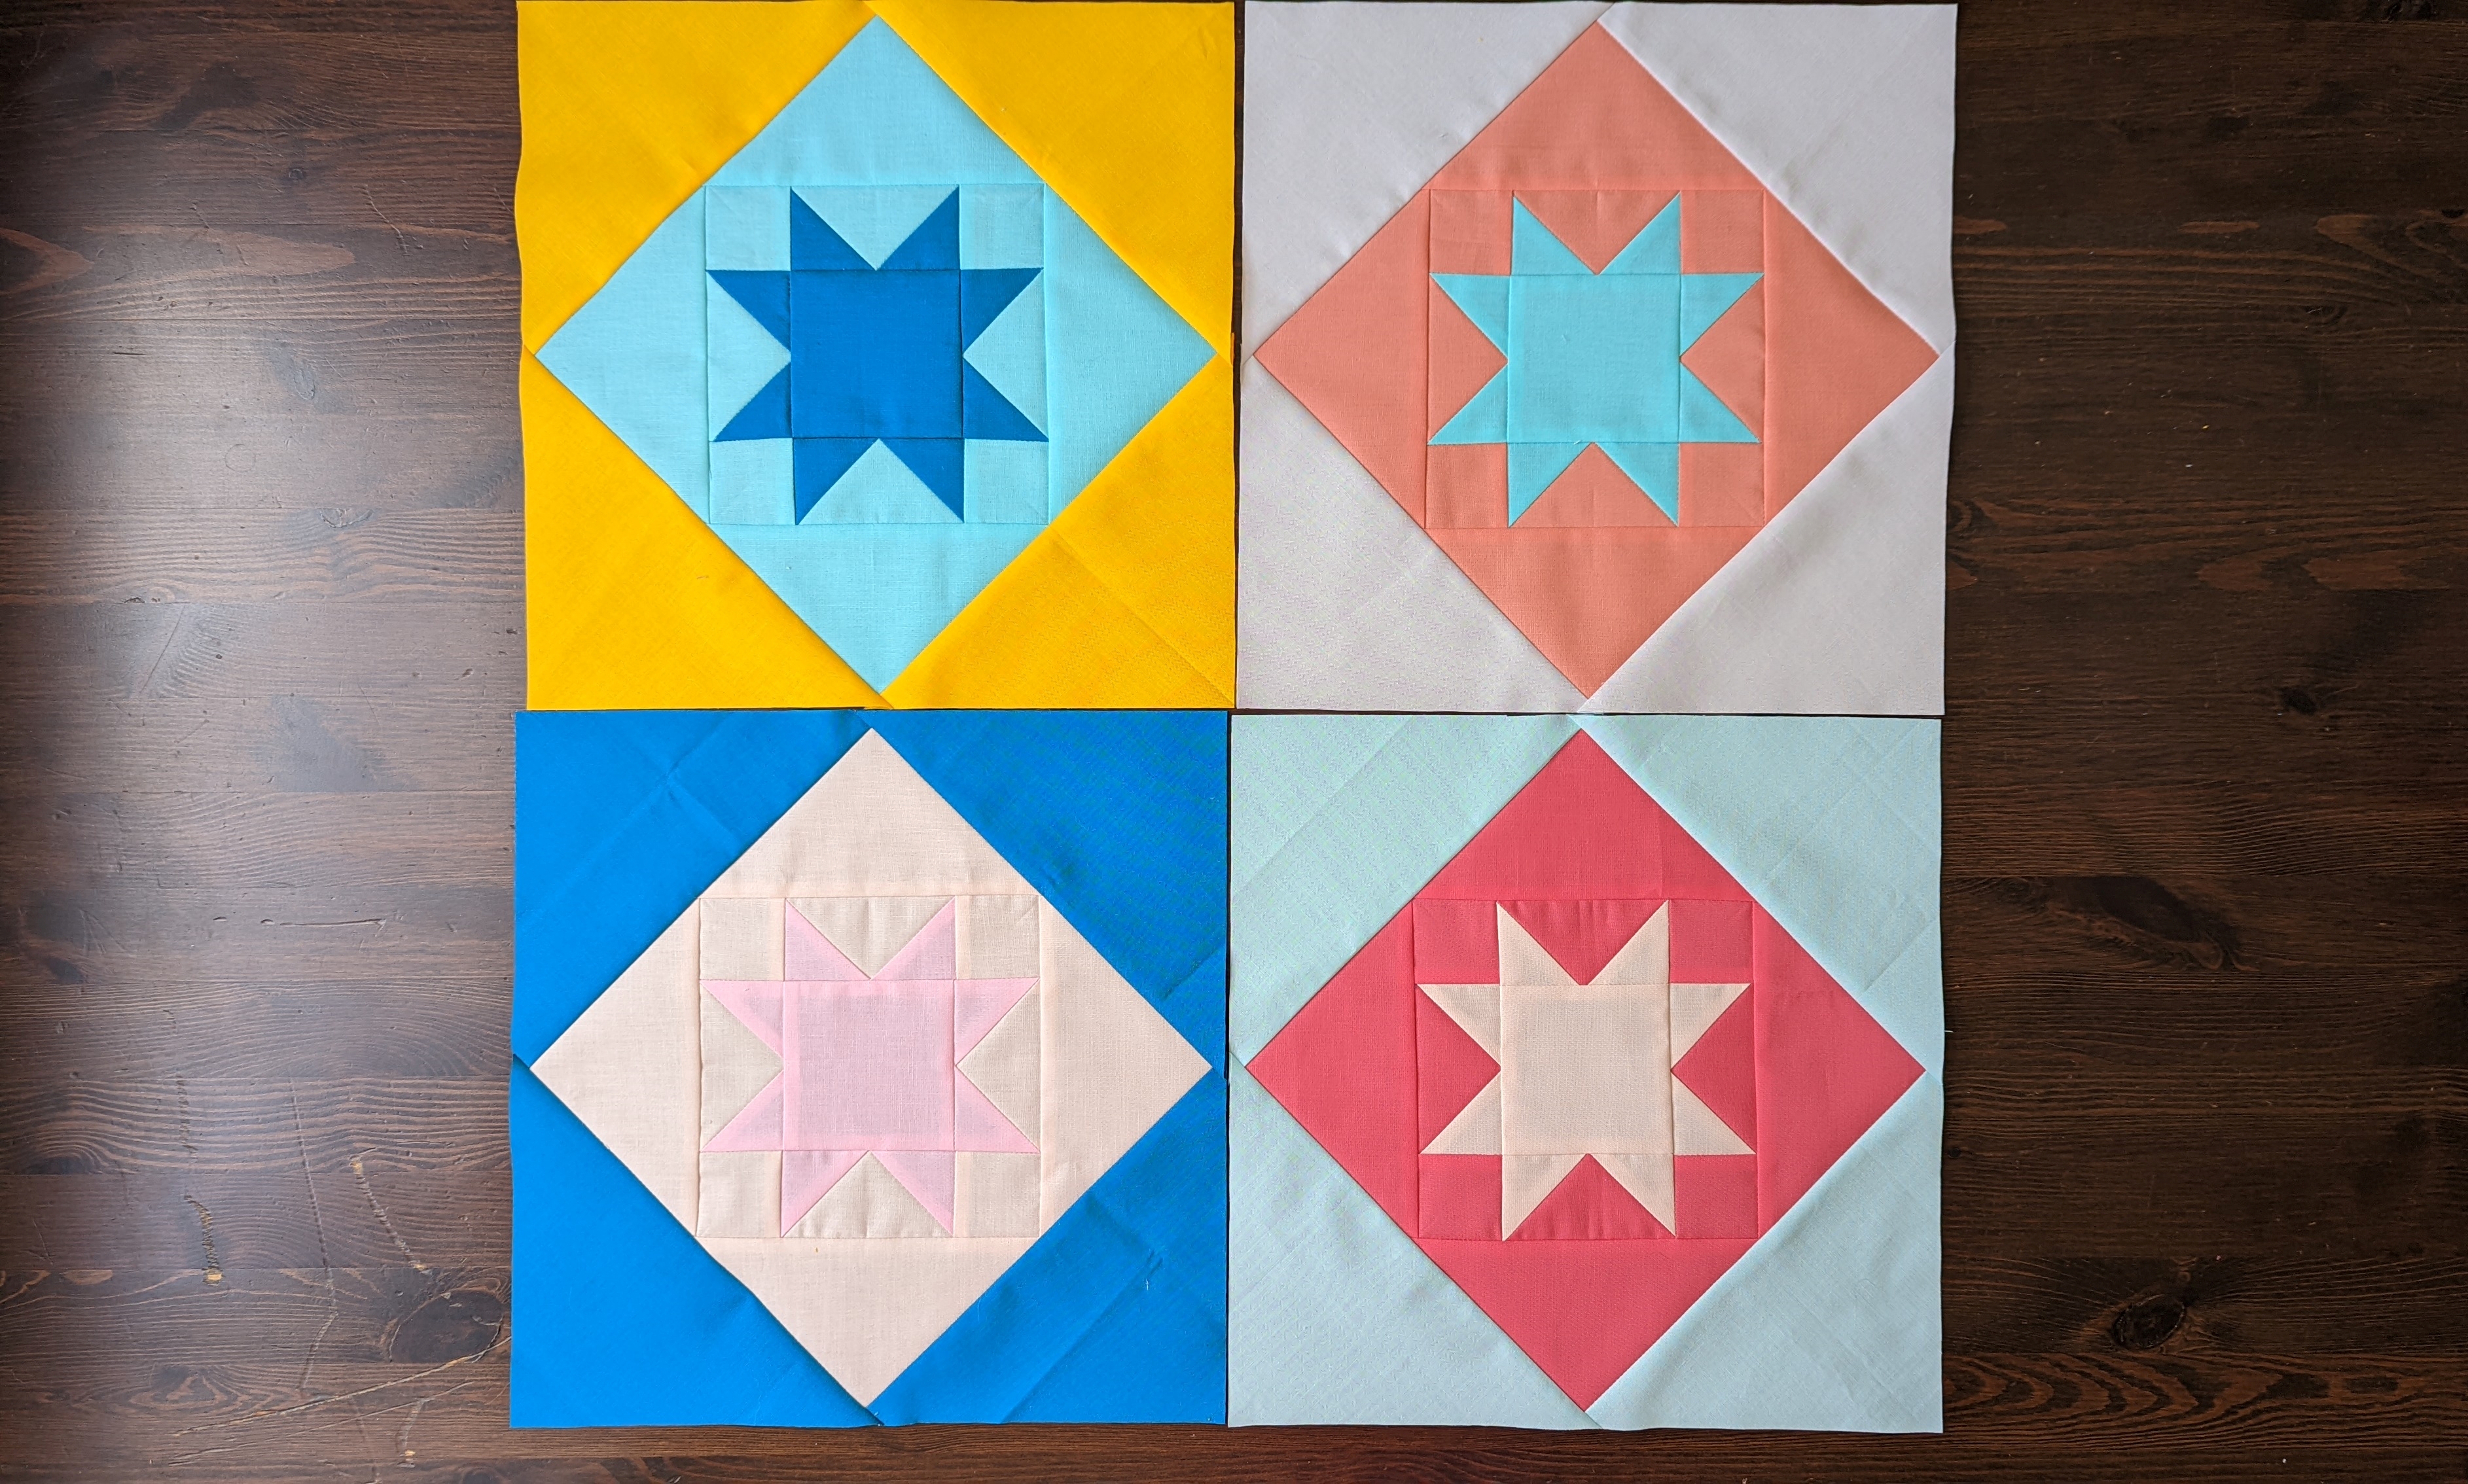
Inspiration for this quilt came entirely from BERNINA! I have been watching the BERNINA Block-of-the-month series here at WeAllSew, and I absolutely fell in love with the Union Square block from December.
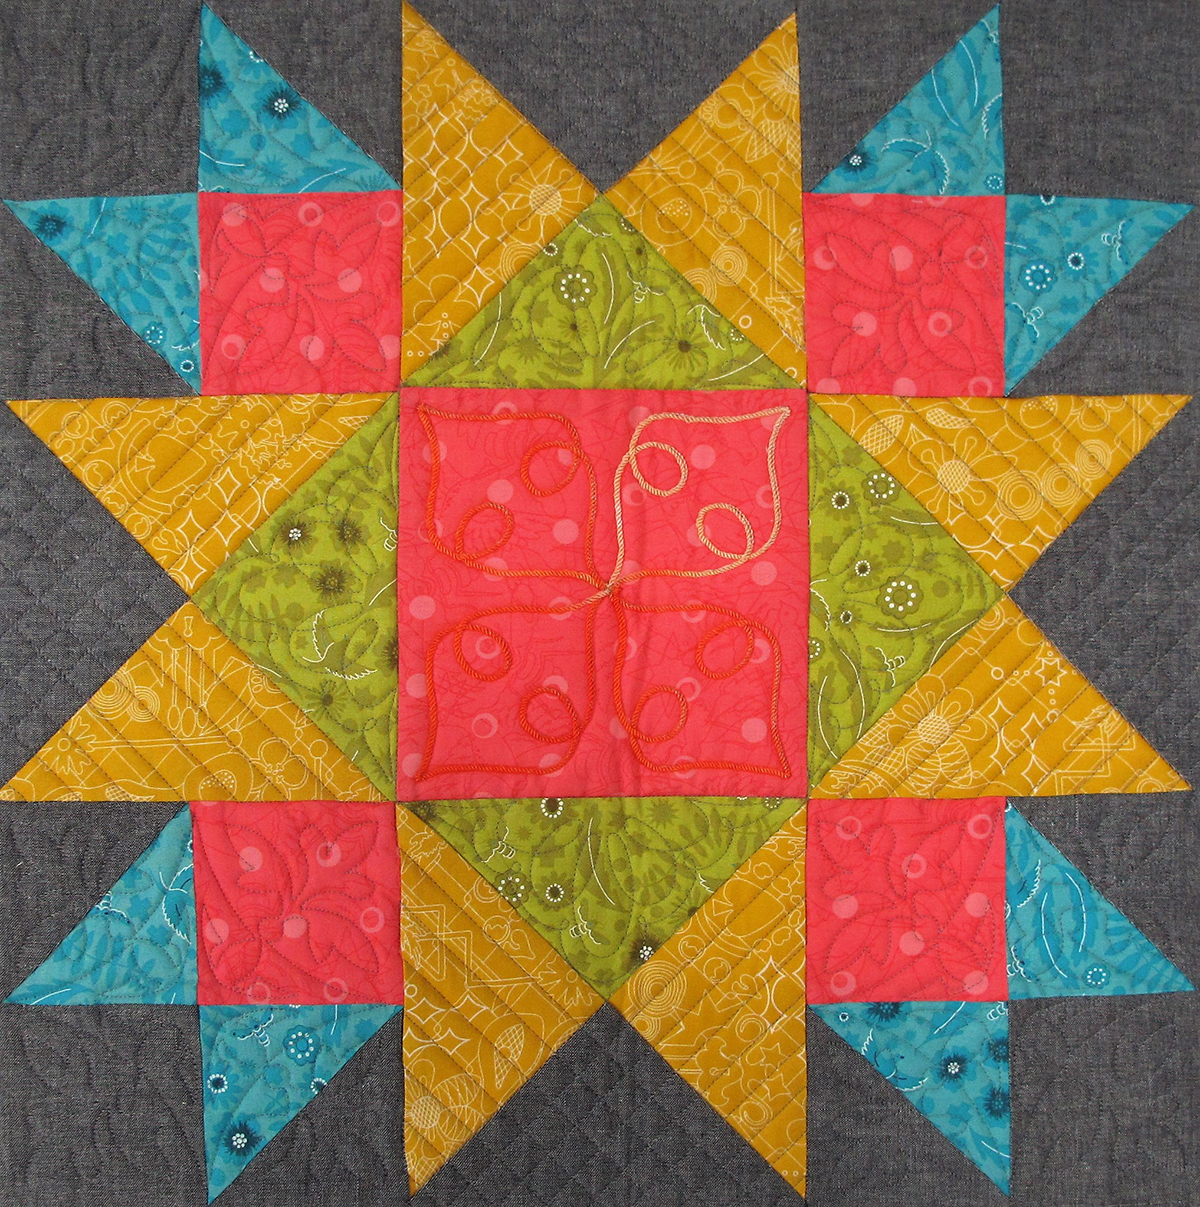
I just love the simplicity and symmetry of this block! I’m also really excited and inspired by BERNINA’s 125 Years Golden Anniversary this year, and had some fun expressing the anniversary event in the colors of this quilt.
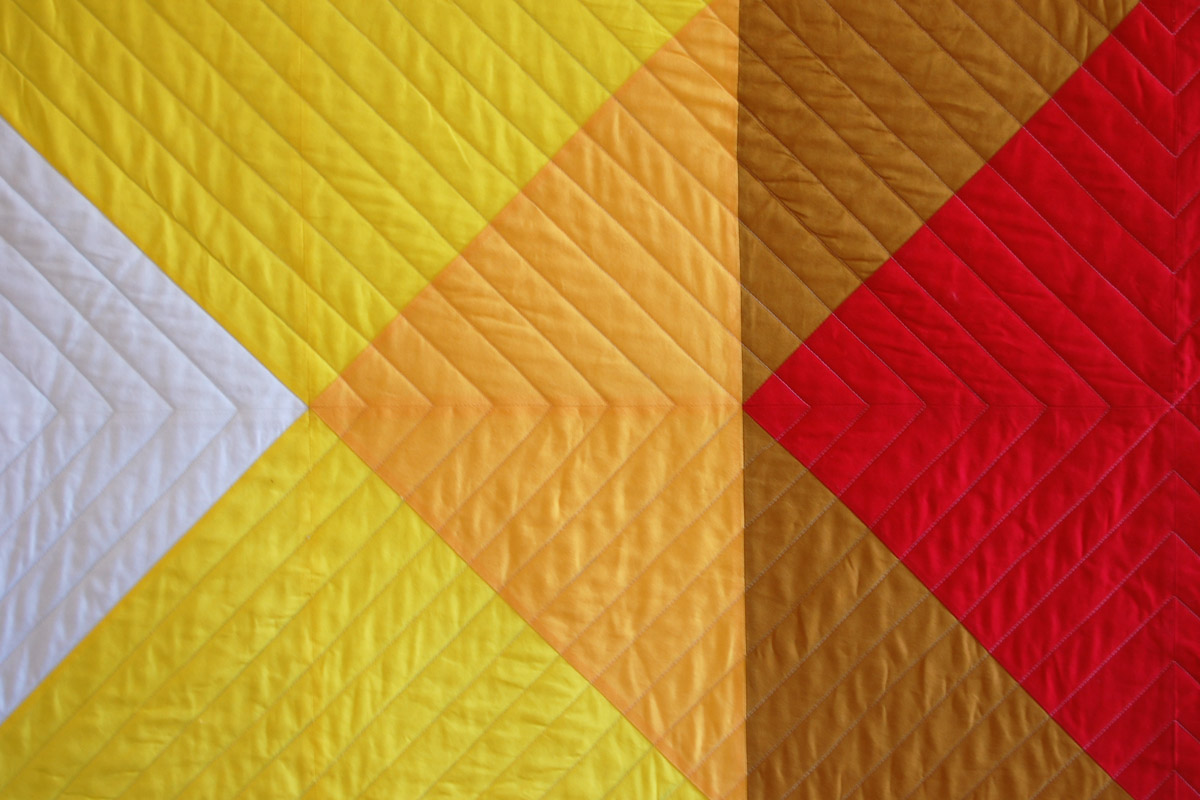
I added a red square on-point in the center block, and made it BERNINA red. Radiating out from the red center square you can see shades of golden yellow, darkest in the center and lightening to a bright golden yellow at the edges. I also added quilting lines that flow out of the center of the BERNINA red square, almost like sunbeams, and I think it adds to the glowing quality of the quilt. I guess you could could call this my BERNINA quilt! Are you ready to follow along and make a BERNINA inspired Union Square Big Block quilt with me?
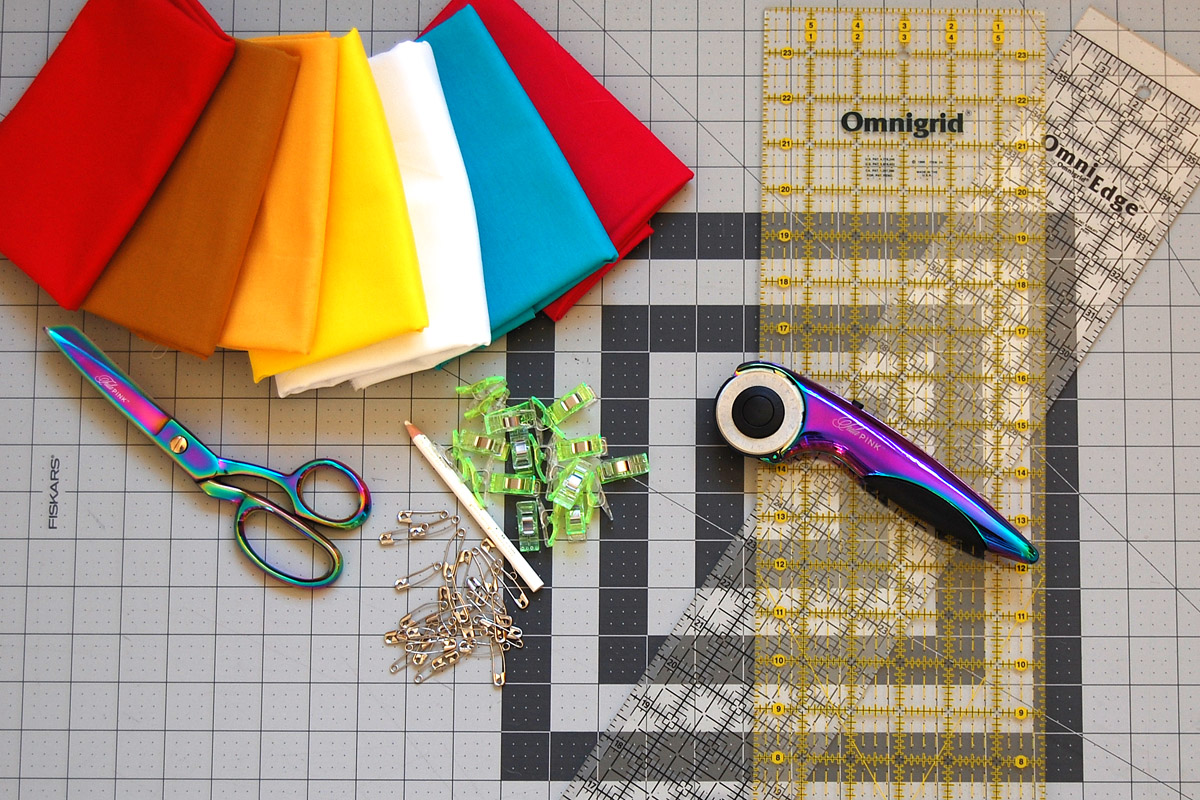
Materials to Make a Union Square Big Block Quilt
- Sewing machine (I sew on a BERNINA 770 QE)
- Patchwork foot #97D (or any 1/4″ foot like the Patchwork foot #57/#57D, #37/#37D or #97)
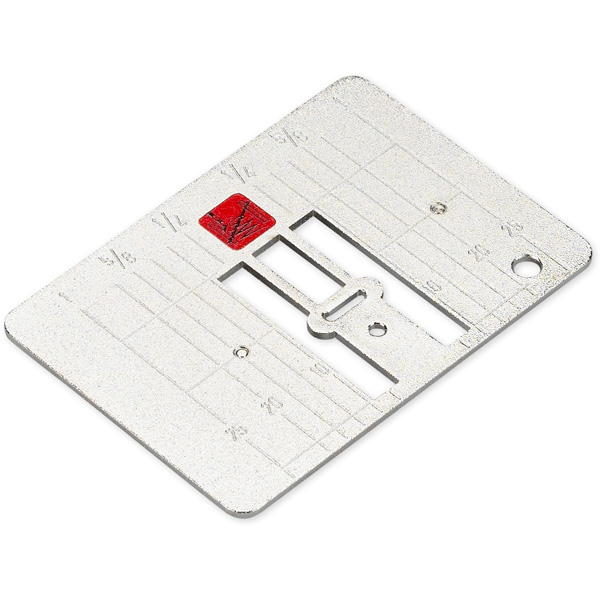
- Straight stitch needle plate and Zigzag needle plate
- Quilting needle size 75/11
- Rotary cutter (I use a Tula Pink 45mm Rotary Cutter)
- Cutting mat
- Quilting ruler size 24″ x 6″ (I also use a 36″ x 4″ and a15.5″ x 15.5″ for squaring up the quilt)
- Straight pins
- Quilt basting pins
- Quilt clips (I use Clover Wonder Clips)
- Fabric marking pencil
- Coordinating thread for piecing (I use Gutermann Sew-All 50 wt white)
- Quilting thread of choice (I use Gutermann Sew-All 50 wt white)
- 100% cotton solid 45″ wide quilting fabrics for quilt top
- Red= 1/3 yard
- Dark golden yellow= 1/3 yard
- Medium golden yellow= 2/3 yard
- Bright yellow= 1 yard
- White= 1 1/3 yard
- Cyan/bright blue= 2/3 yard
- Magenta/bright pink= 2/3 yard
- 100% cotton fabric for binding, 1/2 yard if cutting on straight grain, 1 yard if cutting on the bias (more about the binding in Part 3)
- 100% cotton fabric for backing, 72″ x 72″ square (you can buy 108″ quilt backing and cut to size, or use 45″ wide cotton and piece the backing)
- Cotton batting, 72″ x 72″ (I used a twin size batting at 72″ x 90″ and cut it to size)
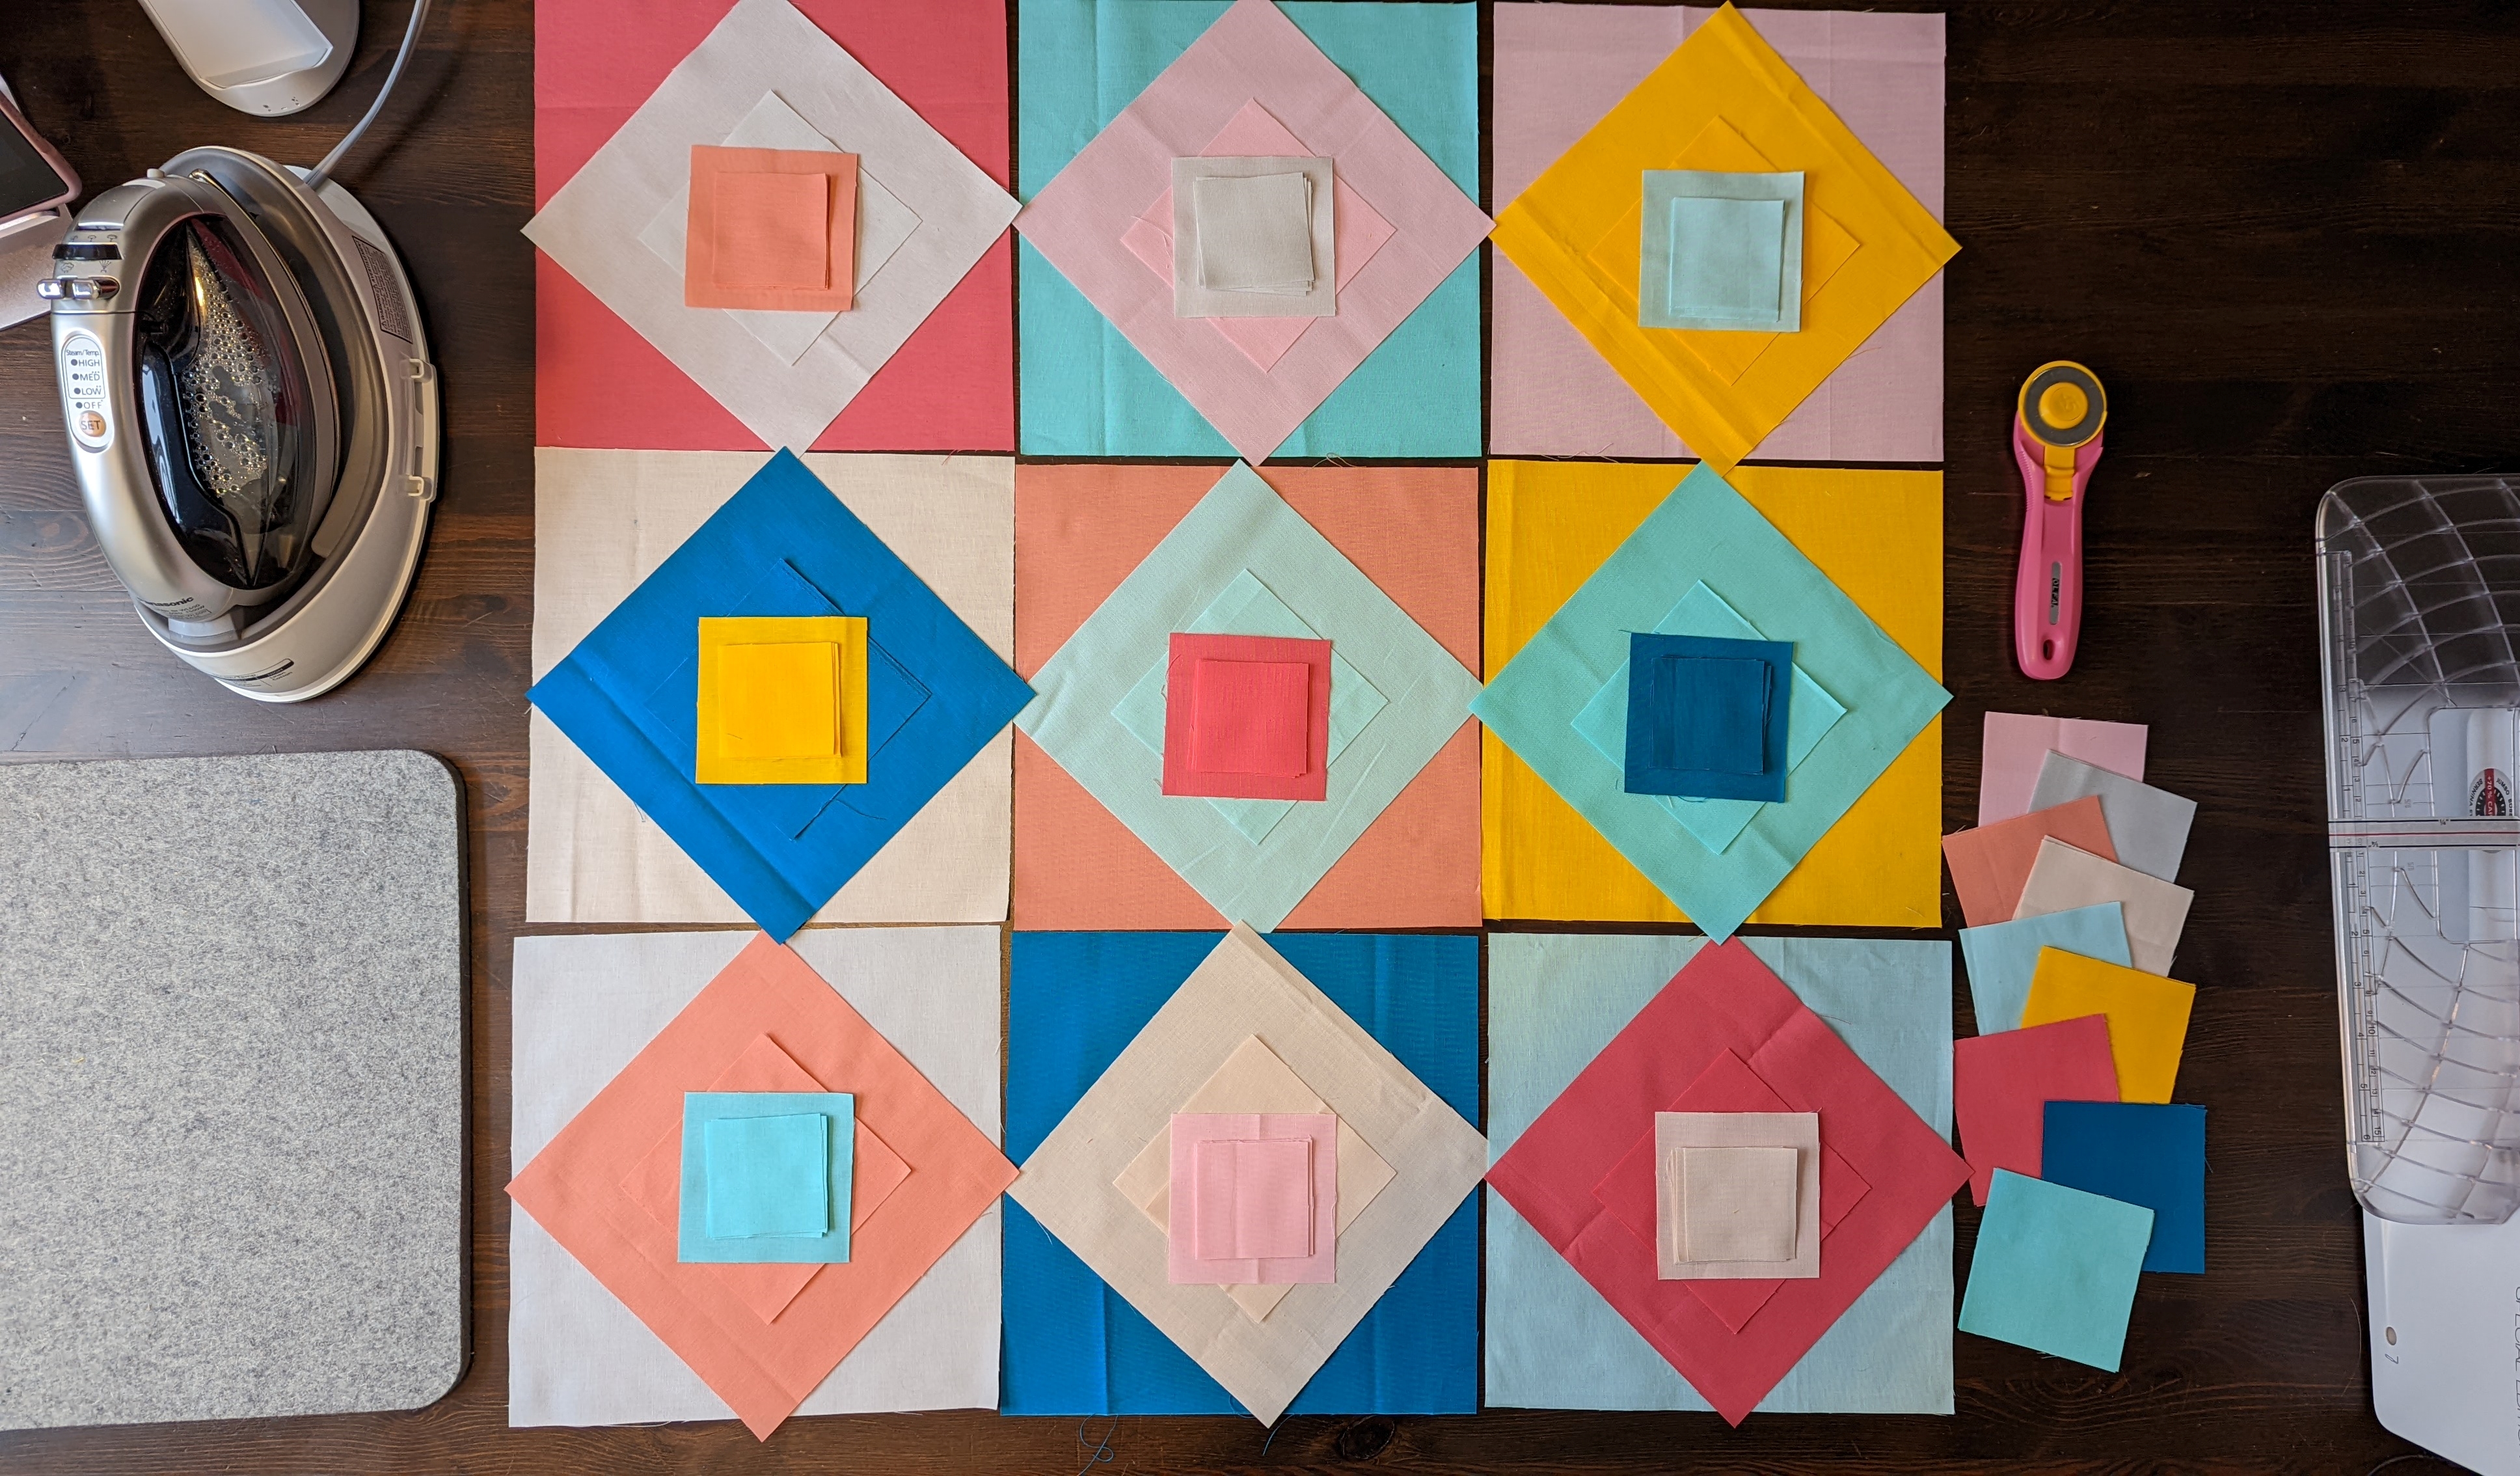
You can get started by preparing your fabric and cut the squares for the top. But before you start cutting, here’s a tip that can help with large-scale piecing.
Tip #1: Prepare your fabric. Whether you pre-wash or not, it’s important that you are cutting and sewing with fabric that is as straight on the grain as possible! First, steam-press your fabric well to help straighten the fibers. Let the fabric cool completely draped over your ironing board (or even laying completely flat). Next, add starch to your fabric. Starching the fabric will add stability to help keep the fabric on-grain and keep it from shifting while sewing. Add the starch after you have steam pressed the fabric (I like a heavy starch, and spritz both sides of the fabric with spray starch). After applying the starch, let the fabric dry before pressing. After pressing let the fabric cool completely before moving on to cut the fabric.
Union Square Big Block Quilt Cutting Guide
You will be cutting the fabric into two sizes of squares, 11″ x 11″ and 10.5″ x 10.5″ following below:
- Red: cut two 11″ x 11″ squares
- Dark golden yellow: cut two 11″ x 11″ squares
- Medium golden yellow: cut four 11″ x 11″ squares
- Light yellow: cut eight 11″ x 11″ squares
- Cyan light blue: cut four 11″ x 11″ squares
- Magenta bright pink: cut four 10.5″ x 10.5″ squares
- White: cut four 10.5″ x 10.5″ squares, and cut eight 11″ x 11″ squares
Once your squares are all cut, you’ll be ready to move on to Part 2 to learn how to create the half-square triangle blocks and piece together the top. Until then, happy sewing!
Used Products


What you might also like


17 comments on “Union Square Big Block Quilt-Along Part 1”
-
-
I can’t wait to get started on this.
-
Looks easy to do. I think I may make it for my quilting secret sister.
-
Love these quilt challenges. Have lots of anxiety waiting for each next step.
-
I would like to do this. But am having surgery on the 9th. Will I still be able to get the quilting and binding tutorial if I an a few weeks late?
-
Hi sandycall, I wish you well on your upcoming surgery! This tutorial will stay posted even after the quilt-along has ended. No worries, you can join us anytime! – Erika
-
-
Any chance you can provide cutting instructions for the Allison Glass fabrics included in the posting? I have some yardage of hers I would like to use in this gorgeous quilt. It should be easier, but I cannot figure out which of the various shades of yellow are which. Thanks
-
Hi kathyjoyce, I am not familiar with the Alison Glass fabrics that you mention. I can suggest taking a look at the yellow fabrics that you have available and sorting them from the lightest shade to the darkest shade. Use the lightest shade where I used the bright yellow, the medium shade where I use the medium golden yellow, and the darkest shade where I use the dark gold. Thanks for checking out the quilt-along, and happy stitching! – Erika
-
Thanks, the fabrics I mention are on this posting, pictured with an all pink center and green triangles surrounding it, instead of the square in a square. Thanks for your info, though. I think I will wait for the piecing instructions before cutting/
-
Hi kathyjoyce, I think you are mentioning the inspiration for my quilt which was the Union Square block posted to WeAllSew back in December. This is part of the BENRINA block-of-the-month, and I included a link to that post above the photo. You can find cutting instructions for that block, which is a much smaller scale, at the original post: https://weallsew.com/union-square-block/?utm_source=weallsew&utm_medium=social&utm_campaign=post_union_square_big_block_quilt_part_one
-
-
-
-
When do the following parts become available?
-
Hello jcoachamn, check the schedule at the top of the post to see when Part 2 and Part 3 will be published at WeAllSew. Glad to have you following along with us! Happy stitching – Erika
-
-
Yes, you are correct. I am snow blind here in the northeast US, lol. I want to make a giant one of those and will adapt accordingly. I always get a little extra fabric so I have enough here. t looks fabulous.
-
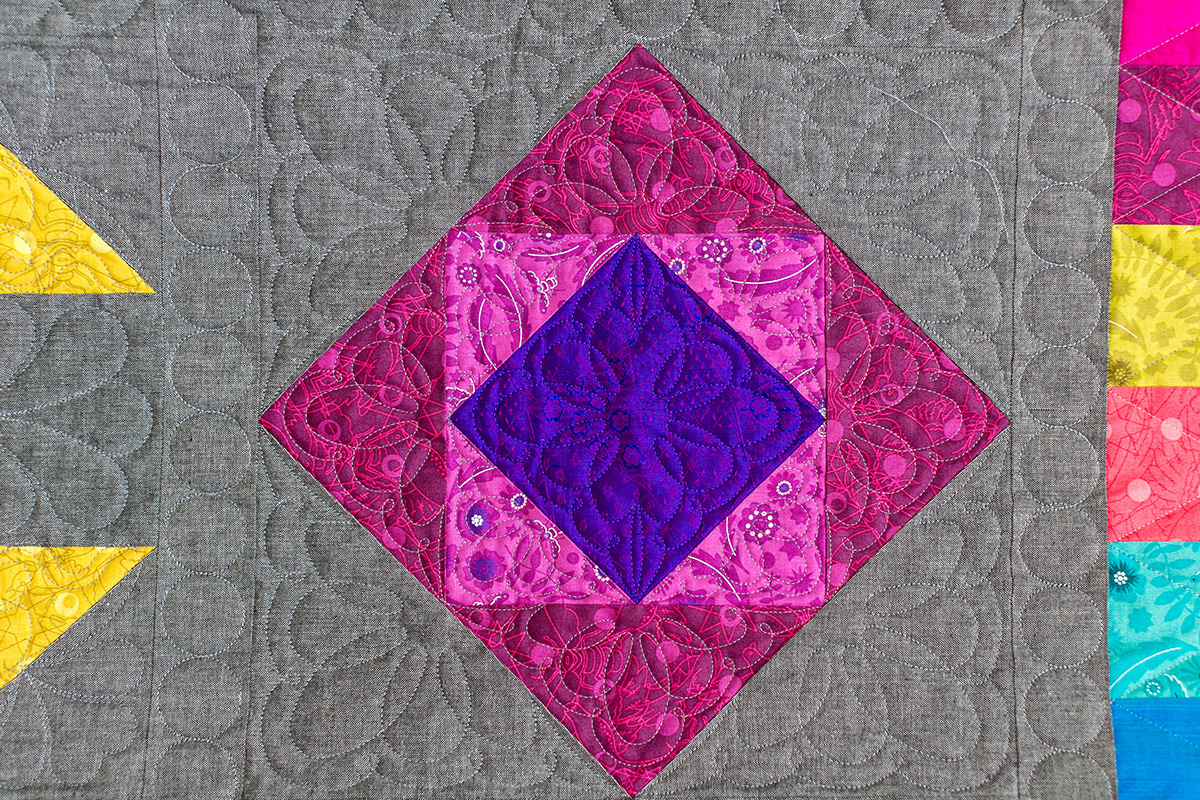
I’m confused about the magenta fabric. Where are we using it in the quilt? Thank you.
-
Hello brngods, the four corner blocks include the magenta colored fabric. I can suggest checking in with Part 2 of the quilt-along where you can see exactly where the magenta blocks are sewn into the top. The photos may be helpful. Happy stitching! – Erika
-
-
Ok,1 metre gray jersey
½ meter Green car print jersey
½ meter little whale jersey.
Thanks much
Donna-
Oops! Played in wrong spot! LOL
-
Leave a Reply
You must be logged in to post a comment.

Love this. Can’t wait to get fabric and start.