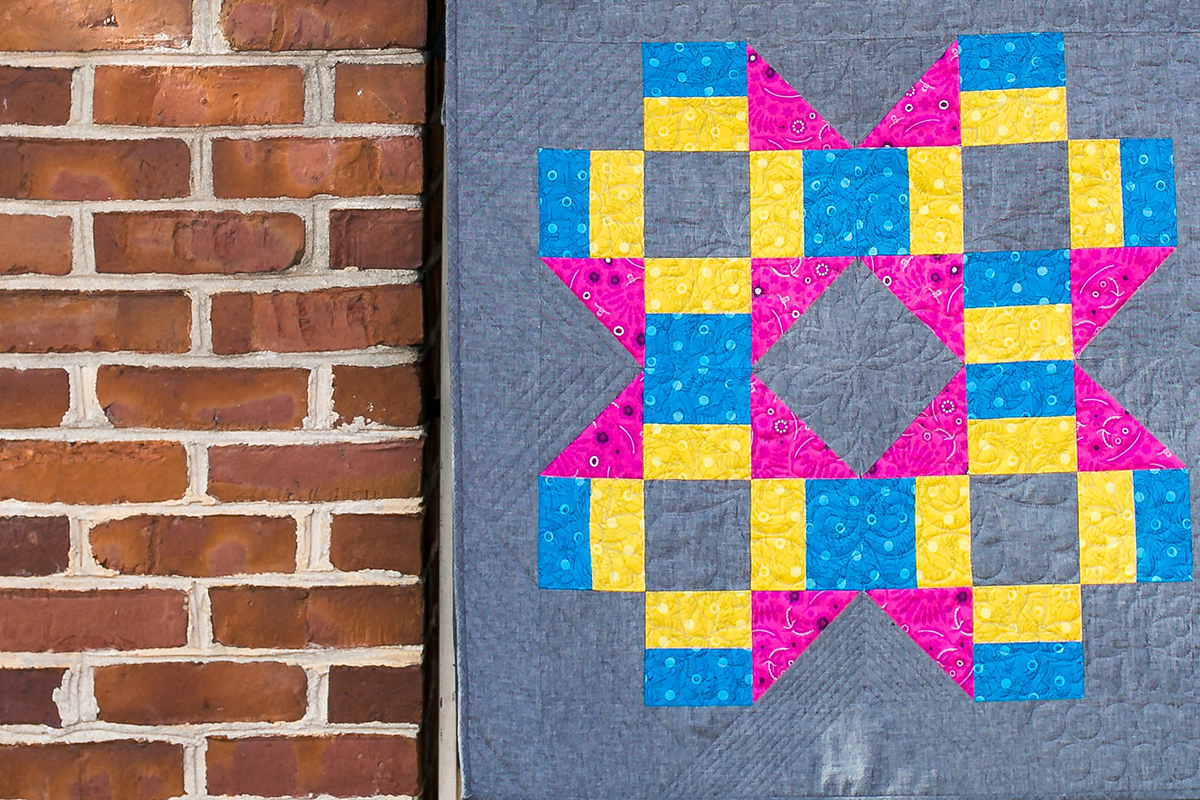
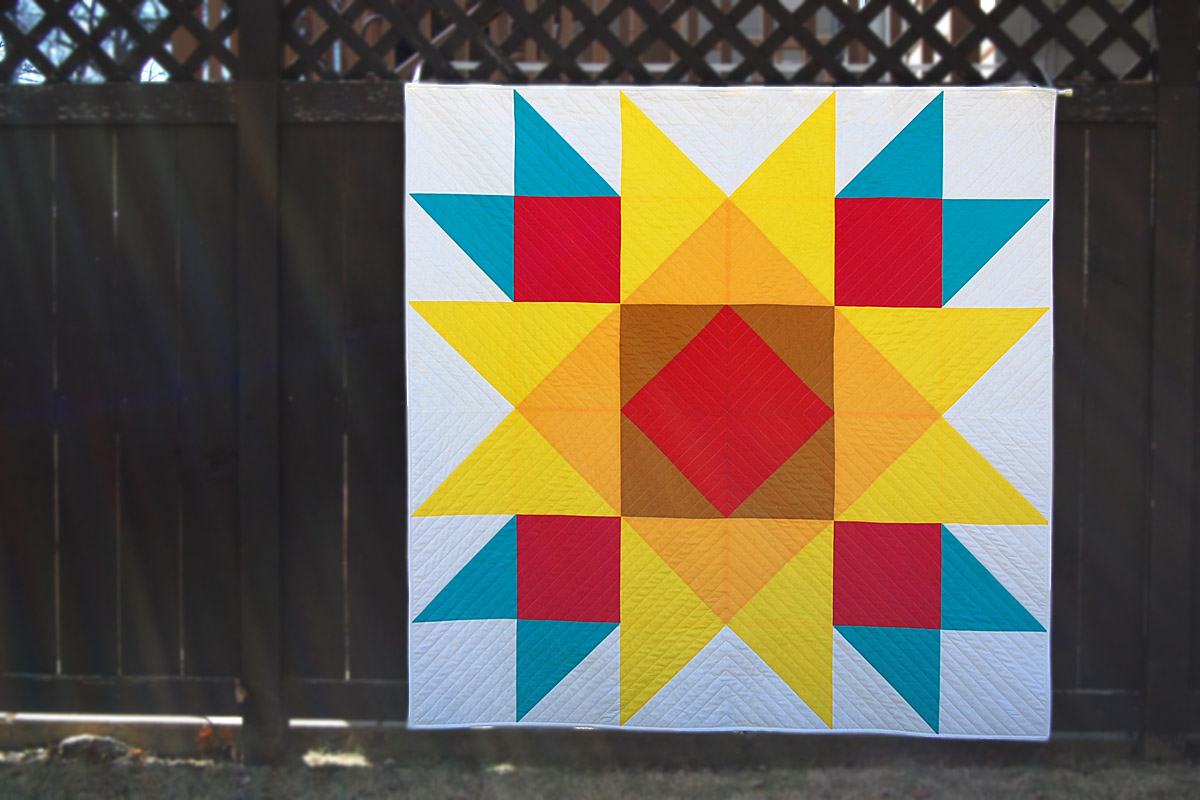
Grecian Square Quilt Block
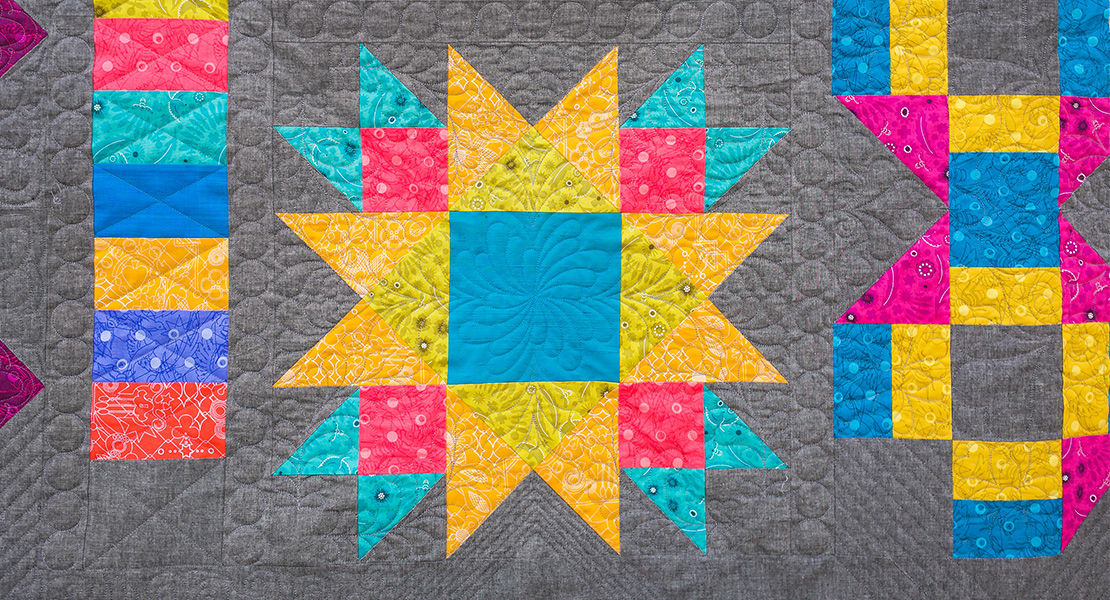
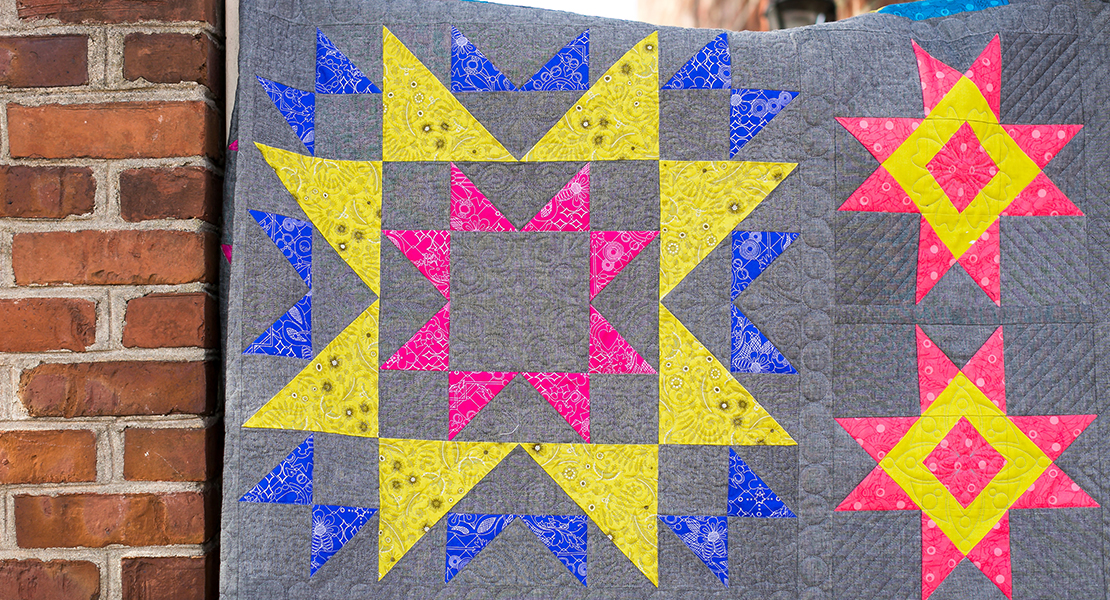
For Block 8 of the BERNINA Block of the Month Series, we will be making the Grecian Square. It is an easy block made from four individual blocks. Because of the color placement and the rotation of the blocks, it ends up forming one large star block. Each of the 4 blocks is a 12″ finished square so the large Grecian Square Block is a finished 24″ block.
If you are buying fabric for each block on a monthly basis, you will need four fabrics for this block; a teal, a yellow, a pink and the gray background fabric.
Please see more details about fabric requirements here. You will follow the Alternate Cutting Instructions below if you are cutting from a kit.
Please also download the BERNINA Block Party Fabric Chart.
If you are using the Sun Print 2017 Andover fabric line by Alison Glass, the specific colors are listed in bold:
Fabrics to Use to Create the Grecian Square Quilt Block

| Fabric A | Yellow | A-8482-Y | 1/4 Yard |

| Fabric B | Teal | A-8484-T | 1/4 Yard |

| Fabric C | Pink | A-8483-E | 1/4 Yard |

| Fabric D | Gray | A-C-Black | 1/4 Yard |
Supplies to Create a Grecian Quilt Block
Patchwork Foot #37/37D or #57/57D or #97/97D
Use one of the following for quilting:
- BERNINA Q 20/Q 24 Longarm Quilting on Frame with BERNINA Q-matic Longarm Quilting Automation System
- Pantograph Kit for the longarm machine
- Machine with Embroidery Capability for quilting in the hoop with an embroidery design and Embroidery Foot #26
Cutting Instructions to Create a Grecian Square Quilt Block
Fabric A and B
Cut 16 Rectangles 2 1/2″ X 4 1/2″
Fabric C
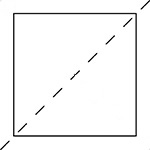
Cut 6 Squares 4 7/8″; cut in half diagonally making 12 triangles
Fabric D
Cut 8 Squares 4 1/2″
Cut 6 Squares 4 7/8″; cut in half diagonally making 12 triangles
Alternate Cutting Instructions
Fabric A:
Cut a 4 1/2″ strip; cut 16 rectangles
Fabric B:
Cut a 4 1/2″ strip; cut 16 rectangles
Fabric C:
Cut a 4 7/8″ strip; cut 6 squares. 13″ of the length will remain.
Fabric D:
Cut a 4 7/8″ strip; cut 6 squares. Cut three 4 1/2″ squares from remaining strip.
Piecing Instructions to Create a Grecian Quilt Block
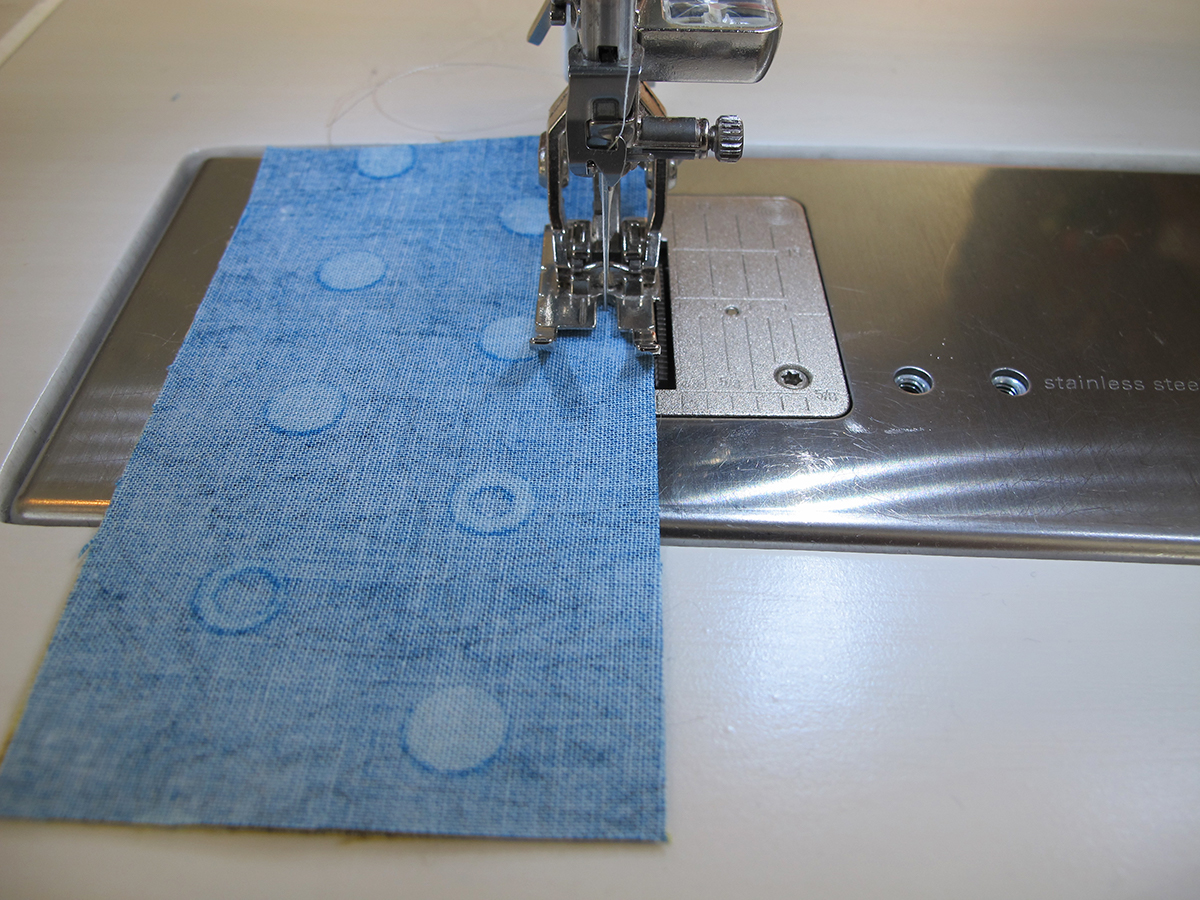
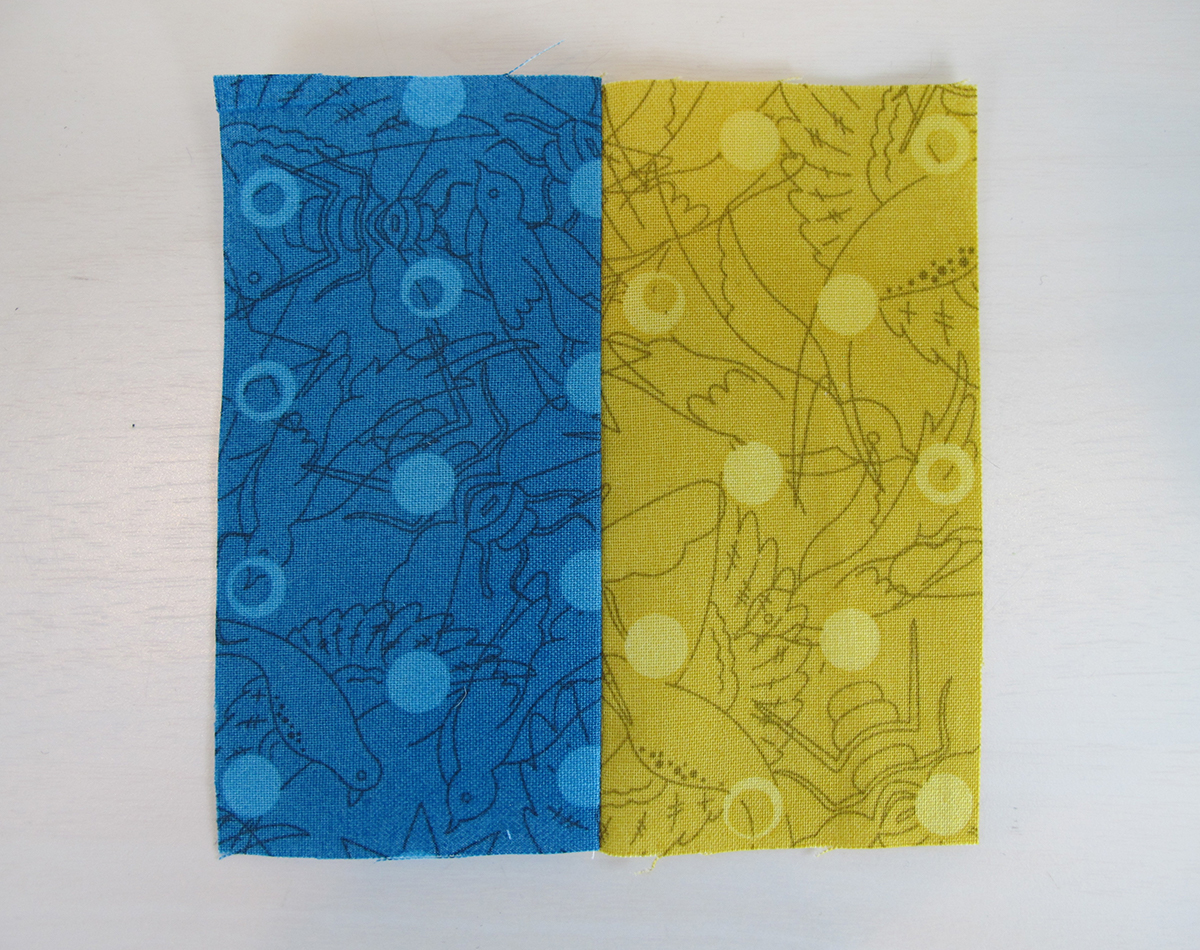
Piece together a Fabric A and Fabric B rectangle along the longer side. Make 16 units.
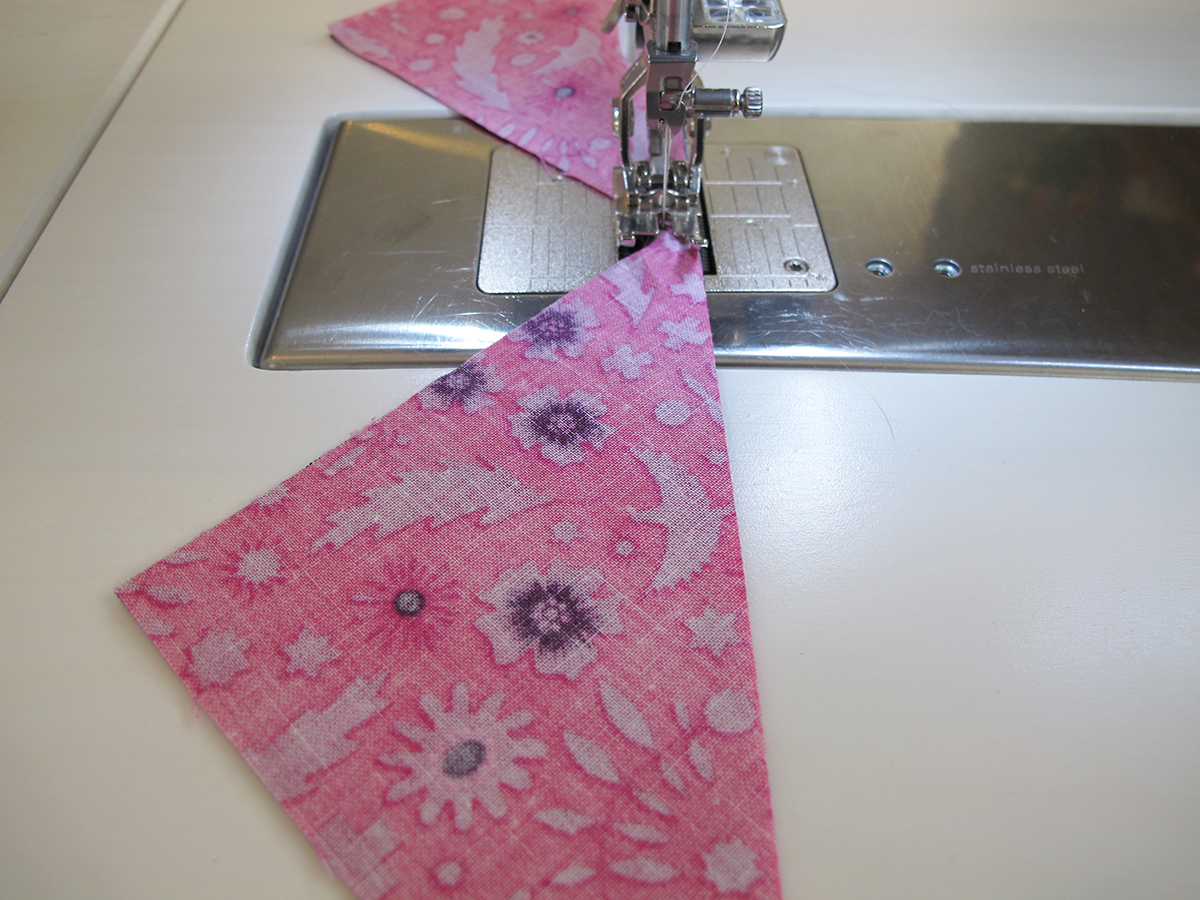
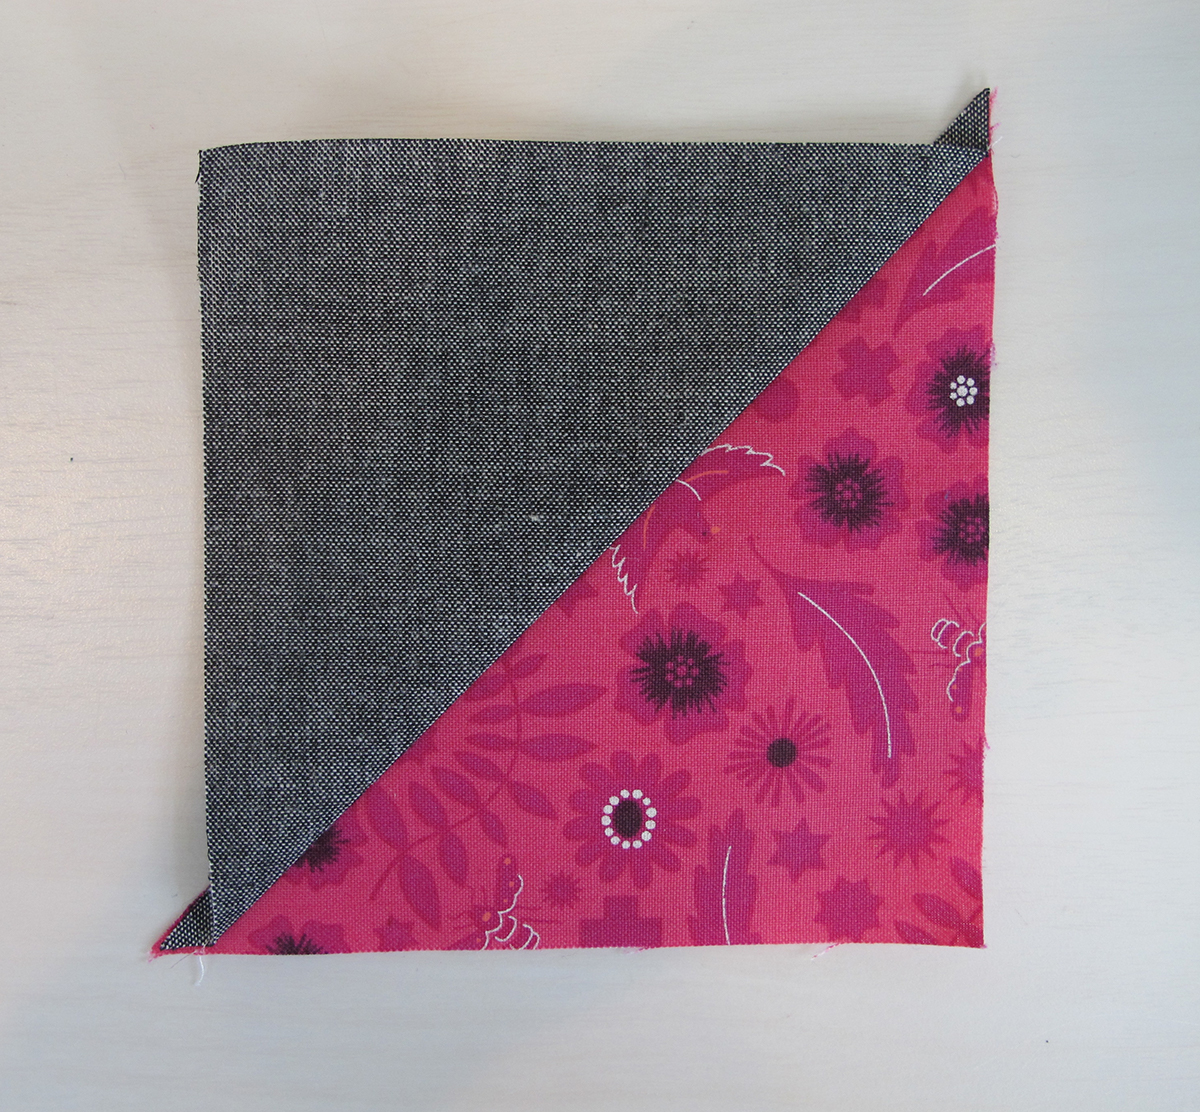
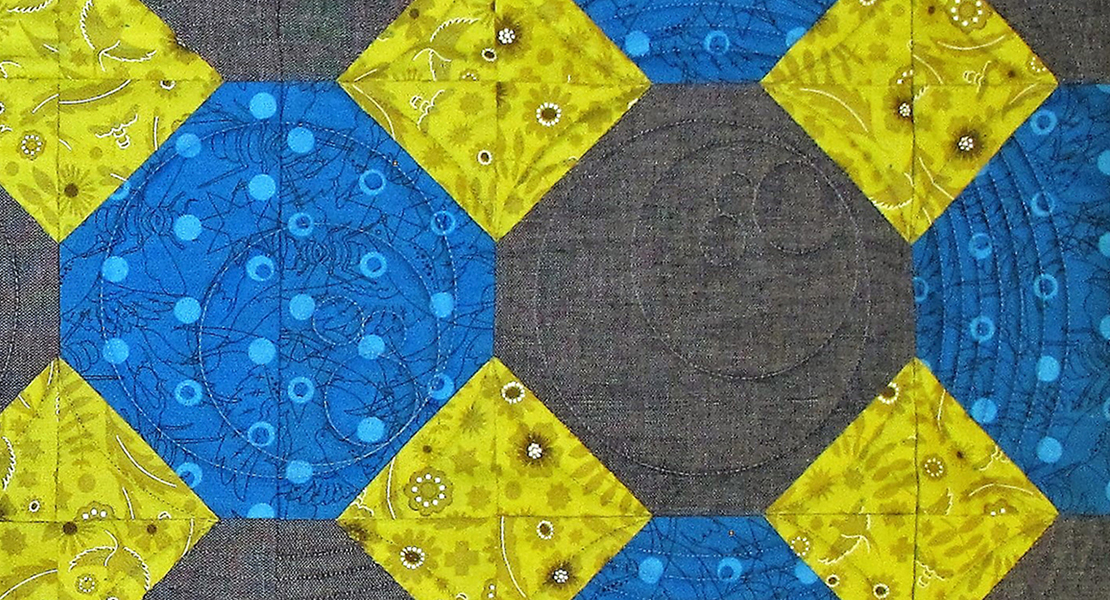
Piece a Fabric C triangle to a Fabric D triangle creating a half square triangle (HST) unit. Make 12 units.
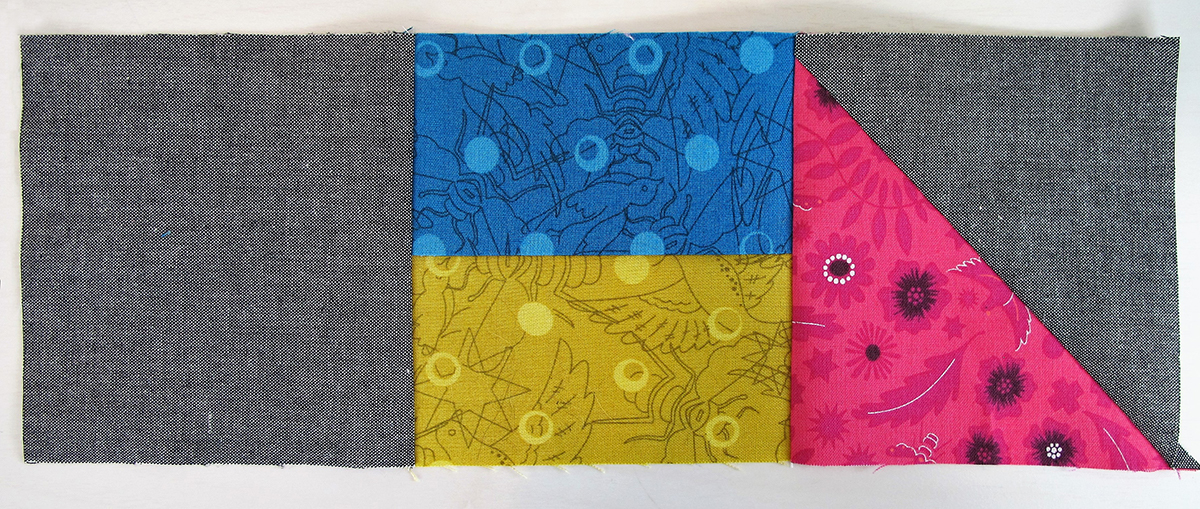
Stitch together a Fabric D square, and on each of the previously pieced units to create Row 1. Repeat for 2 units. Stitch the same row reversing the Fabric D square and the HST square. Repeat for 2 units.
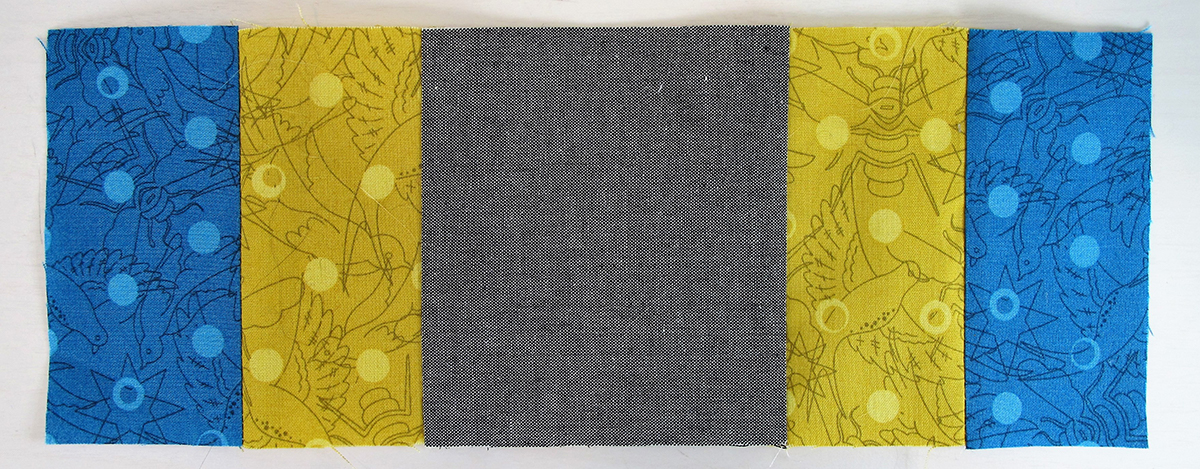
Center a Fabric D square in-between two of the Fabric A/B pieced units as shown below to create Row 2. Repeat 3 more times for a total of 4 units.
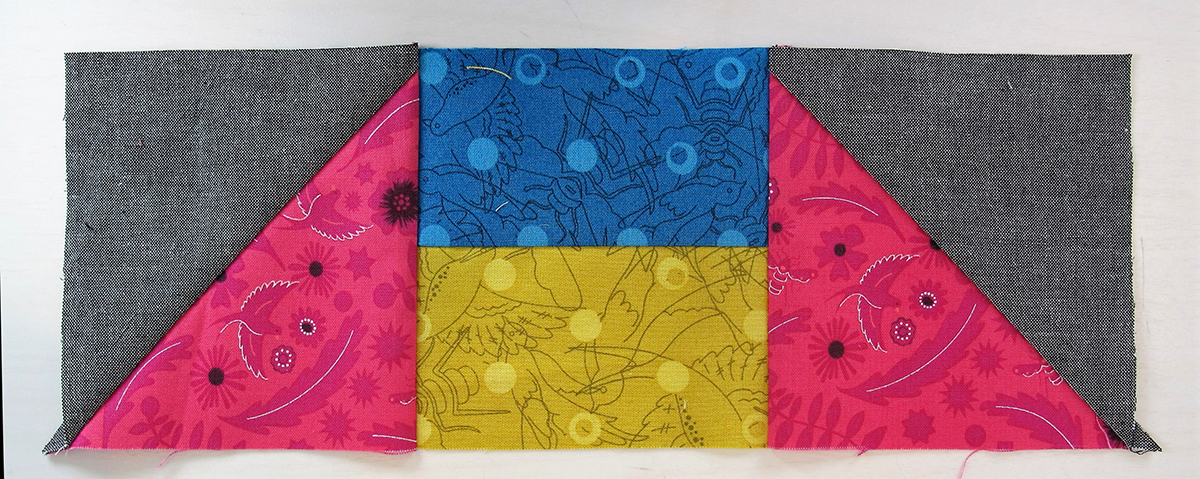
Center a Fabric A/B pieced unit in-between two of the HST units as shown below to create Row 3. Make 3 more of this unit for a total of 4 units.
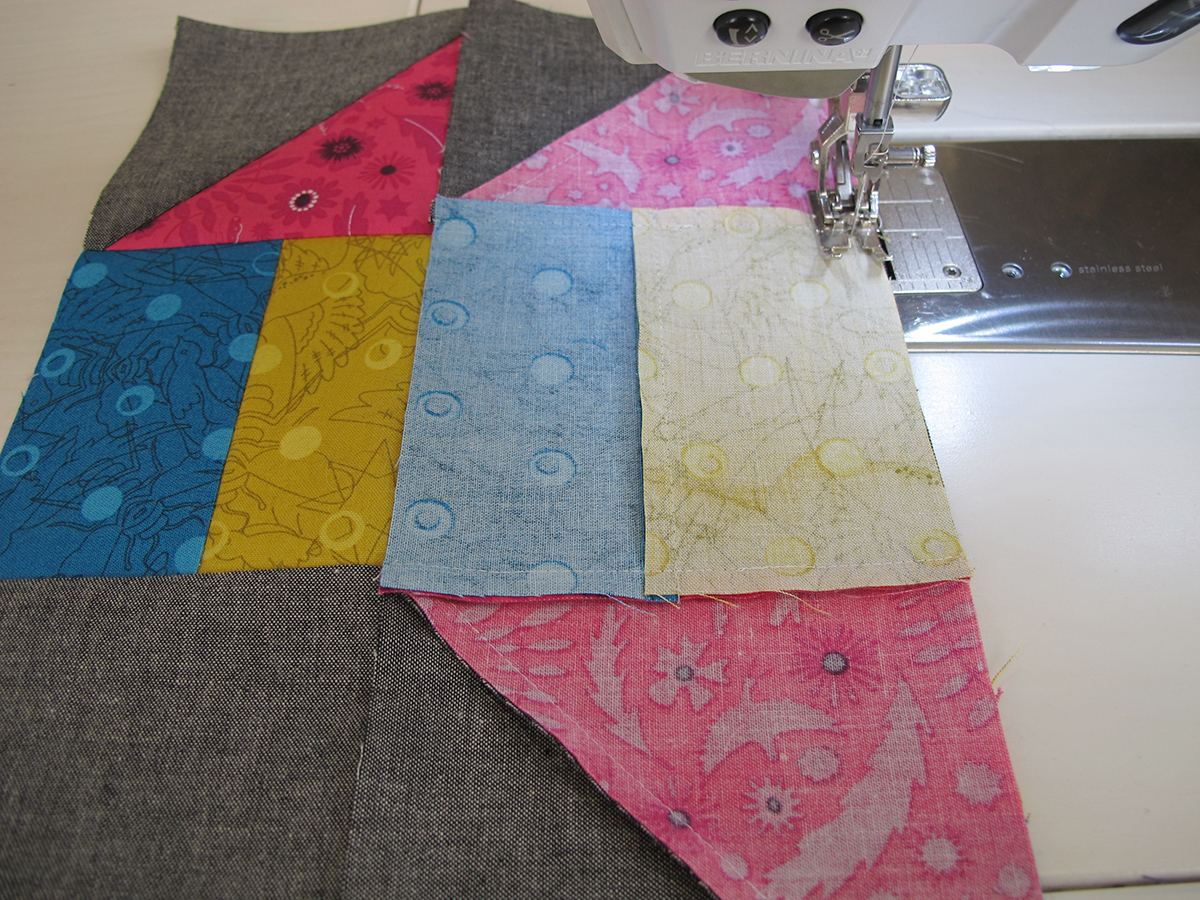
Piece together Row 1, 2, and 3 as shown to make a 12 ½” block. Repeat to make four 4 12 ½” blocks.
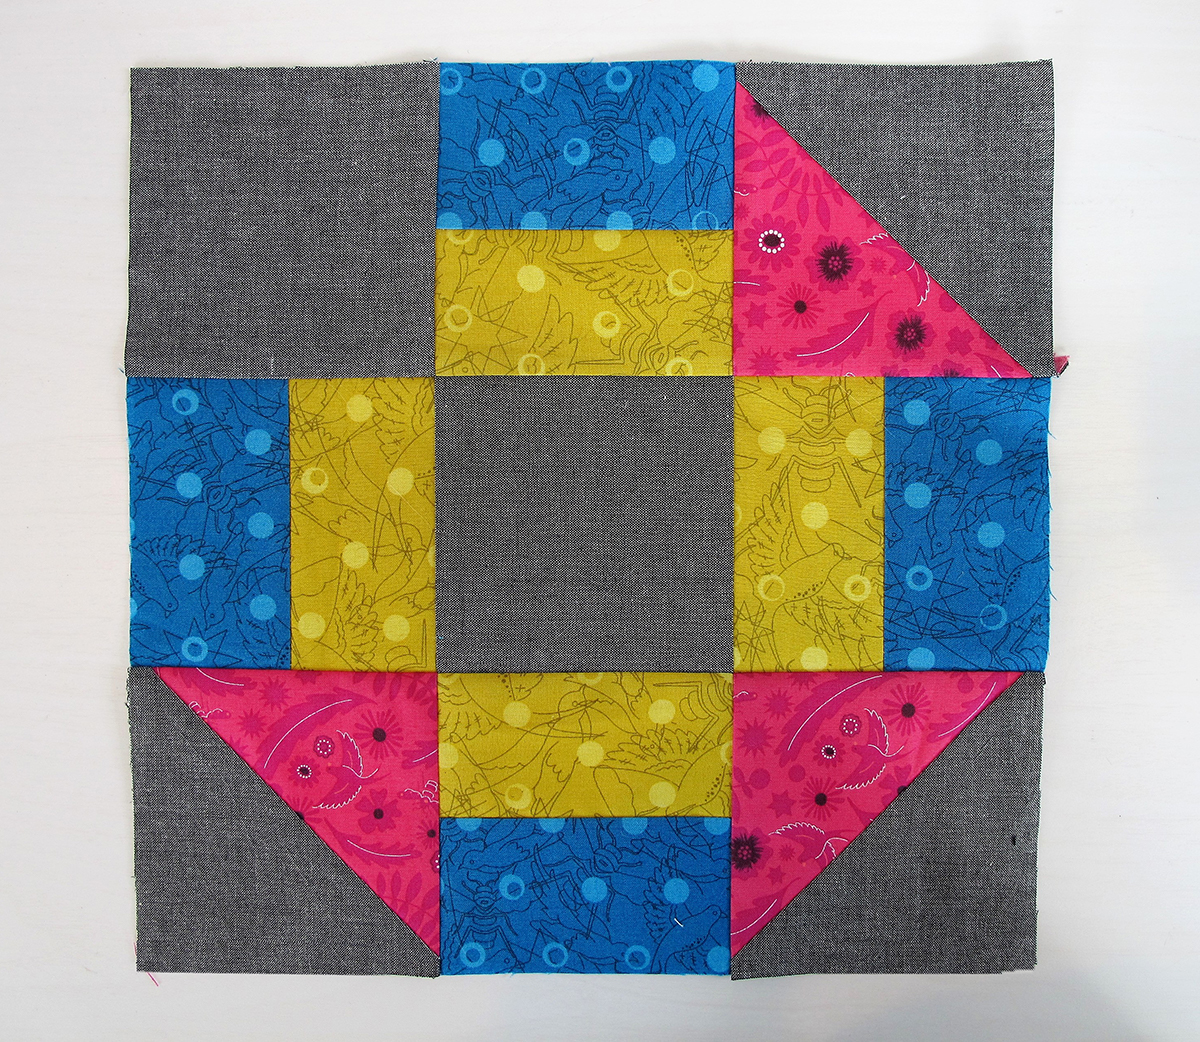
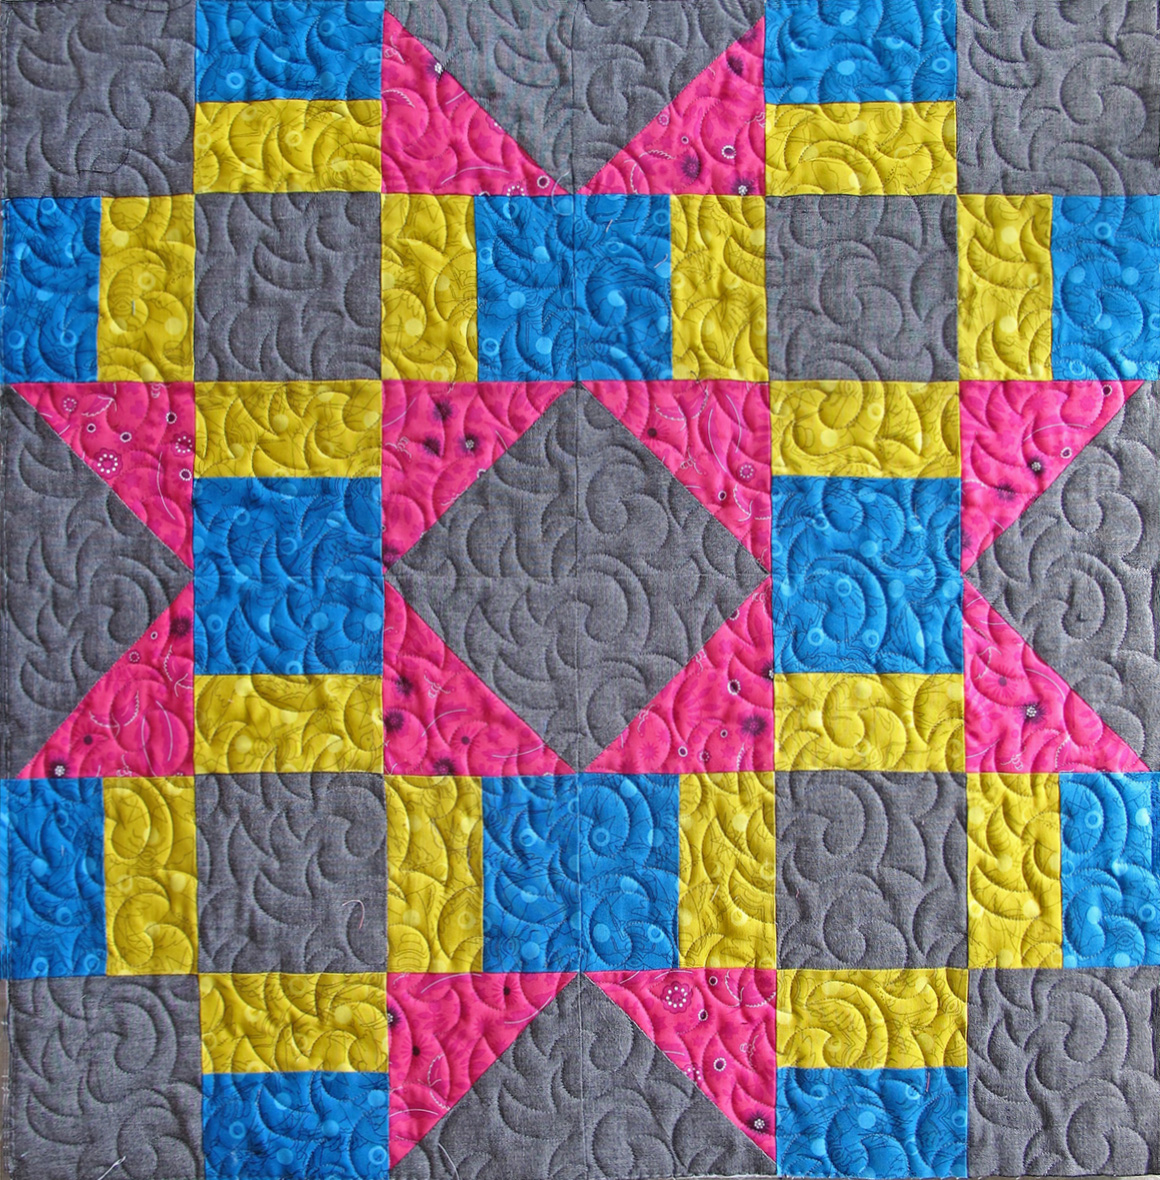
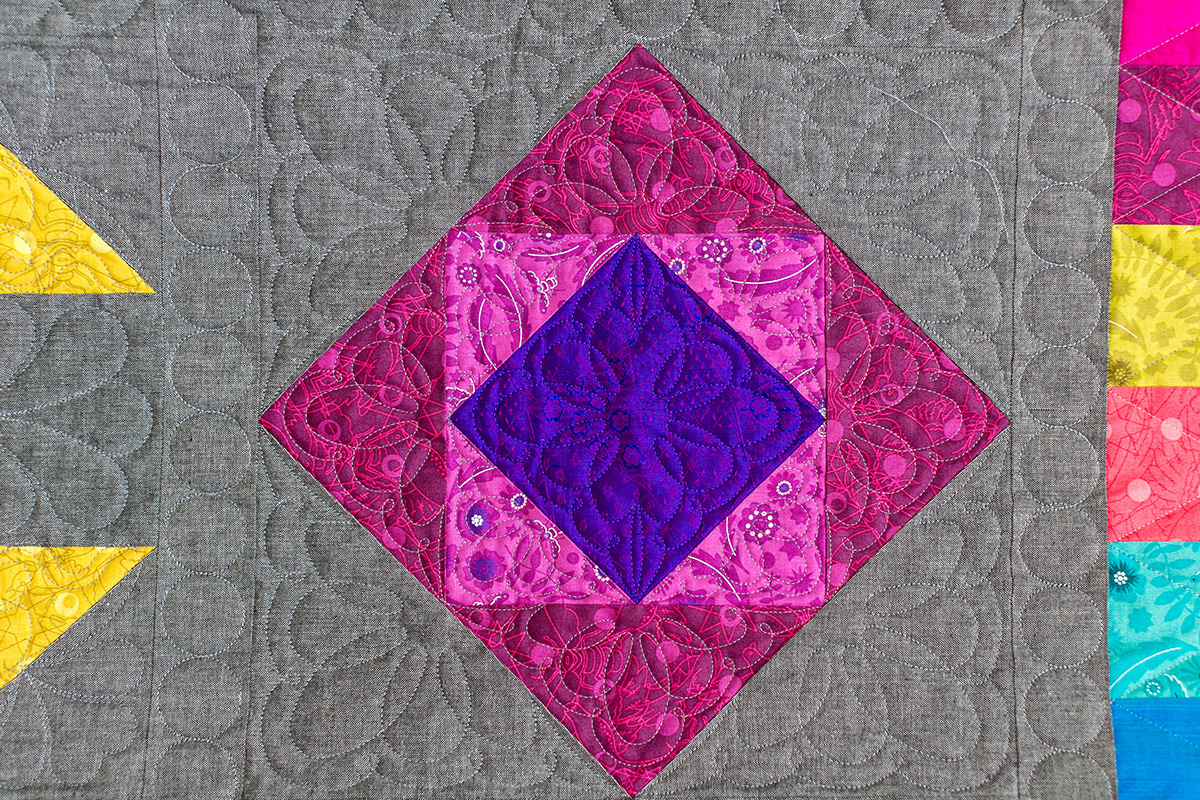
Piece together the four blocks with the solid gray background square in each outside corner of the large square. Refer to the completed block photo for reference. Block should measure 24 1/2″ X 24 1/2″.

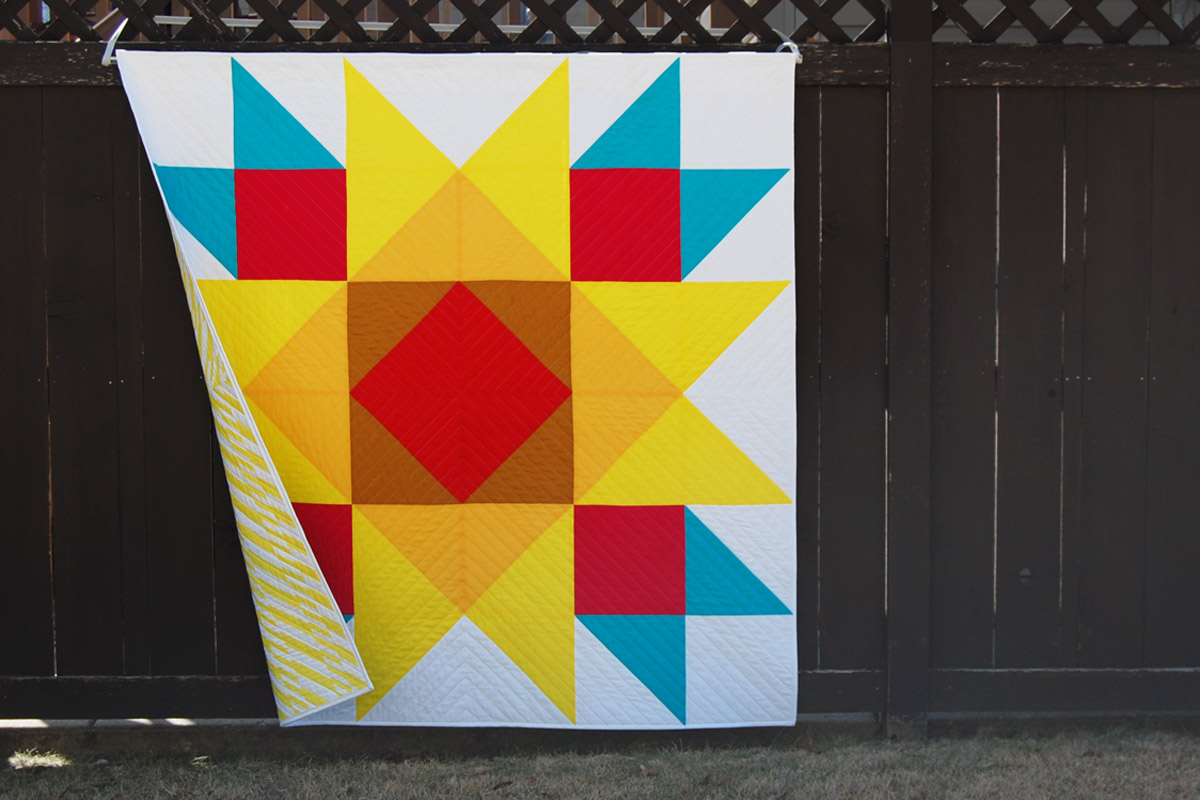
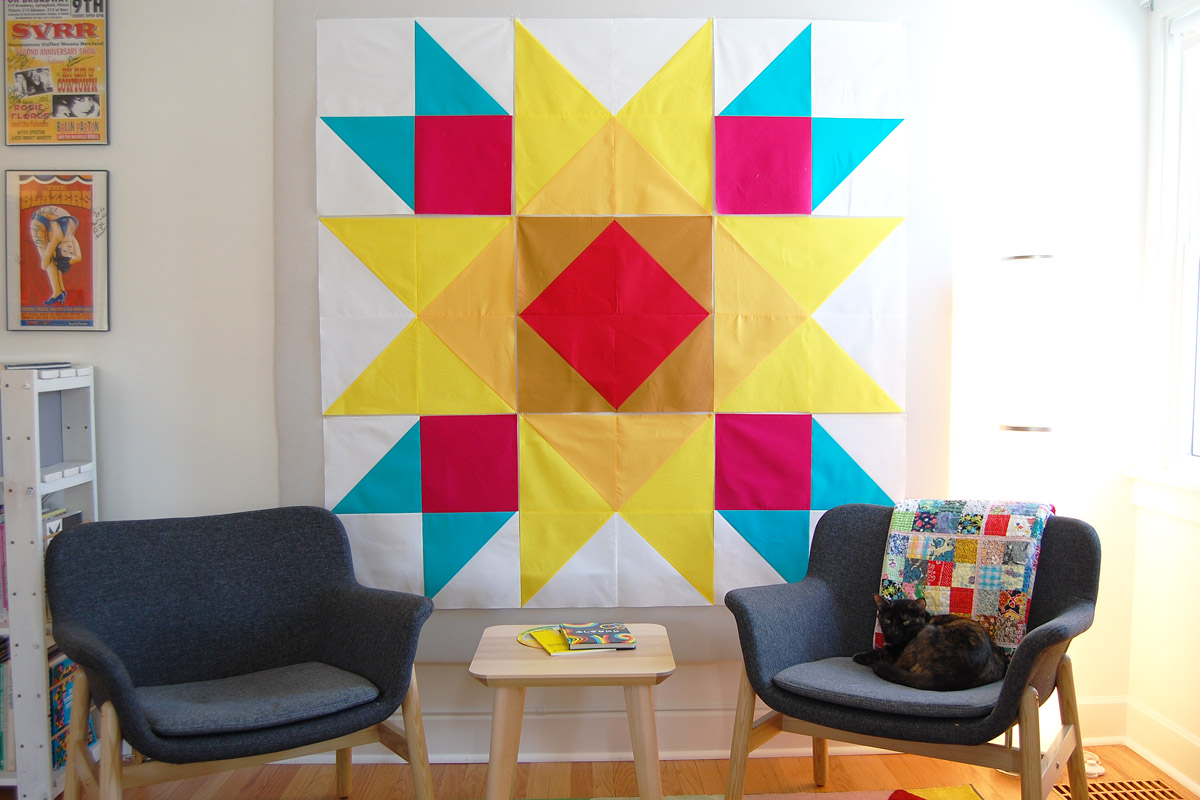
(Because everyone makes mistakes, I should point out that when I was making the original quilt, I wasn’t paying attention when I was piecing. So my block in that quilt is not laid out correctly!)
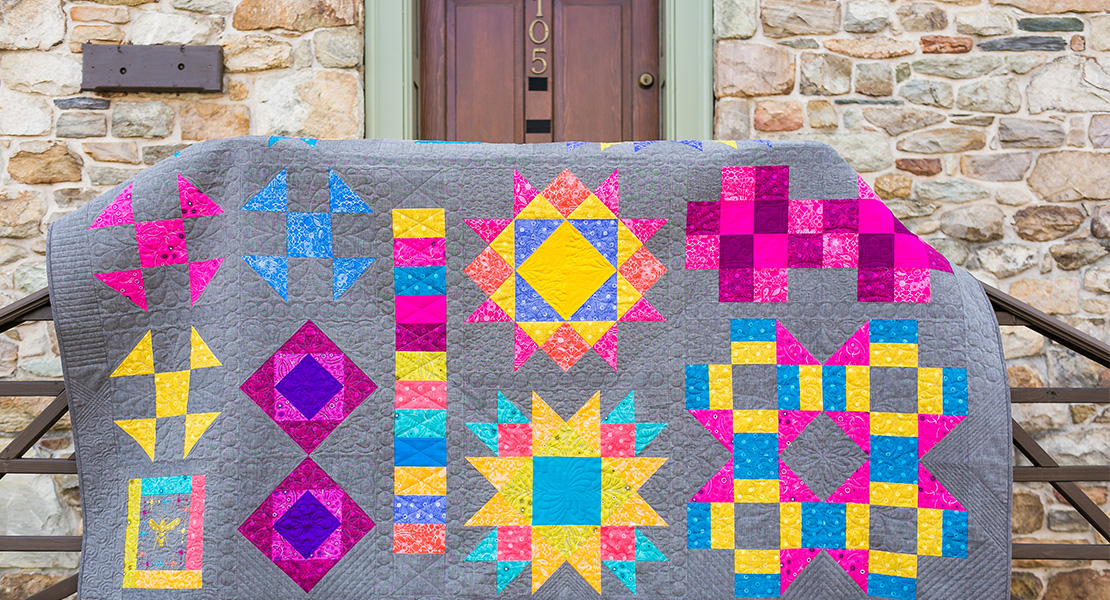
If you are going to make the entire quilt from the Block of the Month Series, set this large block aside for now. The instructions for the piecing together all the blocks will come at the end of the series.
Each month, I also give you instructions for a different quilting technique so that you can experiment with different techniques. When it comes time for the final quilting, you will be ready to decide which quilting techniques you like best.
Remember to join Denise Jones later this month on Monday, November 20th. Check out the great project she has come up with for the Grecian Square!
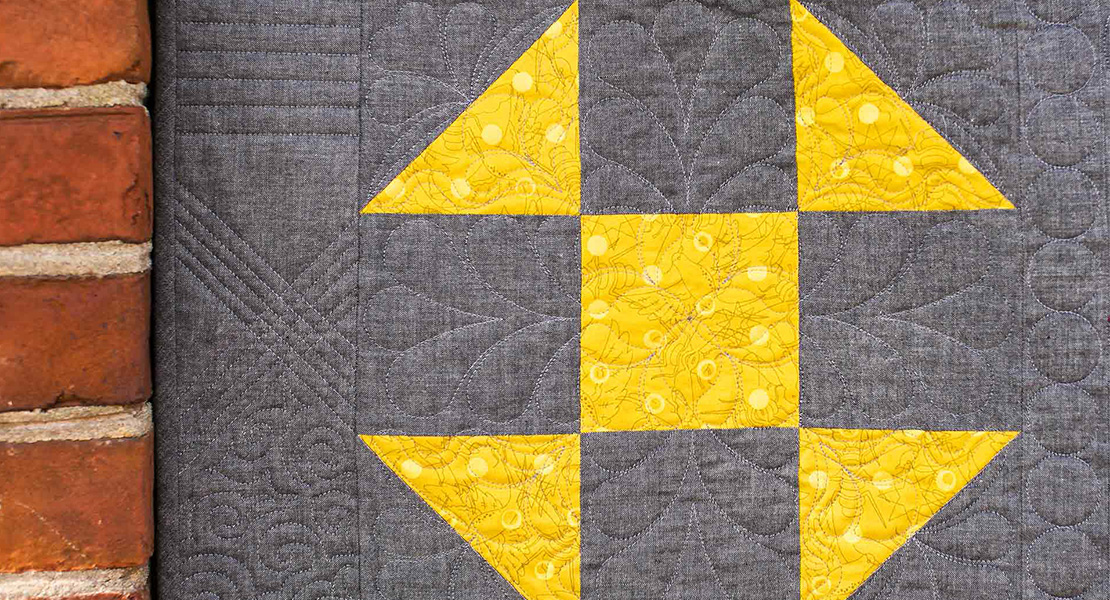
A Quilting Lesson: Creating a Quilting Pattern with Q-matic Quilting Automation System
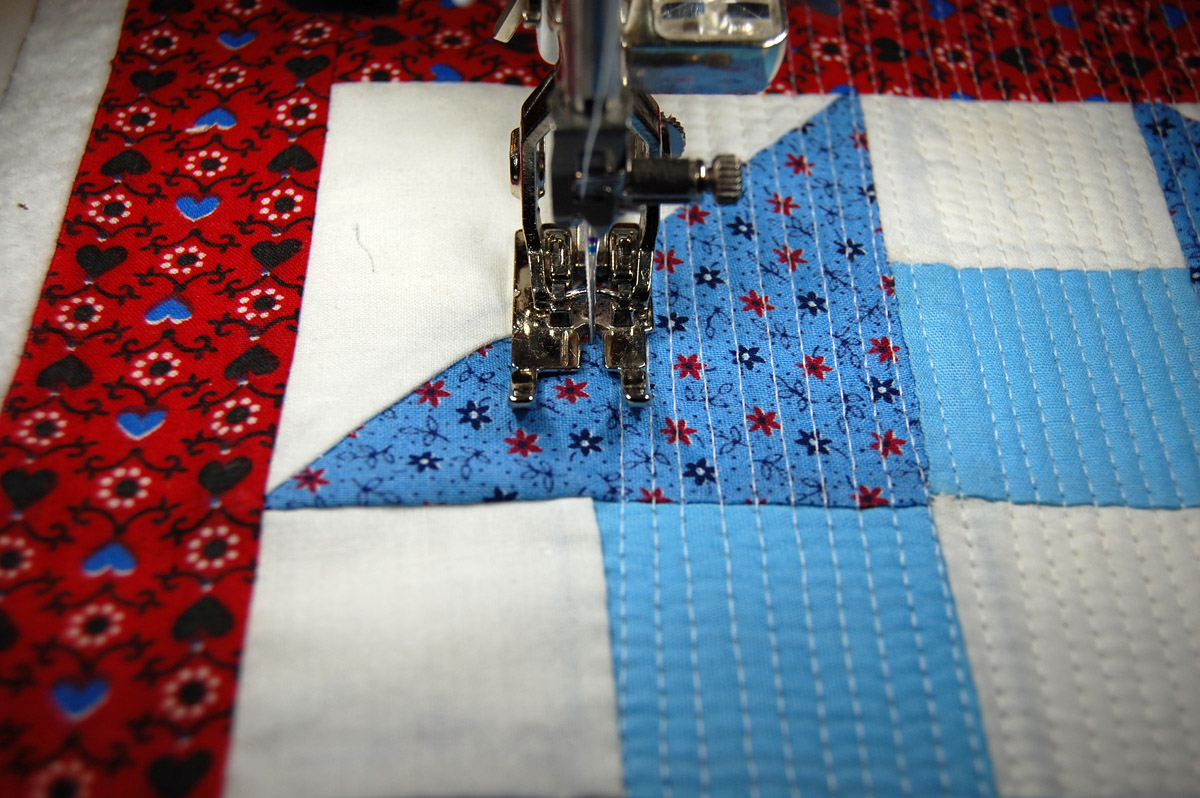
My Grecian Square Block was quilted using a Pantograph design. A Pantograph means that the quilting design goes from one edge of the quilt to the other. There are several different scenarios for achieving this type of quilting.
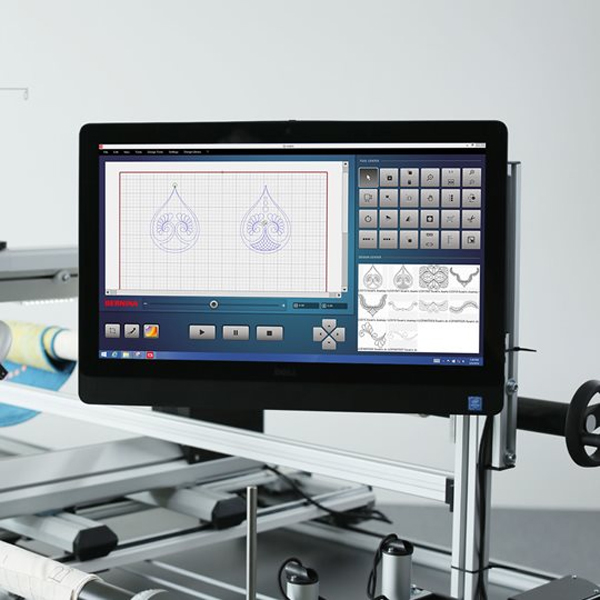
I used the BERNINA Q 24 on the Q Series Frame with the Q-matic Quilting Automation System (more details on that below).
If you do not have Q-matic, you might choose to use the Pantograph Kit on the frame. The Pantograph Kit allows you to follow your design with a laser light using the handles on the backside of the frame. You may choose to use the printed pantograph that came with the kit, but there are also innumerable designs Pantograph designs available.
If you are quilting on your domestic sewing machine with embroidery capability, you can use any number of embroidery quilting designs to create an all over pattern. For more information on machine embroidered quilting, refer to the Quilting Lesson in Block 7.
And of course, if you are quilting free motion, you will do your own all over pattern.
I will take you through the steps for setting up this pattern in Q-matic. This quilting section is not meant to be a lesson in the use of Q-matic. Check with your dealer for your guide lesson(s) on operating your system.
For the pantograph as pictured on the block seen here, I used a Q-matic built in design.
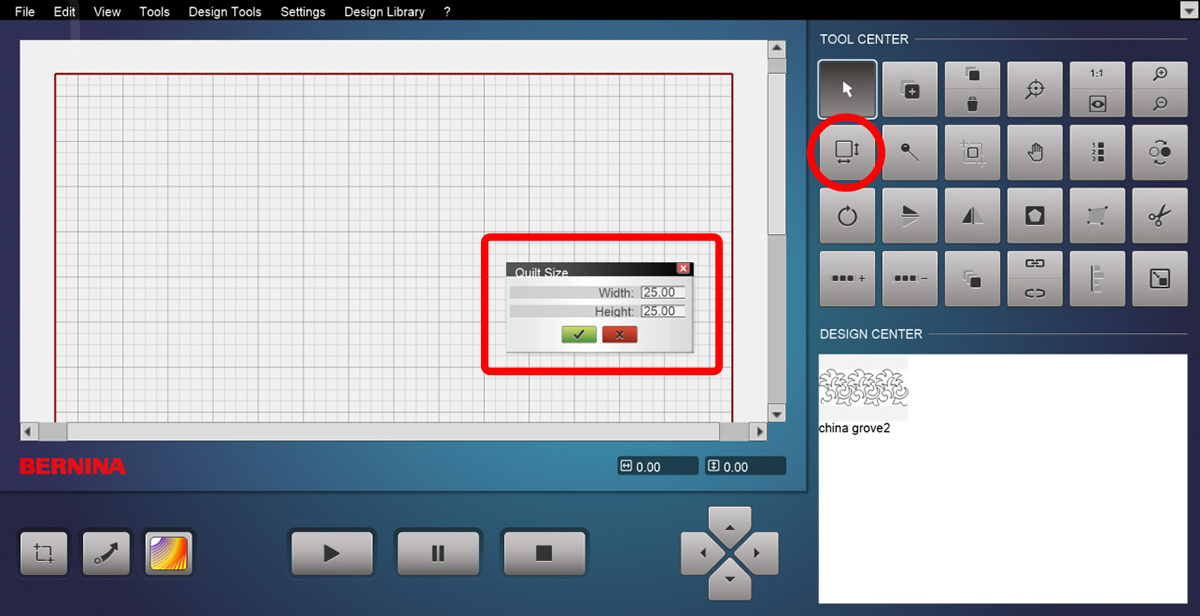
Open Q-matic and follow the prompts on screen to set the safe area. Select Quilt Size and enter the size of your block. I rounded up to 25″ X 25″.
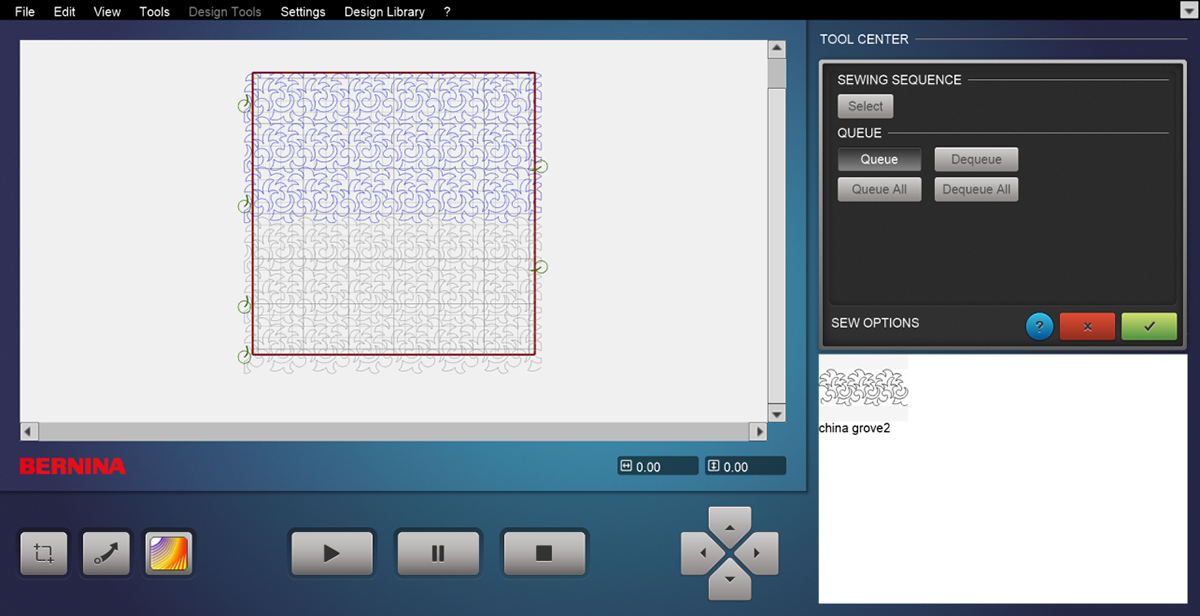
With Q-matic still open, go to the Design Center. Select China Groove 2 from the Design Pool and place it in the Design Center. Select Close to go back to the main screen.
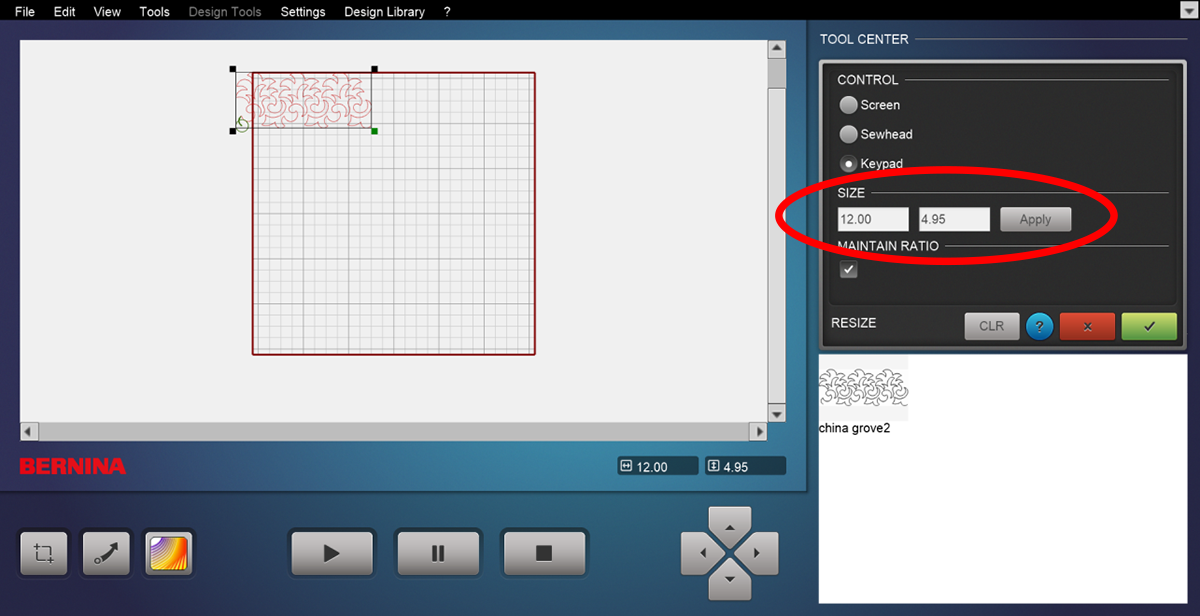
Now select the China Groove 2 design to place it on the Quilting Area. Move the design to the upper left corner of the quilt grid. Resize the design to 12.00″ X 4.95″.
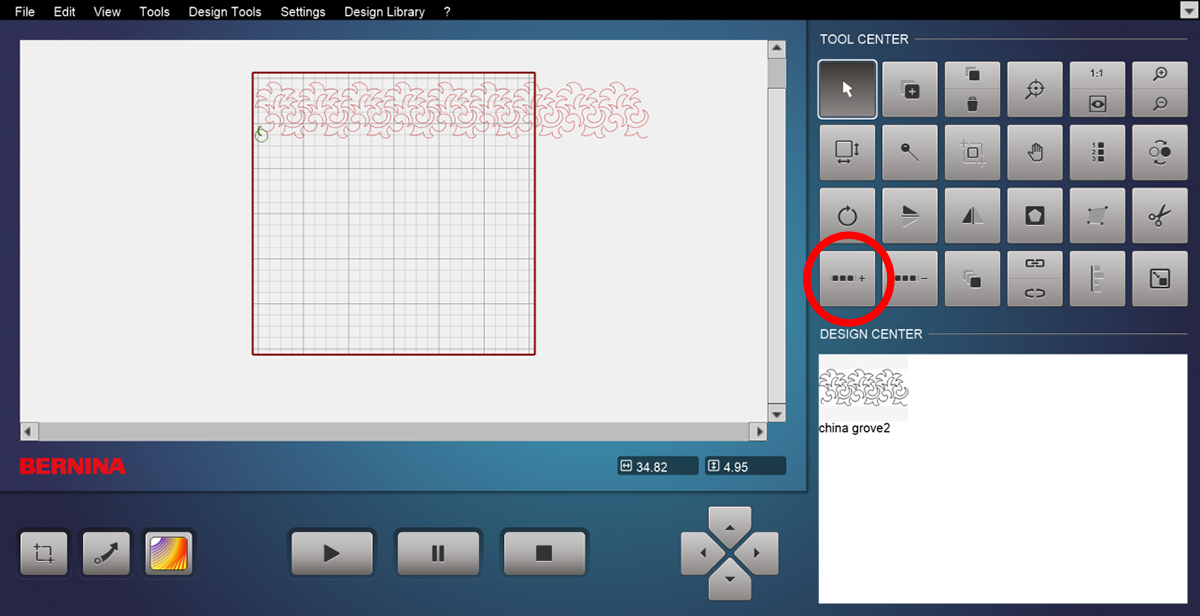
Use the E2E+ Function to place 3 designs in a row.
Center the row across the top of the block. Open the Multiply function and input 1 row across, 6 rows down, with vertical spacing -0.50 (negative.5).
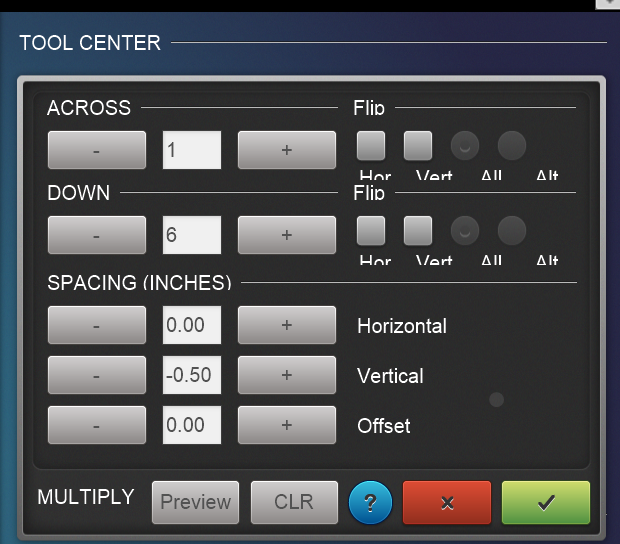
Be sure to preview the design before selecting (check) the green box, confirming your design.
The entire design should be selected. Carefully Unconnect the designs so all the rows are separate.
Select every other row, one at a time, and reverse sew. Go to Connect, select Group and then select each row making one design again.
Move the entire design so that it is centered on the quilt grid, and just off the top so that there are no gaps in the quilting at the top of the block.
Open the Trim Function. Select the entire quilt as well as Horizontal orientation. Touch on screen at the very top of the block, a line will appear. Do a preview to see what will be cut off. If correct, confirm with the check mark in the green box.

Trim the sides of the quilting design by placing a vertical line about ½″ from the side of the quilt.
I find it best not to trim the bottom edge of the quilt at this time.
You will now want to place the design in the correct place for it to be stitched on the block in the right place. I do this with markers. Open up Markers; with the sewhead, place markers across the top of the block beginning at the very left edge and ending at the right edge. Connect the markers to form a line which is the top of your block. Now move the design so that it is against the line and centered on the line on the computer screen.
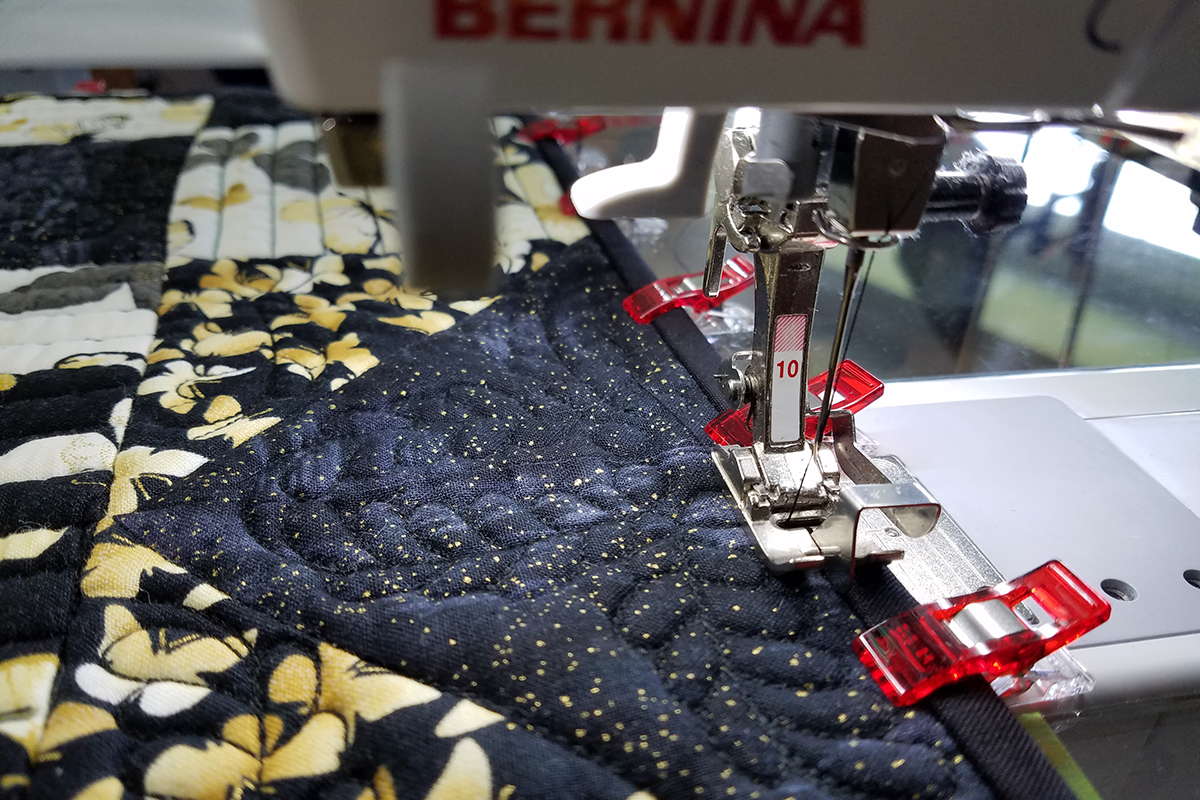
You are now ready to quilt. Baste the top and sides of the quilt.
Select the design and unconnect so the rows are all separate. Select Sewing Options and Dequeue All. Then select Queue and select rows 1, 2 and 3. Confirm your choice.
Press the Start button. When the first three rows are complete, advance the quilt, realign the safe area and quilt rows 4, 5 and 6. Be sure the rest of the sides and bottom are basted.

Tutorial List of the BERNINA Block of the Month Series
Block 1: Antique Mosaic Block
Block 2: Shoofly Block
Block 3: Square in a Square Block
Block 4: Magic Circle
Block 5: Card Basket Variation Block
Block 6: Ohio Star Variation Block
Block 7: Maple Star Block
Block 8: Grecian Square Block
Block 9: Union Square Block
Block 10: A Girl’s Favorite
Used Products


What you might also like


7 comments on “Grecian Square Quilt Block ”
-
-
Ooops! You are absolutely right! You will need to make two of row 1 and then 2 of the flipped layout. Look at the large finished block to see the full layout.
-
Where did Decembers block go? Just stopped by to do Decembers block and it’s gone ?
-
Hello trucksseven, you can find the December Union Square block here: https://weallsew.com/union-square-block/
-
-
-
-
What happened to December’s block?
-
Thank you so much for this quilt along Nina, beautiful pattern and beautiful fabrics. Thank you
-
Where can January’s block be found?
Leave a Reply
You must be logged in to post a comment.

I believe there’s a boo-boo in the block on the first page. And the instructions for Row 1 might need a rewrite – only make 2 of what is shown in the picture. Then it needs to be flipped to make the other 2. Hopefully, this will help others.