Antique Mosaic Block
BERNINA Block Party—Block One: Antique Mosaic Block
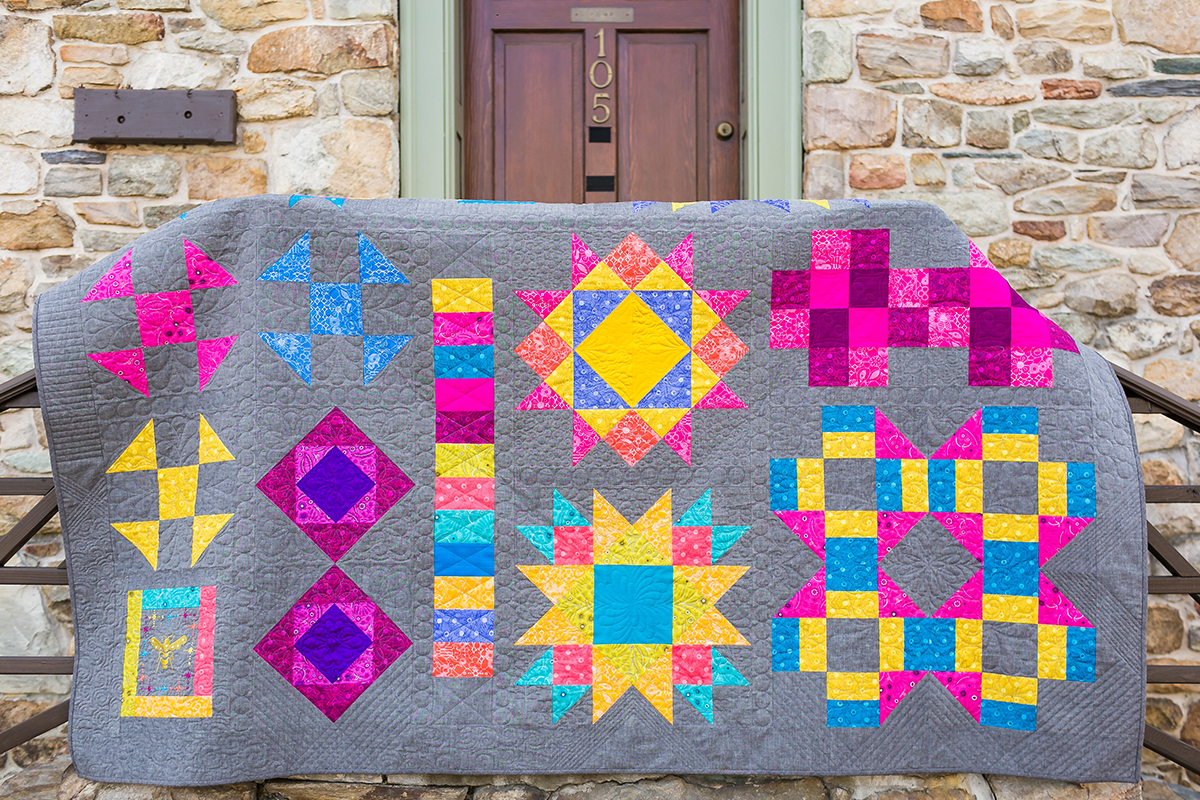
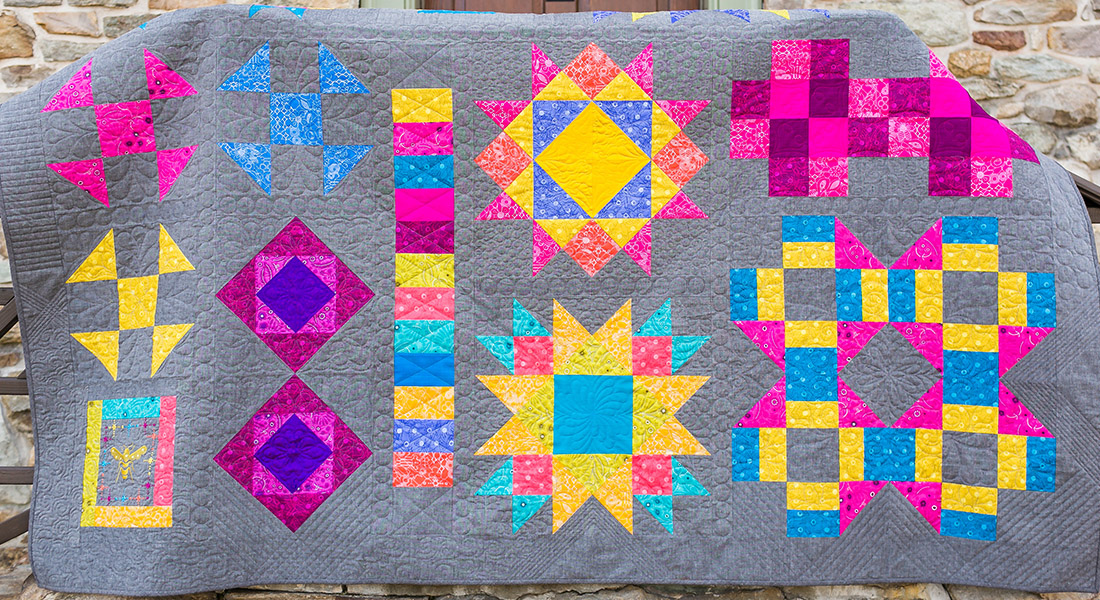
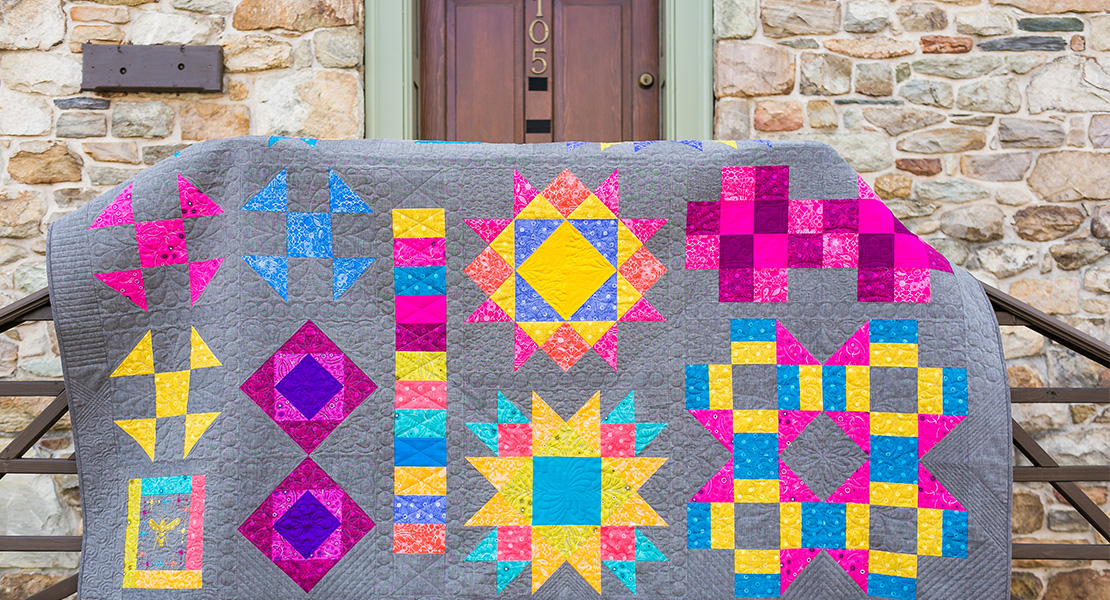
Welcome to the BERNINA Block Party! We have already had a great response to our introduction blog post, showing the finished quilt and listing all the supplies needed to make the entire quilt. We will be creating one block a month for the next twelve months, so keep checking back!
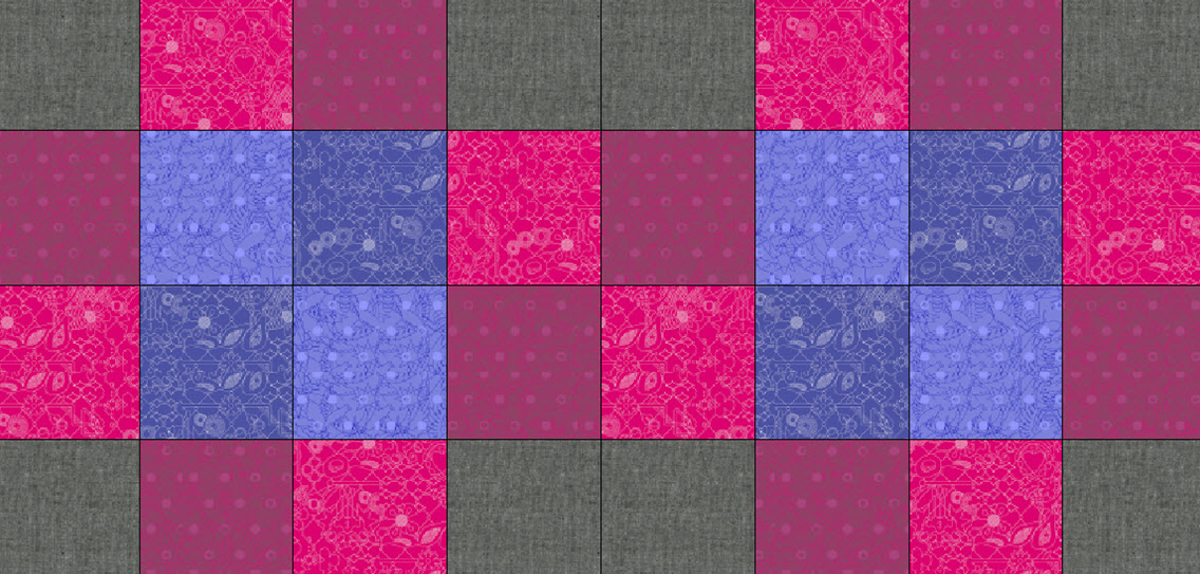
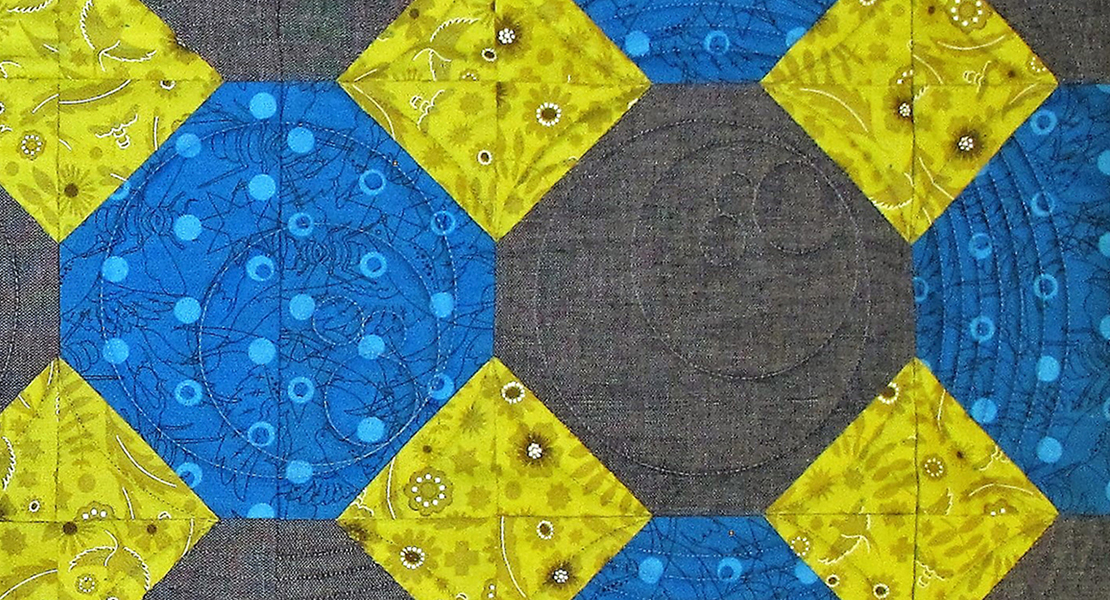
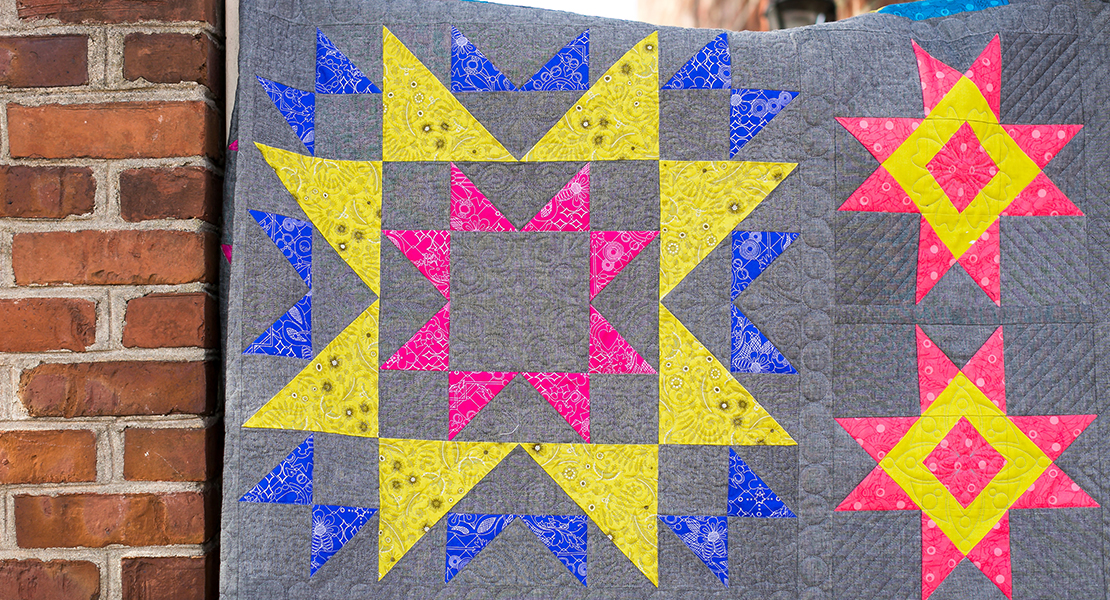
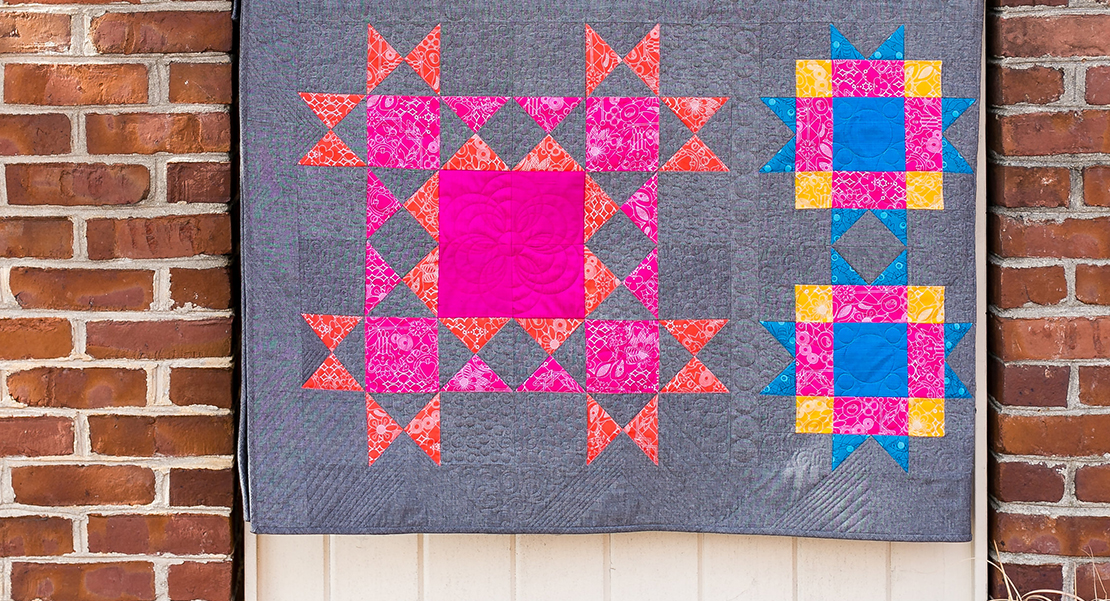
Let’s get started with Block 1, the “Antique Mosaic”, which is actually made up of two 12″ blocks.
Fabric to Create the Antique Mosaic Block
If you are buying fabric for each block on a monthly basis, you will need five fabrics for this block. Please see more details about fabric requirements here.
Please also download the BERNINA Block Party Fabric Chart.
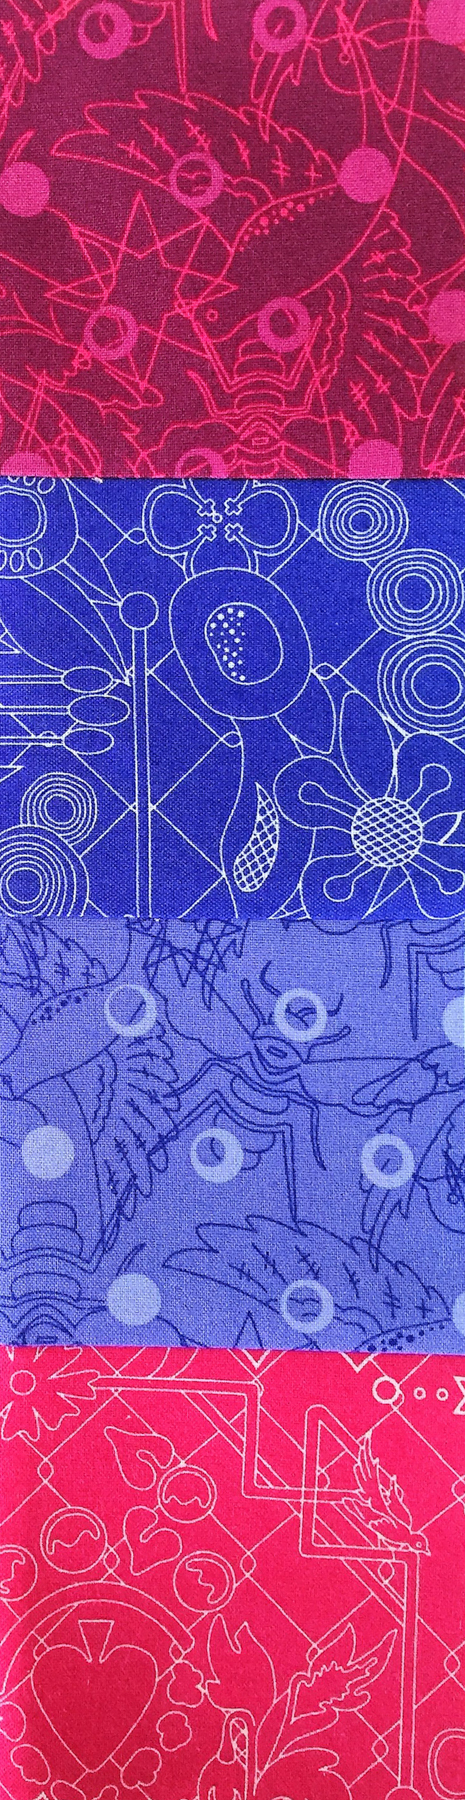
In case you are using the Sun Print 2017 Andover fabric line by Alison Glass, the specific fabric colors are listed in bold:
Fabric A Pink, A-8482-E, 1/8 Yard
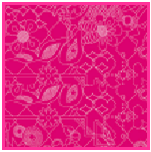
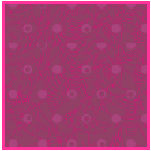
Fabric B Dark Pink, A-8484-R, 1/8 Yard
Fabric C Purple *, A-8482-B, 1/8 Yard
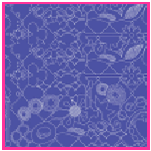
Fabric D Light Purple* , A-8484-B, 1/8 Yard

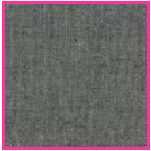
Fabric E Gray, A-C-Black, 1/8 Yard
*On the original quilt, I substituted 2 silk colors in place of the two shades of purple to add more texture to the quilt.
Cutting Instructions to Create the Antique Mosaic Block
Fabric A: 8 Squares 3 1/2″
Fabric B: 8 Squares 3 1/2″
Fabric C: 4 Squares 3 1/2″
Fabric D: 4 Squares 3 1/2″
Fabric E (background): 8 Squares 3 1/2″
NOTE: If you have purchased a fabric kit from your local BERNINA store, be sure you get a cutting guide from the store staff. If you have purchased all the fabric for the entire quilt using the fabric amounts listed in the introduction blog post be sure to follow the Block 1 Kit Cutting Instructions below so that you do not run out of fabric, as the fabrics are most often shared with other blocks.
Block 1 Cutting Instructions if using purchased fabric kit or fabrics from introduction blog post
Fabric A, C, and E: Cut a 3 ½″ strip from each of these fabrics. Cut eight 3 ½″ squares from Fabric A and E and four 3 ½″ squares from Fabric C. Reserve the remaining lengths for another block. You should have a 15″ strip of both Fabrics A & E and a 29″ strip of Fabric C.
Fabric B and D: Cut 14 ½″ off the bottom of the ¼ yard cut of Fabric B. Cut 7″ off the bottom of the ¼ yard cut of Fabric D. Cut eight 3 ½″ squares of Fabric B and four 3 ½″ squares of Fabric D.
Reserve the remaining fabrics to be used in Block 3.
Prepare your Machine
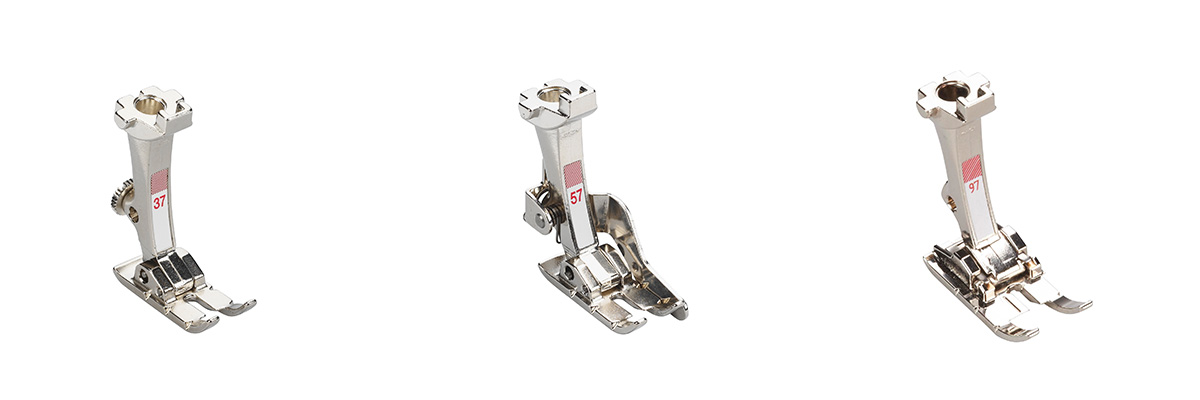
Attach the appropriate Patchwork foot to your machine. We sew on a BERNINA 570. Click here if you need help deciding which is best for your machine.
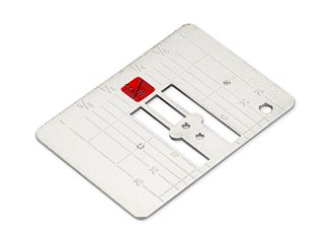
Be sure to insert a new #70 Jeans machine needle (my favorite needle for piecing).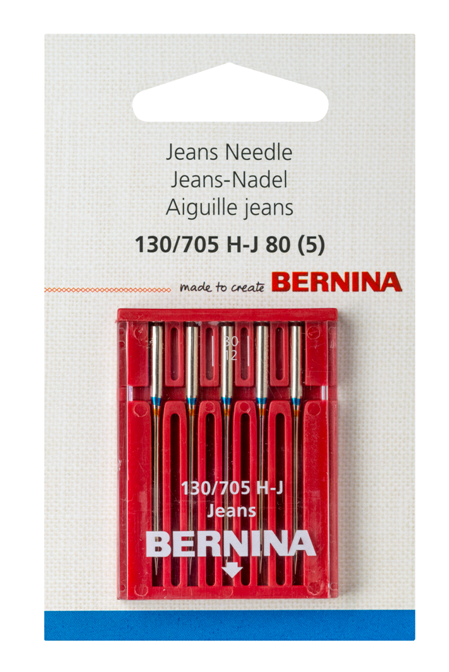 Attach a straight stitch needle plate on your machine to help keep your straight stitch more precise.
How to Achieve the Perfect Seam Allowance and Stitch the Quilt Block
Our first month’s block is a very simple block sewn together from just squares. It doesn’t get any easier than this but it may all go wrong if your seam allowance is not correct.
Select stitch #1326. Why stitch #1326? It is a straight stitch but it is designed with a shorter stitch length (2.0) which I prefer when piecing. If you do not have this stitch, shorten your straight stitch length to 2.0mm for piecing.
So let’s begin by piecing together the four squares that make up the first row of the block. We will call this Strip A.
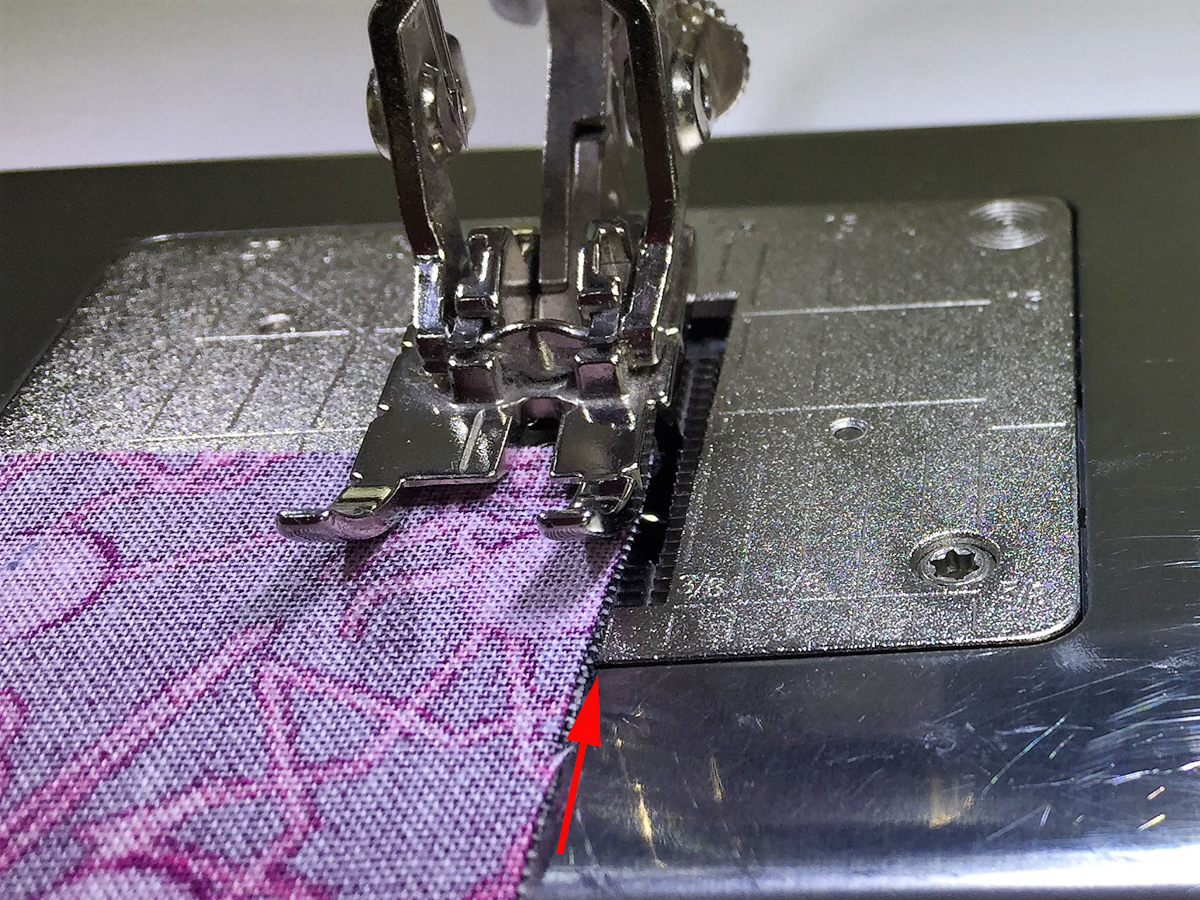
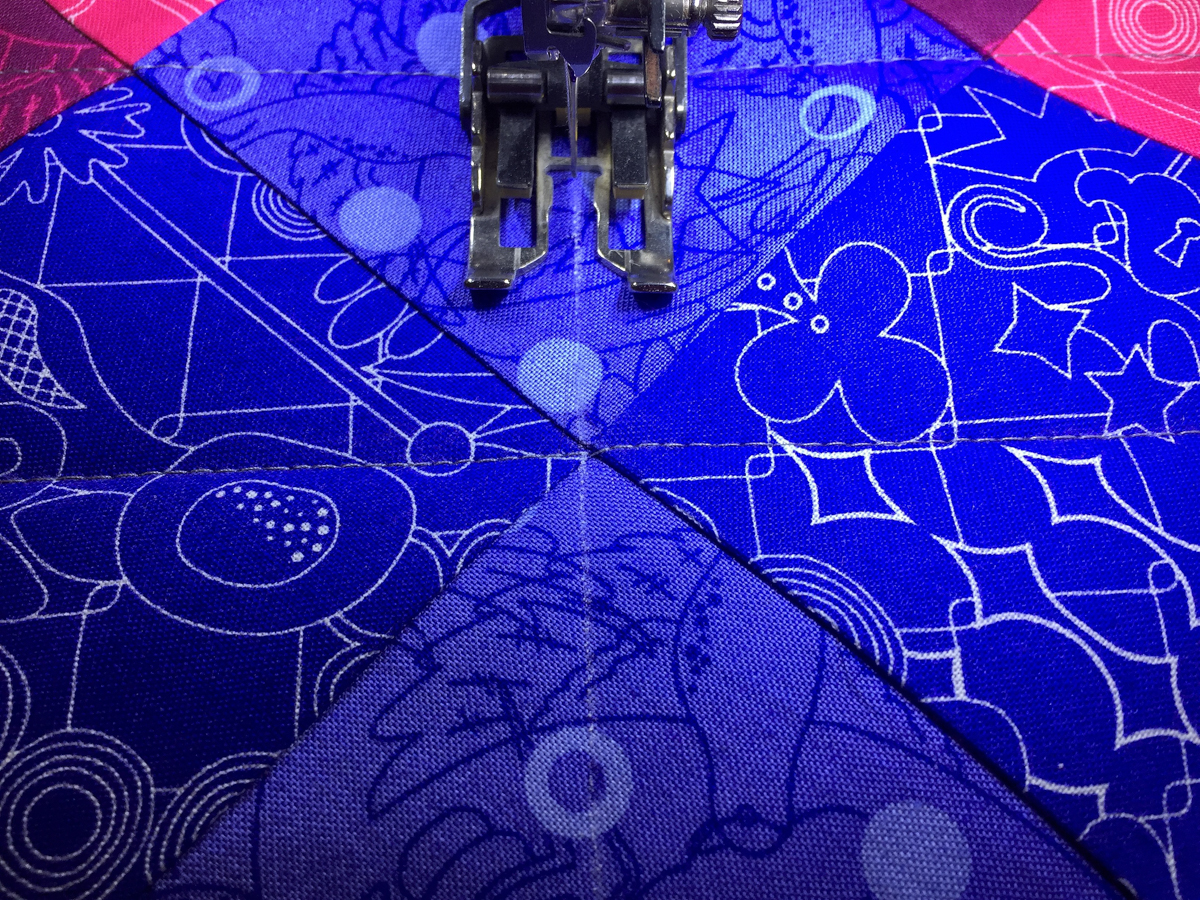
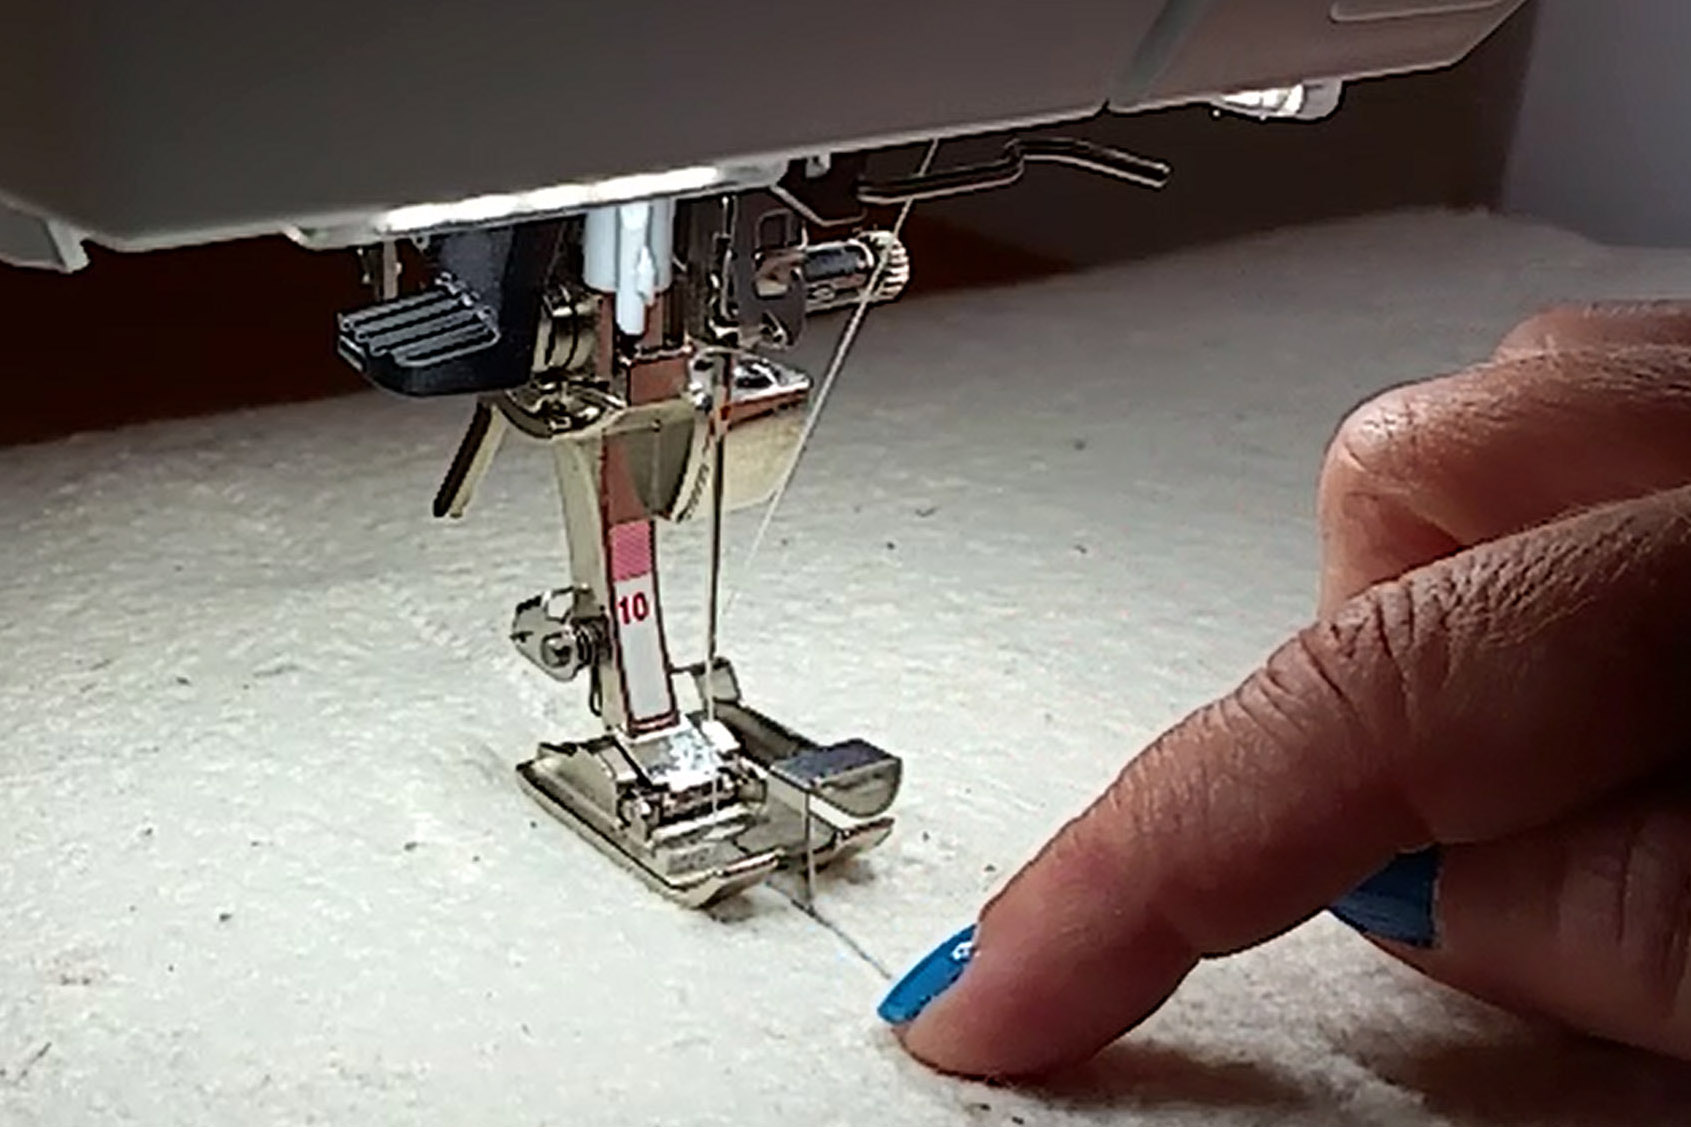
Pay attention to where you are guiding your fabric as it enters your machine. Before you start, locate the small line in front of the foot that is even with the edge of your foot. This is your quarter inch seam mark. Be sure that you can see it at all times. If you cover it up, you will not know exactly where it is. Pay attention to the mark rather than the side of the foot.
Before you go any further, lay the strip on a ruler to make sure that it measures exactly 12 1/2″ in length.
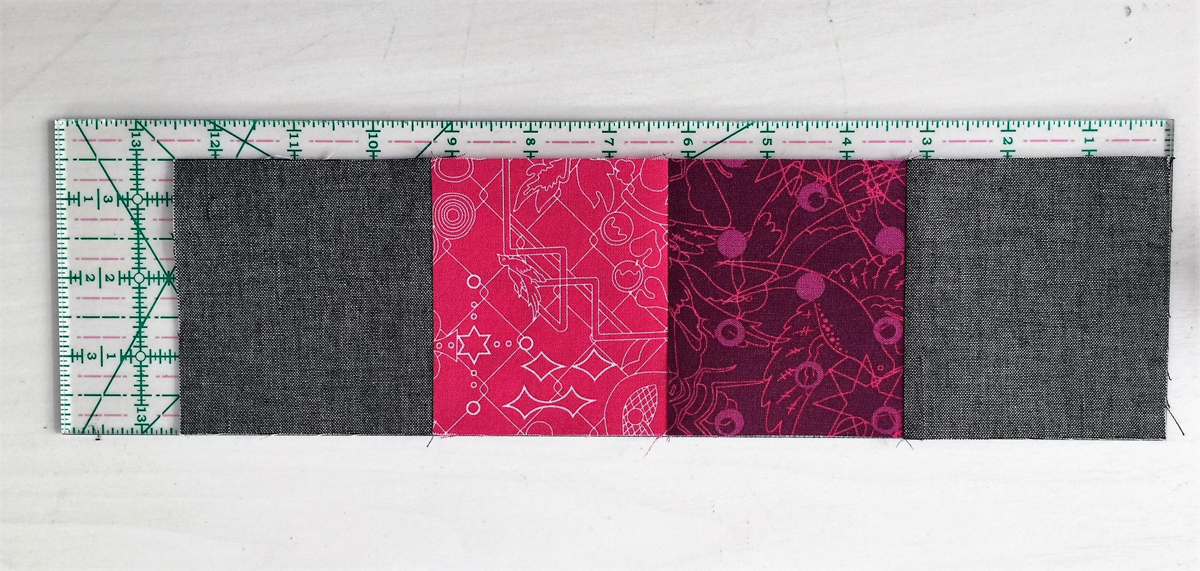
If the strip does not measure 12 1/2″, you will need to go back and make some adjustment to your seam allowances. Pay attention to where you are guiding your fabric so that you will always have the perfect seam.
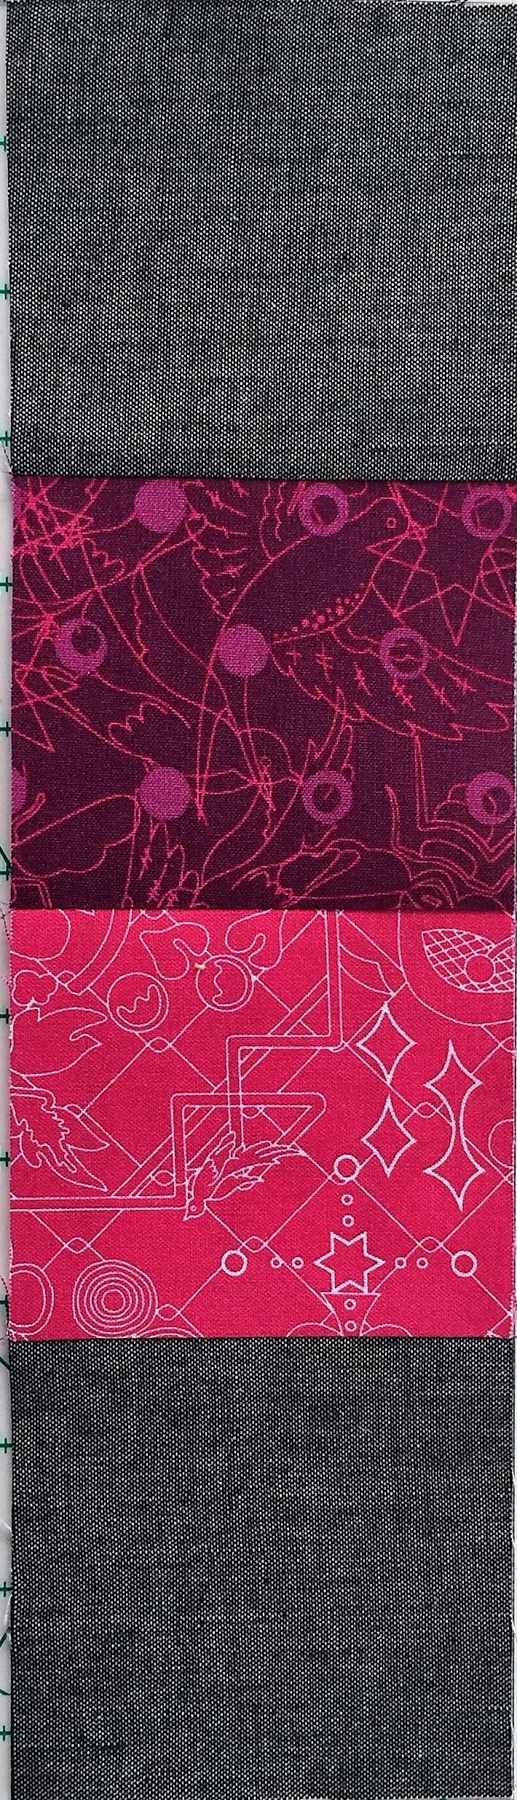
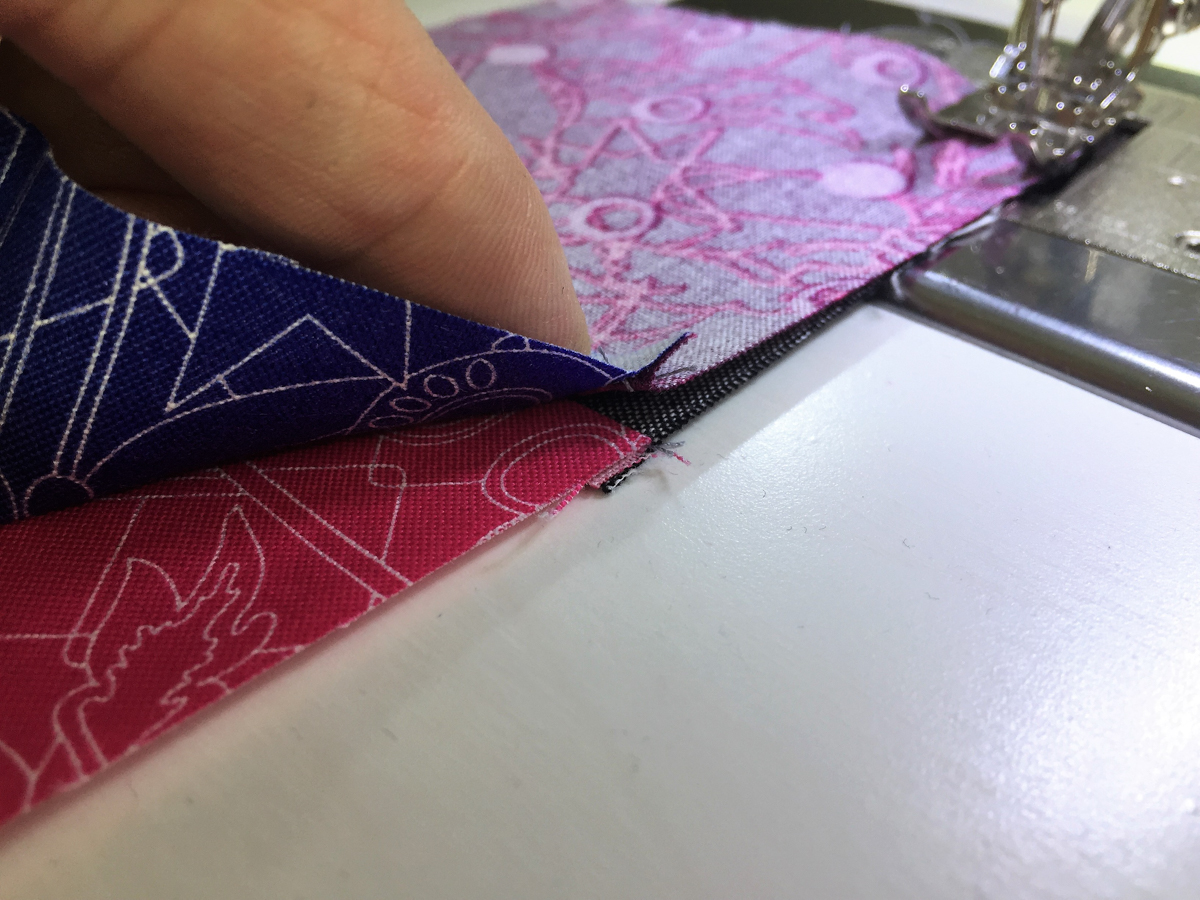
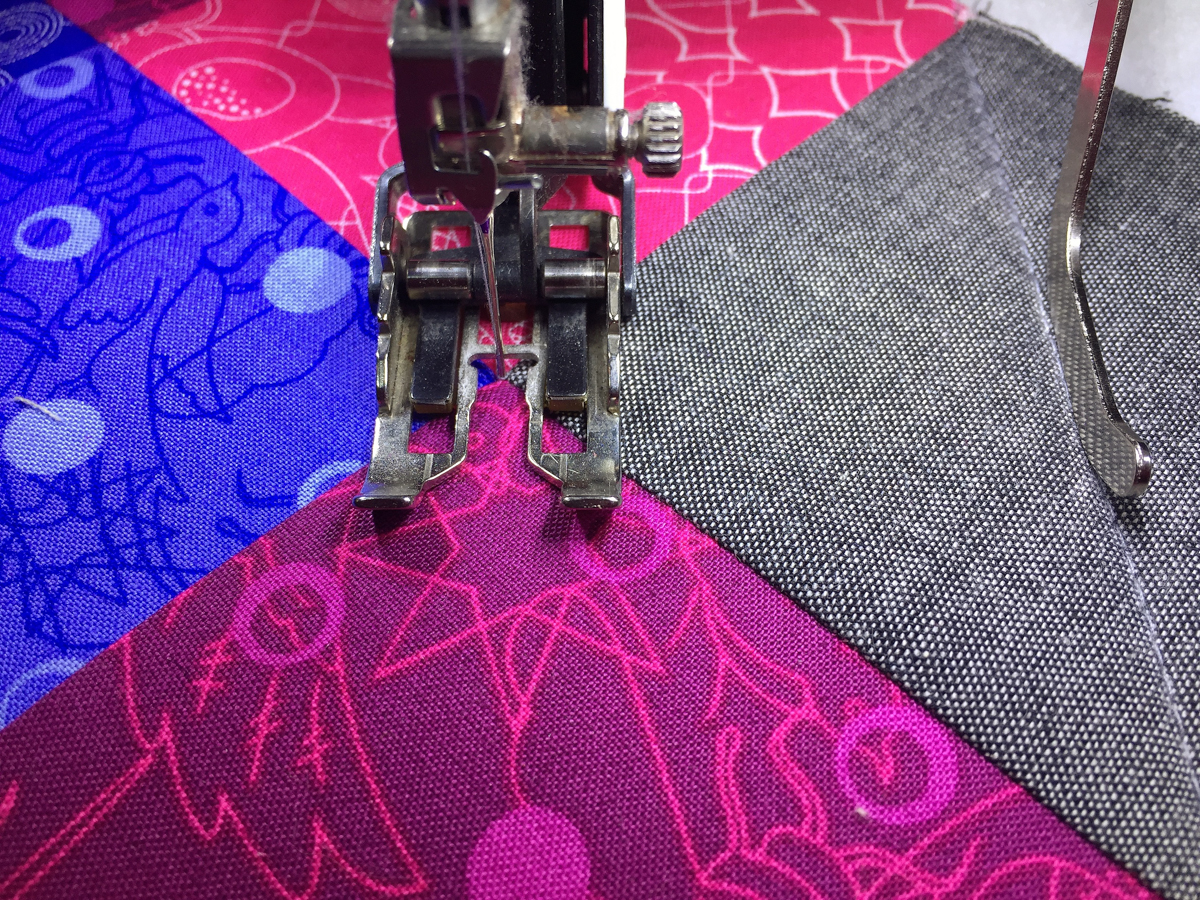
As you piece the strips together pay attention to which direction the seam allowances are going. You want the seam allowances to go in opposing directions as you stitch the squares together. I find that I get a better match when I position the set so that the top strip has seams going away from me. This is not always possible. But when it is, this is the way to go because the top seam and the bottom seam just nest together for a perfect match!
It is sometimes better not to do any pressing until the block is completely done so that you can finger press the seams in the direction they need to go as you are stitching and constructing the block. You can do the final pressing when the block is finished.
Once Strip A is pieced together, piece together the four squares that make up the next row which we will call Strip B.
Stitch Strip A and Strip B together as shown.
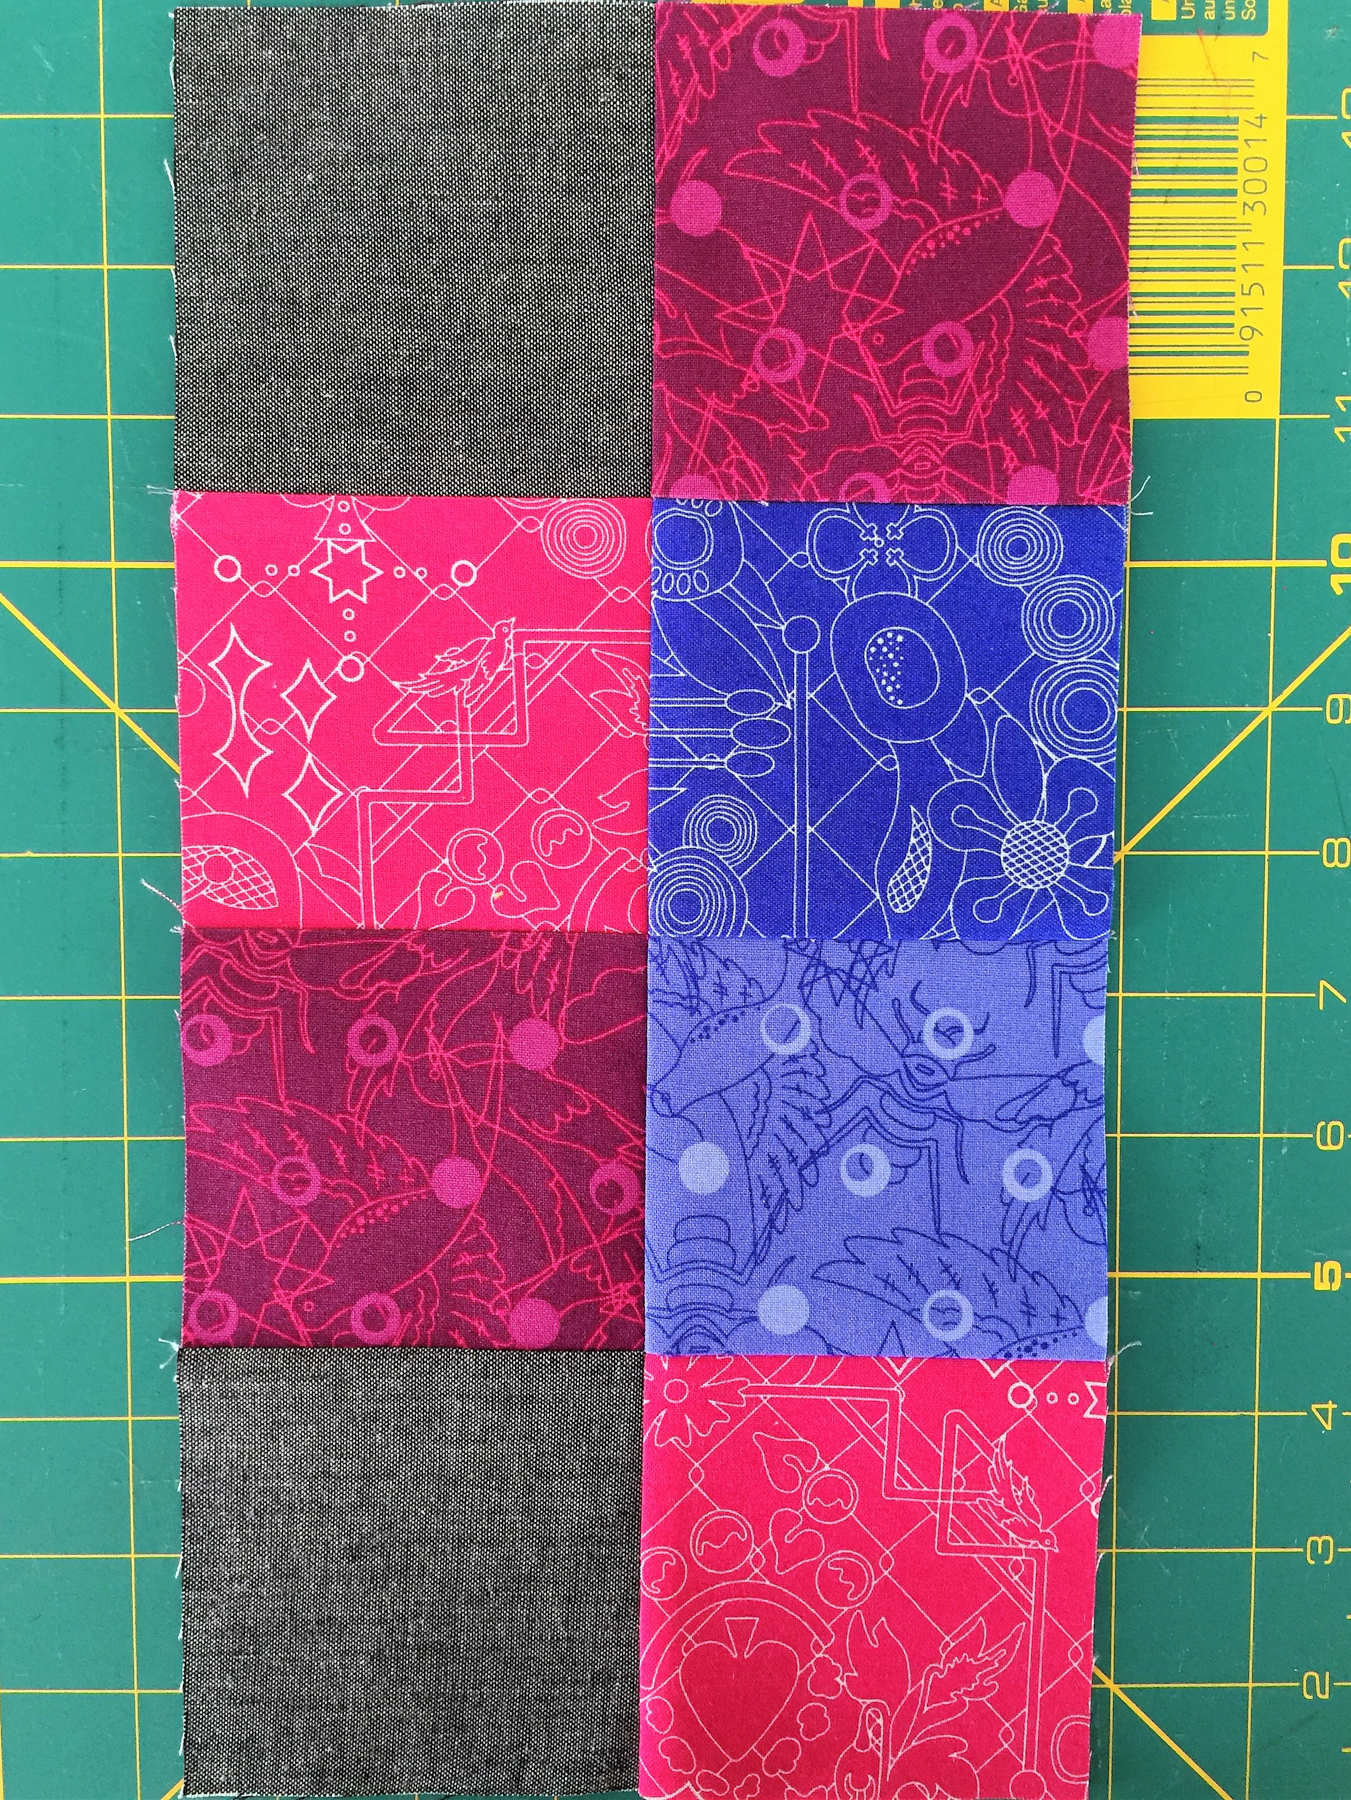
Piece together a second set of both Strip A and Strip B.
Now piece these four strips together as shown in the block below.

Make two of these units.
Sew the two units together to create the finished Antique Mosaic Block. The block should now measure 24-½″ x 12-½″.
If you are going to complete the entire quilt, you will set this block aside for now. The entire quilt top will be pieced before the final quilting of the layers is done.
But as we move forward in this quilt along, we will explore different quilting techniques each month so when you are finished with the quilt top you may have a better idea of exactly how you want to quilt it. The choice is yours!
You can also use these quilting techniques if you join Denise Jones as she creates original projects using each month’s block. Her first project will post on April 17 here on WeAllSew.
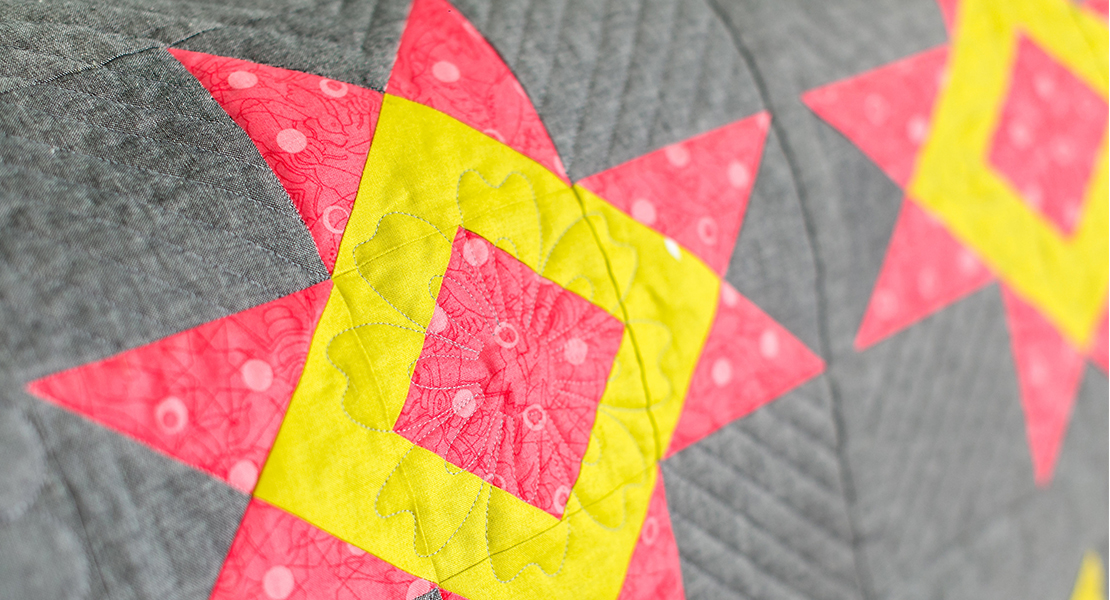
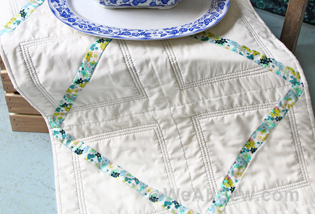
Quilting with the Walking Foot: A Quilting Lesson
One of the easiest and most accurate ways to quilt is to use your BERNINA Walking Foot. When using a walking foot you have the use of your feed dogs so the machine will maintain a preset stitch length. While you can do decorative stitches with the walking foot, simple straight stitch quilting is classic. The BERNINA Walking Foot has three soles to choose from, whether you are looking for more visibility or a sole that will perfect “stitching in the ditch.” There are guides that attach to the left or the right of the foot for channel quilting.

For machine quilting layers together, I like to use stitch #1325 which is found in the Quilt Menu on most BERNINA machines. It has been programmed to be a longer stitch length of 3.0mm.
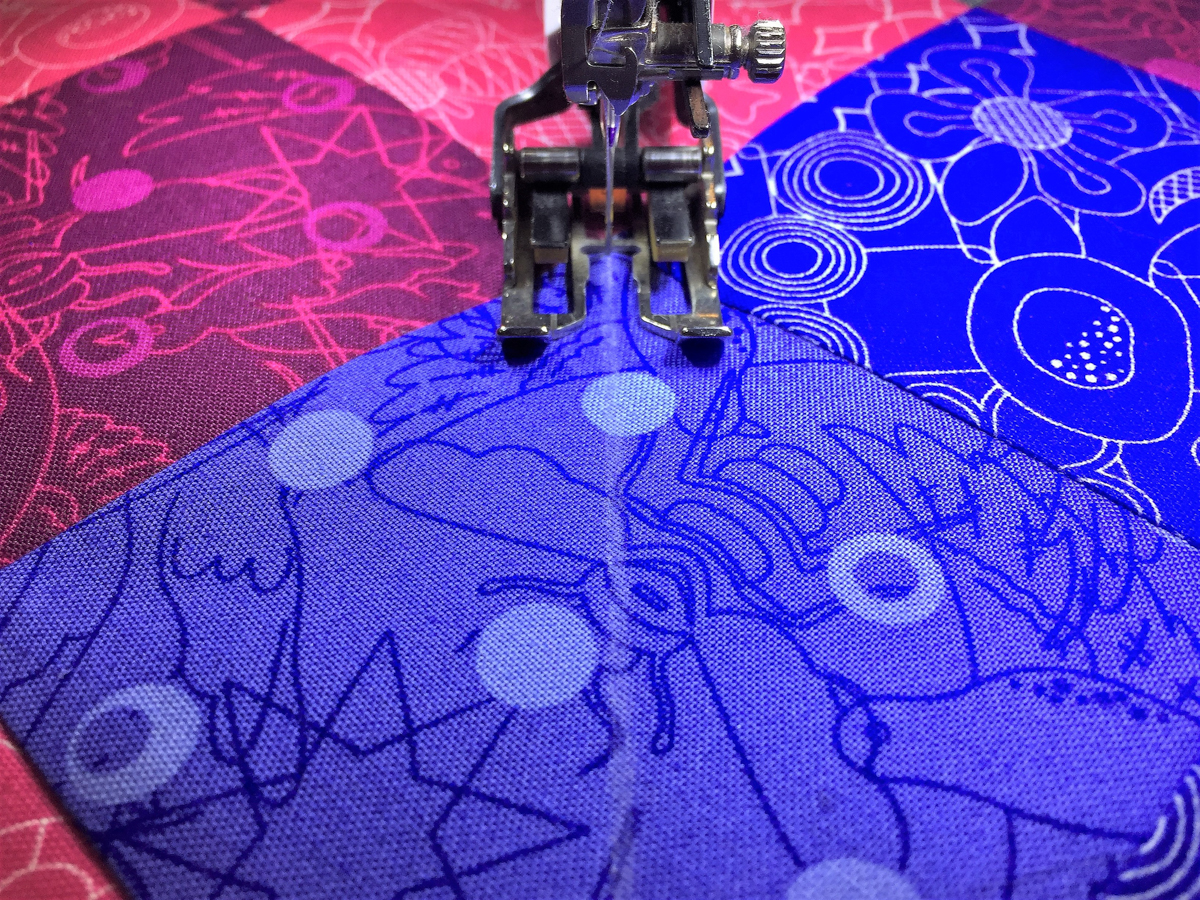
Layer the pieced block with batting and backing. Spray Baste or Pin Baste the layers together. When you have squares as we have in this block, doing a cross grid is one of the easiest ways to quilt it.
Begin by drawing a line on the block that will run from corner to corner in the squares. Attach the walking foot and stitch on the drawn line.
Once you have stitched one row, you will want to attach the seam guide to the walking foot.
For the next row, let the guide run along the previously stitched row. You may then continue across the block with evenly spaced rows.
I said that we were going to do a cross grid, so we need to also quilt in the opposite direction.
You again will draw a line across the blocks in the opposite direction. If you were going to do this for a larger project, I would start out by drawing a line in both directions and alternate the direction as I stitched.
Have fun constructing your first block. And if you choose to make an extra block to practice the quilting, have fun with that too!
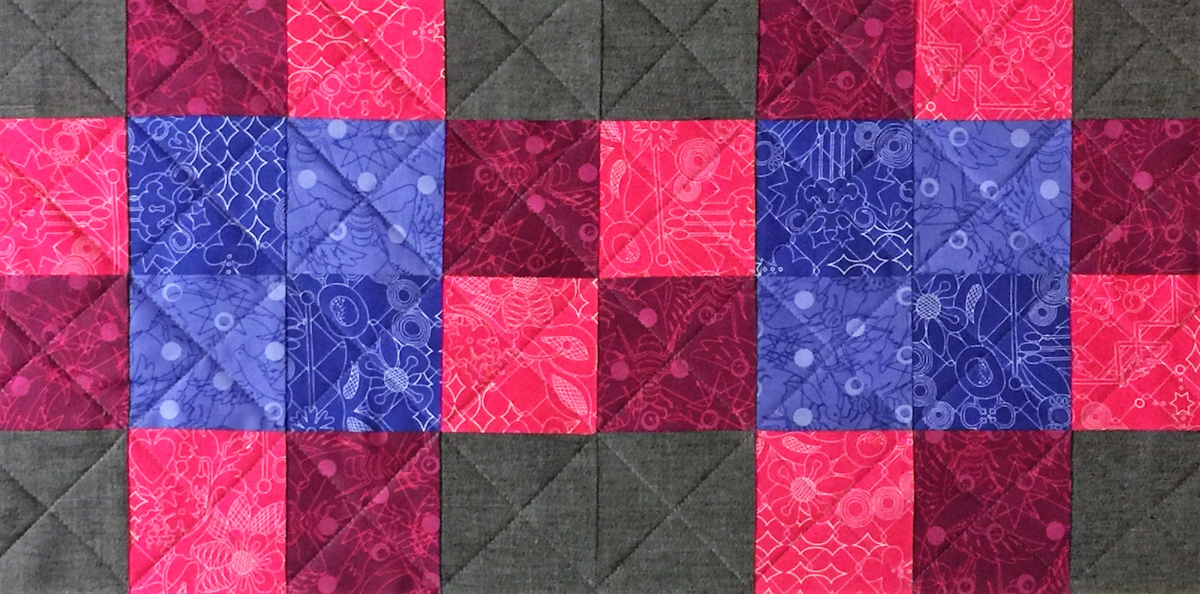
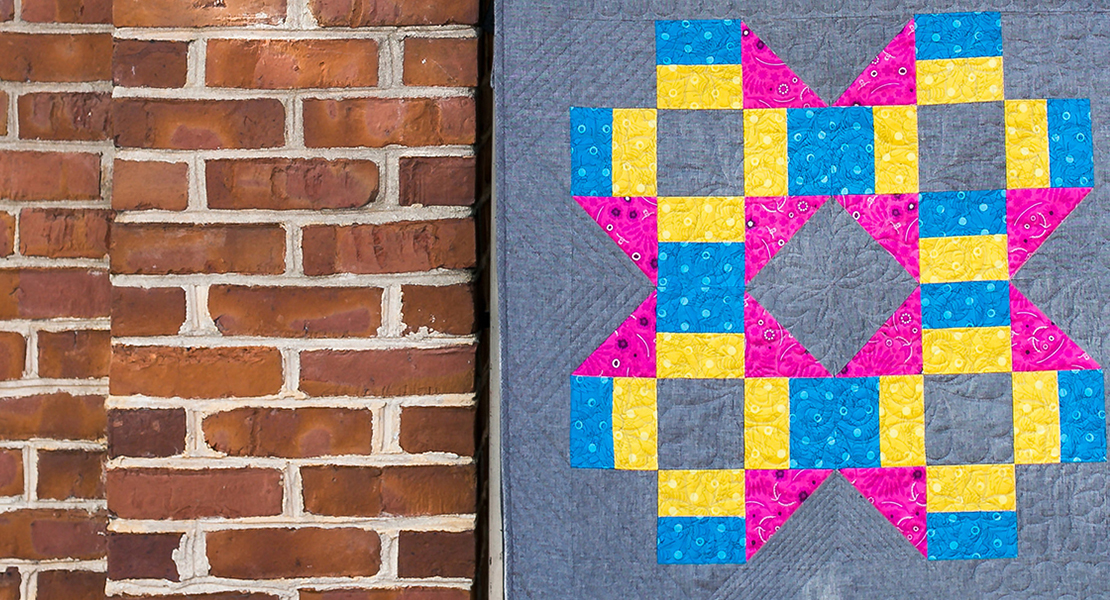
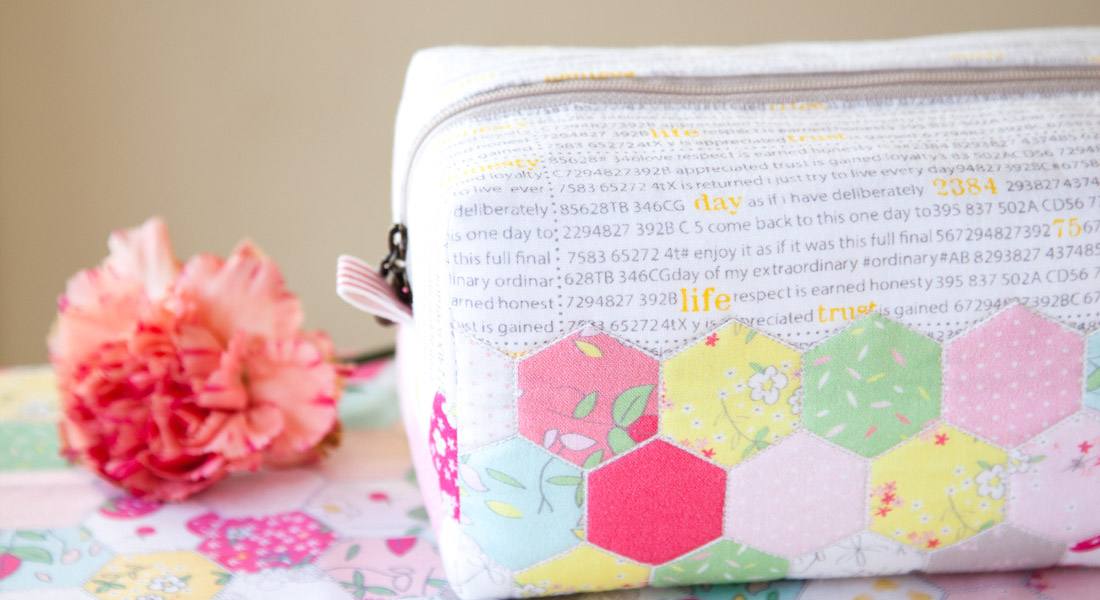
Changing the fabrics used in the Antique Mosaic Block can create a whole new look to this block.
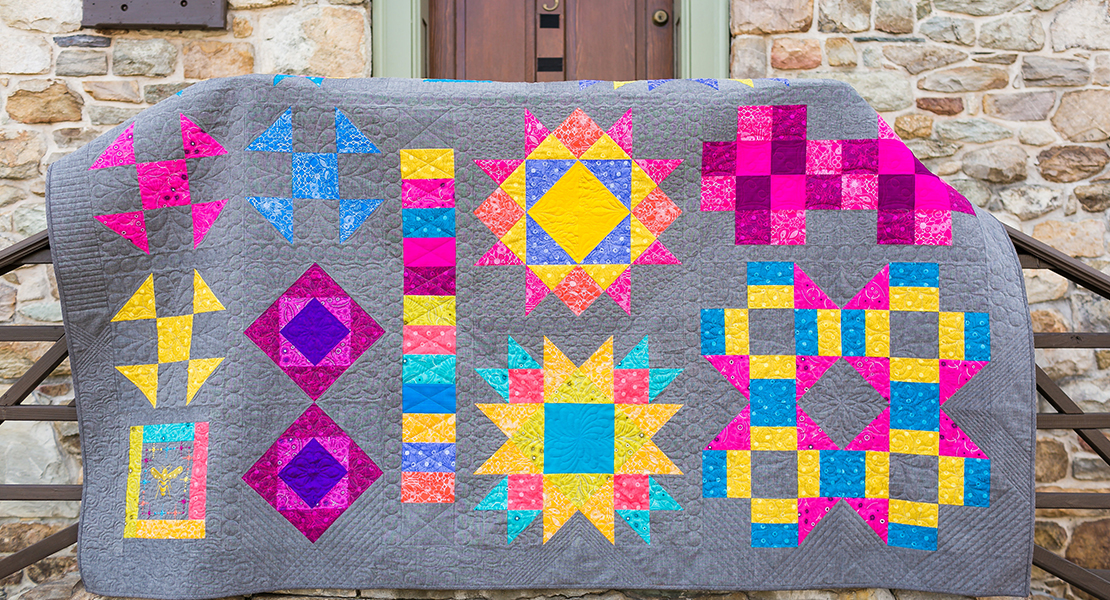
For example, in this finished example of our Block of the Month quilt you can see this block stitched with plum, pink and purple.
Tutorial List of the BERNINA Block of the Month Series
Block 1: Antique Mosaic Block
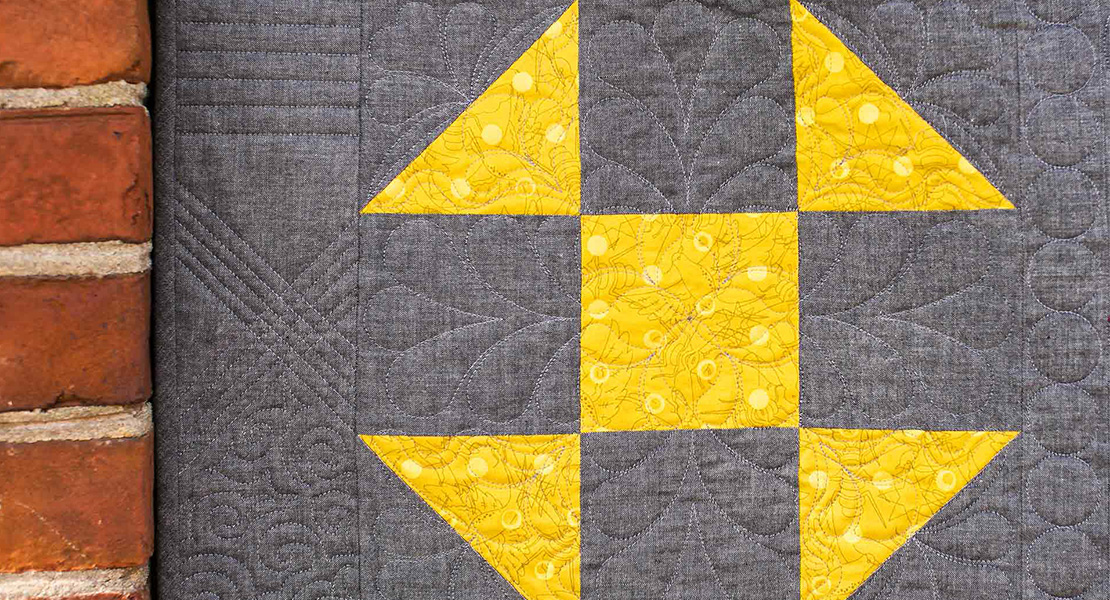
Block 2: Shoofly Block
Block 3: Square in a Square Block
Block 4: Magic Circle
Block 5: Card Basket Variation Block
Block 6: Ohio Star Variation Block
Block 7: Maple Star Block
Block 8: Grecian Square Block
Block 9: Union Square Block
Block 10: A Girl’s Favorite


What you might also like


46 comments on “Antique Mosaic Block”
-
-
I bought all the fabric you listed for the entire quilt. How do I know which cut to use? The fabric listed is per block. Can you please give me some guidance?? And I am so ready LOL
-
If you read through the blog you will see a paragraph for anyone working from a kit or purchased fabric amounts from the first post. You should be able to identify your fabrics by the photos for each block.
-
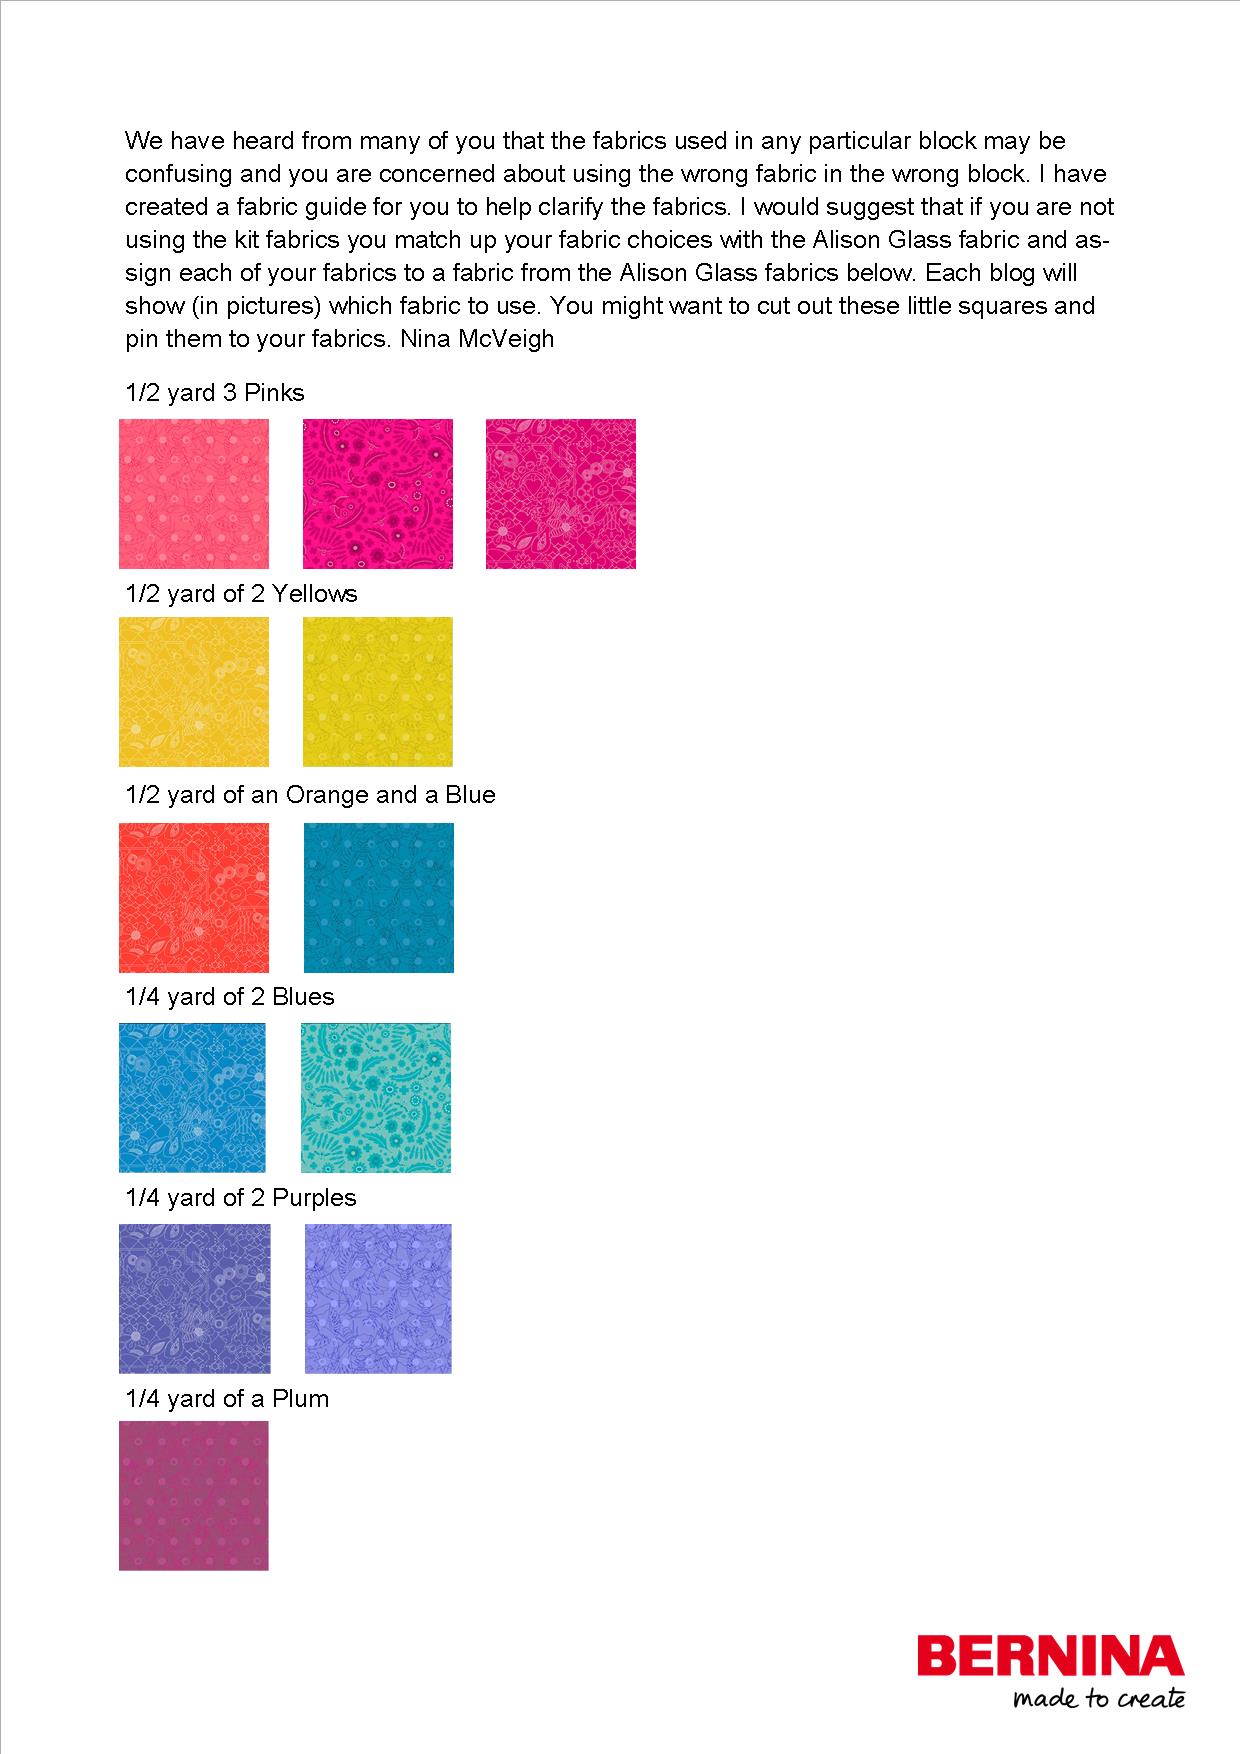
Will the fabrics keep the same referenced numbers throughout the quilt. If not can you post a list of reference numbers for each fabric in the supply list? Questioning this because there are several pinks, plums, blues, purples and greens. This sounds confusing to others also. Thanks for your assistance ( I am not using a kit)
-
The fabrics will be referenced for each individual block. There will always be a photo of the fabric used. However, if you are using different fabrics I can see where this would be confusing.
Therefore we will be posting a fabric chart so you can assign your fabrics to the Alison Glass fabrics so whenever you see a fabric pictured you will be able to see which of your fabrics to use.
-
-
They have fabric kits at Bear’s Paw Fabrics in Towson, MD. They will ship them.
-
-
-
I would like to make this quilt, but am having difficulty finding the fabrics. I would like to purchase the whole kit all at once. My local store does not carry it. I have gone to the Alison Glass site, but I do not see an option to buy the whole kit. Any suggestions?
-
There are several stores in the comment section of the Introductory Blog Post stating that they have kits available. You can check there.
-
sewitup.com has the kit
-
I bought the complete kit from Bernina World of Sewing in Raleigh, NC, 919-782-2945, berninaworldofsewing.com
-
Jane917 – Bernina World of Sewing still has a few kits left. They are located in Raleigh, NC and would be happy to send one out to you.
-
-
Nina… Question for you…. is there anyway that you could give us correlating letters based on the beginning instructions, so we can make sure to keep our colors in order? Reading through this this morning, if you are not using Sun Print 2017 fabric (which I am not) it looks like mixing up the fabrics can happen easily. I took pictures of my fabrics and labeled them 1 yard green, 1/2 yard pink1, 1/2 yard pink2, 1/2 yard pink3, 1/2 yard orange, 1/2 yard yellow1, 1/2 yard yellow2, etc.
Based on today’s instructions I can tell that the pinks are from my 1/2 yards of fabric and I am guessing that the purples are too but what happens when we get into the blue fabrics? I also want to make sure I am not supposed to use the plum fabric for this block.
I am worried that I will pick the wrong fabric and since this project lasts the length of a year if I make one error I many not be able to get more of the fabric.
Thanks so much!!-
A fabric chart will be posted this week so that you will be able to assign the Alison Glass fabrics to your fabrics. Whenever you see the photos of fabric used you will know which of your fabrics to use. Hope that will help.
-
Thank You so much Nina!!! God Bless
-
-
-
What did you mean by 2 silk colors? Are they Alison Glass also. I like the sample colors. Also, is the background a lighter color in the sample?
-
When I made the original quilt I used two pieces of silk. We will be talking about this in future blogs. This was not an Alison Glass fabric, simply dupioni silk. I planned for this first block to be all cottons. I only mentioned it in case you may have noticed it on the original quilt.
-
And as far as the background I think it is just a matter of lighting when photos were taken.
-
The back ground may appear lighter due to photography.
-
-
-
Question on the cutting instructions for fabric B and D. For fabric B & D are you using the 13″ , 7″ cutoff bottoms of 1/4 yd to get the 3 1/2″ squares from? If yes, for fabric B appears would not be enough to make 8 squares.
Also, like the questions of Kellyann923 because I have the same situation.
Thanks so much for for doing this Block Party.-
The cut has been corrected. It should be 14 1/2 not 13″.
-
-
So far, I’m not able to purchase the 2017 sunprints, however I do have fqs of the 2016 sun prints. How much yardage is required of each color to complete the quilt? I’m wondering if I can make due with what I’ve go.
Thank you, Janet-
Janet,
The amount of fabric needed is listed on this blog on March 6, Block of the Month Series. Did you prewash your 2016 sun prints fabric? I prewashed the first colors and the fabric raveled about 1/4″.
Thanks,
Penny -
The fabrics amounts were listed in the first blog posted on March 6th. However there should be a post this week with pictures of the fabrics and amounts.
-
-
I am so eager to get started but I am anxiously awaiting your response to several previous and unanswered posts. I too have concerns with the labeling of each of my fabrics to ensure consistency throughout the development of my quilt. I did not purchase a kit so I am not able to match up my fabrics to the pictures that have been provided. I do not think you would be receiving so many similar messages if there were not an issue that needed to be addressed. Many thanks for the beautiful quilt we all look so forward to making.
Please respond.-
There will be a fabric chart added in the next few days that will help clear up any confusion and expecially for those who did not buy a kit.
-
-
Hello Nina. Not sure if I’ll do this BOM, but I do love the instructions – since I just got a 770QE, from my dealership here in Germany. Still waiting for the English manual, but have been looking at it online, watching videos, so your instructions re-affirmed what I was doing! But I do have a question – why a Jeans needle? Yes, 70 is a finer point, but Jeans?
-
Great question! I like to use a 70 jeans needle for piecing because it is a little bit finer needle and the point is a sharp point rather than a universal.
-
I cannot find a 70 jeans needle. I only see an 80, which is also pictured in the instructions. Am I not understanding something correctly? Thanks!
-
-
-
I just got a Bernina 350PE and am SO excited about this project.
Would you consider putting the instructions in pdf form? That way I could print off and have paper near my sew-zone. I do not have a computer near my machine.Thank you for considering this.
-
While we have had this request it is not something that we have available at this time. I would suggest you do a print screen of the page. You can save and print it off.
-
I use a program called Print Friendly which will make a PDF which one can download or print for each block. I determine what elements to include before hitting the “PDF” button.
-
-
Seriously, how hard is it to provide the amount of fabric needed in the event we don’t want to buy the kit?
-
The amount of each fabric is given in the first post (https://weallsew.com/block-of-the-month-series/) my concern is that they are not labeled as fabric A=1/2 yard pink1 and fabric B=1/2 yard pink2 so I know when to use each fabric. I just want to make sure I do not use the wrong fabric at the wrong time and have nothing left for month 12.
-
Thank you Kelly for sending Sue the post for the fabric amounts. Please watch this week for a post that will help clarify the fabrics.
-
-
-
The instructions should be more specific regarding which fabrics are which. With so many similar colors
(there are blues in the 1/2 yard, 1/4 yard, Fat Quarter), it’s very difficult to know which should be A,B,C, etc.
It should have STARTED with identification of A,B,C and on…with each fabric so we could individually mark them.
I expect Bernina to not be so confusing and clear up any confusion! I went ahead and started, but sure hope that by the end I don’t find myself short of enough fabric to complete the quilt. I am a beginner and purchased this kit because I thought Bernina would have clear, concise instructions for someone like me.-
I’m praying for you, having already begun. Surely we should receive a response soon.
-
Exactly! Please give us a key!
-
Hi there! So I think I can answer some of your questions, so if you purchased a kit with the fabrics you should have received a color print out of each fabric in the kit that also has the fabric identification number for each. This is your key for each fabric and the yardage that is in each kit however it is not labeled a b c d etc, this is because it is a block of the month and the complete layout and pattern are given out one at a time, hence the free pattern if it all was given up front you could complete this quilt before the BOM was finished, however to solve all of this you can label the color copy you have with the letters that correspond. All the colors are different in some way either value or print so you should be able to distinguish the fabrics for this months blocks pretty easily and just label your copy with the appropriate letter and use that as your key for the entire BOM, if your not purchasing a kit call a dealer close to you and they will make you a copy for a small fee, or go back to the original blog post with all the starting out information. Hope this helps and please stay positive allot of hard work has gone into this program and making negative comments are not going to resolve your frustration, we are all here to help!
-
There will be a post this week that should clear up any confusion. Each month the fabric being used is pictured. However, if you are not using the Alison Glass fabrics, I can see where you might be confused. When the post is available, I would suggest you assign each of your fabrics one of the Alison Glass fabrics. That way, whenever you see that fabric pictured you will know which one of your fabrics to use.
-
I think that’s the best idea I’ve seen yet. Assigning my fabric choices to the Alison Glass fabrics; thank you for the suggestion.
-
-
-
I used the 97D foot but my strip did not measure 12.5 inches. Any other recommendations?
-
Check your seam allowances and also your cutting. Keep trying you will get the perfect seam. And it is more important to be consistent than 100% accurate.
-
-
I would like to suggest, for those of us who want to choose our own colors, fabrics, etc. that you also consider calling each color by light, light medium, medium, medium dark, dark, or some such way. That would enable those of us who don’t want to make an exact duplicate of your beautiful quilt, to more easily choose our fabrics. Thank you for considering this. Meanwhile, I am going to print a copy of your fabrics in black and white. Your quilt is gorgeous! Thank you for doing this Bernina Block Party.
-
How do I get the next block?
-
It was posted today!
-
-
How do you download the block. I don’t see anything to click on for the block
Leave a Reply
You must be logged in to post a comment.

I am so ready