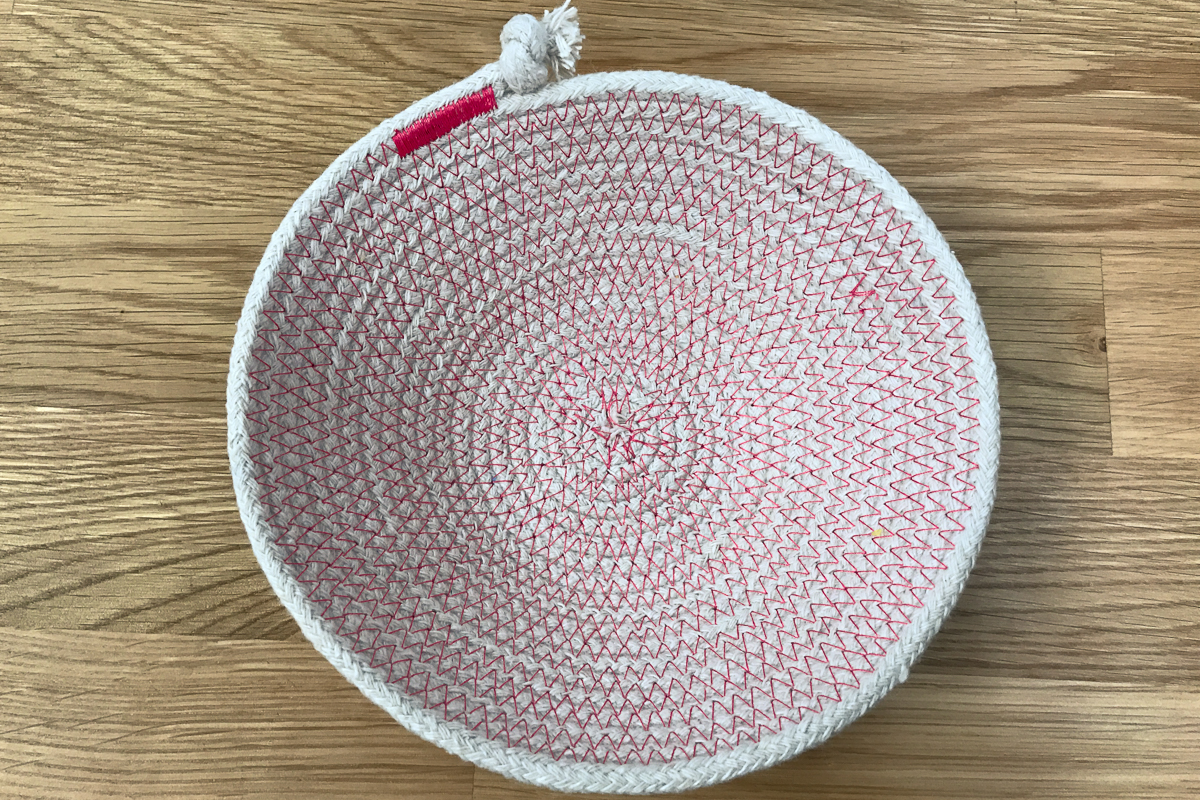
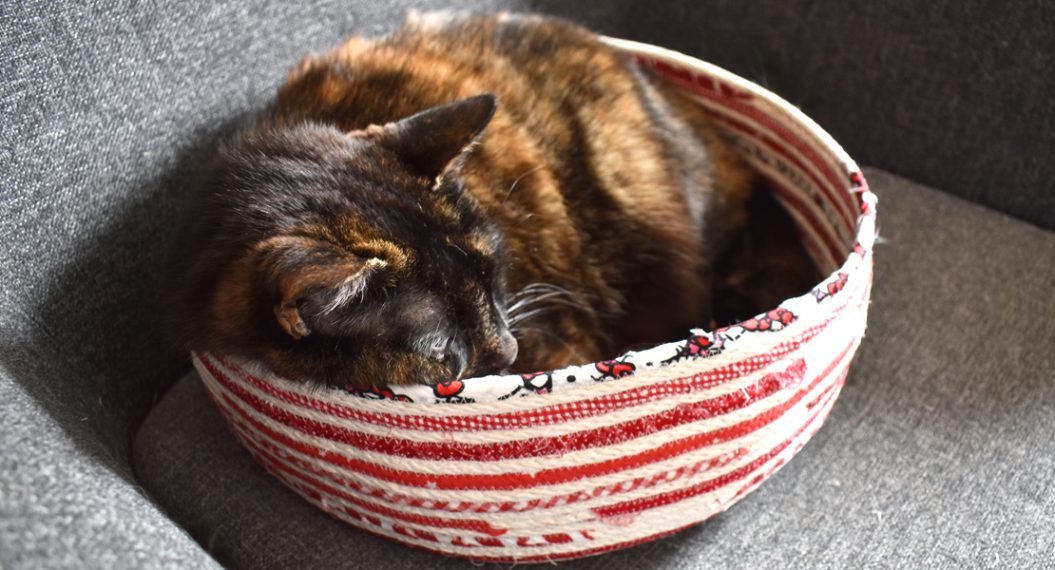
Rock A Rope Bowl
Rope bowls are a fun, easy, and quick project with tons of uses! Keep one near your front door to catch your keys and loose change when you walk in, on your bedside table to hold your jewelry for the evening, or go big and make a statement basket for your living room décor. They’re form and function in your home and they also make great gifts. A rope bowl is quick and inexpensive to make and it’s a useful way to use up bobbins filled with odd colors we all have in our sewing room.
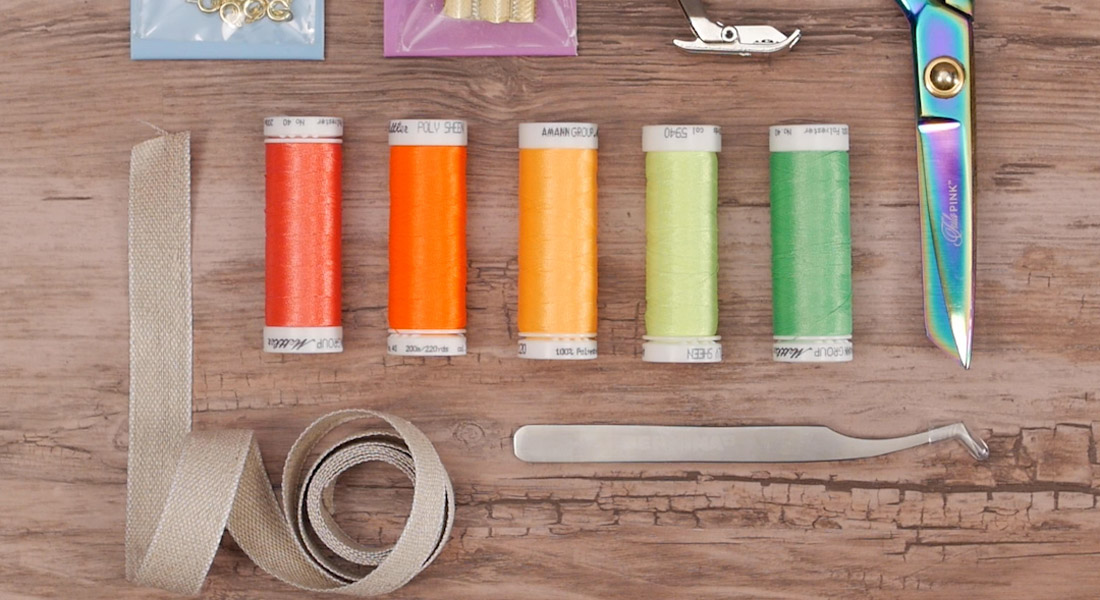
Materials to Sew a Rope Bowl

- Cotton cord or clothesline
- Thread (bright, high contrast colors are fun)
- Fabric scissors
- #20D open toe embroidery foot with dual feed
- B 790 Plus (or your favorite model with dual feed!)
Instructions to Sew a Rope Bowl
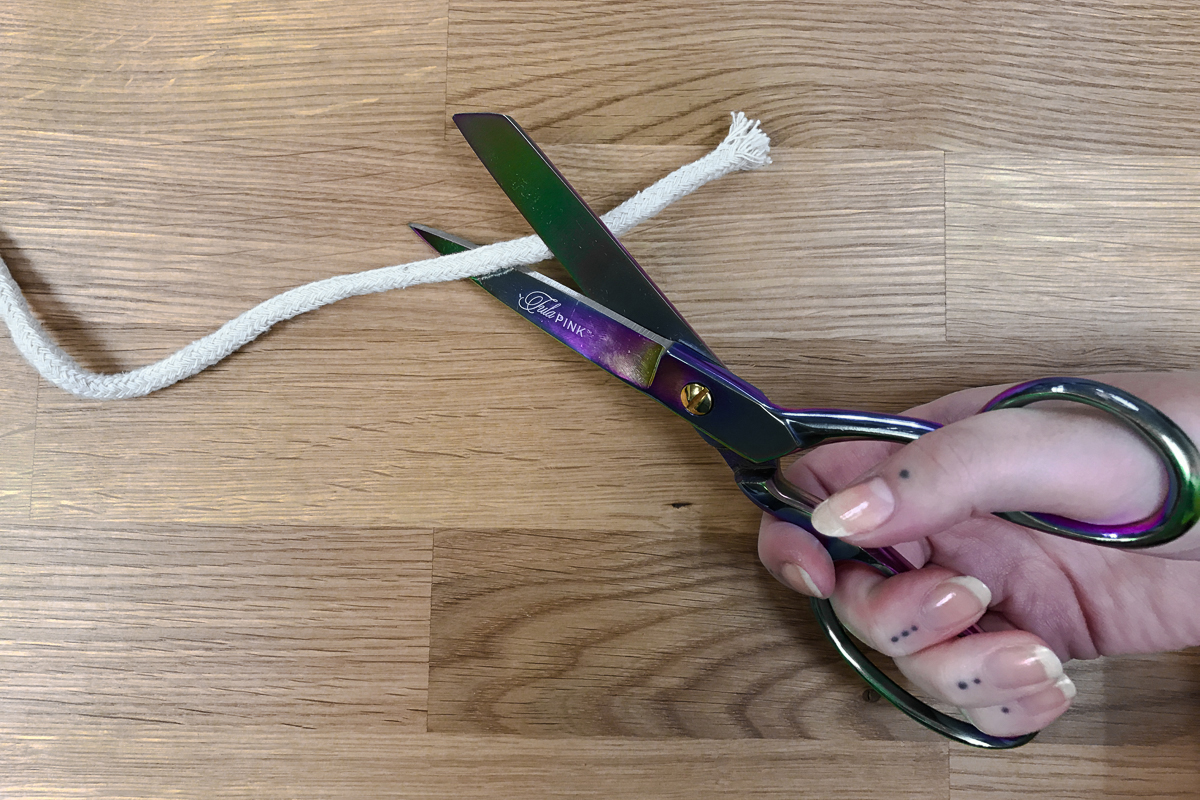
Step 1. Start fresh
I like to clip a clean end to the start of my cord. I find it helps coil more neatly when we’re starting out!
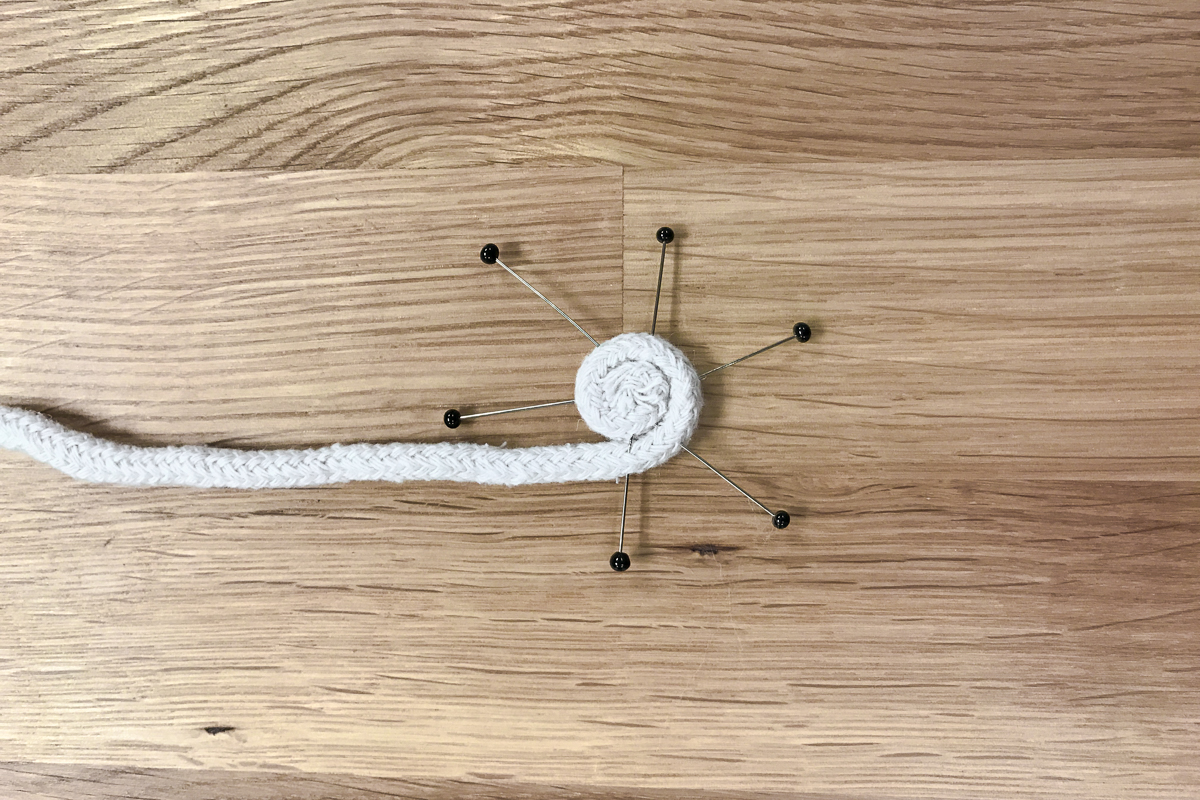
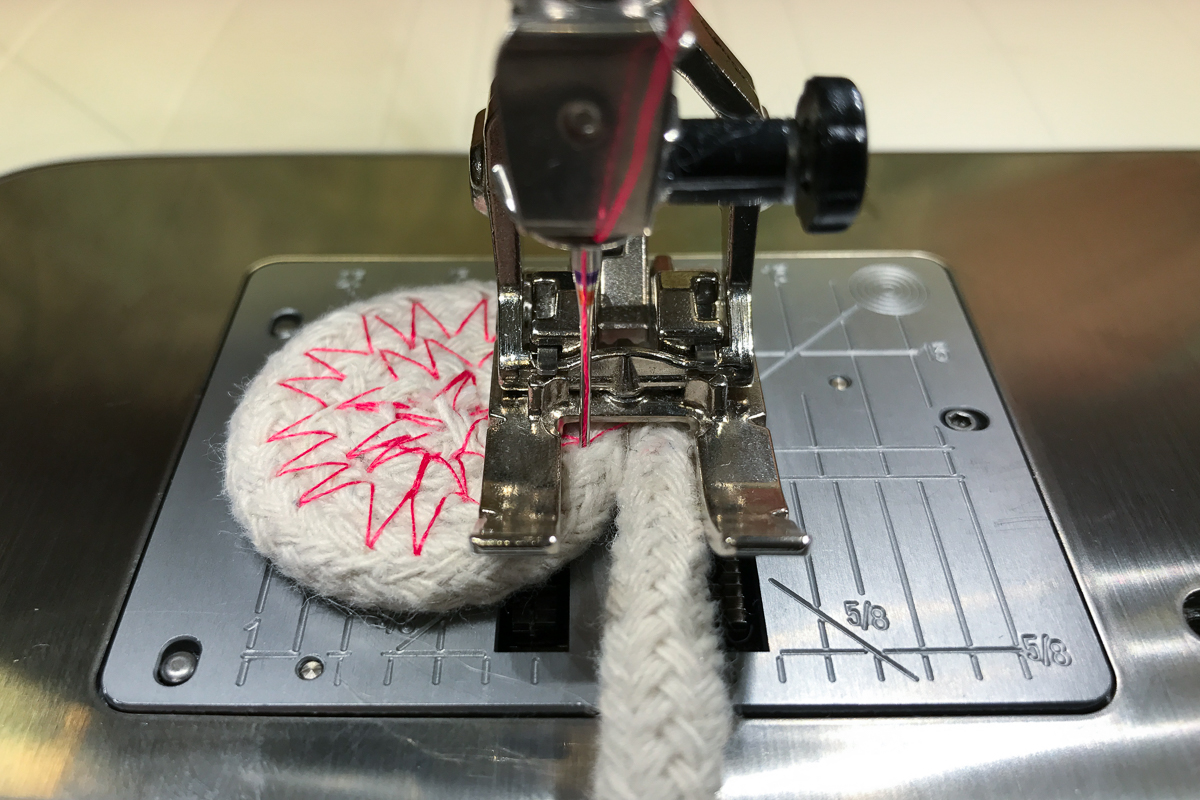
Step 2. Coil & pin
Begin coiling your cord and pin the first couple rotations in place. Wrap until the coil is about 1” in diameter and pin in place.
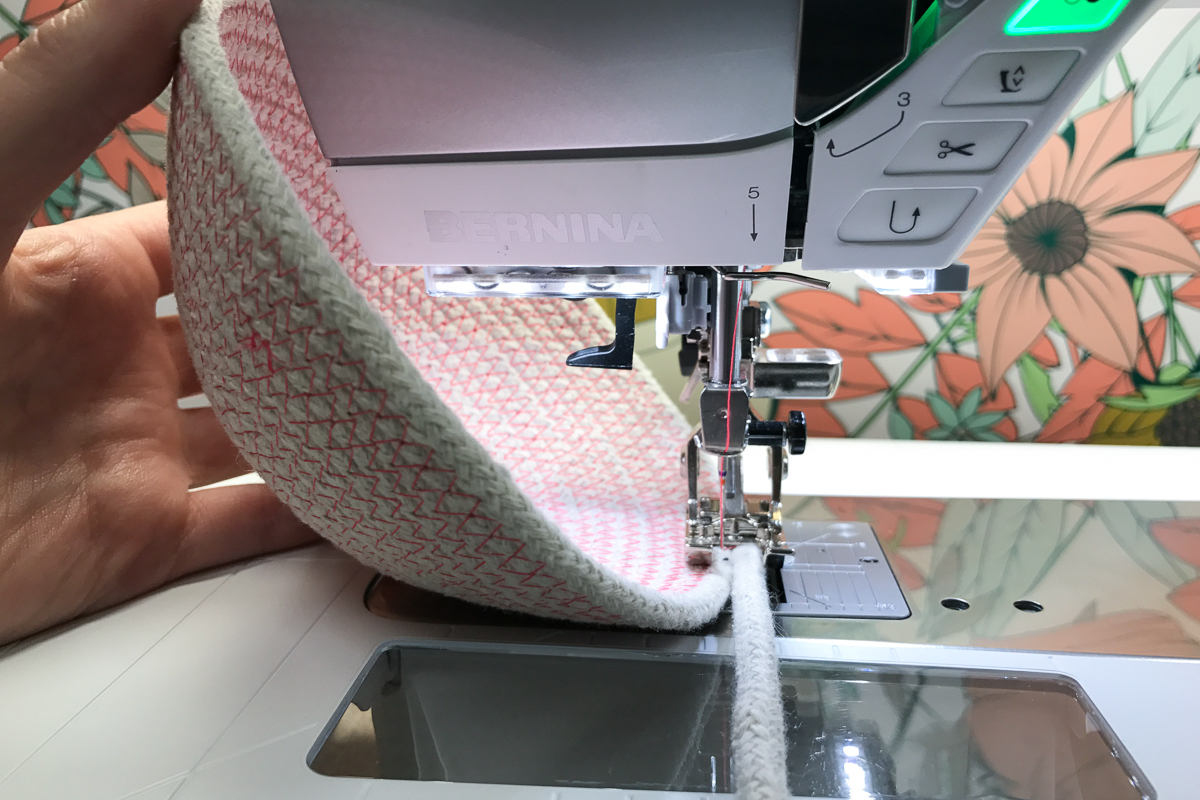
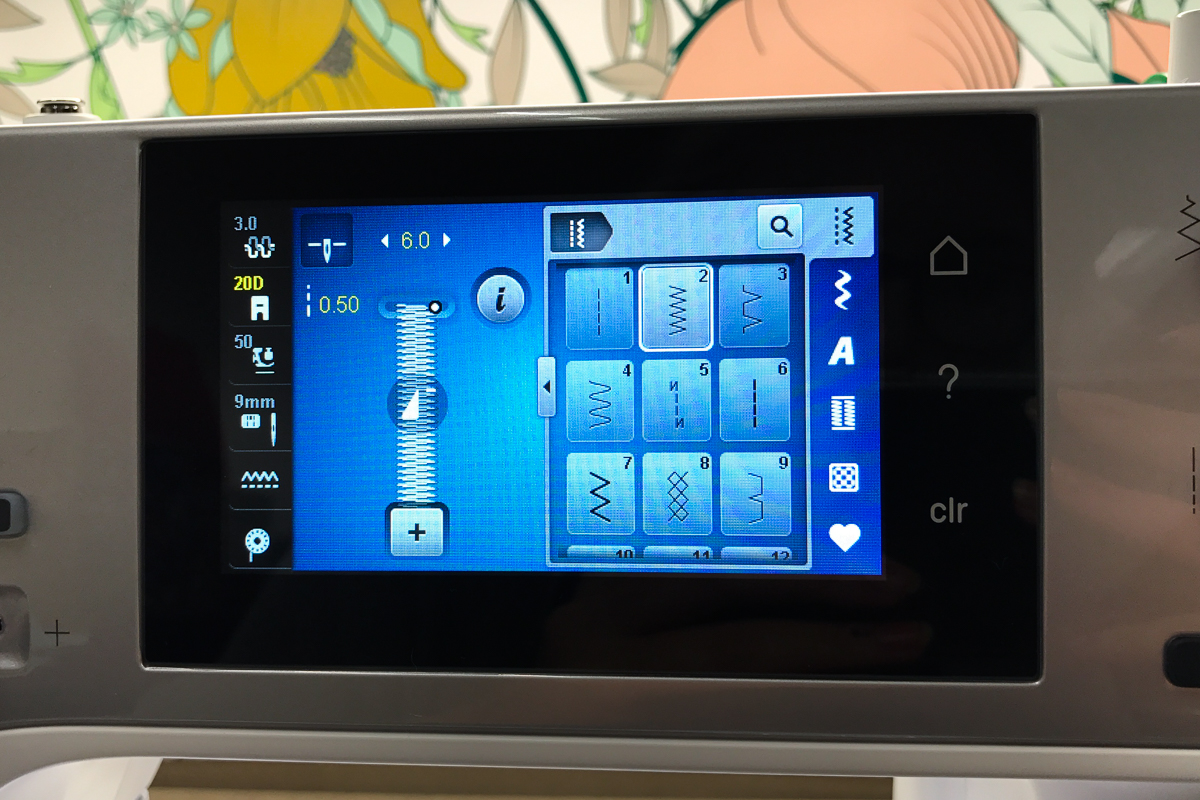
Step 3. Set up your stitch
Set your machine to stitch a standard zigzag at about 6mm width. This is wide enough to make sure you’re catching both sides of the cord as you sew—no one wants holes in their rope bowl! Be sure to set your machine to stop with the needle down.
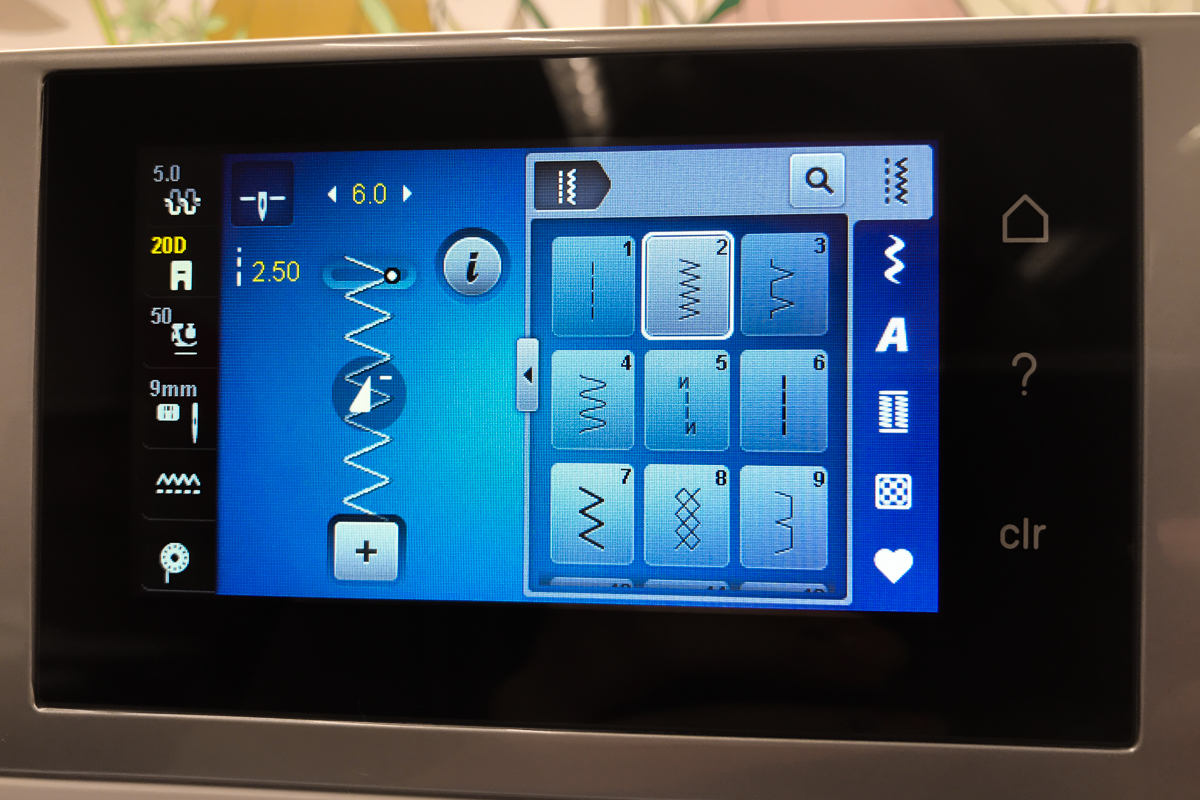
I keep my stitch length at about 2.5mm. You can play with the length of the stitch to create different effects and textures!
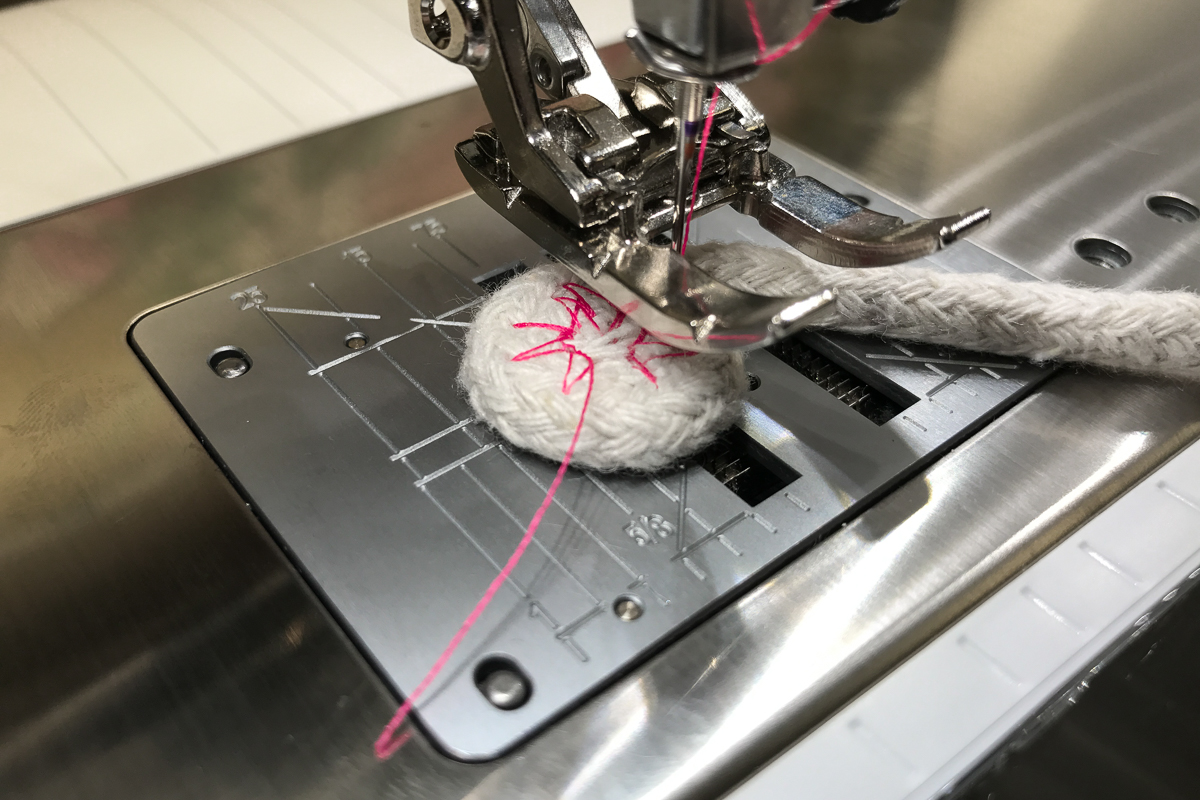
Step 4. Lock the center
Place your coil under the #20D foot. Take the first few stitches very slowly to make sure you sew through the cord with every stitch. Stop and rotate the coil after every stitch or two to work your way around. Make sure not to sew over your pins!

When pivoting, stop with your needle down on the left side, or anchored toward the center of the coil rather than in the length of cord. This helps keep your stitches even and the tension on the cord consistent.
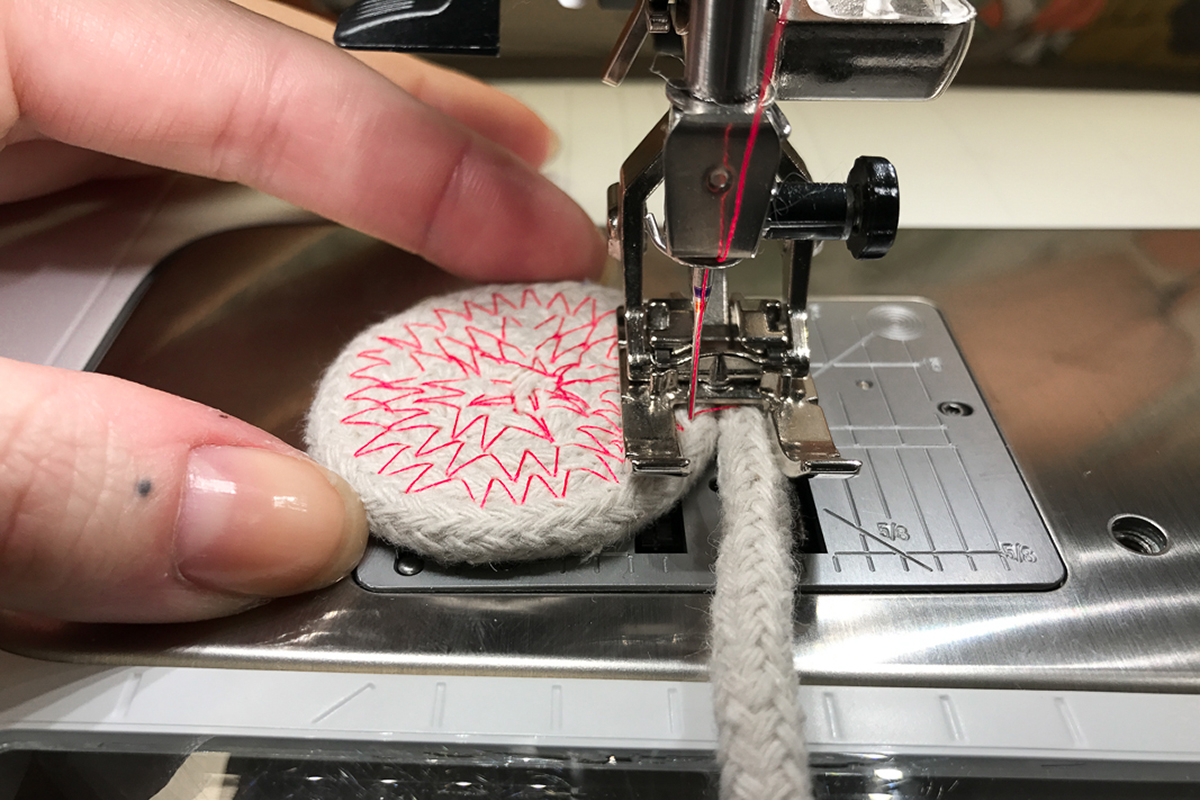
Step 5. Build your base
Once your center is locked in, rotating the bowl will get easier and more consistent. Line up the center where the coil and new cord meet with the center marking on your #20D foot. Move the bowl by gently pulling the base coil toward you from the left side. With dual feed engaged, it will spin with some light pressure.
Slow and steady is the mantra here. If you start sewing too fast, it’s easy to lose track of your placement and end up with holes. It’s hypnotizing after a minute or so!
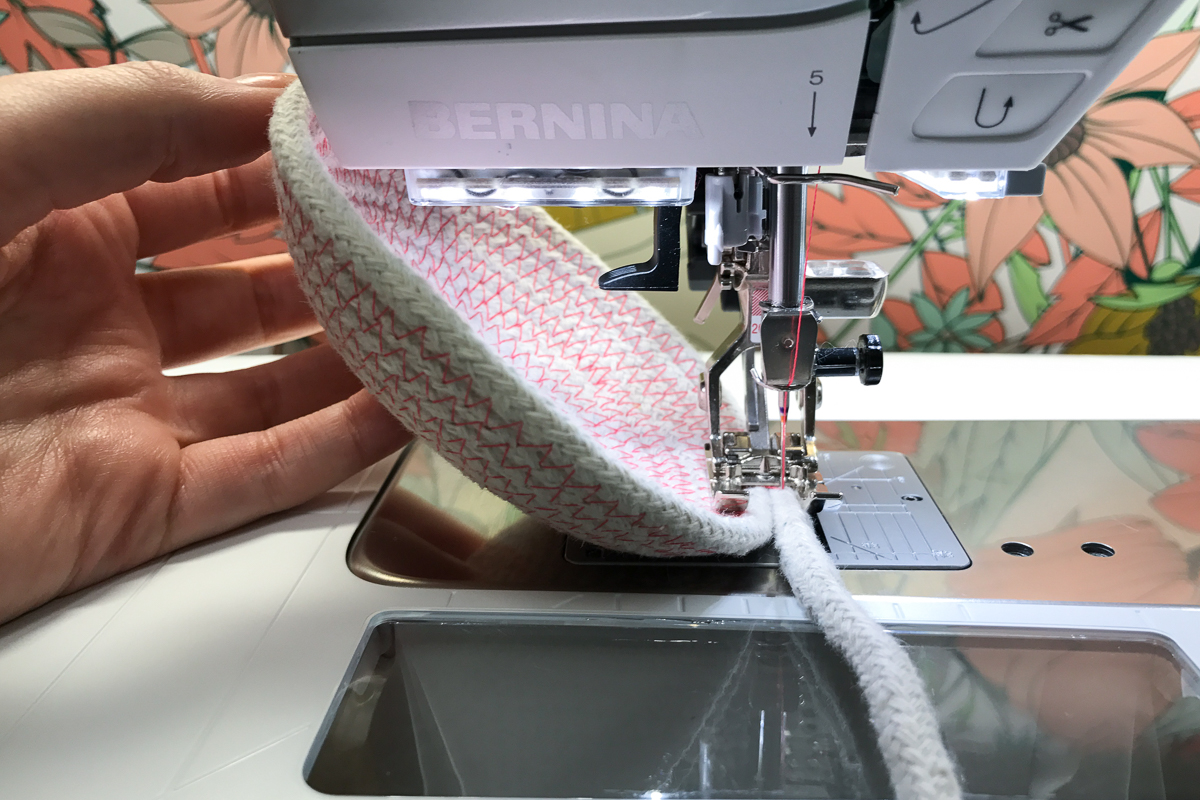
Step 6. Slope the sides
When you’ve stitched around and around enough to create a base for your bowl, you can start creating an angle to slope the sides of the bowl. Stop stitching, with your needle down as always, and lift the edge of the base up toward your machine head. Continue stitching.
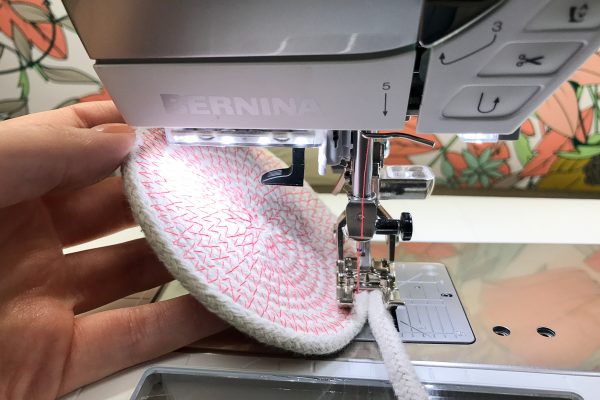
It won’t feel like anything’s happening immediately but after a few turns, you’ll see it start to take shape!
Step 7. Lock the end
After lots of rotations around, you’ll eventually decide your bowl is large enough. To secure the end of your cord, head back to your stitch settings and shorten your zigzag to a tight satin stitch.
Stitch about an inch in the satin stitch and backstitch a couple steps at the very end to keep things extra secure.

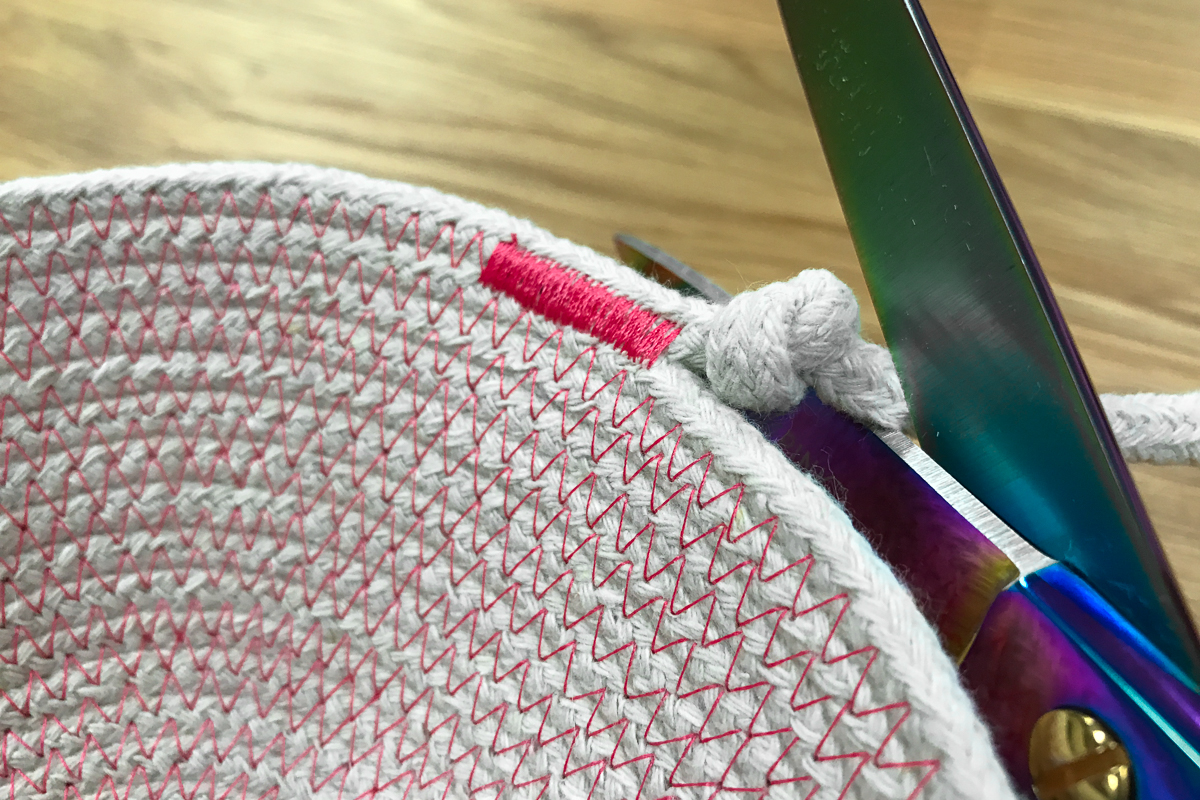
Step 8. Tie it off
Pull your bowl away from the sewing machine. Make a small knot in the cord as close to your satin stitching as possible. Cut off the excess cord, fray the raw edge, and you’re done!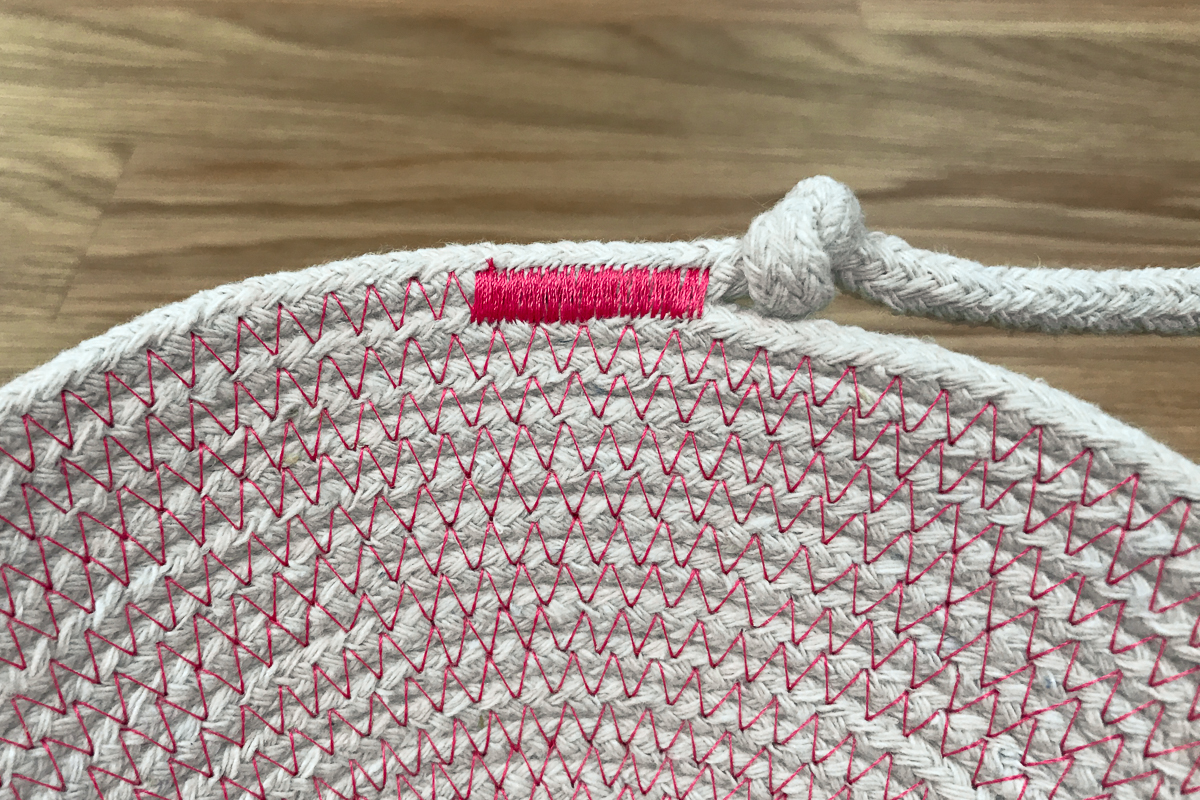
Used Products


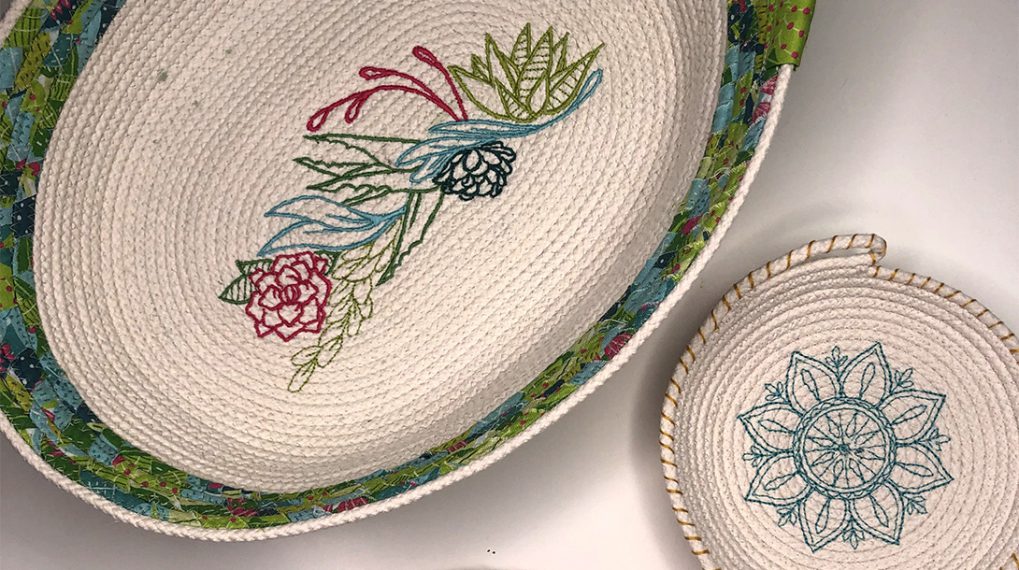
What you might also like


13 comments on “Rock A Rope Bowl”
-
-
Thanks, loriraley! They are really fun and easy to make. They’re great to make for gift wrapping too– it really adds a personal touch to give small gifts in something handmade 🙂
-
-
What size needle did you use, what bobbin thread? Thanks.
-
Hi! I used a microtex 80/12 because my cord was relatively soft. If you’re using a stiffer cord, try a heavier jeans needle 🙂
-
Also, my bobbin thread matches my top with a 50wt polyester.
-
-
-
When you are sewing on rope you should be wearing safety glasses because the needle breaks very often and pops up and hits you in the face
-
What a great gift idea and a chance to practice a new technique. Thanks.
-
And I suppose we could cover the cord with fabric before stitching?
-
Taking this one step farther…what about making a rectangular tray…Could start by holding the rope in a long straight line, say 7-8 inches, stitching it like the coil in the round bowl until it reaches the proportions of the bottom of the tray you want. Then, go to one corner and lift the rope up a bit as you sew to turn the first side. Stitch, holding the rope at about a 45* angle to turn up the side, and when you get to the next corner, fold a right angle into the piece as you stitch into the next side, repeating as you reach each corner. When the tray’s sides are as high as you’d like, you could backstitch a bout an inch about 1/4 of the way in. Stitch only the edge of the tray until you get to about the same place on the opposite side of this end piece; bow up the rope to make a handle big enough to hold, and then attach the rope back to the side of the tray and stitch and backstitch to secure it before continuing to the opposite side of the tray to make the other handle. I can see all this in my mind. Does anyone else see it?
-
My machine does not have dual feed. Can I still do this? I do not really know what dual feed is.
-
Dual feed is a feature of certain machines that essentially moves the top side of the fabric (or in this case, rope) at the same speed as the bottom fabric. It’s really helpful for almost any kind of piecing – it sort of helps move everything along in tandem. That being said, I’ve seen this done without it and with a standard 1 foot and a zig zag stitch. Just go slowly and turn your stitching speed low, so that it will be easy to predict how to shape the bowl.
-
-
What about presser foot pressure? Did any if you change it from 50?
-
I have been wanting to make a rope bowl for several years, ever since I first saw one at a craft show, but I was fearful–how would any sewing machine manage to stitch through clothesline? Even my Bernina 790? I bought 100 yards of clothesline, and it sat and sat. When I saw your post about embroidering the center, I figured I should at least give a plain bowl a try. I’ve spent most of the day at my machine, and I finished three bowls, easy peasy. Why did I wait so long? Why was I so afraid? Now I have a laundry basket filled with yard that I’m going to turn into cord and use it for baskets. Fun, fun, fun!
Leave a Reply
You must be logged in to post a comment.

I just made a rope bowl!! Finally have a use for 1,000 ft of cotton rope! Everyone gets a bowl for Christmas. If they are nice, I might put something in it too. Thanks for a fun and easy project!