Add a Patchwork Accent to a Garment
Patchwork – sewing small pieces of fabric together – is no longer just for creating quilts. It has become popular again in clothing design, which is great news for those of us that sew! We can customize colors to suit our personal taste and style.
Patchwork clothing was quite popular in the 1970s and early 1980s. I fondly recall many patchwork projects in my teen sewing years, including a pair of bell-bottom pants I sewed completely out of patchwork fabric I created using my fabric scraps. Oh how I wish there was a photo to share!
Hello everyone! It’s Sharon from Sharon Sews and I’m going to show you how to add a patchwork accent to a shirt sleeve. You can connect with me on YouTube, Instagram and my blog, where I share sewing tips, projects, reviews, and fashion sewing ideas.
While I’m happy that patchwork has returned to the fashion scene, this time around I’ll use patchwork as an accent rather than an entire garment. Like on the sleeves of this button-up shirt!
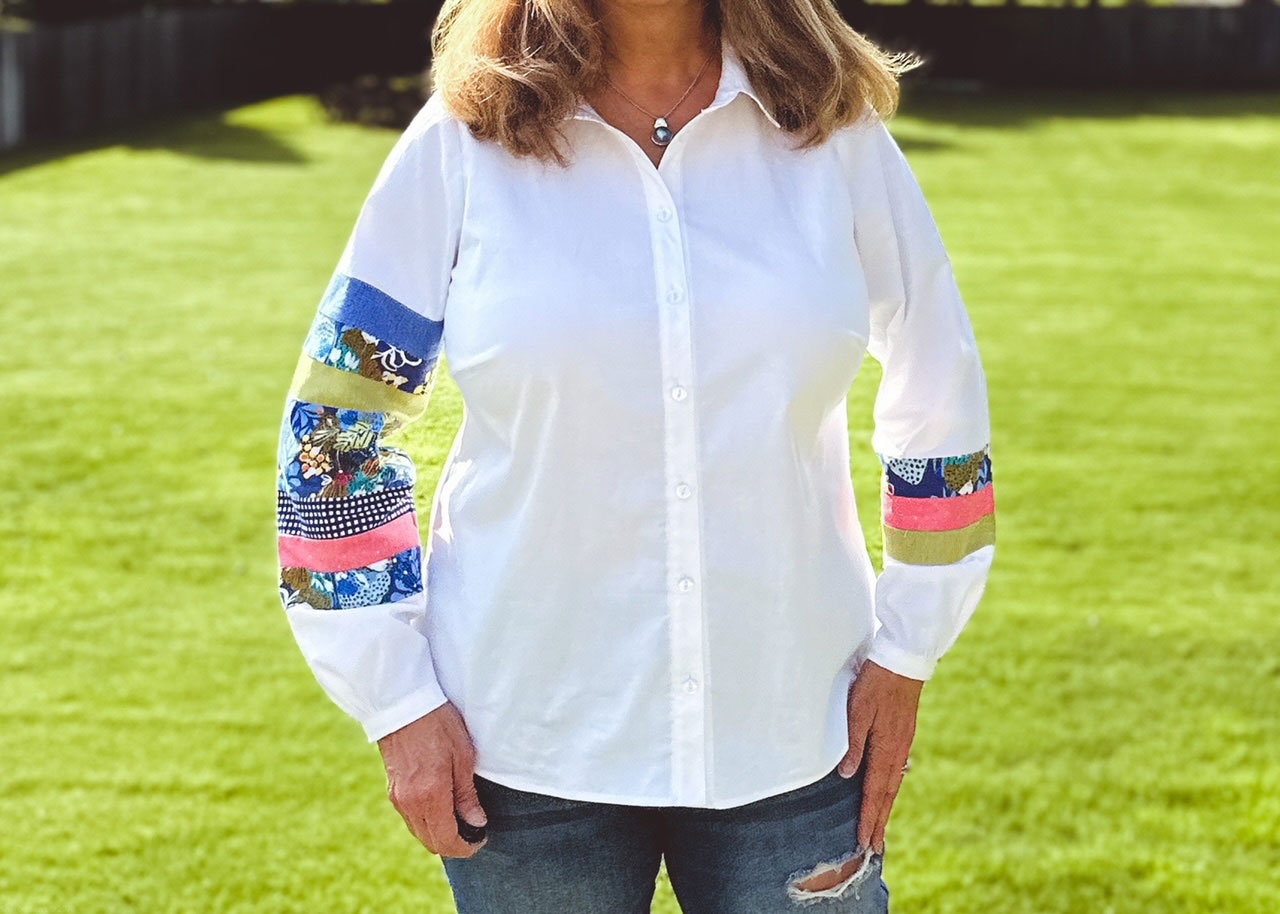
This shirt was inspired by a menswear shirt I saw that used a bold striped fabric on part of one sleeve. Instead of using striped fabric, I used quilting cotton to create a patchwork accent on both sleeves.
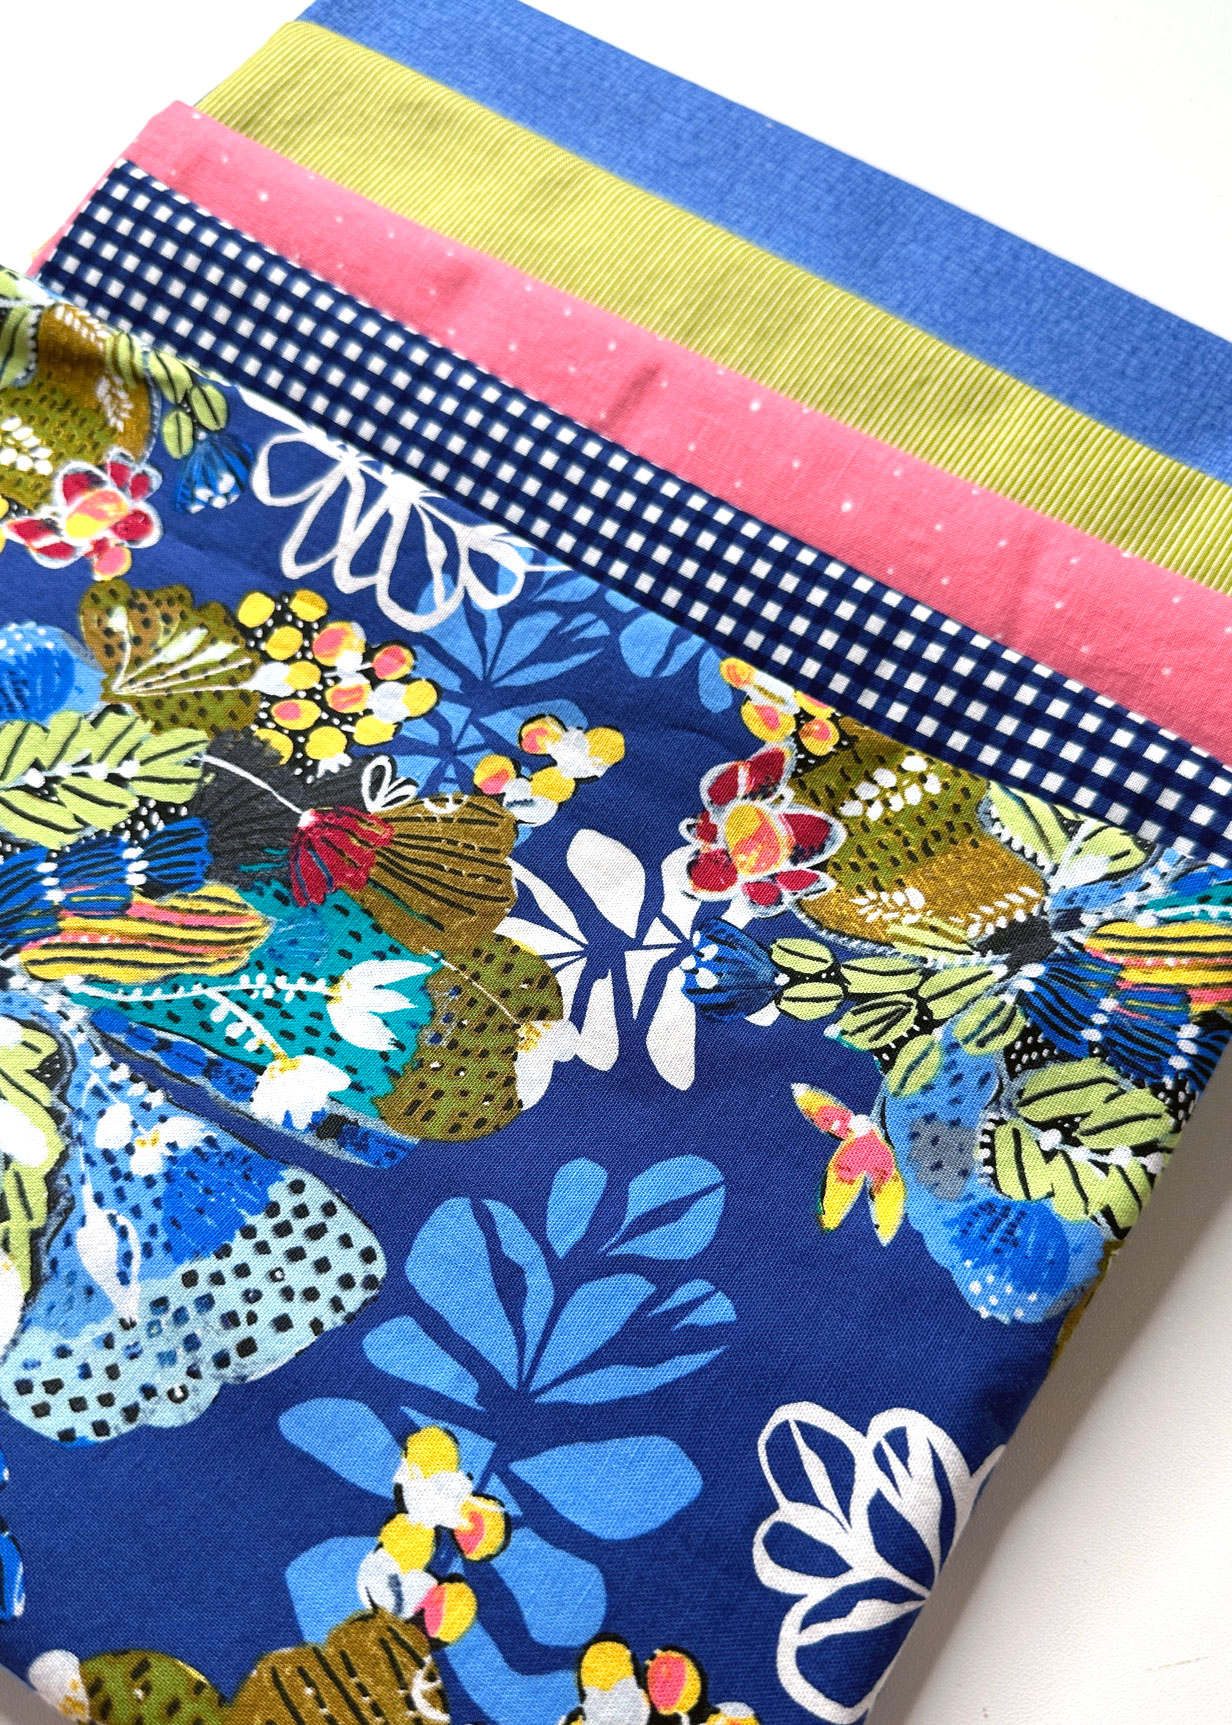
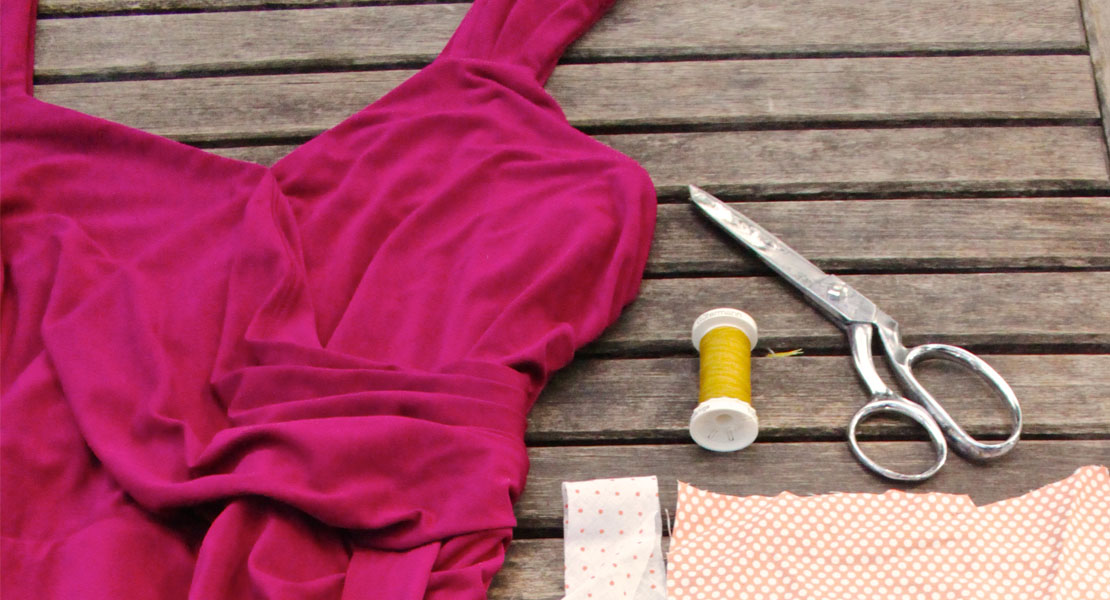
For the patchwork accent, you can use fabrics leftover from other projects, coordinating fat quarters, or purchase small amounts of quilting cottons like I did. I loved the blue floral print, and asked my local quilt shop owner (also my BERNINA dealer!) to help me choose fabrics to pull out the colors in the print. I’m really happy with color combination.
Let’s get started!
Materials to Sew a Patchwork Accent Sleeve Shirt
- Sewing Machine – I used my BERNINA 770 QE PLUS
- Long sleeve button-up shirt pattern. I used the Cashmerette Vernon Shirt Pattern because it’s available in a wide range of sizes (0 to 32) and has optional cup sizes, making it easy to fit the bust. (You can use any shirt pattern with a long sleeve as long as it’s designed for woven fabrics.)
- Cashmerette provided the shirt pattern for this project
- Fabric for the shirt, yardage and type based on the pattern recommendation
- Fabric for the patchwork sleeve accent
- Five coordinating fabrics, cutting dimension are listed below
- Coordinating all-purpose thread
- Mettler provided the All-Purpose Metrosone thread for this project
- Straight pins
- Ruler
- French curve
- Tracing paper and pen or pencil
- Removable marking pen or chalk
- Scissors OR Rotary cutter and cutting mat
- Iron and pressing surface
Trace and Mark the Sleeve Pattern for the Shirt
Note: If you are using a multi-sized shirt pattern, consider tracing all of your pattern pieces. Tracing will allow you to keep the original pattern pieces which is helpful if you want to sew additional sizes.
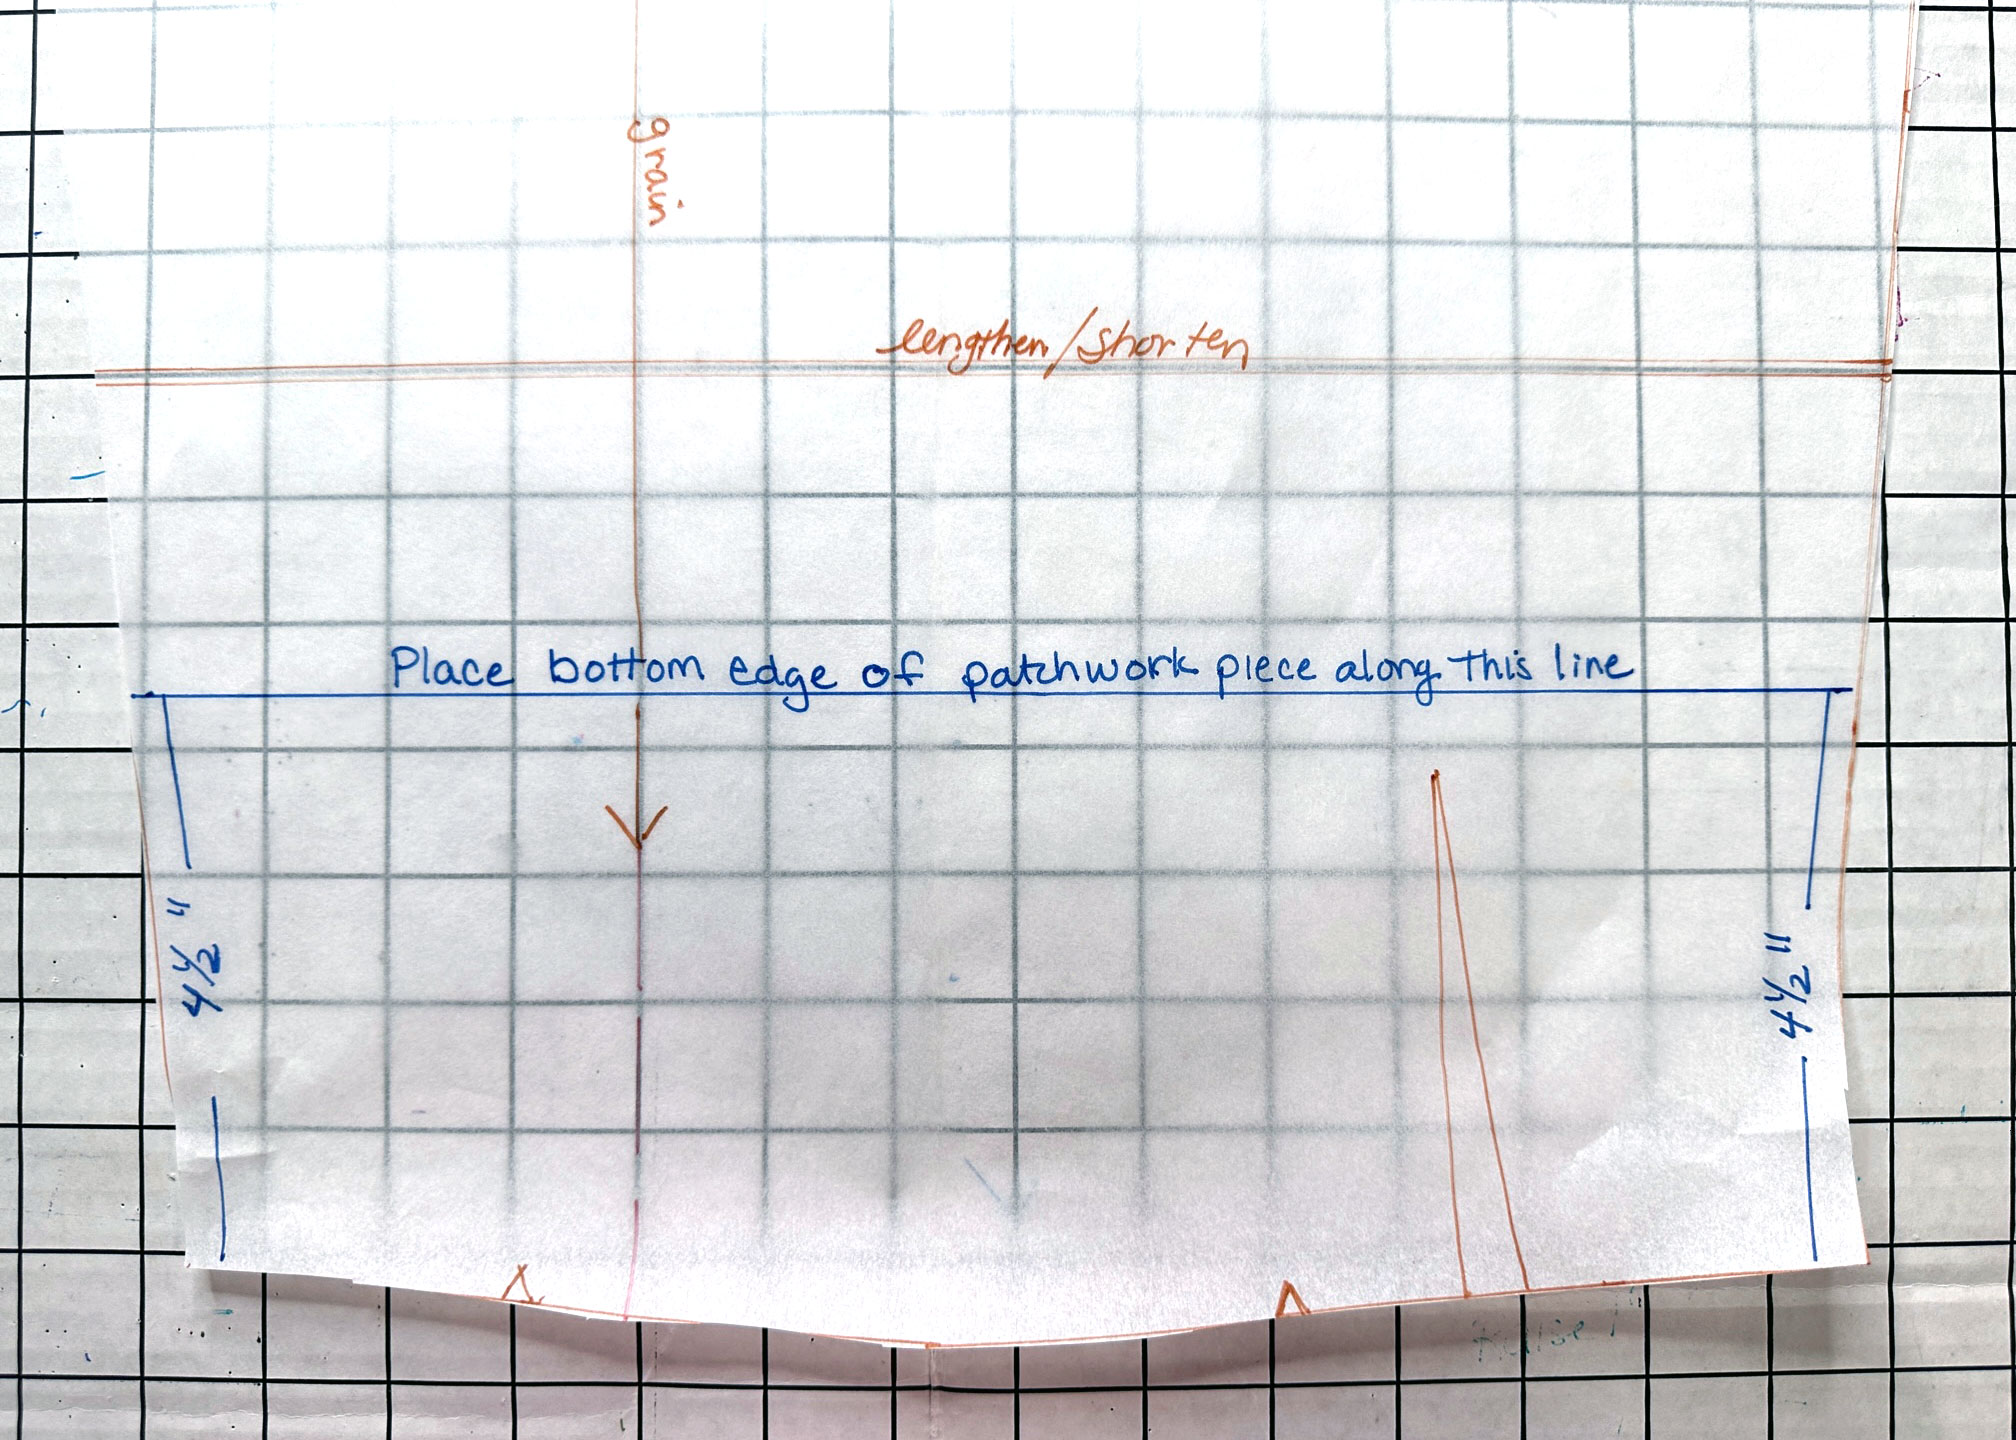
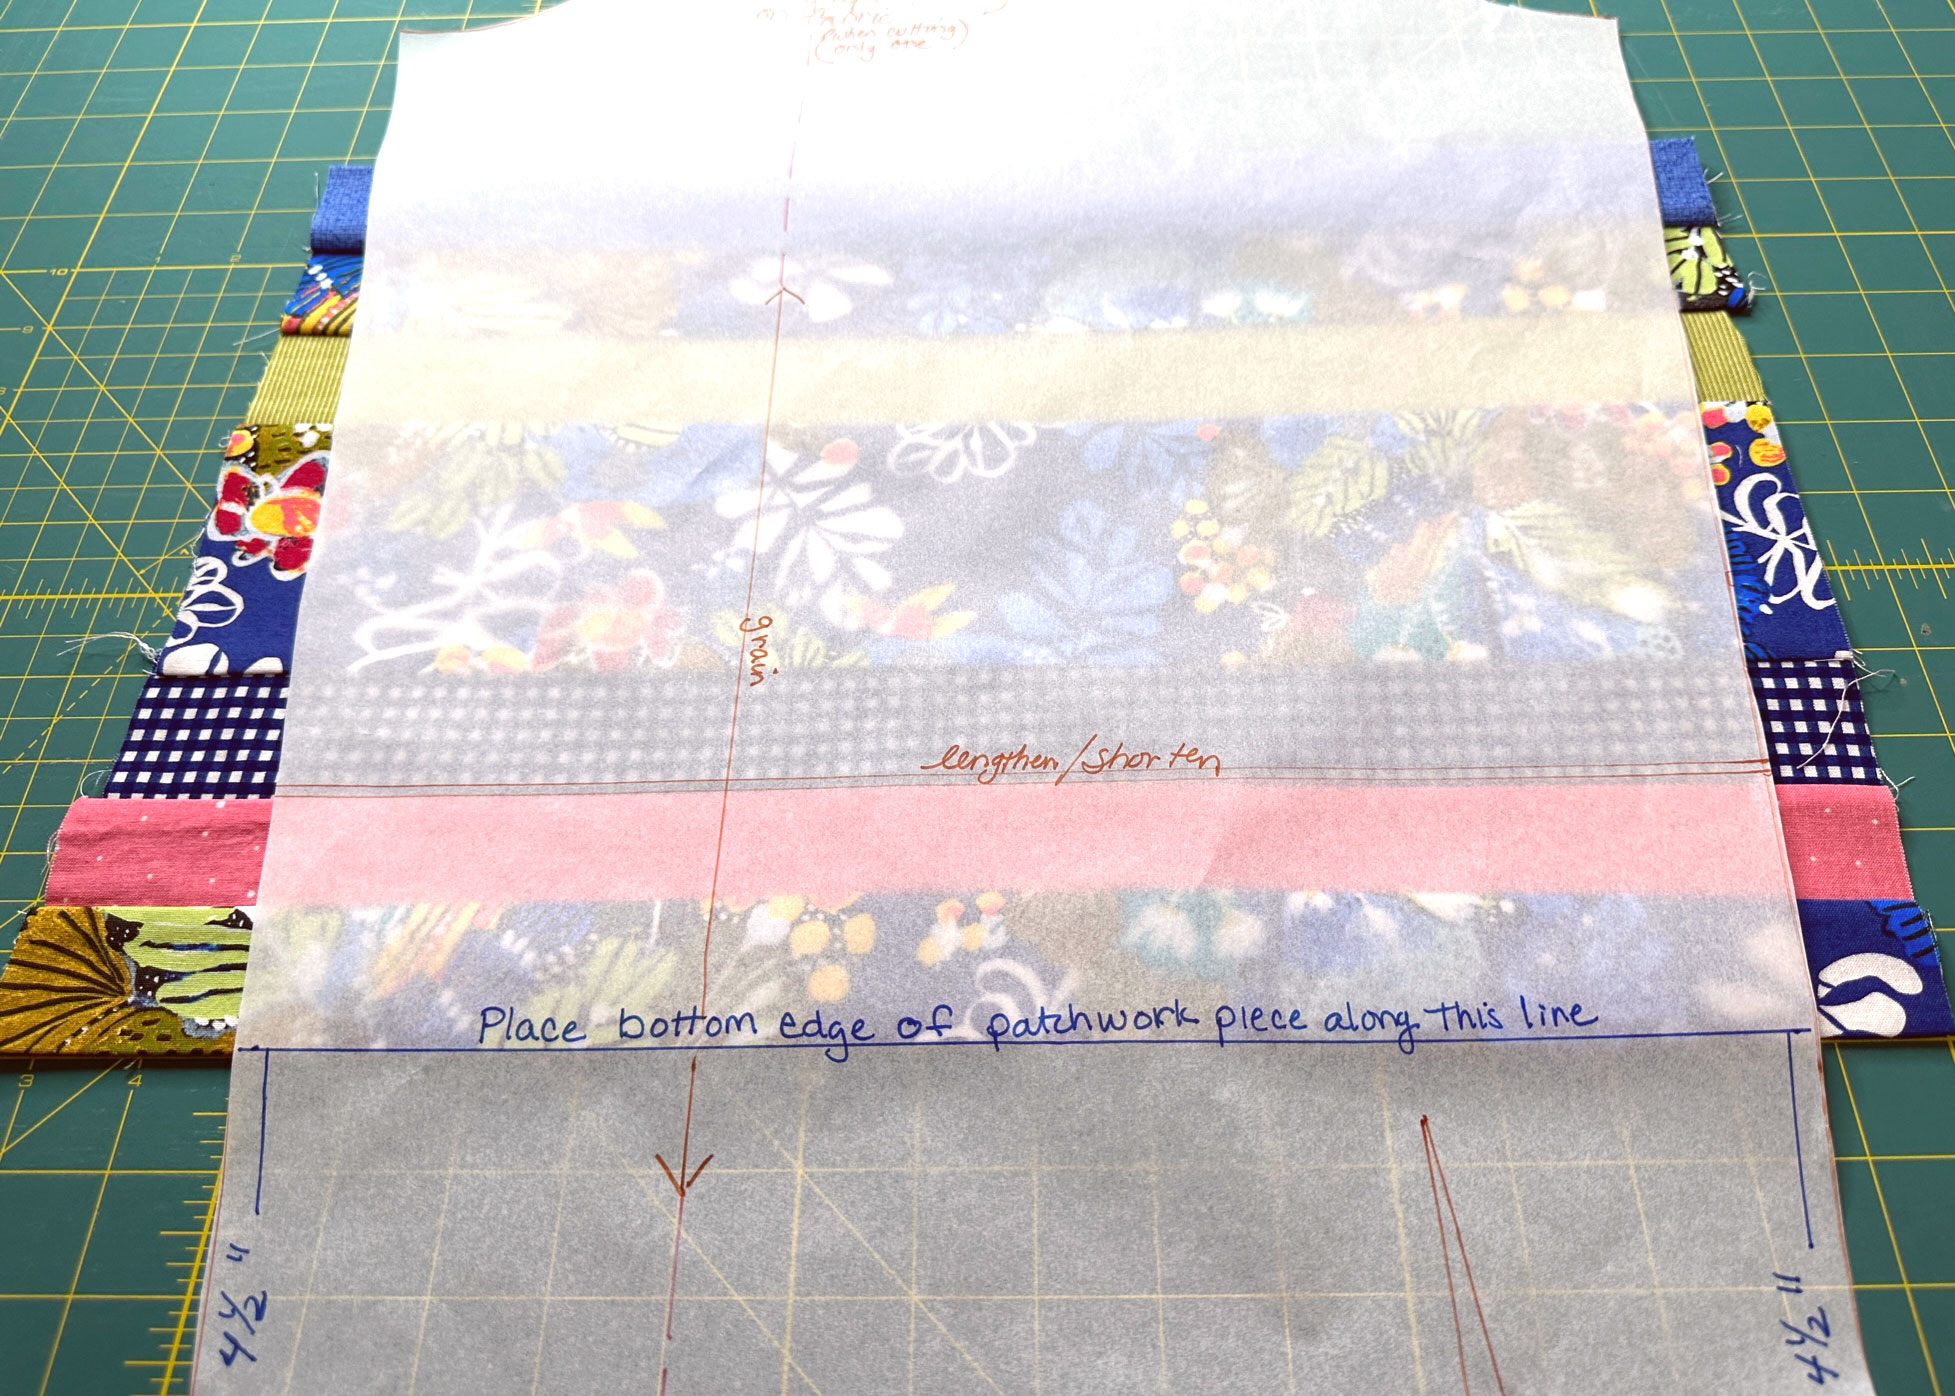
Trace the sleeve pattern in the size you are using. To do so, place the sleeve pattern piece right side up on a flat work surface and place tracing paper over the top of the pattern piece. Using a pen, ruler, and French curve, trace along the size line of your sleeve pattern piece. Transfer all the pattern markings to your traced pattern piece.
Starting at the bottom of the sleeve, measure along one side seam and make a mark 4-1/2″ up; repeat for the other side seam. Use a ruler to draw a horizontal line connecting the two dots. This is where the bottom edge of the patchwork will be placed.
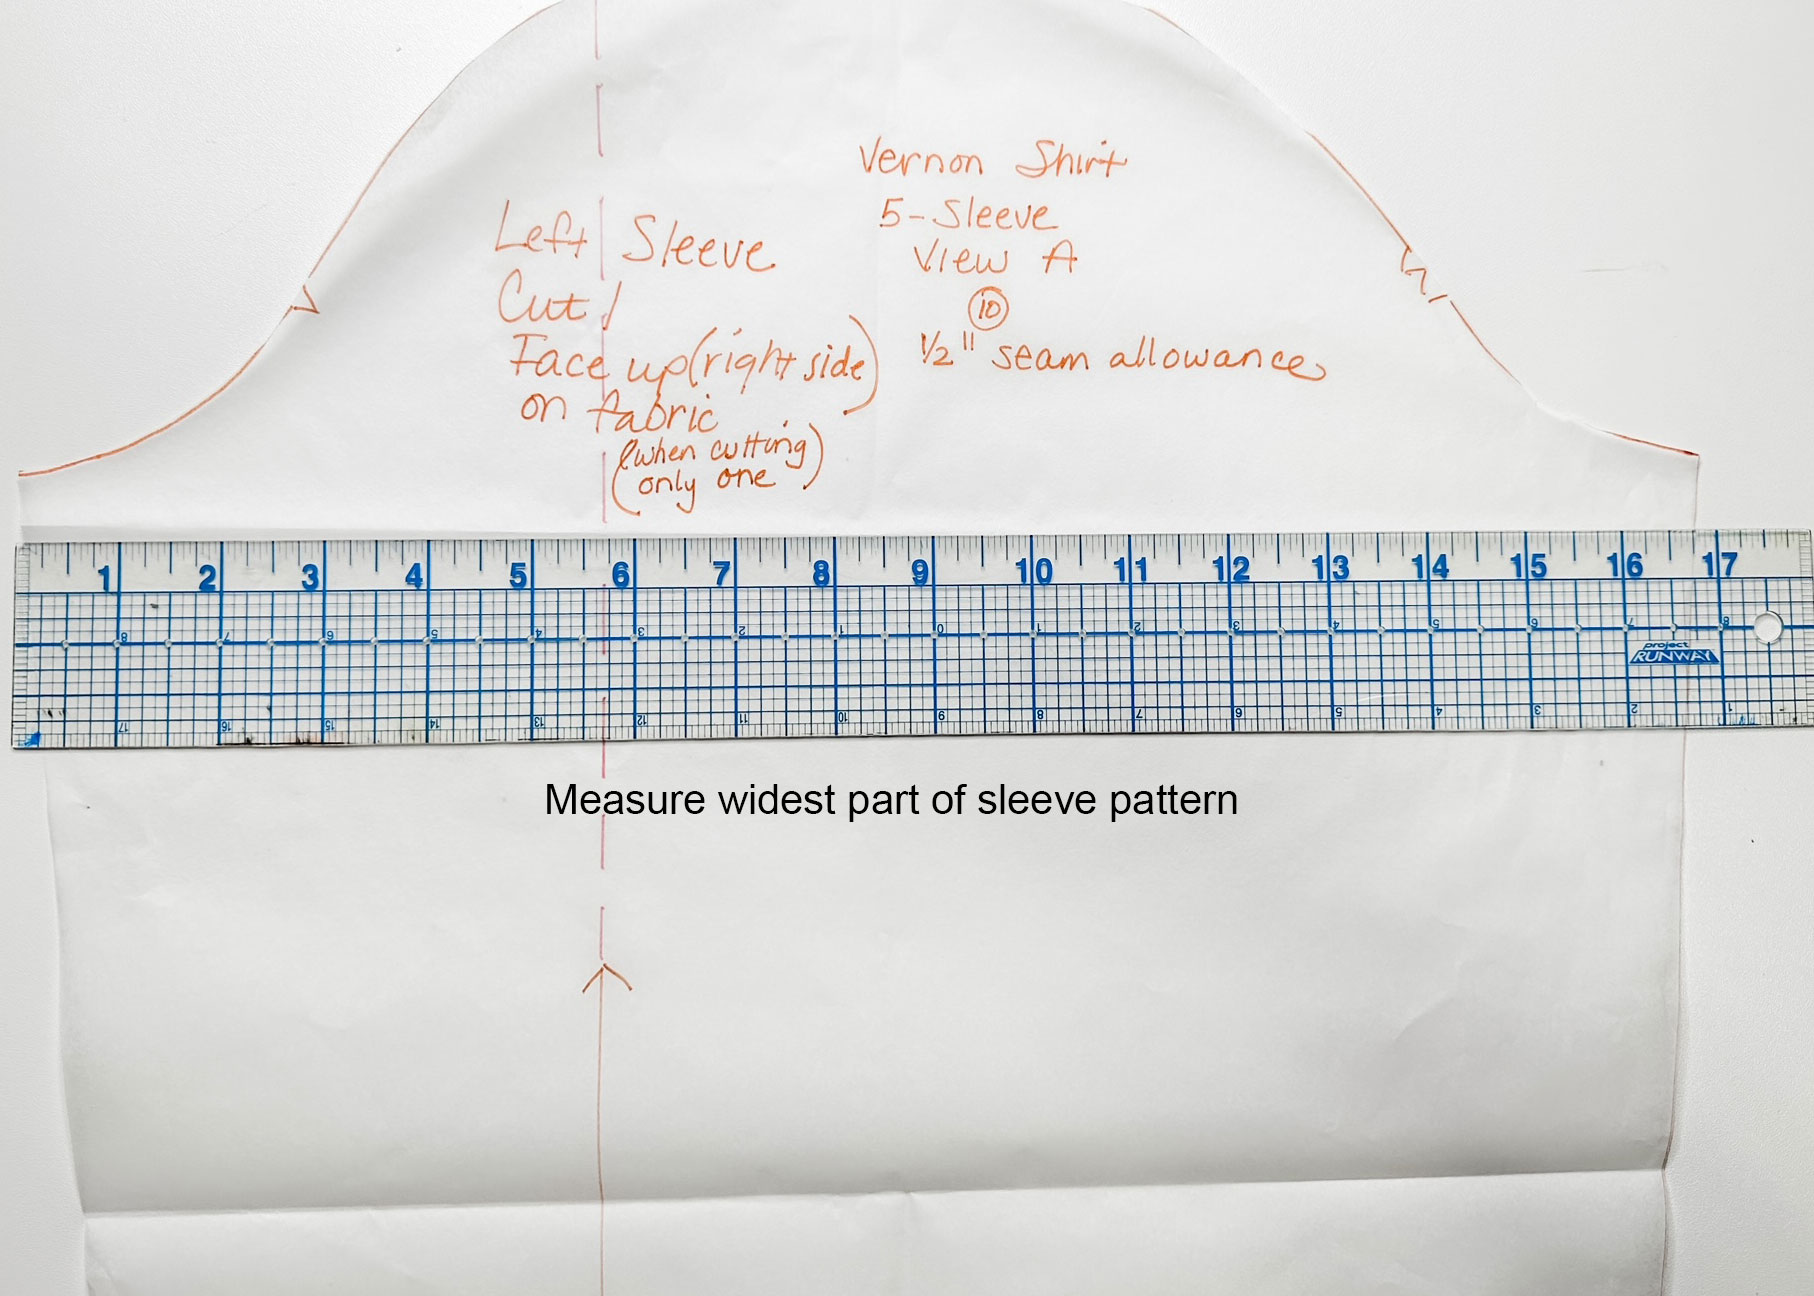
Measure the widest part of the sleeve and add 1″. The fabric for the patchwork strips will be cut to this width. It is easier to trim the patchwork fabric to the correct size after sewing the strips together.
Cut out the Shirt Pattern Pieces
Lay out and cut the shirt pattern pieces following the cutting diagram included with the pattern. Set pieces aside. You’ll construct the shirt after adding the patchwork to the sleeves.
Cut and Sew the Patchwork Strips
Select five coordinating fabrics to use for the patchwork strips and arrange in a way that is pleasing to you. The right sleeve will have seven strips, and the left sleeve will have three strips.
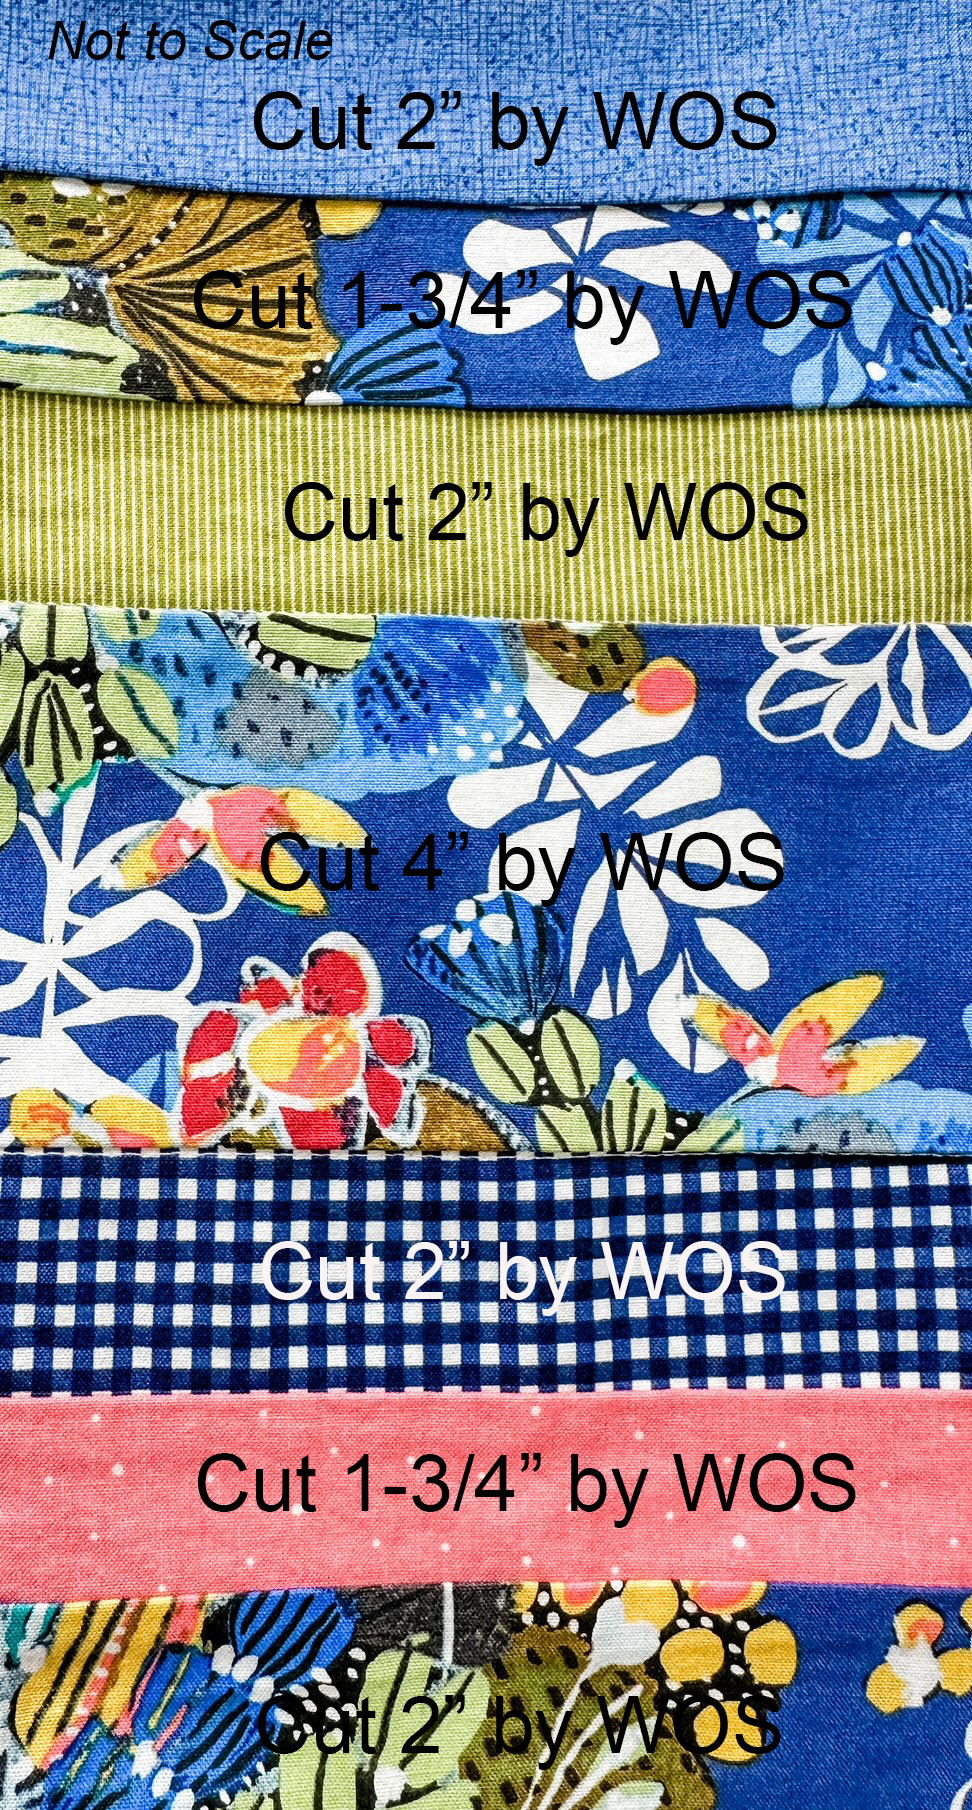
Cut Fabrics for the Right Sleeve Patchwork
From each fabric, cut one each using the following dimensions. WOS = width of sleeve plus 1″
- Right fabric 1 – Cut 2″ wide by WOS
- Right fabric 2 – Cut 1-3/4″ by WOS
- Right fabric 3 – Cut 2″ by WOS
- Right fabric 4 – Cut 4″ by WOS
- Right fabric 5 – Cut 2″ by WOS
- Right fabric 6 – Cut 1-3/4″ by WOS
- Right fabric 7 – Cut 2″ by WOS
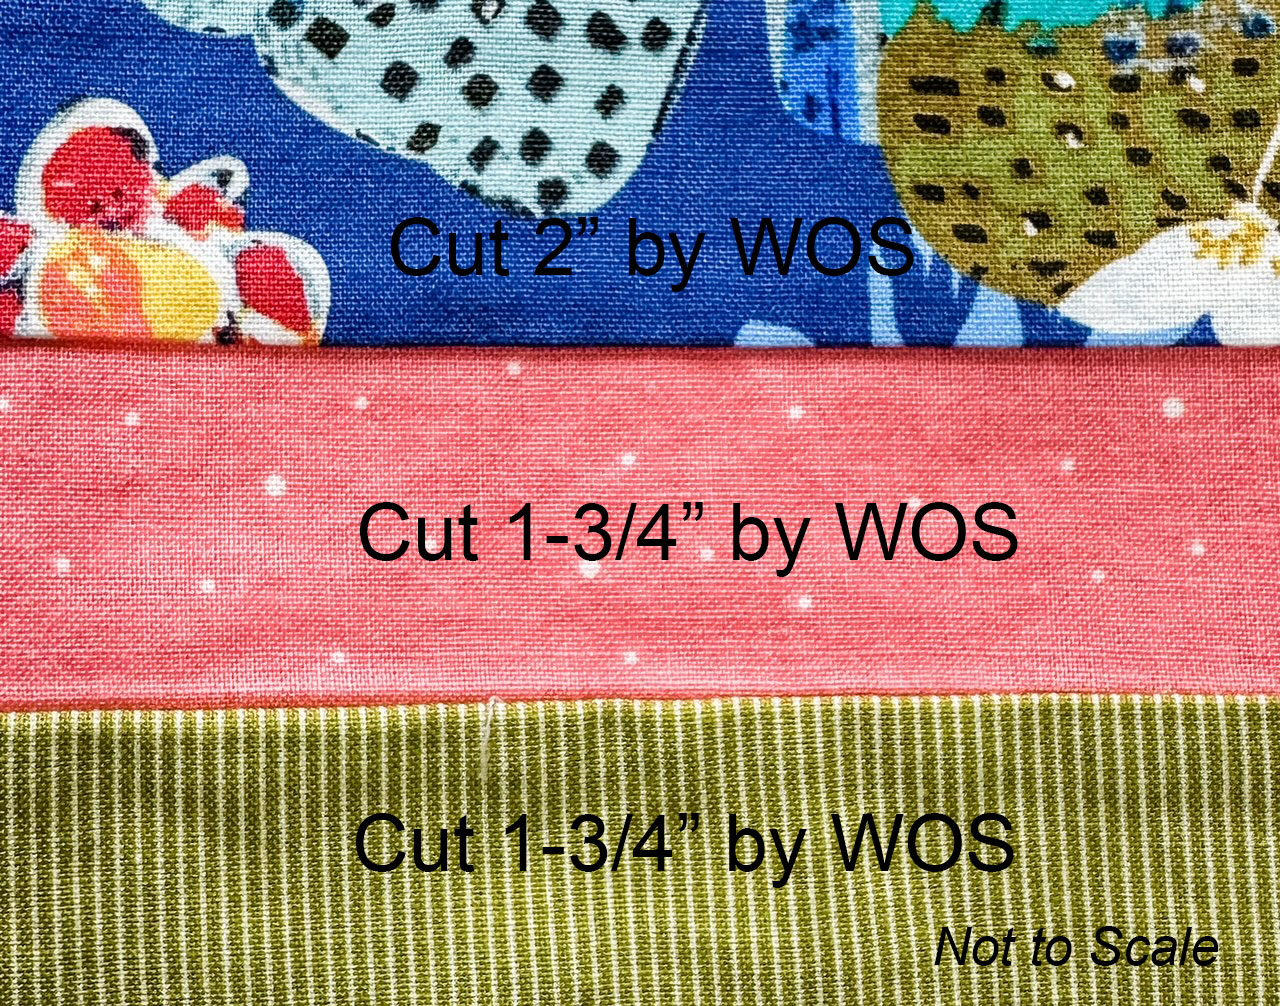
Cut Fabrics for the Left Sleeve Patchwork
- Left fabric 1 – Cut 2″ by WOS
- Left fabric 2 – Cut 1-3/4″ by WOS
- Left fabric 3 – Cut 1-3/4″ by WOS
Sew Patchwork Fabric Strips Together
Sew Fabrics for the Right Sleeve
Place the seven fabric pieces for the right sleeve right side up on a flat work surface in the order to be sewn together.
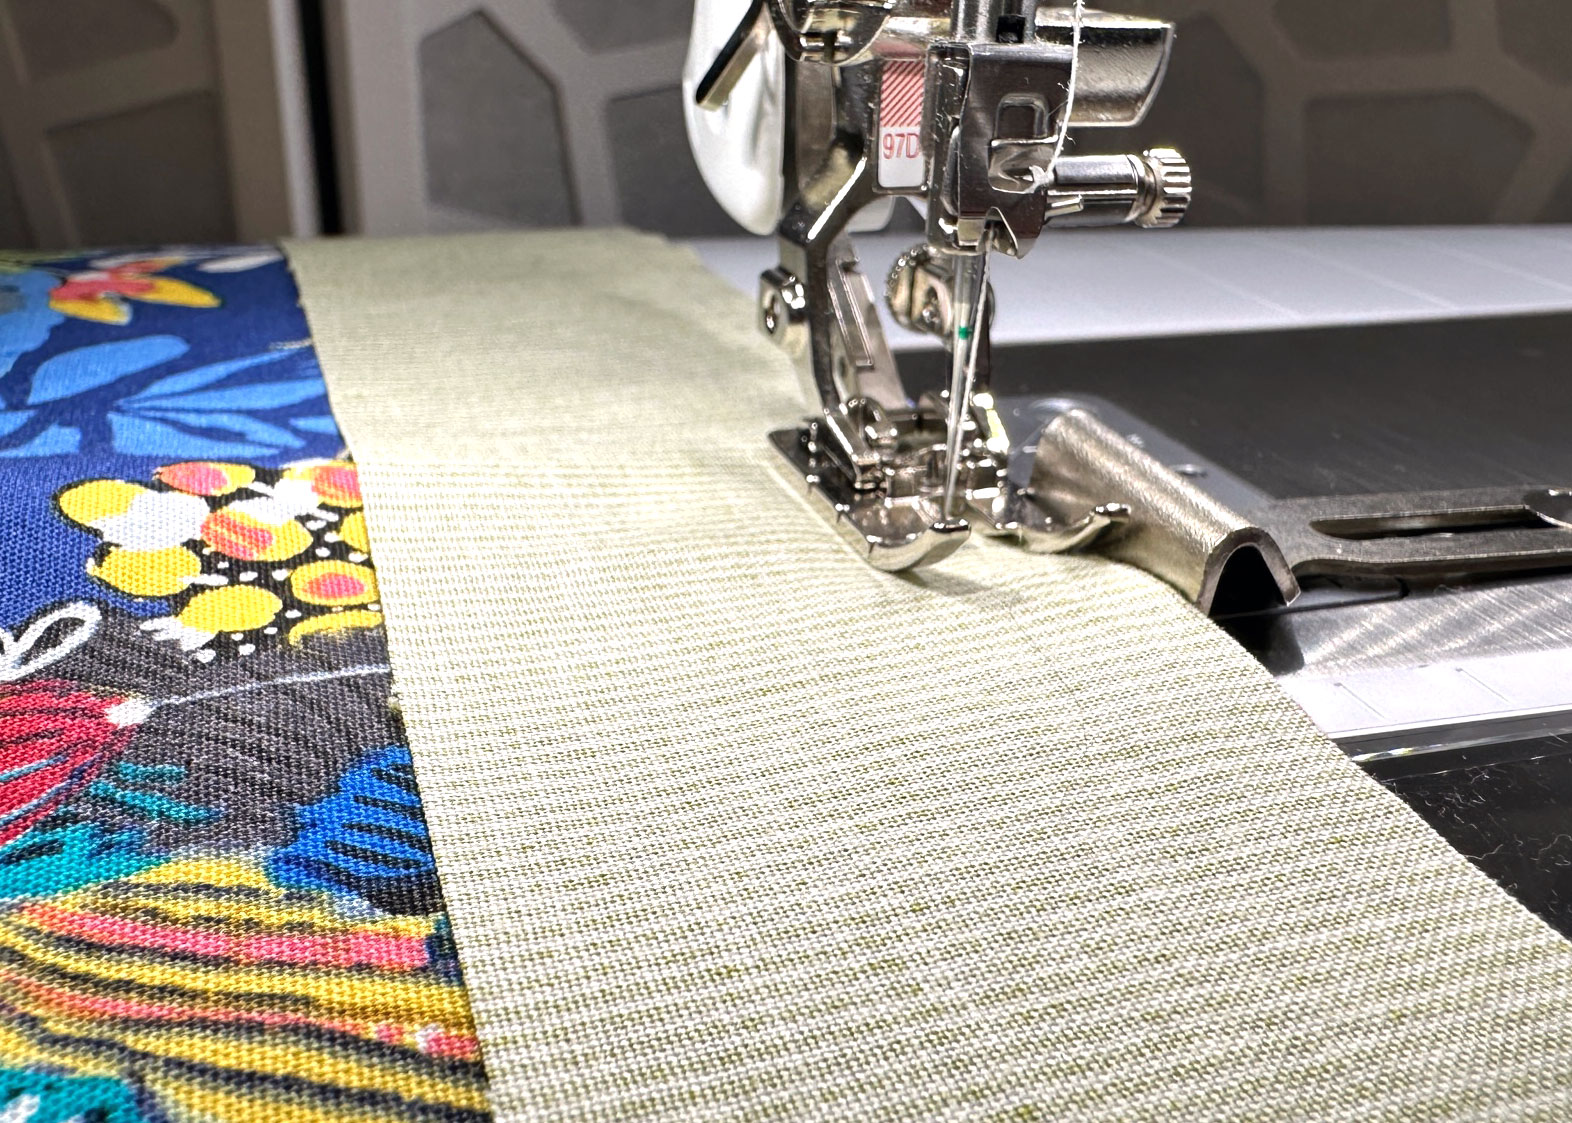
Place Right fabric 1 and Right fabric 2 with right sides facing and stitch using a 1/4” seam allowance. Cut the threads. Continue sewing the rest of the right fabric strips together using a 1/4″ seam allowance.
I used the BERNINA Patchwork Foot #97D to sew the 1/4” seams as it is designed for precise 1/4” stitching. My BERNINA 770 QE PLUS also has a Dual Feed function that feeds the fabric evenly with no shifting or slipping.
Sew Fabrics for the Left Sleeve
Place the three fabric pieces for the left sleeve right side up on a flat work surface in the order to be sewn together.
Place Left fabric 1 and Left fabric 2 right sides facing and stitch using a 1/4” seam allowance. Cut the threads. Continue sewing the additional strip together using a 1/4″ seam allowance.
Press Seams and Edges of Patchwork
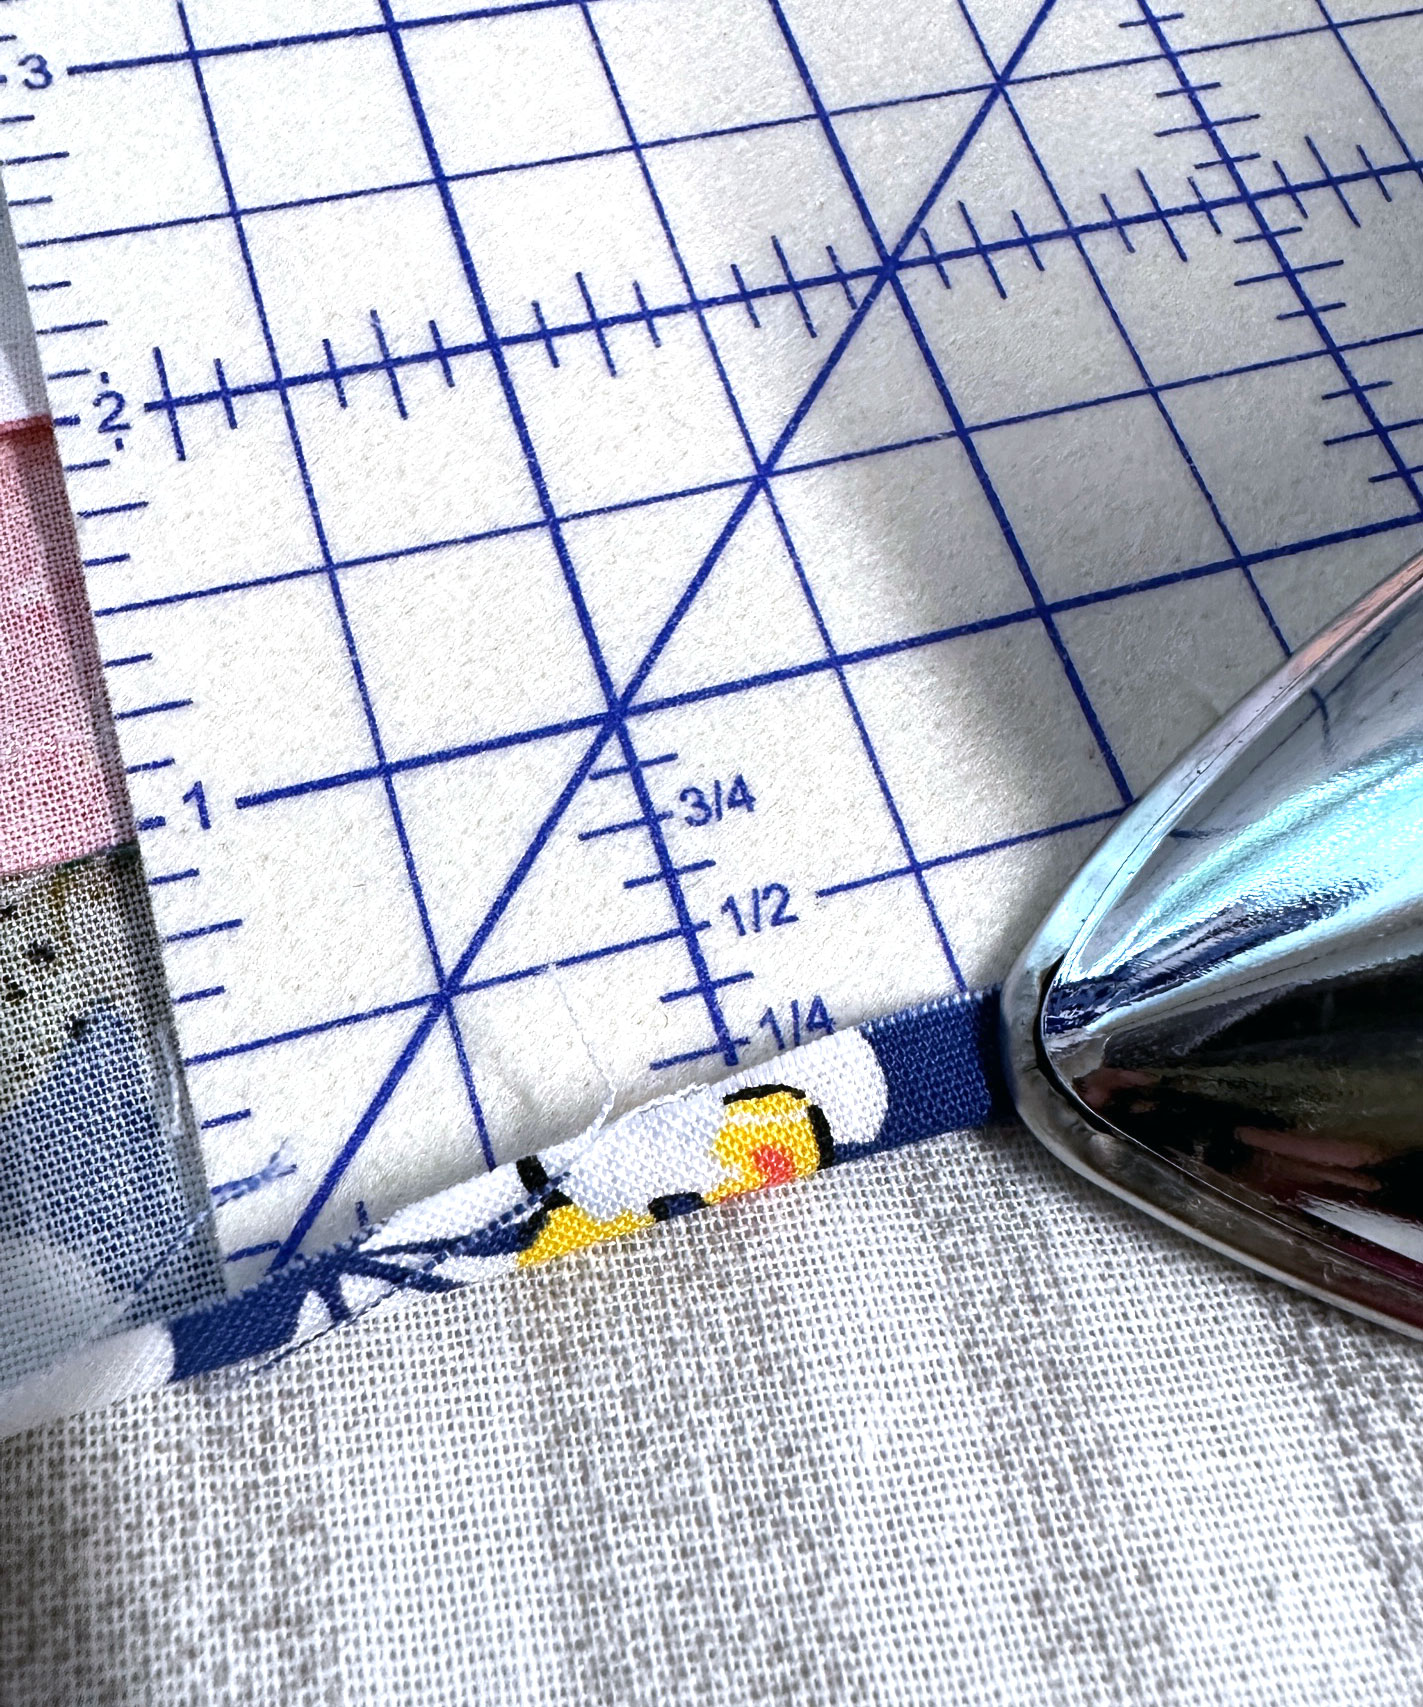
Press all seams toward the darker fabrics. You can finish the seams if you wish but it is not necessary as they will not be exposed.
Press under 1/4″ on the top and bottom edge of both the right sleeve and left sleeve patchwork piece.
Add the Patchwork Piece to the Sleeves
Place the right sleeve patchwork piece on a flat work surface right side up. Place the right sleeve pattern on top of the patchwork piece matching the placement line with the bottom of the patchwork.
Cut away the excess using the sleeve pattern piece as the guide. You can trim using a rotary cutter or cut with a scissor, whichever you prefer.
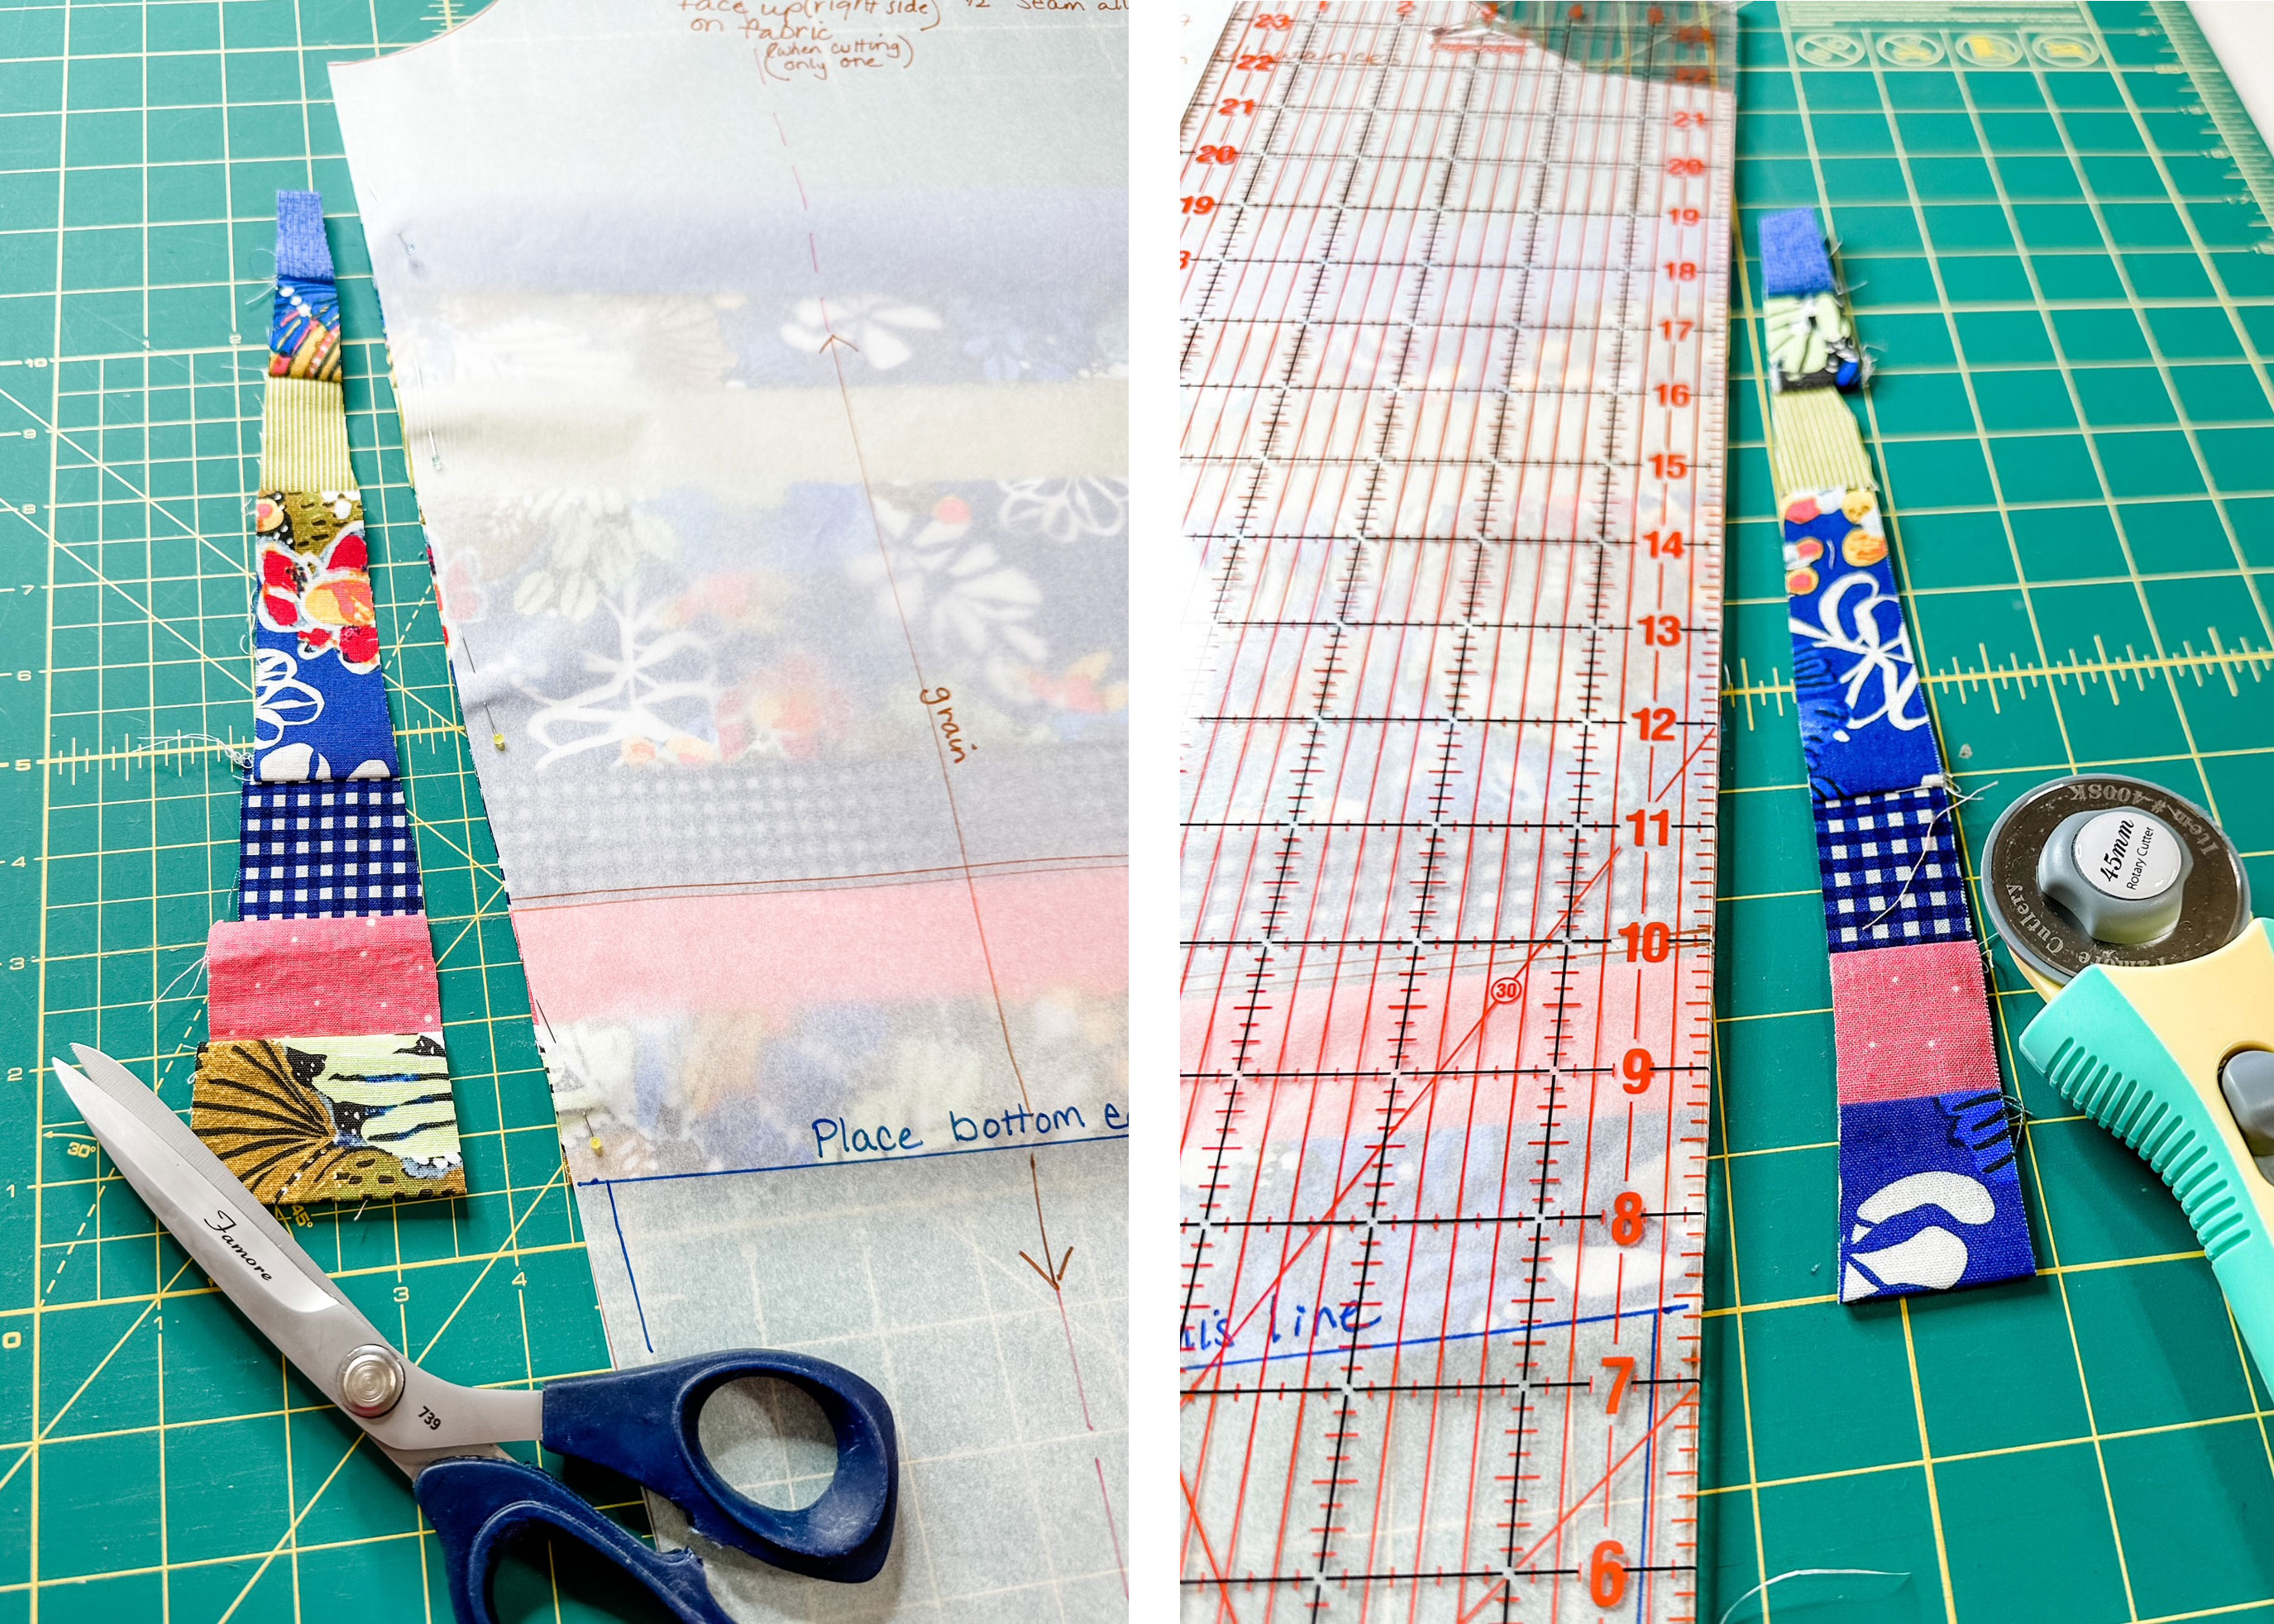
Repeat for the left sleeve patchwork piece. (Remember to turn your pattern piece over if you did not trace two separate sleeve pieces.)
Use a removable fabric marker to lightly transfer the placement line to the right side of each sleeve.
Place the right sleeve on a flat work surface right side up. Place the right sleeve patchwork piece on top of the sleeve with the wrong side of the patchwork against the right side of the sleeve, aligning the bottom edge along the placement line. Pin in place.
Place the left sleeve on a flat work surface right side up. Place the left sleeve patchwork piece on top of the sleeve with the wrong side of the patchwork against the right side of the sleeve, aligning the bottom edge along the placement line. Pin in place.

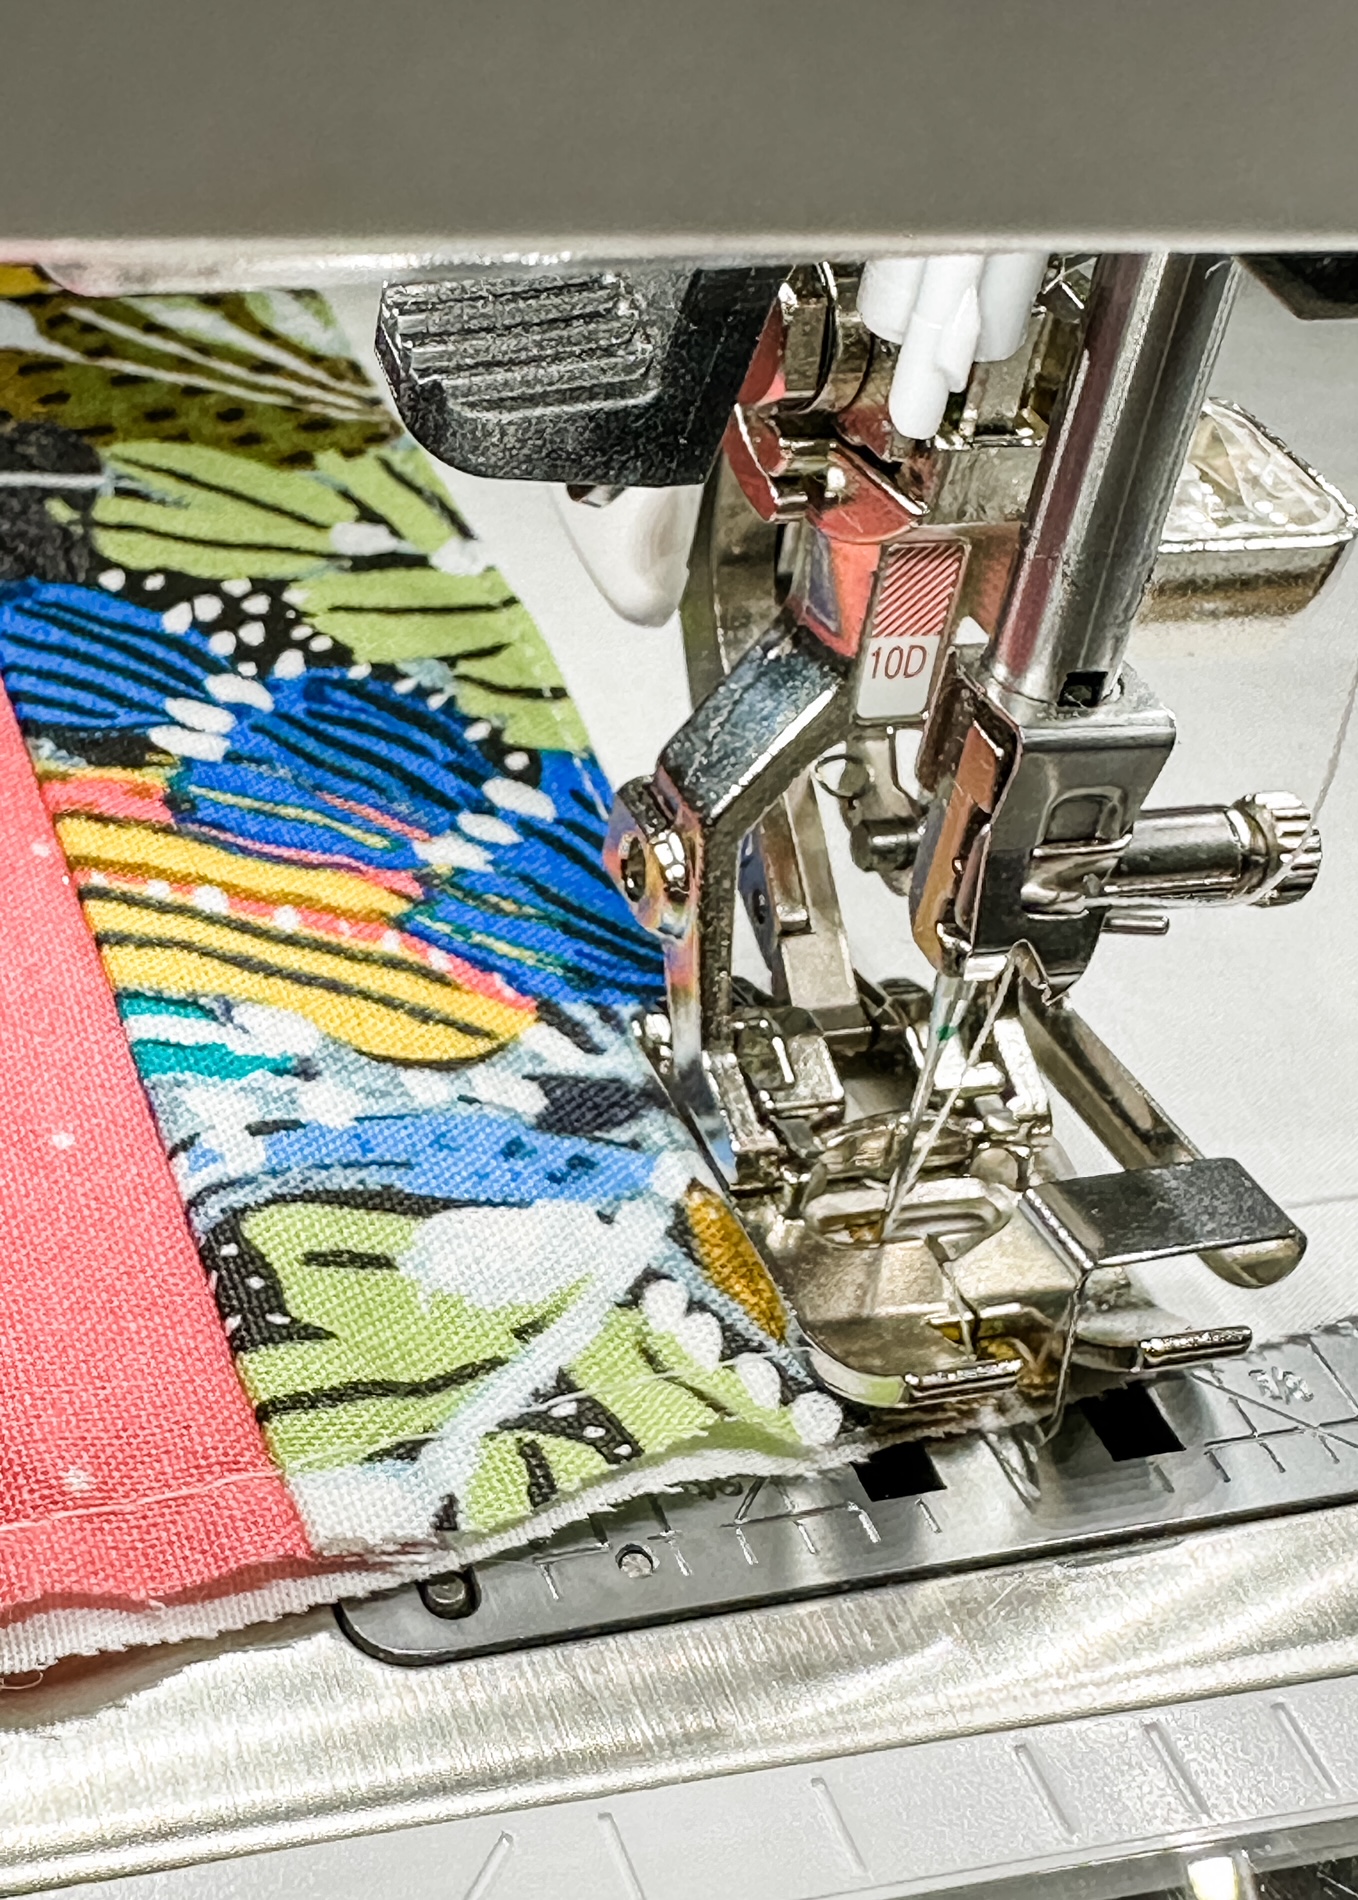
Edgestitch along the top and bottom edge of each patchwork piece. The Edgestitch Foot #10D has a guide that will let you achieve perfect edgestitching.
Stitch in the ditch on the seamline above the 4″ patchwork section on the right sleeve. This will help keep the patchwork in place on the sleeve.

Finish sewing the shirt per the pattern instructions and be prepared for the compliments you’re sure to receive when you wear your new custom shirt with patchwork accents!

Used Products


What you might also like


3 comments on “Add a Patchwork Accent to a Garment”
-
-
Hello! Thank you for your feedback! The search box found at the top of the blog will pull content from the entire website. You can search specific projects or techniques here. We hope this helps. Happy stitching!
-
-
I’m looking for a past post for a quilt using two inch strips.
Leave a Reply
You must be logged in to post a comment.

A search box is needed in We All Sew Projects and Tips