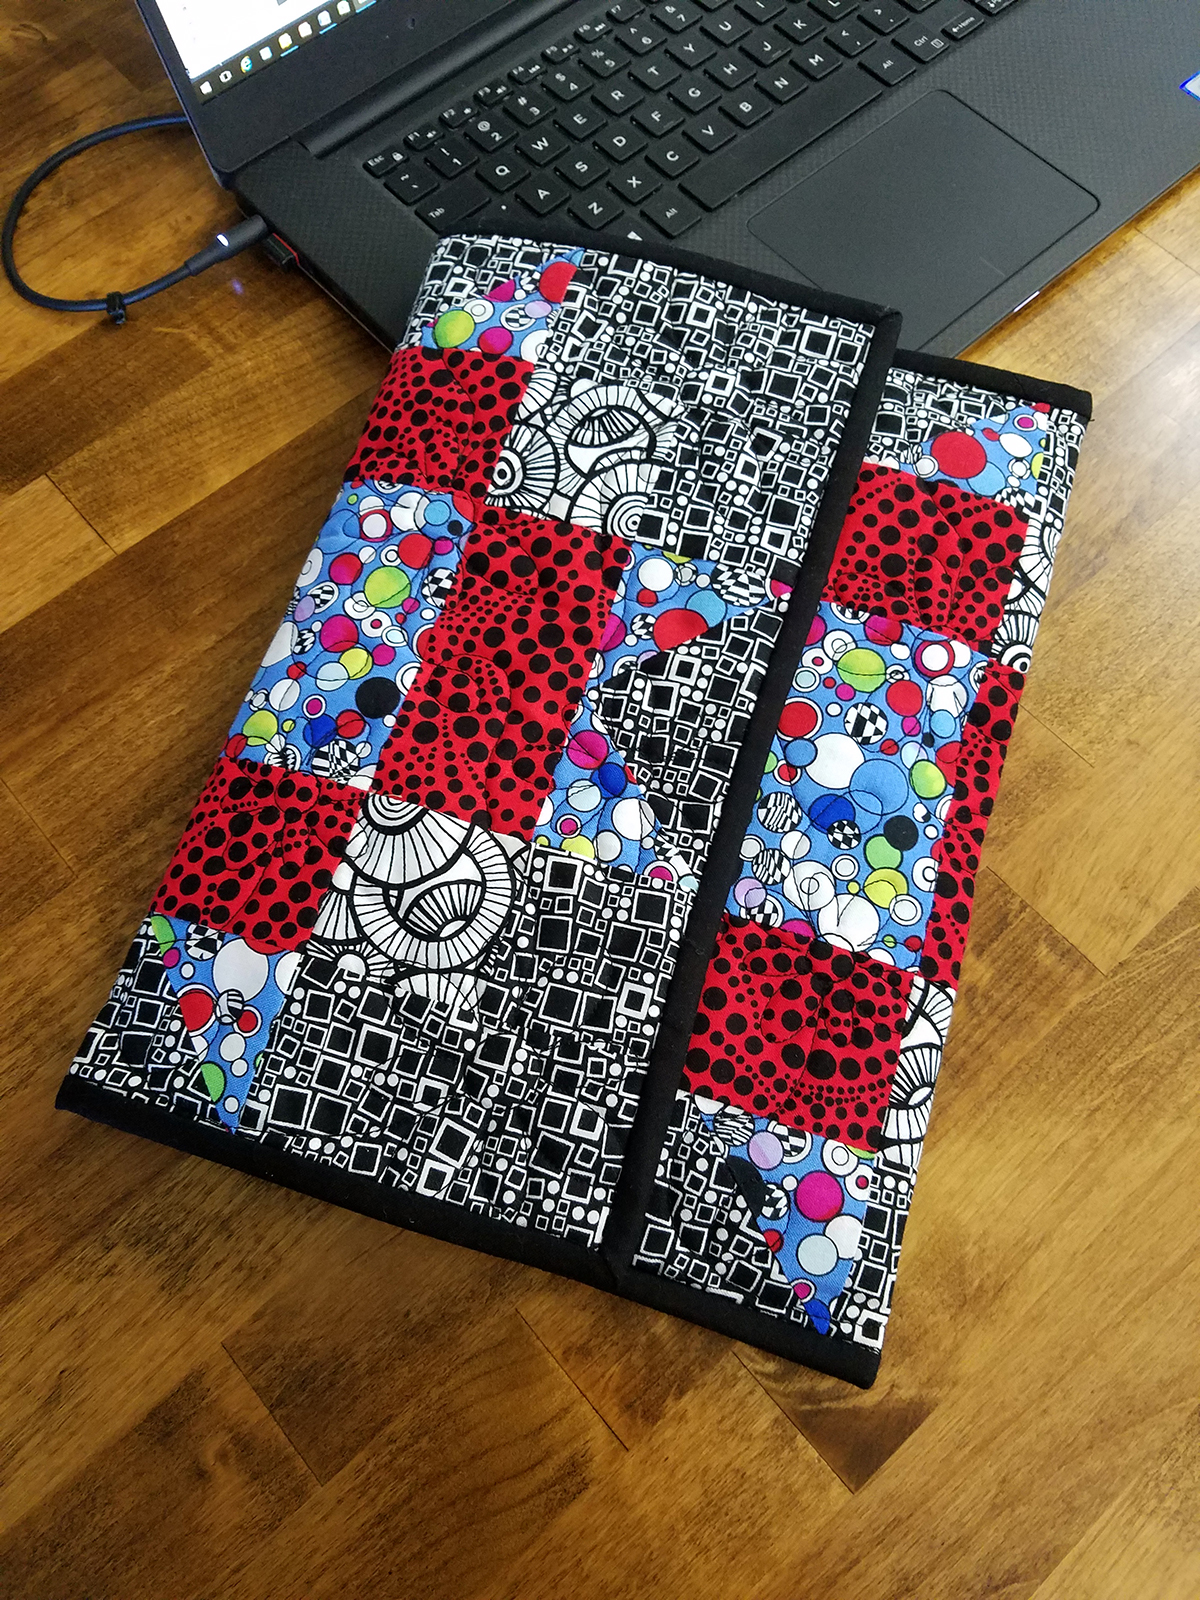
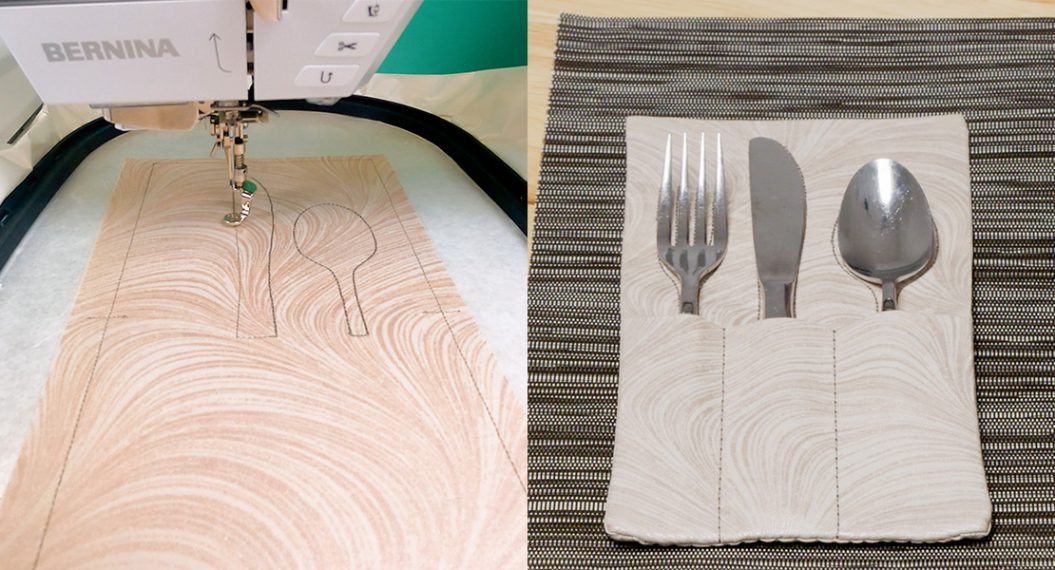
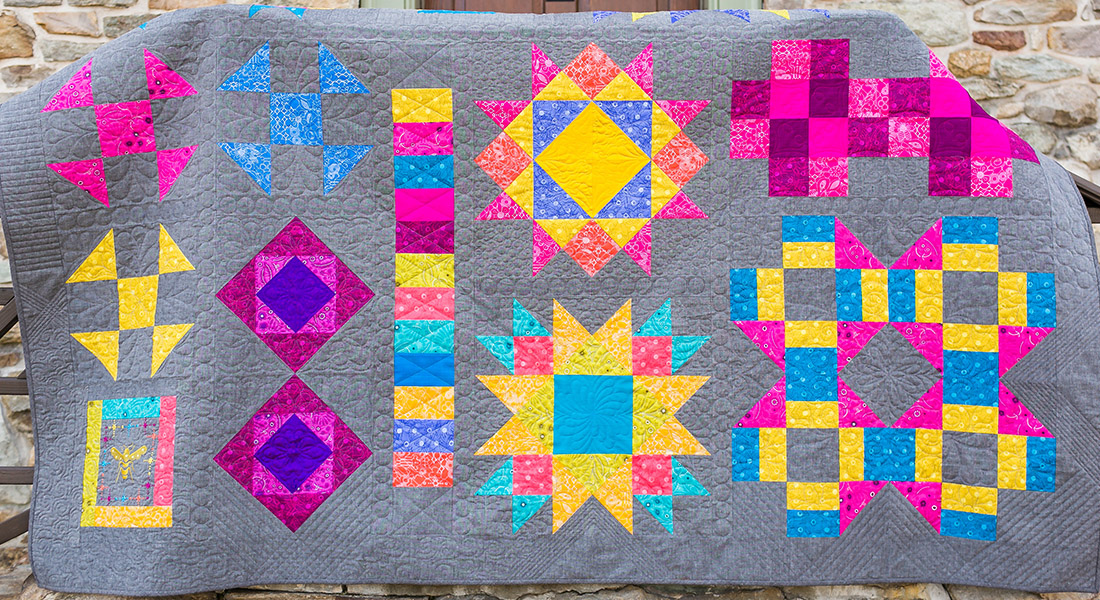
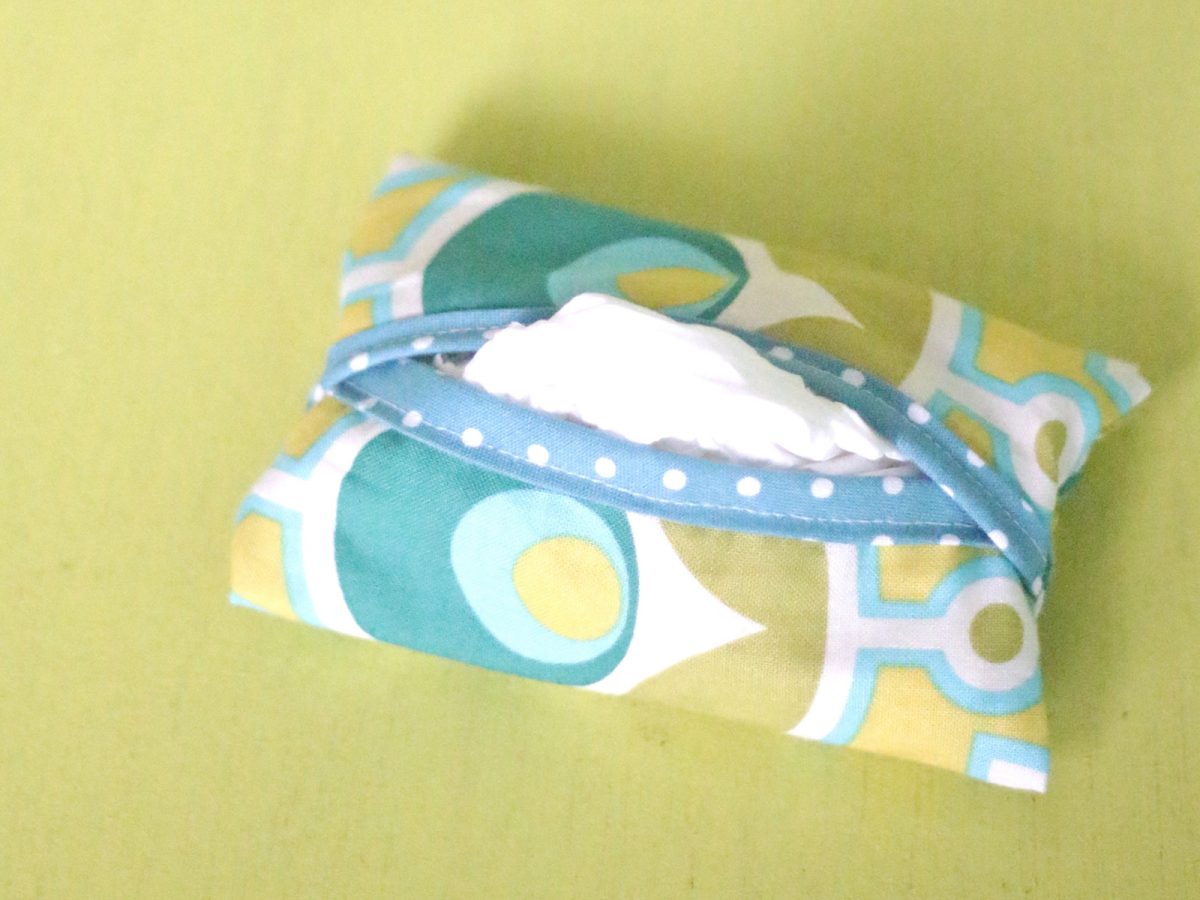
Maple Star Tablet Holder
When you have two 12 inch square blocks stitched together as we do in this month’s Maple Star Block on BERNINA Block Party Block of the Month, it opens a wide range of small projects we can make. I think with this month’s Maple Star blocks, we will make a tablet holder for any tablet that measures 8″ x 11″ or smaller. This is going to be a fast one.
Materials to Sew Maple Star Tablet Holder
- 4 Fat quarters of you favorite fabrics for the quilt blocks (I used the Anything Goes fabric collection by Benartex Fabrics)
- Daisy design from Edge to Edge Quilting on Your Embroidery Machine by Amelie Scott Designs
- Batting: Cut 15″ x 27″
- Backing: Cut 16″ x 28″
- Binding: Cut 2 strips 2 ¼ inches wide by with of fabric (44″)
- Clover Wonder Clips (optional)
- Patchwork Foot #37/37D
- Edgestitch Foot #10/10C/10D
- Your sewing machine. We recommend a BERNINA 570 QE.
Creating the Maple Star-Tablet Holder
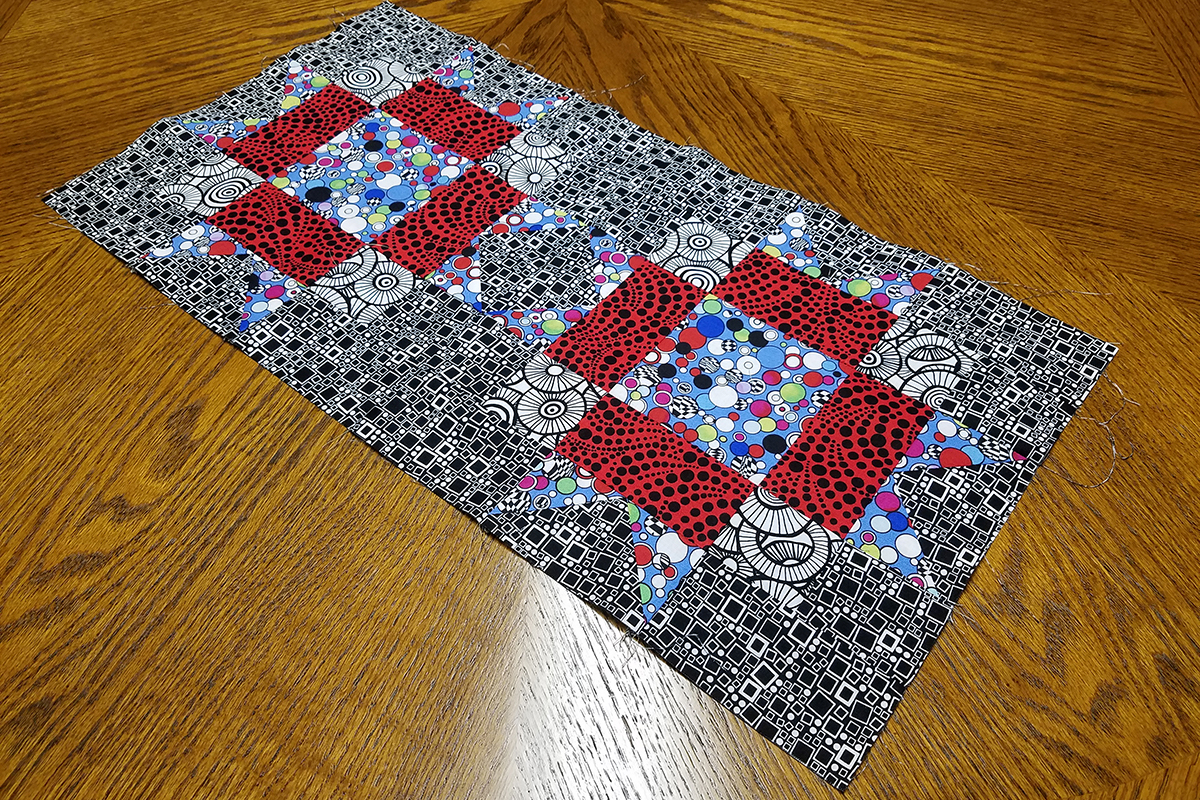
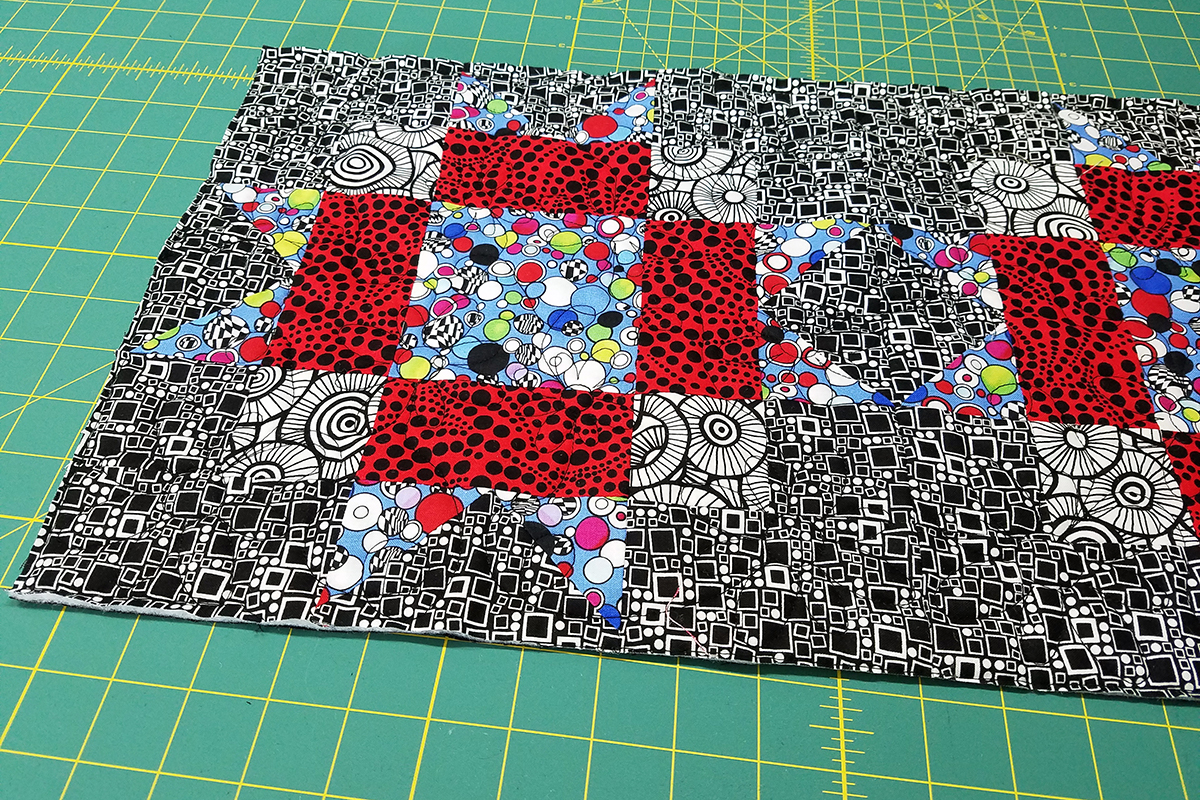
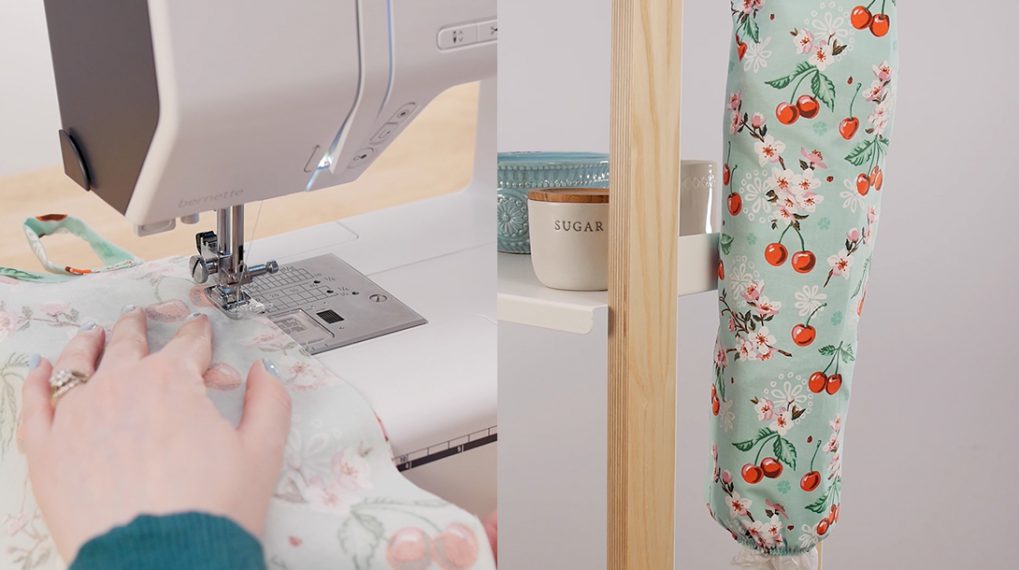
Follow the Maple Star Block directions from the BERNINA Block Party of the Month to complete the piecing for the two-block set.
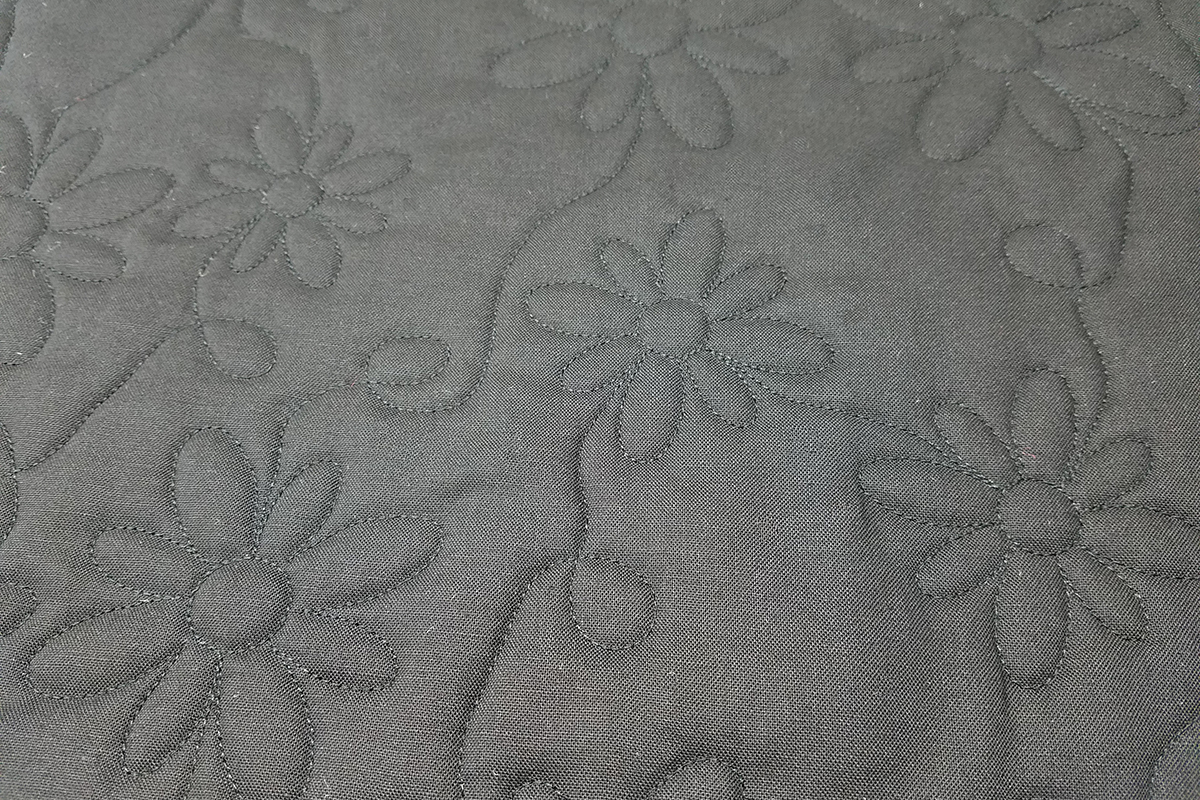
Create a “sandwich” by layering the backing fabric right side down, the batting, and then the pieced top right side up.
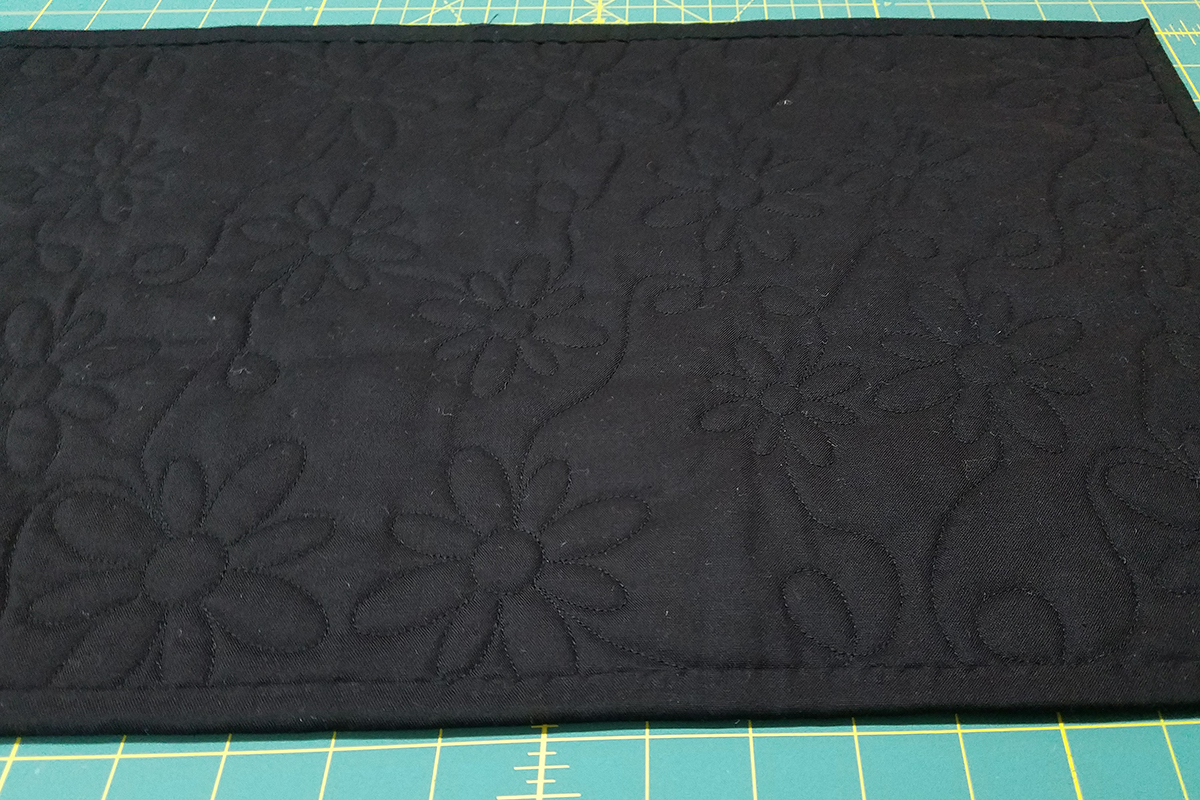
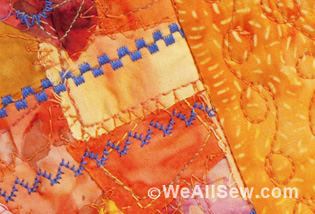
Quilt the layers together. I followed Nina’s suggestions for quilting the layers together with the embroidery machine, but used a different design collection. Here is a picture of the back so that you can see how perfect it turned out!
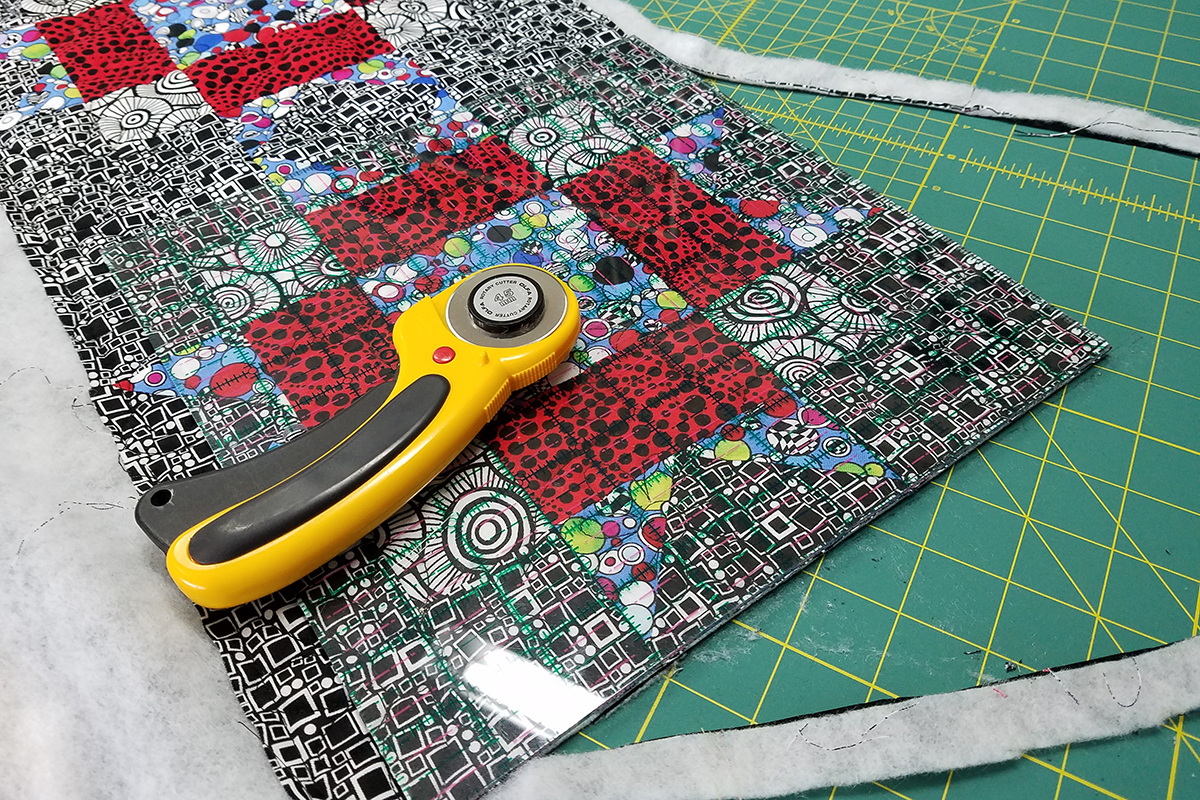
After you have pieced and quilted the Maple Star blocks, use a rotary cutter and ruler to square it up.
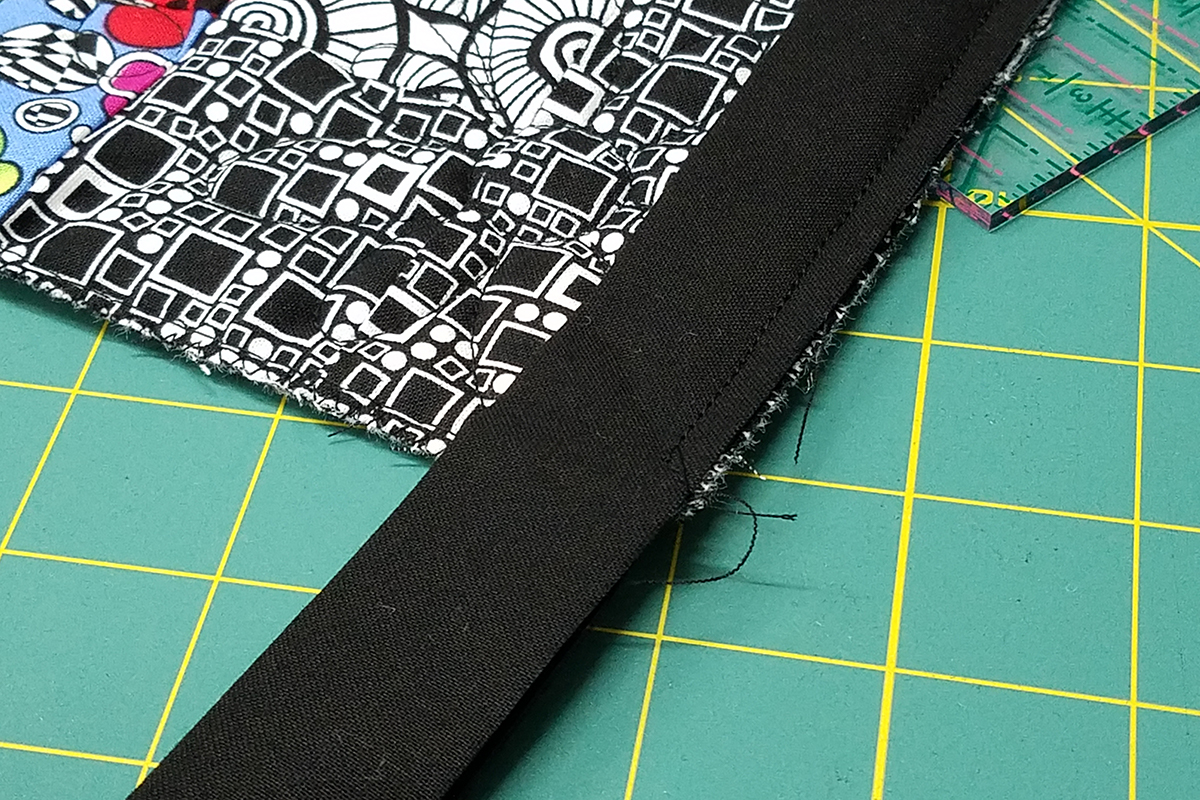
Stitch the two strips of binding together using a diagonal seam as we did when we made the Shoofly Block Placemats.
Trim the seam to ¼″ and press it open. Fold the binding in half lengthwise with wrong sides together and press. Trim the end of the binding you will start with to a 45 degree angle.
Let’s put the binding on now.
Start on one of the long sides of the quilted piece with the end of the binding you have cut to a 45 degree angle. Leave about 5 or 6 inches unstitched.
Use a ¼ inch seam to stitch the binding to the right side of the block.
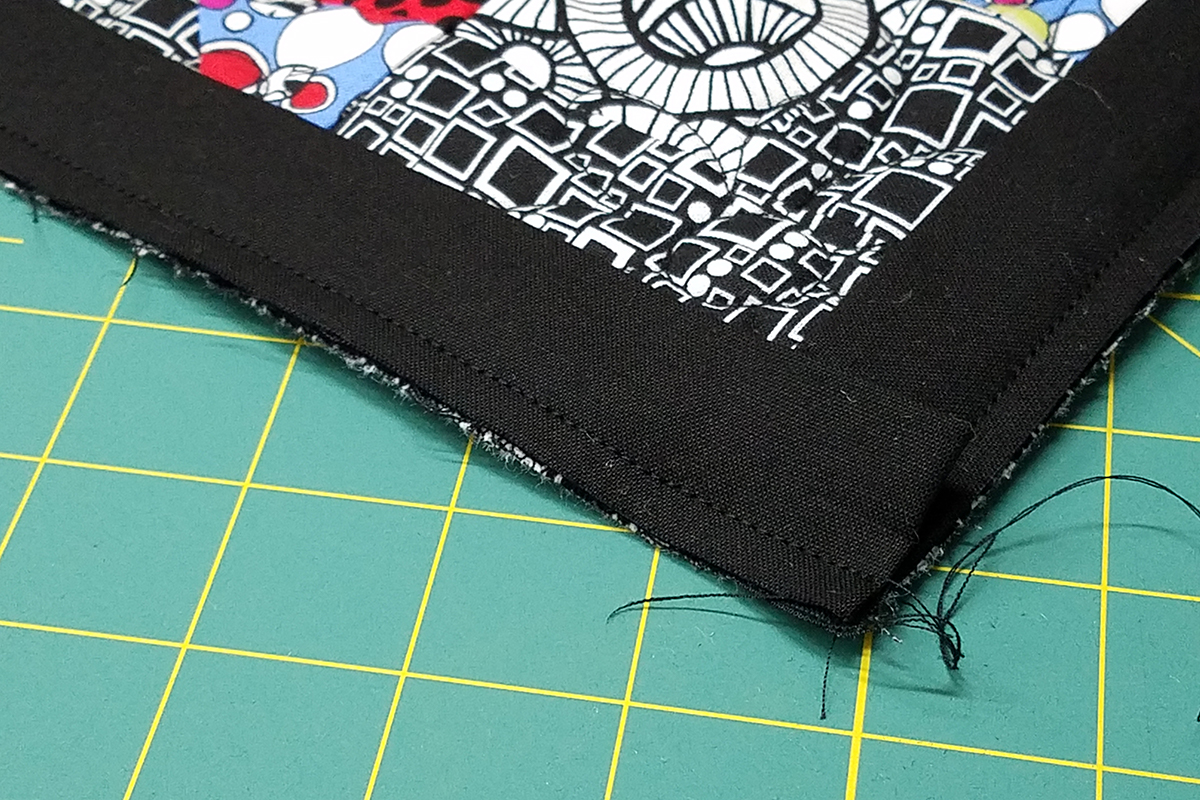
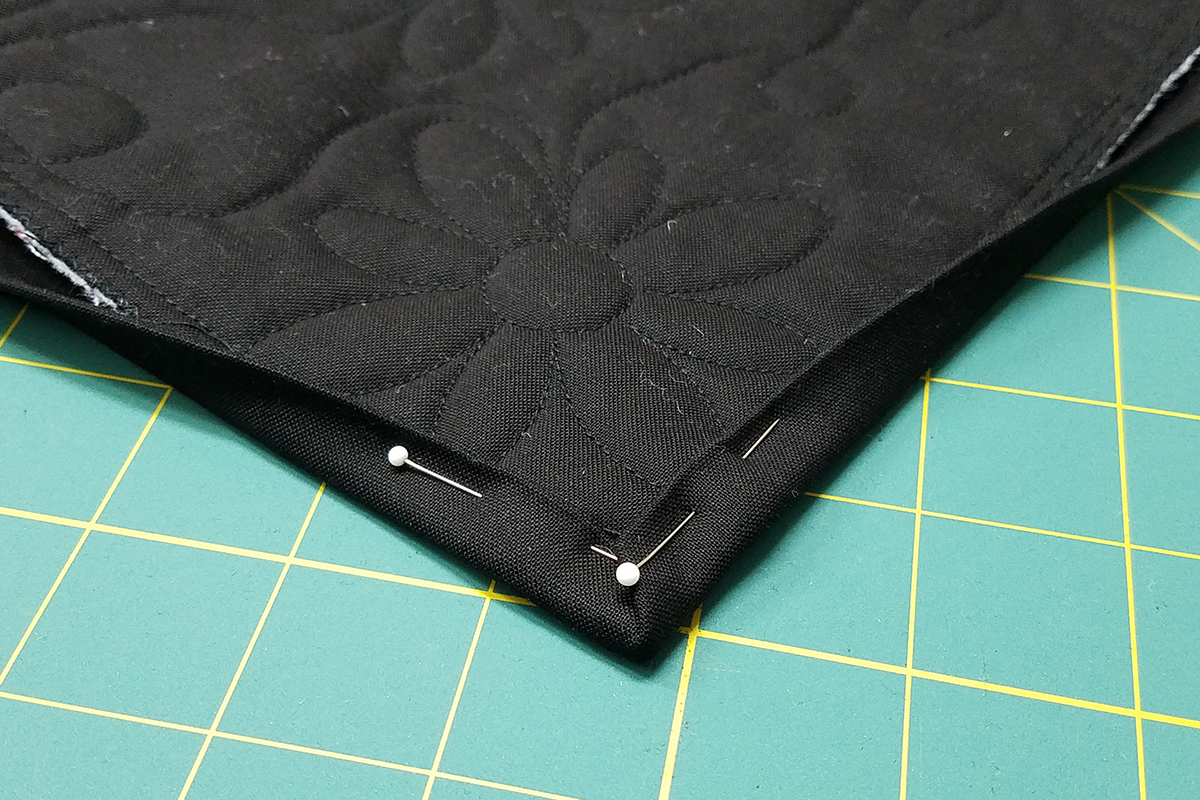
Stop ¼ inch from corner and stitch right off that corner at a 45 degree angle.
Fold the binding up to make your mitered corner.
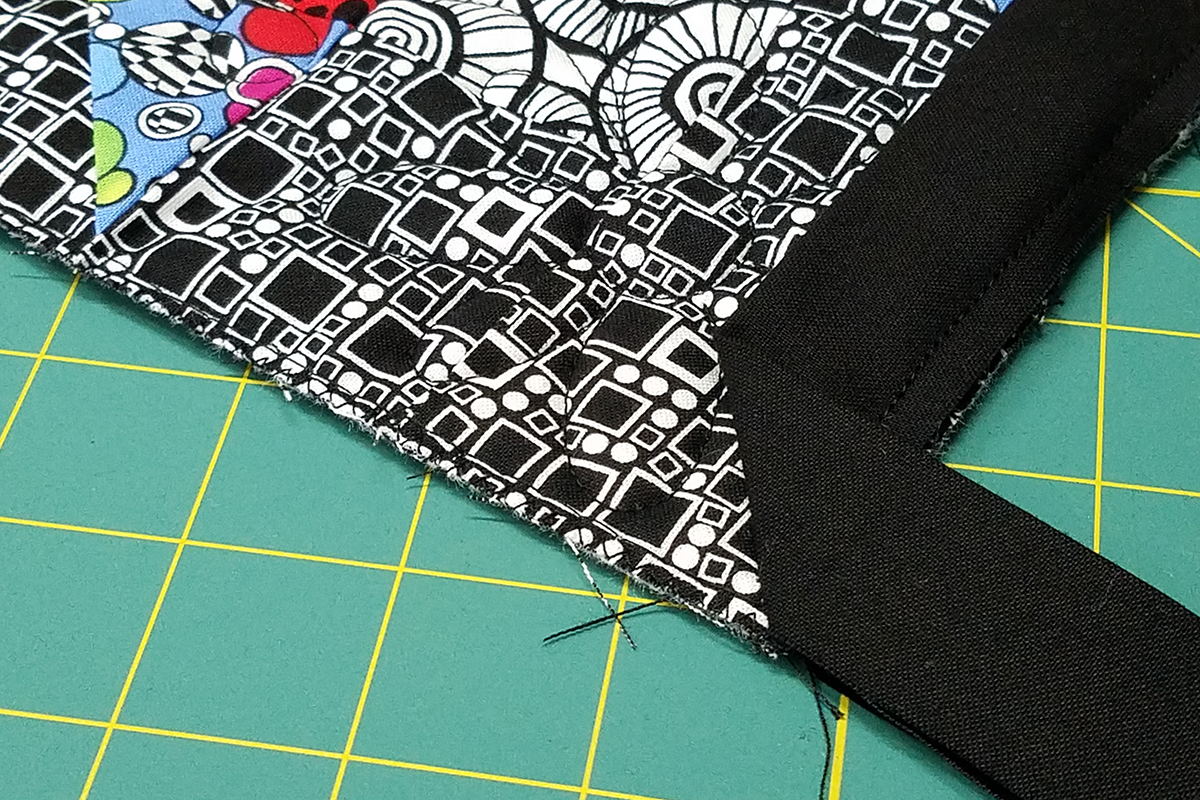
Fold the binding back down so that the fold is along the previously stitched side and the raw edges are even with the next side.
Start stitching at the fold and continue to stitch your ¼ inch seam. Repeat for all four sides and corners.
Stop stitching about 5 or 6 inches from where the starting tail is.
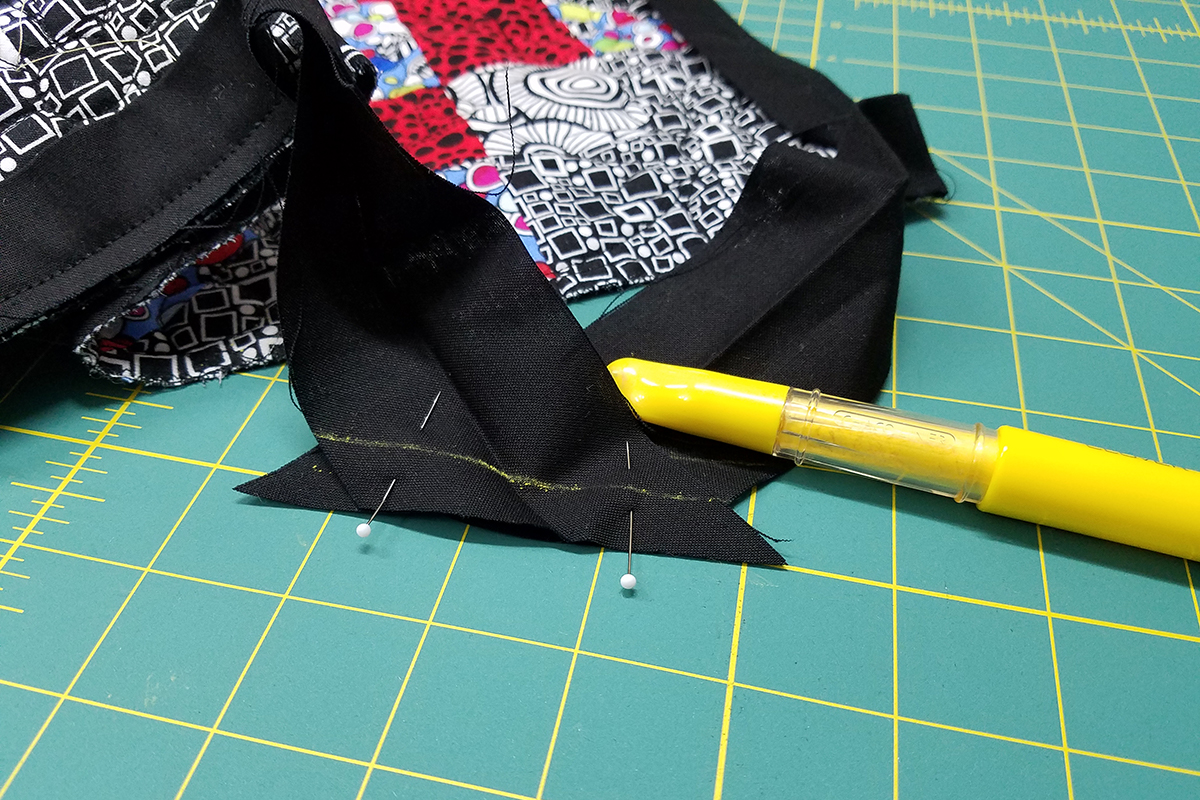
Slide the ending tail into the folded/mitered end of the beginning tail. Trace the angle of the beginning tail with a chalk marker.
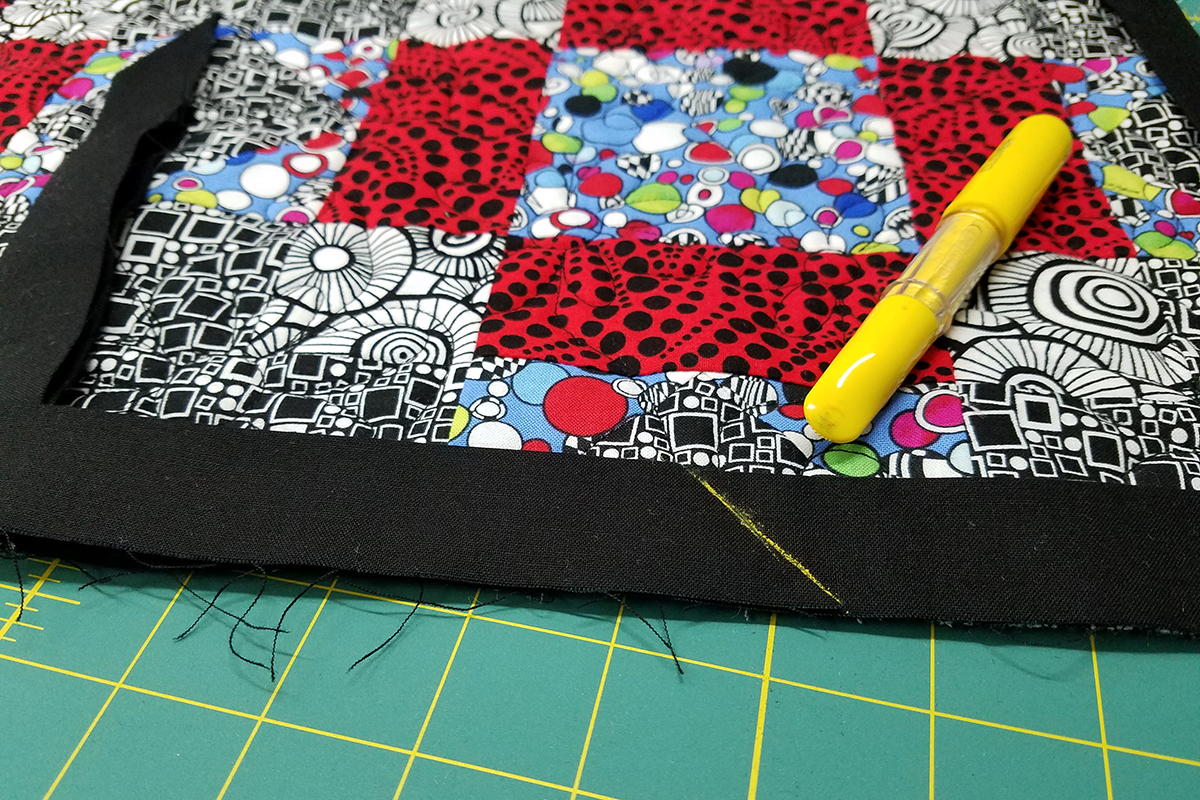
Cut the excess ending binding one inch beyond the traced line so you can stitch a ½ seam to join the ends.
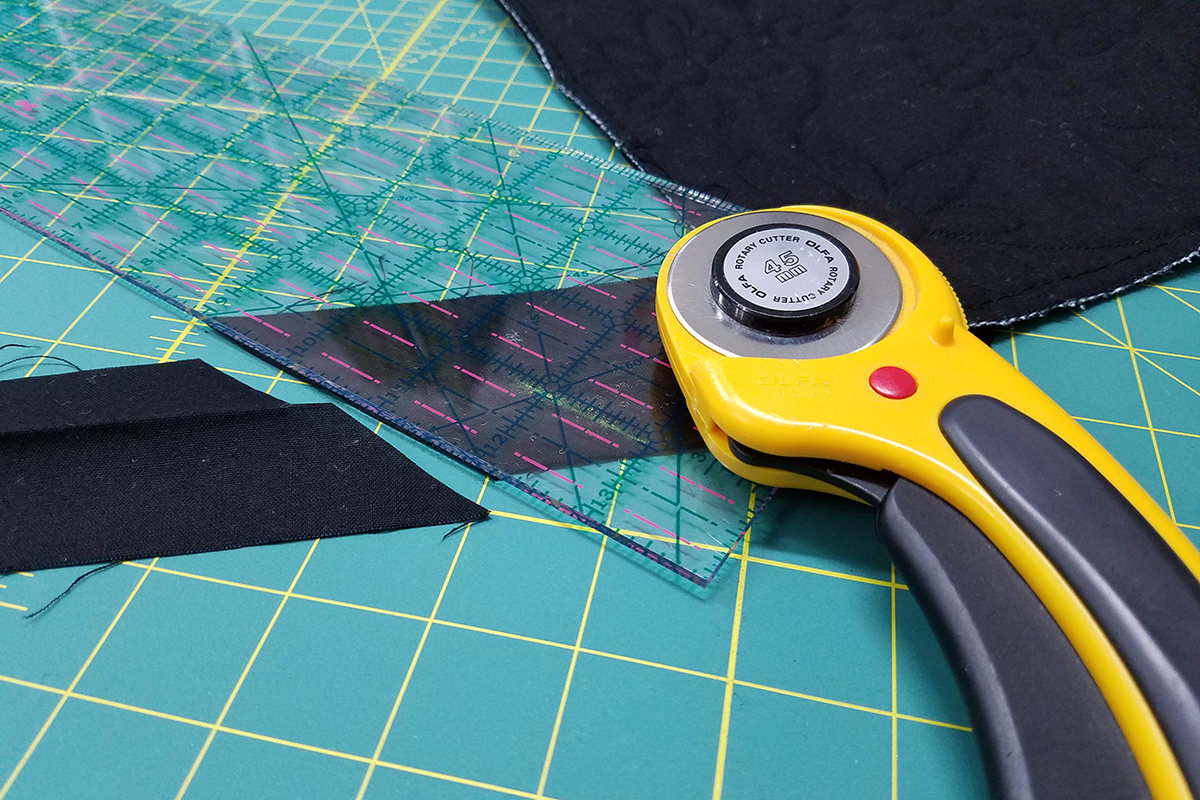
Draw a line on each binding end ½″ from the cut edge.
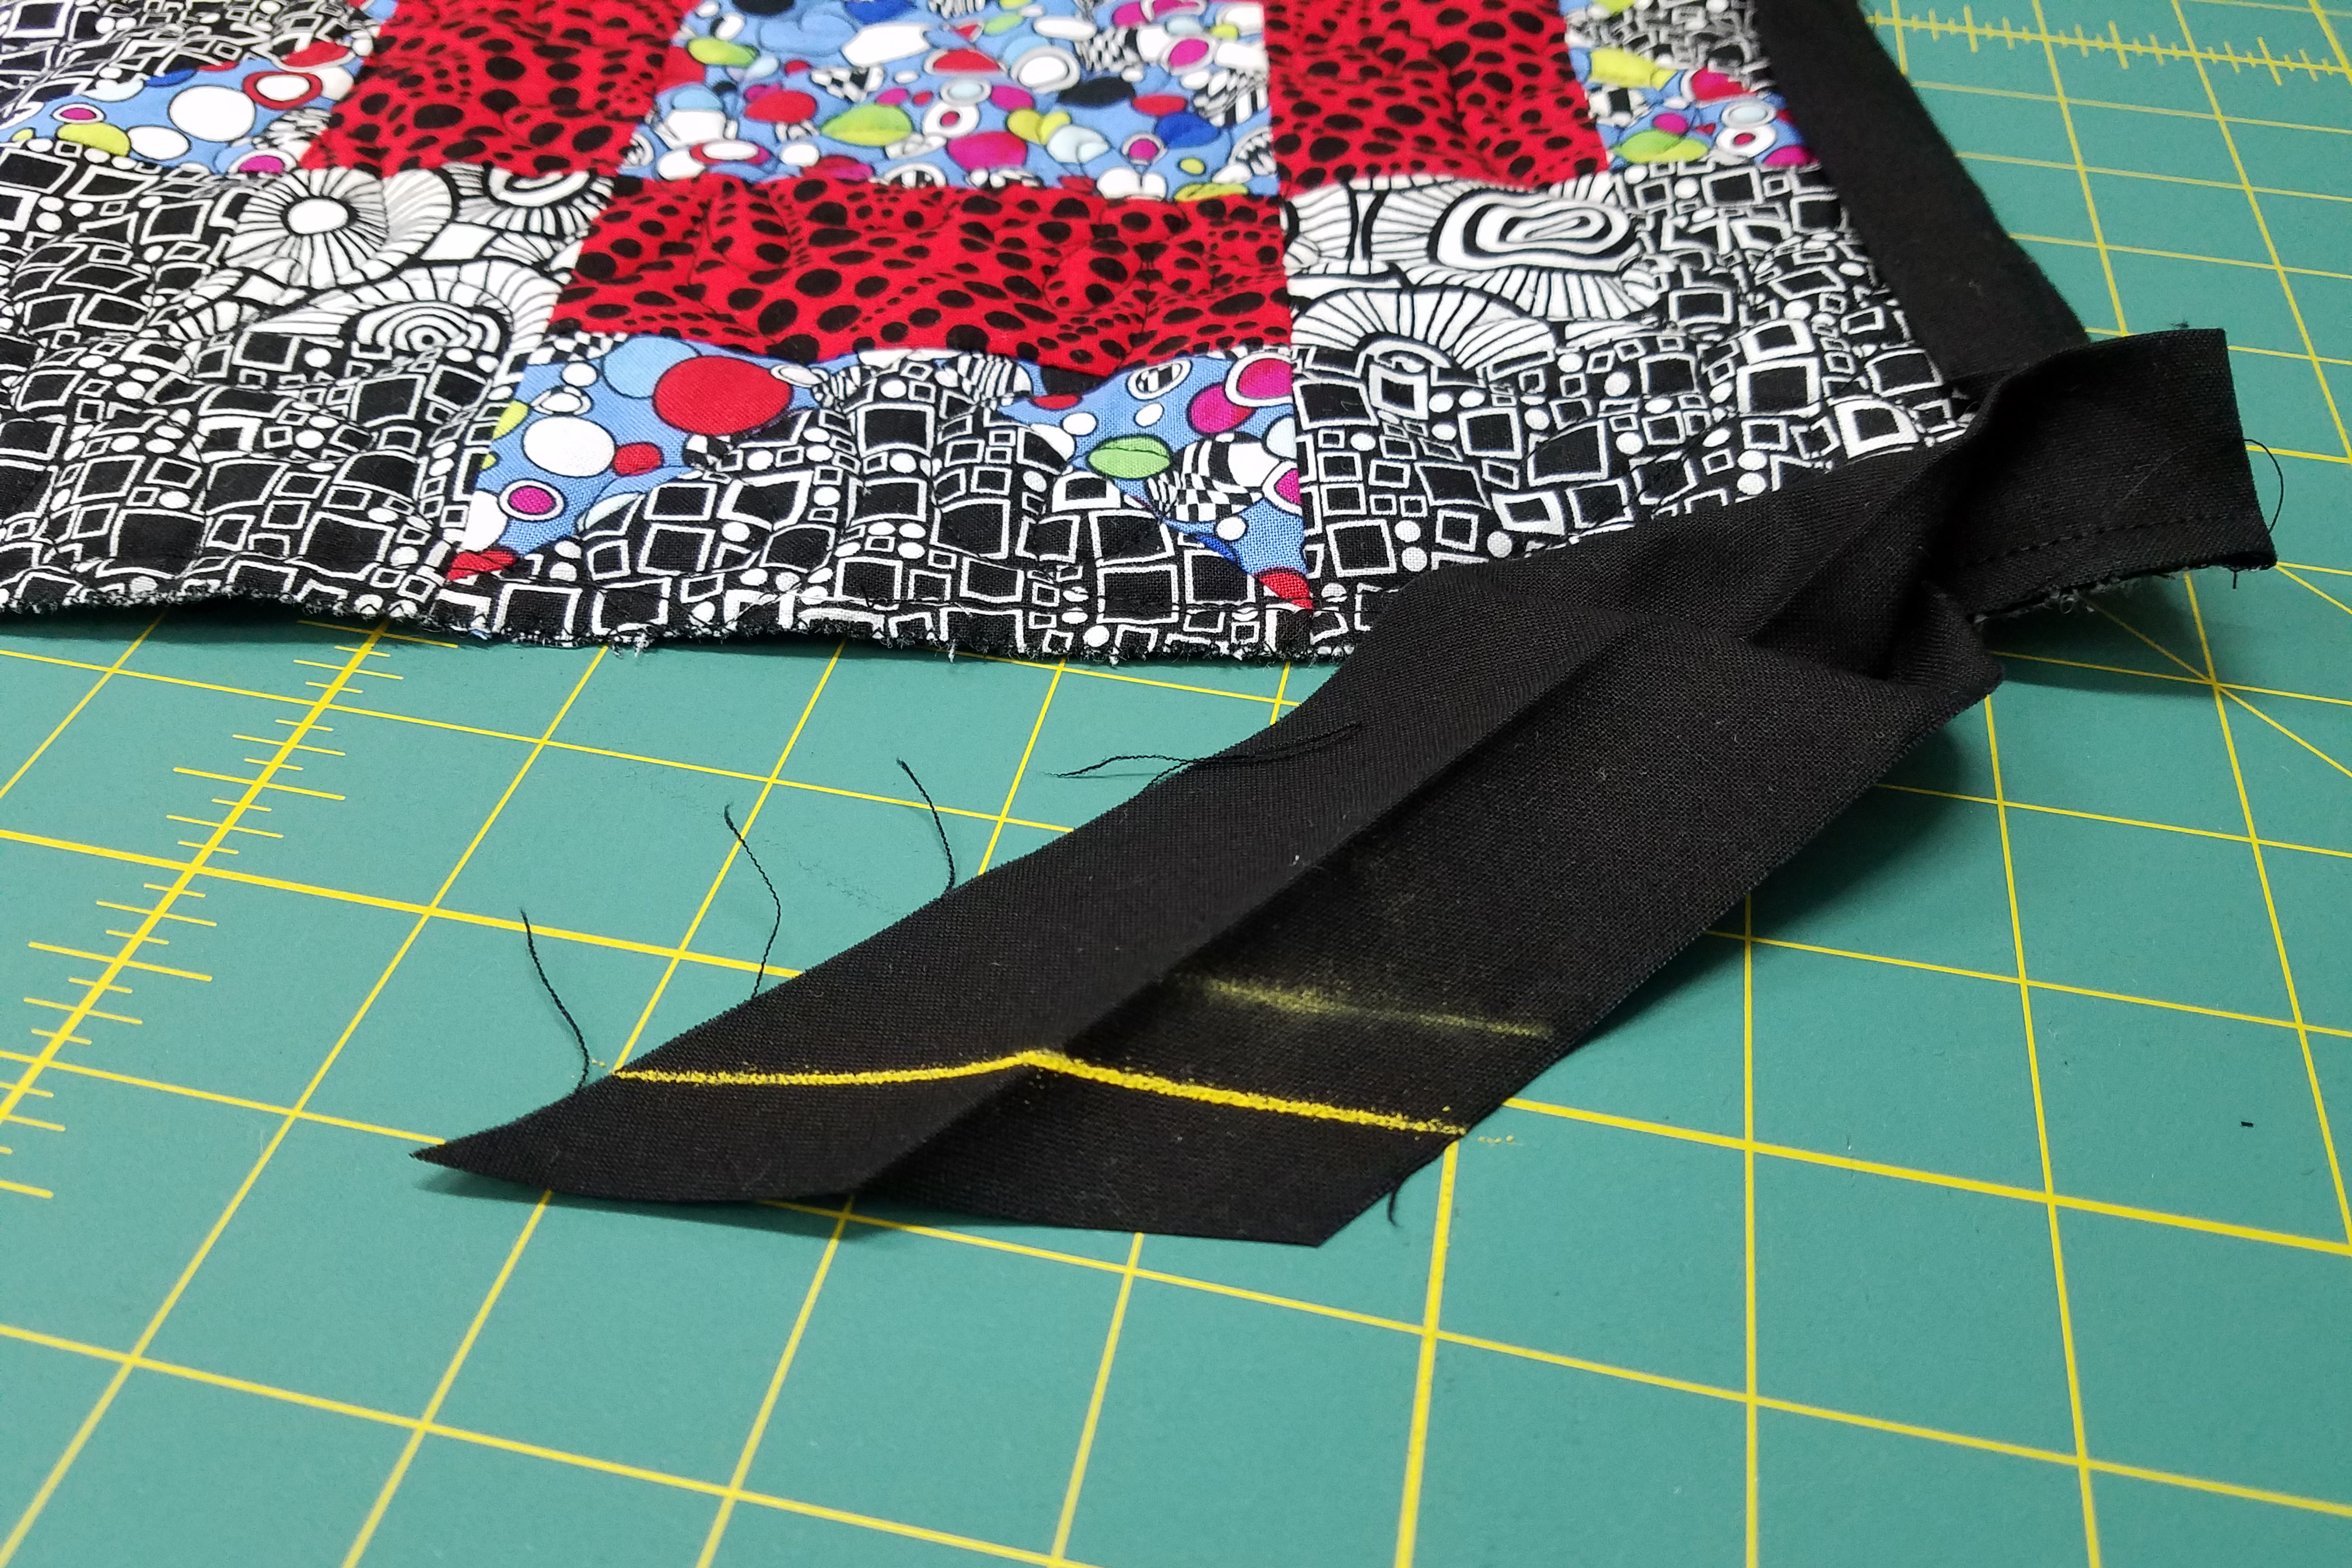
Pin the ends together along the ½″ marks.
Press the seam open.

Flatten the binding into its final folded position and stitch the seam to finish attaching the binding.
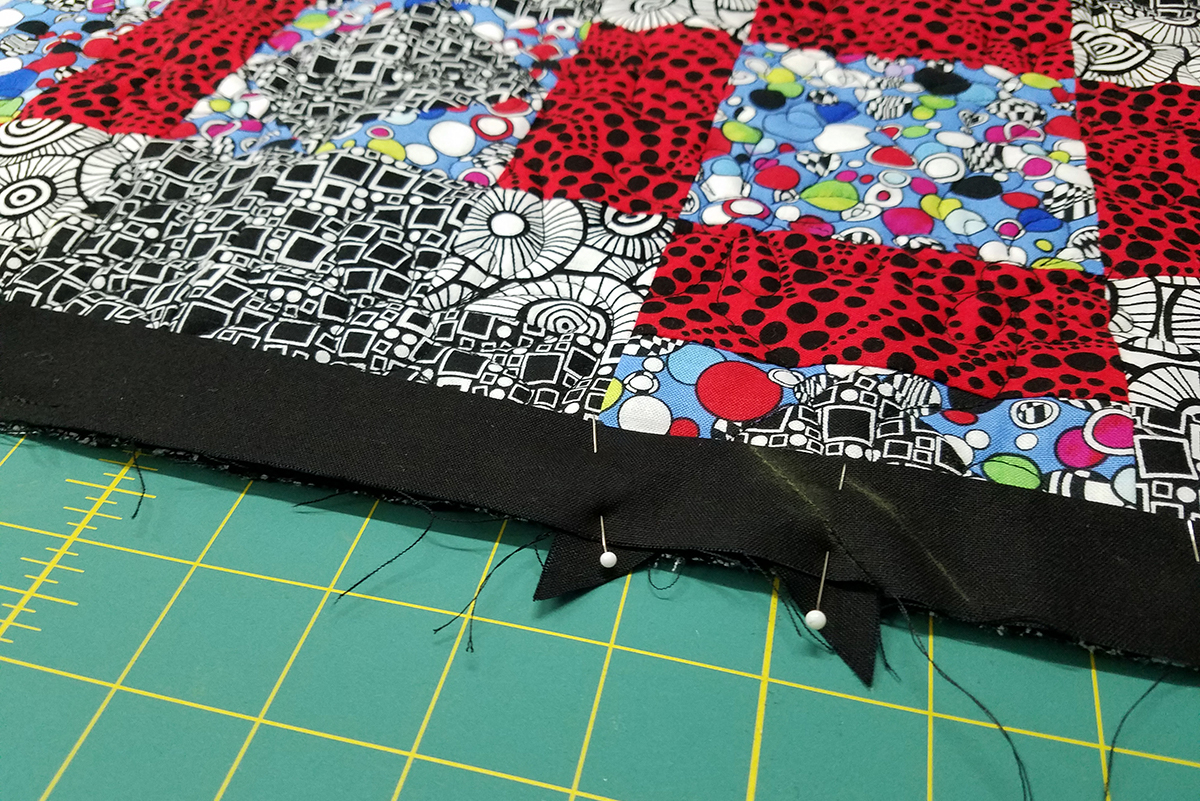
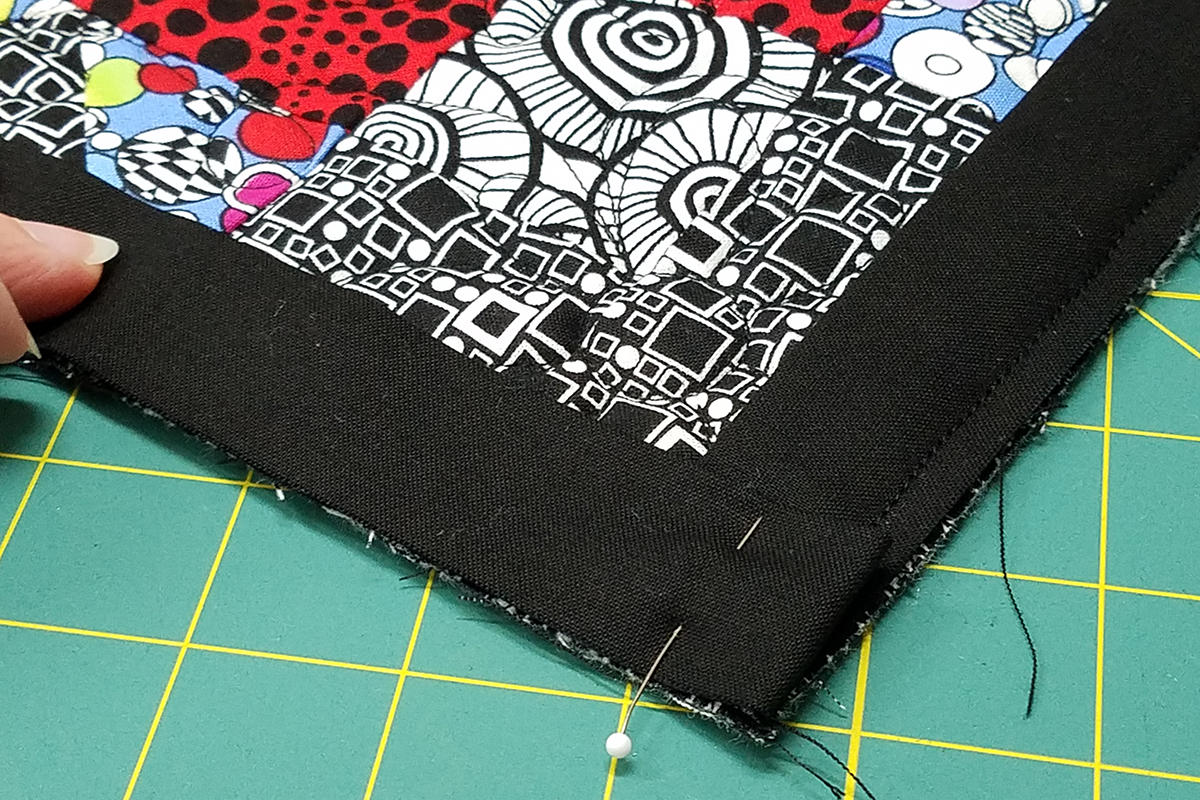
Trim the corner tips off seam.
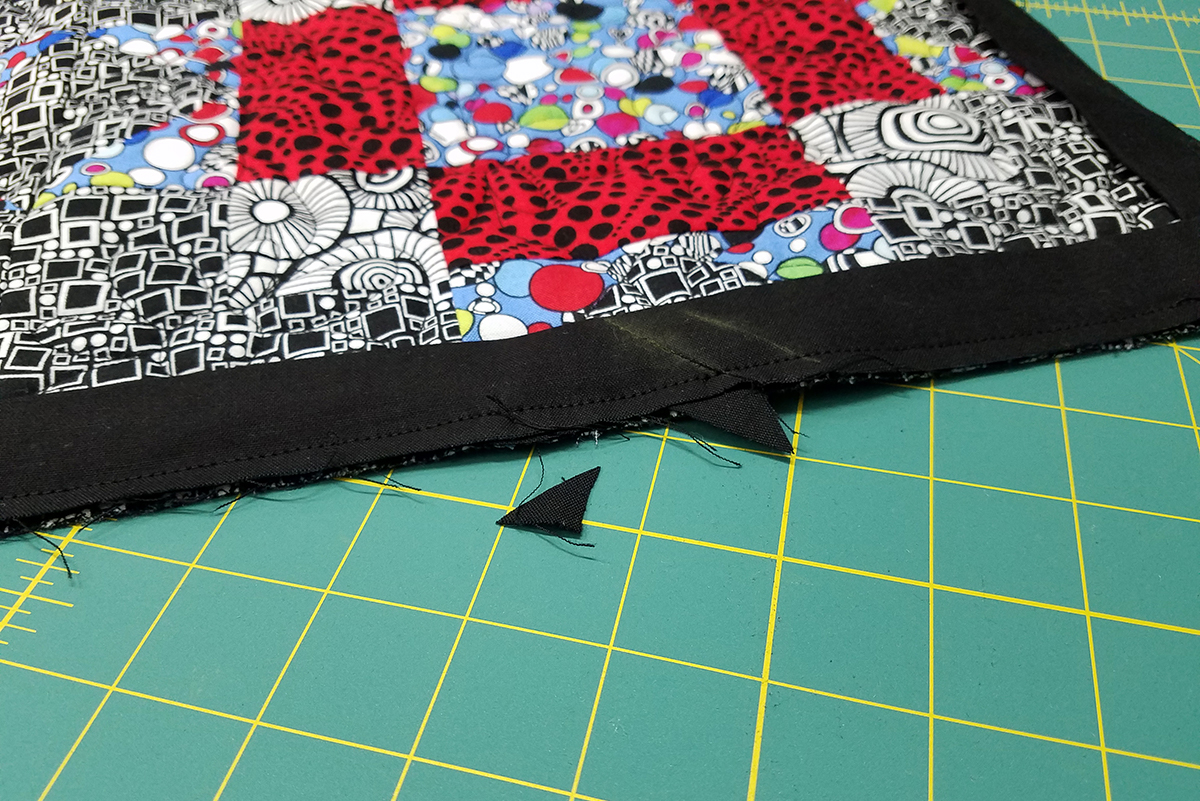
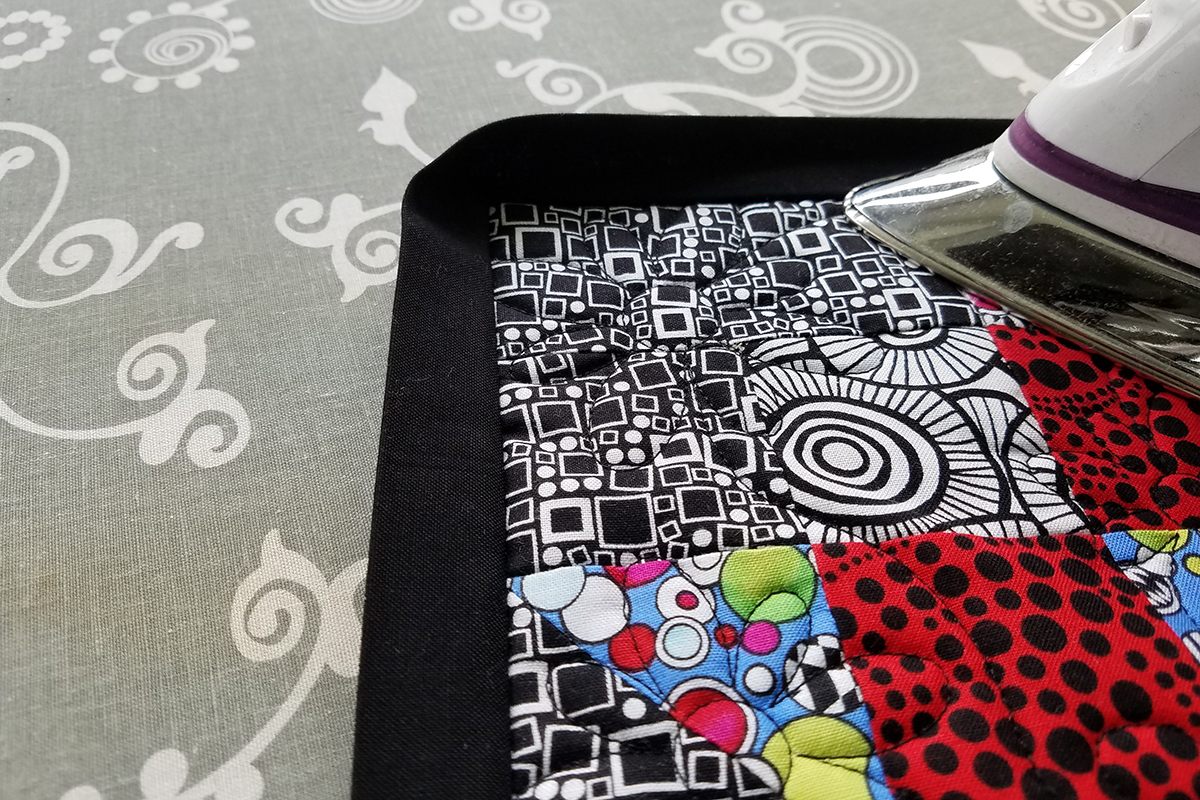
Press the binding toward the seam allowance from the right side of the quilted piece.
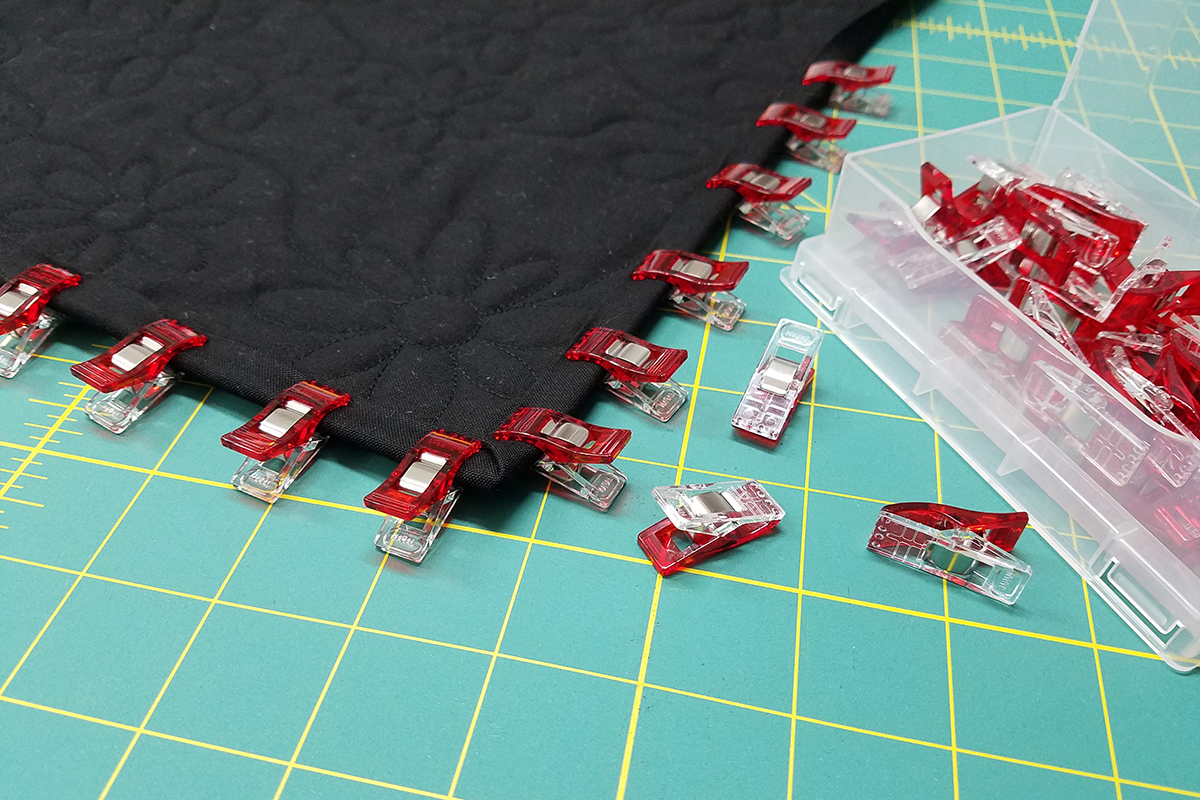
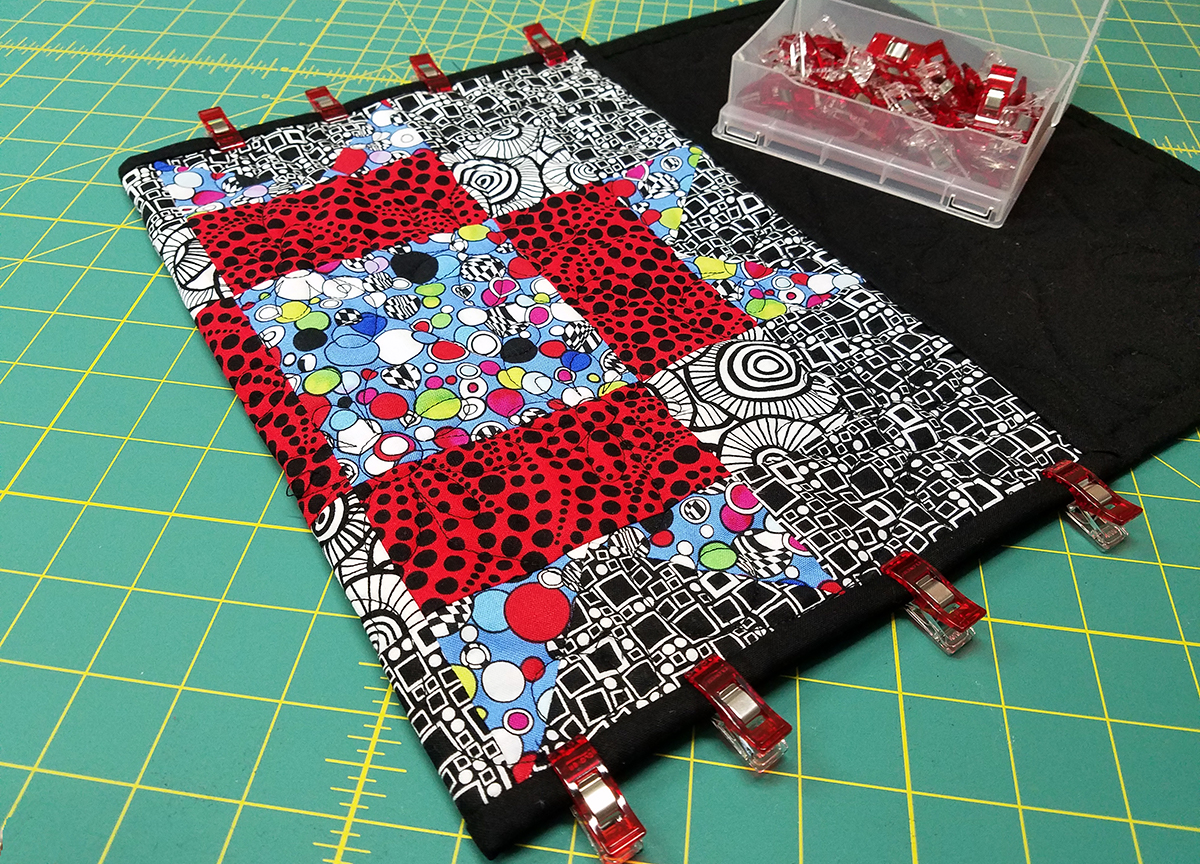
Fold binding over to the back and pin or use Clover Wonder Clips to hold the binding in place until you can stitch. Insert 17 Pins and 18 Wonder Clips
Hand stitch or machine stitch the binding to the wrong side.
We’re all finished with the binding. Looks fun on the back too!
Now we just need to fold the finished block to make tablet holder.
Fold the block with wrong sides together 8 ½″ from one end. Use your tablet to measure so you get the most accurate measurement. Make sure both sides are folded up the same amount.
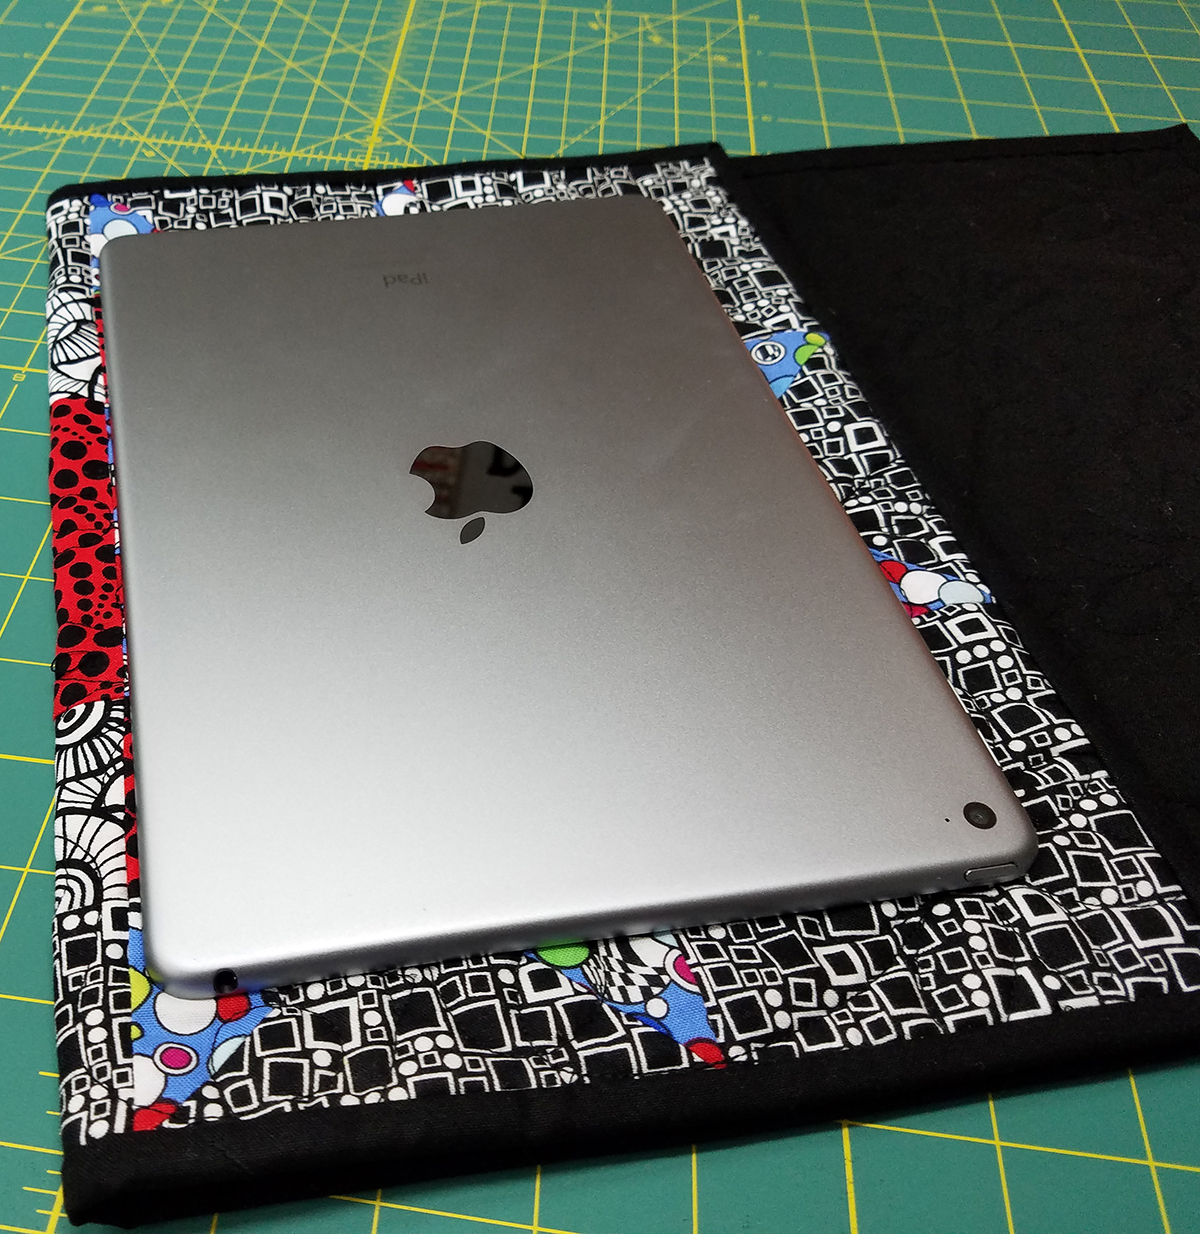
Use clips to hold in place. Place the clips so that the flat side is on the bottom.
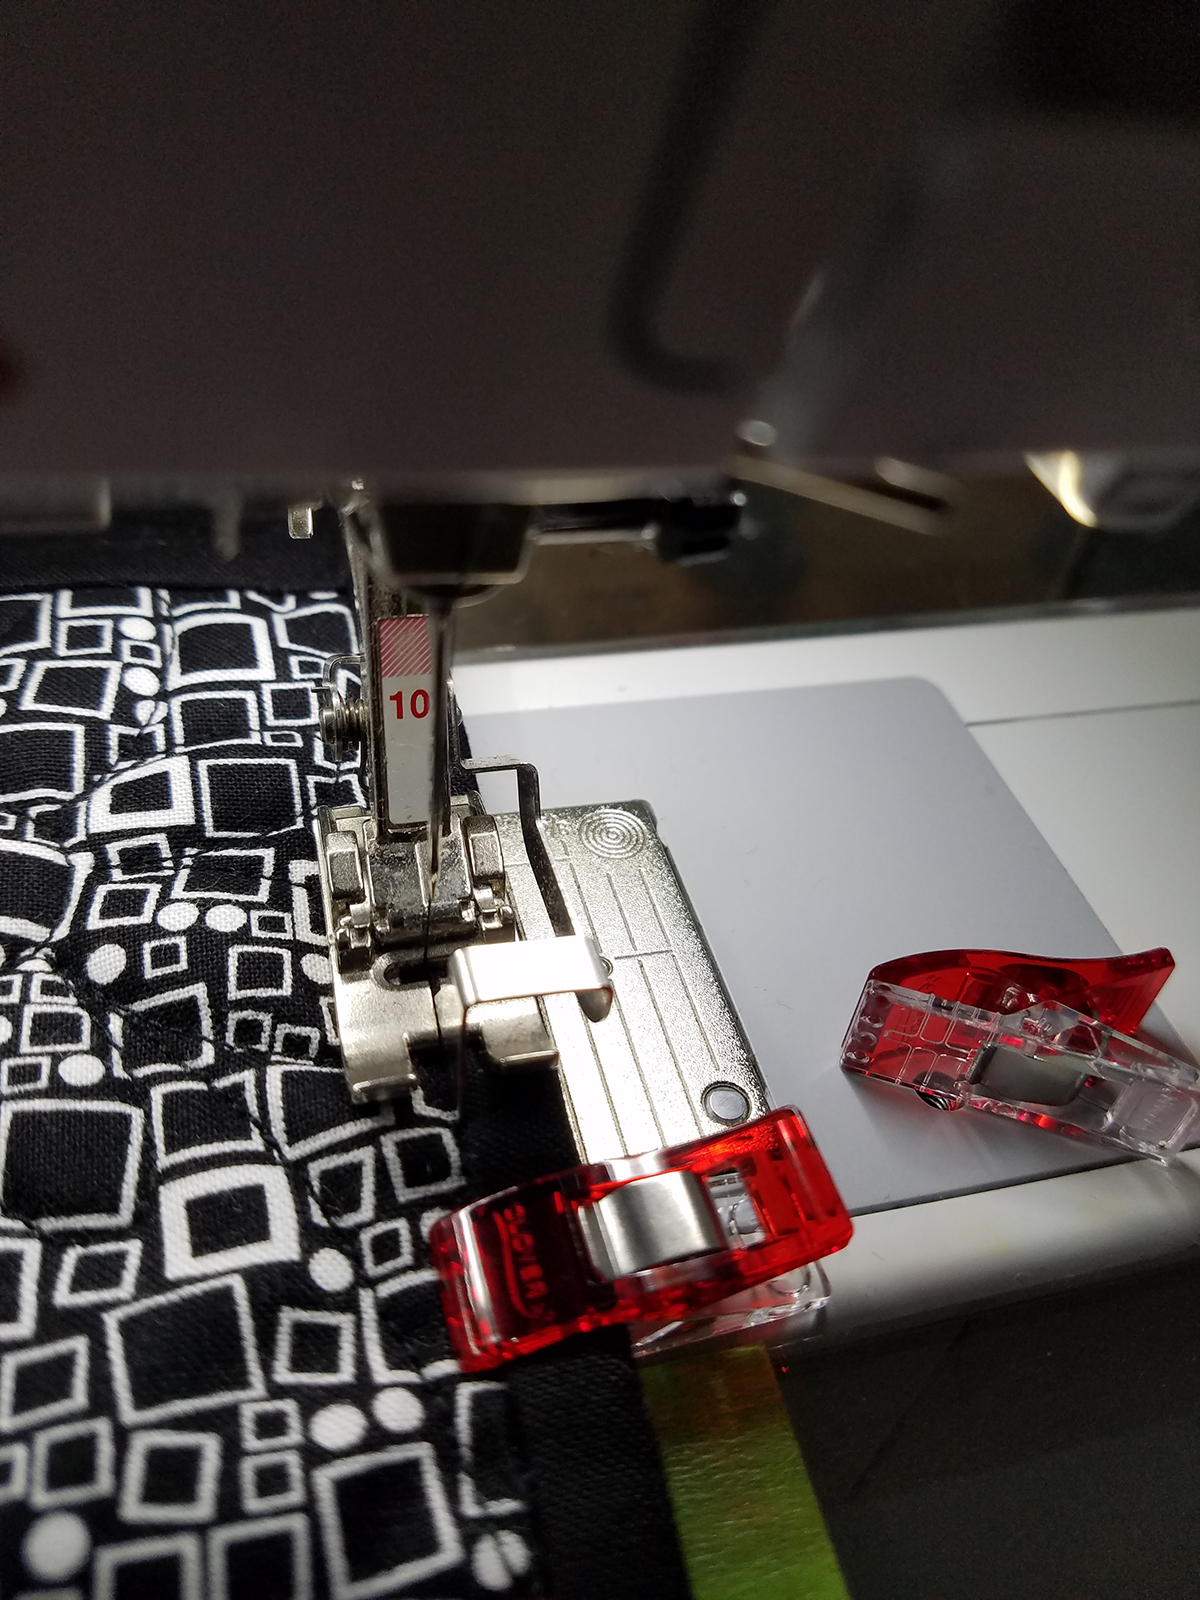
Attach Edgestitch Foot #10/10C/10D to the machine.

With the clips’ flat sides on bottom, stitch right at the edge of the binding. Foot #10 makes it easy to stay right next to binding. Back stitch at both ends of the seams on both sides.
All finished! Wasn’t that easy?!


What you might also like


2 comments on “Maple Star Tablet Holder”
-
-
Congratulations, I am so happy you completed this project. Lots more to come and all are this easy.
-
Leave a Reply
You must be logged in to post a comment.

I made this. It was my first project following along using your directions. I have never made flying geese. Actually never made a “block” before either, LOL. Everything I have made has been straight lines.
Thanks for the project.