Travel Shoe Bag Tutorial
This Travel Shoe Bag Tutorial project is from Linda Chang Teufel from Dragon Threads Ltd.
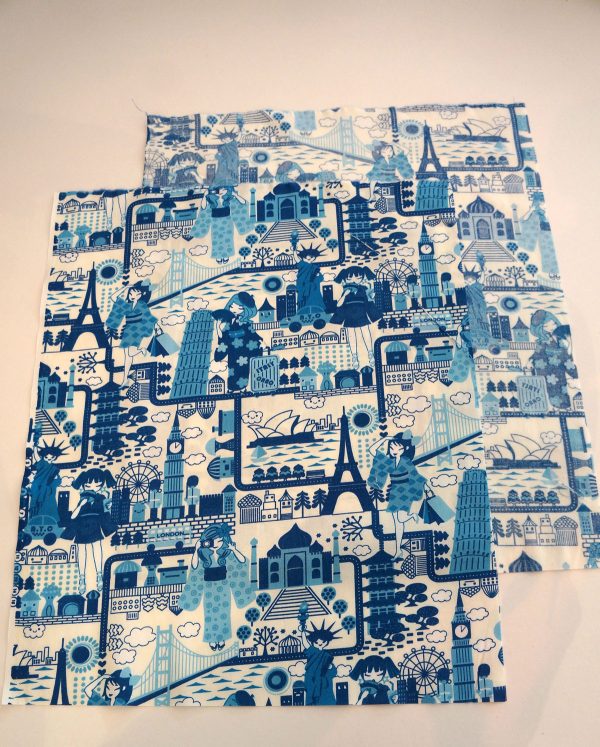
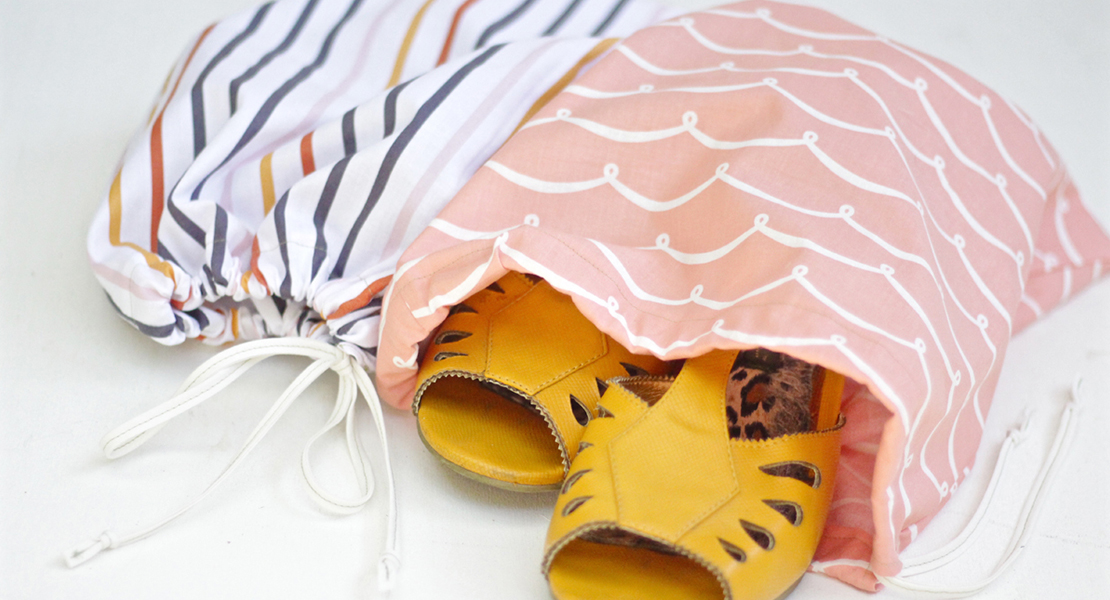
Shoe bags are so useful when traveling for keeping your shoes together and to keep the dirt from the soles from getting on your luggage or clothing. They also make fast, nice and welcome gifts for your friends that travel. I made about 4 dozen for Christmas gifts and will share my tips on the speedy methods that I used. Usually I cut up one yard and made three bags at a time.
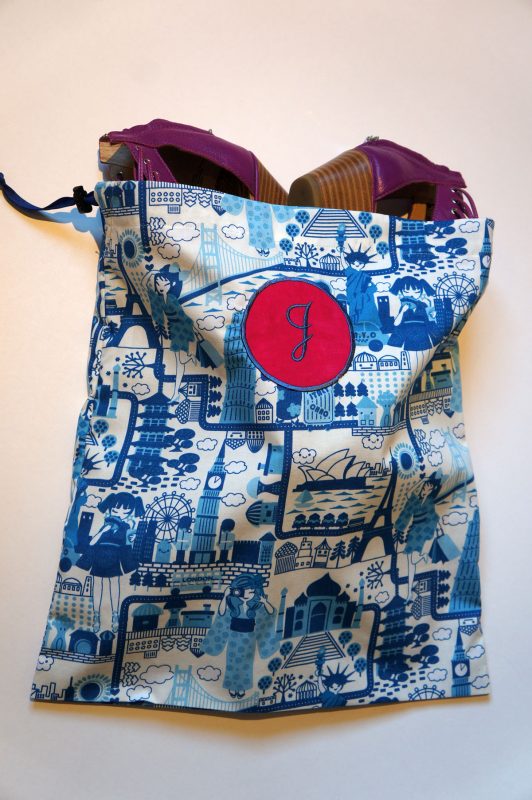
Here is a fancy monogrammed version to personalize your gift and to wow your friends. You can make it without the monogram and use a fun travel print too. For my friend that is going to Mexico with me, I made bags from a Mexican printed fabric. For my relatives in Germany that will be coming to visit next year, I used some fun American prints.
Materials to make a Shoe Bag
- ½ yard fabric (1 yard will make 3 shoe bags)
- Small piece fabric for circle monogram
- 1 yard 3/8″ grosgrain ribbon
- 1 cord stop
- Thread
- Embroidery thread for monogram
- Stabilizer –small piece for monogram
Directions to sew a Travel Shoe Bag
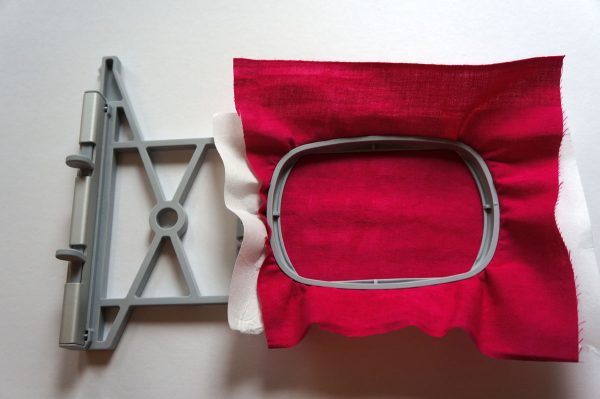
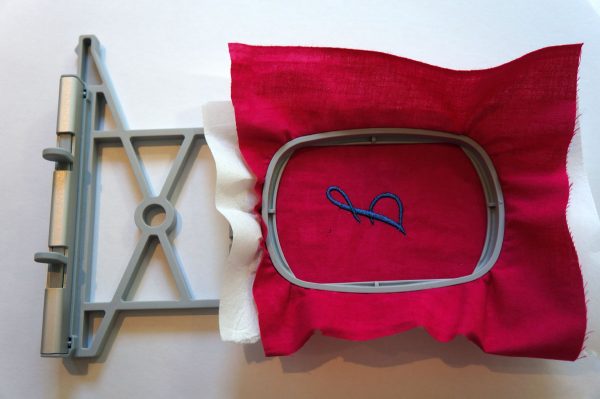
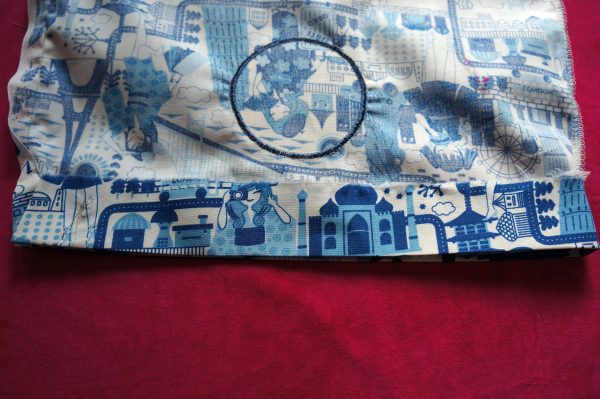
1. Cut a piece of fabric and stabilizer to fit into the small hoop. Embroider the initial. Refer to the machine manual for embroidery instructions.
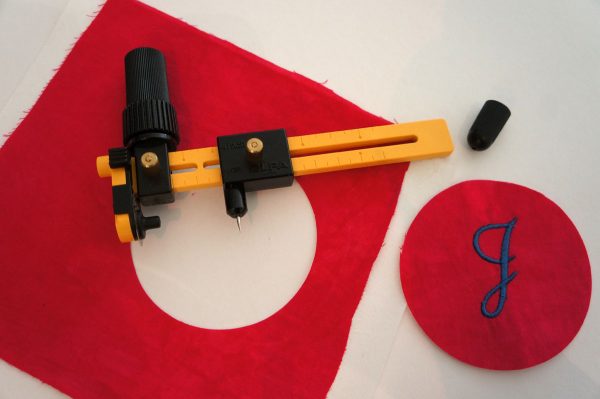
2. Cut out around the initial. I used a circle cutter by Olfa but you can trace any round object around the initial and then cut out with scissors.
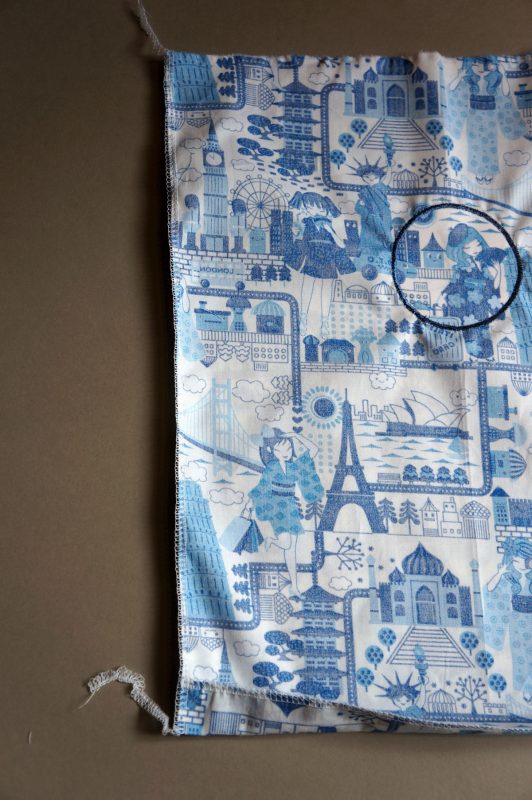
3. Cut two pieces of main fabric 17″ tall and 14″ wide using the selvedges.
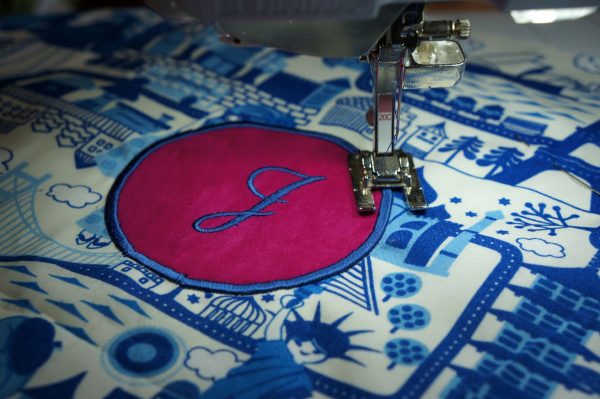
4. Place the circle 4″ down from the top, centered. Spray glue it onto the base fabric.
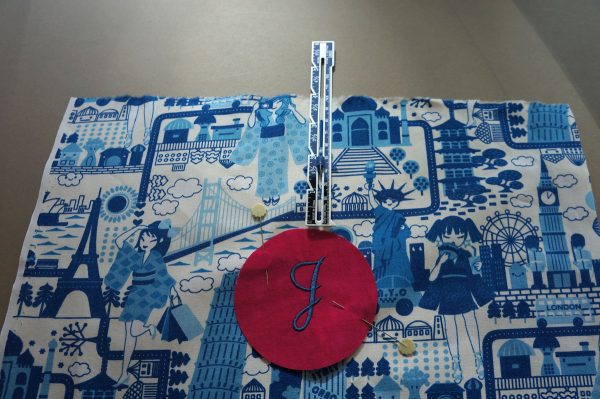
5. Place some tear-away stabilizer or thin paper under all this and satin stitch around the circle using Open embroidery foot #20/#20C/#20D and embroidery thread. I used stitch width of 4.0mm and a length of .30mm.
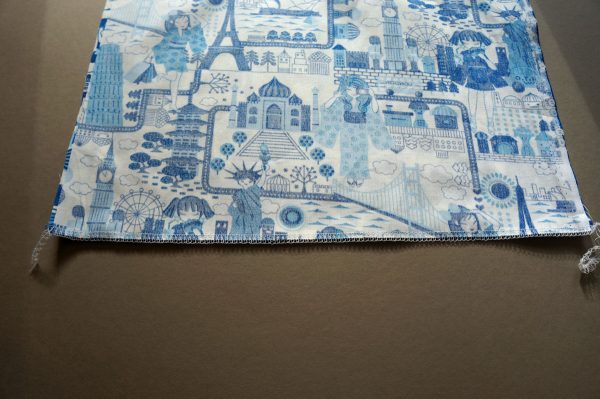
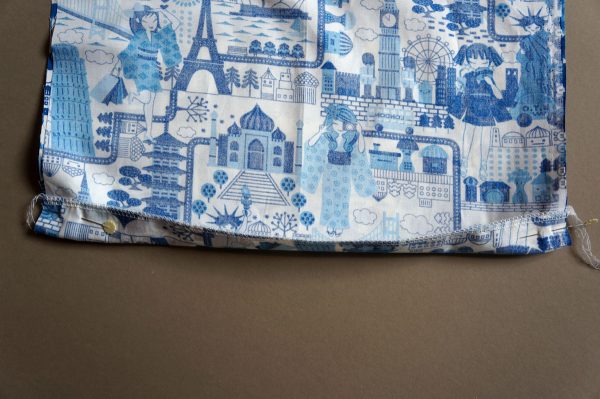
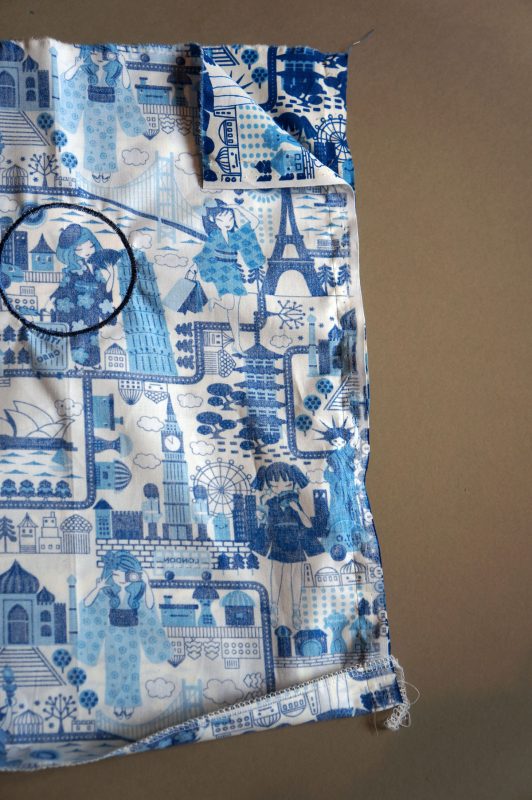
6. Put two fabrics wrong sides together and serge the bottom edge. I serge right on the edge of the serger blade where only about 1/8″ is cut off. If you are making all three bags, I would do all three bottoms now in a chain and then cut apart. If you have a one-direction print like here, make sure you have both sides right side up with the casing at the top.
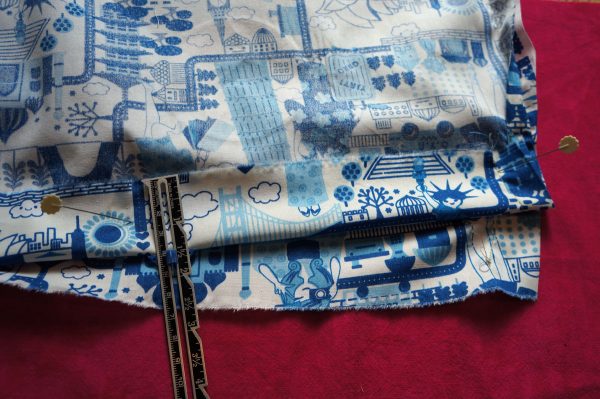
7. Turn bottom up one inch and pin both sides.
8. Serge the long side that isn’t the selvedge at ¼” or the minimum on the edge of the serger where it cuts off only about 1/8″. I serged three in a row here too and then cut apart.
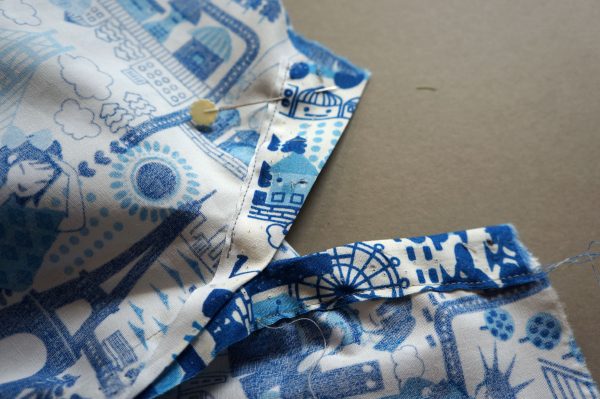
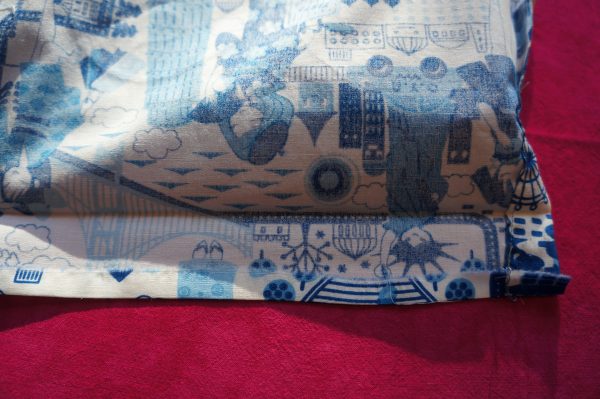
9. On the sewing machine, stitch the selvedge edge at about 1/2″-5/8″ to cover the width of the selvedge but stop at 3″ from the top and backstitch.
10. Fold back the selvedge at an angle from the top down to the end of the stitching and stitch down close to the edge, backstitching on both ends. Do this on both sides. On the bag that doesn’t have any selvedge, proceed the same way since it is mostly covered by the casing later.
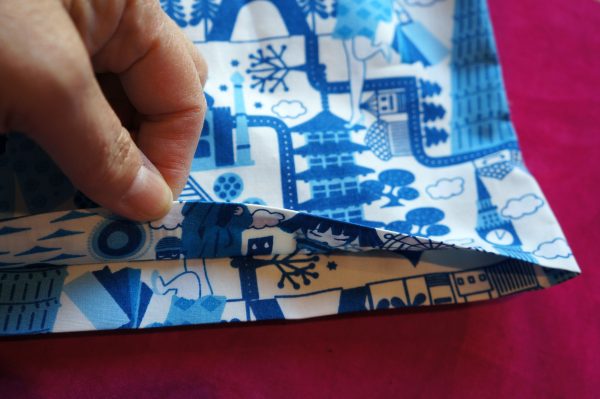
11. Making the casing: With the bag still wrong sides out, press under 1 ½” on the top edge. For speed: I used a pin to hold the end and then pulled the other end to make an even fold back. Then press with an iron.
12. For speed: Flip it over and fold the top fabric to match the pressed under casing underneath. It is accurate enough. Then finish pressing the small part on the side.
13. Press under approximately ¼” on top edge by eye.
14. Pin top edge with the ¼” folded under and stitch close to the edge. You could use the Edgestitch foot #10 and move the needle two places to the right.

15. Turn it right side out and notice the inverted pleat in the bottom. It’s approx. 1 inch on both sides, stretch it until the pleats form and press it flat.
16. Put a large safety pin on the end of the ribbon and run it through the casing.
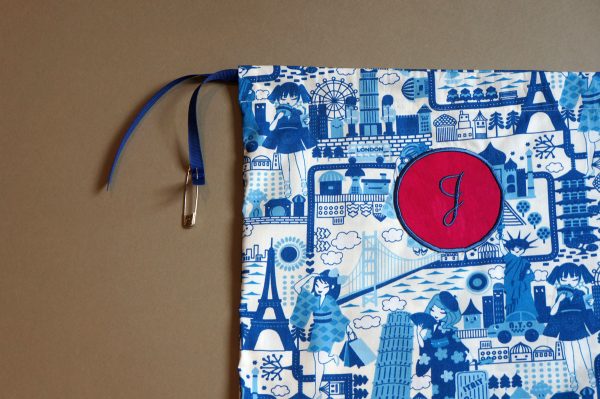
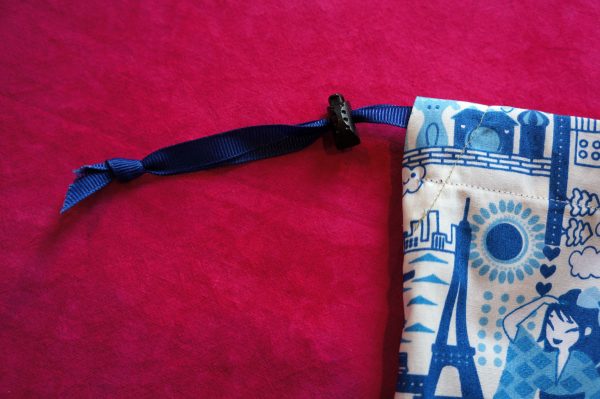
17. Cut both ends at an angle and feed them through the cord stop.
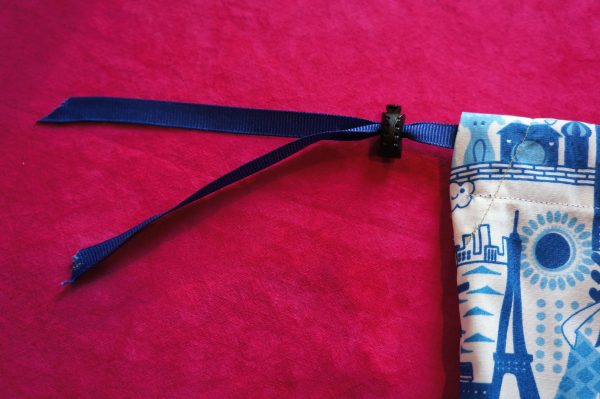
18. Tie the ends of the ribbon so the cord stop won’t fall off.


What you might also like


3 comments on “Travel Shoe Bag Tutorial”
-
-
Looks great. Excellent tips and clear beautiful photographs to support inexperienced sewers. I’d suggest using very lightweight fabric, as every gram counts when flying.
-
It appears that #6 should be put “ right sides together….”
Leave a Reply
You must be logged in to post a comment.
I would like to make a few of these before Christmas. I have not purchased cord stops before, what size and brand is best for this project?
Thanks!