Three Ways of Mending
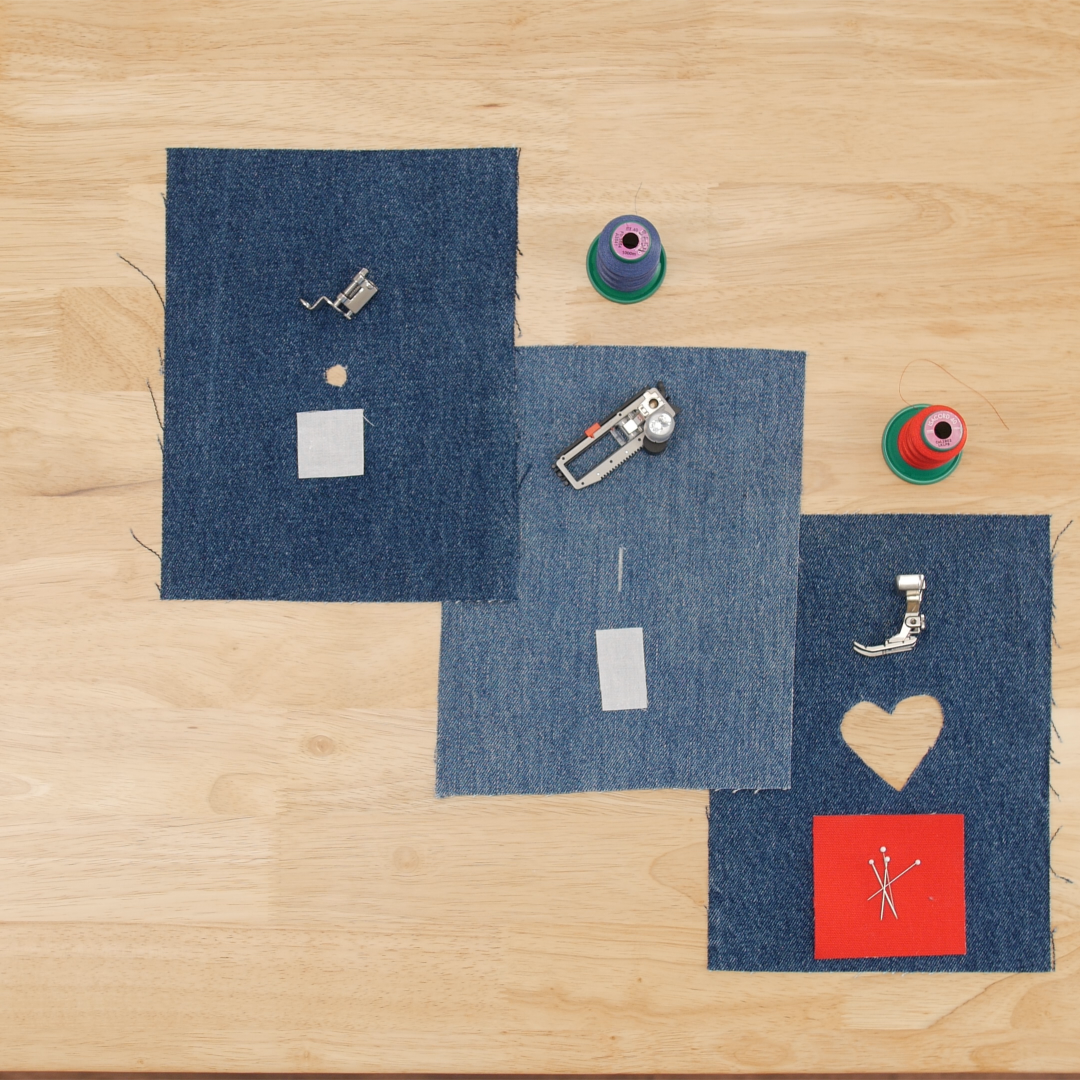
Mending is “Love”. Whether it is your favorite pair of jeans or a scuffed hole in a school backpack, mending is how we can show love for an article, and better yet, for someone we love who needs said item fixed. I personally enjoy mending. It’s a puzzle and a challenge that I find engaging. And restoring an item to service brings about a special satisfaction.
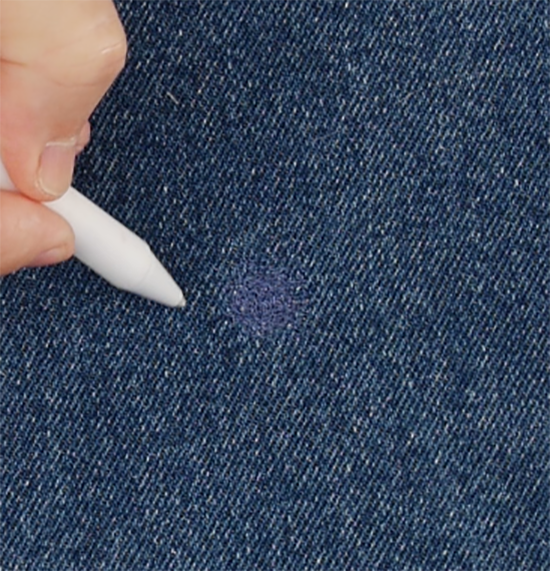
There are many ways and types of mending, depending on how flat (or not) the item to be repaired is. Talking of flat…it’s a good idea to practice on a flat scrap piece if you want to gain proficiency with a mending technique. Trying to darn a hole on a tubular item like the leg of a pair of jeans can seem tricky the first time. It’s actually fairly simple when first tried on a flat piece.
For this article, we will explore three different mending techniques:
- Darning (Free-motion): A classic technique and great for round(ish) holes
- Darning Program: Automated and excellent for small tears
- Reverse appliqué: Lets you turn larger holes into a decorative statement.
Regardless of the method you choose, make sure that:
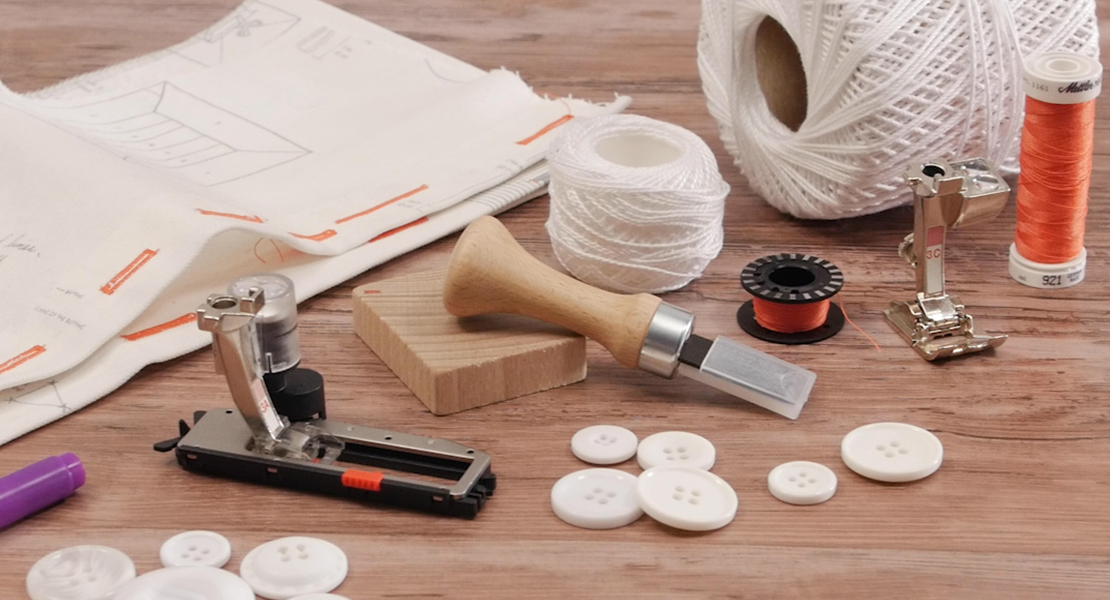
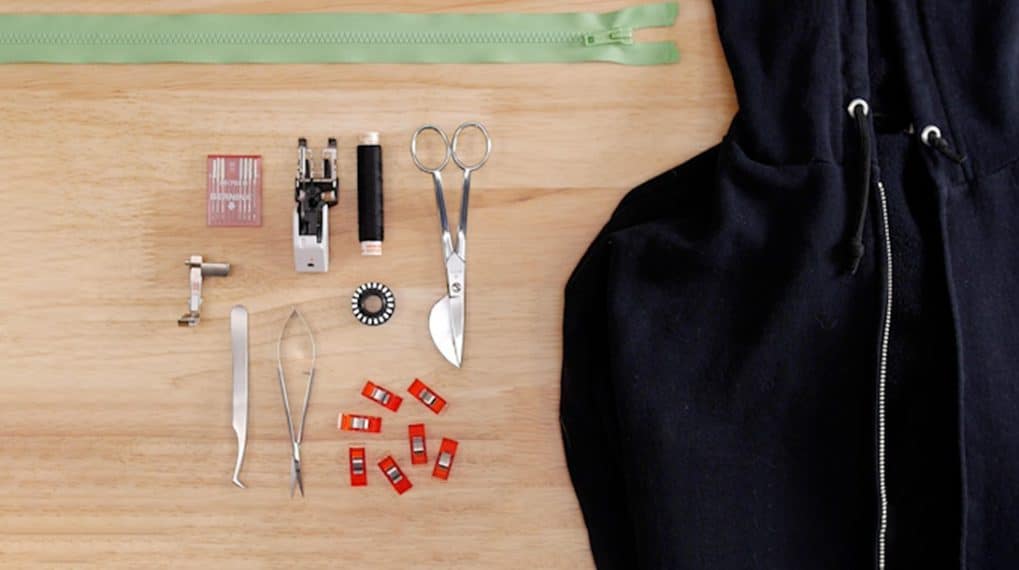
- You have the right type of needle for the fabric being mended. For wovens, a jeans 80 needle usually works very well (being sharp and sturdy)
- I recommend using polyester thread for mending as it’s more abrasion resistant. I like to use polyester embroidery thread (I use Isacord thread, of which I have a wide selection of colors) since it’s easy to find a color that will match the base fabric color. If your local store carries the Mettler Polysheen brand of thread, you’ll be in luck; it is the same thread as Isacord (and same color numbers) but in smaller spools…perfect for a mending job.
Method 1: Darning
Simple…and lets you practice your free-motion skills

Darning consists of running stitching lines across the area to be mended in a back-and-forth motion while varying the angle of stitching.
To Set Up for Darning
- Pre-fuse a patch of Fusible Woven or other type of firm interfacing to the back of the area to be mended.
- This will stabilize the damaged area from underneath.
- It will also provide anchoring for the free-motion stitching.
Tip: For items made of lighter weight fabrics cut the patch with rounded corners to avoid a rectangular impression on the right side of the project. For heavier fabrics like denim, you can cut a rectangular patch of interfacing. The interfacing will be light weight enough to not leave an impression on the right side.
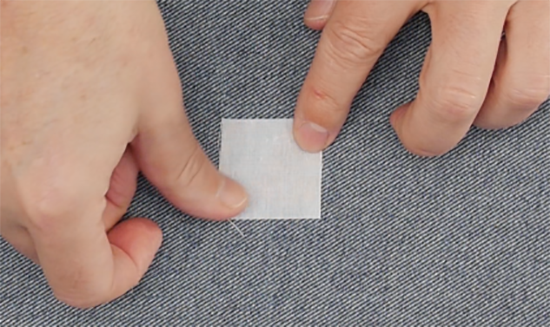
- When fusing the interfacing (from the wrong side) if the hole is large enough, the interfacing might fuse to your ironing board. Using a Teflon Pressing Sheet will help avoid unwanted fusing to your ironing board.
- To trim or not to trim the frayed threads? If the area to be mended is worn to the point where frayed threads are cut and running loose over the area, I prefer trimming them off as they will make it more difficult to get an even mending stitch.
Use a darning foot, such as BERNINA’s Darning Foot #9
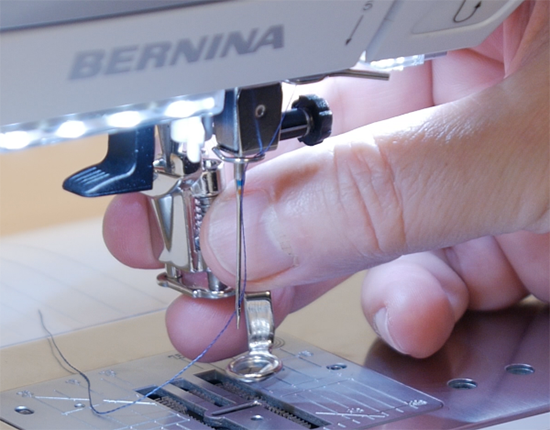
Tip: If you don’t have a darning foot, you can use an embroidery foot like the BERNINA Drop-Shaped Embroidery Foot # 26 instead.
Note: BERNINA machines have a hopper mechanism, which lets a darning type foot go up and down as you do free motion work. Best of all, the foot stays down and lags a bit behind the needle pulling up and out of a stitch so that it holds down the project and helps prevent loose or skipped stitches in the process. That is why BERNINA machines excel at free-motion stitching of all kinds.
- Drop the feed dog. This is essential for free-motion work.
- Set your speed control to a medium speed.
- Start stitching in place at the edge of the hole on the intact fabric. Having two layers there (fabric and interfacing) will make it easier to anchor the threads.
Now the fun begins. And I really mean fun. Think doodling with your sewing machine.
- Hold your threads when you start. Loose tails can cause thread nests.
- Lay your hands flat on the piece to be mended. This makes for smoother guidance while you stitch (pinching the project tightens your hands and makes motions more irregular).
With the speed of your machine set to moderate (e.g. with a ½ speed function on older models or the Slide Speed control set slower on recent models), you can ‘floor the pedal’ and get a uniform, moderate speed. As you gain proficiency, you can increase the speed setting.
- Start ‘painting’ over the area to be mended:
- Make sure that each back-and-forth pass reaches the ‘good’ fabric just outside the edges of the hole. This will make for a clean looking mend at the end (and will be more durable).
- I like to change direction several times to get an even coverage without disrupting the fabric base.
- Start with a vertical back-and-forth motion, from left to right, leaving some space between passes.
- Switch to a diagonal / 45 degree angle (either direction will work).
- Switch to the other diagonal / 135 degree – perpendicular to the previous stitching.
- If you need more coverage, switch to a horizontal direction. Note that this direction is trickier for most people as your arms have to move laterally.
- Repeat from the vertical direction if you still need coverage, although it often is not necessary.
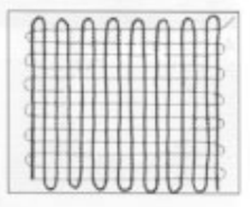
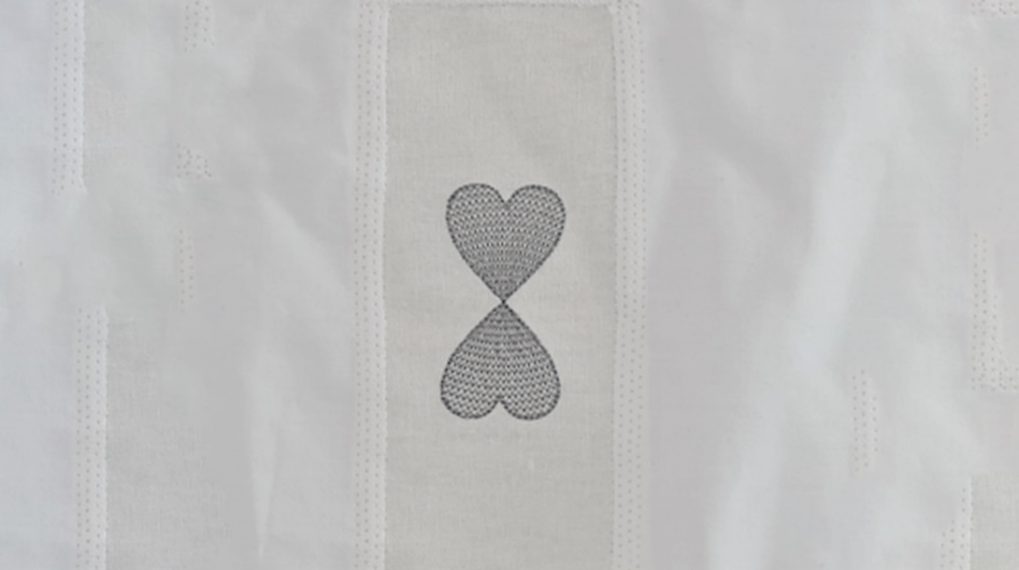
The following is an illustration from my vintage BERNINA 1260 QPE Owner’s manual, showing how to space the rows of stitching a little to create an even mend. I’ve found that by adding the diagonal passes I get a more even, filled-in thread patch.
Note: If the item to be mended is flat, it’s best to use the extension table with your machine, or if the machine is in a cabinet, in the ‘flatbed’ configuration.
When done, your darn will look something like the following:
Notice the random appearance to the stitching. This makes the darn less obvious, compared to a very rigid stitching pattern.
- Do not try to cover the mending area all at once:
- Stitching too heavily in one area will lead to a wavy/warped mend at the end. This has to do with thread pushing against the fabric and existing stitching. Embroiderers sometimes encounter this effect when a design is too dense.
- Using a single back-and-forth direction will accentuate the thread push effect.
Darning on tubular items (e.g. the leg of a pair of jeans)
If you can slide the tubular item over the free arm of your machine, you can mend it without opening a side seam. If you find that the tubular item won’t lie flat and becomes wrinkled, it is worth opening a side seam and flattening the area to be mended.
Method 2: Automatic Darning Programs
Quick and easy fix to small tears
A tear is not as easy to mend with a darning motion. It can be tricky to do a very narrow patch with thread in a narrow shape. Luckily, most modern BERNINA machines have an Automatic Darning Program, or perhaps two, depending on your machine model.
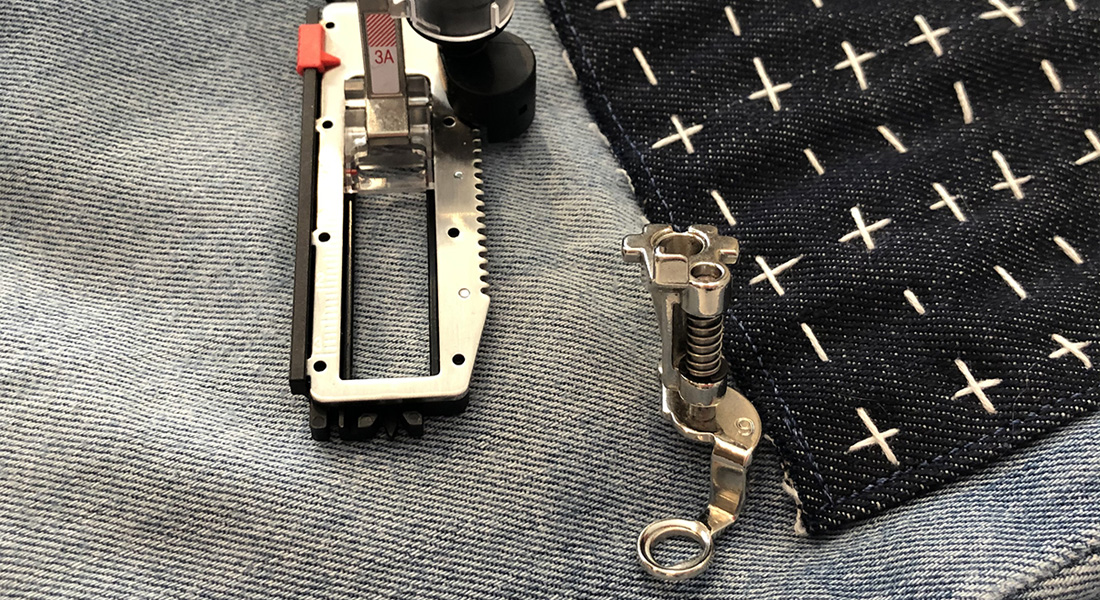
Darning Programs # 22 and 23 let you quickly mend over a tear.
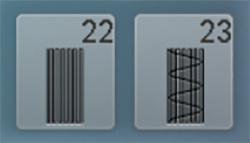
- Simple Darning Program #22 stitches back-and-forth, spanning the entire width that the machine is capable of and forming a rectangular thread patch (e.g. a 9 mm wide mend on my B 790 PLUS, or a 5.5 mm on a machine with 5.5 mm feed dog)
- Reinforced Darning Program #23 is similar to #22, with the addition of a lateral running stitch before stitching the ‘patch’. This helps close the tear before stitching the thread patch.
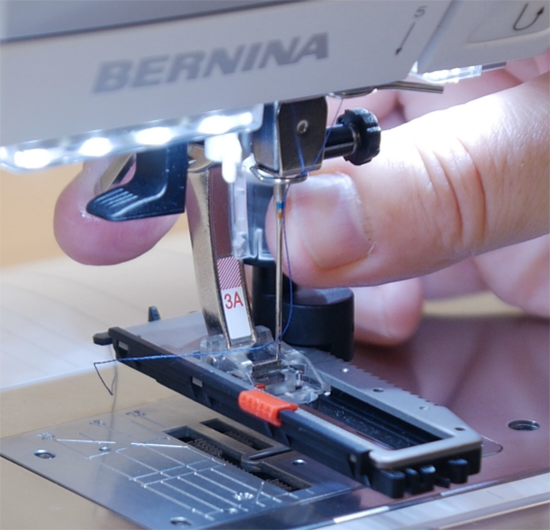
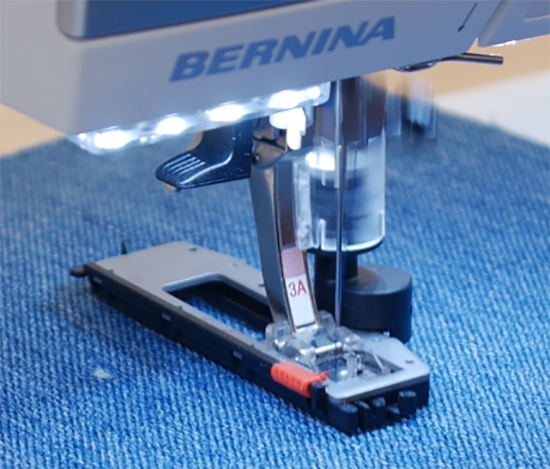
- Recommended Presser Foot is Automatic Buttonhole Foot #3A.
Top: Unless the base fabric is too soft, this is my favorite of the two darning programs
How to Use the Automatic Darning Programs
- I prefer to use a fusible interfacing under the tear before stitching. It helps seal the tear temporarily.
- Place the tear under the foot, making sure that the beginning of the tear is about 1/8 inch in in front of the needle opening in the foot so that your stitching will be anchored behind the tear (on the ‘good’ fabric).
- Stitch forward until the needle opening is about 1/8 inch past the end of the tear (for the same reason as above).
- Stop stitching and tap the Quick Reverse button once on your machine. This will program the length of the darning patch
- Resume stitching and continue stitching until the machine stops on its own. This being a program, the machine will stitch the darning patch until it is completed and secure the stitches at the end.
Tip: I like to use the Start/Stop button at this point to restart the stitching. Then I don’t have to mind the foot control and there is no risk of stopping stitching before the program has completed its run.
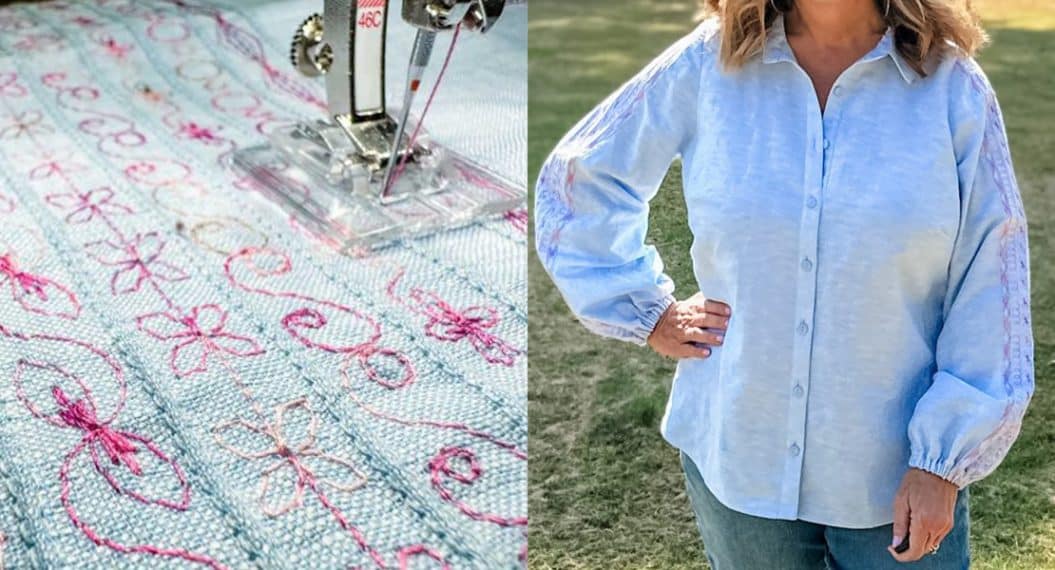
The result (here with Program #23) will look like a tile of stitching. It makes for a very secure mend for a tear. I’ve mended tote bags and backpacks that lasted a long time after being darned this way.
Method 3: Reverse Appliqué
Great for larger areas
If the area to be mended is larger than what an automatic program can cover, or large enough that free-motion darning will be less than satisfactory, you can opt to patch over the area, or rather under with a reverse appliqué.
Note that this will likely require flattening the piece if it is tubular in nature (e.g. by opening a side seam).
The suggested foot is Open Embroidery Foot #20/20C/20D
The recommended Thread is Isacord Polyester Embroidery Thread or Polysheen.
The process is pretty standard as far as reverse appliqué goes.
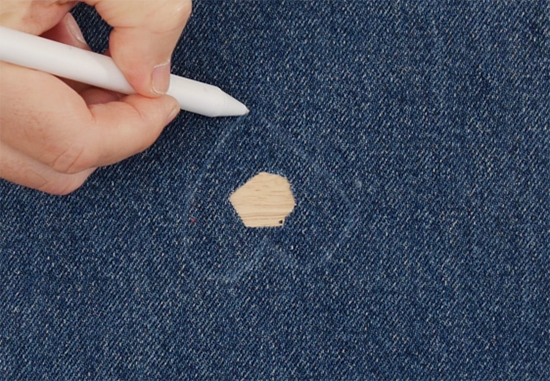
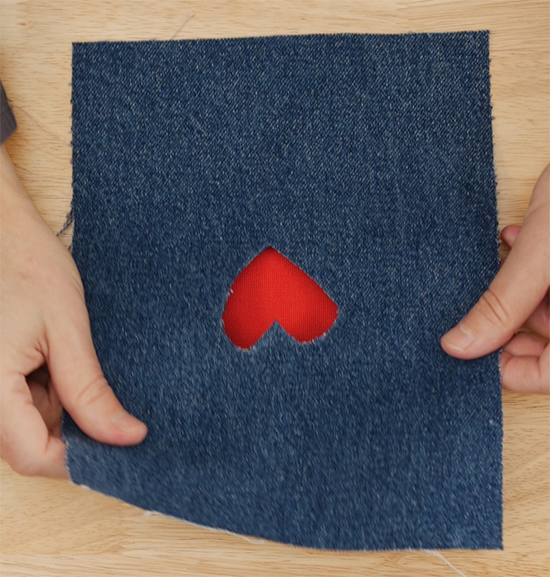
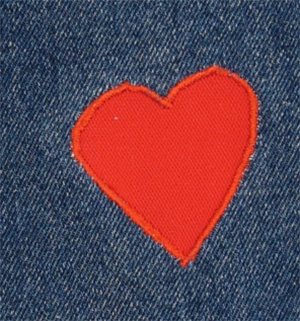
- Draw and then cut a shape out of the damaged fabric (here, a heart) that will remove all the damaged fabric.
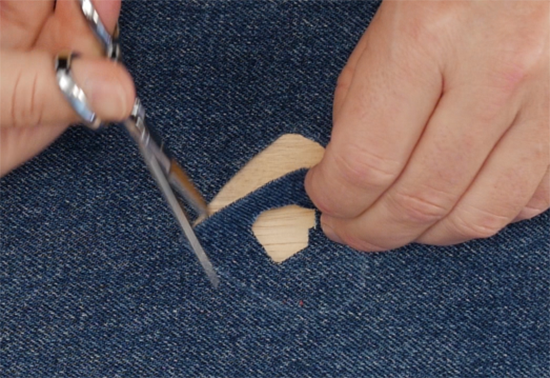
- Cut a patch of applique fabric larger than the shape that you cut (by about 1/2 to 1 inch on all sides).
- Layer the applique patch, right side up, under the cutout shape (article is right side out) and pin in place.
Use a narrow zig-zag as a tack down stitch and stitch once around the contour of the shape, in a counter clockwise direction, keeping the cut edge of the fabric (here the denim) against the right toe of the foot.
- Stitch Width 2.0 mm
- Stitch Length 1.5 mm
- Far Right Needle position
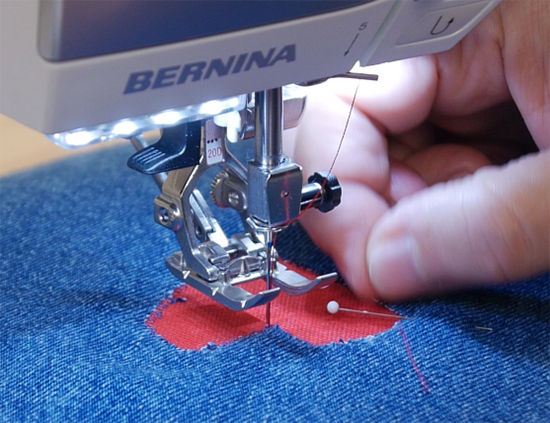
- Once the tack down stitch is done, change to a satin stitch and stitch around the applique.
- Stitch Width 2.5 mm
- Stitch Length 0.5 mm
- Far Right Needle Position
Tip: Since satin stitch is dense, it can distort an already worn edge of fabric. I prefer using a slightly more open satin stitch (stitch length 0.5 – 0.55) rather than a very compact one so as to not weaken the edge of the main fabric. I will go over twice with the satin stich instead if I want a more filled-in look.
When done, you’ll have a reverse applique and it will look like a designer’s touch rather than a gaping hole in your project!
One More Thing
There is one more way to cover a large tear or hole in a project. You can also stitch an embroidery appliqué done entirely in the hoop.
If you have embroidery software, you can digitize your own appliqué. BERNINA Embroidery Software has an easy-to-use appliqué tool. All you’ll have to do is:
- Digitize the appliqué shape.
- Make sure you have both a placement and cutting line (in object property).
- Flatten your article as needed (open a seam if needed).
- Hoop the project (small or medium hoop usually will do).
- Stitch the appliqué as you would with any in-the-hoop appliqué.
- When the embroidery design is done stitching, unhoop the article and trim off the work fabric that is under the appliqué to reduce bulk and potential scuffing.
In conclusion, mending makes it possible to extend the useful life of an article you loved in the first place. Chalk one up for a bit of sustainability.


What you might also like


2 comments on “Three Ways of Mending”
-
-
I would use Mettler Metrosene (polyester) thread. It will combine well with the embroidery thread and is wear resistant.
-
Leave a Reply
You must be logged in to post a comment.

If using the automatic darning program 23 with size 80 needle and polysheen or Isacord embroidery thread for mending jeans, what is the recommended thread in the bobbin ? Thank you.