Mending a Tear in Your Duvet Cover
I have a confession to make: I enjoy mending!
To me, mending is a way to show love to an item that has served me well. I grew up in a large family where things got mended, often more than once, rather than simply thrown away. Mending also presents us with a unique puzzle and challenge every time. For me, the fun part is in figuring how to mend, what materials to use..
A friend who heard about my interest in mending asked me to fix a large tear in a very nice cotton duvet cover. Btw, be careful when taking duvets on camping trips… tears happen!
When mending a large tear in a flat piece of fabric, there are a few considerations or approaches you can take:
- For a simple tear, applying a piece of fusible interfacing to the back to ‘seal’ it and then stitching from the top might do the job. Note that this tends to yield a stiffer area on the fabric.
- If the tear is actually a collection of tears/rips in an area (like was the case on the duvet cover), there is no elegant way to patch it up with stitching. You are likely will end up with a stiff slab of stitches over the fused interfacing patch.
So the mission here is to mend the torn area without creating an ugly patch.
The goal: a simple way to patch a large rip (here: duvet cover)
- Few steps
- Secure patch that can withstand wear and repeated washings
- Without adding stiffness to the duvet cover (we like it soft and fluffy)
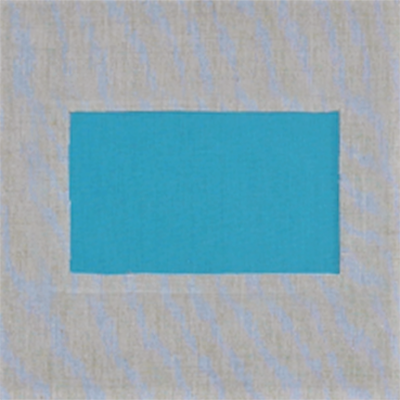
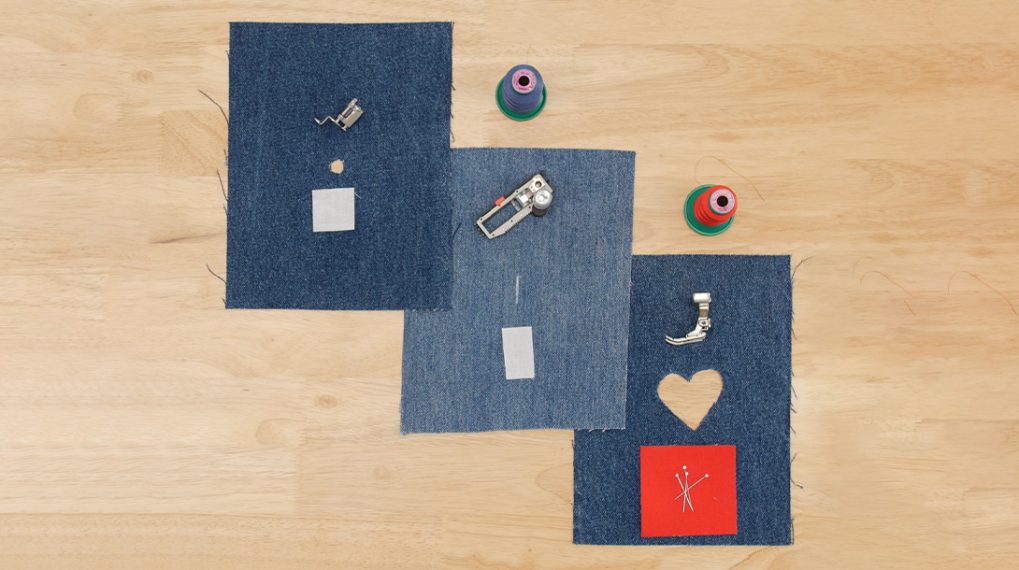
In this article, I’m using sample materials with contrasting colors to better illustrate the process. Stay tuned for the end where the last image is of the actual mend on the duvet cover.
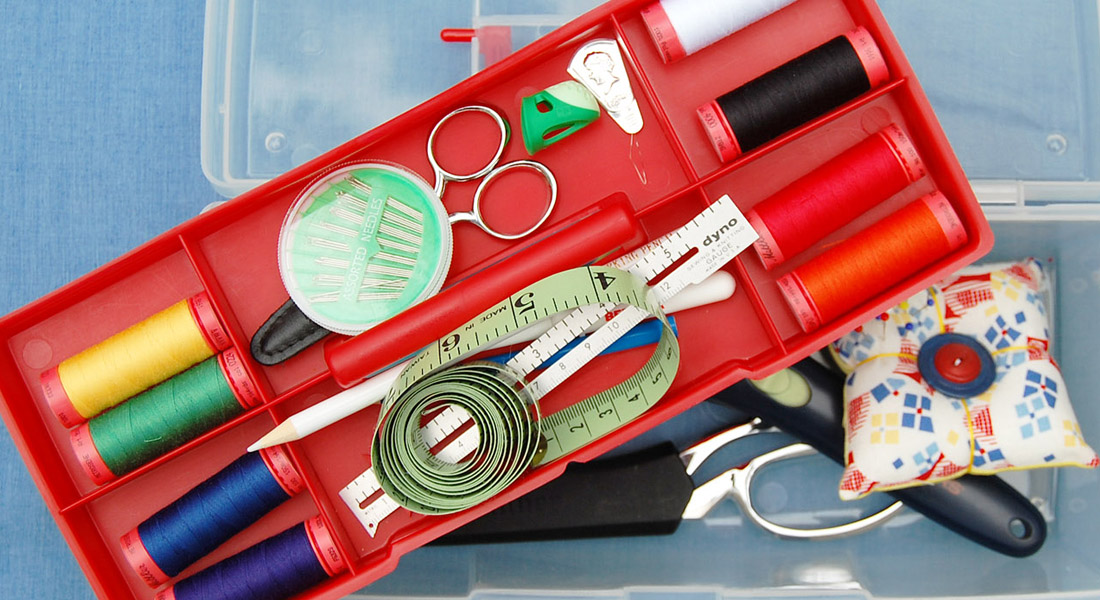
What you will need:
- Regular scissors for cutting around the tear
- Fabric swatch (patch) larger than the cutout around the tear (this will help with stability while stitching around the patch)
- Appliqué (duckbill) scissors to trim off the patch
- 1/4 wide fusible tape to secure the contour of the patch (Pellon EZ-Steam™ II)
- Note: There is also a 1/2″ wide version that can be used on heavier materials.
- Chalk marking tool
- Pins (optional)
- Thread of choice (cotton is fine for in-house items, poly is recommended for any outdoor items)
- Sewing machine needle: type and size suited to the item’s material, thickness, etc.
For this example (basic cotton), a Jeans 80 needle was used.
We start with a torn area:
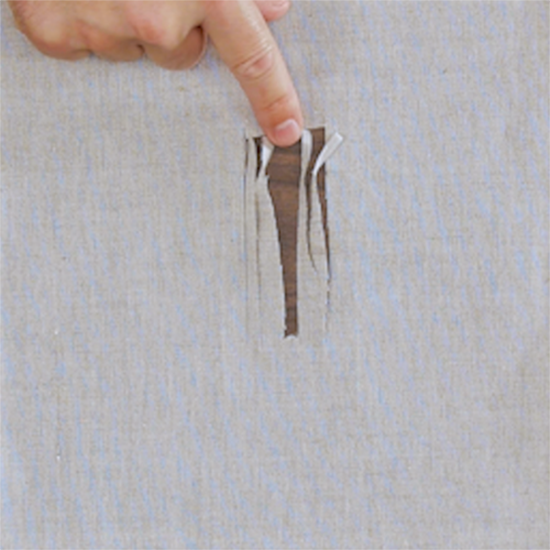
Cleaning up the torn area:
- Mark a rectangle with chalk and trim the ripped area to a clean rectangle with regular scissors. I find that smaller scissors work better than shears.
- I cut from the center of the area and diagonally into each corner
- This makes cutting clean corners on the rectangle easier
Preparing to apply the patch:
On the wrong/back side:
- Apply a 1/4″ fusible tape to the perimeter and peel the waxy paper backing. This will leave a sticky edge exposed, ready to apply the patch.
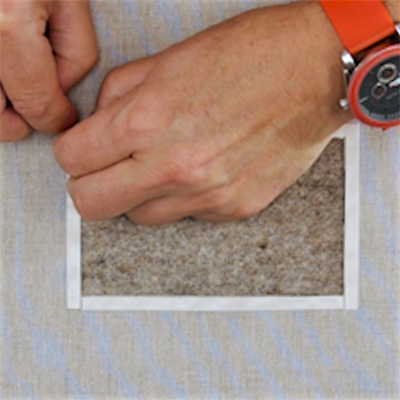
- Apply a patch of fabric to the wrong side and fuse in place.
- The patch will be stable.
- It will help stabilize the edges of the cutout area (good for the subsequent stitching).
- Turn the item right side out. You will have a clean patch like a reverse appliqué.
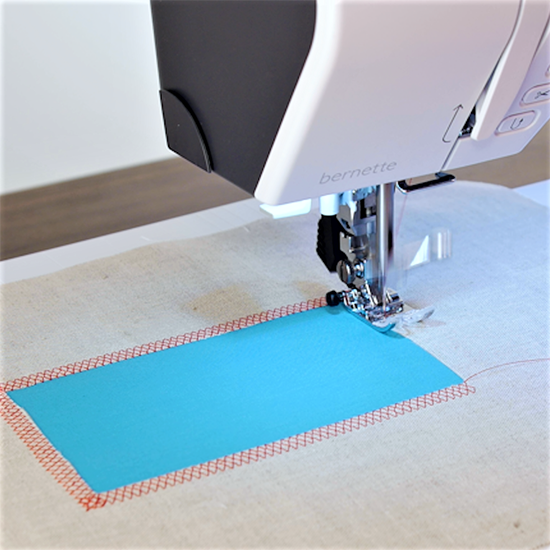
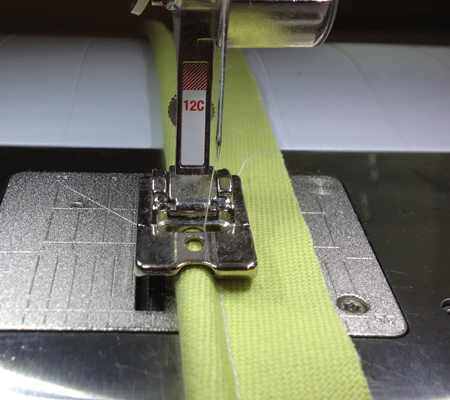
It’s time for the final stage: stitching around the perimeter of the patch.
From the right/top side:
- Stitch over the patch border to secure the main fabric around the cut area and to further secure the layers of fabric together).
- This process is similar to stitching around a reverse appliqué.
- Stitch around the perimeter of the ‘hole’ onto the main fabric to secure the patch and the raw edge of the duvet.
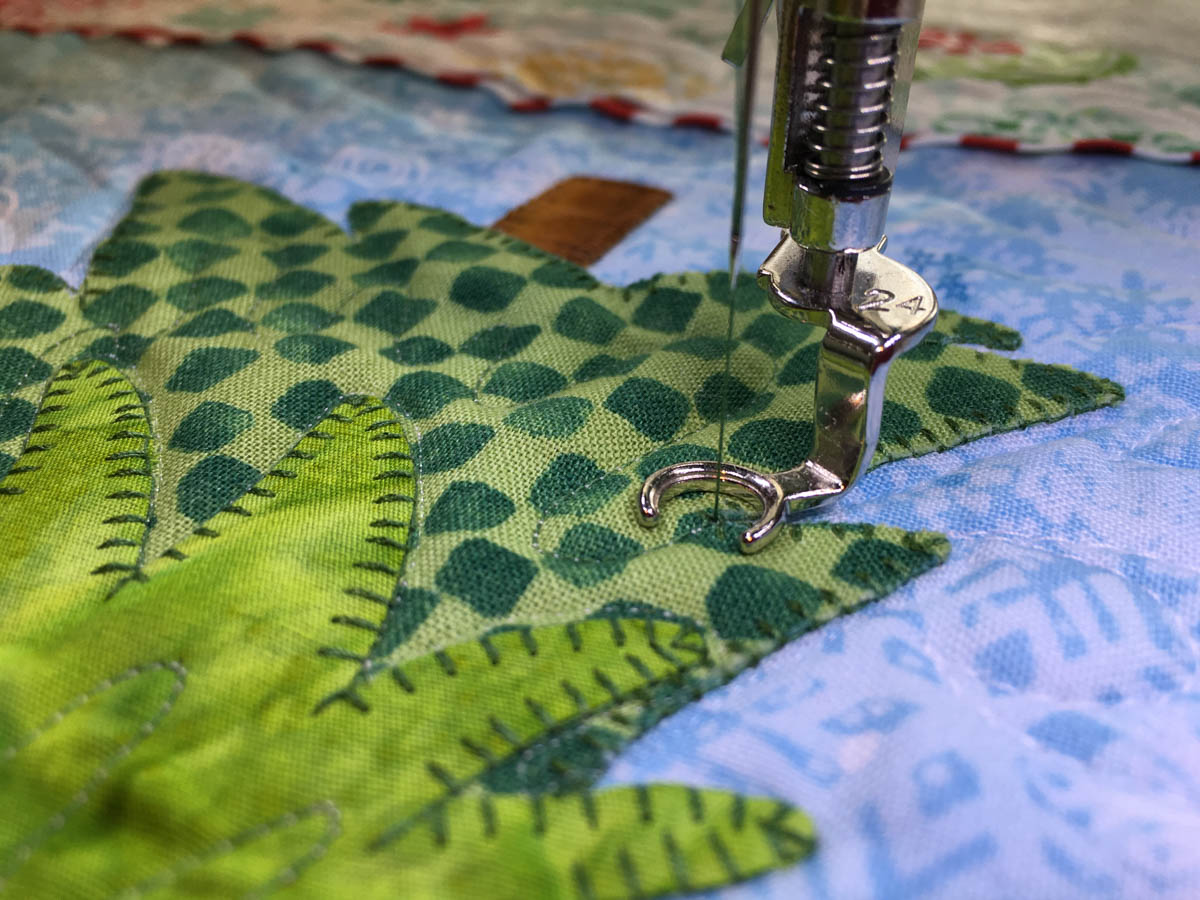
- I like to use a honeycomb stitch.
- Make the stitch length slightly shorter than the default (SL=1.5 mm)
- Position the needle in the Far Left Needle Position.
- Place the foot so that the leftmost swing of the needle lands just inside the patch area, just off the edge of the original fabric
- It makes for a strong construction.
- It helps prevent fraying at the edge of the cut on the main fabric down the road.
- It looks good.
- All-in-all, the honeycomb stitch is a really good stitch to secure the contour of the patch without disrupting it or adding bulk to it.
- Since the fusible tape is 1/4 inch wide (just a hair over 6 mm), I set my stitch width to 7 mm on my machine if available. If using a 5.5 mm machine, the stitch will be OK still at 5.5 mm in width.
- I like to use a honeycomb stitch.
TIP: Avoid dense stitching (like satin stitch or compact stitches) as it may cause the edge of the patch to wave (this is due to fabric push related to the insertion of thread by stitching into the fabric).
- To turn corners while stitching around the patch:
- Stitch along the first side and continue past the corner for a distance equivalent to your stitch width.
- Stop with the needle down, on the far right side of the stitch (this is key in turning a clean corner).
- Pivot the corner. If you’re not sure you have stitched far enough past the corner, use this pivoting to verify that the left edge of the main fabric will land in the same place as on the first side of the patch opening. If you haven’t reached the right point yet, stitch one more pass of the stitch, ending on the far right and pivot/test again.
- Once you have reached the right pivoting point, resume stitching on the next ‘side’ of the patch.
- Repeat until you have turned all corners and closed the loop of stitching around the patch.
- Secure the stitches like you did at the start of the stitching, with the short straight stitch (see the tips immediately below).
Tips for securing stitches at the start and end of the patch contouring:
- If your machine has a securing function, it’s a good and easy way to secure stitches at the start and end of the stitching run.
- You can also sew securing stitches at the beginning: especially if the item is to be washed repeatedly
- This is how I prefer to secure stitches:
- I like to use a short straight stitch at the edge of the patch contour:
- Set the Stitch Length to .5.
- Set the Needle Position to Far Left: It will put the stitches right at the edge of the patch.
- Start about 1/8” in front of the planned starting point (closer to you).
- Use the Quick Reverse.
- Stitch about 1/8” in reverse until you reach the intended starting point.
- Switch to the honeycomb stitch (or stitch of your choice) and stitch around the perimeter.
- Use the same securing stitching at the end of the stitching run.
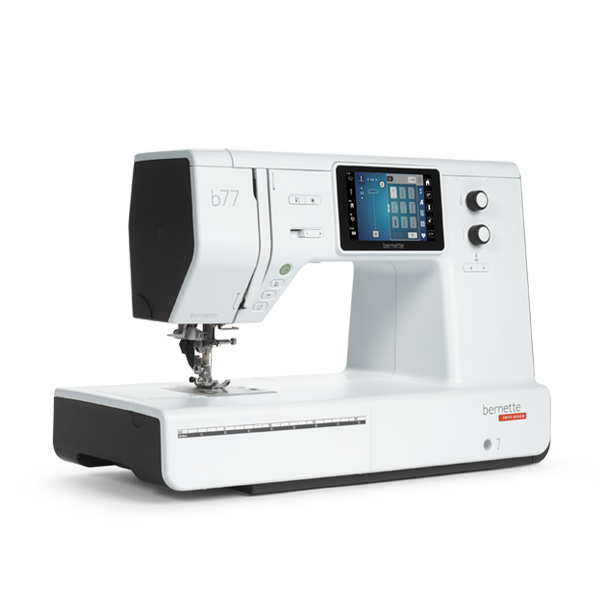
- TIP: Your BERNINA’s (or here bernette 77 or 79) Altered Stitch Memory will remember how you configured that straight stitch so it’s ready to use again without having to set it up a second time.
- I like to use a short straight stitch at the edge of the patch contour:
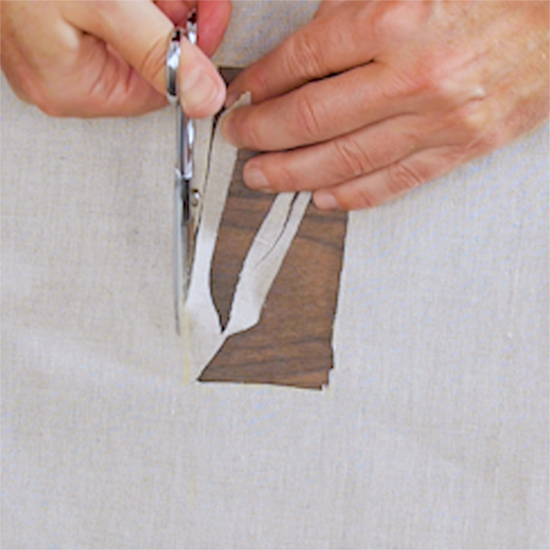
The last step… Trimming the surplus fabric in the patch:
- From the wrong side: use appliqué (duckbill) scissors and trim the excess fabric around the perimeter of the patch.
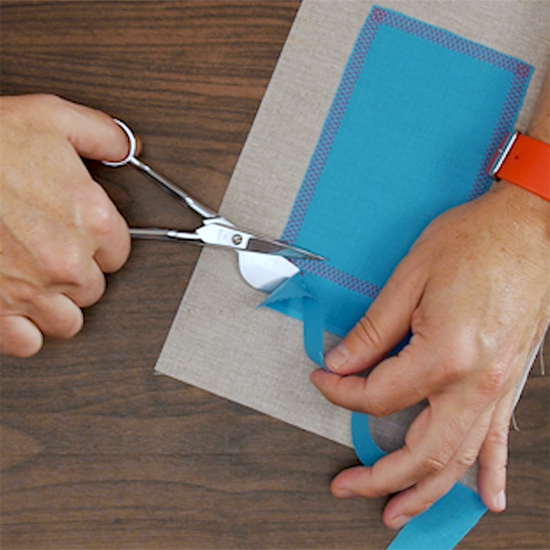
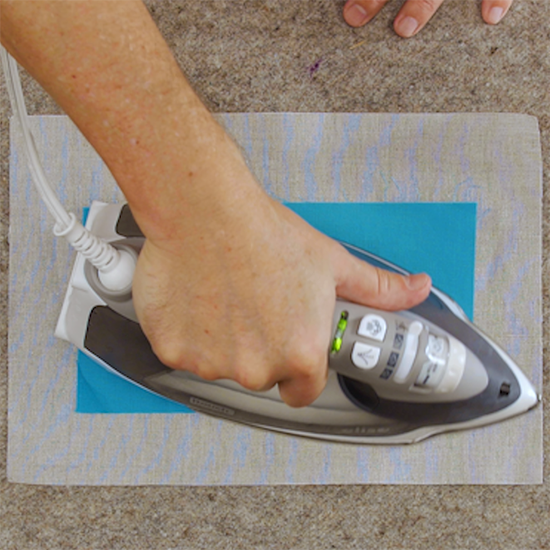
- If necessary, give the item a final pressing
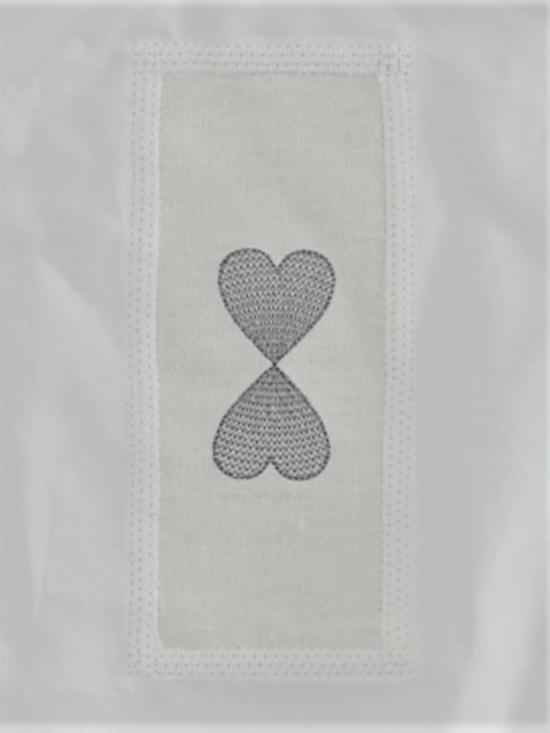
You now have a simple, durable patch that restores your article. Here’s the actual mend on the duvet cover. I embroidered the fabric patch ahead of time… just because I could!
Additional options to consider:
- Embroider a design on the patch fabric before cutting out the patch piece.
- Put decorative stitches on the patch.
- Piece fabric together (e.g. into a scrappy block) to make the patch.
- Consider trimming a torn area into a larger ‘hole’ to make room for an embroidery design, pieced patch, etc.
Used Products

What you might also like


2 comments on “Mending a Tear in Your Duvet Cover”
-
-
Gosh how did know I have 2 quilts I love that need mending!
Don’t have your wiz bang machine just my trusty 1230 …. I’ll work it out!Thanks
Vicki
Leave a Reply
You must be logged in to post a comment.

I thought a honeycomb stitch could only be used on stretch fabrics. This summer I put a patch in a bedsheet using a regular straight seam and then pressing the seams open. It was much harder and bulkier than what you suggested here. I never knew I could use a honeycomb stitch on woven; all this time I was led to believe it was only for attaching elastic. Thank you Sylvain. I always learn something from you. I now have an easy way to save bedsheets that develop holes.