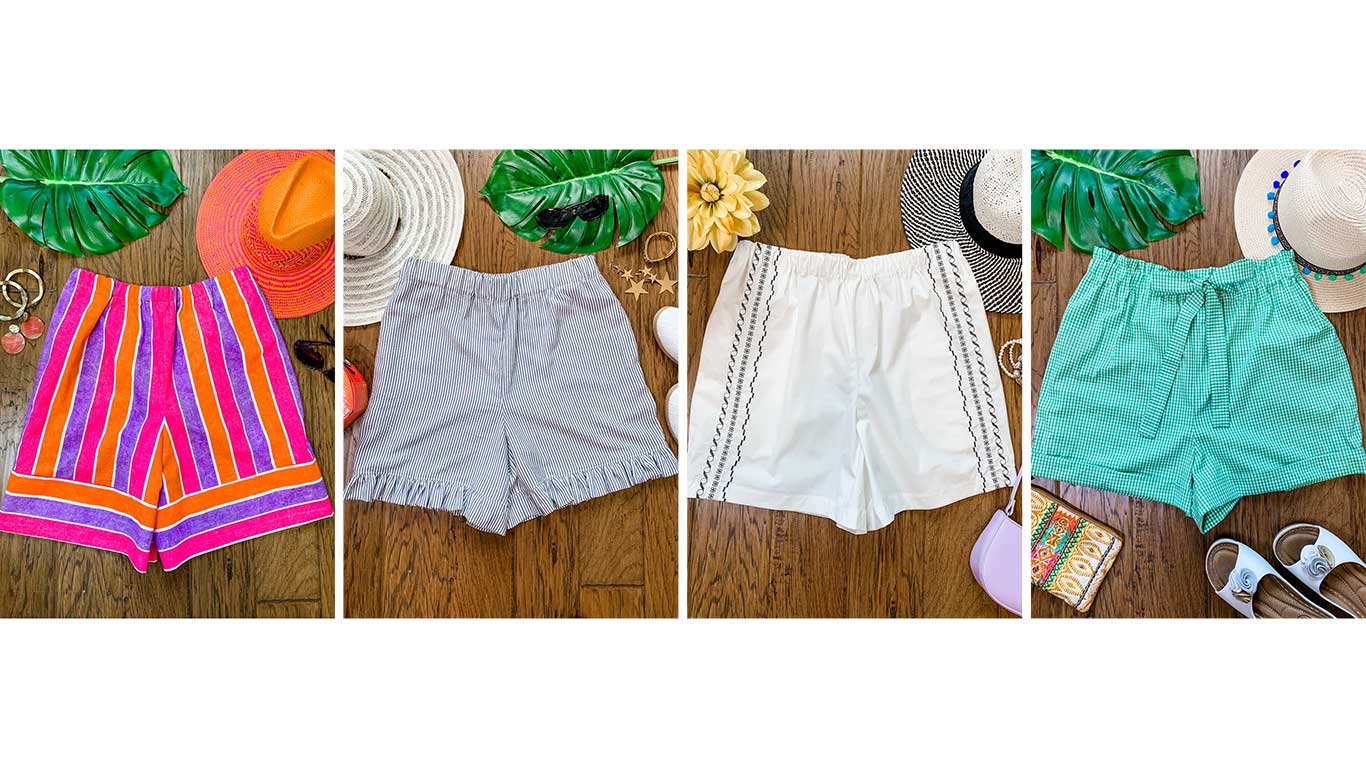
One Pattern Four Ways: Easy-to-Sew Summer Shorts
With just a few simple changes to an easy-to-sew pajama shorts pattern, you will be ready for the sweltering summer heat in style. No one will ever guess your cute summer shorts were sewn using a pajama shorts pattern!
I’ll show you the easy changes you can make to your pattern to transform your pajama shorts into four different summer shorts. You’ll learn how to add a ruffle at the hem, a contrast hem band, a cuff and faux tie belt, and how to use some of those decorative stitches on your sewing machine as a design detail.
You can sew each project as shown or pick and choose the design elements to create your own unique pair of shorts.
Hello everyone! I’m Sharon of Sharon Sews. You can connect with me on YouTube and Instagram where I share sewing tips, projects, and reviews, as well as wardrobe ideas.
Gather Your Supplies to Sew Summer Shorts
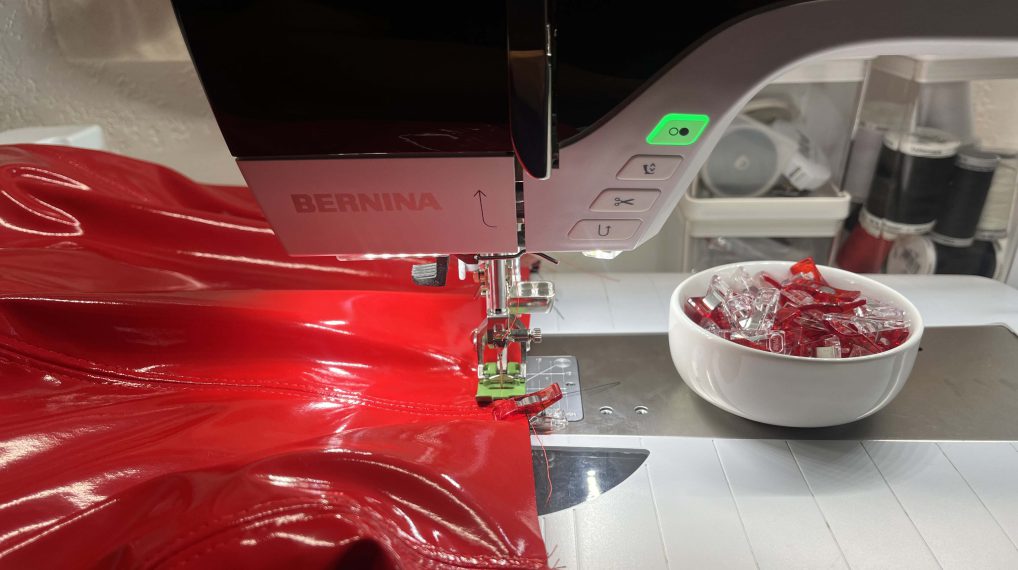
- Sewing Machine (I used my BERNINA 770 QE Plus)
- Pattern – I used New Look 6859, a multi-sized pattern that includes both pajama shorts and pants. See more about choosing a pattern below.
- Fabric – Choose a light- to medium-weight woven fabric. Quilting cottons, shirting fabrics, and linen are all great choices for summer shorts. Be sure to pre-shrink your fabric before cutting out your pattern pieces.
- Purchase yardage based on the amount provided for the pattern you are using.
- Check under each individual pattern hack for any additional fabric you may need.
- Coordinating thread (Mettler provided the All-Purpose Metrosone thread and the Poly Sheen thread).
- Elastic – 1” elastic (your waist measurement plus 1”)
- Scissors
- Measuring tape
- Straight pins
- Safety pin
- Removable marking chalk or pencil
- Iron and pressing surface
- Calculator
- Tracing paper and pen or pencil
- Ruler
- Stabilizer (for the shorts with decorative stitches)
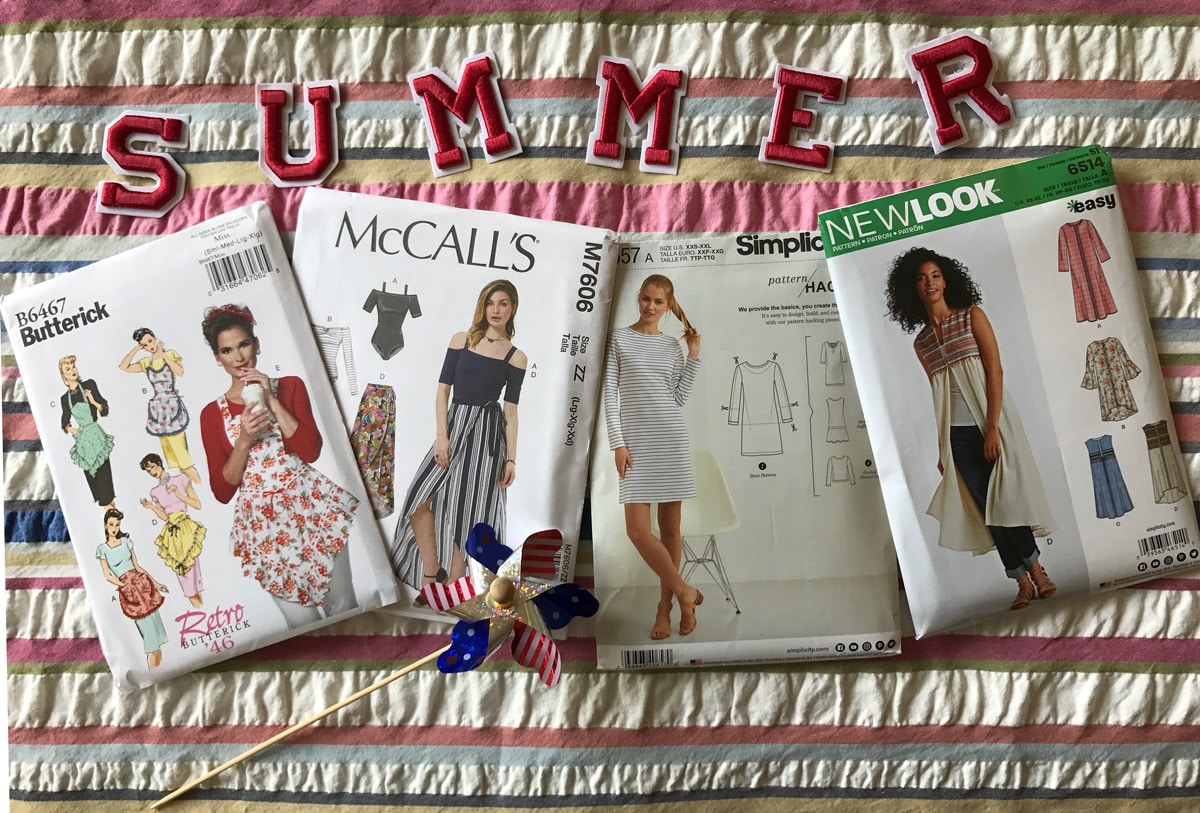
Choosing a Pajama Shorts Pattern to Sew Your Shorts
Look for a pull-on, elastic waist, pajama shorts pattern without front slant pockets. Pick a pattern that is designed for woven fabrics, not knits. It’s okay if your pattern has in-seam pockets as those are sewn into the side seam and will not affect the pattern changes being made.
Choose a pattern based on your hip measurement. Elastic is used to pull in the waistline to fit your waist.
Look in the sleepwear or loungewear sections of the major pattern companies (Butterick, McCall’s, New Look, Simplicity, or Vogue) catalogs.
If you prefer working with PDF patterns, search “PDF pajama shorts pattern” on the Internet and you’ll find many options, some available for free.
How to Determine the Ease in Your Shorts Pattern
Ease is the difference between the body measurement and the finished garment measurement and determines how closely a garment fits.
Most pajama bottom patterns are designed with a fair amount of ease making them comfortable for wearing and sleeping.
For all of the shorts in this blog post, I used a size medium. The medium for my pattern has a body hip measurement of 41” and a finished garment hip measurement of 45”. The difference between the two is 4” . That is the ease of this pattern.
Trace Your Pajama Shorts Pattern Pieces
If you are using a multi-sized pattern, consider tracing your pattern pieces. Tracing will allow you to keep the original pattern pieces which is helpful if you want to sew additional sizes.
Position your pattern pieces right side up on a flat work surface. Place tracing paper over the top of the pattern pieces. I like to use pattern weights to help hold the tracing paper in place.
Use a pen and ruler to trace along the size lines of your pattern pieces. Transfer all the pattern markings to your traced pattern pieces.
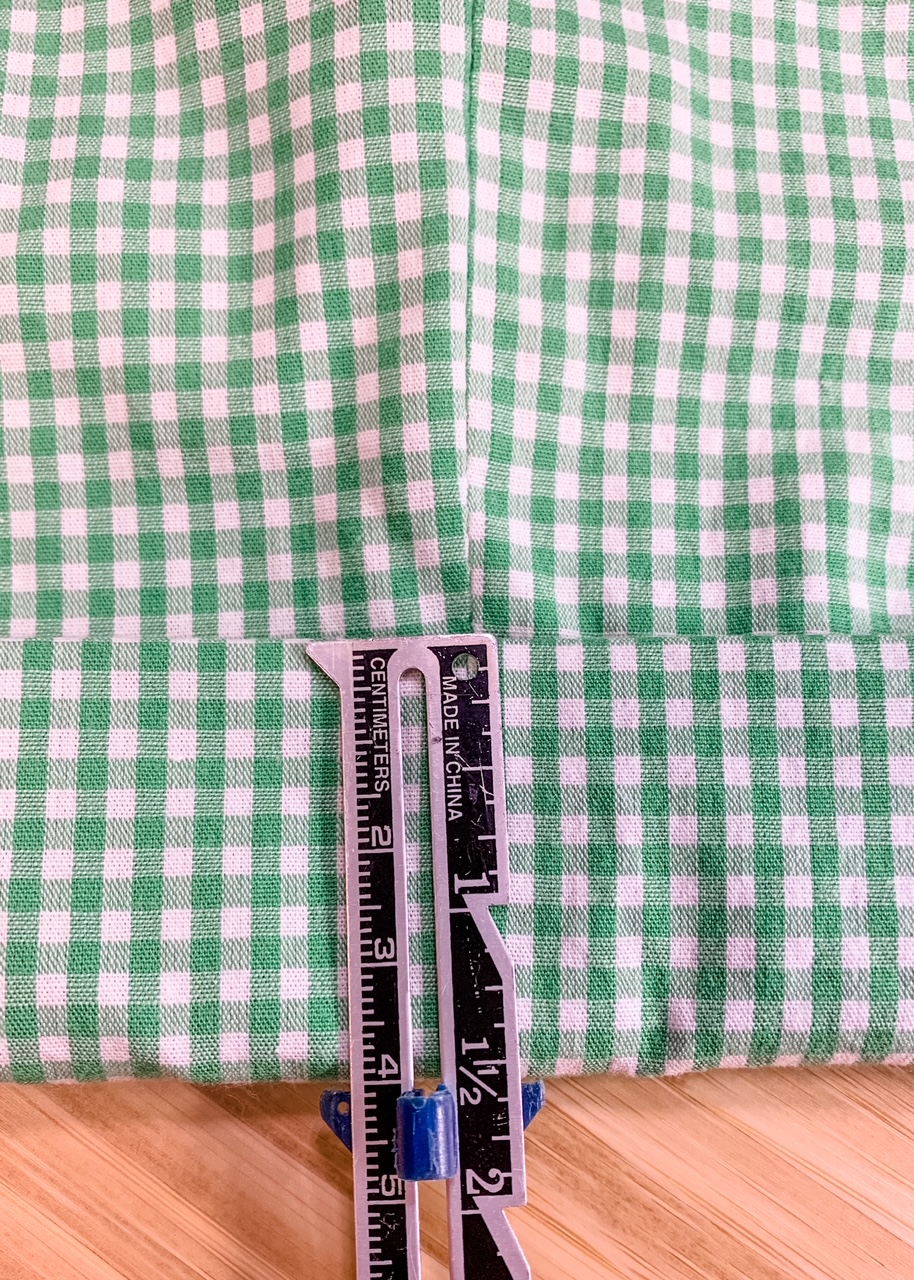
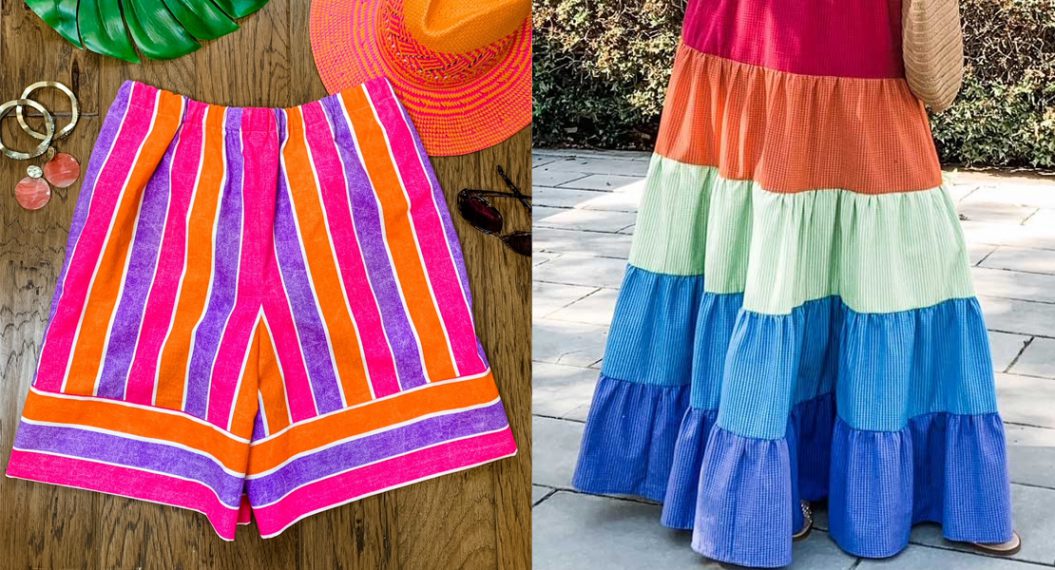
Add a Contrast Band to the Bottom of the Shorts
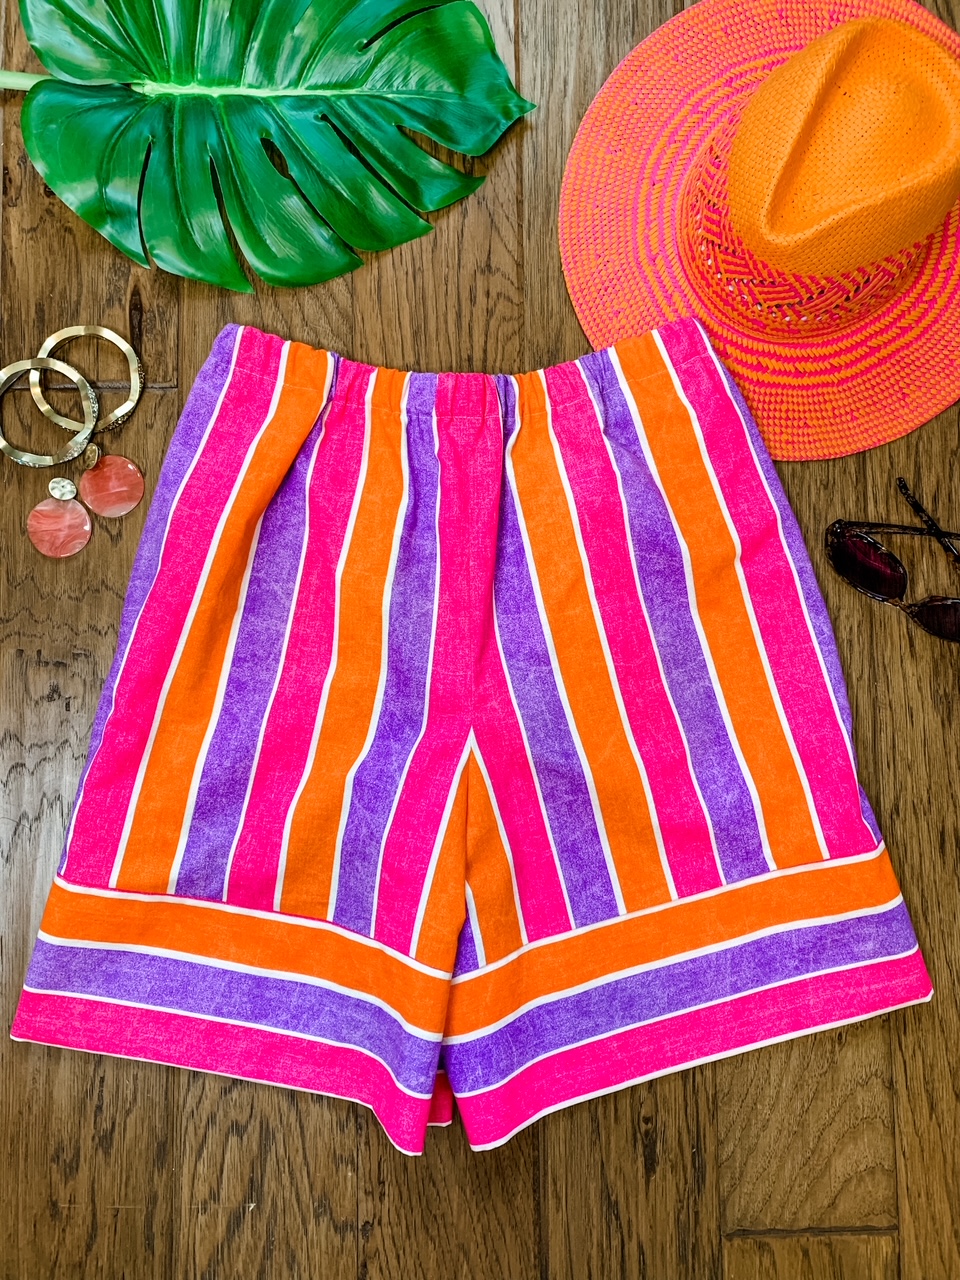
A contrast band adds length to your pajama shorts and is a great design detail that is easy to do. Use a brightly colored striped fabric to really highlight the hem band.
Note: For the contrast band you will need an additional 10” to 20” of fabric depending on the width of the fabric and the size of your shorts. If you are using stripes you may need extra to make sure your stripes match on the bottom of each short leg. You’ll determine the size of the band in the steps below.
Note: The band adds 4-1/2″ to the length of the shorts. If this is more than you want you can either shorten the inseam on your pattern, or shorten the width of the hem band.
Following the layout of your pattern, cut out your pattern pieces. With right sides together align one front and one back piece matching the inseam; pin and then stitch. Finish your seam as desired and press. Repeat for the other front and back.
Position one section of your shorts on a flat work surface, and measure the bottom width of the leg. Write down that number.
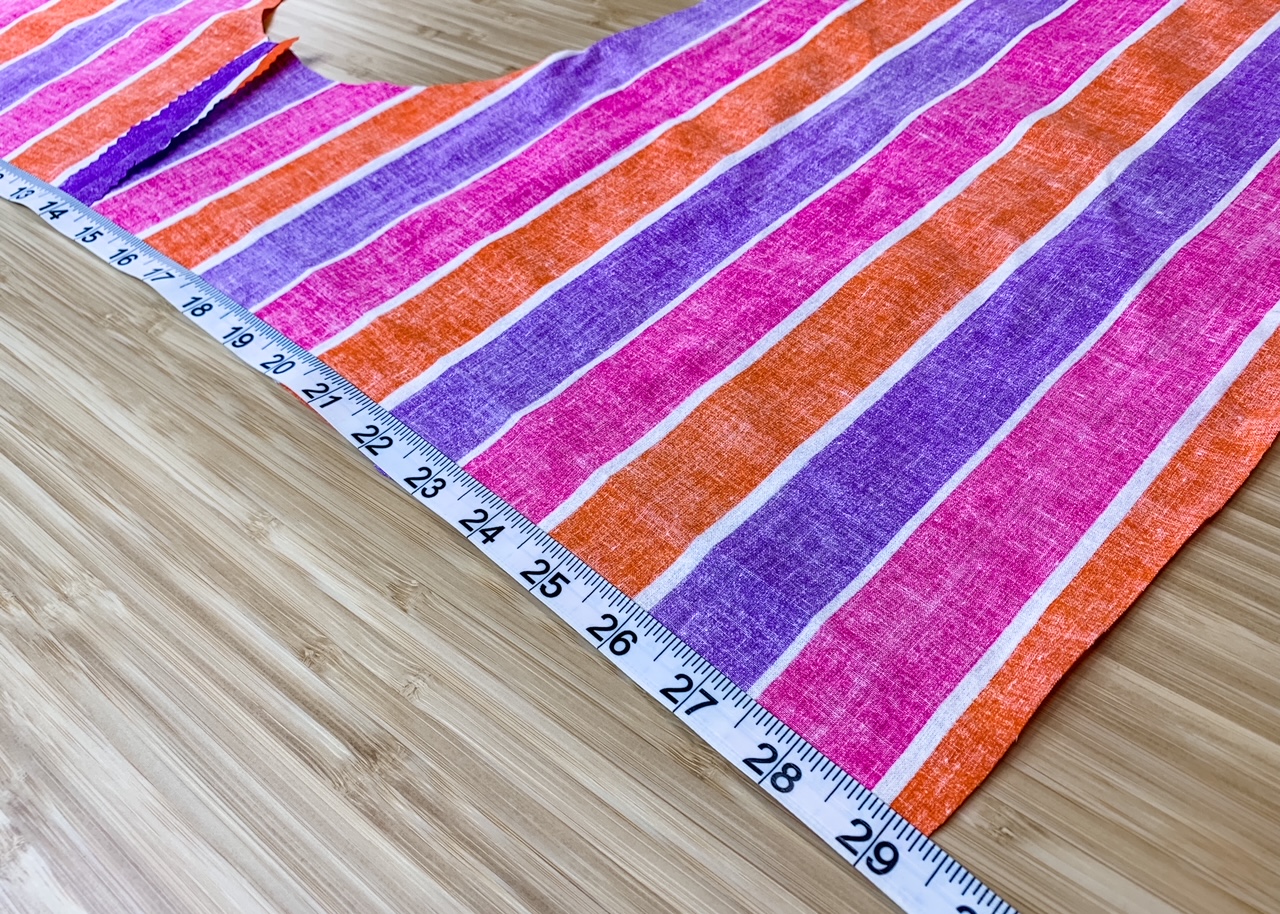
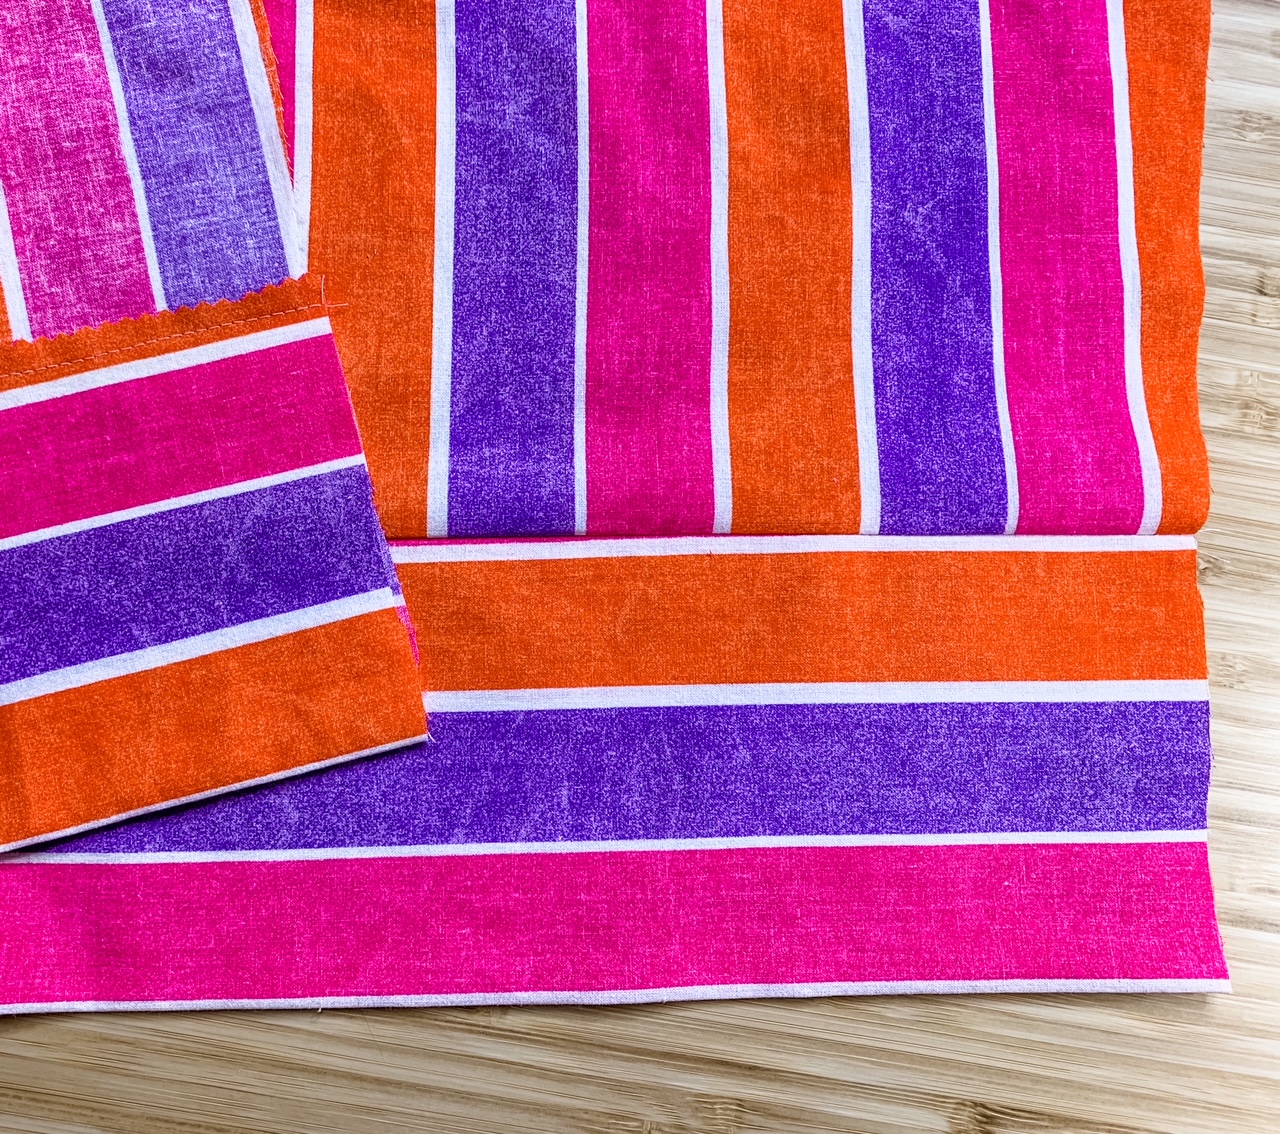
Cut two pieces of fabric the bottom leg measurement (width) by 10” (height). If you are using stripes, cut them in a different direction than the shorts, and make sure the stripes on each band are the same.
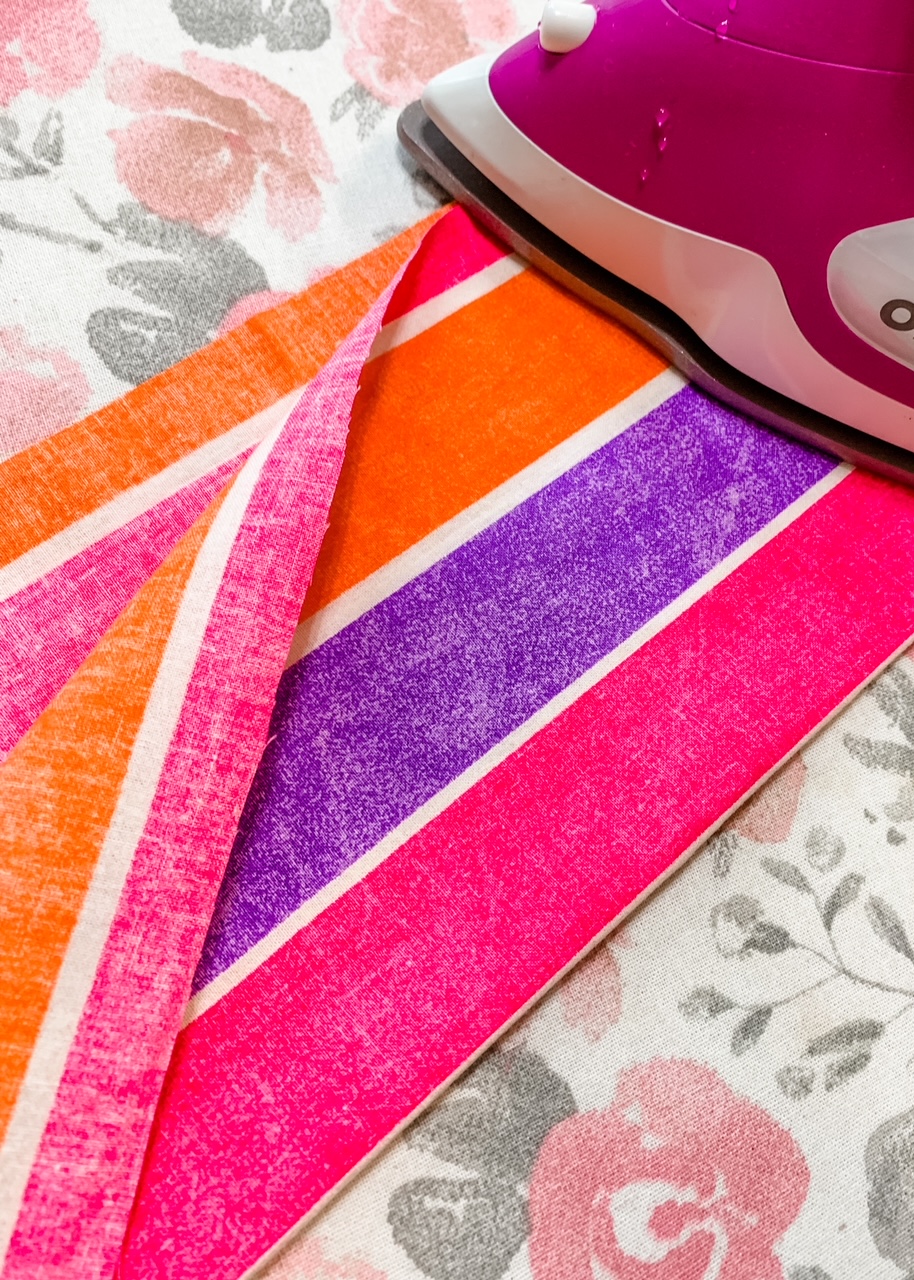
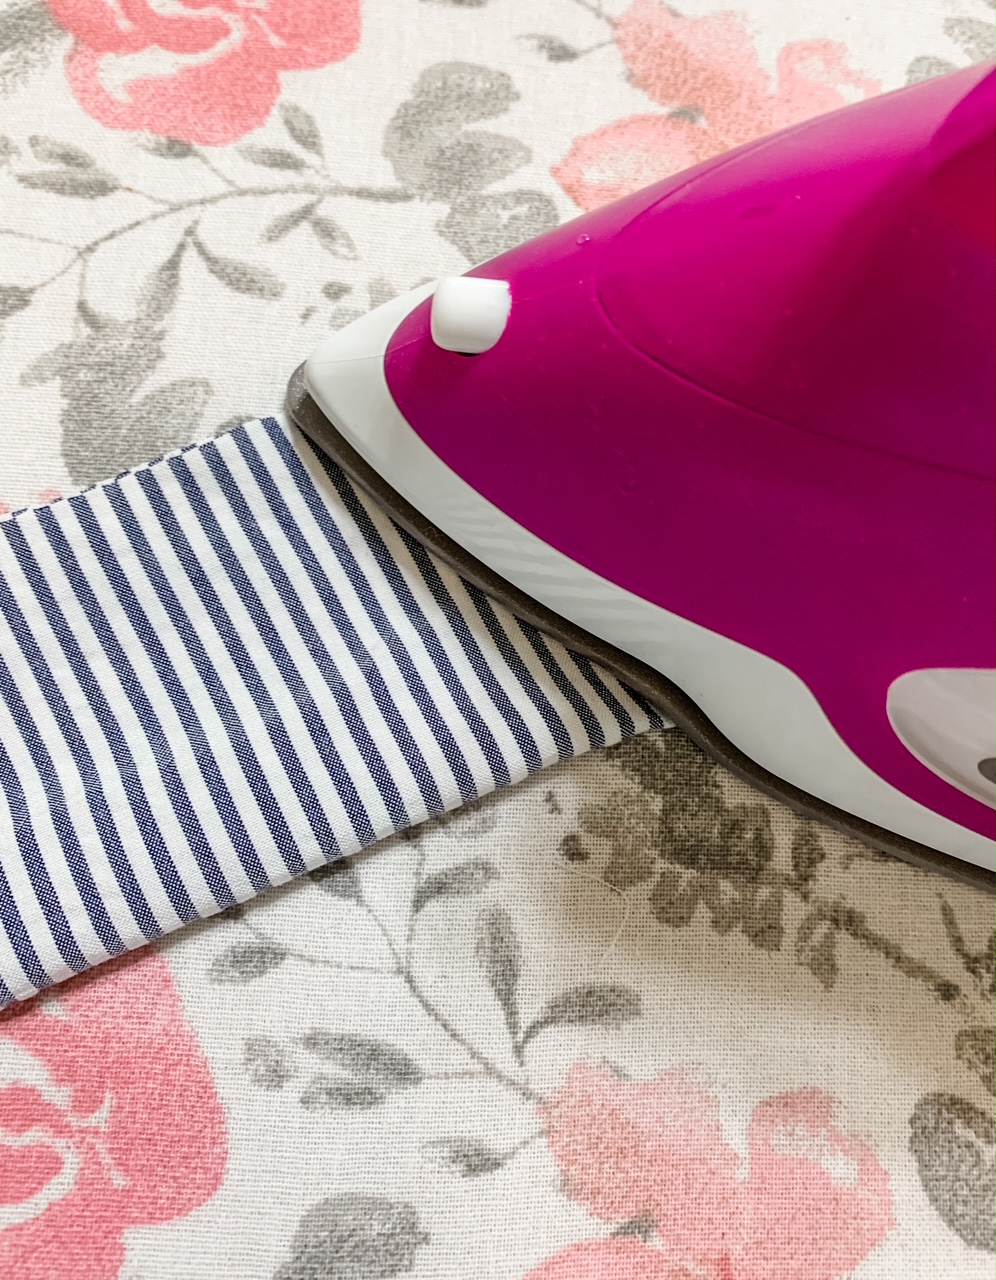
Fold each band in half lengthwise with wrong sides together and press.
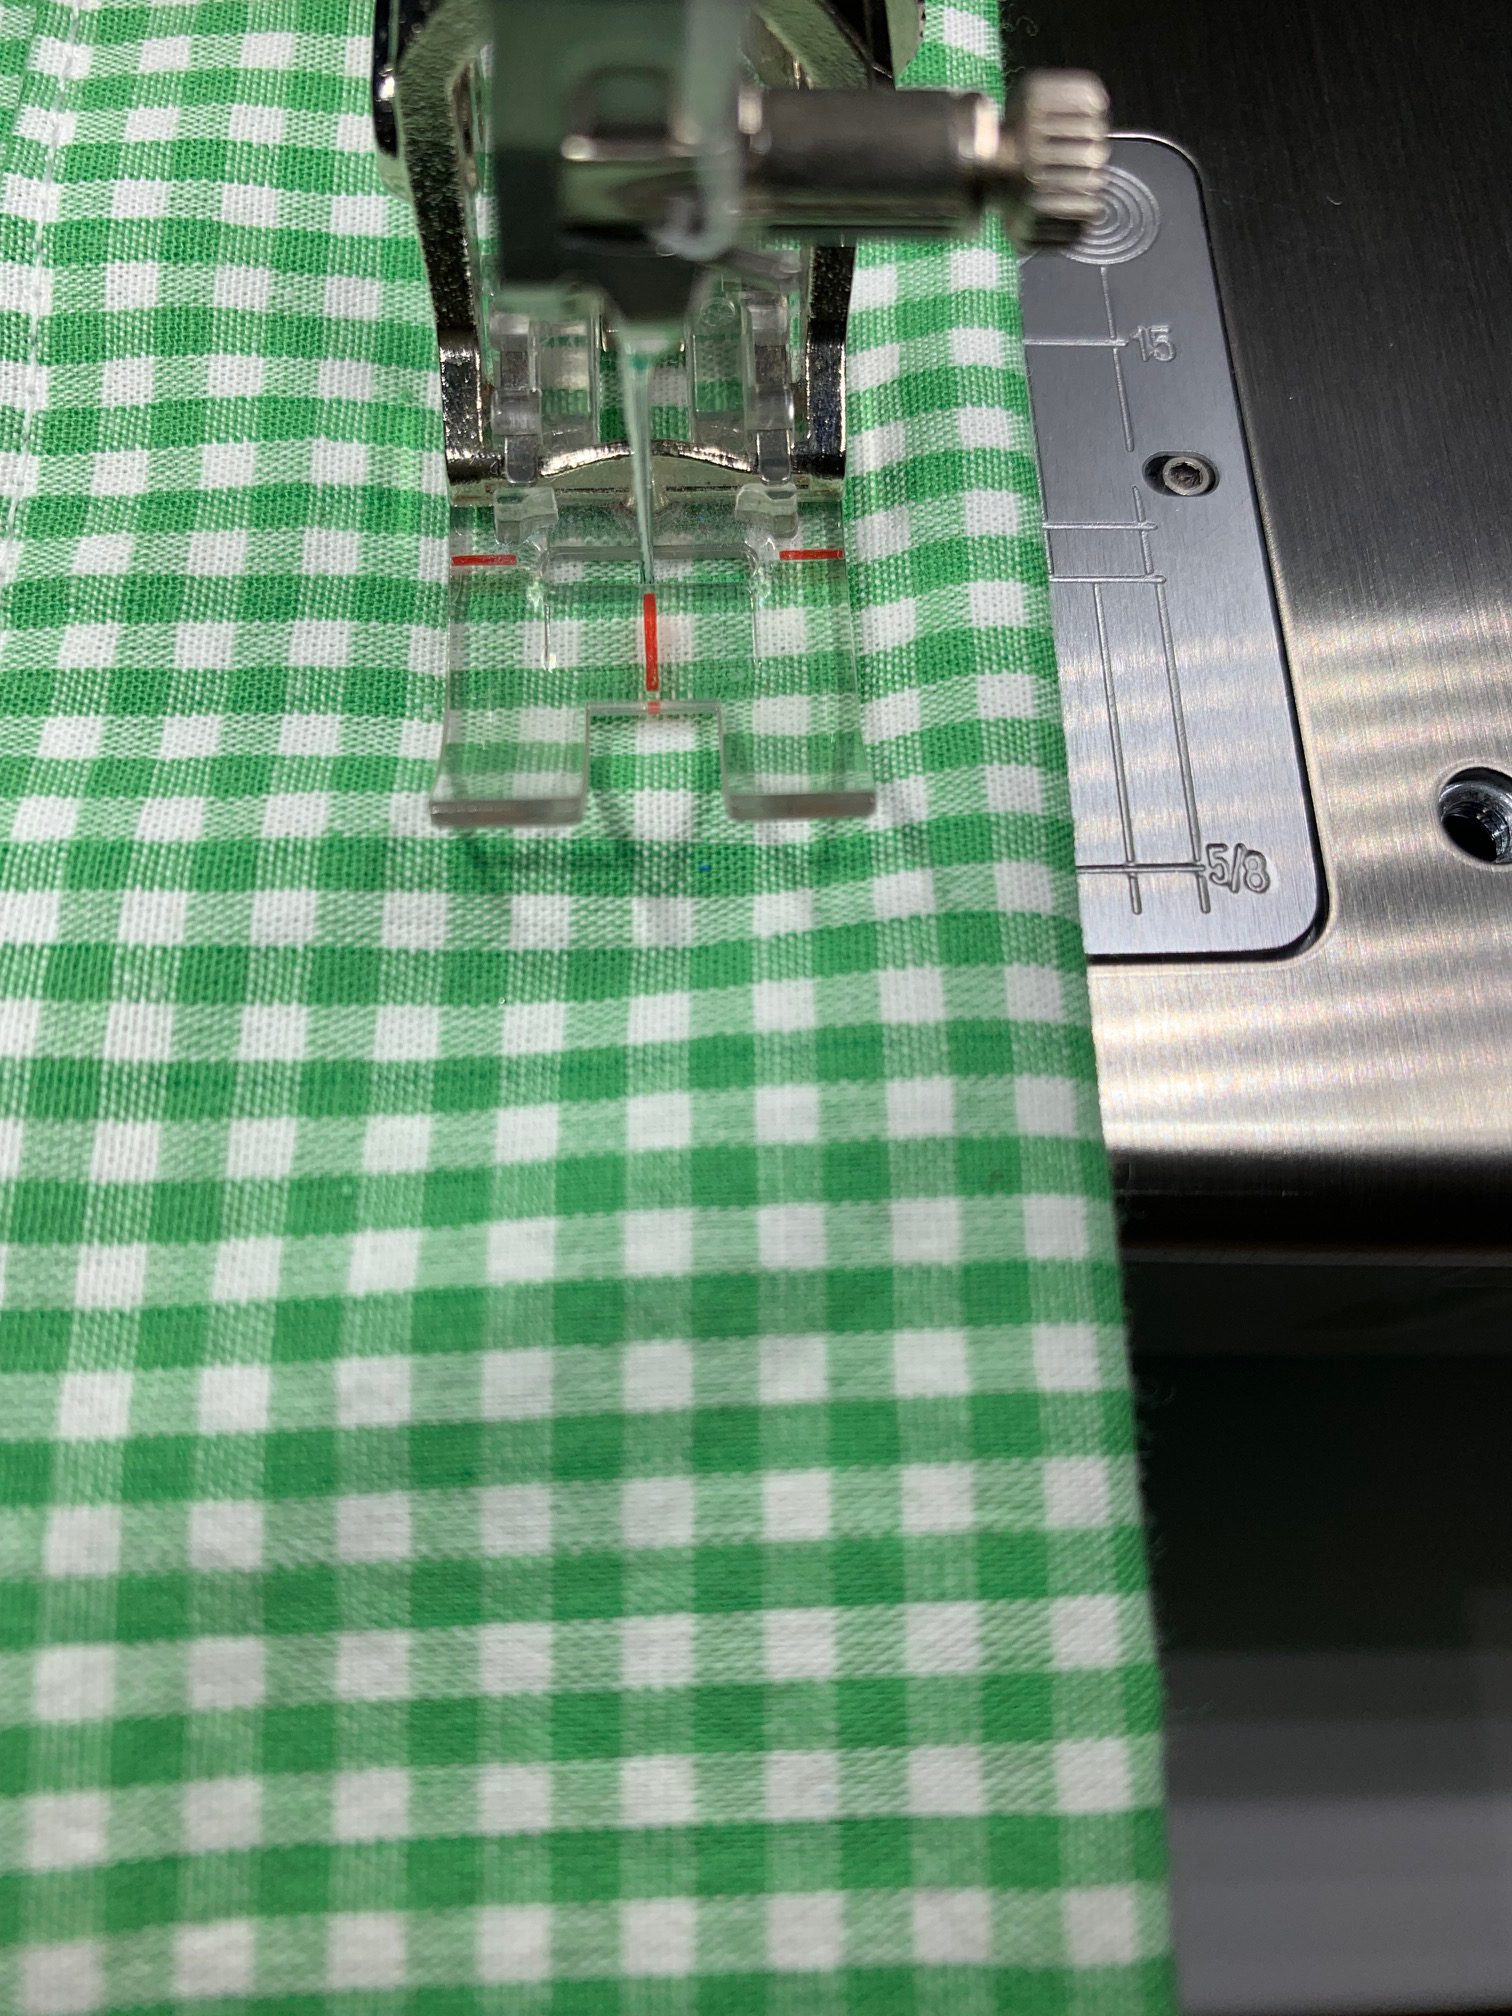
Place one shorts section right side up on a flat work surface. Align the raw edge of the band to one bottom edge of the shorts; pin and then stitch using a 1/2″ seam allowance. Finish seam as desired and press up toward the shorts. Repeat for the other shorts section.
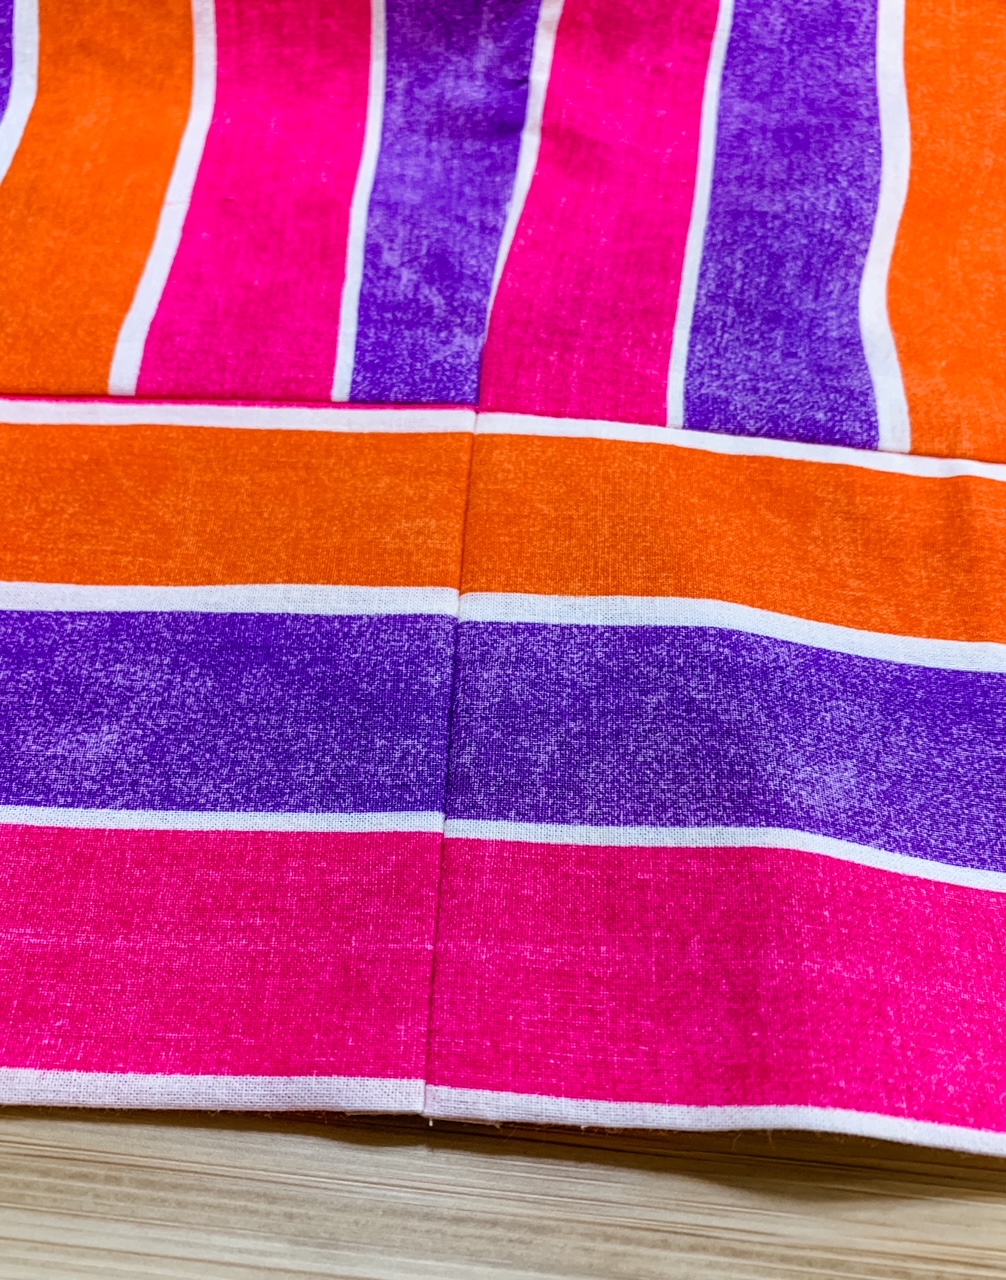
With right sides together align one front and one back side seam together making sure to match the bottom and seam of the band; pin and then stitch. Finish seam as desired and press.
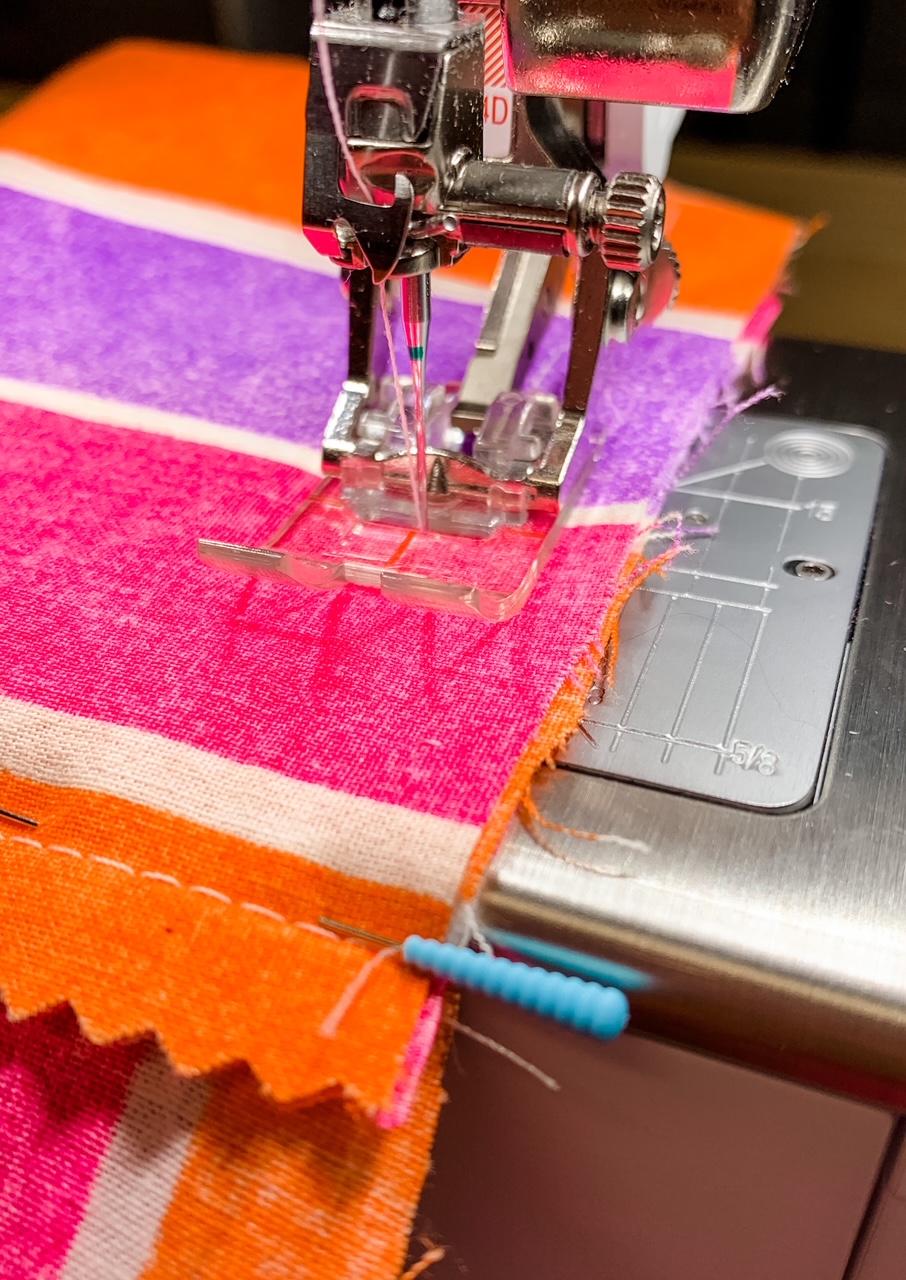
Because you took time to match the bottom and seam of the band before stitching, the band looks beautiful from the right side and is sure to draw admiring comments about your mad sewing skills!
Finish shorts according to the pattern instructions.
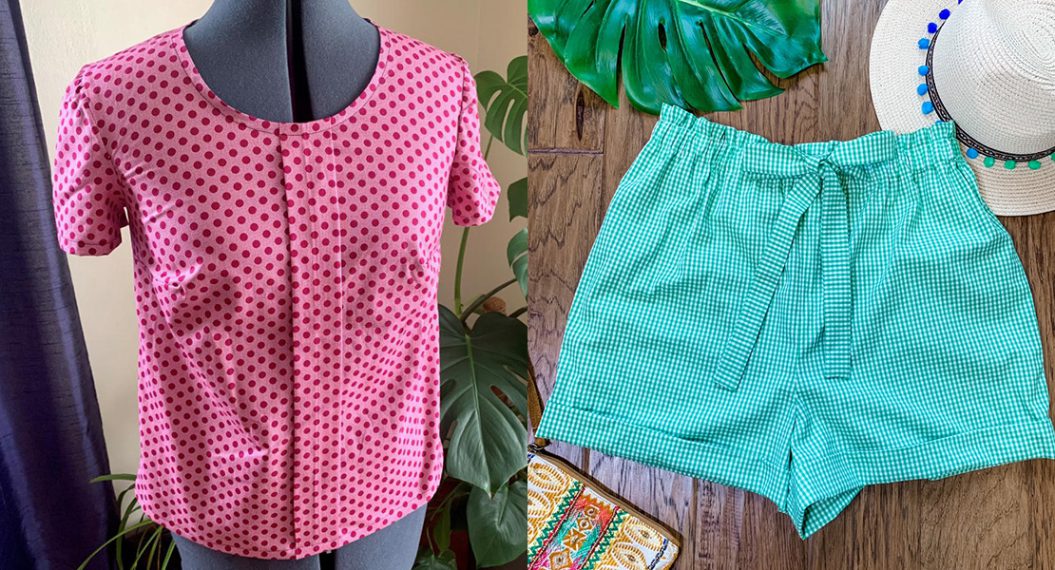
Add a Ruffle to the Bottom of the Shorts

A narrow ruffle on the bottom of the shorts is a simple and sweet details. Pair the shorts with your favorite summer shoe and a wide brim hat and you’re ready for any outdoor event.
Note: For the ruffles, you will need an additional 5” to 10” of fabric depending on the width of the fabric and the size of your shorts. You’ll determine the size of the ruffles below.
Note: The ruffle adds 2″ to the length of the shorts. If this is more than you want, shorten the inseam on your pattern before you begin.
Cut out your pattern pieces and sew the shorts following the instructions included with your pattern. Don’t forget to finish and press your seams.
When it’s time to hem the shorts, stop. This is when the hem ruffle is added.
Position one section of your shorts on a flat work surface, and measure the bottom width of the leg. Write down that number, multiply it by 2, and write down the new number. This is the width of the ruffle.
Note: If you want a ruffle that is not as full multiply by 1.5 instead.
Cut two pieces of fabric the ruffle width by 5” (height). If the total width needed is wider than the width of your fabric you will cut multiple pieces and stitch them together to create the desired width. Place the short edges together, right sides facing, and stitch using a 1/2” seam allowance creating one continuous loop. Press the seam open.
Fold each ruffle in half lengthwise wrong sides together and press.
Using a 3/8” seam allowance and a long gathering stitch (the longest straight stitch on your machine; on my machine that is a 6.0), stitch along the raw edge of each ruffle. Do not backstitch and be sure to leave a long thread tail at the beginning and the end.
Repeat to stitch a second row of gathering stitches 1/4” from the upper edge.

Fold the ruffle in half and mark with pins. Align the raw edge of the ruffle to one bottom edge of the shorts placing the ruffle seam at the inseam and the midpoint of the ruffle at the side seam.

Gently pull the bobbin threads to gather the ruffle to match the bottom edge of the shorts and pin in place.
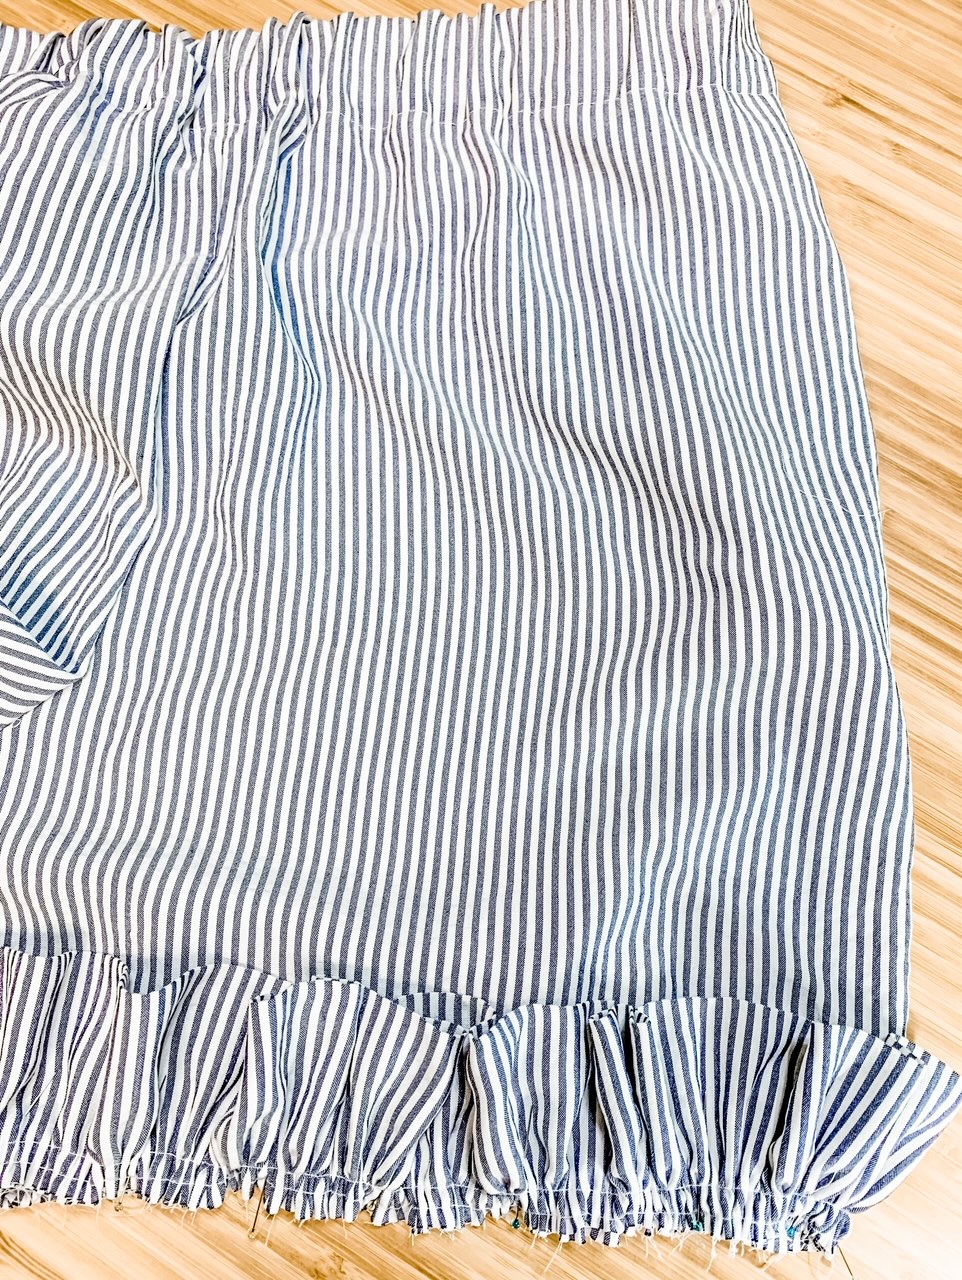
Stitch using a 1/2″ seam allowance. Finish seam as desired and press up toward the shorts. Repeat for the other leg opening.
Stitch in place from the right side using the Edgestitch Foot #10D.

Look at that topstitching! It’s easy to have even stitching when you use the #10D foot!

Note: For an extra special touch, instead of topstitching with a straight stitch, use one of the decorative stitches you have available on your machine!
Add a Cuff and Faux Tie Belt to the Shorts

Create a retro-inspired pair of shorts by adding a cuff at the hem and a faux tie belt at the waist.
Note: You will need an additional 11″ of fabric for the cuff, paper bag waist, and ties.
How to Modify Your Pattern to Add a Cuff and Paper Bag Waist
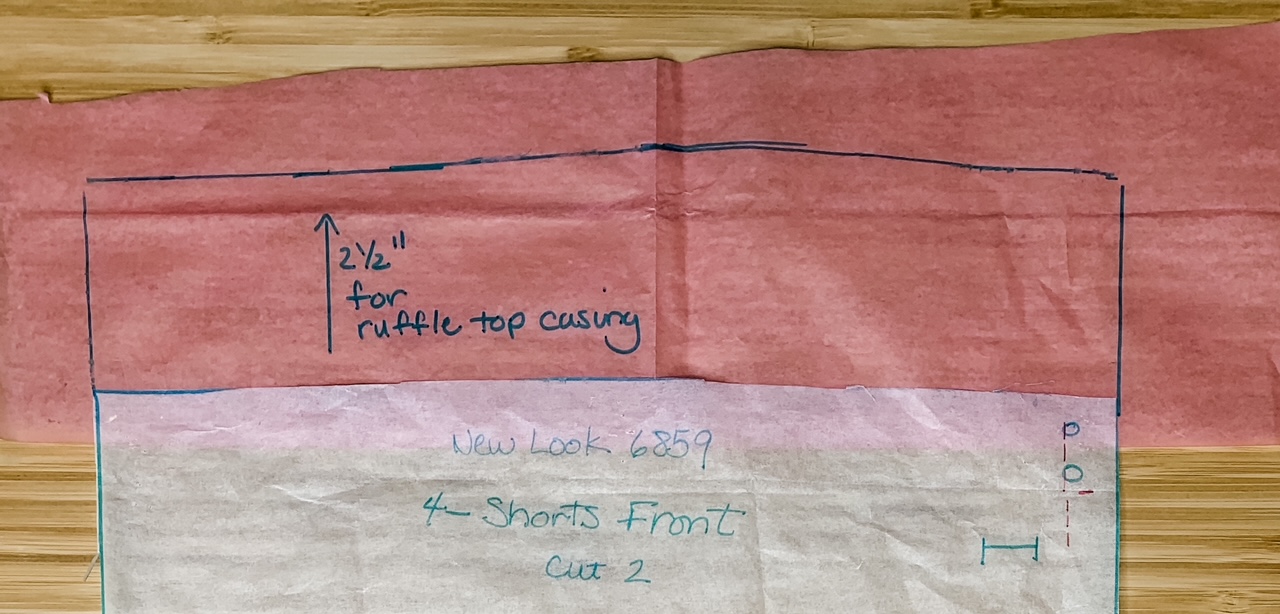
Before you cut out your pattern pieces, you’ll be adding length to the bottom for the cuff and to the top for the small paperbag waist detail.
Place the front pattern piece on a piece of tracing paper at least the width of the top edge. Tape in place. Measure 2-1/2″ from the top edge and draw a line. Repeat for the back pattern piece.
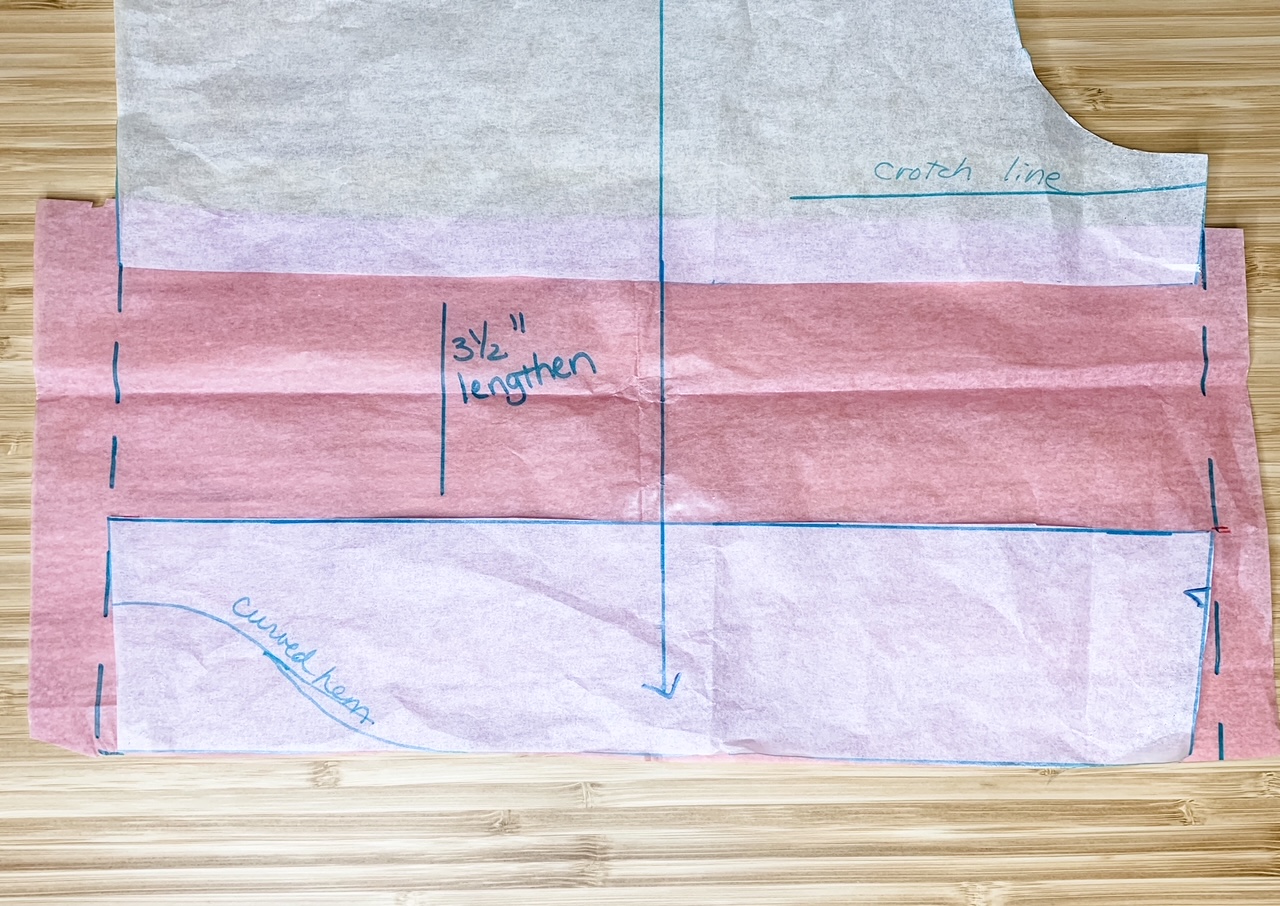
On the front pattern piece, draw a horizontal line 3″ above the hem edge of the pattern. Cut along the line.
Place paper underneath the pattern and spread the pattern piece 3-1/2″ making sure the lines remain parallel. Tape in place. Redraw the seam line, straightening it (as shown in dashed lines below) if needed.
Sew the shorts following the instructions included with your pattern. Don’t forget to finish and press your seams.
When you’re ready for the elastic casing follow these instructions:
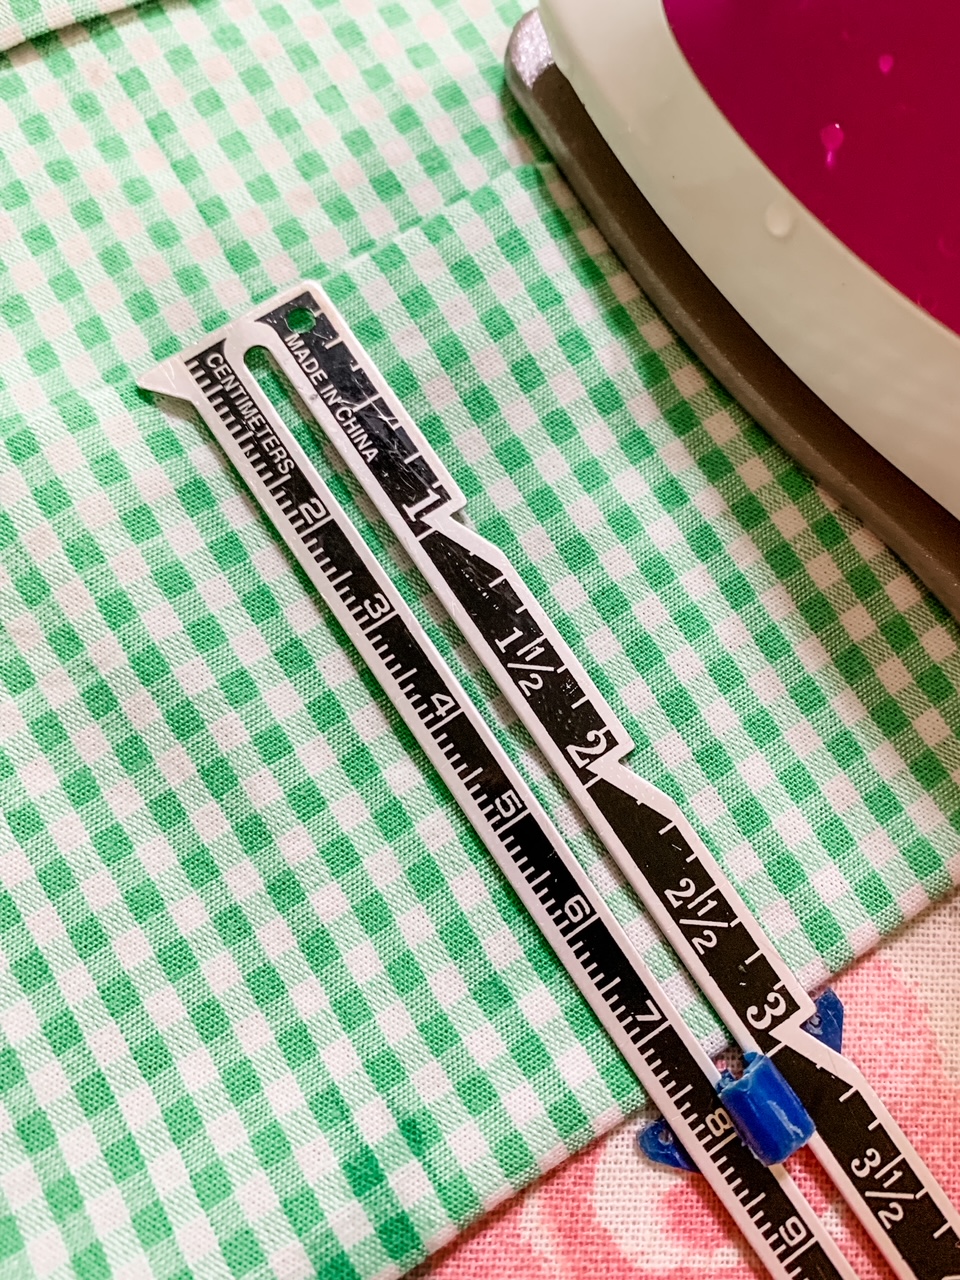
On the upper edge of the shorts, press under 1/4″ to the wrong side and press. Turn under another 2″ to the wrong side and press. Stitch in place leaving a 3″ opening at the center back to insert elastic. Stitch another row of stitches 3/4″ from the upper edge starting and stopping at the center back seam.
Insert the elastic into the casing per the pattern instructions. Continue following the pattern instructions until you are ready to hem the shorts.
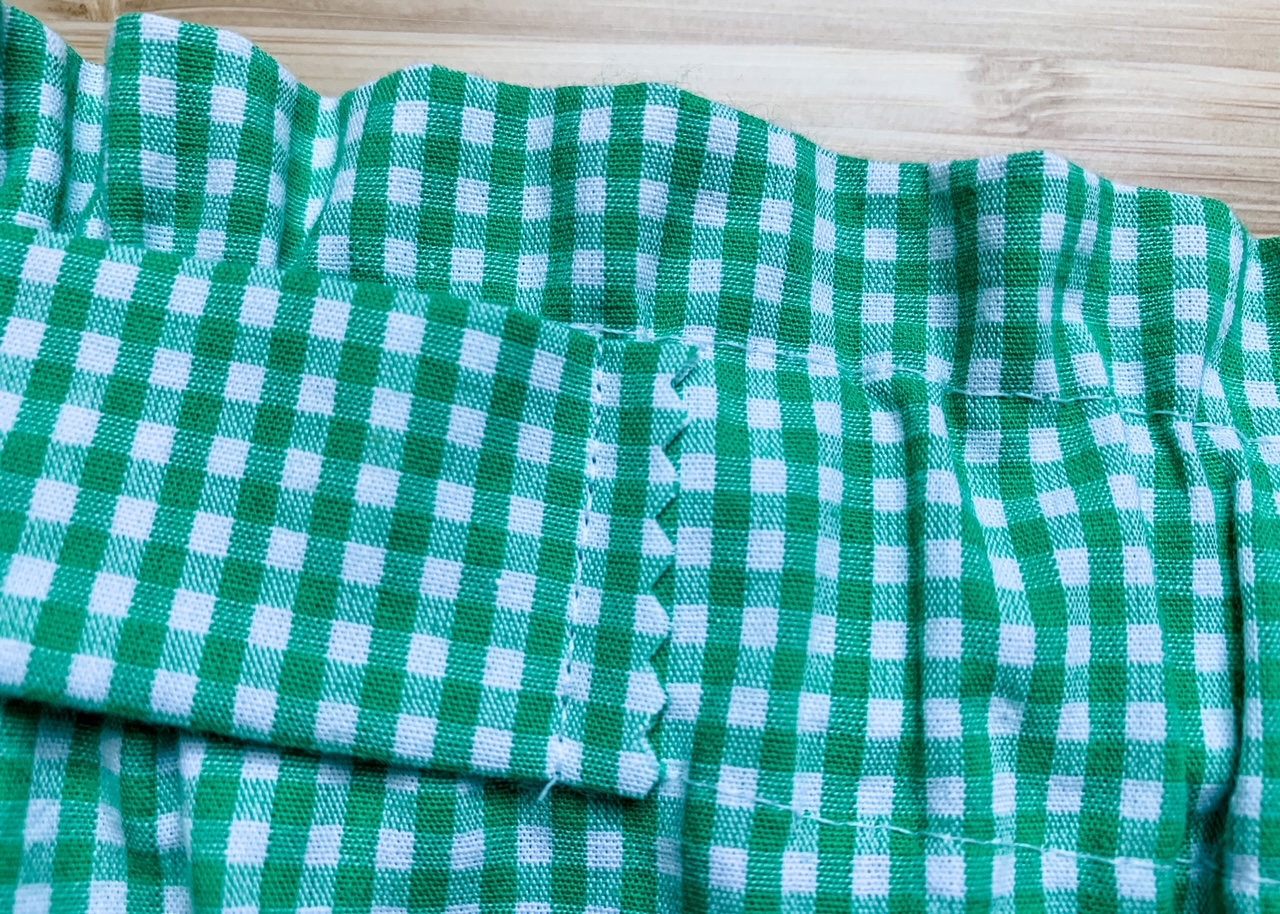
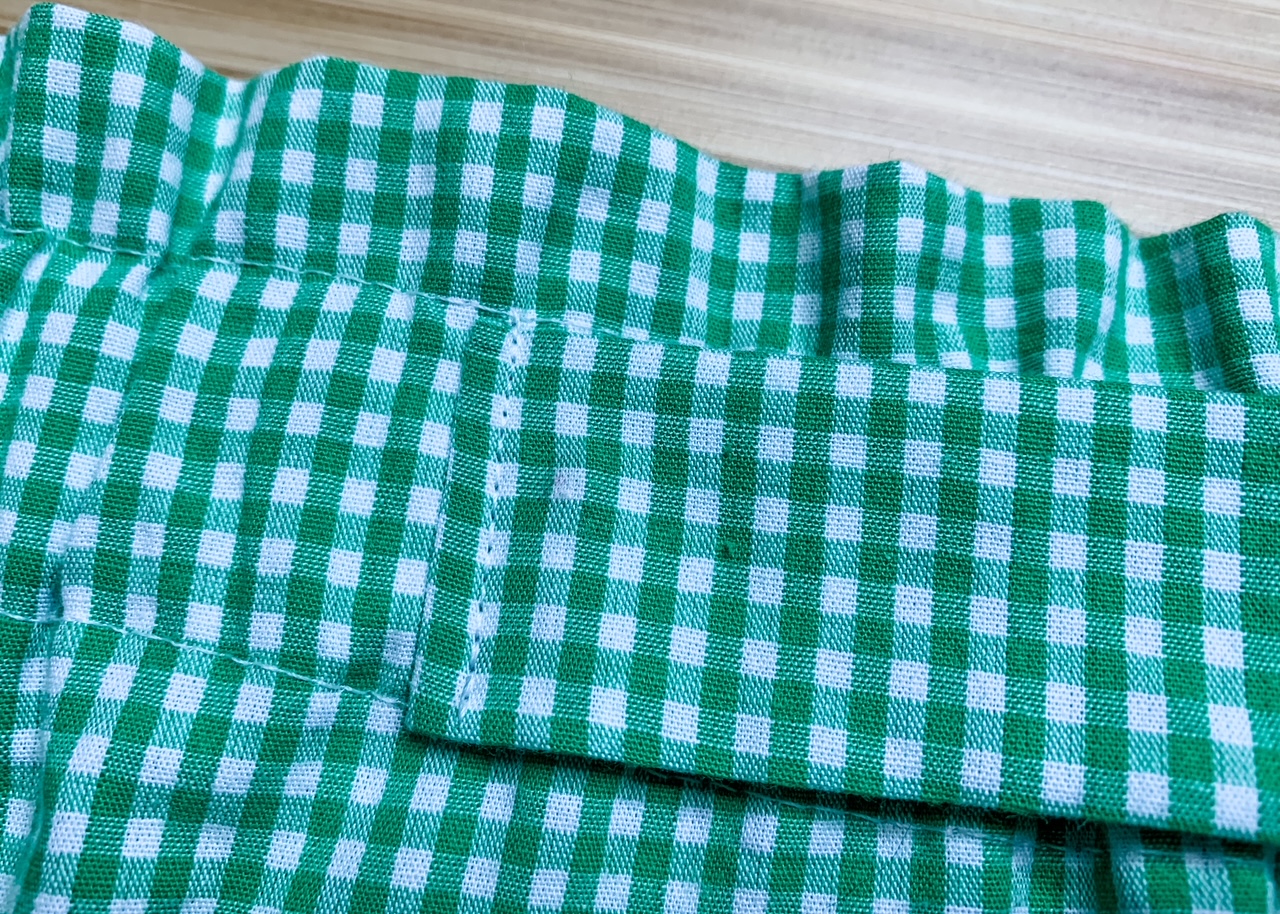
Create the cuff by turning 1/4″along the hem edge to the wrong side and press. Turn under another 3″ to the wrong side, press, and stitch in place.
At the hem edge, fold up 1-1/2″ to the outside and pin in place.
Note: If you want a defined line at the bottom of the cuff, press the cuff now.
Stitch in the ditch along the inseam and side seam to secure the cuffs.
Add the Faux Tie Belt
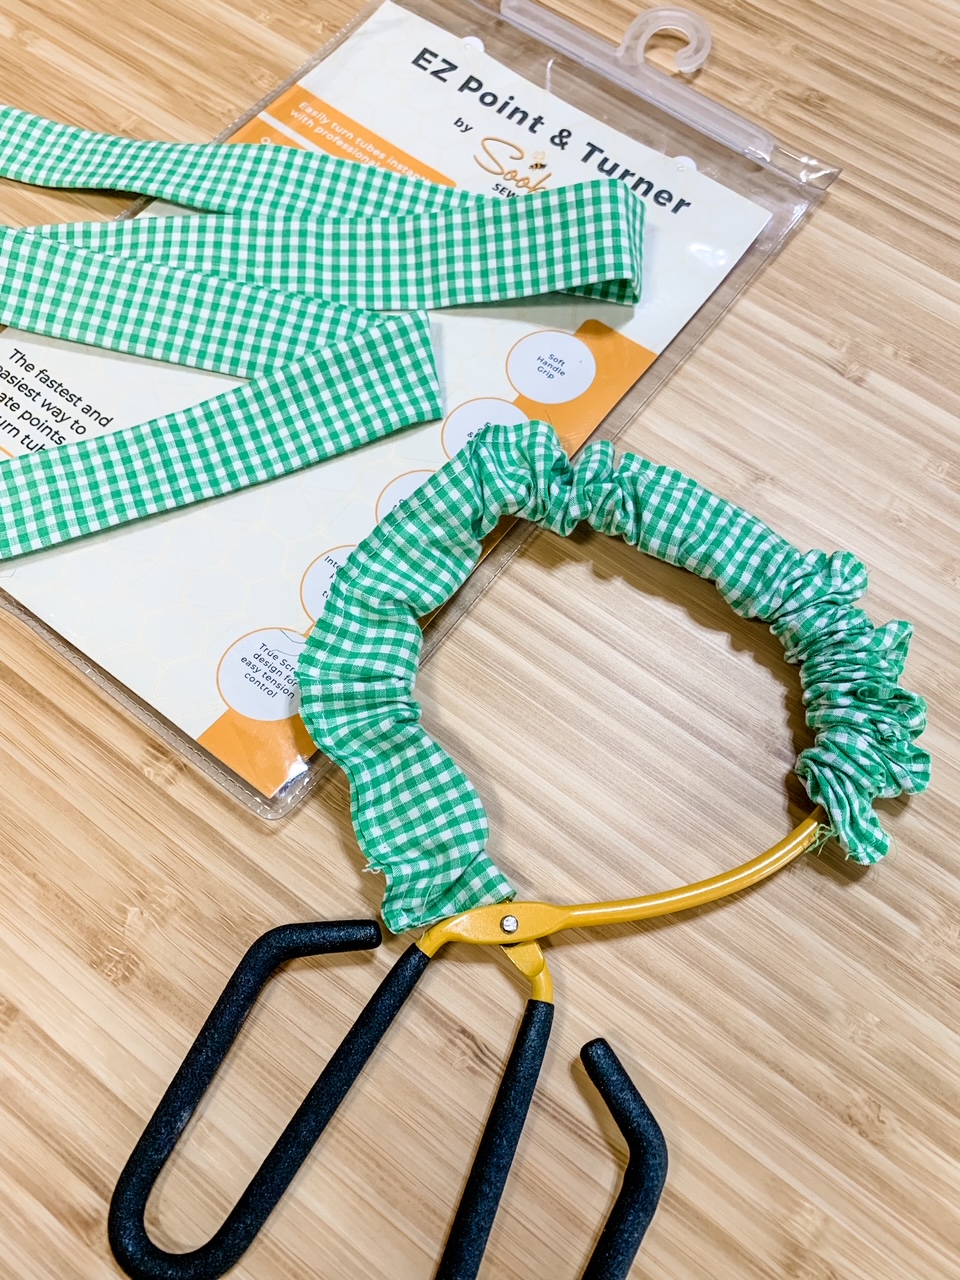
Cut two pieces of fabric 24″ x 2-1/2″. If you want a longer tie belt cut your fabric longer than 24″.
Fold in half lengthwise, right side together, and stitch along the long end and one short end using a 1/4″ seam allowance. Leave one short end open for turning. Turn right side out and press.
Brewer Sewing provided this Sookie Sews EZ Point & Turner for me to use. With this tool, I was able to turn the tie ends quickly.
On the shorts, mark 3″ to the left and 3″ to the right of the center front seam along the casing. I like to use a straight pin to mark this.

Place the raw edge of one tie end on top of the mark; pin and stitch in place using a 1/4″ seam allowance. I used a pinking shears to finish the end of the tie, but you don’t need to as it will be enclosed in the next step.
Fold the tie end toward the center of the shorts, along the line you just stitched; pin and stitch in place.
Tie a bow at the center front.

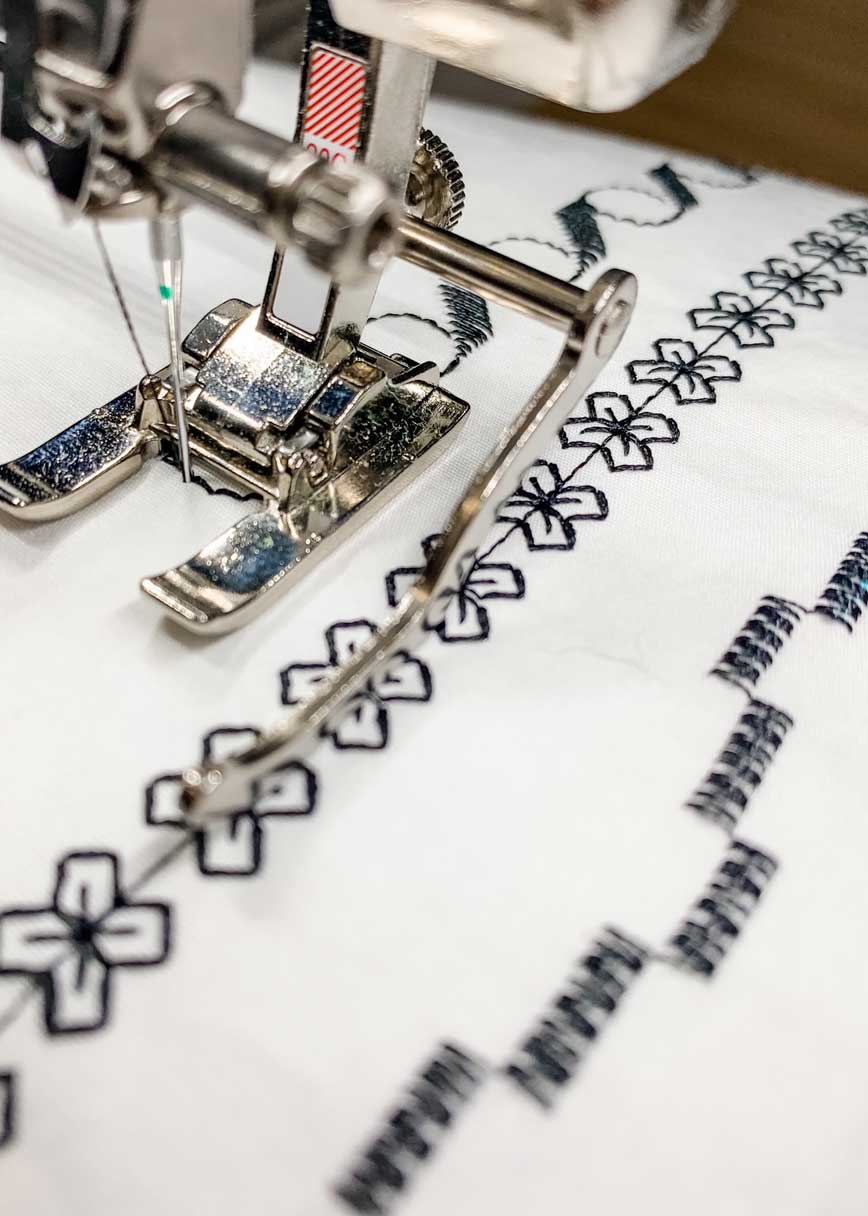
Use Decorative Stitches as a Design Detail on the Shorts
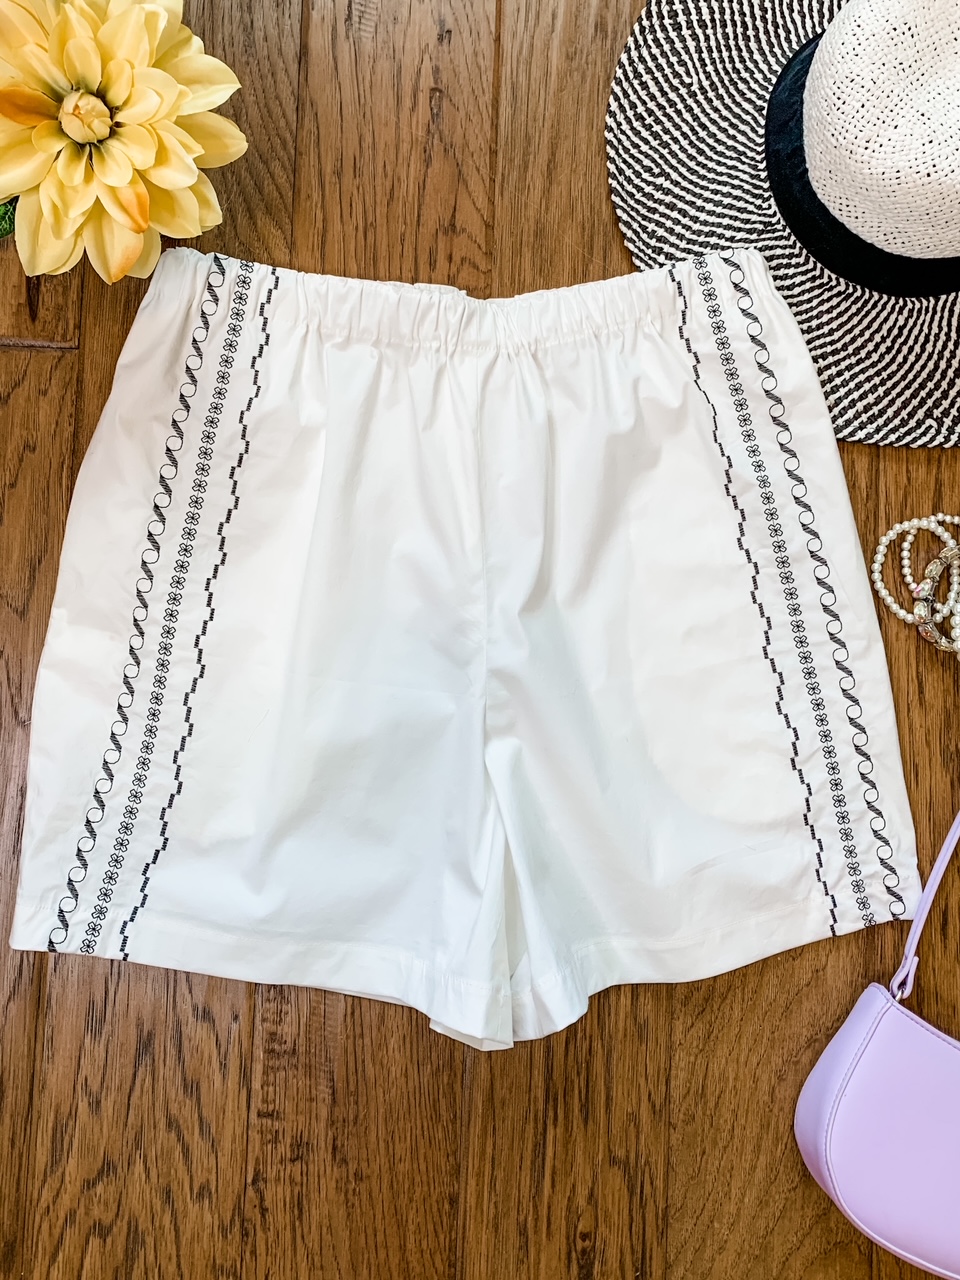
Use three lines of decorative stitches to transform a simple pair of white shorts to wow shorts! The black on white really helps the design pop.
Note: I lengthened the pattern for these shorts by 2″ before I began sewing.
The decorative stitches are added before the shorts are sewn together. After your pattern pieces are cut out, set aside the back pieces.
These shorts have three lines of decorative stitches, each a different stitch, starting 8″ from the center front of the shorts.
The first step is to draw a guideline to use for the first line of stitches. Test your removable marking pen or pencil before marking the guideline to make sure it can be removed from your fabric.
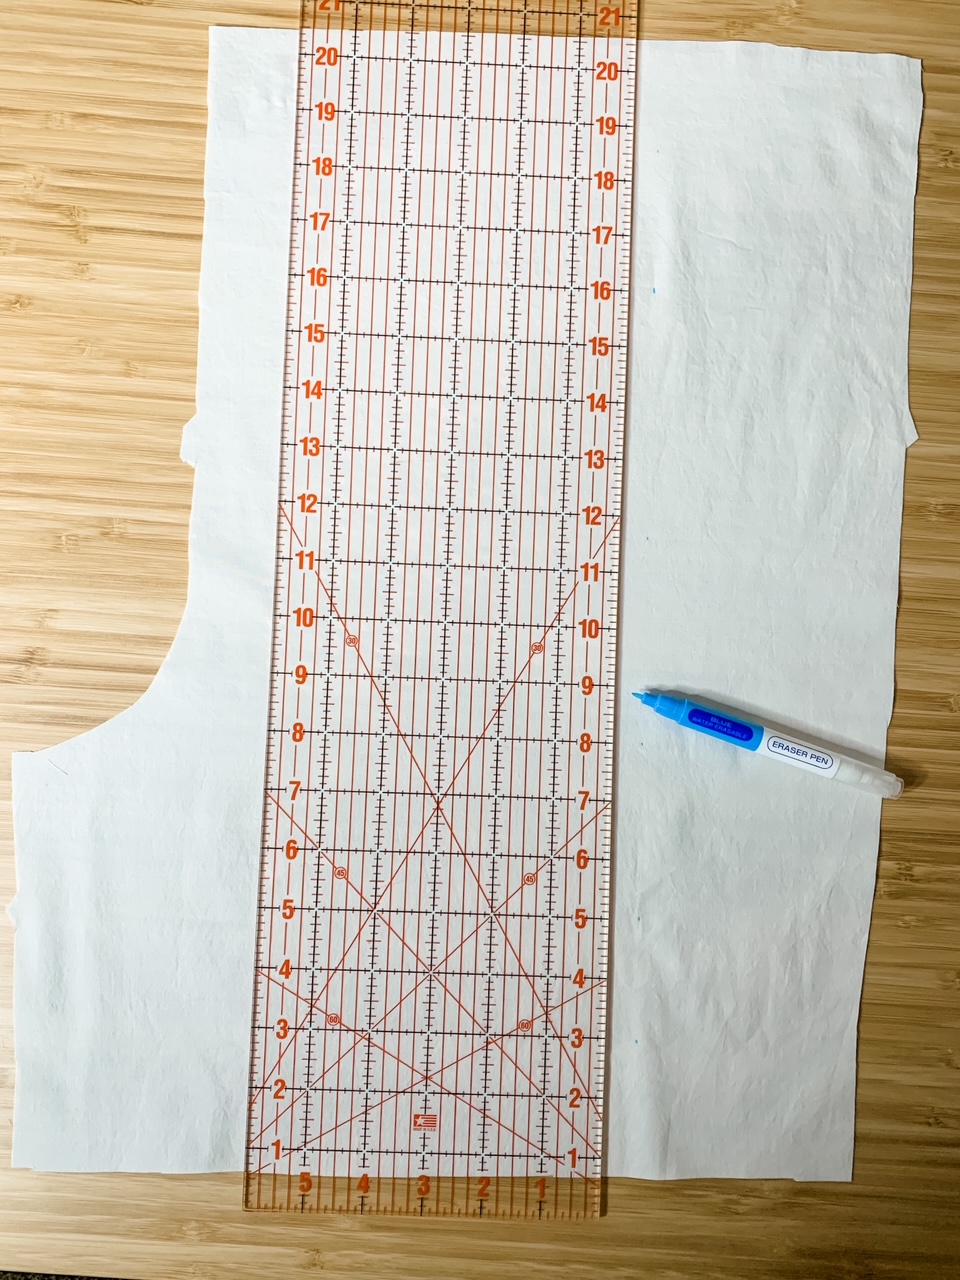
Place one of the front shorts pieces right side up on a flat work surface.
Starting about 4″ from the top, measure 8″ from the center front and make a mark using a removable fabric marker (or straight pin if you’re concerned about not being able to remove the marking from your fabric).
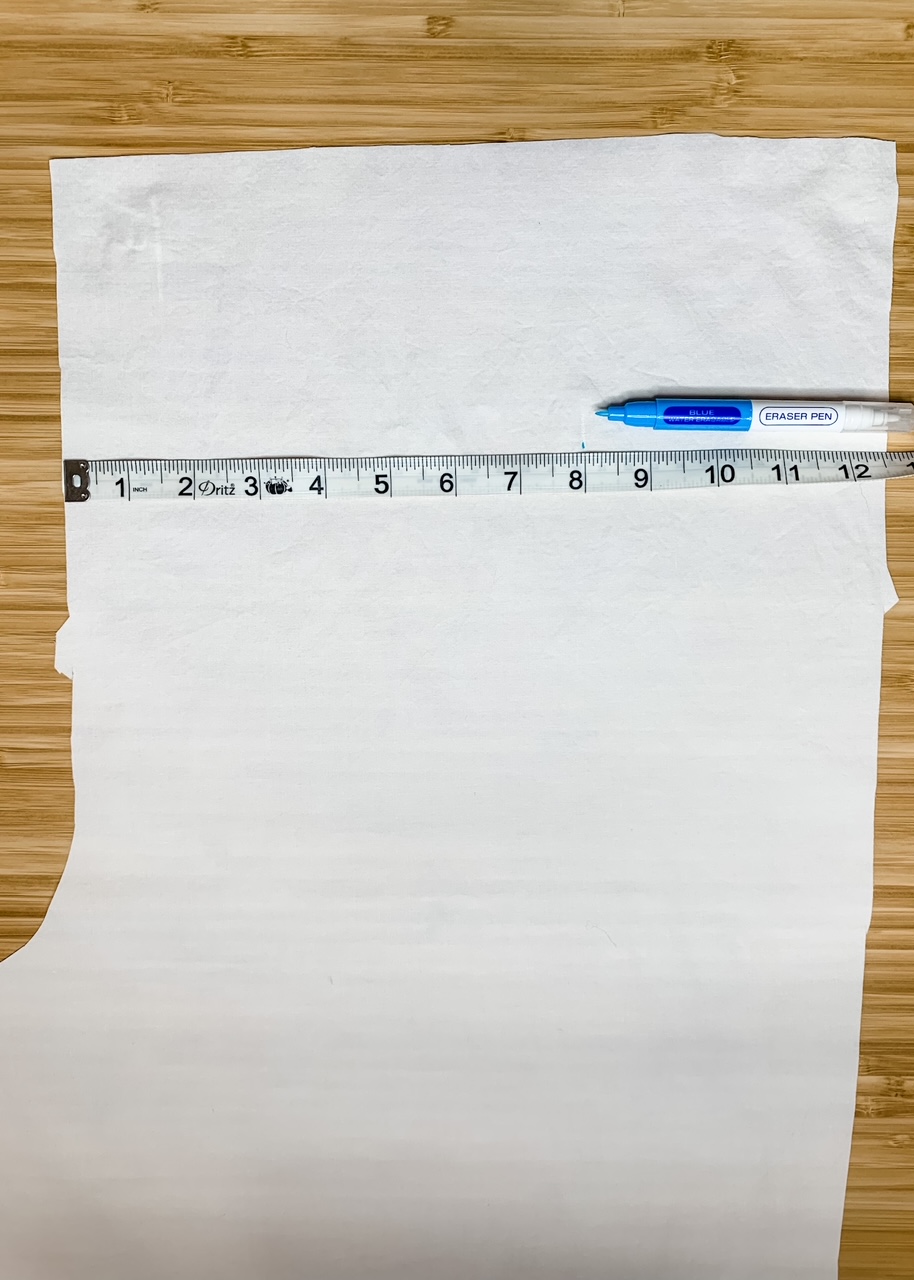
Move down another 4″ and make another mark 8″ from the center front. Line up the two marks along the edge of a ruler. Lightly draw a line along the ruler using a removable marking pen. This will be the guideline for the first line of stitches.
Place stabilizer on the back side of the front shorts making sure it is under the guideline. The stabilizer will provide support for the stitches.
Thread your machine with contrasting thread for the decorative stitches. I used black Mettler Poly-Sheen thread designed for embroidery and decorative stitches. I used the all-purpose Mettler Metrosene thread in the bobbin.
Change your pressure foot. I used the Open Embroidery Foot #20 C The wide opening at the front of the foot lets me clearly see my stitching area and the slight indentation on the sole allows the fabric and stitches to feed evenly.
Stitch a sample of your chosen decorative stitches on your fabric (with stabilizer) to evaluate how it will look on your shorts.
Choose your first stitch. On my BERNINA 770 QE Plus, I started with stitch #422 and elongated it to 200%.
Starting about 1/2″ from the top, stitch your first line ending about 1/2″ from the bottom. The start and end of the stitches will not show as they are in the casing and hem allowances.
I used stitch #644 as my second stitch. Stitch the second line 3/4″ away from the first line going toward the side seam.
For my third stitch I selected #447, stitching it 3/4″ away from my second line going toward the side seam.
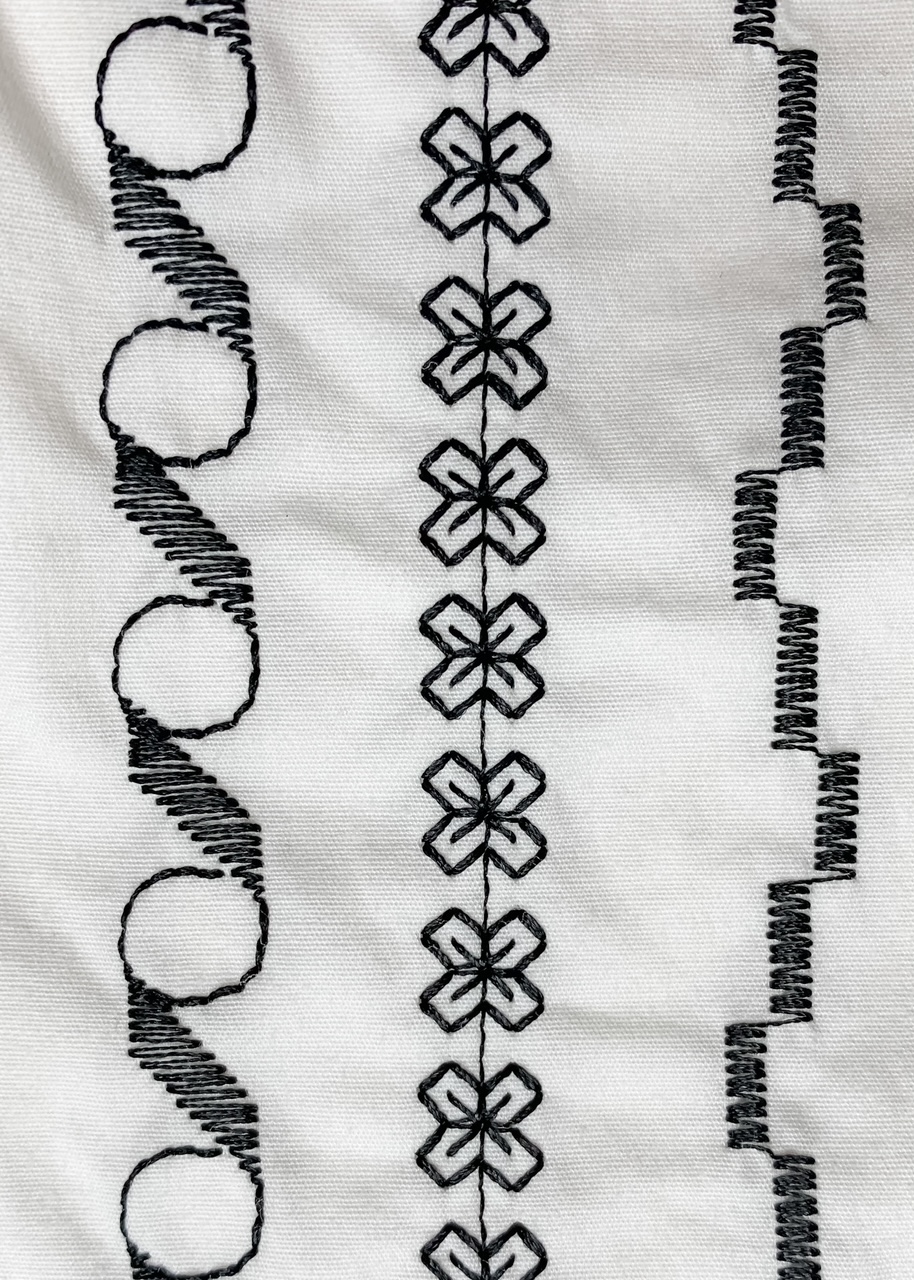
I used a seam guide to keep my seam spacing perfectly parallel.
I found adding the decorative stitches to be fun and relaxing! As you are the designer of your shorts feel free to continue to add as many additional lines of decorative stitches as you want!
Once you’ve added your decorative stitches, finish sewing the shorts following the instructions provided with the pattern. Remember to finish and press your seams!
I’ve shown you four ways to easily change your pajama shorts pattern into wearable summer shorts. Which one is your favorite?
When you sew your shorts using any of these pattern hacks, be sure to tag us (@thesharonsews and @berninausa) so we can see your beautiful makes!
Happy Sewing!
Used Products


What you might also like


2 comments on “One Pattern Four Ways: Easy-to-Sew Summer Shorts”
-
-
What a well written reminder of what we can do to use our machines!
Leave a Reply
You must be logged in to post a comment.

I watched your YT vlog and forgot to come check this article out. So glad they included in the newsletter. What great variations for a basic shorts pattern!