Pleated Top Sewing Tutorial
Hello there. I am Daniela from On the Cutting Floor. I am here today to share how to make an easy pleated top for women. The pattern is a loose fit top with pleats on the neckline area. This creates an easy to wear, sleeveless top. Ideal to add to your spring-summer wardrobe. Match this top with a pencil skirt or a pair of jeans and you will feel ready for the season!

Pattern Details:
Sewing Level: Intermediate
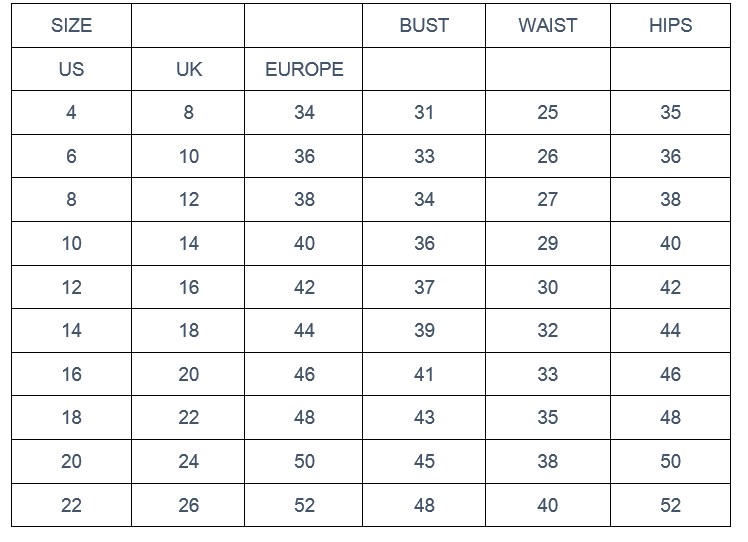
Sizes: From 4 to 22
Materials to make a Pleated Top
- Fabric yardage guide:
45” folded fabric: Size 4 to 22, 1.45 yard
60” folded fabric: Size 4 to 14, 0.71 yard
Size 16 to 22, 1.45 yard
Recommended Fabrics: Denim, Chambray, Shirting, Crepe, or Linen
- Coordinating cotton thread
- Topstitching thread (optional)
- Double fold Bias tape (1 yard)
- Sewing Machine (I use a BERNINA 350 PE)
- Blindstitch foot #5
- Pleated Top Pattern (contains a PDF downloadable pattern for A4 and Letter page format)

How to print the pattern.
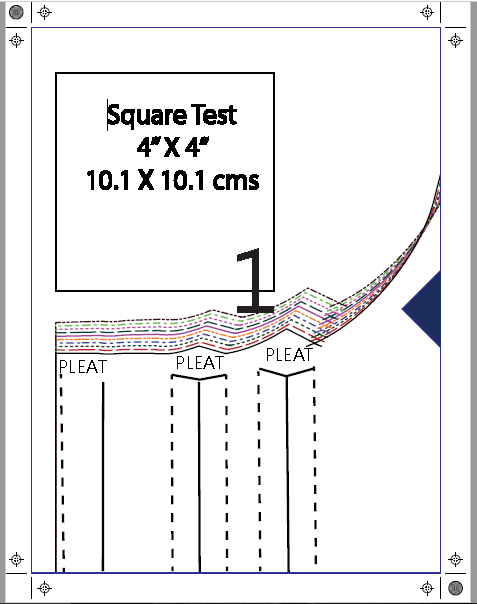
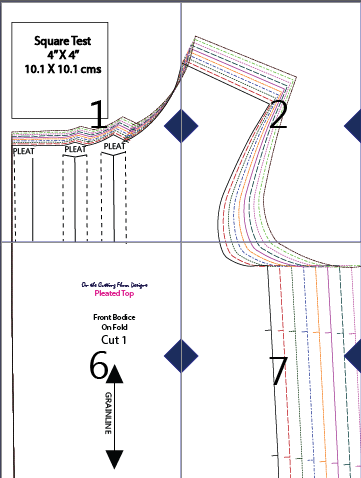
Please notice that this is the chart you will use to choose the correct size for the pattern you need. It is not the finished measurement chart.
How to sew the Pleated Top
PLEASE NOTE: The pattern includes a 3/8 inch seam allowance. I have used contrasting color thread so it is easier to see on the images. You may want to use a coordinating color thread for your project.
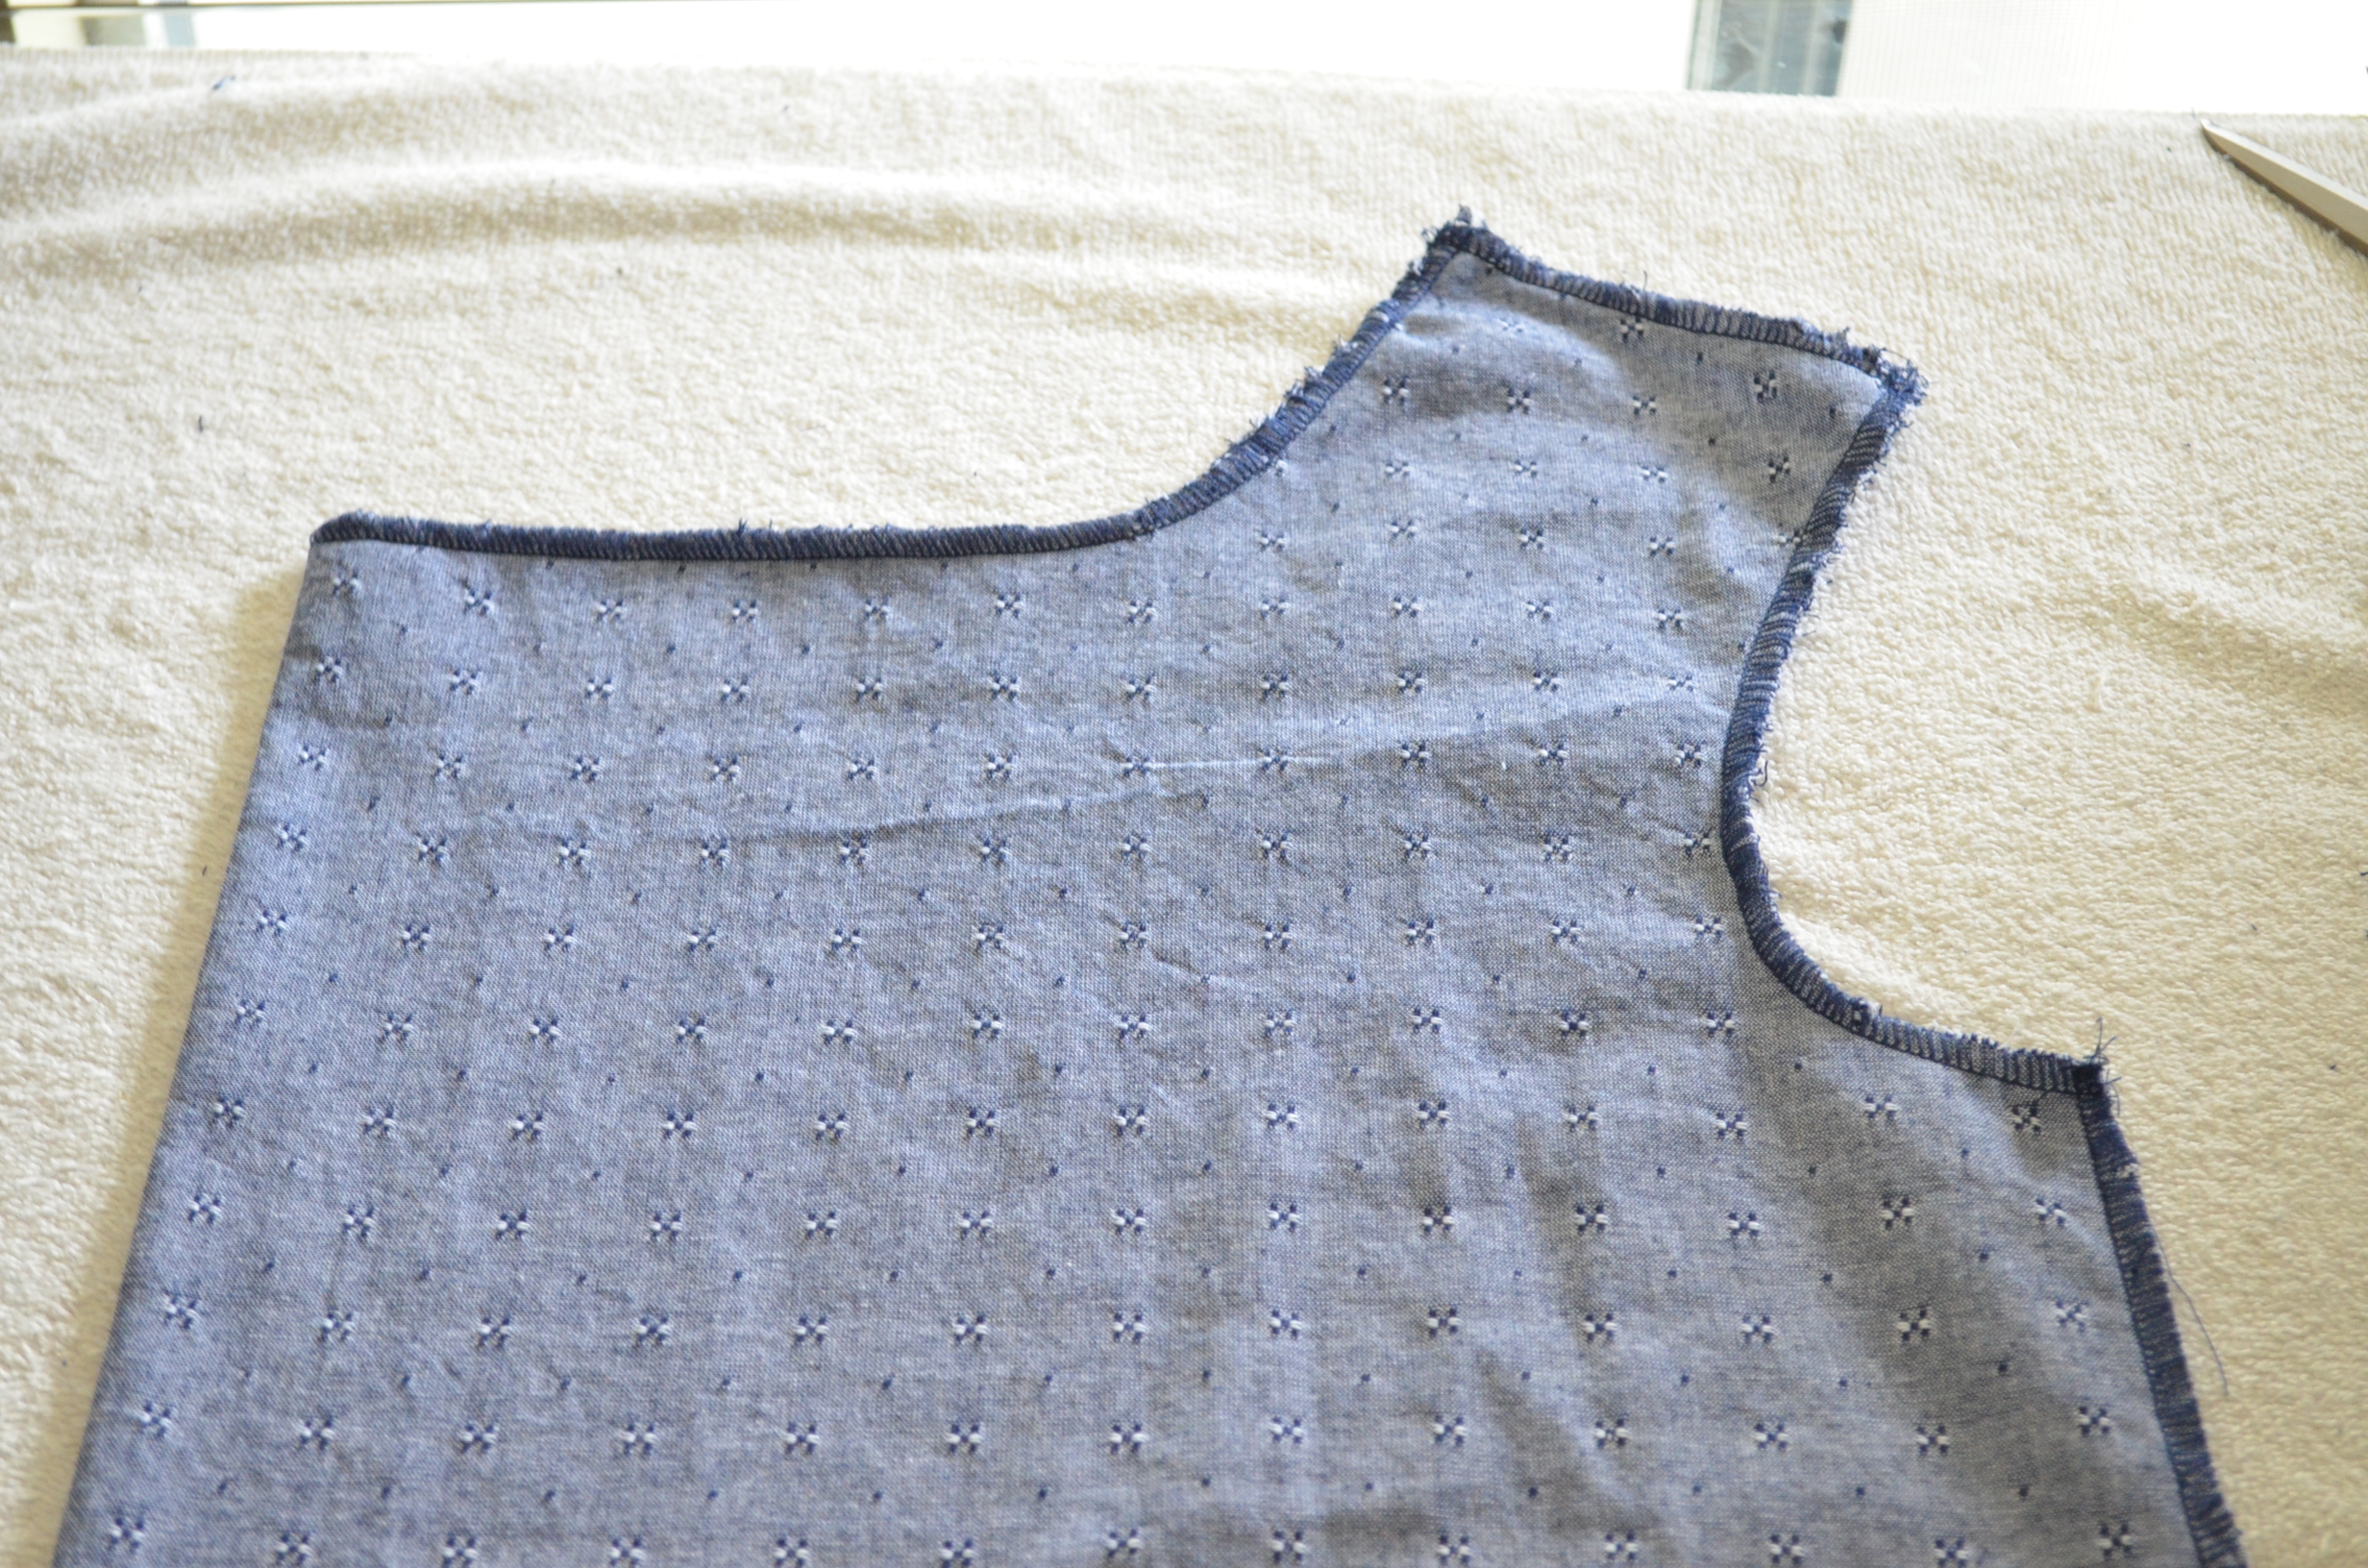
1. Prepare the edges of the pattern pieces to reduce unraveling. There are different methods to do this.
Serge the edges: If you have a serger, this will be a convenient and fast way to do it.
Use your sewing machine: You might want to use your sewing machine to prevent the edges from unraveling; use a zig-zag stitch or an overlock stitch.
Use pinking shears to cut the edges.
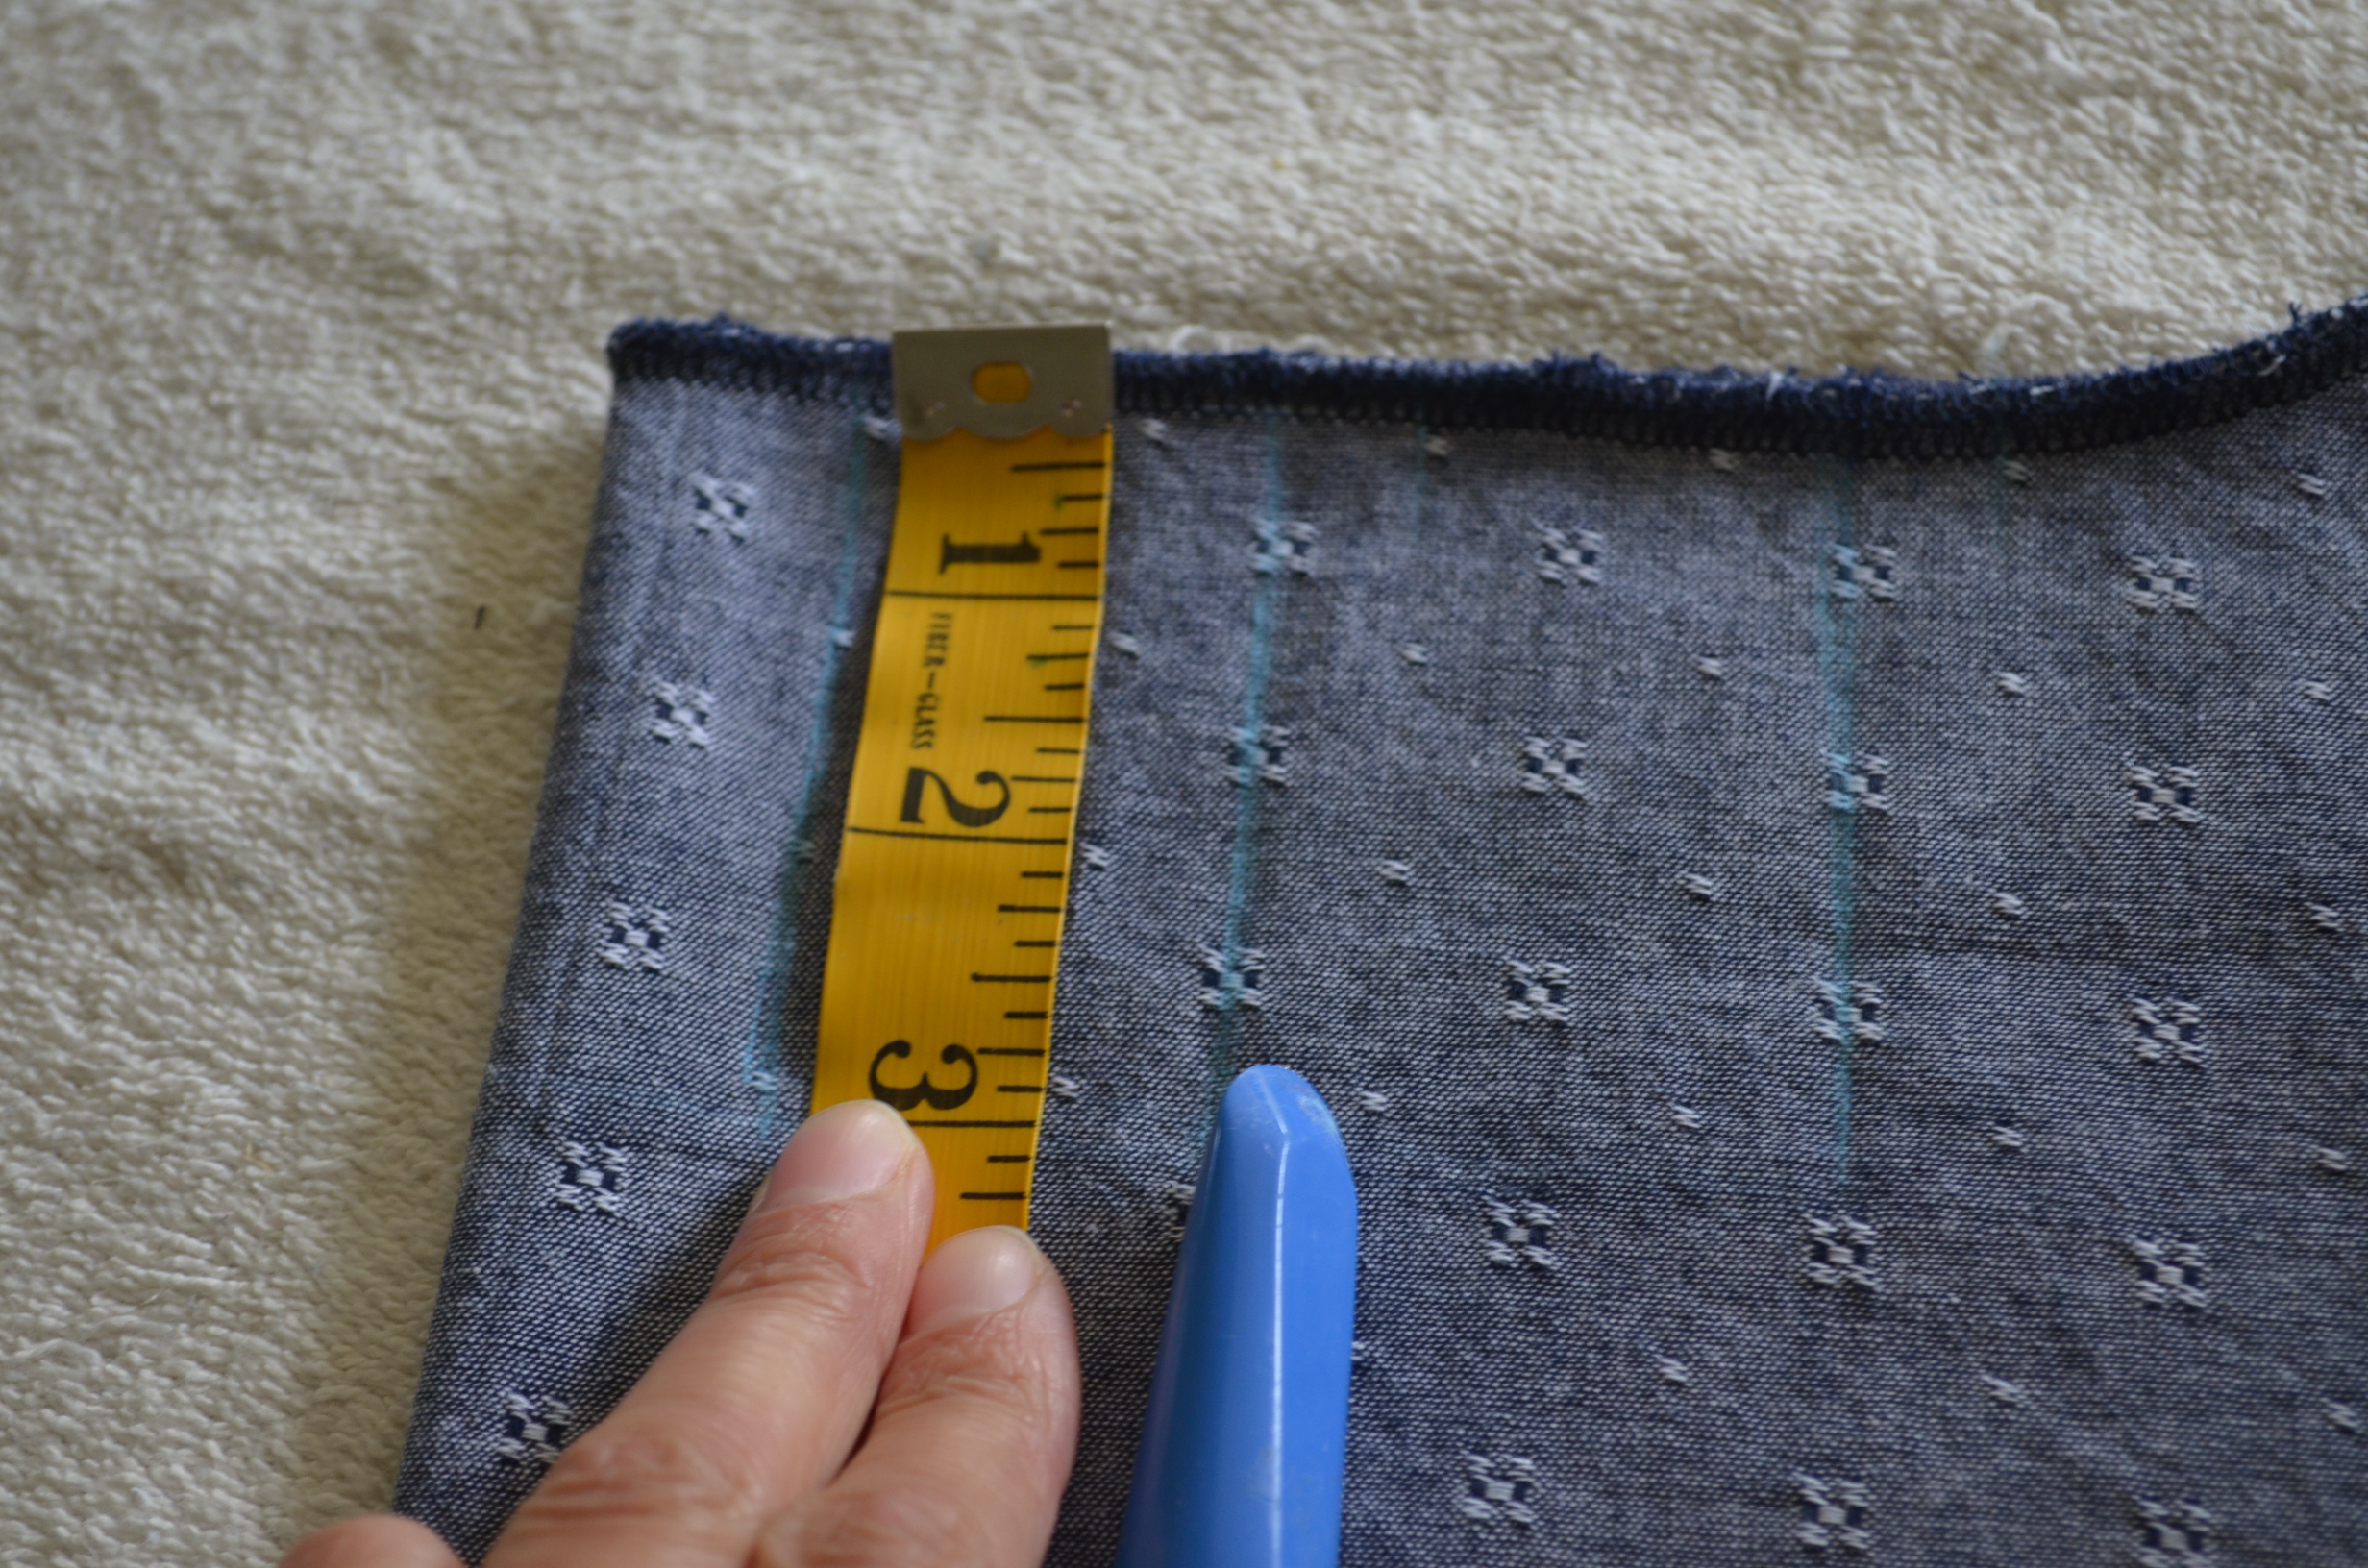
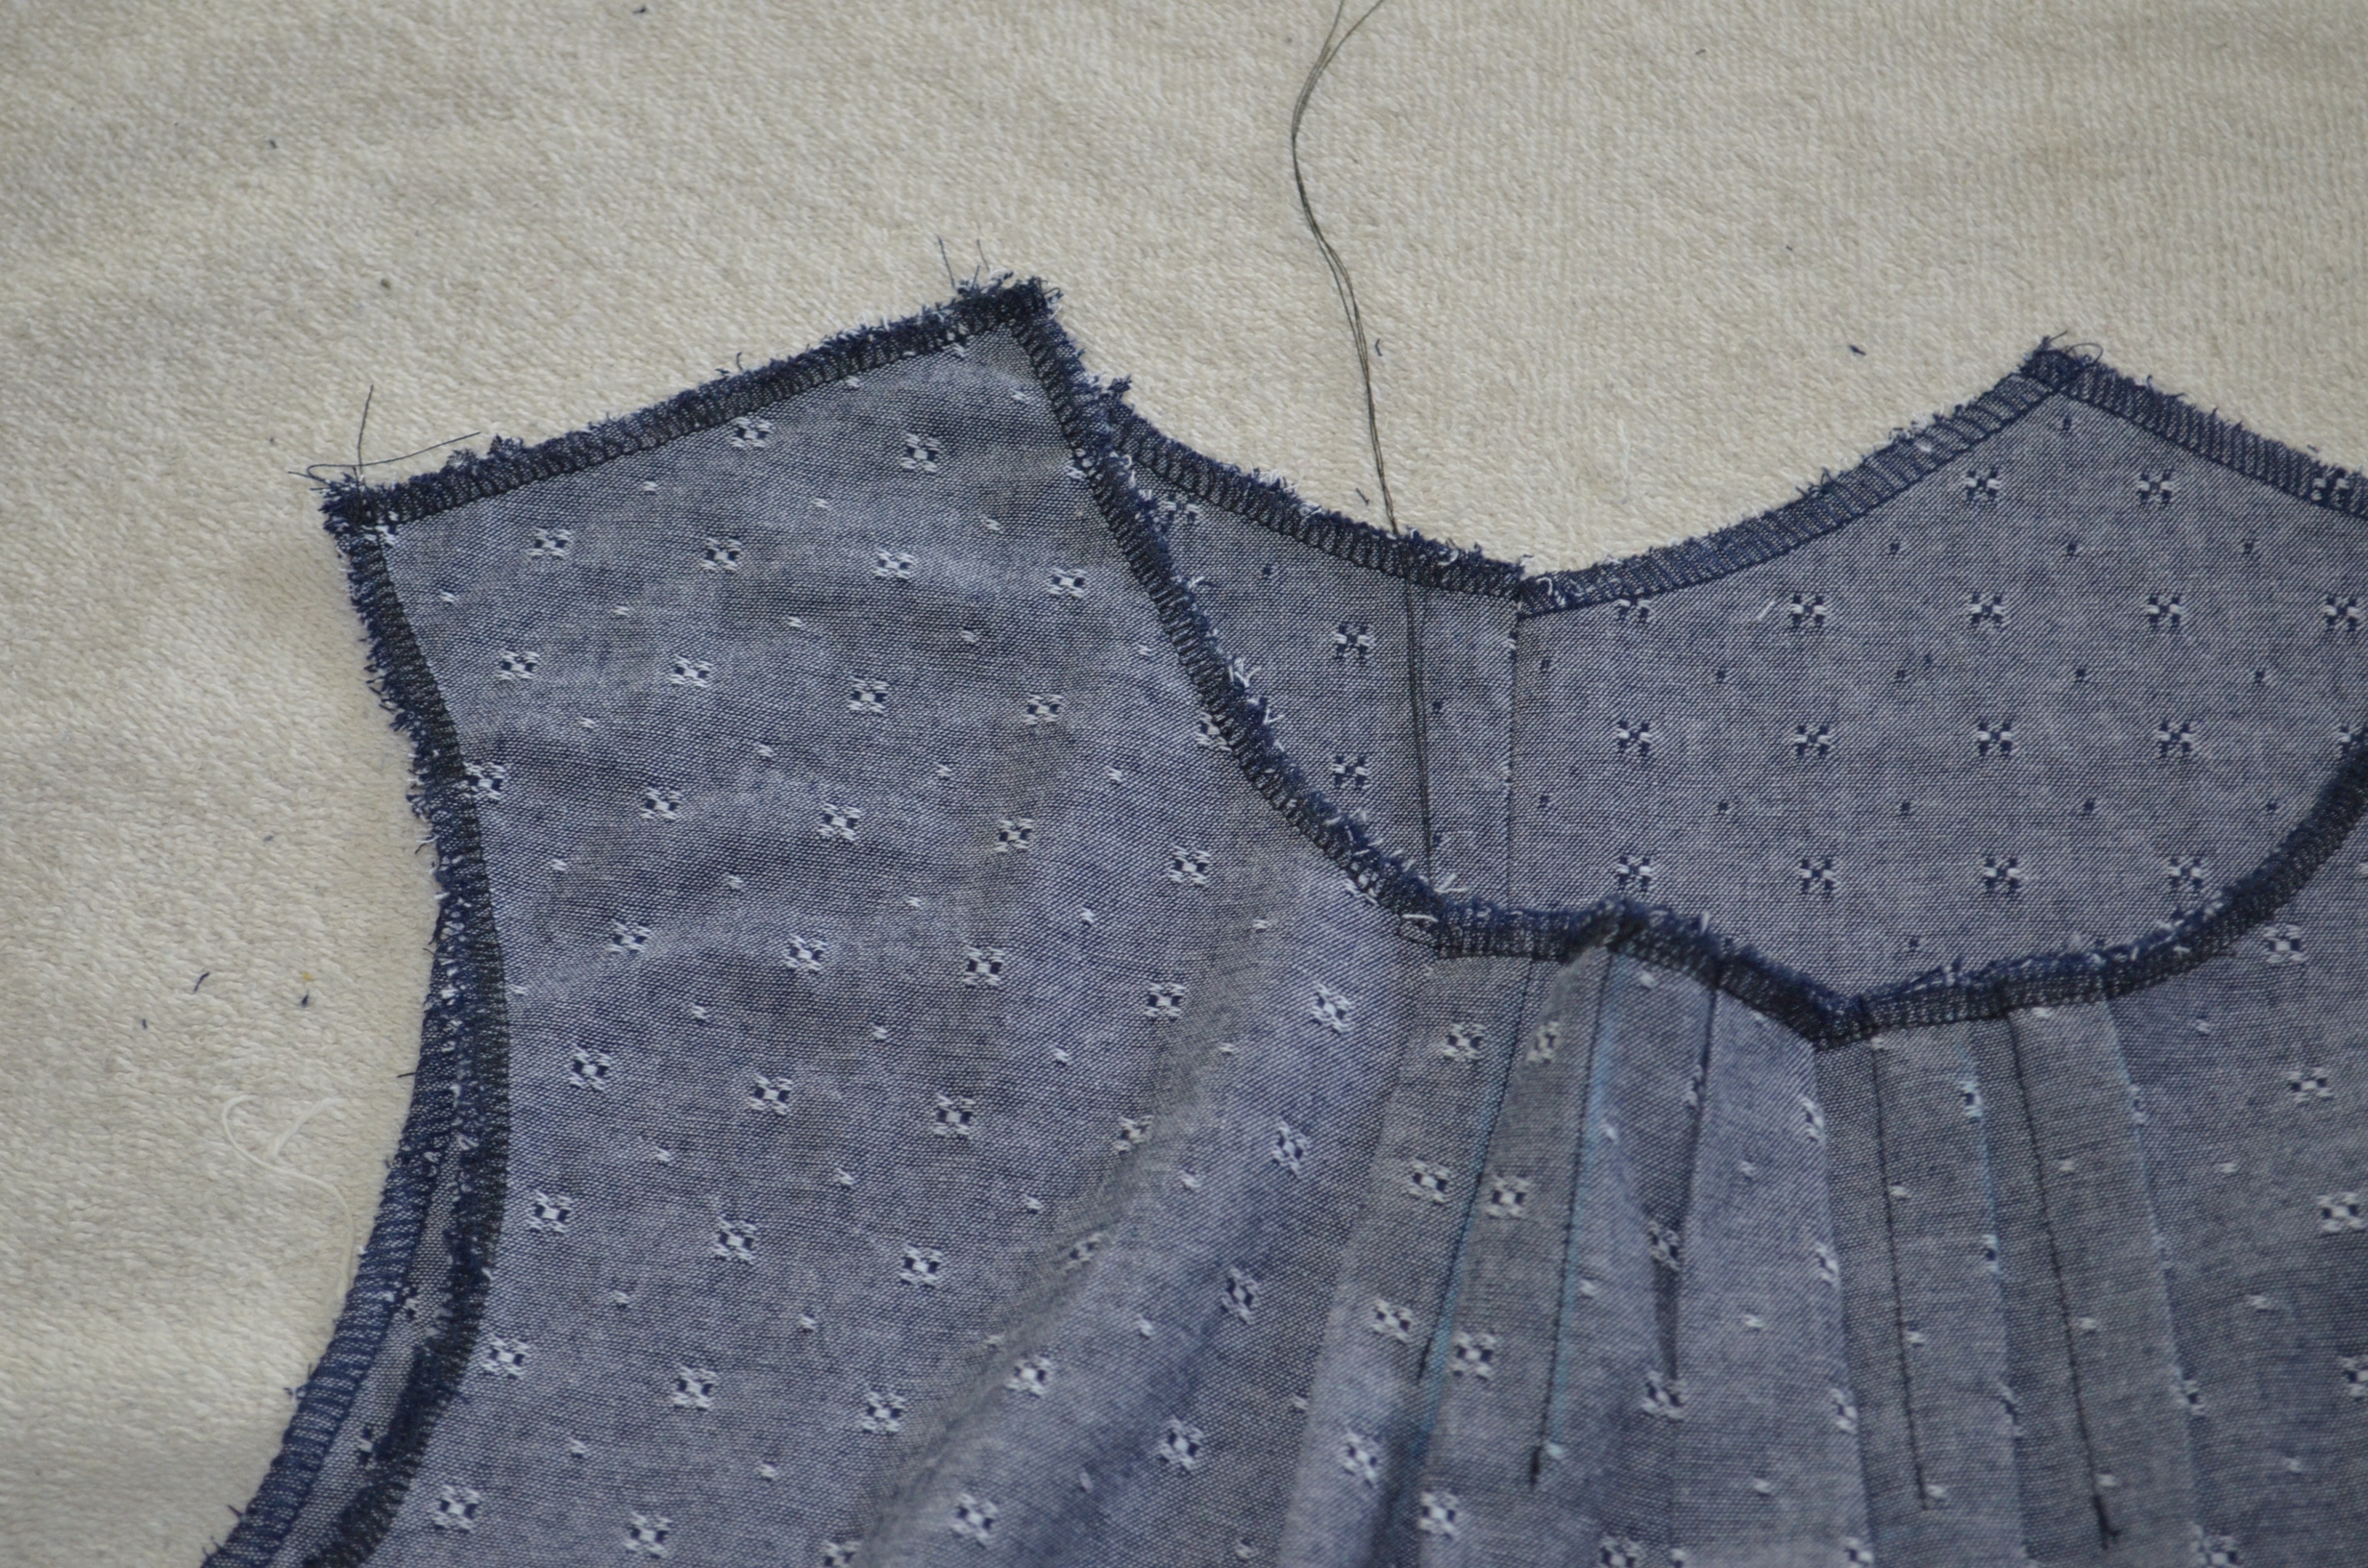
2. Transfer the pleat lines from the pattern to the fabric. Mark 3 inches from the top of the collar, that will be the length of the pleats.
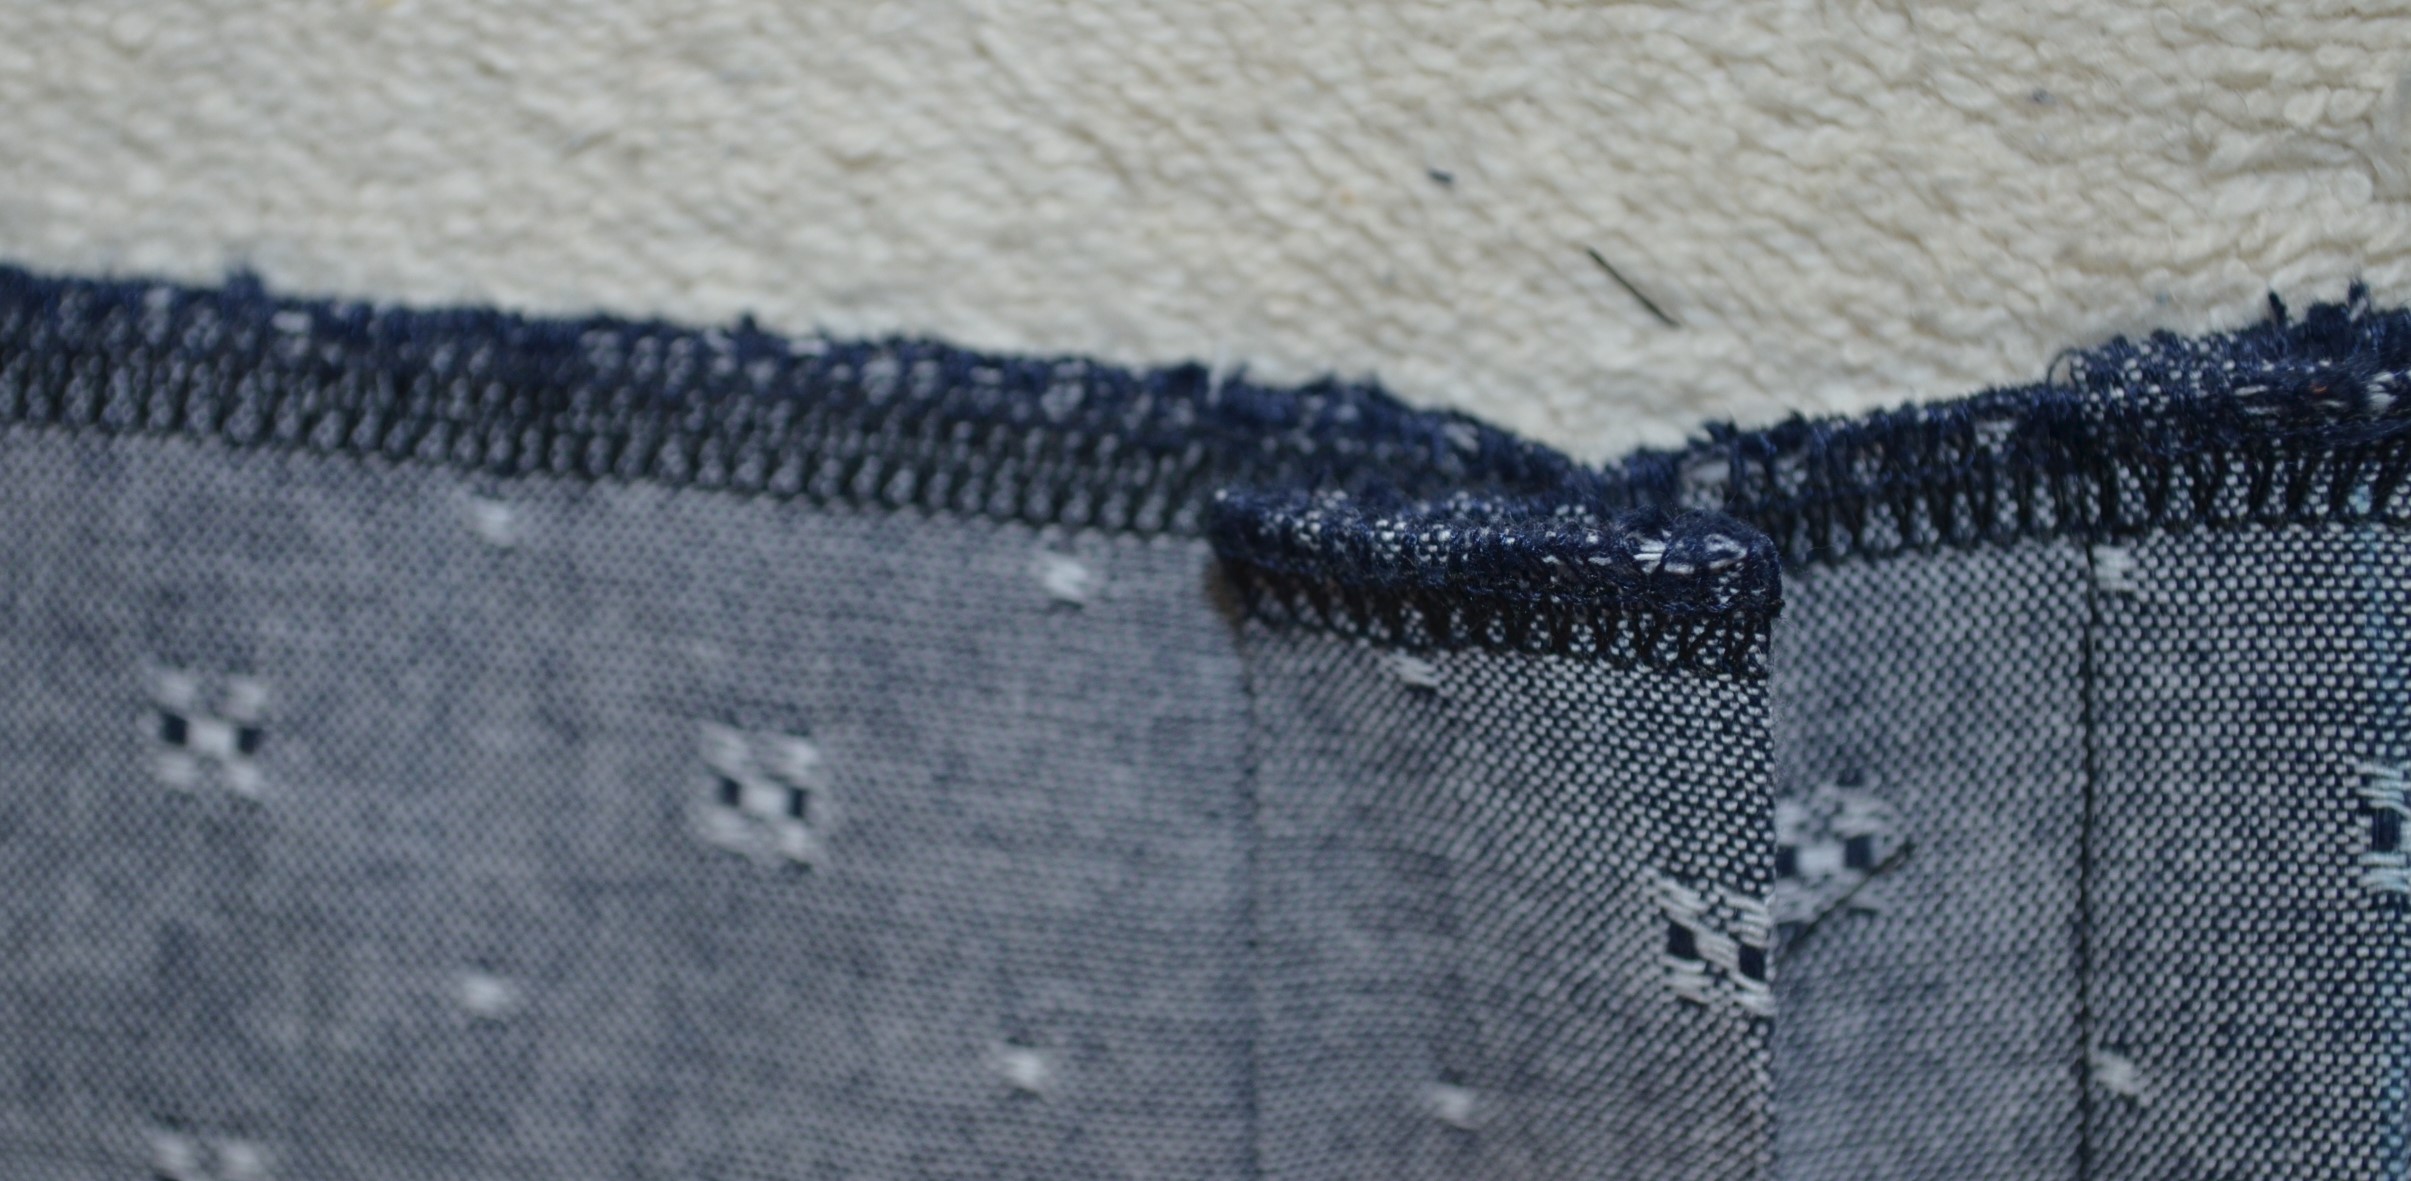
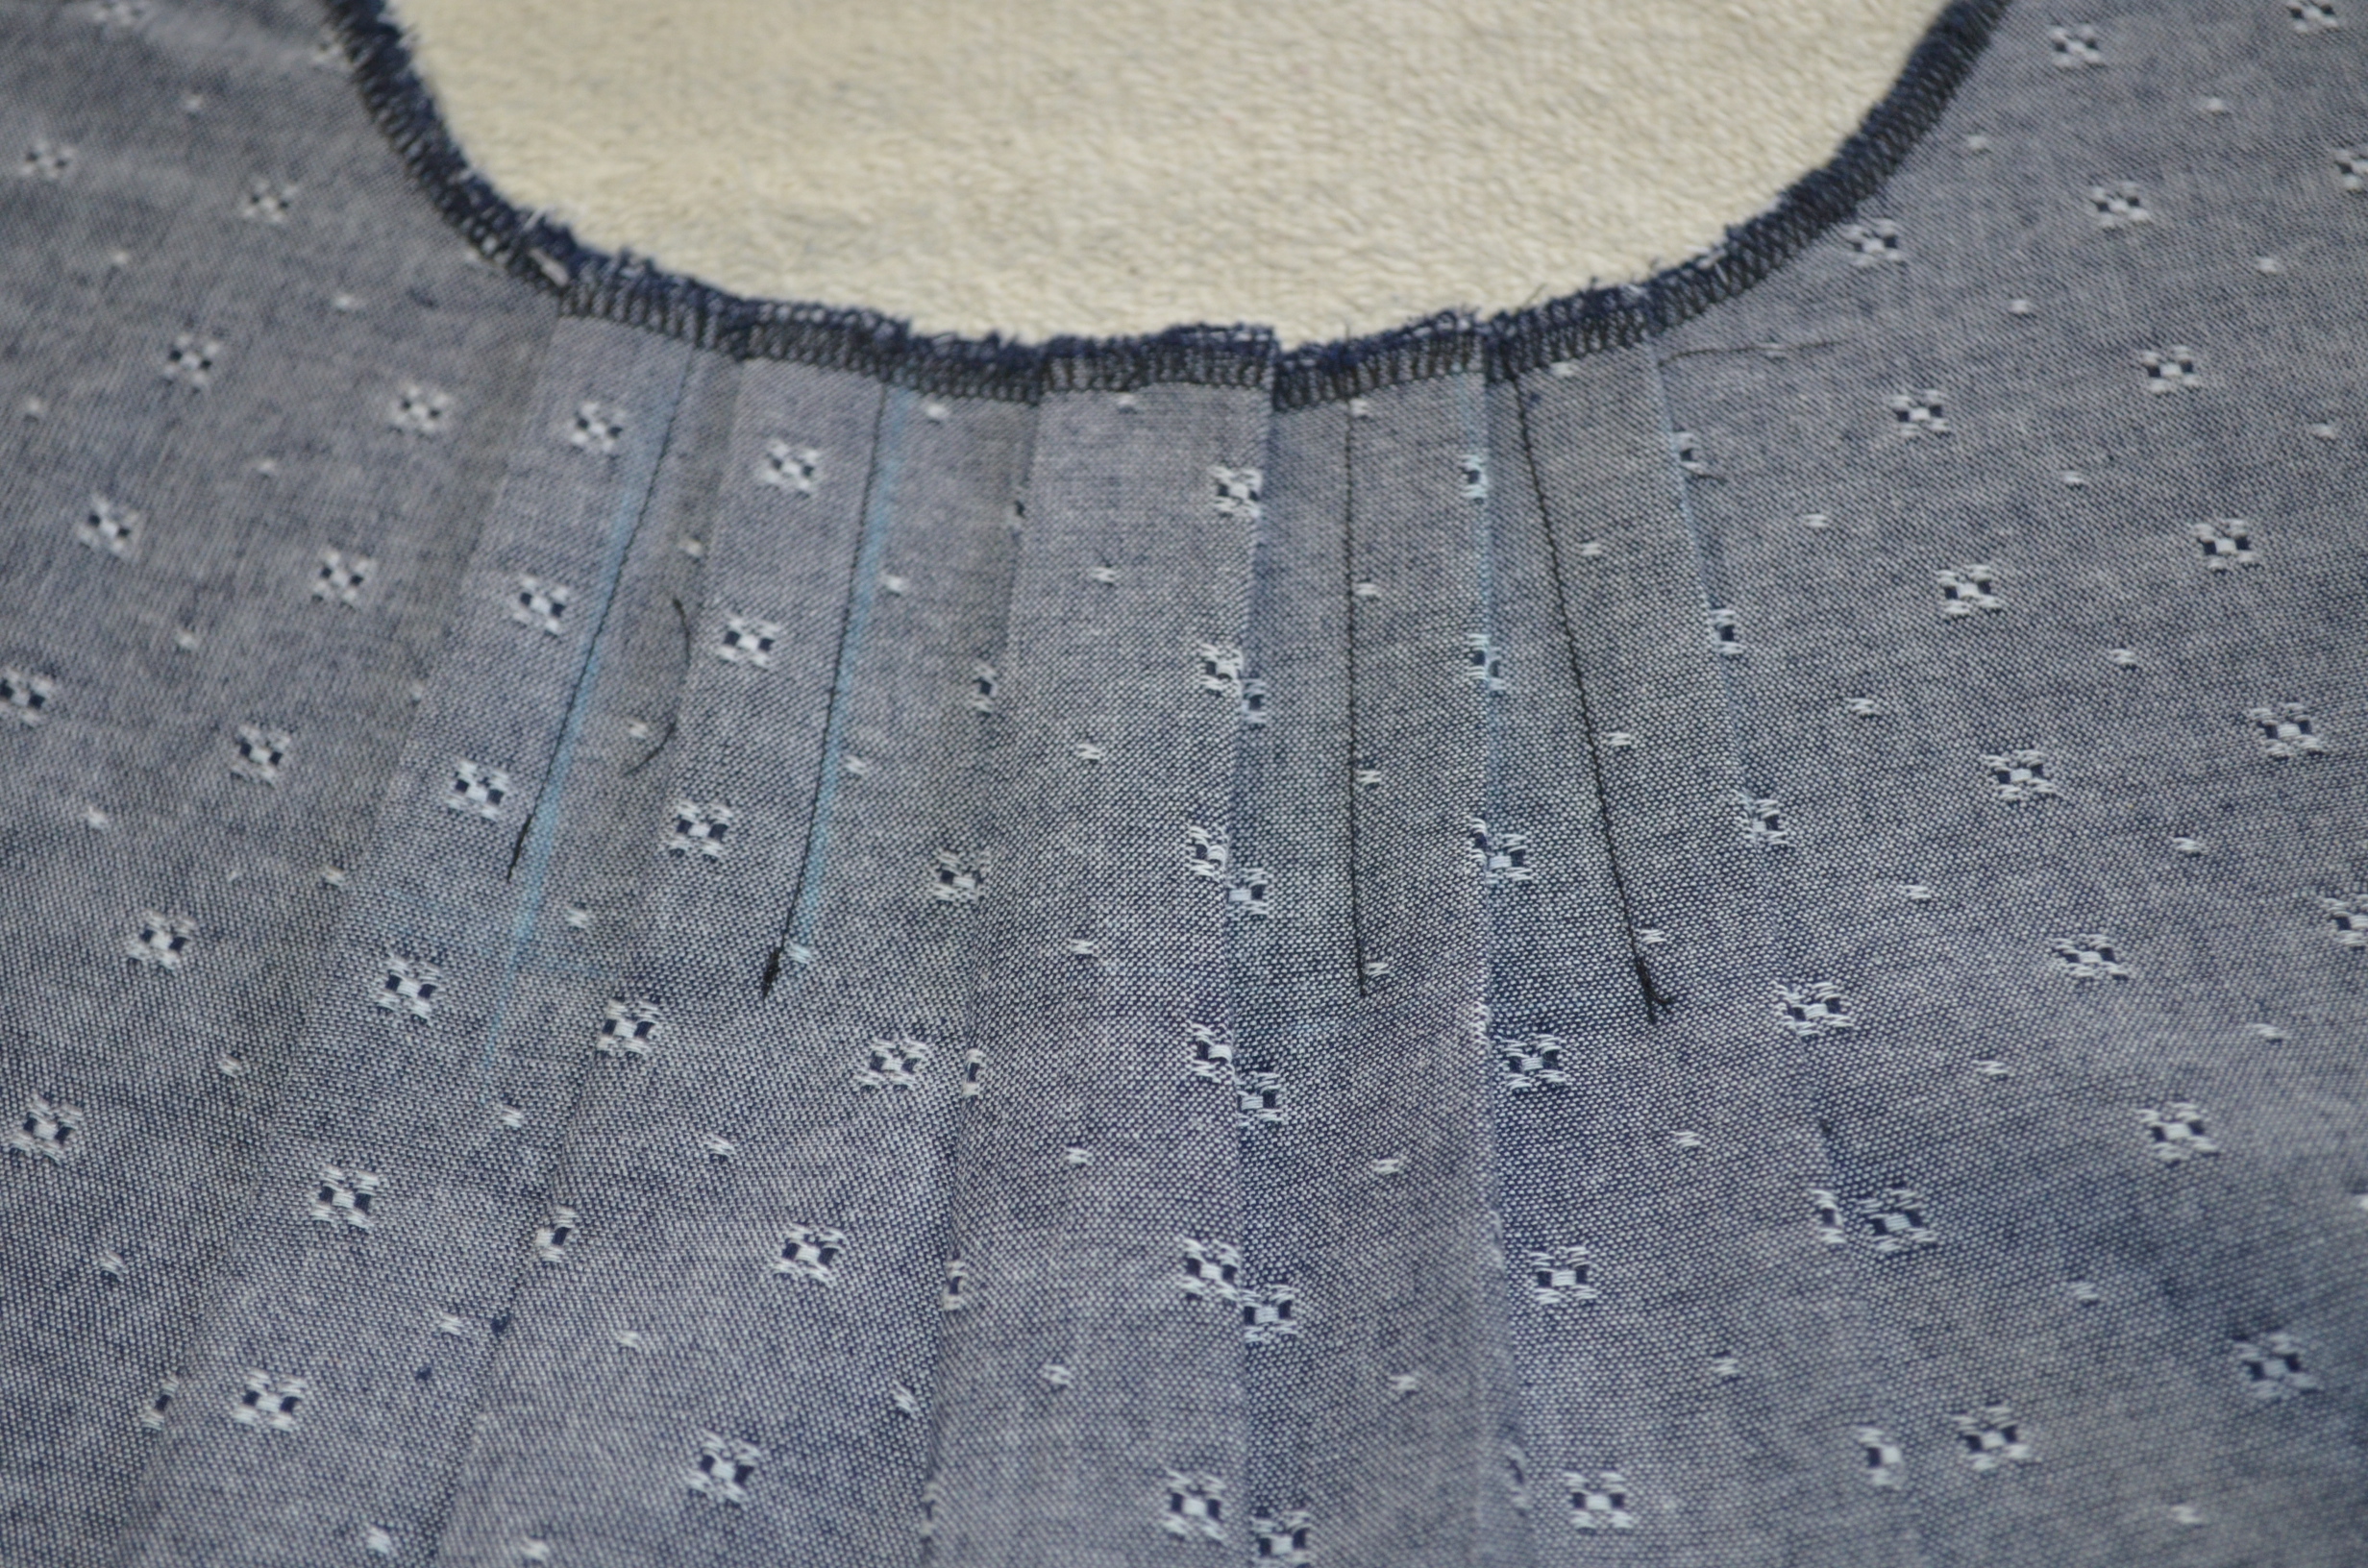
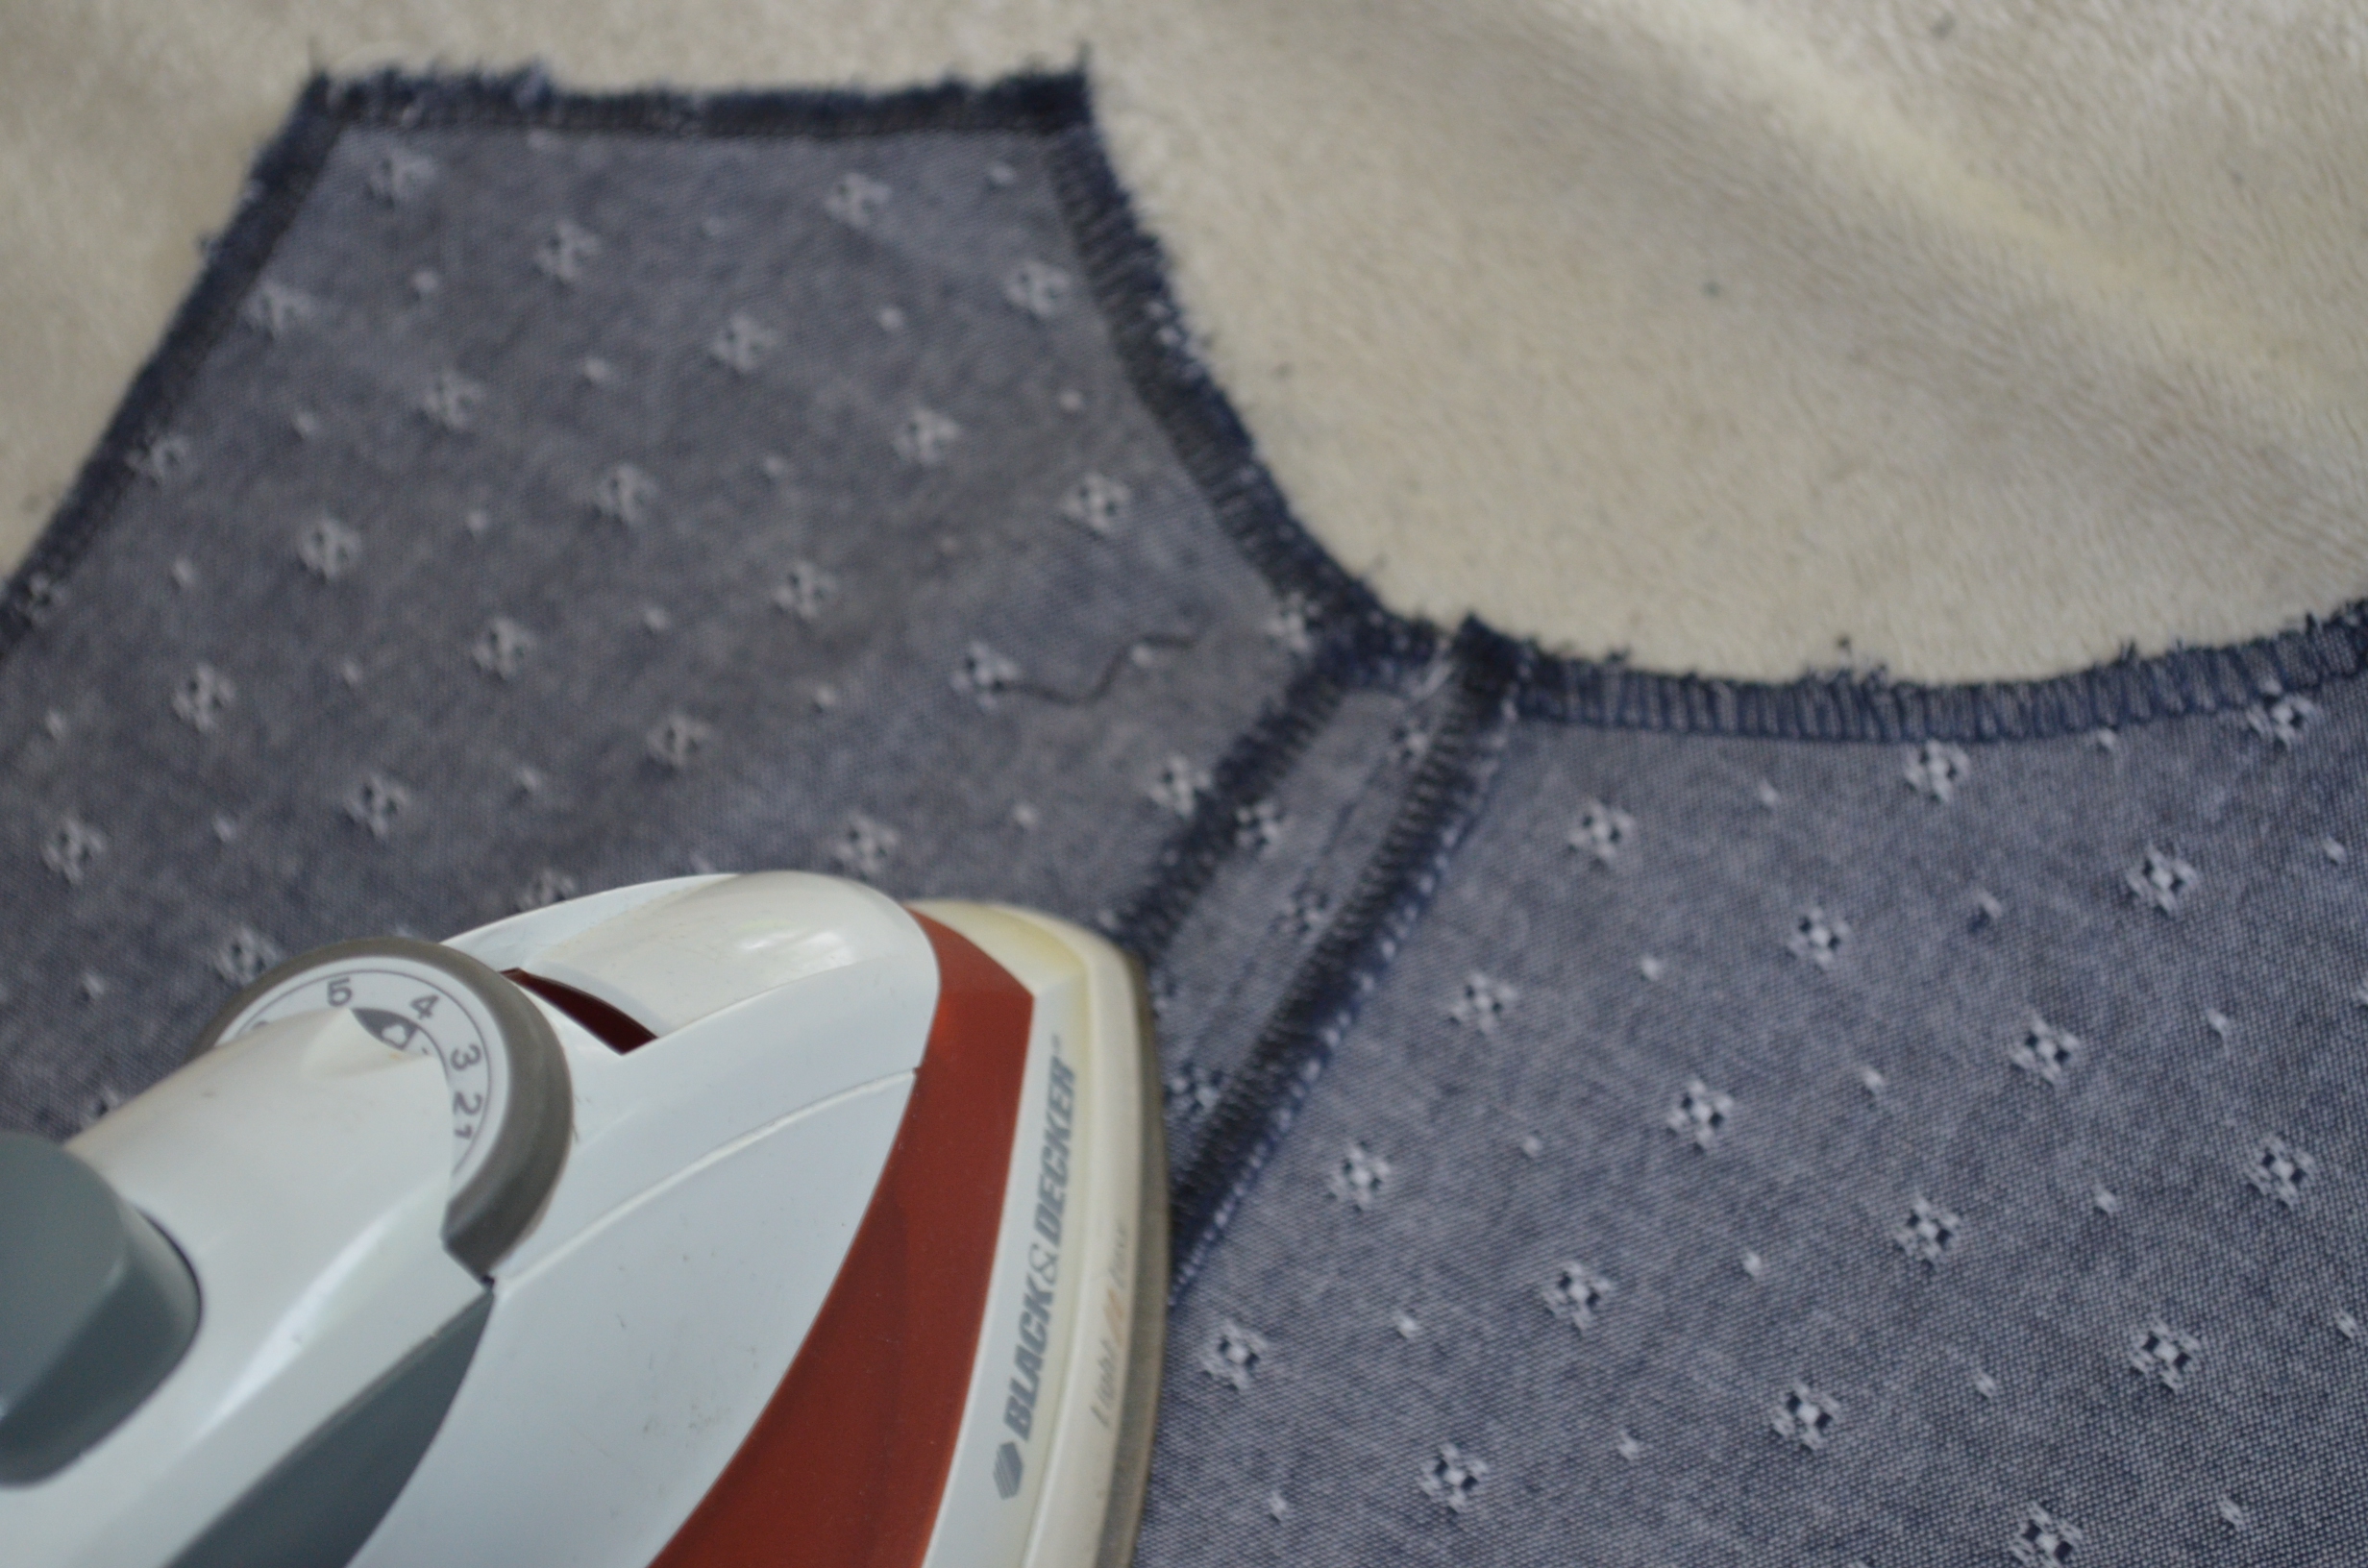
3. Follow the lines you transfer and make the pleats. Press them facing the armhole.

In the case of the pleat in the middle of the top, you must press half the amount of fabric to each side, so the pleat looks even.
4. Add the pleats to the other side of the top as well.
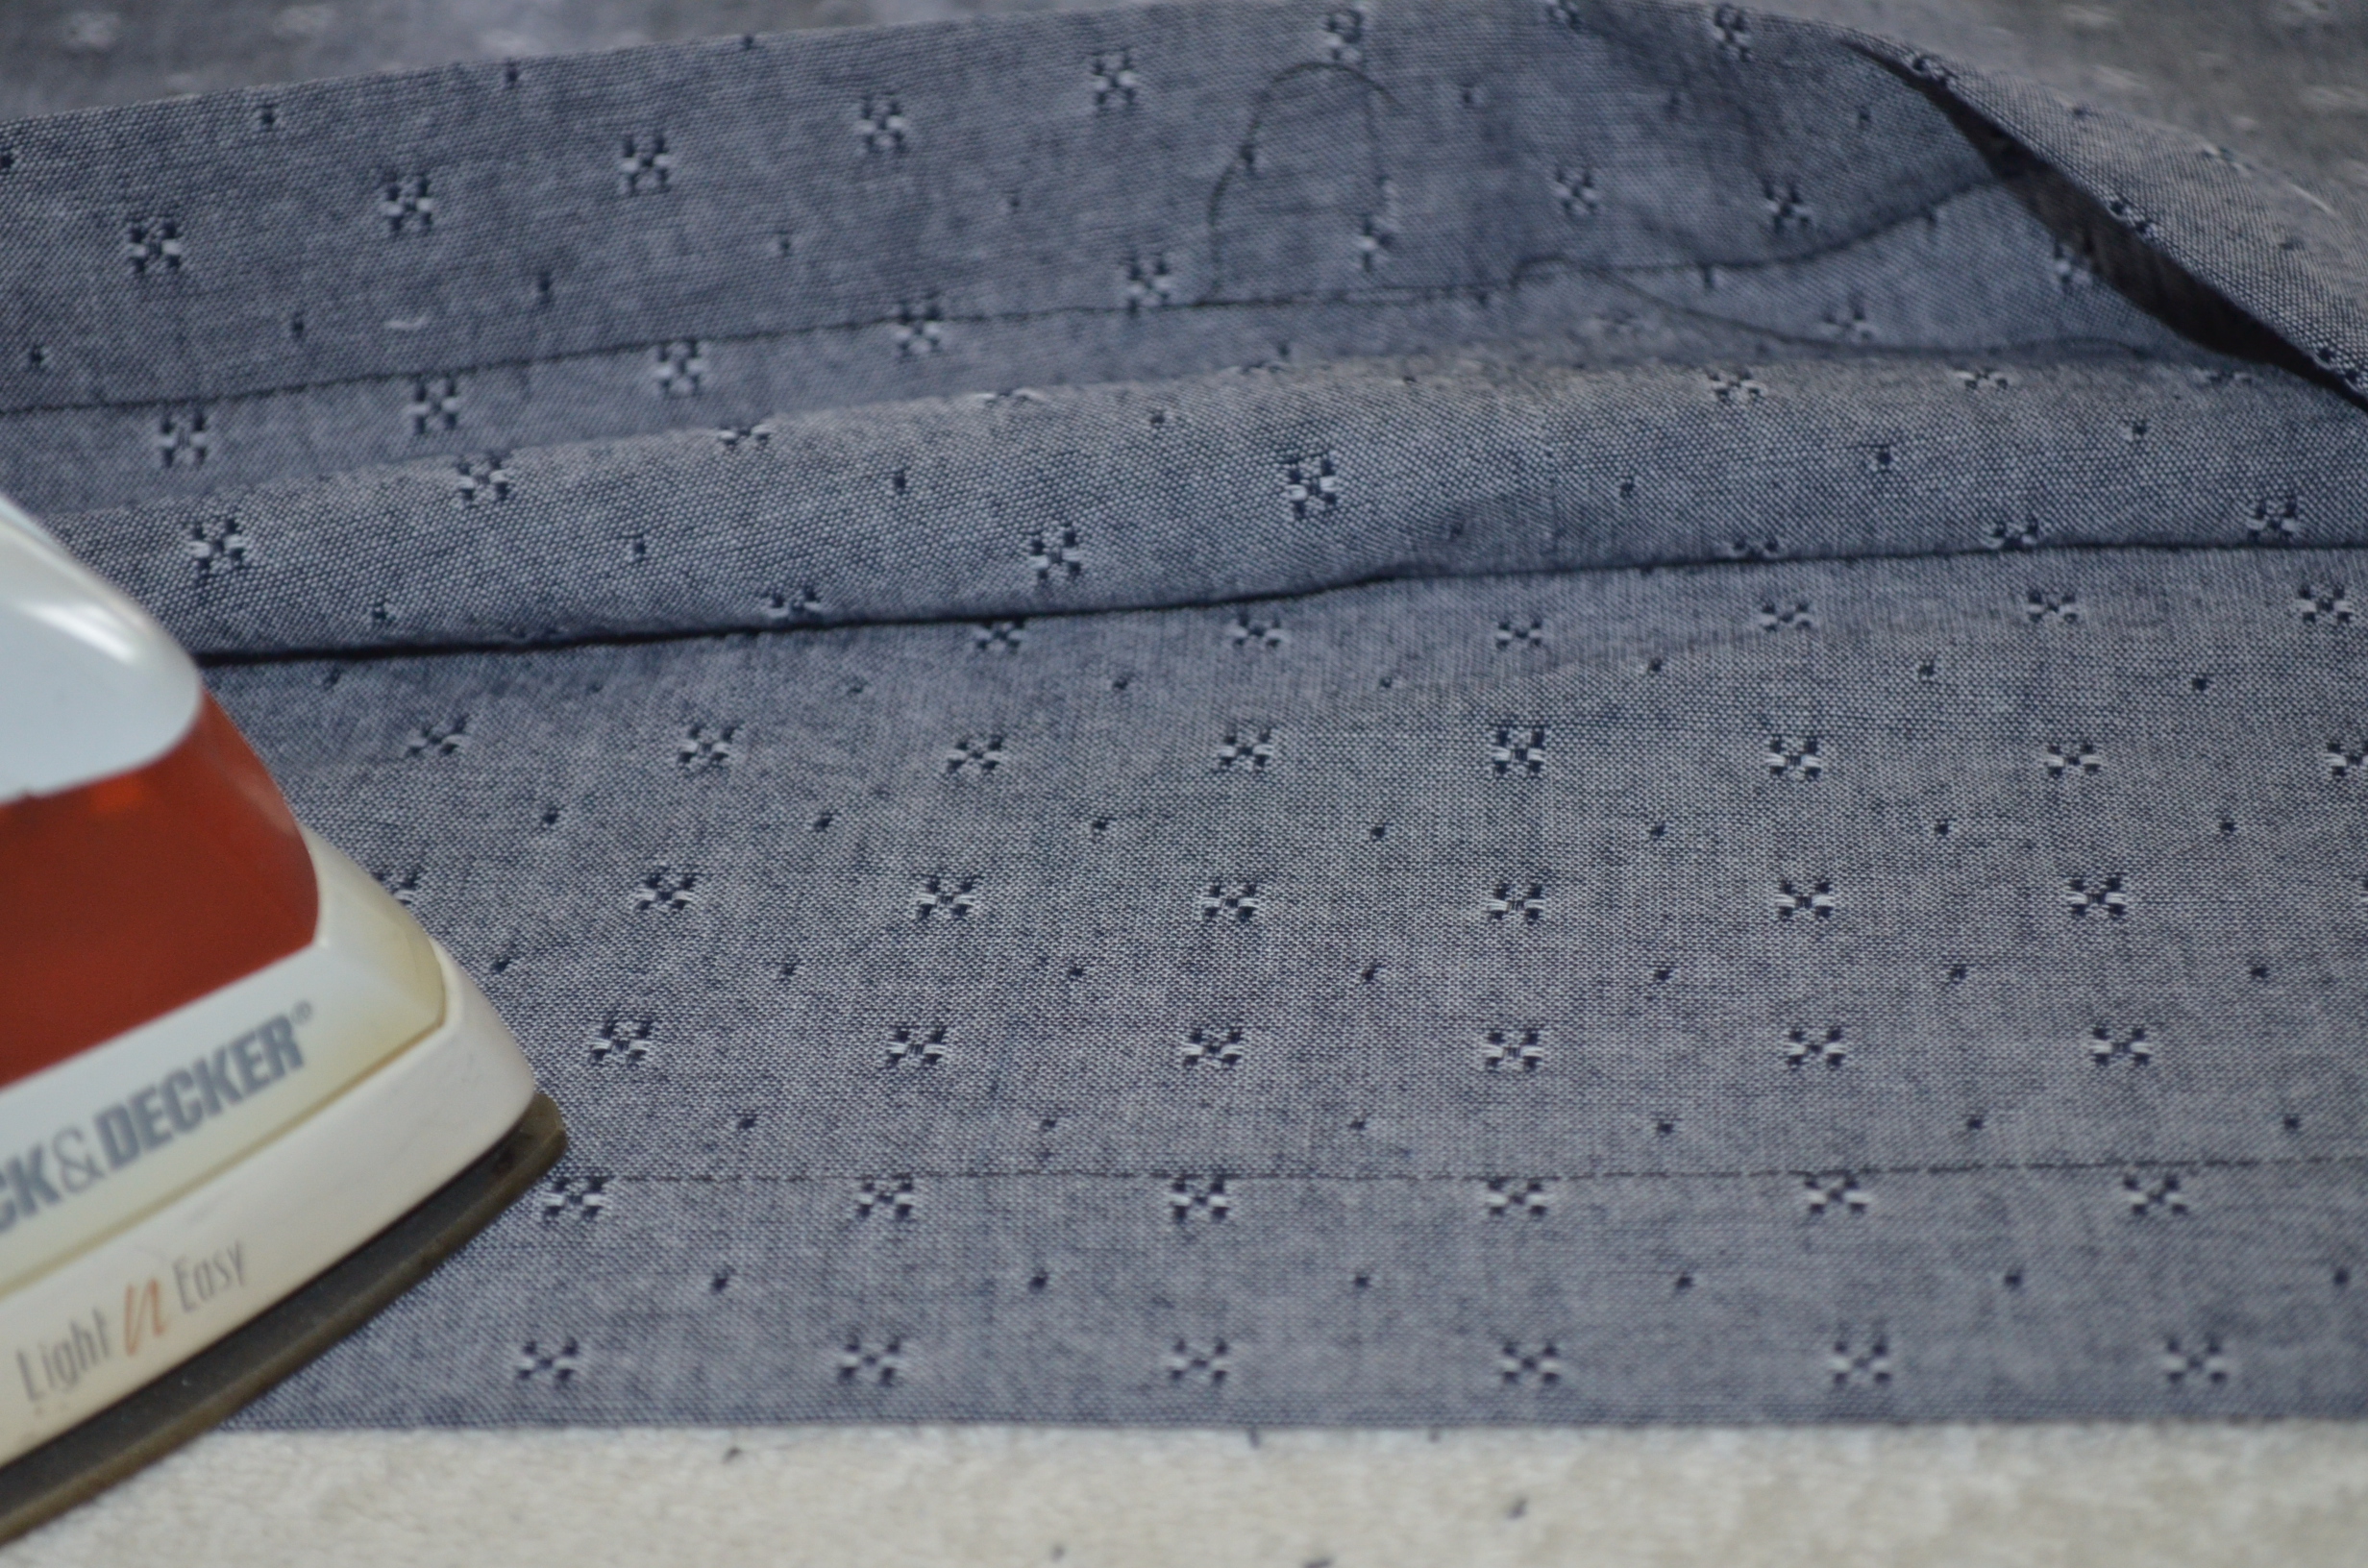
5. Place both sides of the back together, right sides facing and sew along the center back.
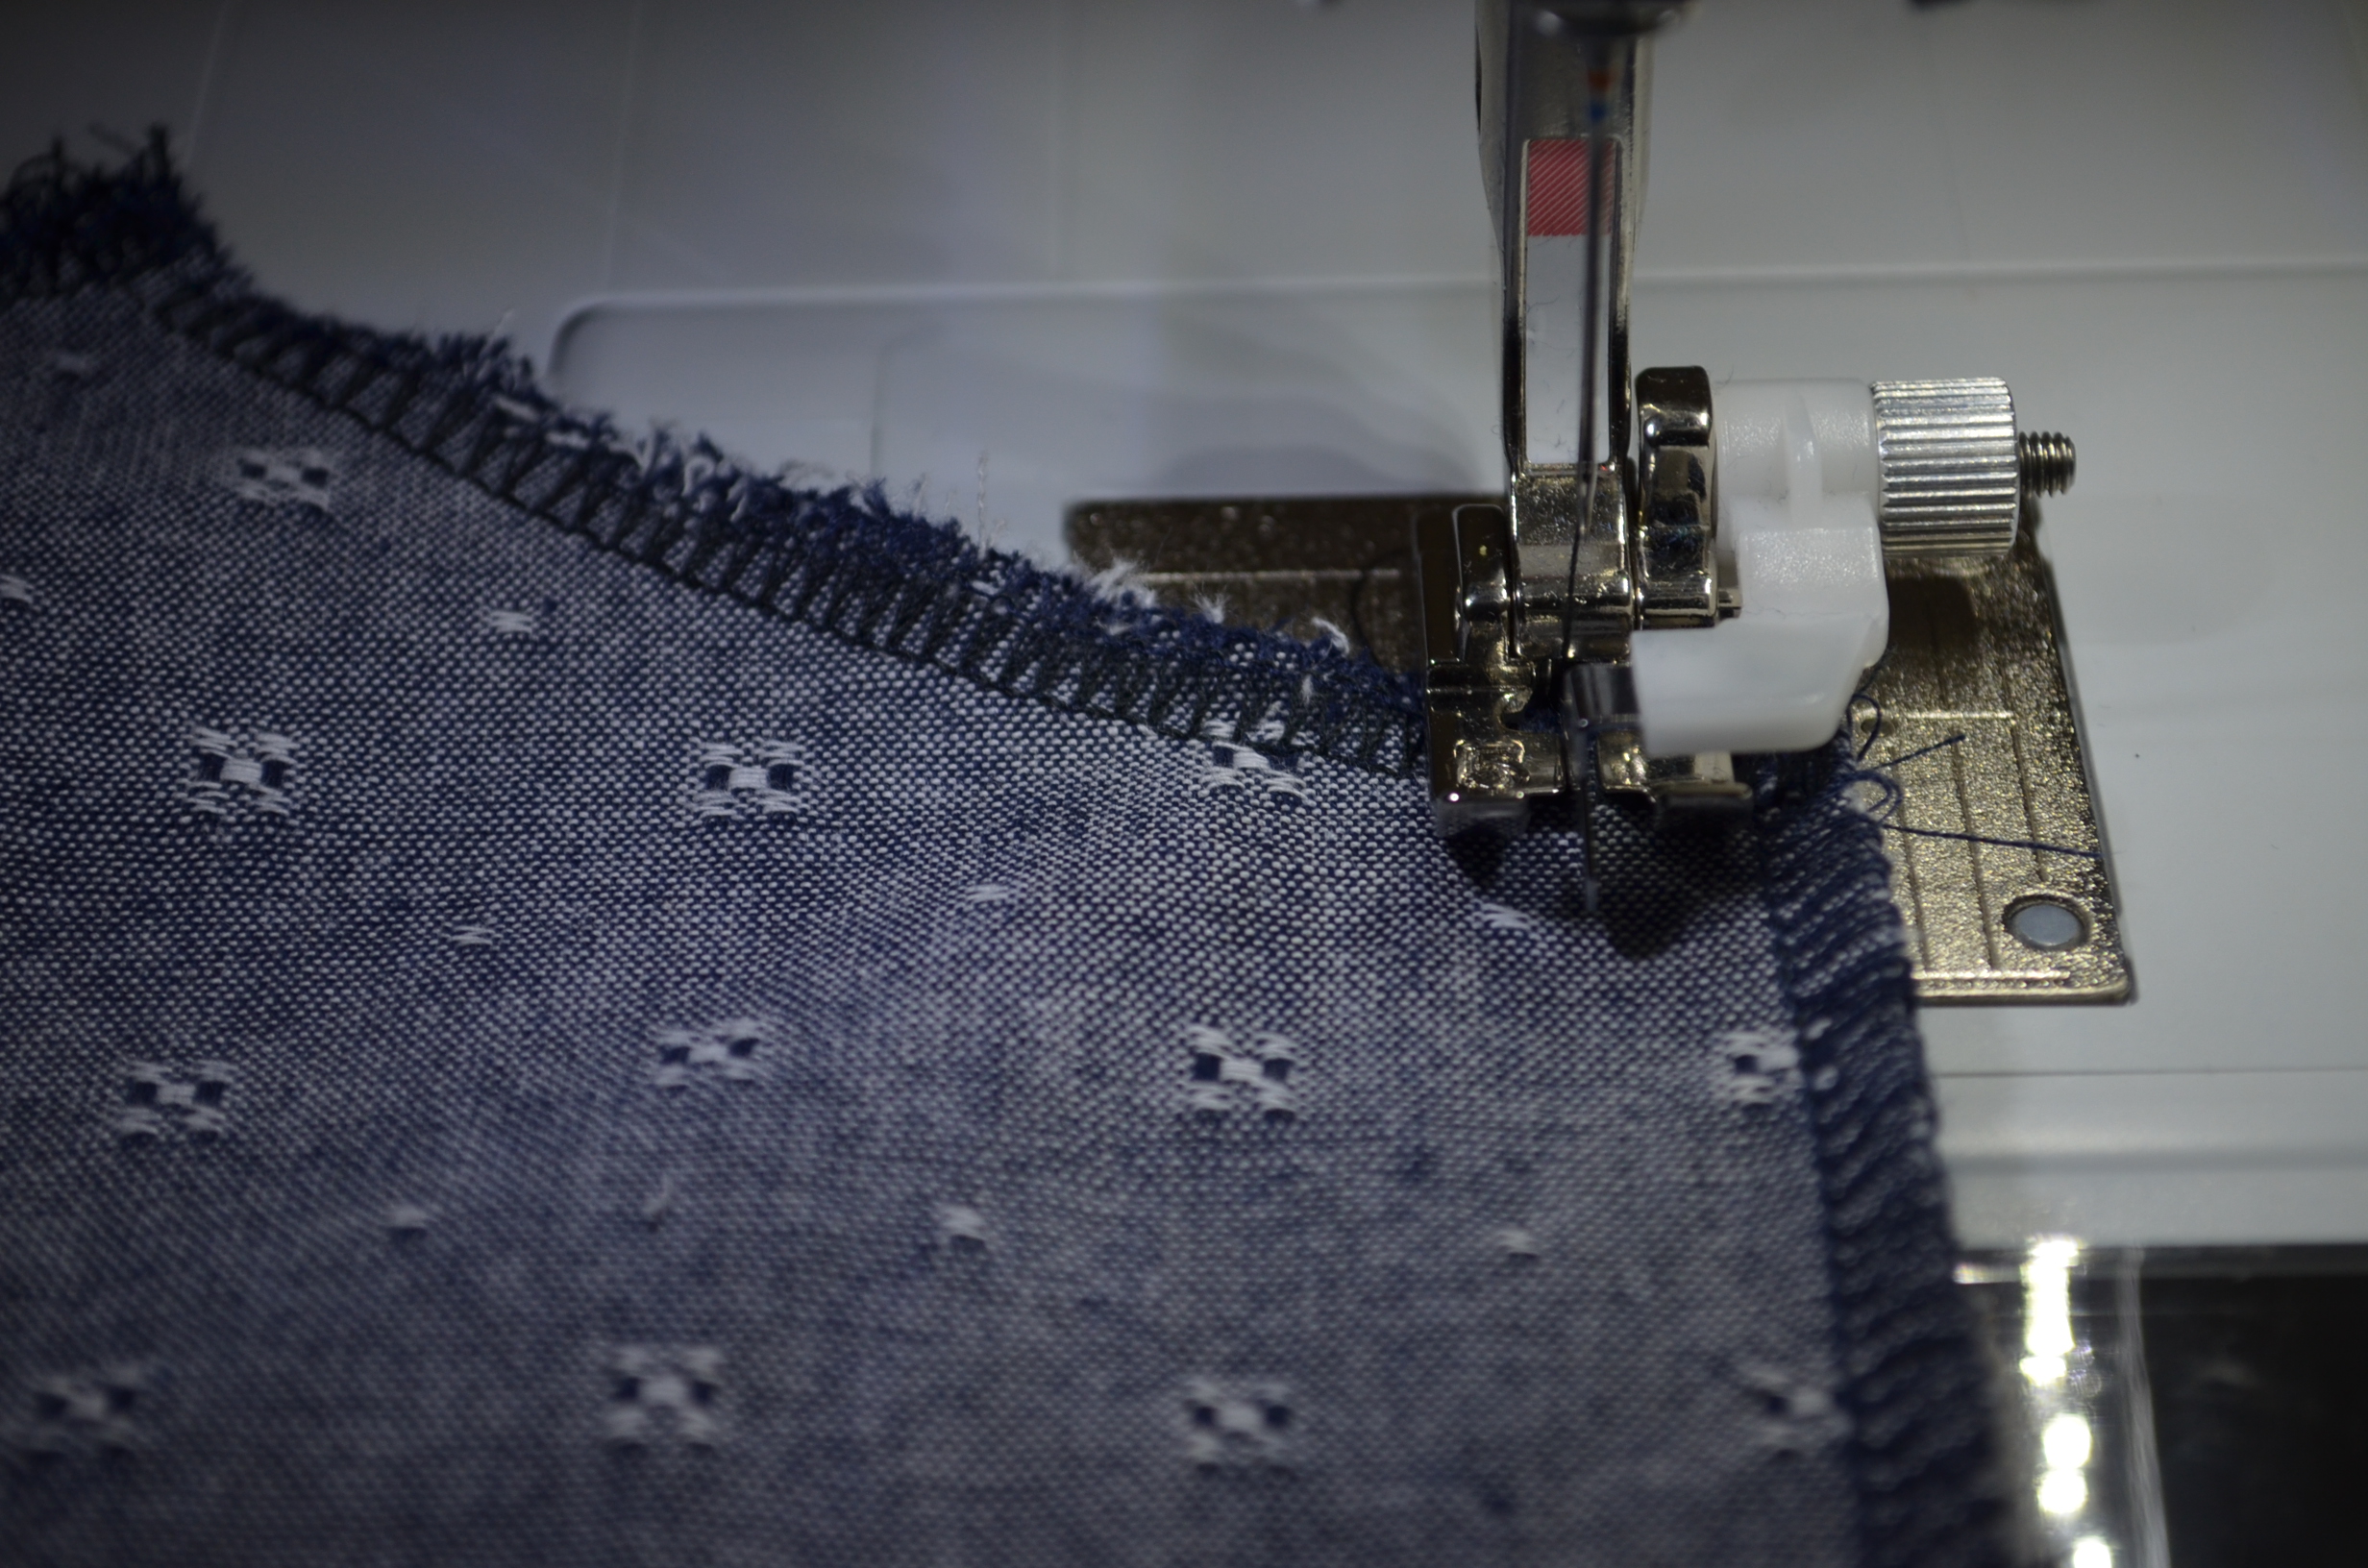
5. Press the center back seam open.
6. Now, place the front and back top pieces together, right sides facing and sew the shoulders and sides.
7. Hem the top by folding 1/4 of the bottom first and press the seam. After that, fold 1 inch of the hemline and press again. Sew along the seam and press flat.
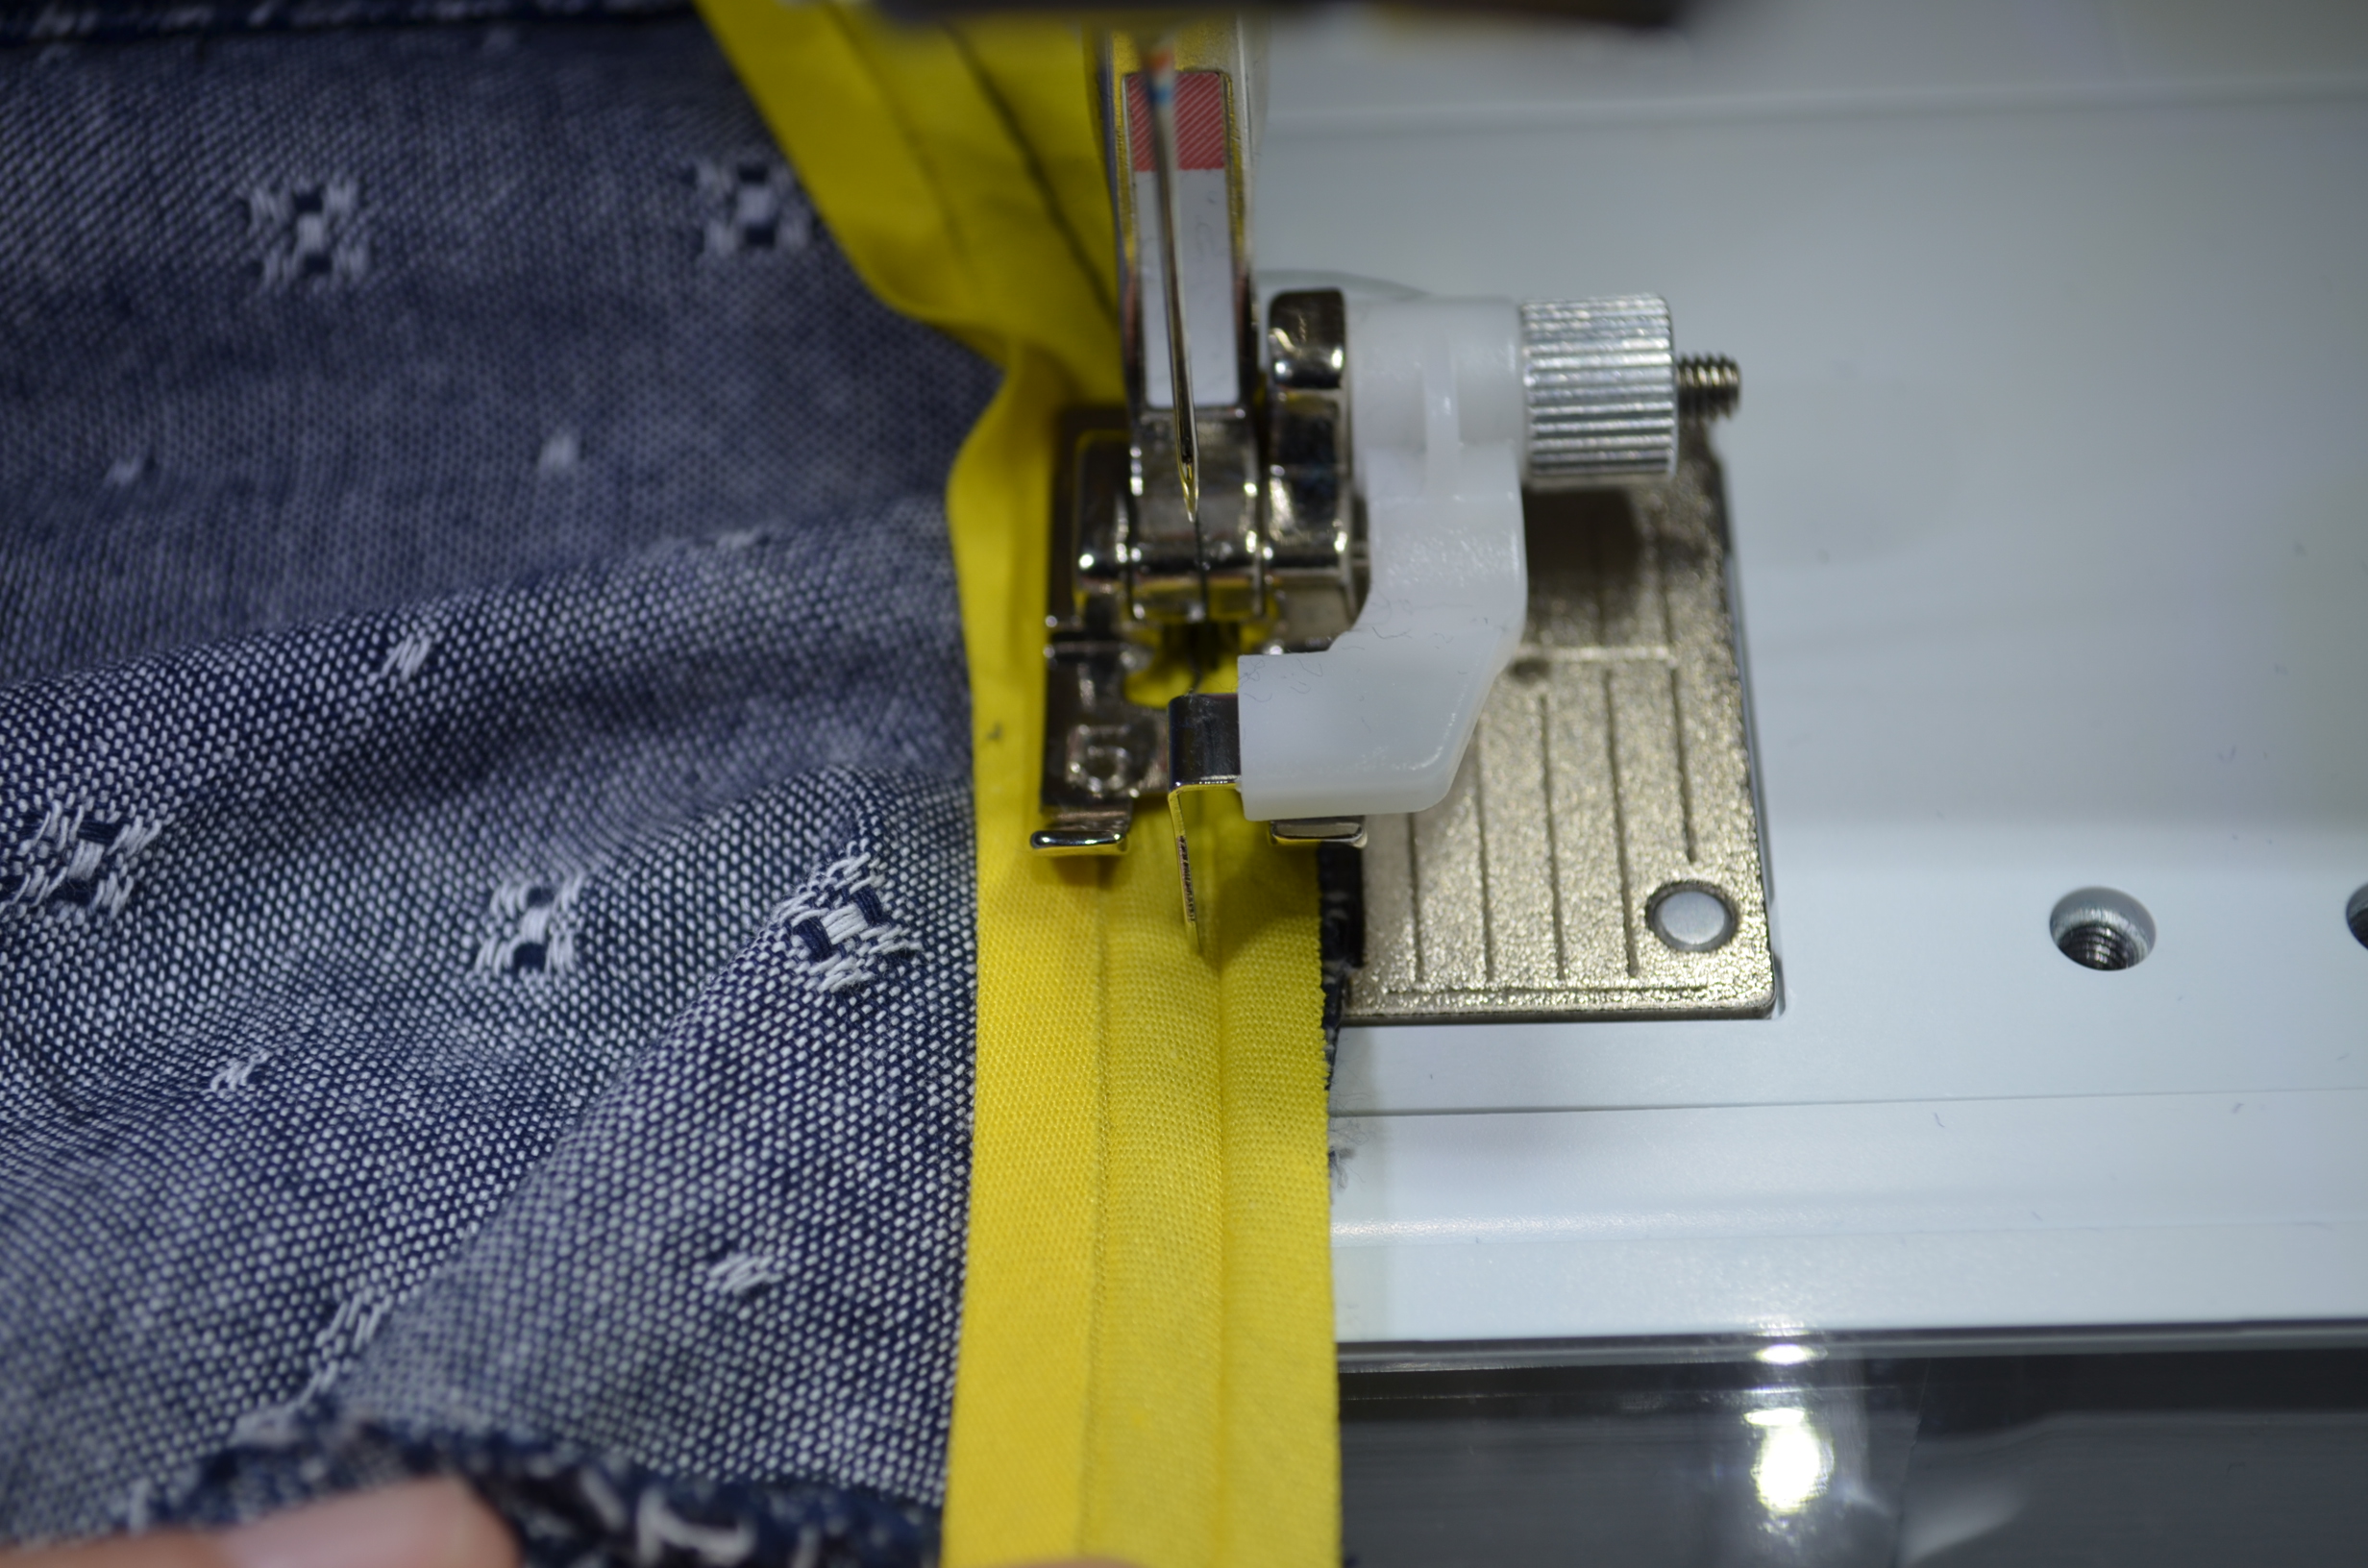
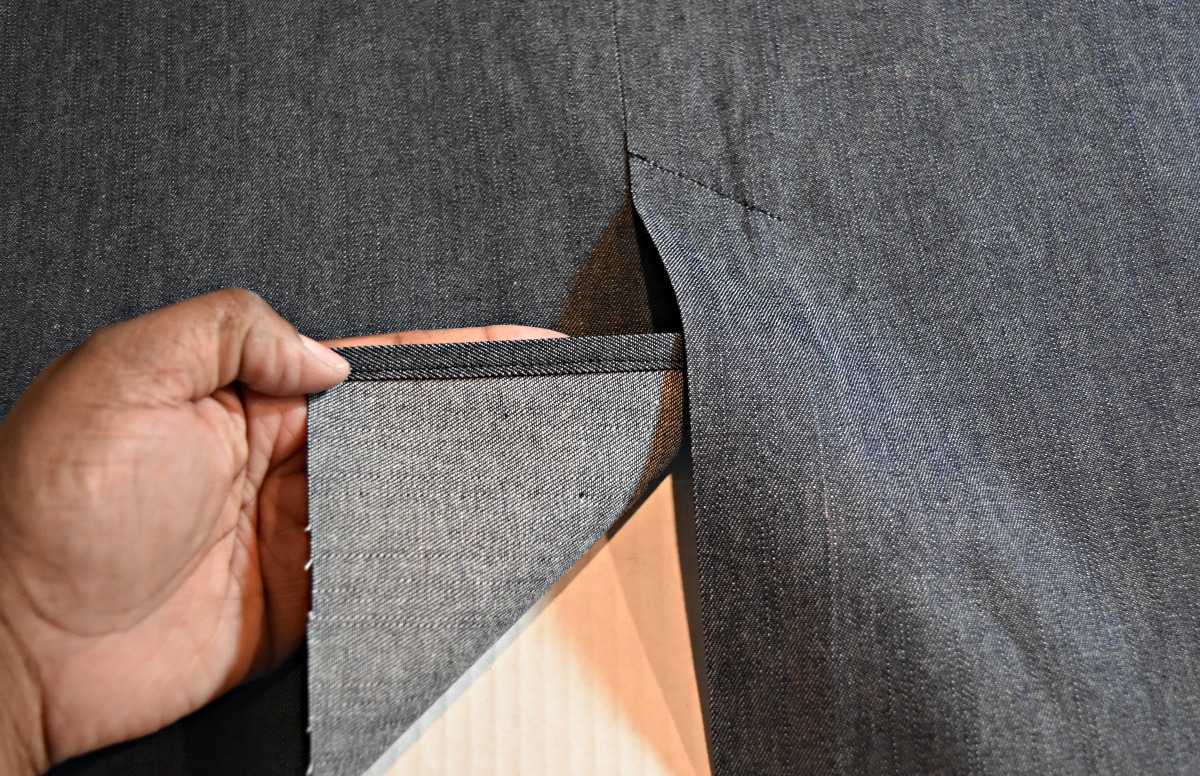
8. Pin the double fold bias tape to the neckline area. Remember to leave 1/2 inch extra to fold at the beginning.
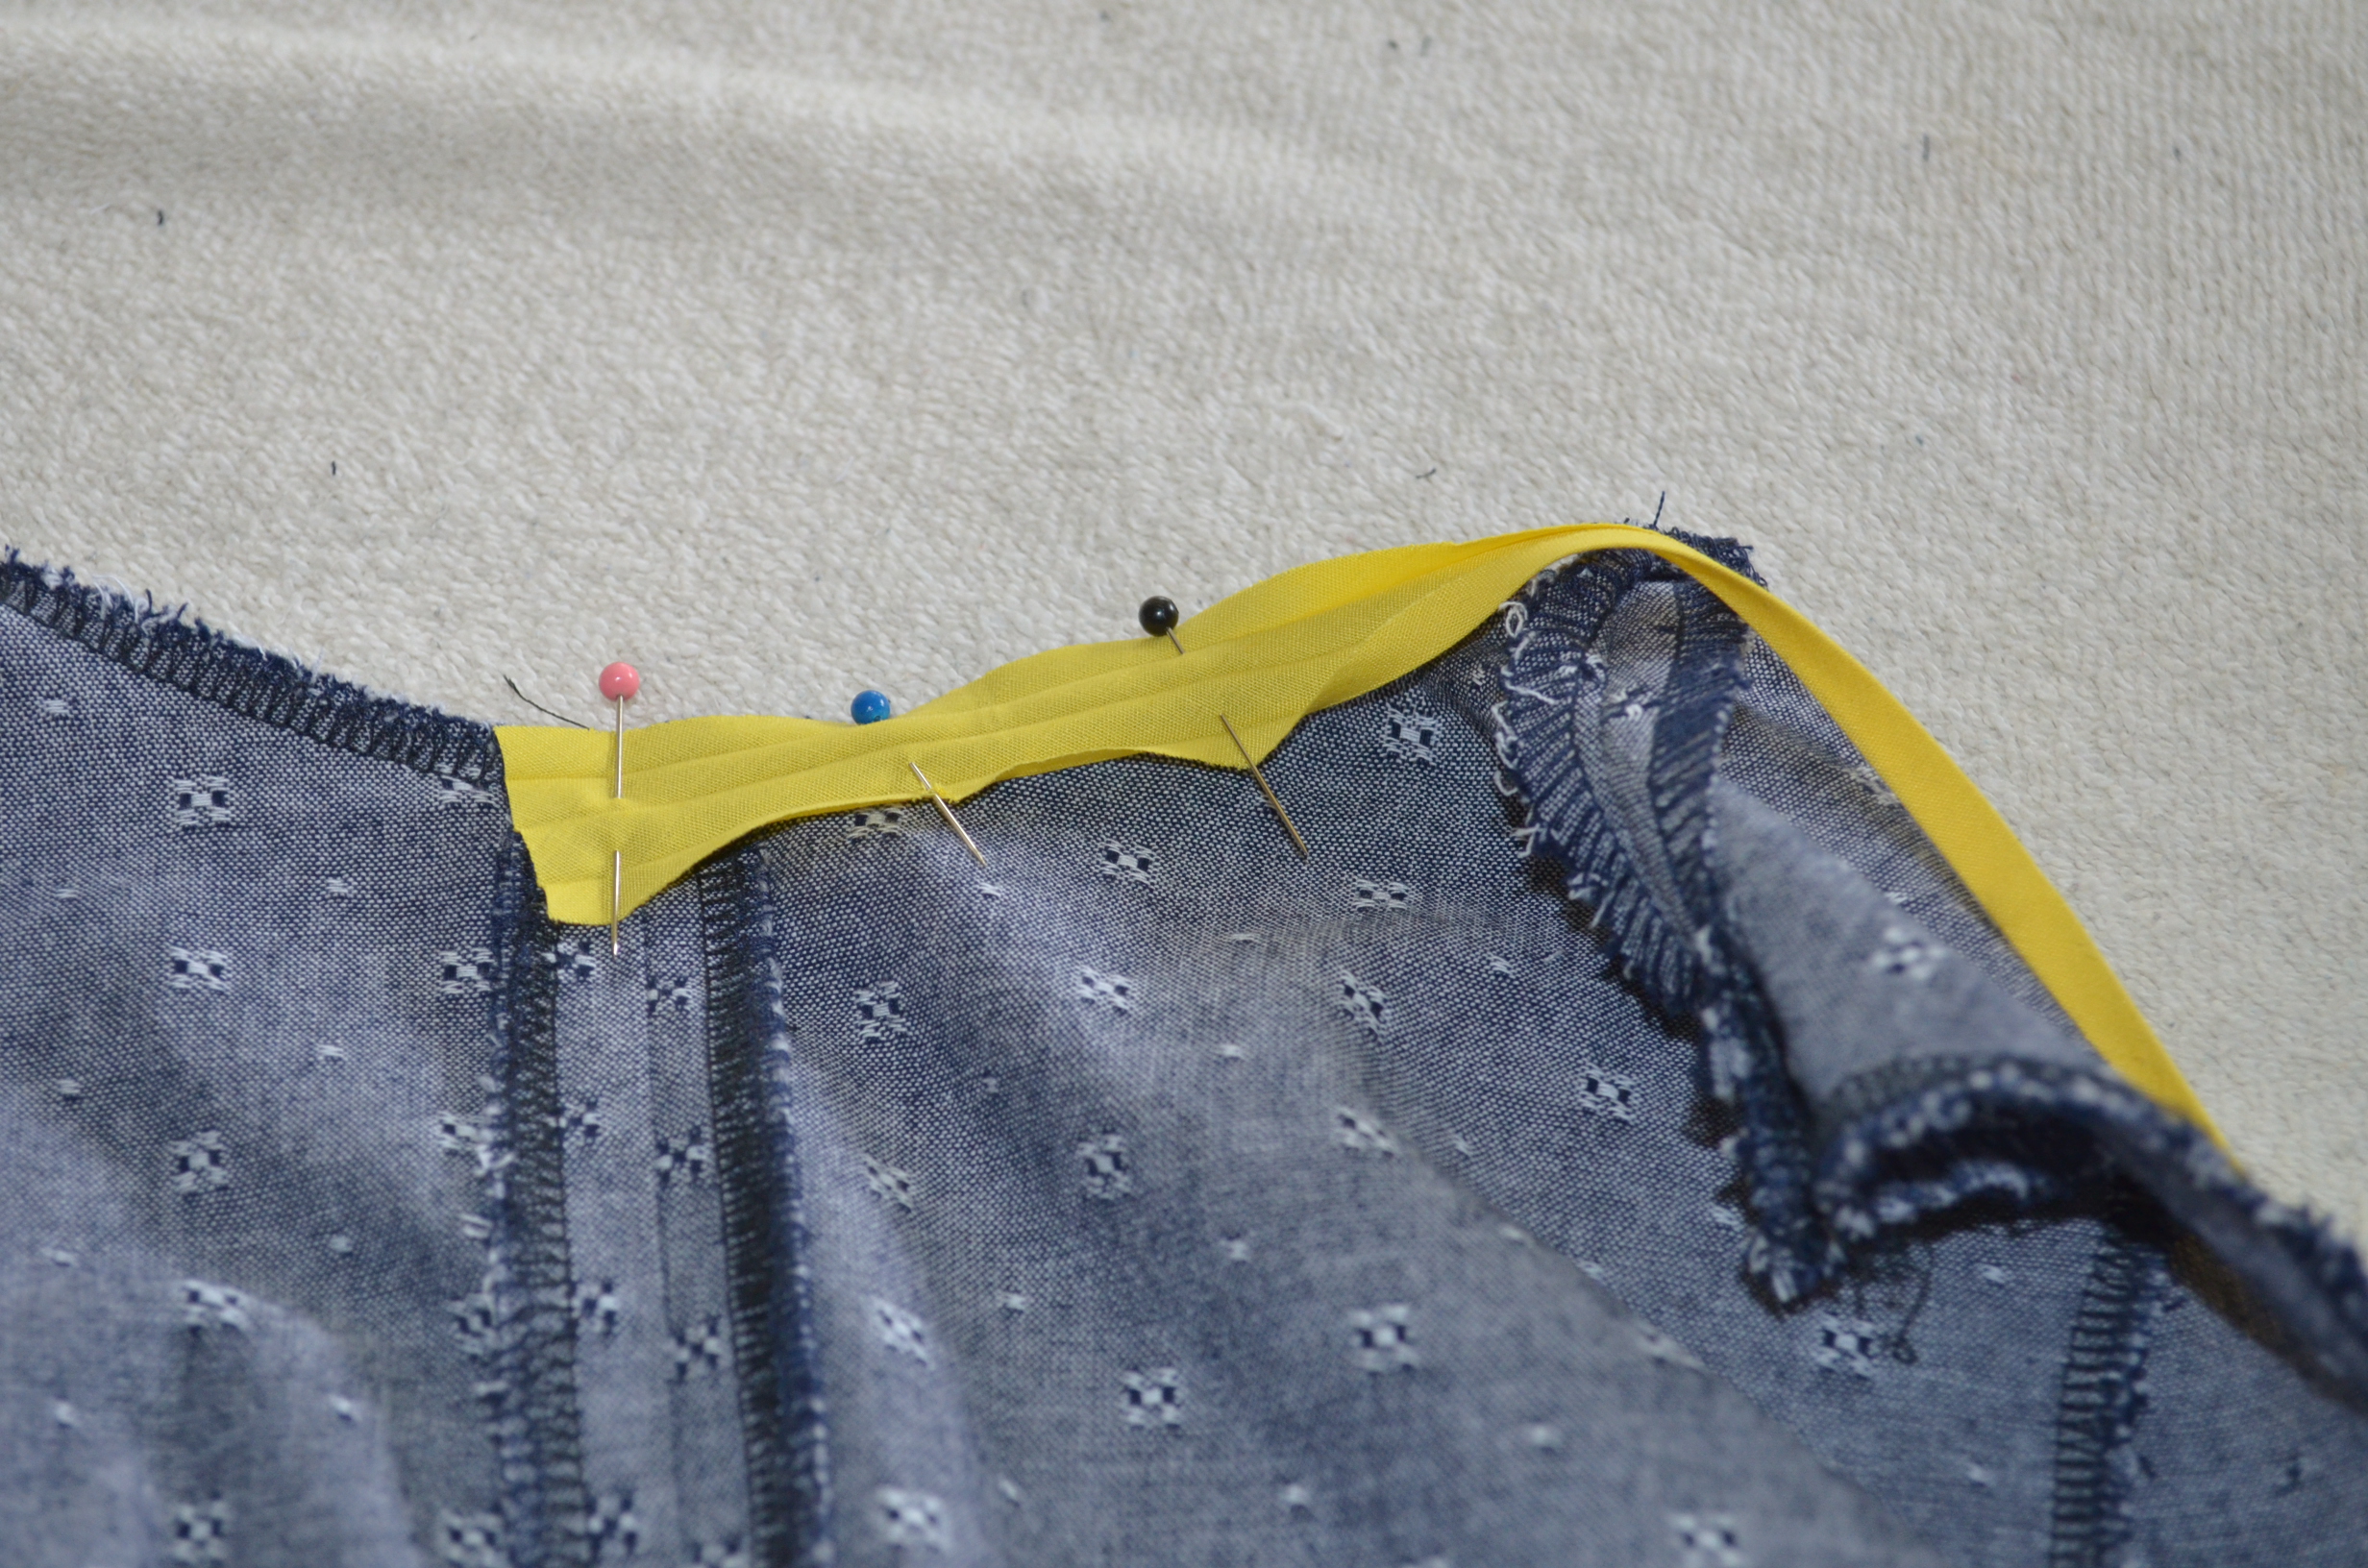
9. Sew it using the folding line of the bias tape. I love to use the blind stitch to do this part 🙂
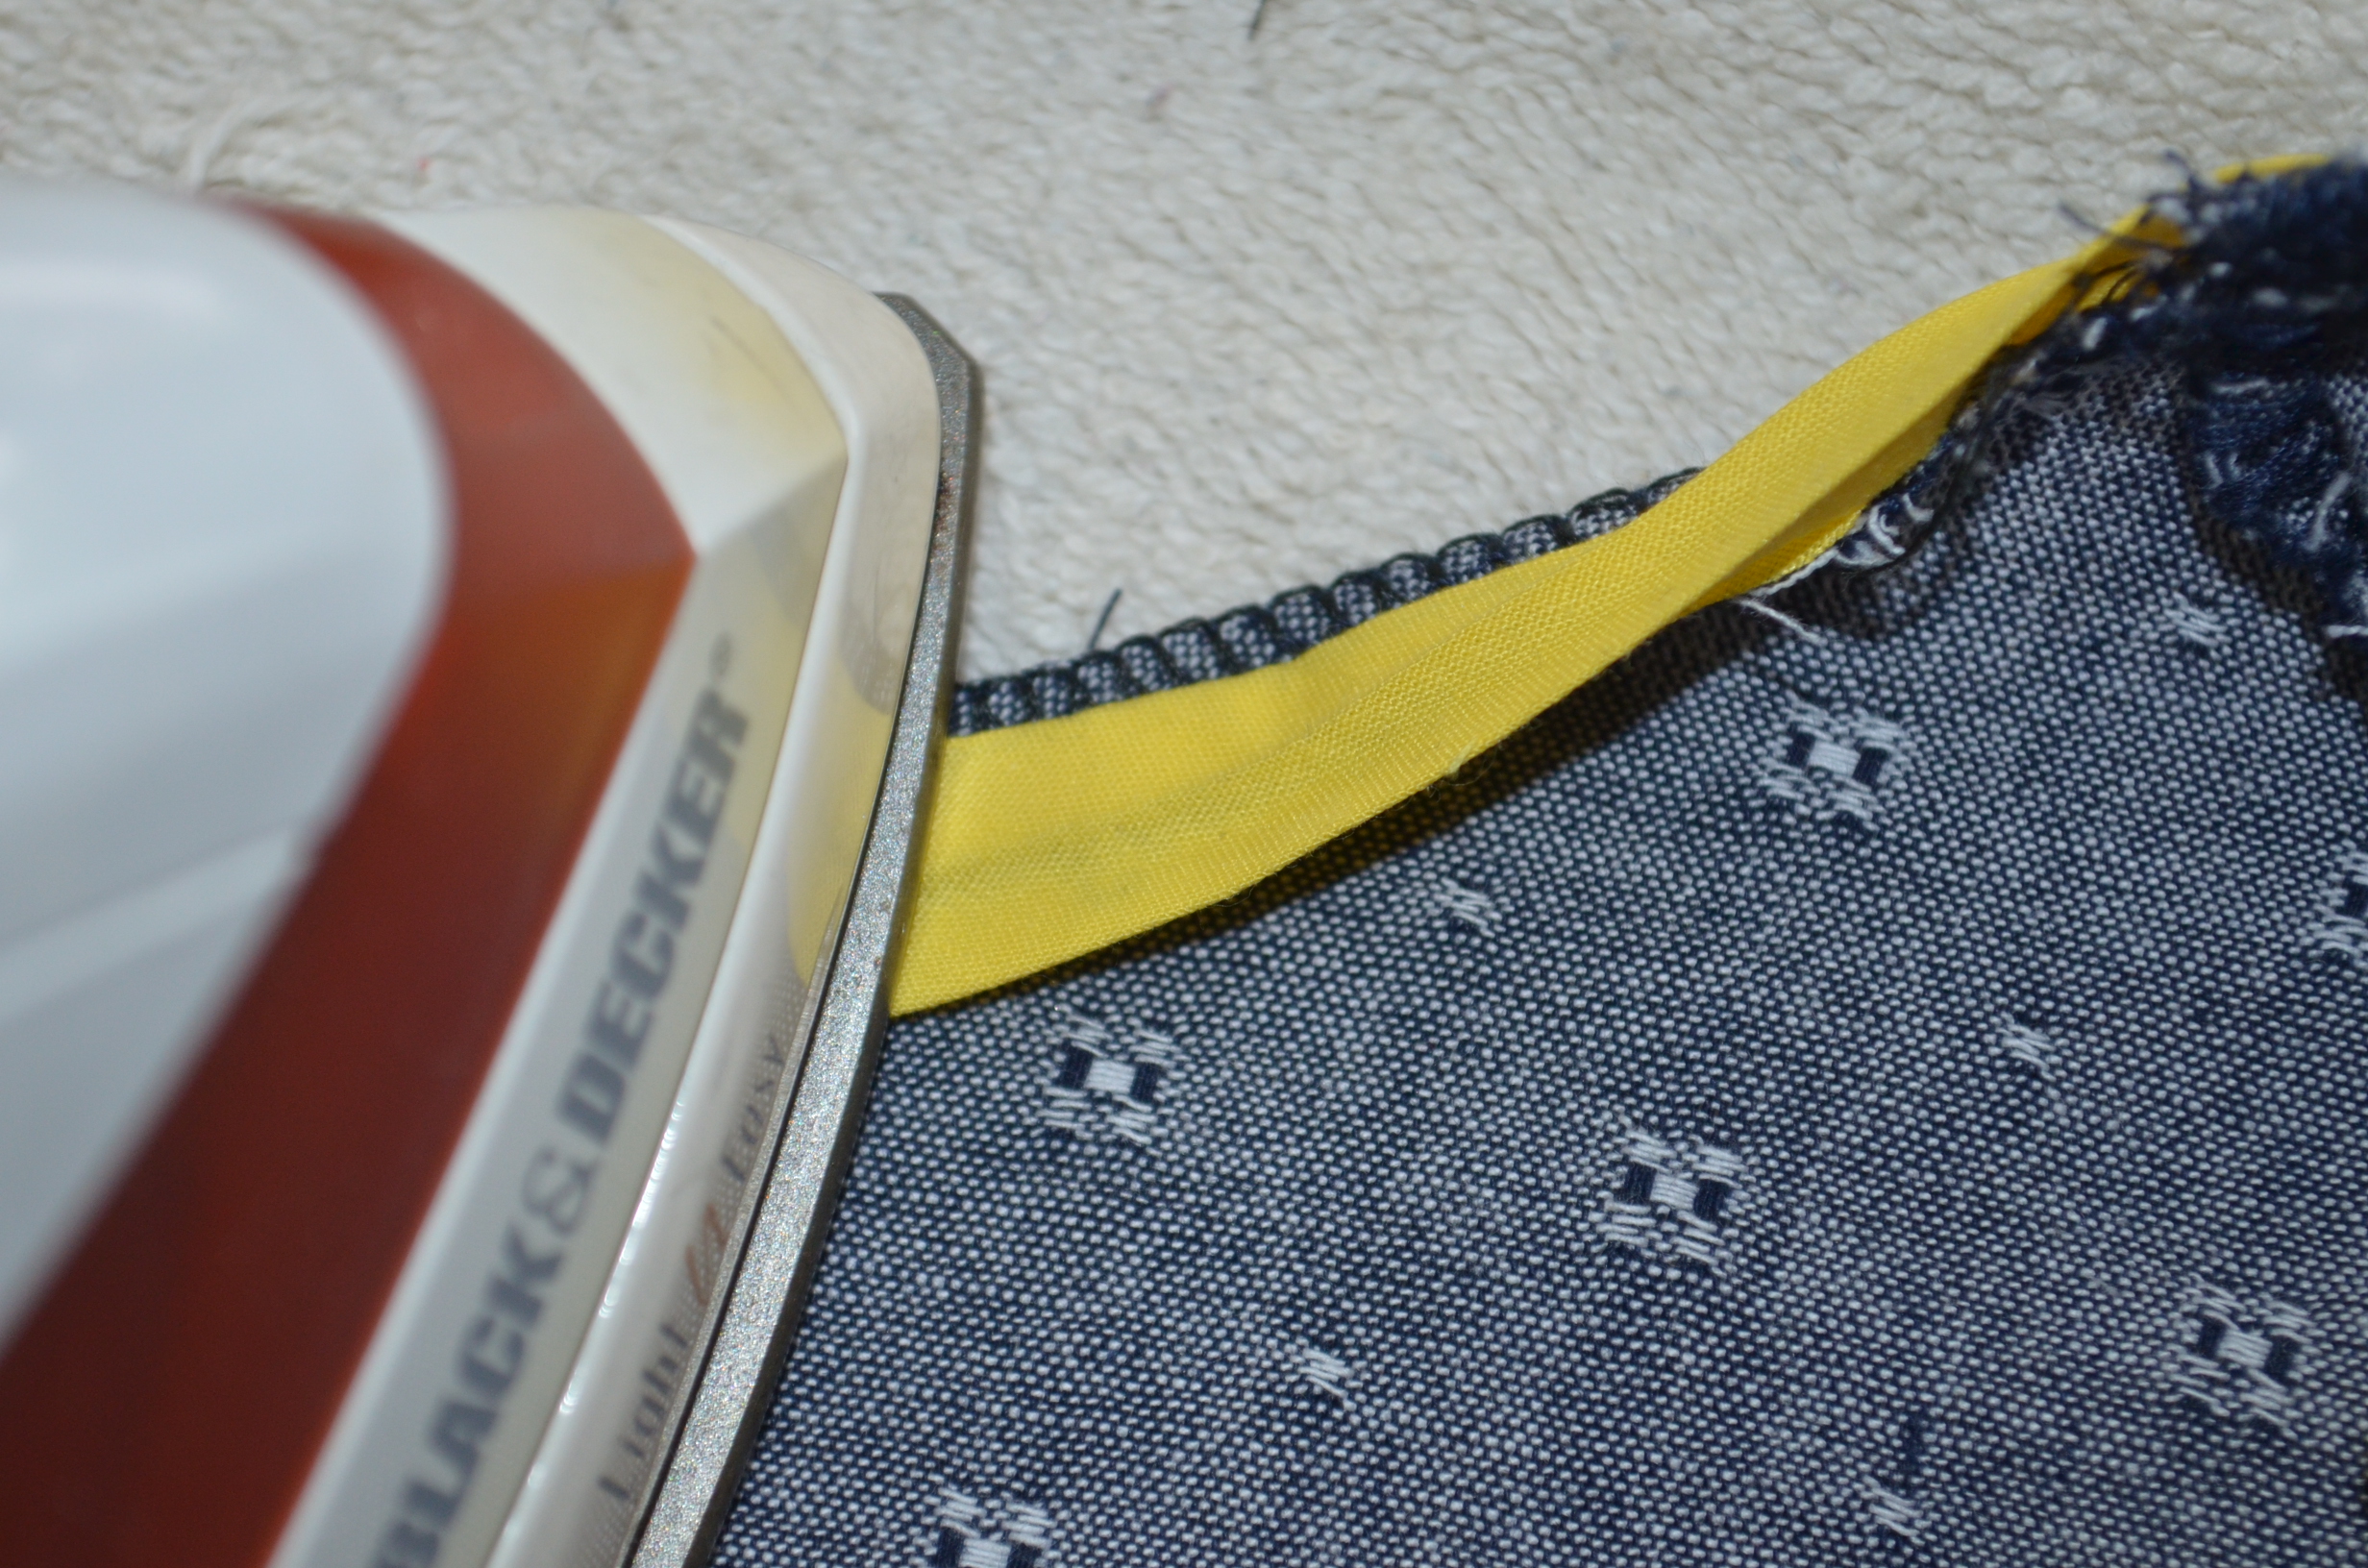
9. Fold the bias tape to the wrong side of the fabric and press flat.
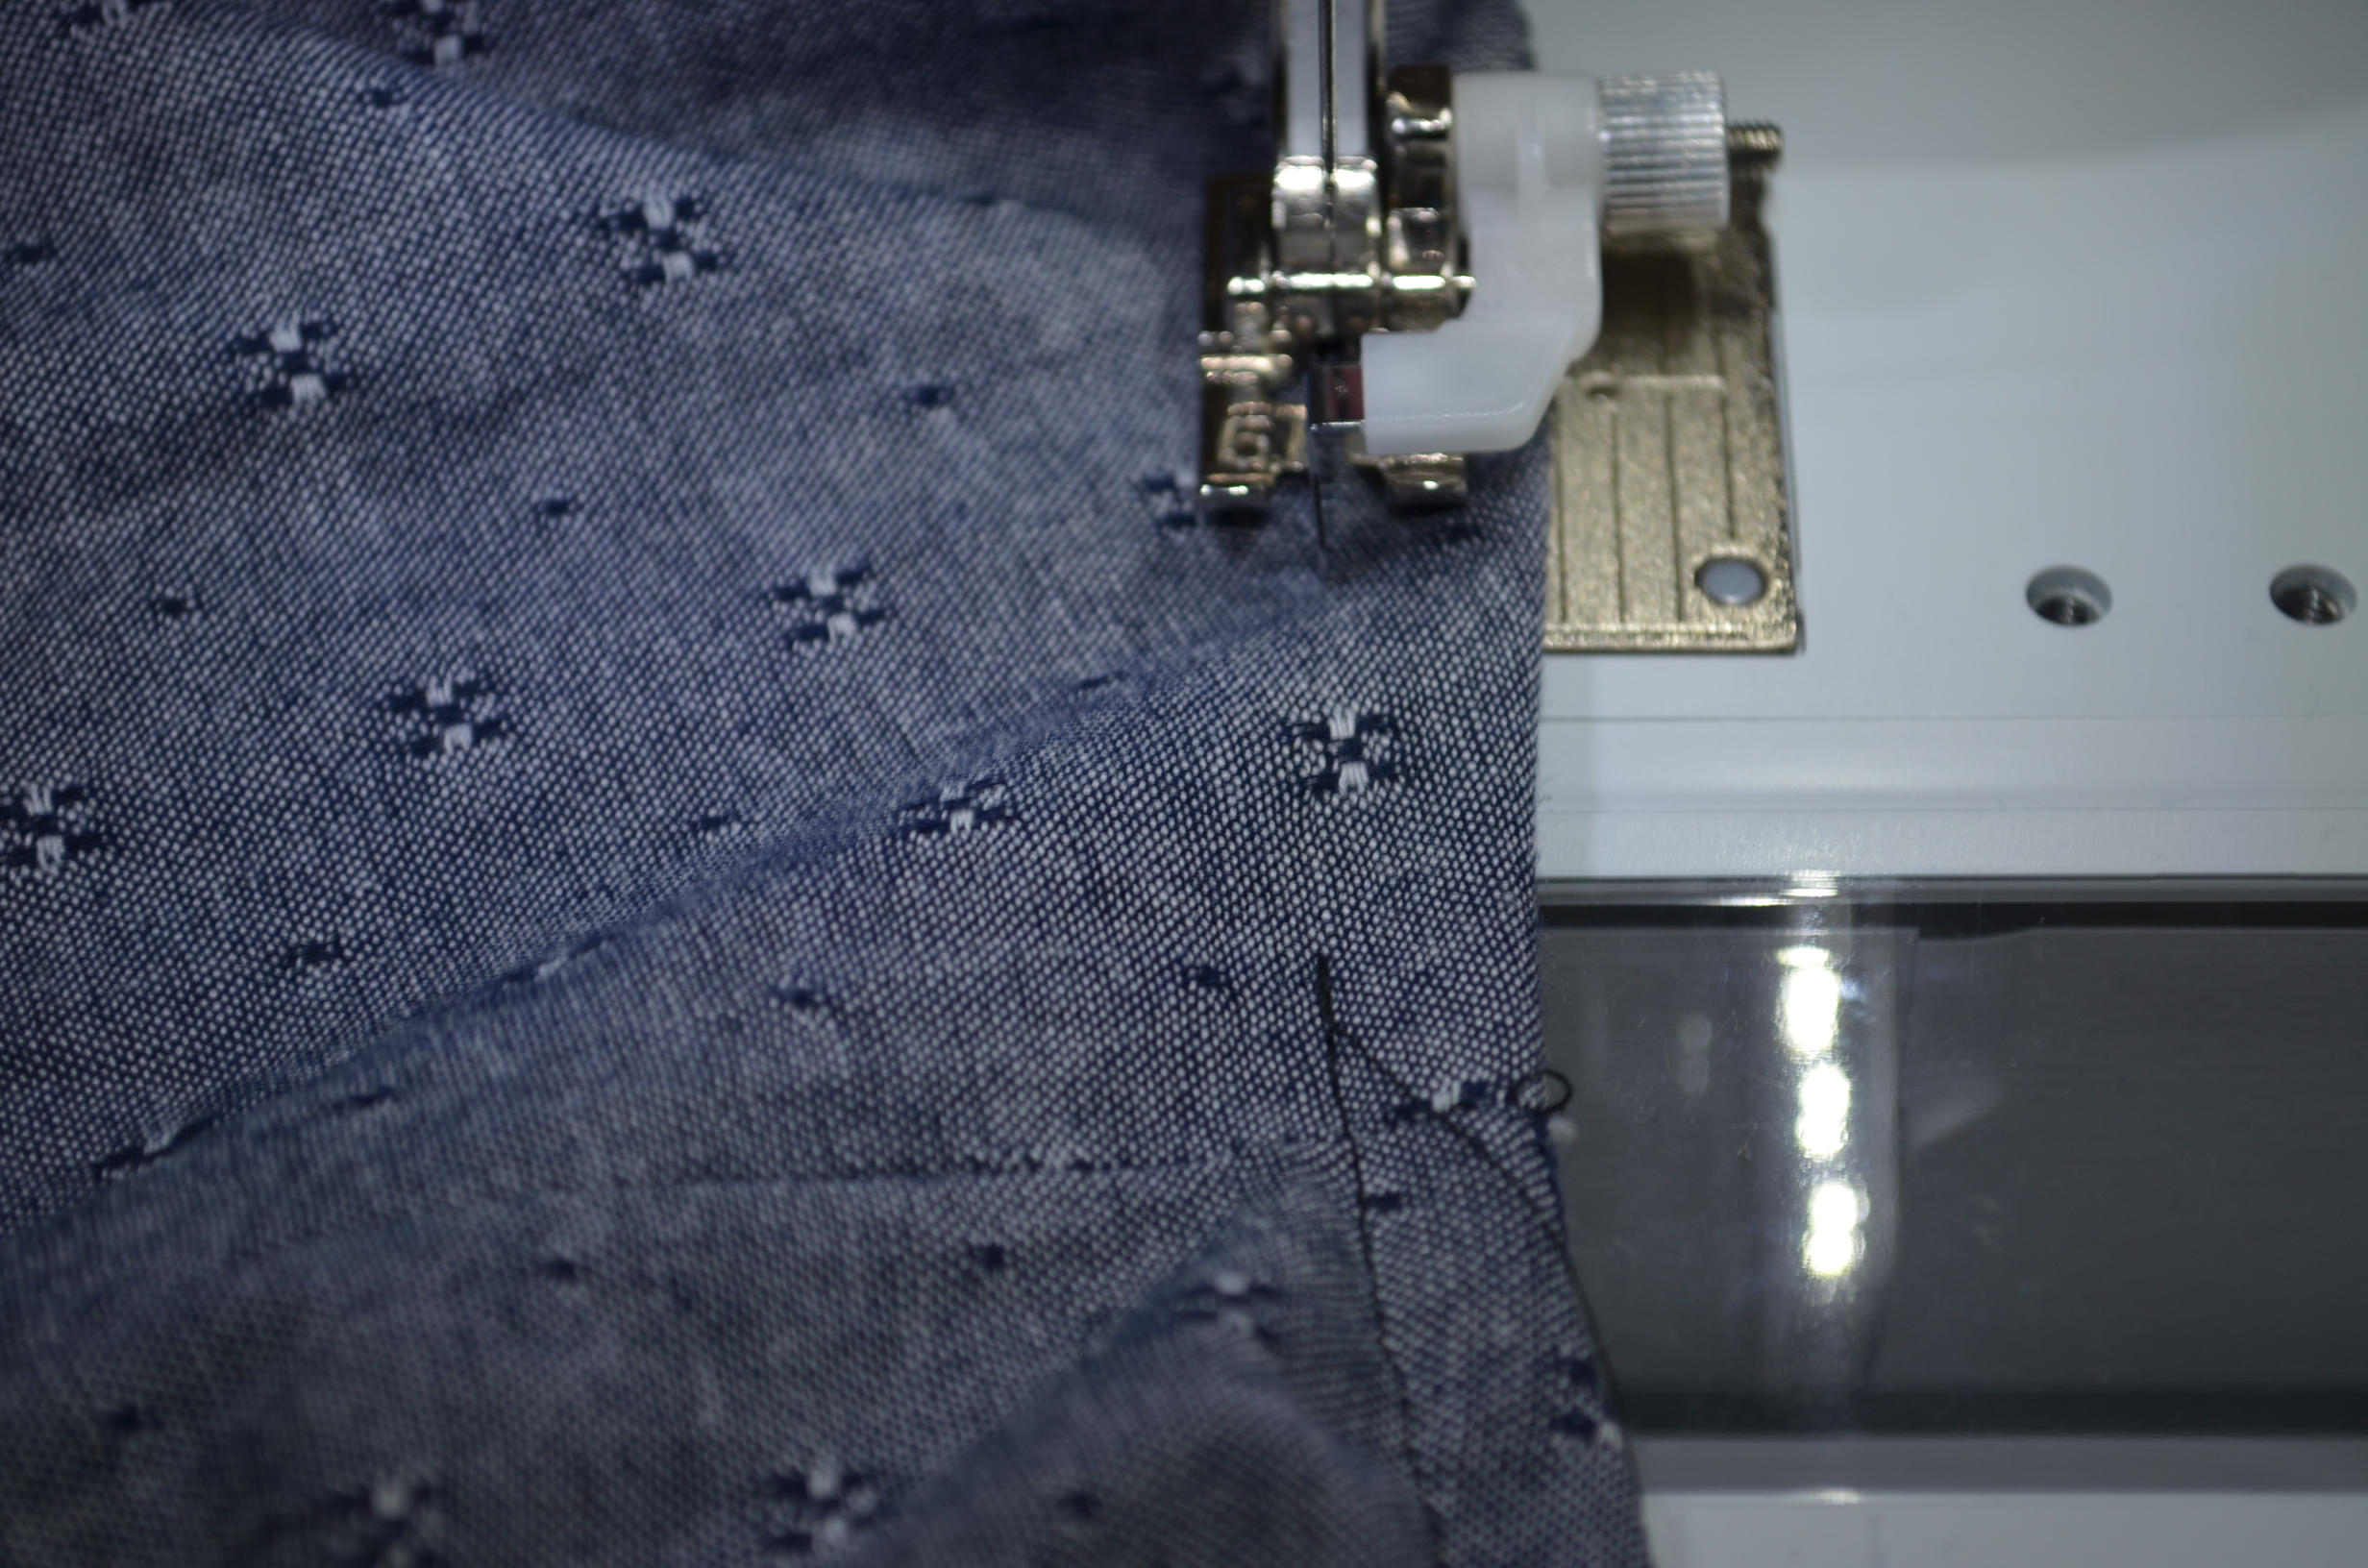
10. Top stitch the neckline 3/8 inch from the edge. This will sew the bias tape to the top to prevent showing on the right side of the fabric.
11. Press the bias tape again.

12. Repeat this procedure with the armholes.
Thank you for reading this tutorial and I really hope you enjoy the pattern this summer.


Steps # 9 & 11 show the edge serging showing above the bias tape on the front on the garment, but not on the garment’s back. How is this possible? And, is it supposed to be outside the bias tape on the front?