Sewing Machine Mat Tutorial
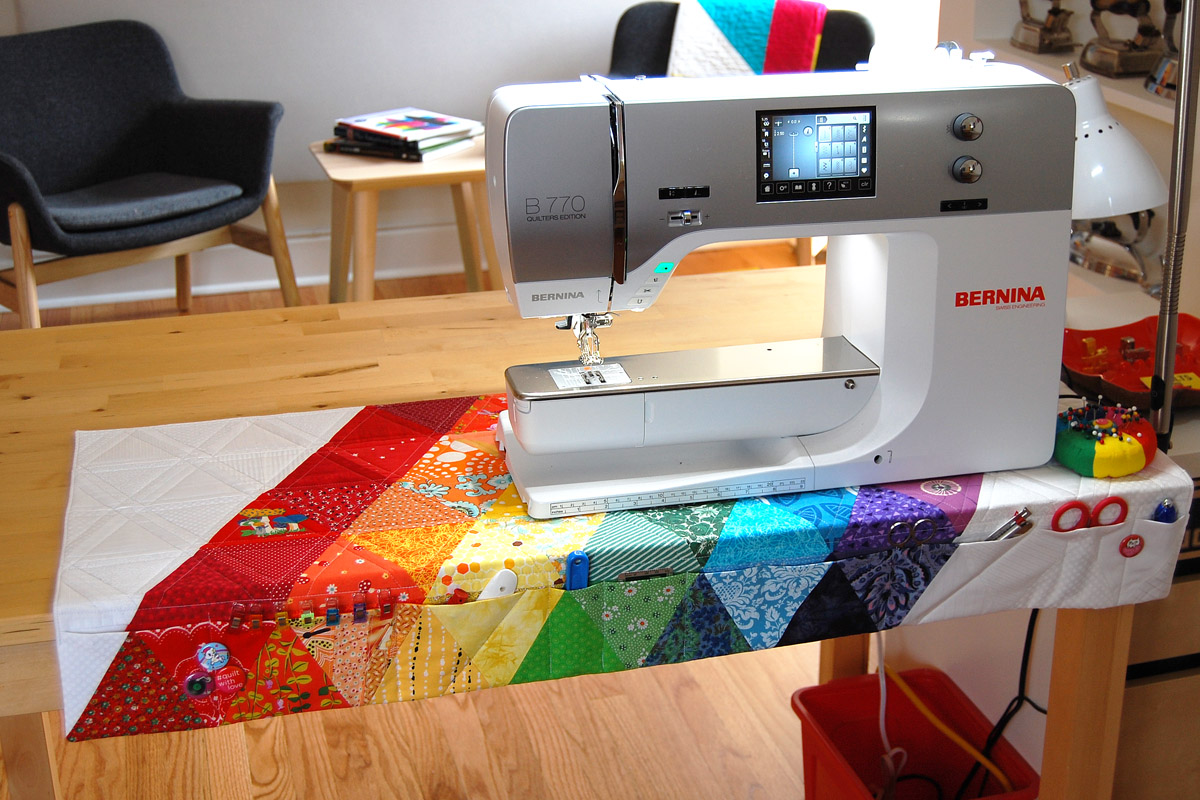
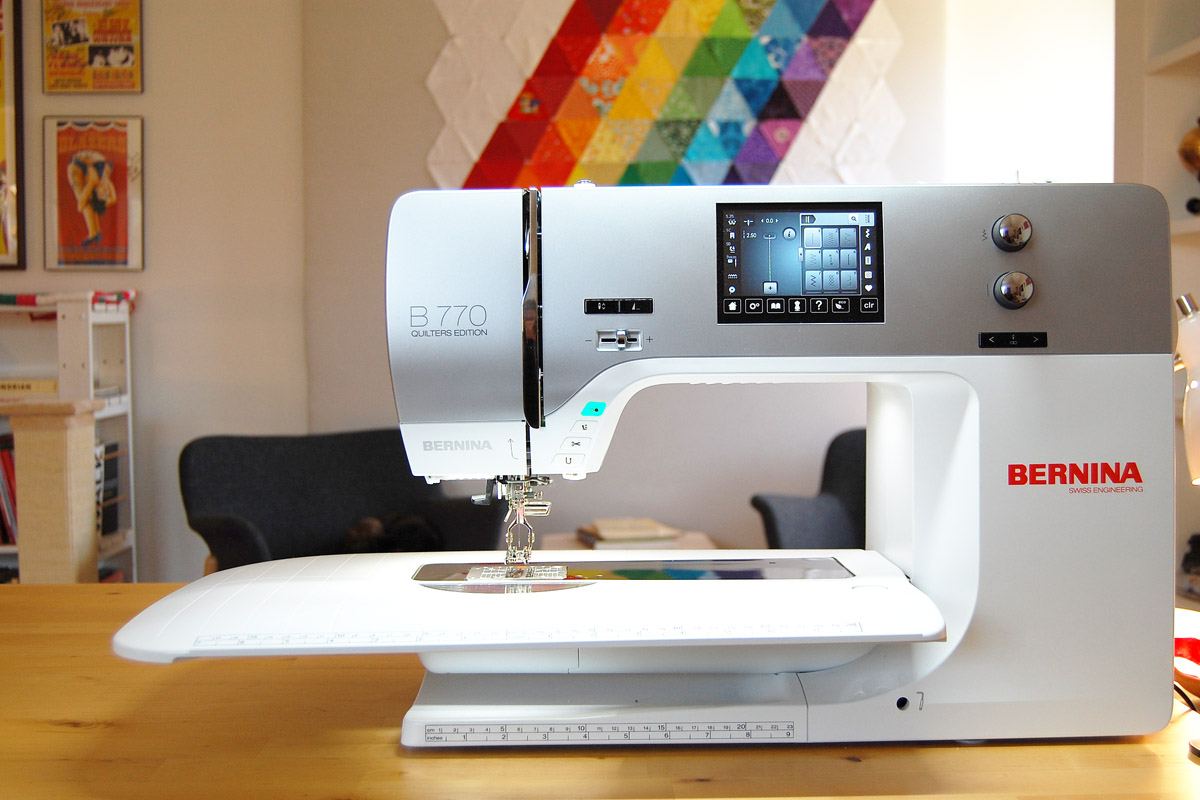
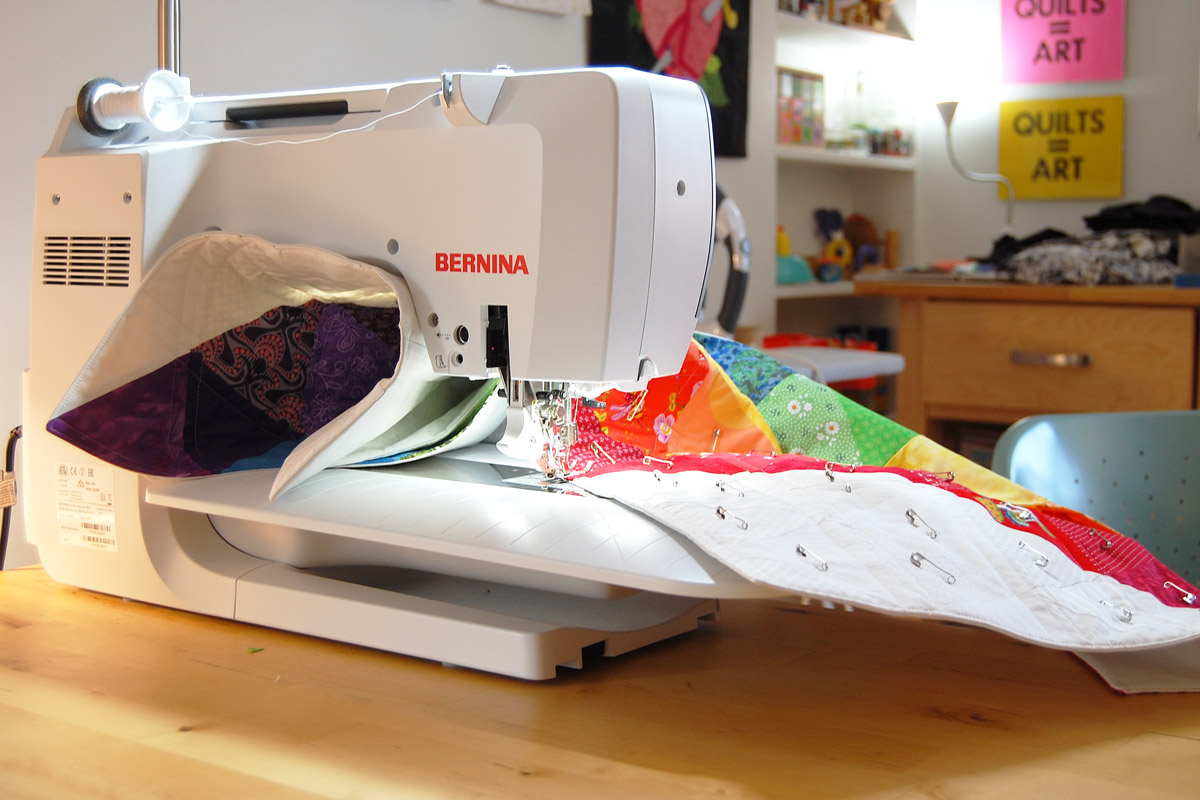
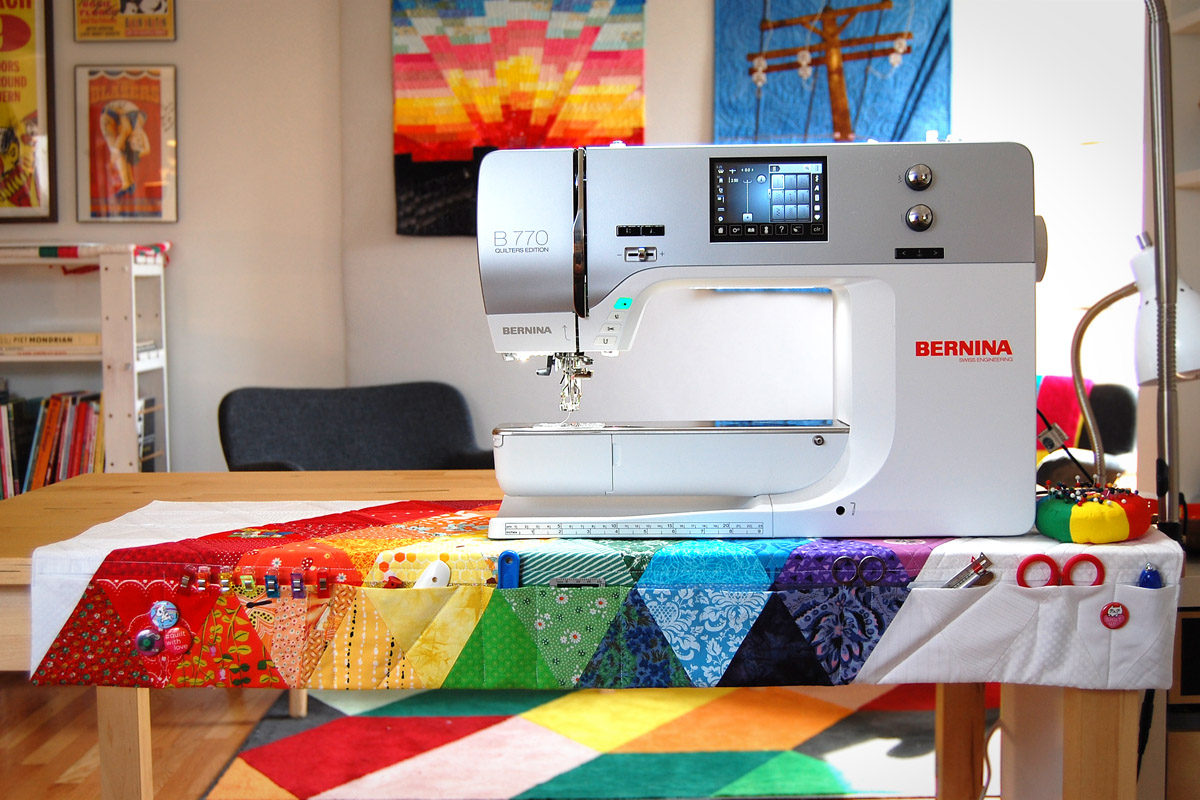
I made my first sewing machine mat a few years ago from a bit of unused patchwork, and I loved using it! But when I upgraded from a 5 Series to a B 770 QE, my old mat suddenly seemed too small. I like my sewing machine mat to be longer than my machine because I have more padded space on the table top, and I have many more pockets on the front of the mat to hold my go-to tools. Time to make a brand new mat!
This patchwork sewing machine mat will comfortably fit all BERNINA 7 Series and 8 Series machines. It features a quilted patchwork top and a layer of heavyweight interfacing in the backing to prevent sagging. And if you’ve ever suffered from a mat slipping and sliding around on a table top, I have a secret tip to fix that at the end of the tutorial! If you have a smaller machine or don’t like such a long mat on your work table, I’ve included measurements to make a smaller size below.
Materials to Make a Sewing Machine Mat
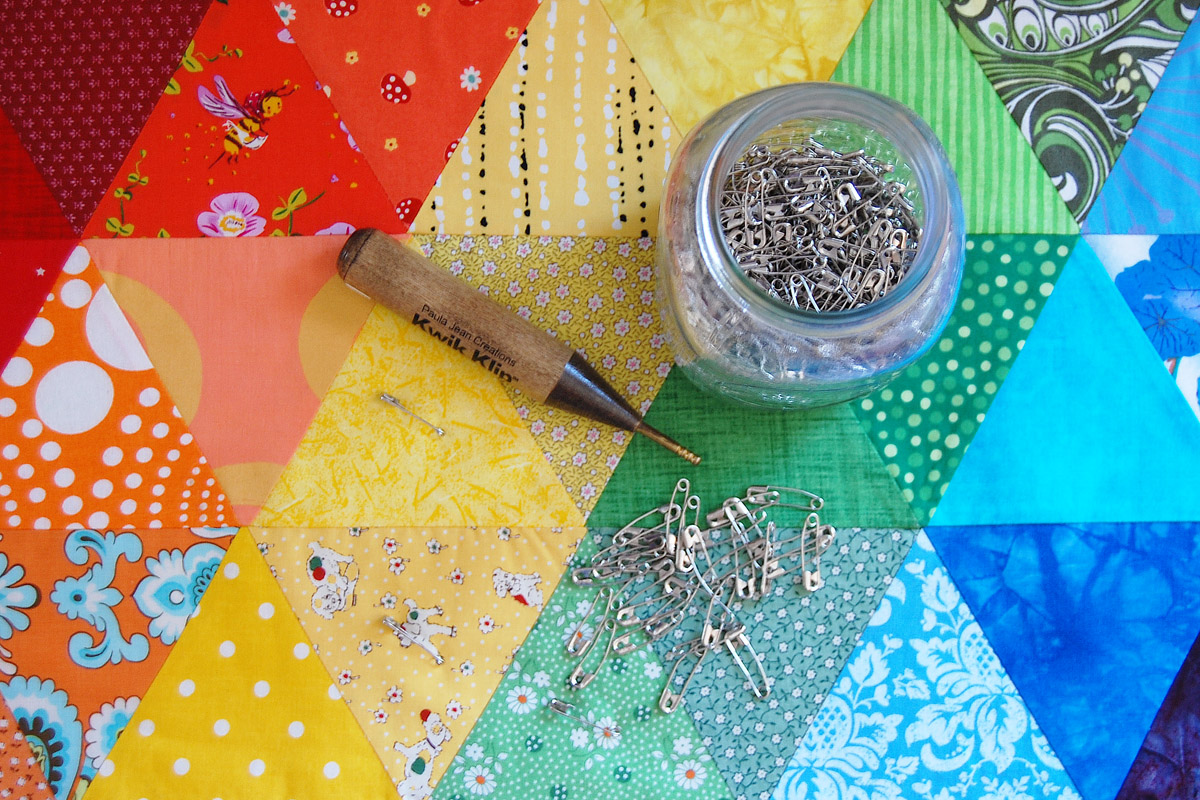
- Download the Triangle Patchwork Template or use your favorite method of cutting 60 degree triangles (die cutter or special ruler)
- Sewing machine (I use a BERNINA 770 Quilter’s Edition)
- Patchwork foot of choice (I use Patchwork foot #97D)
- Straight stitch needle plate
- Dual Feed feature or Walking foot #50
- A wide variety of scraps at least 5″ x 5″ or larger, or a bunch of fat quarters to cut a total of 126 triangles for the full sized mat, or 98 triangles for a smaller mat
- Backing fabric 42″ x 22″
- Cotton batting 45″ x 25″
- Heavyweight fusible craft interfacing cut 22″ x 42″
- Temporary spray adhesive or quilt basting spray
- Coordinating thread
- Basic sewing supplies
All About Triangular Patchwork
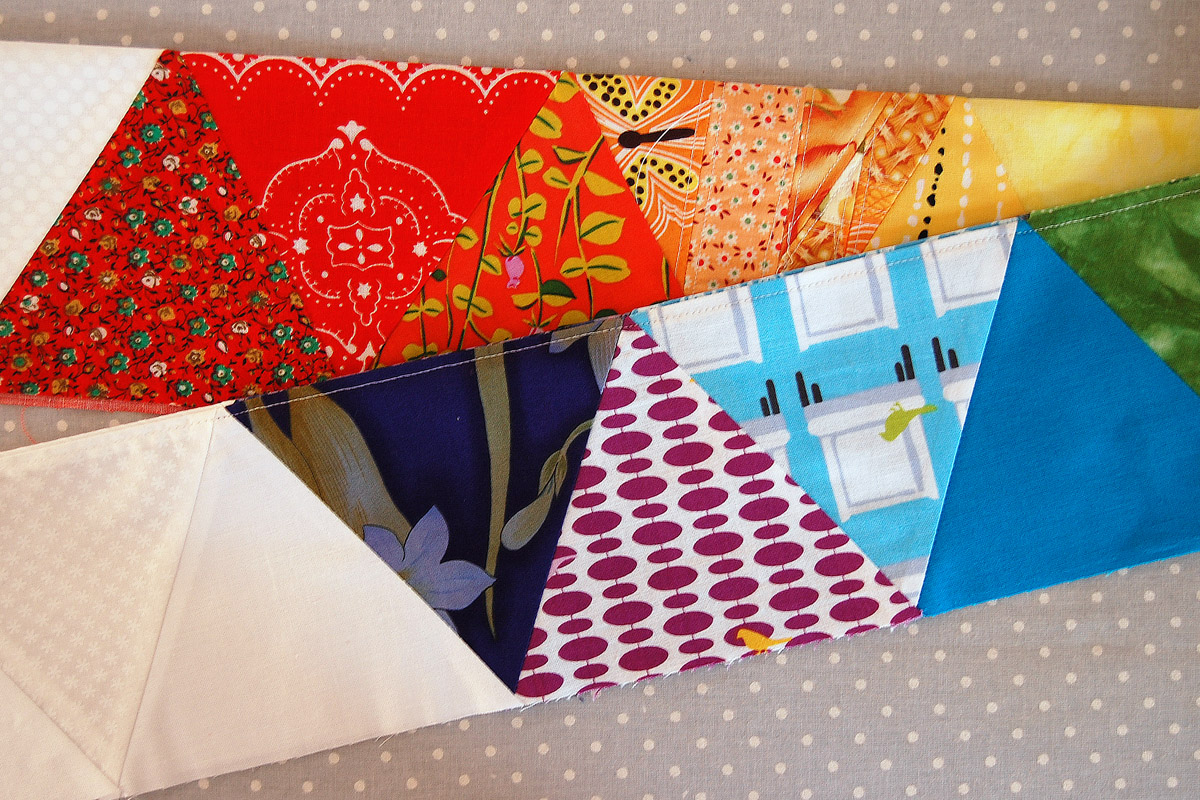
I’m sewing my mat with patchwork triangles that have three equal sides and finish off at 4″ tall. You can learn all about working with patchwork triangles here at WeAllSew with a great series from quilter Lee Heinrich. Read in Lee’s series all about cutting triangle patchwork, designing with triangles, and piecing triangles. Designing with these triangles is fun because there are so many other shapes you can make with them, like hexagons, arrows, chevrons, or just plain old scrappy patchwork.
Cutting the Patchwork to Make a Sewing Machine Mat
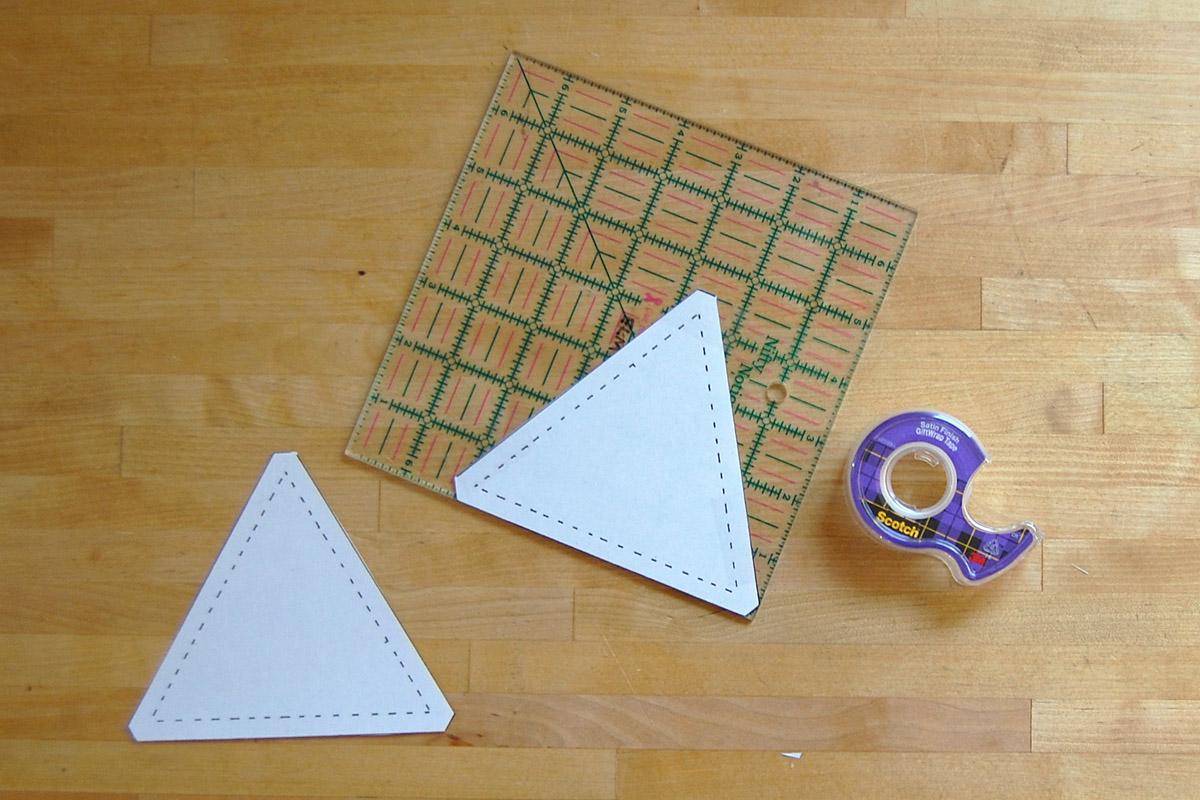
You can cut these equilateral triangles with a special 60 degree ruler, a die cutter, or use my method below for turning a small quilting ruler into a template.
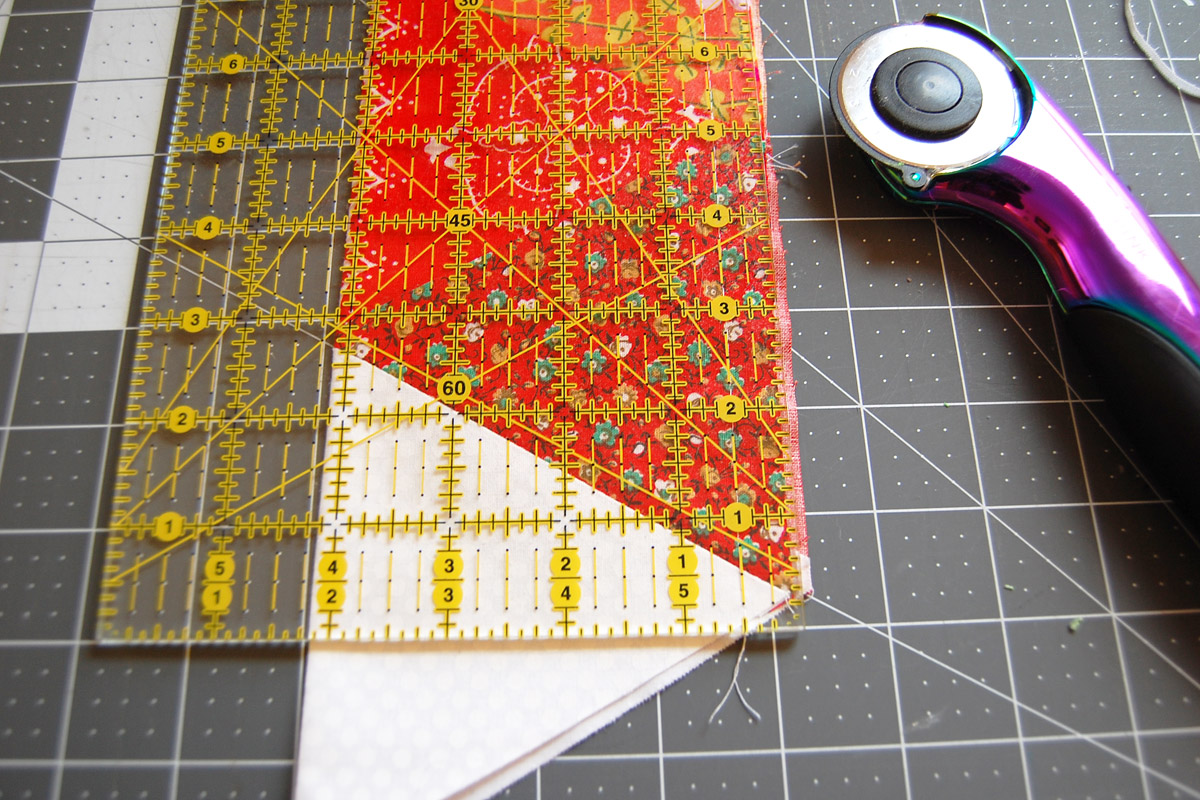
Download and print two copies of the Triangle Patchwork Template (do not shrink or fit when printing) and cut out with craft scissors.
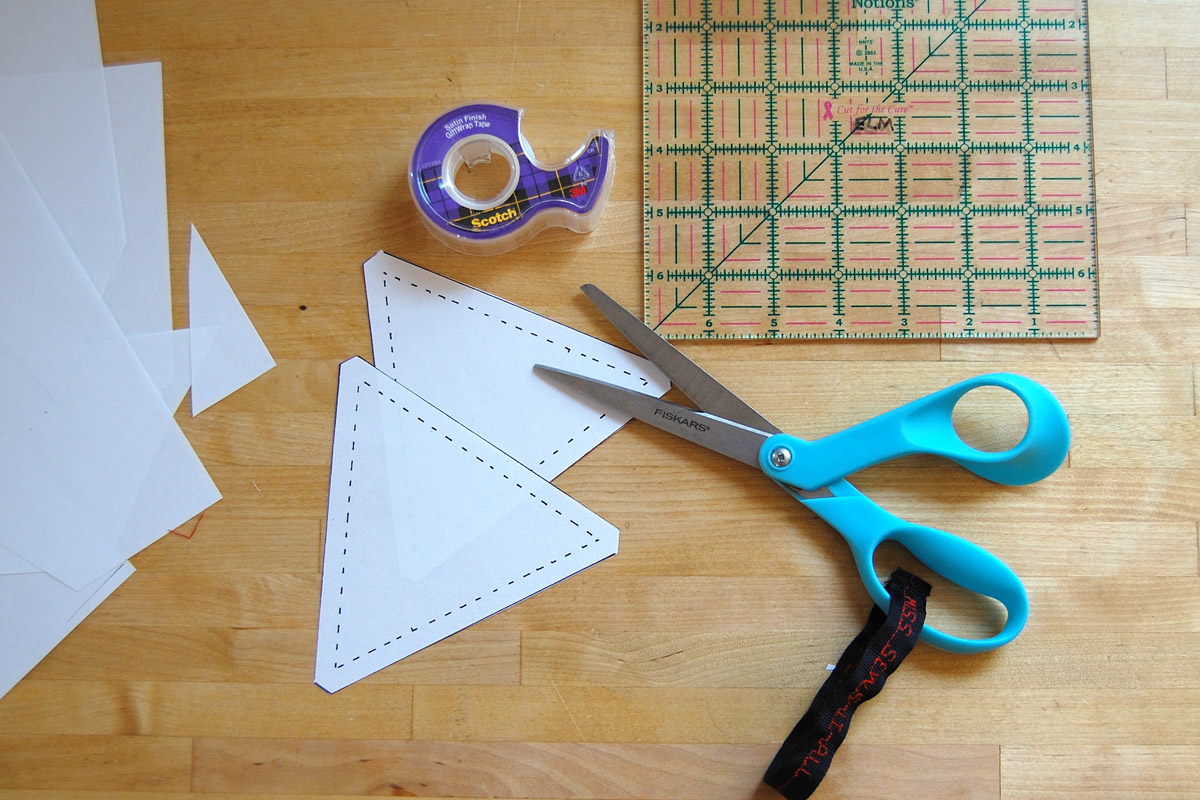
Using clear tape, adhere one template on top of a small quilting ruler. Line up one flat edge with a flat edge of the ruler, and line up the edge of the triangle template with the other edge of the ruler (don’t worry about cutting off the points of the triangles, we’ll do that step last).
To use the template, start with one edge of your fabric cut straight. Line up the edge of the paper template with the straight cut edge of the fabric so that the flat edge of the paper template on the side of the ruler is set to make the first cut.
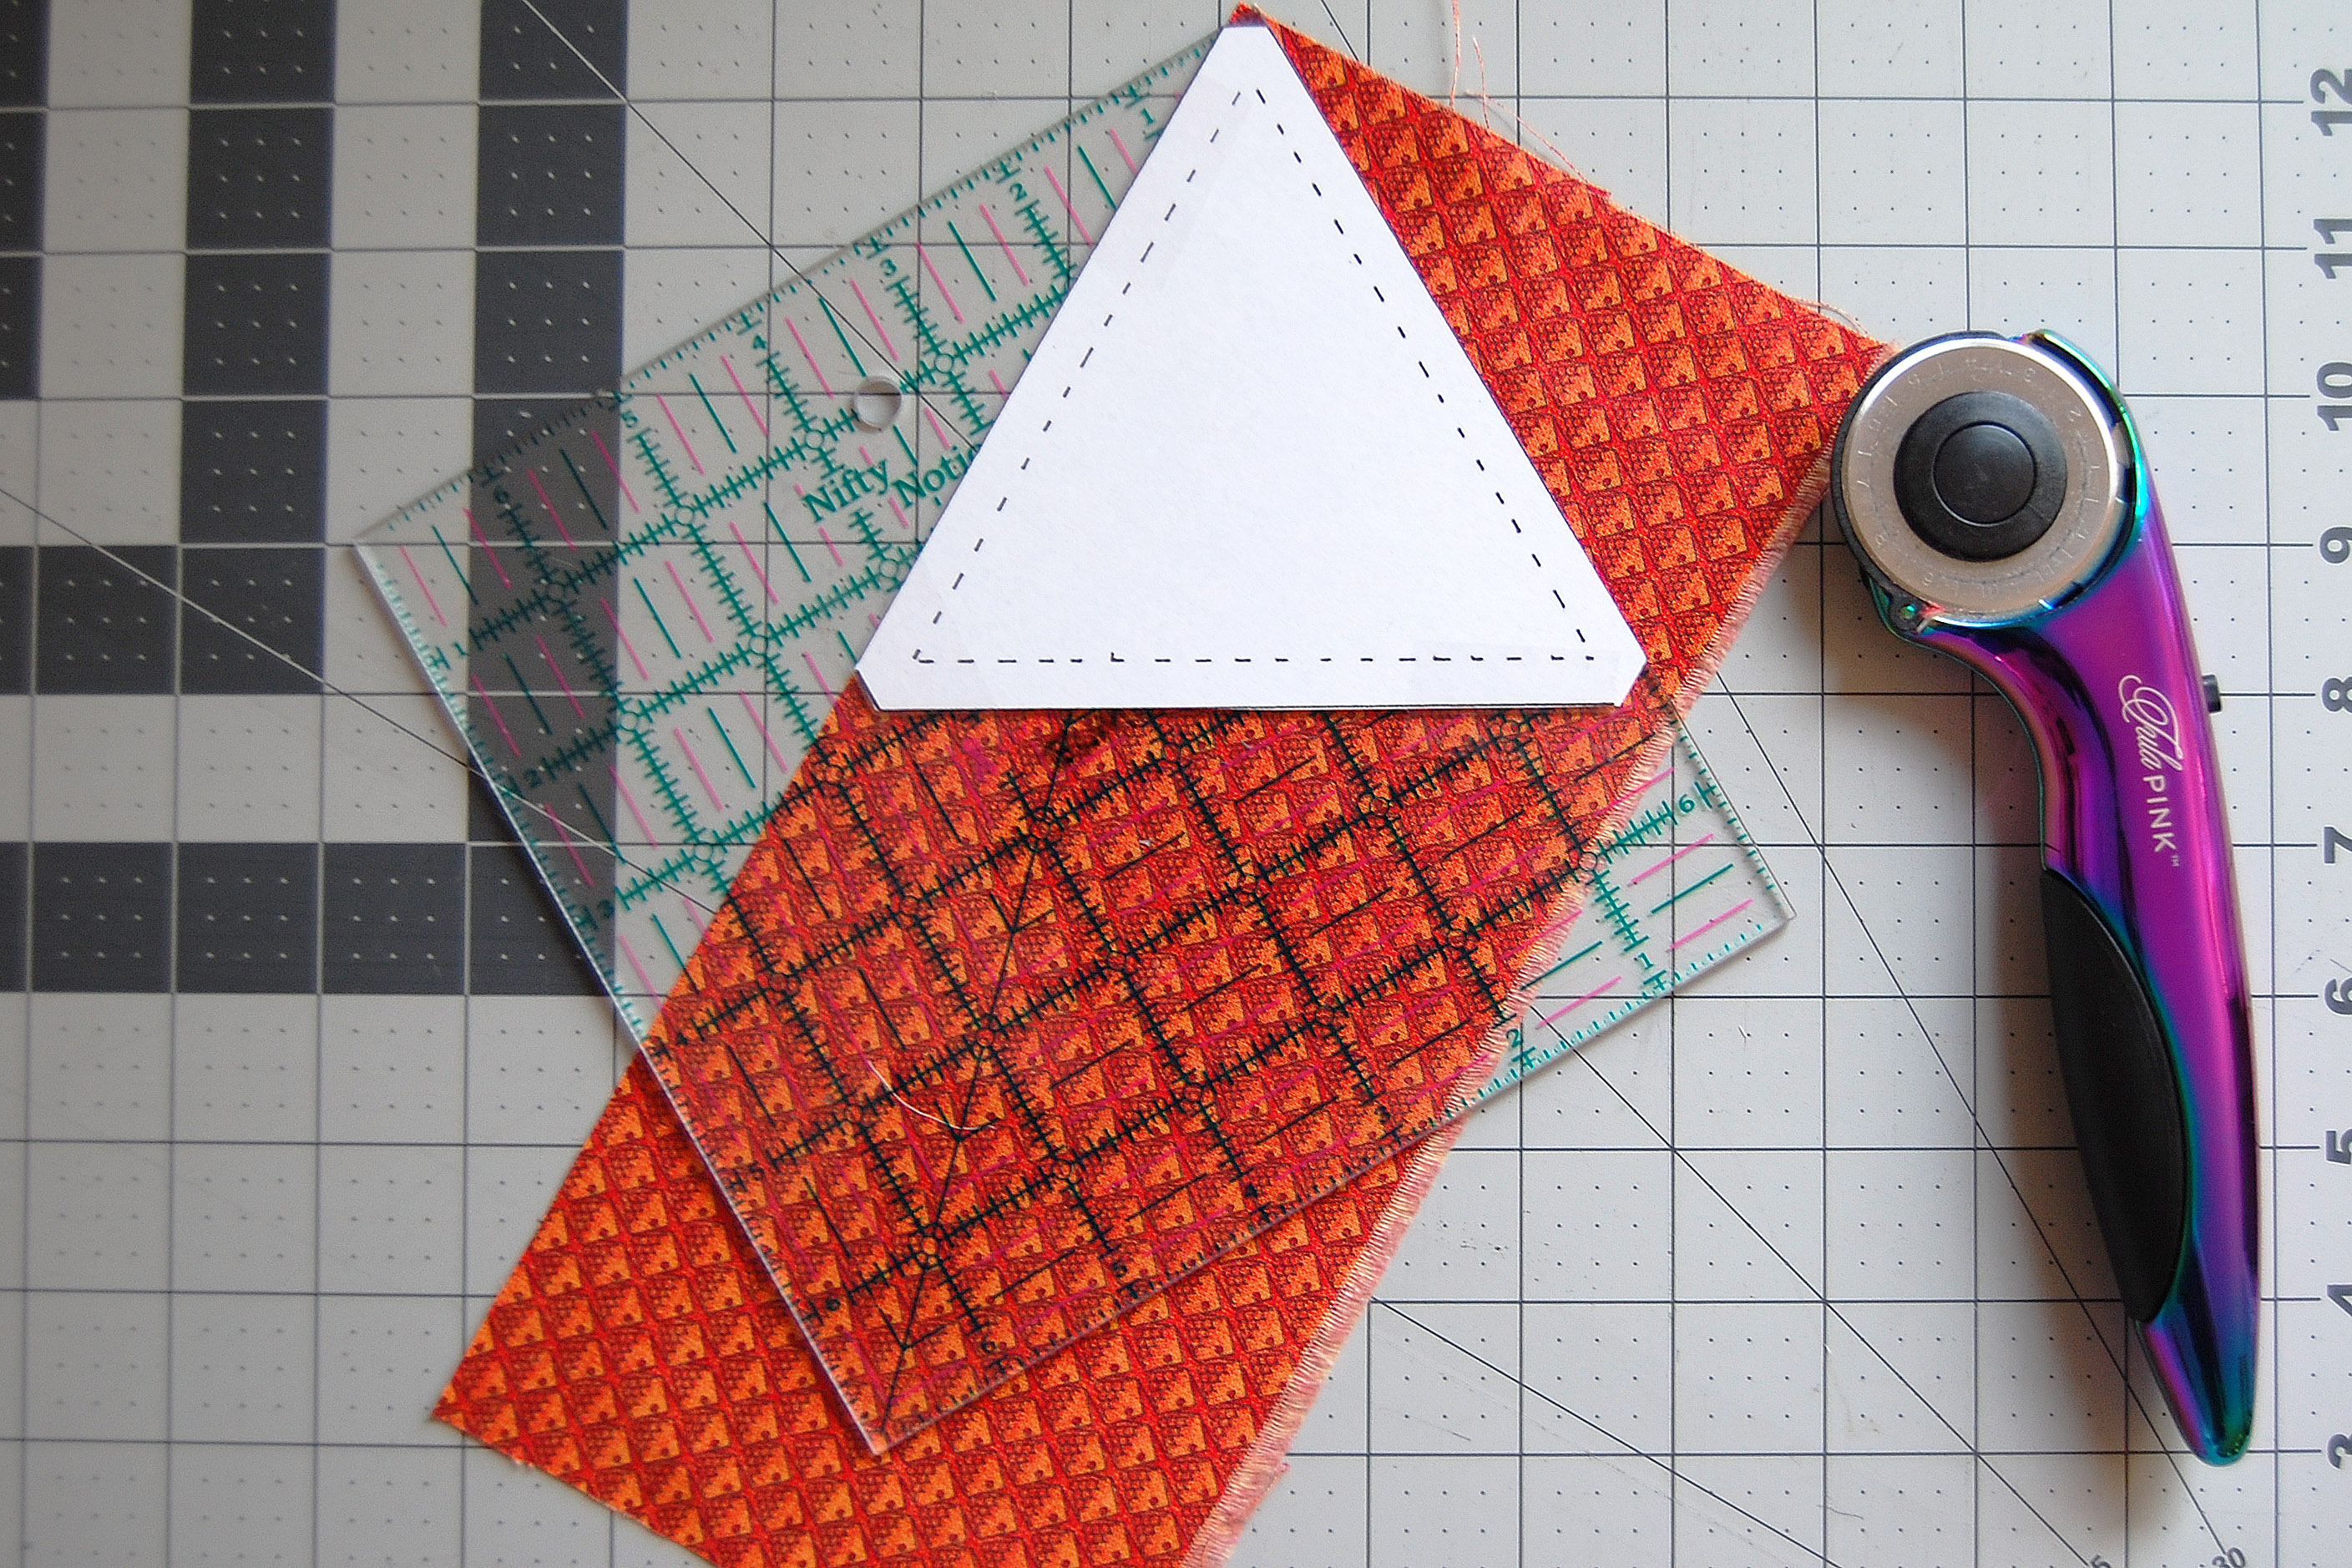
When the ruler is aligned, cut the fabric.
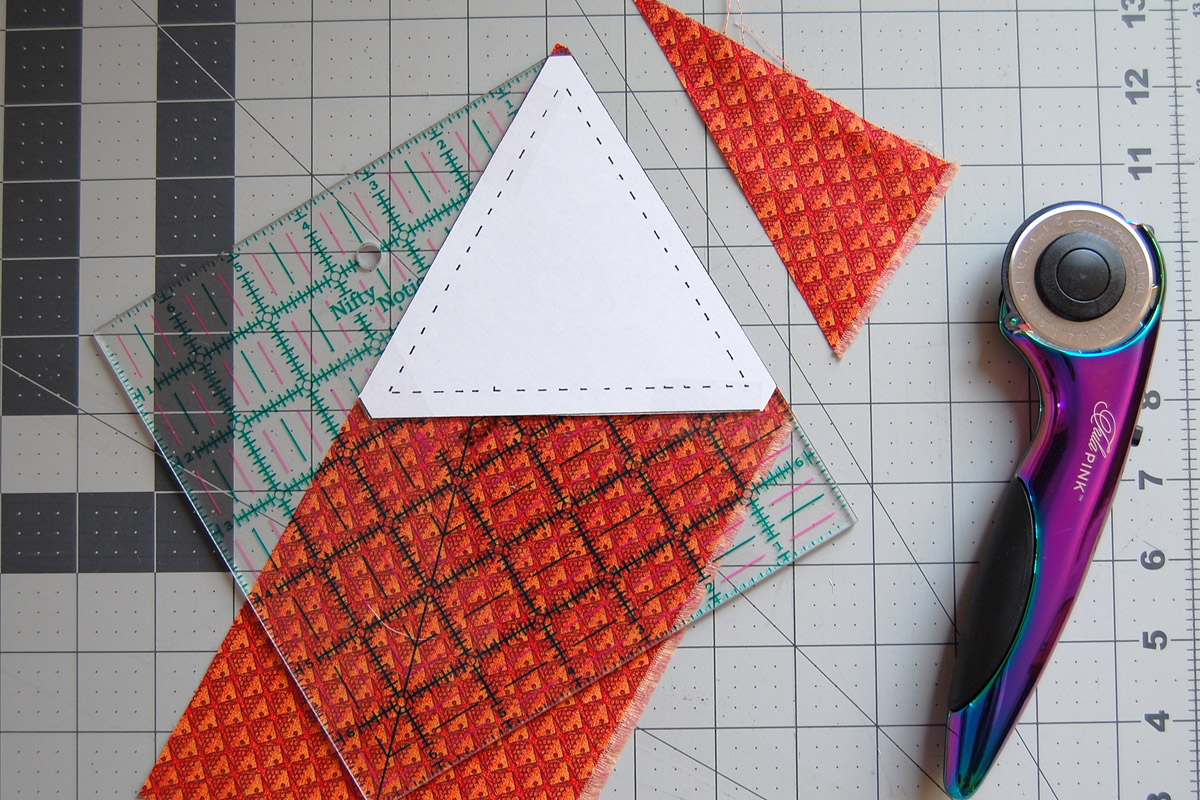
Move the ruler to match up the template edges with the two cut edges. The template on the edge of the ruler is now set to cut the last edge.
When the template is aligned, cut the last edge.
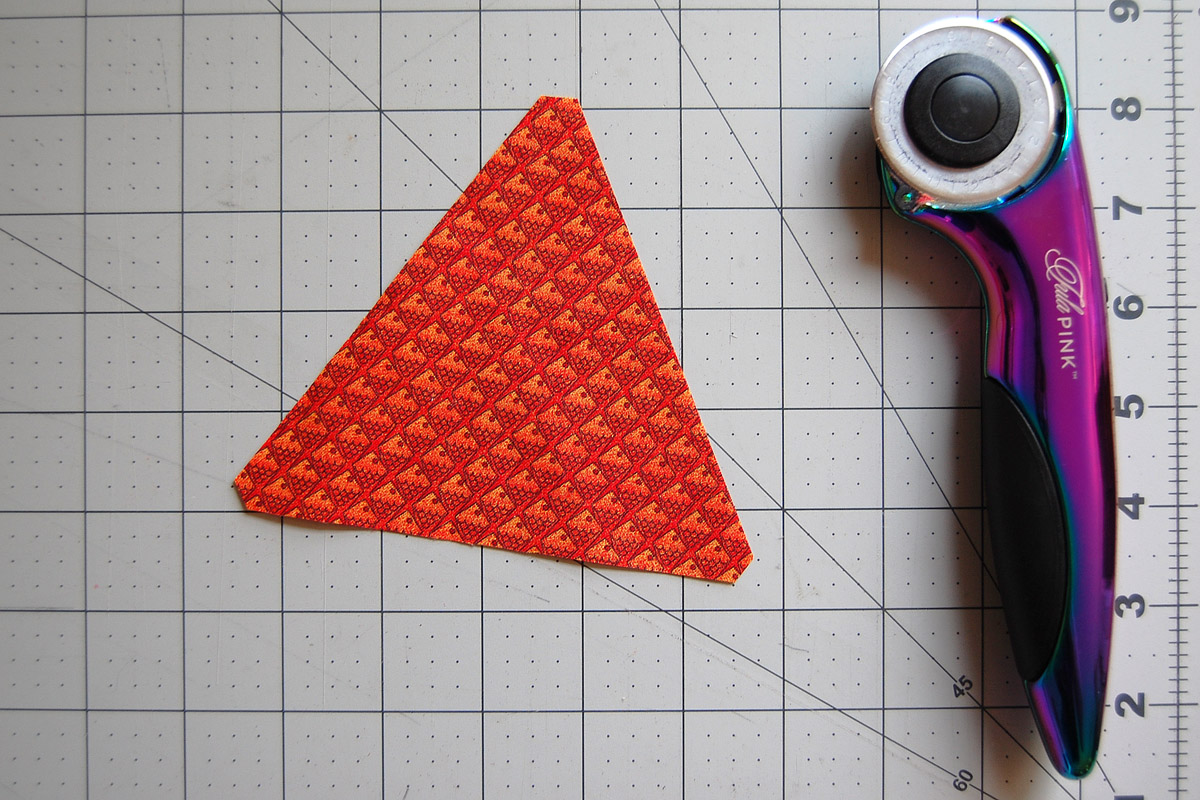
You now have a 60 degree triangle.
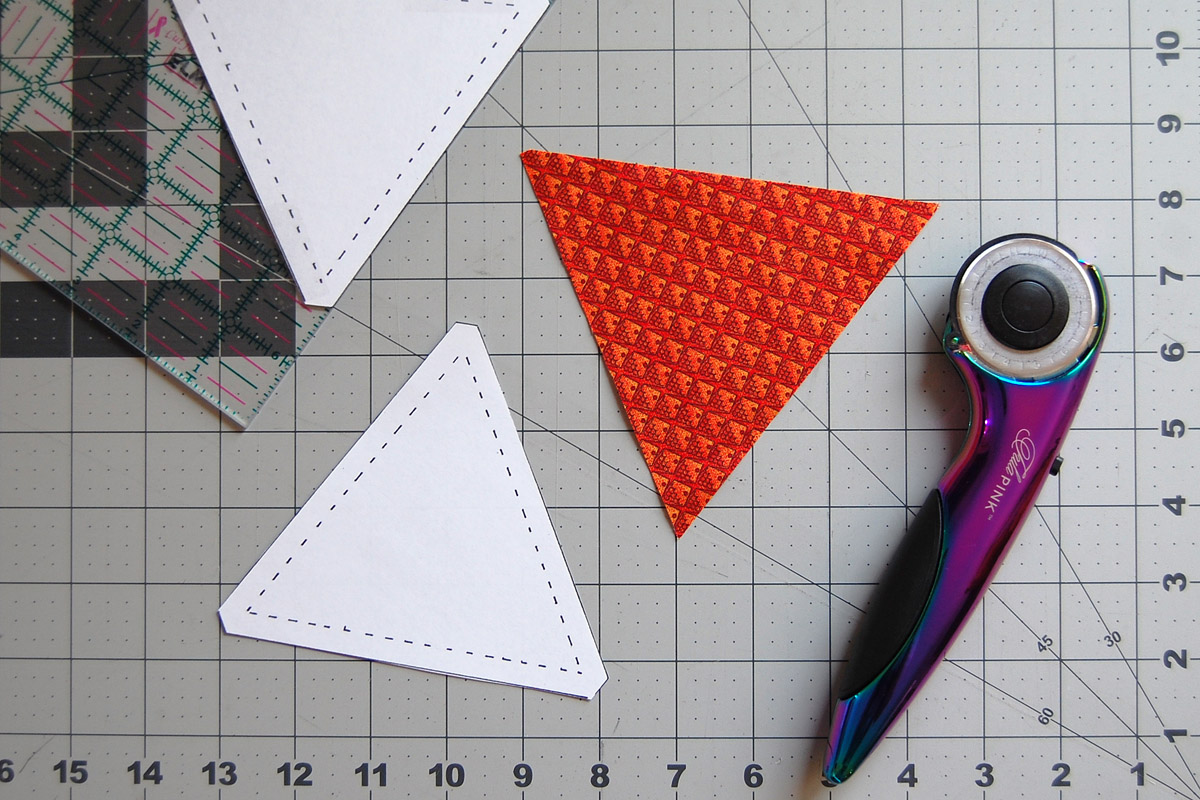
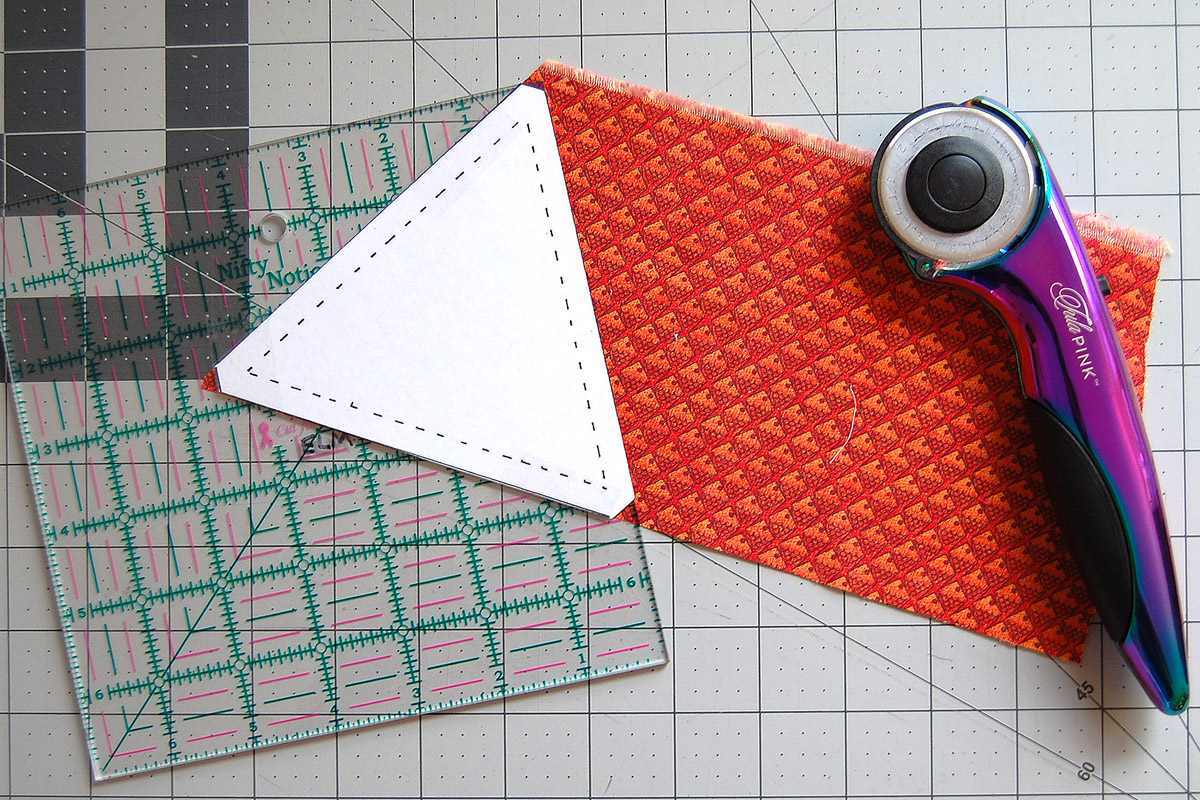
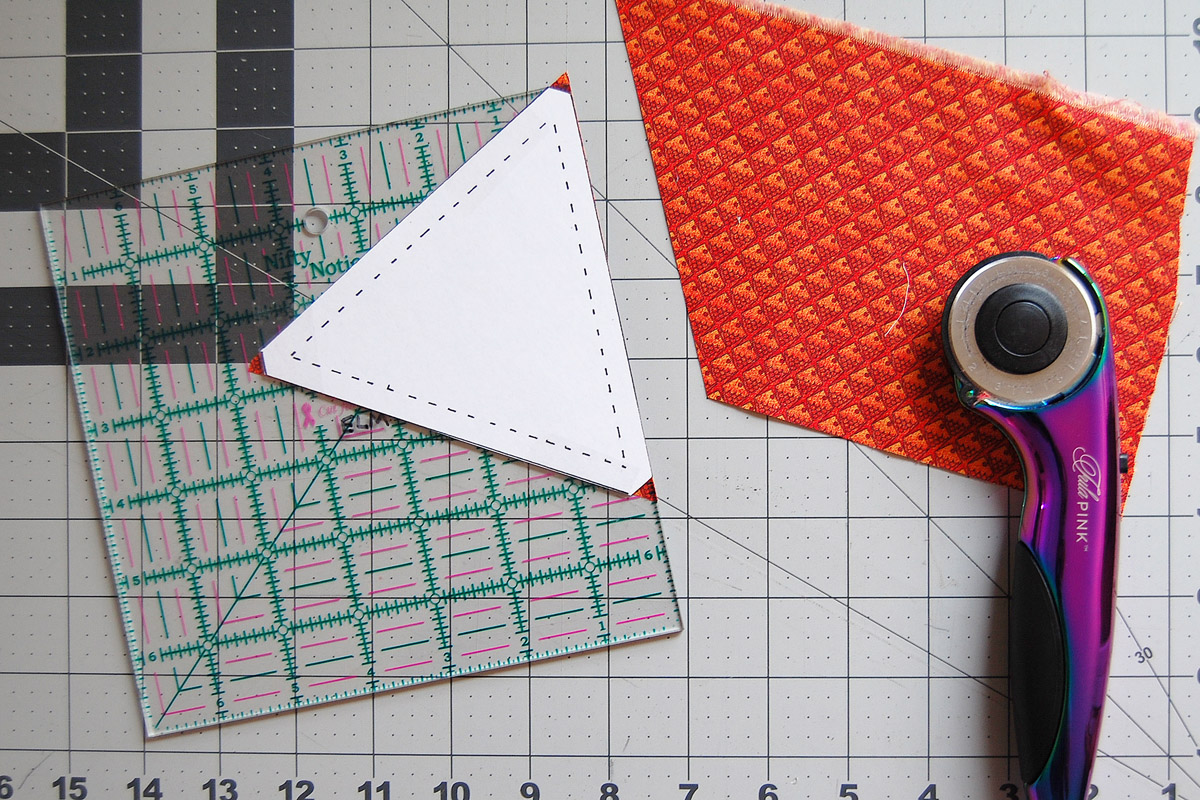
Take the second paper template and place it on top of the triangle. Use this template to cut the points off the three corners of the triangle. Cutting off the points makes it easier to sew the triangles together without the points forming dog ears as you sew.

You now have the perfect patchwork triangle with 1/4″ seam allowance included to create a finished 4″ tall triangle.
Cut all triangles for your patchwork design, see below in Layout and Design to find the total number of triangles needed for your design.
Layout and Design to Make a Sewing Machine Mat
Full Size
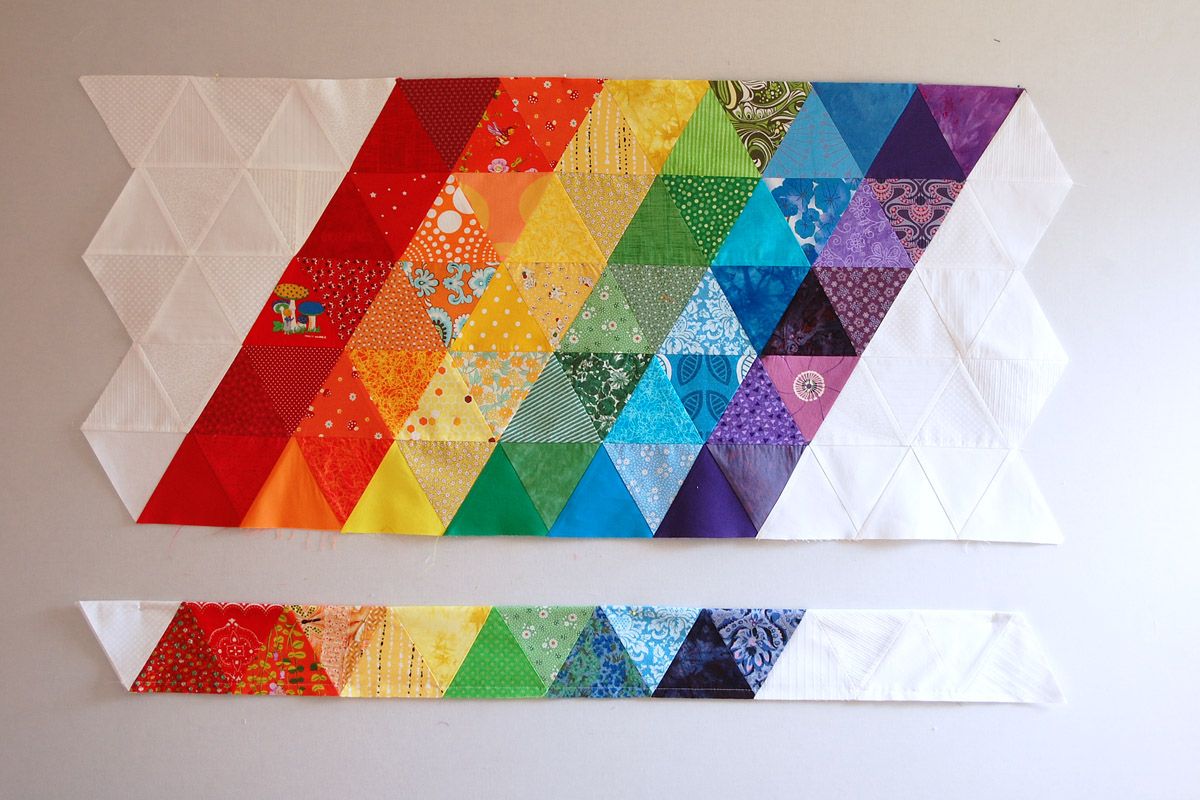
This mat was created with a total of 126 triangles; 90 for the main mat and 36 for the front pocket. The full sized sewing machine mat measures 39 1/2″ across by 15″ under the machine with a 5″ drop-down row of front pockets. As you can see in my sketch below, the main mat is created with 5 rows of 18 triangles, and the front pocket uses 2 rows of 18 triangles.
Small Size
The smaller size mat can be created with a total of 98 triangles; 70 for the main mat and 28 for the front pocket. This mat measures 27 1/2″ across by 15″ under the machine with a 5″ drop-down row of front pockets. To create this size, instead of laying out the rows 18 triangles wide, only use 14 triangles. Your final layout will have a main patchwork mat made from 5 rows of 14 triangles each, and the front pocket will use 2 rows of 14 triangles. While I’m showing instructions for making the full sized mat, as long as you are careful to change the dimensions with your patchwork, and cut your backing and batting to the same size, you can follow along with the tutorial.
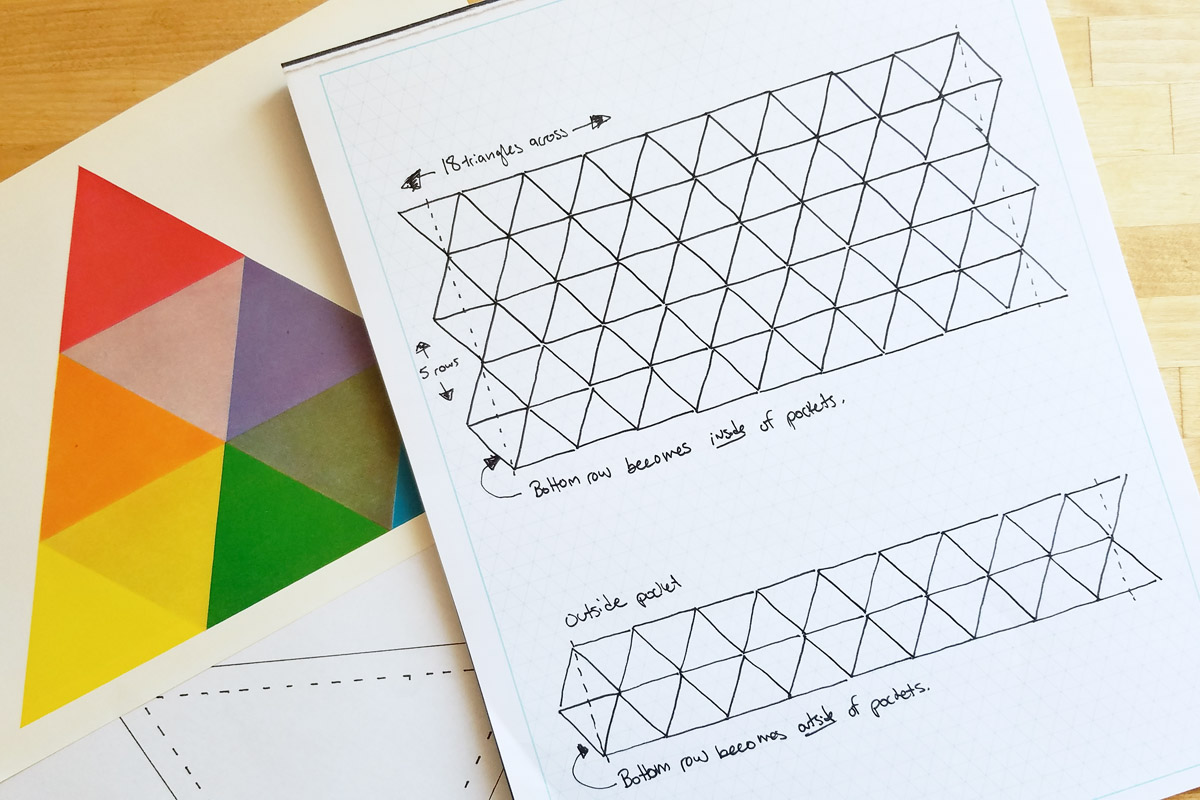
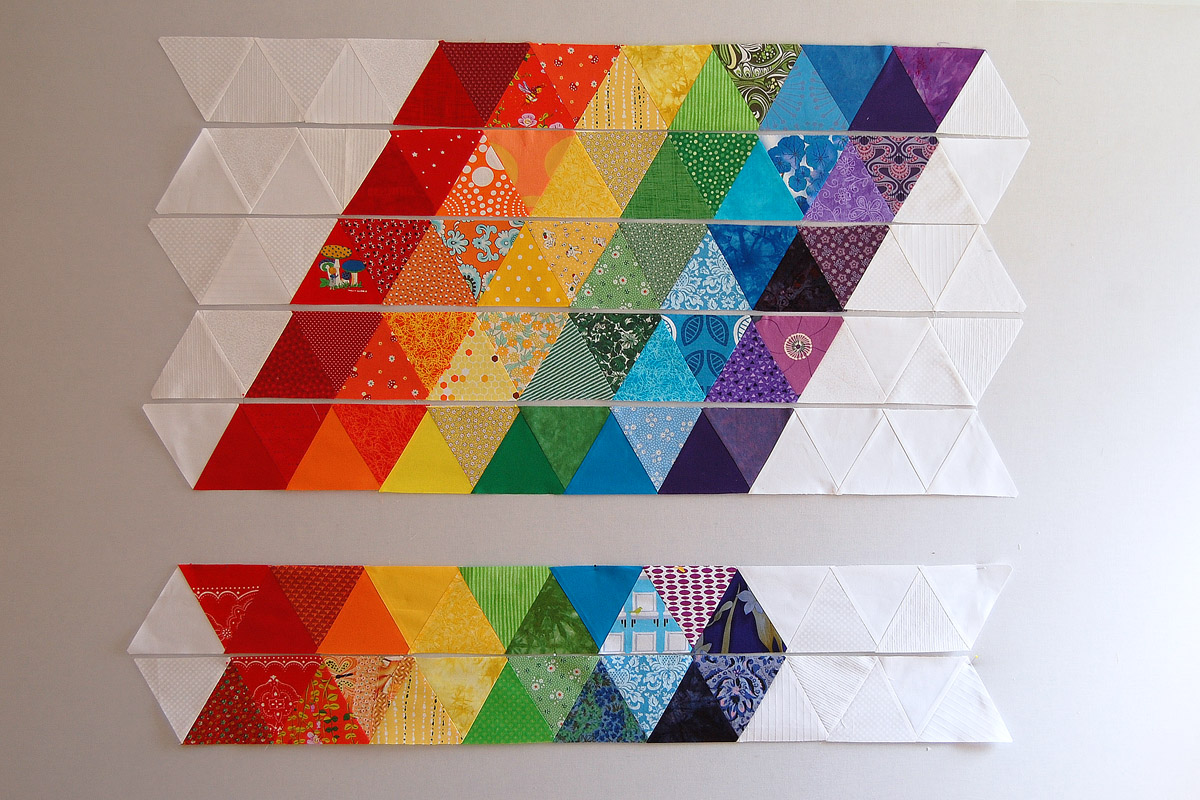
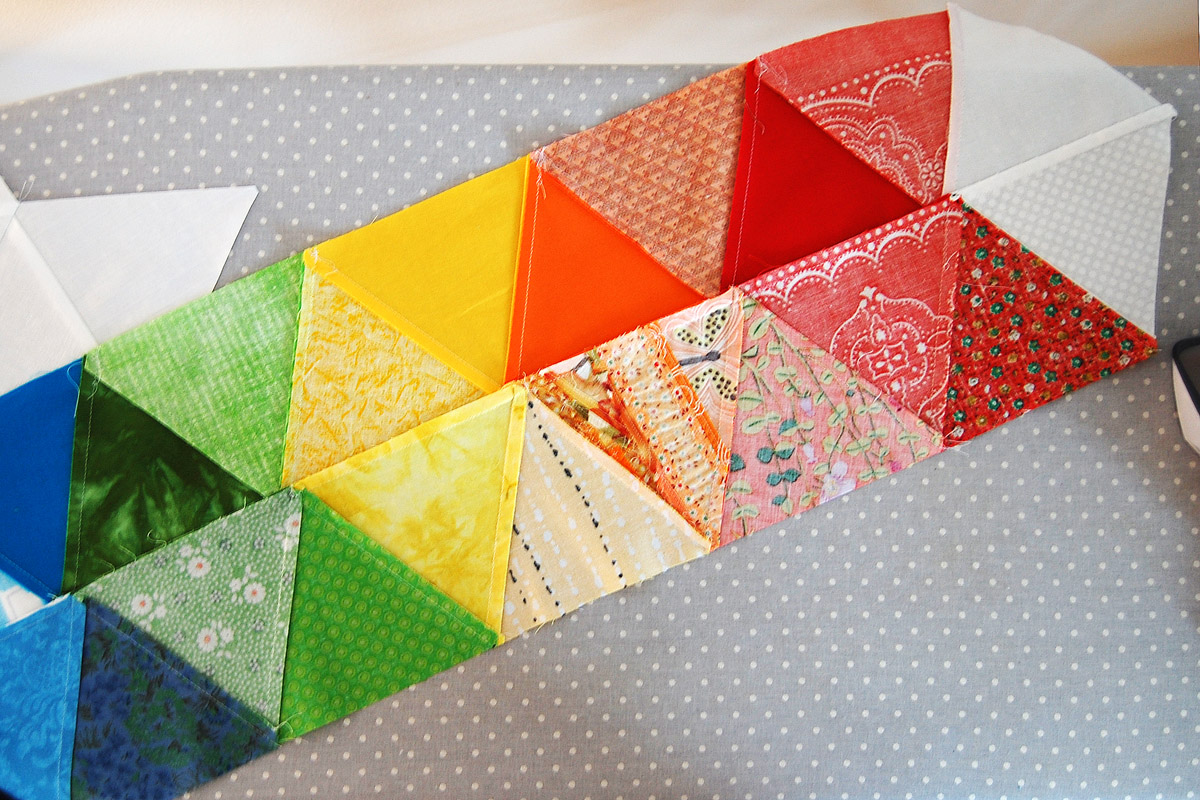
You can see in my sketch that the overall mat is made of a grid of triangles. I knew right away my design would be a rainbow of patchwork to brighten up my sewing space! Looking at the sketch above, there is a large block of 5 rows made of 18 triangles each to make the main mat, and two other rows of 18 triangles each to create the front pocket.
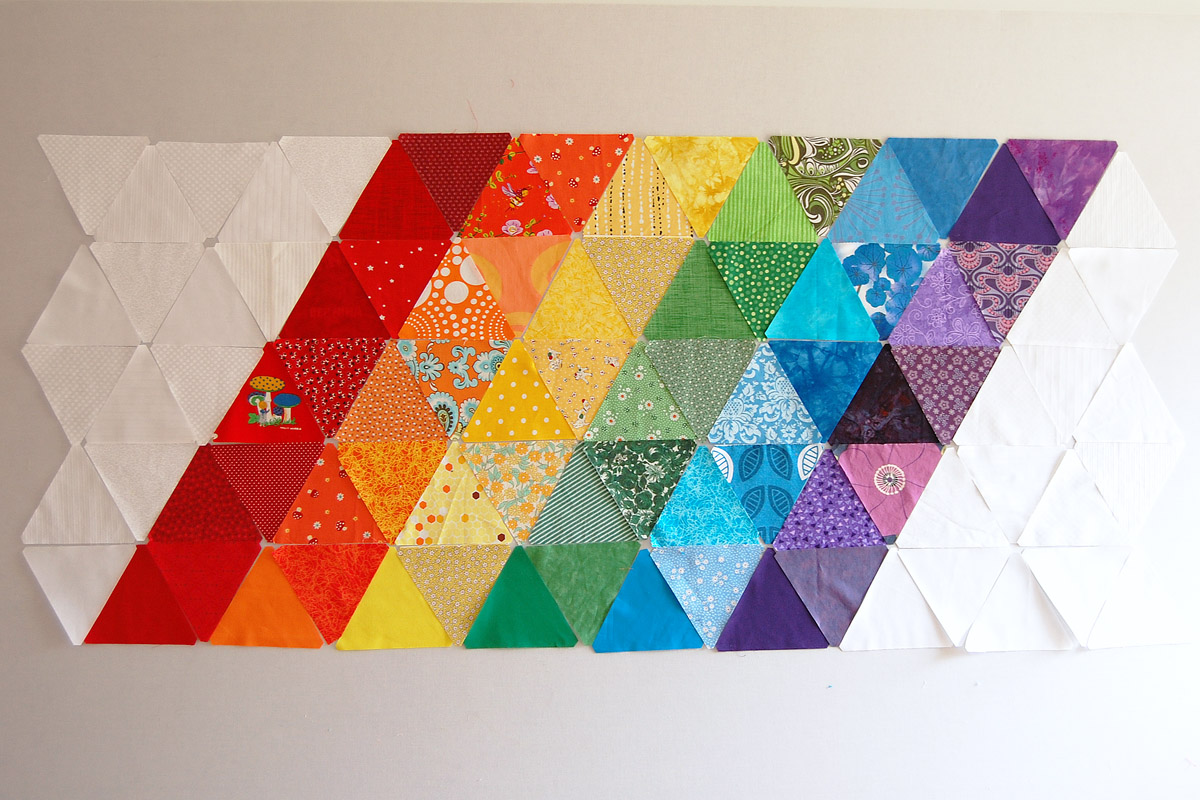
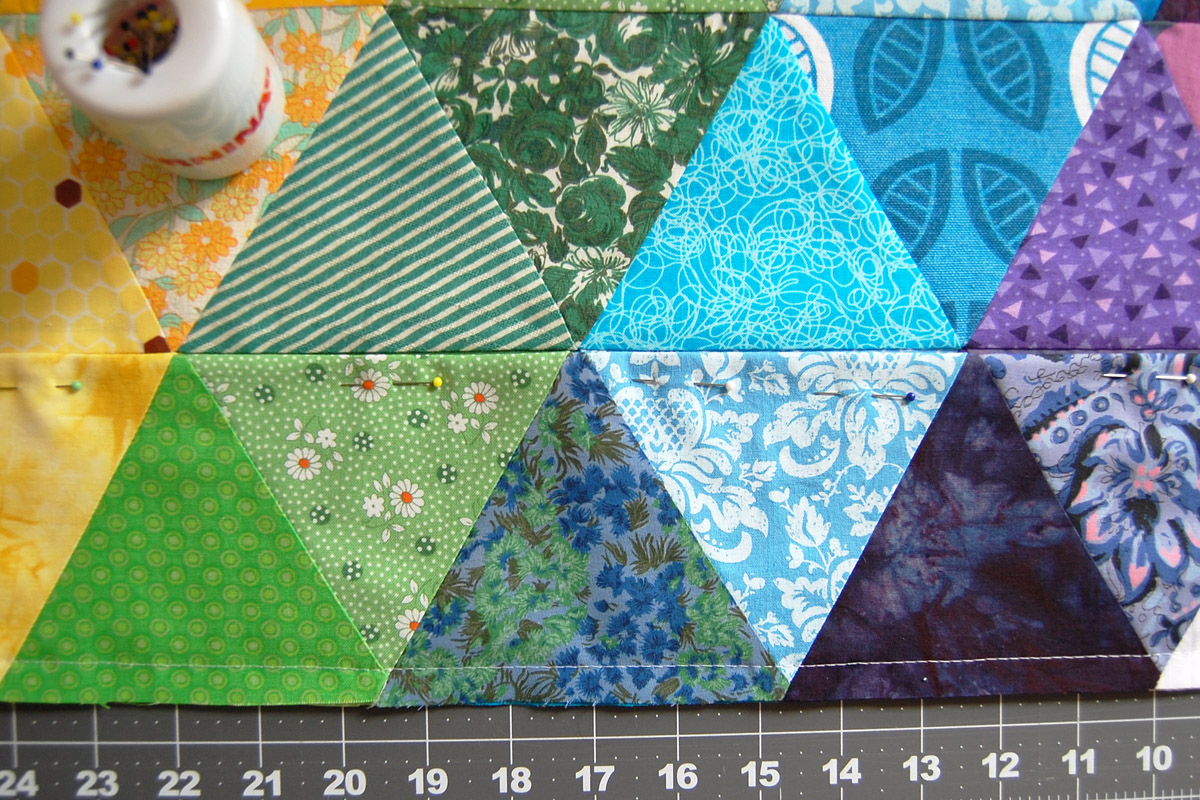
First I worked on the main section of patchwork with my rainbow of scrappy patchwork. Pay close attention to the very last row on the bottom because this will become the inside of the front pocket. Don’t put any of your favorite pieces of patchwork here because once the pocket is attached you won’t see them anymore!
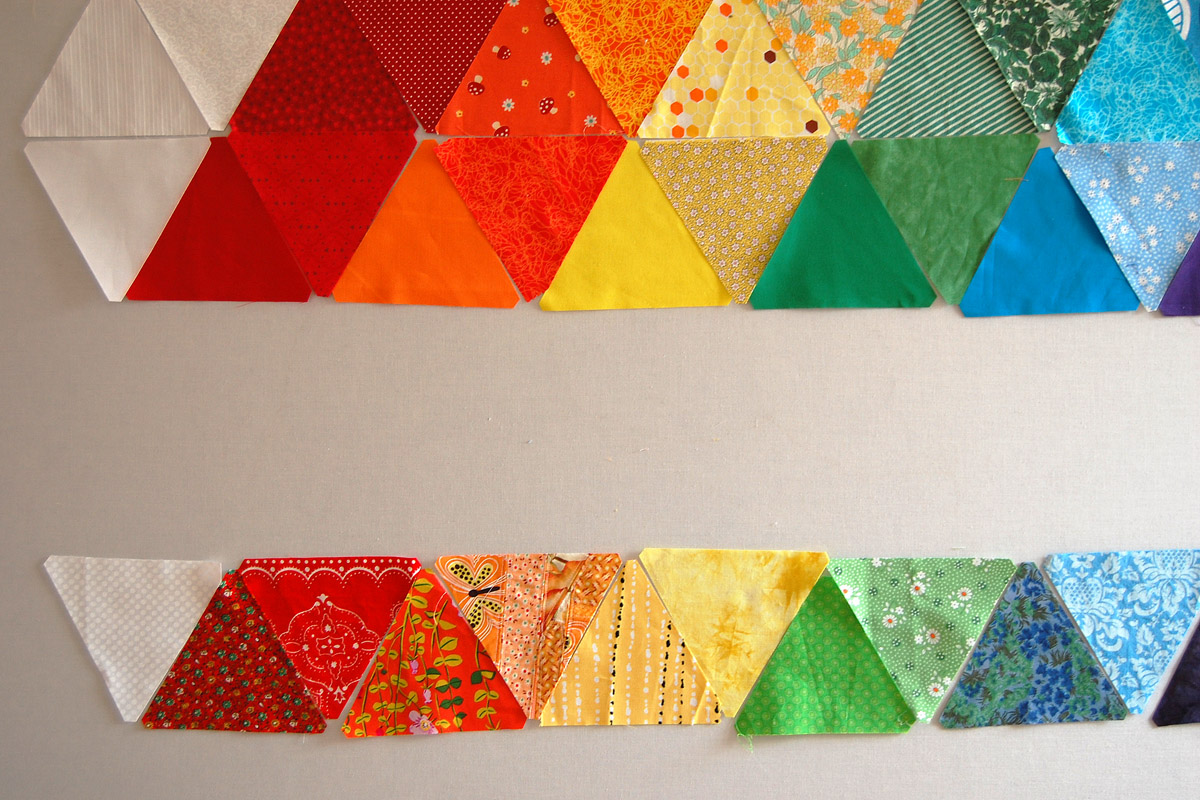
Once you have finished designing the main part of the mat, move on to laying out the pocket. Start with a row that mirrors the very last row on the bottom. This will become the outside of the front pocket, and will lay right on top of the last row of the main mat. If you’re making a definite design with your patchwork (instead of a totally scrappy look), you will want the pattern to match. Make sure to put your best, most favorite fabrics here because you will see them first!
After laying out what will become the outside of the front pocket, add another row right above it, and mirror the patchwork design. If you’re making a definite design, make it same or similar colors as the triangles below. This extra row will become the other half of the inside pocket. Again, it’s the inside and you won’t see it, so plan accordingly with your patchwork.
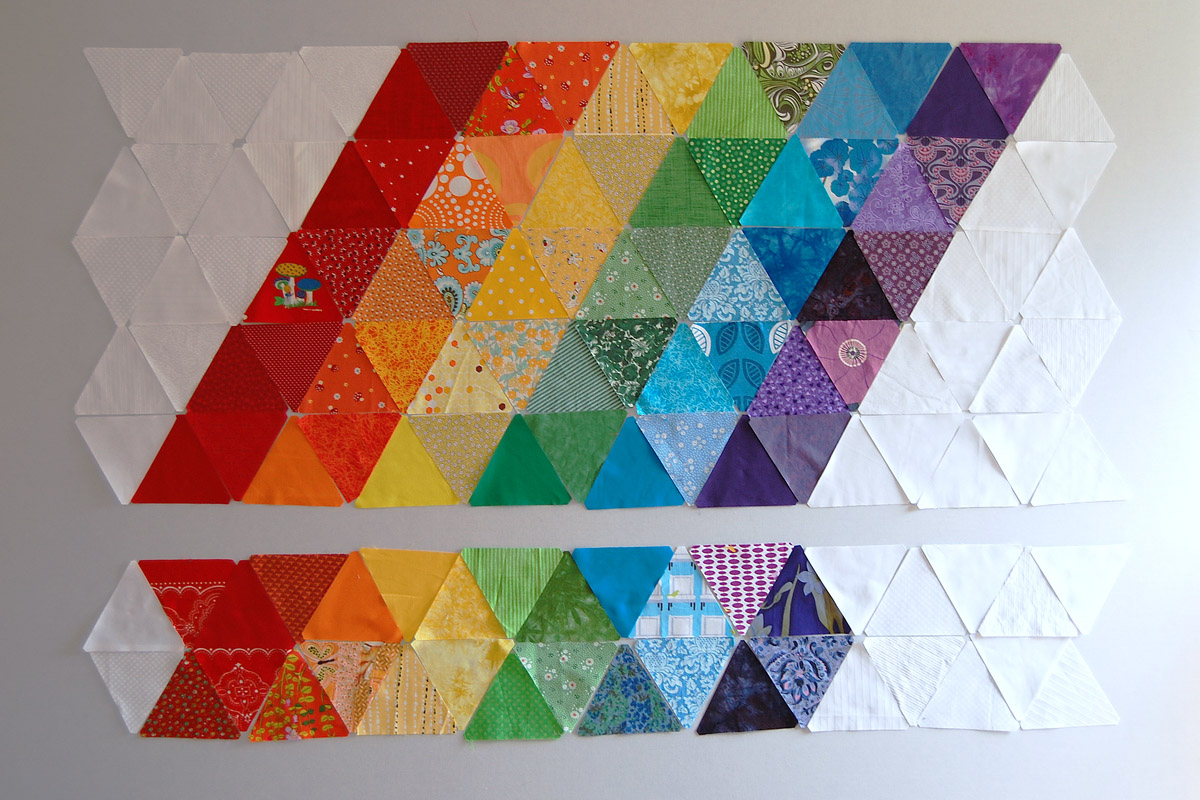
When finished with layout, you will have two separate blocks of patchwork; one large main mat block made of 5 rows of 18 triangles, and one front pocket block made of 2 rows of 18 triangles.
Sew the Patchwork for the Sewing Machine Mat
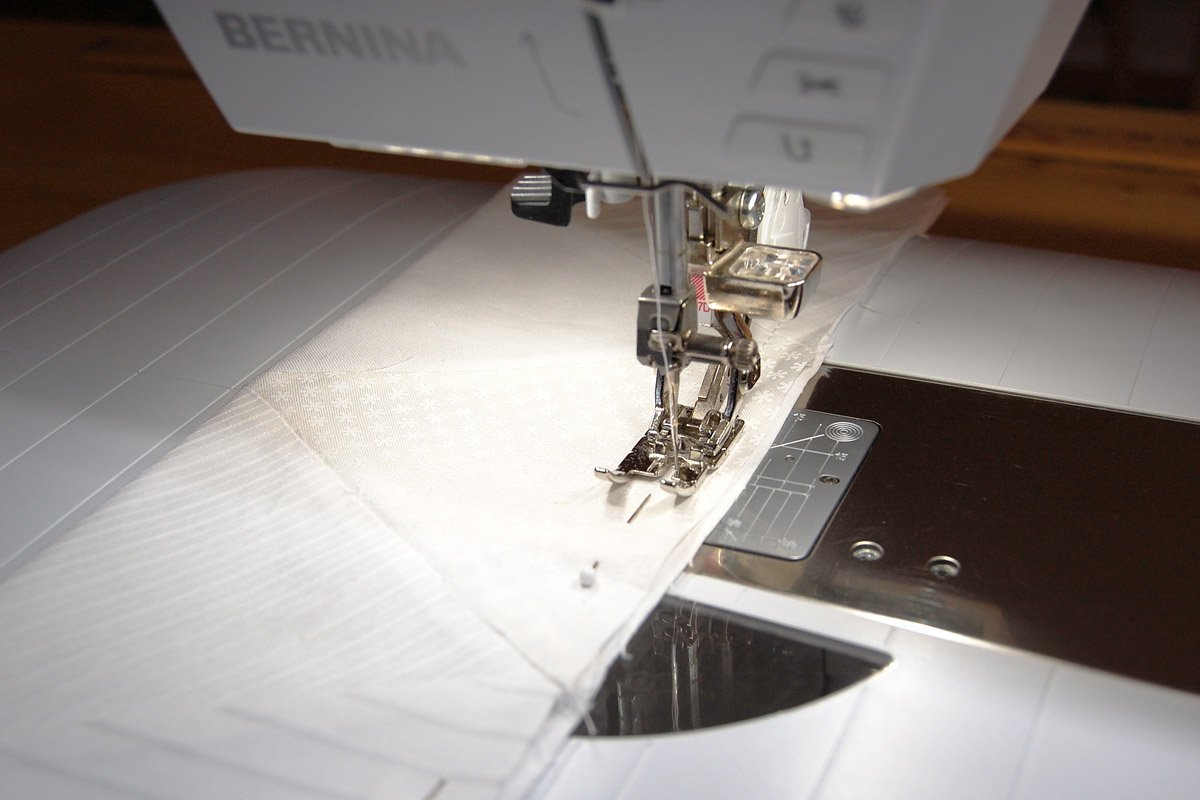
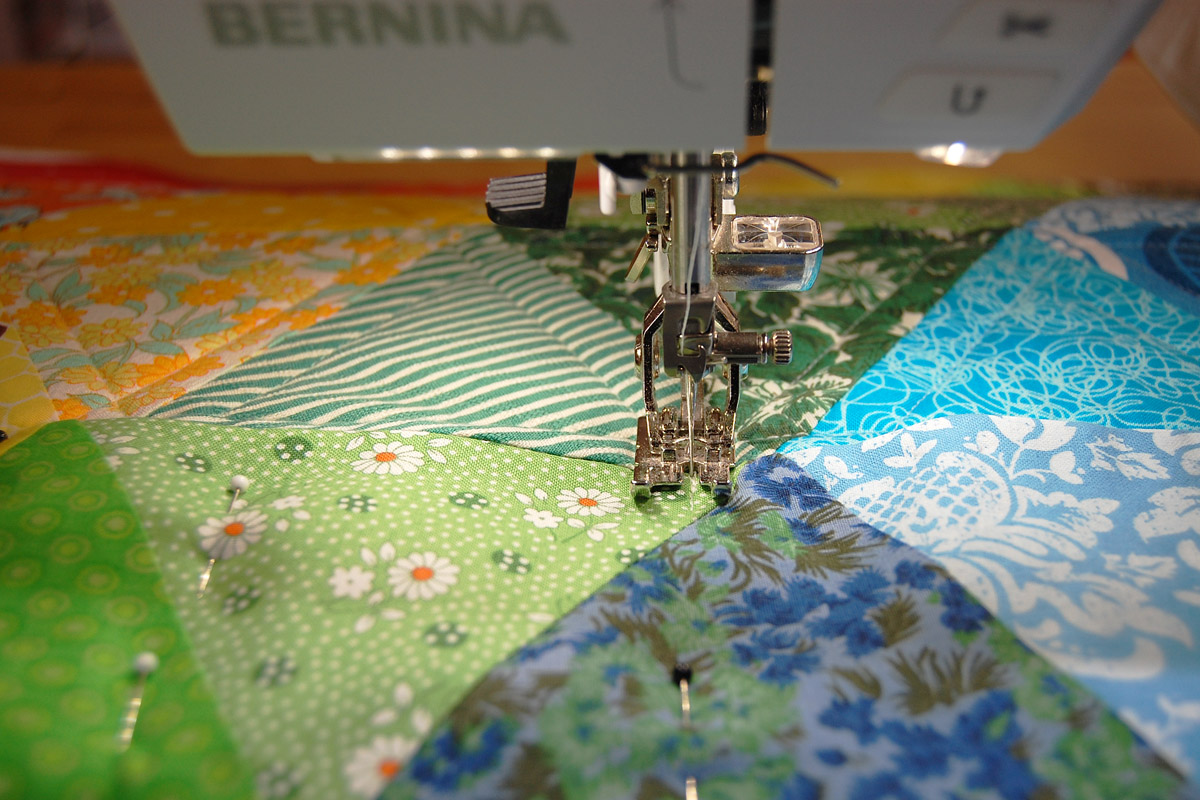
Set up your sewing machine to begin sewing the patchwork triangles together.
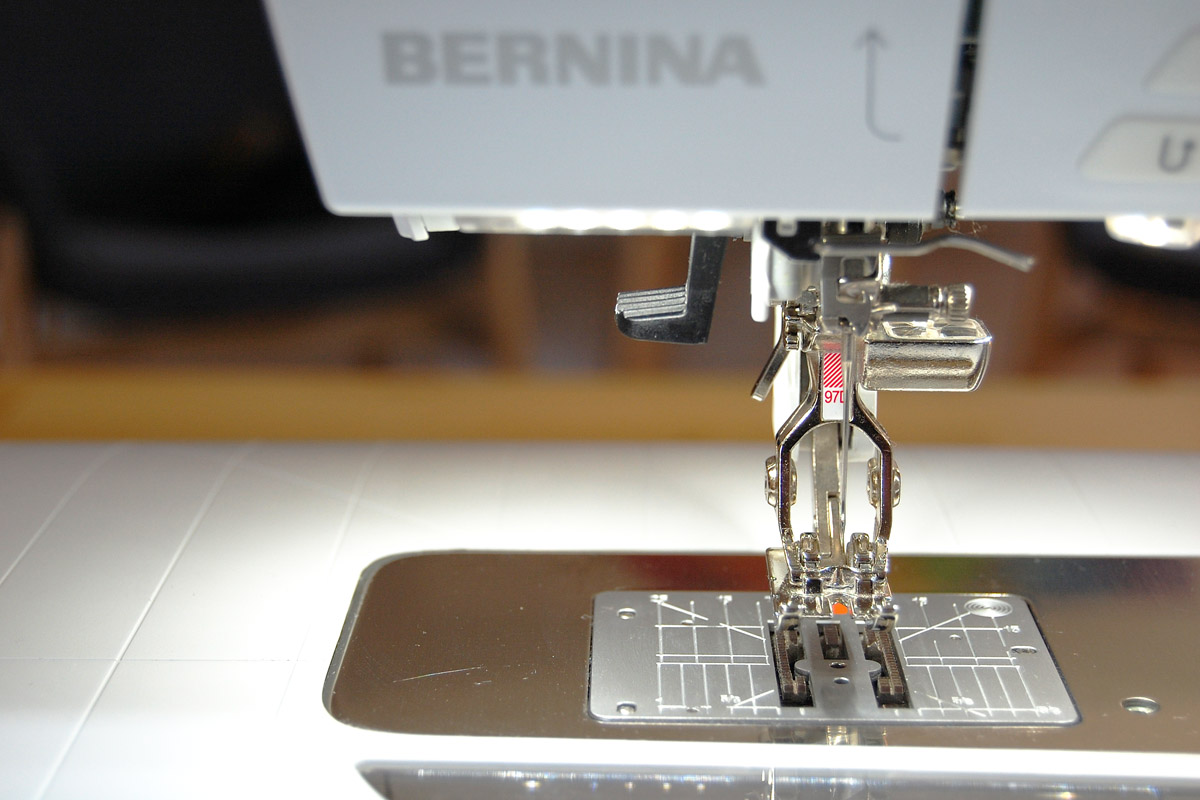
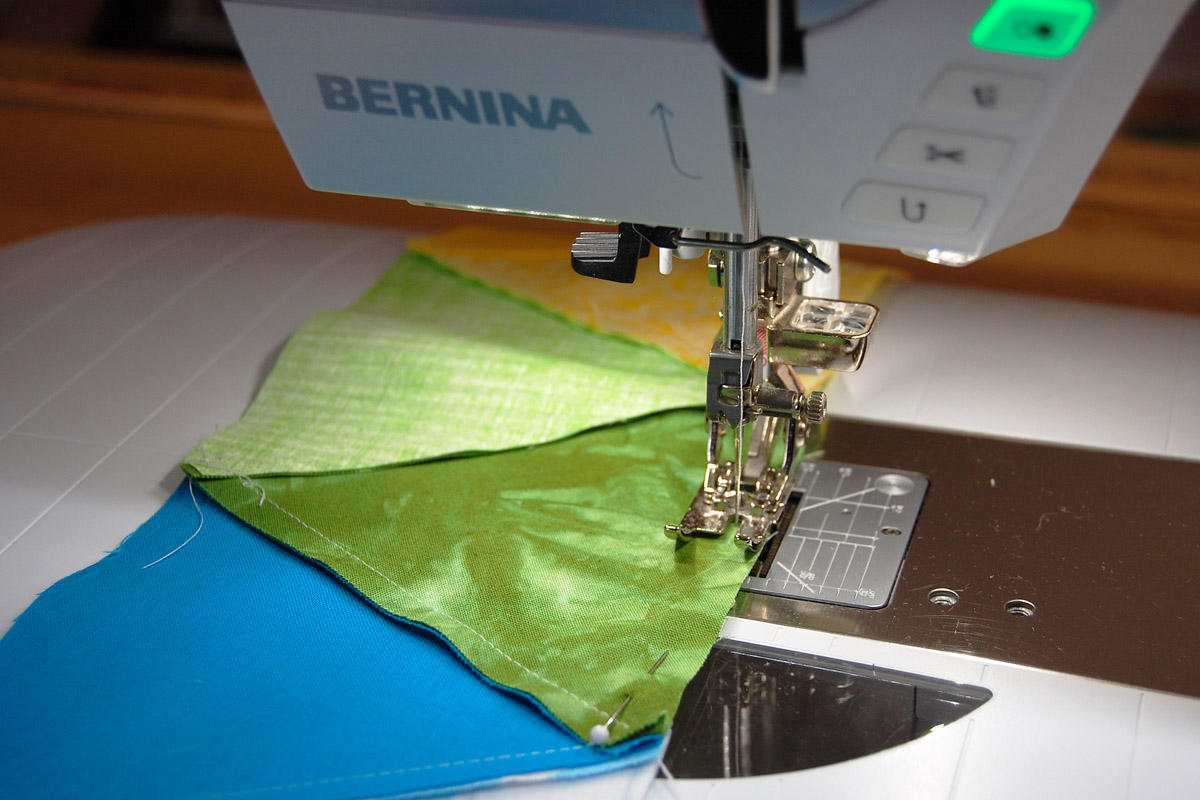
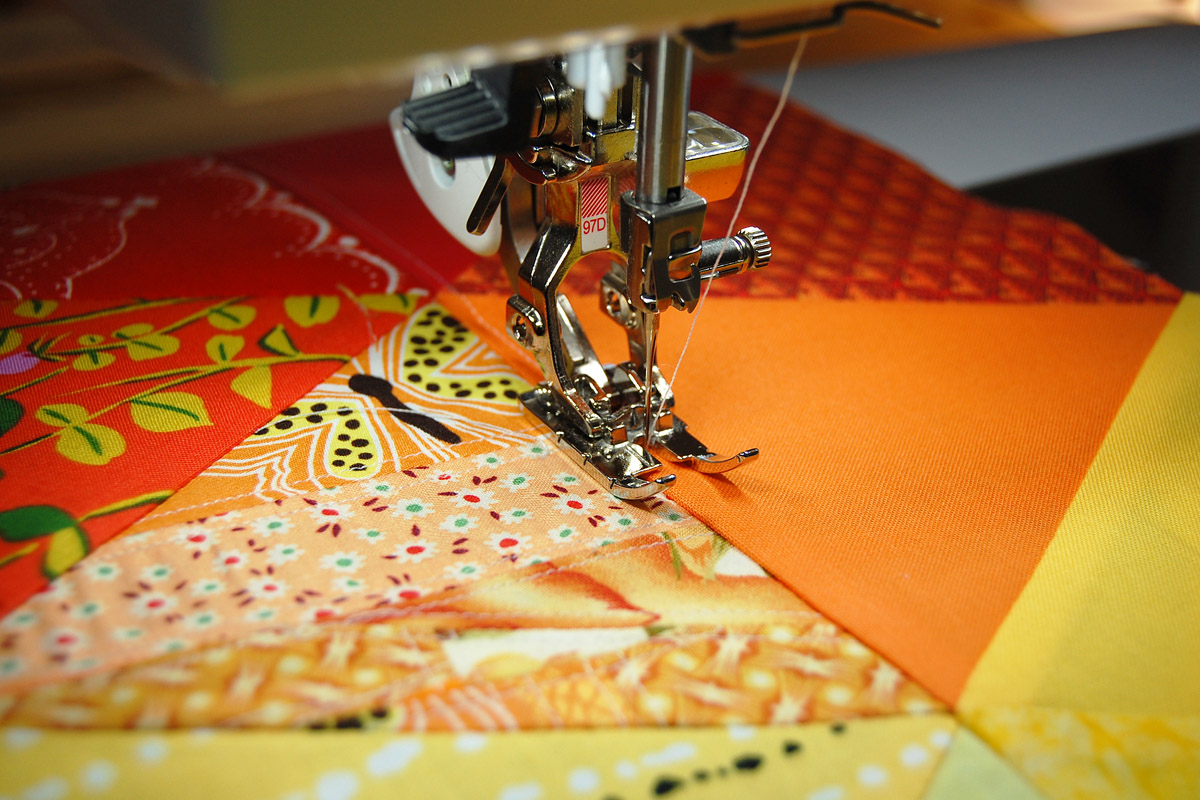
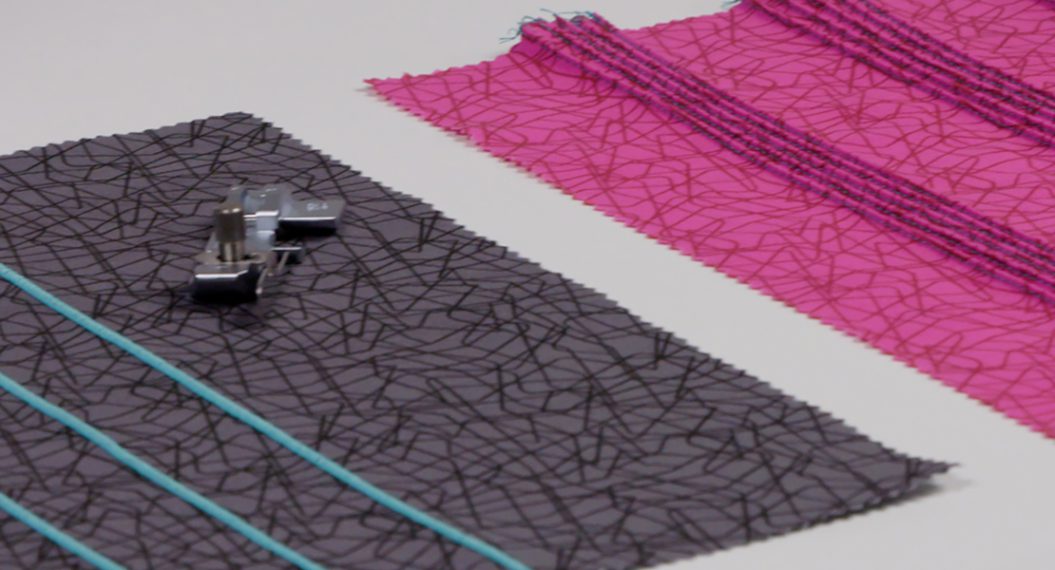
Use a straight stitch needle plate if you have one, and a patchwork foot of your choice. I am using Patchwork foot #97D with Dual Feed engaged on my B 770 QE.
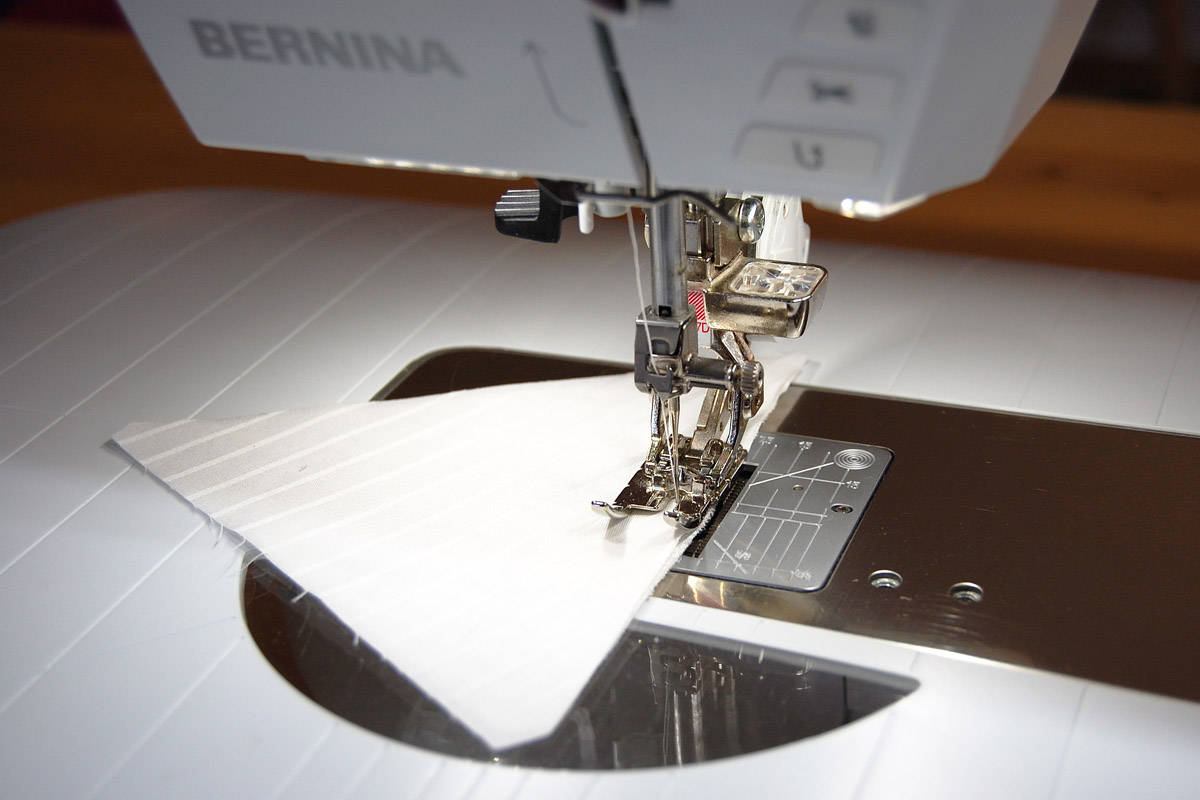
Begin piecing the first two triangles of the top row together with a perfect quarter-inch seam.
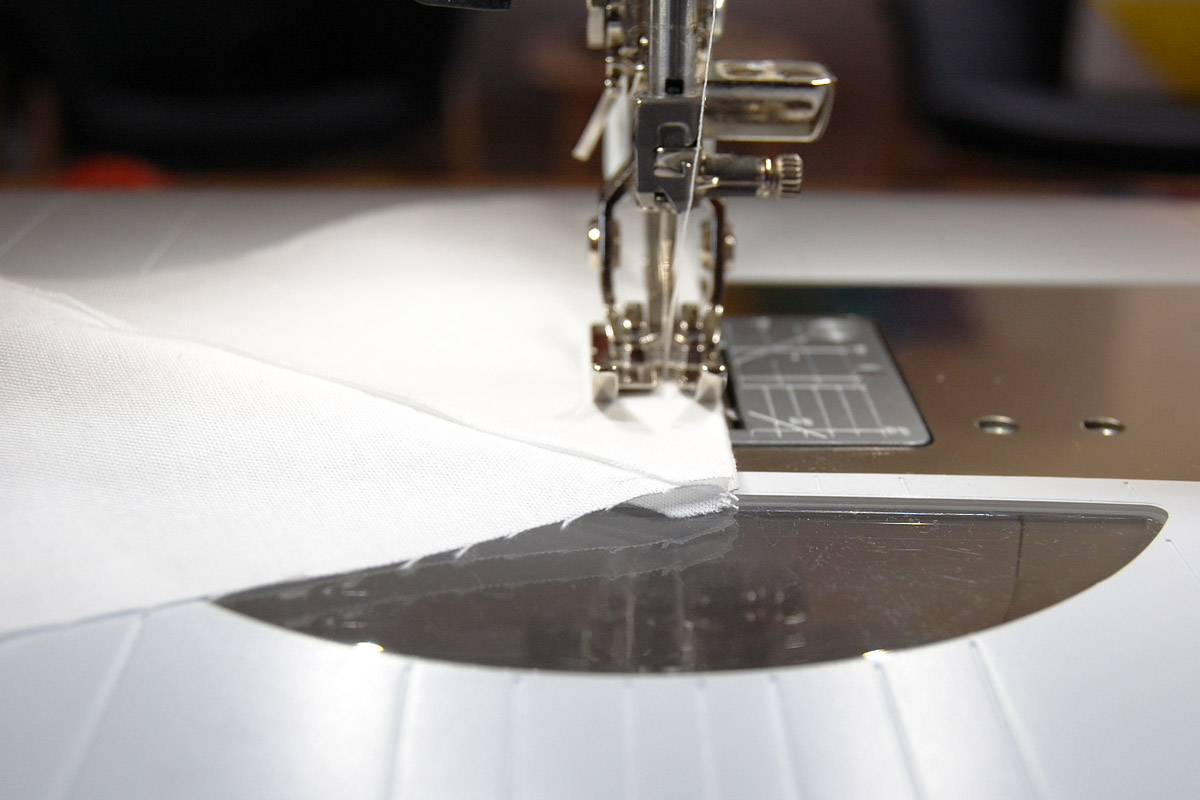
Notice that once you start adding other triangles you will be stitching across the end of the previous seam. My strategy is to push all of these seams in the same direction for one row, and to press all seams in that direction when finished.
I switch directions with the next row of patchwork, pushing them in the opposite direction, and pressing all the seams in the same direction when finished. This creates seams pressed in opposite directions for each row of patchwork, making it a bit easier to sew the rows together.
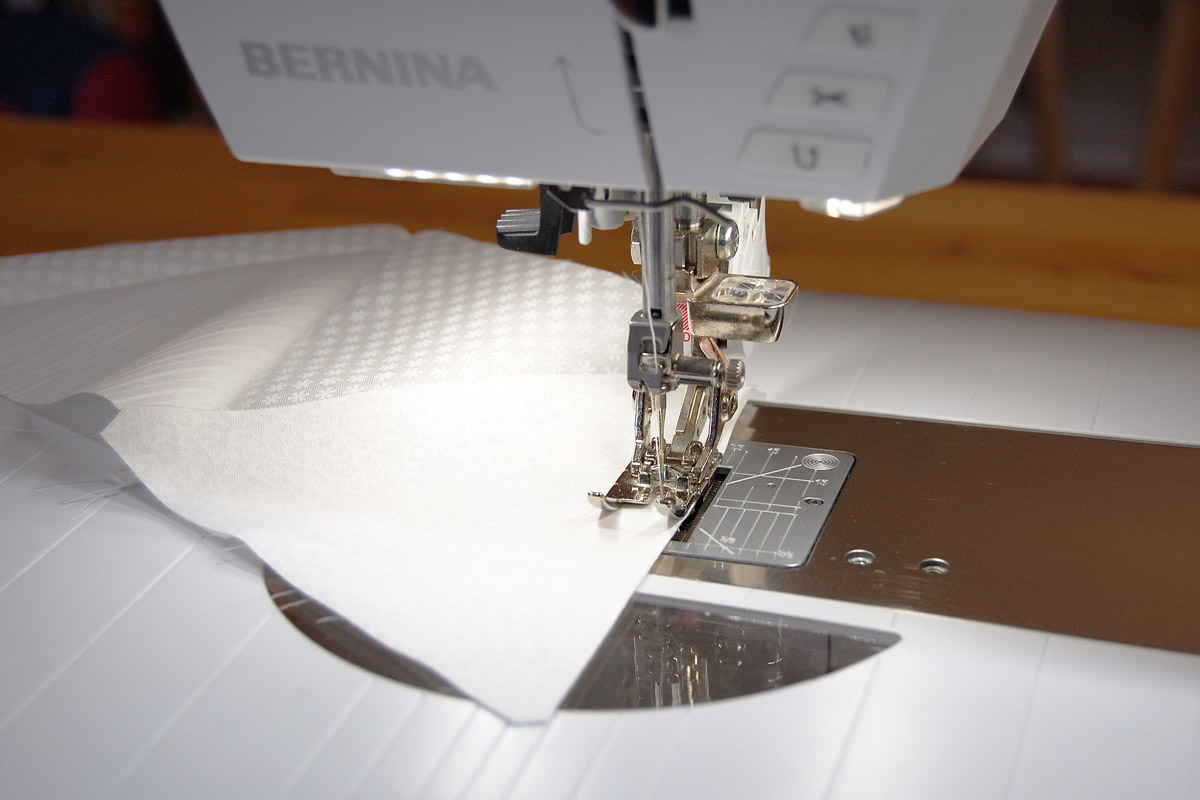
Keep sewing each row, pressing all seams in one direction when finished. Keep track of your rows after stitching. I placed all of mine back on the design wall to keep them in order.
Once all rows are stitched, you can move on to sewing the rows together.
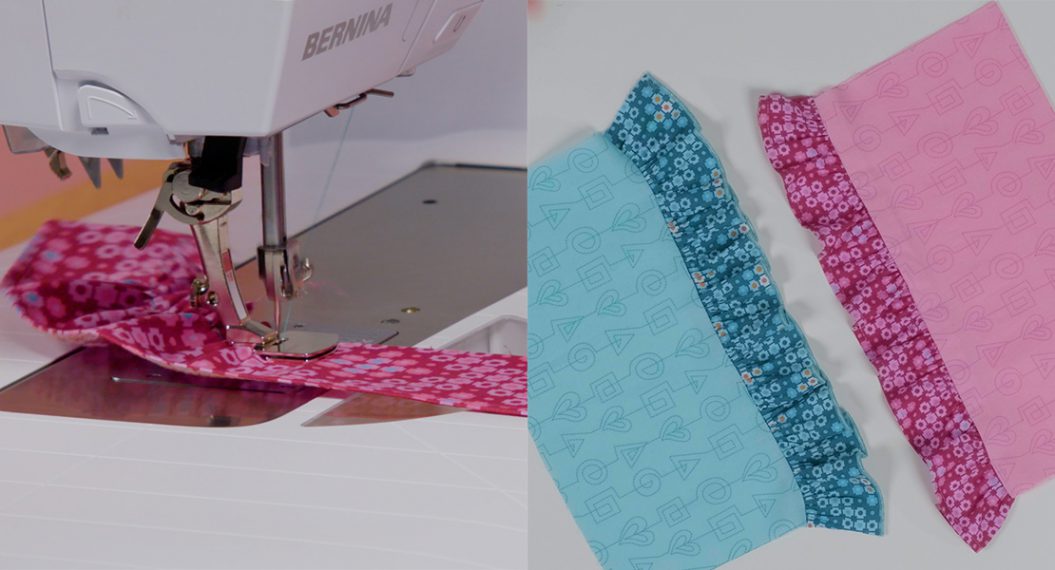
Stitch the Pocket
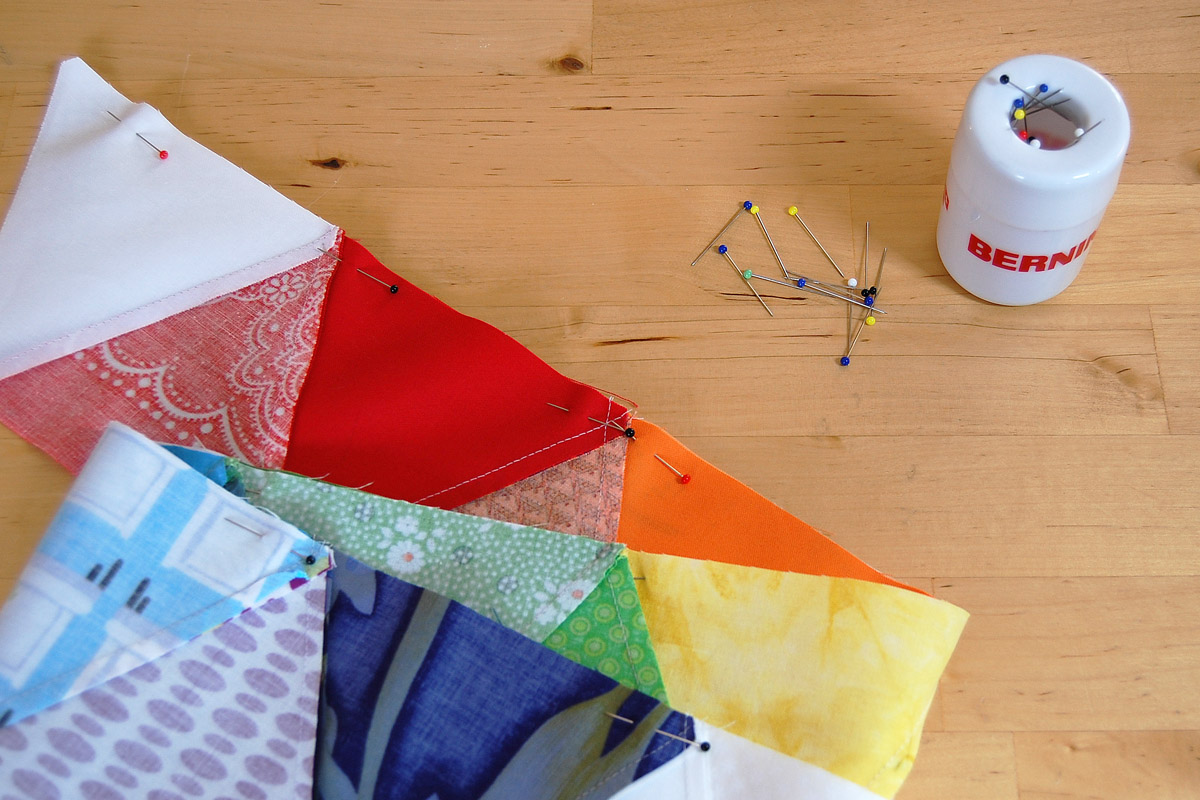
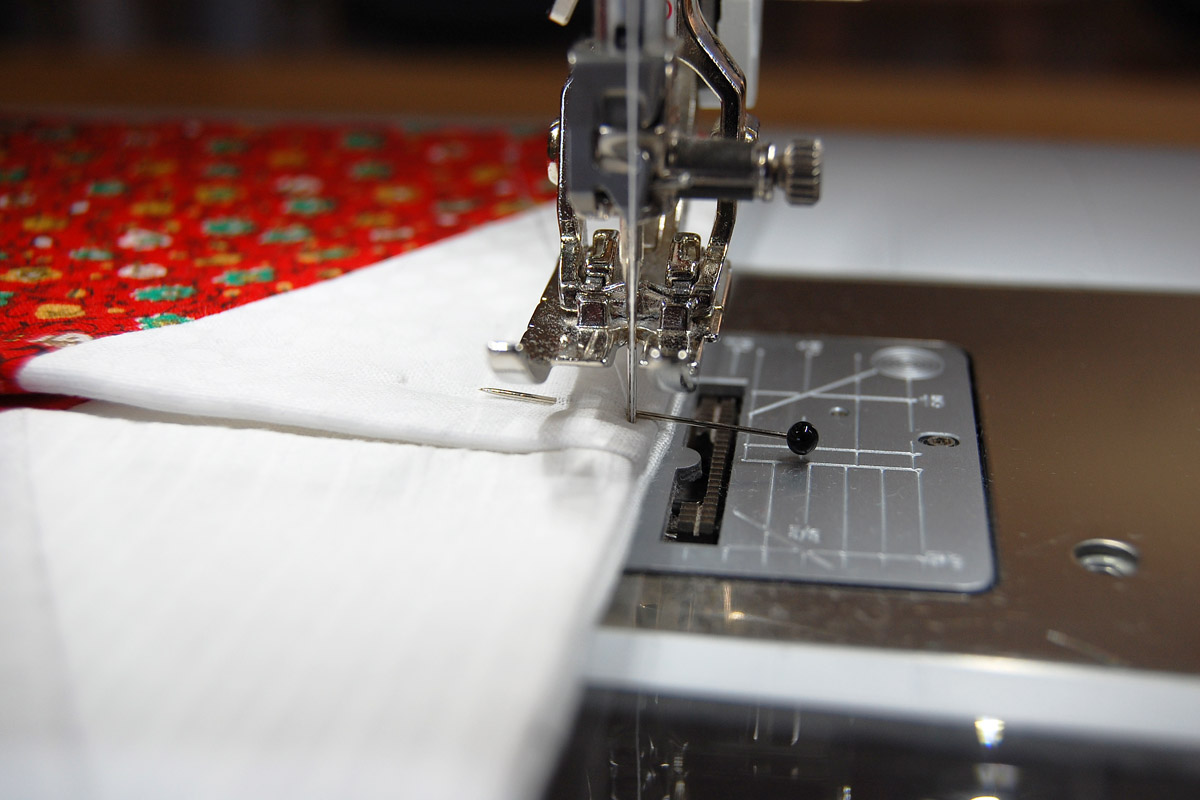
Pin the two rows of the front pocket together, matching triangle points as you go.
Stitch with a 1/4″ seam.
Press the seam towards the inside part of the pocket, away from the fancy patchwork that will become the outside of the front pocket.
Once pressed, topstitch the pressed seam down about 1/8″ inch from the middle of the seam. The stitching should be on the patchwork that will become the inside of the pocket.
This stitching will help pull the top of the seam over just a smidge towards the inside pocket to give the top edge a clean, finished look. Press the pocket in half along the edge, noticing that the front edge will roll over just a bit more than the stitched down edge.
Next, pin the bottom raw edges of the pocket together. You will notice that one edge is now longer than the other because we understitched the inside seam on the pocket, and this is okay! Set your sewing machine to a long 4mm basting stitch, and quickly baste the raw edges together 1/2″ away from the edge. This will help hold the pocket edges in place during the final construction steps.
Bring your basted pocket to the cutting table, front side up.
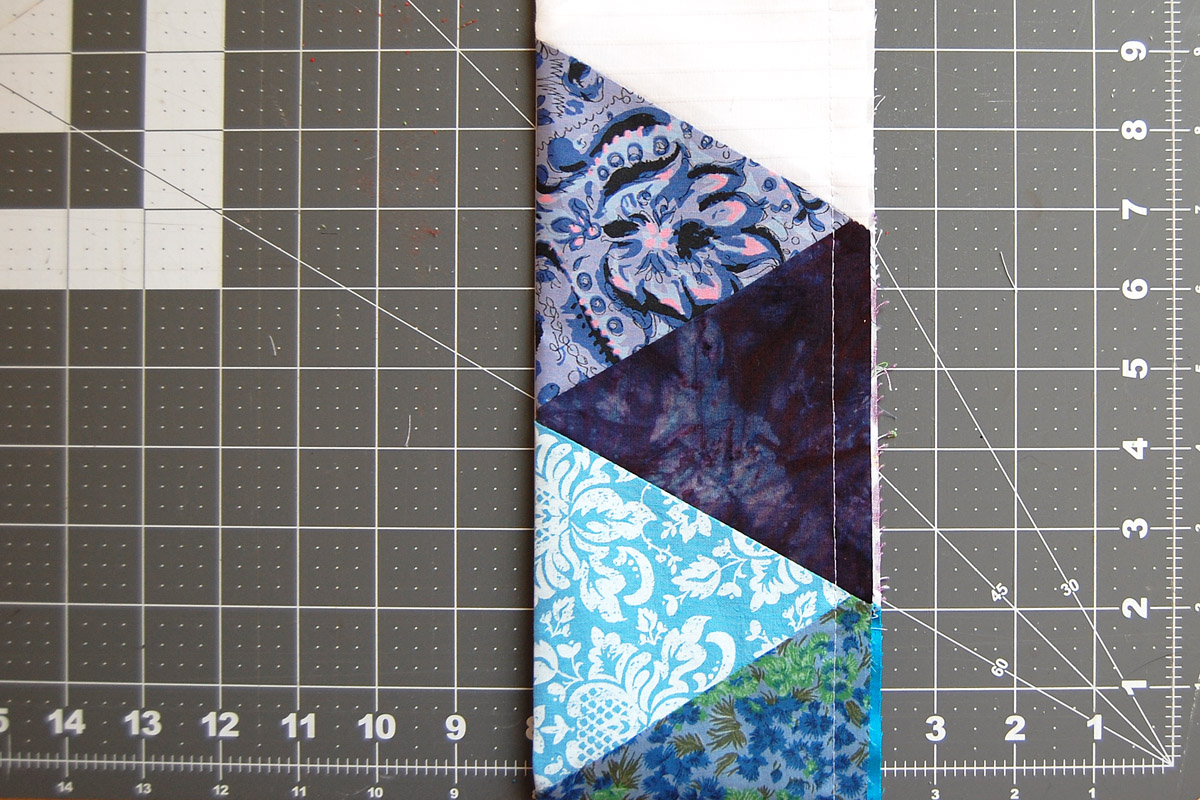
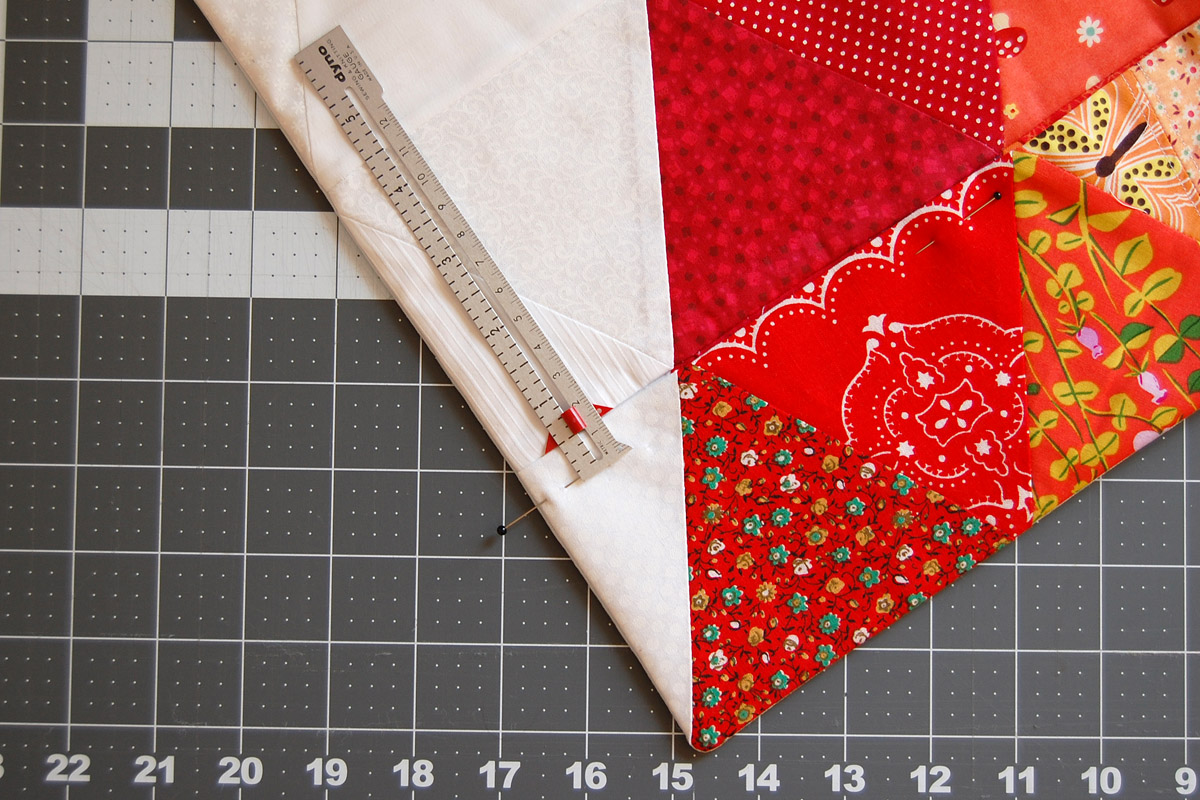
Use a quilting ruler, cut the raw edges even. To help make your cut straight, line up the 4 1/8″ mark on your ruler with the pressed edge of the pocket, and trim off excess on raw edges with the rotary cutter.
Put your prepared pocket aside and bring the main patchwork mat to your cutting table.

Square up the main patchwork, cutting off the extra parts of the triangles on both sides of the patchwork.
Grab your prepared pocket and bring it to your table, placing it directly on top of the bottom row of patchwork. Match bottom raw edges, and make sure the colors or patterns are matching up at the top edge of the pocket. Pin all along top edge of pocket. Do not place pins in the bottom pocket during this step!
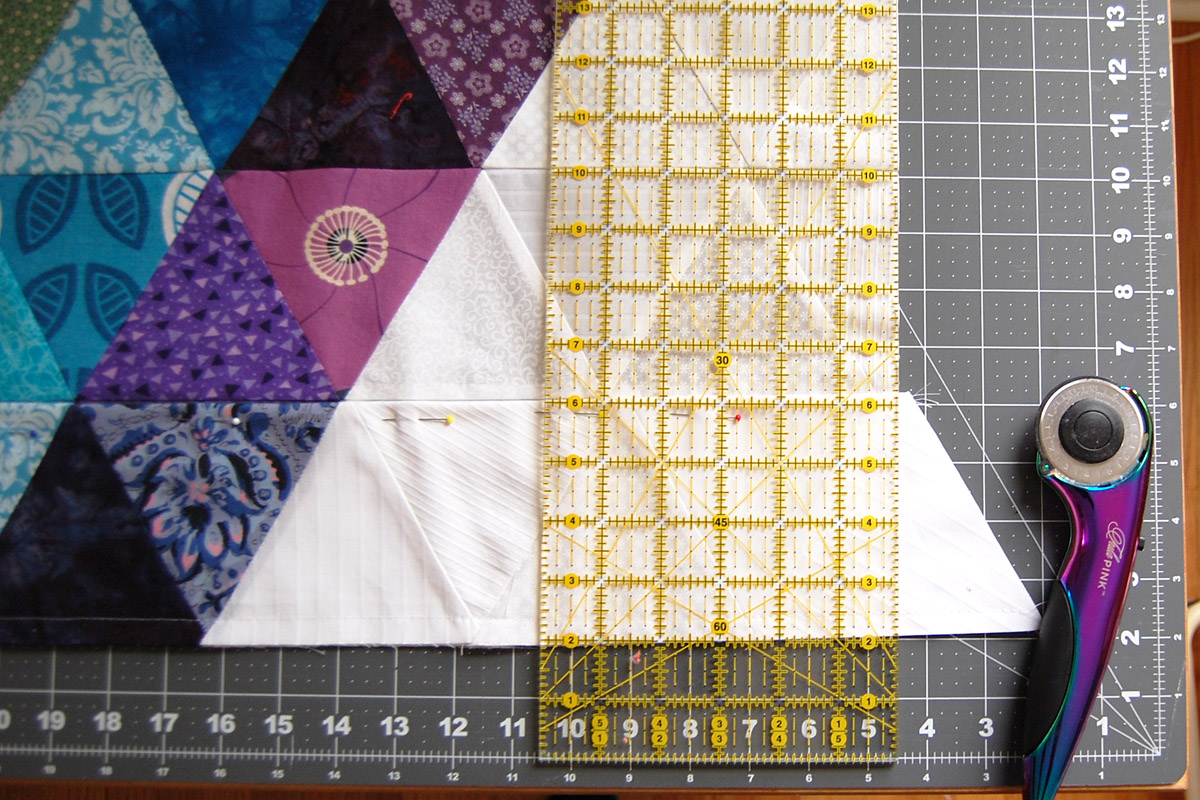
After pinning, use your ruler and rotary cutter to trim off extra ends of the pockets. Set the top with pinned pockets aside.
Now is the time to prepare your backing fabric following these steps.
- Cut the backing to match the size of the top, either by placing the top directly on top of the backing and cutting to match, or by carefully measuring your top and cutting the backing to size.
- Cut the heavyweight fusible craft interfacing to the same size as the backing, and apply to the wrong side of the fabric following manufacturer’s instructions.
- Set prepared backing with fused interfacing aside.
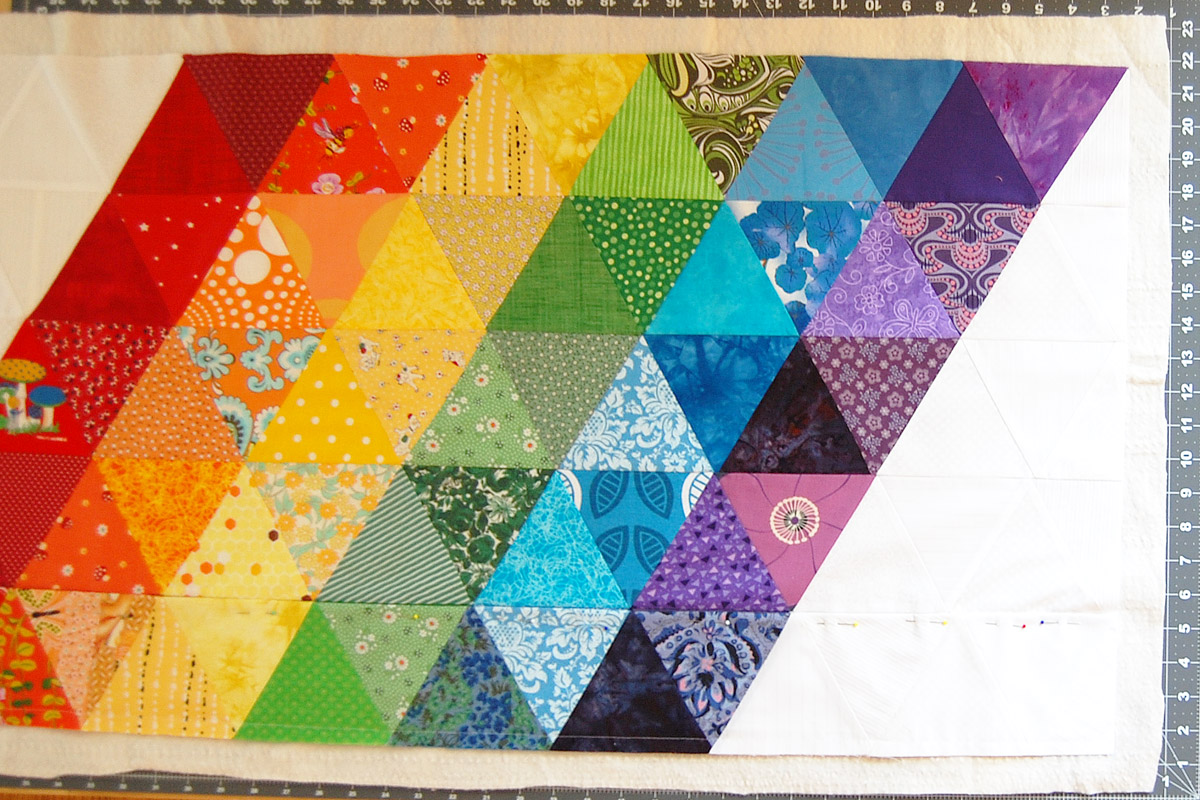
Cut your batting a few inches wider than the mat. Place your batting down on a smooth work surface, and spread the prepared top with pinned pocket directly on the batting to make sure it is a good fit. Use temporary spray adhesive or spray quilt basting to secure the mat to the batting, pressing wrinkles out as you go. This step will help the top stay secured to the batting during the final construction steps.
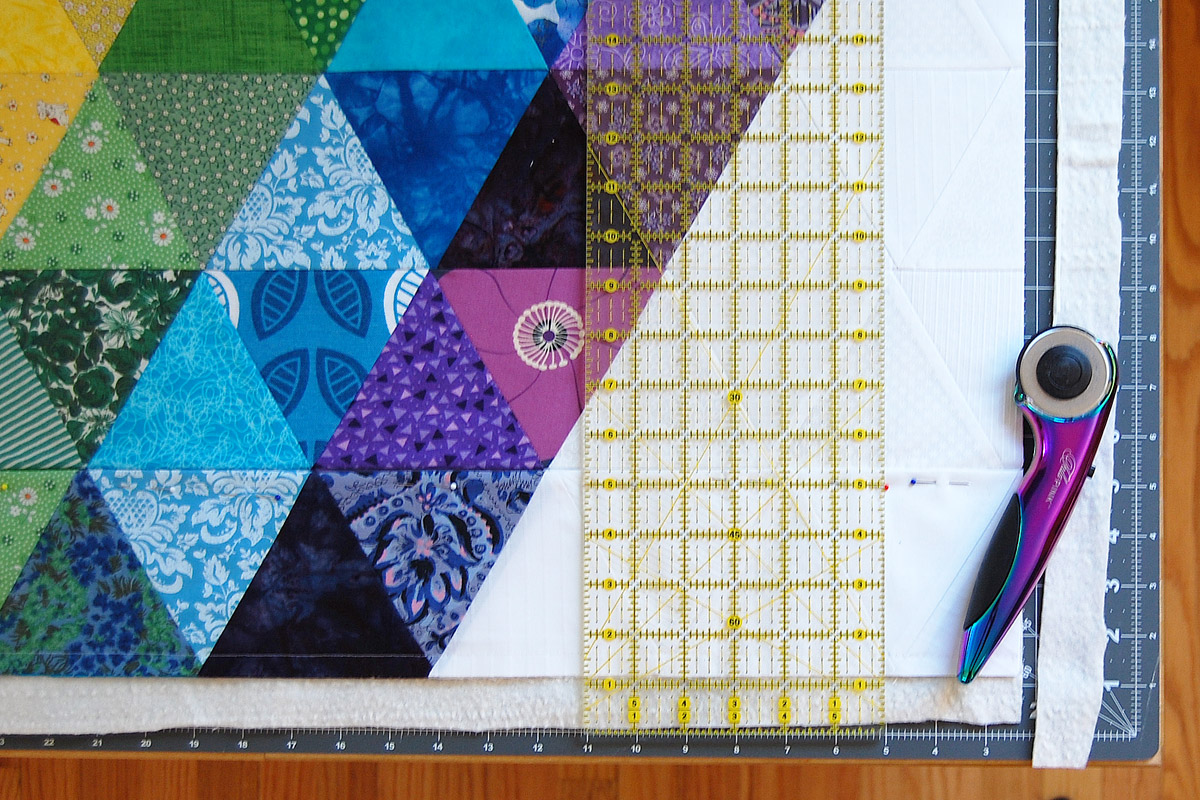
Trim extra batting even with the patchwork on all edges. At this point, make a final check to see that all edges are straight and square before moving on! If your edges are crooked now, it will really show up in the end.

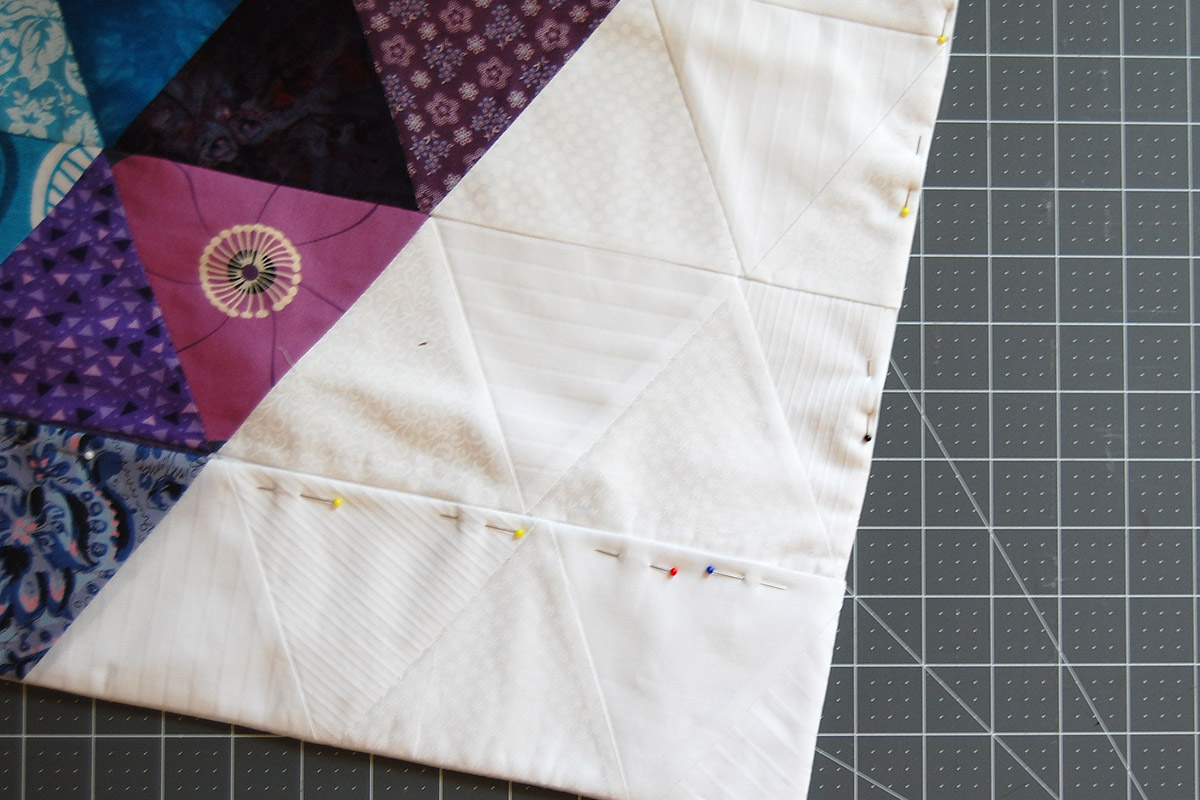
It’s time to make the quilt sandwich. Clear your work table, and grab the prepared backing. Place the backing right side up on the table. Layer the top with batting right side down on top of the backing, with the pockets along the bottom edge. Make sure layers are flat and smooth.
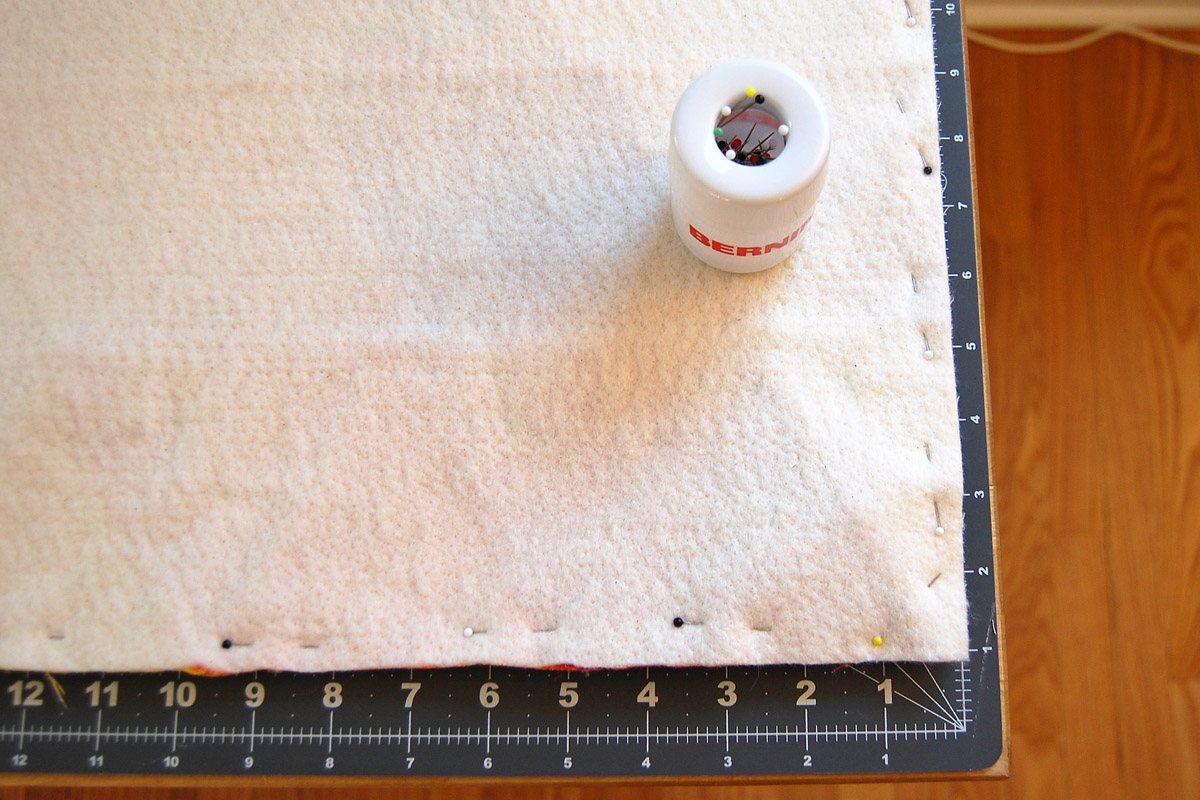
Pin all layers together, leaving an opening to the left side of this quilt sandwich. When finished, this end of the mat will live on the left side of your sewing machine where the power cord and foot control cord are plugged in to your machine. This is the perfect edge to leave open for turning the project inside out later, as it will end up being the least obvious edge of the mat.
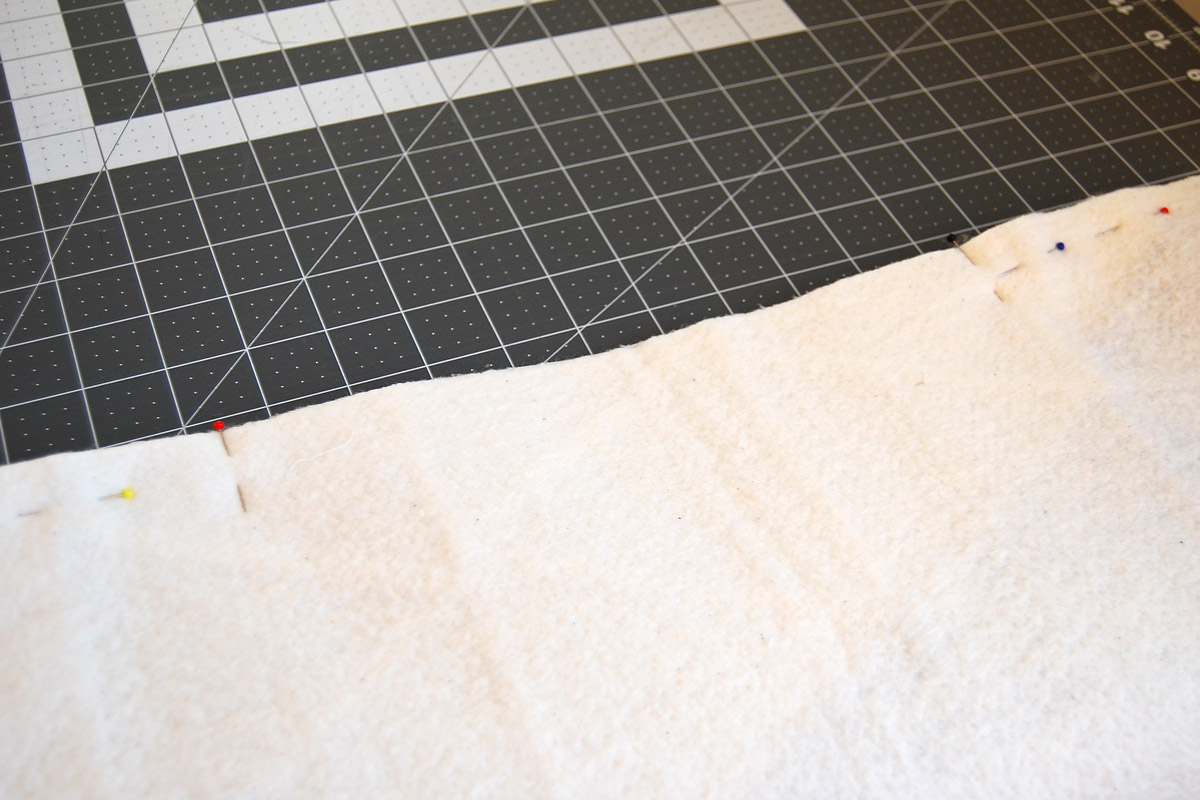
Mark the opening with pins at 8″ to 10″ wide. All other edges should be pinned well through all layers.
You can continue using the Patchwork foot #97D for the final construction and quilting steps. If you do not have the Dual Feed feature on your sewing machine, switch to the Walking foot #50 to help move all of these layers easily through the sewing machine.
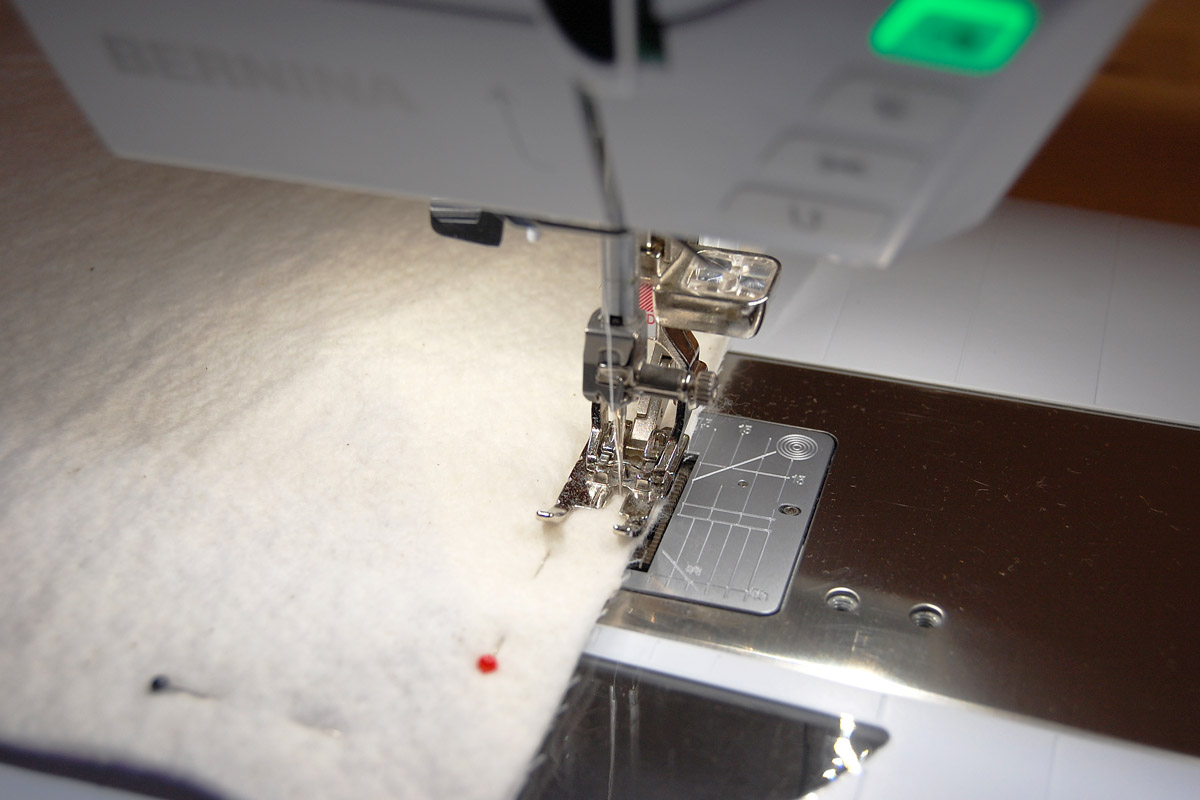
Start sewing at one side of the opening, backstitching a few times. Stitch all the way around the pinned mat, ending at the other side of the opening. Remember to end your stitching by backstitching a few times.
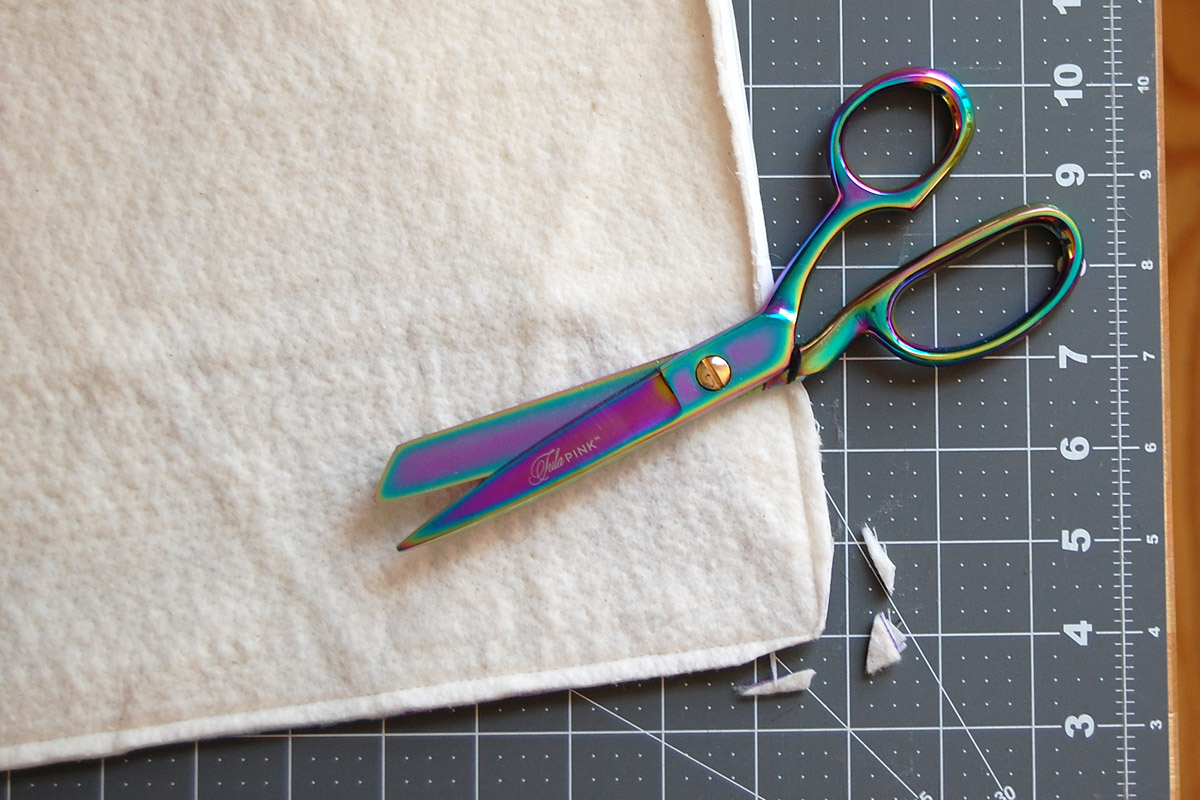
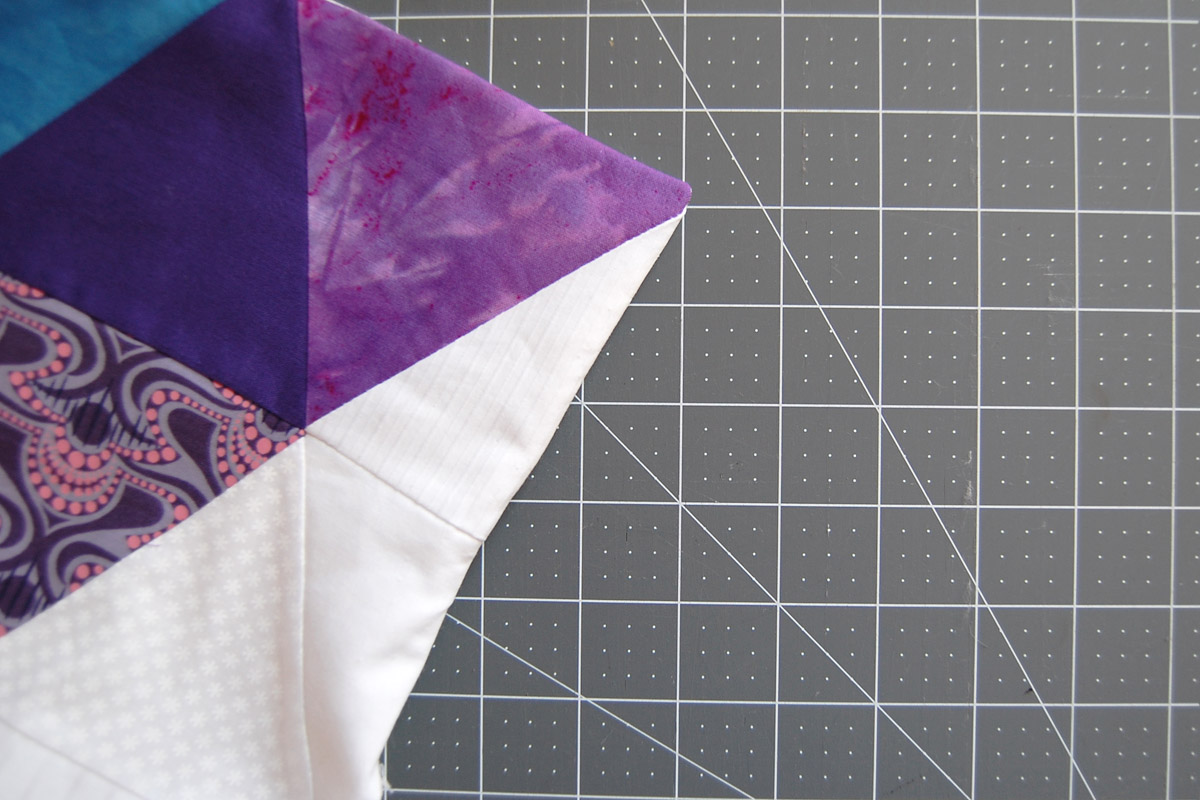
Trim corners close to the stitching.
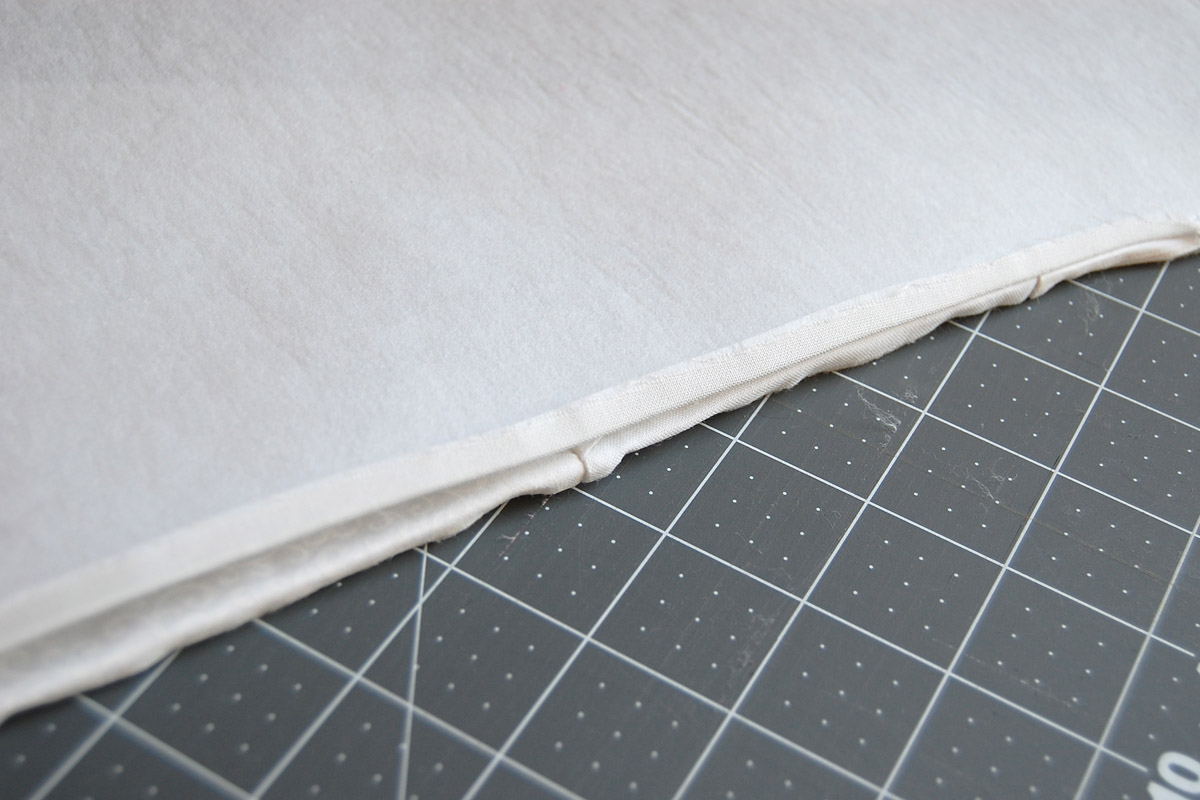
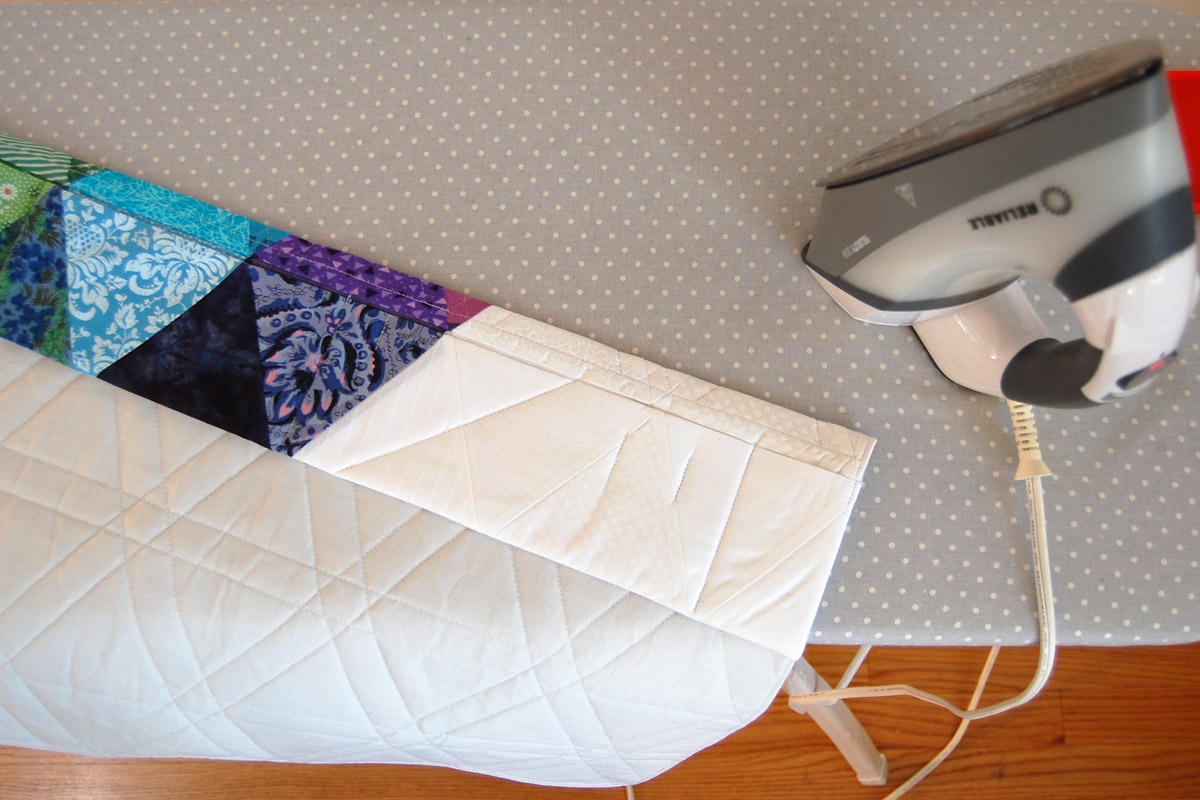
Press the open edges over 1/4″ on both sides. Then turn the mat inside out, being careful to remember that there are still straight pins holding the top edge of the pocket to the mat, watch your fingers!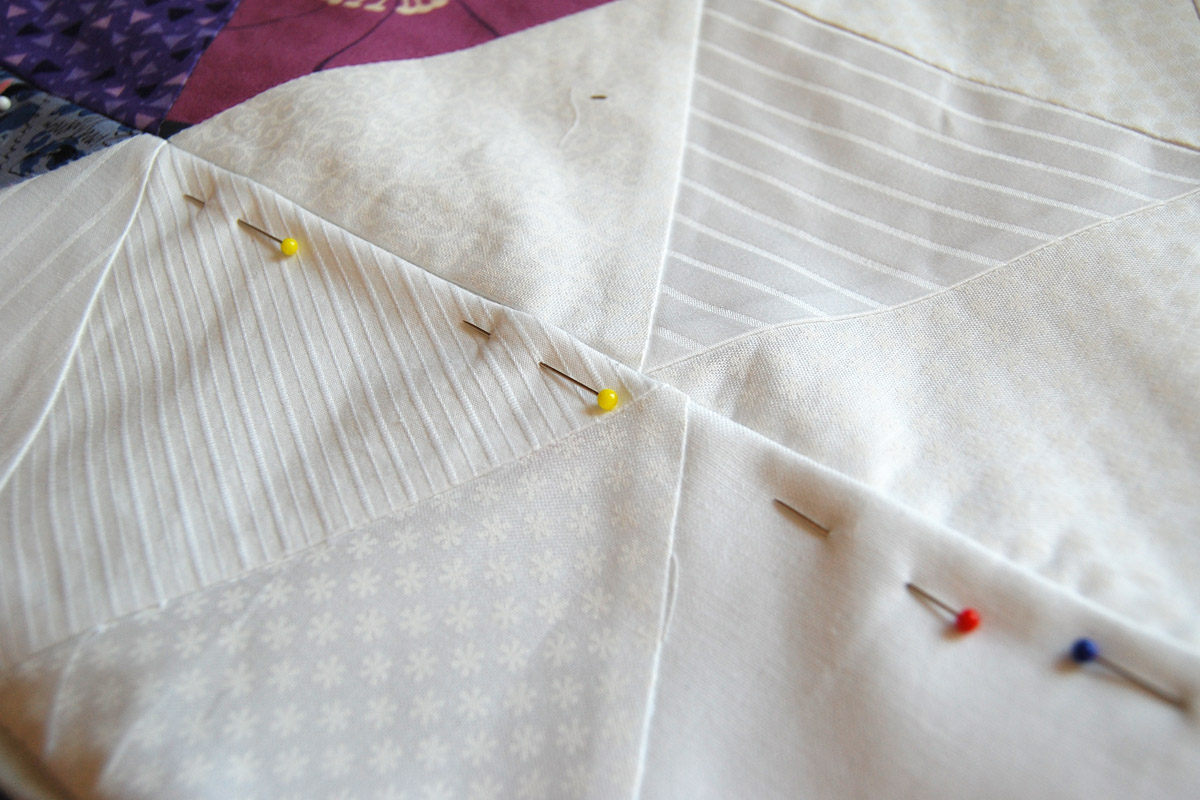
You can leave those straight pins at the pocket top in at this point, or you can take them out. I just left them in until the last steps of sewing the pockets.
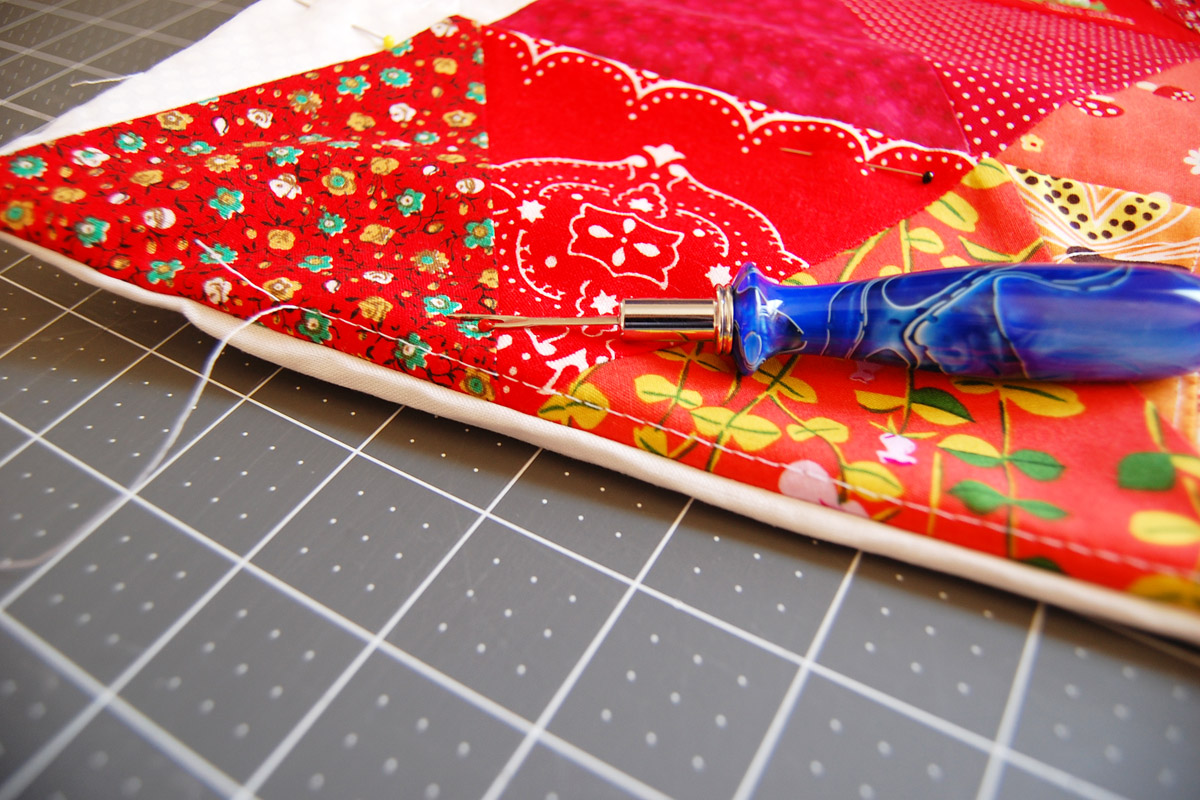
Now is the time to grab a seam ripper and remove the basting stitches at the bottom of the pocket.
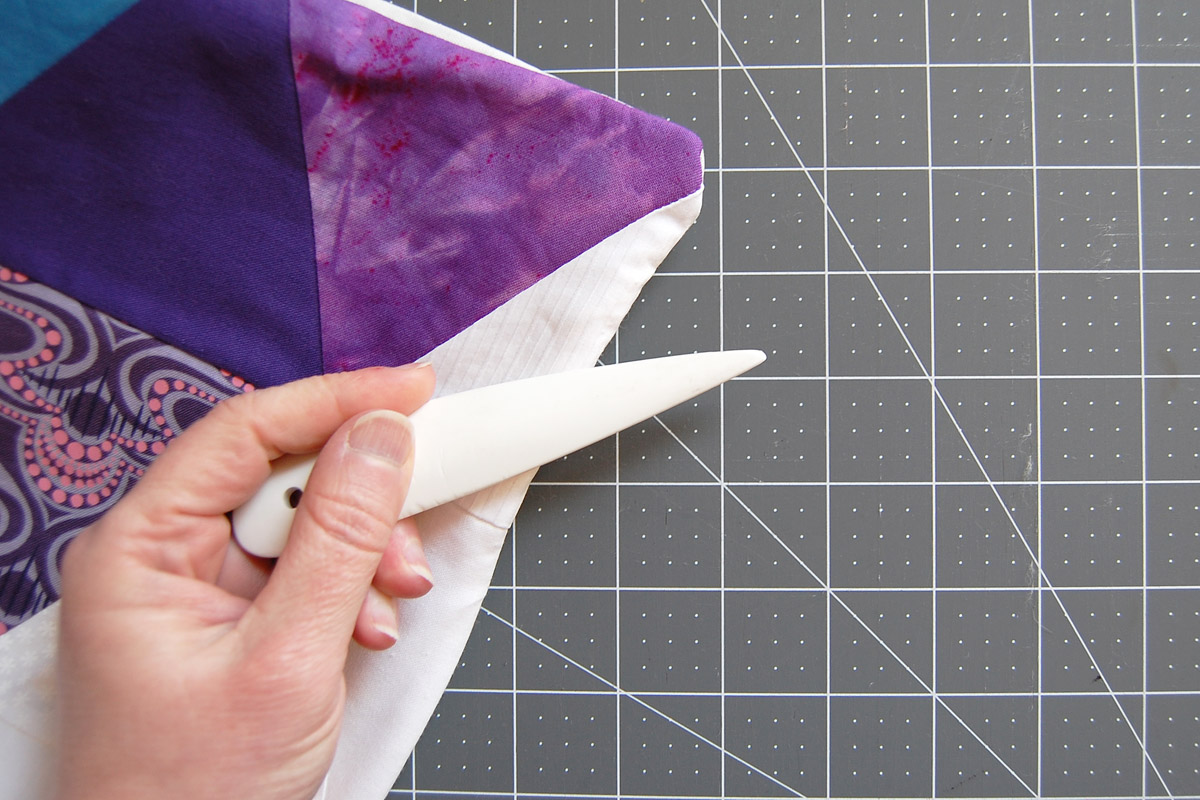
Use a point turner, blunt end of a chopstick, or eraser end of a pencil to carefully push out all four corners. Using something sharp like scissors may poke all the way through the corner.
Pin the opening closed, matching edges as closely as possible.
Measure about 1/2″ down from the top of the pocket on each side and mark with a pin.
Next, topstitch around sides and top of the mat and secure the opening closed with the top stitches.
Begin topstitching where you pinned 1/2″ down on one pocket edge, backstitching a few times. Top stitch around the side, the top, and down the other side of the mat.

When reaching the other pocket, sew to where you pinned 1/2″ down on the other pocket edge and backstitch well. Do not topstitch the sides and bottom of the mat around the pocket.

Quilting the Sewing Machine Mat
The mat is nearly finished! It needs some quilting stitches to secure the front layers to the backing (except the pocket layer). I threw a few pins in to hold the layers still for the first few stitches.
You can quilt the mat together any way you like. I chose to add a few straight lines next to each seam to outline the triangle patchwork.
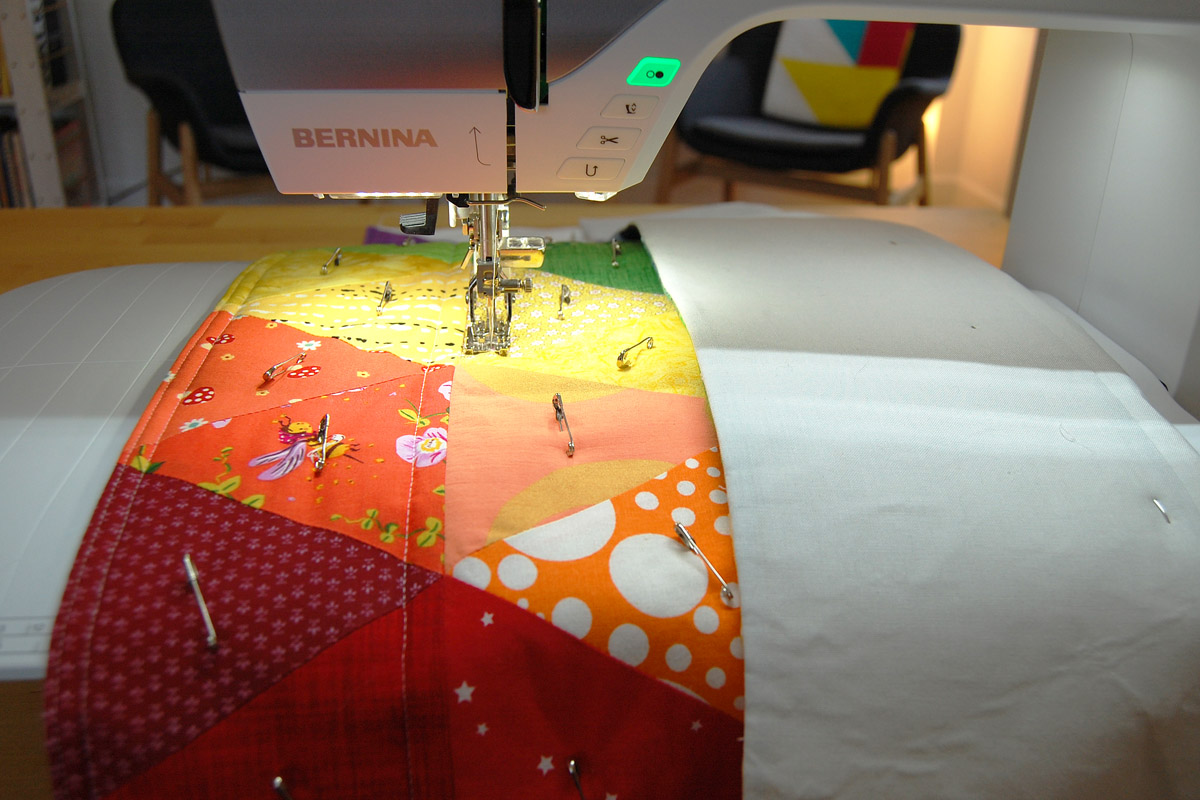
You’ll notice right away that it’s not easy to work with such a stiff project under the machine!
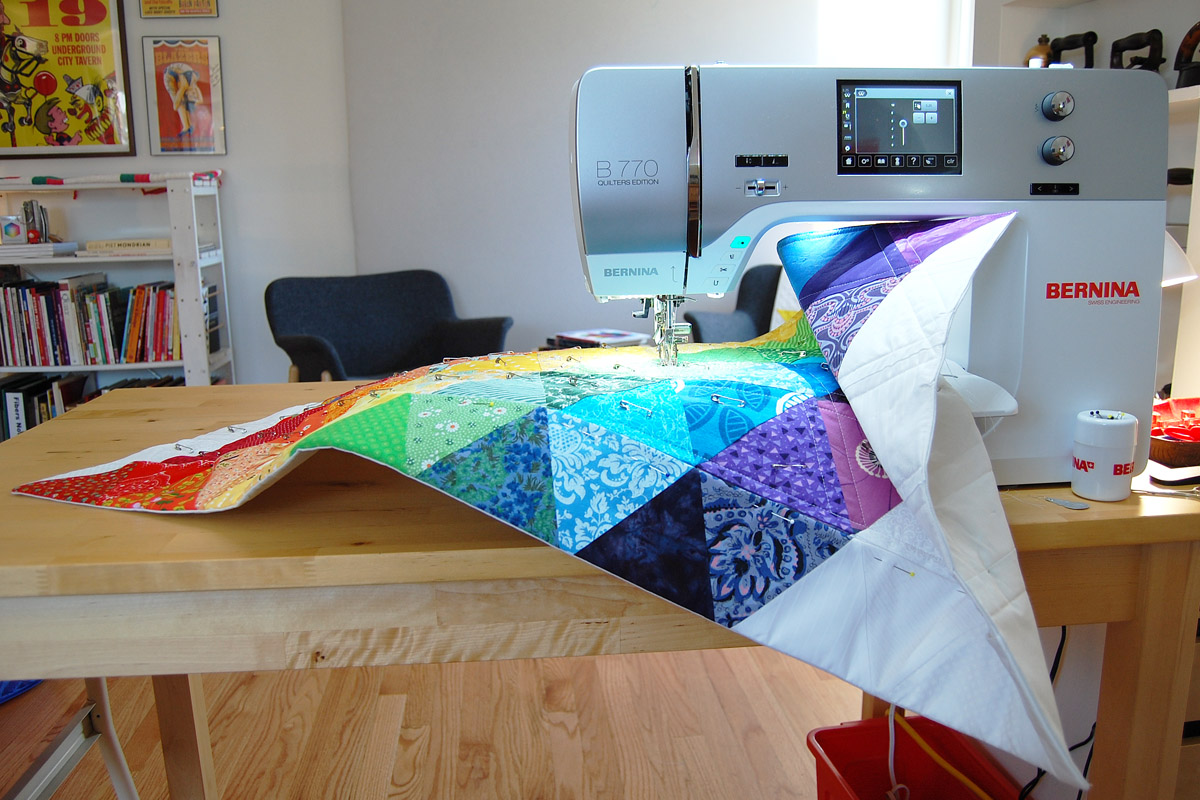
The trick is to figure out how to fold or roll the mat under the machine while you quilt.
It felt a bit like origami at the end! Once you’re happy with the quilting stitches, it’s on to the last step of adding the pockets.
Adding Pockets to the Sewing Machine Mat
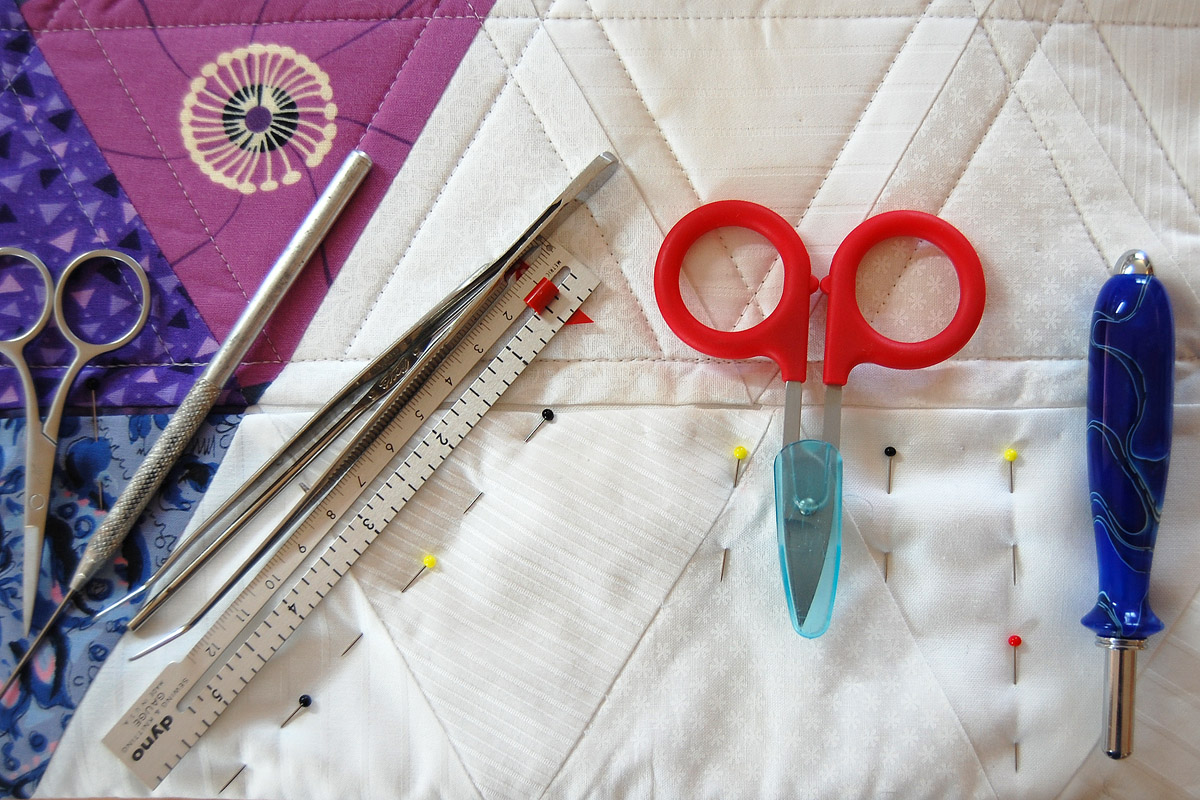
Before deciding how to stitch the dividers across the pocket, grab all the tools and extras that you use when you sew.
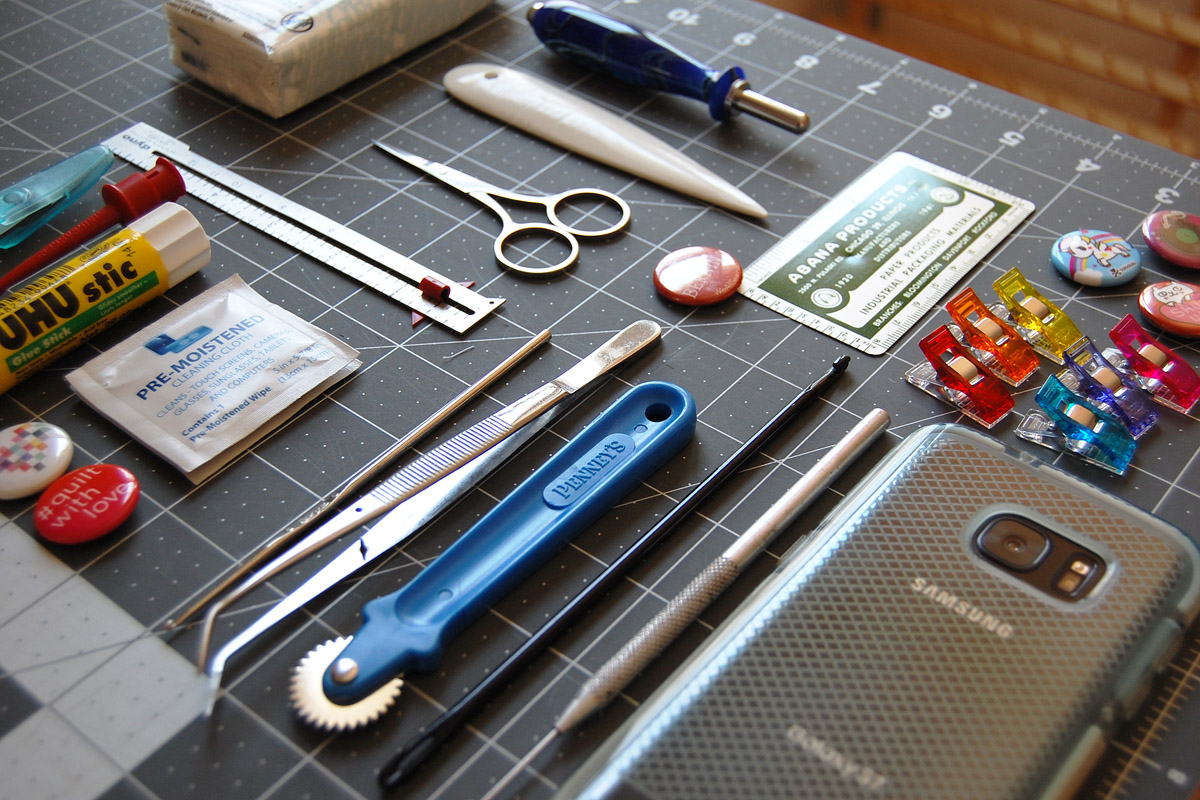
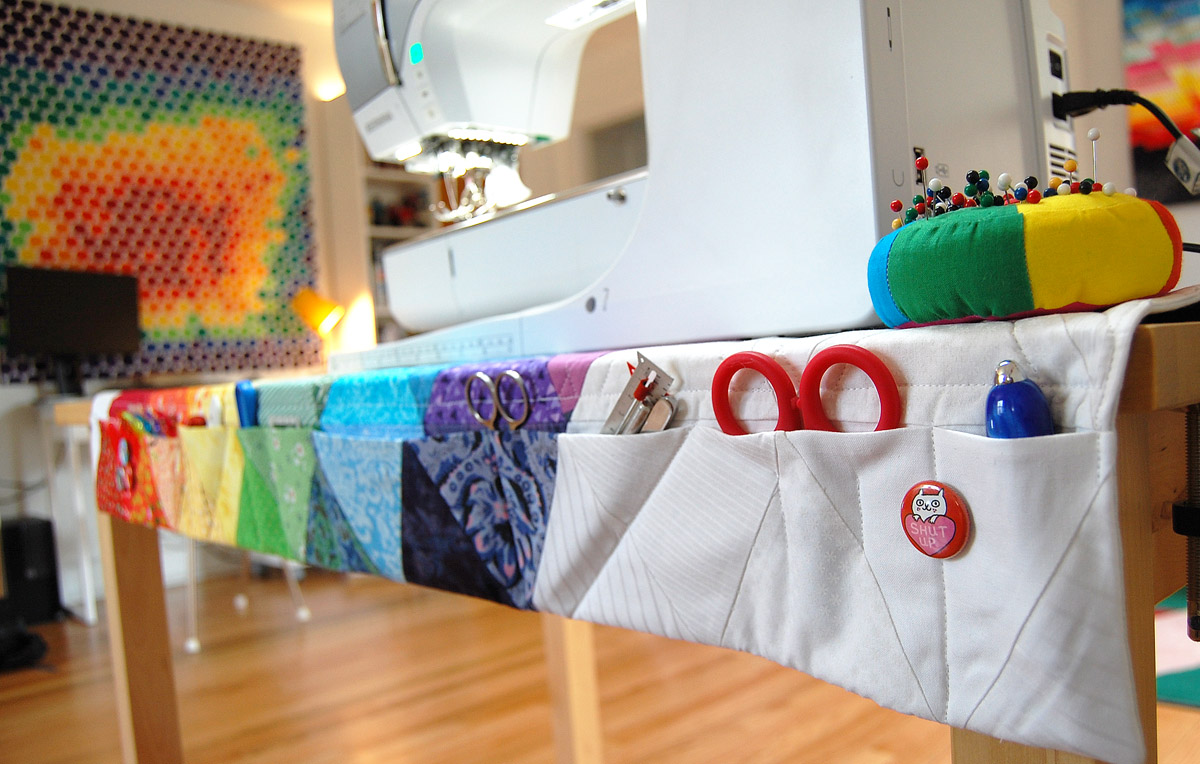
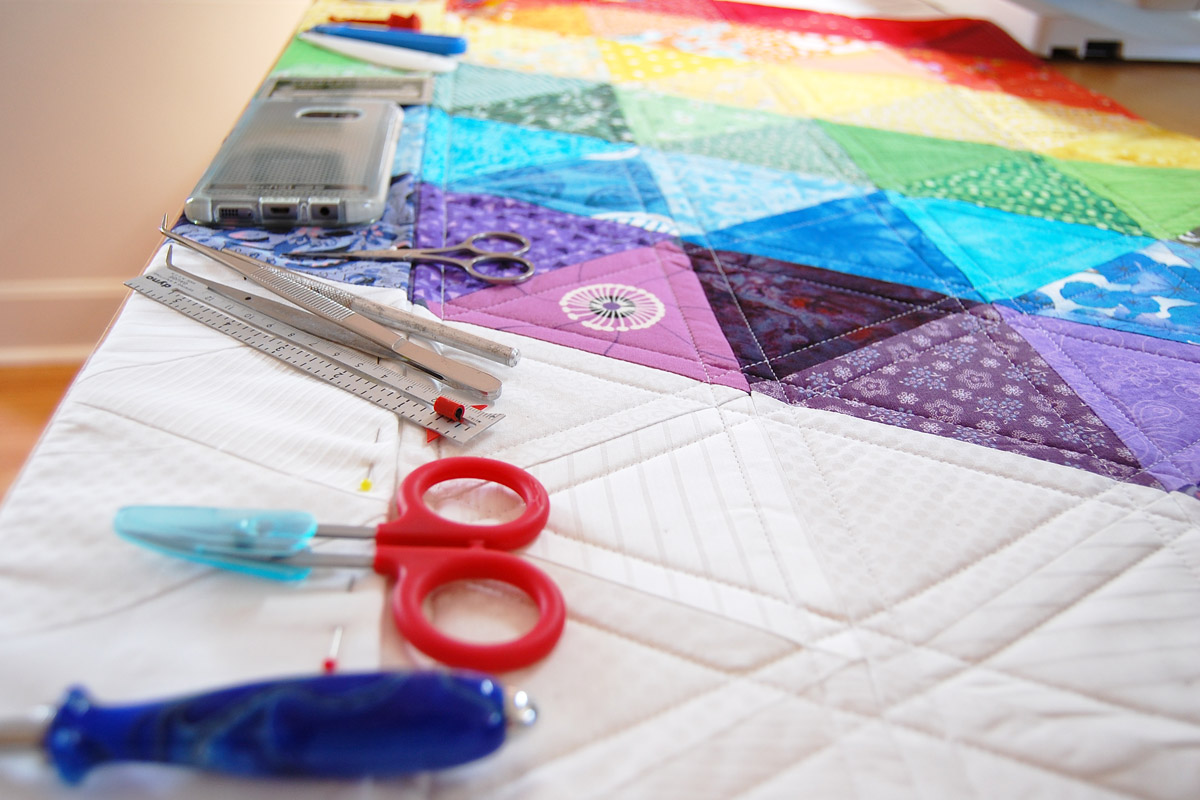
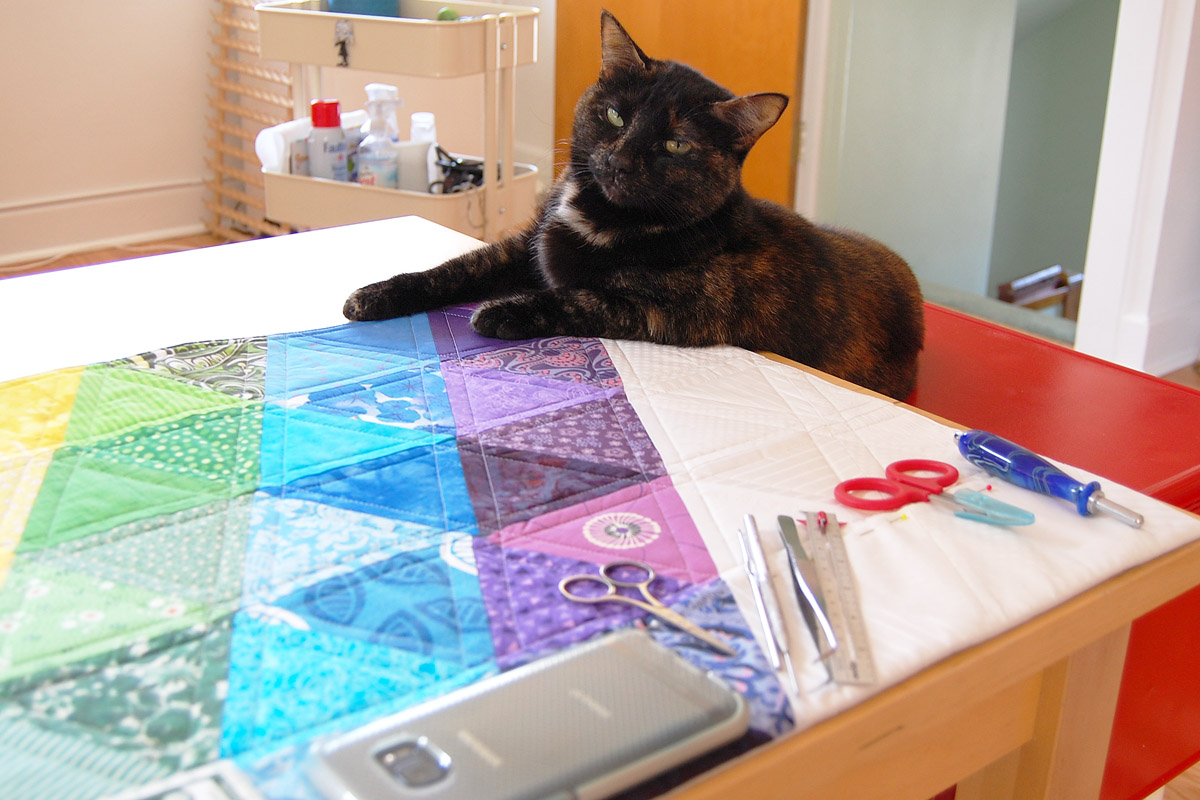
Here’s a collection of sewing tools and stuff that were in the pockets of my last sewing mat. In addition to seam ripper and thread snips, I regularly use tweezers, a super small crochet hook, sewing gauge, clips, little ruler, glue stick, and some other random bits. I love having a pocket big enough for my smart phone so I don’t lose it under piles of fabric or batting (which happened to me all the time).
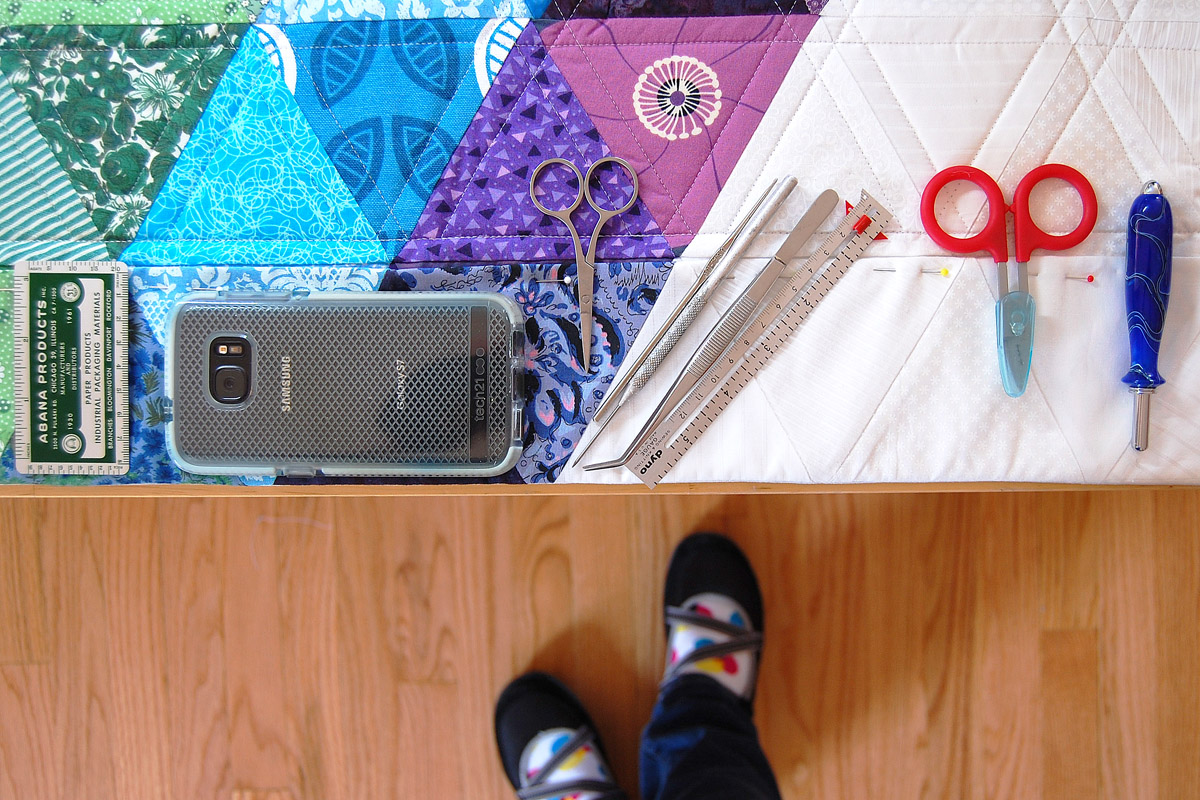
Lay your mat on a table and start to find a good way to organize your tools. I put most-used tools all the way to the right (I’m right handed, so I can grab seam ripper or thread snips super fast this way) and less-used tools farther over to the left.
I discovered early on when using a mat with pockets that you don’t want really tall tools sticking up from the pockets. Anything sticking up above table height has the possibility of getting snagged on your project or your hand. My solution to this issue is to create slanted pockets for tall tools like tweezers and sewing gauges to keep them below the edge of the table while still in easy reach.
Take your time when laying out all your goodies.
Sometimes it’s good to have a helper for this step!
When you’re good with the layout, pin the pockets where you want to add top stitching to create the separate compartments in the pocket. You can see above where I am pinning a slanted pocket for a few tall tools.
Start sewing the separating stitches in the middle of the pocket and move over to each end. Top stitch the pockets where you have placed the pins. For each separating stitch in the pocket start sewing at the top edge, backstitching a few times to make the pocket nice and strong.

Don’t sew all the way over the super thick seam at the bottom! Stop about 1/4″ from the bottom edge and backstitch. Then move on to stitching the next pocket divider.

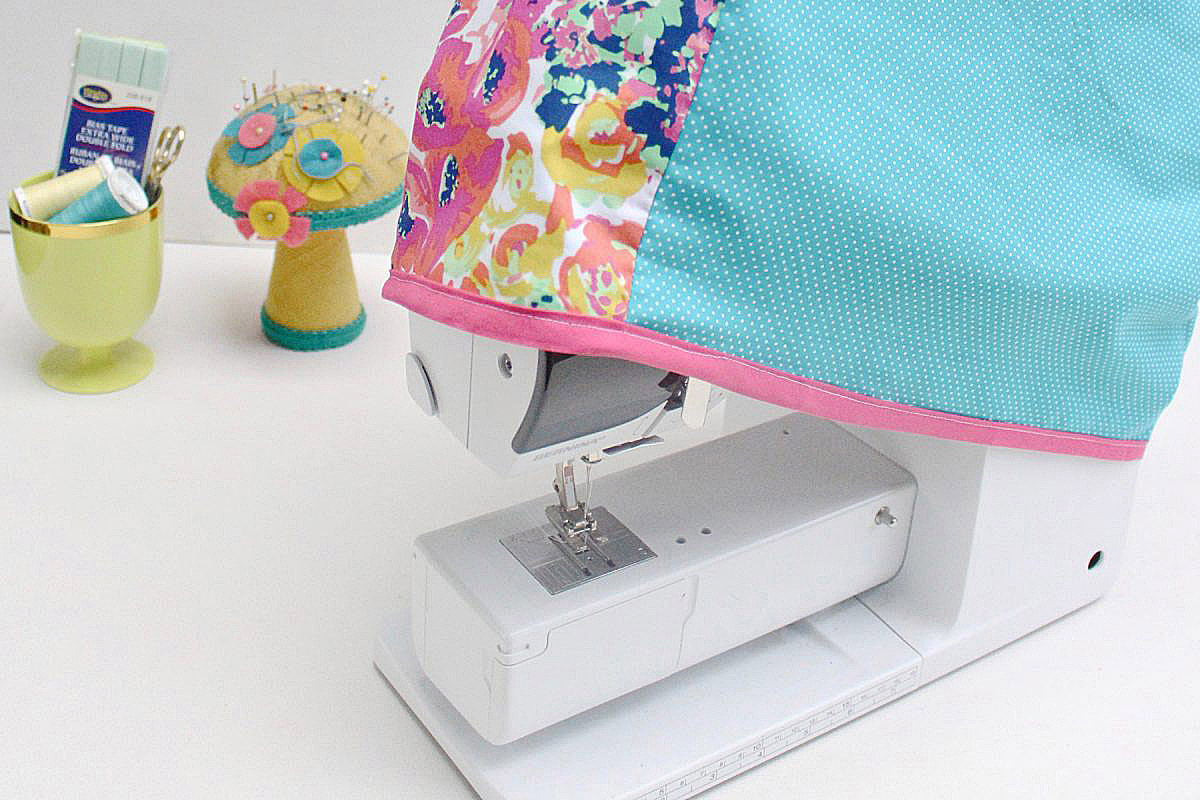
Give your sewing machine mat and pockets a good final steam press. Really press the mat well around corners, outside edges and the pockets.
As a final step, fold down the pocket about 1″ above the pocket edge and steam press well to set the fold. This folded bit sits on the edge of the table. You are now ready to test out your sewing machine mat!
TIP: Here’s my secret for using a really wide mat like this and keeping it from shifting or sagging on my work table.

I use a strip of indoor rug grip tape all along the back edge of the mat (Scotch brand Indoor Gripping Tape for Rugs formulated for vinyl, hardwood, and tile floors). This is a temporary, easy to reposition rug grip that sticks to both the fabric and the table, but doesn’t create a permanent bond. I have no problems using this stuff on my simple wooden sewing table, but I highly recommend testing a small piece of this out first on an inconspicuous part of your table before going full-tilt and using a big strip, especially if you have a table with a special finish!
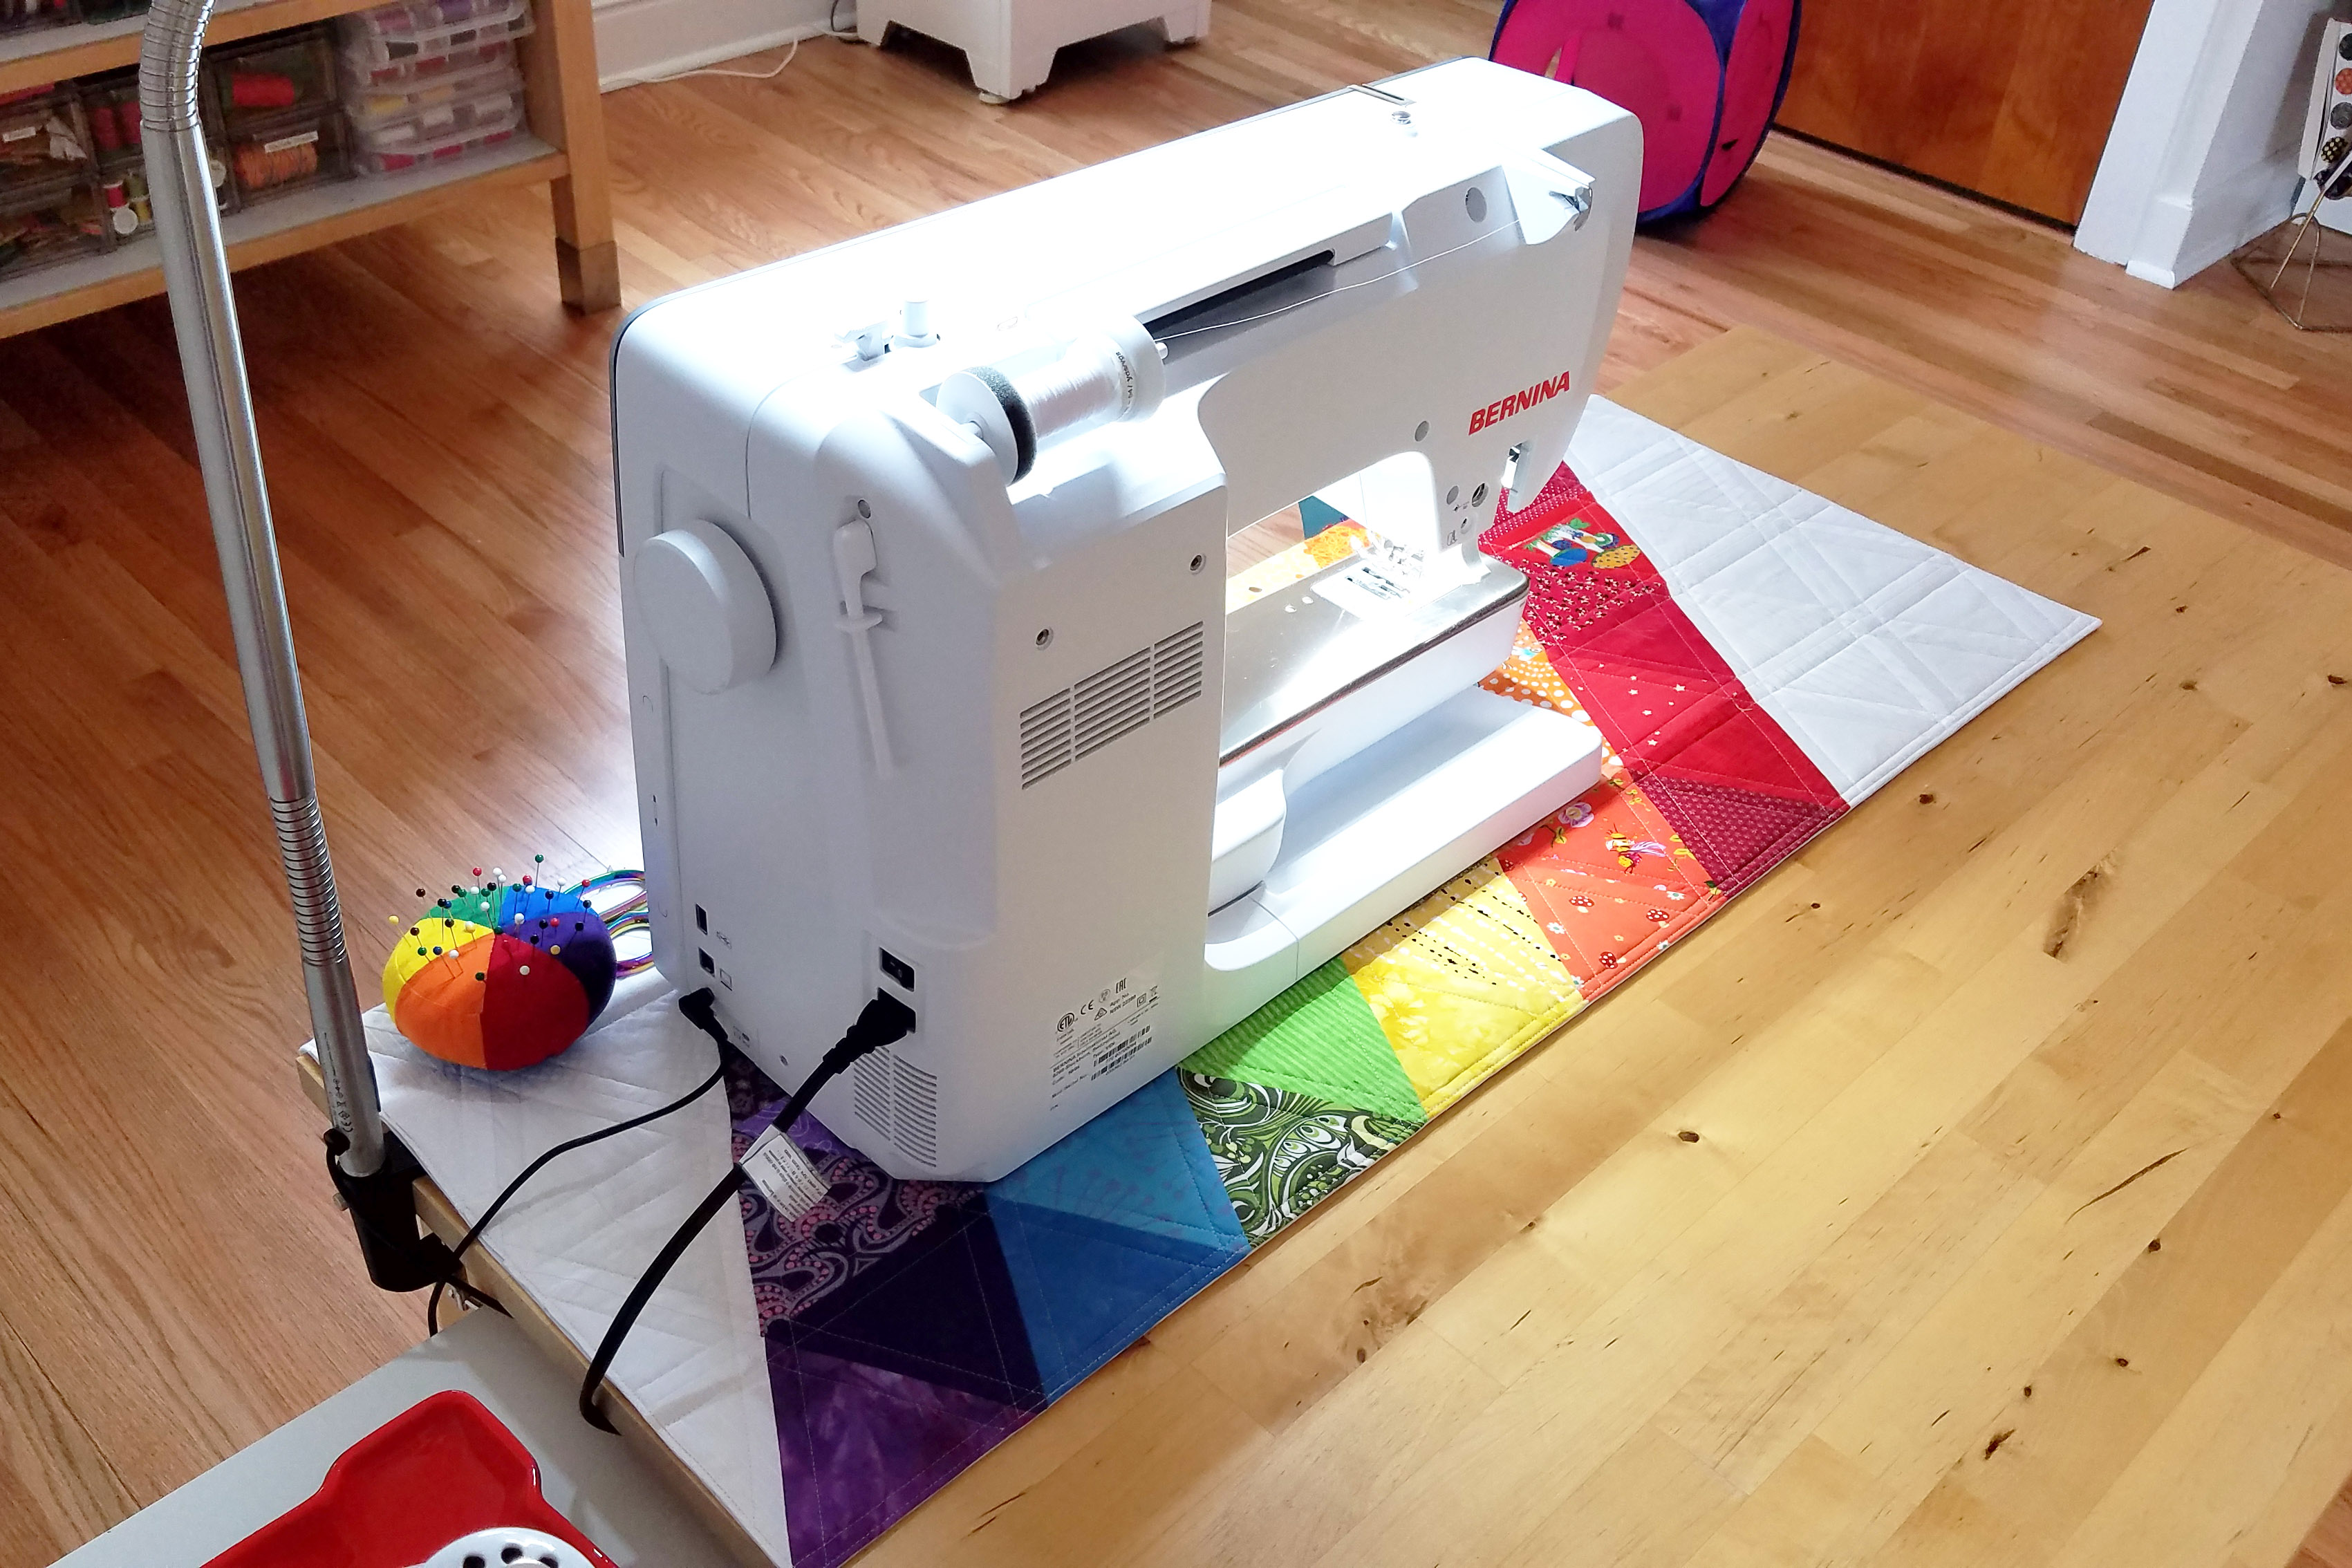
The grip tape makes the mat lay nice and flat all along the back edge, keeping everything in place. No slipping, sliding, or sagging!
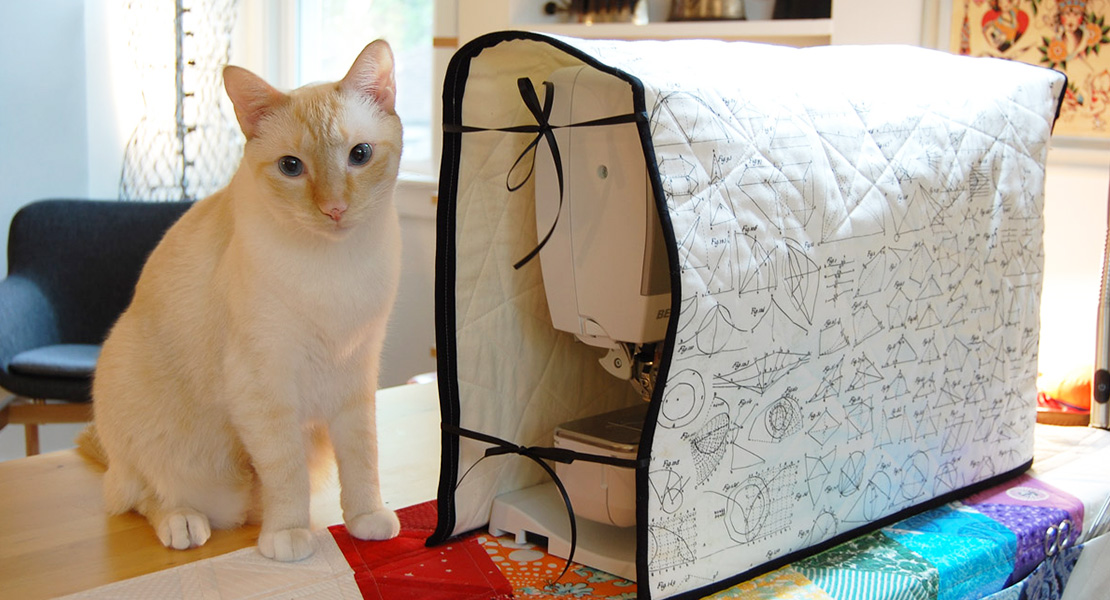
What’s especially nice about this handy pocket mat is that it works well as a base for other things, too.
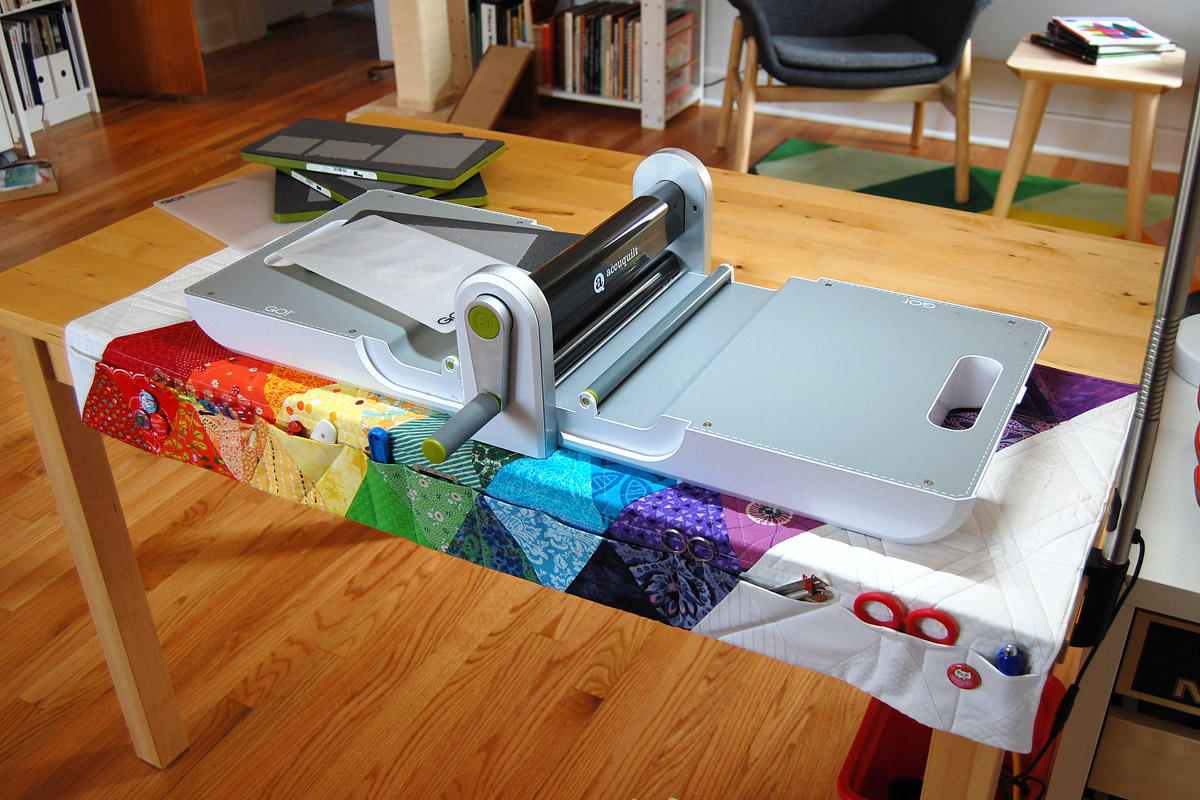
Like my fabric die cutter which fits so perfectly! Thread snips and picks at the ready if I need them when die cutting fabric.
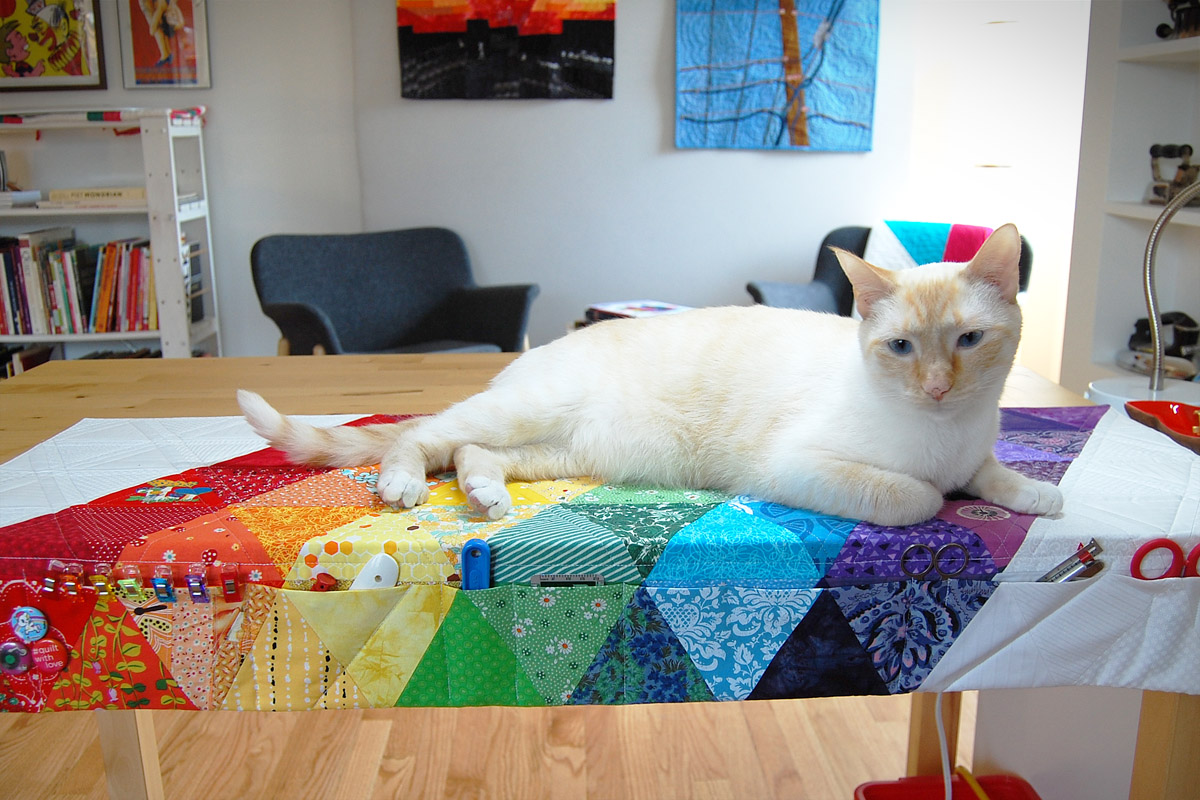
Also works great for my studio assistants who seem to need frequent naps. I hope you enjoy this project as much as I have, I absolutely love using this mat. Please share your version of the sewing machine mat with us by posting pictures to the WeAllSew Community section, or tagging @berninausa and @erika.mulvenna on Instagram!
Used Products


What you might also like


14 comments on “Sewing Machine Mat Tutorial”
-
-
Beautiful project. And, beautiful models!
-
I’m ready to make a mat for my new Bernina 570QE! But I’m having trouble finding the interfacing. Everything I have looked at (online) is only 20″ wide. What am I doing wrong when searching for this? Suggestions welcome. I guess I can piece it if I have to. Also, I have a patchwork foot 97, not 97D. I presume it’s not a big deal. I honestly can’t tell what the difference is in usage. All I can find is sites that say the “D” is for dual feed machines. Mine IS dual feed, but the I got the standard 97 foot. As usual, I’m obsessing over details!
-
Hi kathyjb, the interfacing I used is Pellon Decor Bond that comes in a 45″ width. Check at your local fabric or BERNINA store and ask specifically if they carry this product. In regards to the feet for your B 570 QE with Dual Feed, only feet labeled with the “D” letter are compatible with the Dual Feed feature. If you look closely at the “D” feet they have a slot in the back made for the finger of the Dual Feed to fit into, and this is where the Dual Feed gives an extra tug on the top layer of your fabric to help it move along under the presser foot. “D” feet in conjunction with the Dual Feed help the top layer from stretching out or sliding forward while sewing. It’s especially helpful with patchwork! Happy sewing – Erika
-
Hi Erika, I understand now – my 97 foot doesn’t work with the Dual Feed. I should have figured that out! I’m moving up from an older Bernina 1230 and haven’t had any “new owner” orientation yet. The 570 QE is like another world by comparison. Thanks for the Pellon recommendation; I see it at JoAnn, which is nearby, so that’ll take care of it. Unfortunately I’ve run into a problem as I started cutting the triangles this afternoon. I bought 5″ charm squares and they’re a little too skimpy, especially with pinked edges! Thank you for your help. Kathy.
-
-
-
Great step by step pictures along with template.Thanks
-
Great step by step pictures along with template.Thanks
-
Great step by step pictures along with template.Thanks
-
Great pattern, and easy to understand considering this is my first attempt at anything like quilting. I finished mine this weekend, wish there was a way to share a photo of it on here!
-
I’ve added a pic on my Instagram @marshmallow_stallion_sews
https://instagram.com/p/BsdgQMqhNRk/
-
-
Love We All Sew!
Is there a .Pdf of this pattern?
On this site, printing capabilities would be a great advantage for patterns. Just saying! -
What’s the table you are using for sewing machine?
I need a new table for my newish 880+ -
I have to say , thanks for all you do !! and I echo the idea of having a pdf to print this info would be much appreciated!
-
Thanks so much Maryann! The WeAllSew blog is posted in an open format, so if you wanted to copy/paste the post to a document you can either save for later or print and have a hard copy. Cheers! – Erika
-
Leave a Reply
You must be logged in to post a comment.

These sewing assistants are vital to a successful project. They model for you and they also drape over your equipment to protect it from unwanted touches. And until they are finished, you are probably in a hold pattern.