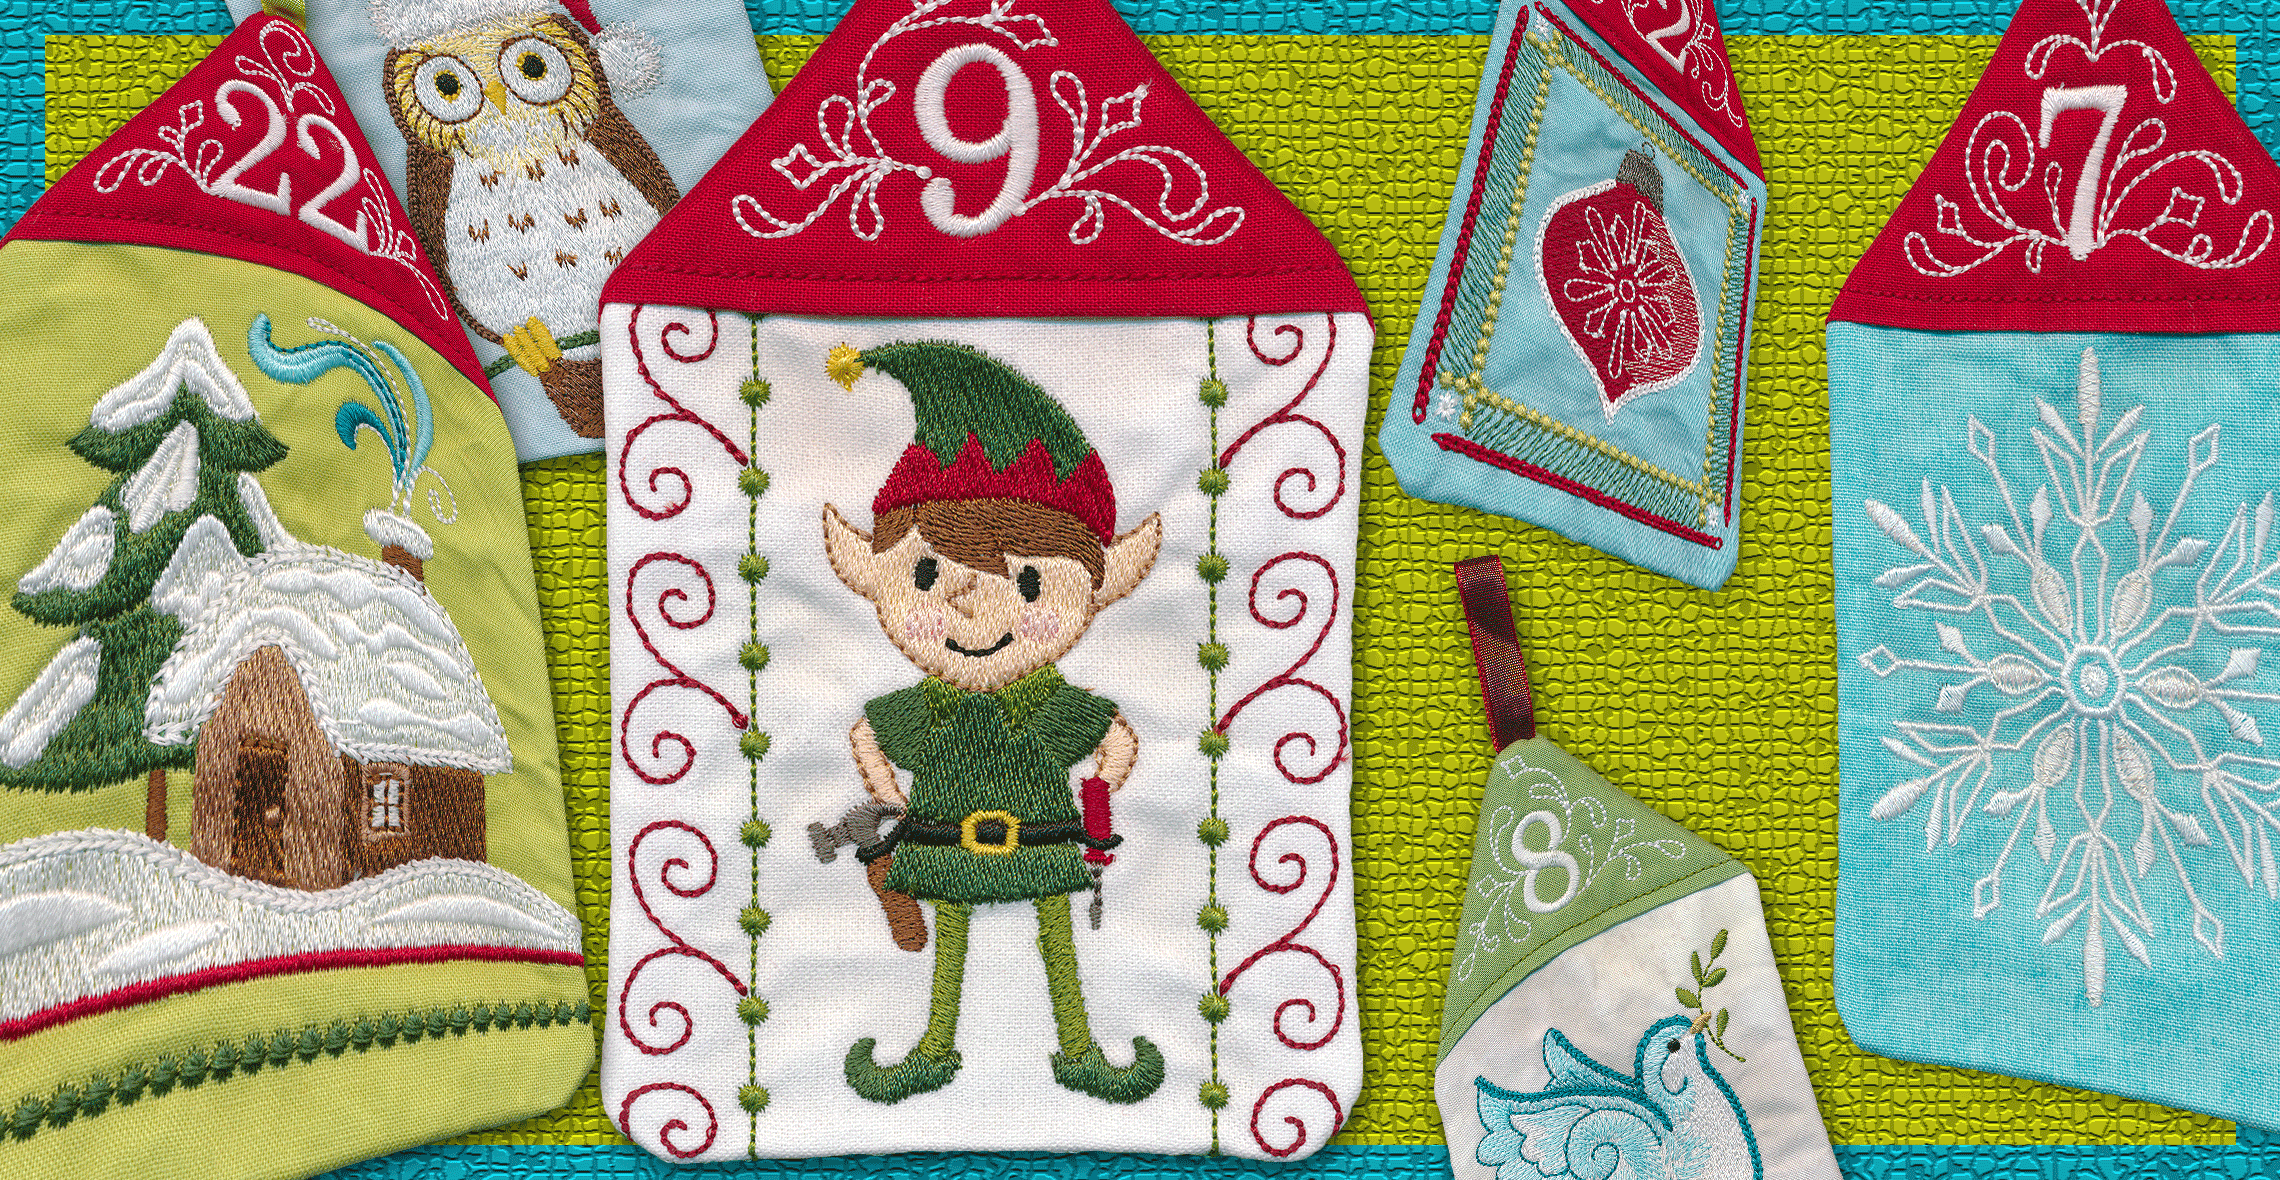
How to Sew an Advent Calendar
When I was growing up, a family friend would send my brother and me each an advent calendar. It was one of those cardboard ones with a winter or holiday scene on the front and 24 flaps to open before Christmas Day. Inside each flap was a piece of chocolate so of course, it was the first thing we ate every morning from December 1st to the 24th.
My grandmother made Advent calendars for us and her other four grandchildren. The backing was burlap that had a felt Christmas tree about two feet tall and 24 pockets, each with a felt ornament to pin to the tree. I’m sure it was a pattern my grandmother found in a sewing or craft magazine in the ’70s. I still have mine and admire the ornaments she embellished by hand with beads and sequins.
I can’t imagine how many hours and weeks she spent making them. But that’s what she did, and I’m sure I inherited her sewing, quilting and craft genes. So, I’m dedicating this post to my grandmother, Georganna Johns, who never lived close to me, but was always close in my heart.
Sewing Machine Set-up to Sew an Advent Calendar
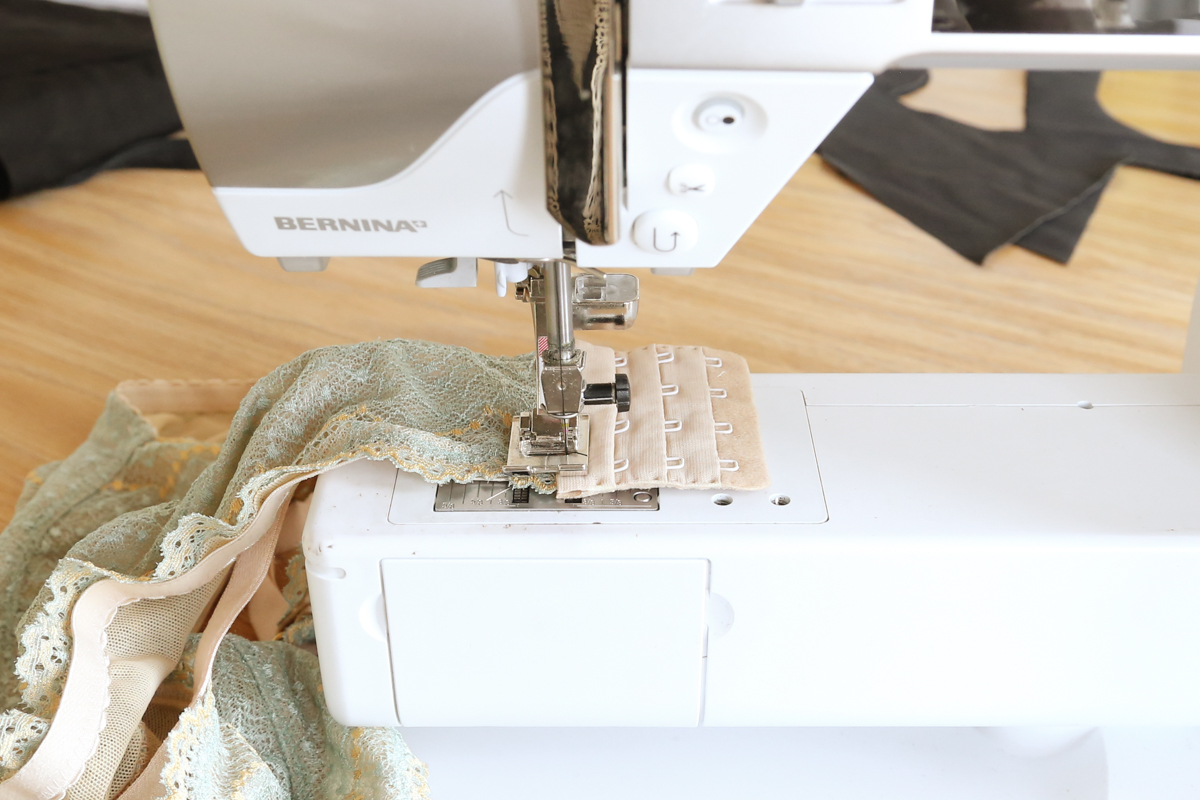
Sewing Machine
BERNINA Presser Feet
- Reverse Pattern Foot with Clear Sole #34/34C/34D
- Embroidery Foot with Clear Sole #39/39C
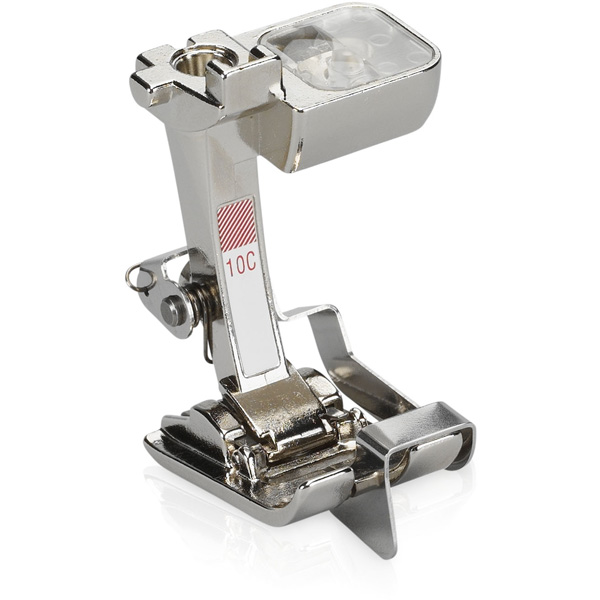
- Edgestitch Foot #10/10C/10D
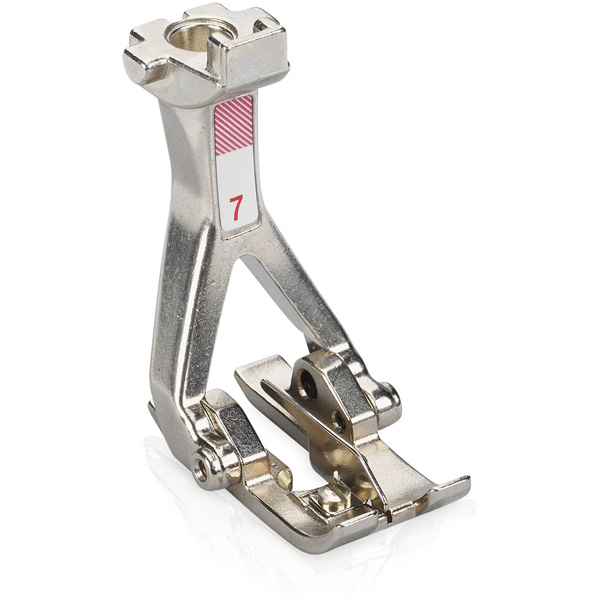
- Tailor Tack Foot #7
Materials to Sew an Advent Calendar
- Advent Calendar Panel (see below for the exact one that I used)
- Advent panels are found in various designs but are generally put together the same way.
- Essex Linen by Robert Kaufman (backing)
- Pellon P44F Interfacing
- Schmetz Microtex Needle 80
- Schmetz Topstitch Needle 80
- Mettler Cotton Thread 50 wt (one red and one white)
- WonderFil Eleganza Perle #5 or Mettler Cordonnet
- Aurifil Cotton 28 wt in white
- Rotary Cutter and Ruler
- Mini Iron by Nifty Notions or other small Iron
- Seam Gauge
- Stiletto
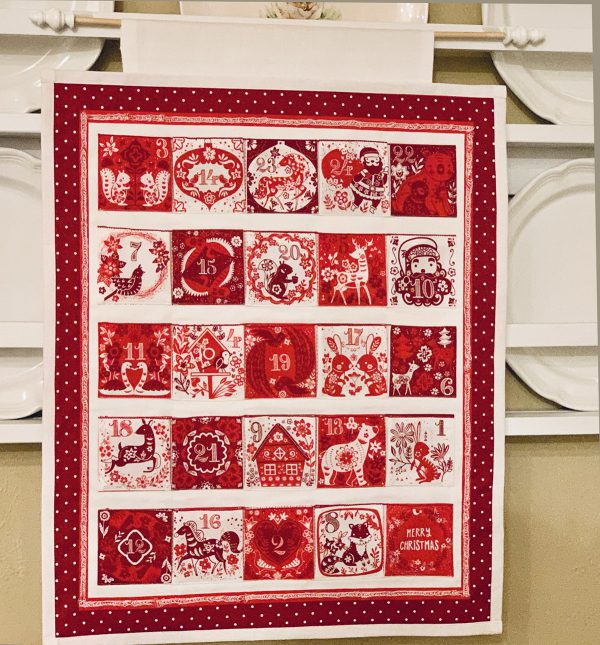
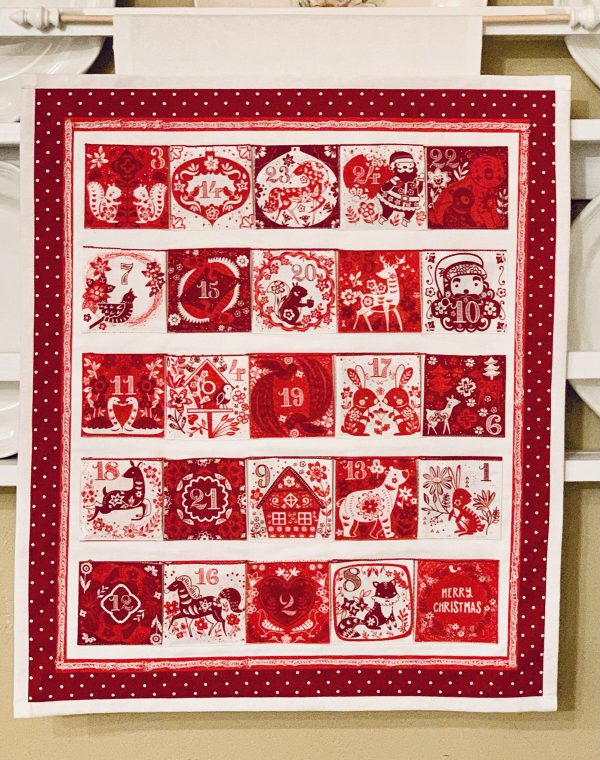
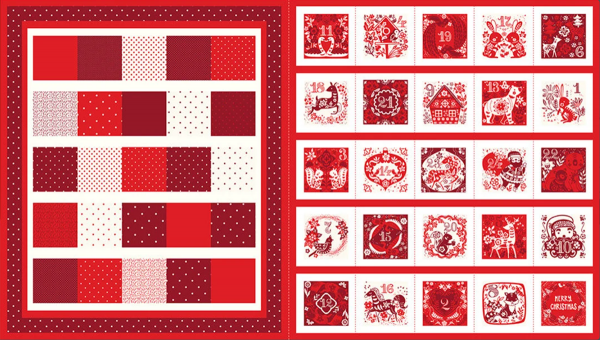
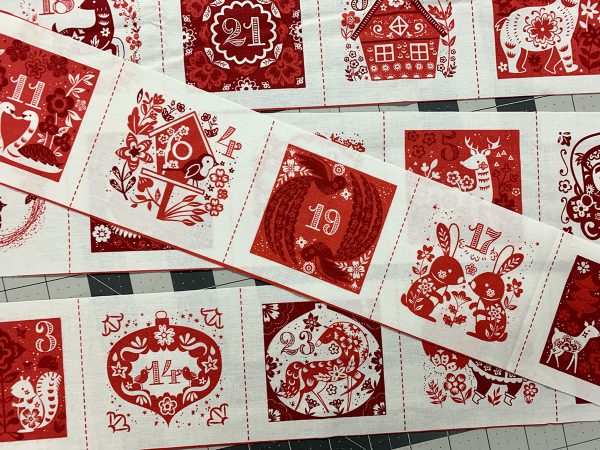
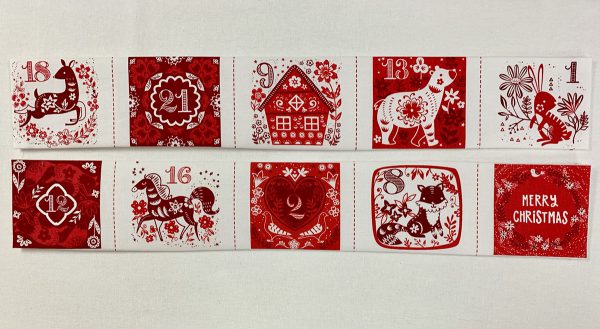
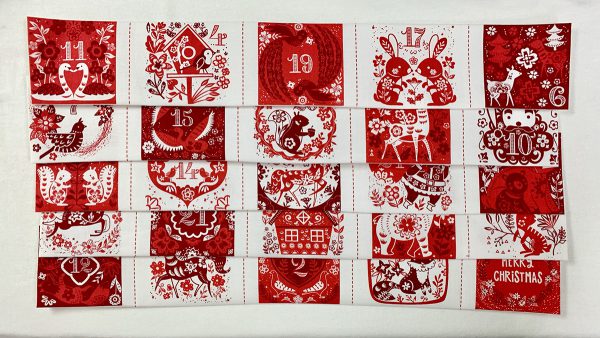
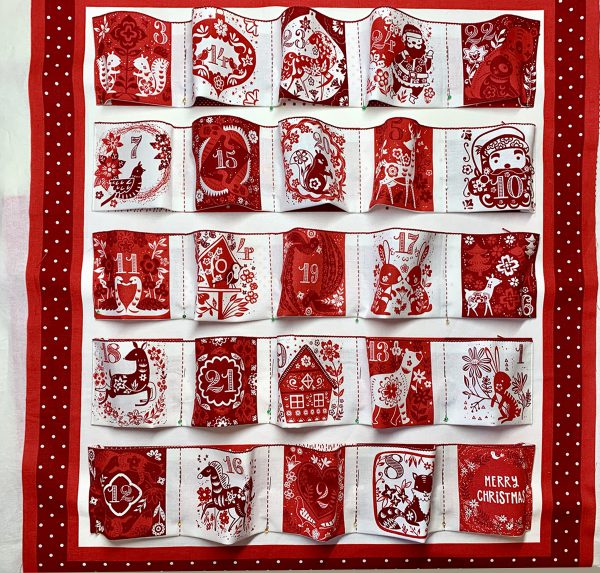
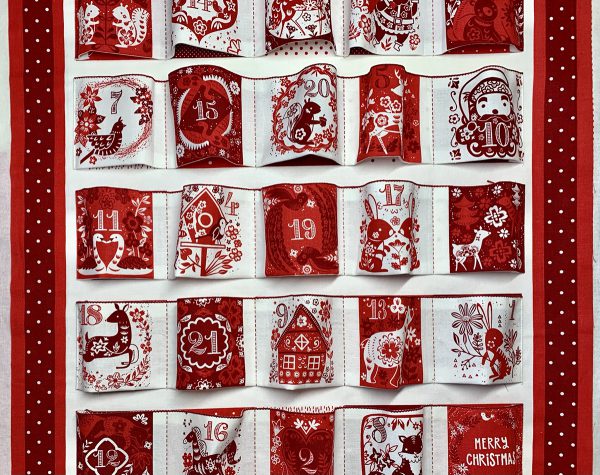
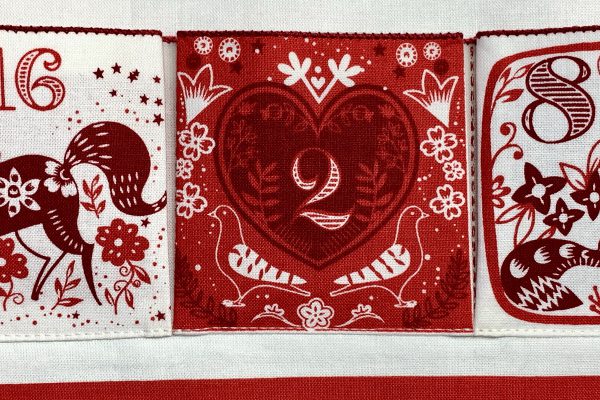
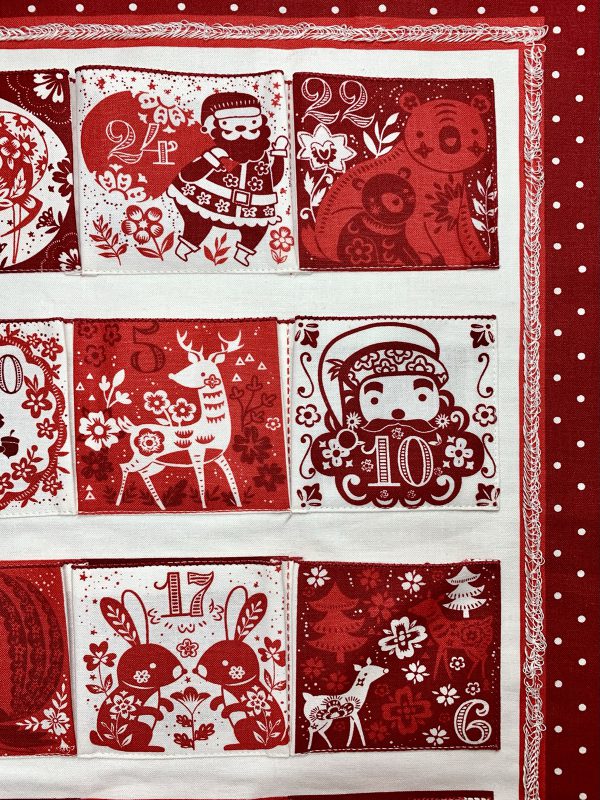
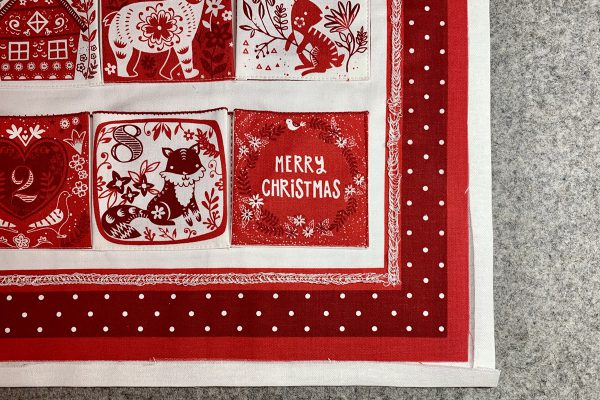
Below is an advent calendar panel I fell in love with by Dashwood Studios called Festive Magic. I love the red and white and the artwork on the pockets. There are instructions printed on the side of the panel but they are very basic. A beginner might have a hard time reading between the lines, so I created this tutorial to help those who would like more detailed instruction. Also, I have added some extra features to add structure and texture to the calendar. Let’s get started!
Steps to Sew an Advent Calendar
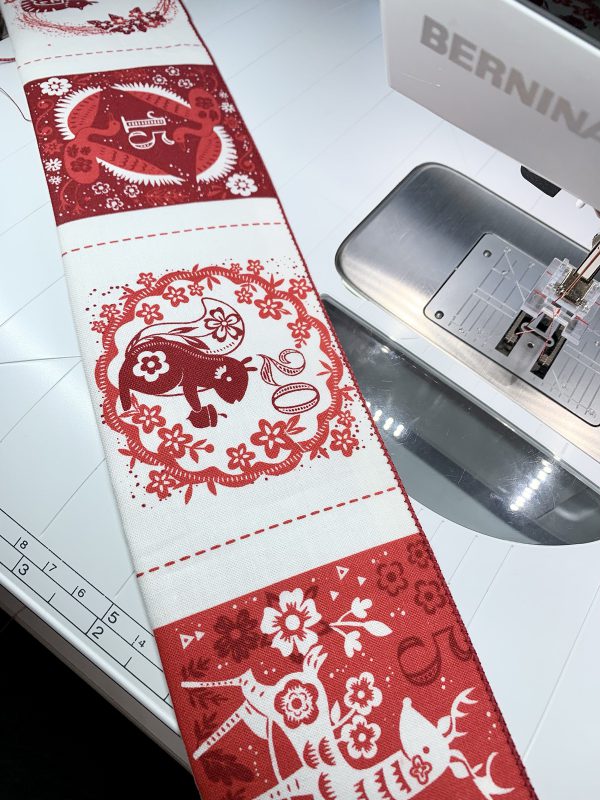
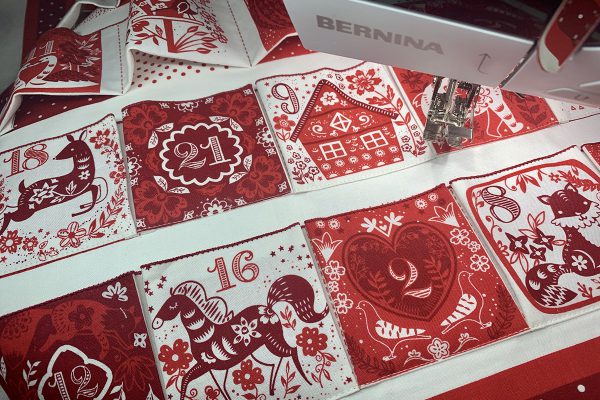
Carefully trim along the dotted line in the center of the panel creating two halves – the background and the pockets. Then, with your rotary cutter and ruler, trim the background along the outside red border.
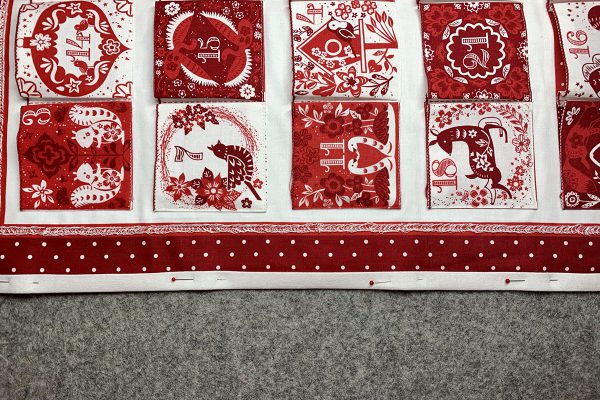
Next, trim the pockets into five strips.
Cut interfacing the same size as your background piece and the pocket strips. Mine measured 19 3/4″ x 4” for the pocket strips and 19 1/2″ x 22 1/2″ for the background piece. Press interfacing to the back of each piece.

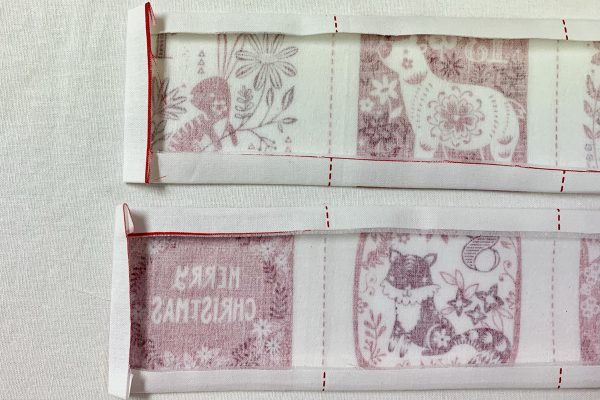
Fold and press along each pocket strip 1/2” on top and bottom. I use a seam gauge to stay accurate.
Then, fold and press 1/2” at both ends.
Looking good!
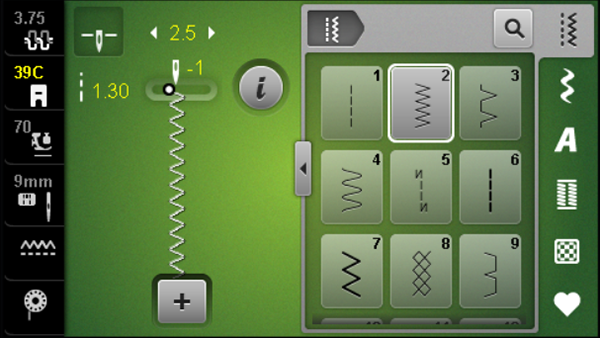
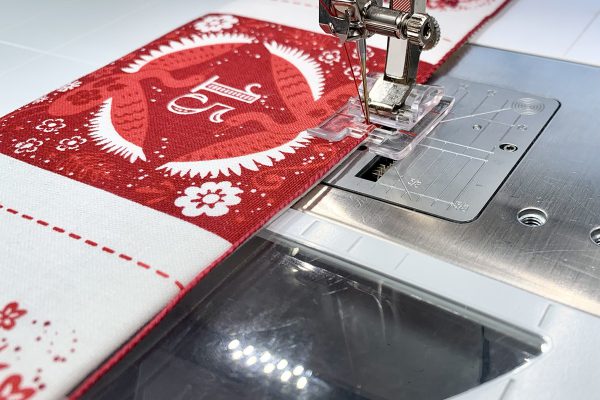
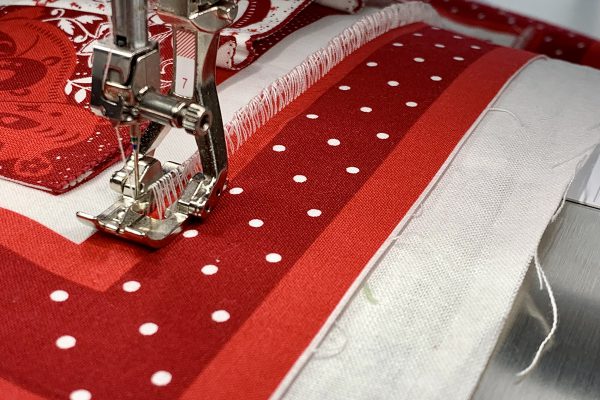
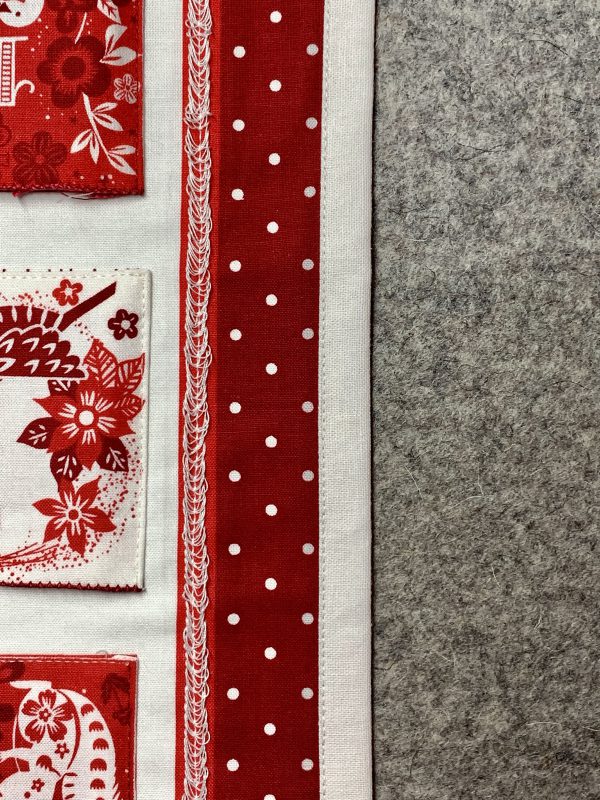
We are going to have some fun with Embroidery Foot with Clear Sole #39/39C and Eleganza or Cordonnet thread by creating a reinforced edge that is both practical and decorative. This sewing technique will add structure, texture and color to the pockets!
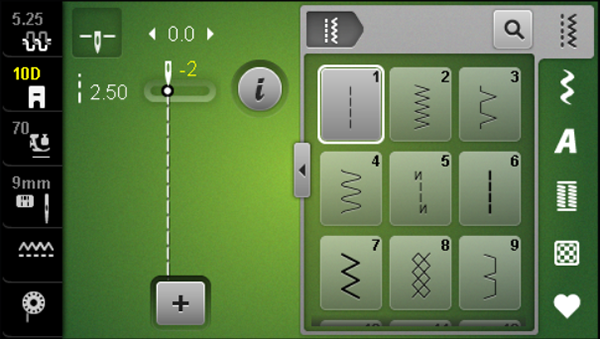
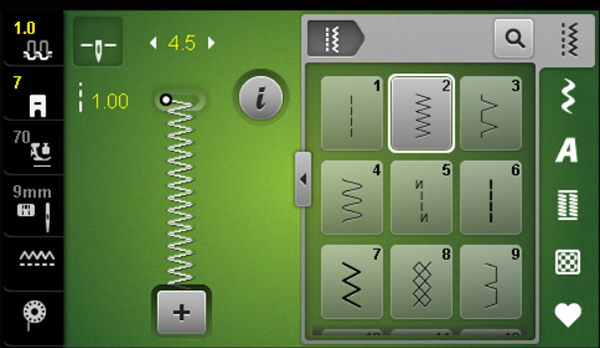
At your machine, select Zigzag Stitch #2. Change Stitch Width to 2.5 mm and Stitch Length to 1.3 mm. Move your Needle Position to -1. These settings worked best for me.
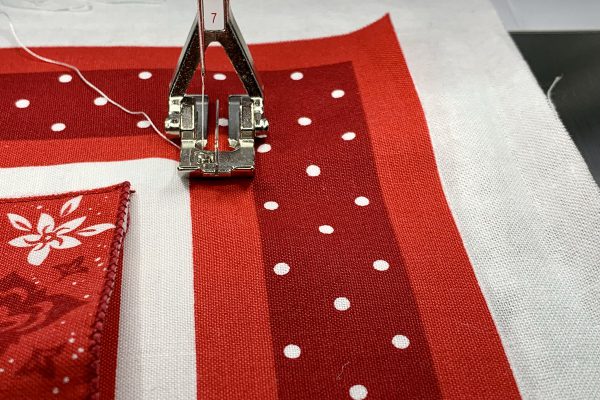
To avoid confusion, I am going to refer to the red Eleganza or Cordonnet thread in the presser foot as the cord. Thread your machine with a color thread matching the cord. Then, insert the cord thru the hole in the sole of the foot. Attach the foot to your machine being careful the cord does not come out. You can tie a knot in the back if that helps.
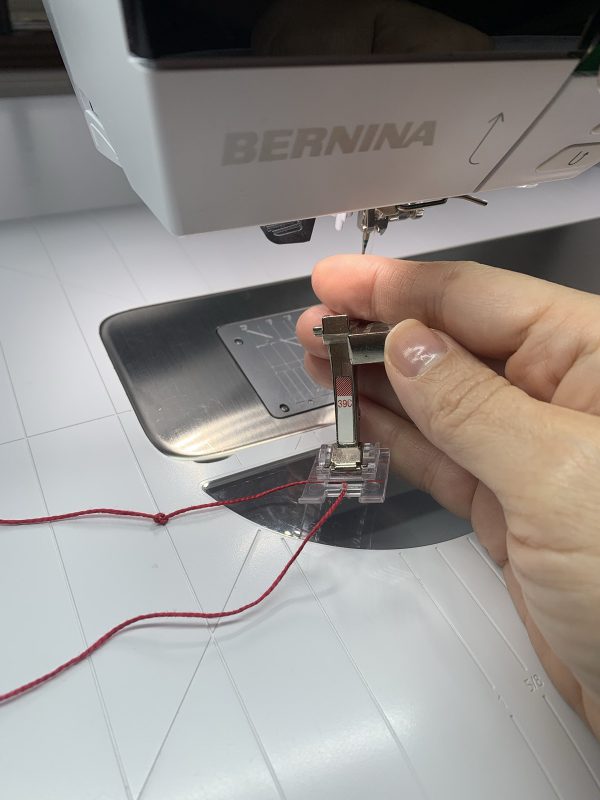
Place one pocket strip up against the cord making sure it is the top of the pocket. Lower the needle with your handwheel to check placement. The left swing of the needle should land in the fabric next to the cord but not in the cord. Now check the placement of the needle on the right swing of the zigzag stitch. The needle should land “in the air” to the right of the cord but not in the cord.
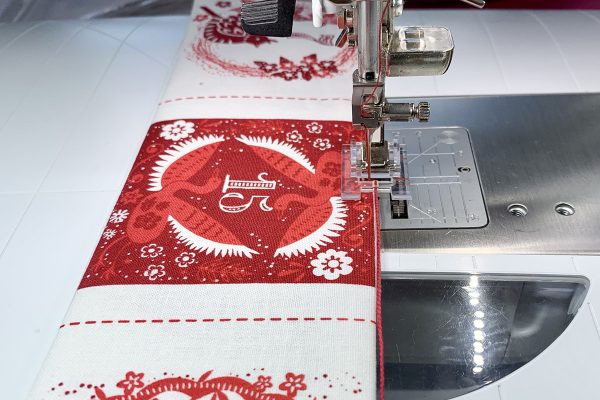
Sew along the pocket strip to the end. Then, pull the cord to the back and cut. Continue the same process with the other four pocket strips.
Love the look and it’s such a fun sewing technique!
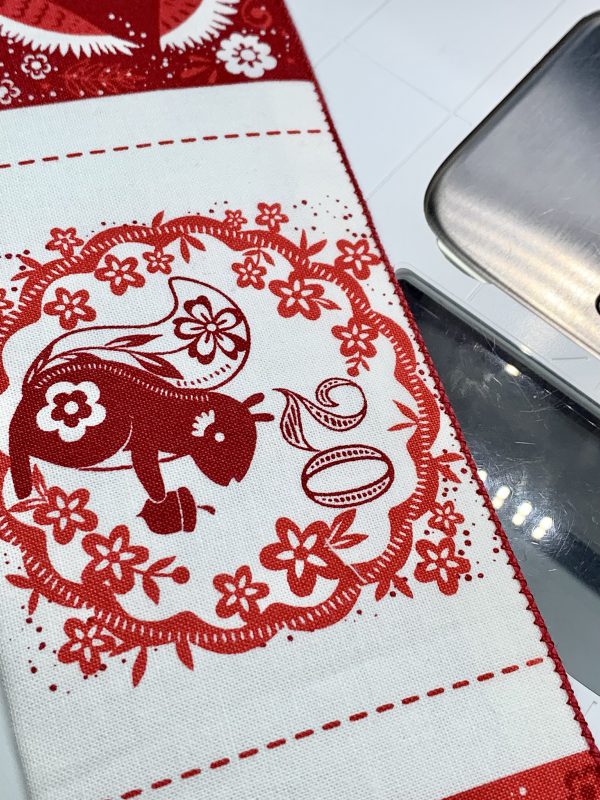
Here’s a closer look at the stitching. See how the thread wraps around the cord?
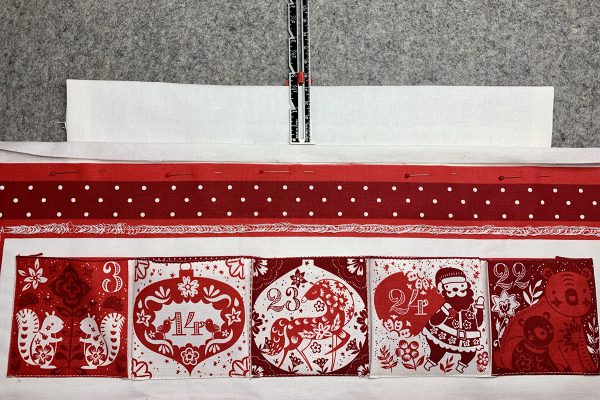
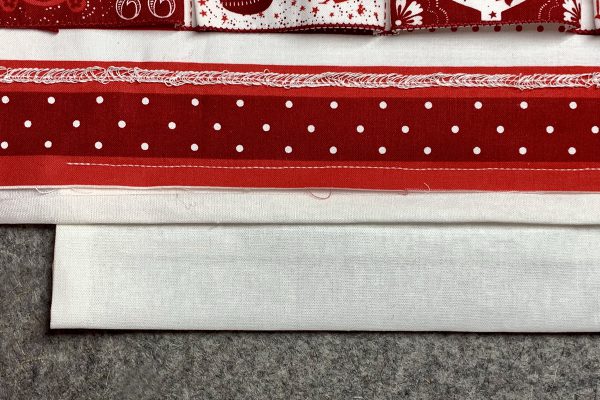
Cut the backing fabric so it’s 1” larger on all sides of the background panel. I am using Essex Linen by Robert Kaufman in white. Using a temporary spray adhesive, spray baste the background panel to the backing fabric.
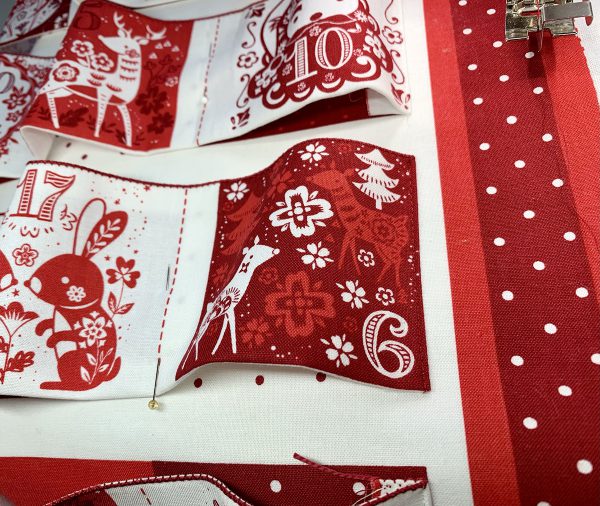
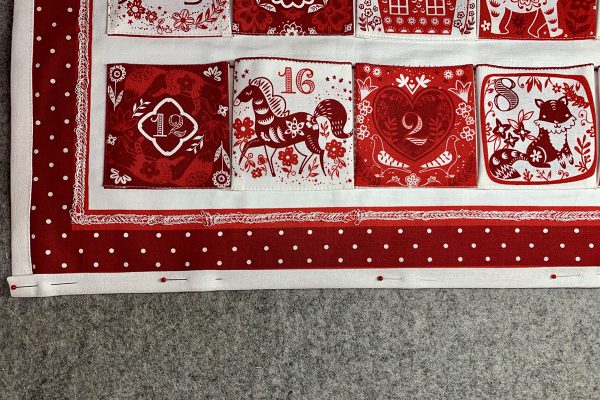
Decide where you will place each pocket strip and keep them in order off to the side. Take one pocket strip and place it over the background panel in the appropriate row. Pin the ends to the background panel. Then, pin on the dotted lines into the background panel. Notice how the background panel has squares to help with placement. This makes it so easy to line up the pockets!

Pin the other 4 pocket strips to the background panel.
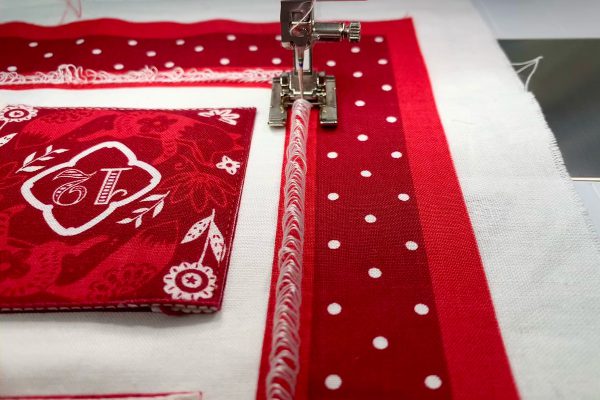
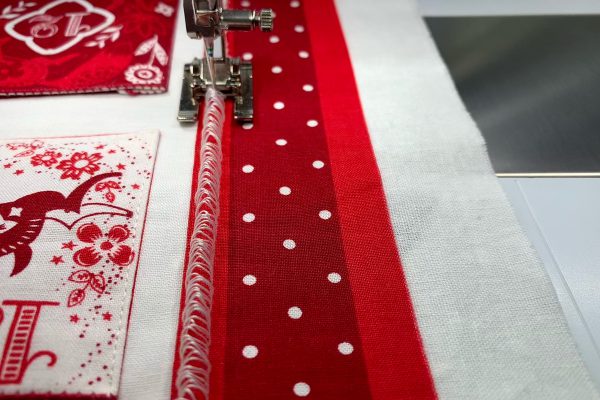
Attach Edgestitch Foot #10/10C/10D. Select Straight Stitch #1 and change Needle Position to -2.
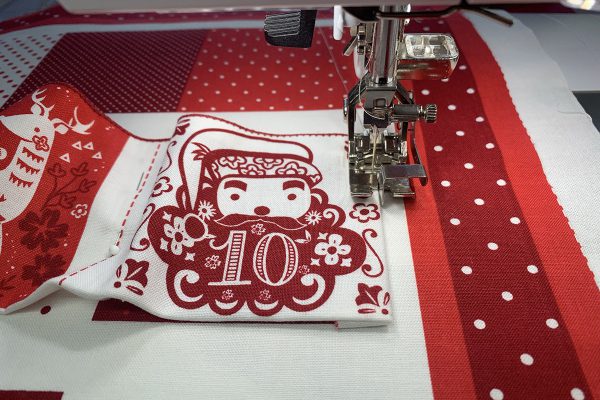
Place center guide of the foot up against an outside pocket and stitch down. Use a securing stitch at start and end. Do the same with all outside pocket edges, but not the center dashed lines.
I changed my thread to red for the red pockets.
Attach Reverse Pattern Foot with Clear Sole #34/34C/34D to your machine. Move Needle Position back to center. Notice how this foot has 3 red marks to help with placement. Line up the center, red mark with a dashed line. Stitch on the dashed line using a securing stitch at start and end.
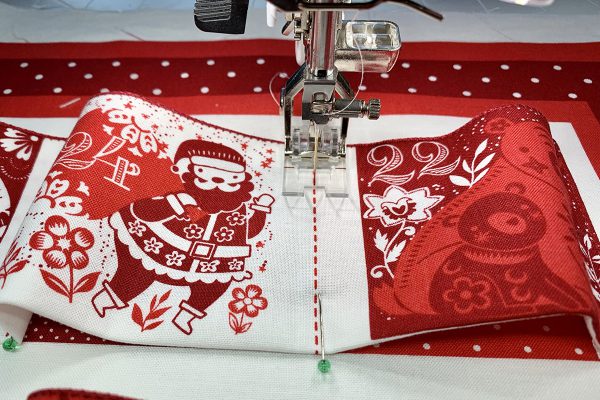
White thread was the least noticeable.
Continue until all the dashed lines are stitched down.
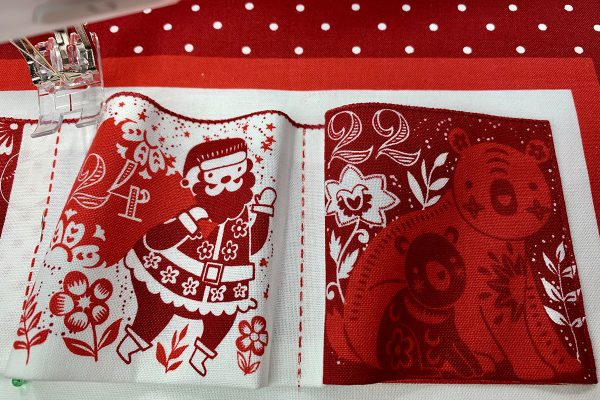
Time to form the pockets. With a stiletto, make a small pleat along the side of a pocket. The fold of the pleat should line up with the red dashed line.
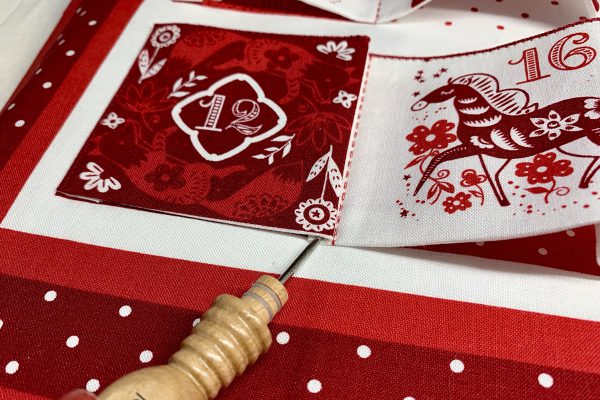
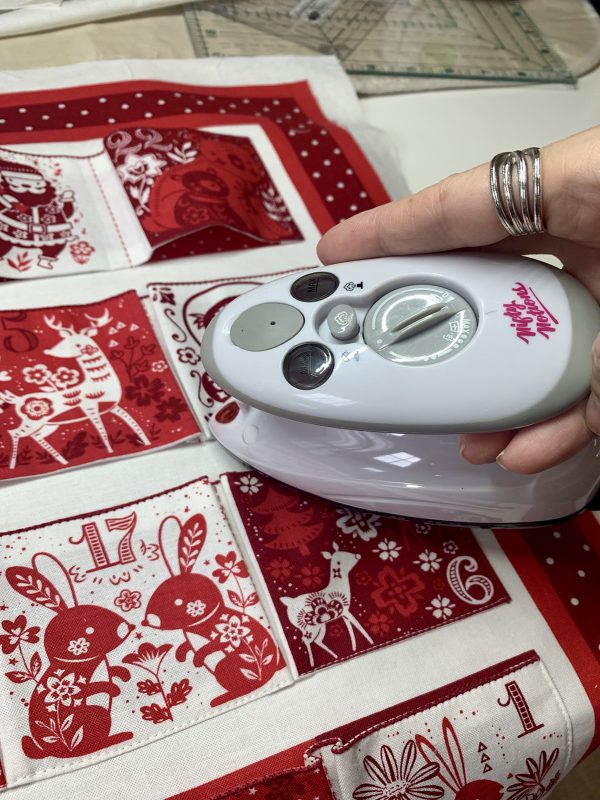
Press. I pressed with a mini iron by Nifty Notions. This small iron makes all the difference when pressing small areas. It’s small and light but still gets hot and you can add water for steam. I love it for traveling too.
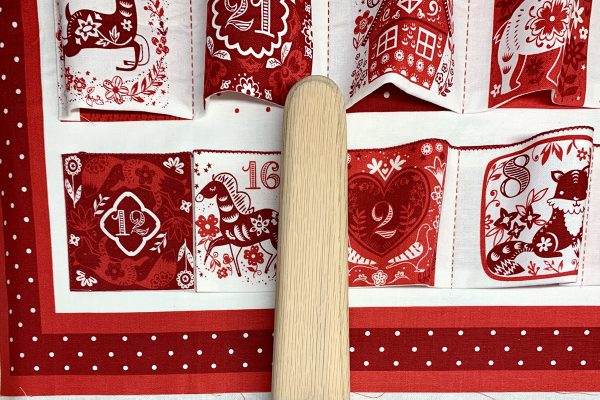
Do the same with the adjacent pocket. The folds should meet side-by-side along the dashed line. Place a wood clapper over both pleats while you continue with the next two sides. This helps set the pleats. Also, you can add pins to secure the pleats. Continue until you have pressed one row of pockets. My pleats measured about 1/4” – 3/8”.
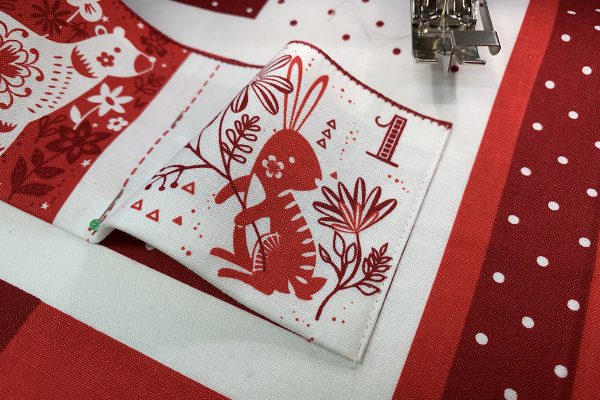
Attach Edgestitch Foot #10/10C/10D to your machine. Select Straight Stitch #1 and Needle Position -2. Add Mettler white thread. Place center guide of foot up against the bottom edge of the pocket strip. Stitch along the pocket strip securing at start and end.
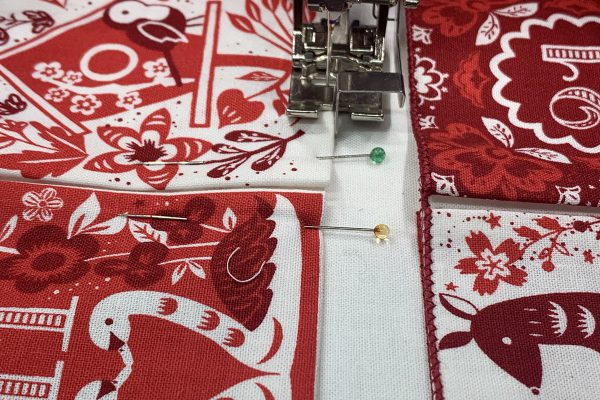
Use stiletto while sewing to keep pleats in place.

Backstitch over the pleats. This will give that area extra strength.
Do the same with the other 4 pocket strips.
Congrats on completing the pockets. Now let’s add some embellishments. Attach Tailor Tack Foot #7 to your machine. Thread machine with Aurifil Cotton 28 weight. You can keep the 50 wt thread in the bobbin. Change needle to Schmetz 80 Topstitch. Select Zigzag Stitch #2. Change Stitch Width to 4.5 mm and Stitch Length to 1 mm. Decrease upper tension to 1. Time to play!
Place the inner red border under the foot so it is centered. It doesn’t have to be exact.
Stitch along the red border on one side only. You’ll have a mountain of white thread. So cool, right? Do the same for the opposite side.
Now attach Open Embroidery Foot #20/20C (do not use #20D) or Embroidery Foot with Clear Sole #39/39C. Select Straight Stitch #1 at default settings. We need to stitch down the mountain of thread which will create texture. Place the fabric under the foot with the white thread between the toes of the foot. Stitch down the center. Don’t worry which way the thread is stitched down. This is not meant to be uniform.
Do the same for the remaining two sides of the border starting with Tailor Tack Foot #7.
Love this foot to create texture! It’s a great foot to create fringe too but that’s for another day.
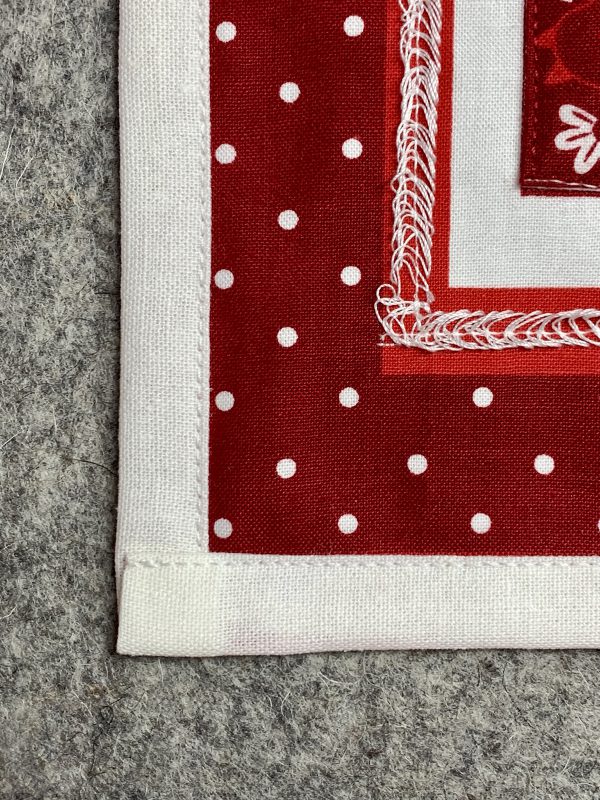
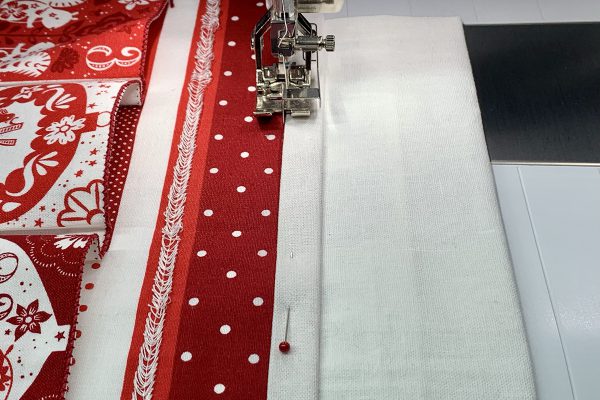
Let’s wrap this up with binding! Remember we added the backing with an extra 1” on all sides. We are going to do a binding technique called self-binding which is basically wrapping the backing to the front to create the binding. It’s easy, quick and looks great! To start, press the excess backing fabric 1/2” so the raw edge meets the raw edge of the panel. Do this for all 4 sides.
Next, press again 1/2” to create a double fold but only on the 2 long sides. Pin.
Attach Edgestitch Foot #10/10C/10D. Select Straight Stitch #1 and move Needle Position to 2. Place center blade of foot up against the binding. Stitch binding down securing at start and end.

Beautiful!
Do the same process for the bottom side. I decided not to make mitered corners for this project, but it is possible with self-binding. There are a lot of tutorials on it if you are interested.
Make sure to secure stitches at start and end.
For the top side, we need to add a tube so there is a place to insert a wood dowel or craft log for hanging. First, create a basic tube with the linen fabric. My tube is 2 1/2” x 13” finished. The top binding should already be pressed 1/2”. Place the tube about 3/4” behind the project. Pin. Measure along the tube making sure it is even.
Attach Clear Foot #34/34C/34D. Line up the foot so the tube will be sewn with the stitching inside the seam allowance. The solid red border is a good guide for me. I followed the edge of the border with the inside left toe.

See how the tube is stitched down inside the seam allowance? The stitches will be covered once we fold over the binding.
Press binding 1/2” to create a double fold. Pin and stitch down the same way we stitched the other 3 sides.
So beautiful! Now all you need to do is add candy, trinkets and special notes for the month of December! What a special tradition to enjoy with your family for many years!