Sashiko-inspired Hanukkah Projects
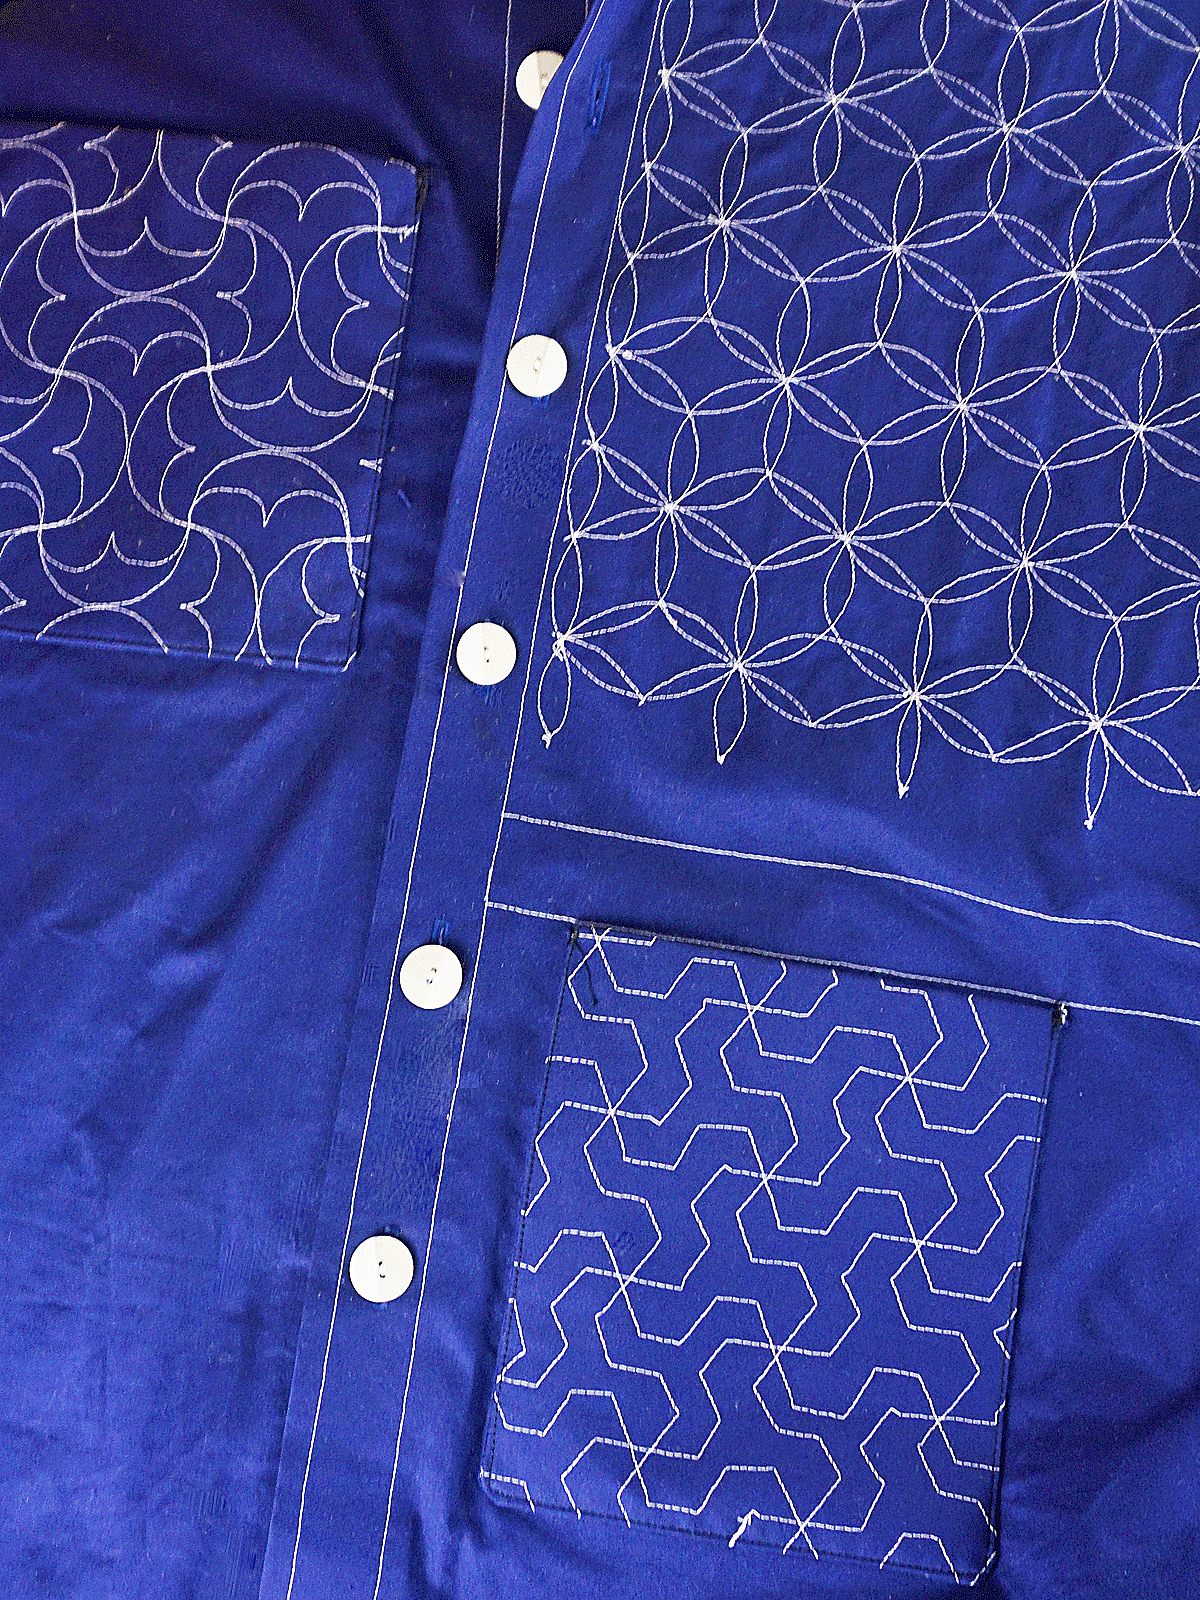
I have always loved Sashiko, the traditional Japanese hand stitching in beautiful geometric designs usually done on dark blue fabric with white thread. Over the years I have experimented with doing it by machine, and have been pretty pleased with how simple it is.
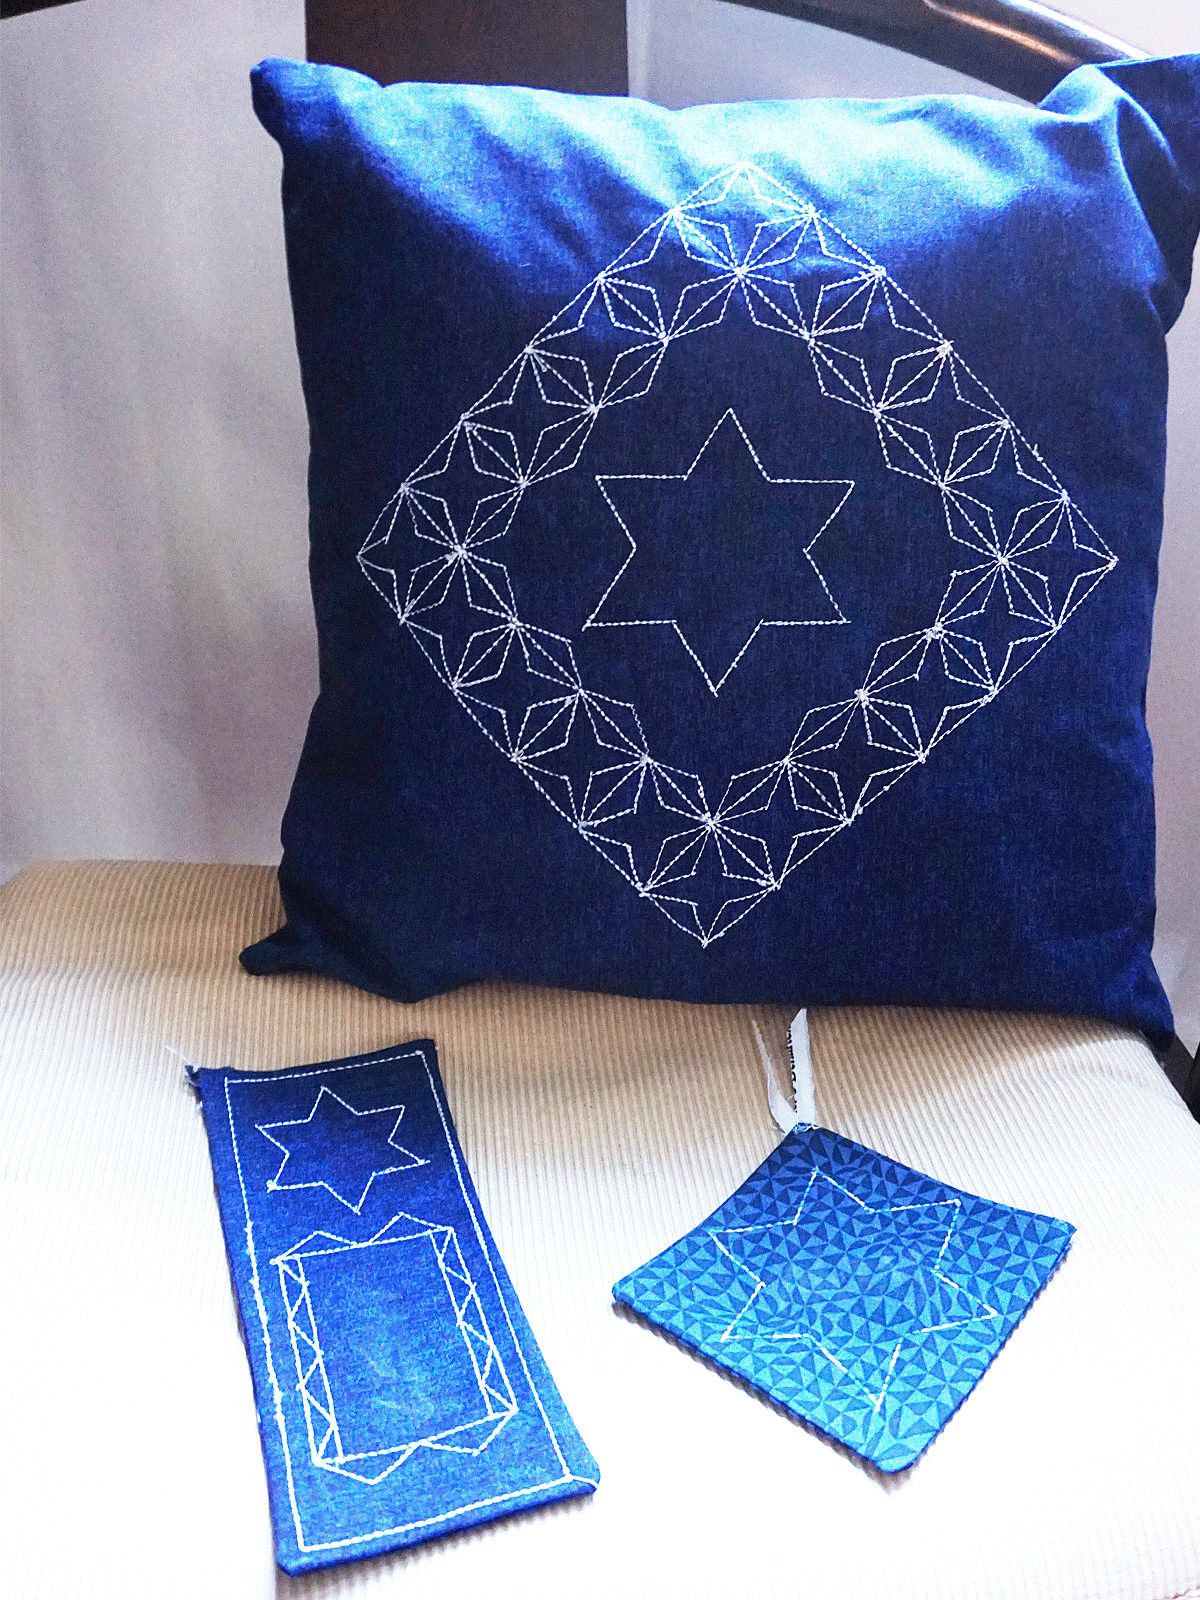
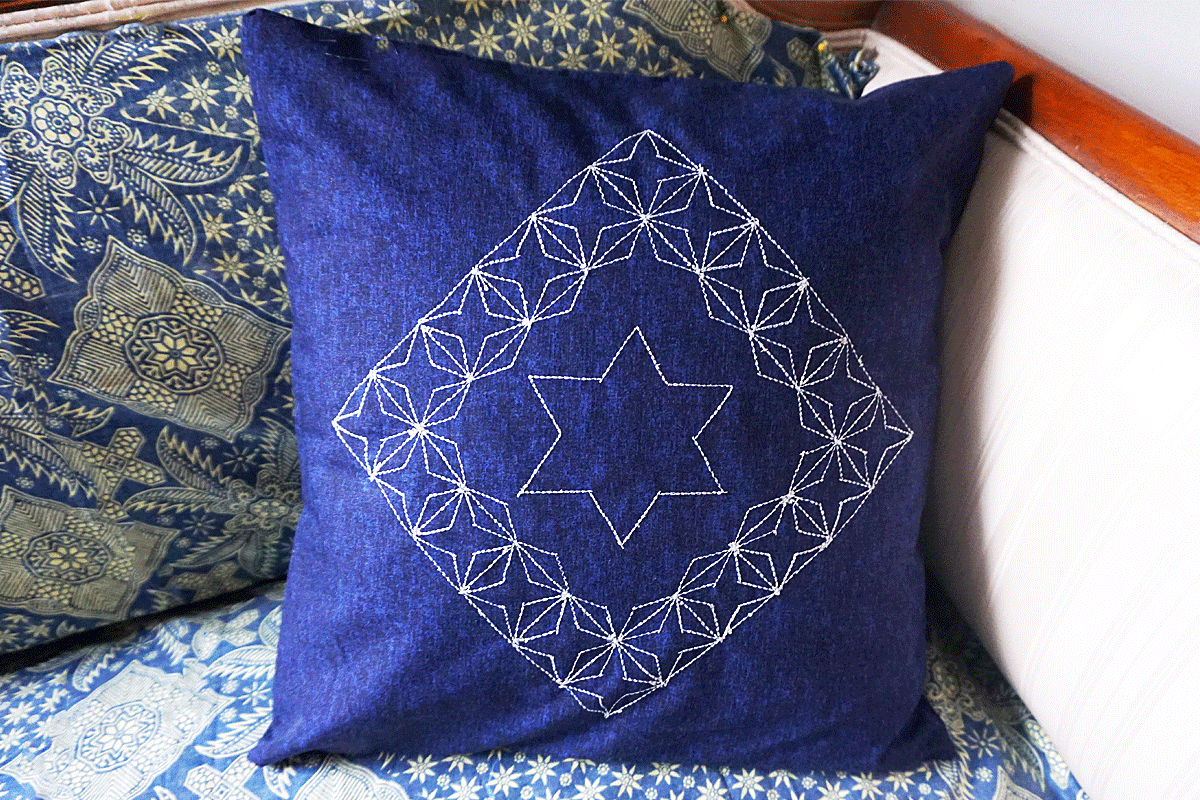
Finished Sashiko-inspired Star of David pillow, bookmark, gift tag
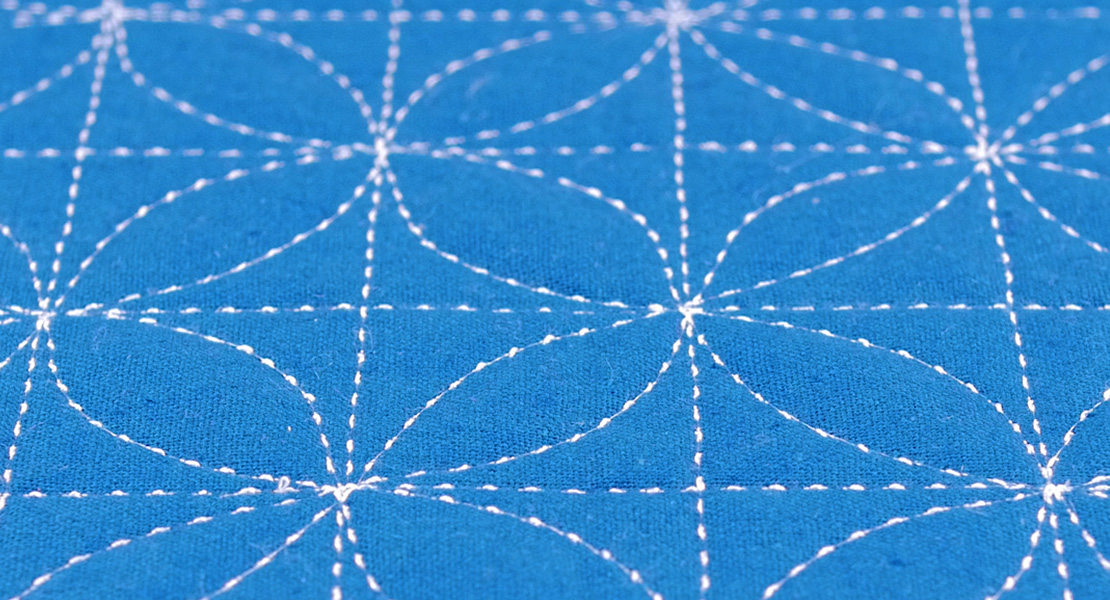
So, since Hanukkah is also a traditional “blue and white” holiday I got to thinking, why not combine them. Here is a pretty simple project of a Sashiko-inspired pillow. Sashiko designs can be quite elaborate, so I have tried here to keep the actual stitching fairly simple, making it an easy introduction to the technique. I have used navy fabric with white thread, but you can use anything—just keep in mind that a high contrast between the fabric and thread colors will show off your work the best. It is all done with straight line stitching so you don’t even have to worry about your free-motion skills.
Like the look but intimidated to start with the pillow? I have also included two smaller, simpler templates for a bookmark that can both be used as a bookmark or gift tag and a single star that works as a hanging decoration, gift tag or coaster. Start there, learn the technique, move on to the pillow when you are ready.
Materials to Make Sashiko-inspired Hanukkah Projects
Materials to Make the Star of David Pillow
- Base fabric—1/2 yard (mine is navy)
- Pillow form—14” x 14”
- Thread—I have white
- The thicker the thread the more impact your stitching will have.
- Fusible stabilizer (I used Pellon 950, but any fusible will work) a piece 16” square
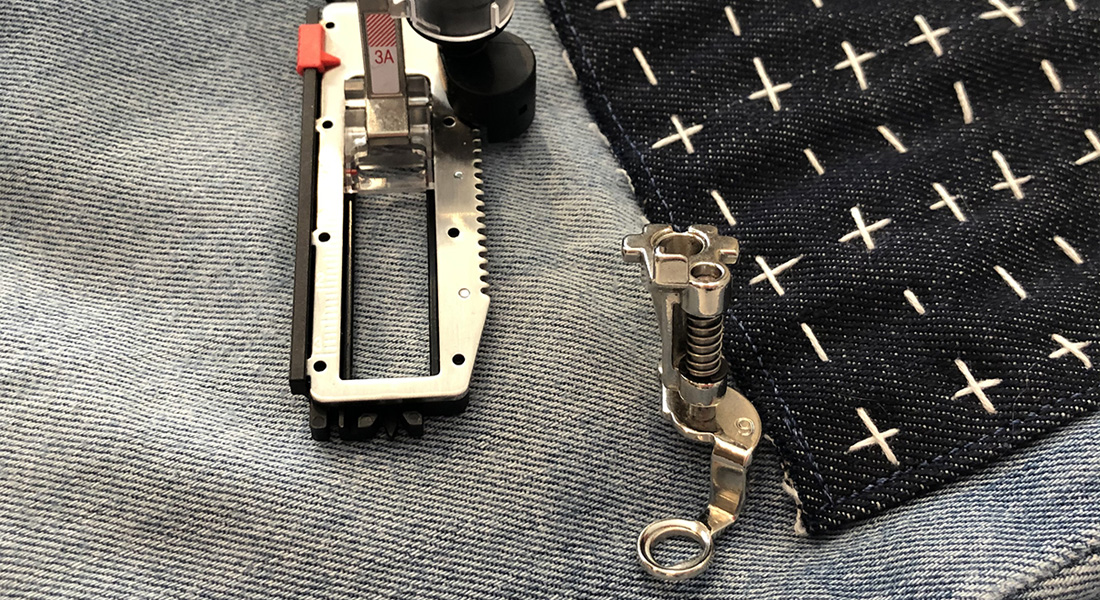
- Open Embroidery Foot #20/20C or Reverse Pattern Foot #1/1C/1D work well here
- BERNINA Patchwork Foot (Patchwork Foot #37/37D, Patchwork Foot with Guide #57/57D or Patchwork Foot #97/97D)
- You are going to want to get out your knee lift because it will come in very handy with the pivoting!
Materials to Make the Bookmark/Gift Tag
- Two pieces of base fabric pieces cut to 3 ½ inches x 8 ½ inches
- Stabilizer cut at 3 x 8, centered on the back of one piece of the base fabric and fused
- Thread
- Small piece of fusible or glue to close up the bottom
Materials to Make the Star Ornament/Gift Tag/Coaster
- Two pieces of base fabric cut at 4 ½ inches square
- Stabilizer cut at 4 inches square, centered on the back of one piece of the base fabric and fused
- Thread
- Small amount of fusible or glue to close up the bottom

Getting Started
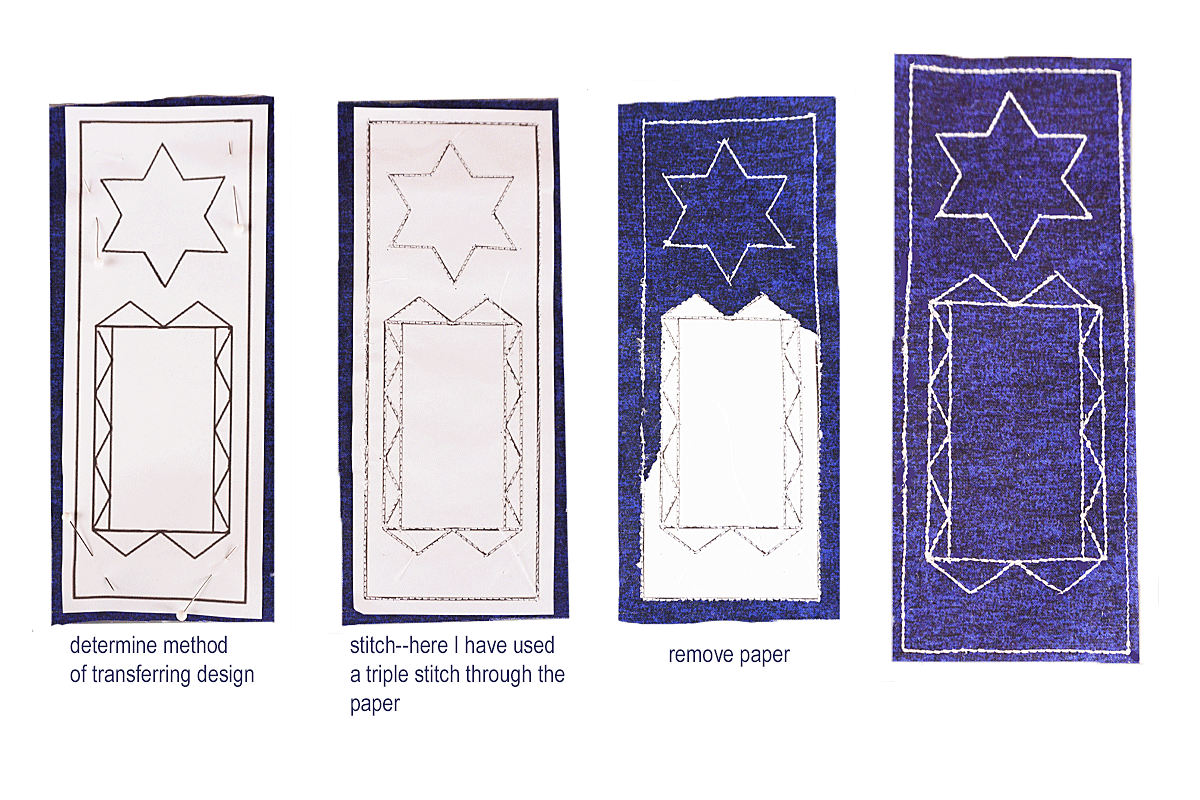
The star is the centermost portion of the pillow template and the simplest way to start, so that is what I will use as the example in the three methods that follow–the most important thing you will need to do is transfer the design to the fabric. This can be accomplished in three different ways; you choose the one that you prefer:
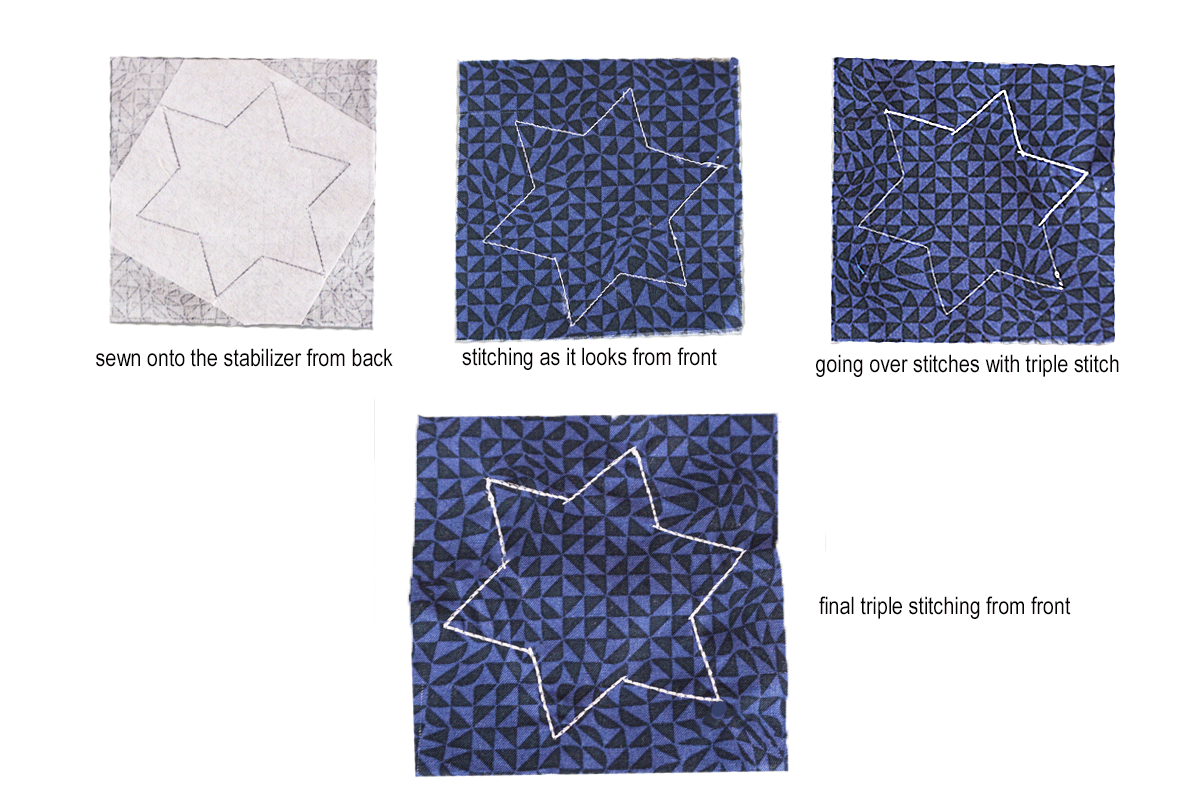
Method One — Marking the Stabilizer
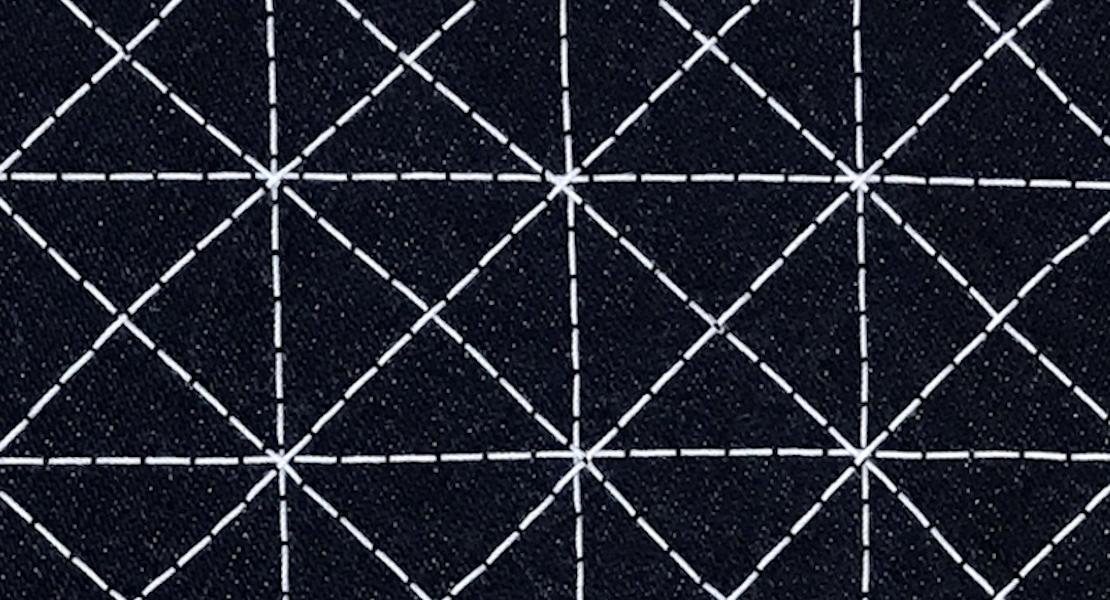
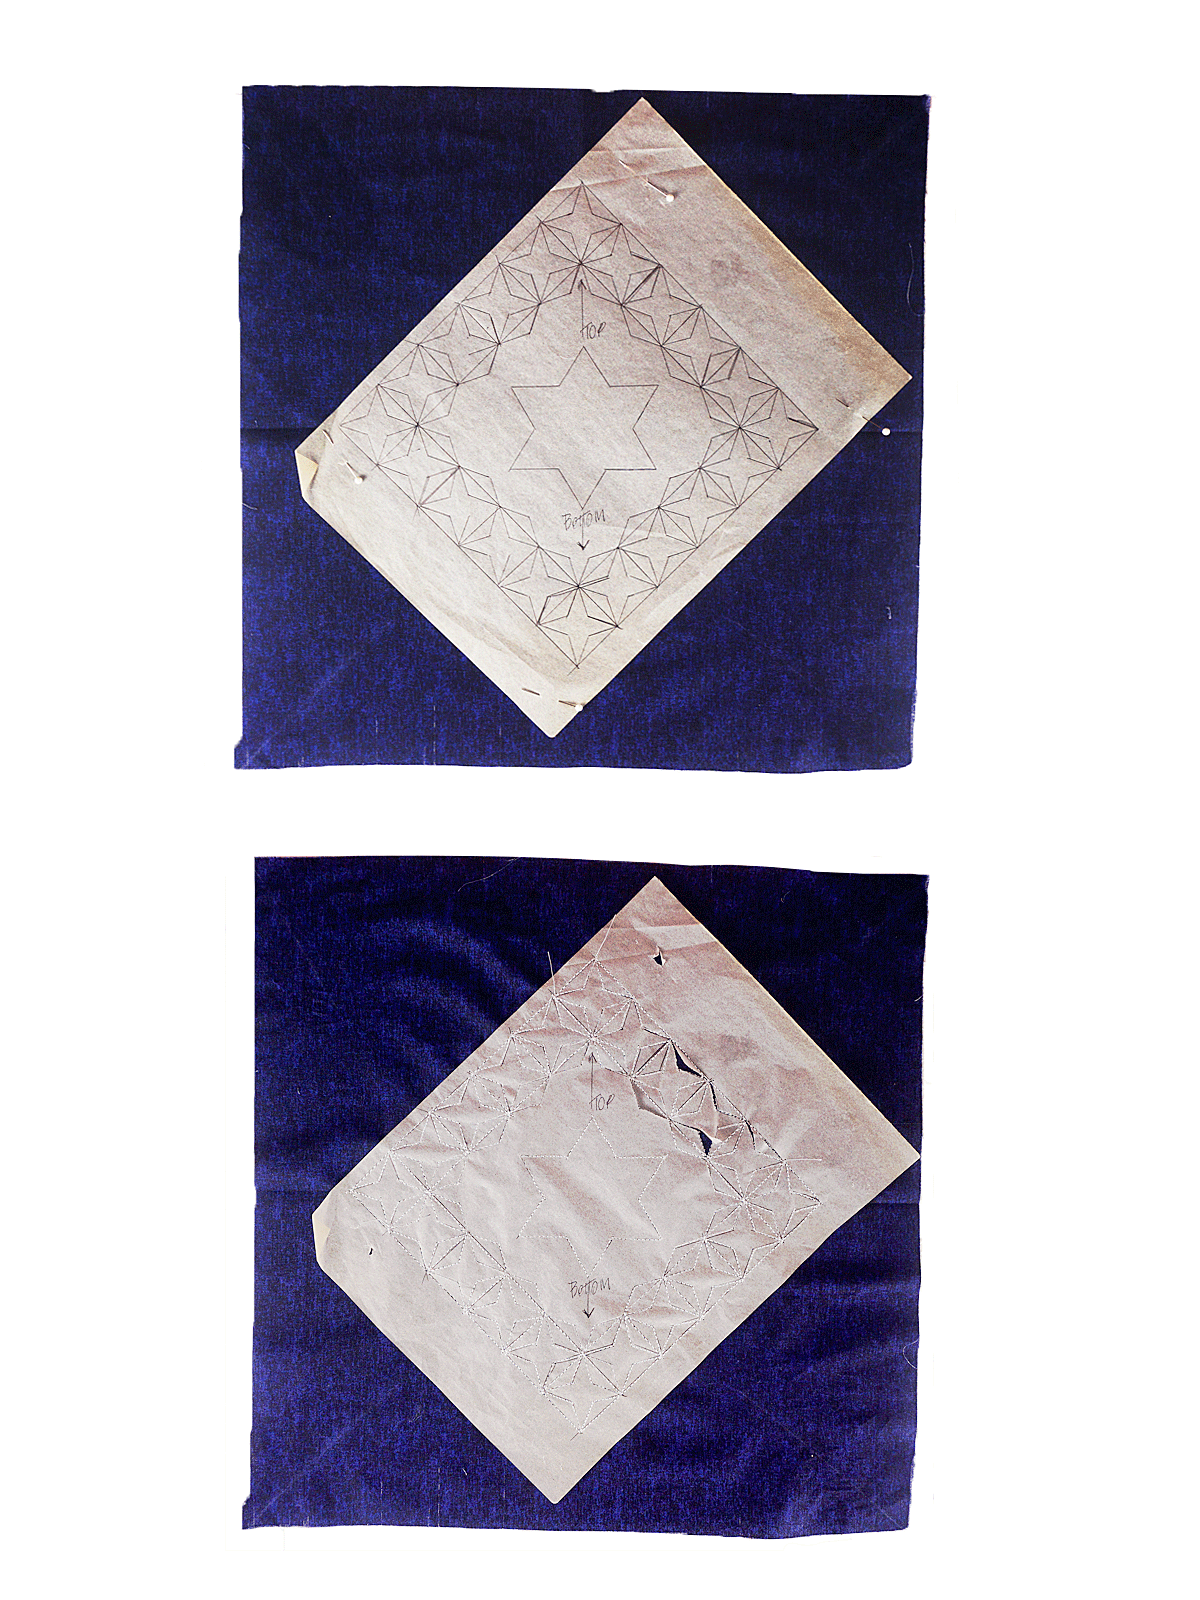
For something like a pillow, gift tag or bookmark, where the stabilizer won’t interfere with the finished design, you can mark the design on the stabilizer directly. Print out the template and put it on a lightbox or in a window and trace the design onto the non-fusible side of the stabilizer. Draw all the lines using either a very fine tip marker or pen. It really doesn’t take so much time, and it means the design is transferred accurately. It is more important to make sure the pivot points are accurate than the straightness of the lines—the pivot points are anywhere two or more lines intersect. If you hit those while you are sewing, your feed dogs will carry you along in a straight line to the next pivot point.
Once the design is drawn onto the stabilizer, use the registration points to line it up on the backside of your fabric. Follow the instructions for your chosen stabilizer to adhere it to the back of your base fabric piece.
Using whatever color thread you ultimately want on the top of your work in the bobbin and on the top of your machine, stitch along all the lines on your stabilizer. Needle down and knee lift are really helpful for the pivots.
Once all the lines are stitched, you will turn the work over and see the single line of stitching showing on the front of your fabric. At this point you have three choices; you can leave it as a single stitch; you can go over your stitch lines from the front using a regular straight stitch again; or you can go over your stitch lines using a #6 triple stitch—the triple stitch intended for knits–to go over all the lines on the front and really make them look nice and thick. This additional stitching from the front can be done now or after you add your back fabric if you want to have it show on both sides.
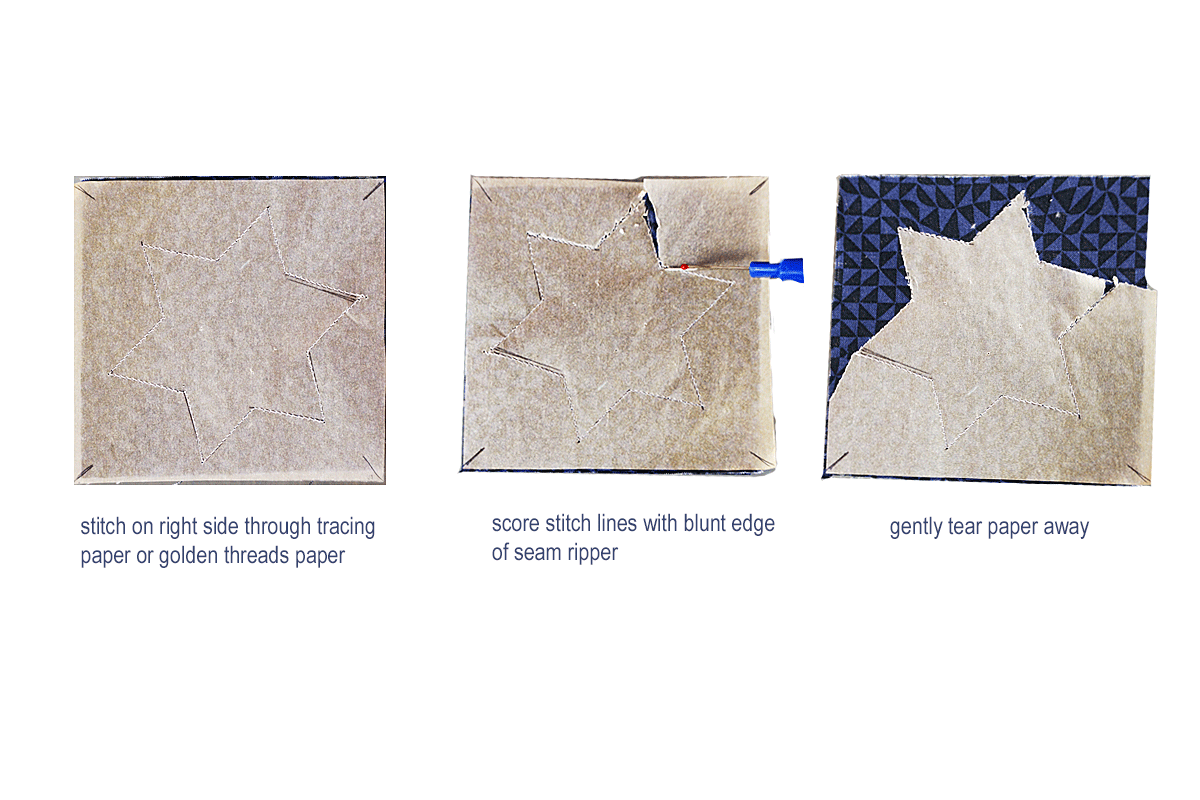
Method Two — Tracing Paper
Don’t want to go over your work a second time? Use tracing paper or golden threads paper to trace the design instead of tracing it onto the stabilizer. I find it a little easier to trace onto tracing or golden threads paper since the stabilizer has a slightly nubby texture. But here you are stitching from the TOP of your work, rather than the bottom when you draw it onto the stabilizer.
You will still want the stabilizer underneath so the stitching stays flat and crisp, but with the tracing paper on the top of your fabric, you can use a straight stitch for a finer line of stitching or start with the #6 stitch and do all your more impactful stitching only once. If you use the triple stitch it will lay in a thicker line of stitching and will make removing the paper easier.
Set your stitch length a little smaller than your default (I went down to 2.25 on the straight stitch, 2.5 on the triple stitch), and be sure to lock all lines of stitching at the start and finish so nothing comes loose while tearing out the paper. If it does, you can carefully fix that spot once the paper is removed.
Once all your stitch work is done, carefully run the blunt end of a seam ripper or even fold along the stitch lines to score them and more easily remove the paper. This takes a little time but the tracing paper and golden threads are so thin they break away pretty easily. No need to stitch over your work from the front again.
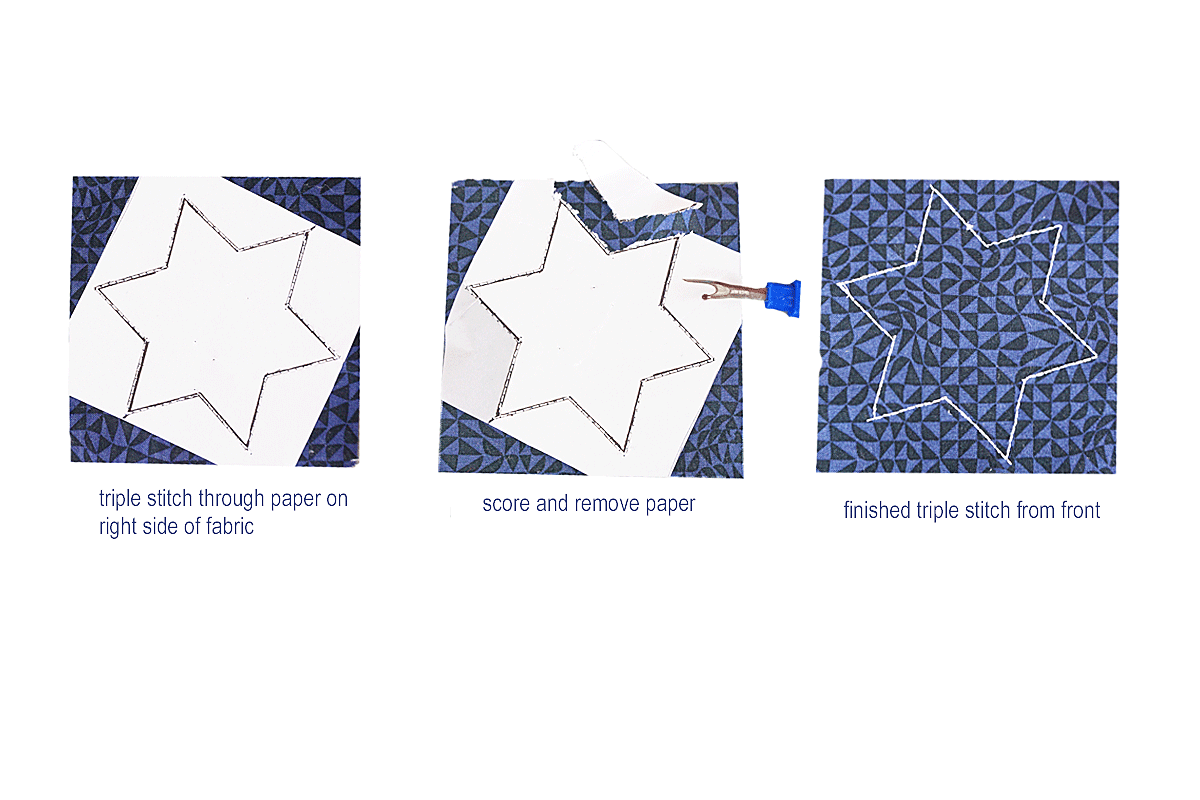
Method Three — Use the Printed Template Directly
If you want to avoid doing any tracing, you can pin the printed template directly on the top of your fabric and sew exactly the way you would for the tracing paper or golden threads in method two. The difference here is that printer paper is sturdier and will take a little more work to remove, but it works. As you would with the tracing paper or golden threads, set your stitch length a little smaller than your default, and be sure to lock all lines of stitching at the start and finish so nothing comes loose while tearing out the paper. And, as with the tracing paper method, using a triple stitch not only lays down a nice thick line of thread, it also makes removal of the paper easier. It is all about what you want the end result to look like and how much work you want to do.
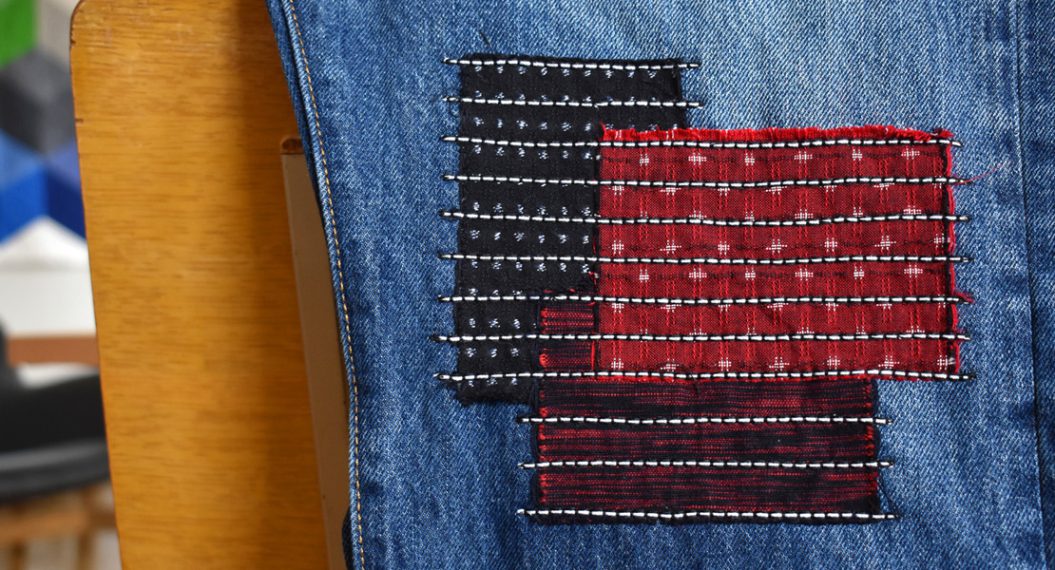
That is how I did the shirt shown, I didn’t want a stabilizer on the back and used the sturdier paper for stability, just a straight stitch for a finer line, and tore it away when I was through. This method is good in situations where you do not want a stabilizer on the back like a jacket, which would make it too stiff.
For any of these three methods, your knee lift is the easiest way to pivot at all those points where the direction changes with your needle in the down position. Especially when using the triple stitch, let the stitch completely finish before pivoting. If your stitch didn’t end at the right place, simply lift the needle and gently move it to the correct place before you pivot and continue.
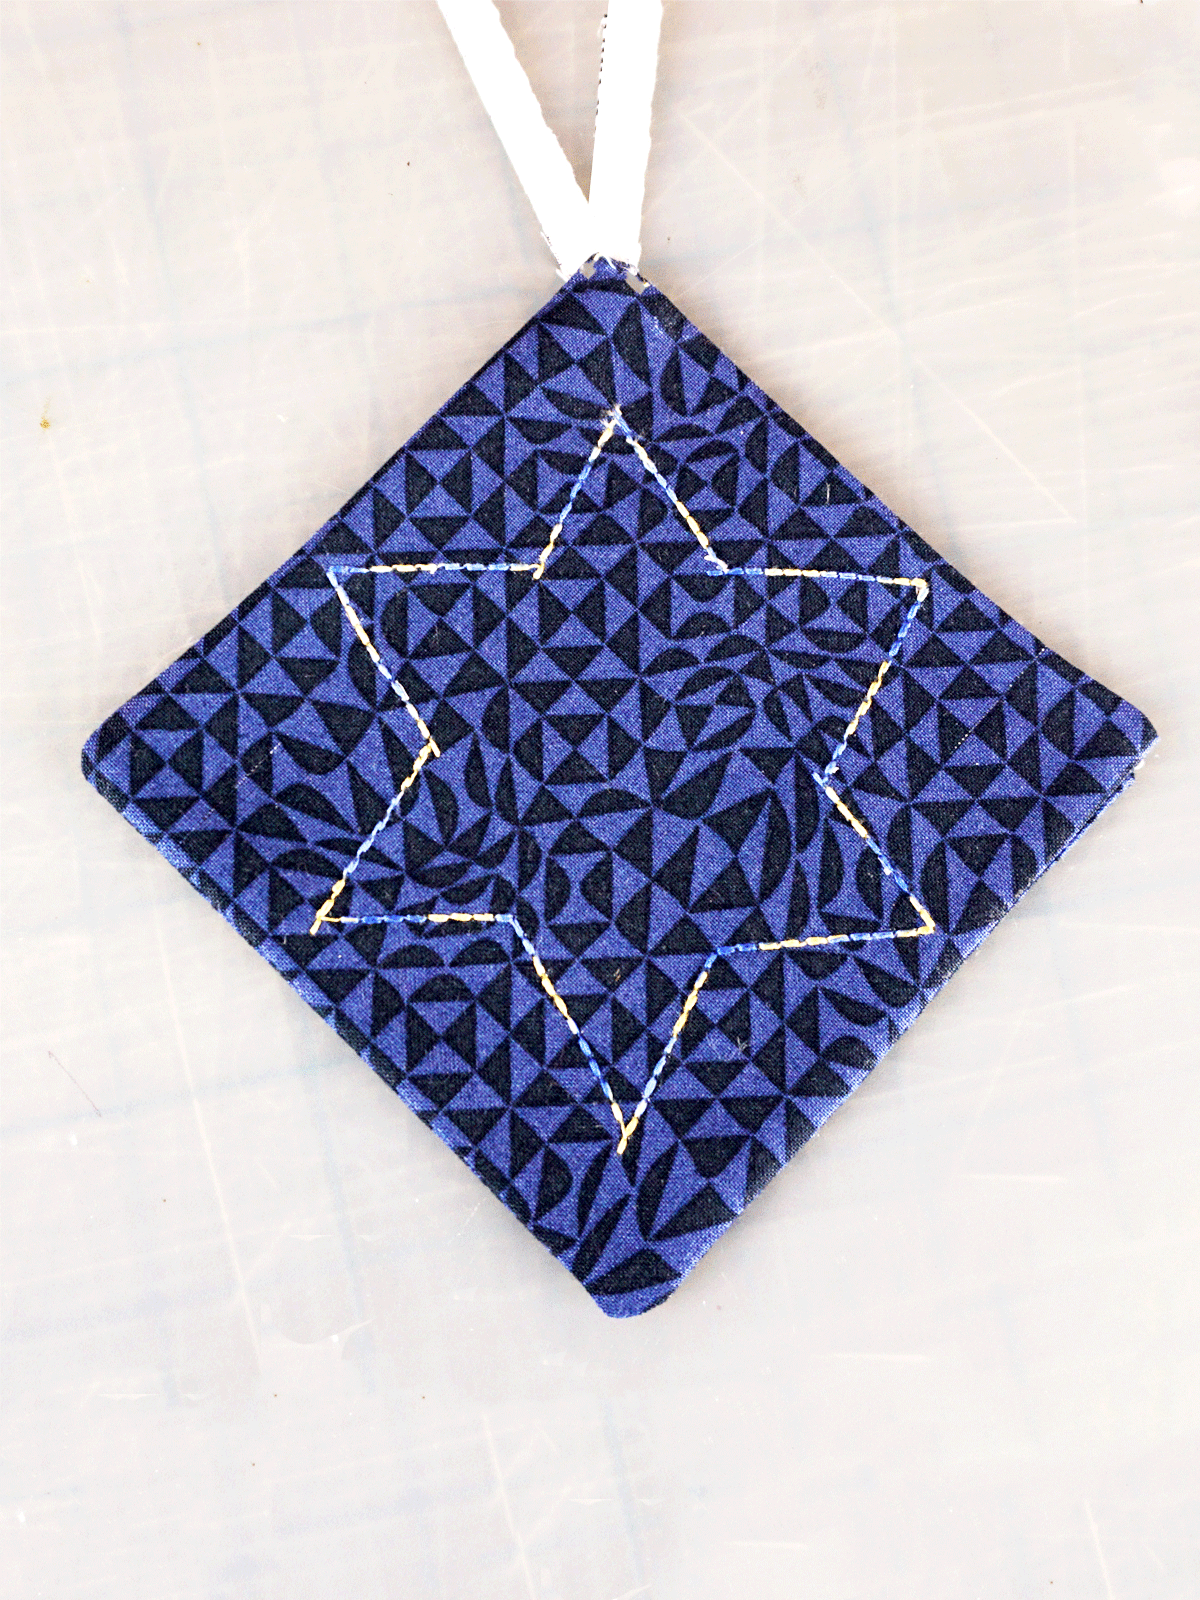
The finished gift tag can also be used as a coaster or an ornament.
Instructions
How to Make the Simple Star Gift Tag/Decoration/Coaster or the Bookmark/Gift Tag
- Cut your base fabric pieces in the appropriate size and fuse your stabilizer to the back of one piece of the base fabric.
- Using your preferred method, center your stabilizer onto the back of one piece of base fabric and stitch your design.
- Press.
- Place the other piece of base fabric right sides together and sew around the outside edge on three sides with a ¼” inch seam allowance.
- Turn right side out, gently poke out the corners with either your finger or the eraser end of a pencil.
- Finger press the opened end in, use fusible or glue to close this up. If you want the design on both sides of your finished piece, go over the stitching again now from the front. If you don’t mind that it is plain on the back, no need to do more stitching. You could even use a pretty print fabric on the other side instead–your choice.
- Sew a piece of ribbon, selvage or yarn to the top to use as a gift tag or hanging ornament. You can write directly on the fabric using a fabric marker or permanent felt tip marker.
Steps to Make the Pillow
- Cut a piece of your base fabric 16” square and cut two other pieces each 15 ½” x 11”
- Cut a piece of stabilizer 16” square and fuse it to the back of your 16” square fabric.
- Fold the square in half and press, then in half again and press. This will establish your halfway marks which you will use to line up the points from your design.
- Using your preferred method, stitch the design onto the fabric.
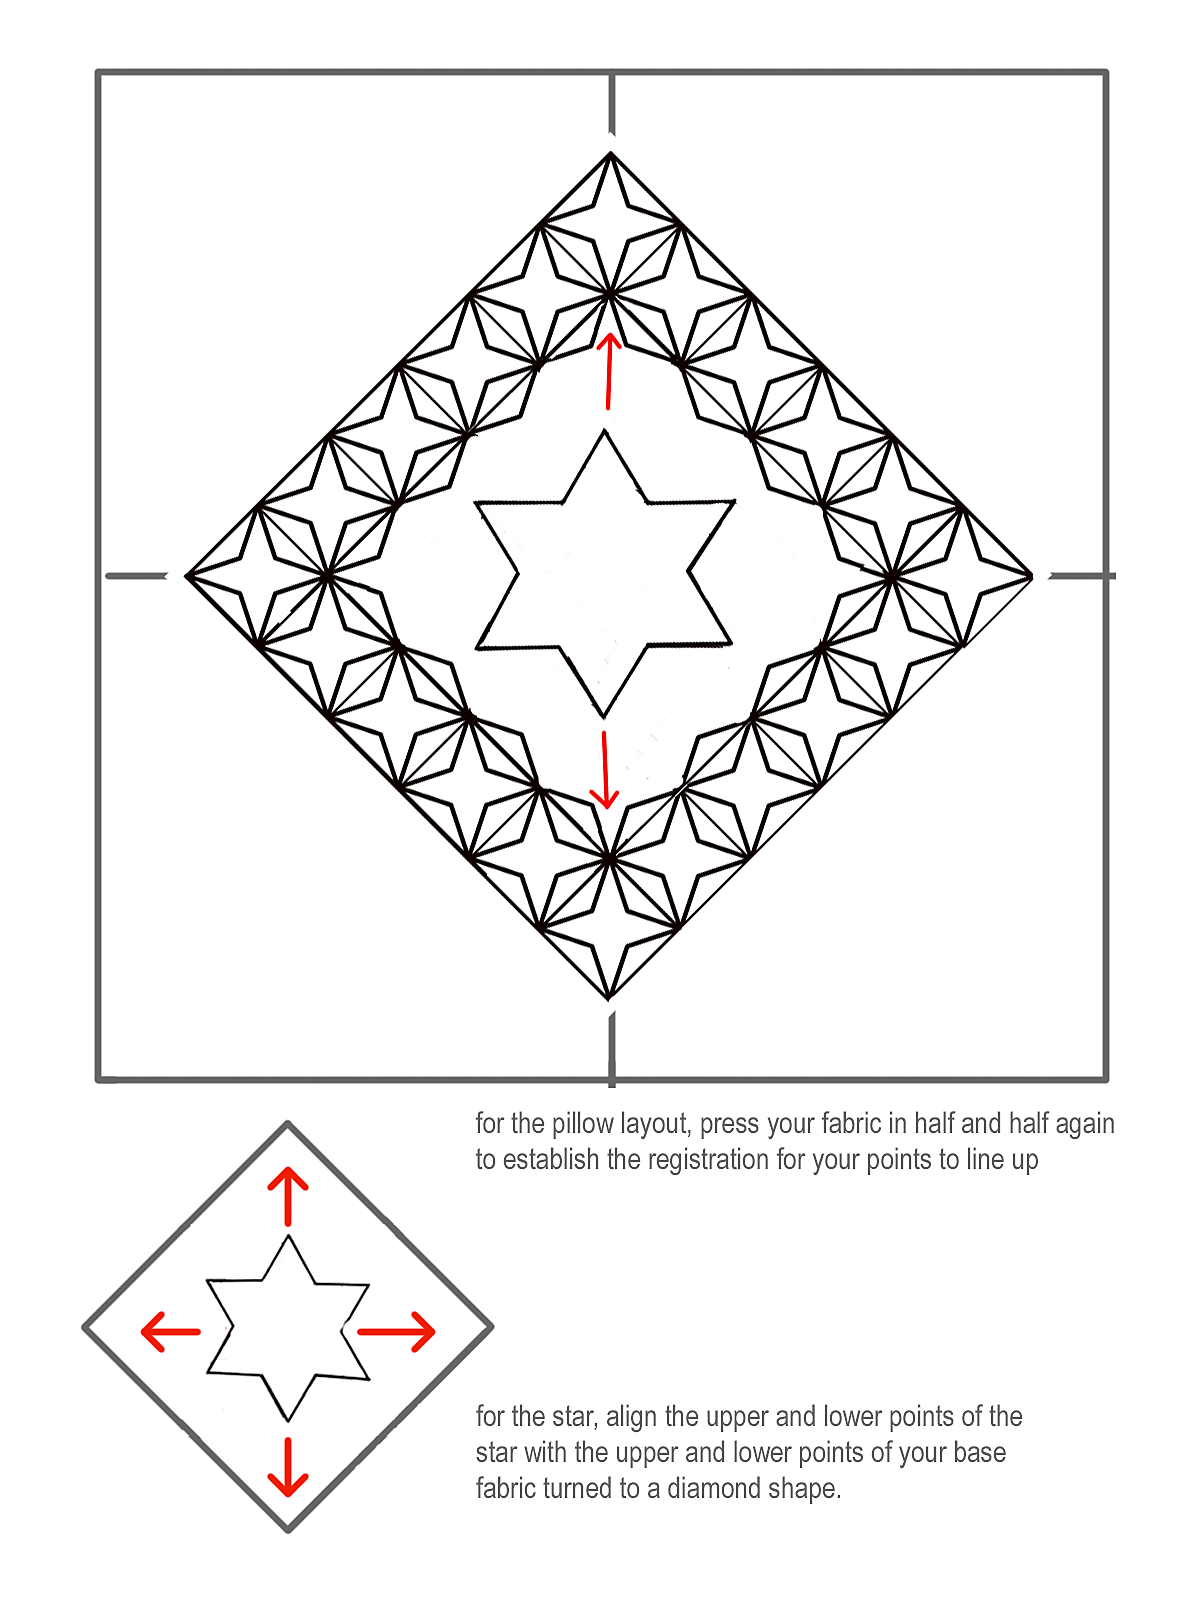
- Press your fabric into quarters for registration marks to align your template.
- Pin your template in place using your folded lines as registration marks
I used the triple stitch through the tracing paper. It may appear that the secondary motifs in the design are how the stitching is done, but Sashiko is done in rows, all the rows in this design are sewn down one side and up the other, pivoting at the points. Start with the star in the center and work out towards the edges so everything lies flat.
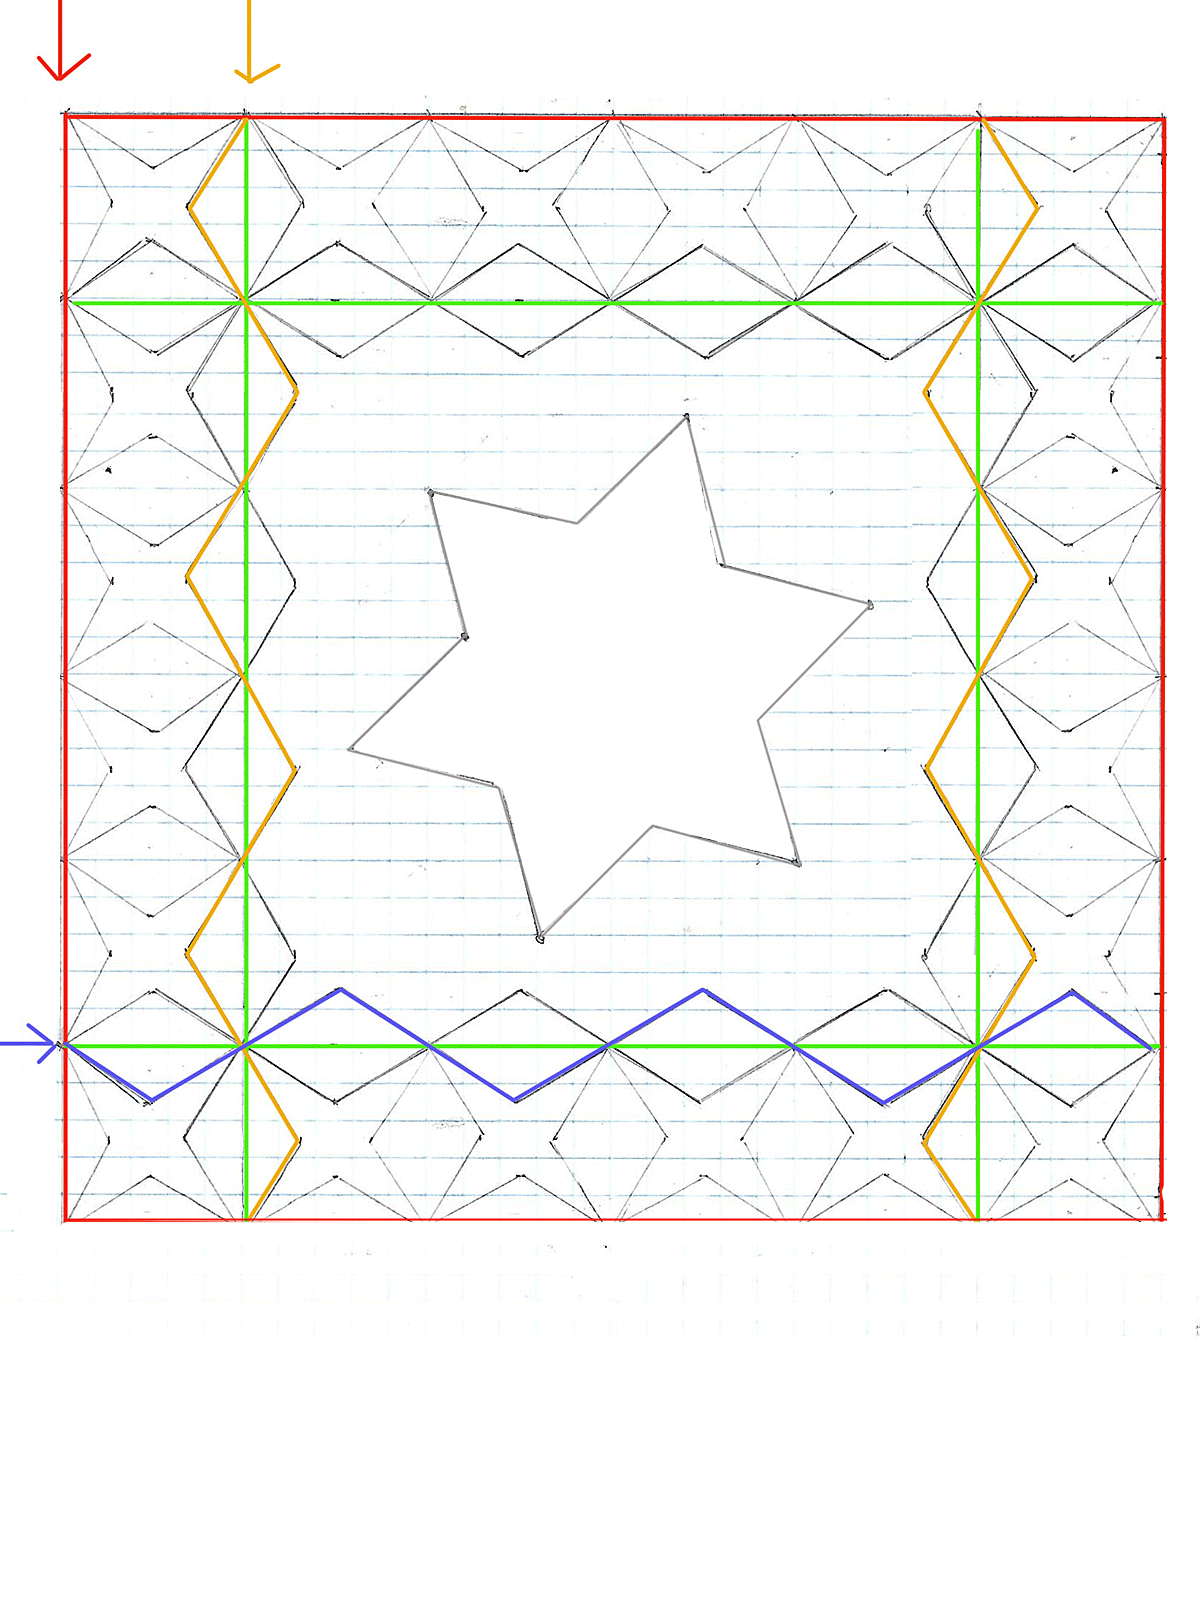
Sashiko designs are sewn in rows as shown here in color
- Press. Trim to 15 ½”. Trimming down ensures a nice clean square as all that stitching can distort the surface.
- Turn one long end of each of your two 15 ½” x 11” inch strips to the wrong side and then again. Stitch this to make a finished edge. Overlap these so that the finished edges are at the center of the pillow, right sides together with the pillow top and sew around all four sides.

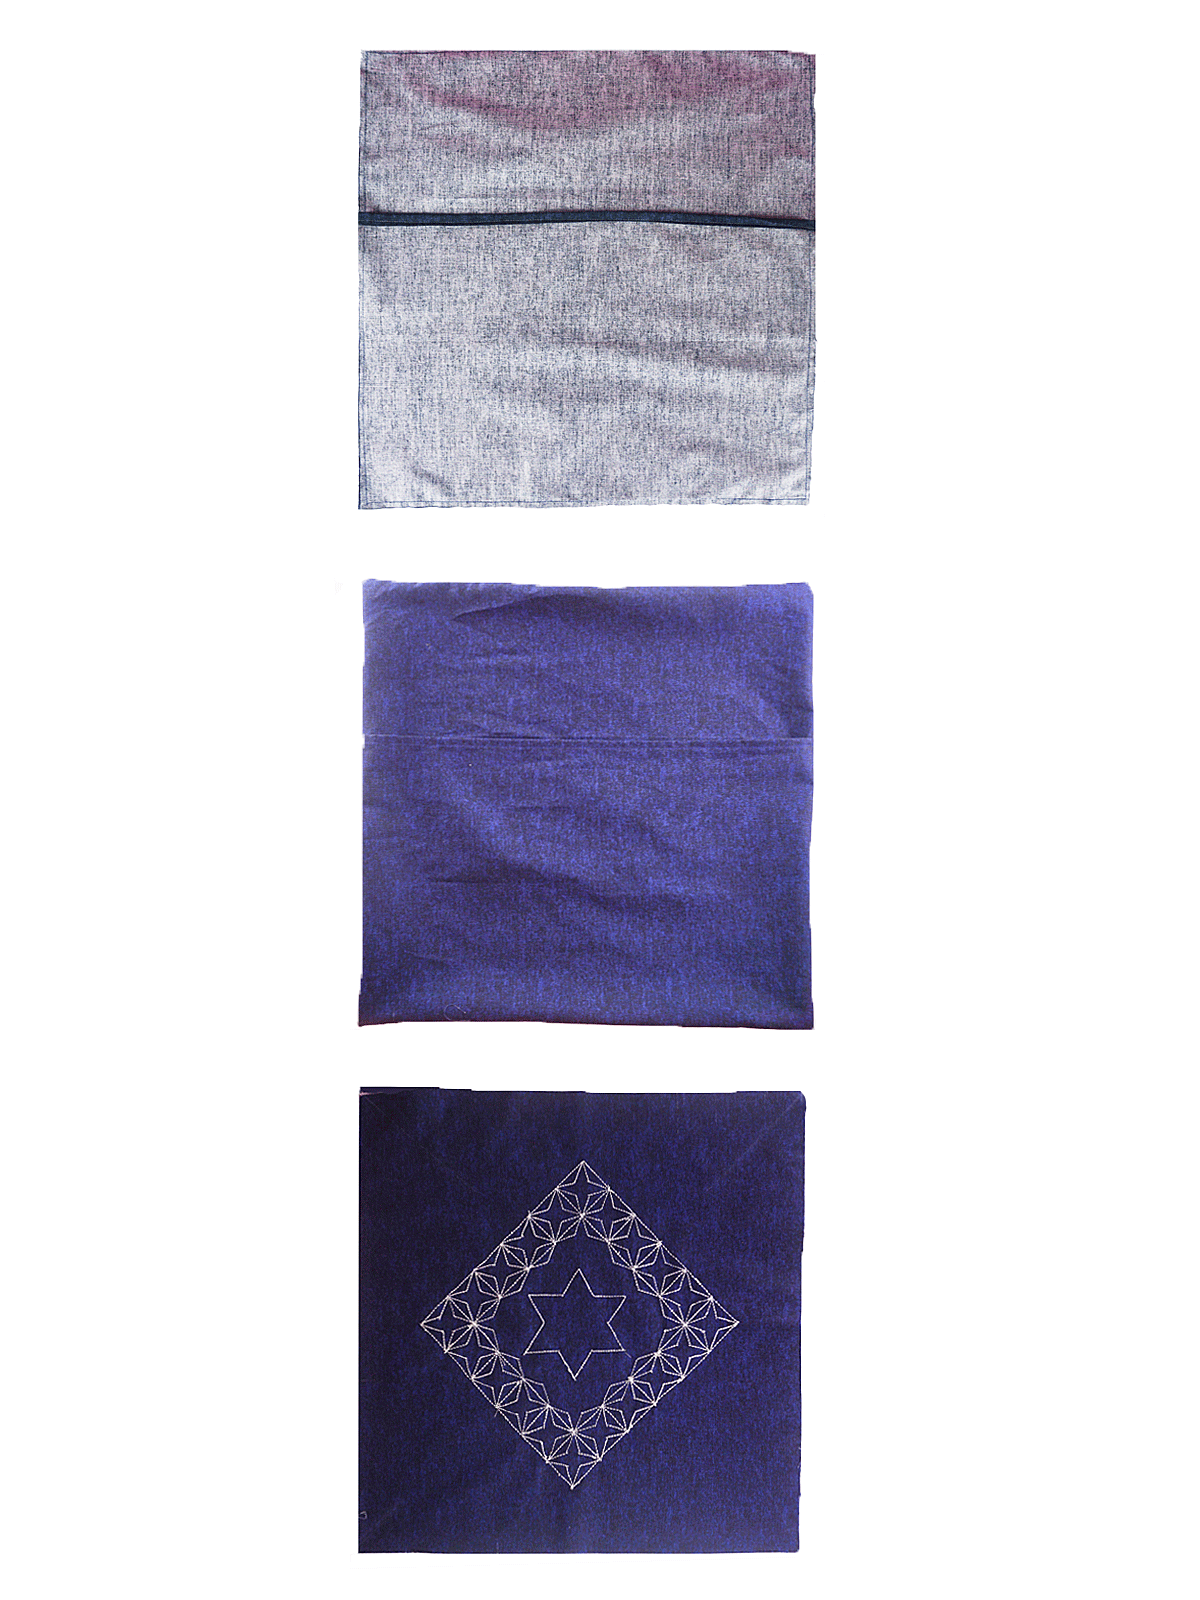
- Sew around all four sides of your pillowcase and turn right side out.
- Turn the pillow right side out, gently poke out the corners with either your finger or the eraser end of a pencil.
- Place a 14” pillow form into the pillowcase, using the opening in the back.
Sashiko-inspired Hanukkah Star of David Pillow
Leni Levenson Wiener | www.leniwiener.com