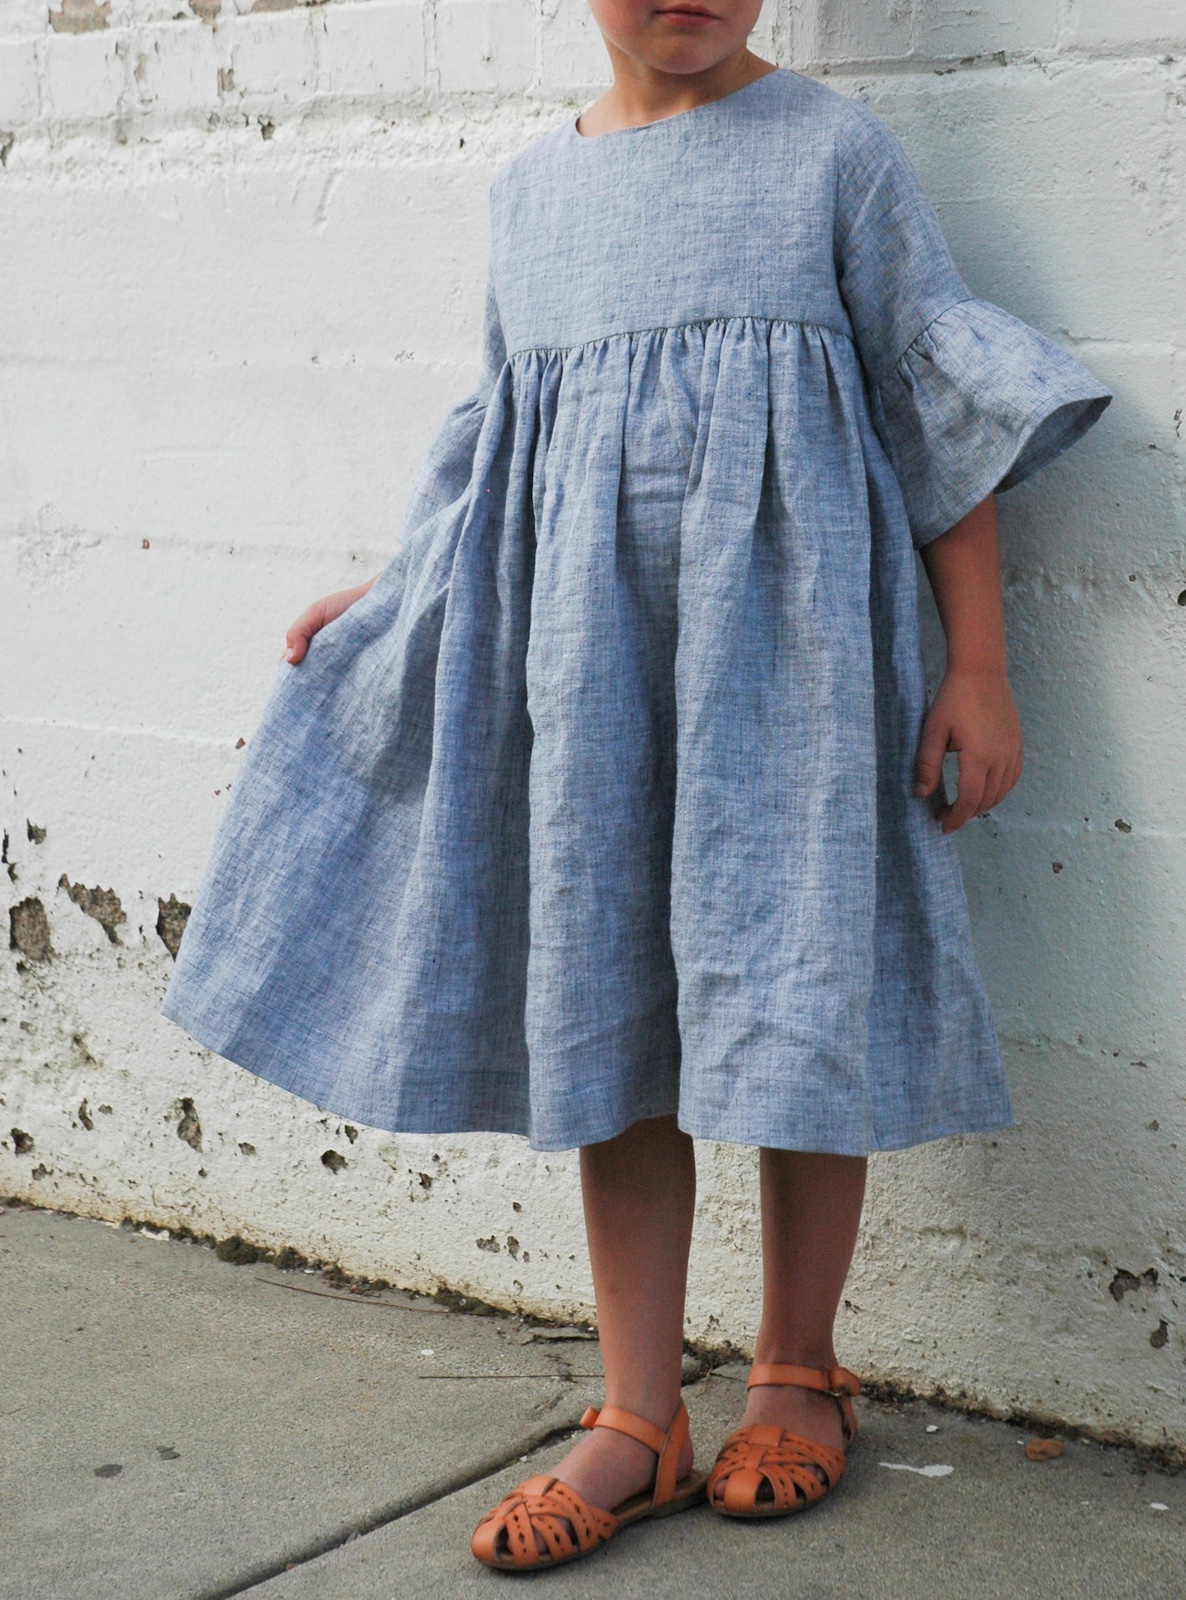
How to Sew a Girl’s Summer Dress
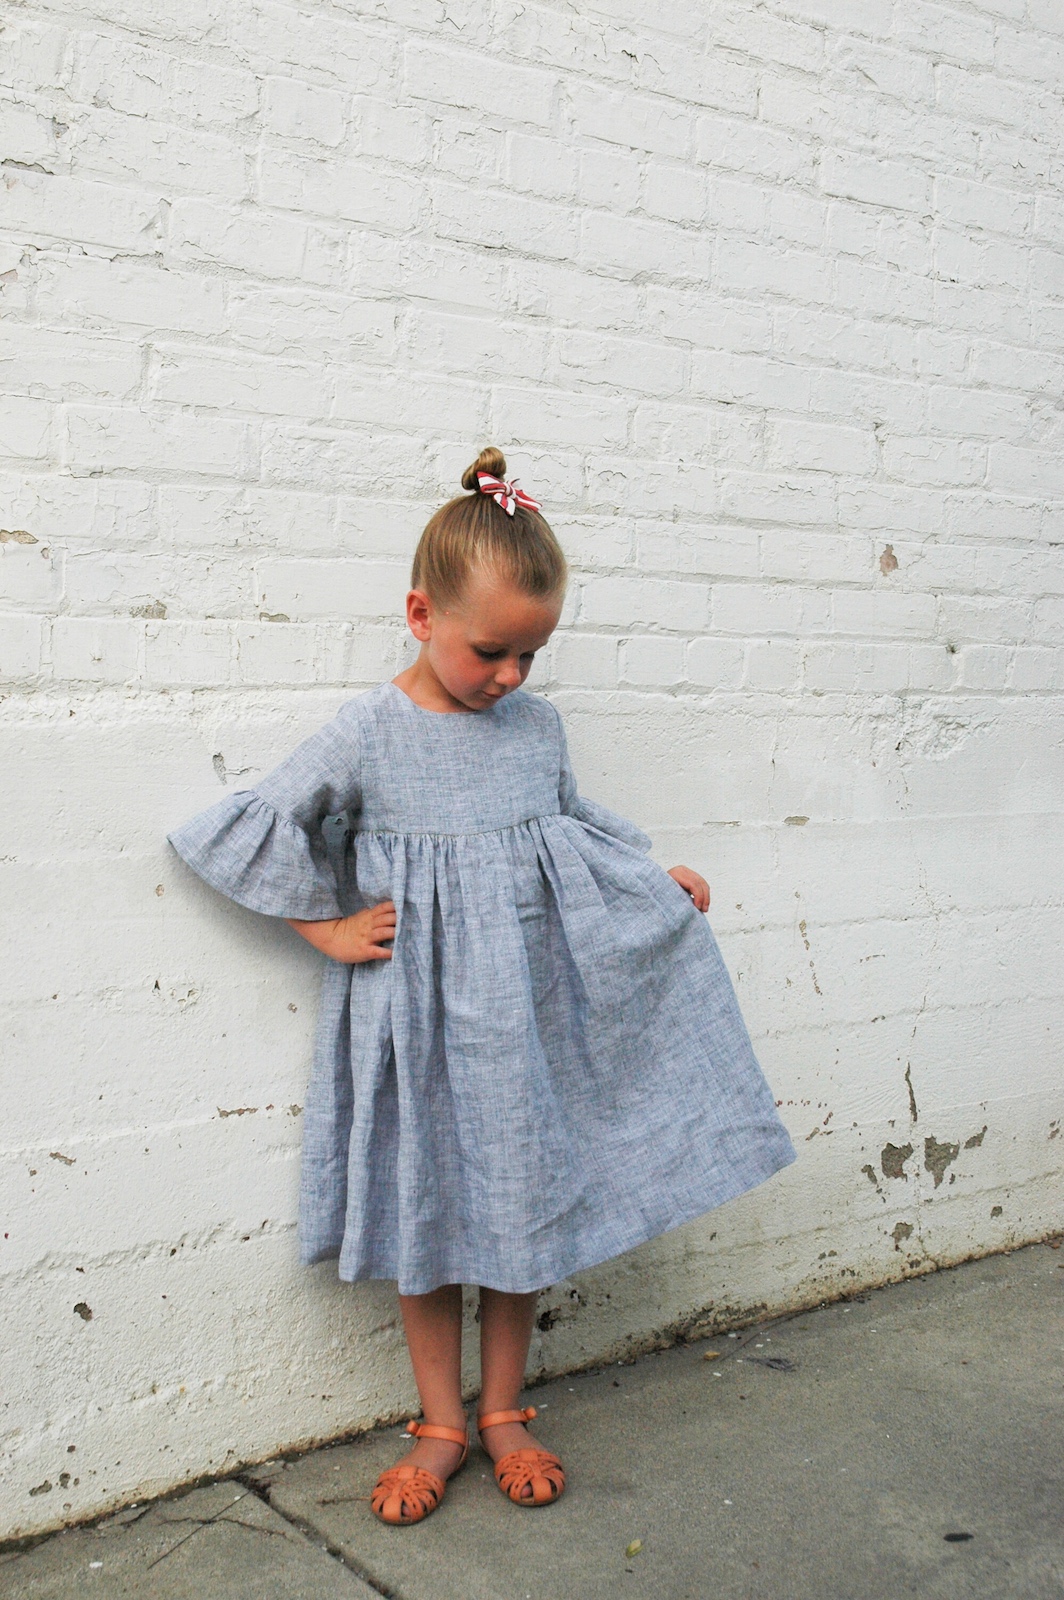
Hey everyone! Sara from The Sara Project here with another great fashion forward sewing tutorial for you. I really love sewing things for my daughter because little clothes are so quick to make! My daughter has been in need of a summer dress lately, so she and I found a few we loved online and recreated our own version. This tutorial will walk you through how to design the pattern based off of a free downloadable pattern for girls, as well as how to sew it all together. Let’s begin!
Materials to Sew a Girls Gathered Linen Dress
- Sewing Machine (I use a BERNINA 560)
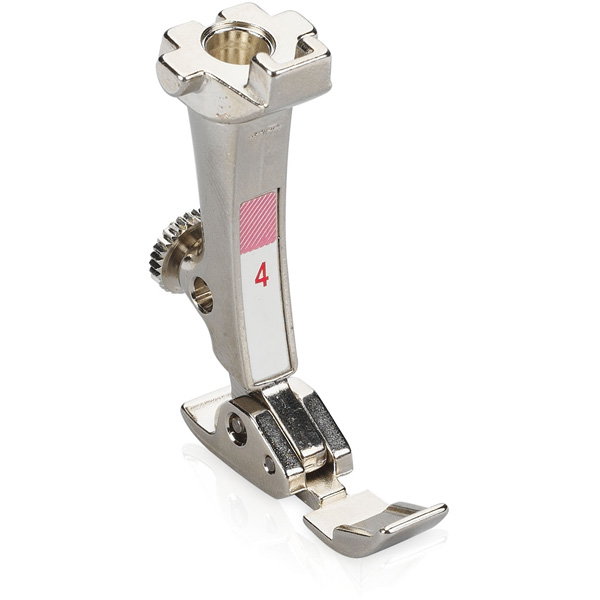
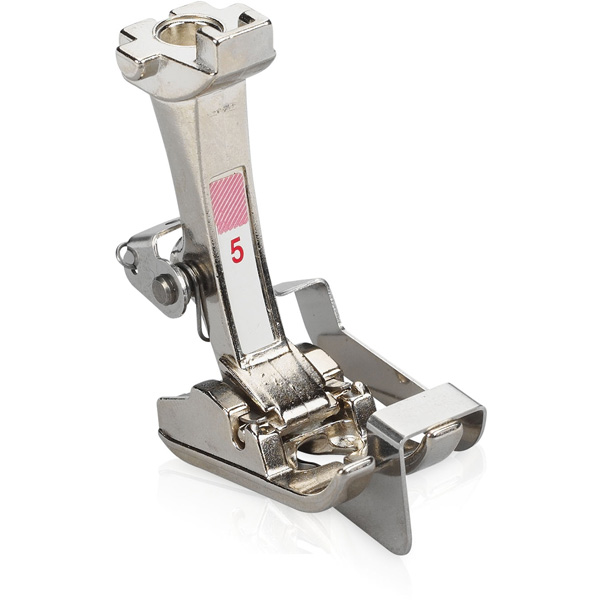
- Edgestitch foot #10/#10C/#10D
- Pre-washed linen Fabric (I picked mine up at Joann Fabric, I used about 1 1/2 yards for a five year old girl).
- Coordinating 12-14″ invisible zipper
- Coordinating thread
- FREE downloadable girls shirt pattern sizes 3-14
- Pins
- Tracing paper
- Ruler
- Tape
How to Draft Your Pattern
First, tape and assemble the printed pattern.
Next, take the bodice pattern piece and make a mark 1 1/2″ inched down from the underarm and draw a perpendicular line. Cut along this line. This is your bodice piece. Cut four on the fold, remember to remove the bodice back neckline piece for the two front bodice pieces. One set is for the lining.
Next, get your short sleeve piece and add 1 3/4″ of length. I drew the other half of my sleeve so I could cut two at once. You can also leave it as it is and cut two on the fold.
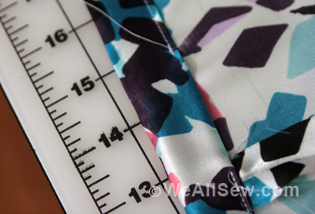
Now we need to create the ruffle to be attached to the sleeve hem. Draw a rectangle that is 2x the sleeve hem measurement by your desired length for the ruffle. Mine ended up being 4″ long by 20″ wide. Cut two.
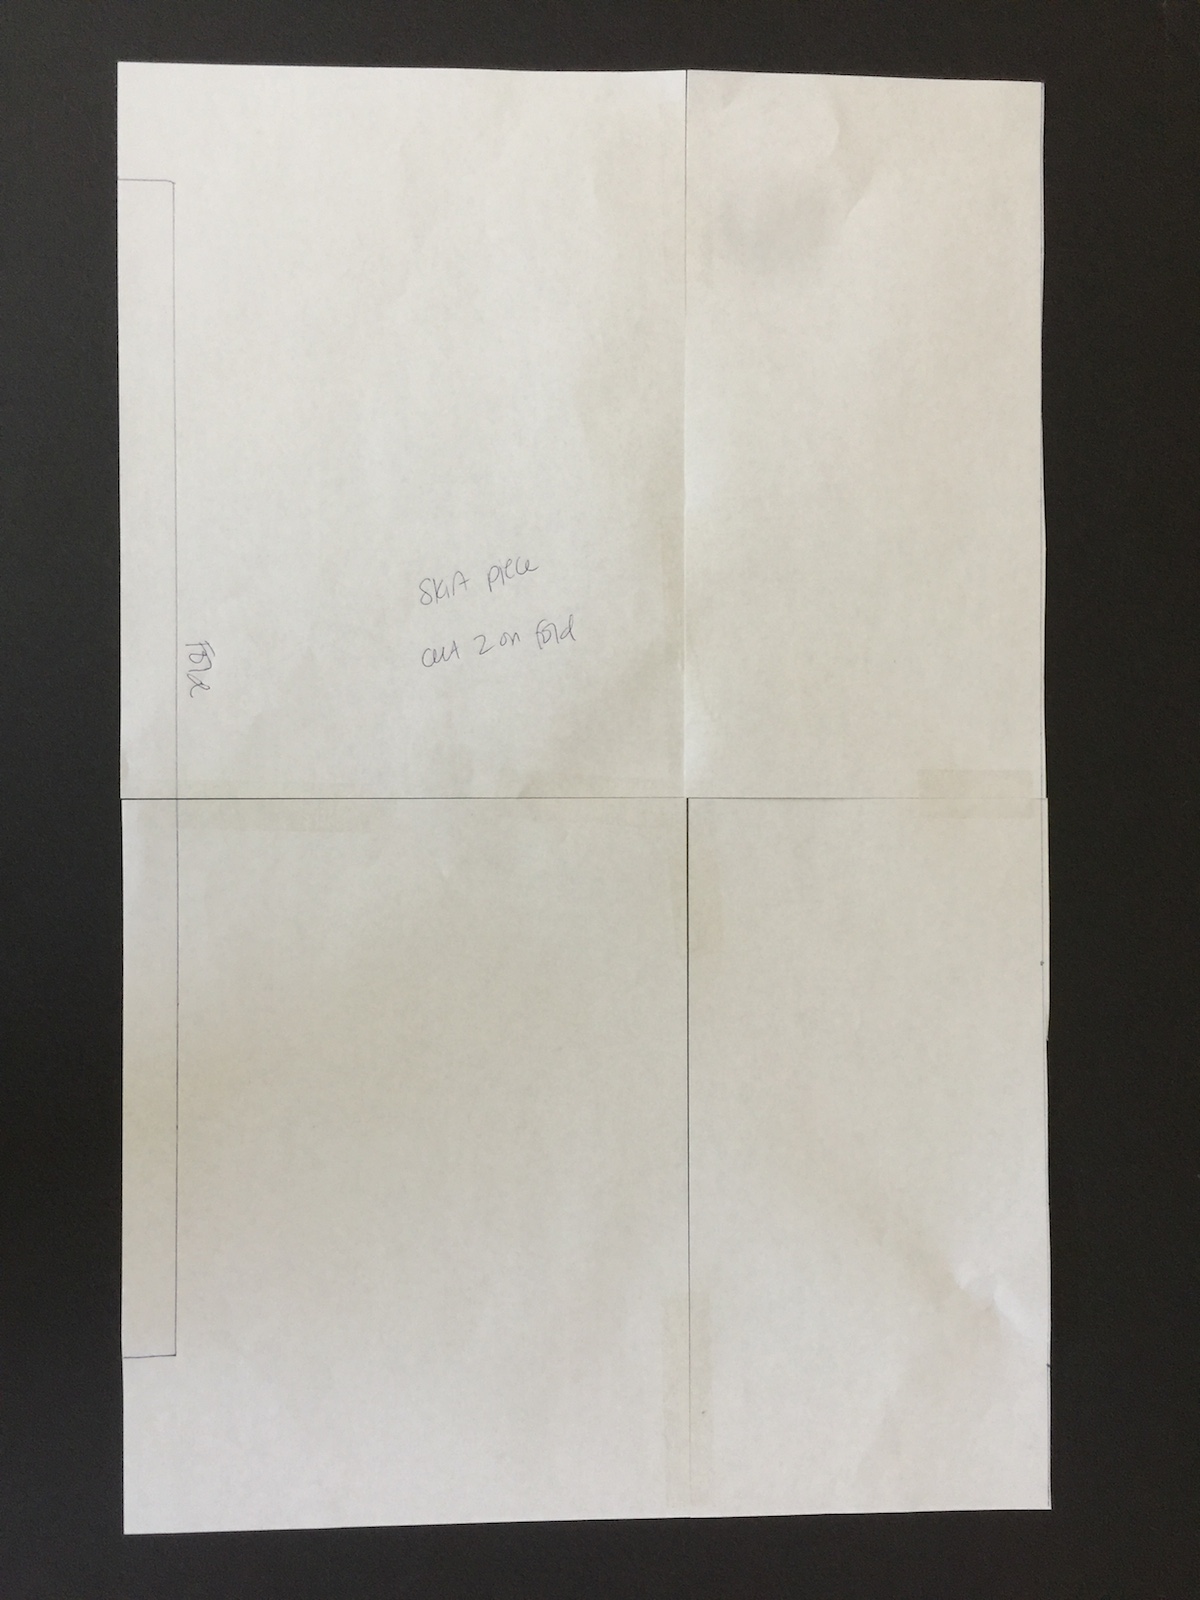
The last piece we need to design is the skirt piece. Calculate 2x the bodice width by your desired length of the skirt. Mine ended measuring 20″ in length by 28″ wide. I Cut the width in half to be 20″ by 14″ and cut two on the fold.
Your pieces should look like this:

Cut out all of your pieces, and let’s begin sewing!

Sewing Your Linen Gathered Dress
Step 1:
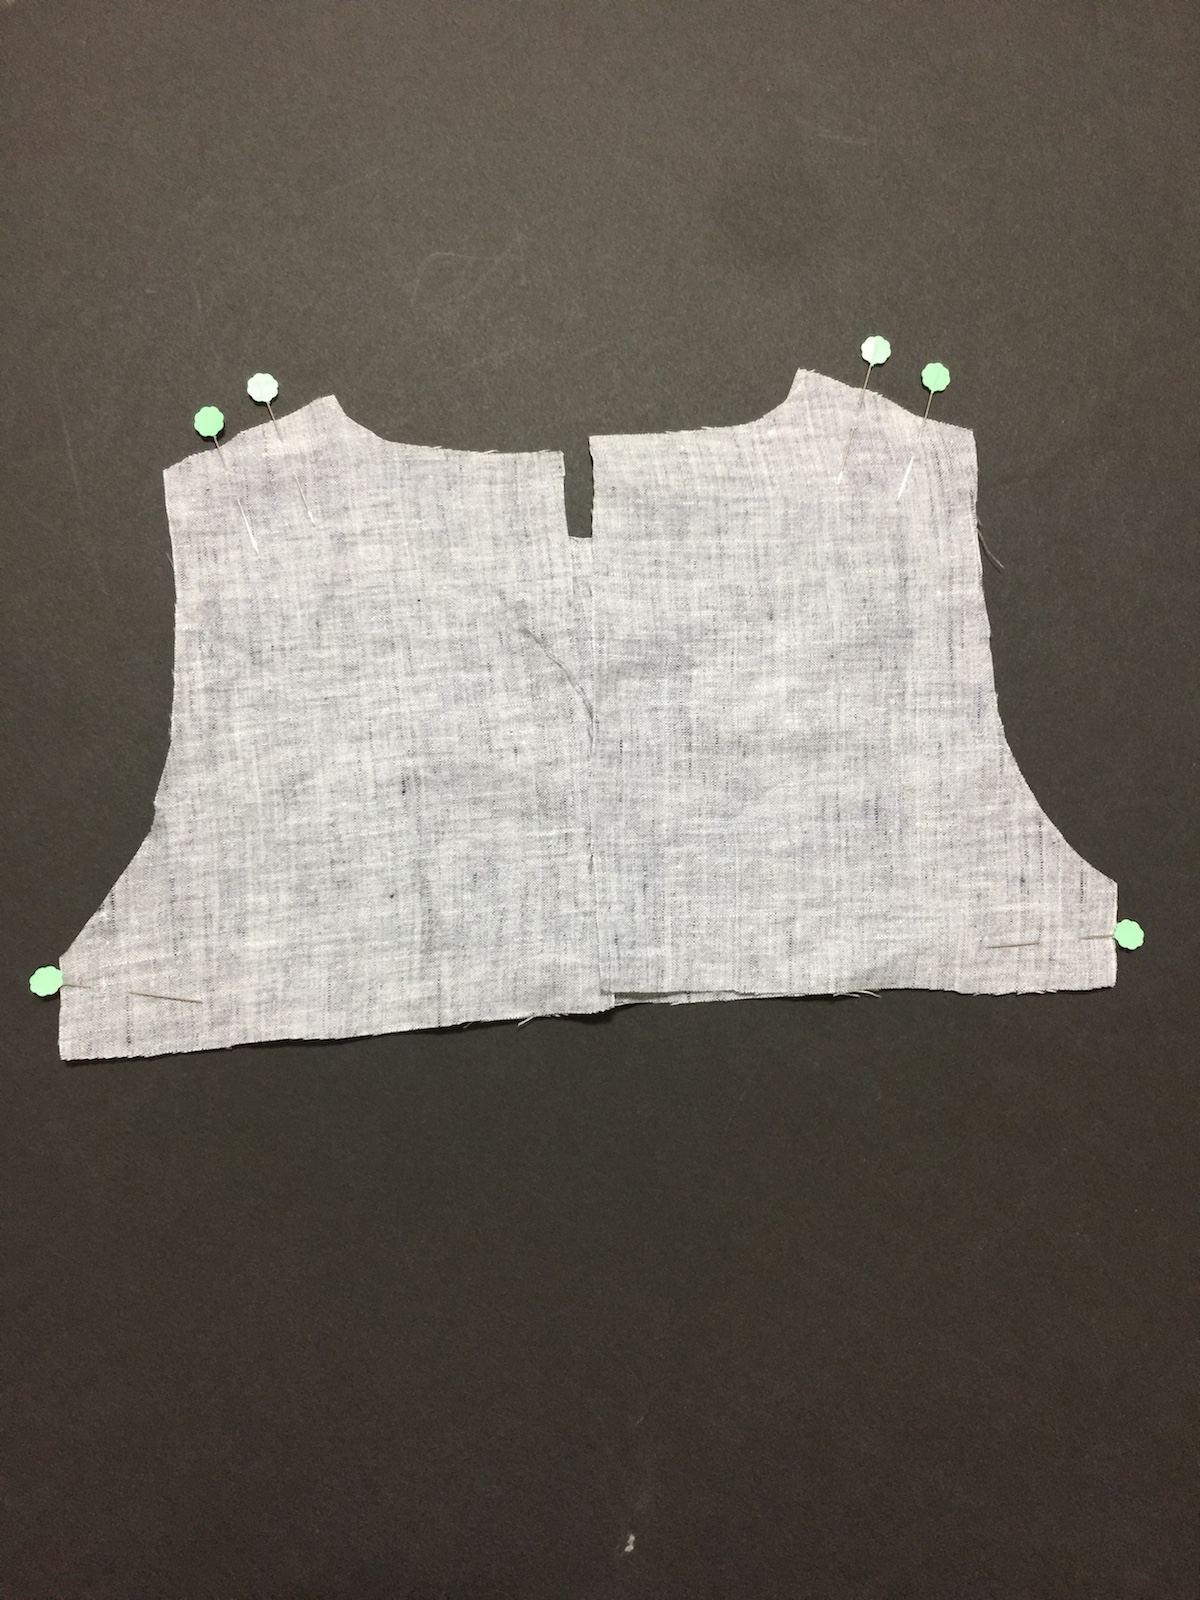
Align the shoulder seams of the bodice front and back pieces right sides together, pin. Align the side seams, pin. Repeat for bodice lining pieces.
Step 2:
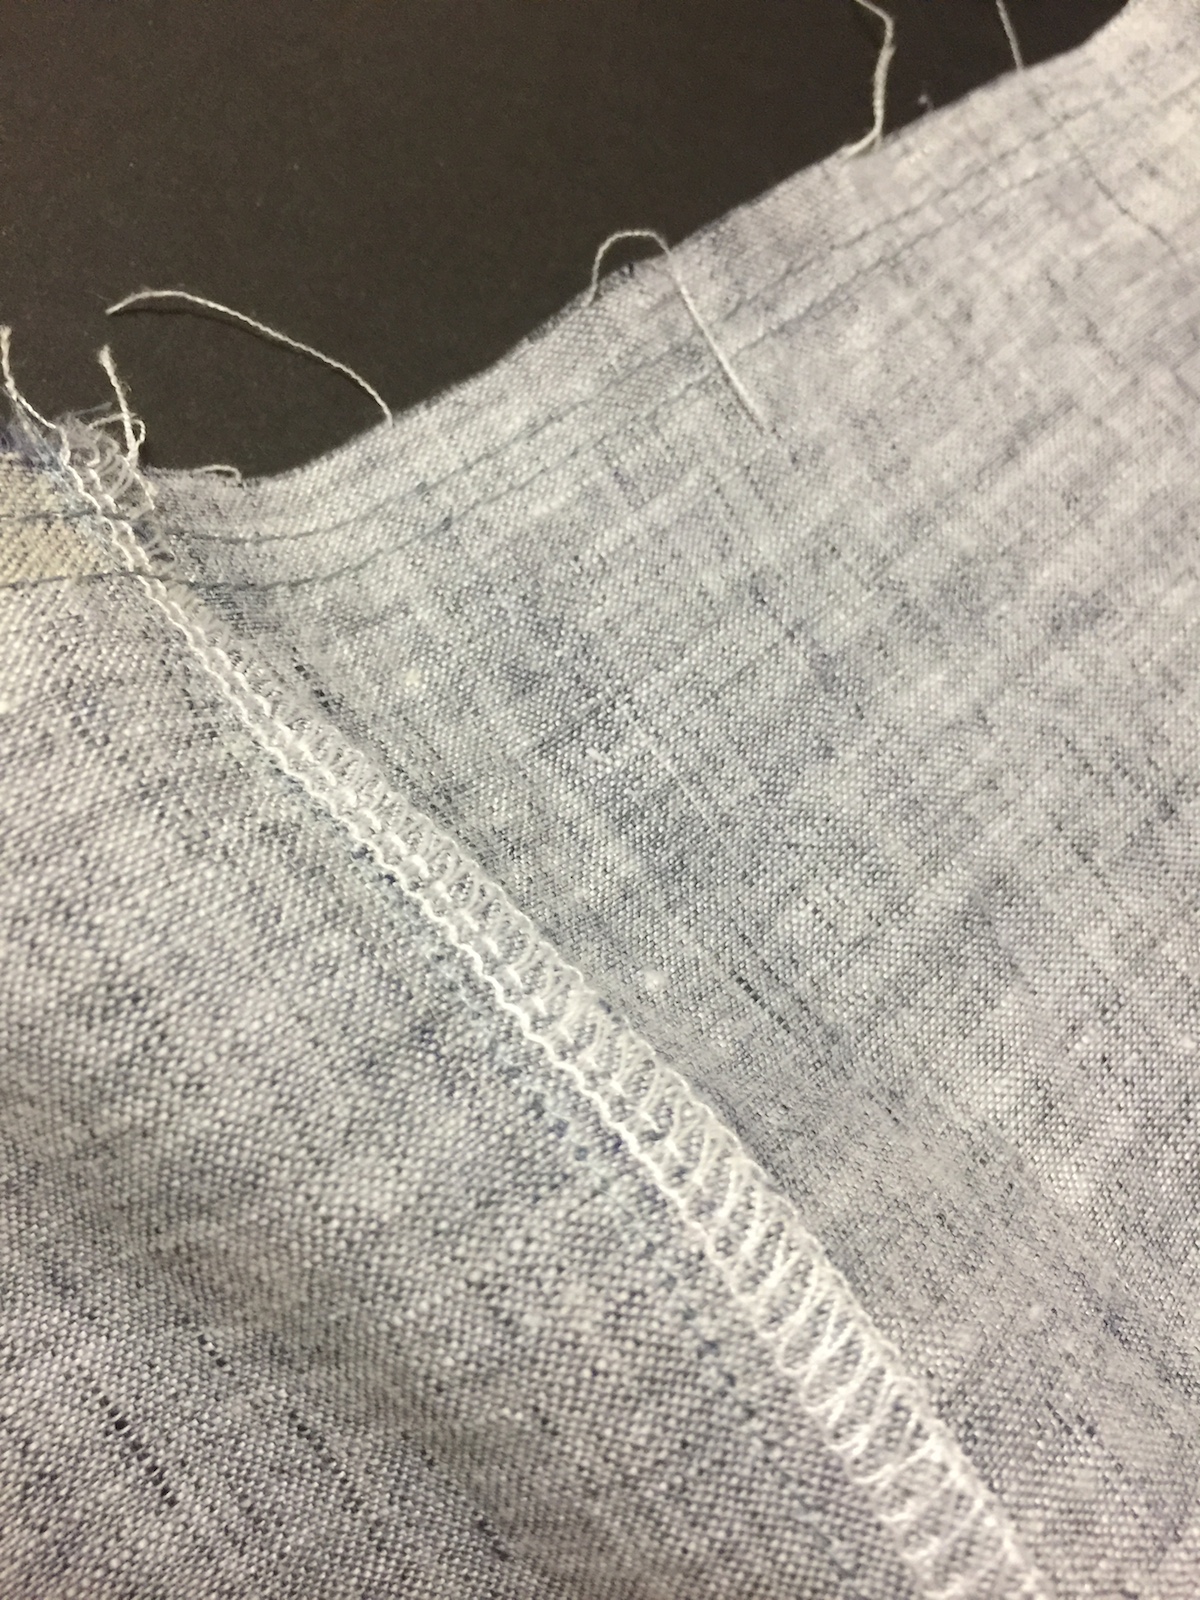
Sew all shoulder and side seams at 1/2″. Iron all seams open.
Step 3:
Align the bodice neckline to the lining neckline, and pin in place with right sides together.
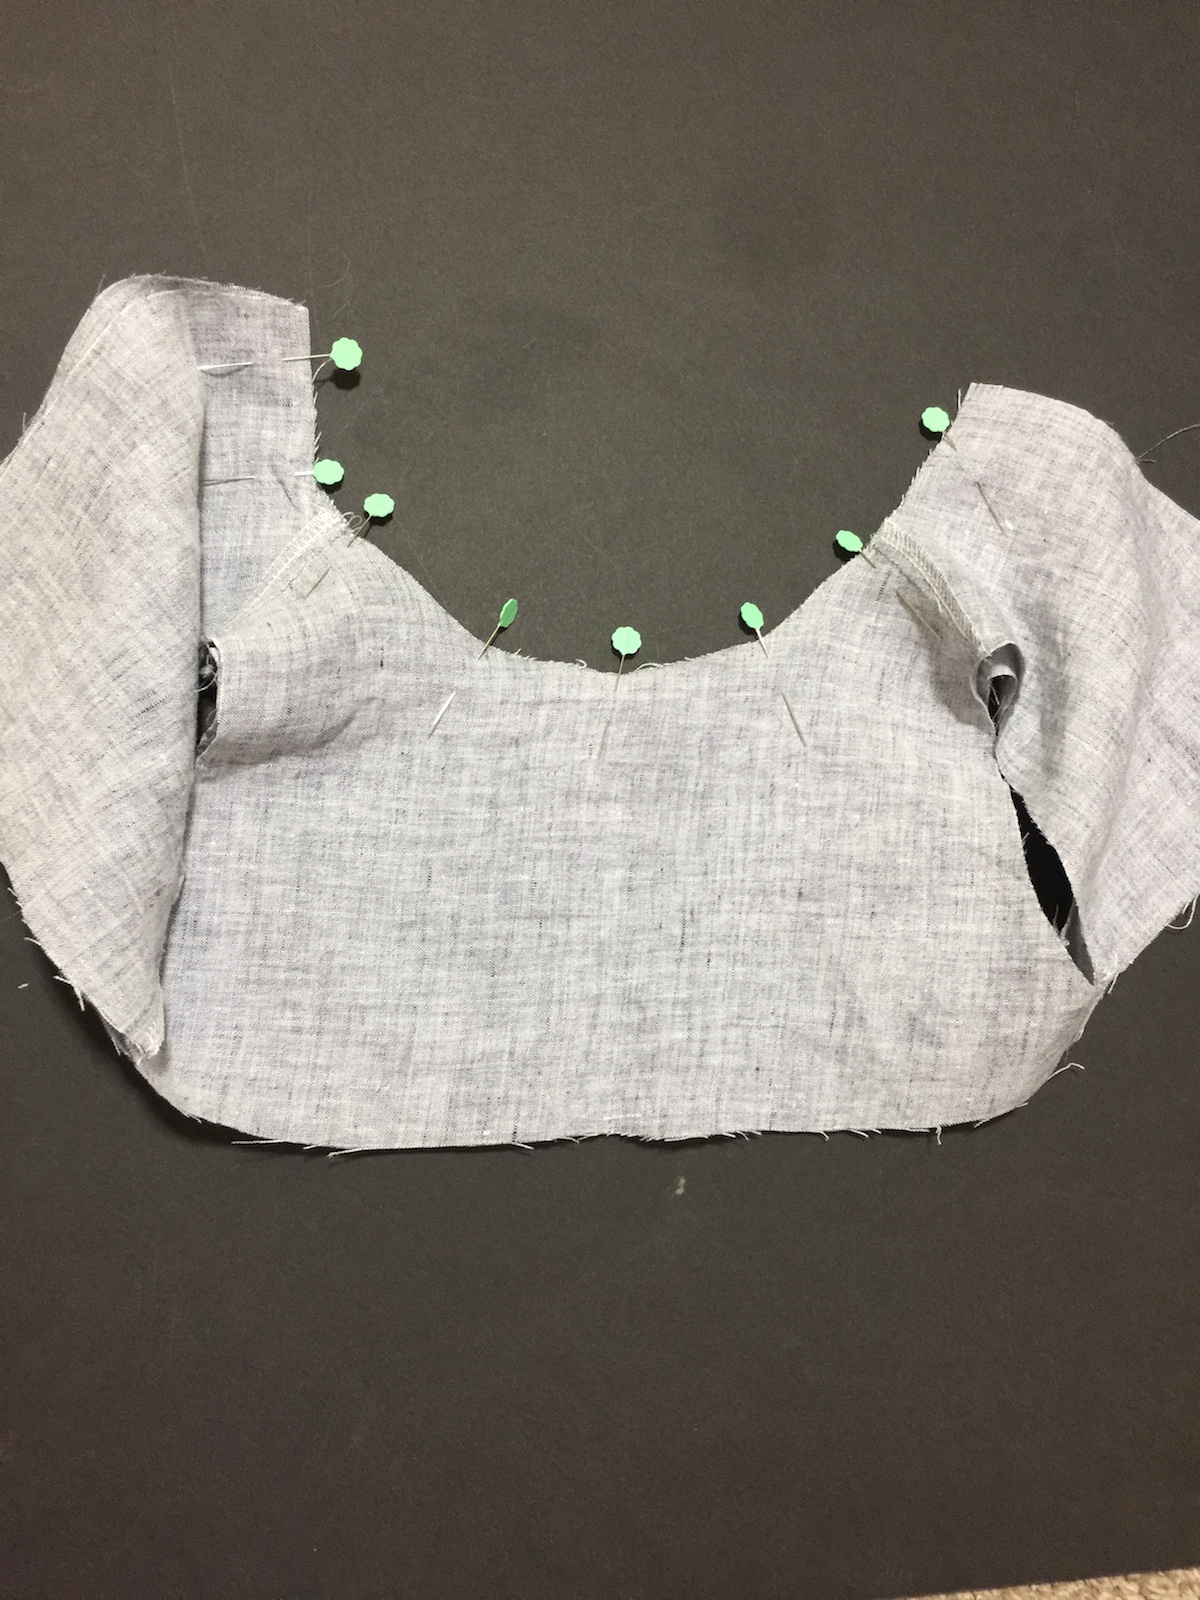
Step 4:
Sew a 1/2″ seam allowance from the neckline edge.

Step 4:
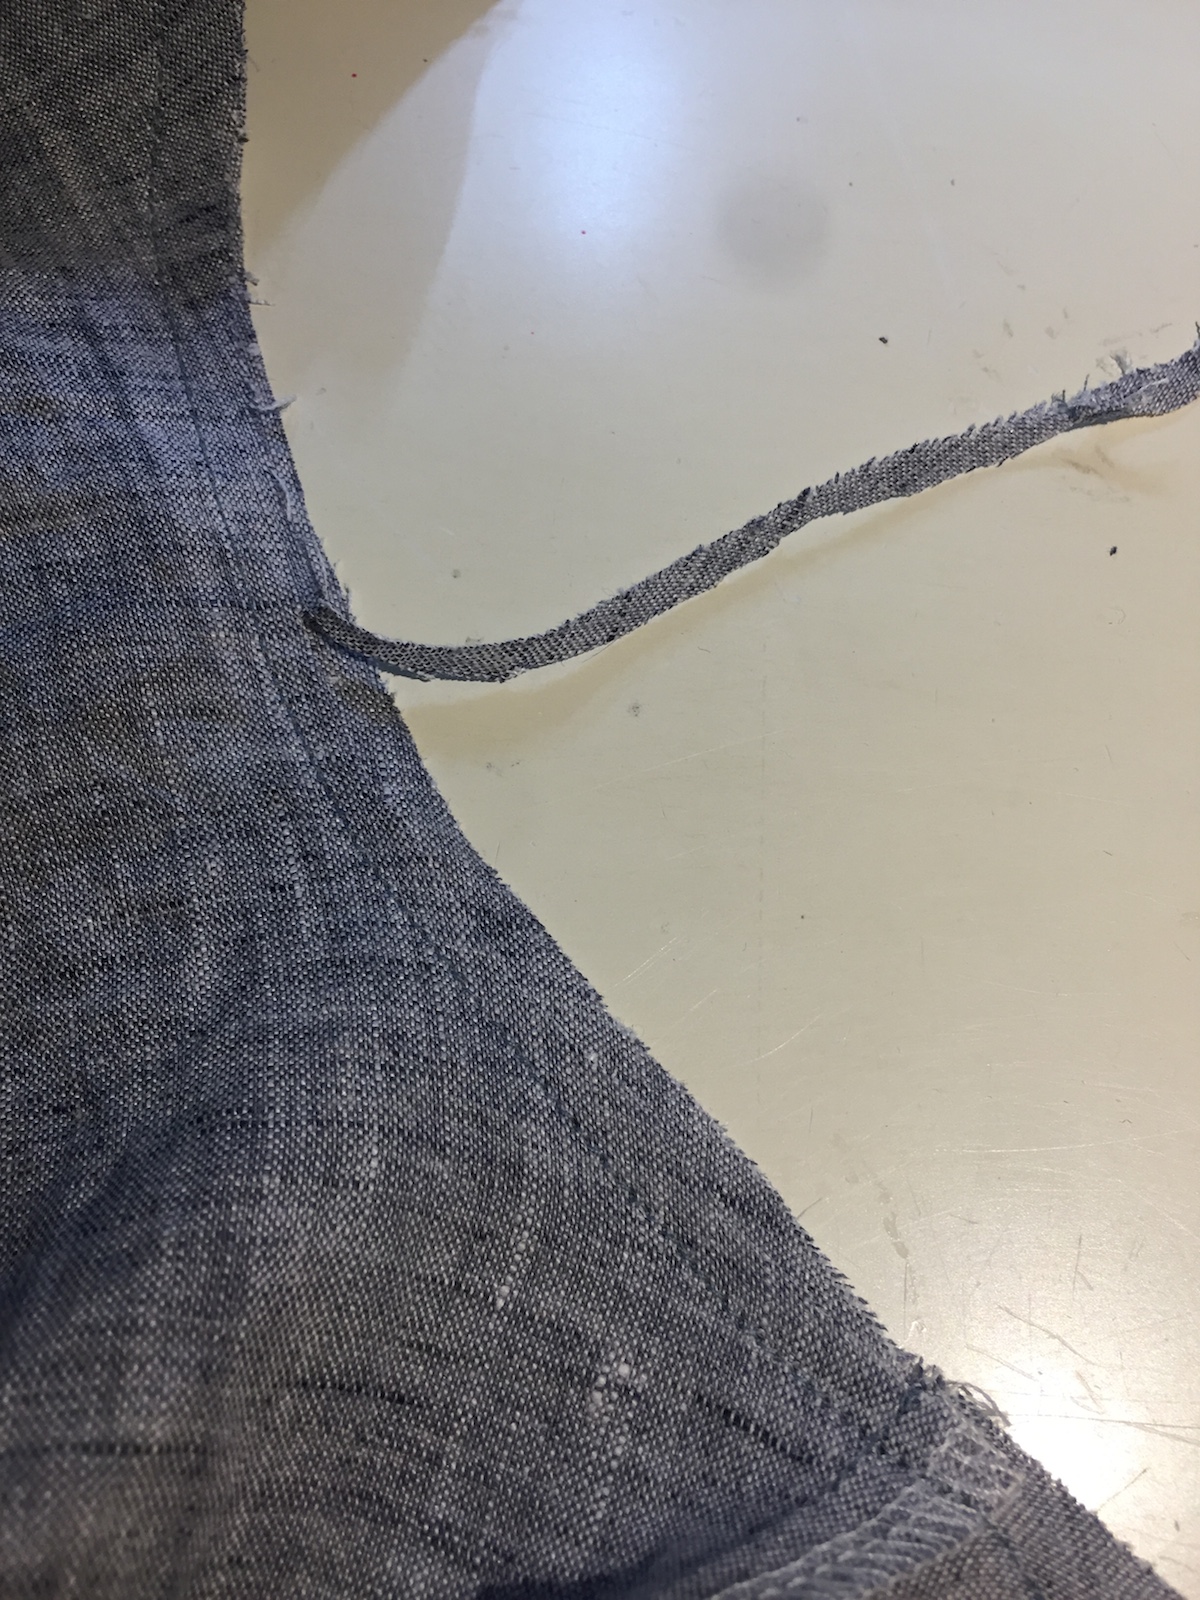
Grade the neckline seam by trimming one side of the seam allowance down to 1/4″.
Step 5:
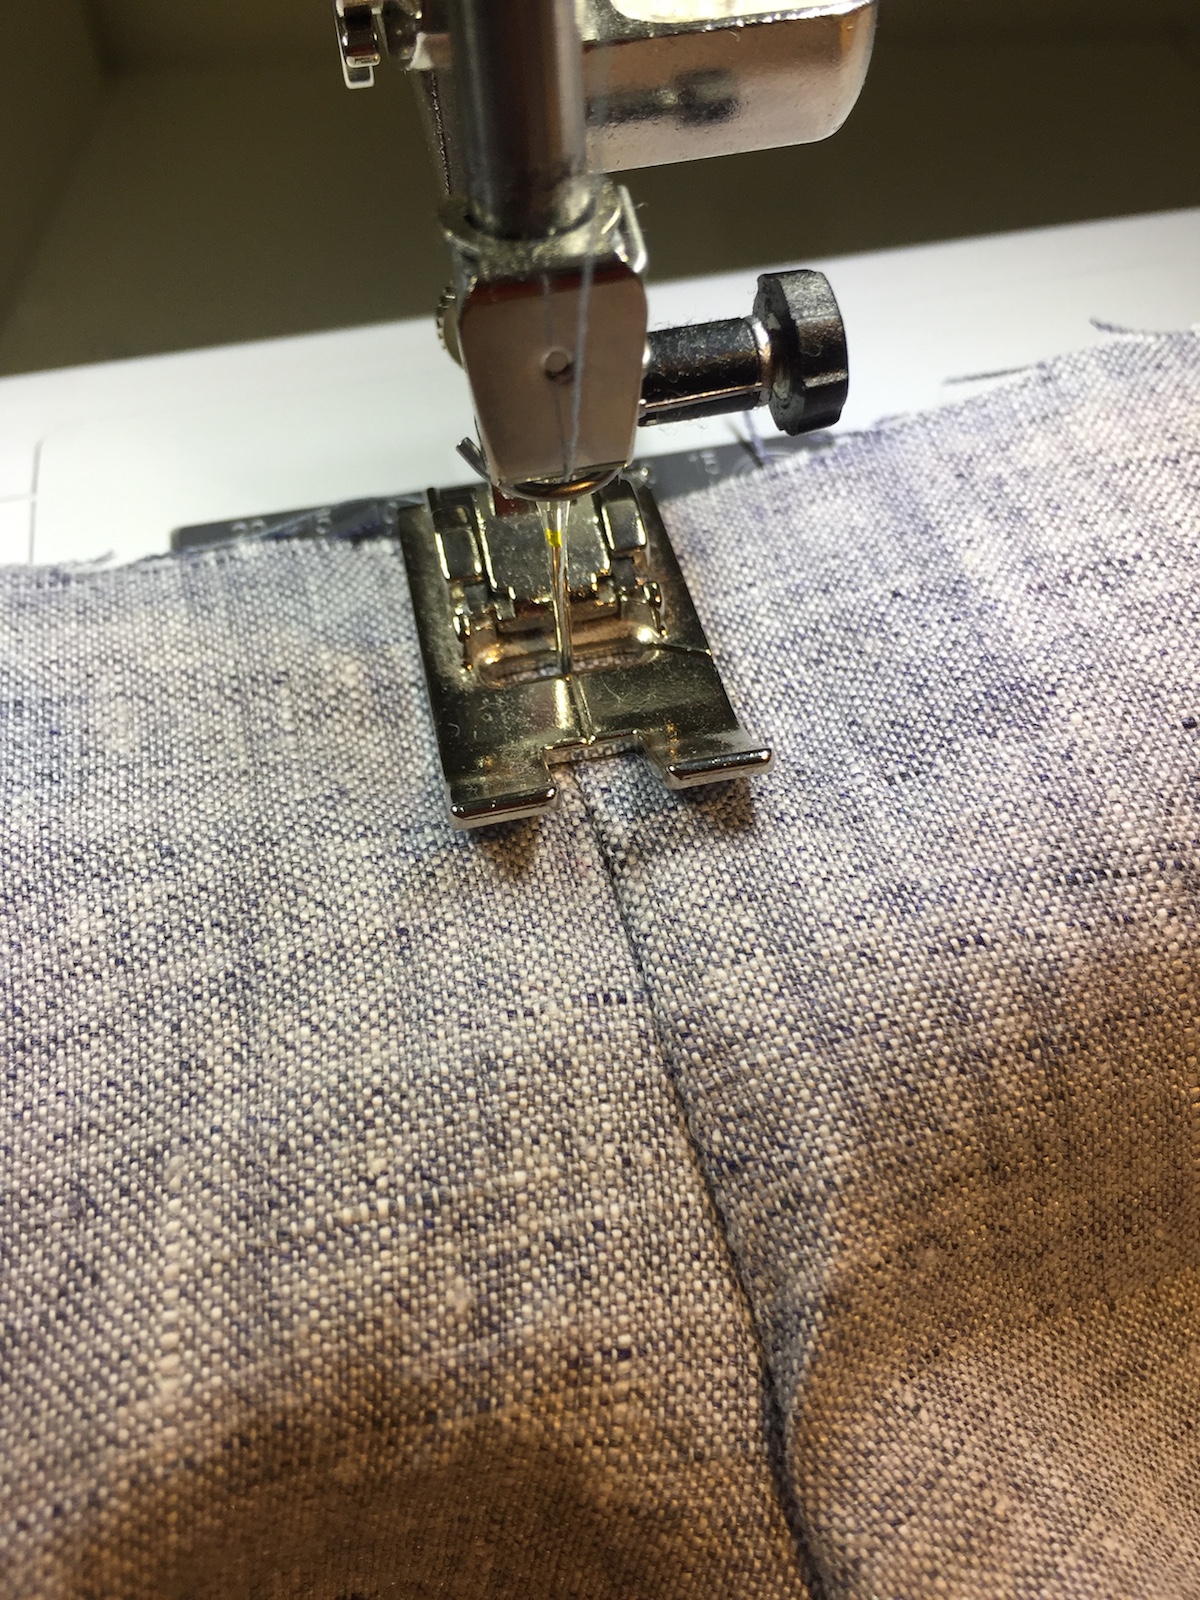
Understitch the bodice neckline seam allowance to the lining.
Step 6:
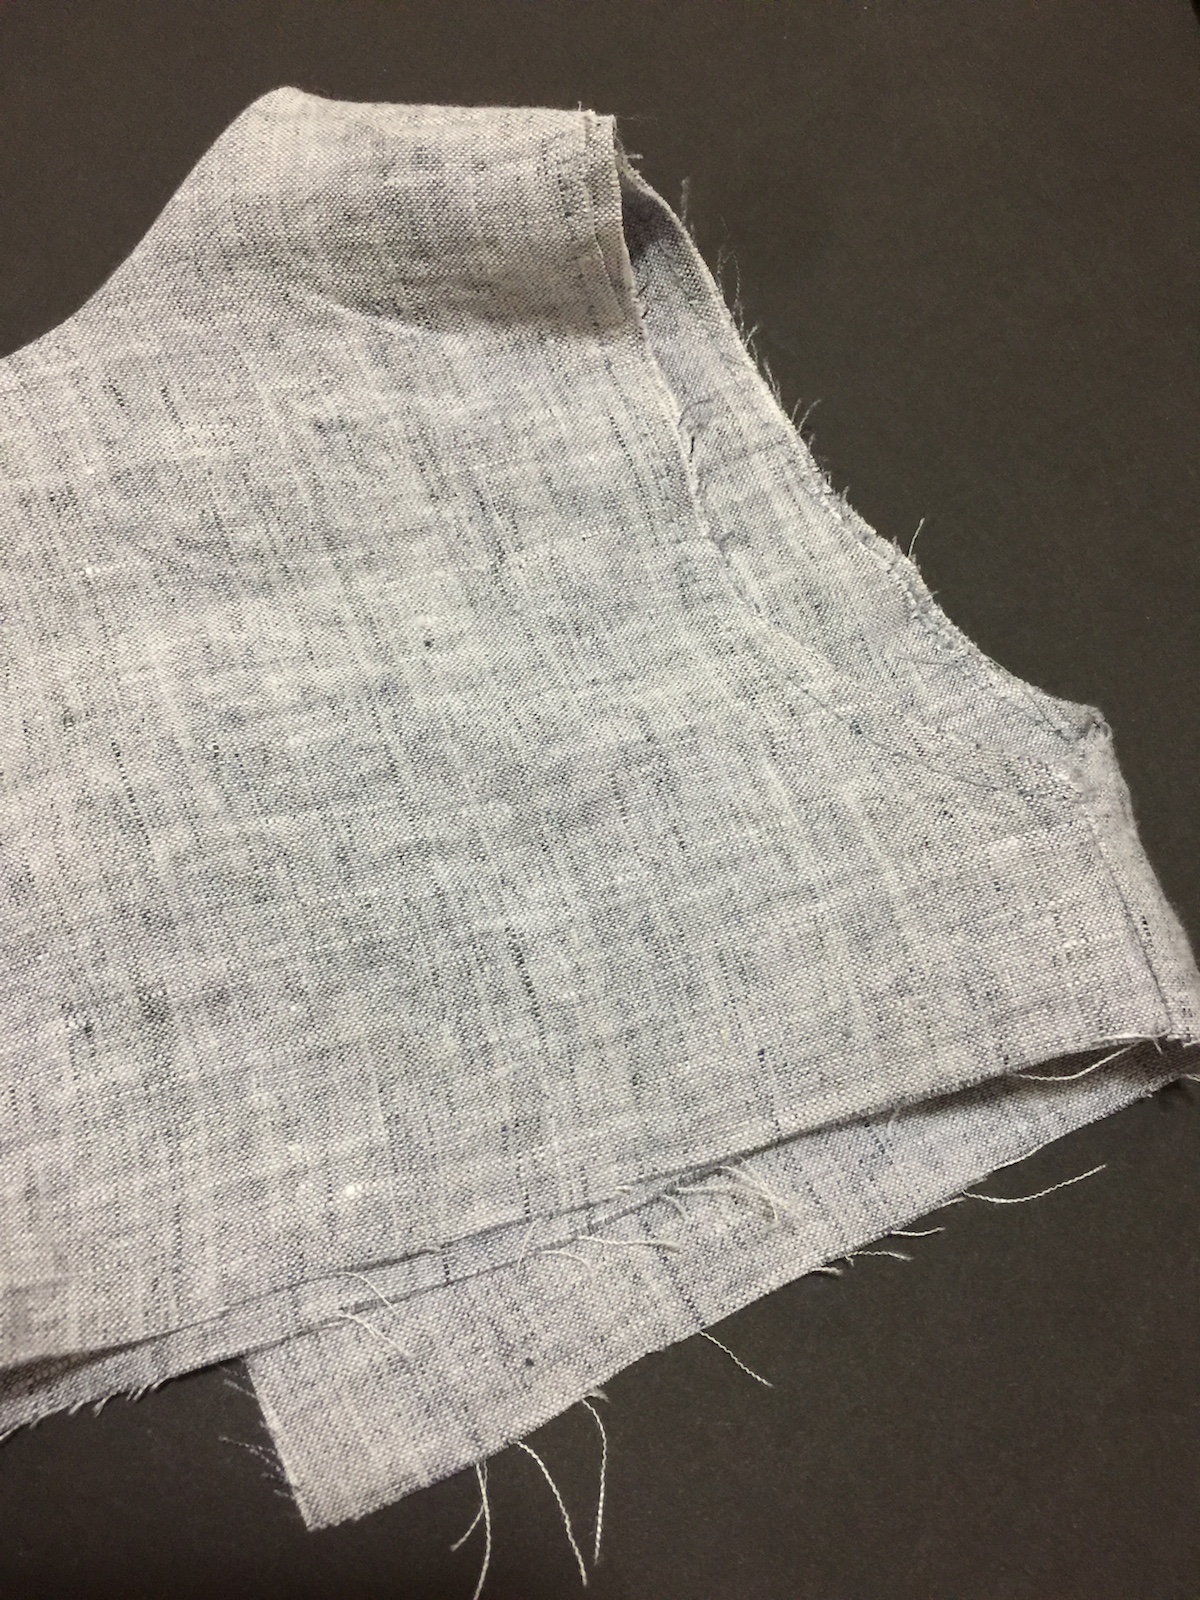
Flip the lining to the inside of the bodice, and iron the lining side of the bodice so you can just barely see the understitching around the neckline.


Step 8:
Pin and baste the lining and bodice armholes together at 1/4″.

Step 9:
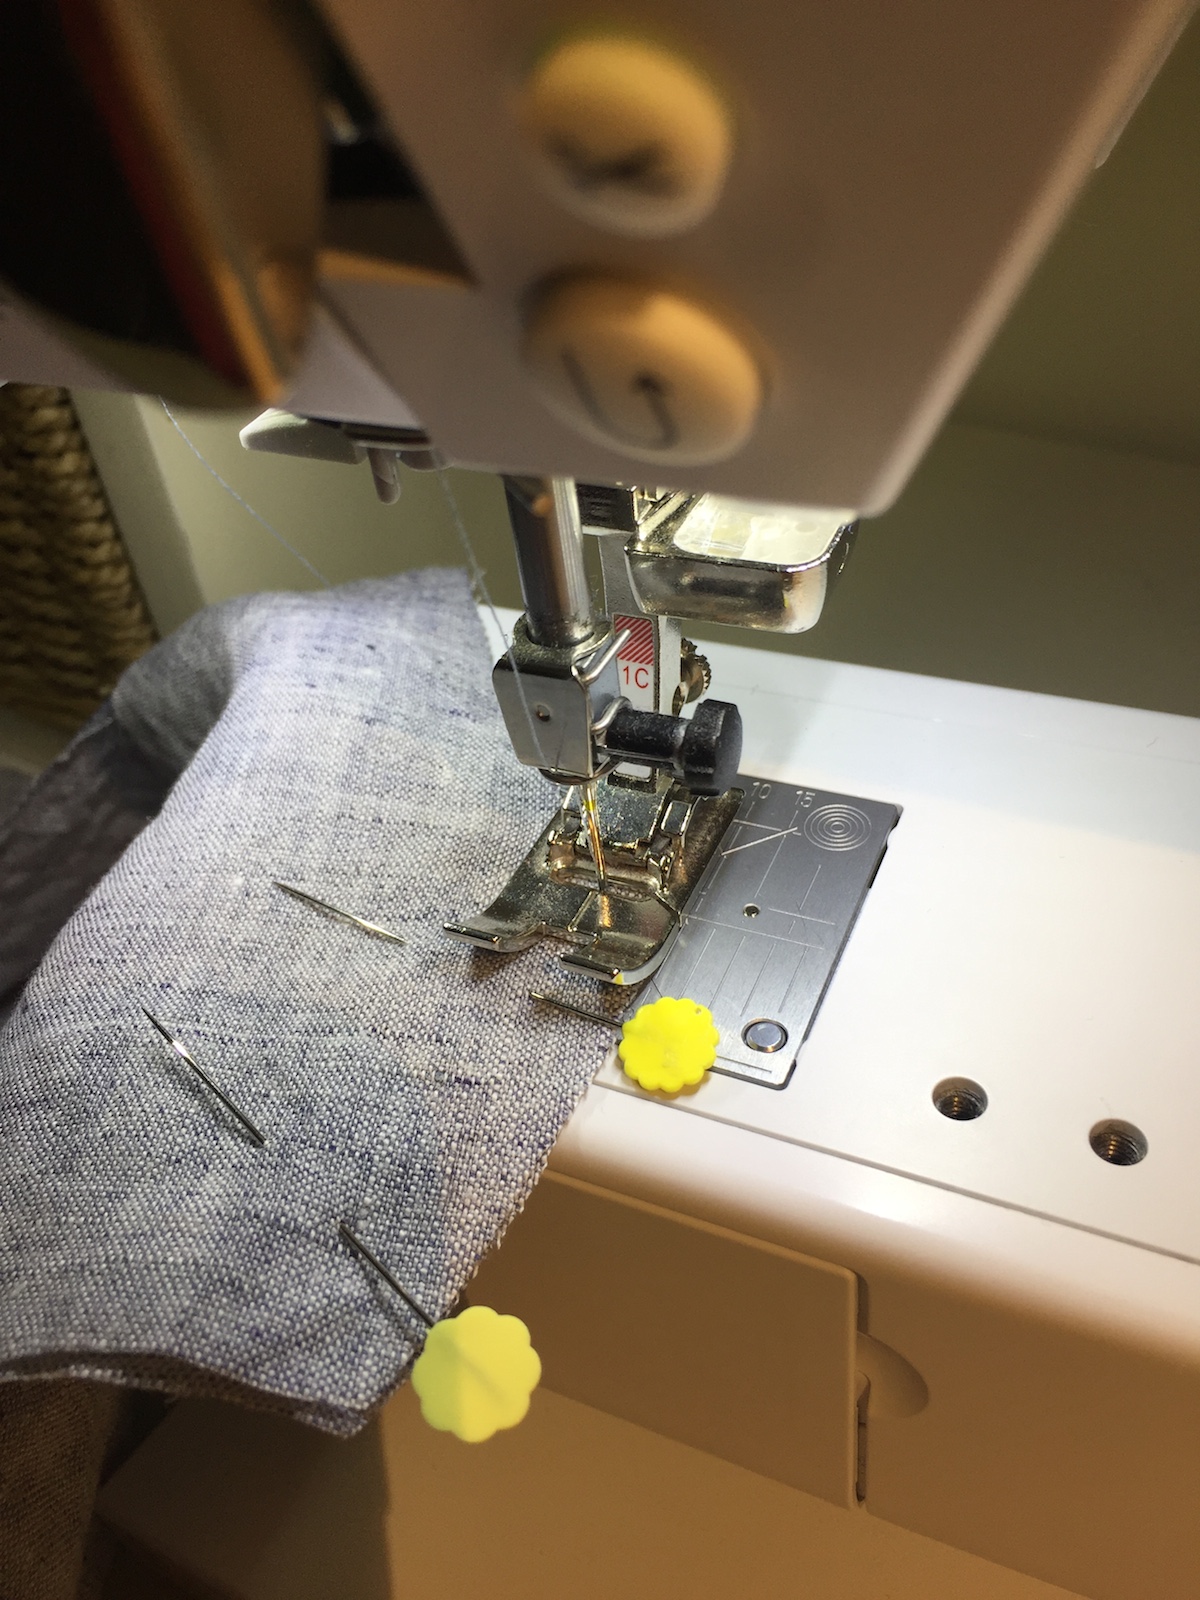
Now we need to prepare the sleeve ruffle. Sew two basting stitches along the top of each sleeve ruffle at 1/4″ and 1/2″ using a 4.00 stitch length. Remember to leave the thread tails long for gathering.

Step 10:
Pin the edge of the sleeve ruffle to the edge of the sleeve, right sides together. Pull basting threads until the ruffle matches in length with the sleeve. Pin ruffle in place.
Step 11:
Sew sleeve ruffle to sleeve at 1/2″ seam allowance. Repeat steps 10 and 11 for second sleeve.
Step 12:
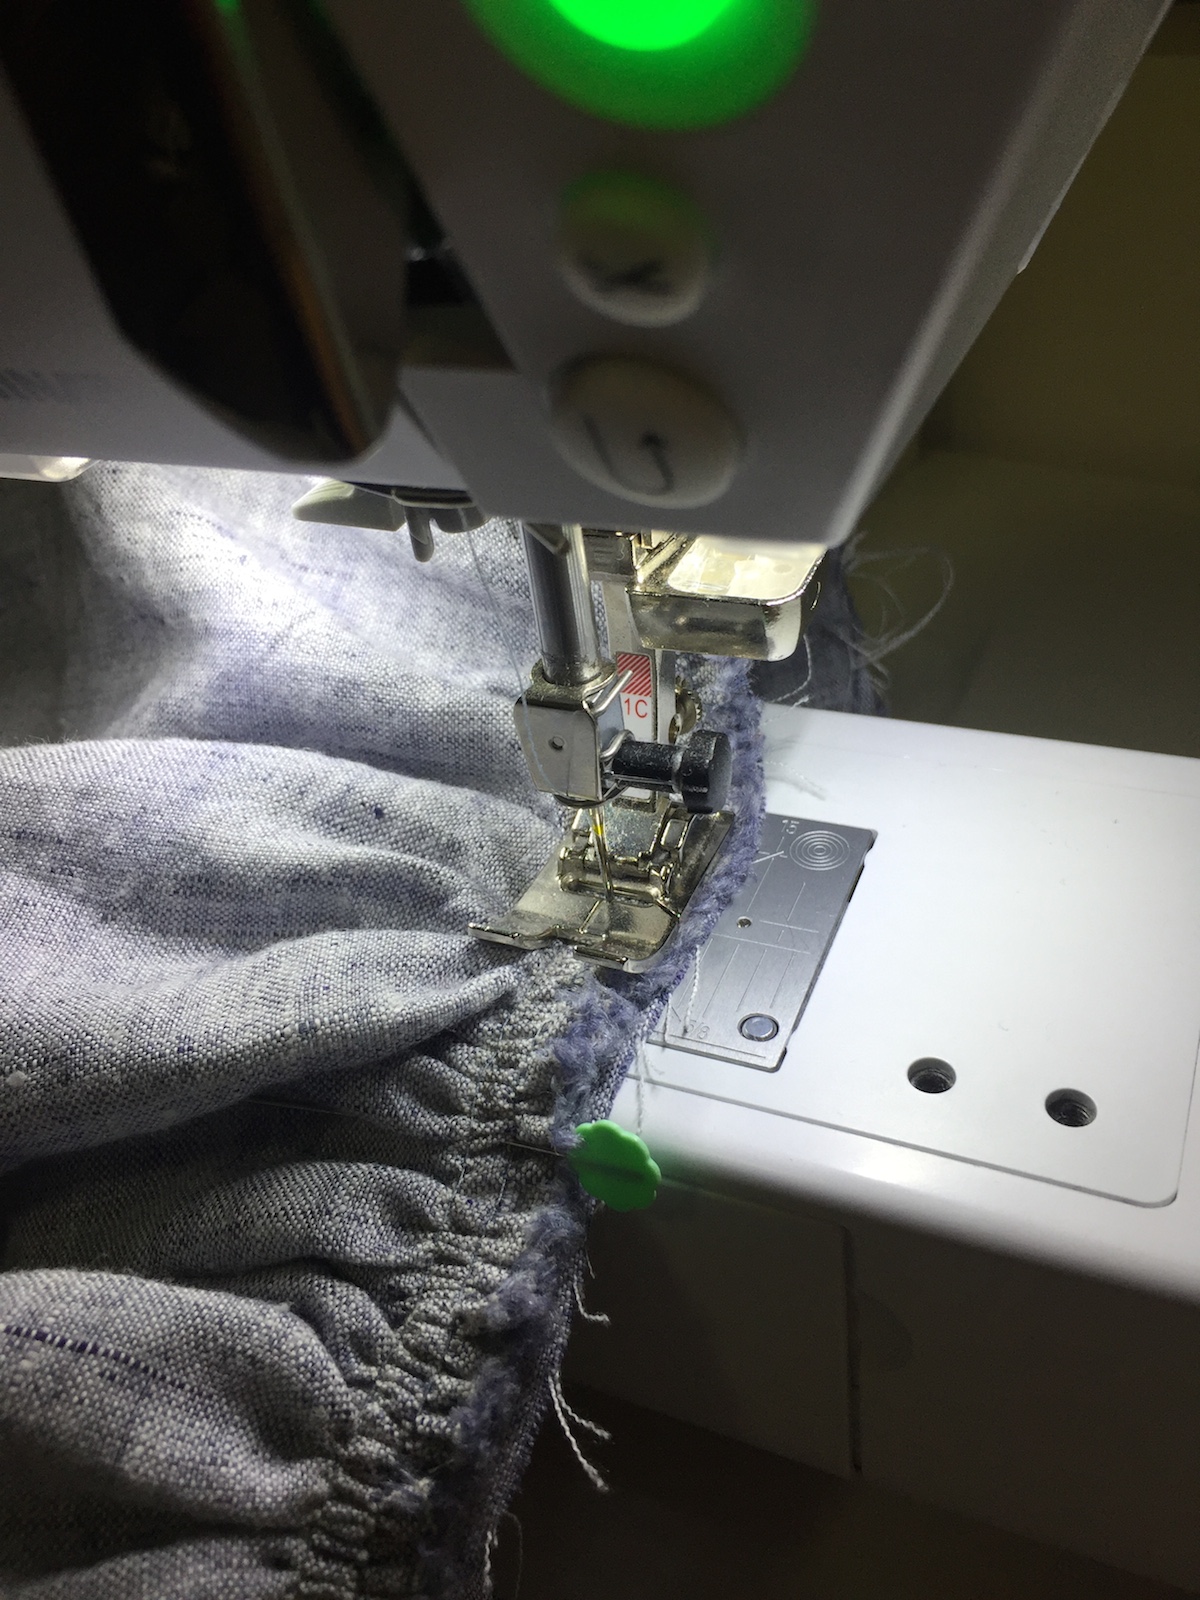
Pin the underarm edges of each sleeve right sides together. Sew at 1/2″ seam allowance, and finish seam as desired.
Step 13:
Insert the sleeve into the armhole, right side together. Make sure to line up the underarm seams and sleeve centers and shoulder seams.

Step 14:
Using a 1/2″ seam allowance, sew the sleeve into the armhole. Finish seam as desired.
Step 15:
Grab your skirt pieces, and cut one piece in half. Now pin the skirt pieces together along the side seams, right sides together. Finish seams as desired, and iron the seams towards the back.
Step 16:
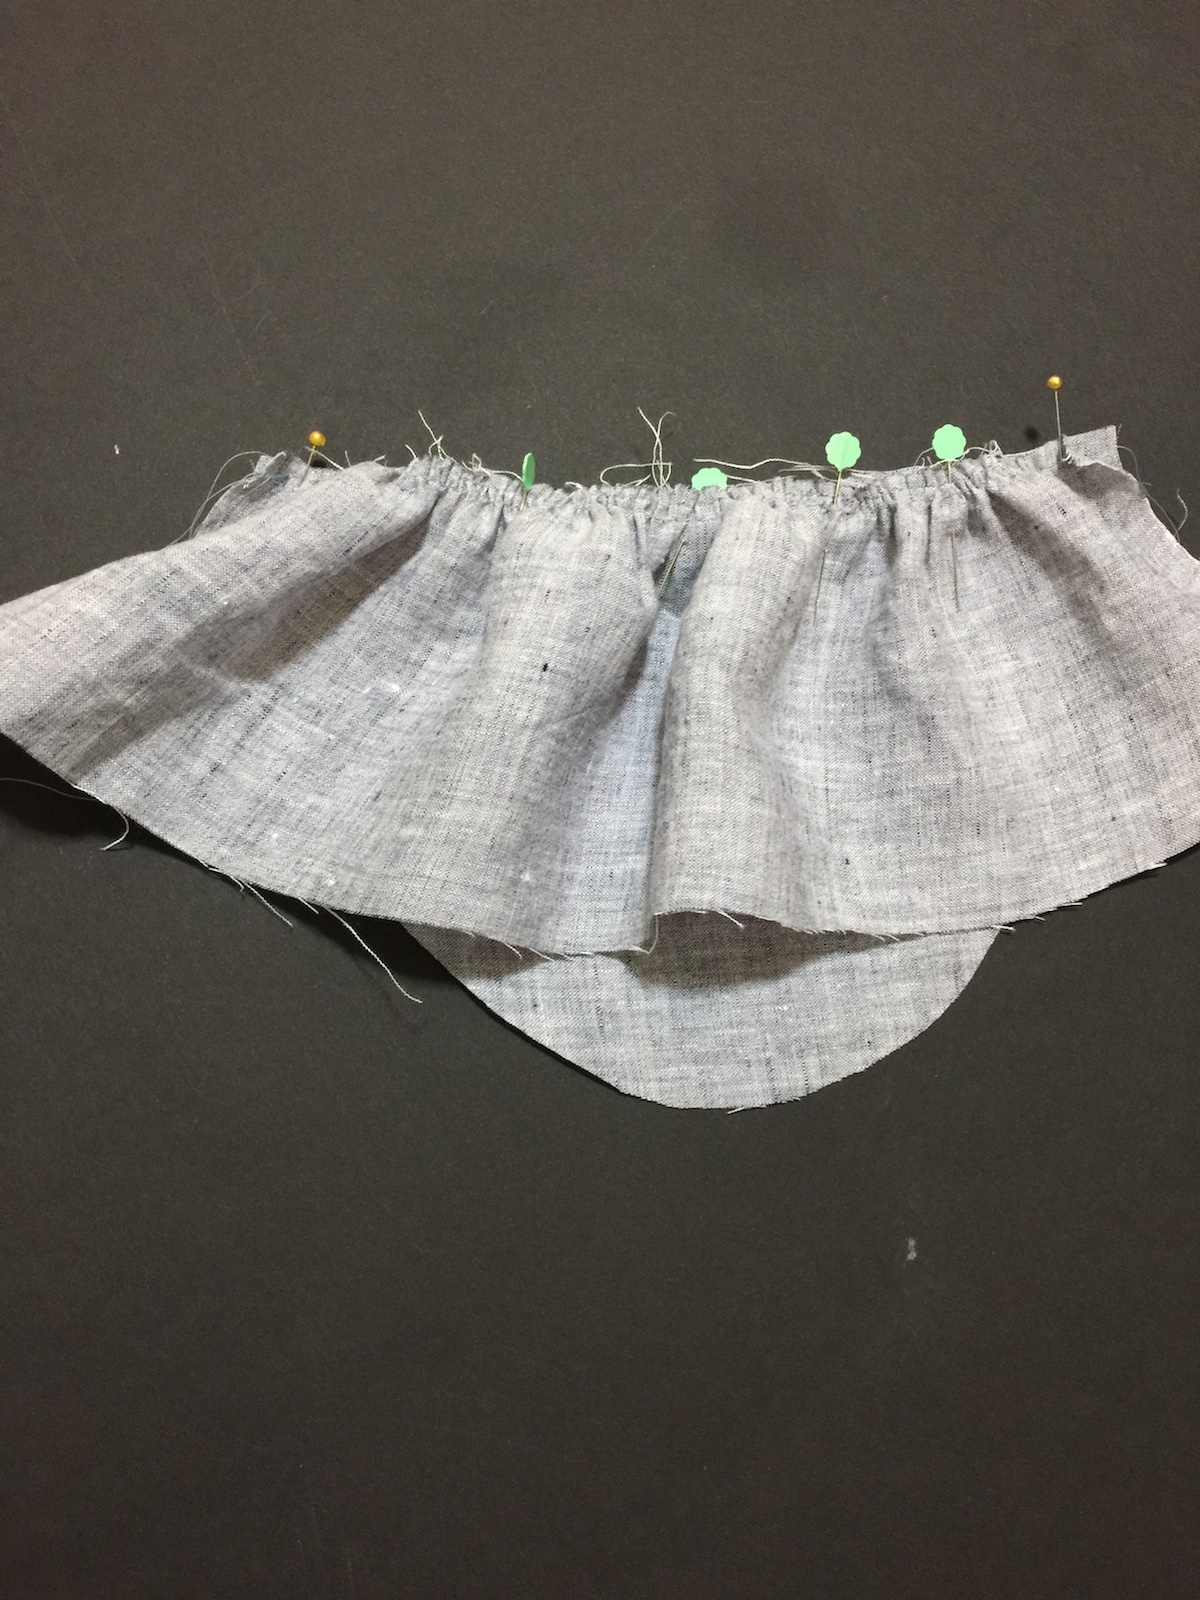
Sew two gathering stitches along the top edge of the skirt at 1/4″ and 1/2″ with a 4.00 stitch length.
Step 17:
Iron the bottom lining edge in at 1/2″.
Step 18:
Pin the skirt edges and center to the side seams and center front of the bodice, right sides together. Pull gathering stitches and evenly spread gathers util the skirt is aligned length wise with the bodice.

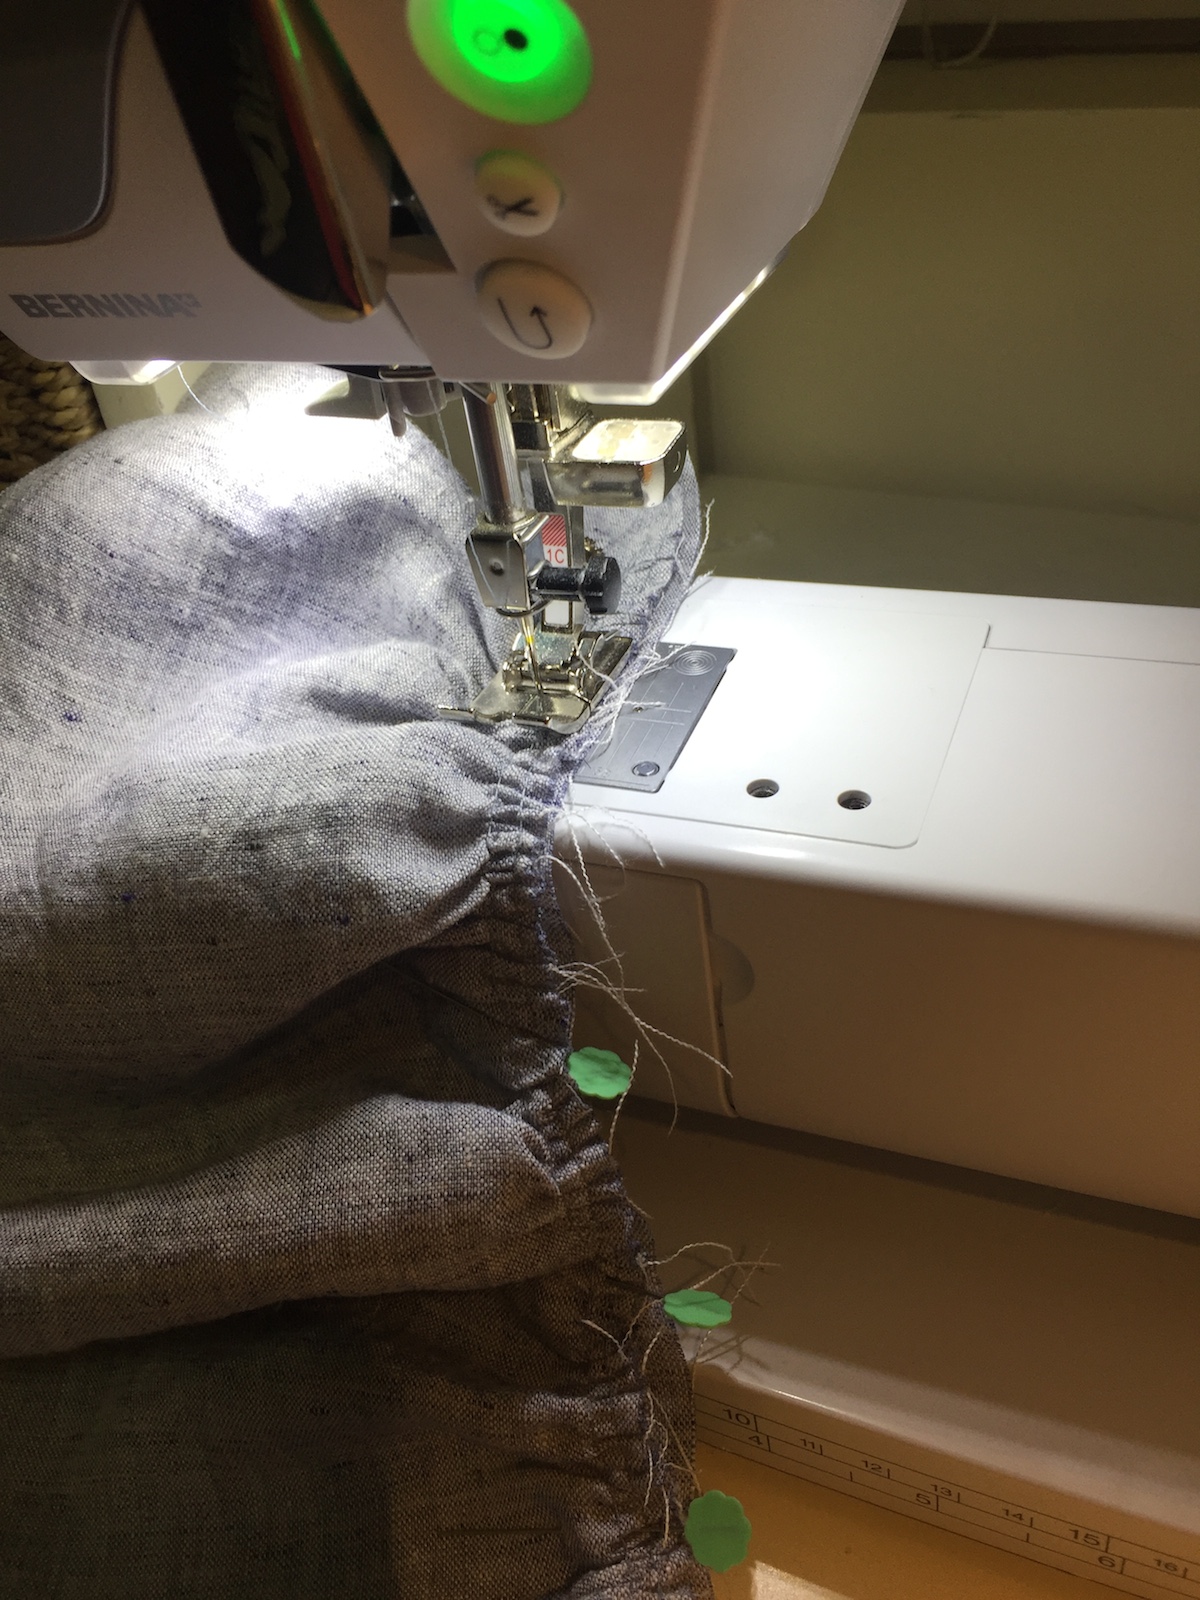
Step 19:
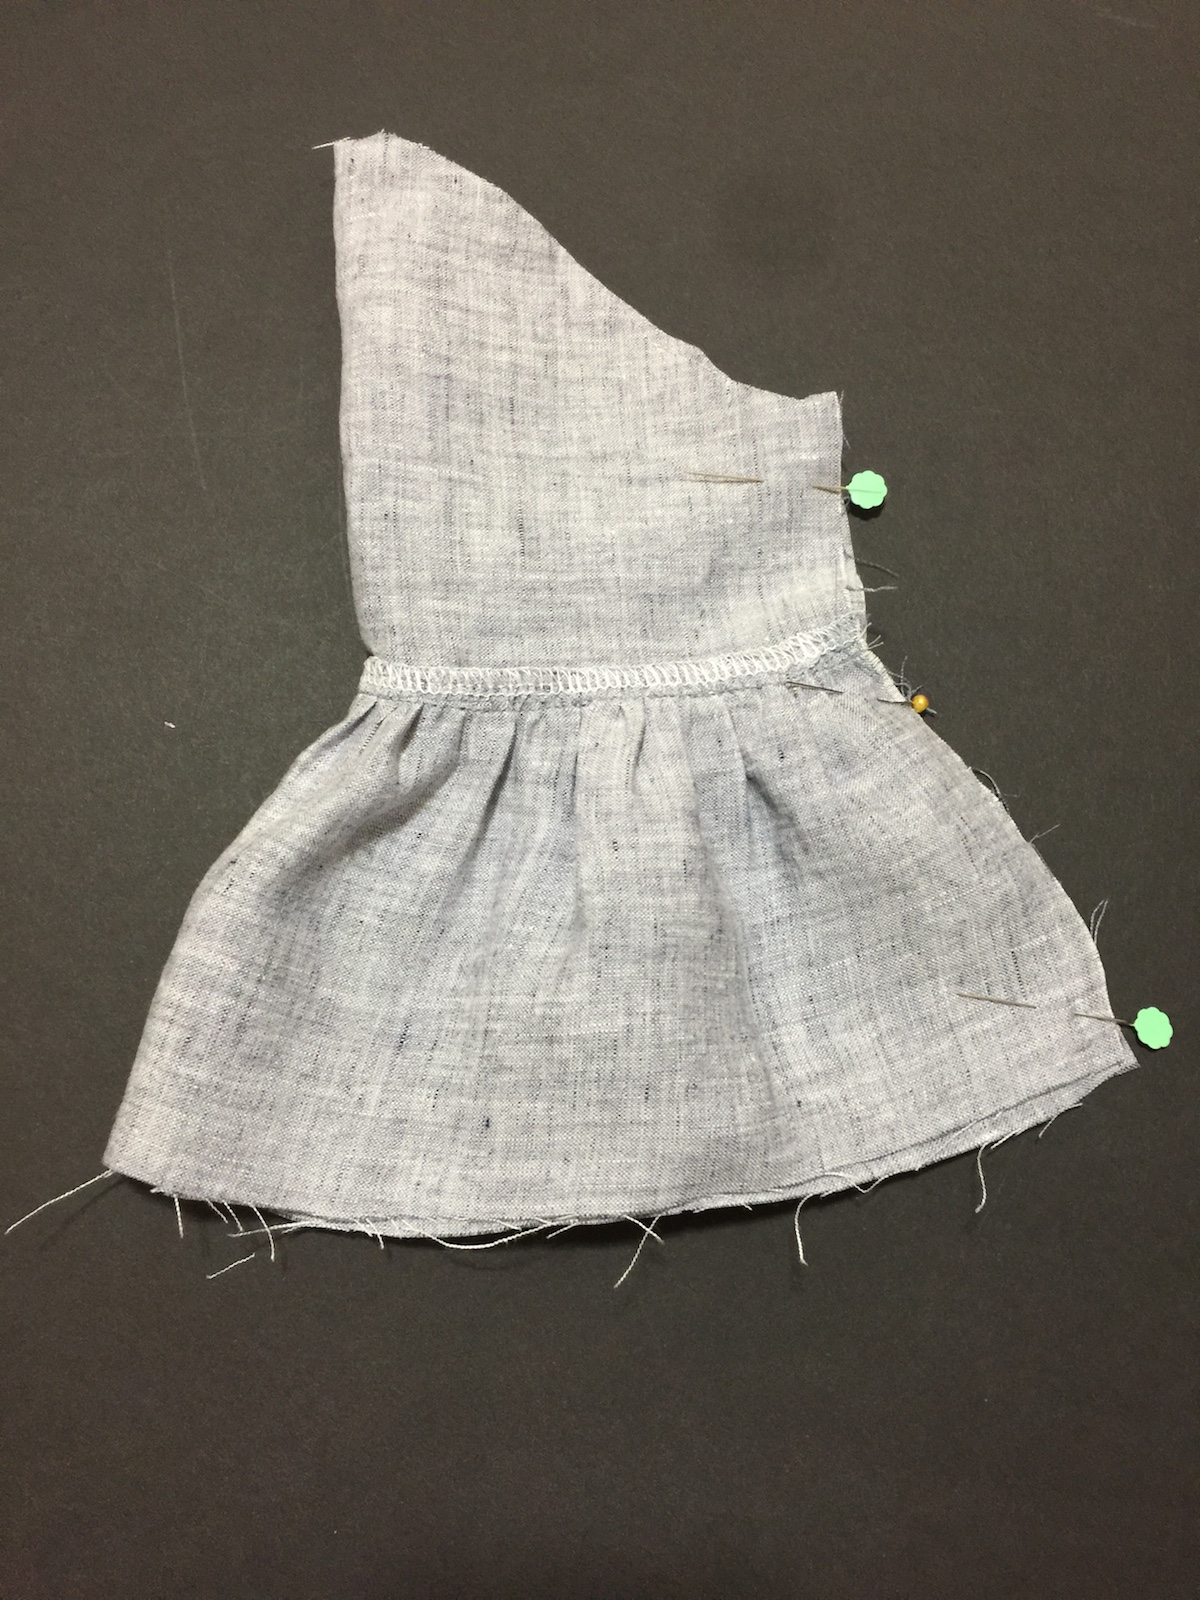
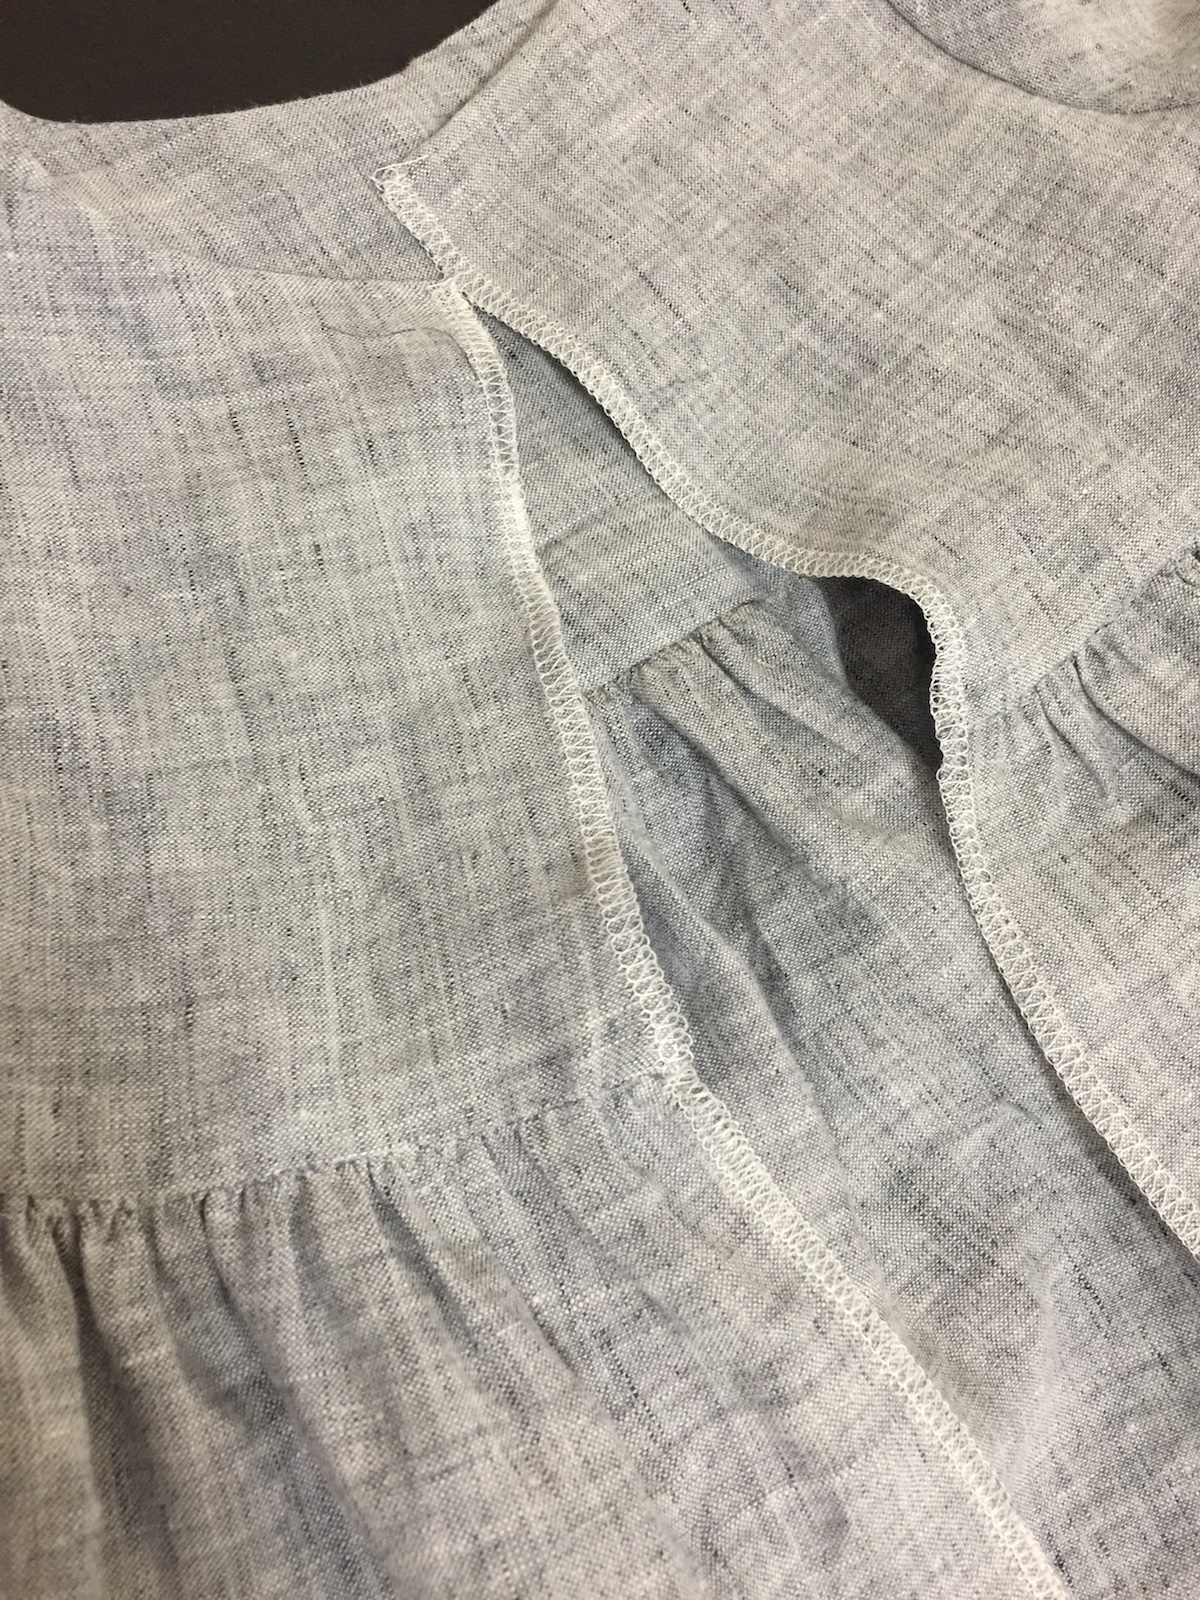
Sew the skirt to the bodice at 1/2″ seam allowance. Remove any basting stitches showing on the right side of the skirt. Iron the seam towards the top of the dress.
Step 20:
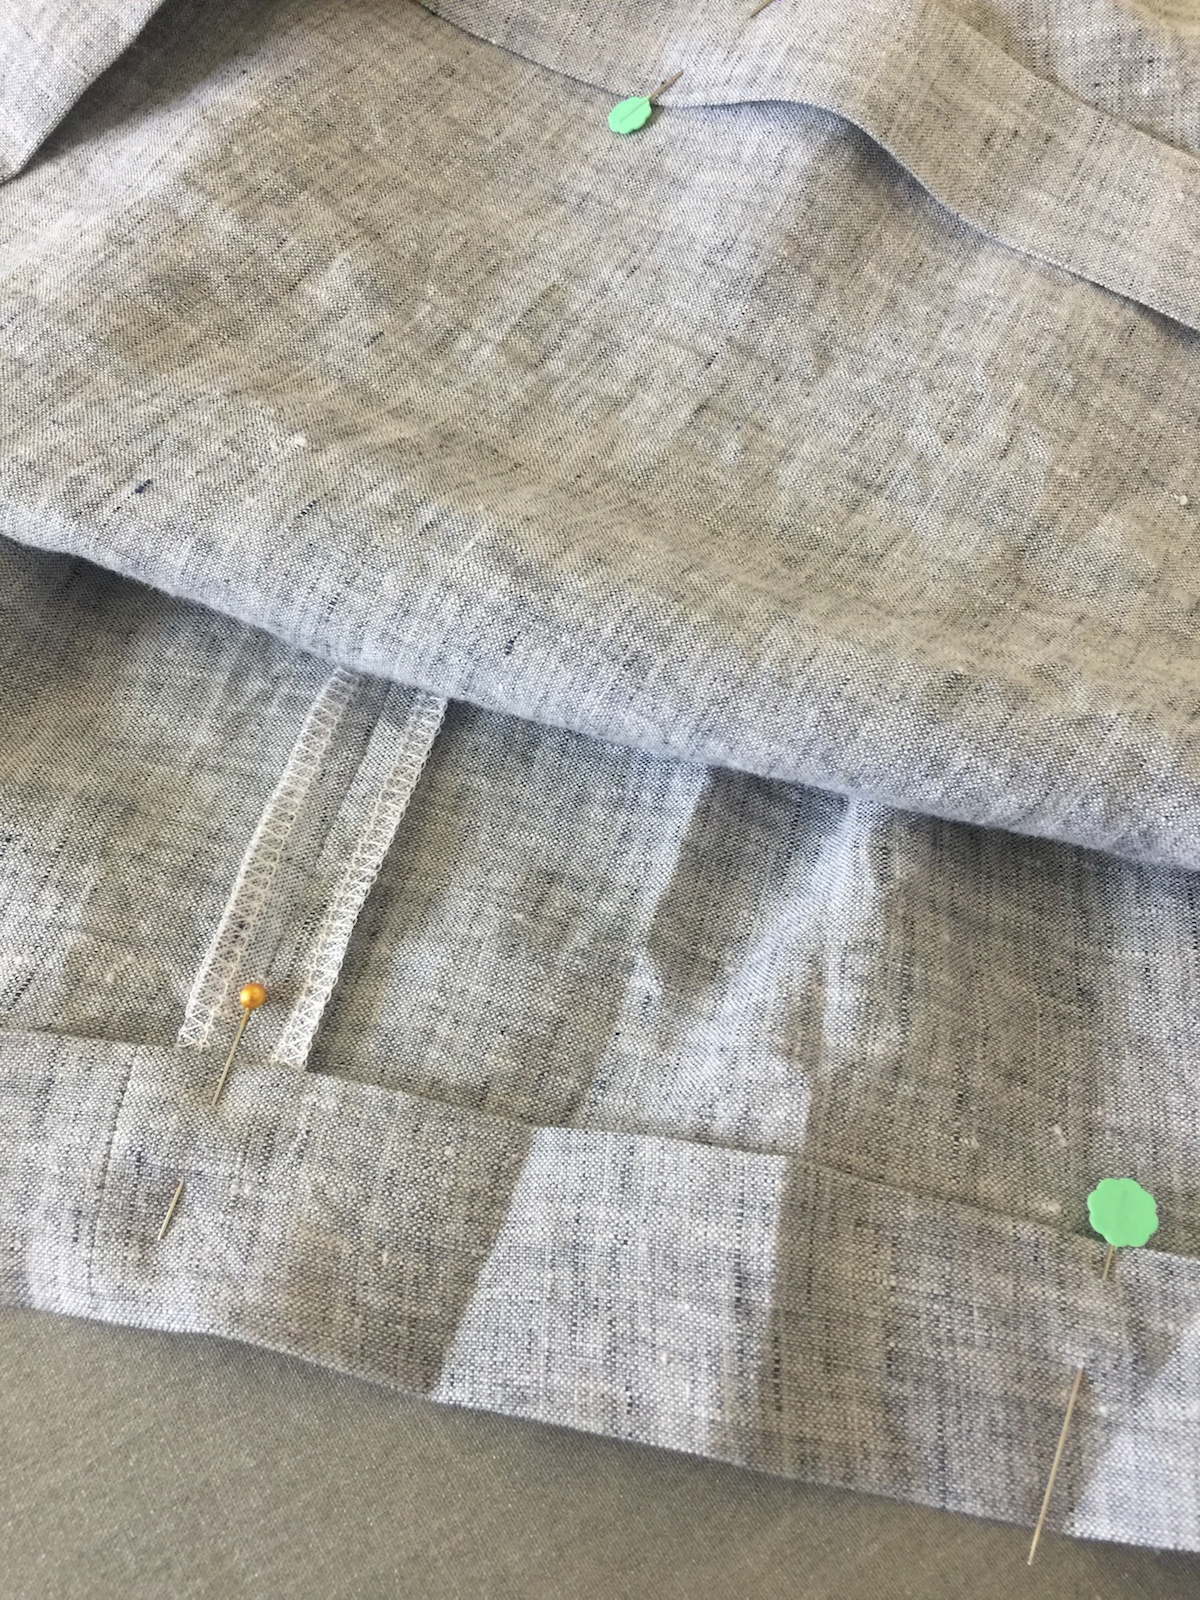
Pin the lining edge just barely past the skirt seam to hide the seam allowance for a clean finish at the waist.

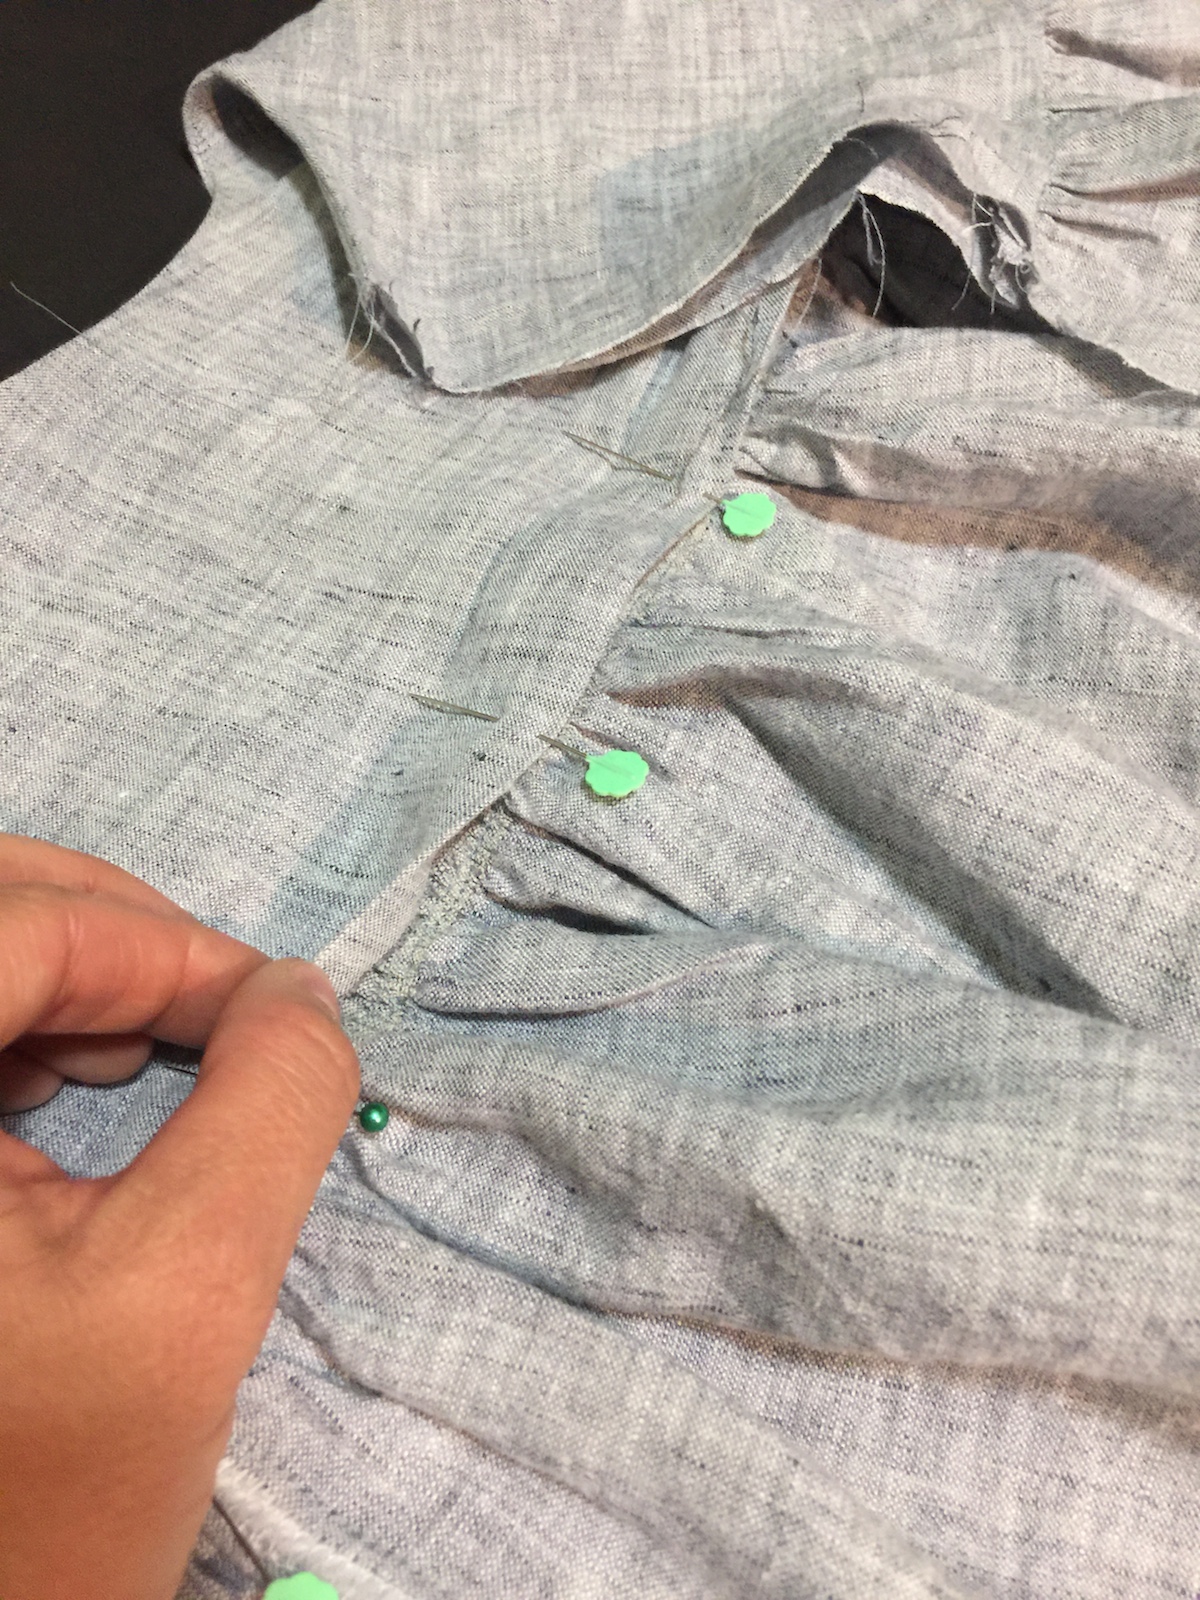
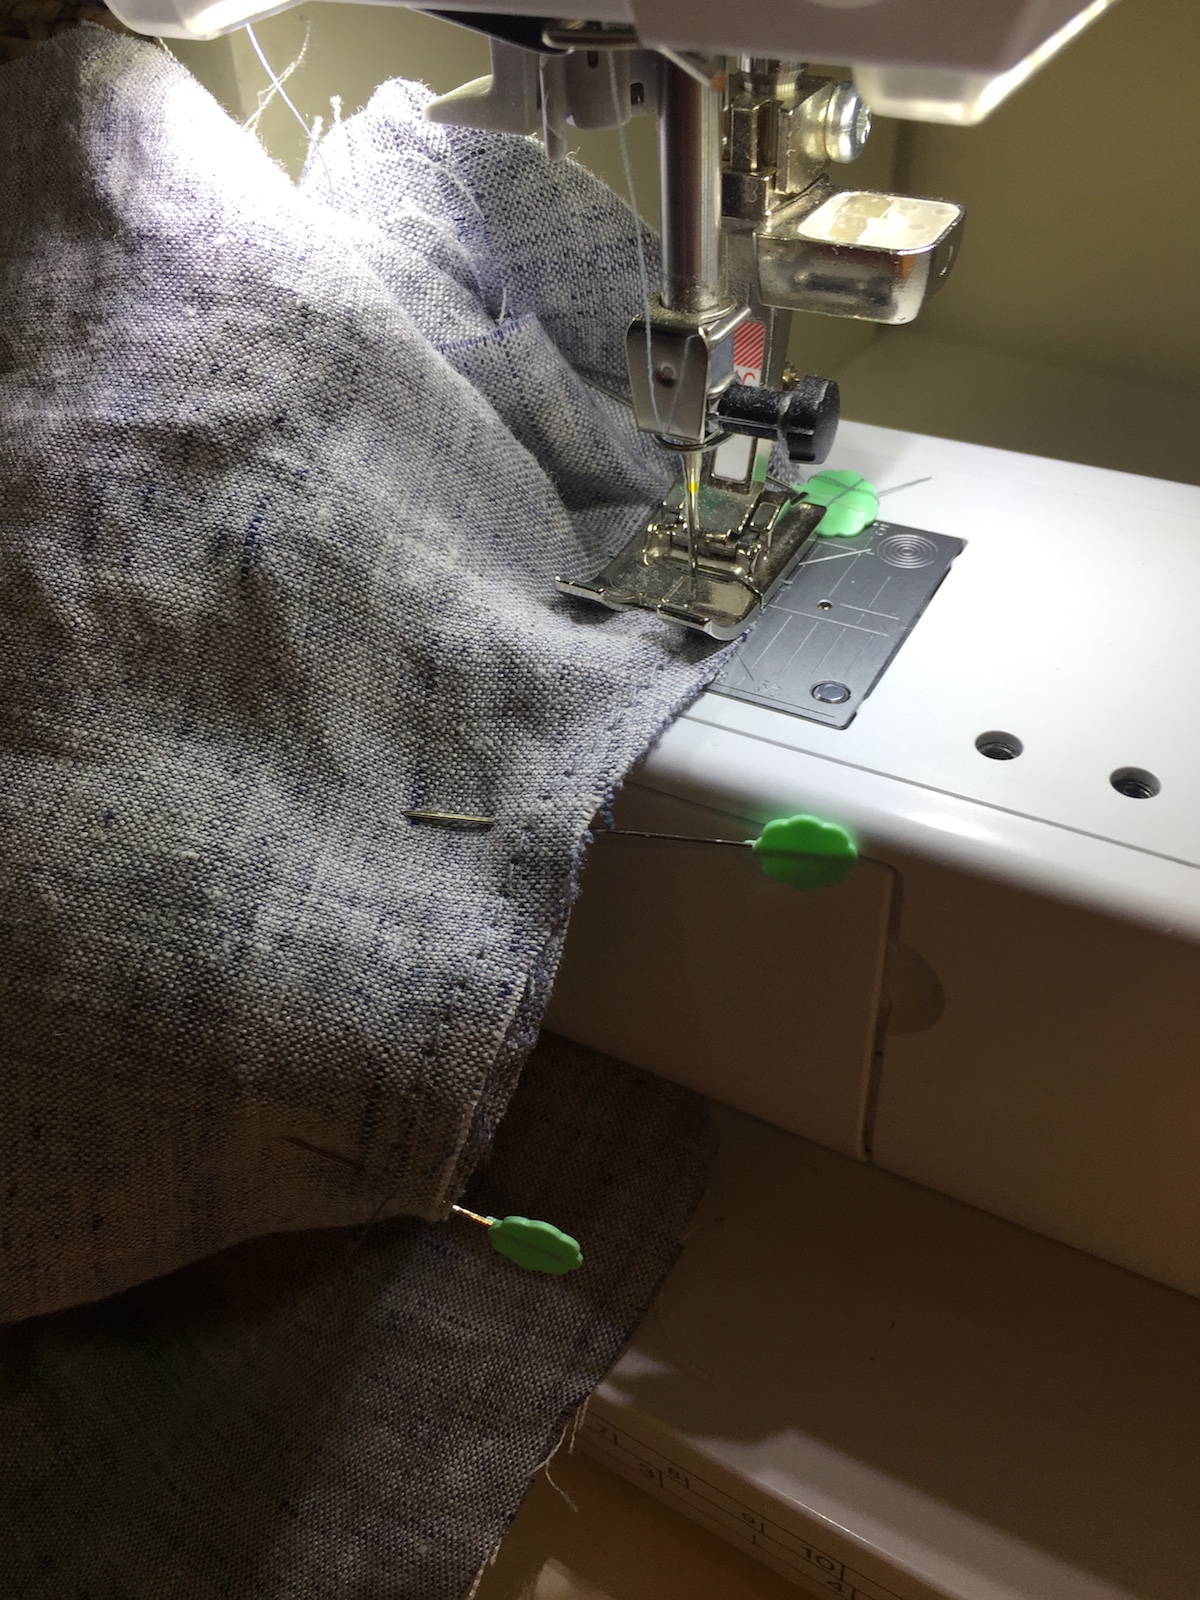
Step 21:
Using a needle and thread, sew the lining to the bodice using a blind hem stitch. You can also stitch in the ditch to finish this edge if you prefer.
Step 22:
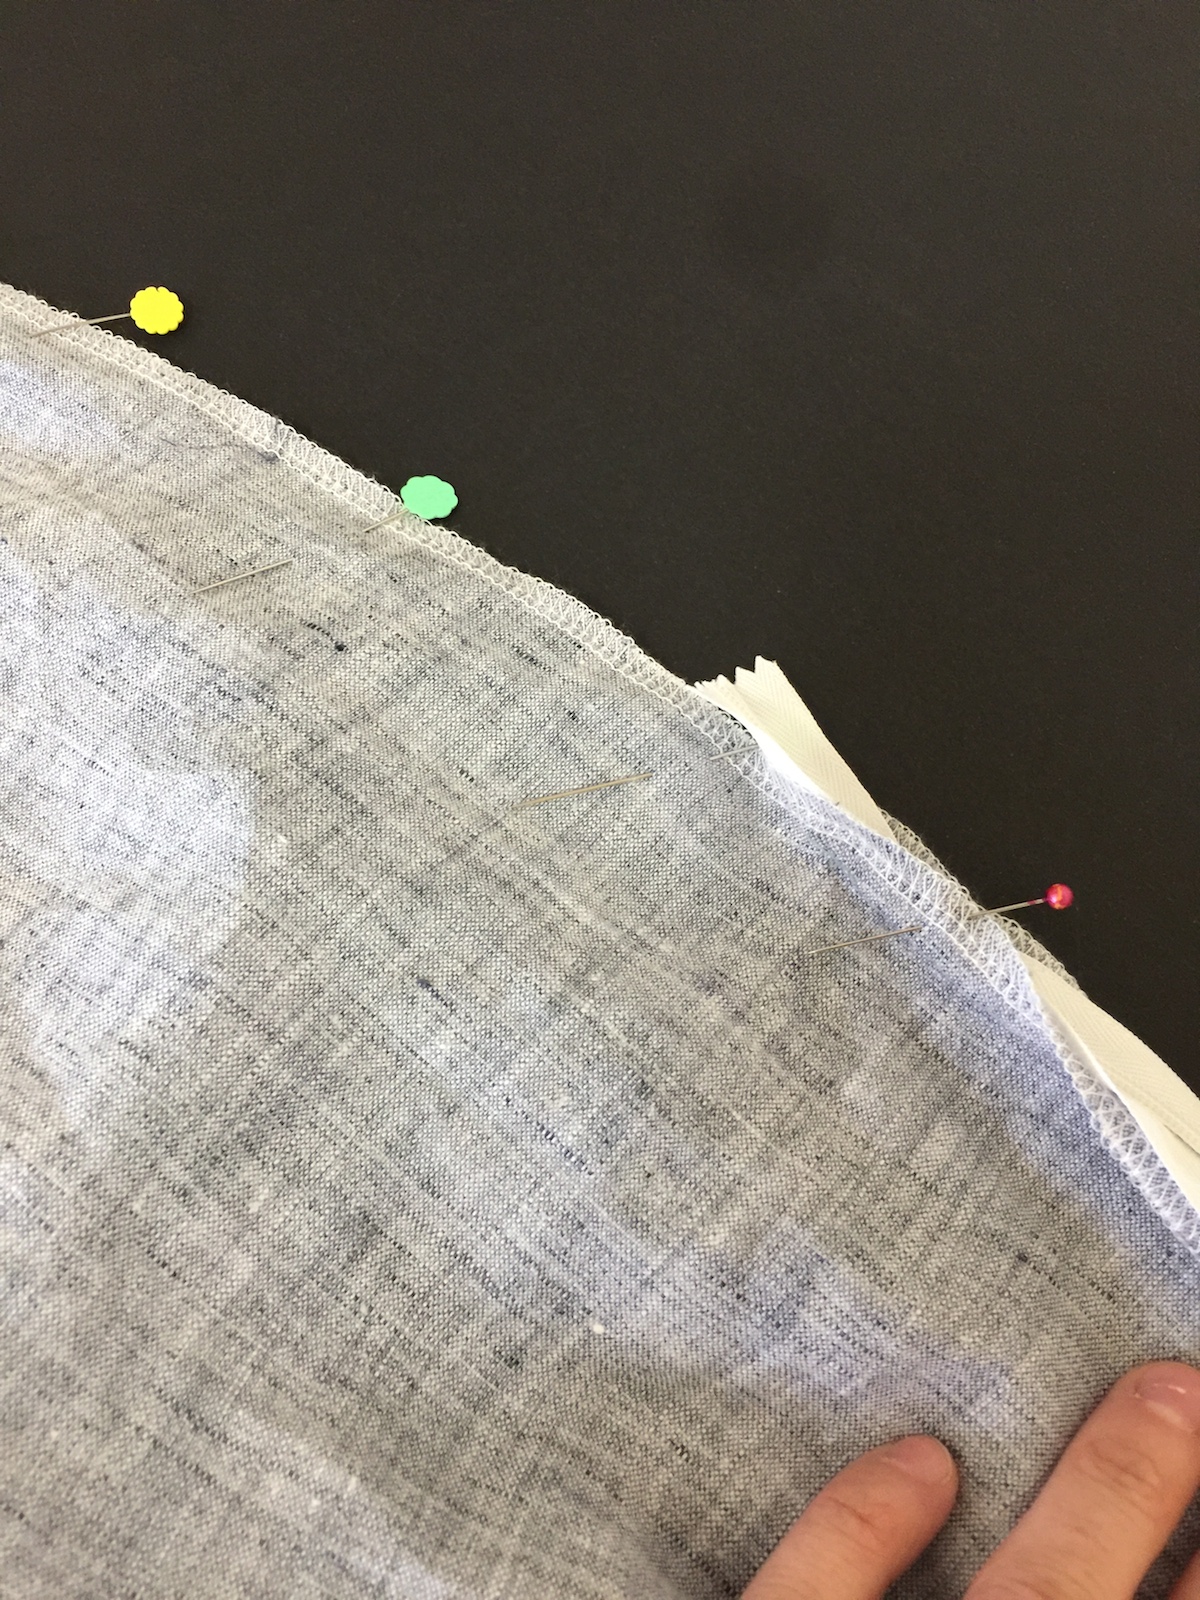
Finish the raw edges of the back of the dress:
Step 23:
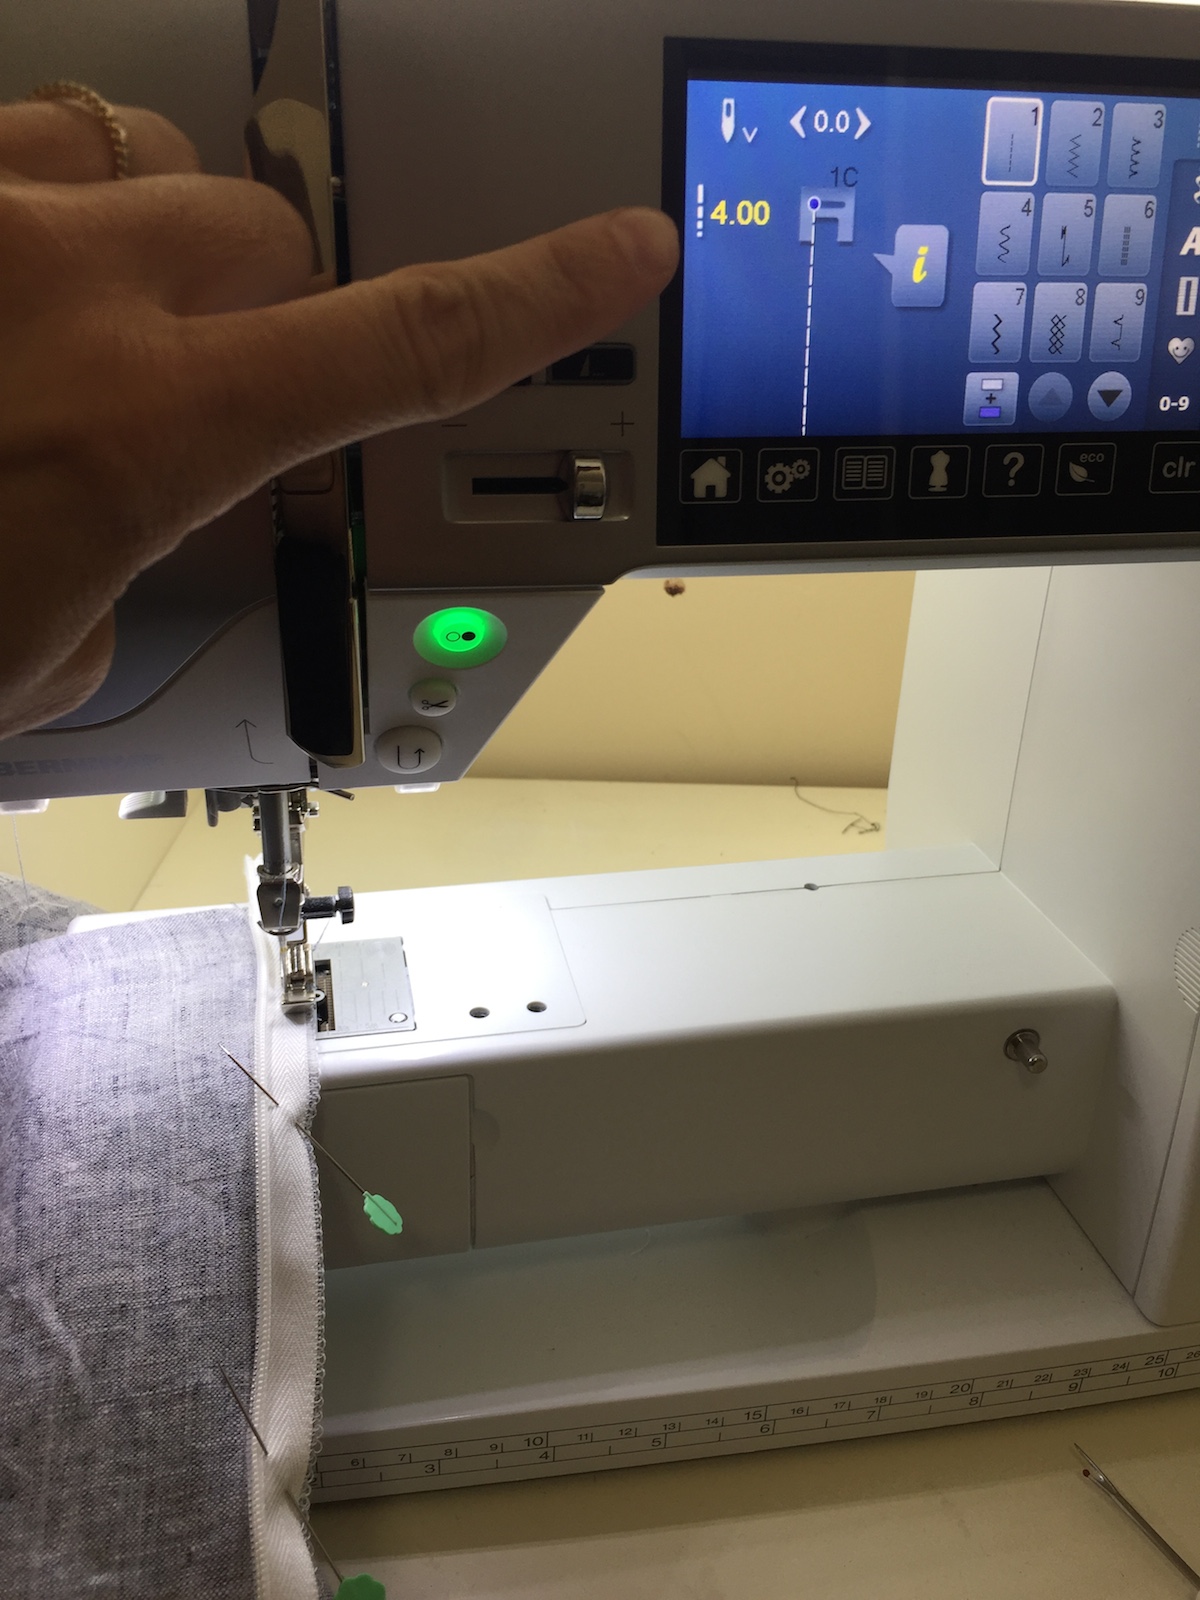
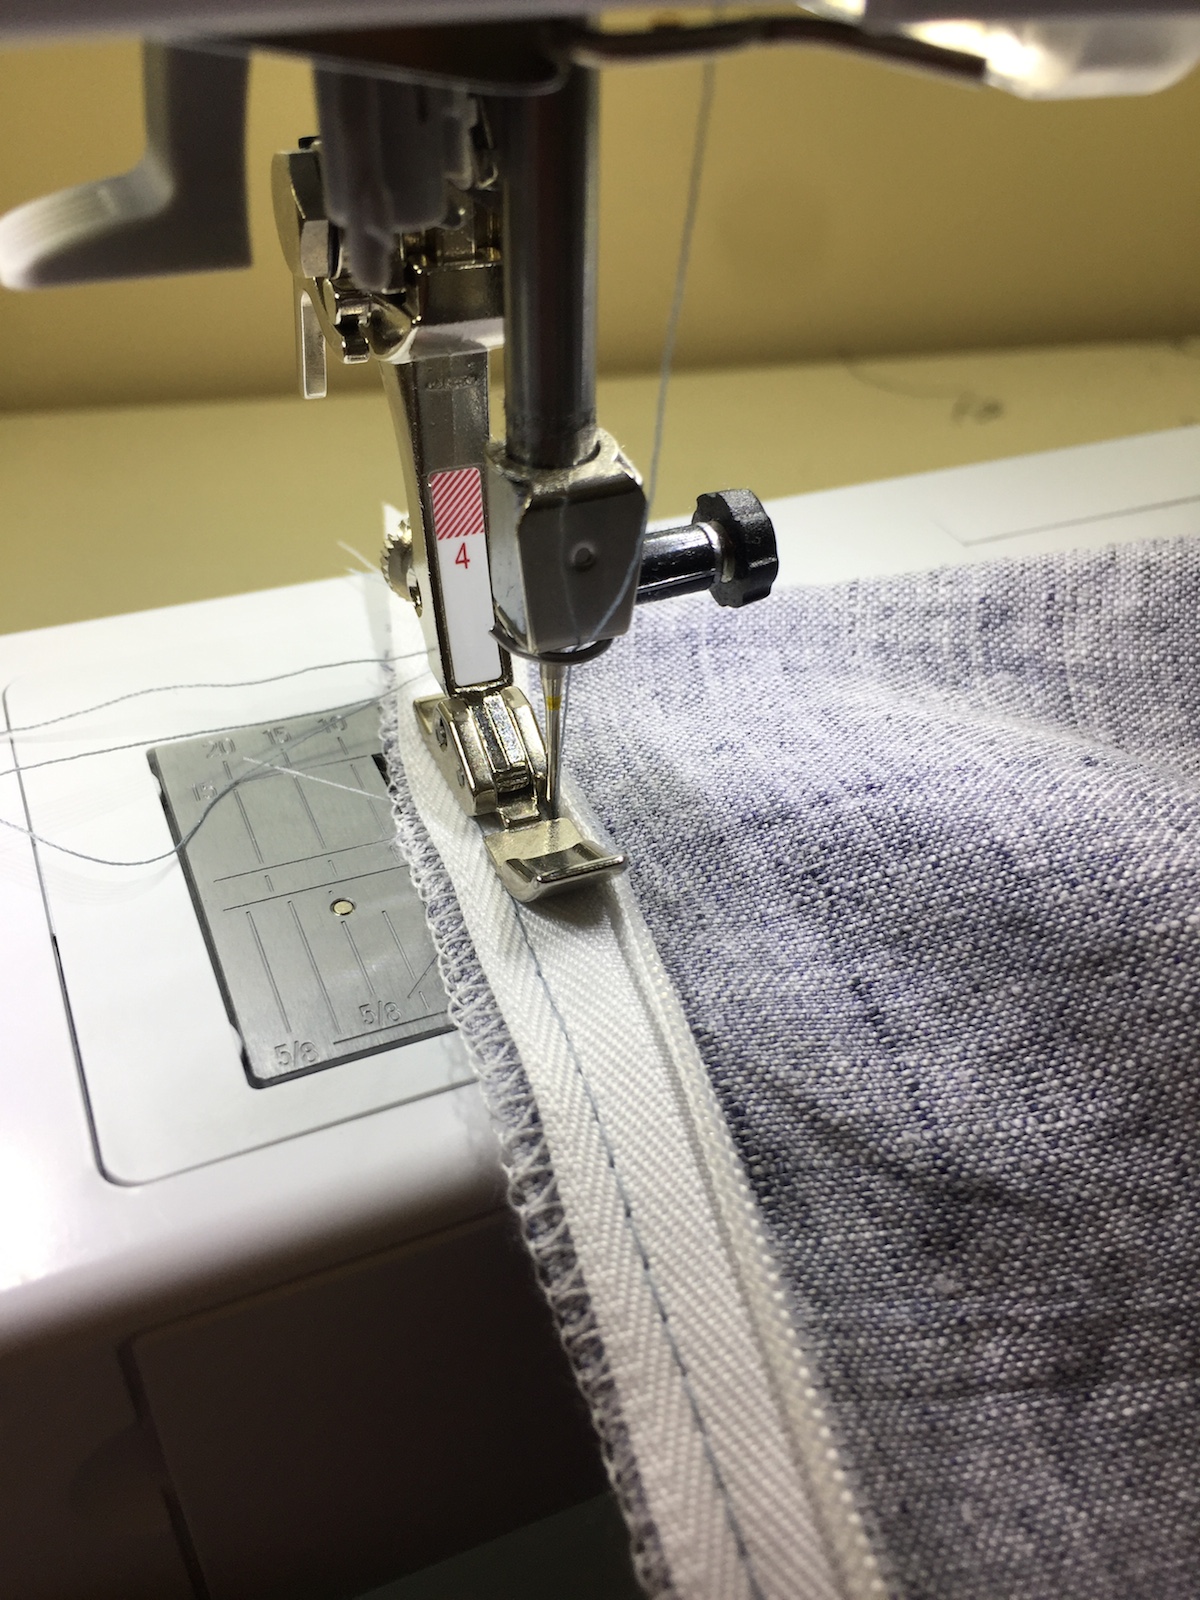
Get out your invisible zipper, and correctly align the right side of the zipper to the right side of the dress. Baste in place using a zipper foot and 4.00 stitch length.
Step 24:
Move your needle over to the left as far as it will go.
Step 25:
Using your zipper foot, get the needle as close to the edge of the zipper teeth as you can, and sew in place.
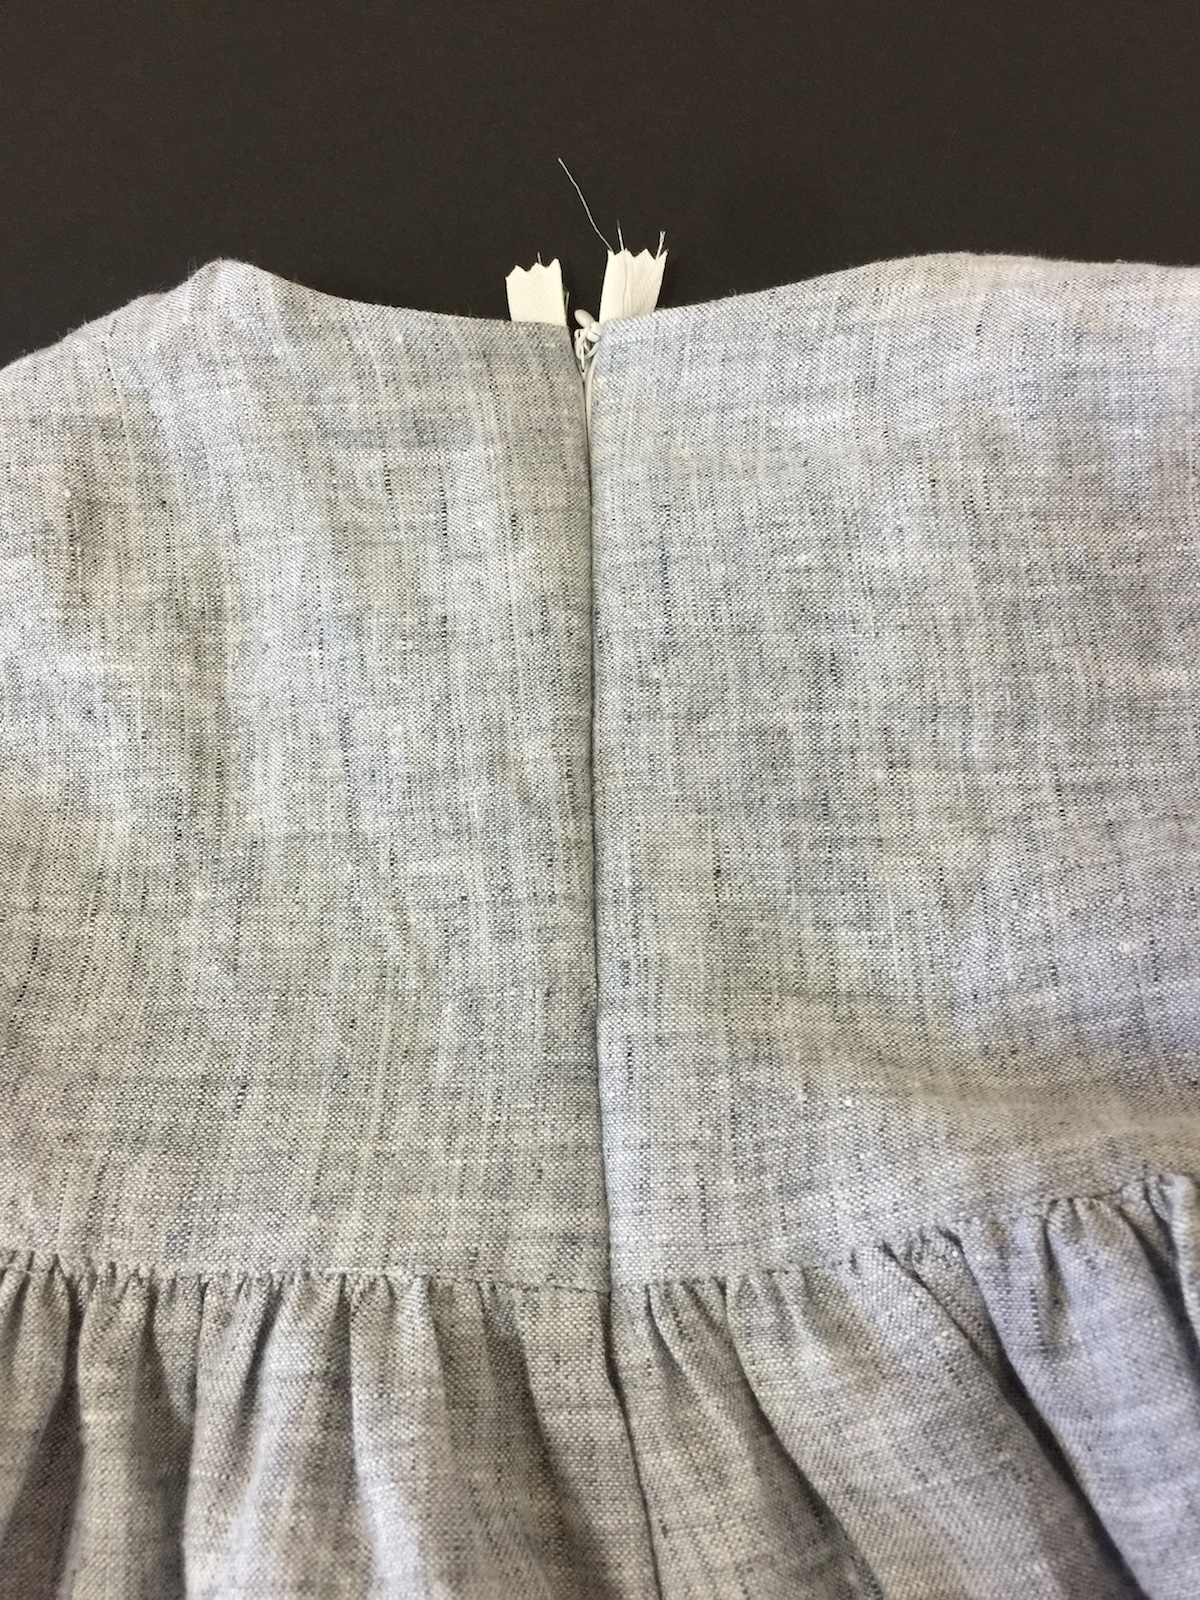
Step 26:
Zip up the zipper and gently mark where the waist seam is on the other side of the zipper tape. This will help us line up both sides of the zipper evenly.
Step 27:
Line up the tape correctly on the other side of the dress back. Move the needle all the way over to the right side and sew your zipper in place once again.
Step 28:
Zip up the zipper to make sure everything lines up correctly, and iron the right side of the dress flat.
Step 29:
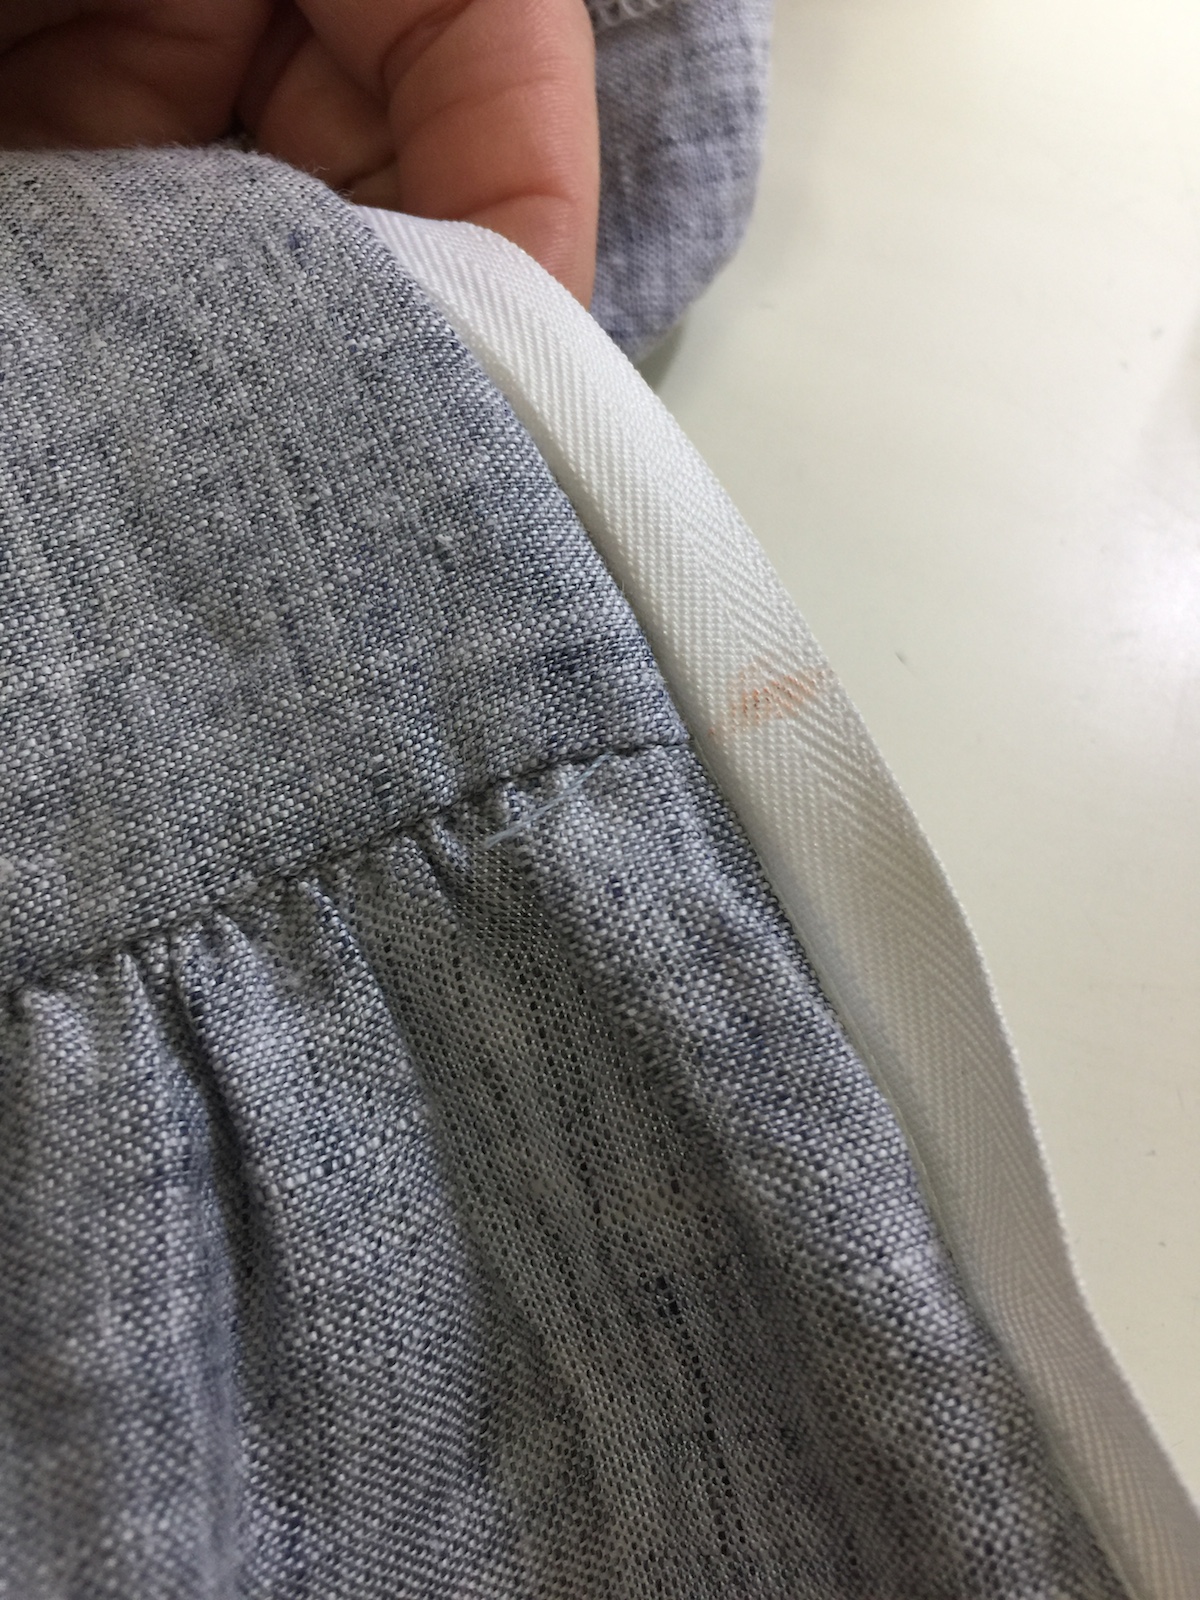
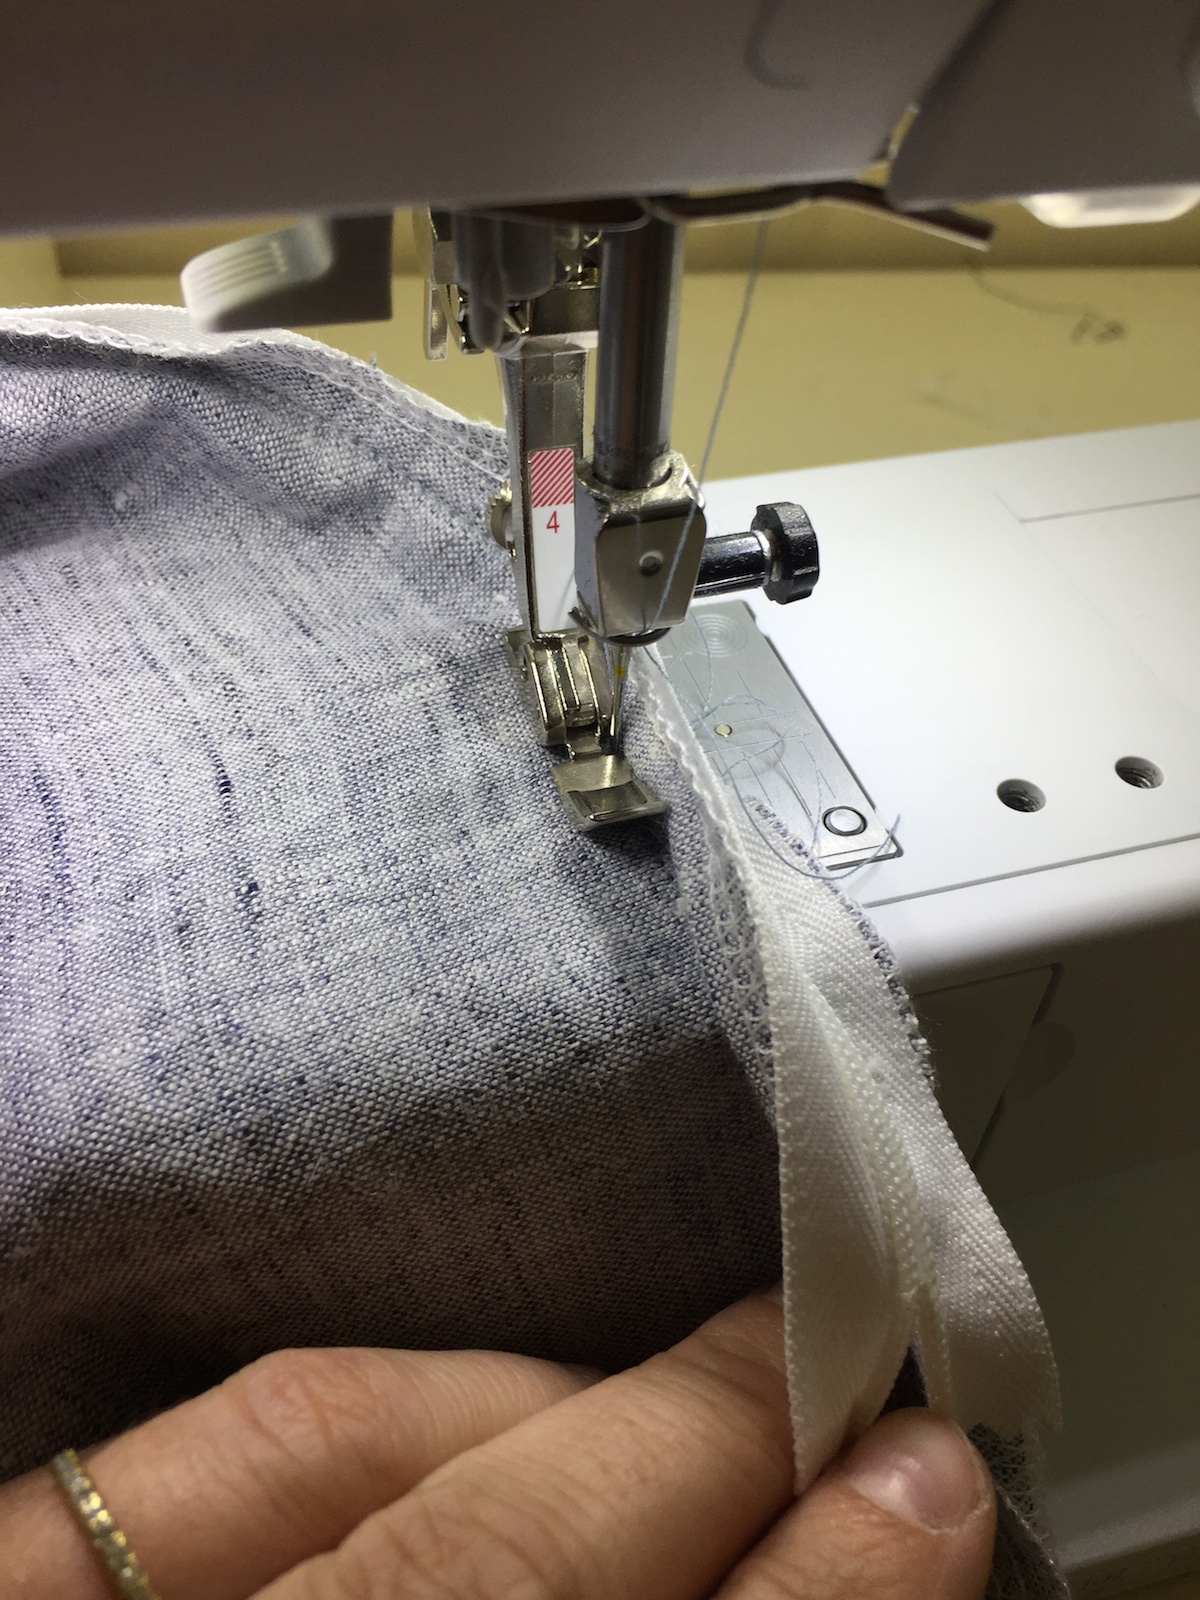
To finish the neckline, fold the top edges of the zipper tape behind the seam, and fold the seam one more time. Hand sew the zipper tape to the back of the dress edge.
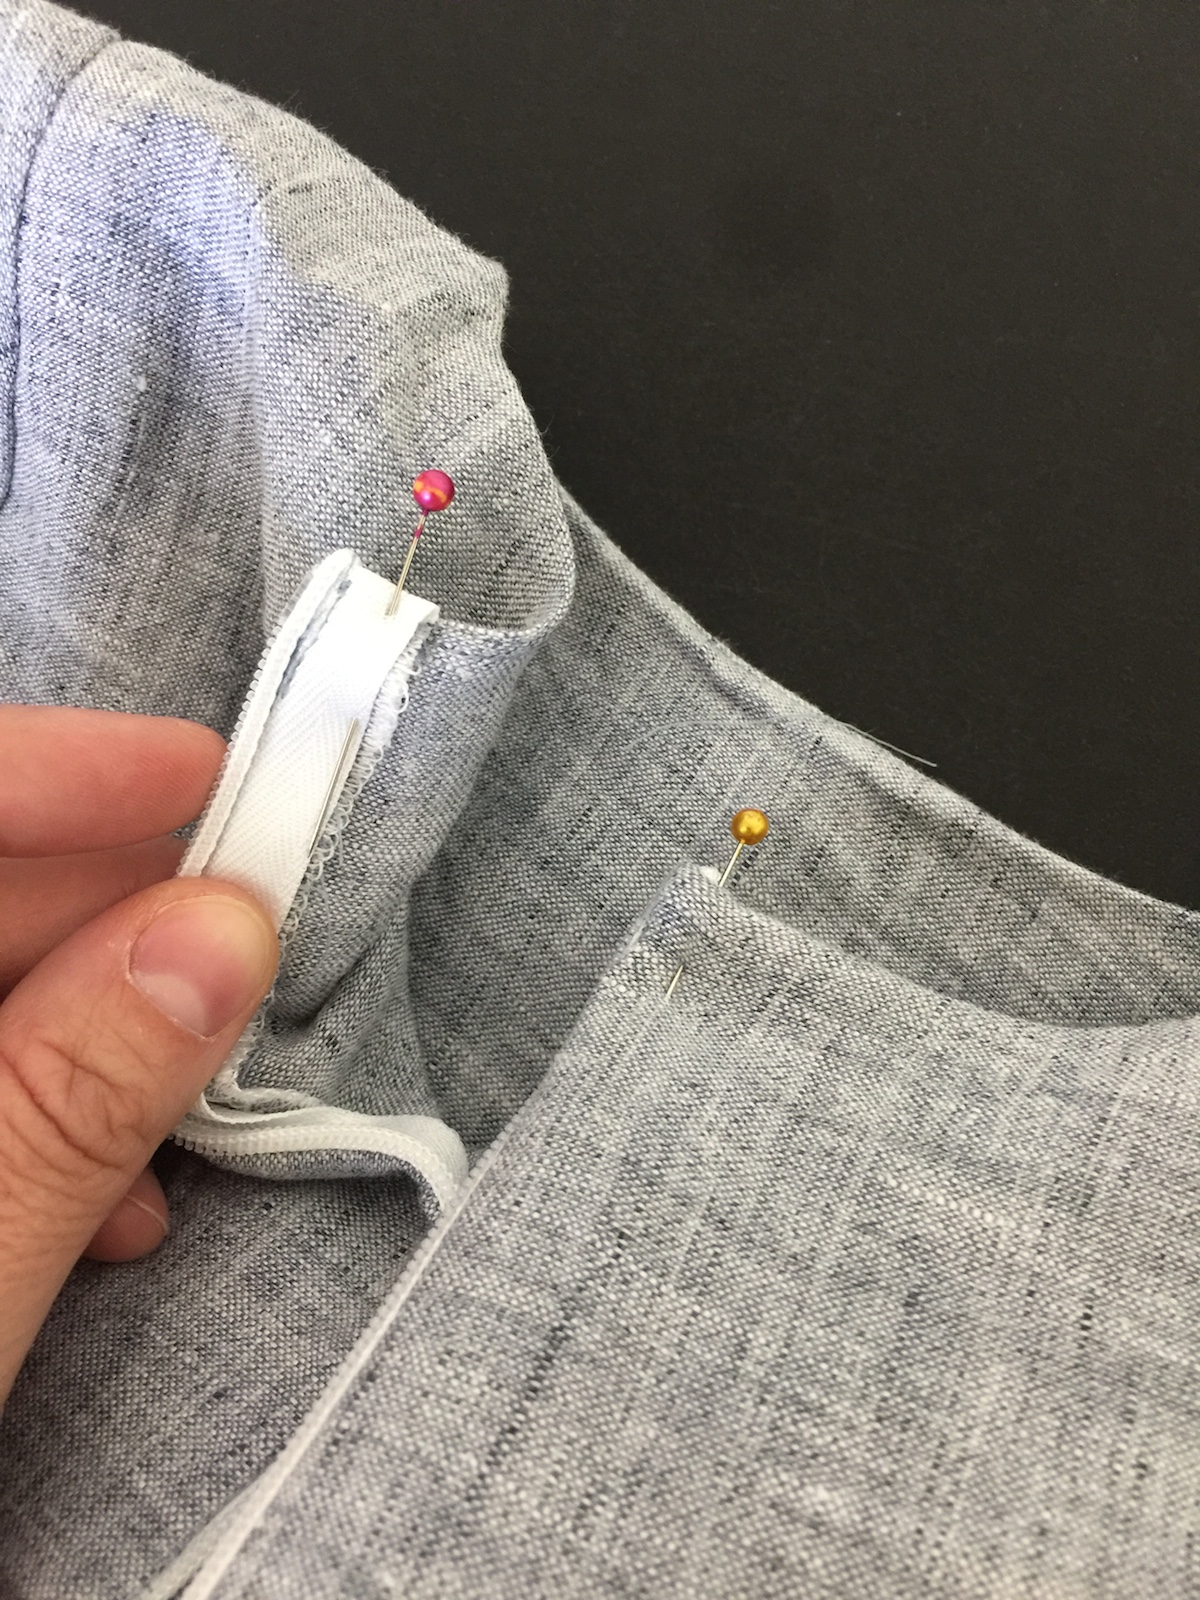
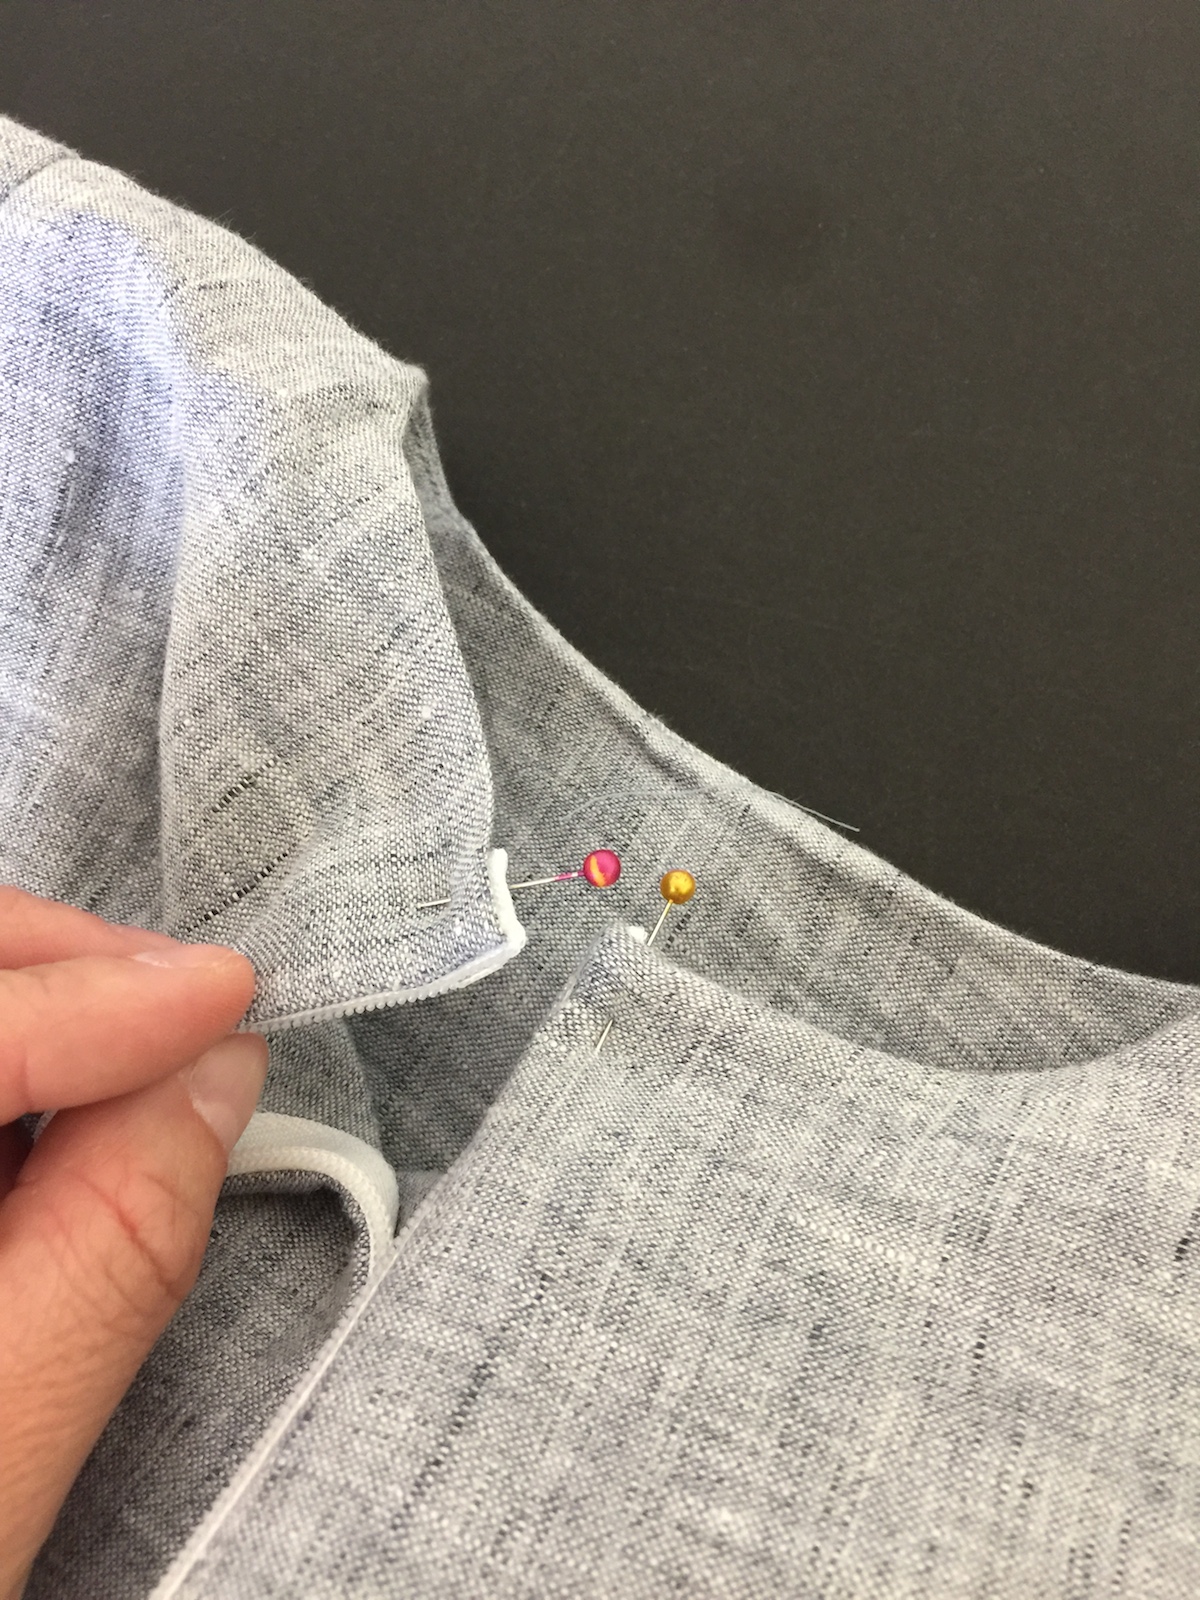
Step 30:
Pin the back edges of the dress right sides together all the way up to the zipper seam.
Step 31:
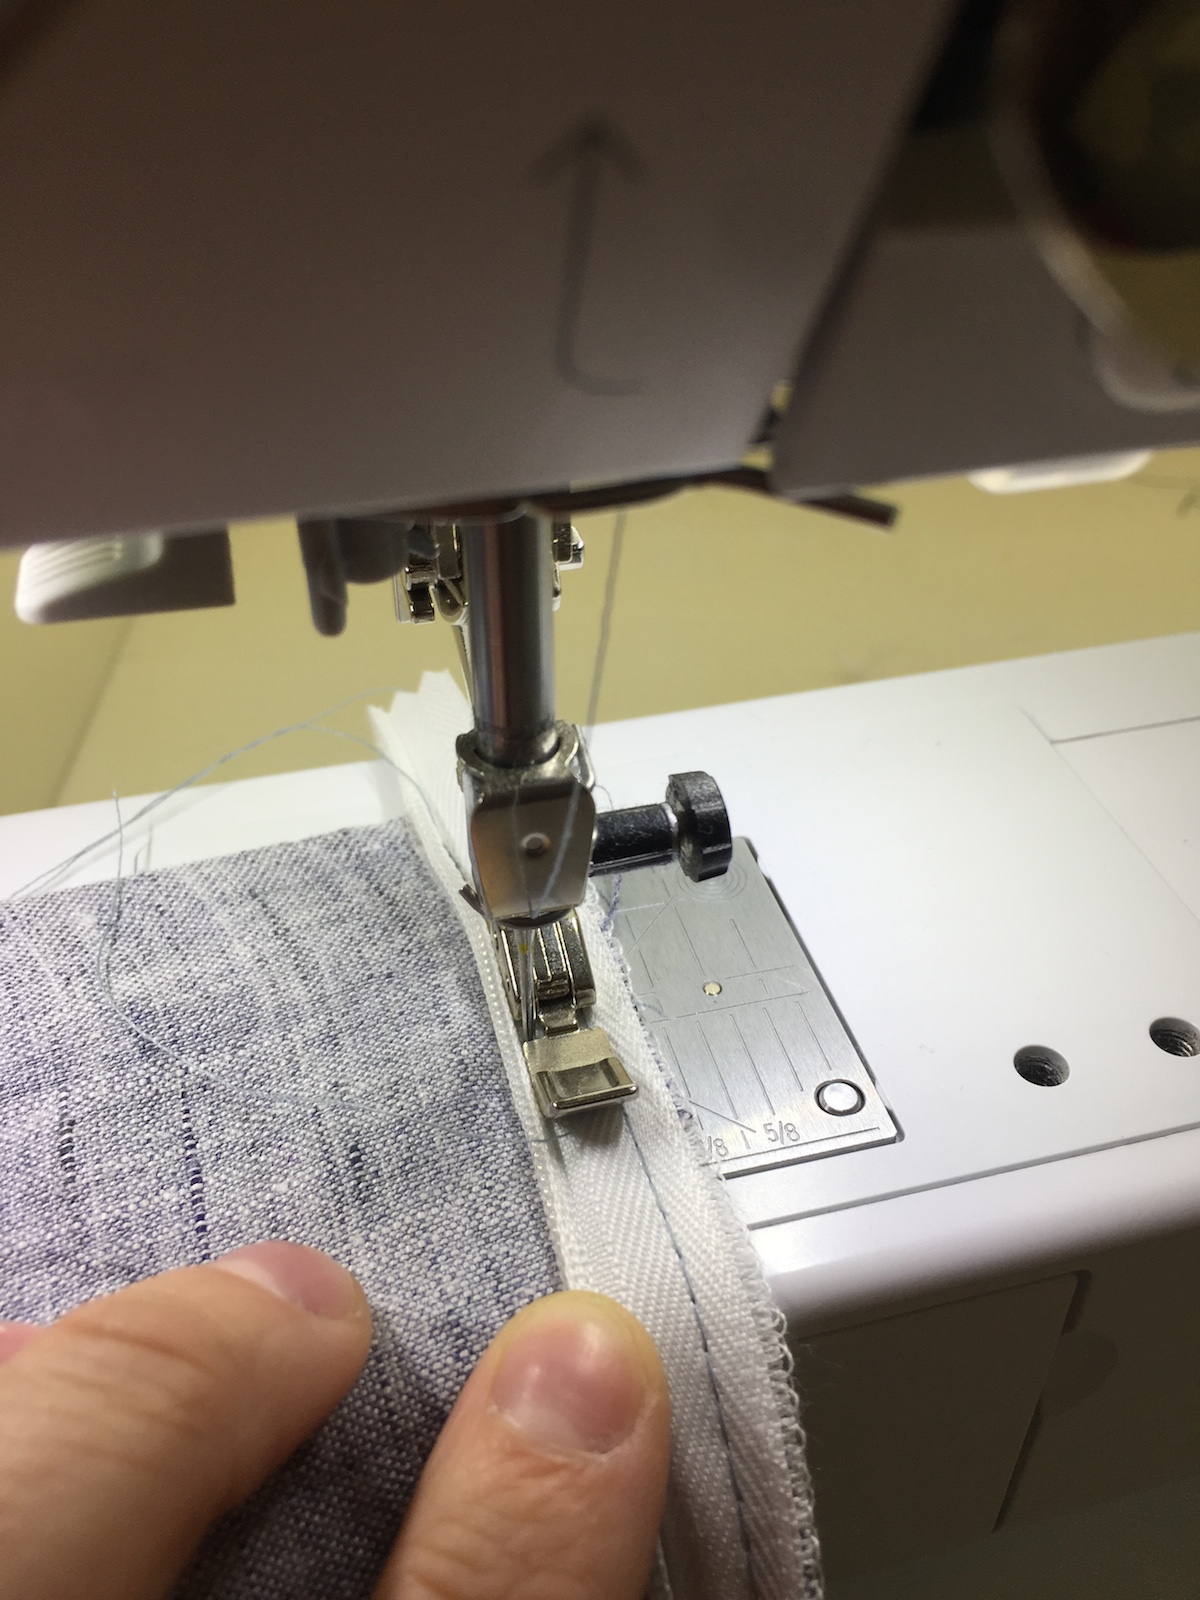
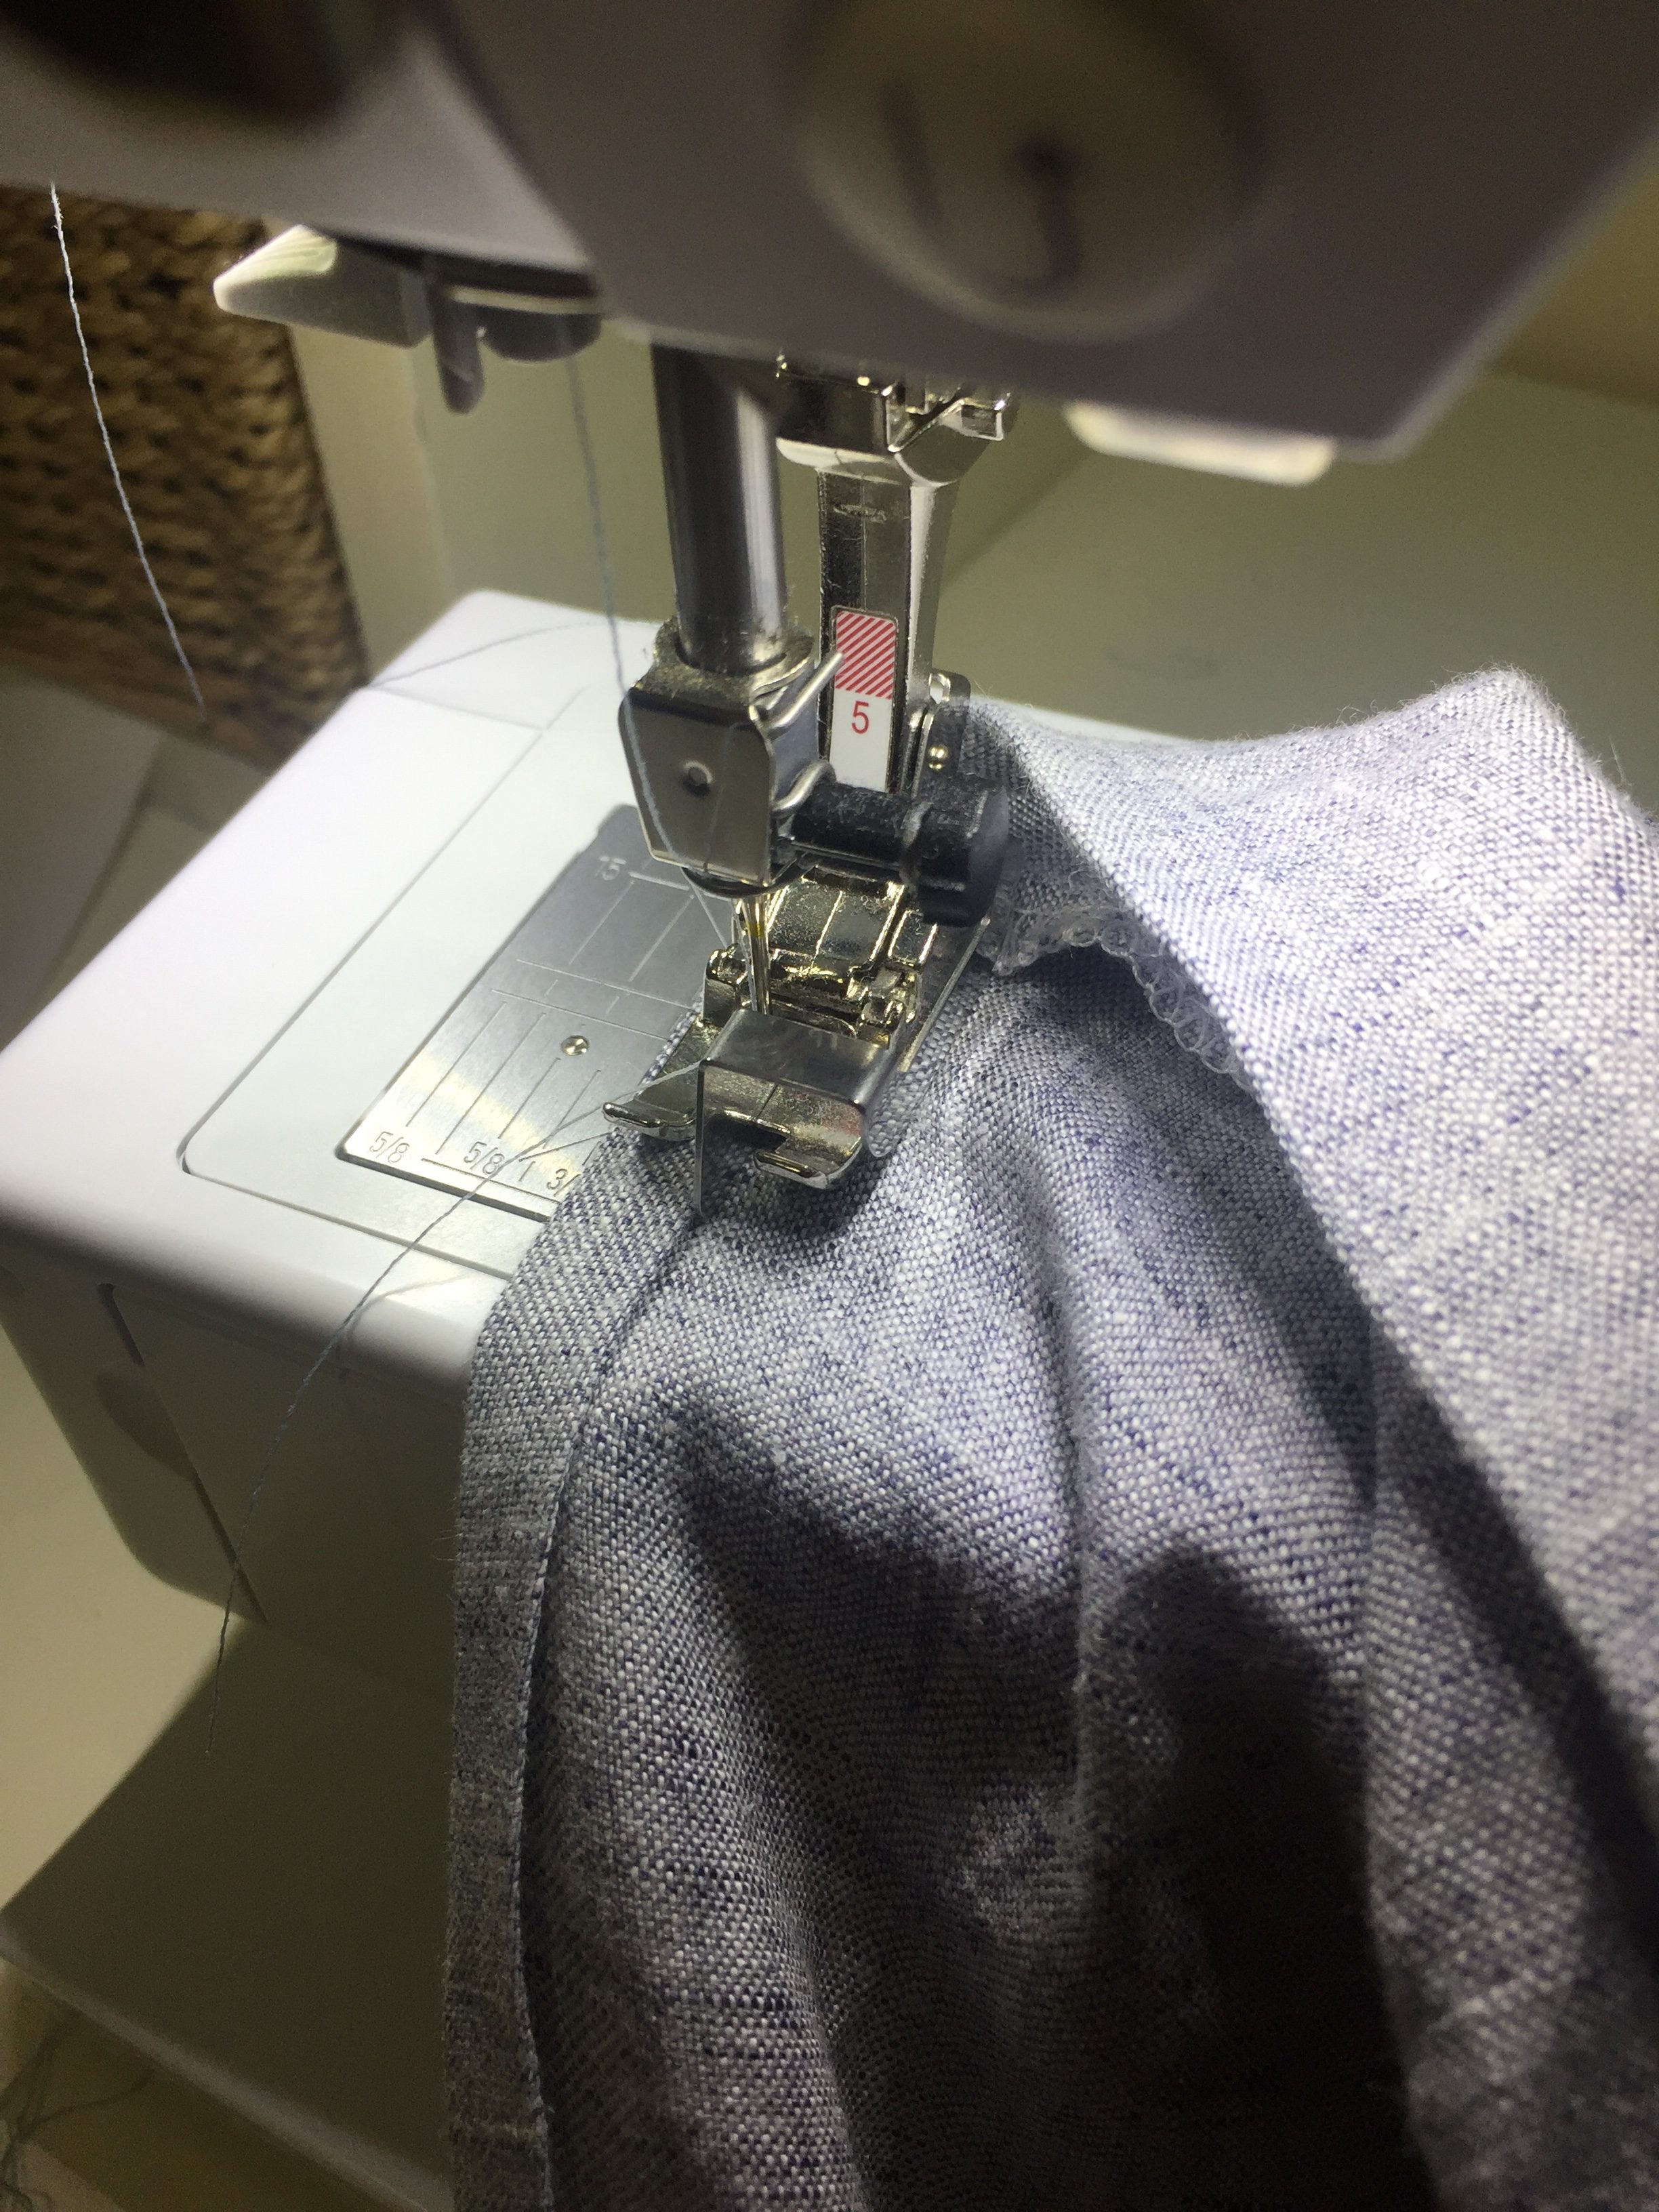
Using your zipper foot again, move your needle to the right and start sewing down from the end of the zipper seam to the hem of the dress.
Step 32:
Iron the back seam of the dress open.

Step 31:
Iron the raw edges of the sleeve ruffle in at 1/4″ twice, pin in place, and sew using an edgestitch foot #10/#10C/#10D. Make sure to move your needle over 2 or 3 times to the left.
Step 32:
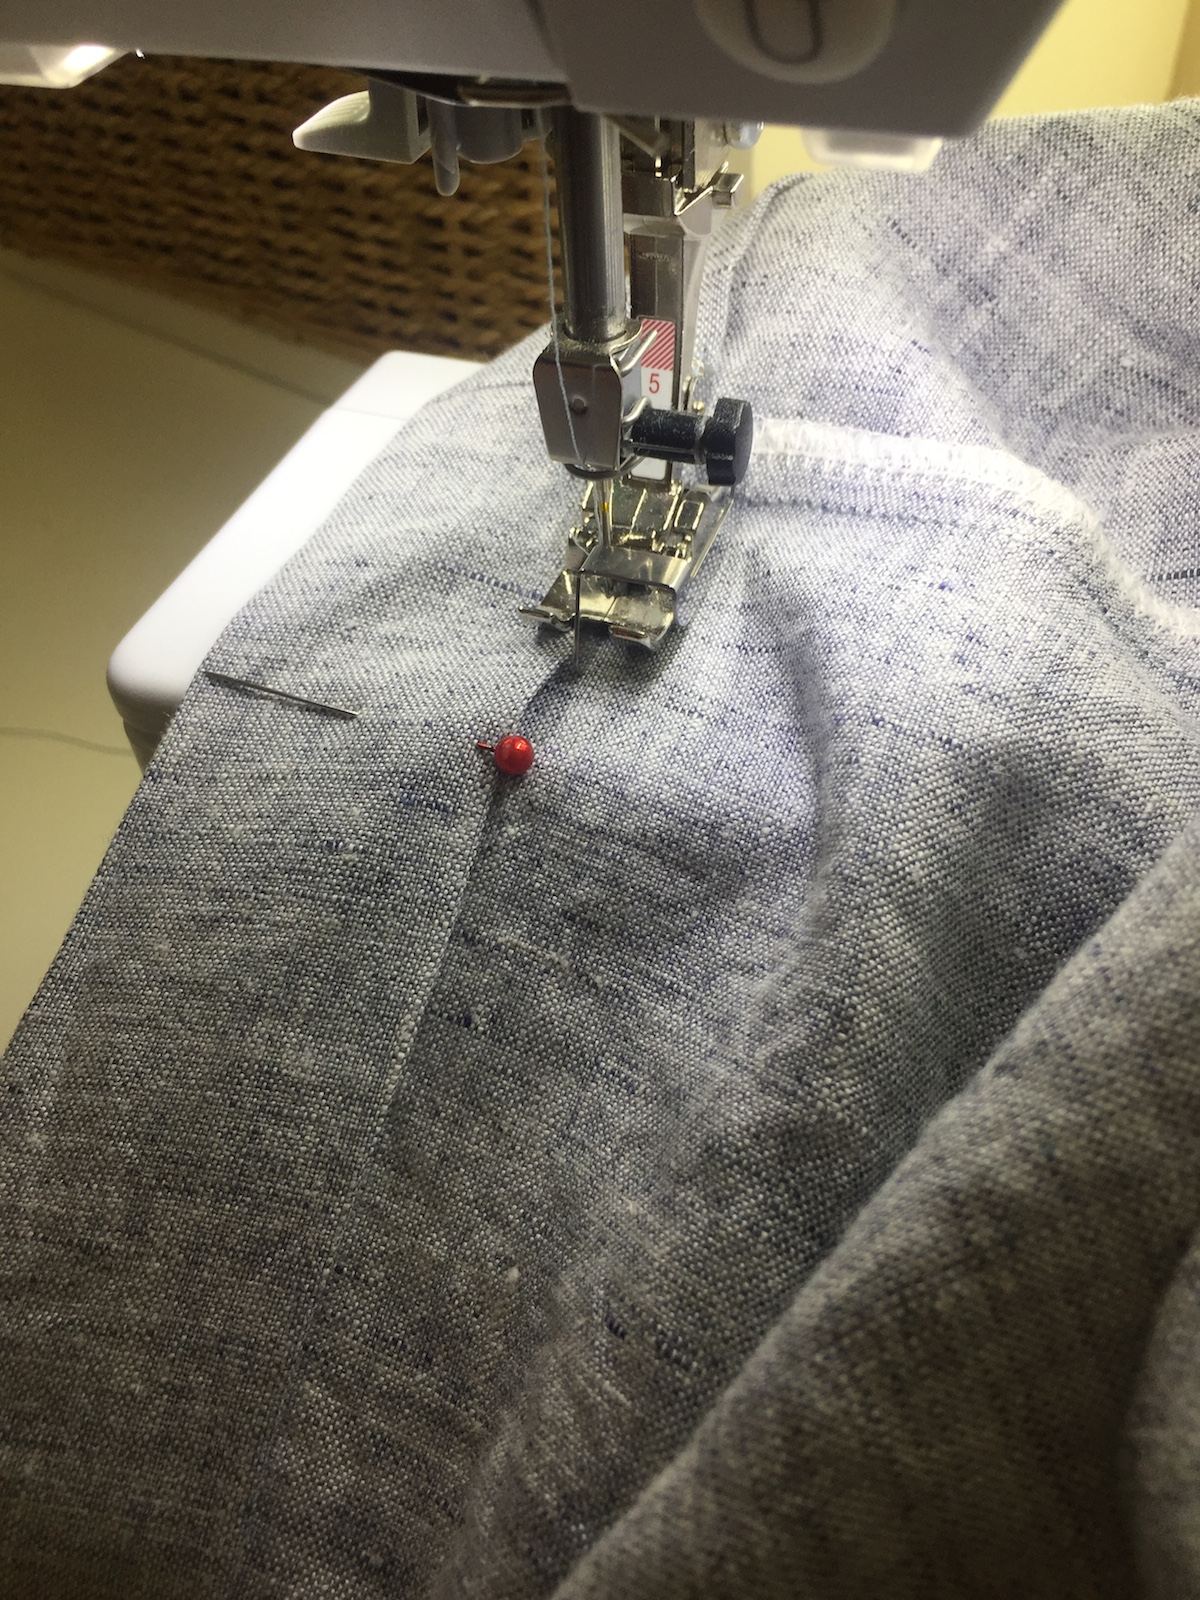
To hem the dress, iron the raw edge up at 1/2″ and then iron it up again at 1 1/2″. Pin in place.
Step 33:
Sew using an edgestitch foot #10/#10C/#10D. Make sure to move your needle over 2 or 3 times to the left.
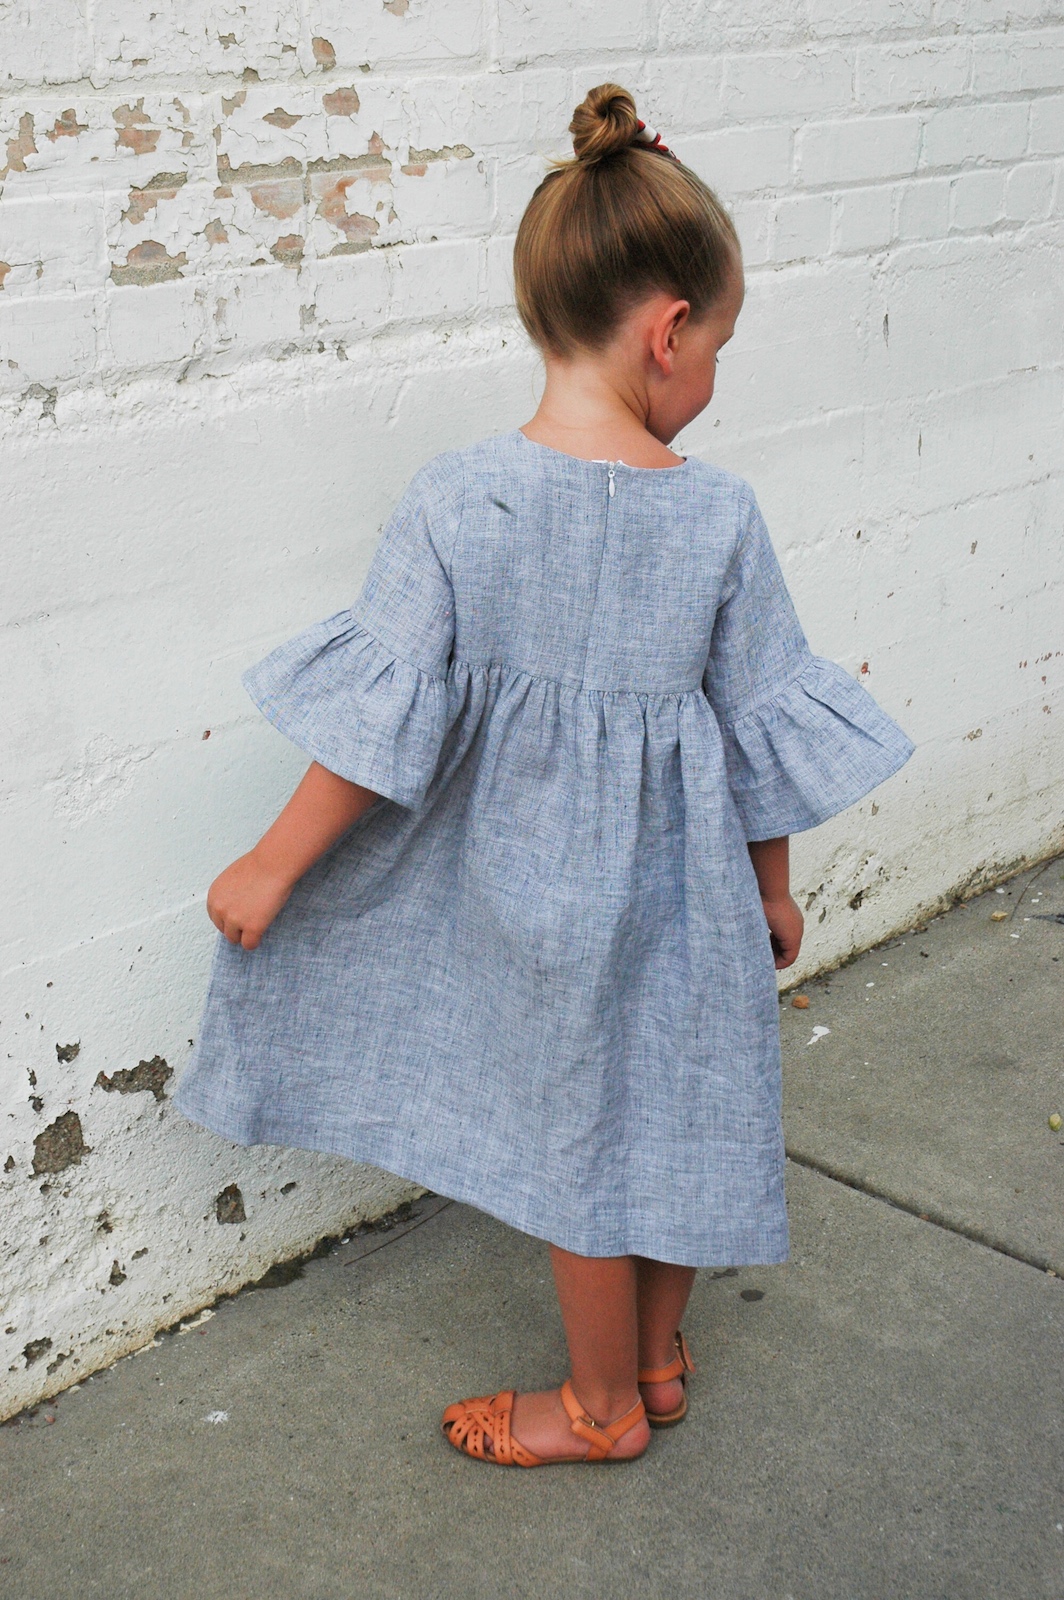
Give the dress a good press and you’re all done!
I love this style in linen, and it’s so pretty when being worn. I think I’m just going to make everything out of linen from here on out to the end of summer! Thanks for following along and happy sewing!
Used Products


What you might also like


7 comments on “How to Sew a Girl’s Summer Dress”
-
-
I am actually working on this cute little dress. My model is 8 YO, her measurements are Height 50.25”, weight 55.5lbs, chest circ. 25”. I made a muslin in the size 7 and it is too small. So I am going to try the 10. What additional length do you suggest I add to the bodice and the sleeve? I am wondering if there is a formula I am not aware of. I do notice the bodice pattern is for a knit top. So maybe that is why the 7 is too tight in a woven? Thank you for any suggestions.
-
I made the dress. I used the size 10 bodice and sleeve for my friend’s 8 year old daughter. I lengthened the sleeves a bit and added the ruffle. It is so very cute. I used a linen with a little stretch. I have a Bernina 770QE.
-
Hi Bernina Fam
I really love this design and I was wondering if there is an adult version of this dress??
?
Belinda-
I would think this could be easily done with a plain women’s blouse pattern (although I wouldn’t pick a knit pattern). The skirt could be ‘high-low’ or straight, or shortened to make a tunic top. On linen, some decorative stitching or embroidery would really dress this up. My wheels are spinning!
-
-
After I read the free pattern instructions, I was wondering how the sizing translated for a woven vs. a knit, as called for in the original pattern? I would think I would need to pick a size or 2 up from the child’s chest measurement to have this work.
-
I really like this dress, however, I cannot find the pattern. The patterne links to a girls t-shirt. What am I doing wrong?
Leave a Reply
You must be logged in to post a comment.

This is so adorable and sylish! And, the instructions are easy to follow. I must make one for my (some day) granddaughter, Marigold! Thank you for the inspiration!