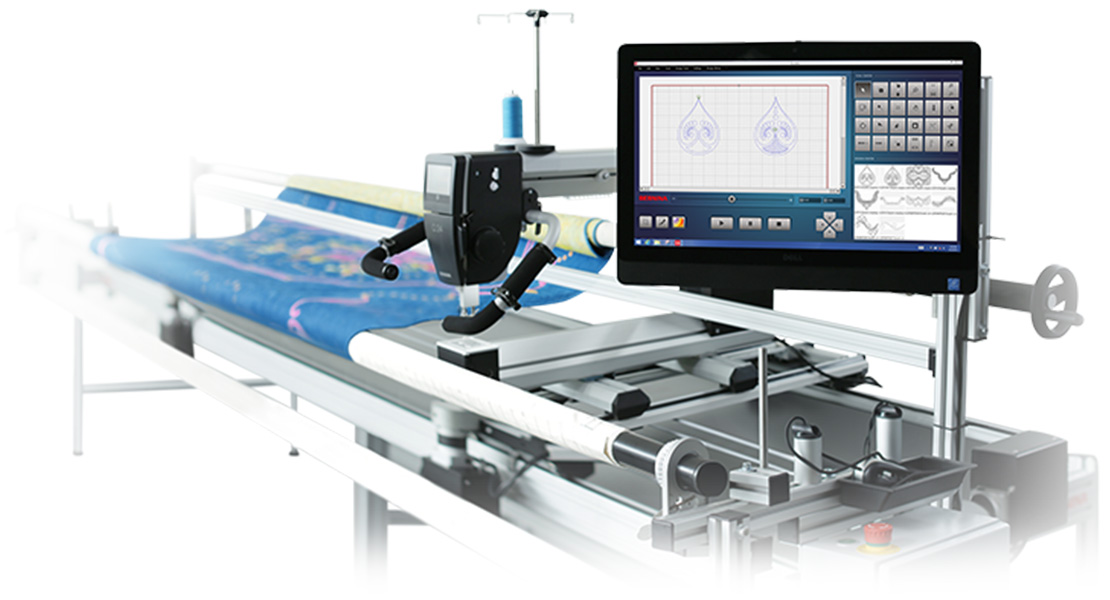
Q-matic Mask Feature
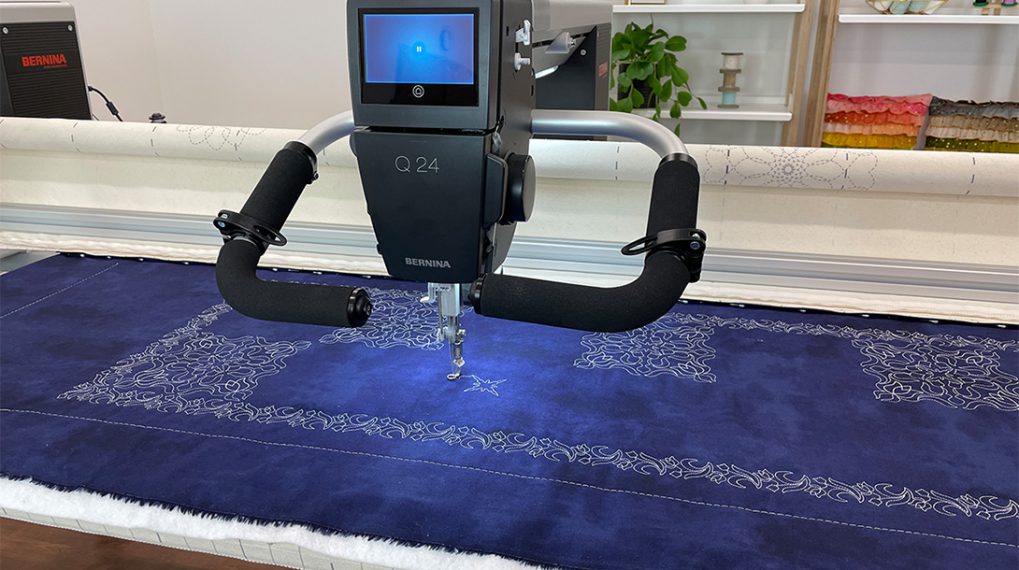
There is a great feature in the BERNINA Q-matic Longarm Quilting Automation System for our Q24 or Q20 on a frame that is called Mask. When you mask an area of background stitches or fills, this means that the stitches in the area are removed. You can remove these stitches with an already created design imported into the software, or you can create the region you want to remove using the sewhead. This post is about creating the region to remove the stitches using the sewhead.
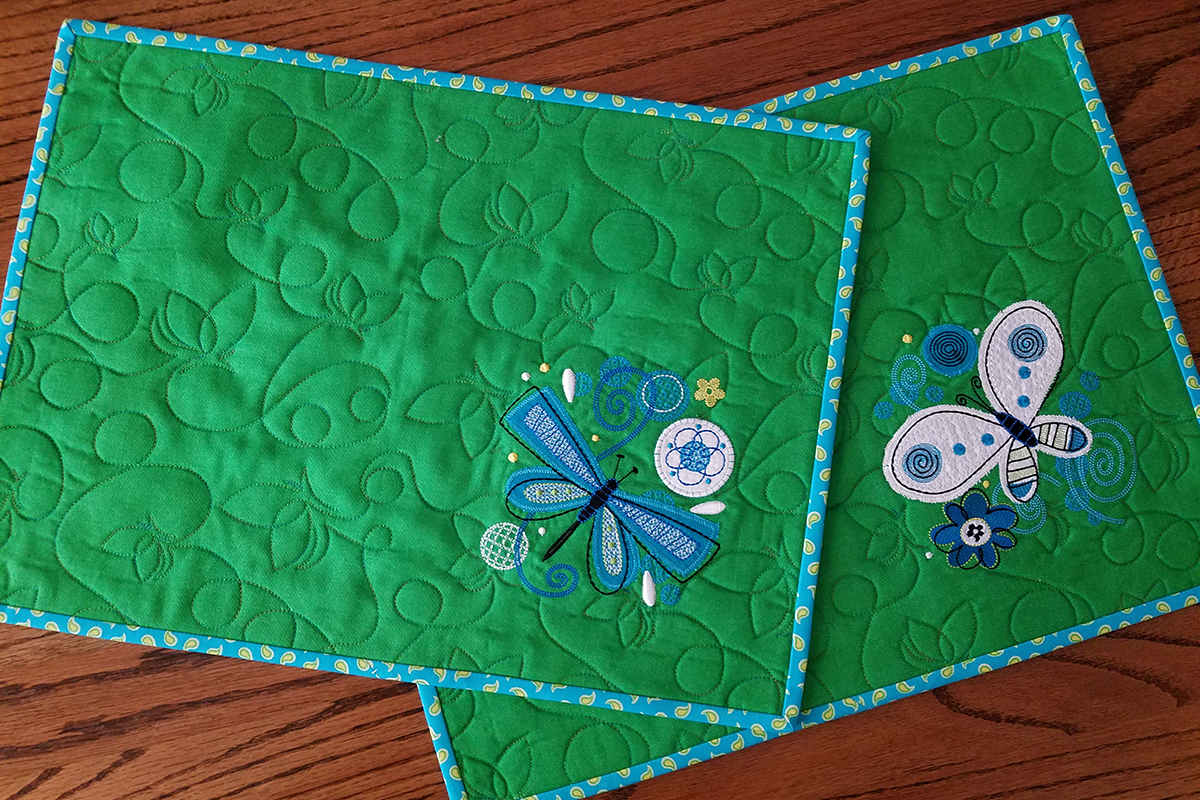
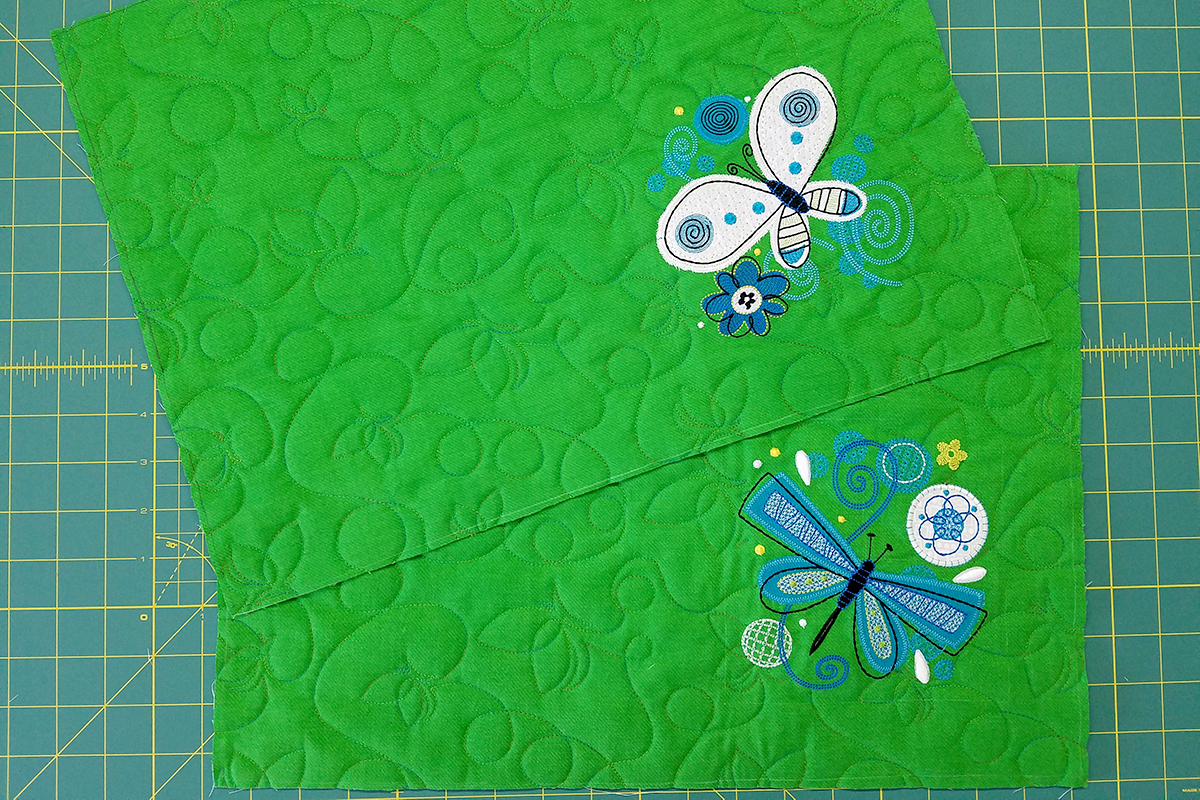
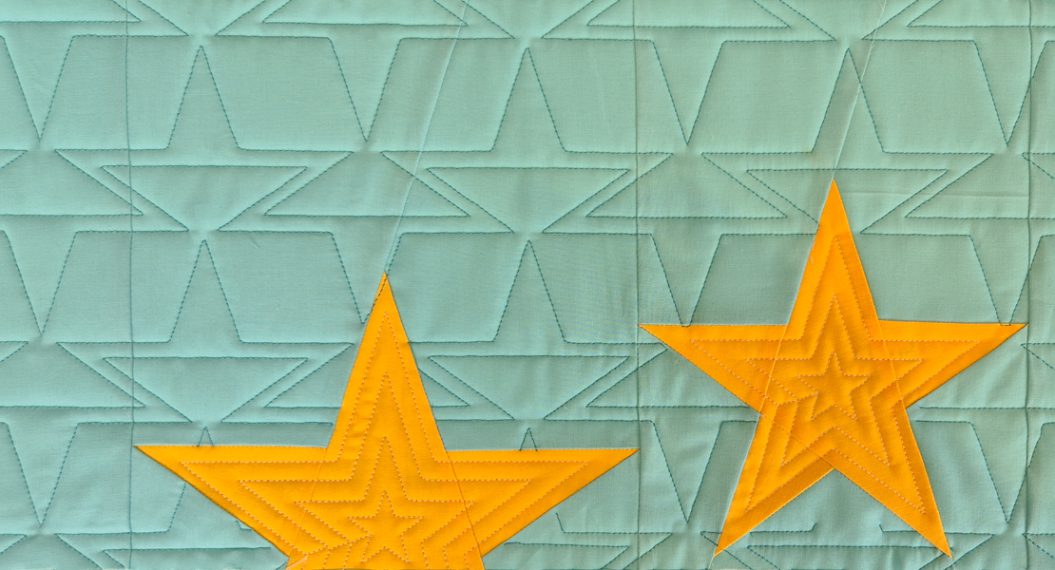
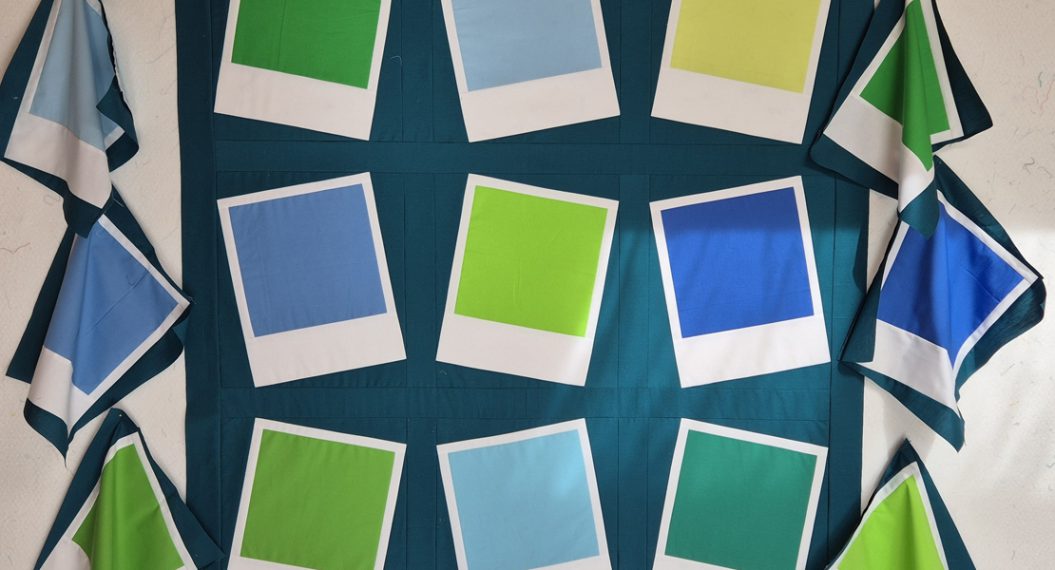
I decided to make a couple of placemats using the Mask feature to remove the background stitches where the embroidery has been stitched. I know we all can make placemats, but there couldn’t be an easier project to work on as you learn about Mask. But you will follow the same masking instructions to remove the background or fill stitches when quilting a larger piece like a quilt or throw.
Supplies Used to Complete Project:
- Q 20/Q 24 Longarm Quilting on Frame
- BERNINA Q-matic Longarm Quilting Automation System (design Butterfly_01_E2E)
- BERNINA Needle Point Laser (Longarm Quilting Accessory)
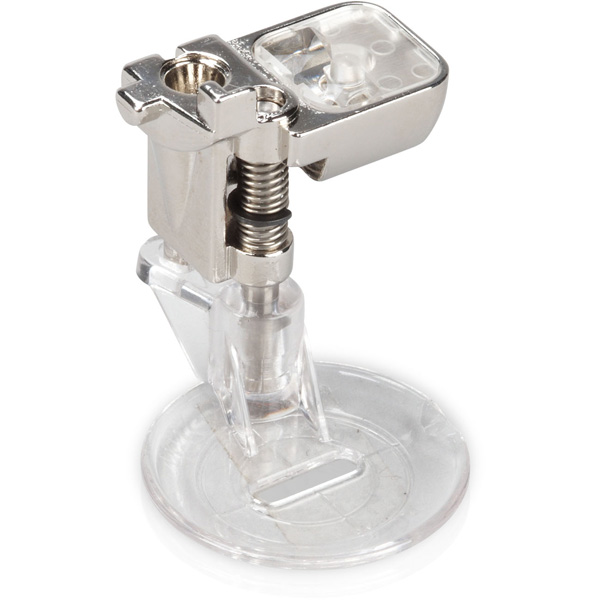
- Echo-quilting and CutWork Foot #44C
- BERNINA 790 PLUS Embroidery Machine (or other BERNINA Embroidery machine) and Large Oval Hoop for embroidering design
- Fabric from stash (fat quarter for each placemat, ¼ yard for binding, odds and ends for applique)
- Batting 45” x 18” or larger
- Backing fabric 45” x 18” or larger
- King Tut 40 weight thread for quilting or the thread you desire
- OESD Embroidery Collection #12585 What a Whirl (Designs #12585-01 and #12585-09)
- Isacord embroidery thread (colors on chart)
- OESD Ultra Clean & Tear Stabilizer
- Pilot Frixion Ball Erasable Gel Ink Pen or other fabric marking pen or pencil
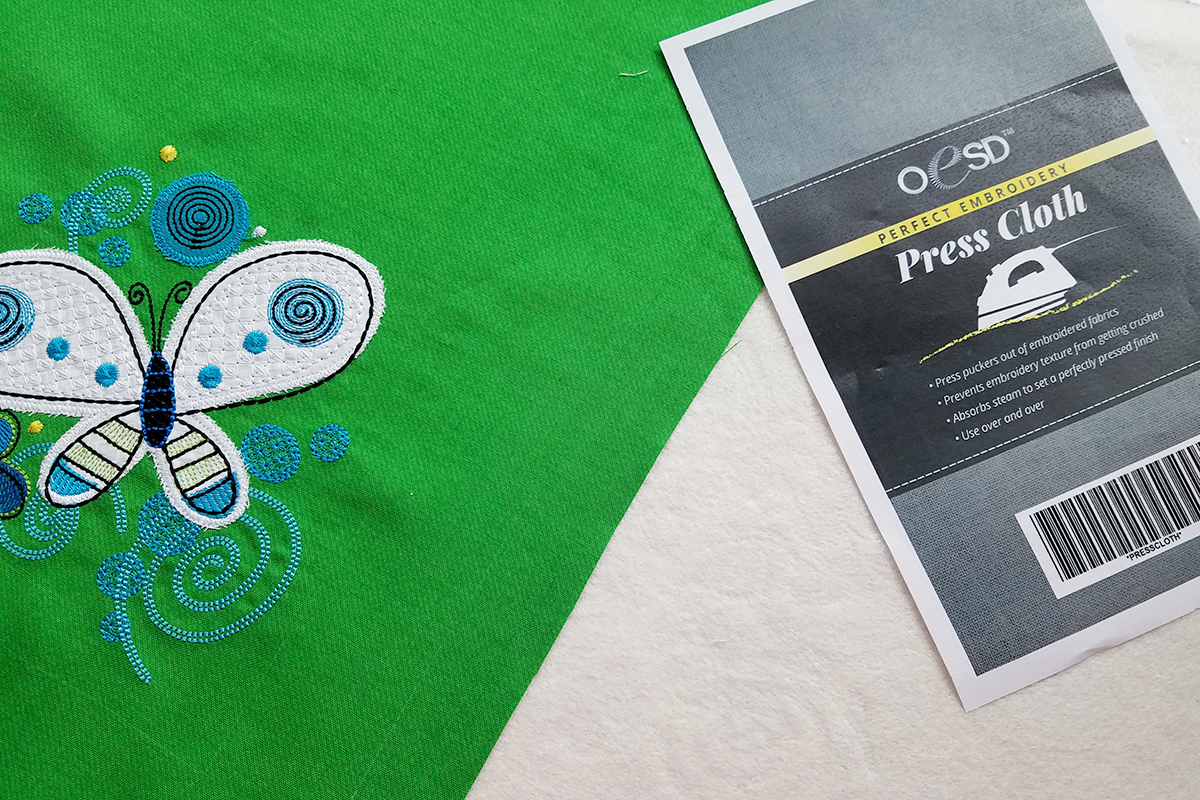
- OESD Perfect Embroidery Press Cloth
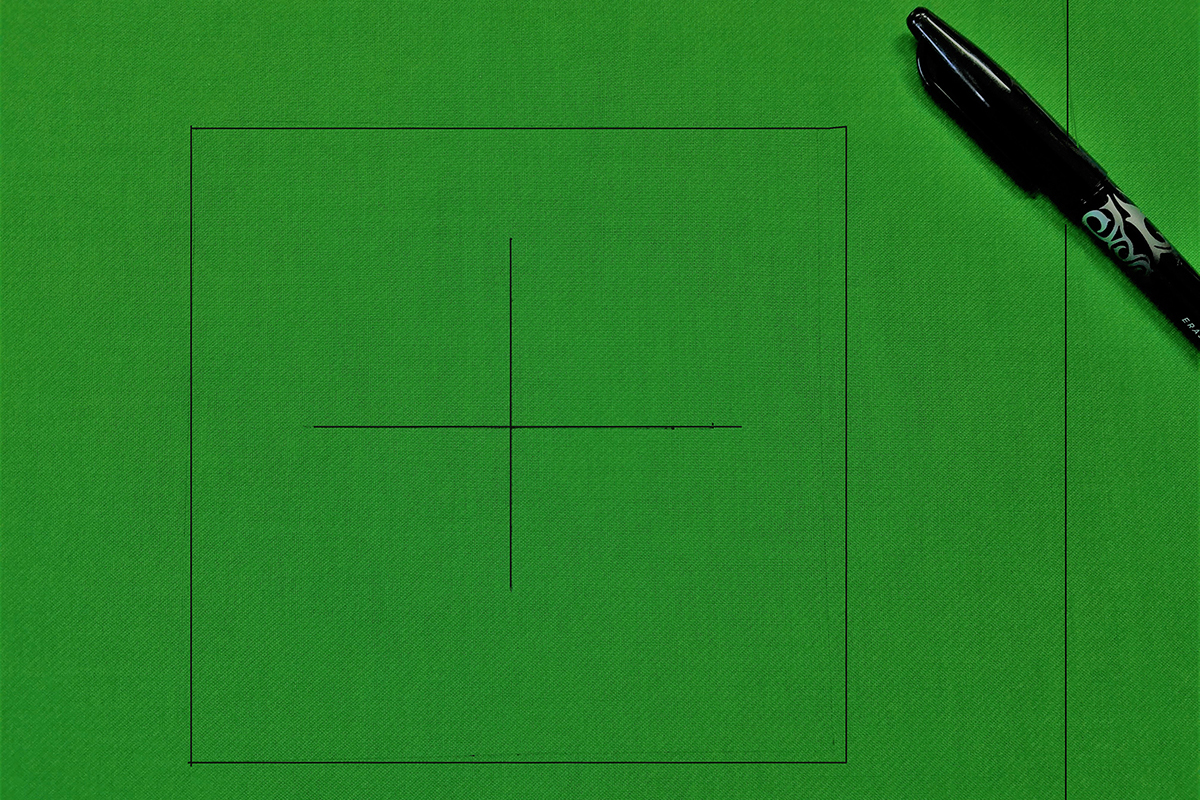
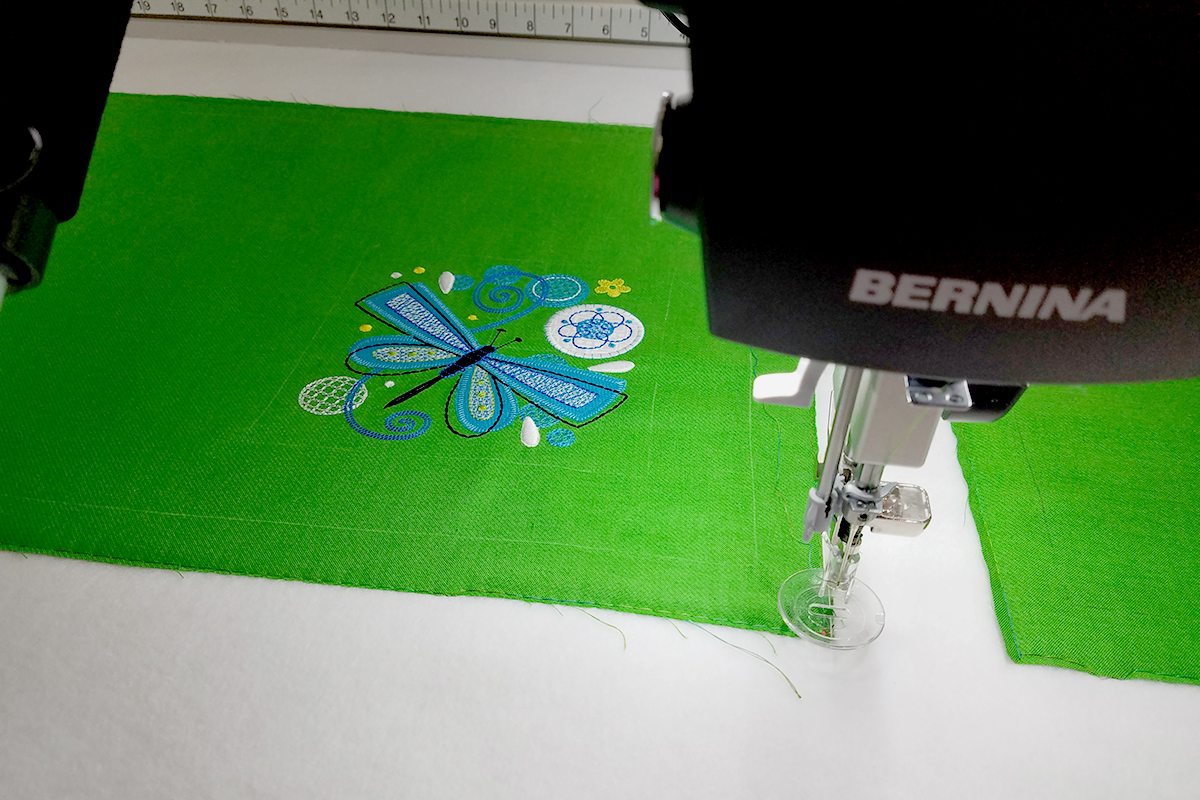
Decide what size placemats you would like and mark the two pieces of fabric and embroider the designs. I wanted 18” x 13” placemats, so I marked them one inch larger on all four sides since the area that is quilted will shrink some. You can trim the mats to the correct size later.
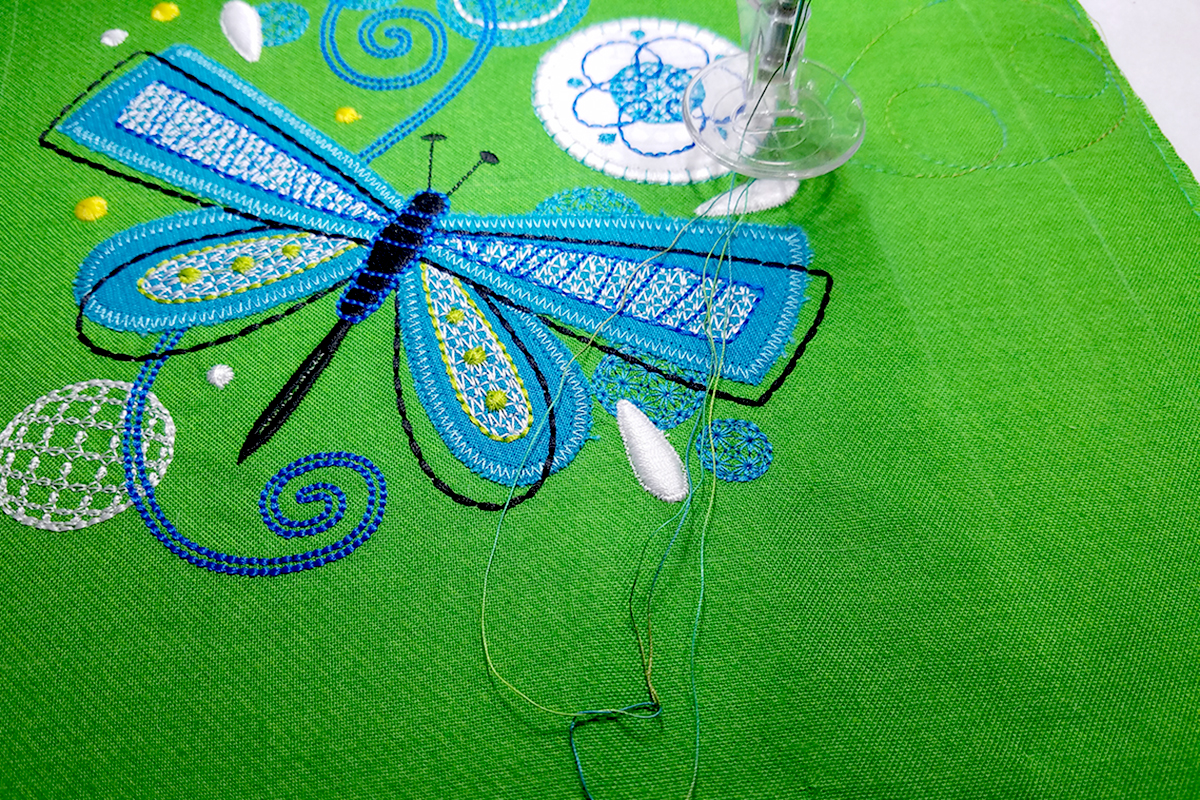
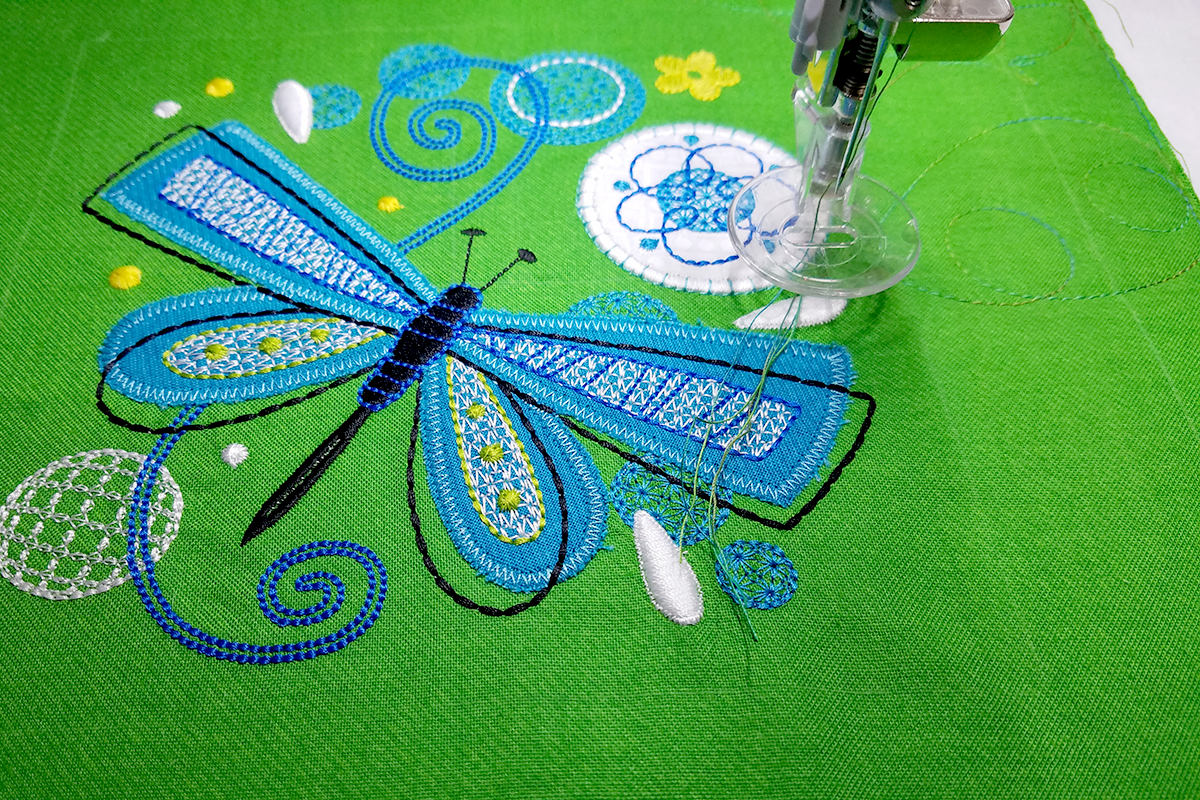
I wanted my embroidery to be in the lower right corner of the mat. I marked a 6 inch square there with the center marked using the Frixion marker.
Hoop the fabric and stabilizer and stitch out the design.
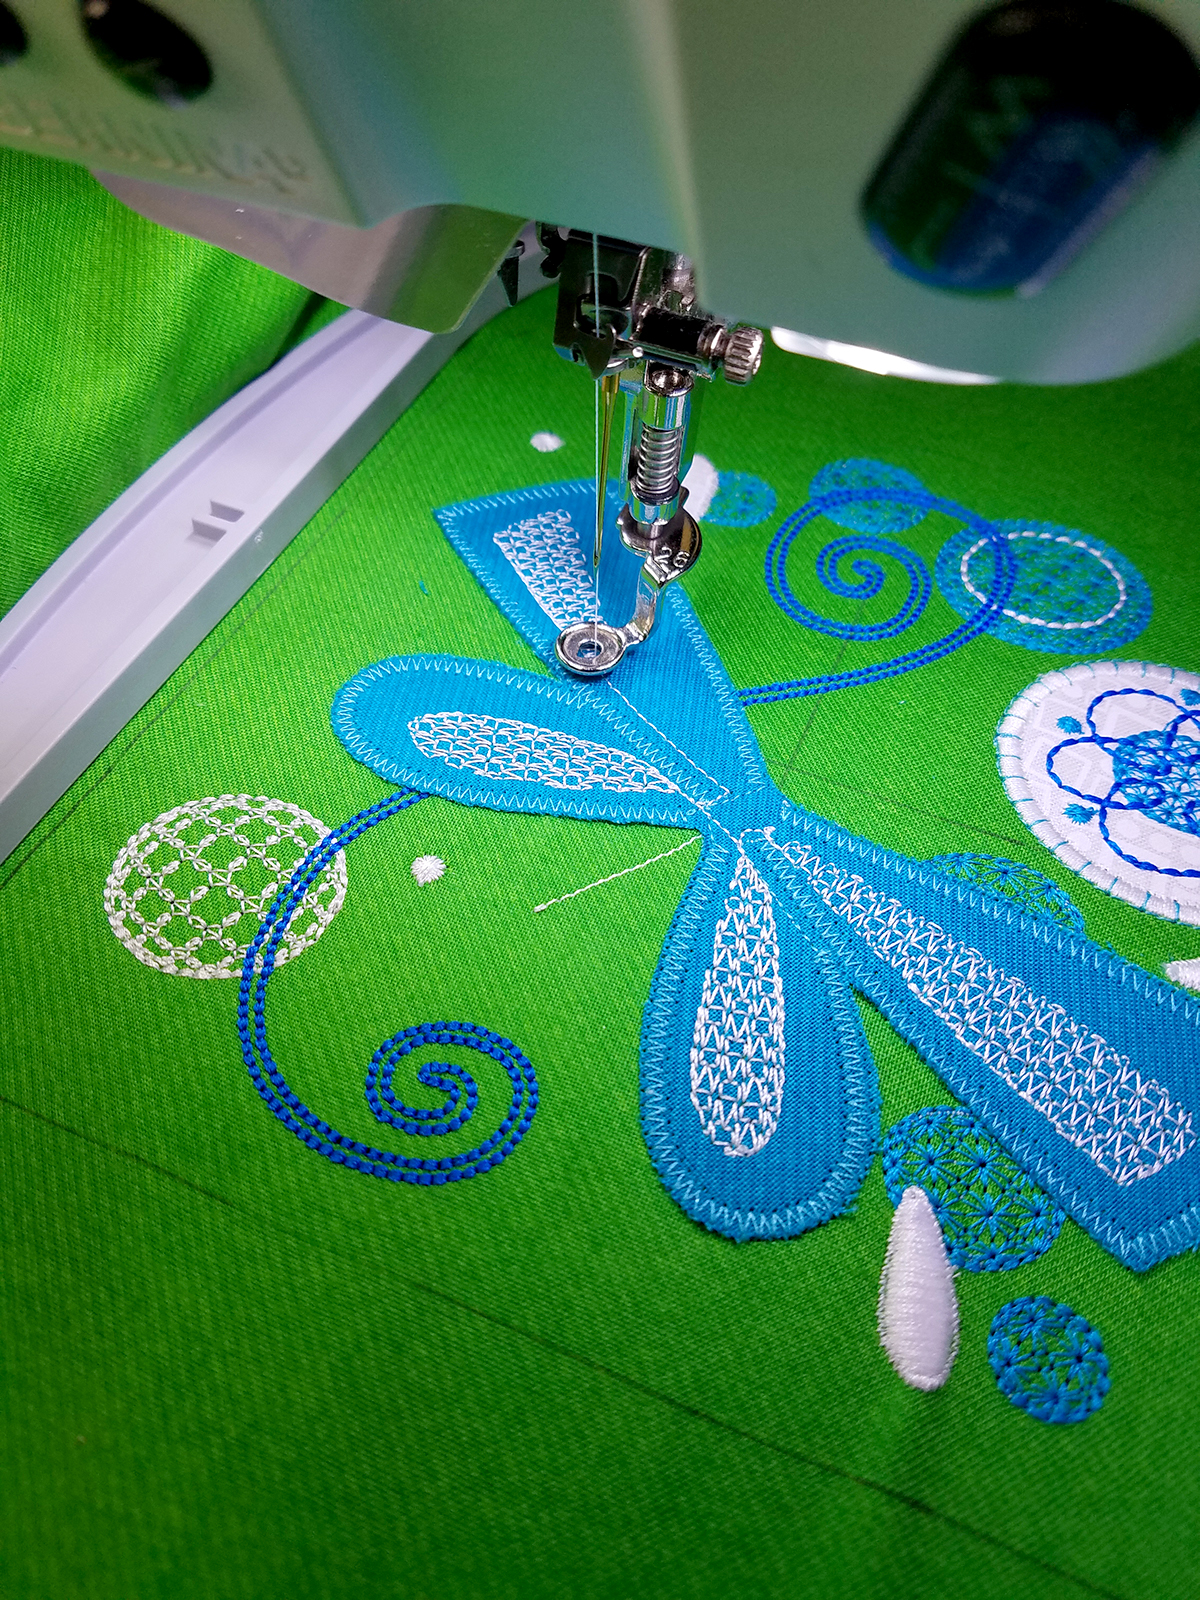
Press the fabric from the wrong side so that the design will not look flat. I used an OESD Press Cloth, which really helps get rid of any puckers around the design without flattening the design.
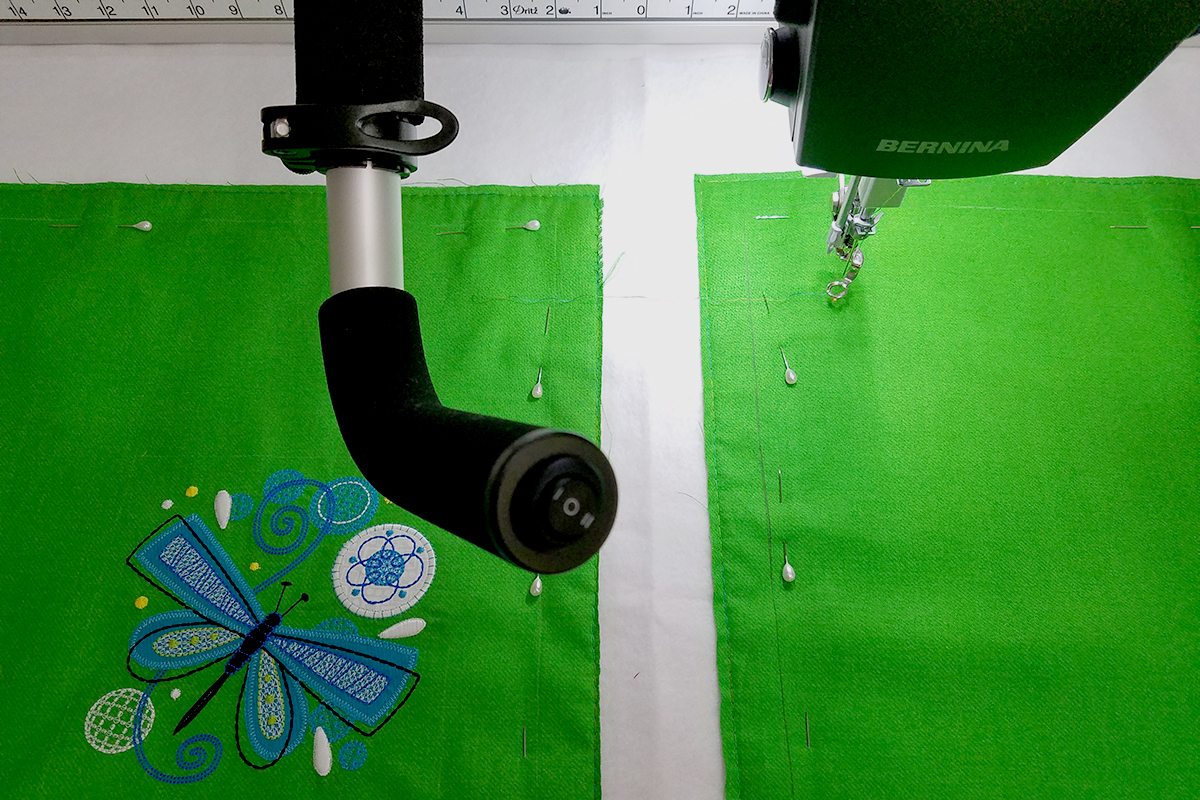
Now load the frame with the backing fabric and the batting, and then place the two pieces of fabric with the embroidery on top. I placed mine side by side on top of batting and basted them. I always like to place a few pins to hold the place mats in place until I am finished.
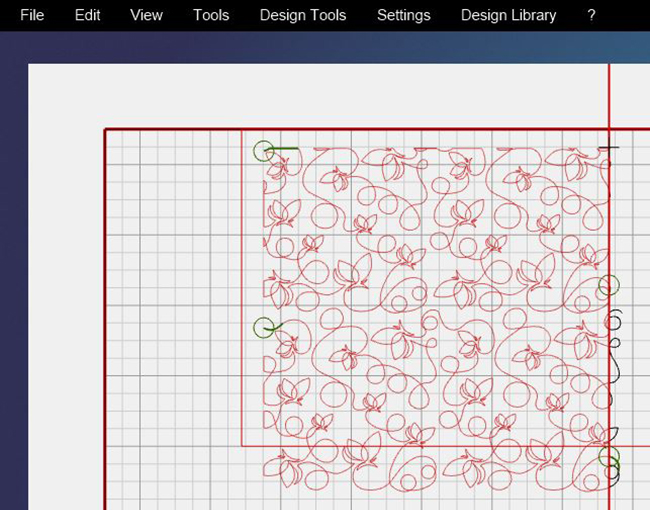
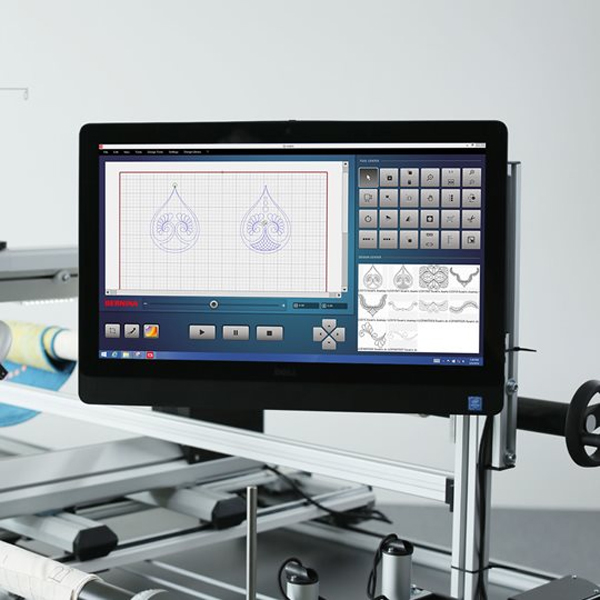
Open the Q-matic software – Create Safe Area.
Place the Butterfly_01_E2E design in the Design Center.
Double click and place the design on the Quilt Area.
Using the Resize tool in Tool Center, resize the selected design to 10” x 10”.
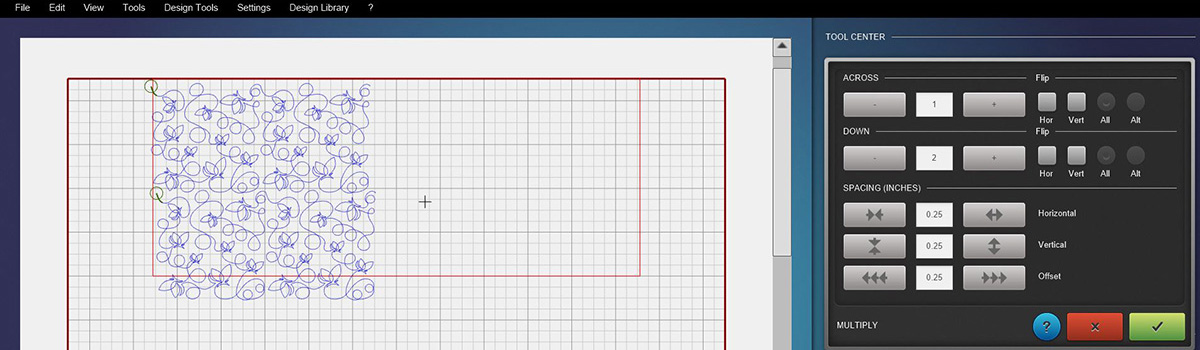
Using the E2E+ in the Tool Center and with the design selected, click once to make a row with two repeats of the design.
Open Multiply and change settings as follows:
Across; 1
Down; 2
Offset; click arrows to the left 2 times @.25 inch
Vertical; click arrows pointing together 1 time @.25 inch
Confirm
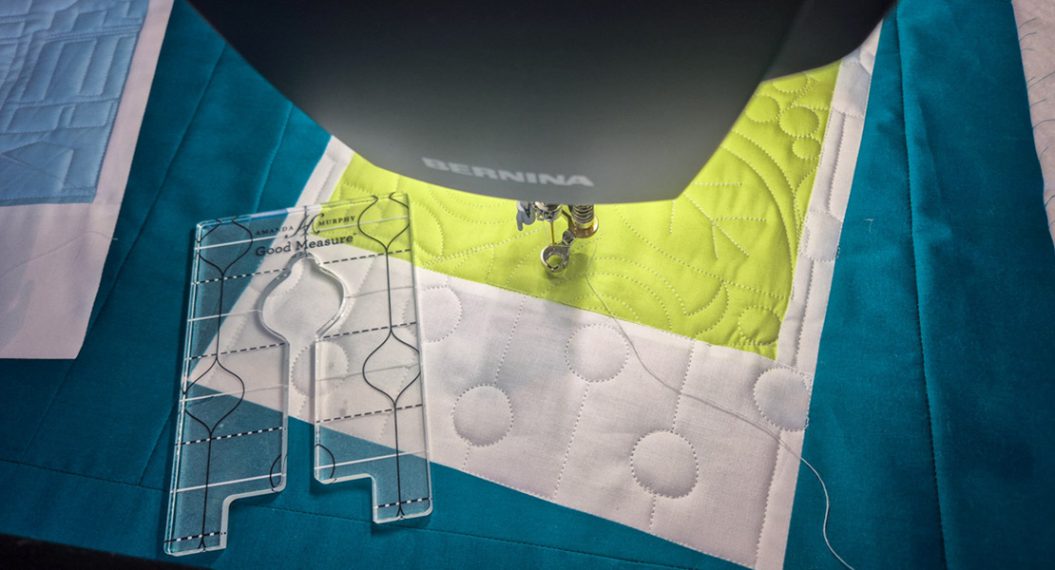
I changed my foot to #44 Echo Quilting and CutWork Foot so that I did not have to worry about the foot getting caught under the edge of fabric when E2E quilting.
I also turned my Needle Point Laser to “A” so that the light would come on when I am not stitching, and go off when I am stitching.
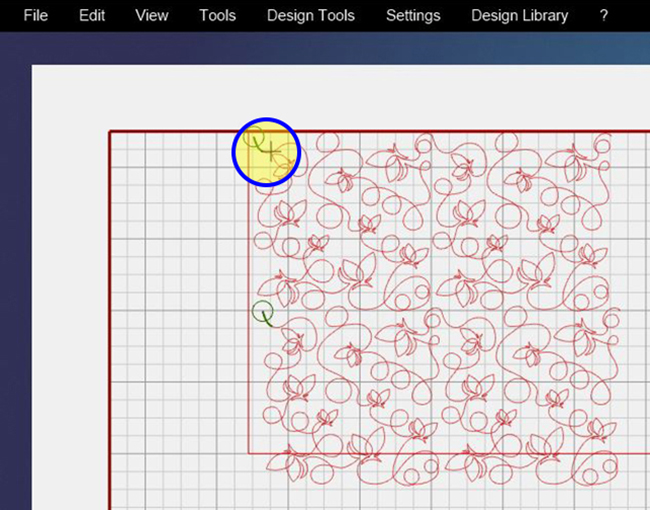
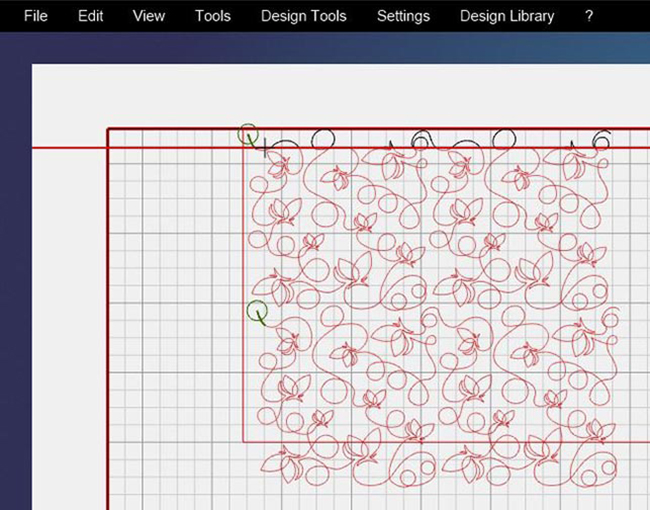
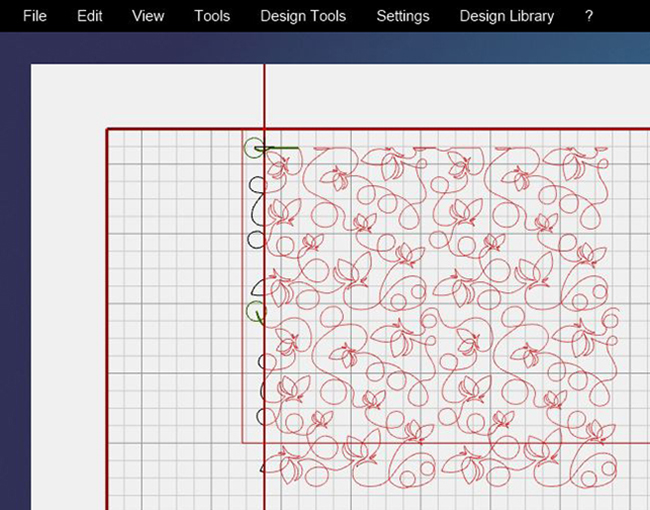
Select the design on screen. Place the sewhead on the upper left corner of one of the basted fabric pieces.

Looking at the computer screen, move the selected design so that the design is located by the crosshairs of the needle. We will use the crosshairs as a reference point to trim the design. You will want the fullest part of the design to be in the center of your fabric.
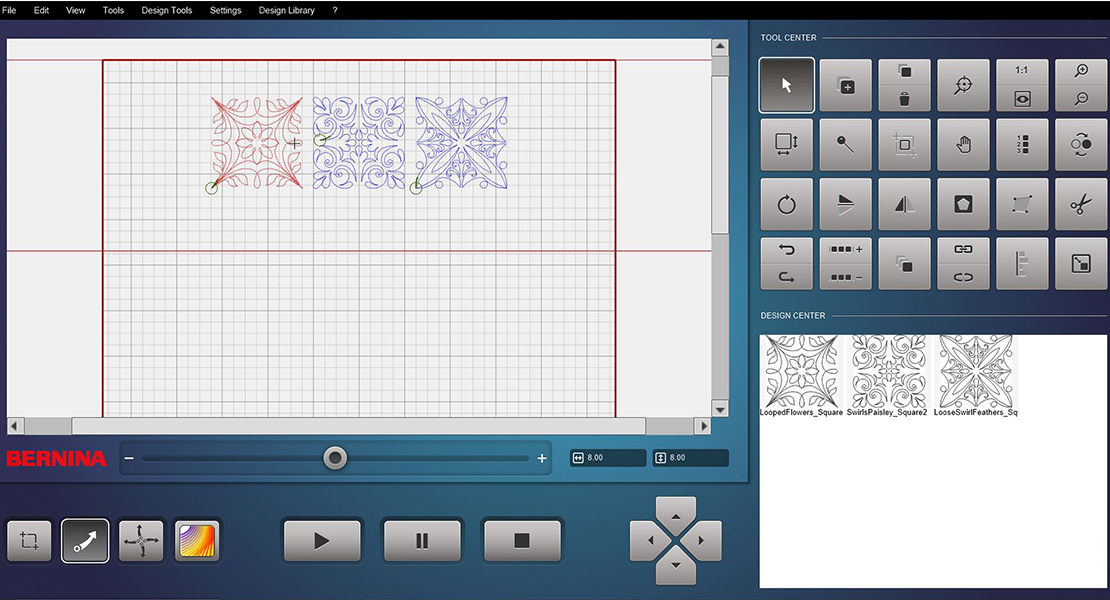
Open Trim:
Select Sewhead
Select Selected Design
Select Horizontal
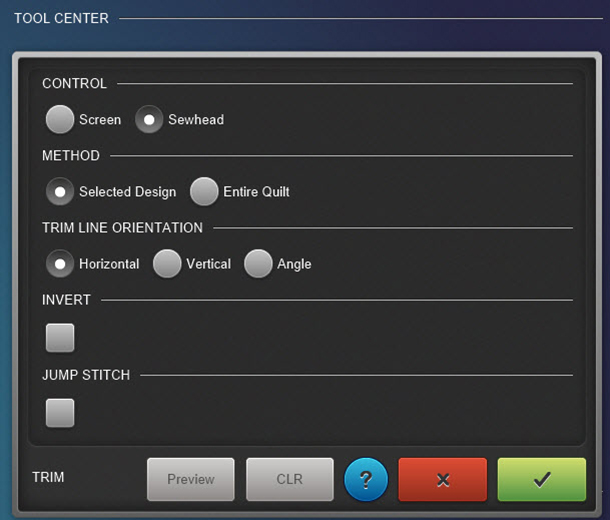
When Sewhead is selected on the Trim screen, the screen on the machine will change. We will trim the top first. With the needle placed on the upper left of fabric, touch Set on sewhead screen.
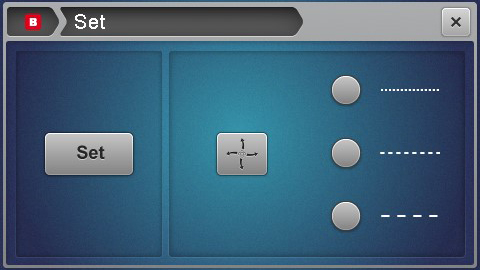
This will place a line. Touch Preview on computer screen. Remember the black part is trimmed away. When you like what you see, Confirm.
Open Trim again and leave machine where it is. Trim the left side (vertical) of the selected design in the same manner. Confirm when you like what is being trimmed away.
Open Trim again with the design selected, and now trim the right side. Move the machine to the upper right corner of the fabric to be trimmed. Touch Set on sewhead. You will need to make sure Vertical and Invert are selected on the Trim screen so that the correct stitches turn black and go away. Confirm.
Open Trim for the last time to trim bottom of design. Move machine to bottom right corner.
Make sure Horizontal is selected as well as Invert. When you like what is to be trimmed away, Confirm.

When working with Mask in Q-matic, you will want this to be the last thing you do. Make sure all trimming, resizing or any editing is finished before you use the Mask feature.
![]()
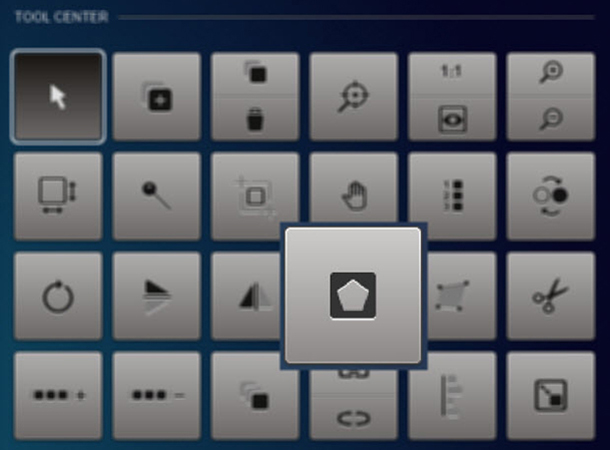
Select the background design and open Mask.
Select Sewhead
Select Create Region
Select Inside
For this masking, we are not going to sew the mask outline. The box should be unchecked.
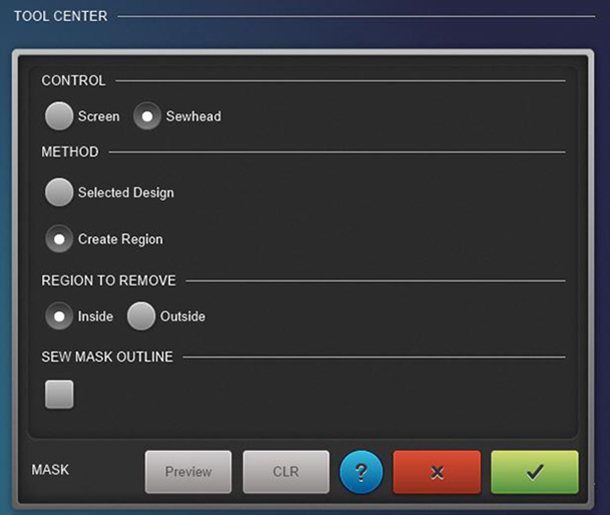
Move the Sewhead around the perimeter of the embroidered design and touch Set on sewhead screen or click one of the toggles on the handles to create the line around the area.
Don’t forget we now have MicroMove, so you can enable it and get very close to the points you need.

Once you have been all the way around your embroidered design, touch Preview on the computer screen. If all looks good, Confirm.

The design is Queued (blue) and ready to stitch out.
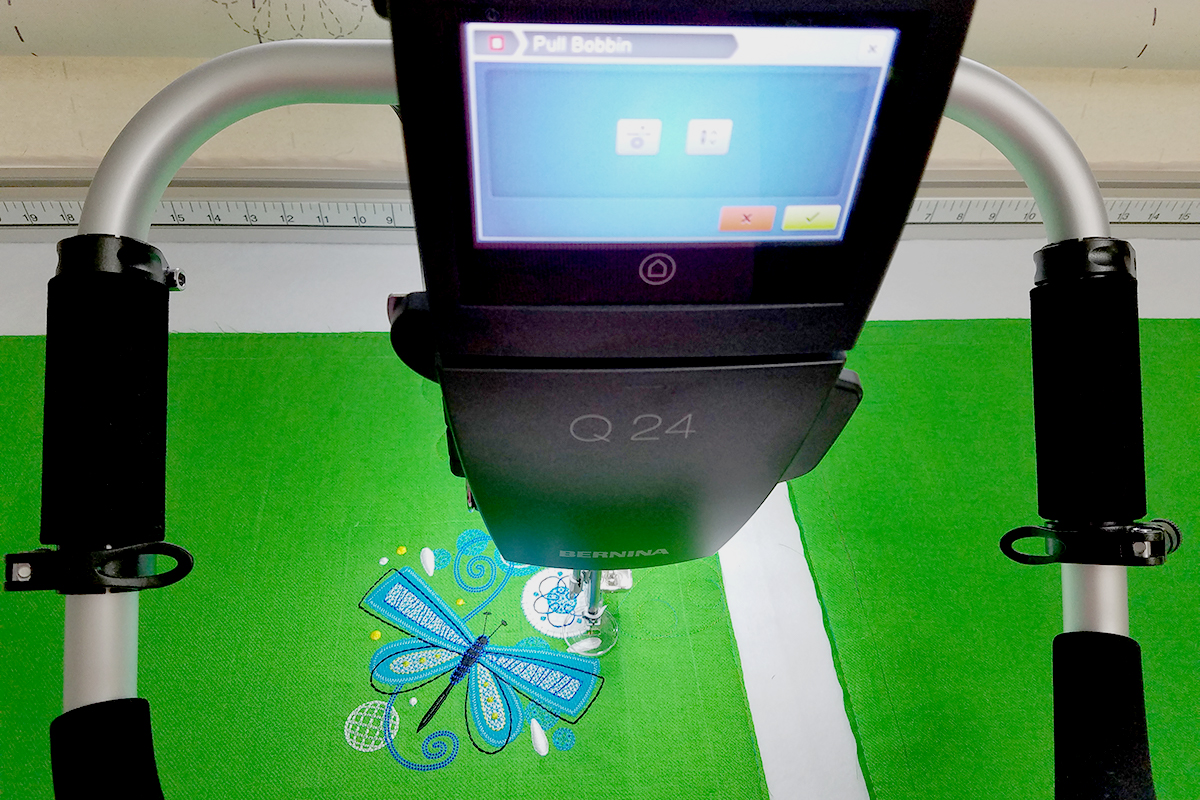
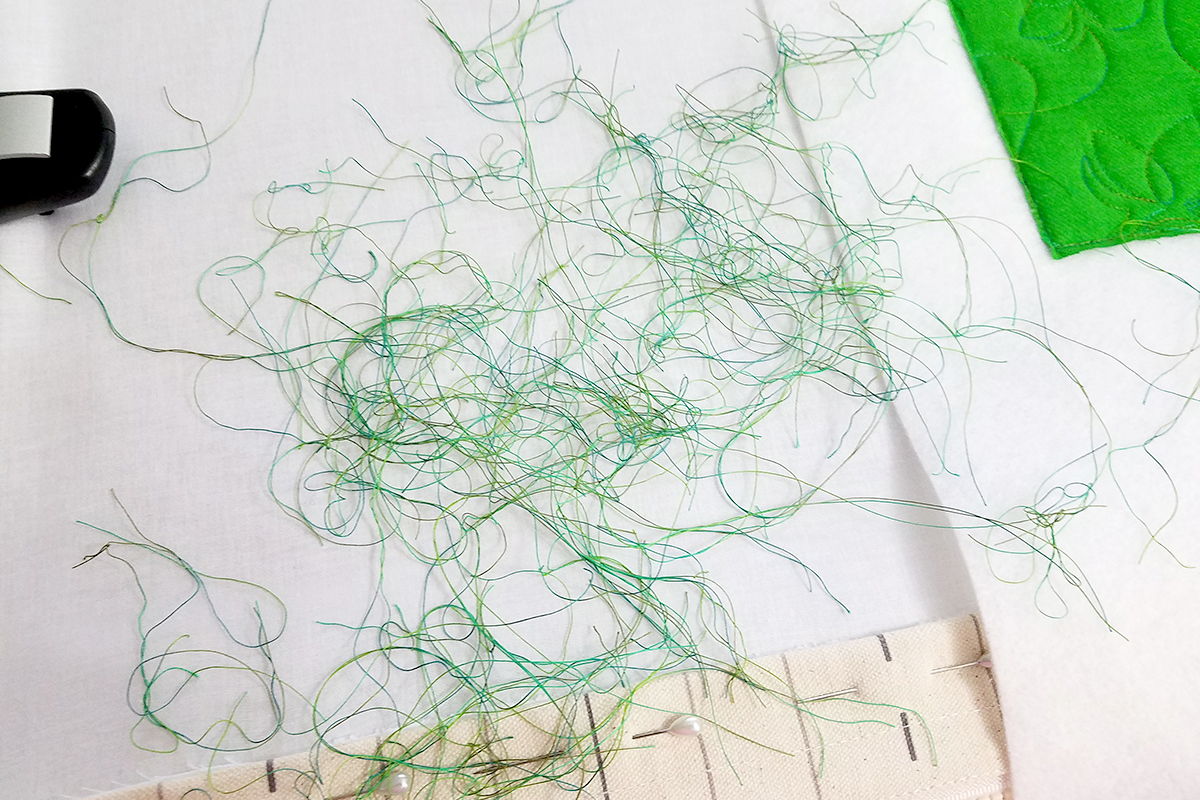
When the design stitches out it will have a lot of stops and starts. The sewhead will always give you the option to pull the bobbin thread up to cut and then continue. To have a neater cleaner back it is always a good idea to pull that bobbin thread and cut it in between the jumps.
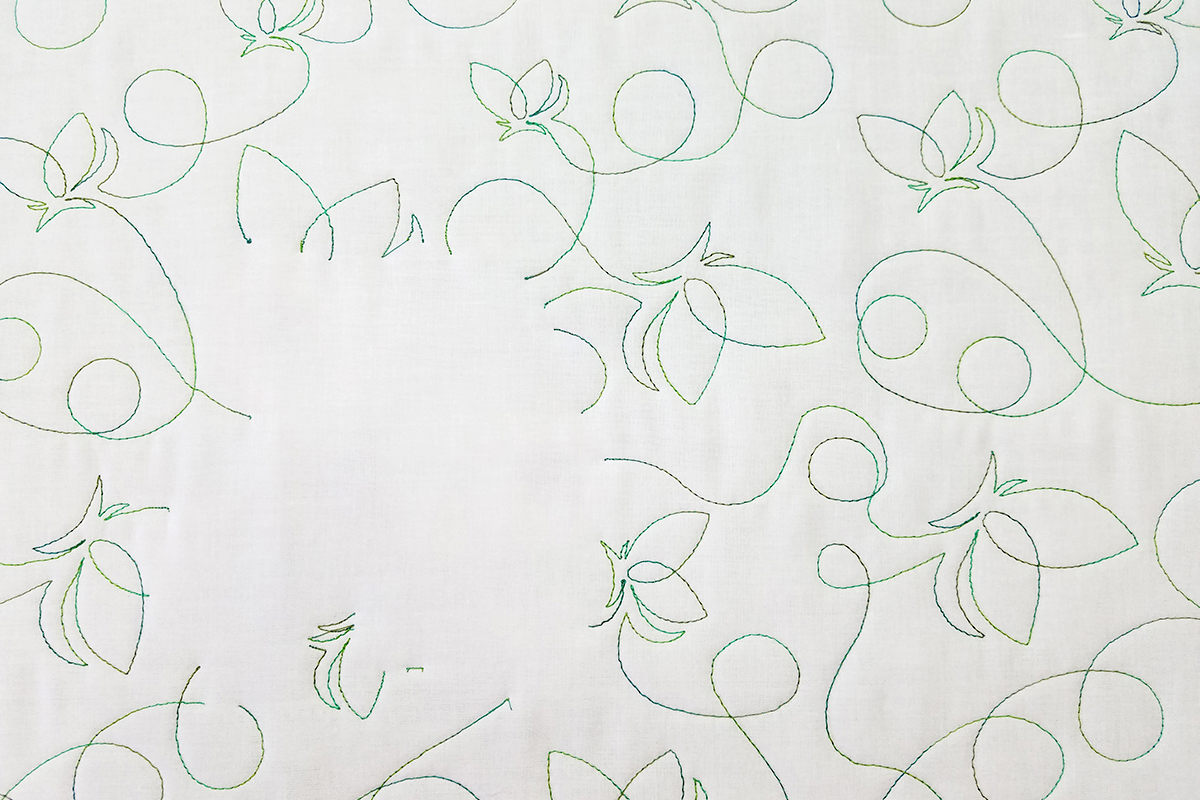
This is what the back will look like after it has been quilted with the area Masked.
While quilting, make sure you pull up two or three inches of the bobbin thread.
Cut the threads long so that you have enough bobbin thread to pull up on the next start point.
You could also just hold all four threads firmly and trim after the machine moves to the next start point.

There will be lots of thread cutting!
Repeat for the other placemat. Practice is always good! Trim up your placemats to the size you desire.
Bind your new placemats with your favorite binding technique.
A few things to remember when using Mask in Q-matic:
- Masking should be done last. Make all changes in the design or layout before masking.
- When an area is masked, the stitches around it are now grouped and cannot be unconnected.
- Masking an area will change the stitching path. The start and stop will be moved as well as the path that is stitched.
- When working on a larger project, mask as you go. Only mask the area that is inside of your Safe Area.
- There is always Help right on your screen. When Mask is open, there is a question mark in a blue circle that will explain what the tool does and how to use it. This is true for all tool’s secondary screens.


What you might also like


10 comments on “Q-matic Mask Feature”
-
-
You are welcome. Hope you enjoy it.
Denise
-
-
Denise- I want to make a baby quilt with several appliques on the quilt. I want to be able to use the mask feature to stitch around these appliques. I want to avoid all those thread stops, thread cutting etc. Isn’t there a way to perhaps do an echo stitch around it ? Will I have to do this all manually or can it be done with qmatic ? THanks . Ruth C
-
Hi Ruth,
You can stitch the Masked line if you would like just check the feature in the Mask window, but the machine will still stop every time the stitching is cut by the masking. You do have the option in Settings to turn off the “Pause at Pull Bobbin”. If you turn that off you will then get a jump stitch.
Hope this helps,
Denise Jones
-
-
Can I use the mask feature to take out a jump stitch from one row to another? I’m new at this and created an edge to edge but it stitched out the jump stitch too.
-
Hi,
I am thinking the Mask is not what you need for this job. If the Trim is used at the ends of the rows you could put a check mark in “Jump Stitch” on the Trim screen and it would not stitch moving from one row to the next. Another thing you could do is to make sure your rows are not “linked” under Connect. You can still Reverse Sew every other row so that the machine starts stitching at the end of the row where it left off. I hope this helps. Let me know how it goes. Thank you for reading my blog post.
-
-
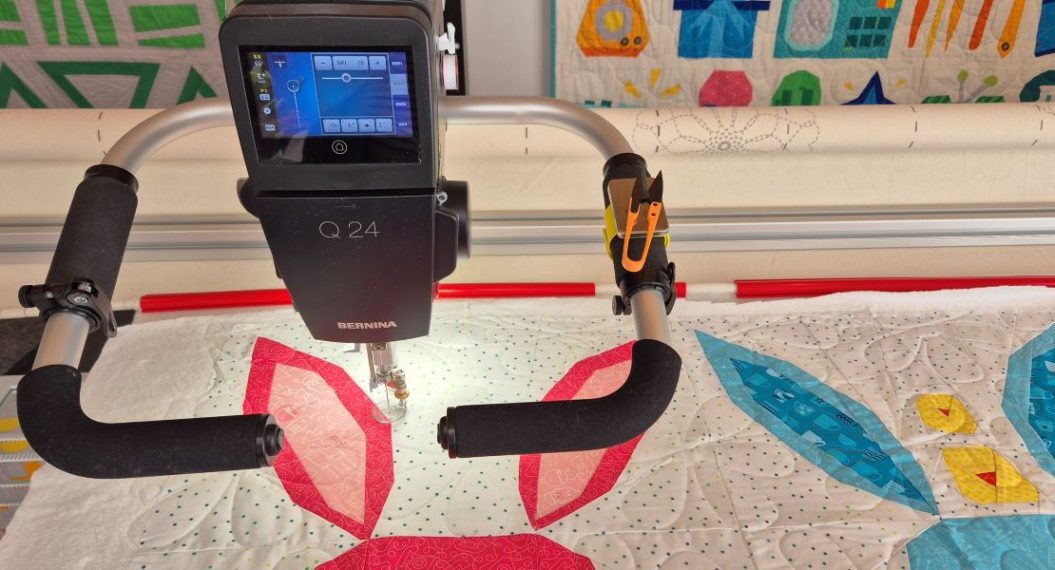
On the picture with the word “Set” there are three buttons with stitches to select. What are these used for?
-
Hi,
Those are for the MicroMove function. This is to move the sewhead in three different increments by clicking the toggles on the handles. The toggles on the right move the sewhead head left and right and the ones on the left handle move the sewhead forward and back on the frame. MicroMove is a great feature to give us the ability to move the sewhead exactly where we need and want it.
-
-
Denise,
Just purchased a 770 with the embroidery module, and saw this project and can’t wait to try it. Do I need the cut work foot if I have the clip on my quilting foot?
Thank you for your help
C-
When you start the quilt the clip on your ruler foot will work as well. Have fun.
Thanks,
Denise
-
Leave a Reply
You must be logged in to post a comment.

Thank you Denise for a great project…I can’t wait to make them…