What’s New in Q-matic
Q-matic has some exciting new changes for you in the 3.0 update. There are quite a few enhancements that I know you’re really going to enjoy, so let’s take a look.
- Software upgrade to 64 bit, which means it can store and compute many more processes. Faster is better!
- Improved Speed Regulation & Consistency. Your machine stitches a whole lot faster. It was upgraded in speed and the smart control of speed, especially in complex designs. This translates to a machine that stitches up to 35% faster and more efficiently. Speed is good!
- Improved Memory Management & Stability which gives you more quilting confidence. Your Q-matic computer will now Autosave designs. You will be able to recoup up to 10 older versions of a project if your system unexpectedly shuts down.
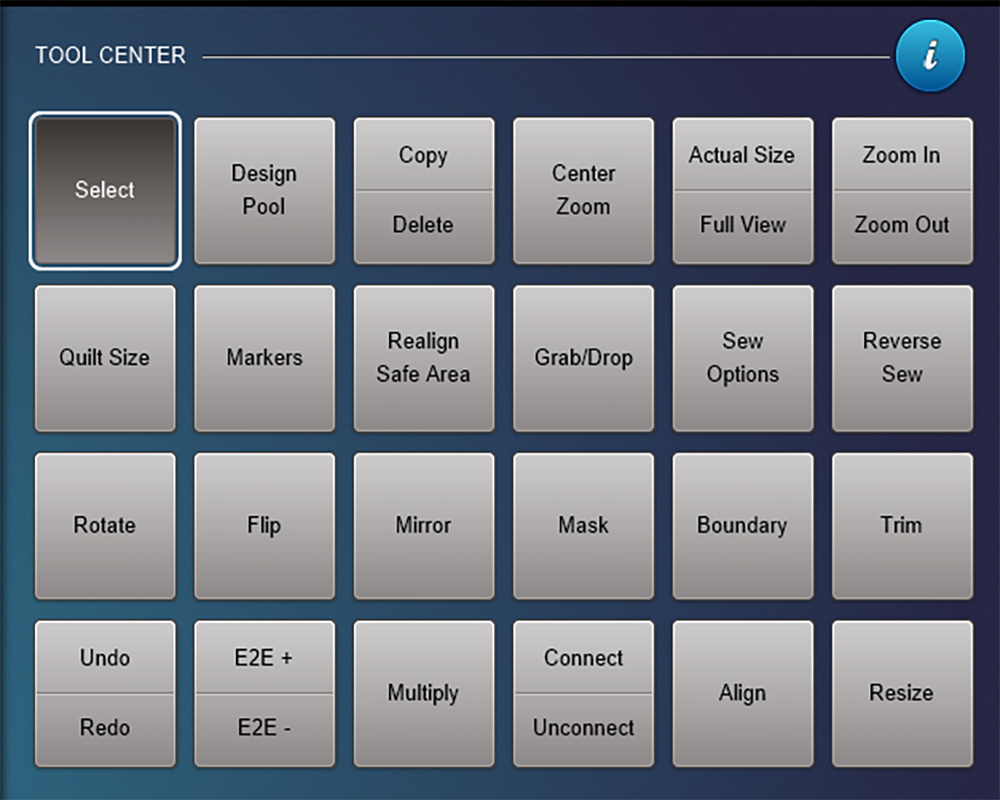
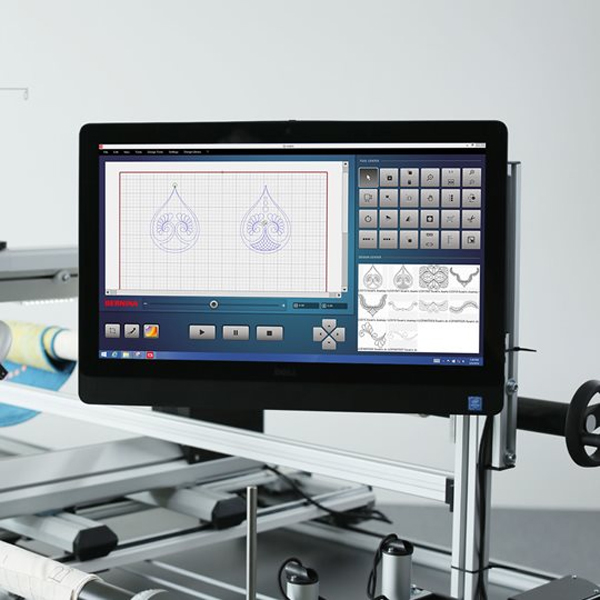
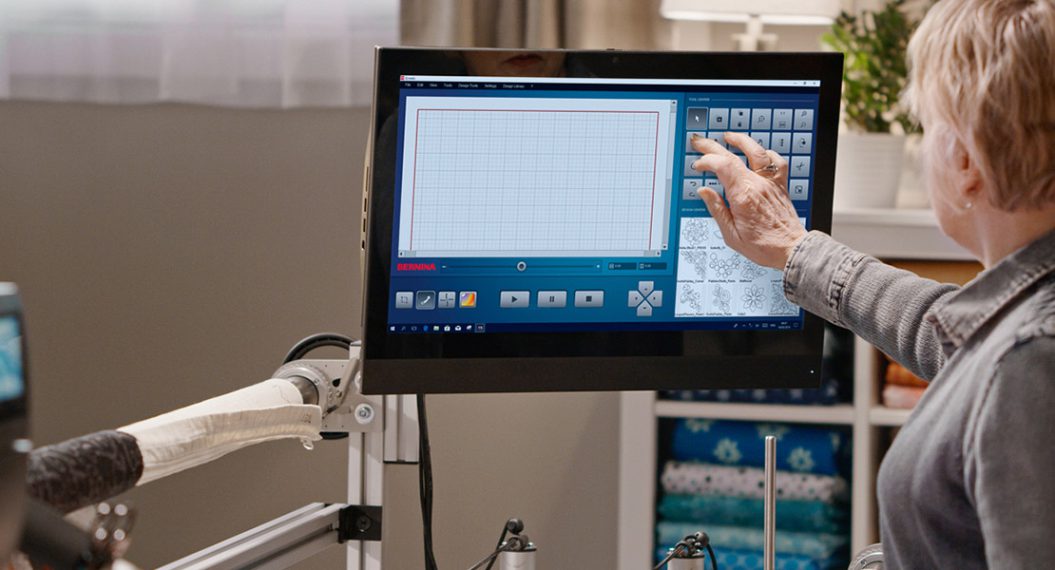
- If you have trouble remembering what the images on your functions keys mean in the Tools Center of your Q-matic screen, there is now a way to change your icon view to a read view. Tap the circle with an “I” icon on the upper right side of your Q-matic screen to toggle between views.
![]()
- Pinch Zoom and Touch PC – Use pinch zoom action with your fingers on the computer screen or use your mouse wheel to zoom in and out of the quilt design area. This is really helpful when you are realigning your Safe Area in E2E, checking to see if your design will fit within placed markers, and generally helping you to find a spot on the quilt design. What a time saver for me.
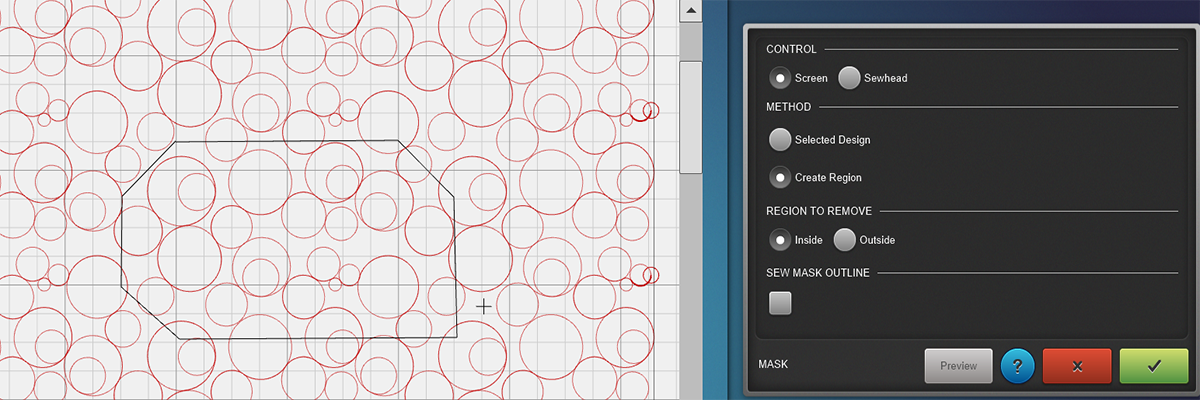
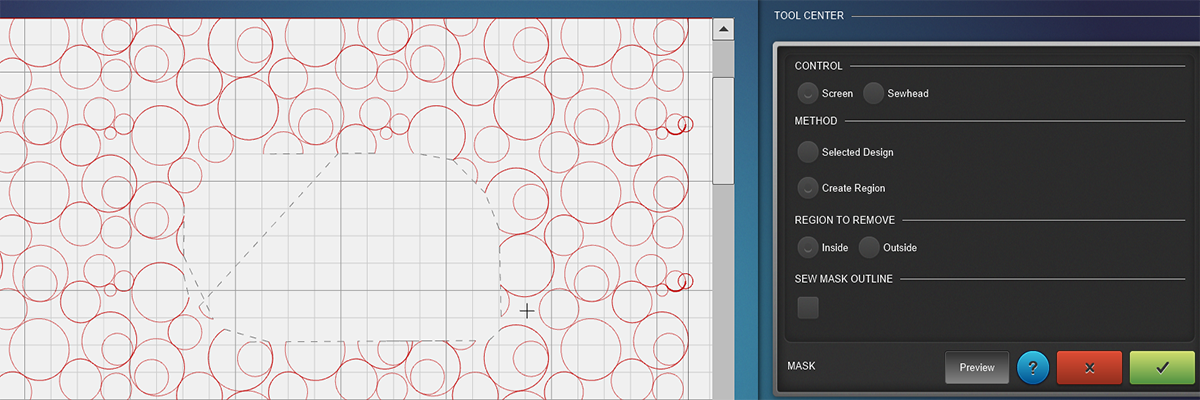
- Masking Changes – When masking a design it is likely you’ll have jump stitches between the starts and stops of the masked area. Below are two photos of a Mask. Photo one shows an area on the design to mask. The second photo shows what the design looks like in preview mode. The greyed out “jump” stitches between sections of the design will not stitch but are helpful in determining the stitch path.
“Unconnect” with new “Divide” feature
- This feature will allow you to divide complex patterns between jump stitches. For example, if you purchase or create a complex design with multiple stitch elements (i.e., whole cloth quilt) you will be able to divide or unconnect portions of a larger design that have been previously connected. This is important when your “design” is larger than your safe area and you to need “Divide” or “Unconnect” it from the larger design.
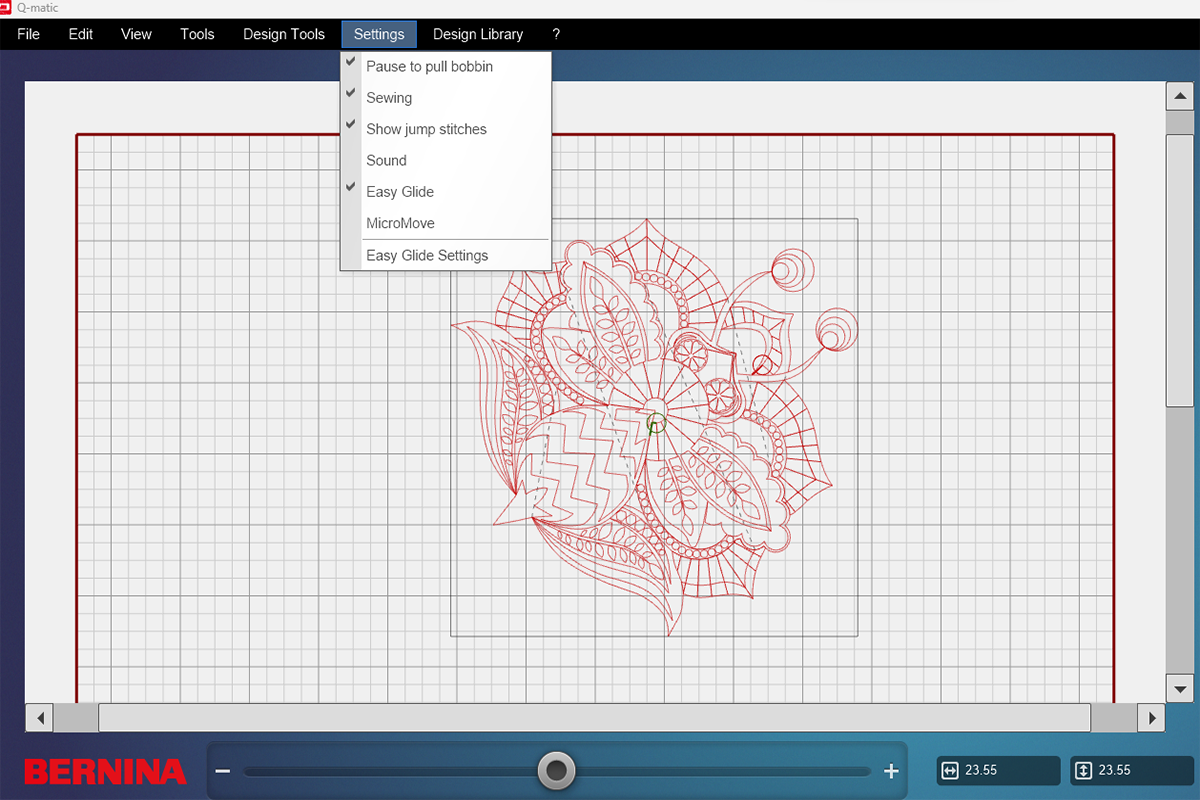
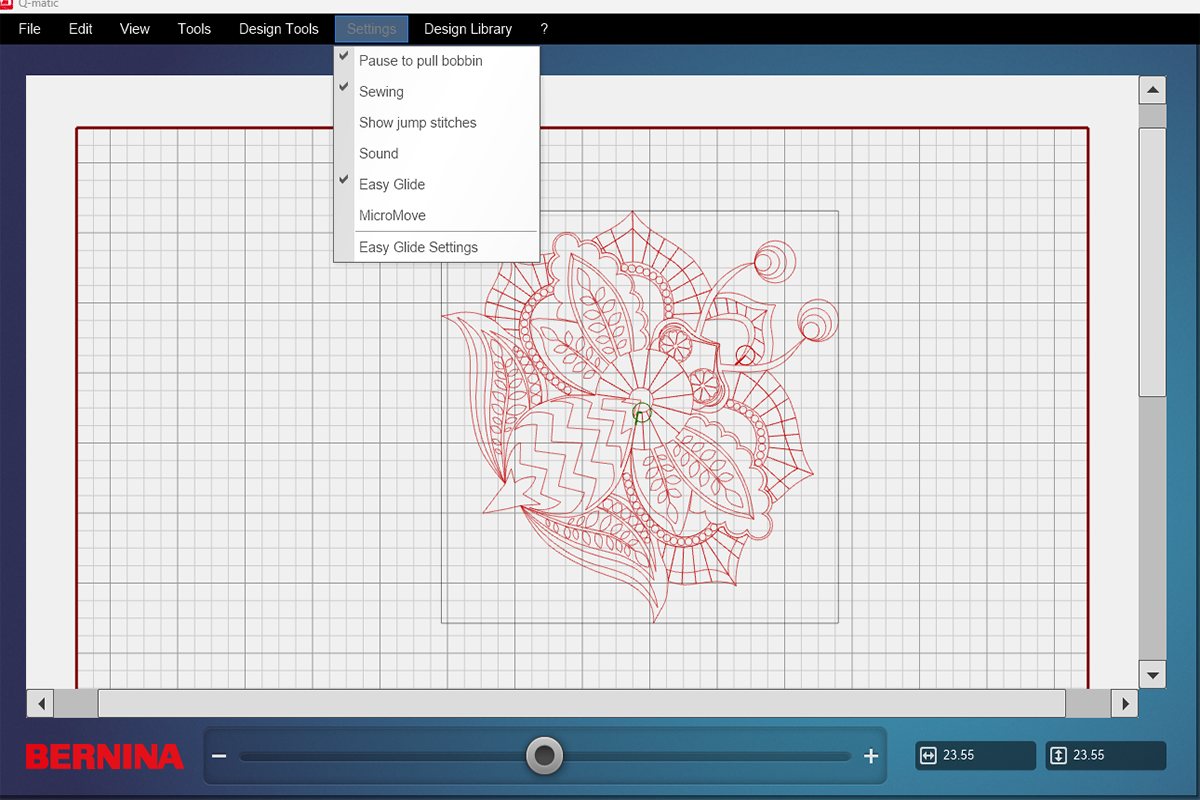
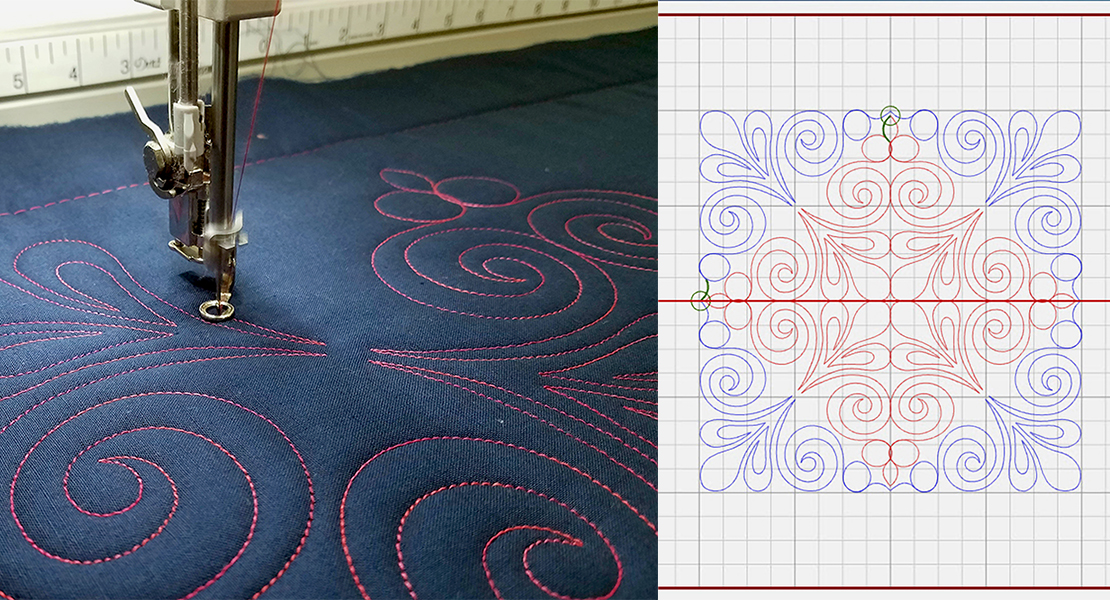
- Visualize Jump Stitches. Visualizing jump stitches between designs can be toggled off in the menu bar if you do not want to see them. Jump stitches are displayed on the screen connecting the start/stop points of sections of your design. When jump stitches are activated in the Menu Bar, the jump stitches will appear as grey dashed lines on your Q-matic screen. If jump stitches are NOT activated in the Menu Bar, no jump stitches are visable on the Q-matic screen. See below:
Jump stitches activated.
Jump stitches not activated.
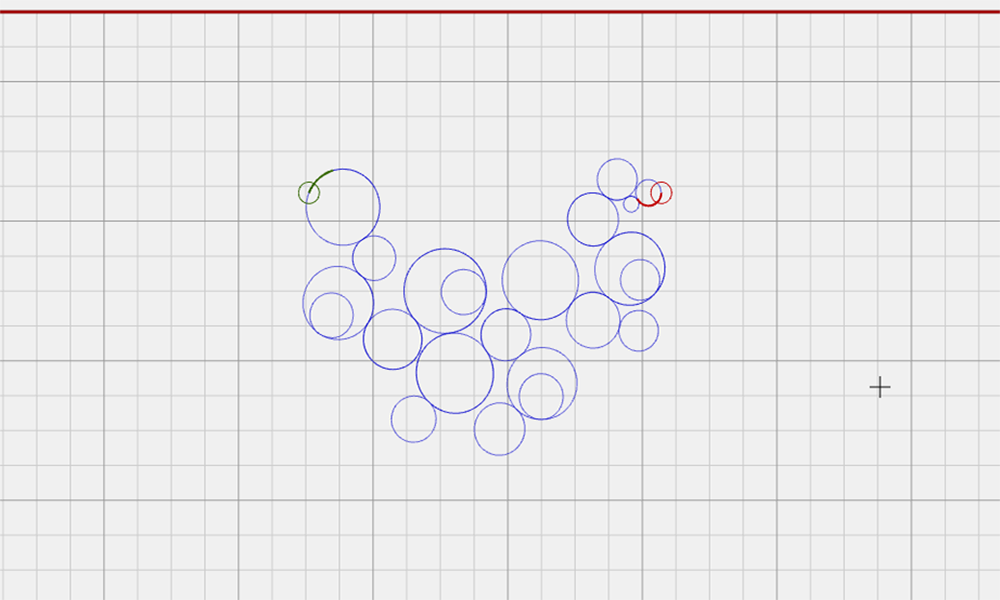
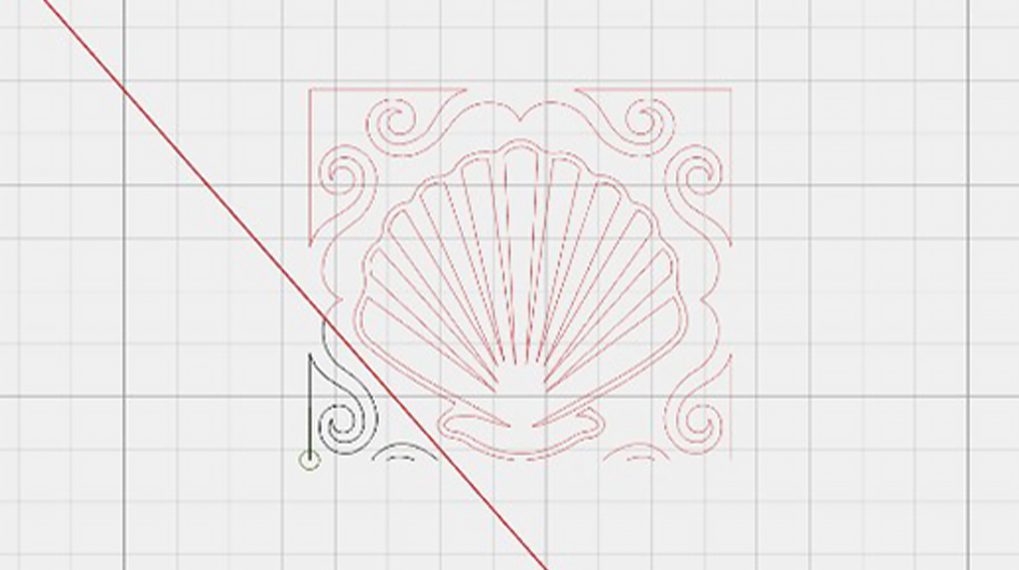
- Visualize start and end points of designs. The beginning of each design will now be indicated with a green circle and the end point of the design will be shown in red. Starts and stops can easily be reversed by selecting the design and using the “Reverse Sew” function. This is a really useful tool when attaching and linking designs.
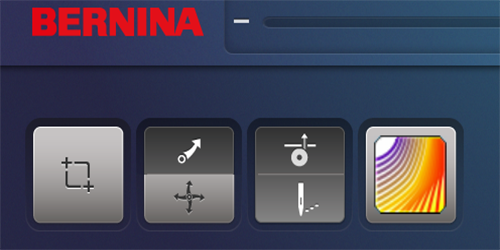
- The Micro Move, Easy Glide, Sewing Off/On and Bobbin Pull Up functions are now all available on your Q-matic screen without needing to access the menu bar.
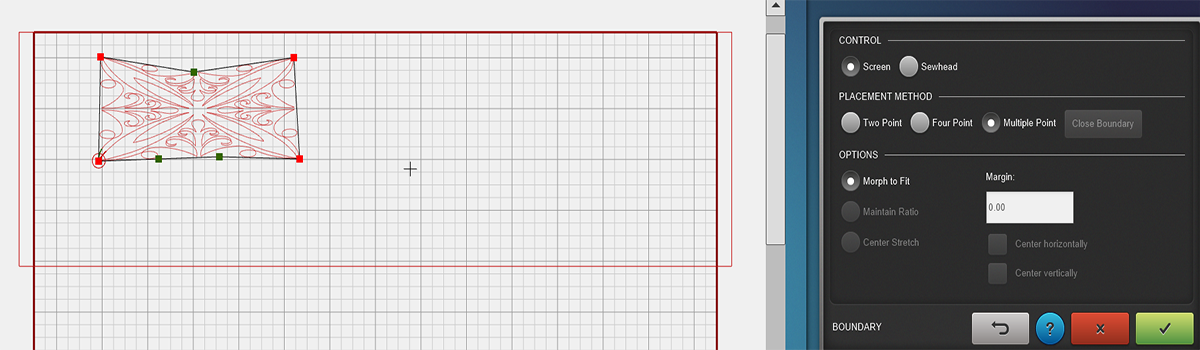
- The Boundary function has been extended to include a 2-point, a 4-point and a multiple-point placement method. Boundary lines can be created with the Sewhead or by selecting them on screen. Below is an image of the Boundary function as it opens in the Tool Center. The quilt pattern can be positioned within the boundary a number of different ways.
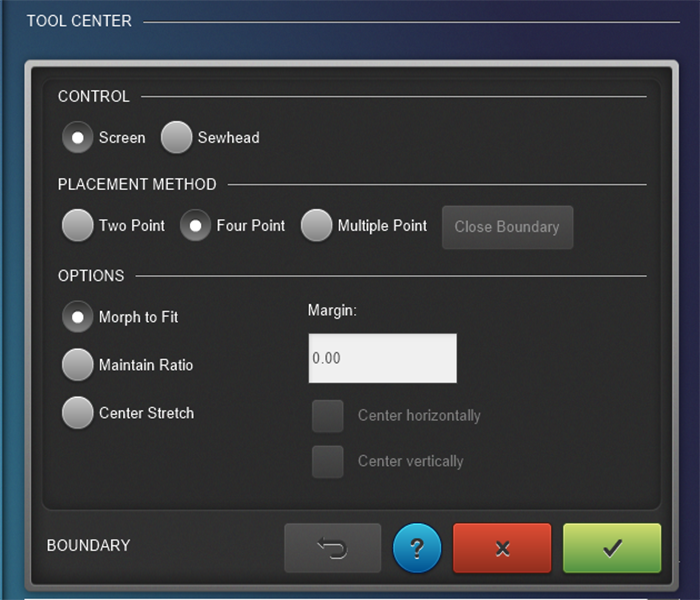
- The first is “Morph to Fit” which will alter the design to fit the points selected.
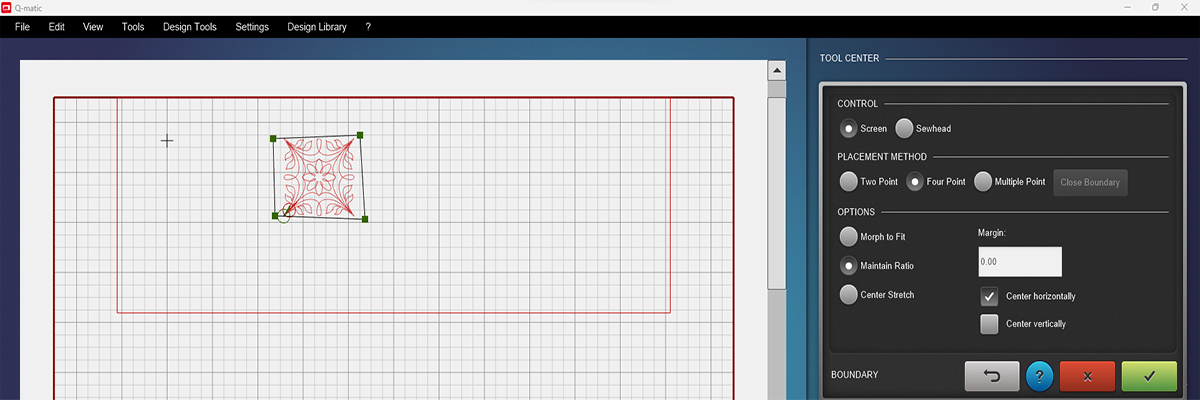
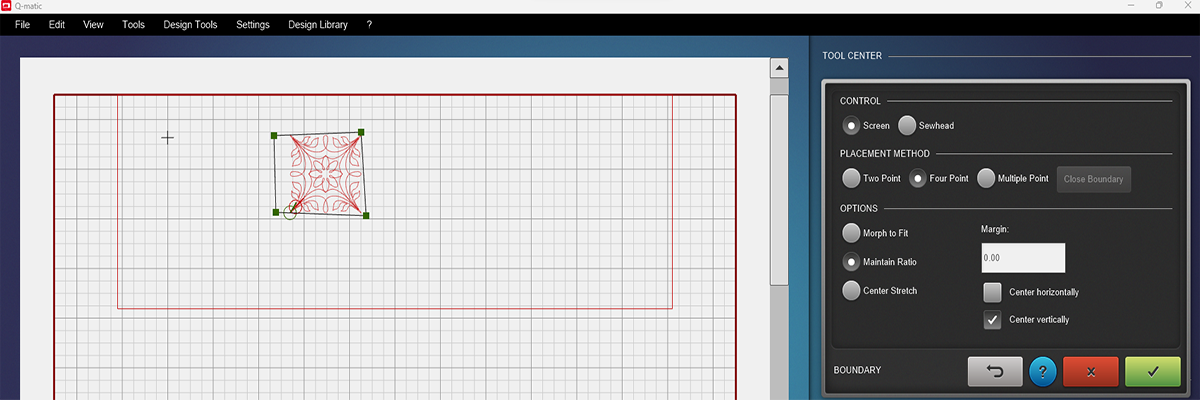
- The second is “Maintain Ratio” which maintains the proportional shape of the design within the selected boundaries. This method can result in areas of your boundary not having stitches.
- The third option is “Center Stretch” which will stetch the design center to fit the boundary method chosen. Not all morphing options are available for all boundary placement options.
Now, let’s take a look at your placement options:
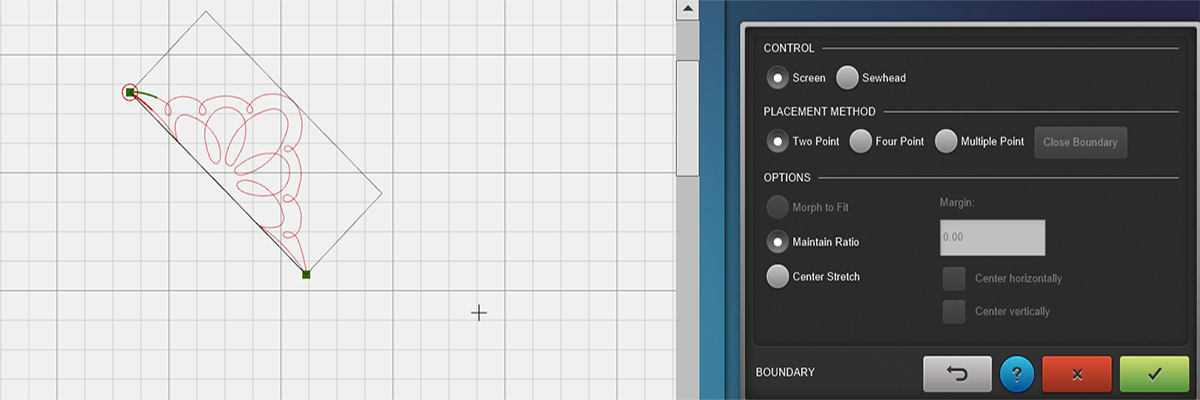
- Two Point – Using Two Point placement method will position the quilt pattern on a line between two points. Set the left point first and then the right. Your design will align with the line. This is a great way to place triangles. With this placement method, you’ll be able to “Maintain Ratio” and perform a “Center Stretch”.
Center Stretch
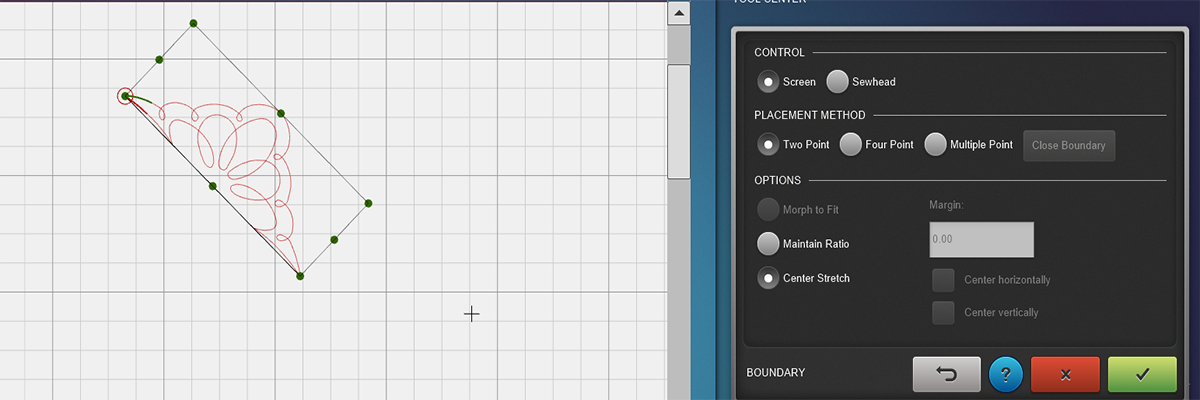
Maintain Ratio
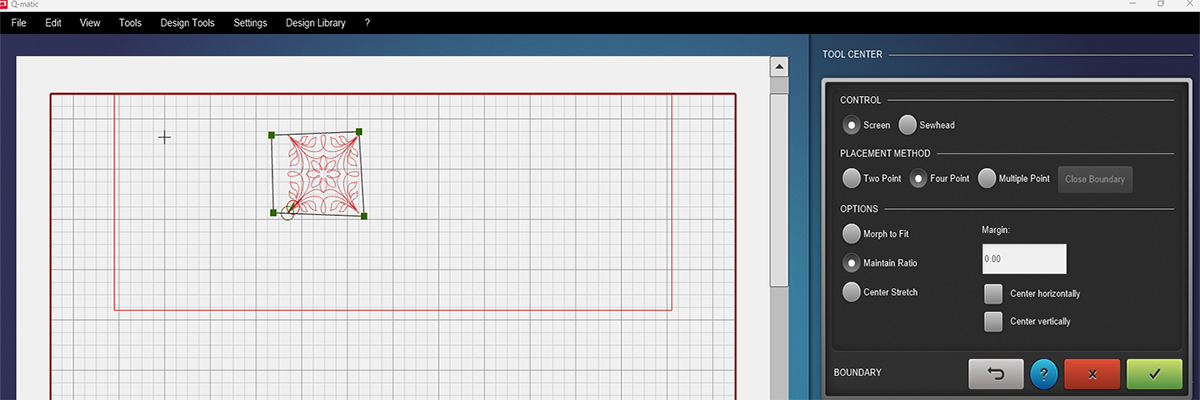
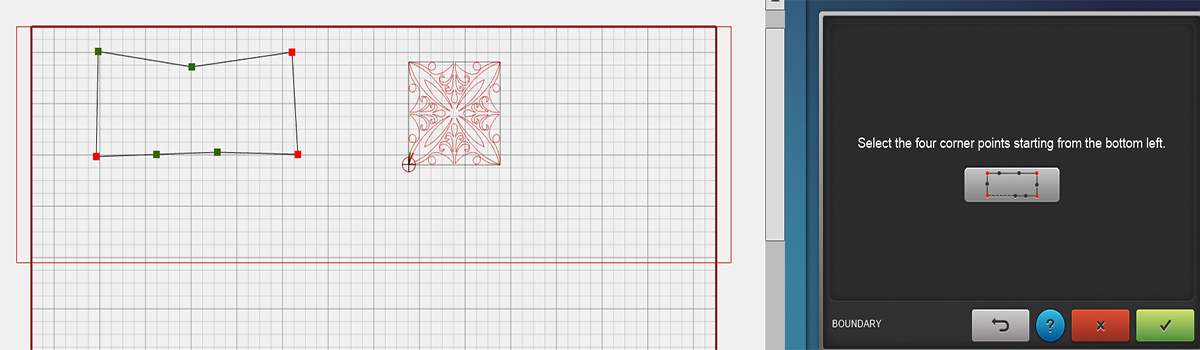
- Four Point – Is the same as before. Set four points, starting at the bottom left and set points in a counterclockwise order. Your design will morph to the 4-points. This method of boundary placement allows you to do all morphing options: Morph to Fit, Maintain Ratio and Center Stretch.
- Multiple Point – You will position the quilt pattern within an irregular, polygonal boundary. You’ll be able to set the desired number of points and close the boundary by pressing “Close Boundary”. Once you’ve identified the boundary, you’ll select 4 points as a positioning guide, starting at the bottom left and selecting points in counterclockwise order. This shape needs 4 points and your design will fit the selected area by “Morph To Fit” only. “Maintain Ratio” and “Center Stretch” are not on.
Select 4 points beginning in lower left going clockwise.
Multiple Point Placement Morph To Fit
- When using 2 and 4-point placement methods, you will also be able to center your design vertically or horizontally within the boundary.
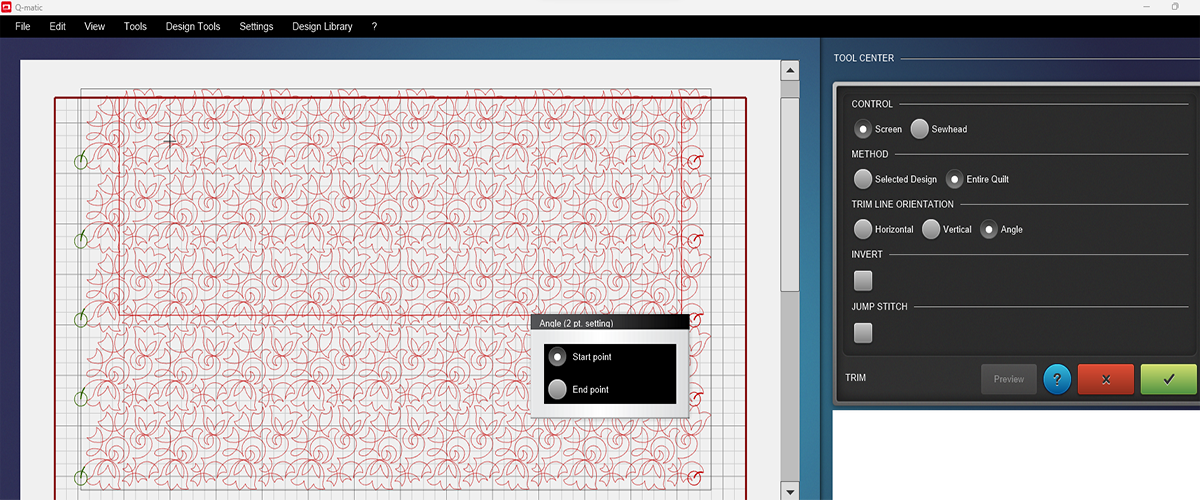
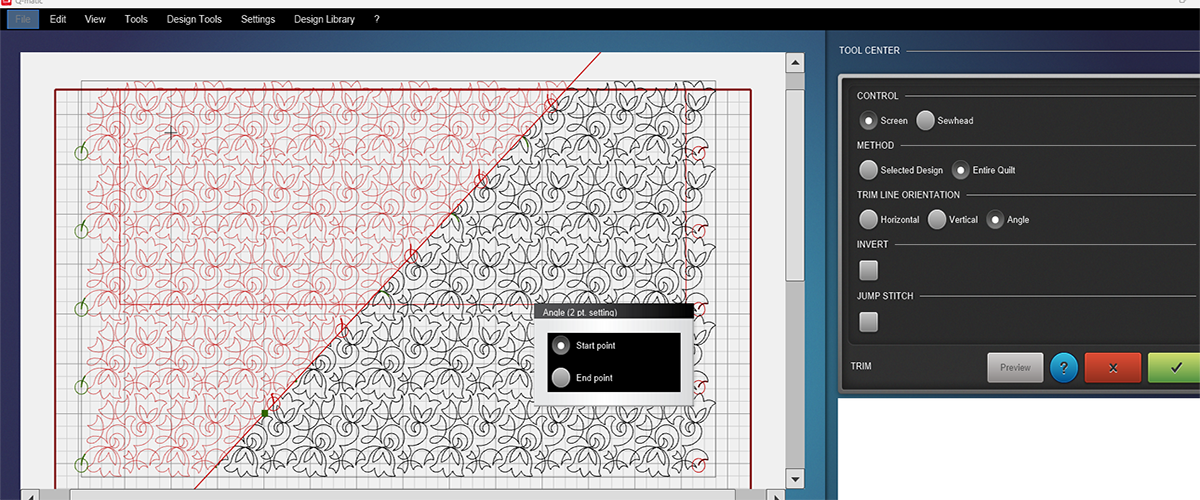
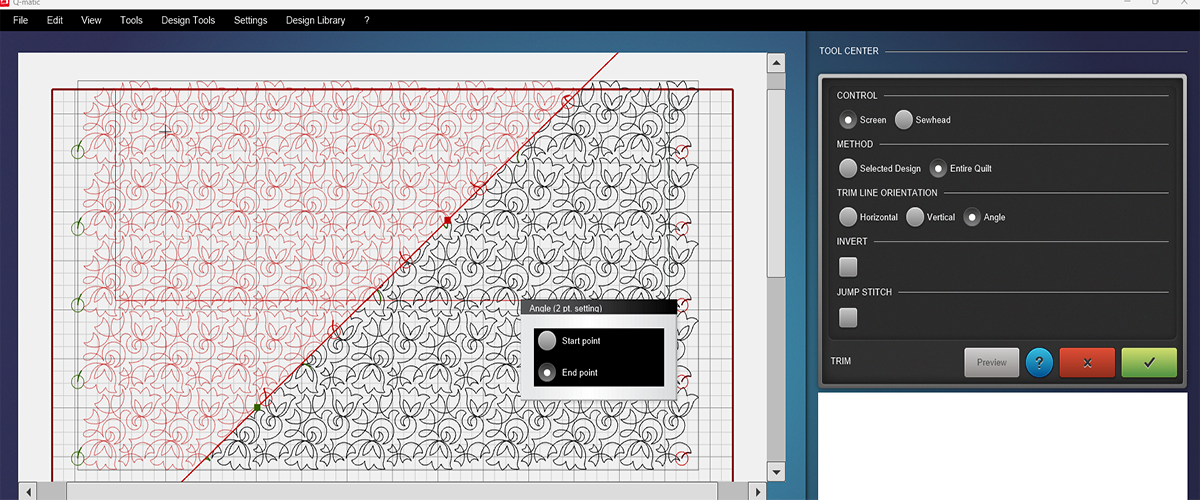
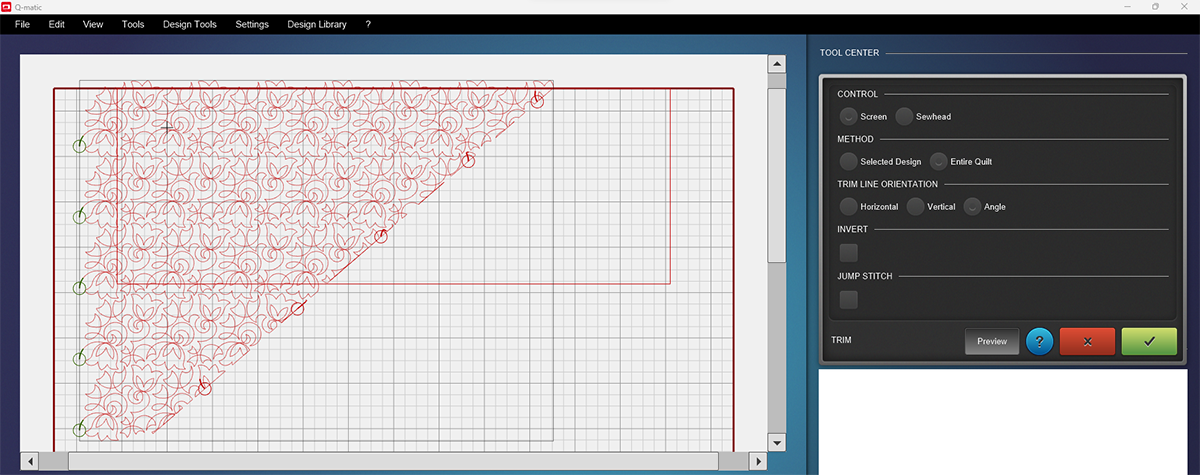
- Trim: There is now an easy-to-use two point placement setting for angle trimming. Open the Trim function and select “Angle”. Place your start point trimming node (green) and then your end point node (red). The end point determines the angle of your trim. Select “Invert” as needed.
Jump Stitch must be activated within the Trim tool to jump. Otherwise, the jumps become a stitch line.
Screen when opening the trim tool and selecting angle.
First point selected is green.
End point or angle point is set in red.
Jump stitches are shown below but will not stitch.
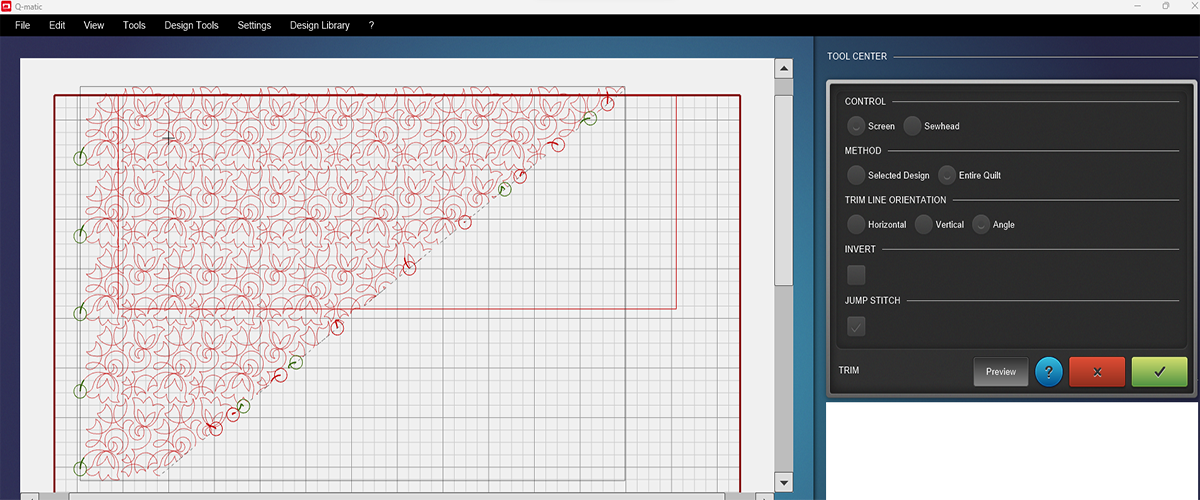
Jump stitches are red and will be stitched.
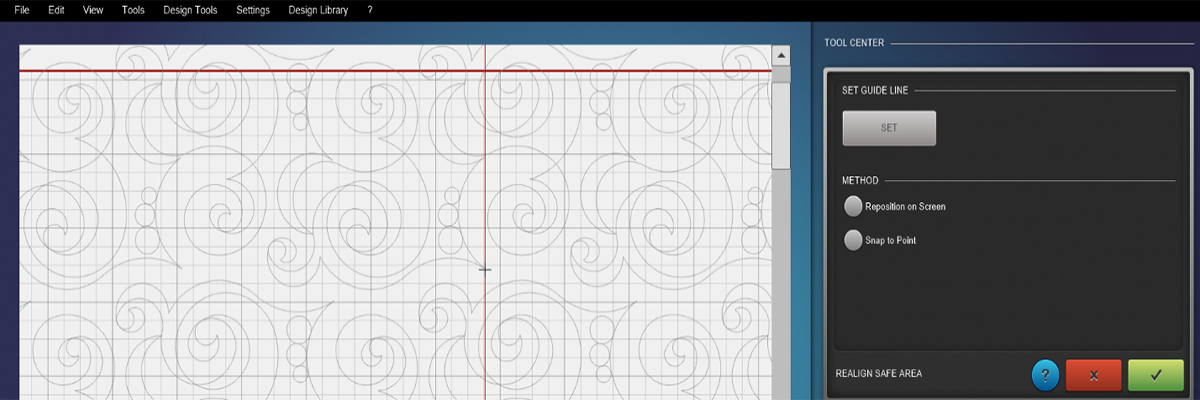
- When re-aligning your safe area you can now set a guide line to help you snap to the correct point on your Q-matic screen. A vertical guide line will appear on your Q-matic screen to help you visually align with the same spot on your quilt. This is one of my favorite features because it eliminates the possibility of choosing the wrong snap point. What a timesaver!
Set Guide Line
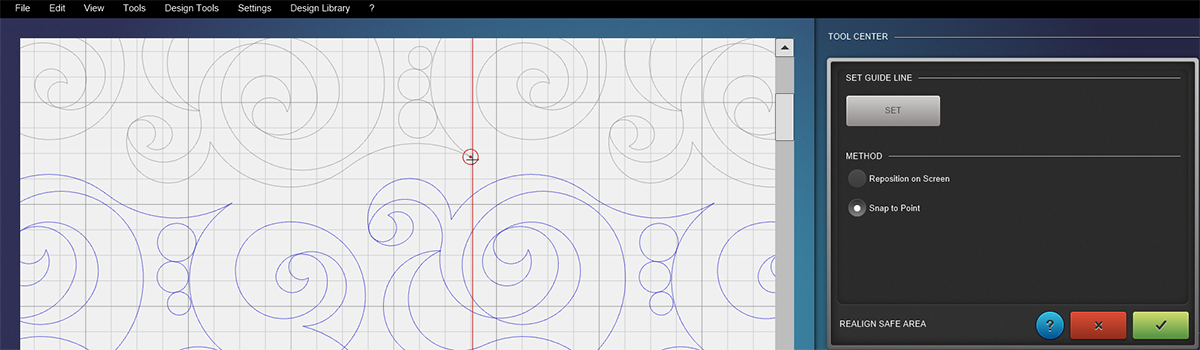
Snapped To Point on Guide Line
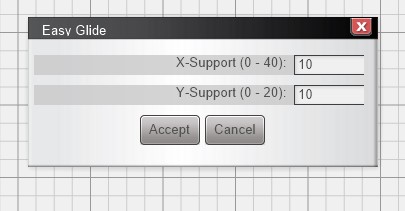
- When updating your software and firmware, the Q-matic Installer will change the Windows settings and switch the PC’s standby mode off. It will also change the default settings of Easy Glide.
- Plus 75 new designs will be added to the design library.
The latest updates to your Q Series longarm and Q-matic software are always available at BERNINA.com under the support tabs for the Q Series longarms and Q-matic headings. Before beginning your update process be sure your computer is up-to-date with the latest Windows updates. Both Windows 10 and 11 are compatible with Q-matic Version 3.0.
Enjoy your new features and functions and happy quilting!
Used Products
What you might also like


11 comments on “What’s New in Q-matic”
-
-
Hello! Thank you for your patience! The download is now available: https://bit.ly/3FMVxeN
-
-
The 3.0 version is not available in the Q-mastic support page.
-
Hello! Thank you for your patience! The download is now available: https://bit.ly/3FMVxeN
-
-
Version 3.0 will be available for download from the BERNINA website on March 22, 2023. Be sure to update both Q-matic and your Q Series longarm. Version 3.0 was released to BERNINA Dealers a short time ago so they would have time to prepare.
-
Hi, I would like to learn how to use markers with curved lines on the Qmatic. I have looked for a video to demonstrate and I have not been successful.
-
Markers are a fantastic tool for sizing and placing a design precisely on your quilt. One extra benefit of markers is that they can create a stitch line if they are connected. You can place any number of marks needed on your screen by moving your sewhead around the curve and setting as many points as needed to create the curve but if your purpose is to create a curved stitching line rather than creating a visual boundary for placement use, go into Art and Stitch and create the arc you desire and bring it back to Q-matic. Thanks for your comment.
-
Any help would be appreciated… since the update, my qmatic screen goes to sleep before a stitch process gets done. It used to only do this w/ very large tasks. Now, it is most any task. If there are still icons visible, they are not responsive to clicks. Then the whole qmatic screen goes black and I am forced to do a complete restart.
My computer is running windows 10, it is up to date, and I do have the up to date Bernina Qmatic version. I also have my computer screen and power to never go into rest or sleep while the computer is turned on… What next??
Thank you for any suggestions.-
Hi Sue, I am emailing you a document to help. Sometimes a visual is easier than words!
Basically, there is a setting in your device manager that puts your USB ports to sleep to save energy and so the system stops responding. It is easy to fix. You will need to uncheck “Allow the computer to turn off this device to save power.” Also do make sure that you are set to never go to sleep on the monitor. I know you already mentioned you did this, maybe double check since you’re in there. This is also under Device Manager. Thank you!
-
-
I am based in India owning Q24 and QMatic. I haven’t updated my system with latest updates released in March.
I contacted my dealer in India. He said, I need to update it at my own risk. As a dealer he has not been intimated by Bernina Swiss officially. He should get official communication from Bernina Swiss.Please let me know what shall I do.
-
Good afternoon and thank you for your message. The 3.0 Q-matic Update was released worldwide and the free download of the update is available on BERNINA.com. There is no reason to delay enjoying the new update!
-
Leave a Reply
You must be logged in to post a comment.

These sound like wonderful enhancements to Q-Matic, but I don’t see the download for the Version 3.0 upgrade available on Bernina’s Q-Matic Support page. When will it be available?