Benartex’s new EMagazine – “Modern by The Yard!” Filled with Pattern Ideas
Hi Everyone!
Benartex has just launched it’s first EMagazine! It’s called Modern by the Yard and you can view it by clicking on the link below.
The idea is that many quilters and quilt shops are turning to the web for ideas and projects—especially “modern quilters.” One main feature of modern quilts is bold color—very often solid colors or textures. Benartex, Kanvas and Contempo have so many great collections to choose from, we are featuring them in this first issue.
We decided to feature Lisa Ruble’s pillow project here on WeAllSew. It’s a cute and easy pattern for all skill levels.
We hope to create the newsletter quarterly. Be sure to tell all your friends about the magazine—we may feature some selected quilt shops or designers in future issues.
Thanks! Let us know what you think!
Color Echoes
Designed by: Lisa Swenson Ruble
Finished Size: 16″ square
Fabric: Color Weave from Contempo Studio
Skill level: Beginner
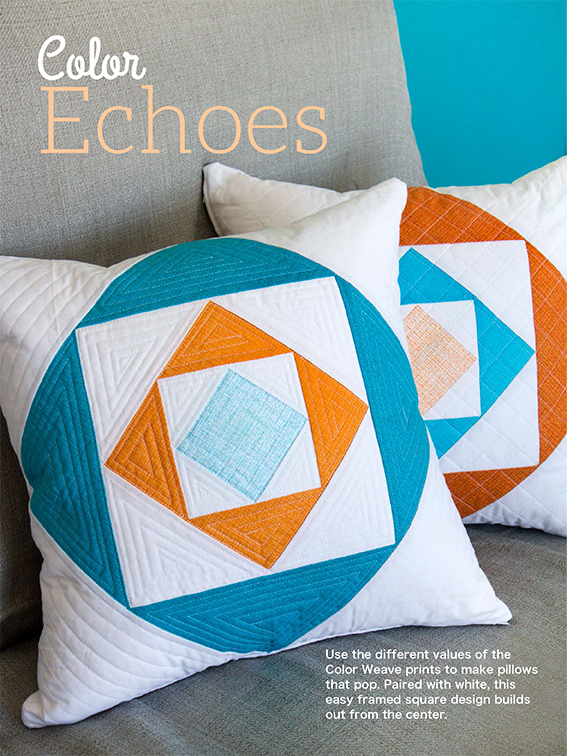
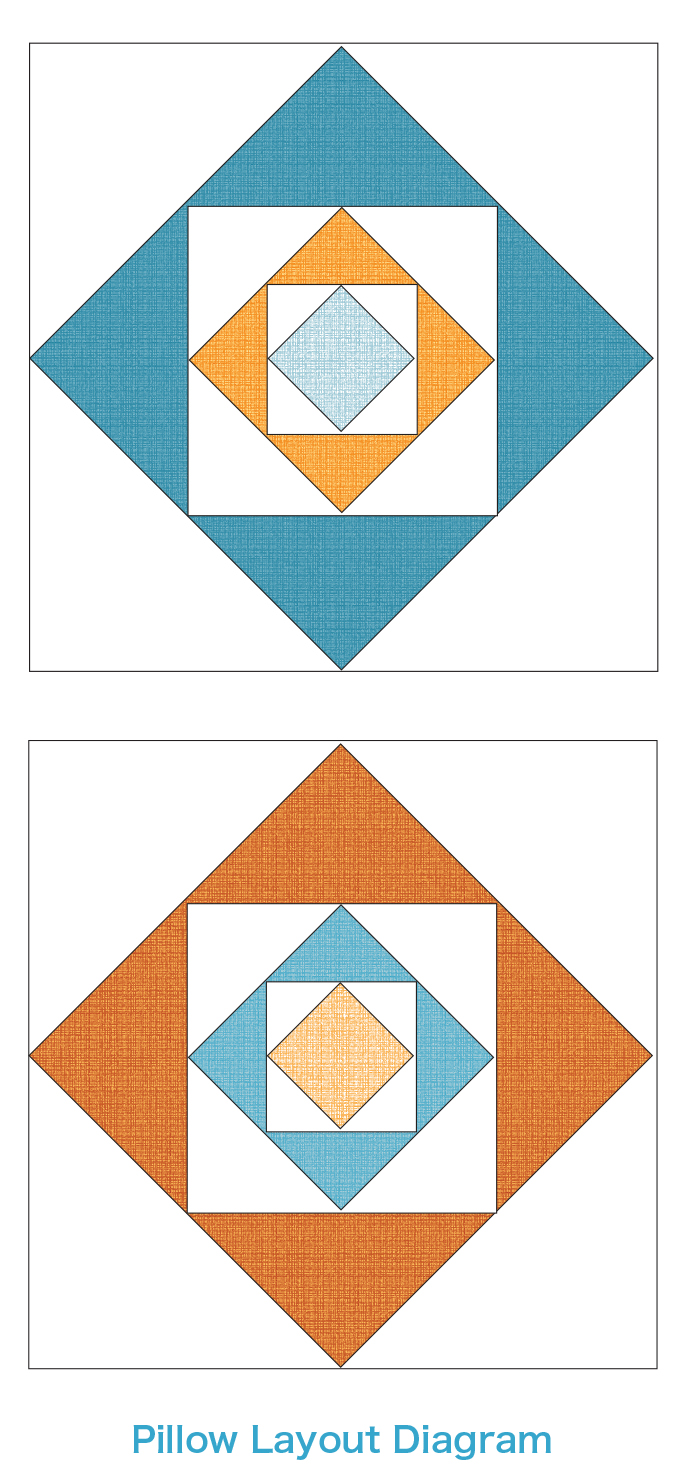
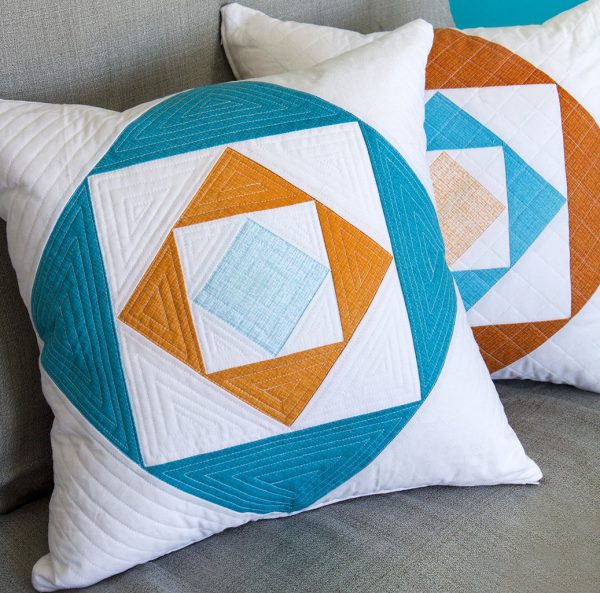
These pillows use a light, medium and dark of two different colors. We’ve created a few digital renderings to show you additional options. Use all three shades of one color together; arrange the shades from a dark center to a light edge, or switch the white and the colors for a pillow with a colored frame. Have fun experimenting with value placement!
Use the different values of the Color Weave prints to make pillows that pop—paired with white, this easy framed square design builds out from the center.
Materials to make both pillows
- 1 FQ each of the Light Blue, Light Orange, Medium Blue, Medium Orange, Blue and Orange fabrics
- 1 yard white solid
- Two 18” square batting pieces
- Two 18” square pillow inserts
- Two 16” white zippers
Step 1: Cutting/Preparation
- From each of the Light Blue and Light Orange
- One 3-1/4” square
- From each of the Medium Orange and Medium Blue
- Two 4-1/4” squares
- From each of the Blue and Orange
- Two 7-1/4” squares
- From the White
- Four 3-1/4” squares
- Four 5-1/2” squares
- Four 9-3/4” squares
- Two 17-1/4” squares for backing
Step 2: Make the Pillow Top
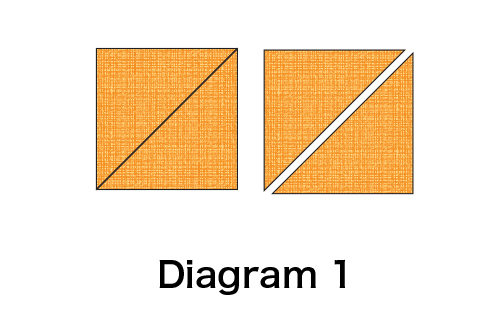
- Set aside the 3-1/4” light blue and light orange squares and the 17-1/4” white squares for backing. Cut all remaining squares diagonally in half once.
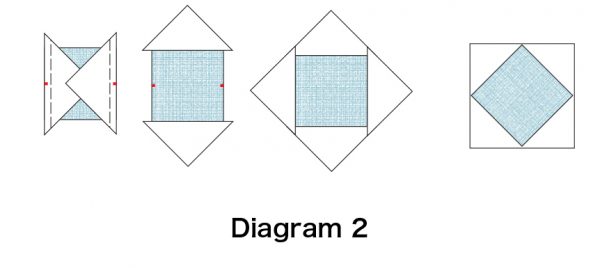
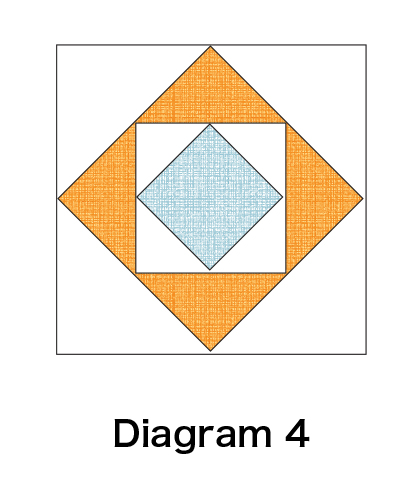
- Mark the center of the long edge of each 3-1/4” white triangle and the center of each side of the 3-1/4” light blue square. Matching center points, lay white triangles on opposite sides of the light blue square, with points facing in. Stitch using a ¼” seam allowance and press open. Add the remaining 3-1/4” white triangles to the top and bottom. Trim unit to measure 4-1/2” square, making sure that the light blue square is centered and you have ¼” of white past all four light blue points.
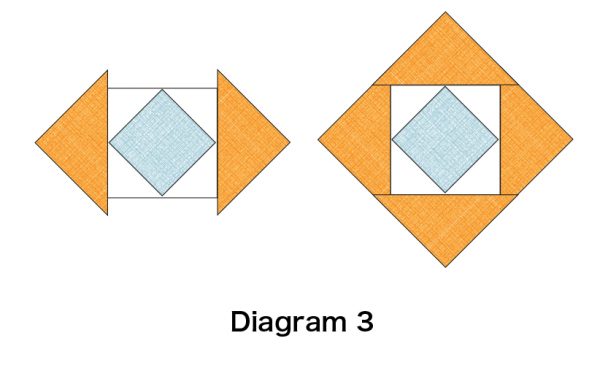
- In the same way, add the 4-1/4” medium orange triangles to the sides and then the top and bottom. Trim unit to measure 6-1/4” square.
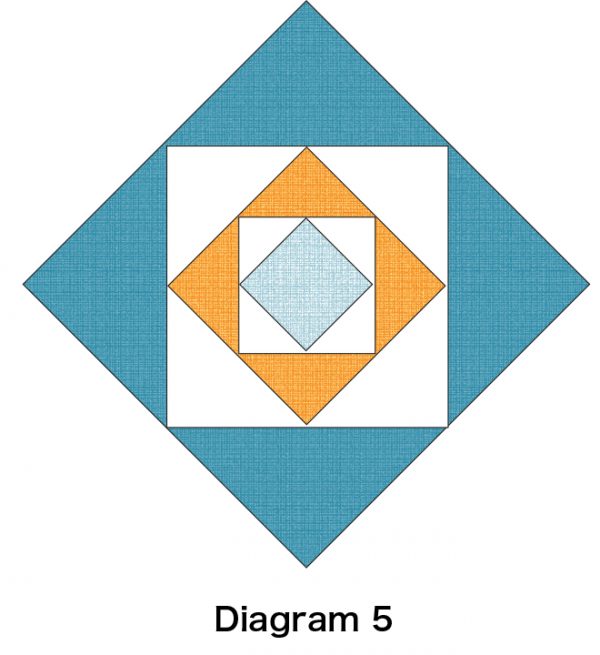
- Add 5-1/2” white triangles and then trim to measure 8-3/4” square.
- Add 7-1/4” blue triangles and then trim to measure 12” square.
- Add 9-3/4” white squares. Do not trim until after quilting. The Pillow Layout Diagram is shown here for the second pillow as well; simply follow steps 2-6 and substitute the fabric colors as you add the triangles.
Step 3: Assemble the Pillow
- Layer each pillow top with batting and quilt as desired. Note: One pillow features echo quilting in the triangle shapes; the other features a classic crosshatch. Trim the pillow tops to measure 17-1/4” square.
- Use your favorite method to add the zipper to the pillow front and 17-1/4” square backing piece. Sew the pillow front and back right sides together using a ½” seam allowance, leaving the zipper open for turning. Turn the pillow right side out and stuff with the pillow insert. Repeat for second pillow.
What you might also like
2 comments on “Benartex’s new EMagazine – “Modern by The Yard!” Filled with Pattern Ideas”
-
-
Hi kacharnell,
The circle is only an illusion. The white “background” on the outer corners of the pillows come from adding the white triangles in step 6. Hope that helps!
-
Leave a Reply
You must be logged in to post a comment.




Nice pillows, however you only gave directions for the square in a square design. You don’t mention how big to cut the white fabric or if the design was appliqued onto a circle, or if the circle behind the square is set in, or if there are 4 separate arcs sewn to the square in the square.