Ta-Da!! My quilt top is done!


Description
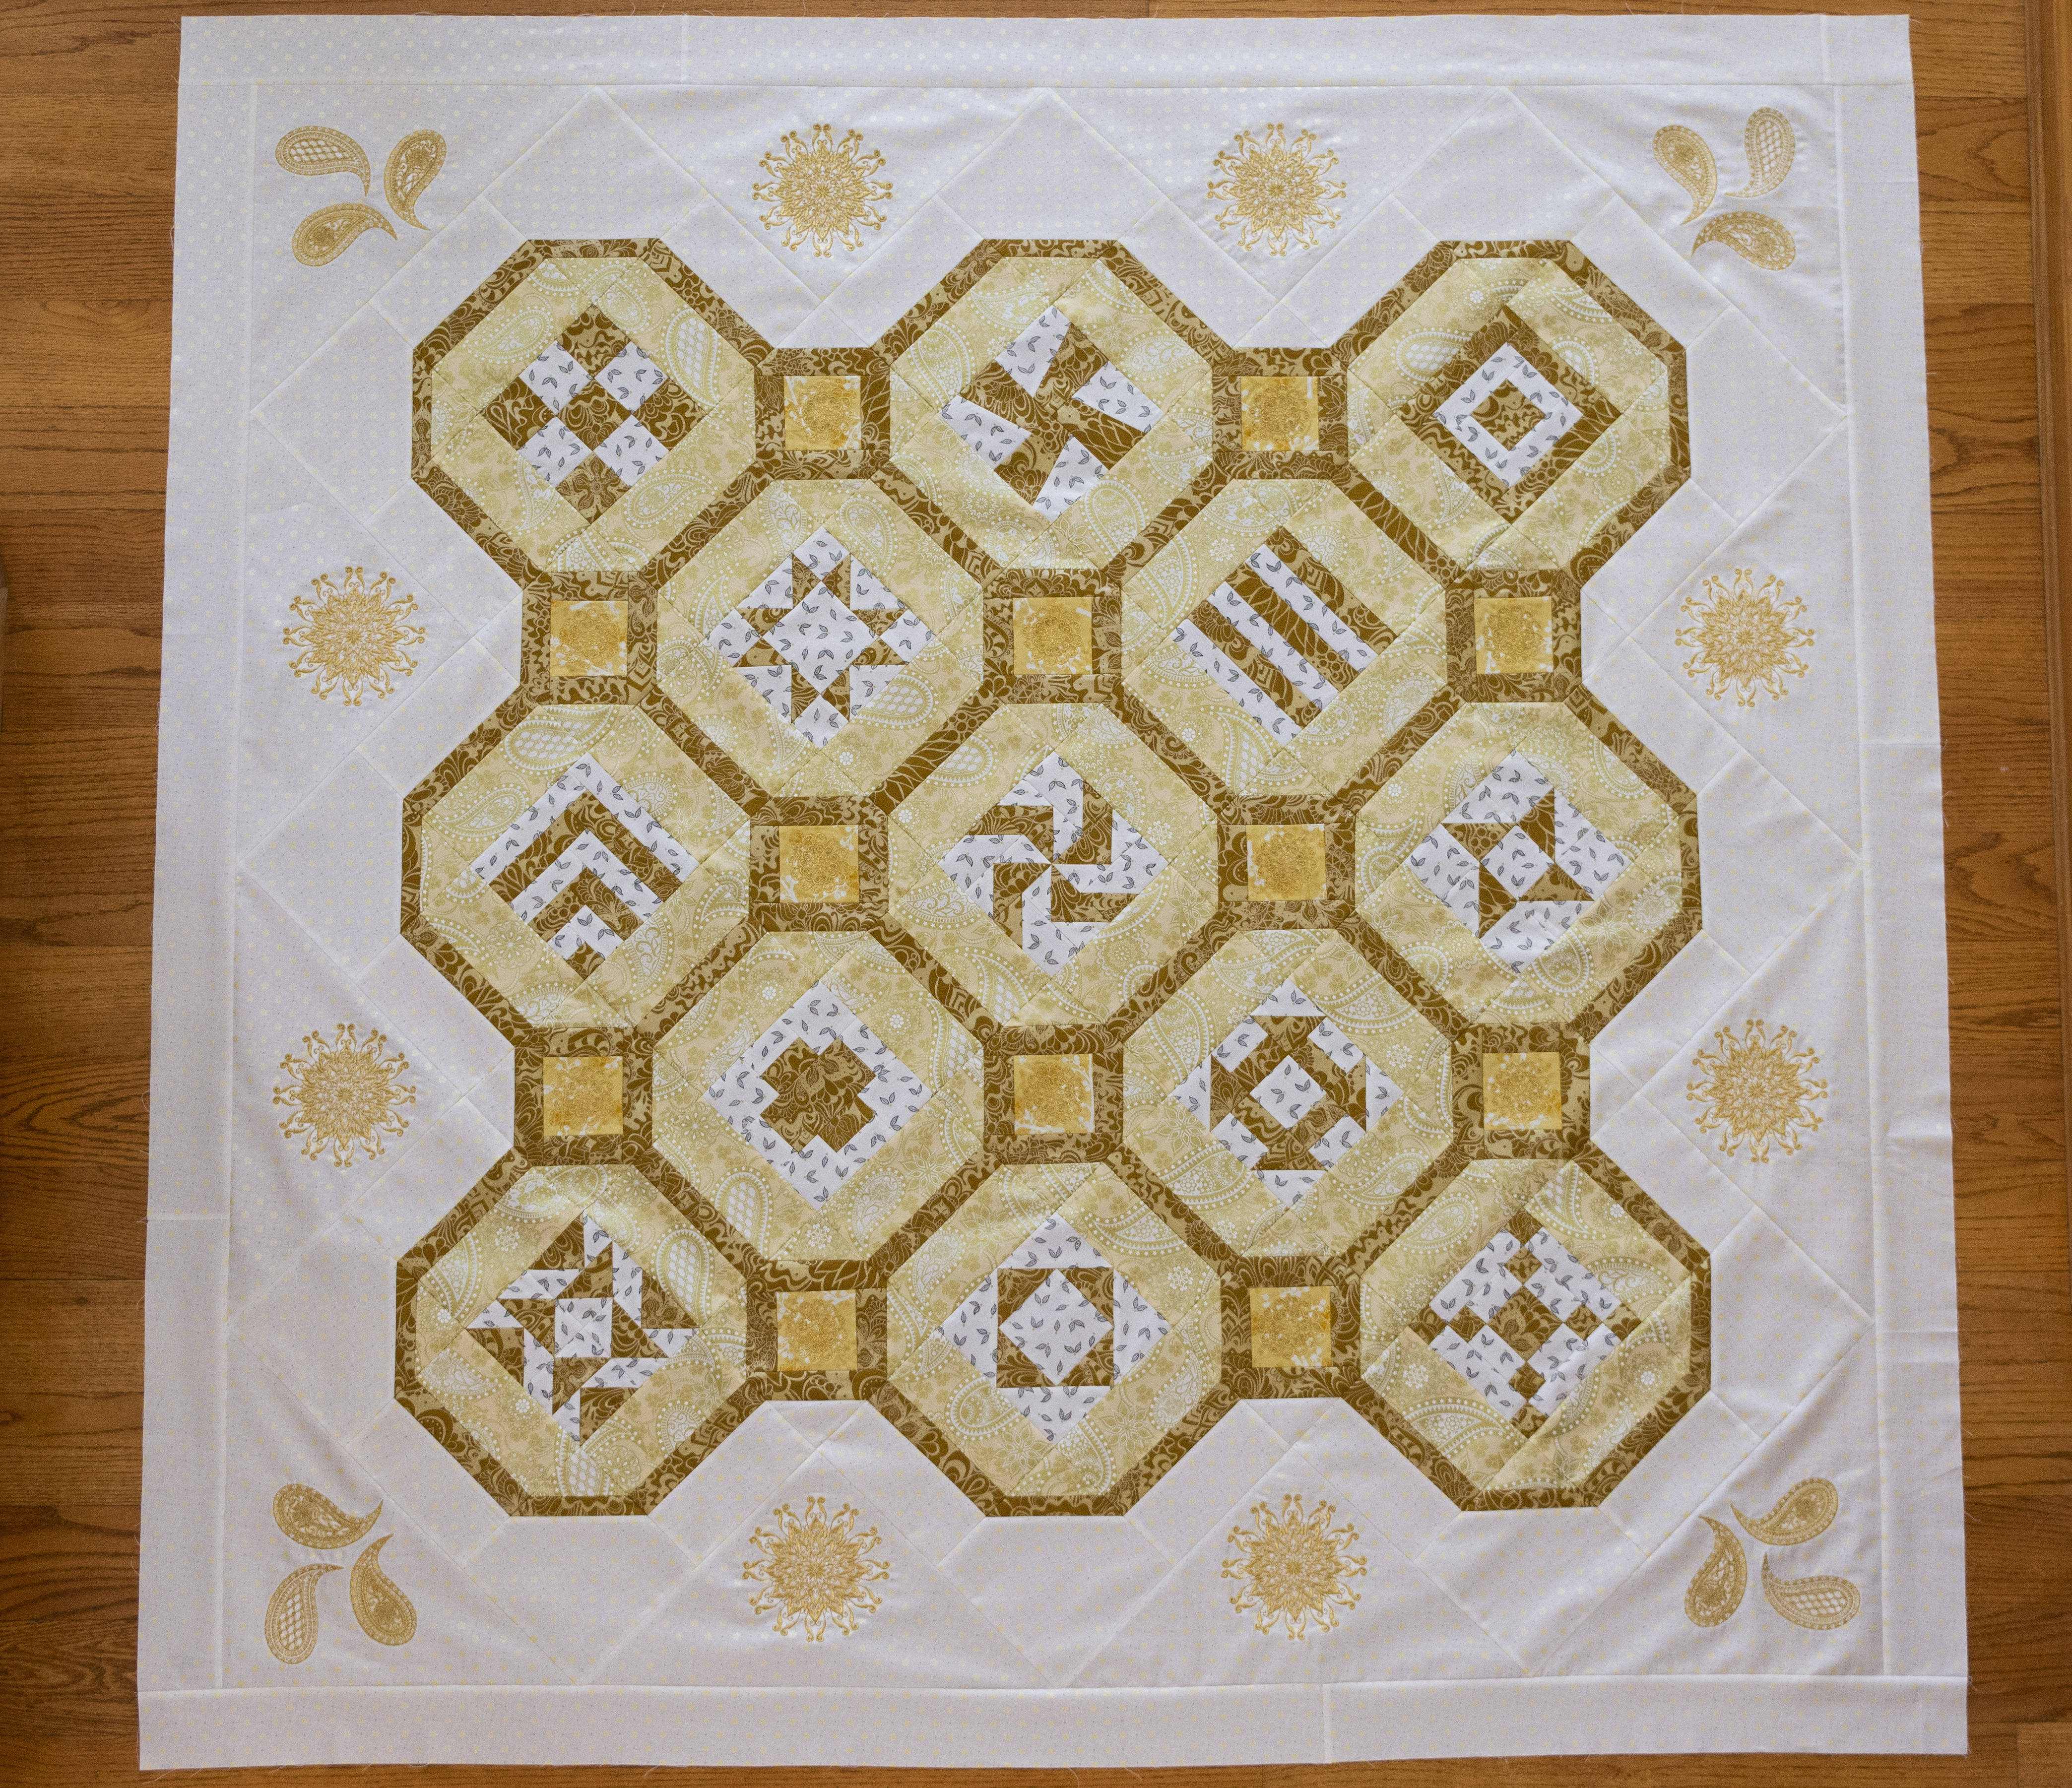
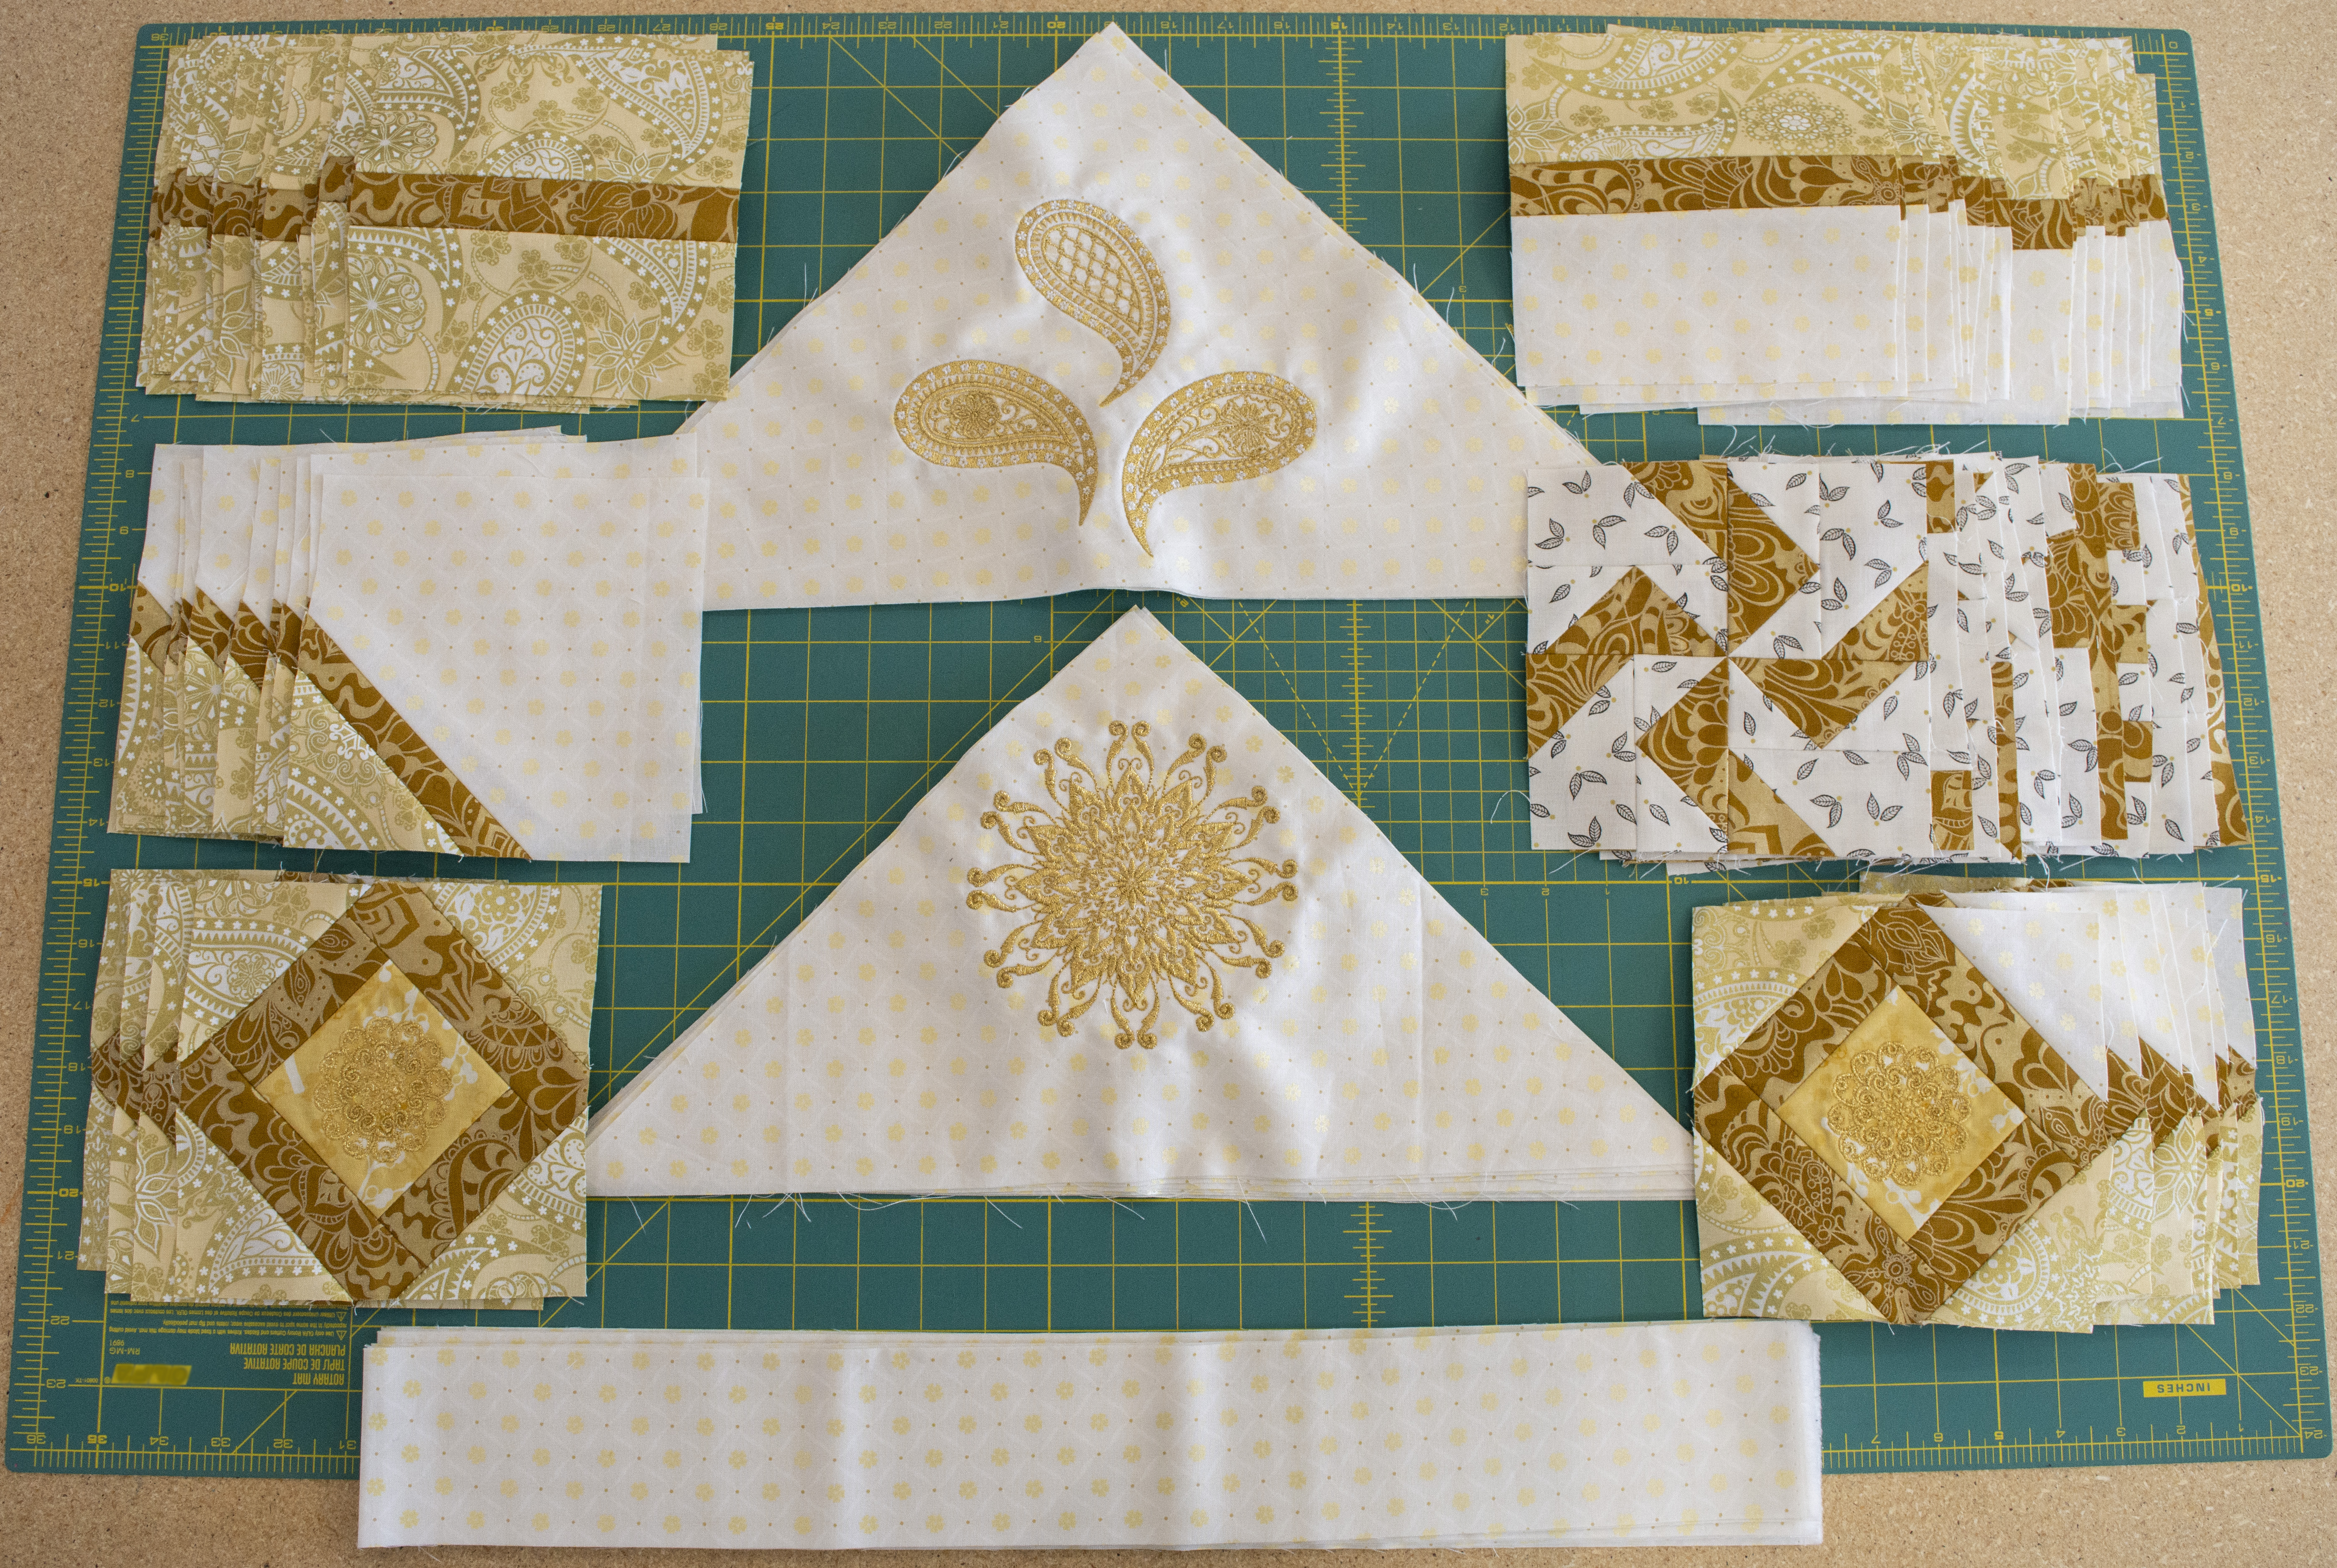
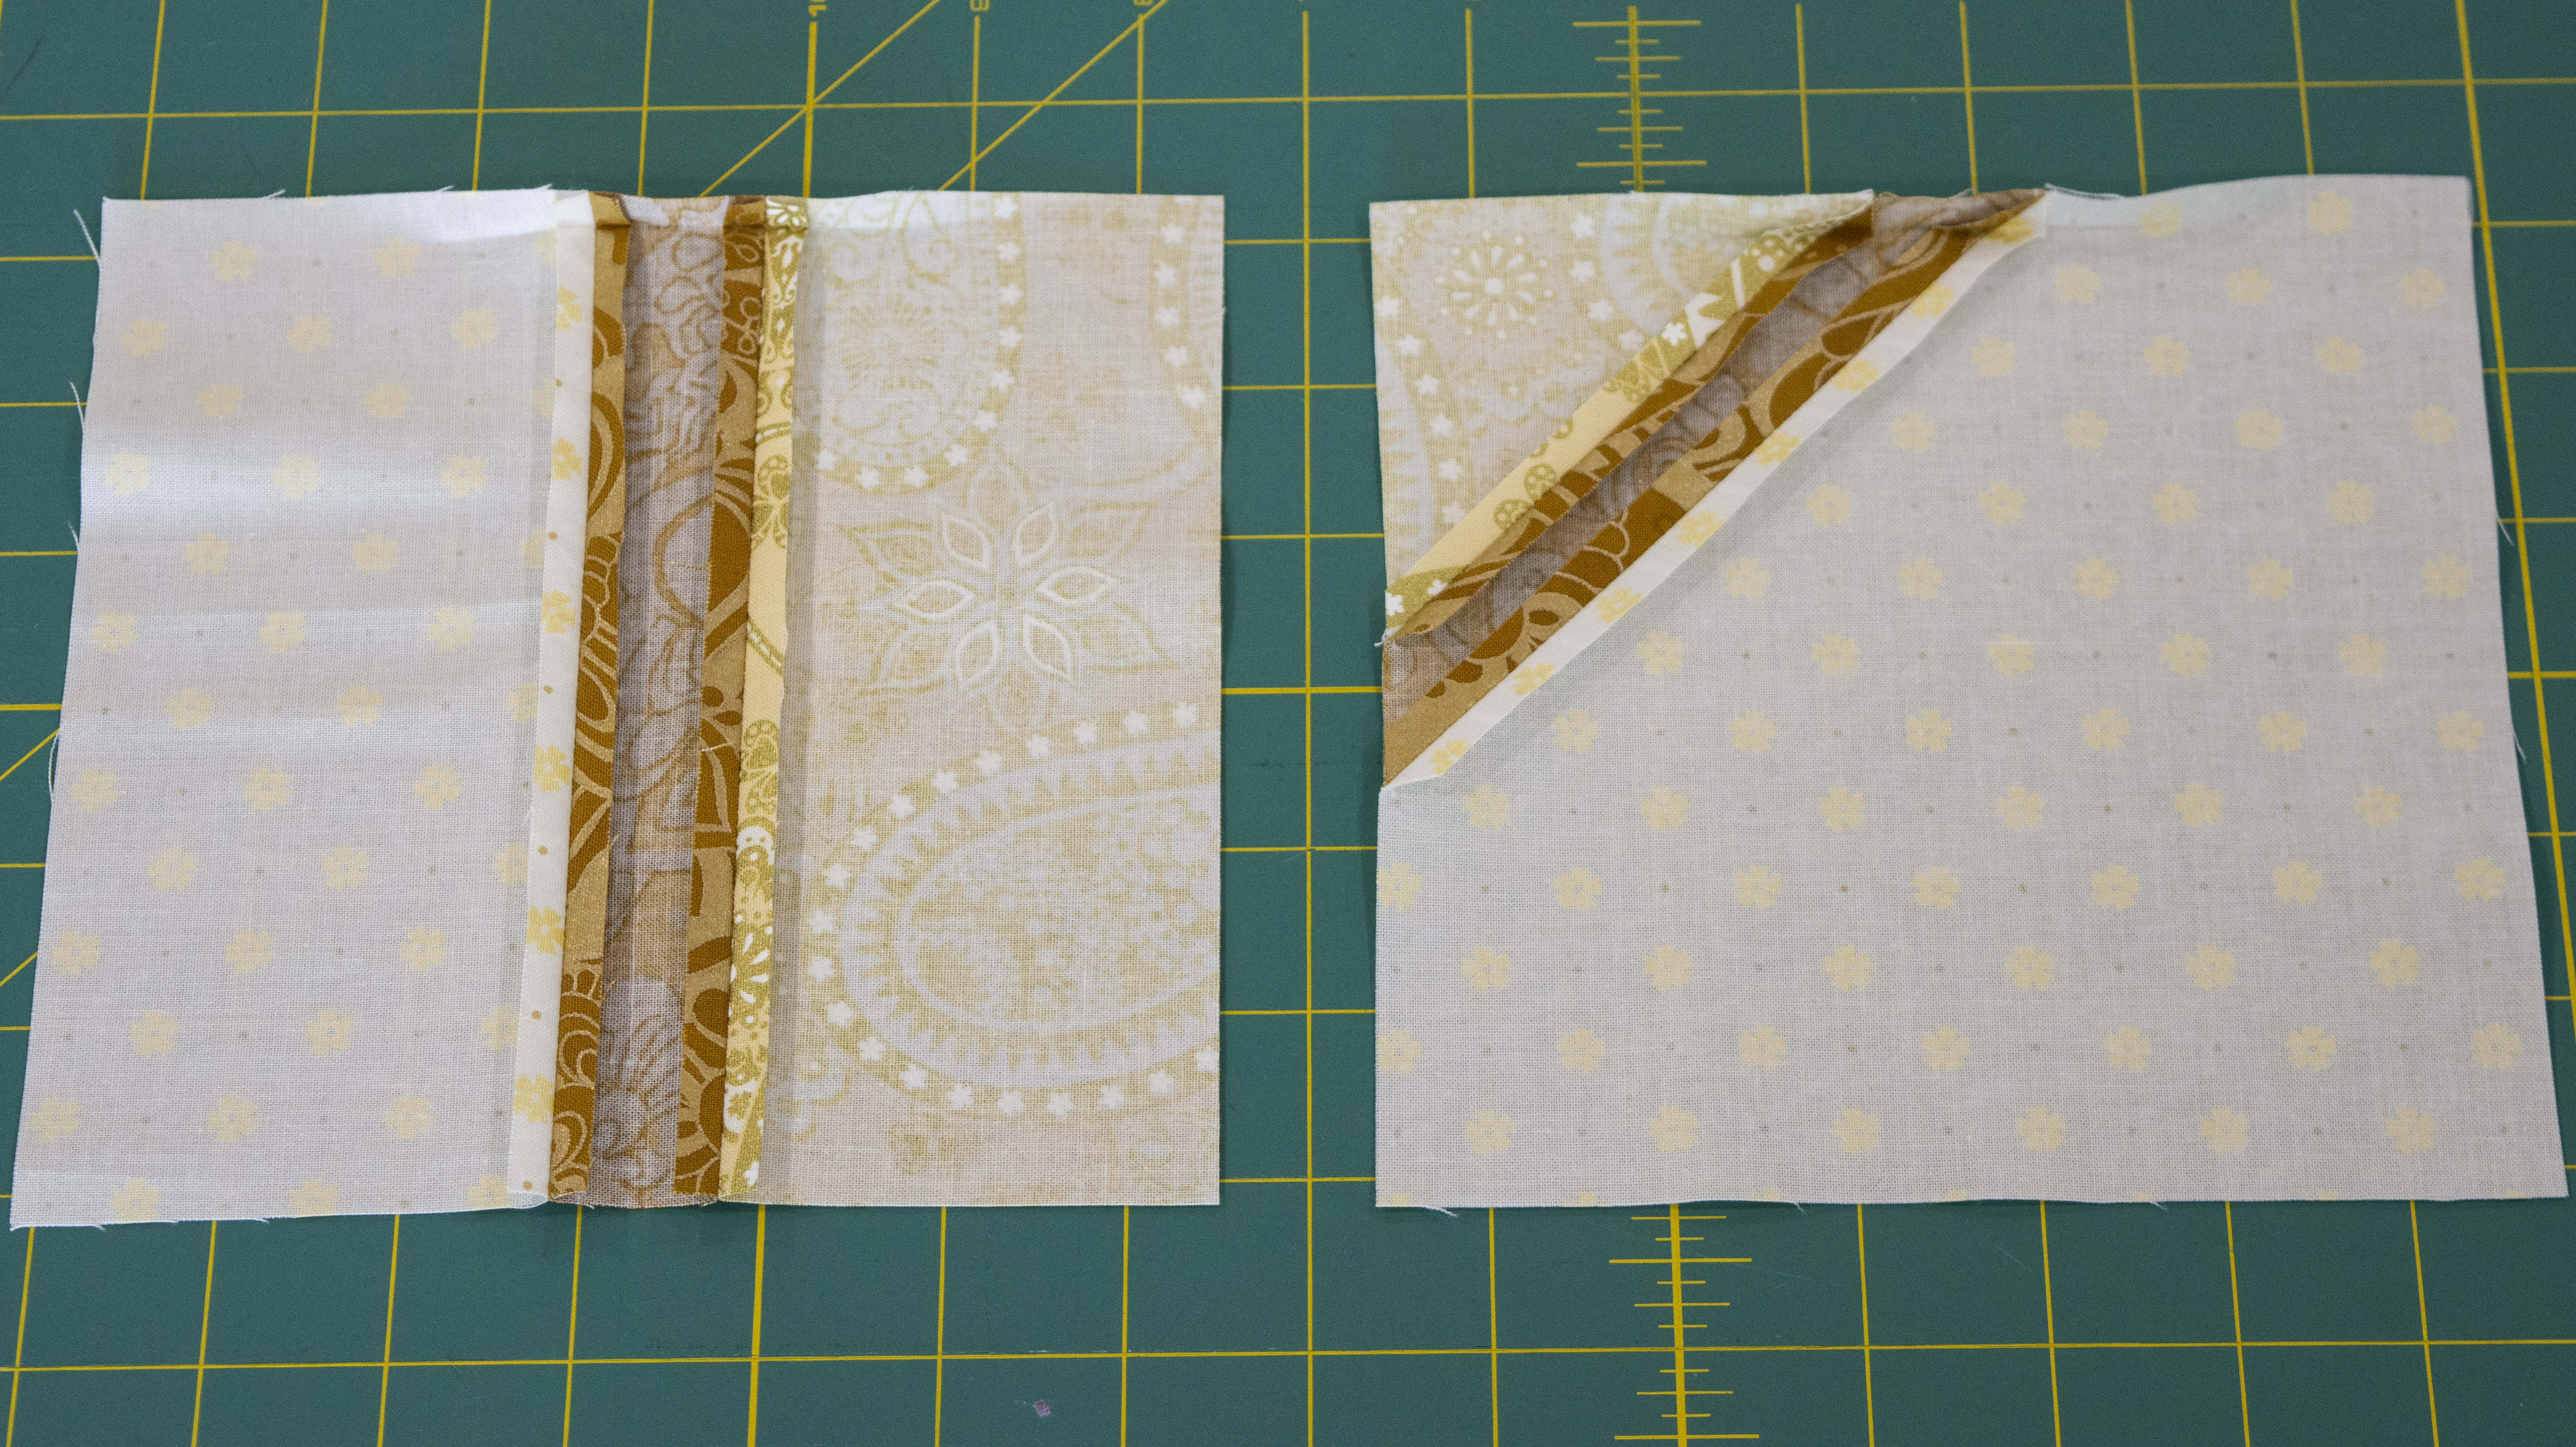
To piece together all of my blocks, I used the #57D presser foot and shortened my stitch length a little bit. Everything went together fairly well, but the framework of the cornerstones was very tricky. After unpicking several times, I came up with a method that helped me to get perfect match-ups every time. I pressed a quarter inch seam on both blocks so I knew exactly where they would come together. Then, I matched up the junctions perfectly and pinned them in place. (This is shown in my pictures above.) This method worked really well and I had little trouble after that. Once all my pieces were together, I trimmed up all the edges of my quilt top and measured for the borders. I measured down each side and down the middle and found that all three measurements actually matched! I think that might be a miracle! I sewed on the side borders and then measured the top, bottom and down the middle for the remaining two border pieces. These measurements differed by 1/8th of an inch, which was pretty close to perfect in my book. After the borders were all on, I stood back and just admired it. I have always thought this was a beautiful quilt, but seeing it all together in real life…It’s gorgeous!! I think this is going to be the next wall hanging in my house. It’s too beautiful to be put away somewhere! I love, love, love it! My quilt sandwich is now all pinned and ready for the quilting!
2 comments on “Ta-Da!! My quilt top is done!”
-
-
Isn’t that the truth?! Precision is so important in quilting! It seems like the smallest error gets multiplied more and more as you continue the process. Thanks for the compliments!?
-
Leave a Reply
You must be logged in to post a comment.


Great job!! You really thought it through! That sounds like exactly why mine were off a bit. Precision does make a difference!